
Awakening: The Golden Age: Chapter Five: Tree
Our Awakening: The Golden Age Walkthrough holds the key to surviving the Minotaur invasion of your village as they search for Prince Cedric, the person they hold responsible for their famine. Trust our custom marked screenshots, our detailed game instructions, and our simple puzzle solutions to help you reveal what's really been happening in this supposed Golden Age of humanity in another thrilling addition to the Awakening games.
General Information & Tips
Chapter One: Village View
Chapter Two: Frozen Lake
Chapter Three: Escape
Chapter Four: The Hut
Chapter Five: Tree
Chapter Six: Castle
Ask for help in the comments below!
Chapter One: Village View
Chapter Two: Frozen Lake
Chapter Three: Escape
Chapter Four: The Hut
Chapter Five: Tree
Chapter Six: Castle
Ask for help in the comments below!
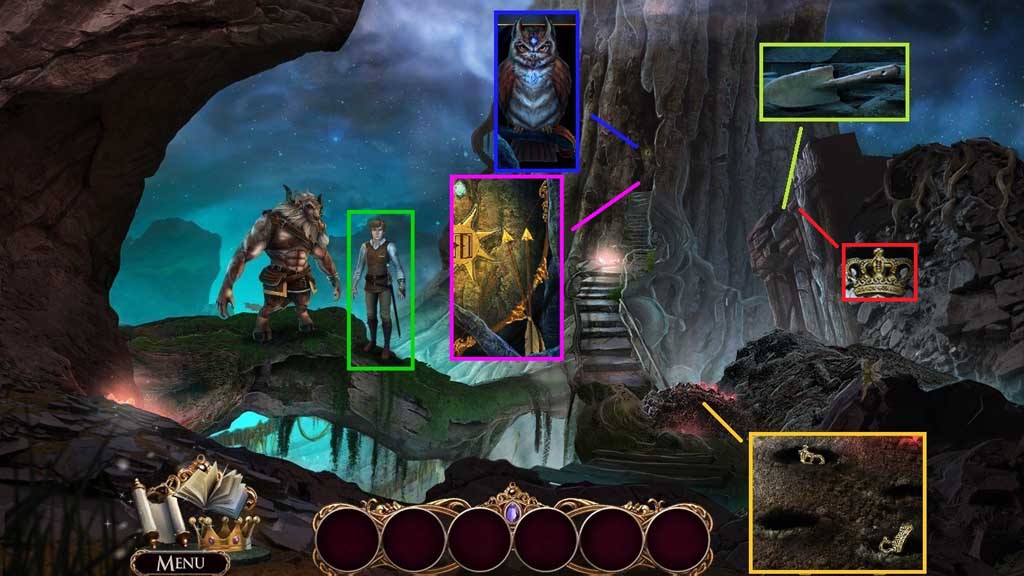
- Collect the spade and use it to uncover and collect the 2 alcove pieces.
- Zoom into the tree hollow.
- Speak to Cedric.
- Collect the bow and arrow.
- Insert the 2 alcove pieces to trigger a hidden objects area.
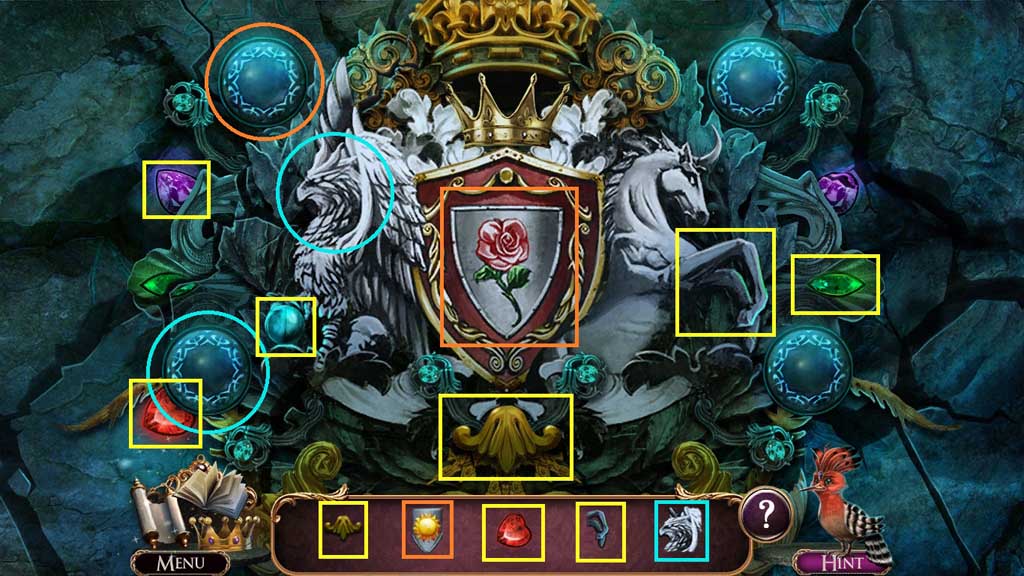
- Find the items.
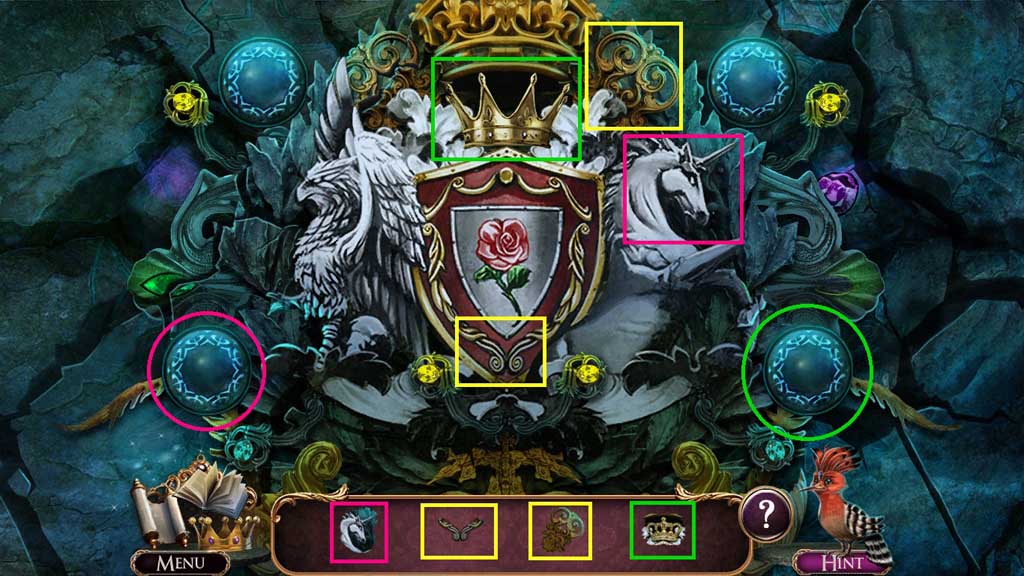
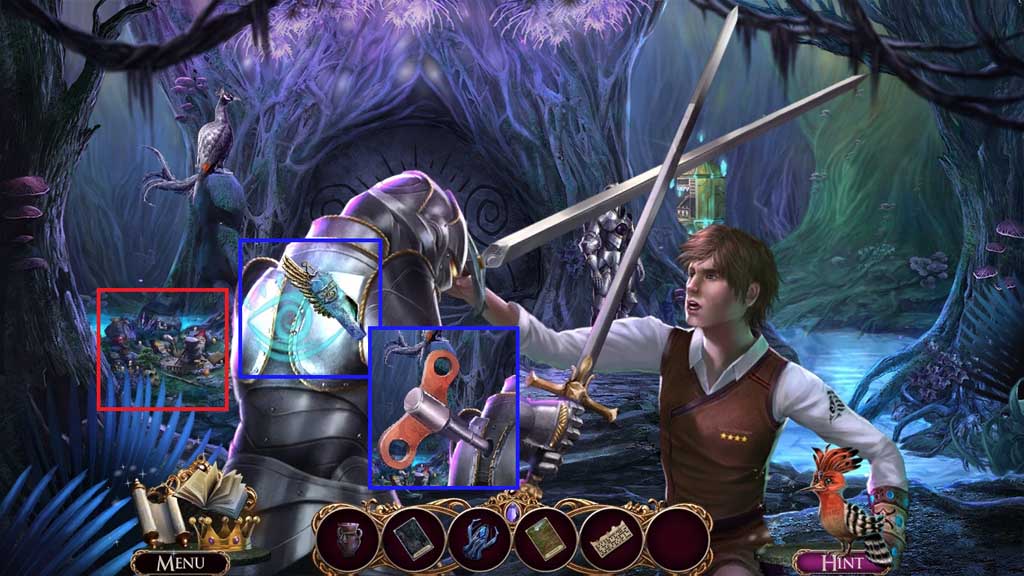
- Click the (orange) button; collect the sun flag.
- Collect the (aqua) button; collect the griffin head.
- Click the (hot pink) button; collect the unicorn head.
- Click the (green) button; collect the crown.
- Move ahead.
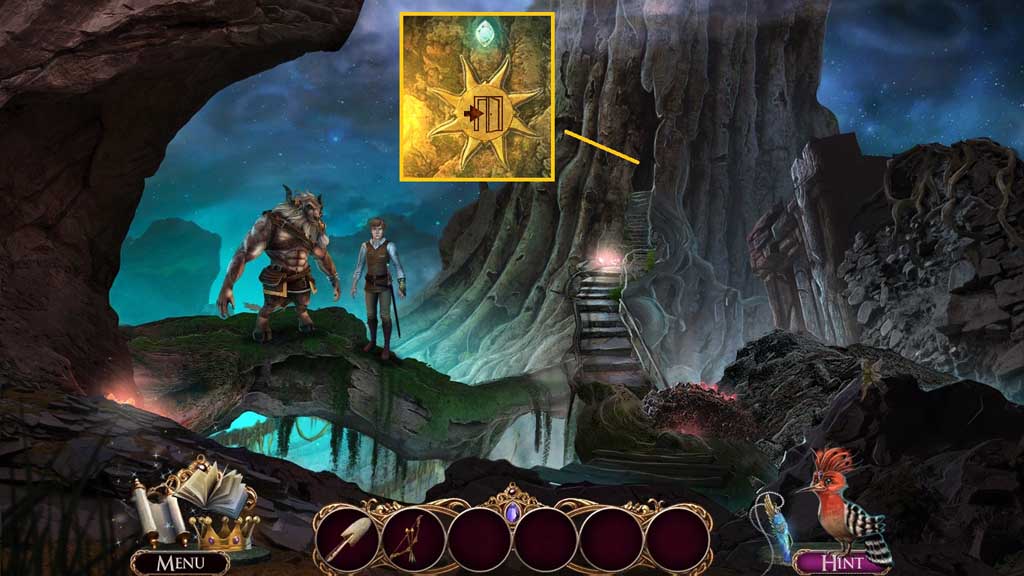
- Click the button.
- Move ahead.
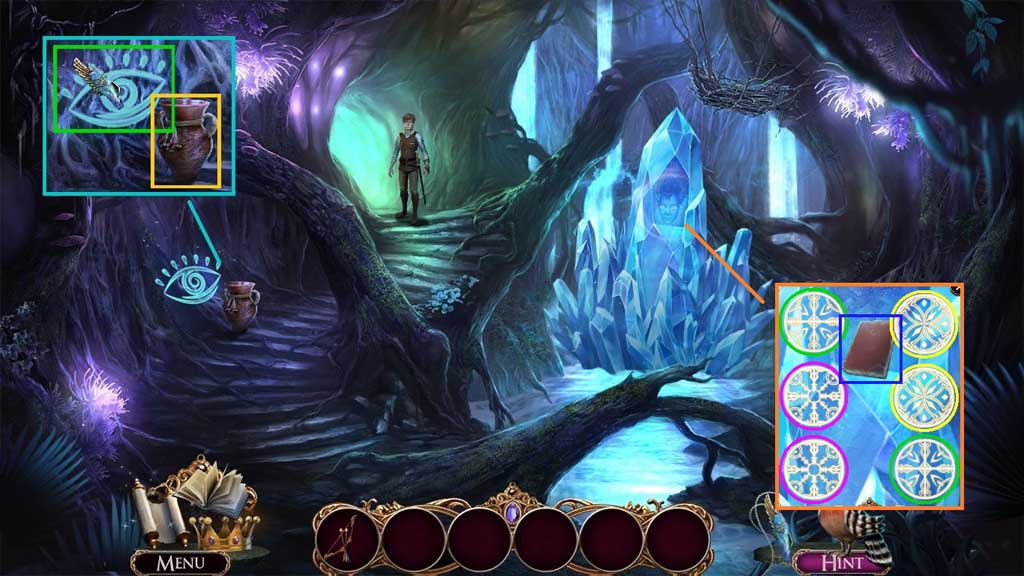
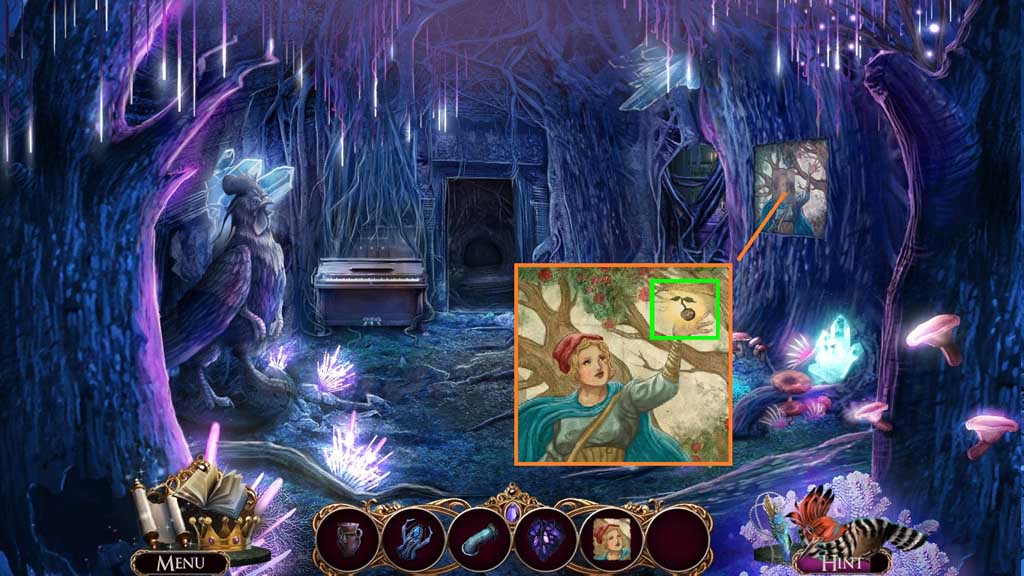
- Collect the empty pot.
- Select the all-seeing pendent to uncover the tiny pebbles.
- Click the mask 2x’s to trigger a mini game.
- Solve the game by matching the patterns; the lay out is randomized.
- Collect the book.
![]()
- Select the bow and arrow to shoot toward the nest.
- Collect the button.
- Speak to Cedric.
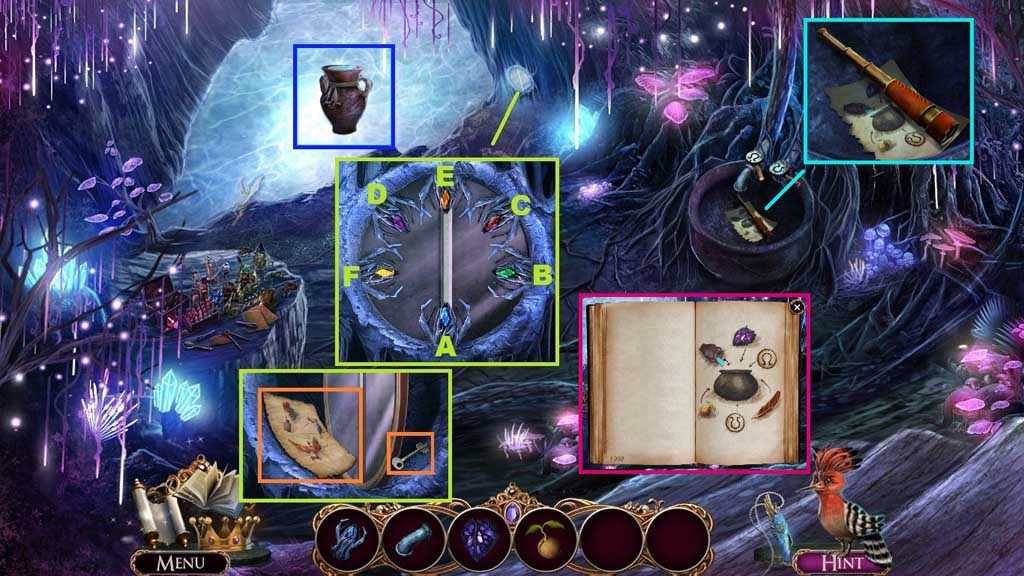
- Move ahead.
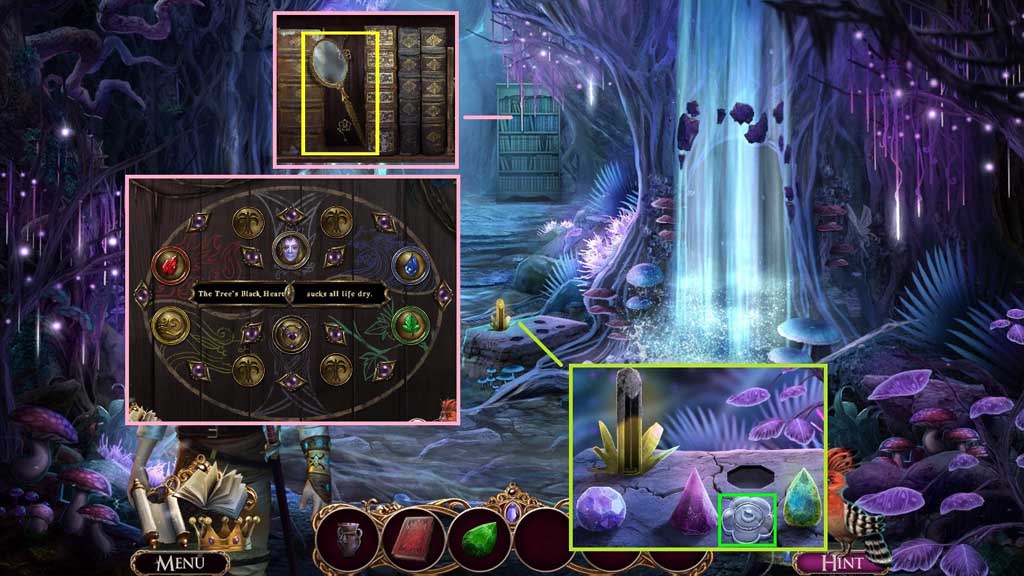
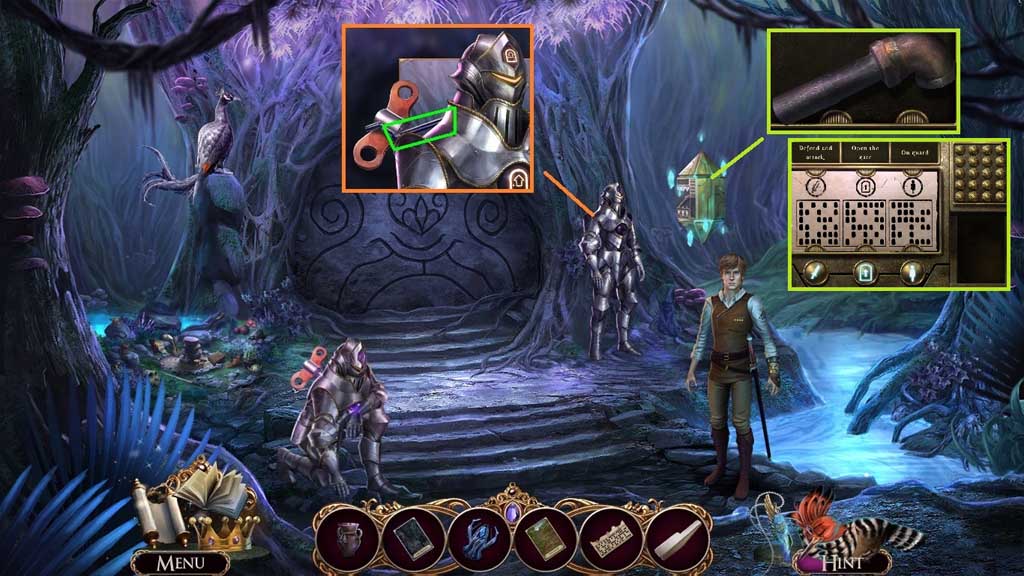
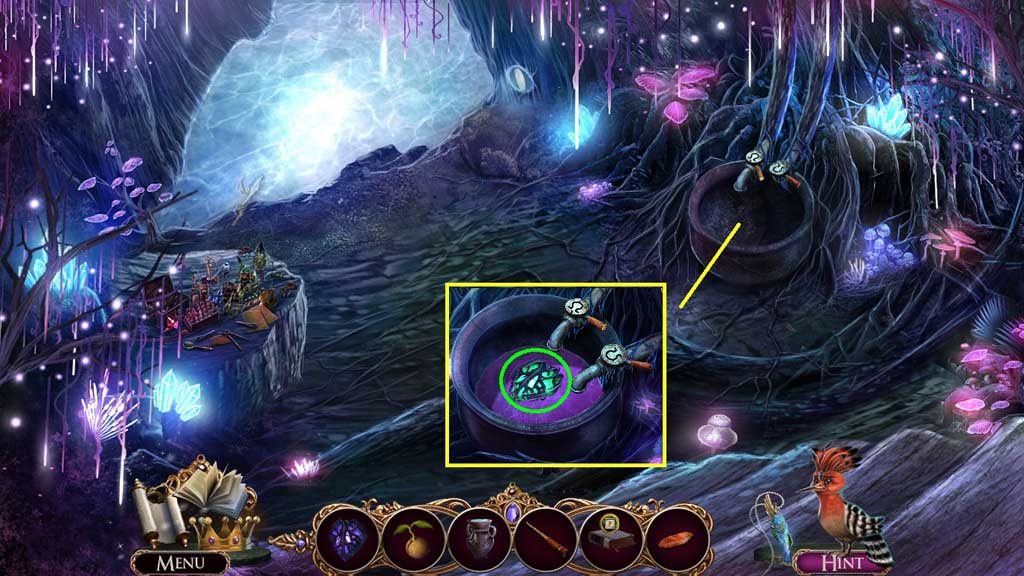
- Collect the valve; align the 3 crystals correctly.
- Collect the lens; place the book to trigger a mini game.
- Solve the game by moving the tokens to the correct areas.
- The solution is random.

- Collect the traitor’s card; attach the valve.
- Attach the button; collect the elevator note and the power crystal beneath it.
- Insert the power crystal.
- Collect the claw.
- Move down once.
- Place the lens onto the pebbles to trigger a mini game.
- Solve the game by matching similar pebbles; the arrangement is randomized.
- Collect the throne piece.
- Move ahead.

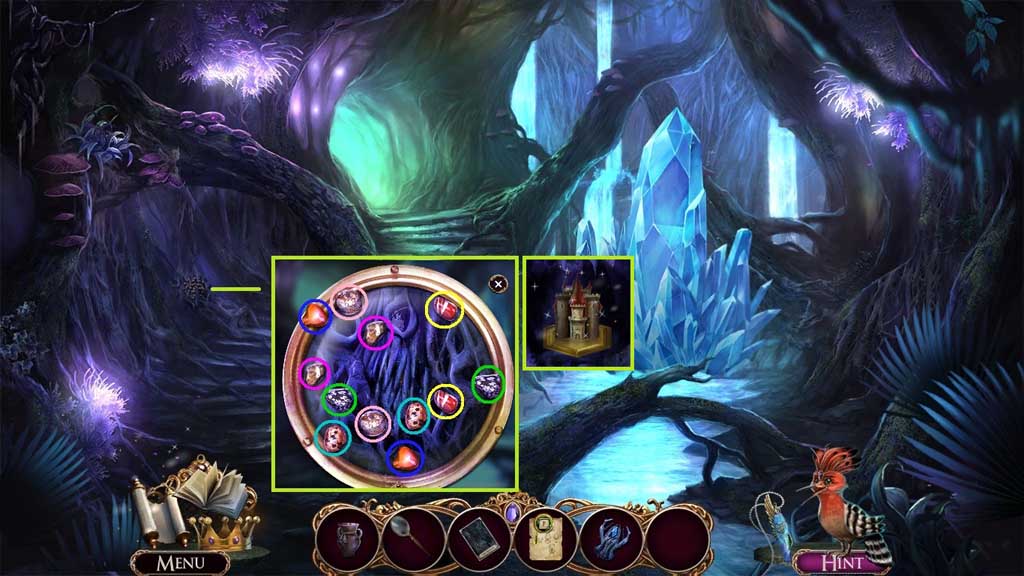
- Place the throne piece to trigger a mini game.
- Solve the game by guiding the black knight to the kingdom by clicking the arrow to point in the right direction.
- Click the green elevator button.
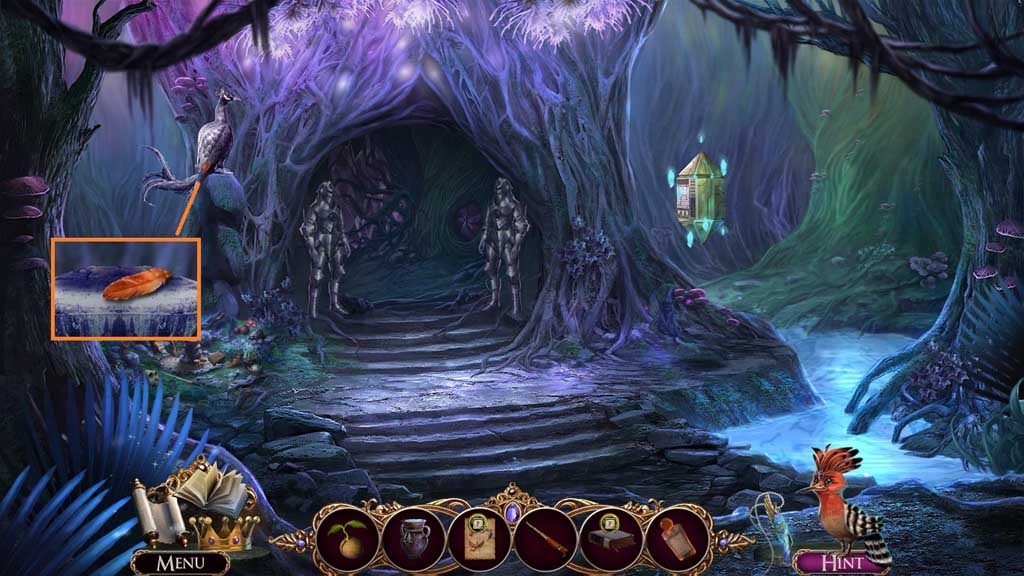
- Move ahead.
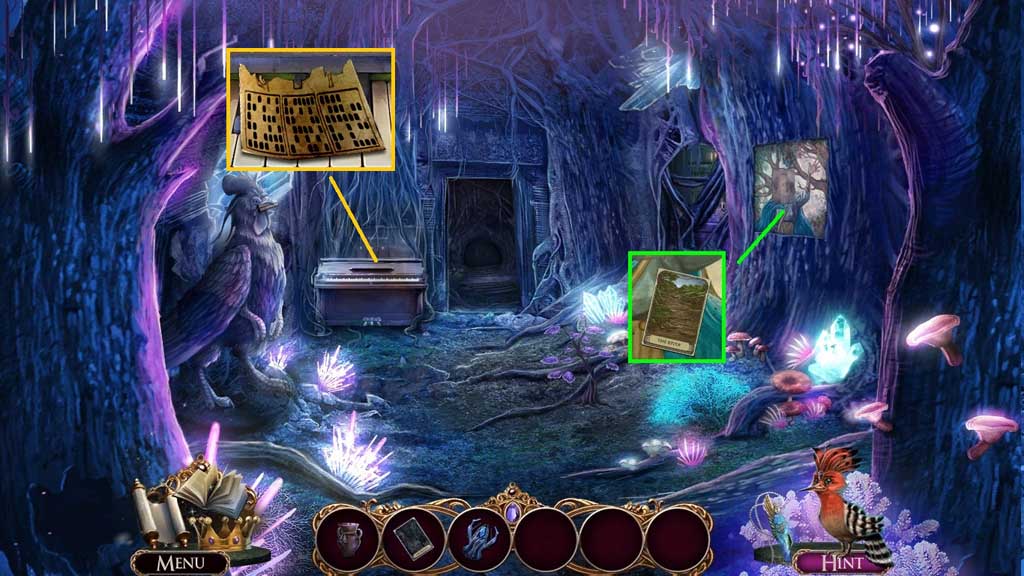
- Collect the river’s card and the automation commands.
- Move ahead.
- Select the all-seeing pendant to reveal the key; click it once.
- Click the hidden objects area.
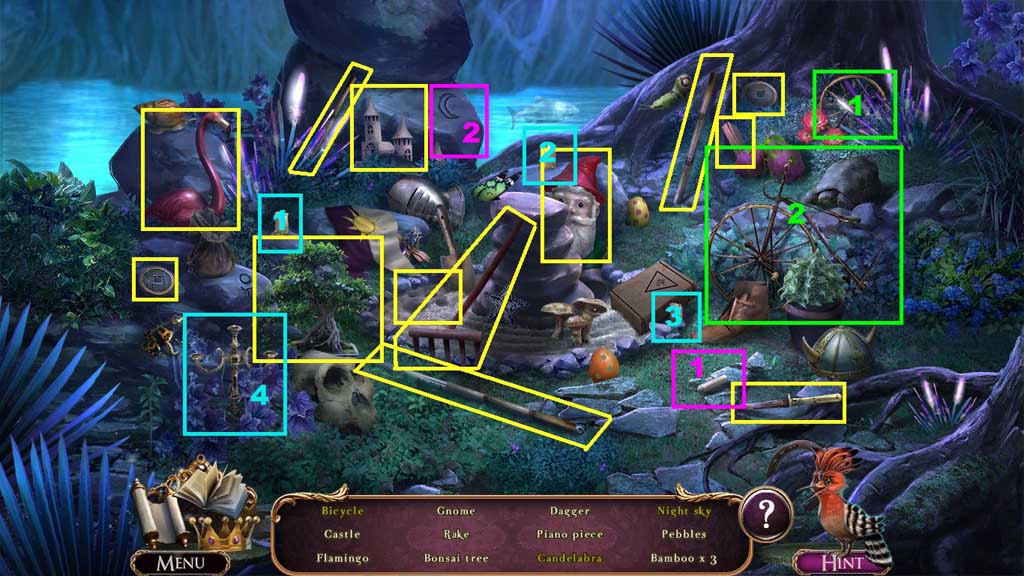
- Find the items.
- Select the wheel and attach it onto the bike frame; collect the bicycle.
- Select the candles and place them into the holder; collect the candelabra.
- Select the chalk to complete and collect the night sky.
- Collect the piano key.
- Collect the crank and the pipe segment.
- Insert the automaton commands.
- Move down once.
- Attach the crank; collect the blank scroll.
- Move ahead.
- Place the blank scroll; click the arrow button.
- Collect the command scroll.
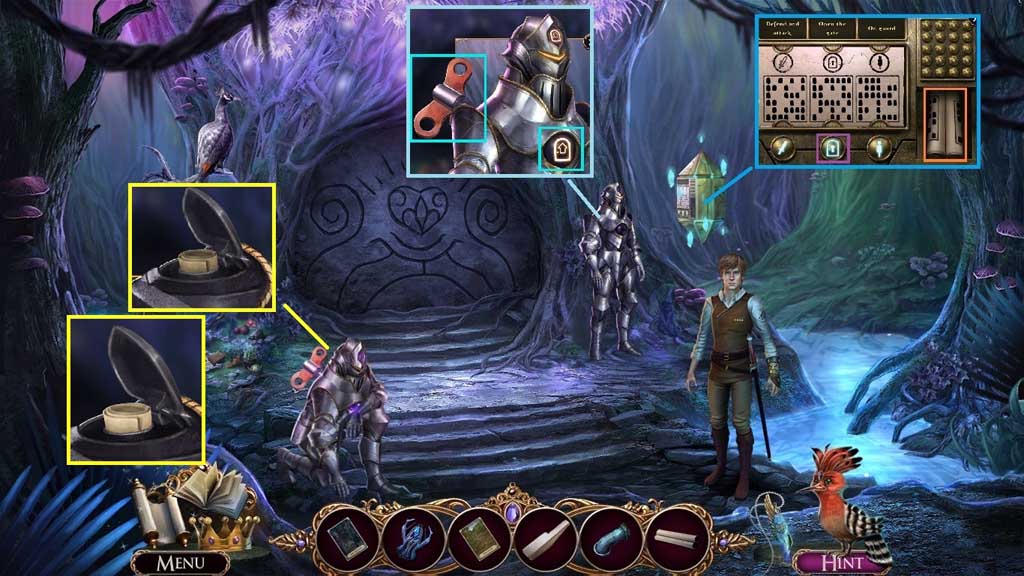
- Zoom into armor and click the button; click the key.
- Click the compartment and click the scroll.
- Place the command scroll and click the compartment closed.
- Move ahead.
- Collect the heart.
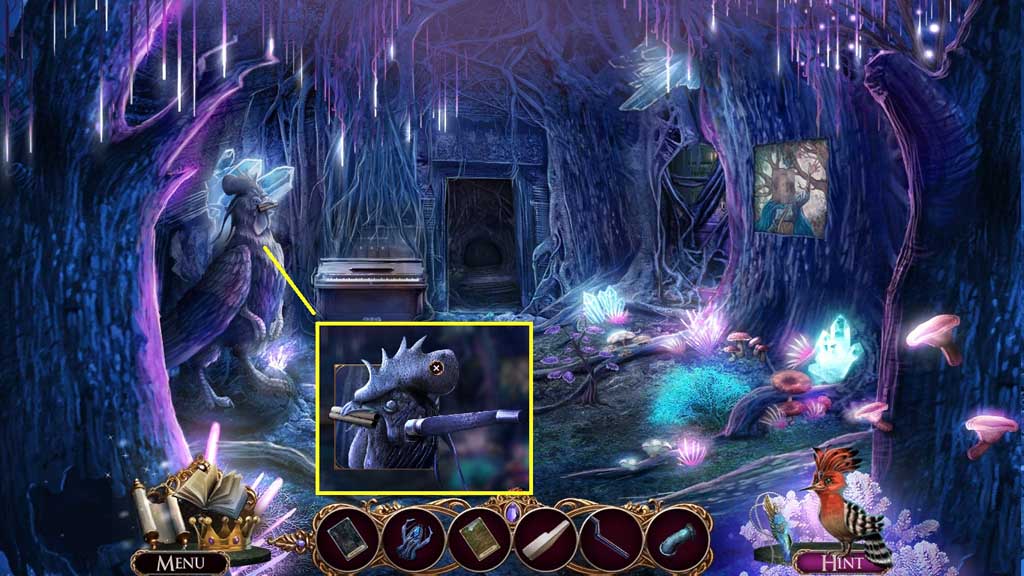
- Speak to the mask.
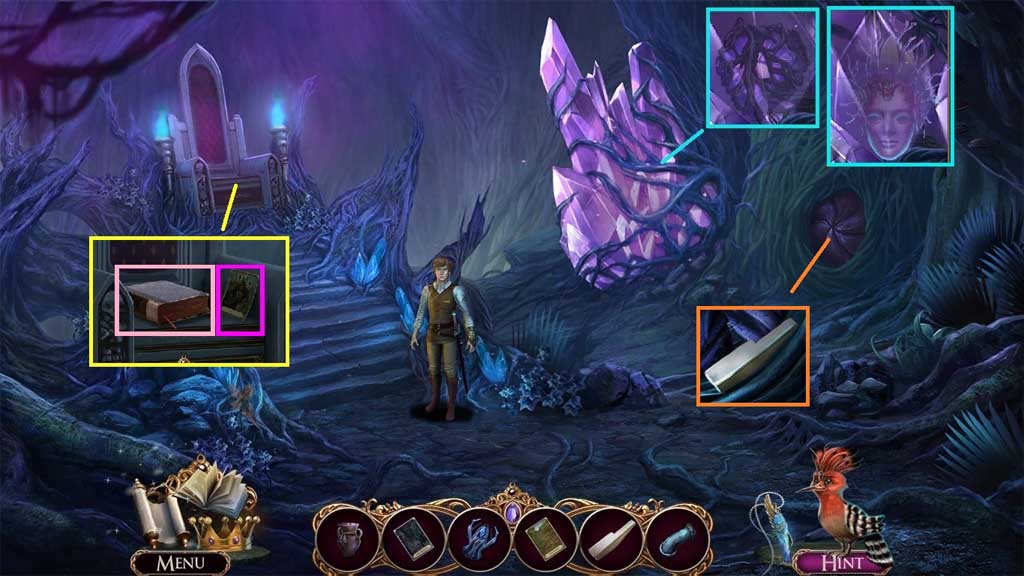
- Collect the book of magic; click it open and click 3 pages.
- Collect the knight’s card.
- Collect the piano key.
- Move down 2x’s.
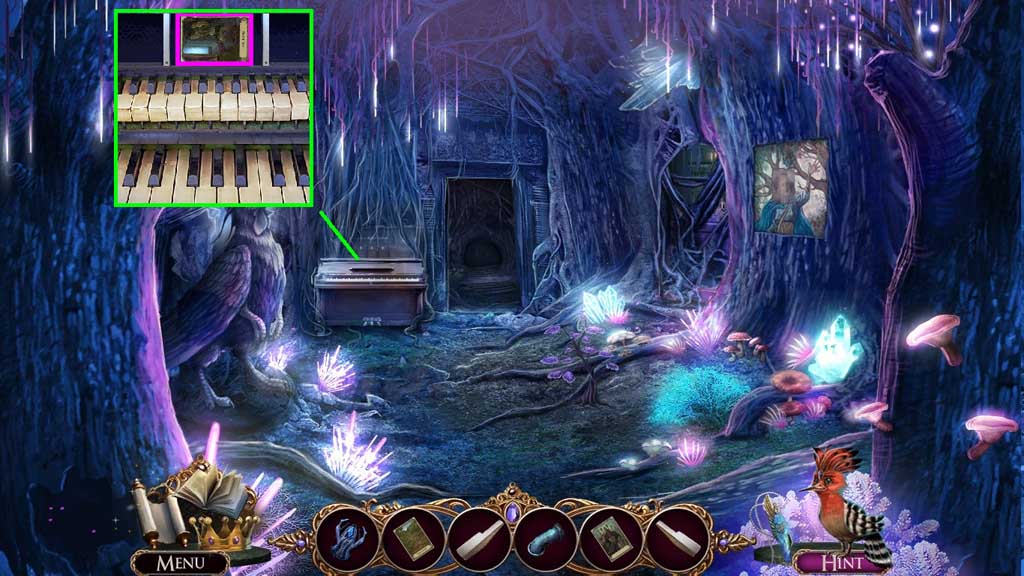
- Attach the 2 piano keys; collect the king’s card.
- Move down once.
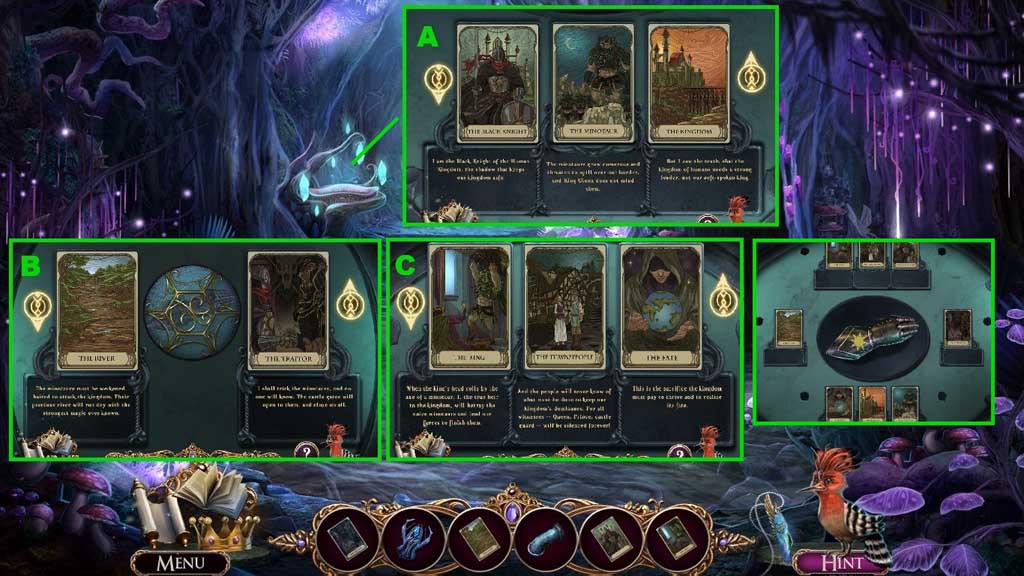
- Place the knight’s, river’s, king’s and traitor’s cards to trigger a mini game.
- Solve the game by arranging the cards correctly based on the clues and clicking the up arrows.
- Collect the knight’s gauntlet.
- Move ahead 3x’s.
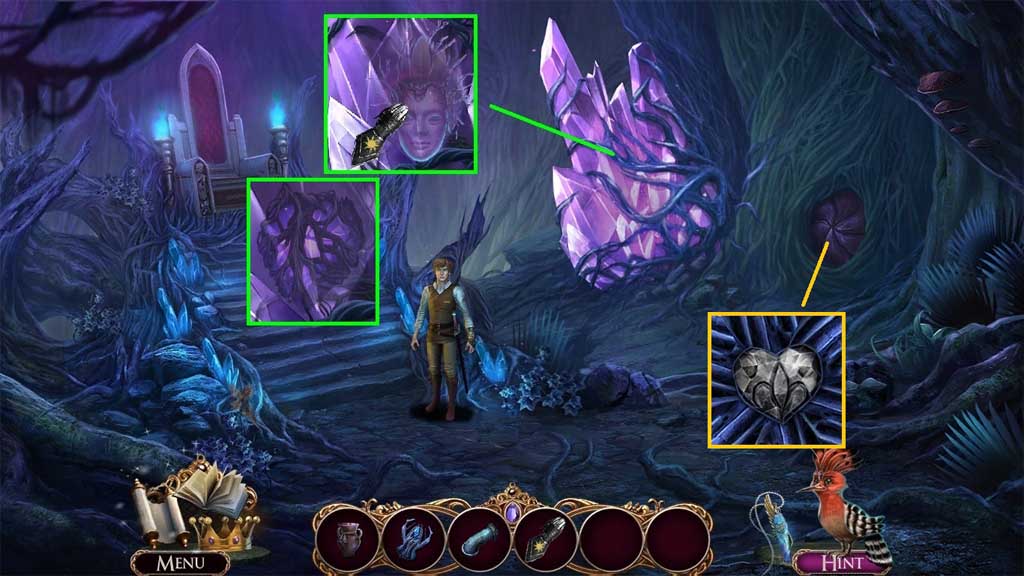
- Select the knight’s gauntlet to use on the mask; collect the black heart.
- Click the heart; move ahead.
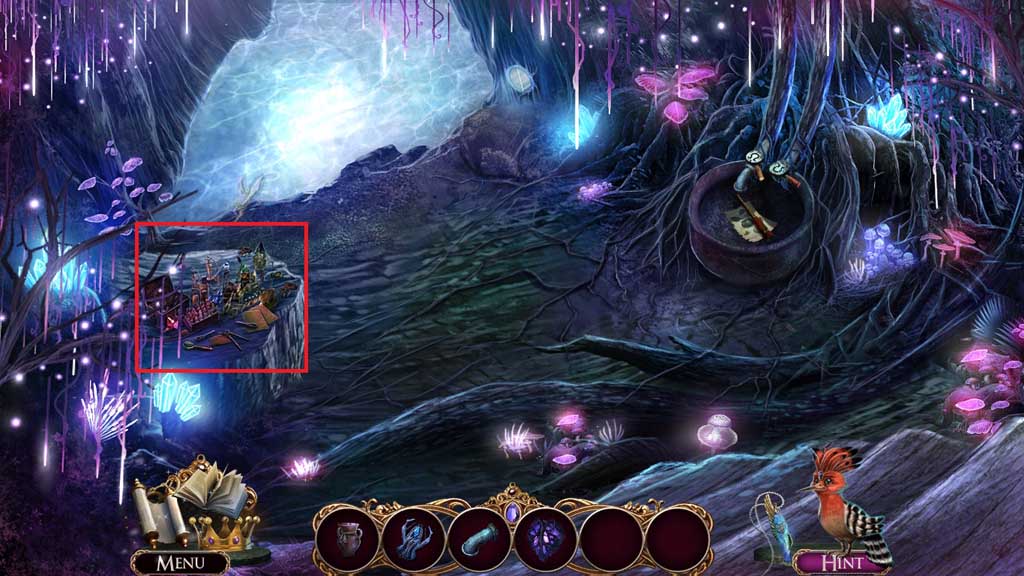
- Click the hidden objects area.
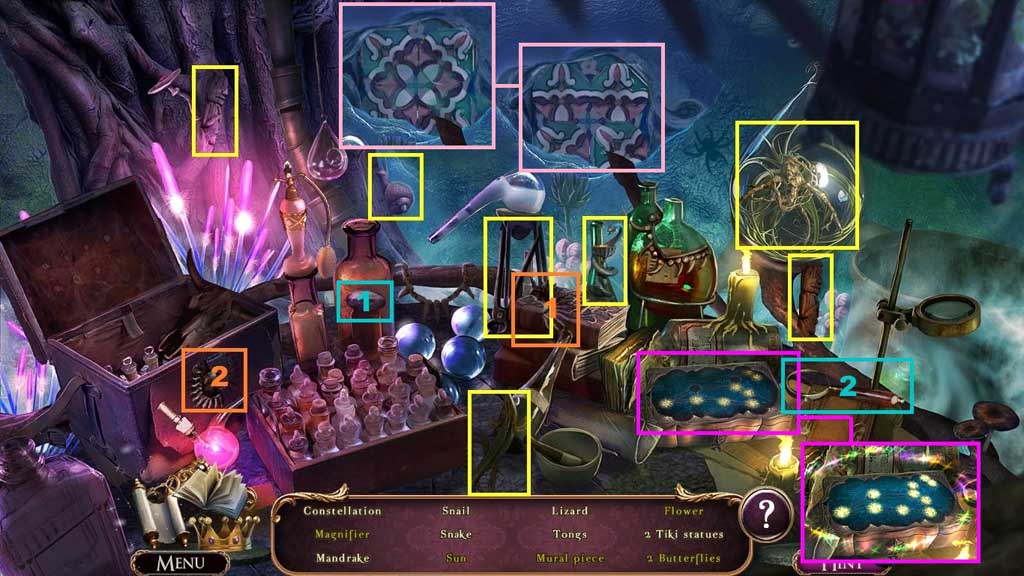
- Find the items.
- Click the box and align the stars correctly; collect the constellation.
- Select the lens and place it into the frame; collect the magnifier.
- Select the sun half and attach it to the other half; collect the sun.
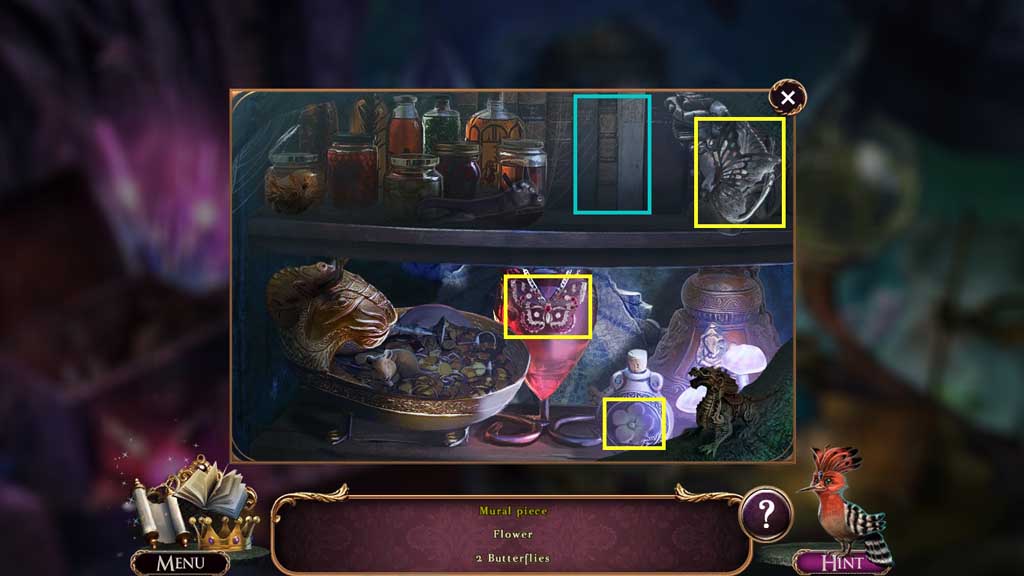
- Click the discs to complete the image and reveal more items.
- Click the books; collect the mural piece.
- Move down 3x’s.
- Place the mural piece.
- Collect the essence of life.
- Move ahead 3x’s.
- Place the empty pot into the water; collect the jar of water.
- Place the claw to trigger a mini game.
- Solve the game by clicking the claws in ABC order.
- Collect the phoenix note and the key.
- Collect the spy glass and the last page.
- Click the book of magic open; click 3 pages and insert the last page.
- Move down 3x’s.

- Insert the key to trigger a hidden objects area.
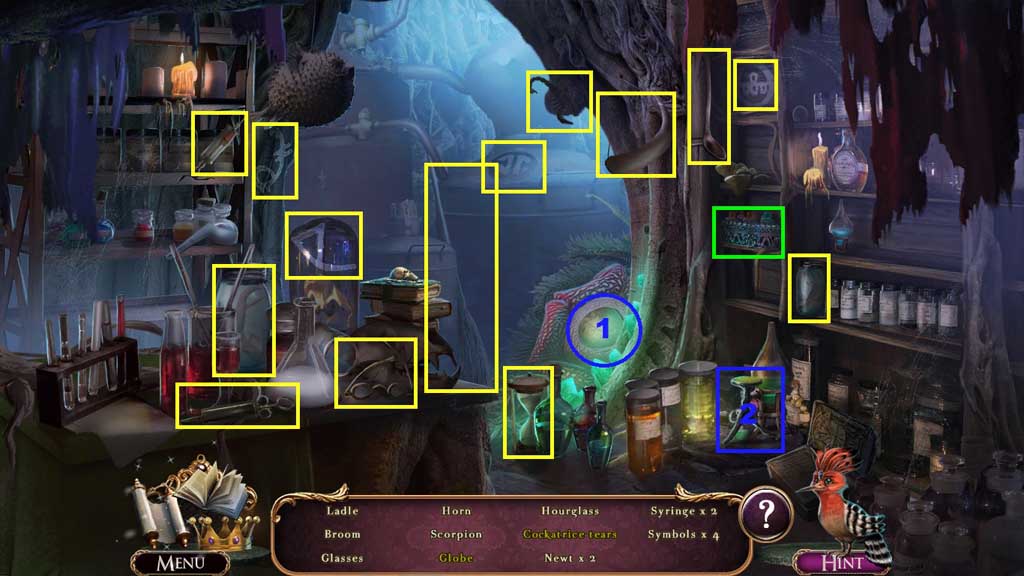

- Find the items.
- Select the globe and place it onto the stand; collect the globe.
- Zoom into the bottles to trigger a mini game.
- Solve the game by using the clues to locate the correctly etched bottles.
- Collect the cockatrice’s treats.
- Move ahead.
- Select the cockatrice’s tears to use on the statue.
- Collect the phoenix feather.
- Move ahead 2x’s.
- Select the jar of water and the heart to
- Attach the pipe segment and click the valve.
- Place the phoenix feather and click the valve.
- Add the essence of life; collect the green heart of life.
- Move down once.
General Information & Tips
Chapter One: Village View
Chapter Two: Frozen Lake
Chapter Three: Escape
Chapter Four: The Hut
Chapter Five: Tree
Chapter Six: Castle
Ask for help in the comments below!
Chapter One: Village View
Chapter Two: Frozen Lake
Chapter Three: Escape
Chapter Four: The Hut
Chapter Five: Tree
Chapter Six: Castle
Ask for help in the comments below!