
Abyss: The Wraiths of Eden: Chapter Nine: Shaft 3
Our Abyss: The Wraiths of Eden Walkthrough will help you traverse the inky depths of the ocean and explore the mysterious underwater city of Eden, where your fiance Robert has been trapped for weeks. With the city crumbling under your feet and supernatural creatures haunting the grounds, can you get to the bottom of this mystery before it's too late? With our detailed screenshots, clear instructions, and puzzle solutions to help you, solving the mystery of the Abyss The Wraiths of Eden will be a quick swim in the shallows.
General Info and Tips
Chapter One: The Wrecked Craft
Chapter Two: Inside Eden
Chapter Three: The Girl
Chapter Four: The Hotel Gate
Chapter Five: Freeing Robert
Chapter Six: The Twins
Chapter Seven: The Bottom Floor
Chapter Eight: Finding the Cure
Chapter Nine: Shaft 3
Chapter Ten: The Rite
Ask for help in the comments below!

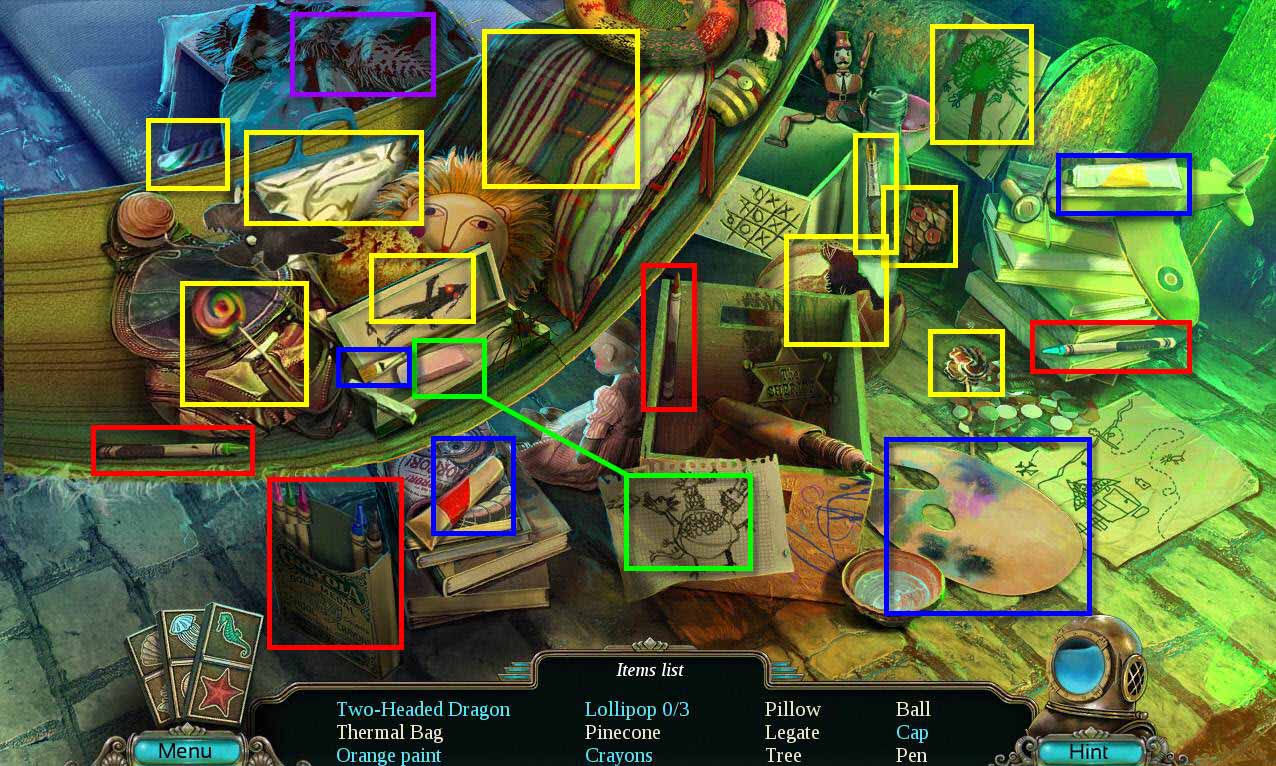
- Click on the sparkles to start the hidden object scene.
- Find all the items on the list.
- You will receive the GOLDEN KEY.
- Go to the outside of the Albion Hotel.
- Click to talk to Gregory.
- He will give you the LAB KEY.
-
Return to the hideout.
- Click on the hatch to zoom in.
- Use the LAB KEY on the lock.
-
Go down to the lab.
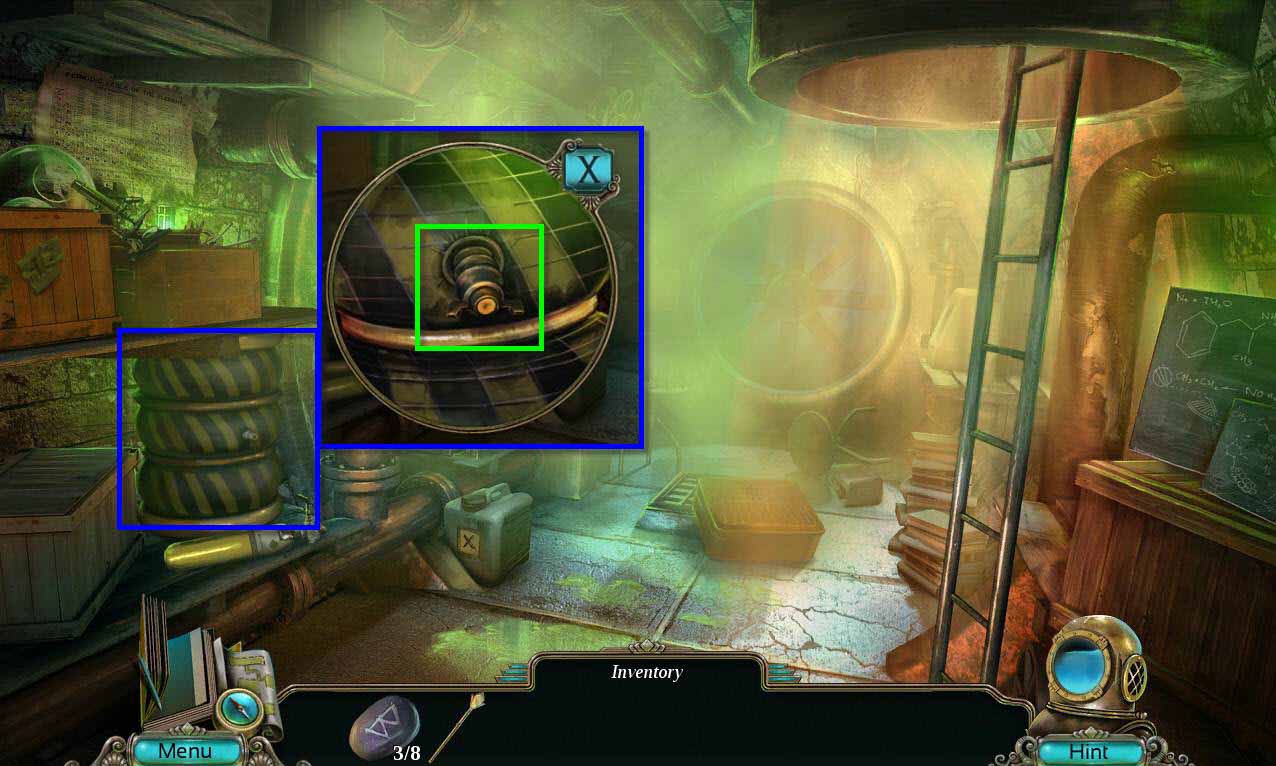
- Click on the air jack on the left to zoom in.
- Click on the nozzle to let the air out.
- Take the AIR JACK.
-
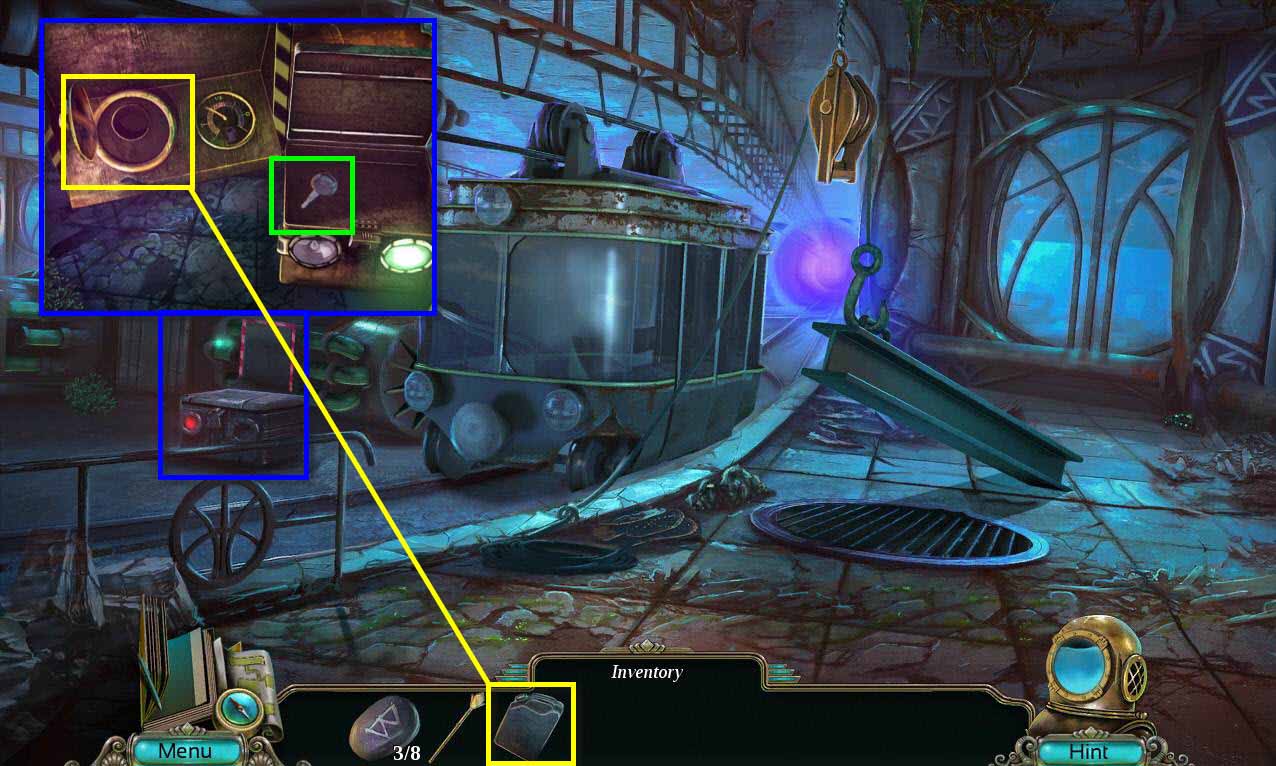
Go back to the bottom floor to the reception room.
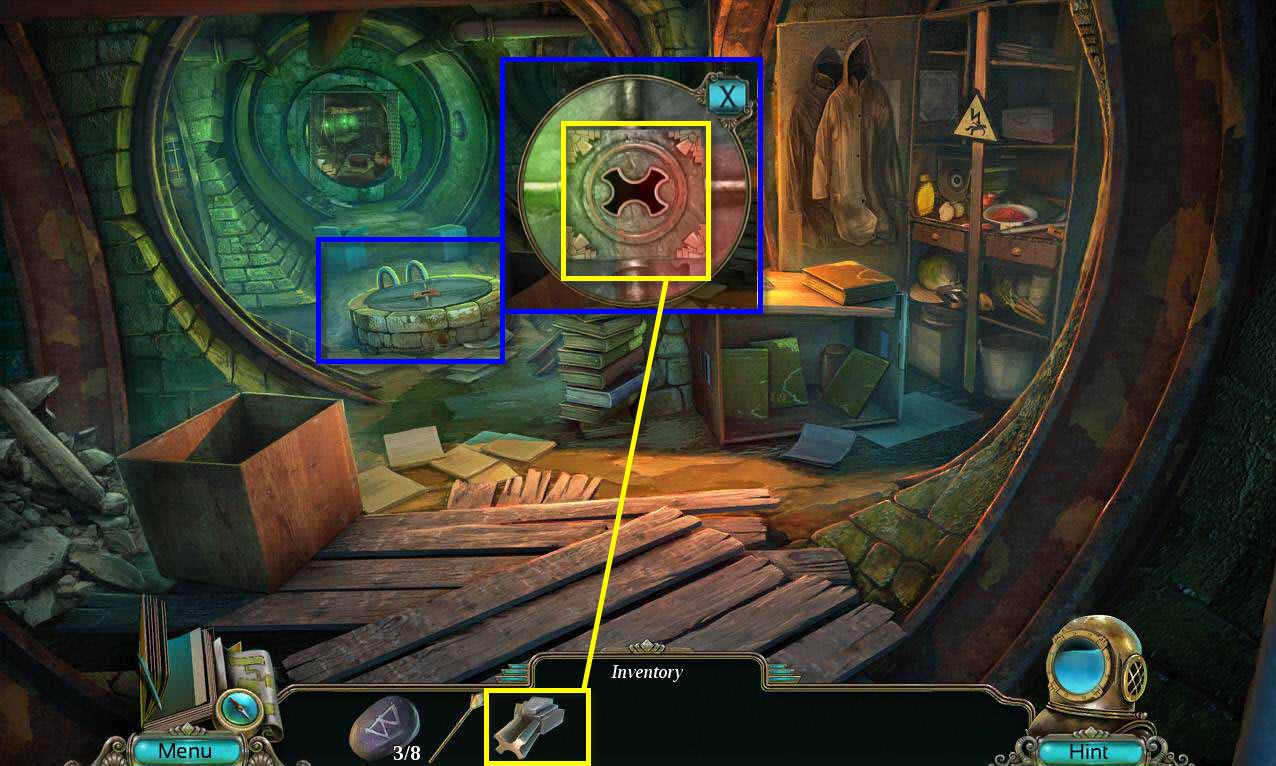
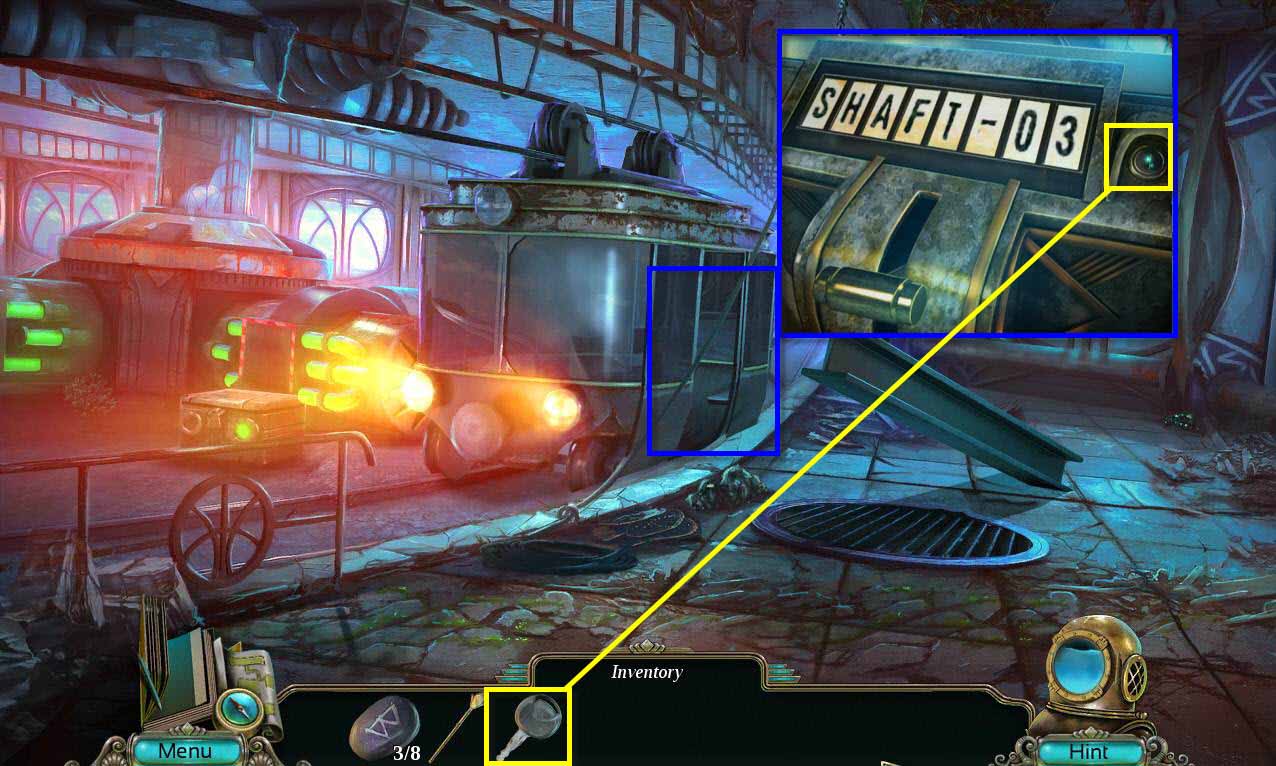
- Click on the door to shaft 3 to zoom in.
- Use the AIR JACK on the door.
- Click on the jack to start it.
- Take the FUEL CANISTER.
-
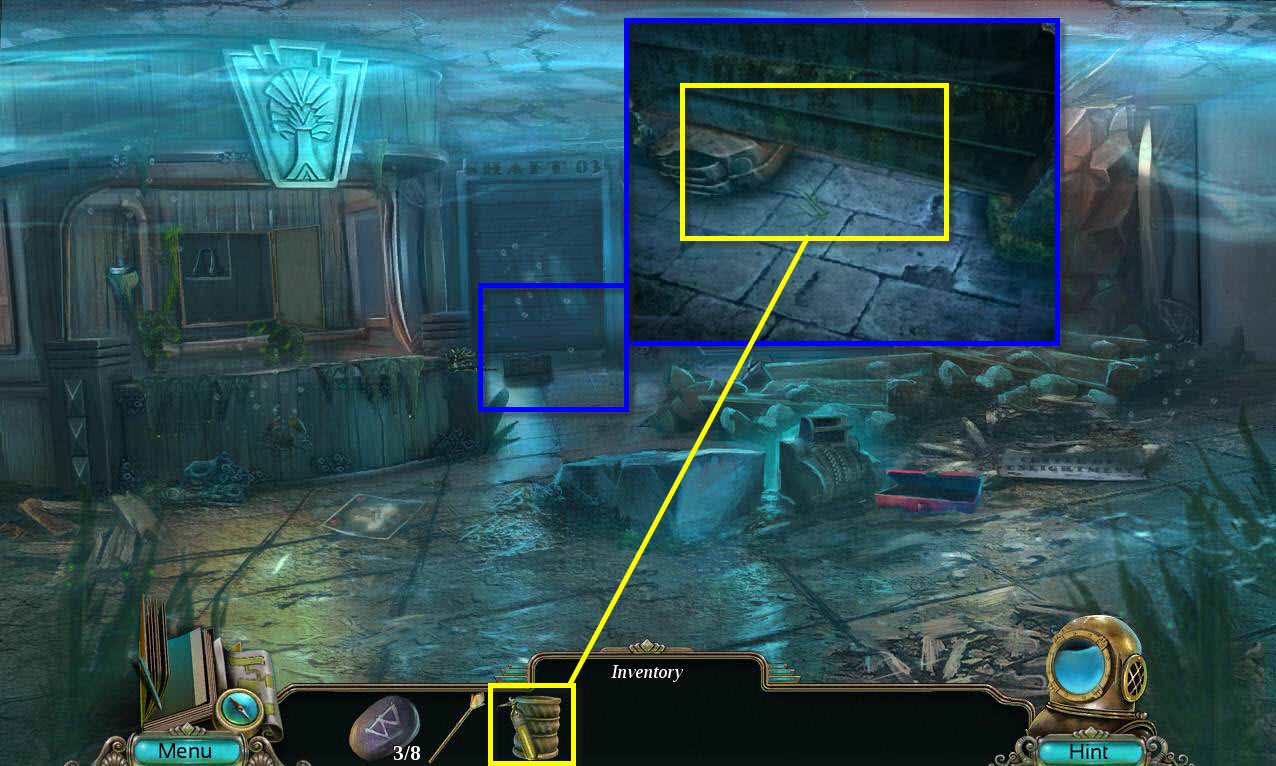
Go through the door.
- Click on the ground in front of you to zoom in.
- Take the SHACKLE PIN.
- Click on the controls on the left to zoom in.
- Take the TACKLE.
-
Go back one screen.
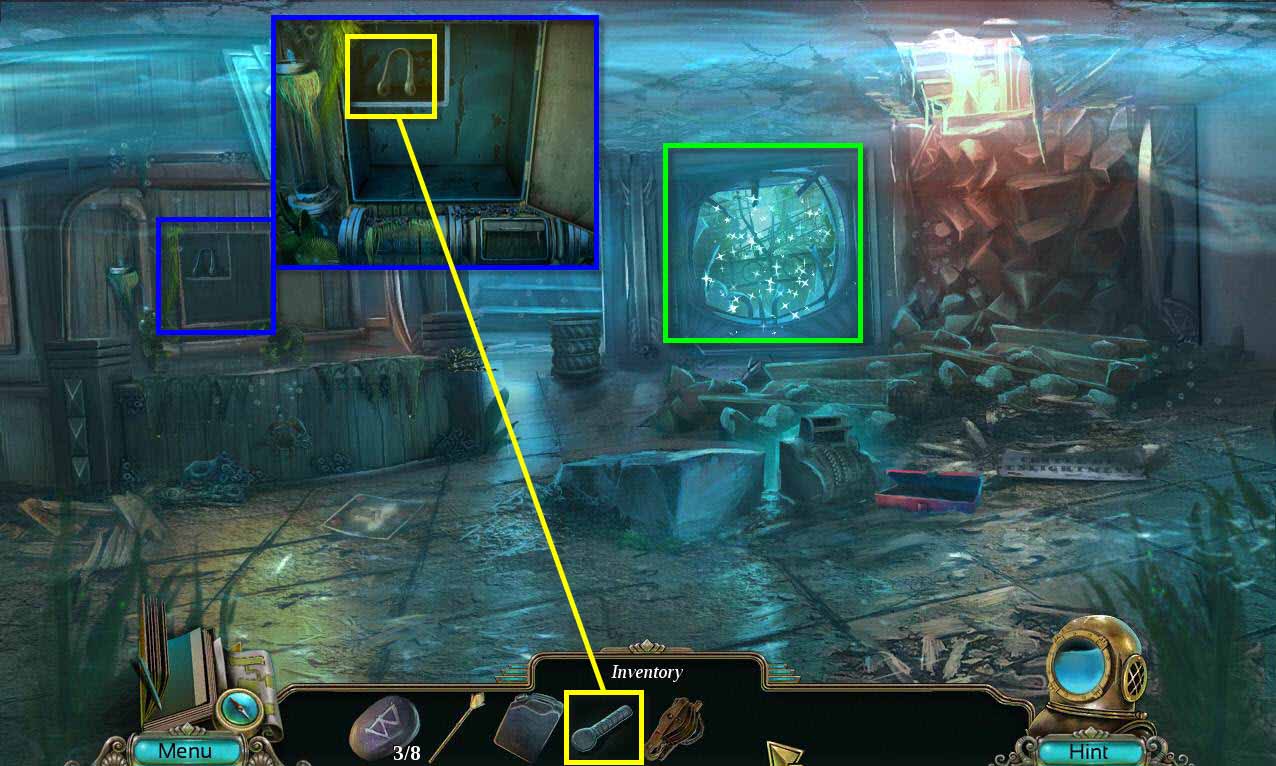
- Click to zoom in on the shelf on the left.
- Use the SHACKLE PIN on the shackle.
- Take the SHACKLE.
-
Click on the sparkles to start the hidden object scene.
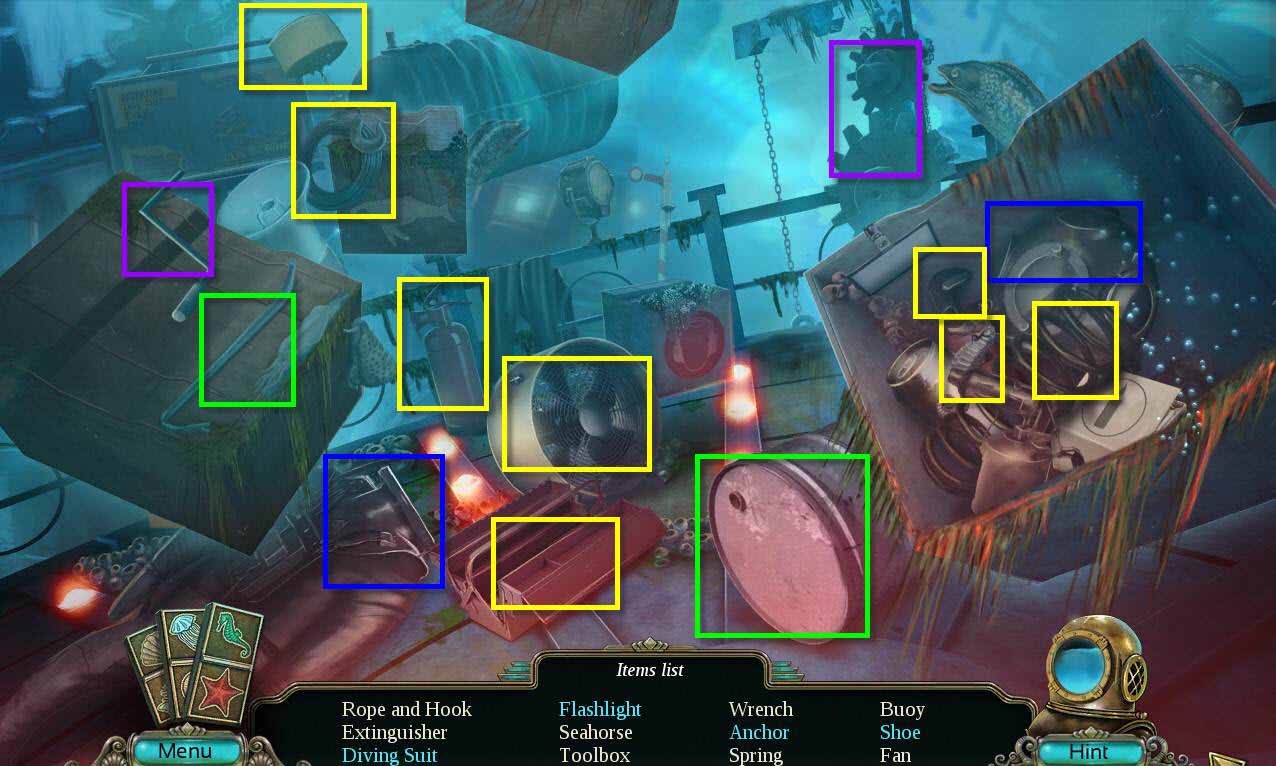
- Find all the items in the scene.
- You will receive a HOOK and ROPE.
-
Go forward to the station.
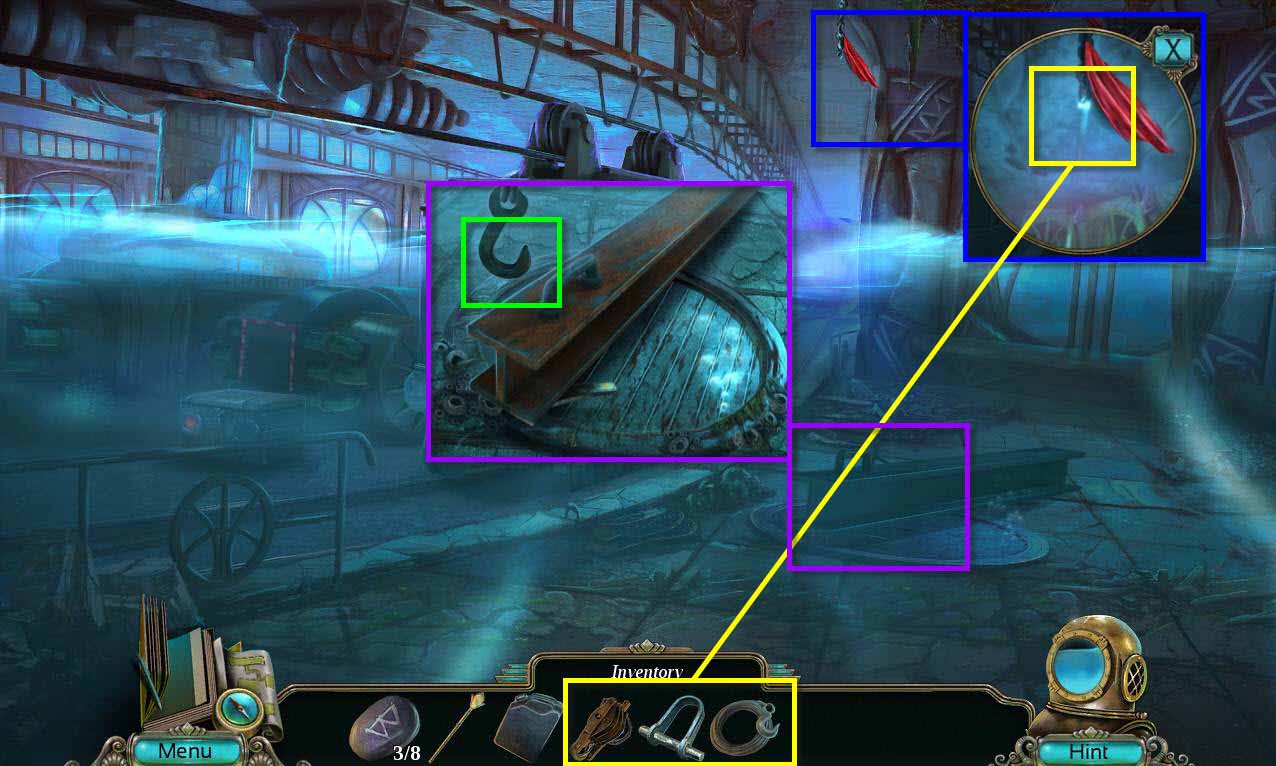
- Click on the chain that is hanging above to zoom in.
- Use the SHACKLE on the chain.
- Use the TACKLE on the chain.
- Use the HOOK AND ROPE on the chain.
- Click on the beam to zoom in.
-
Click on the hook to move it.
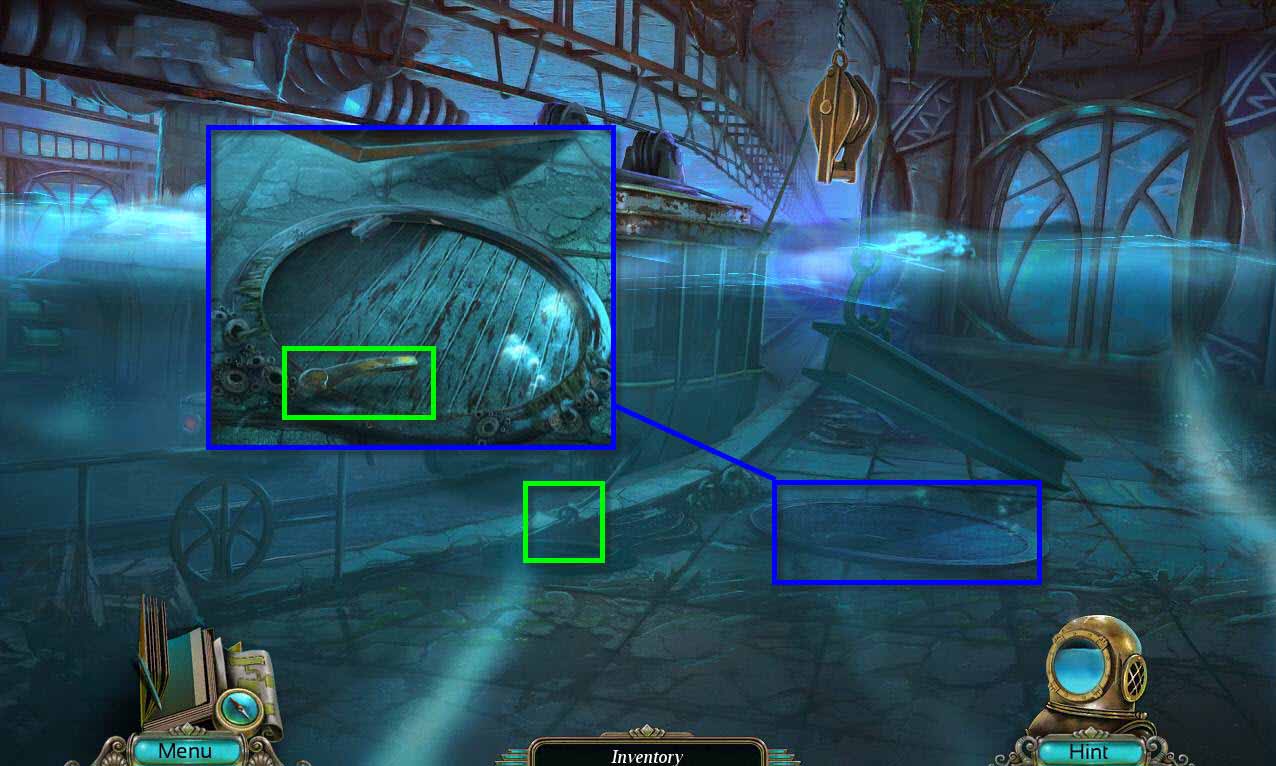
- Click on the rope to secure it and lift the beam.
- Click on the hatch to zoom in.
-
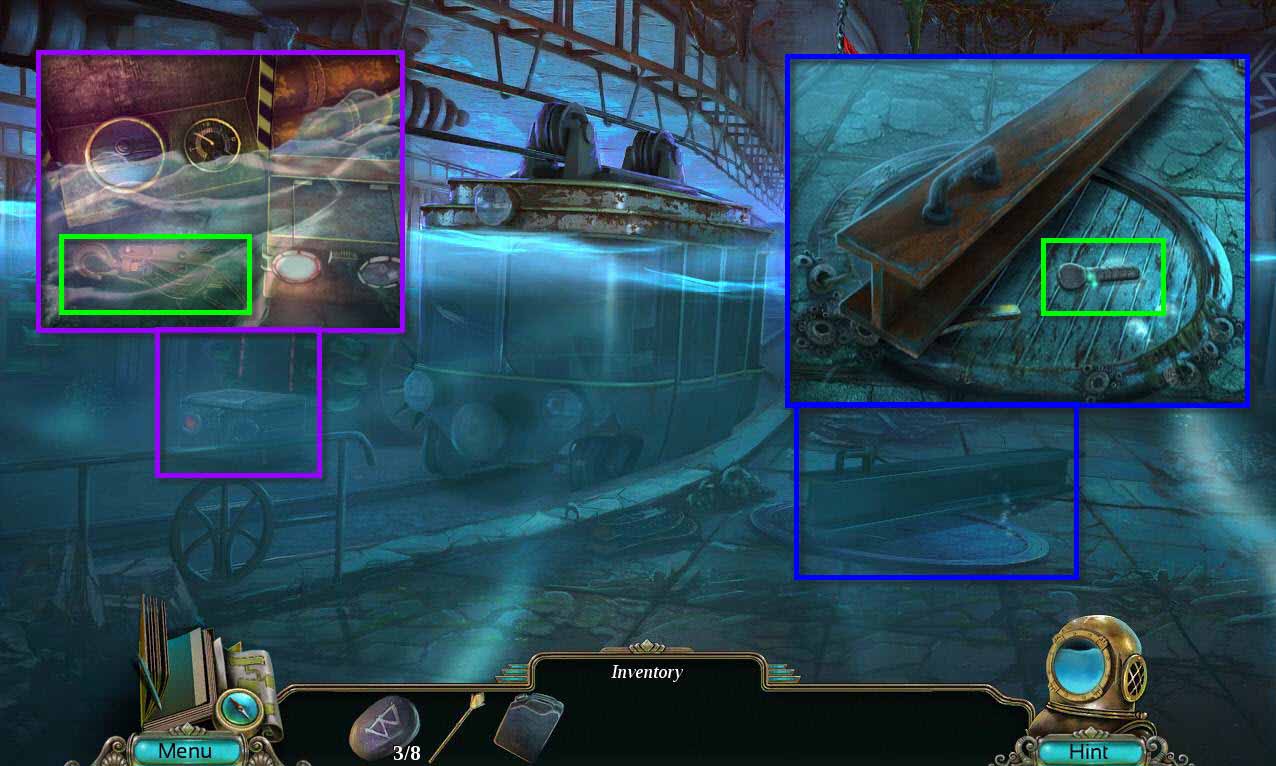
Click on the handle to open the hatch and drain the water from the room.
- Click on the controls on the left to zoom in.
- Click the box to open it.
- Take the TRAIN KEY.
-
Use the FUEL CANISTER on the controls.
- Click on the train to zoom in.
- Use the TRAIN KEY on the ignition.
- Click to turn the key.
- Click on the lever.
-
Go to Shaft 3.
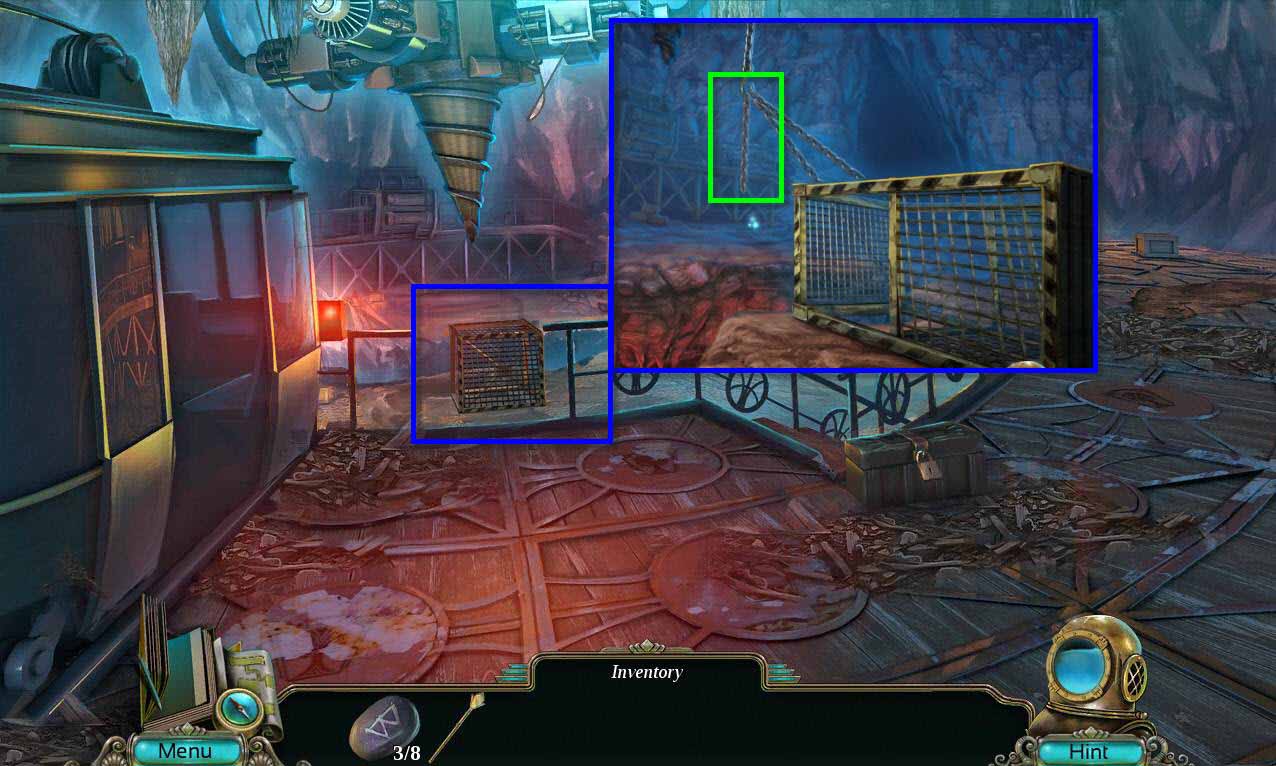
- Click on the cage to zoom in.
-
Click on the chains to secure them to the cage.
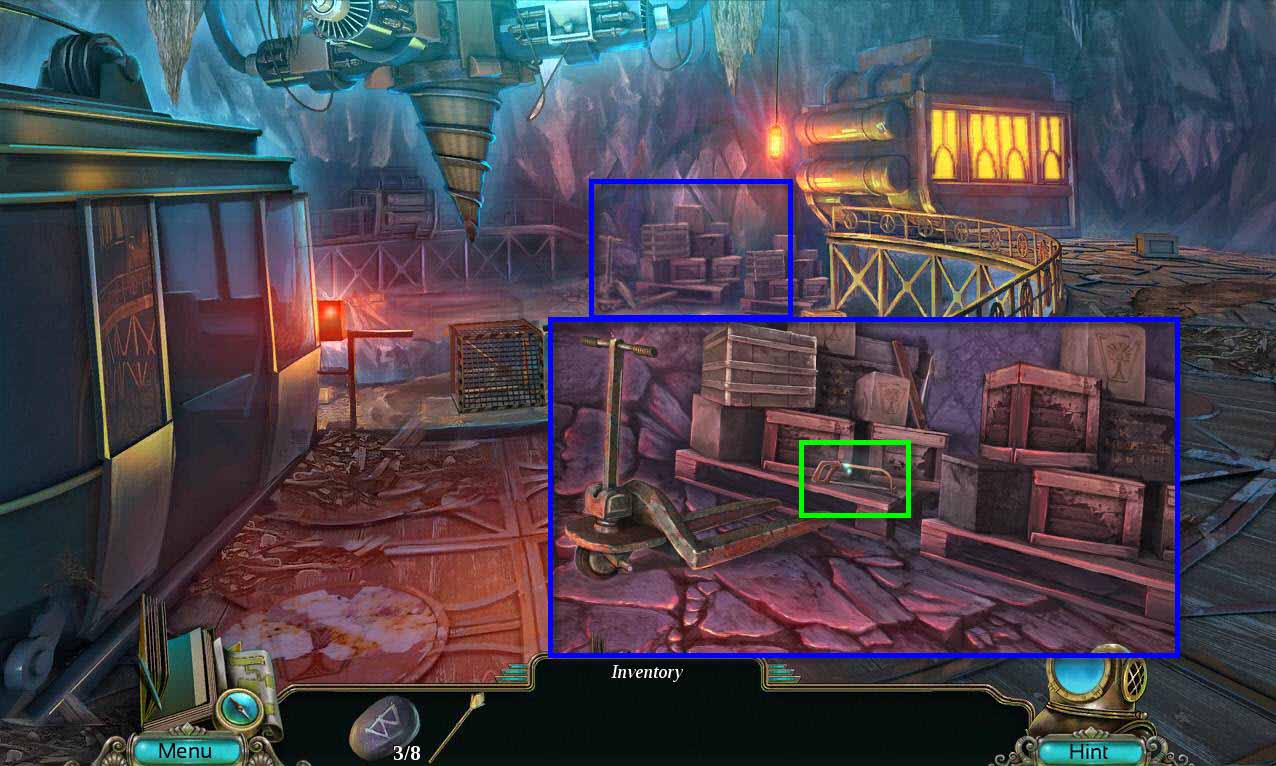
- Click to zoom in on the boxes.
- Take the HACK SAW.
-
Zoom back out.
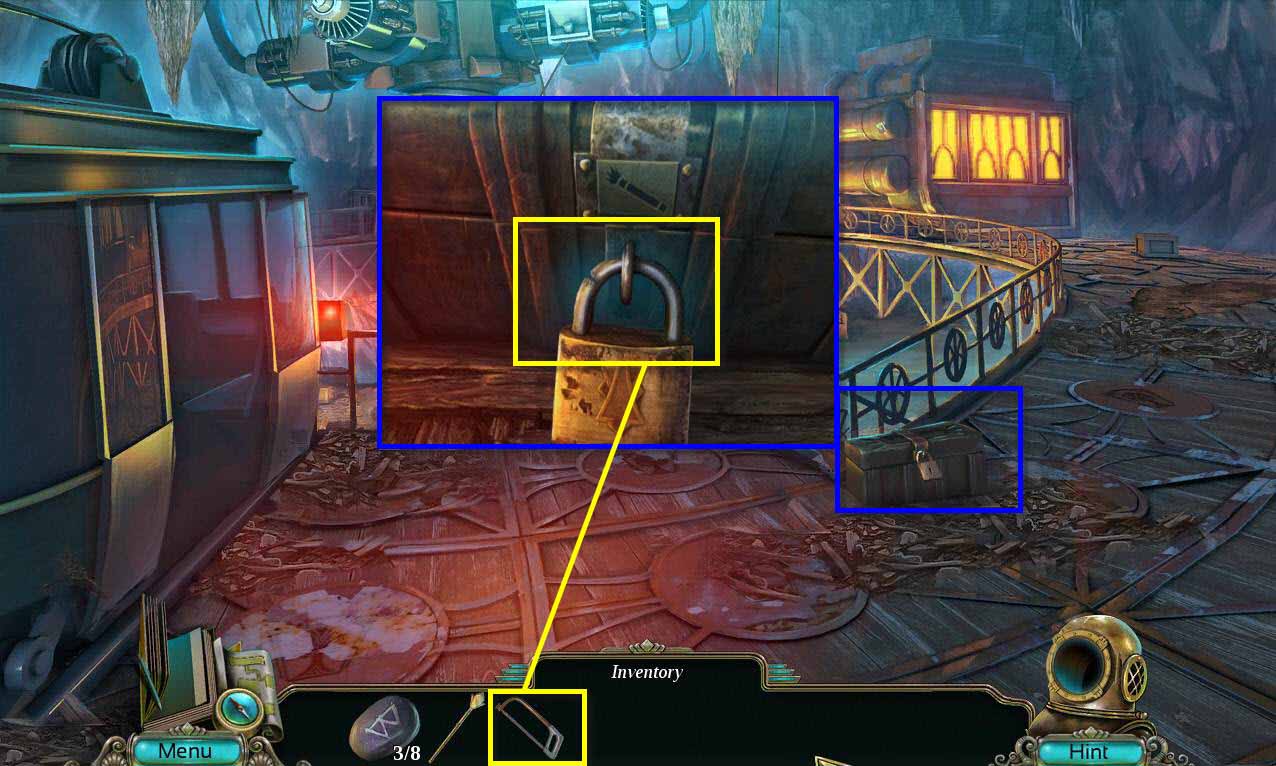
- Click to zoom in on the chest.
- Use the HACK SAW on the padlock.
- Click to open it.
- Take the FLARE.
-
Click on the cage again to zoom in.
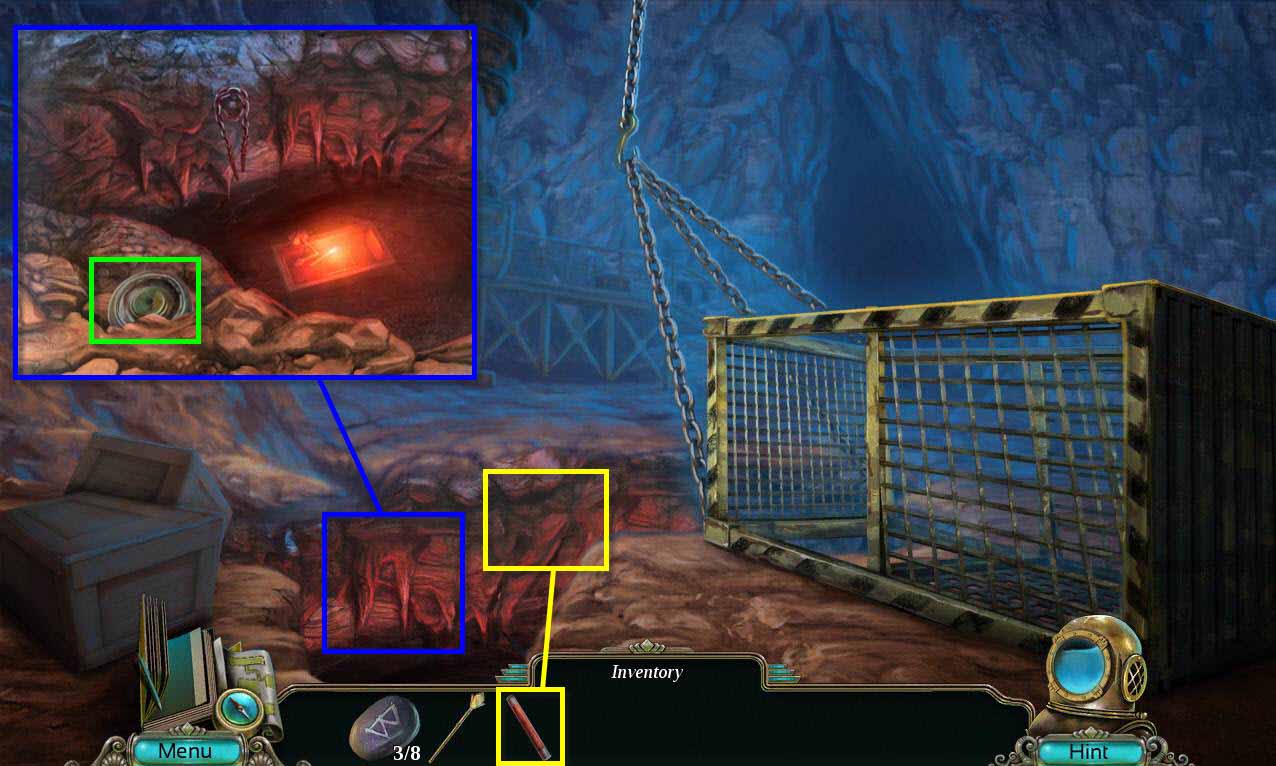
- Use the FLARE on the pit.
- Click to zoom in on the pit.
- Take the WHEEL.
-
Zoom out and click on the boxes again.
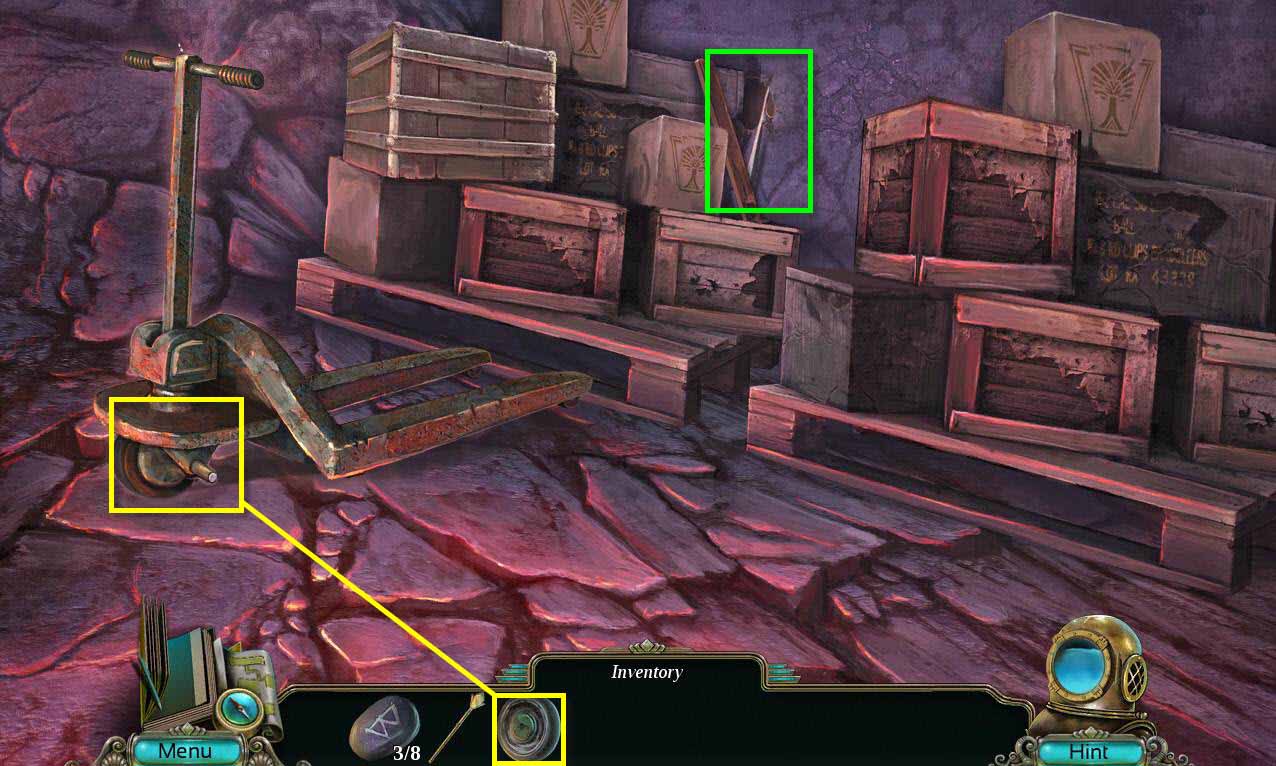
- Use the WHEEL on the dolly.
- Click on the dolly to move the boxes.
- Take the BOAT HOOK.
-
Go back and click on the cage again.
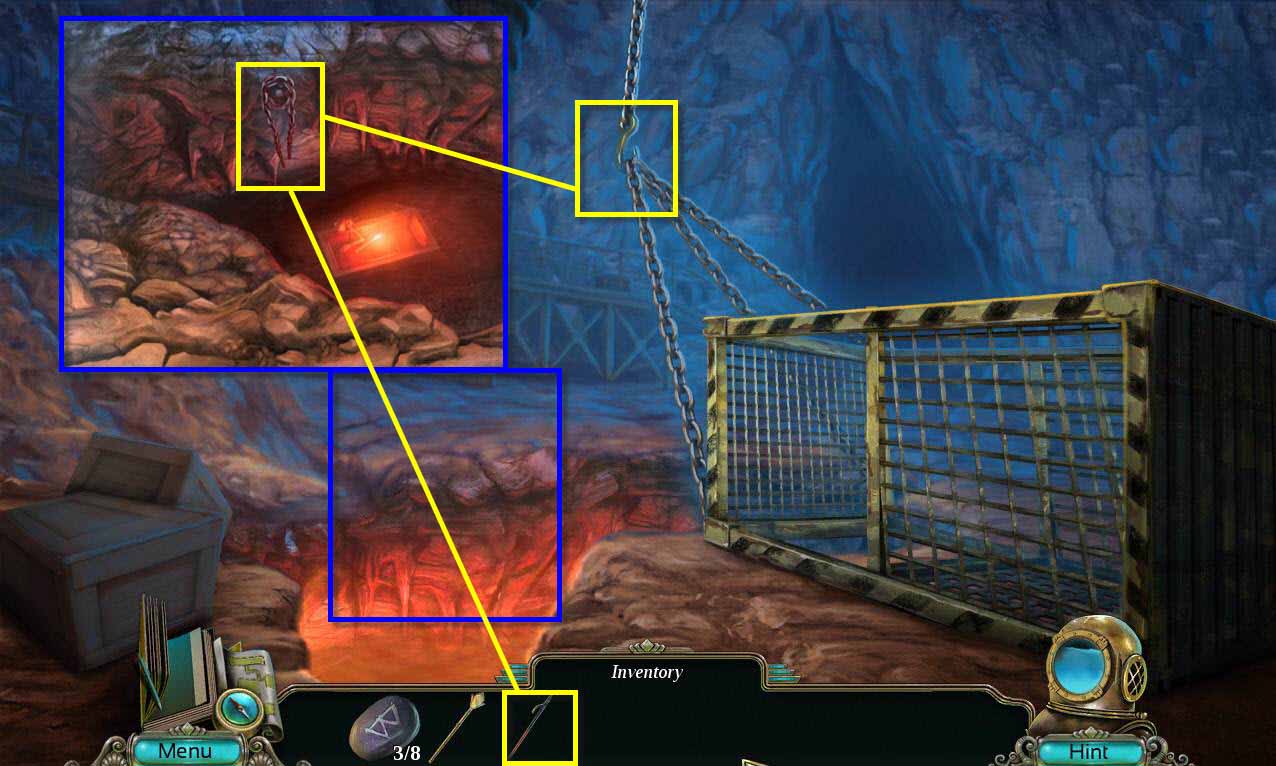
- Click on the pit to zoom in.
- Use the BOAT HOOK to get the CHAIN.
- Use the CHAIN on the rest of the chains to secure the cage.
- Click once more to set the elevator cage right.
-
Go down to the excavation site.

- Click on the glowing ahead to zoom in.
- Click on the switch to turn the lights on.
- Click on the professor's hand twice to get the RUNE 4/8.
-
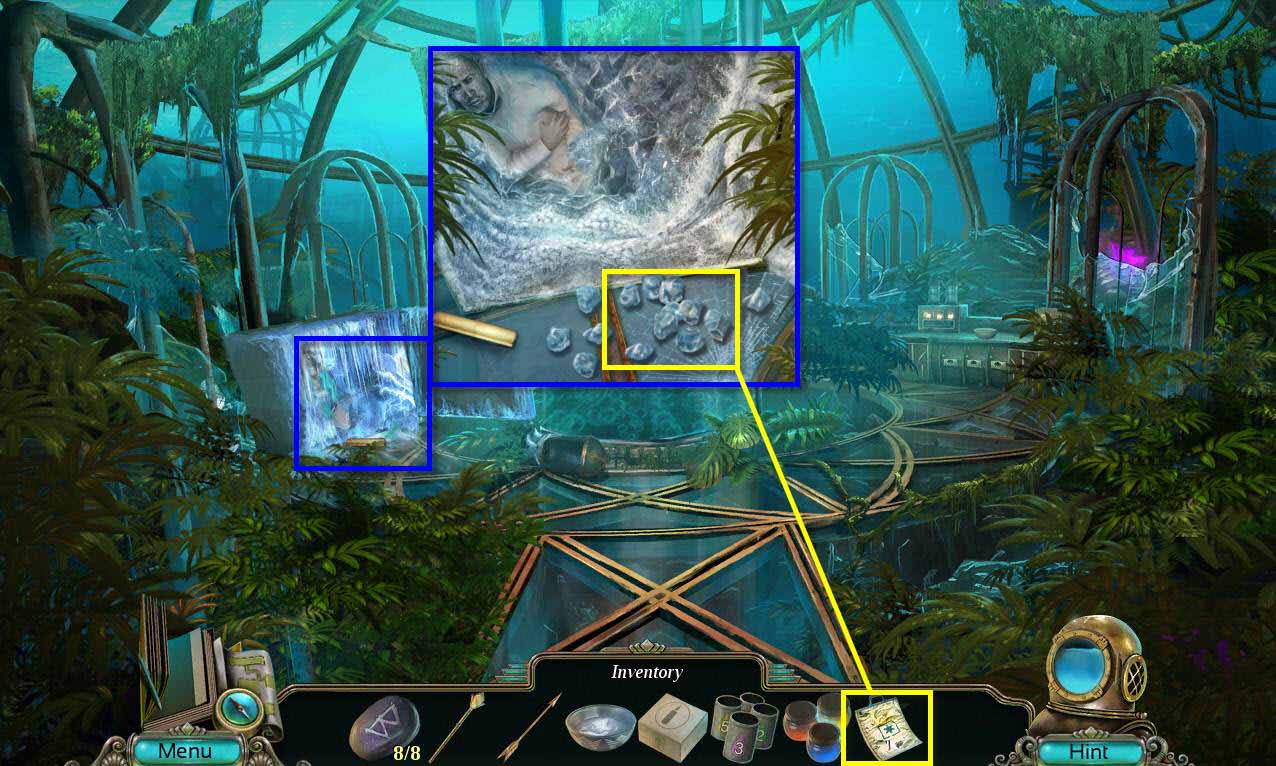
Go back one screen.
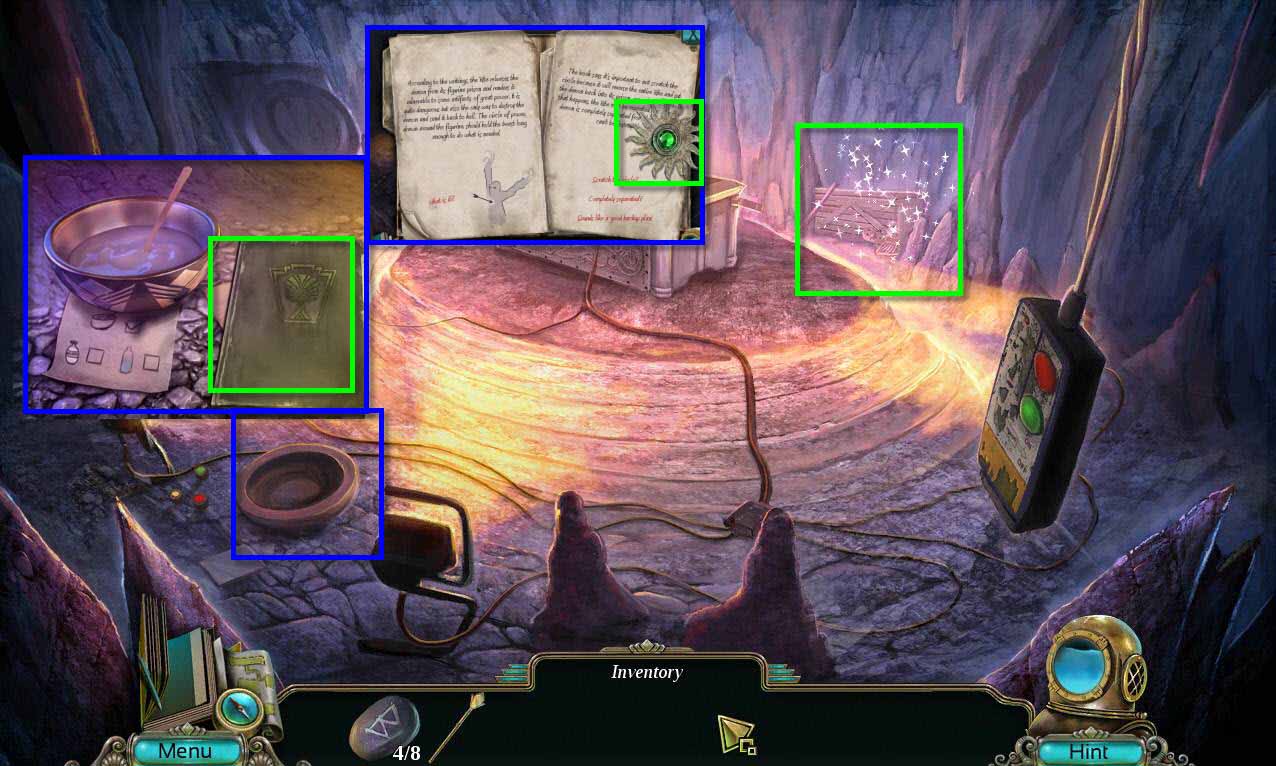
- Click on the bowl on the left to zoom in.
- Click on the file to open it.
- Turn the pages until you get to the page with the pendant.
- Take the SUN PENDANT.
-
Click on the sparkles to access the hidden object area.
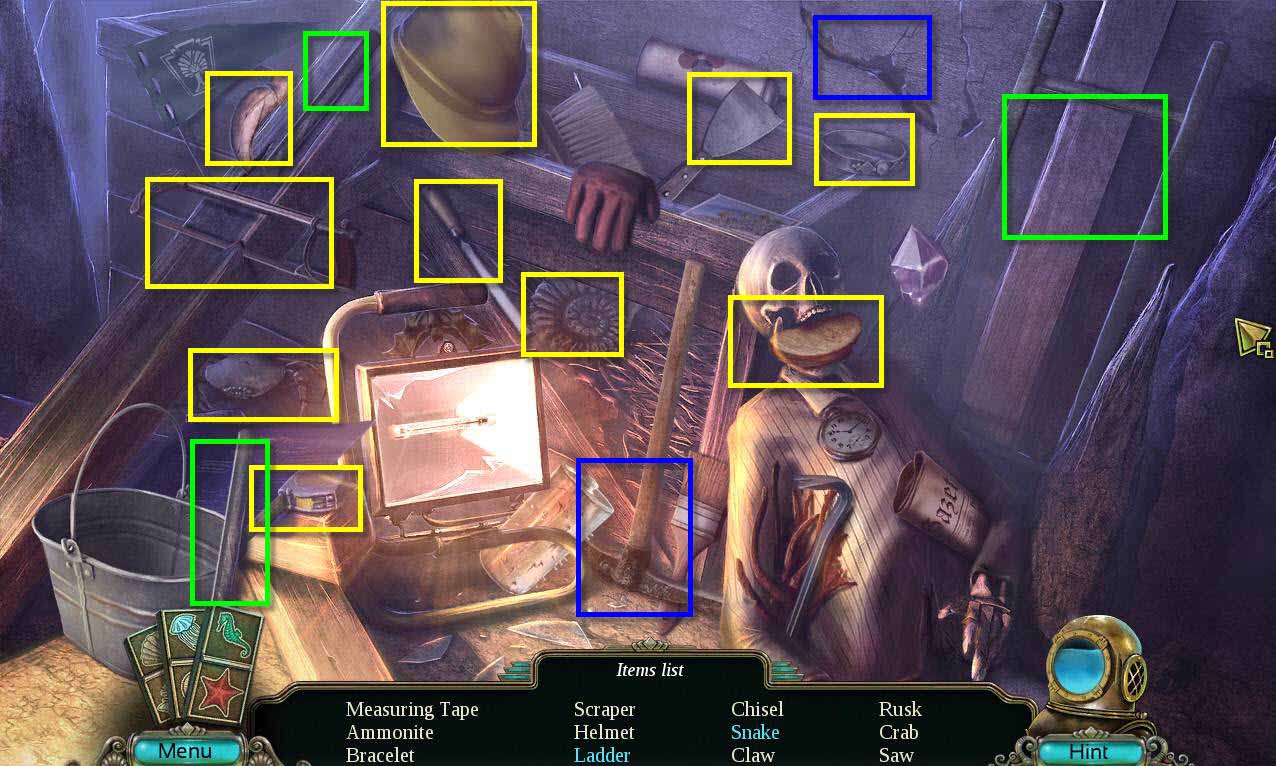
- Find all the items on the list.
- You will receive the SCRAPER.
-
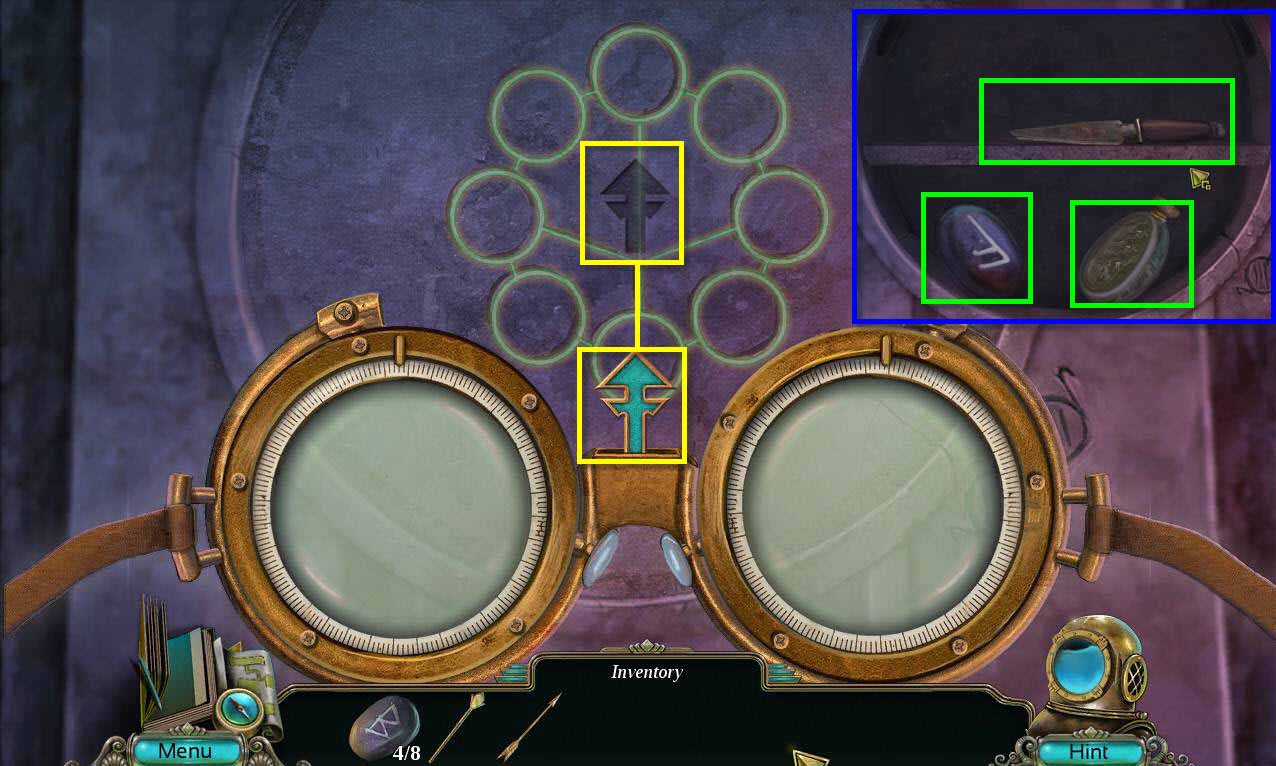
Click on where the professor's body is again to zoom in.
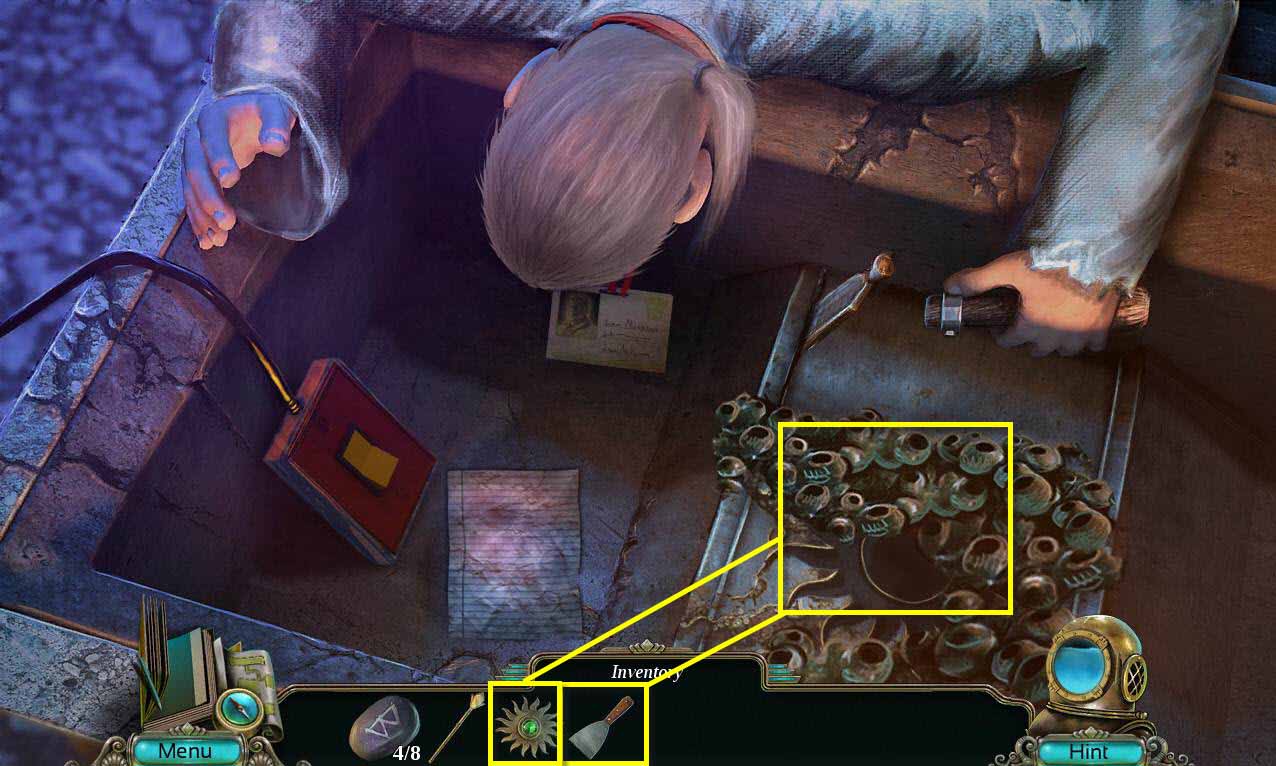
- Use the SCRAPER on the barnacles on the right to get rid of them.
- This will reveal the Sun indentation.
- Use the SUN PENDANT on the sun indentation.
- Take the GOLDEN ARROW and the BINOCULARS.
-
Zoom back out.
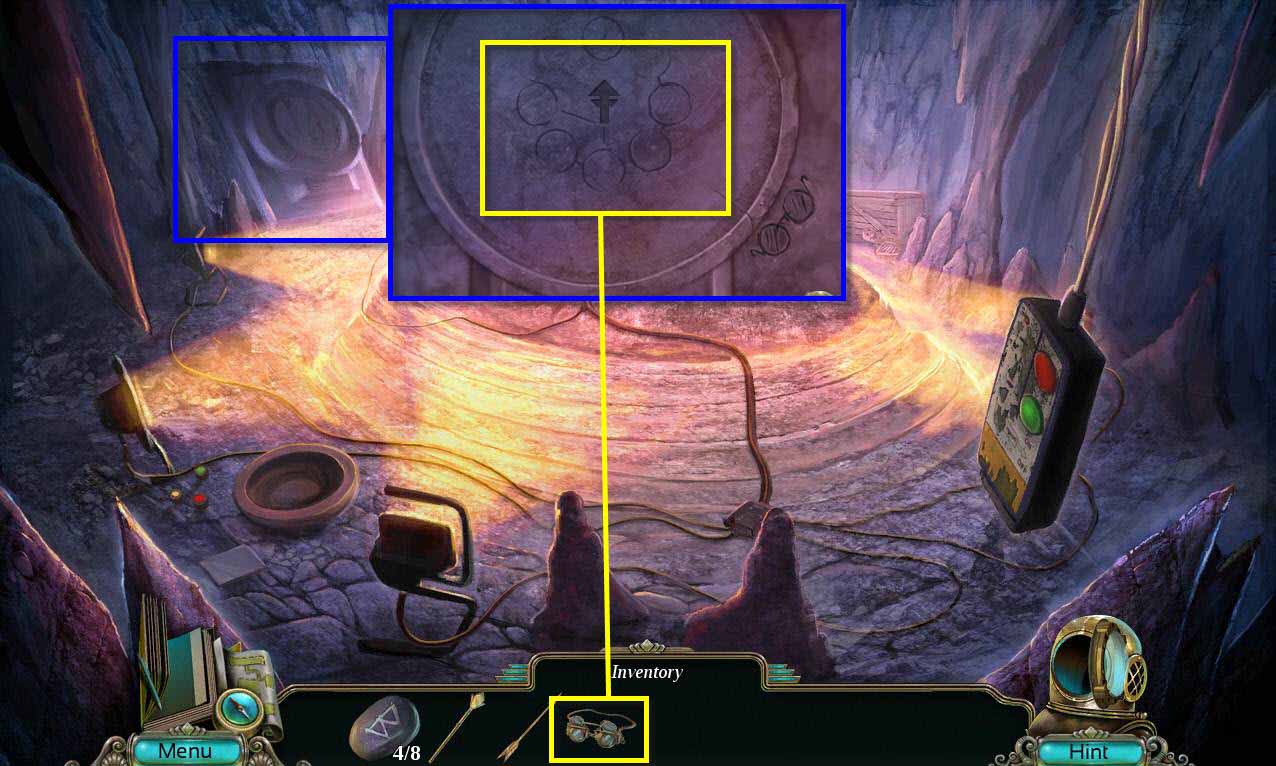
- Click on the wall to the left to zoom in.
- Use the BINOCULARS on the wall.
-
This will start a mini-game.
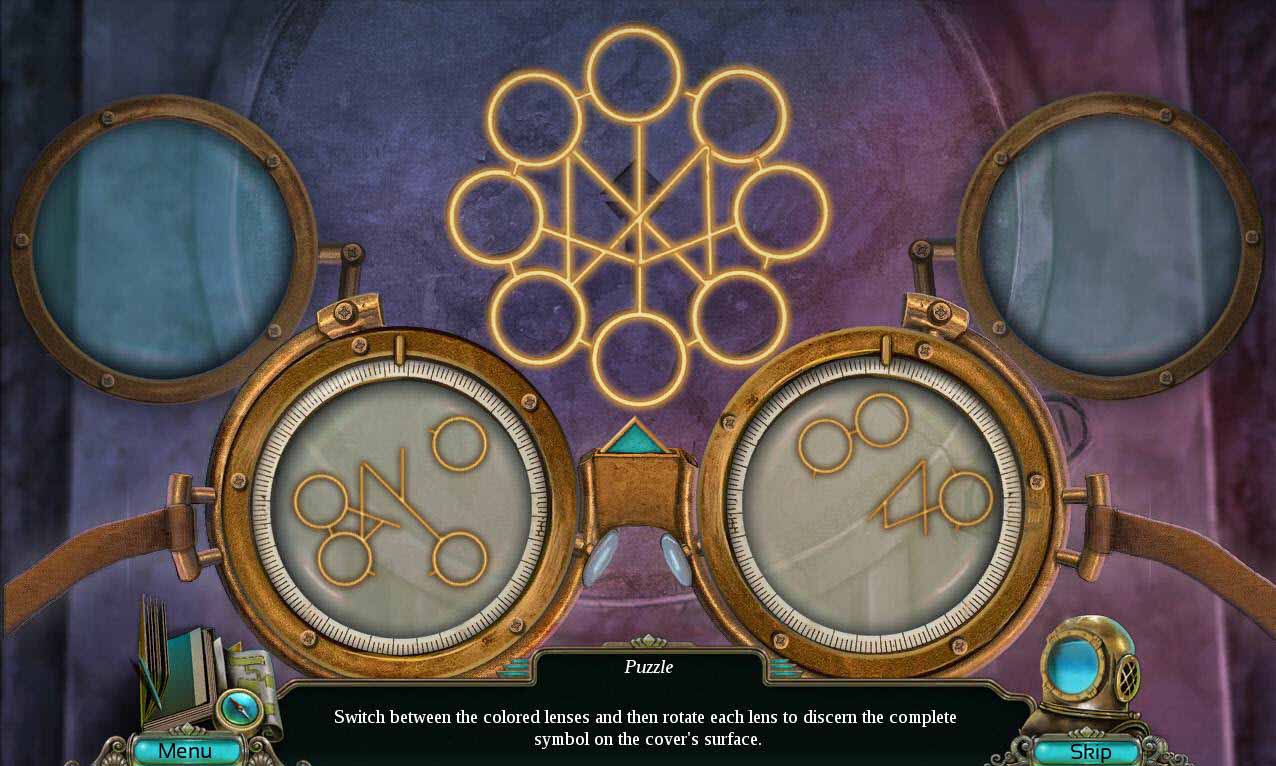
- The goal of the game is to line up the symbols so that they completely cover the wall.
- Click on the lenses to move each set of symbols.
- There are two rounds to this puzzle
-
See the screenshot for the solution to the first round.
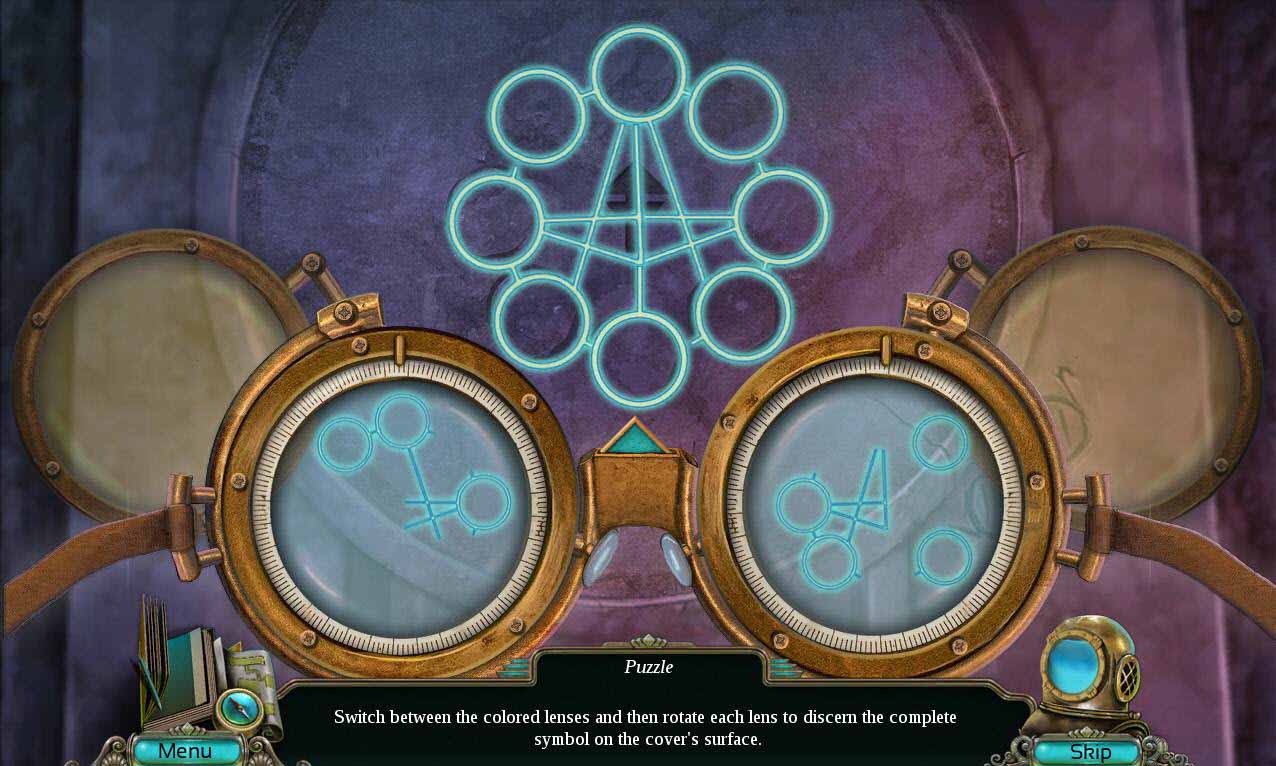
-
See the screenshot for the solution to the second round of the puzzle.
- When you are done, grab the arrow symbol and place it in the wall reveal the compartment hidden behind it.
- Take the RUNE STONE 5/8.
- Take the TRUE SILVER.
- Take the BROKEN DAGGER.
-
Go back up the elevator to Shaft 3.
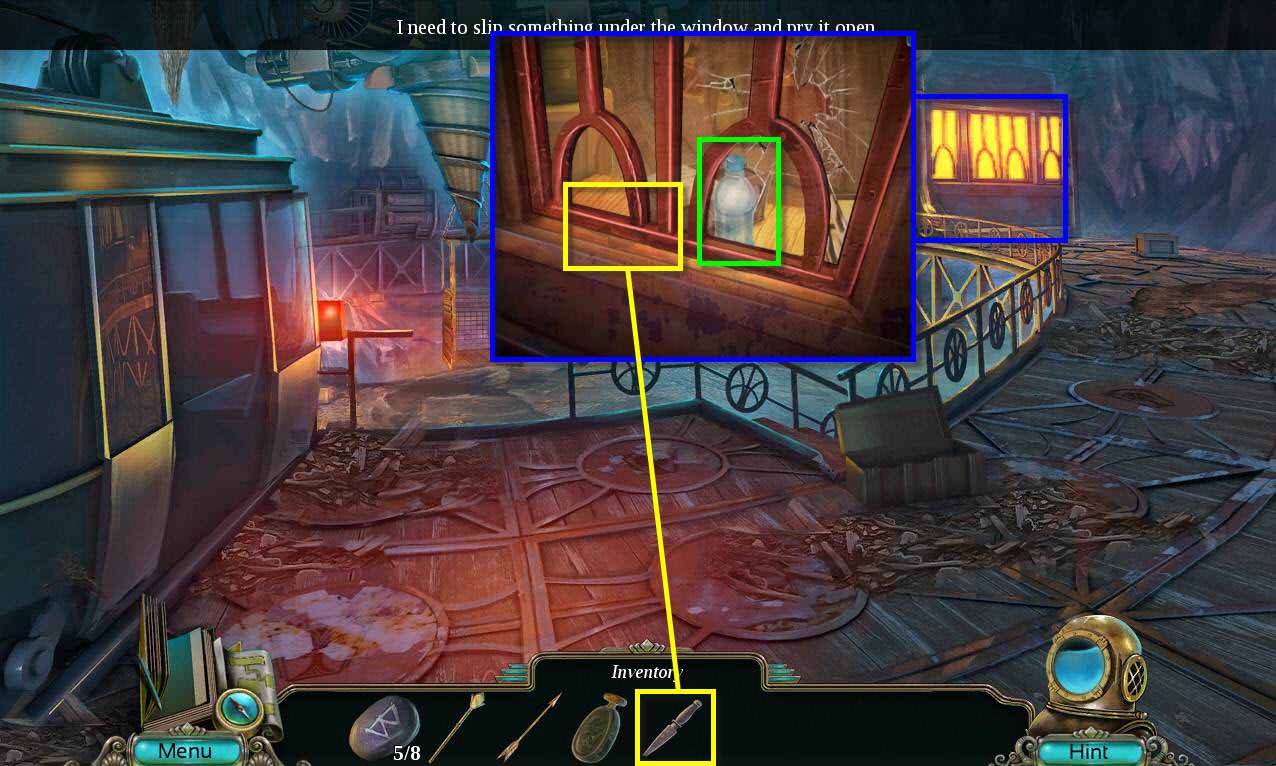
- Click on the window on the right to zoom in.
- Use the BROKEN DAGGER on the window to lift it.
- Take the WATER.
-
Go back down to the excavation.
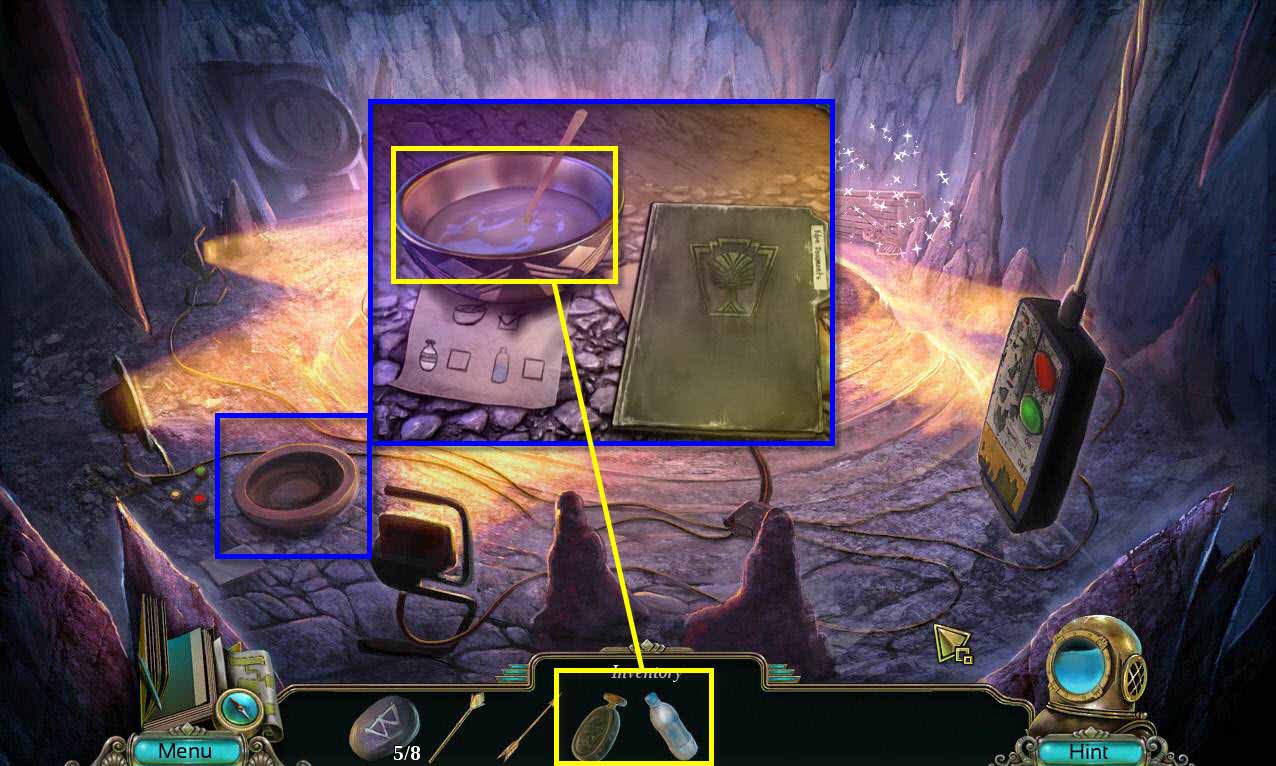
- Click on the bowl to zoom in.
- Use the WATER and the TRUE SILVER on the bowl.
- Click on the spoon to stir it.
- Take the SILVER PAINT.
- Take the MUSIC BOX KEY.
-
Click on the sparkles to start the hidden object scene.
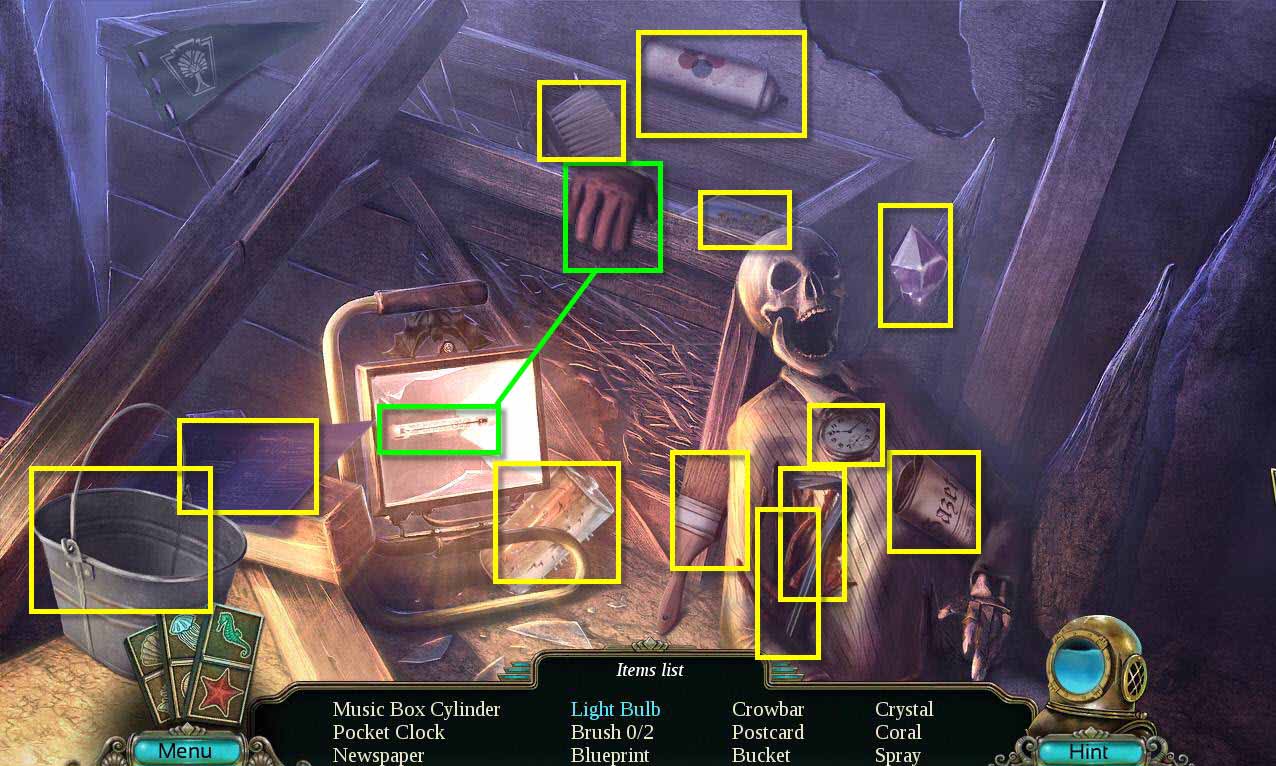
- Find all the items on the list.
- You will receive the MUSIC BOX CYLINDER.
-
Go back up the elevator to shaft 3.
- Click on the window again.
- Click on the note on the music box.
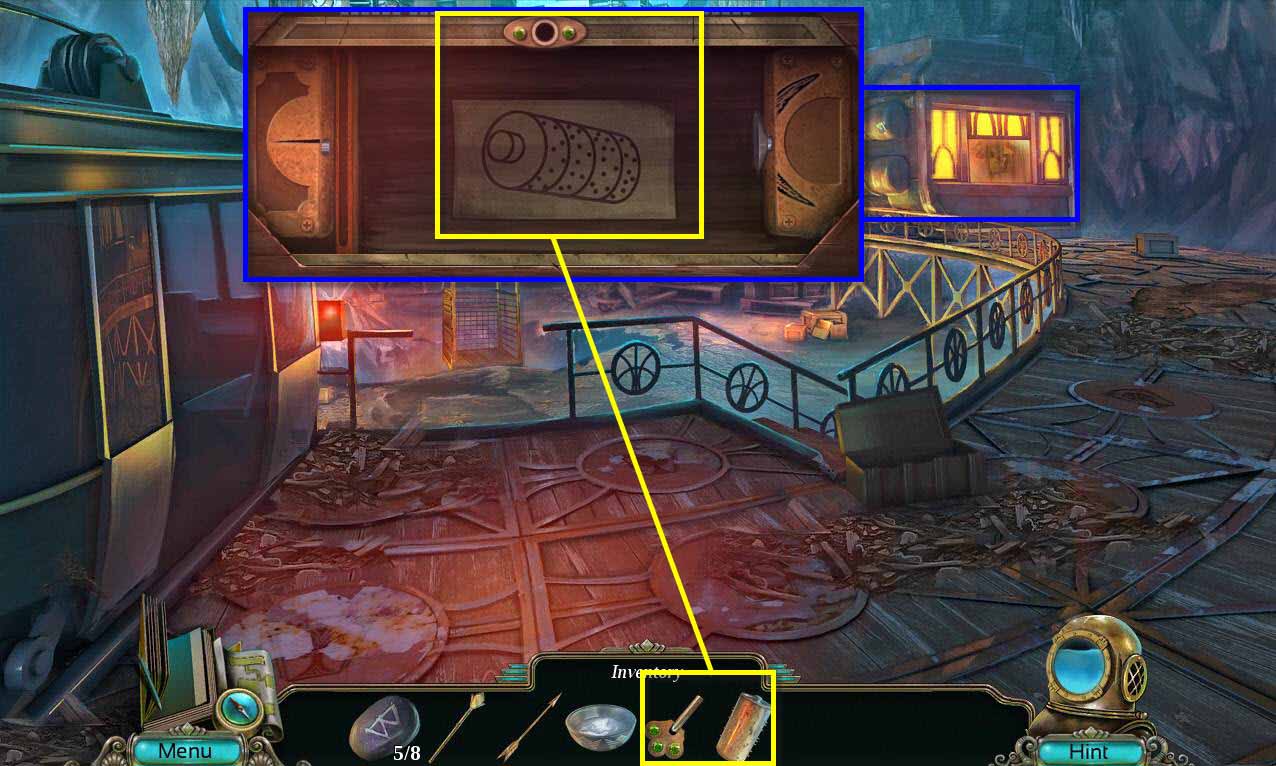
- Click on the music box to zoom in.
- Use the MUSIC BOX CYLINDER on the music box.
- Use the MUSIC BOX KEY on the top of the box.
-
This will start a puzzle.

- The goal of the puzzle is to move the rings so that it forms the picture of a fish.
- Start with the very first ring on the left and move that to the correct position for the head.
- Then skip the next ring and move the 3rd ring. Make sure rind 2 is positioned correctly.
- Then just move on down the line.
- Take the RUNE STONE 6/8.
- Click on the note to read it.
- Take the GLOBE TOKEN.
- Go back to the Reception room.
-
Click on the sparkles to access the hidden object area.
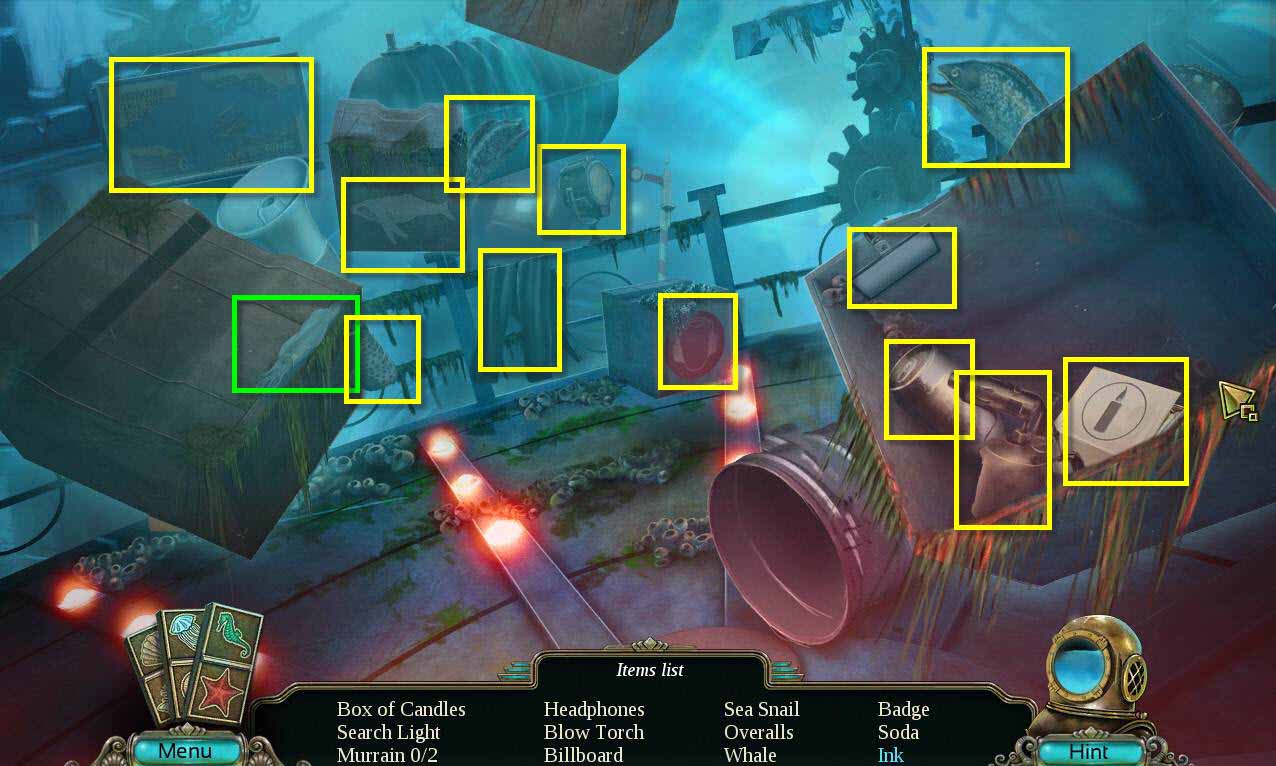
- Find all the items on the list.
- You will receive the WAX.
-
Go to the observatory.
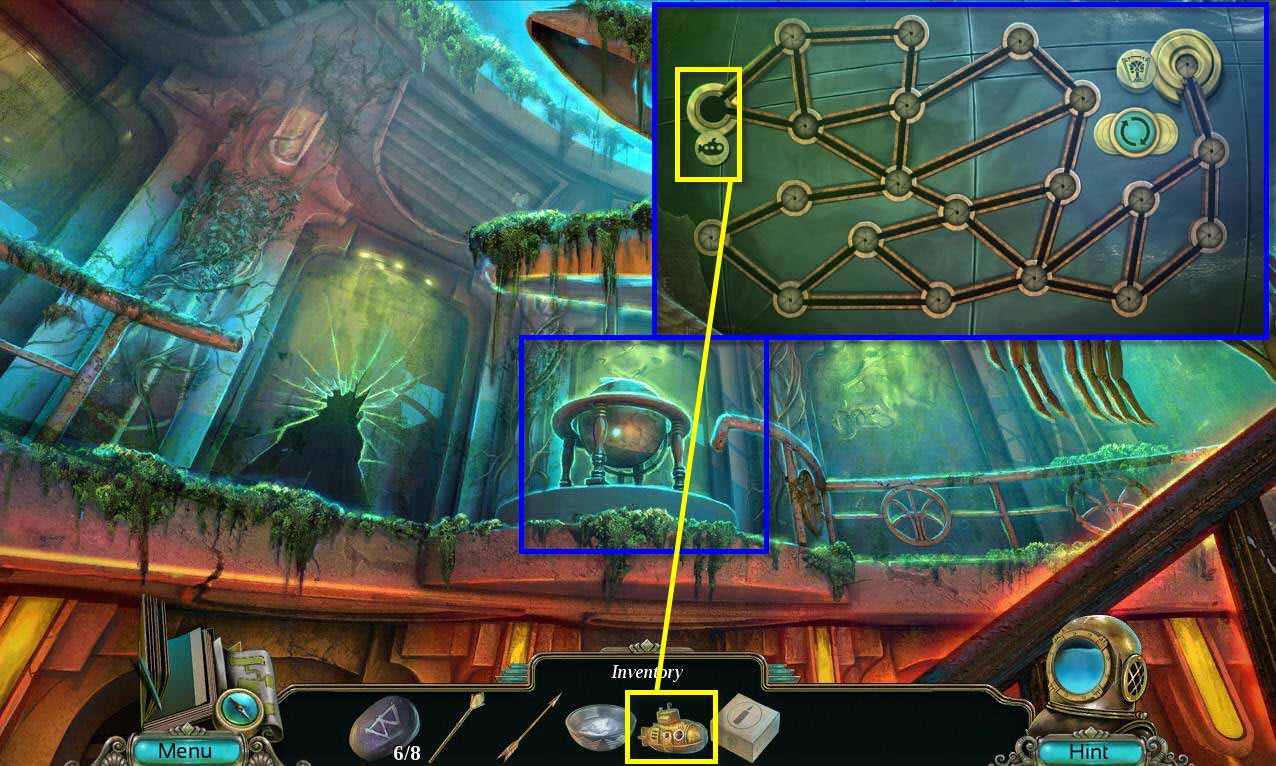
- Click on the globe to zoom in.
- Use the GLOBE TOKEN on the globe.
-
This will start a mini-game.
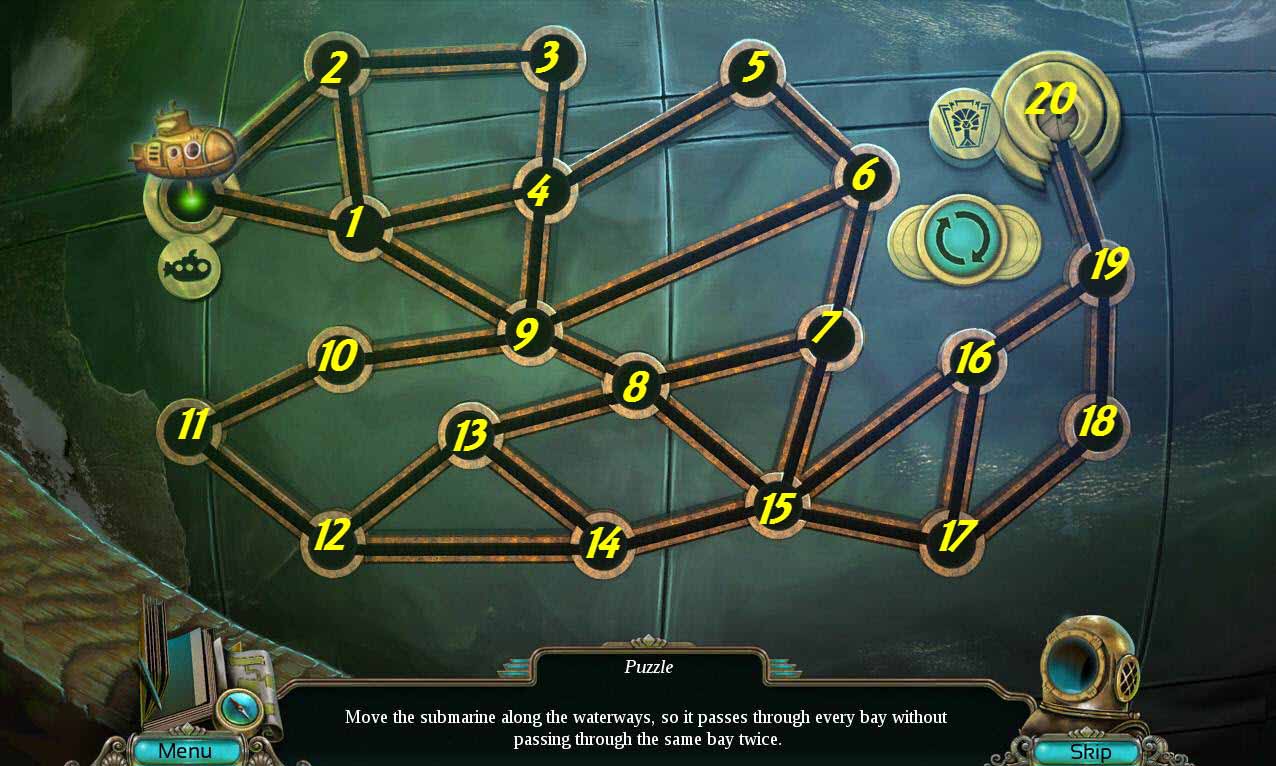
- The goal of the mini-game is to move the submarine through the lines so that it goes through every one without hitting one twice.
- See the screenshot above for help. Move the submarine 1 - 20.
- Take the RUNE STONE 7/8.
- Take the CANDLE MOLD.
- Click on the note to read it.
- Take the FRIDGE TOKEN.
- Return to the hideout.
- Talk to the little girl.
-
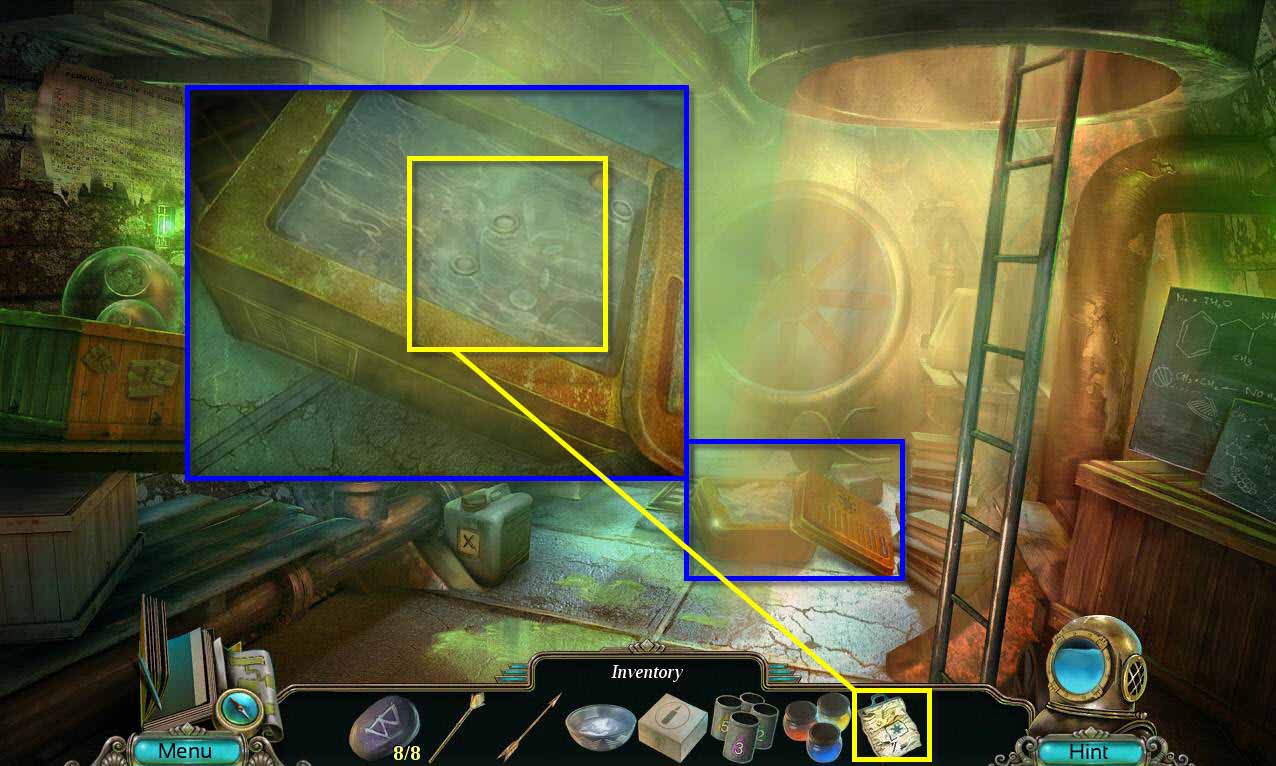
Go down to the lab.
- Click to zoom in on the orange bin.
- Use the FRIDGE TOKEN on the bin.
- Click to open it.
- Take the DRAGON FIGURINE.
-
Go back upstairs and to the dormitory.
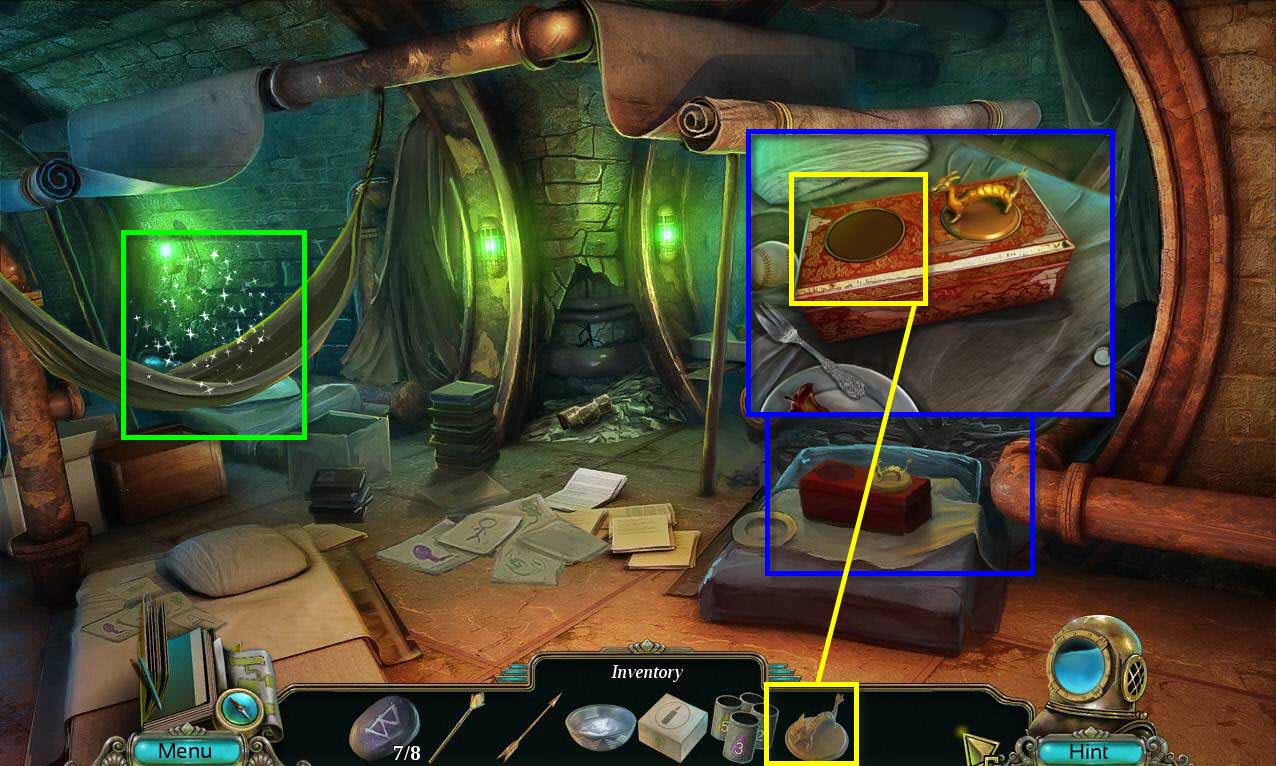
- Click on the dragon box to zoom in.
- Use the DRAGON FIGURINE on the box.
- Click to open it.
- Take the RUNE STONE 8/8 and the PIGMENTS.
-
Click on the sparkles to start the hidden object scene.
- Find all the items on the list.
- You will receive a THERMAL BAG.
-
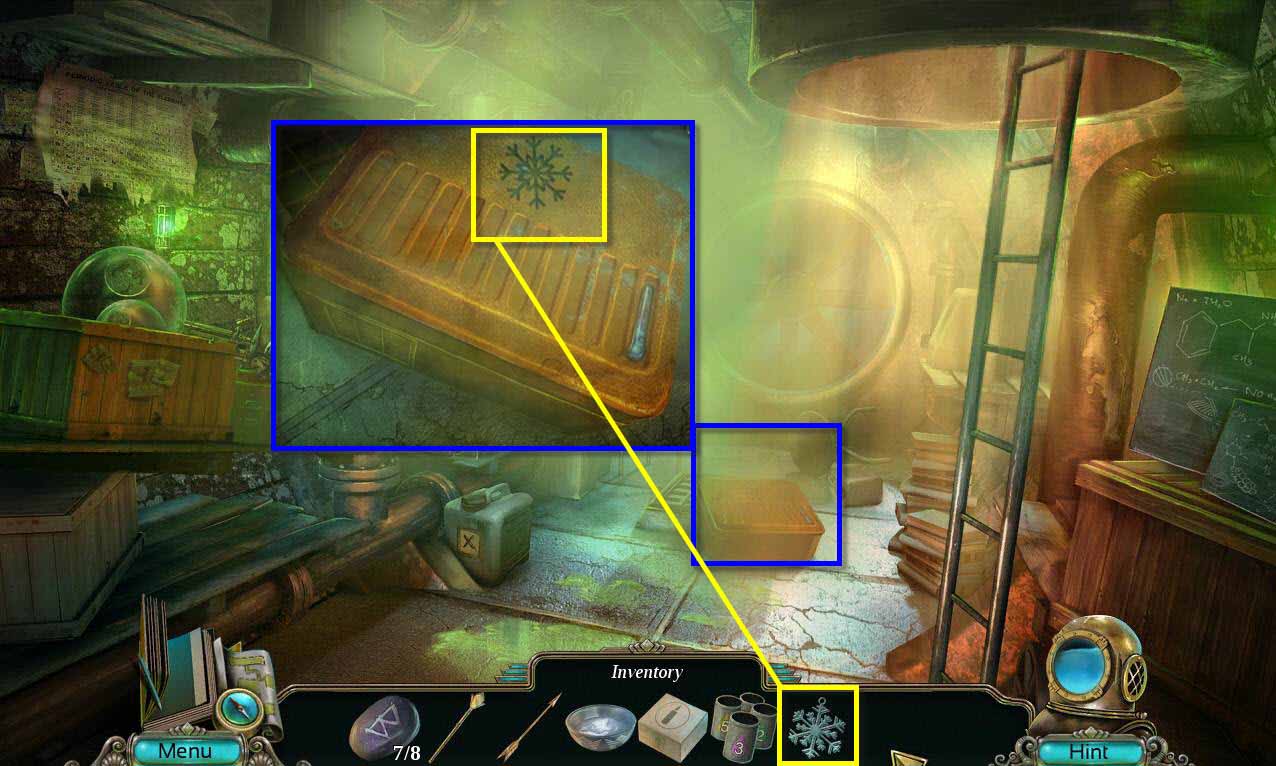
Return to the orangery.
- Click on the fridge to zoom in.
- Use the THERMAL BAG on the ice.
- You will receive the BAG OF ICE.
-
Go back to the lab in the hideout.
- Click on the bin to zoom in.
-
Use the BAG OF ICE on the hot water.
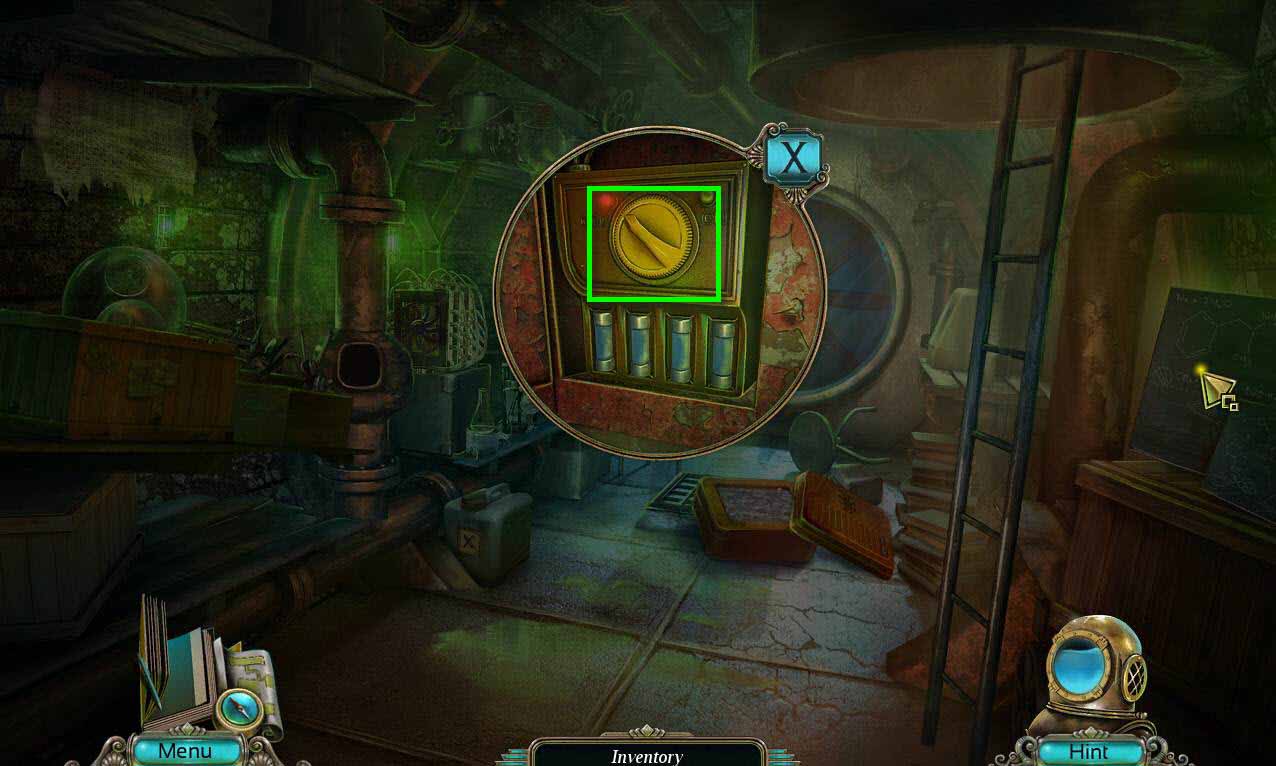
- Click on the red box on the left of the fan to zoom in.
- Click to open the panel.
- Switch the fan on to clear the rest of the room.
-
Click to zoom in on the lab counter.
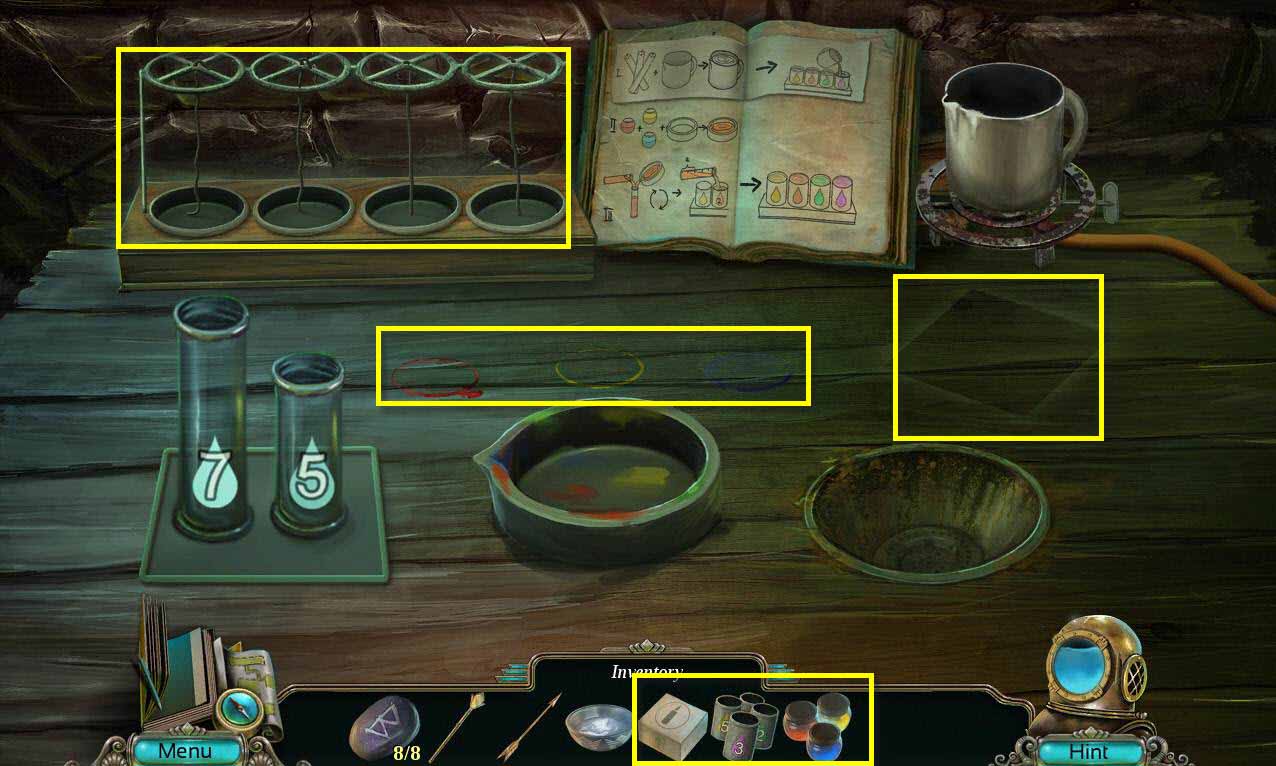
- Use the WAX, the PIGMENTS, and the CANDLE MOLDS on the table.
-
This will start a mini-game.
-
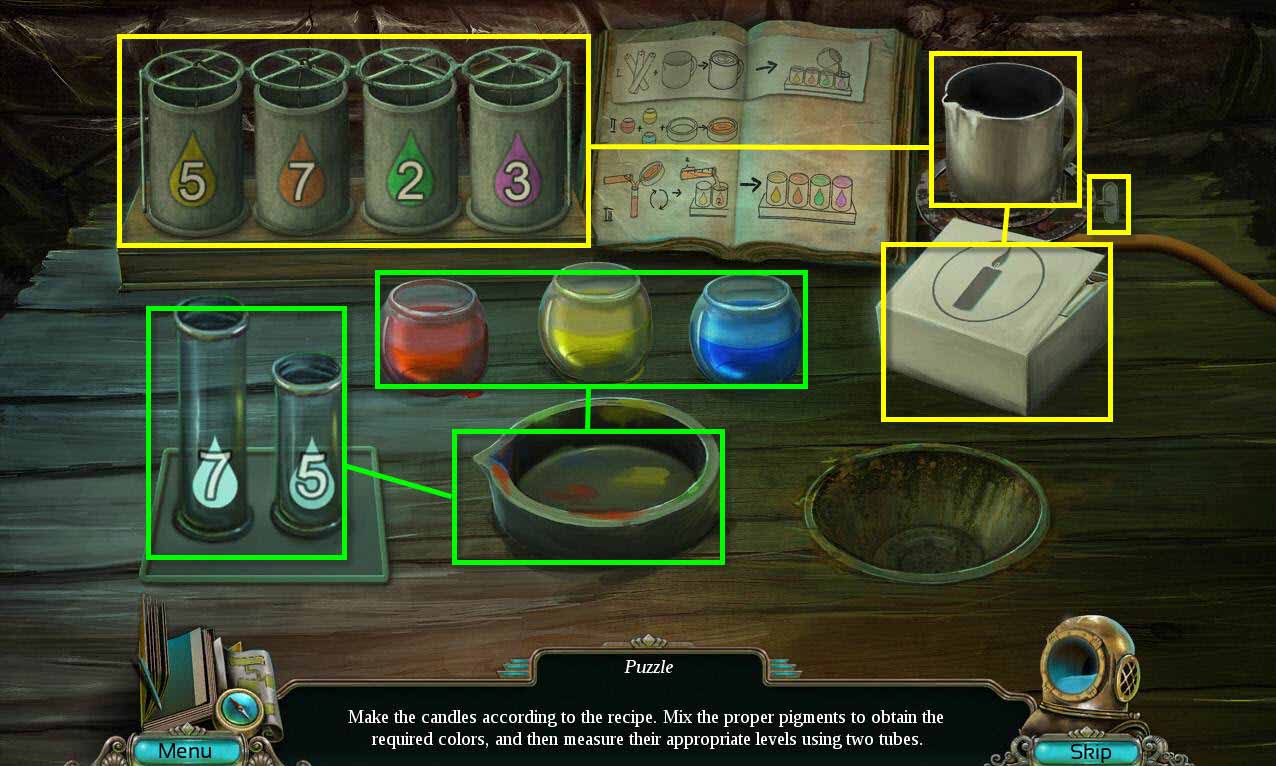
Follow these steps to solve the puzzle.
- Take the candles from the box and put them in the cup right above them.
- Click on the handle on the burner to melt the candles.
- Place the melted candles in the candle molds.
- Take the yellow pigment and pour it in the middle bowl.
- Then pour the yellow pigment into the number 5 test tube.
- Pour that test tube into the yellow candle.
- Pour the blue pigment into the middle bowl with the yellow in order to create green.
- Fill the test tube labeled 7 up with green.
- Pour the green into the five. You are left with 2 in the test tube.
- Use the 2 left on the green candle.
- Dump the 5 green and the green pigment in the bowl in the drain on the right.
- Pour the red and yellow pigments into the bowl to make orange.
- Pour the orange into the 7 test tube and then into the orange candle.
- Dump the orange pigment.
- Pour the red and blue pigments in the bowl to make purple.
- Pour the purple into the 5 test tube.
- Then pour the 5 test tube into the 7 test tube.
- Fill the 5 test tube back up with purple.
- Again pour it into the 7 test tube.
- What's left in the 5 test tube is 3, which you can fill the purple candle with.
- Take the MYSTIC CANDLES when you are done.
- Try to go back up the ladder.
General Info and Tips
Chapter One: The Wrecked Craft
Chapter Two: Inside Eden
Chapter Three: The Girl
Chapter Four: The Hotel Gate
Chapter Five: Freeing Robert
Chapter Six: The Twins
Chapter Seven: The Bottom Floor
Chapter Eight: Finding the Cure
Chapter Nine: Shaft 3
Chapter Ten: The Rite
Ask for help in the comments below!
Chapter One: The Wrecked Craft
Chapter Two: Inside Eden
Chapter Three: The Girl
Chapter Four: The Hotel Gate
Chapter Five: Freeing Robert
Chapter Six: The Twins
Chapter Seven: The Bottom Floor
Chapter Eight: Finding the Cure
Chapter Nine: Shaft 3
Chapter Ten: The Rite
Ask for help in the comments below!