
Abyss: The Wraiths of Eden: Chapter Seven: The Bottom Floor
Our Abyss: The Wraiths of Eden Walkthrough will help you traverse the inky depths of the ocean and explore the mysterious underwater city of Eden, where your fiance Robert has been trapped for weeks. With the city crumbling under your feet and supernatural creatures haunting the grounds, can you get to the bottom of this mystery before it's too late? With our detailed screenshots, clear instructions, and puzzle solutions to help you, solving the mystery of the Abyss The Wraiths of Eden will be a quick swim in the shallows.
General Info and Tips
Chapter One: The Wrecked Craft
Chapter Two: Inside Eden
Chapter Three: The Girl
Chapter Four: The Hotel Gate
Chapter Five: Freeing Robert
Chapter Six: The Twins
Chapter Seven: The Bottom Floor
Chapter Eight: Finding the Cure
Chapter Nine: Shaft 3
Chapter Ten: The Rite
Ask for help in the comments below!
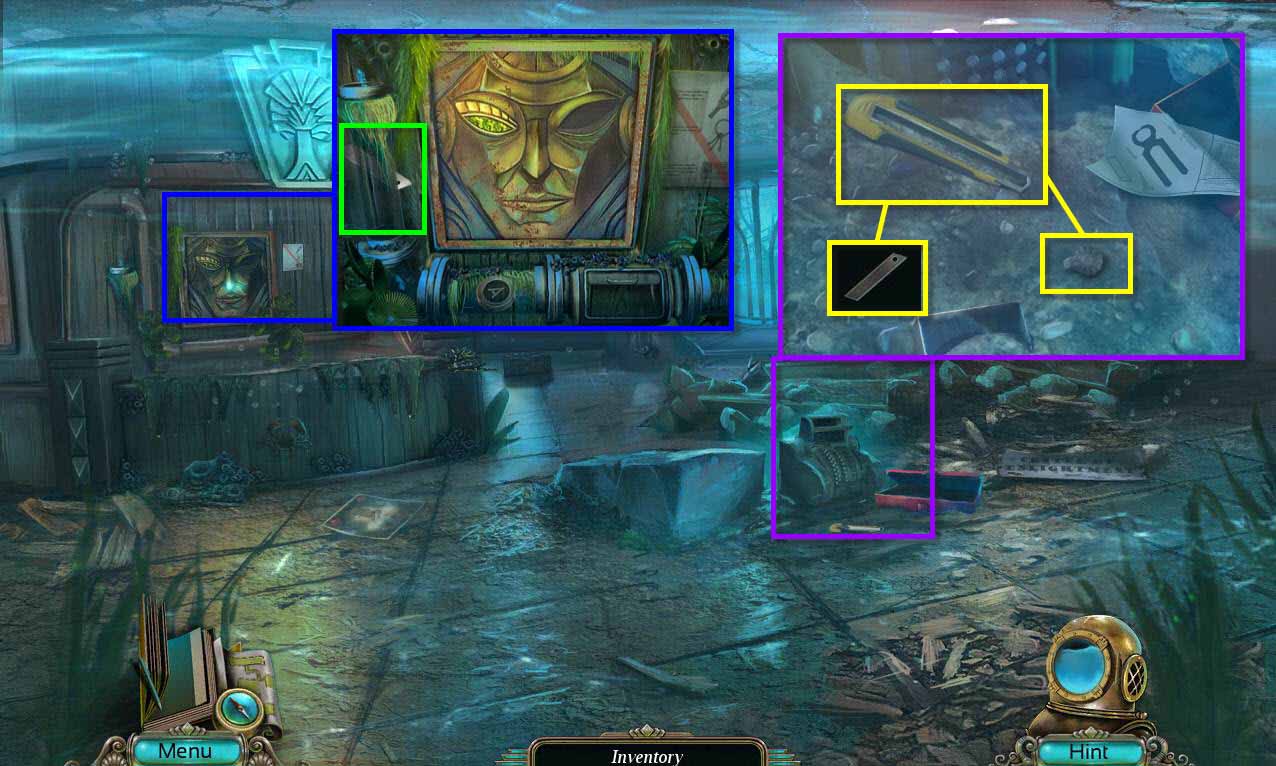
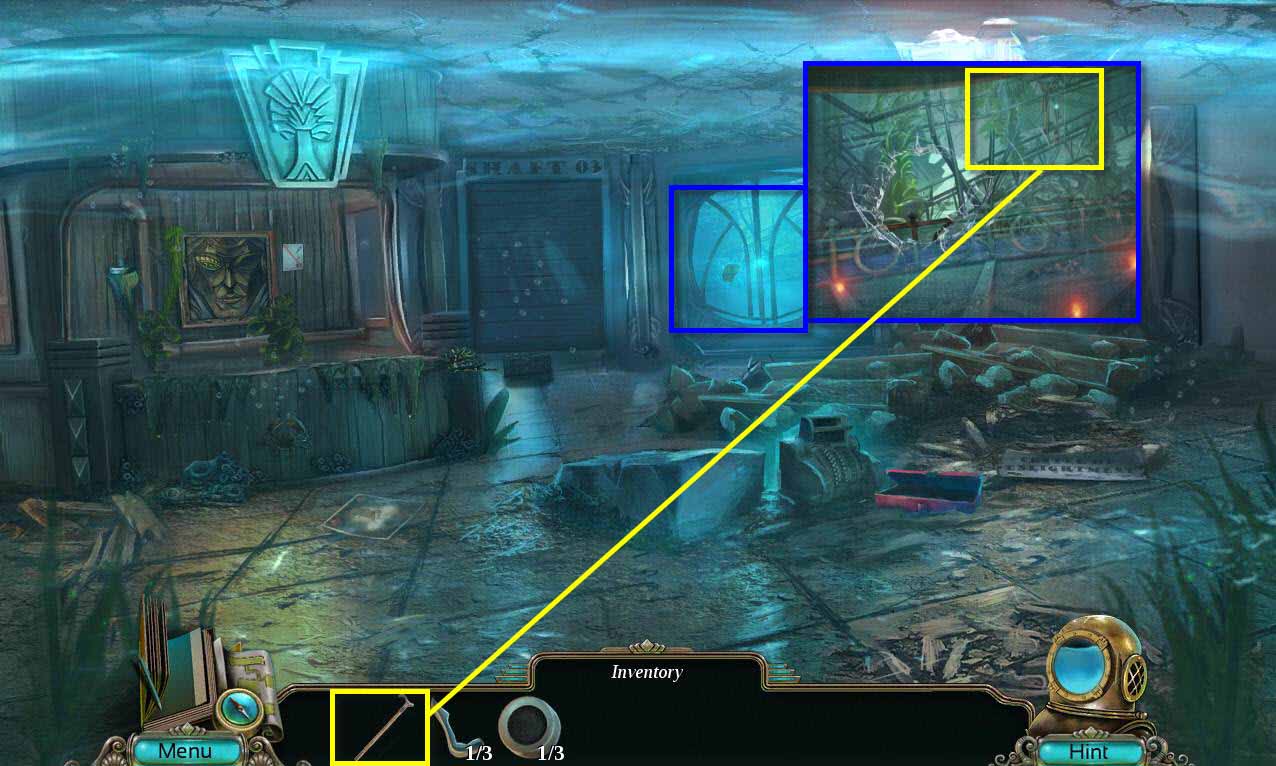
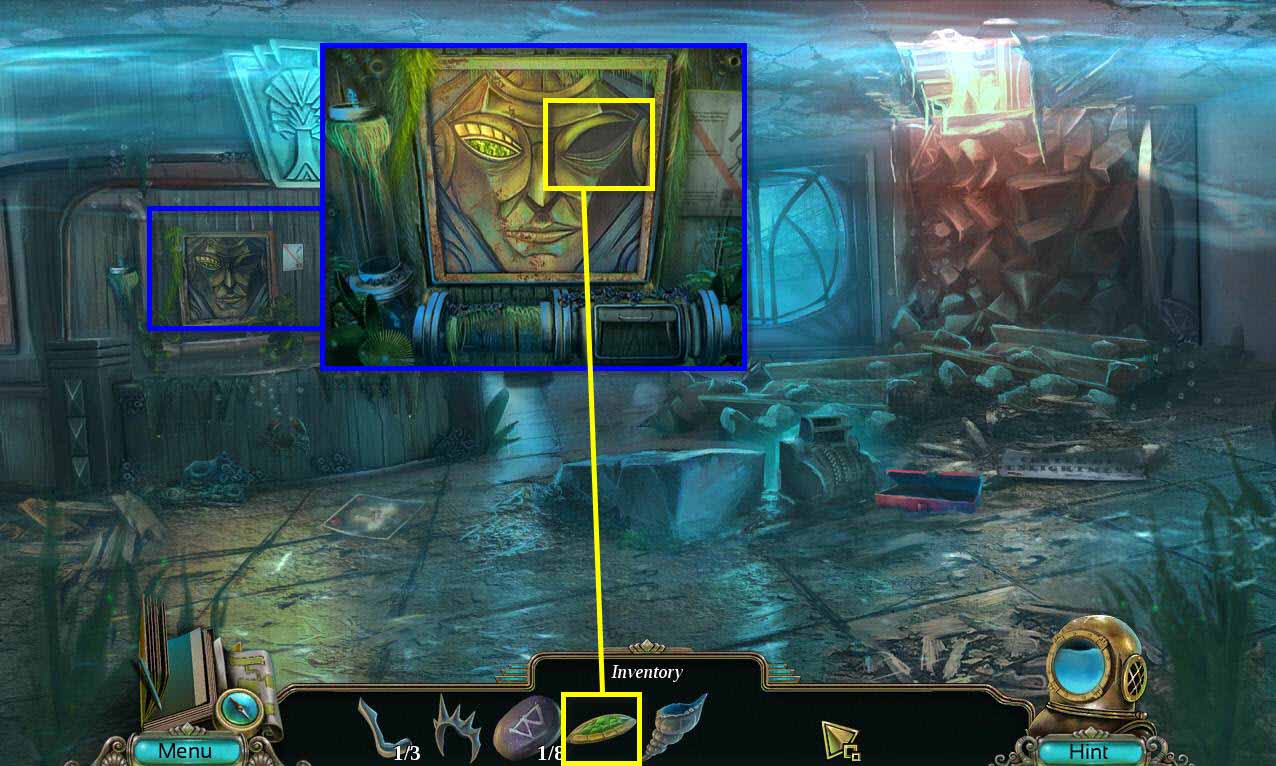
- Click on the artwork on the wall on the left to zoom in.
- Take the PAPER KNIFE BLADE.
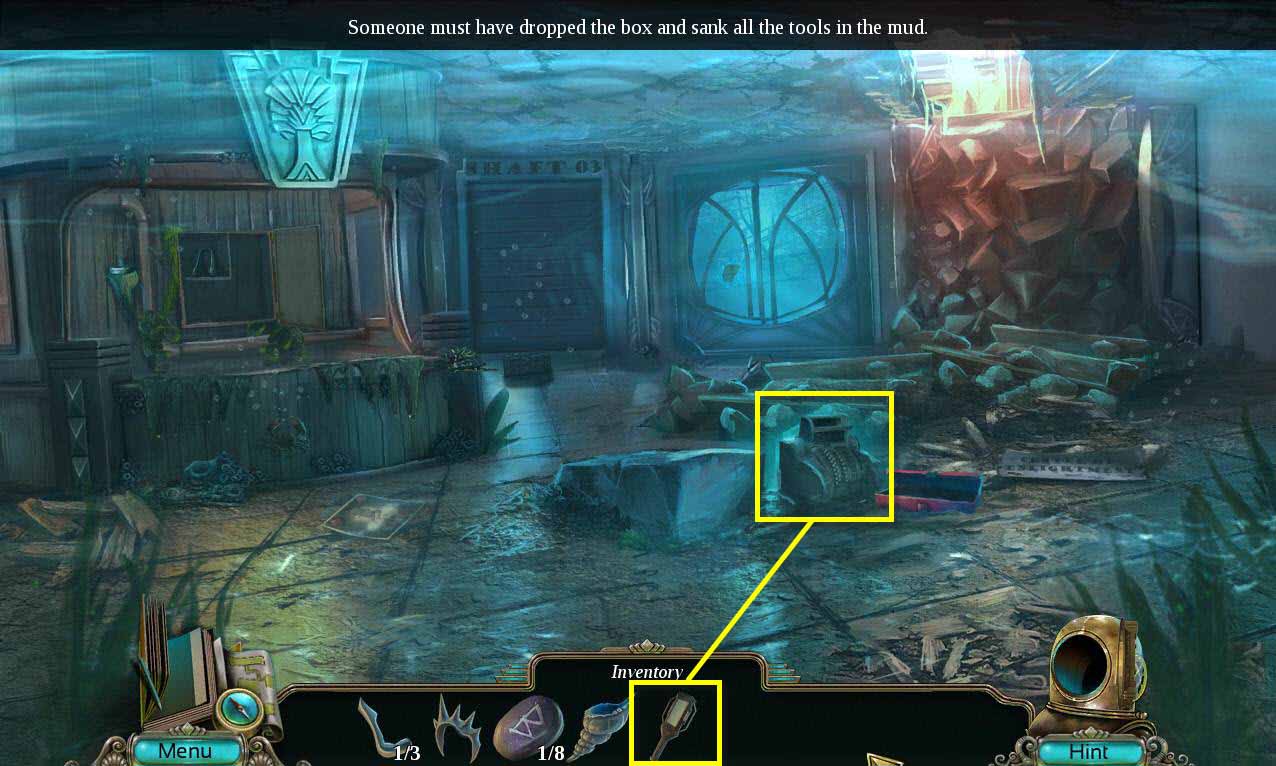
- Click on the cash register on the ground on the right to zoom in.
- Use the PAPER KNIFE BLADE on the knife.
- Click on the screw next to it to secure it.
-
Take the PAPER KNIFE.
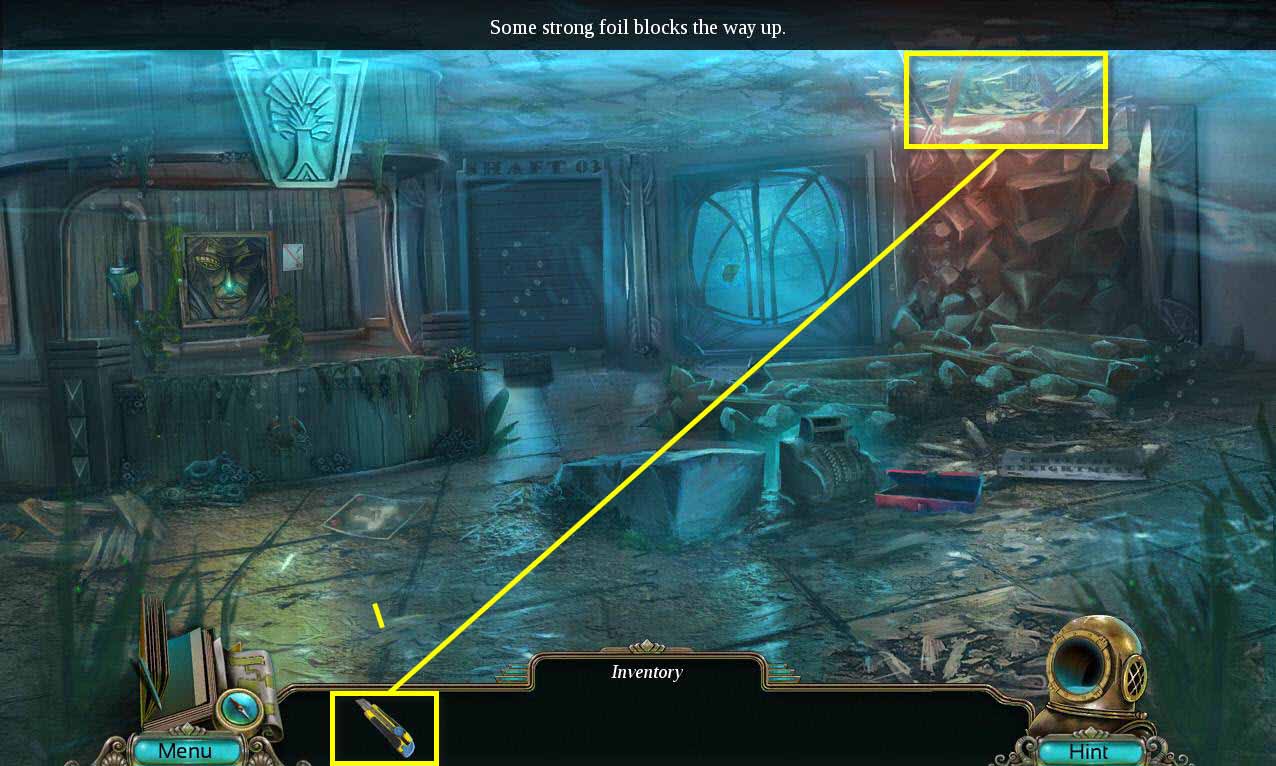
- Use the PAPER KNIFE on the foil on the roof of the ceiling.
-
Go forward to the Library.
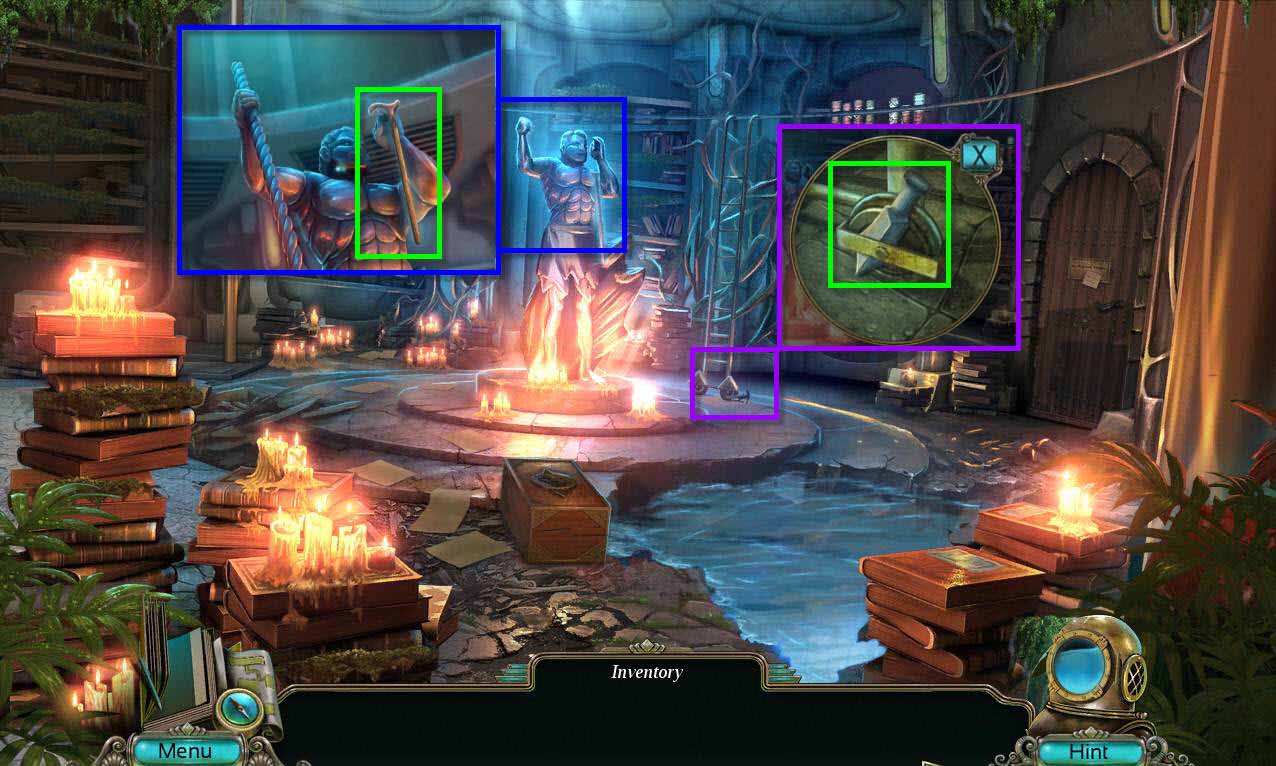
- Click on the statue to zoom in.
- Take the CANE.
- Click on the ladder base.
-
Take the TRIDENT PART 1/3.
- Click on the ladder to move it.
- Click on the shelf to zoom in.
- Take the TYPEWRITER KEY 1/3.
-
Go back one screen.
- Click on the window to zoom in.
- Use the CANE on the keys to get them.
- You will receive the STUDY KEYS.
-
Go back to the library.
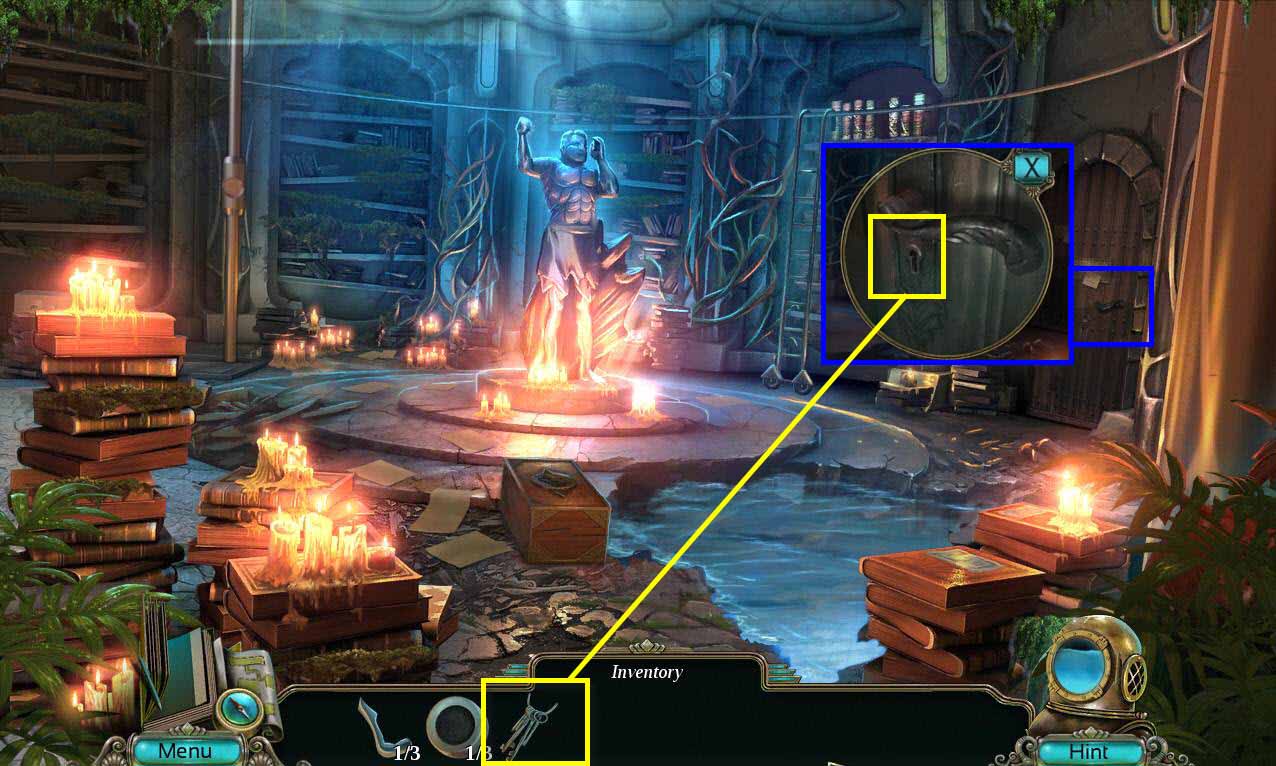
- Click on the door handle of the study to zoom in.
- Use the STUDY KEYS on the door.
- Click on the key to turn it.
- Click on the handle to open the door.
-
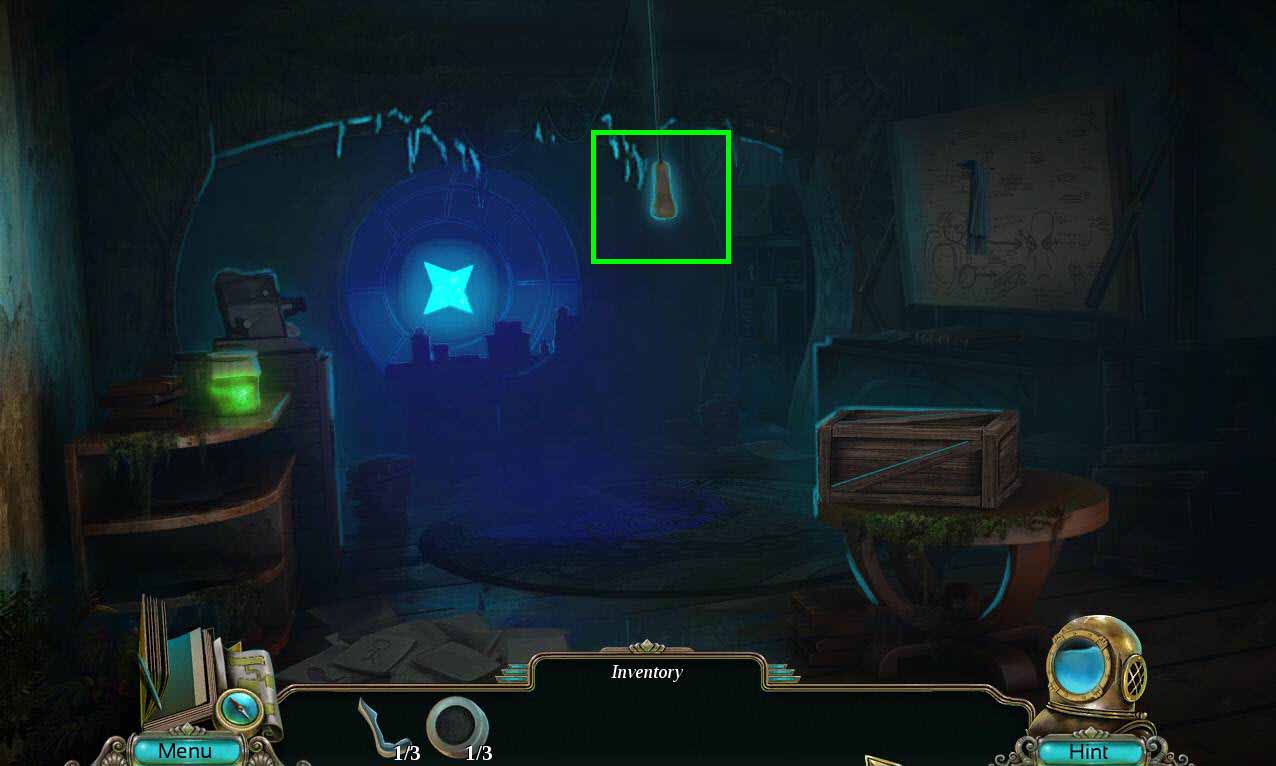
Go into the study.
-
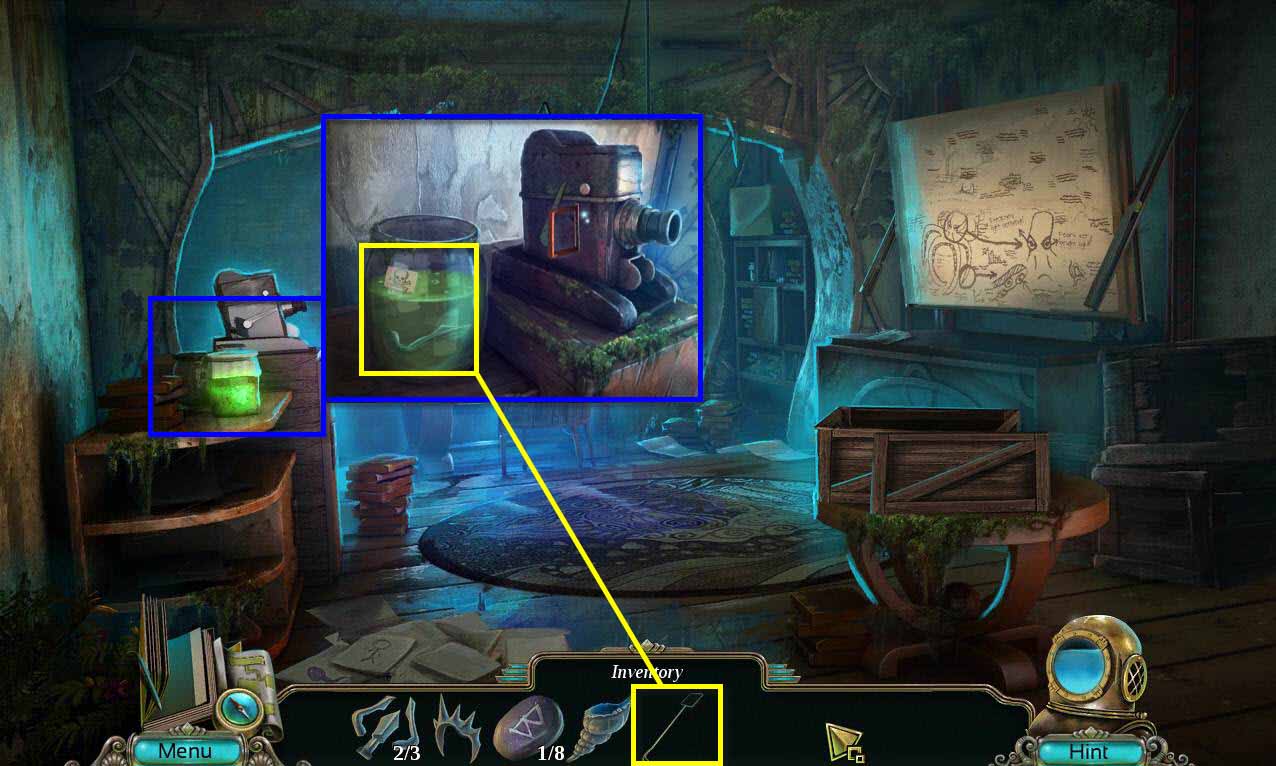
Click on the cord to open the window and let light into the study.
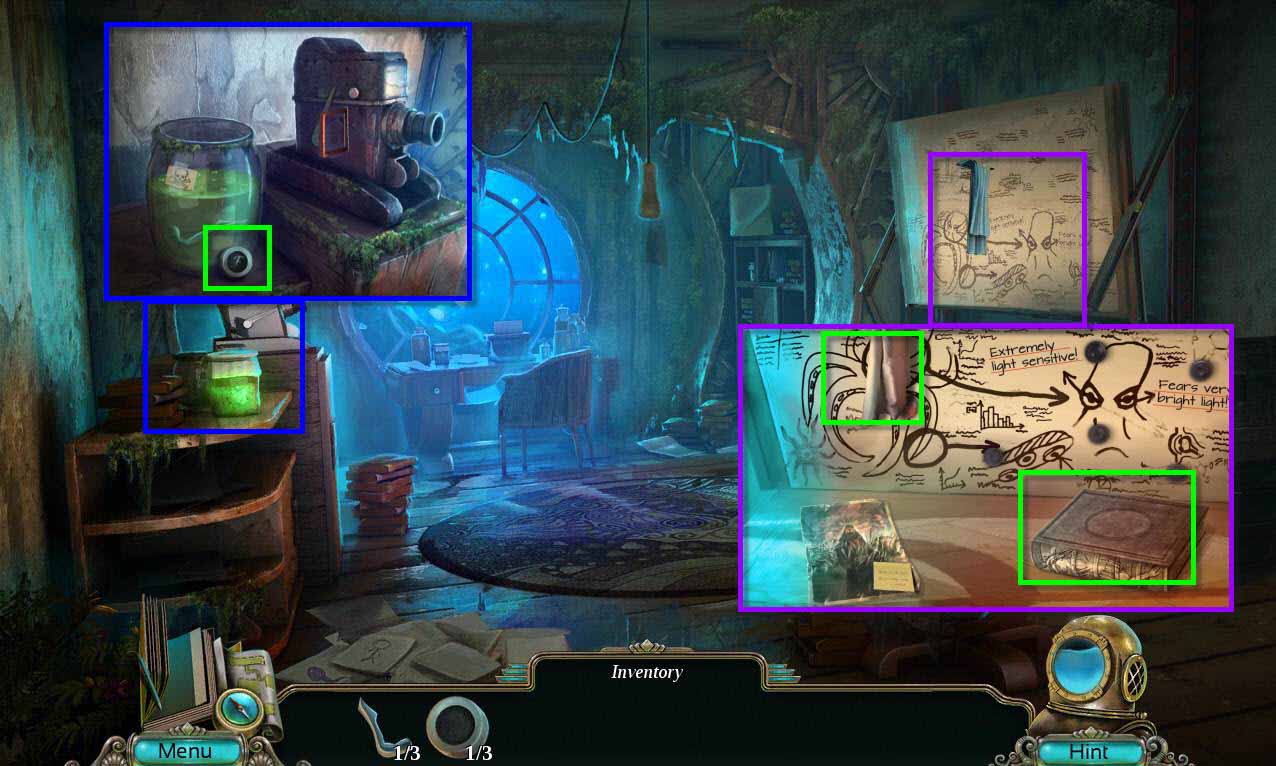
- Click on the poison on the left to zoom in.
- Take the TYPEWRITER KEY 2/3.
- Click on the desk on the right.
- Take the DUMMY BOOK.
- Click on the cloth to remove it and take the RED MAGNET.
-
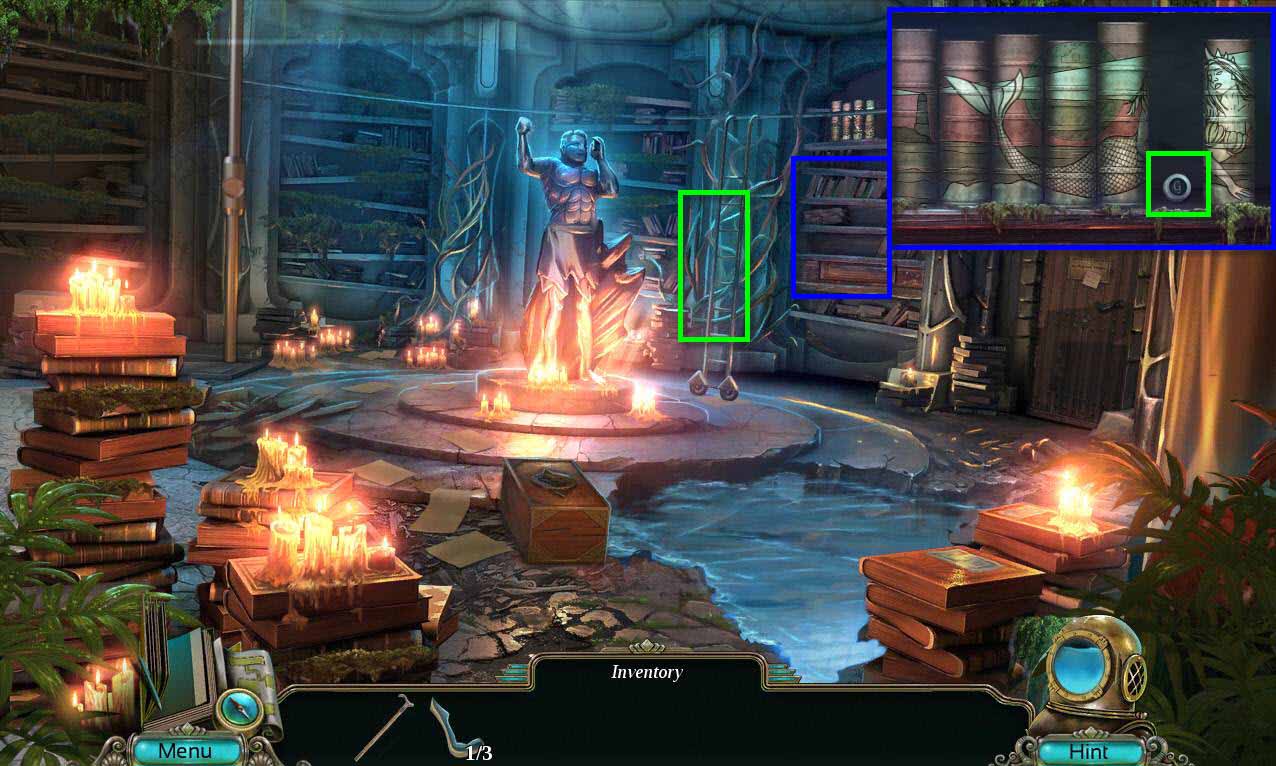
Go back one screen to the Library.
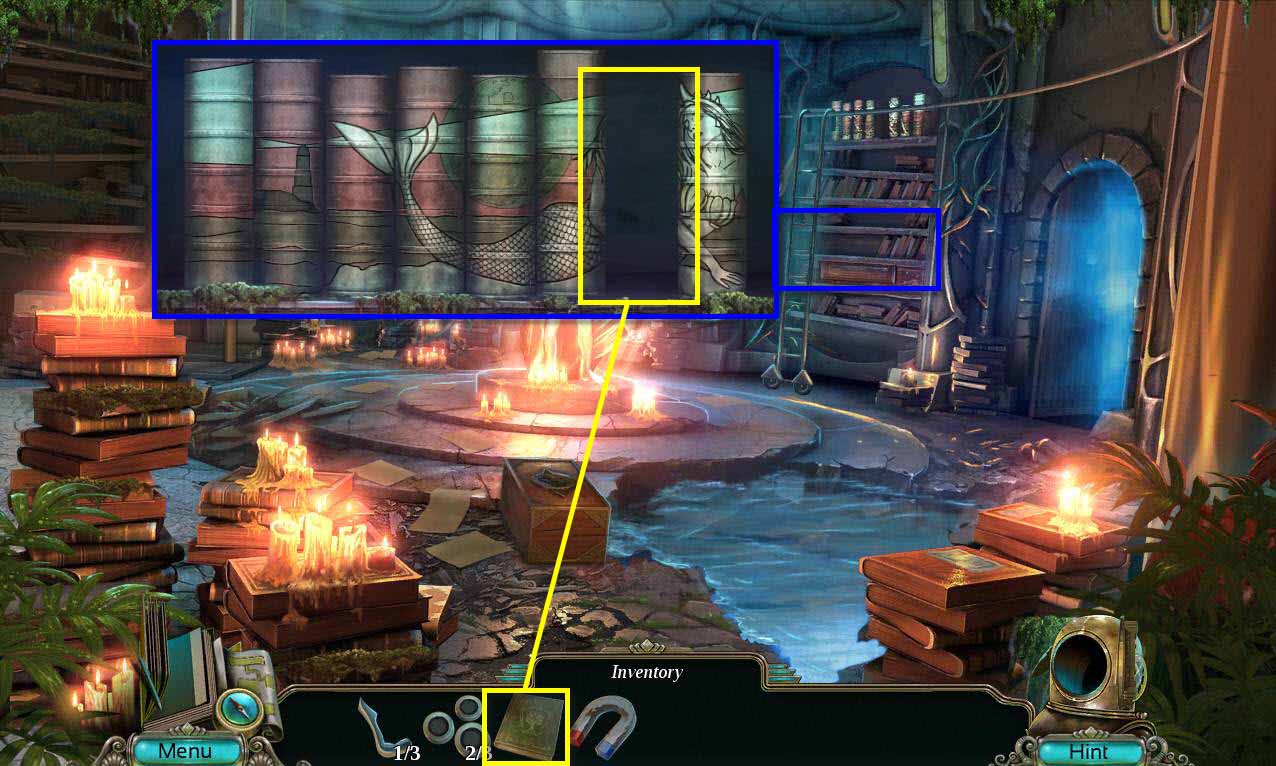
- Click on the shelf by the ladder to zoom in.
- Use the DUMMY BOOK on the shelf.
-
This will start a mini-game.
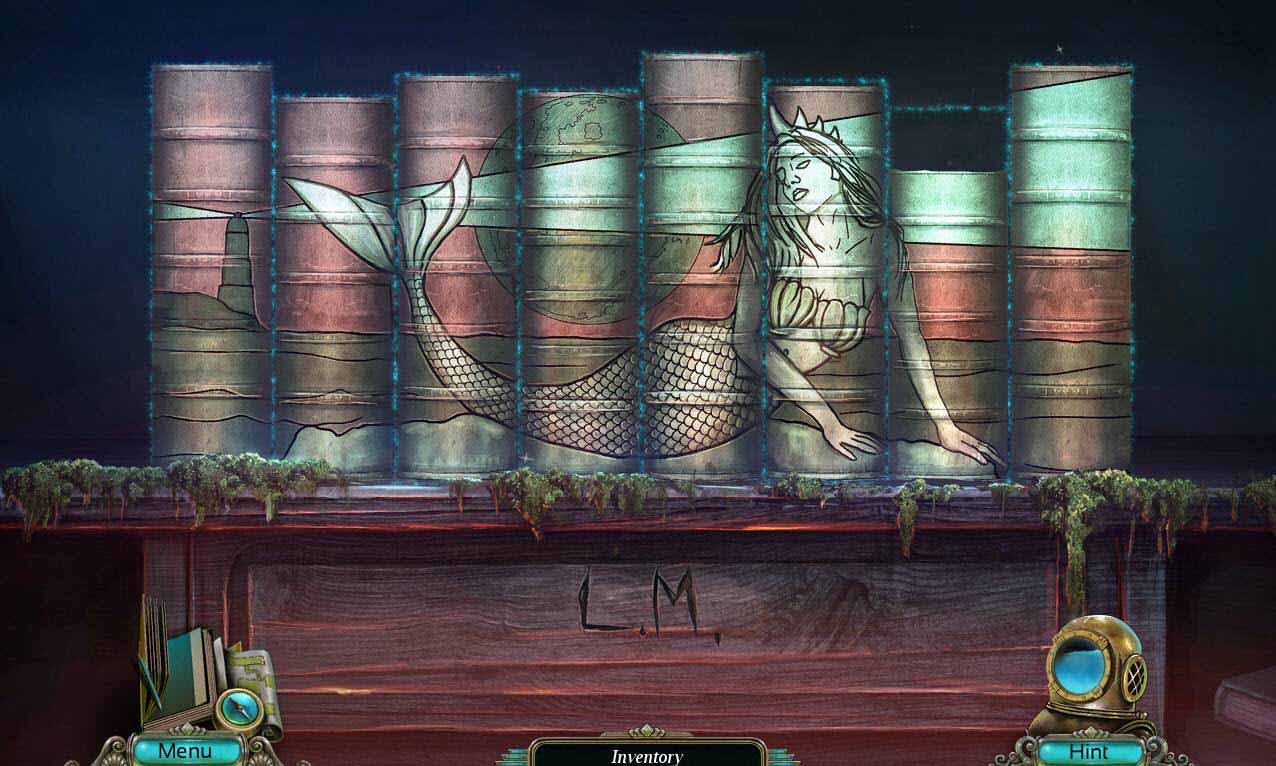
- The goal of the mini-game is to swap the books and line them up so they complete an image.
- See the screenshot above for the solution.
- Take the CROWN.
-
Go back one screen.

- Click on the artwork to zoom in.
- Use the RED MAGNET on the typewriter key to pull it out.
- Take the TYPEWRITER KEY 3/3.
-
Return to the study.
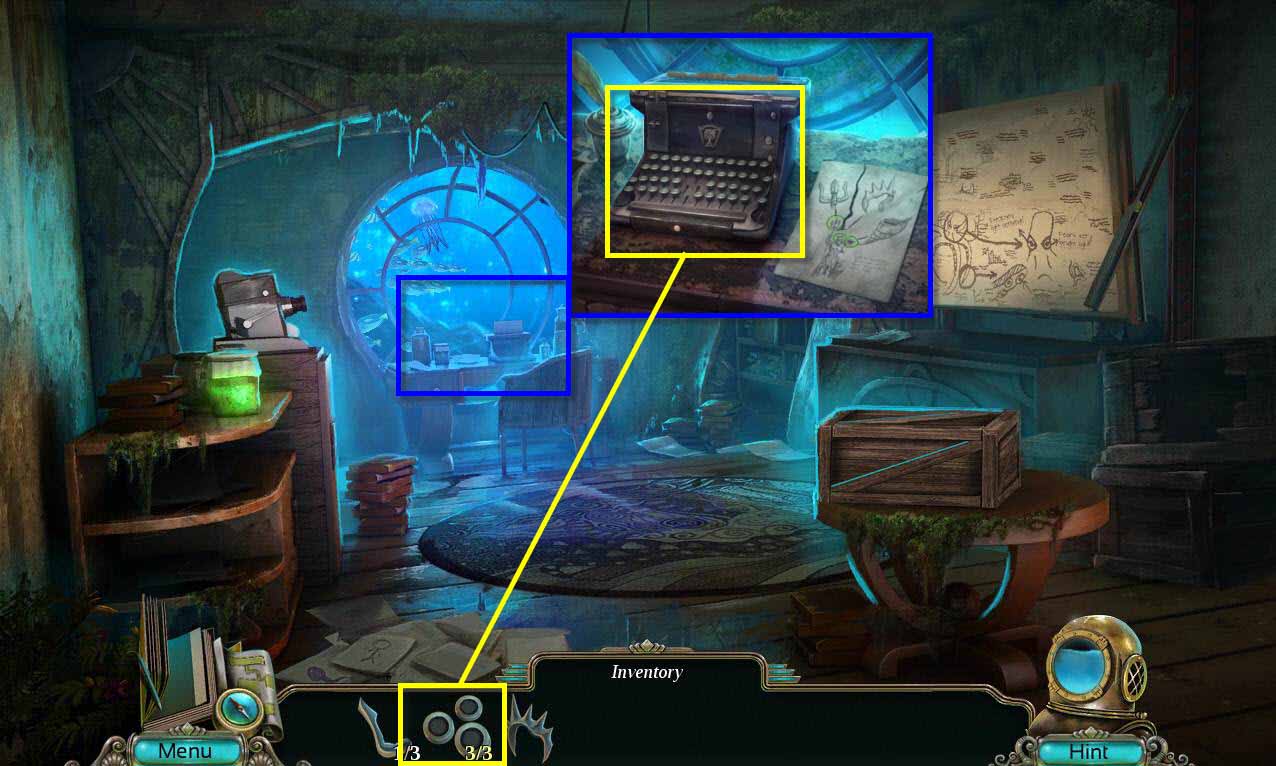
- Click on the desk to zoom in.
- Click on the paper on the right twice to put it together.
- Use the TYPEWRITER KEY 3/3 on the typewriter.
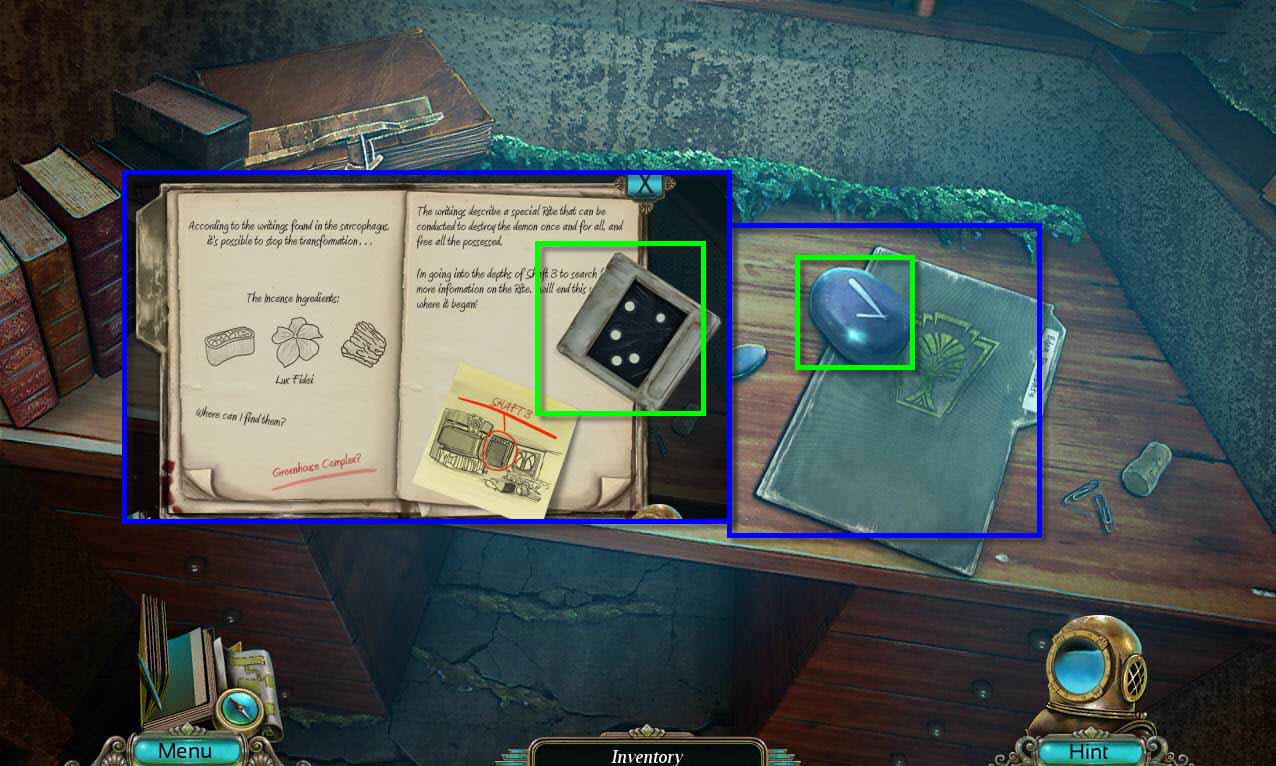
- Look at the note.
- Take the RUNE STONE 1/8 and the LIBRARY CHEST KEY.
-
Go back to the library.
- Click on the chest to zoom in.
- Use the LIBRARY CHEST KEY on the empty slot.
- Click to open the chest.
- Take the EMERALD EYE and the SHELL.
-
Go back one screen.
- Click on the artwork to zoom in.
- Use the EMERALD EYE on the missing slot.
-
Take the METAL DETECTOR.
- Use the METAL DETECTOR on the cash register.
-
Click on the sparkles that appear to start the hidden object scene.
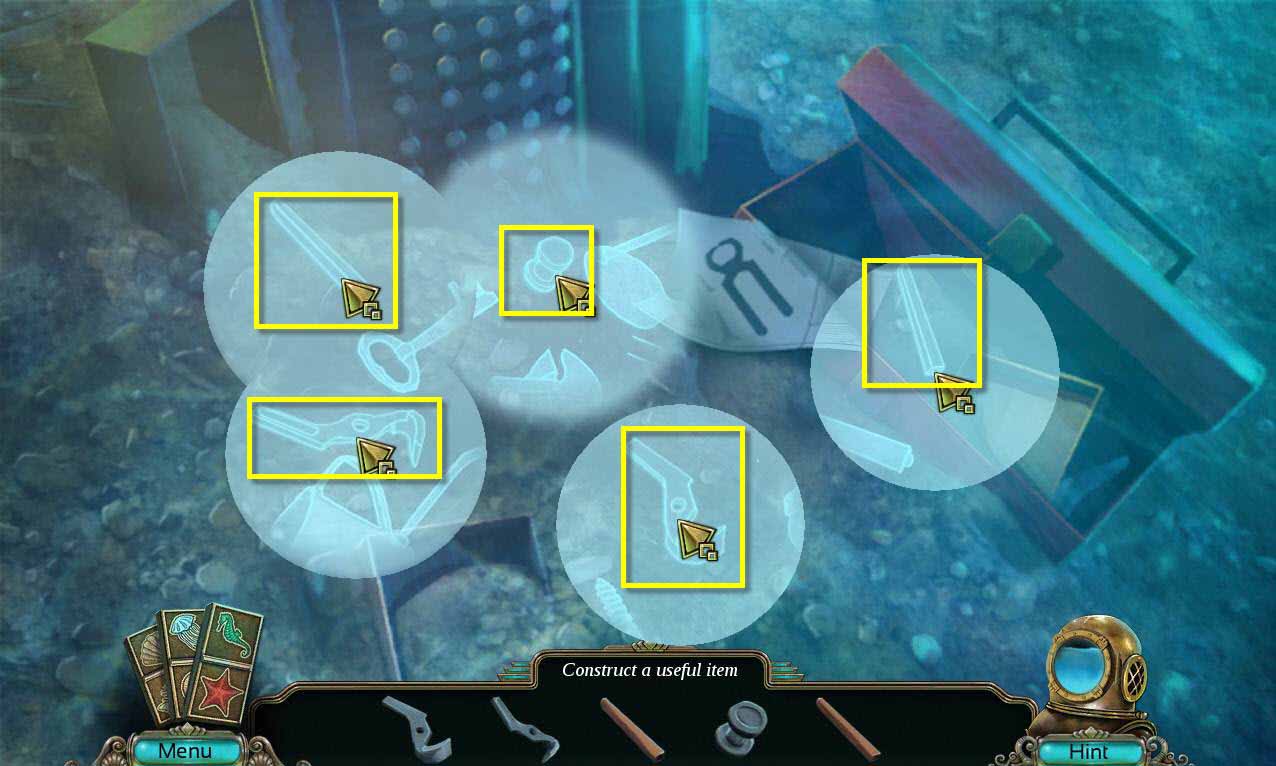
- Move the metal detector around to find the items on the list.
- Click on each item to make the PLIERS.
-
Go back to the study.
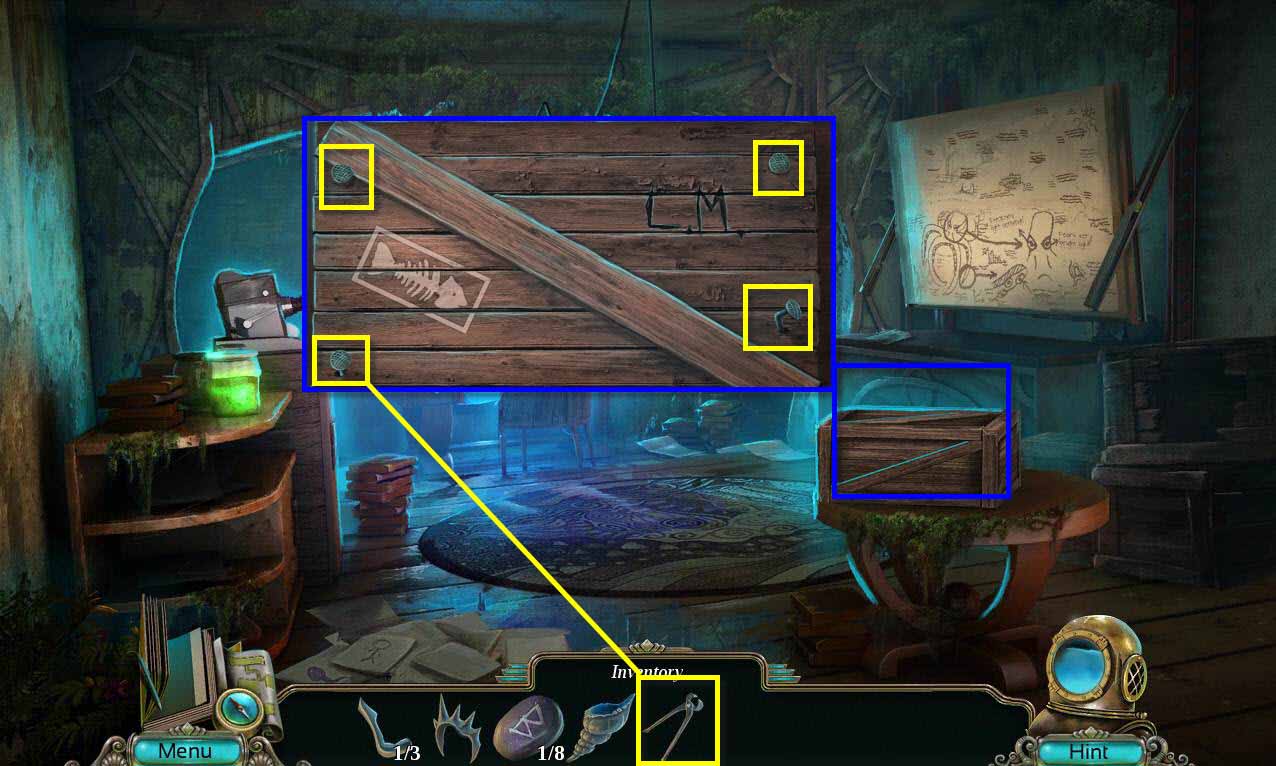
- Click on the chest to zoom in.
- Use the PLIERS on the nails to remove them.
-
This will start a mini-game.
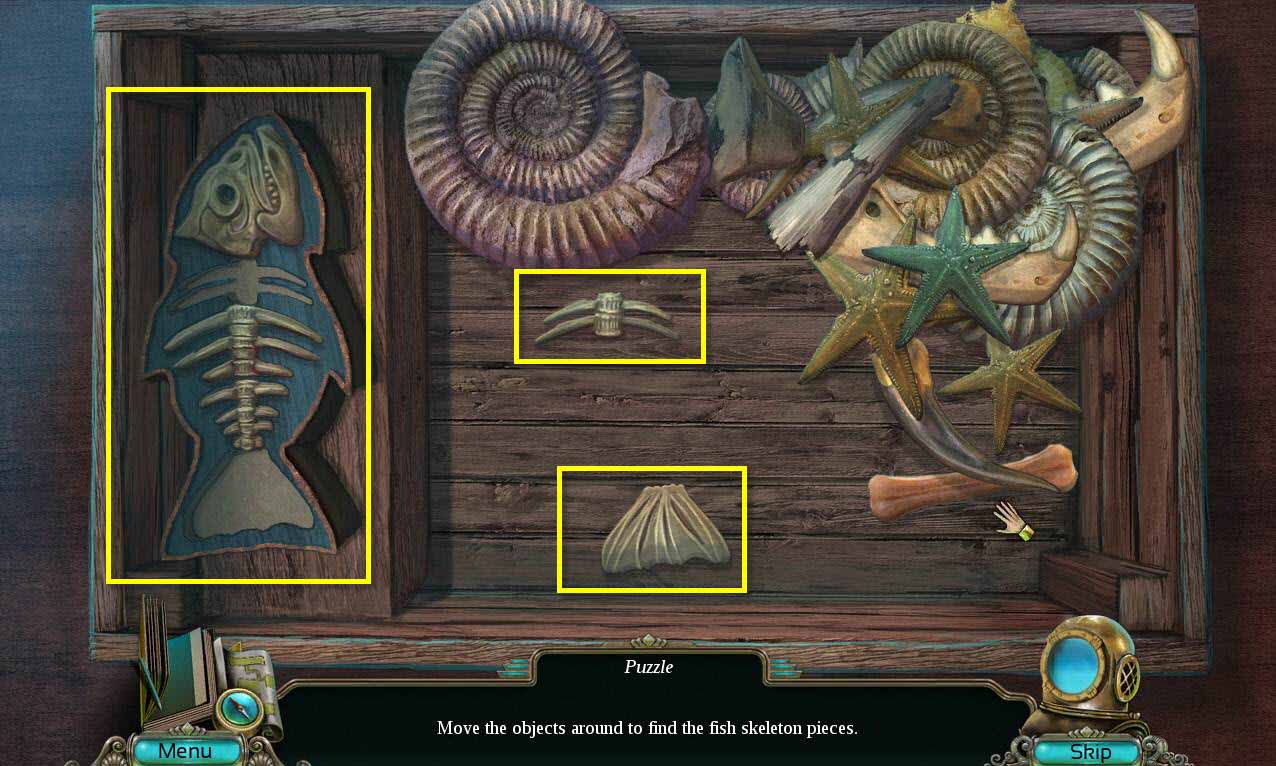
- The goal of the game is to find the pieces of the skeleton that make up the fish on the left.
- Keep moving things around until you find the pieces.
- Once you click on a piece it will automatically move to the correct spot.
- See the screenshot for help.
- When you are done, take the FISHBONE TOKEN.
-
Return to the library.
- Click on the pole to zoom in.
- Use the FISHBONE TOKEN on the empty slot.
-
Go up the stairs.
- Click on the broken glass on the left to zoom in.
- Take the FISHING NET.
-
Click on the sparkles to access the hidden object scene.
- Find all the items on the list.
- You will receive the TRIDENT PART.
-
Go back to the study.
- Click on the desk where the poison is to zoom in.
- Use the FISHING NET on the poison to get the TRIDENT PART 3/3.
-
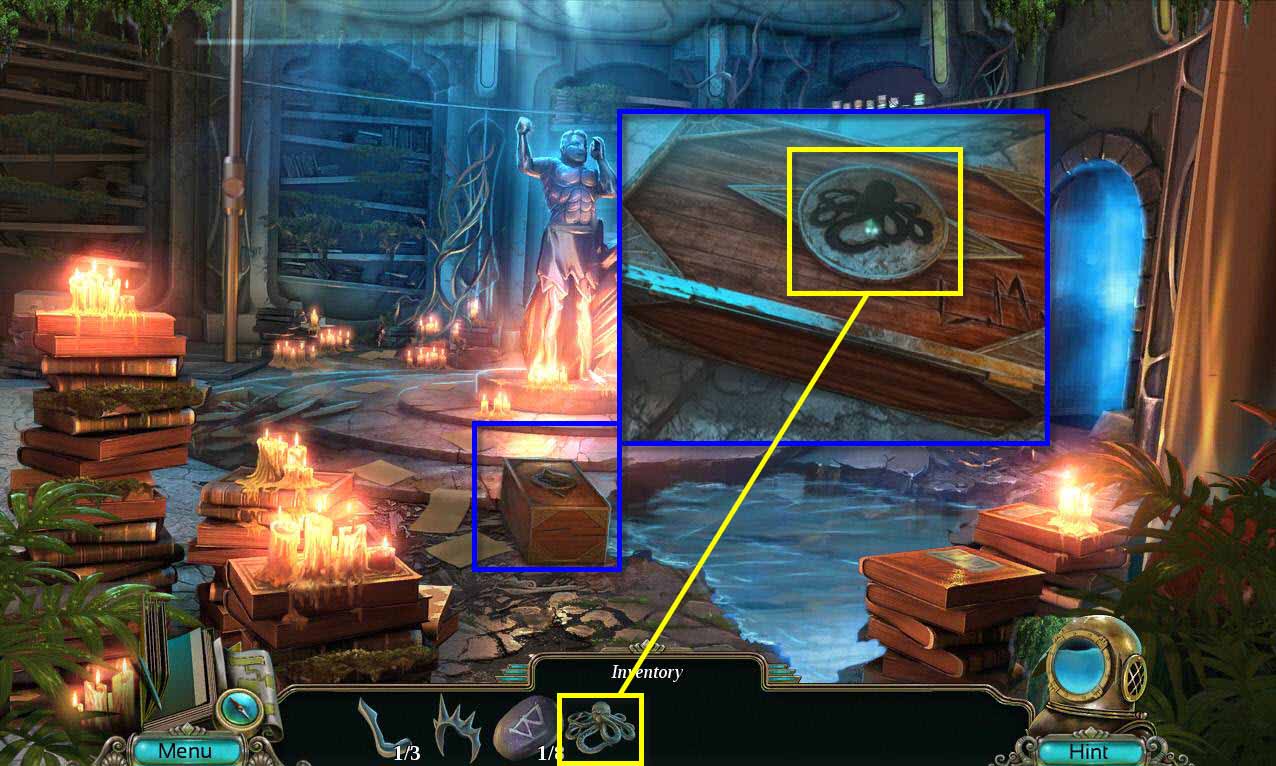
Go back to the library.
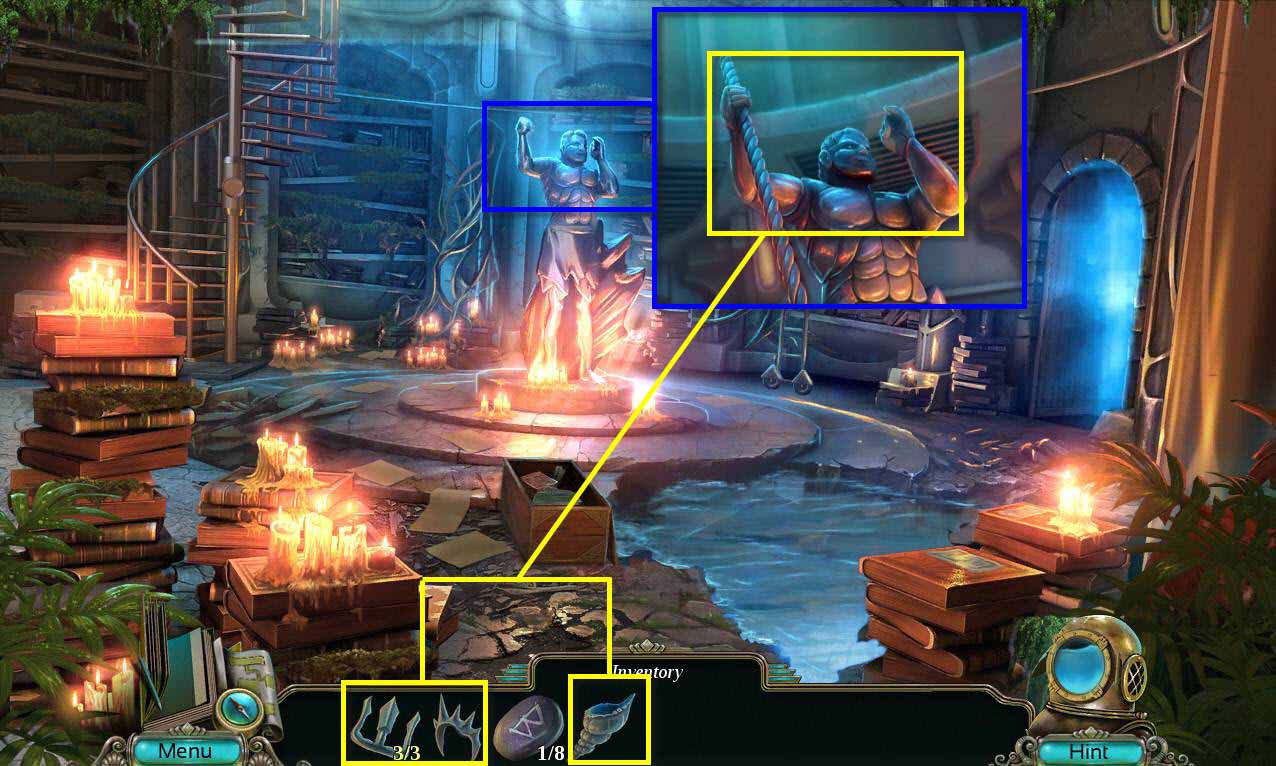
- Click on the statue to zoom in.
- Use the TRIDENT PART 3/3 on him.
- Use the CROWN on him.
- Use the SHELL on him.
-
Click to zoom in on the secret door that opened.
- Take the RUNE STONE 2/8.
- Click on the folder to open it.
- Read the pages and turn until you see the DOTTED SLIDE.
- Take the slide.
- Go to the study.
General Info and Tips
Chapter One: The Wrecked Craft
Chapter Two: Inside Eden
Chapter Three: The Girl
Chapter Four: The Hotel Gate
Chapter Five: Freeing Robert
Chapter Six: The Twins
Chapter Seven: The Bottom Floor
Chapter Eight: Finding the Cure
Chapter Nine: Shaft 3
Chapter Ten: The Rite
Ask for help in the comments below!
Chapter One: The Wrecked Craft
Chapter Two: Inside Eden
Chapter Three: The Girl
Chapter Four: The Hotel Gate
Chapter Five: Freeing Robert
Chapter Six: The Twins
Chapter Seven: The Bottom Floor
Chapter Eight: Finding the Cure
Chapter Nine: Shaft 3
Chapter Ten: The Rite
Ask for help in the comments below!