

Images ©Big Fish Games & PlayFirst
Overview: In the fourth installed of the Dream Chronicles series, you play the part of Lilith's daughter. She had a dream and everyone vanished, leaving her all alone her beloved town of Wish. Can you help her find her way?
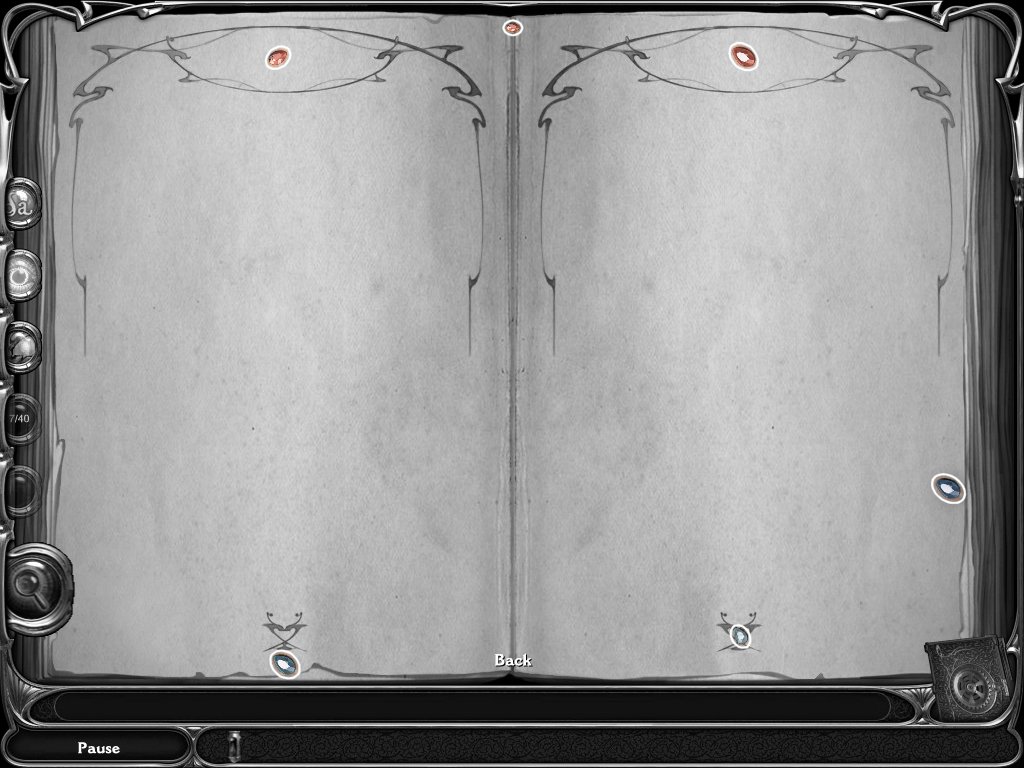
Dream Journal: This will guide you through the game, check it often. It also holds the Dream Jewels, see below.
Dream Pieces: These are sparkling objects that go in your Dream Journal. They are needed to complete Dream Jewels to help you through the game.
Dream Jewels: Always pick these up right away, you can always return to where you saw them!
· Decipher: Deciphers strange symbols.
· Reveal: Shows things which are hidden.
· Transmute: Turns gold into wood.
· Brilliance: Turns dark into light.
· Thunder: Creates storms.
Letters: You will find letters in every locale, read them!
Locate: The magnifying glass helps you find dream pieces.
Levels:
Chapter 1
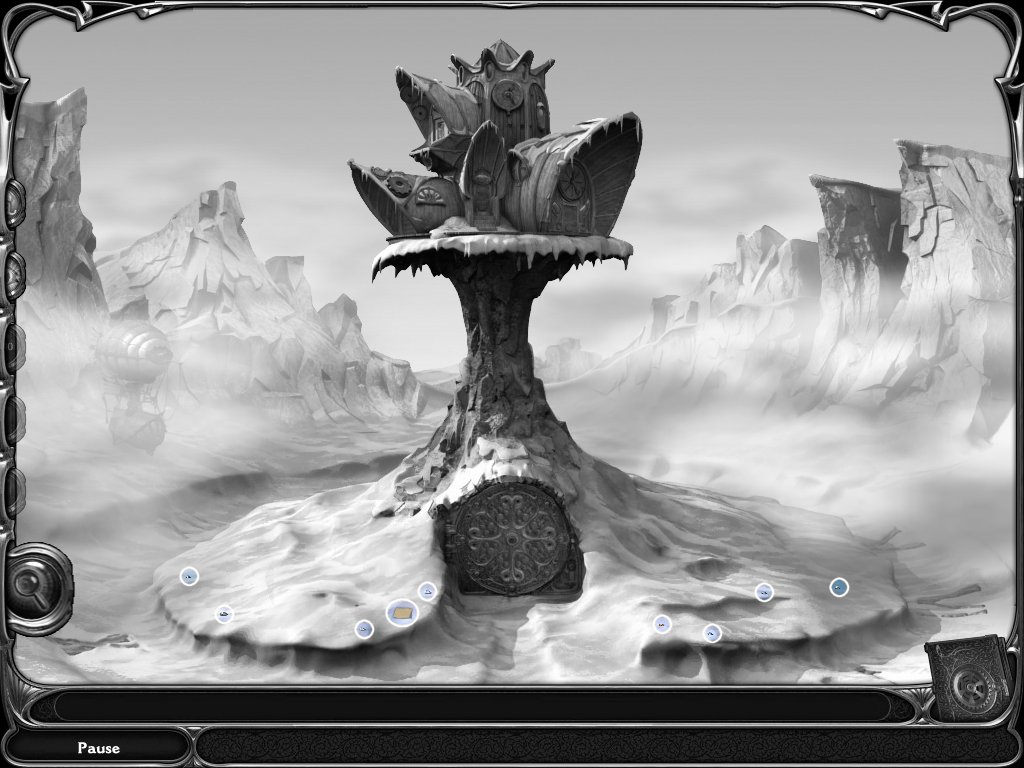
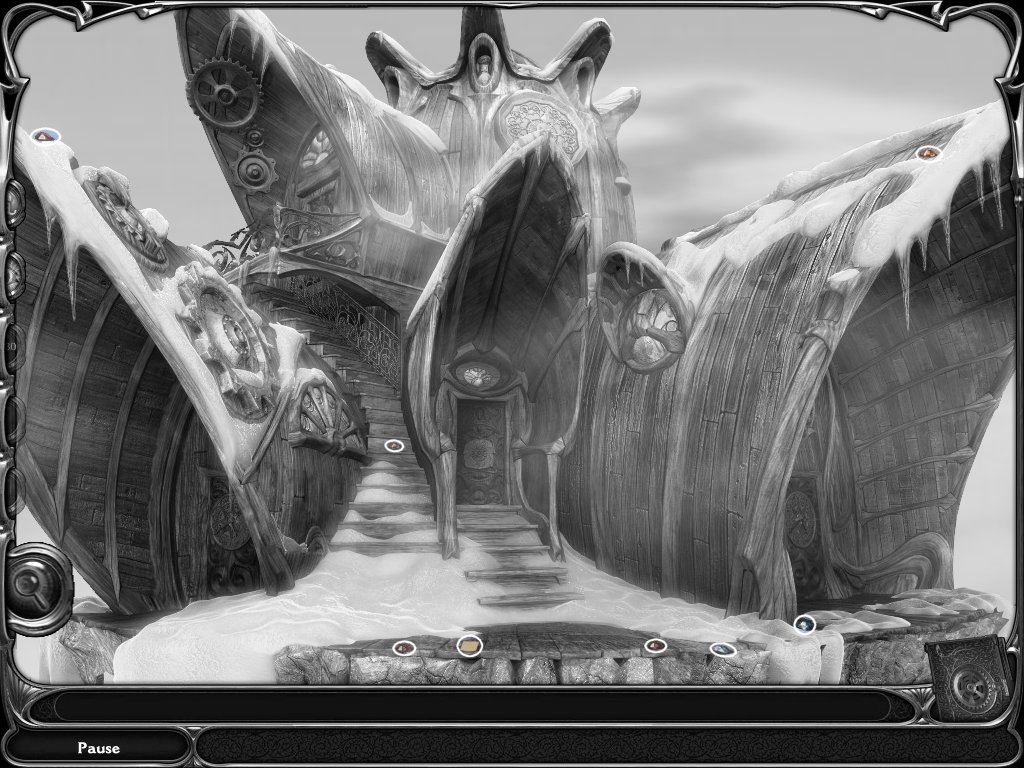
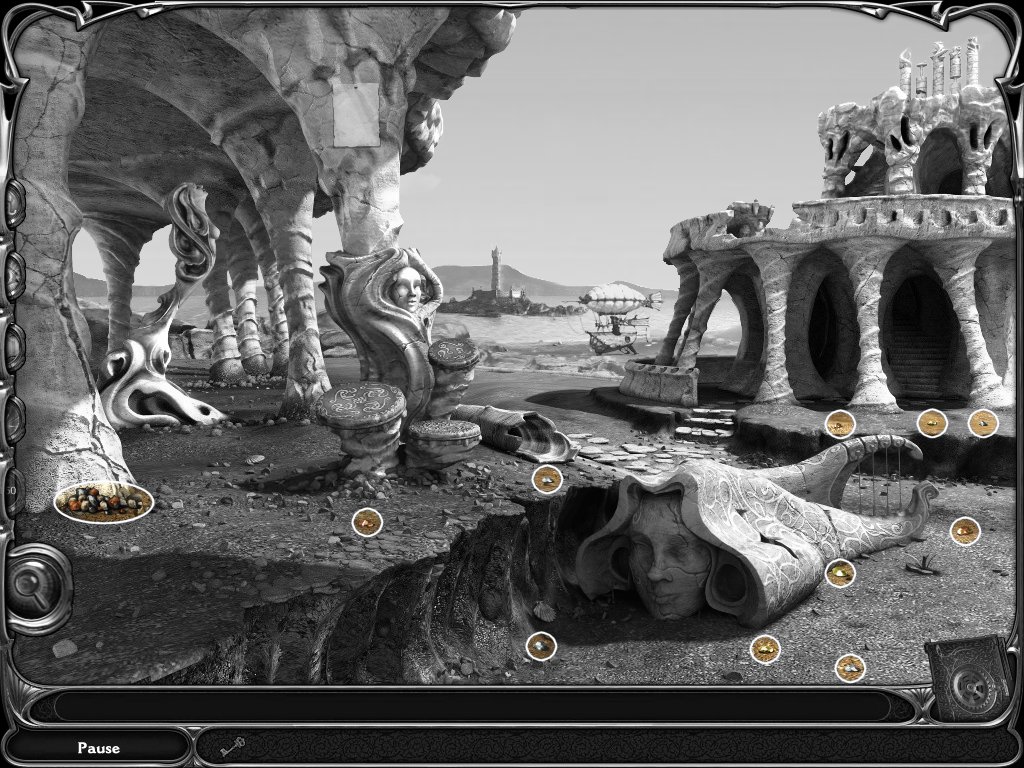
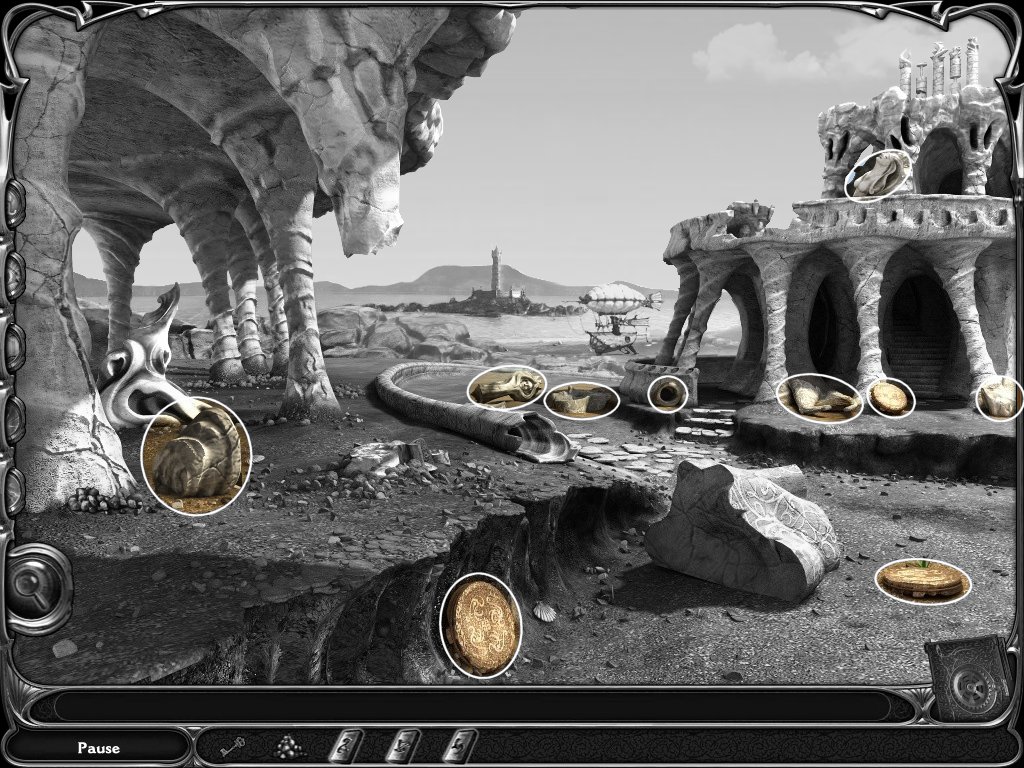
Wish
1. pick up the gear
2. use the gear on the side of the box
3. receive the dream journal
4. pick up the pieces of the statue
5. repair the statue
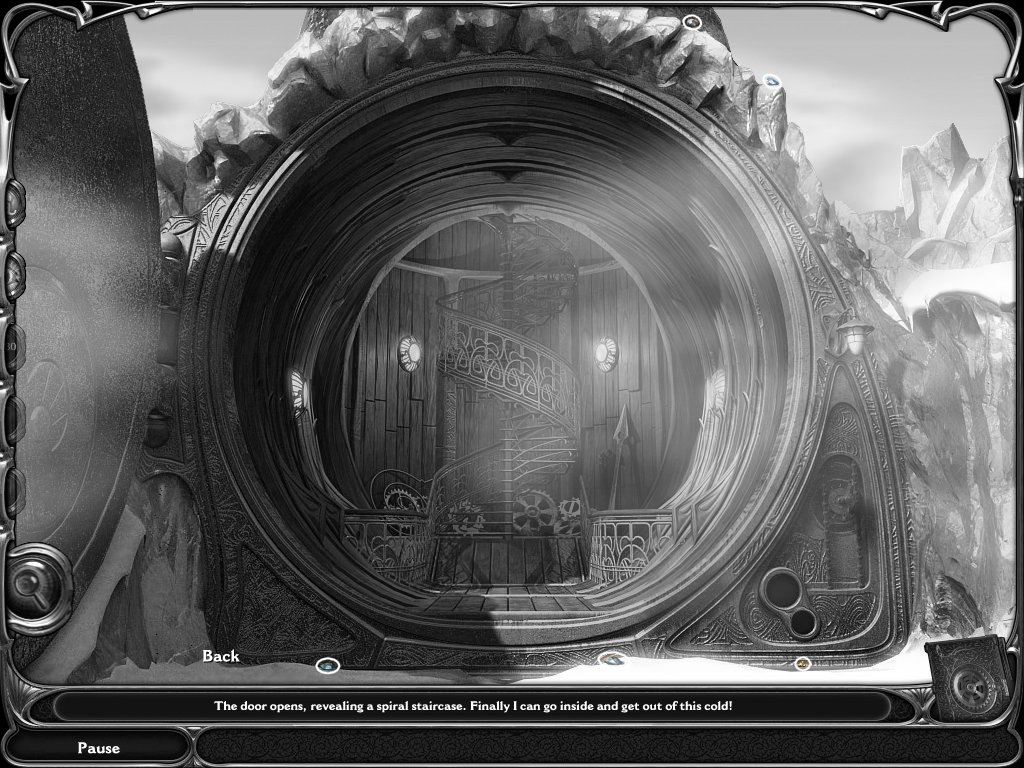
6. enter the school
School
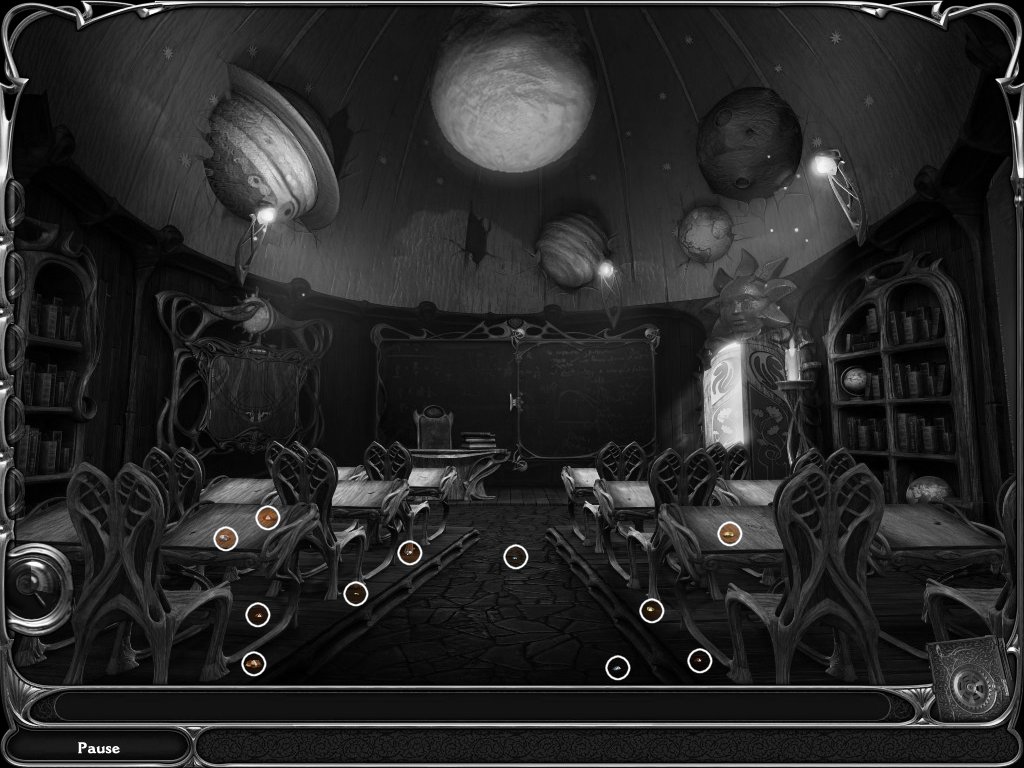
1. find 11 dream pieces
2. examine the chalkboard
3. find 2 dream pieces
4. pull the handle
5. use the first dream jewel
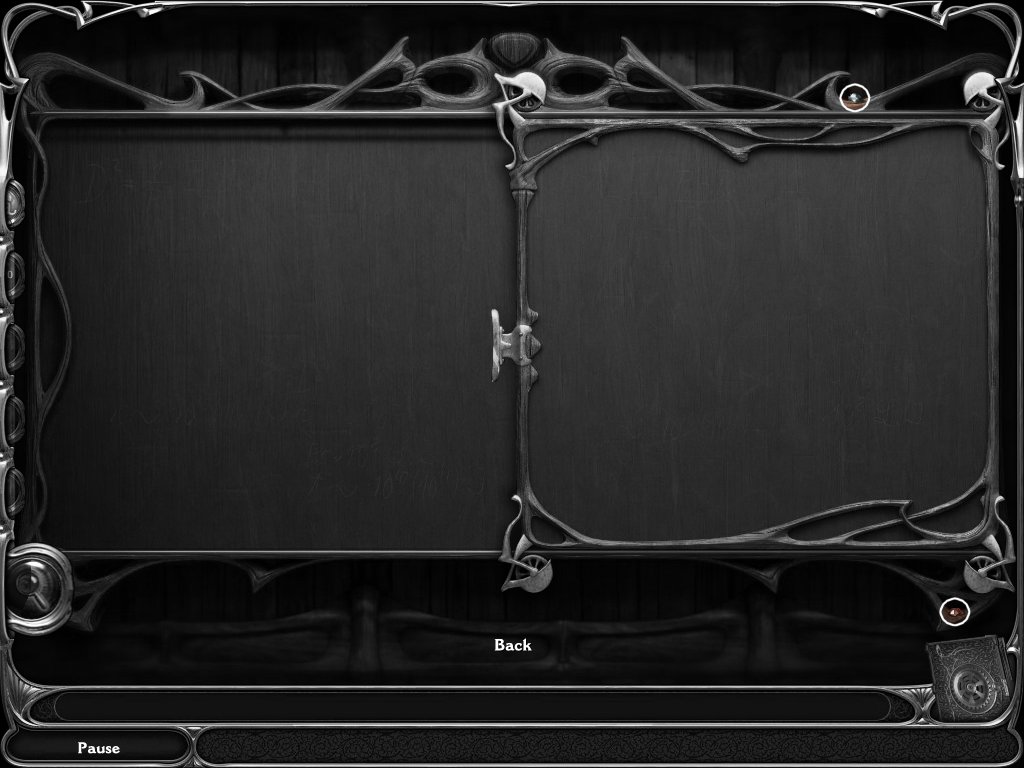
6. examine the cabinet
7. you need to find a code
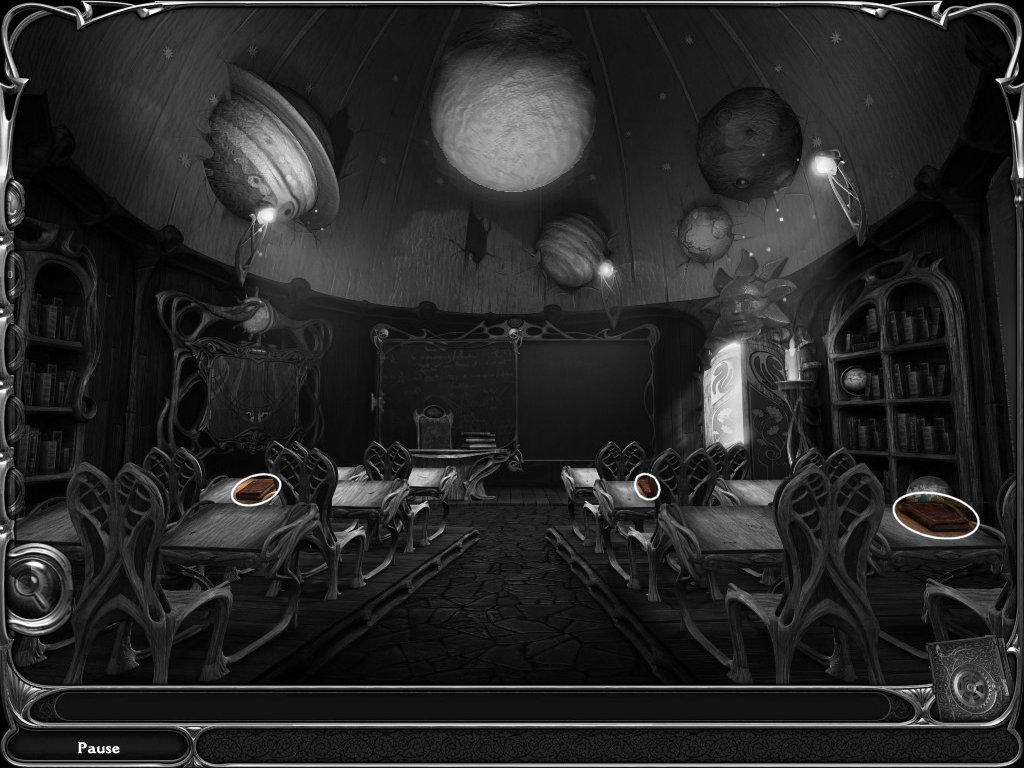
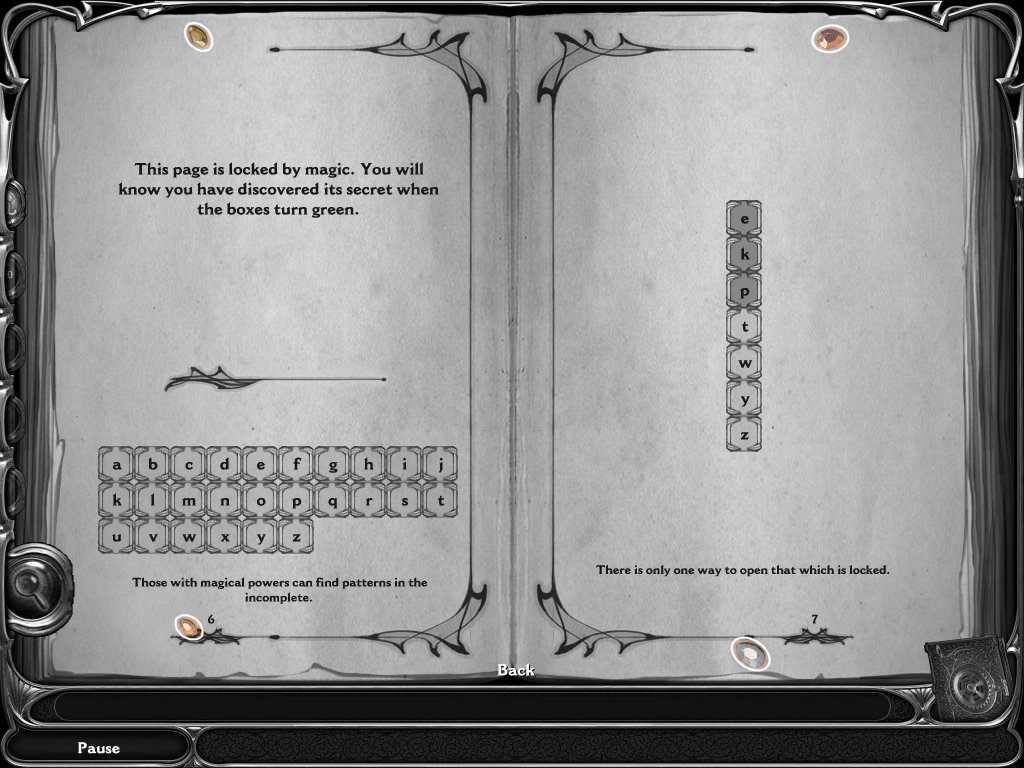
8. examine the book on the left, 2nd desk from the front – puzzle
· use the decipher dream jewel
· pick up 4 dream pieces
· figure out which letters belong on the right page
· hint: mathematical problem
· solution: E K P
9. examine the book lying on right, 2nd desk from the front –puzzle
· use the decipher dream jewel
· figure out which symbol belongs in the pattern
· hint: mirror image
· solution: see screenshot
10. examine the book lying on the right, 4th desk from the front
· use the decipher dream jewel
· figure out which symbol belongs in the pattern
· hint: opposite mirror image
· solution: see screen shot
11. go back to the cabinet
12. insert the symbols the books revealed
· solution: varies per player
13. find the map pieces
14. go back to the cabinet
15. reassemble the map
16. find 4 dream pieces
17. examine the chalkboard
· use the decipher dream jewel
· look at the images on the left side
· find the words of those items in the word search
· words: vary per player
18. enter the portal
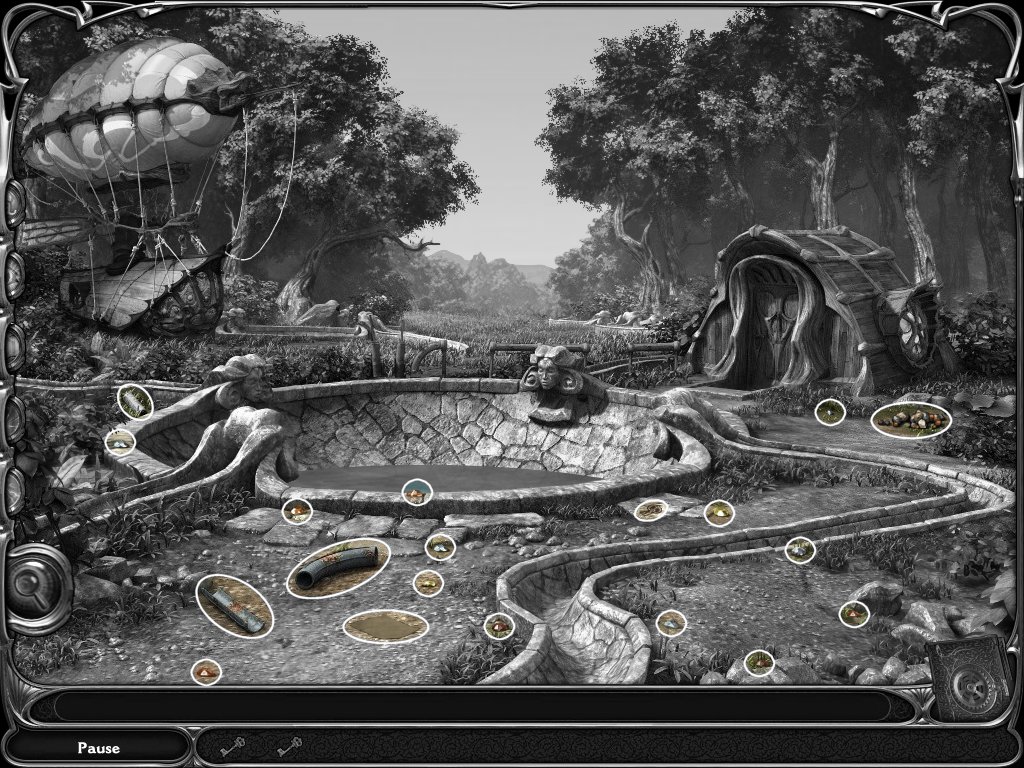
Chapter 2
Airship
1. read the letter
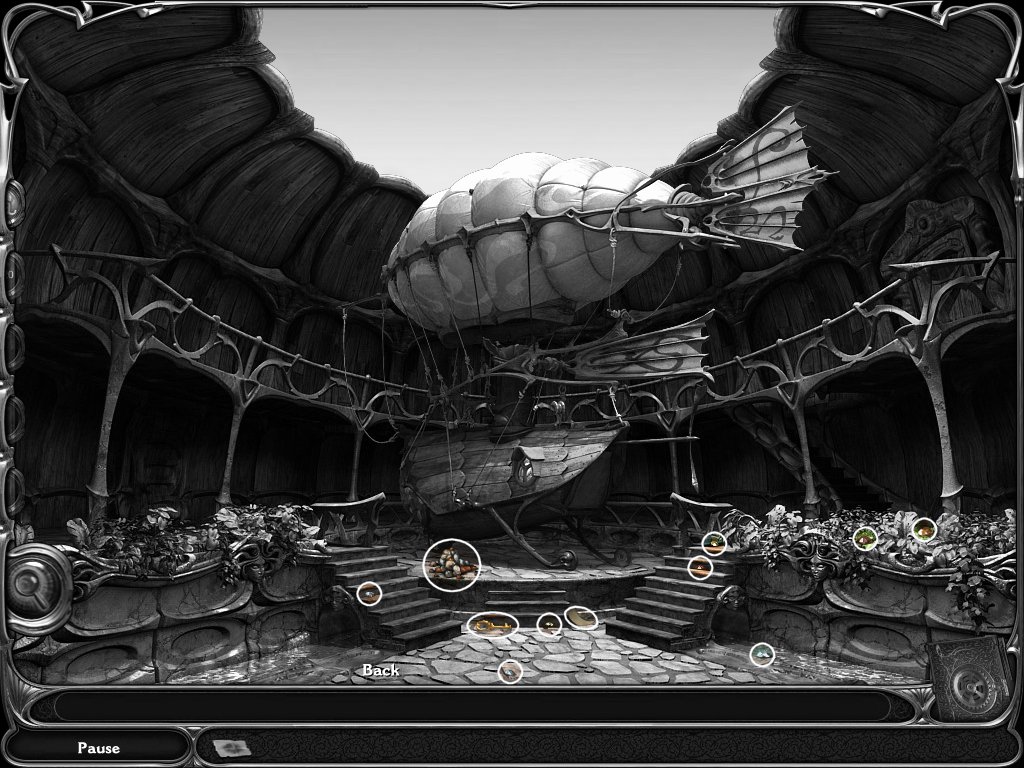
2. find 8 dream pieces
3. pick up the large key
4. pick up the colored stones
5. use the large key on the airships door
Inside Airship
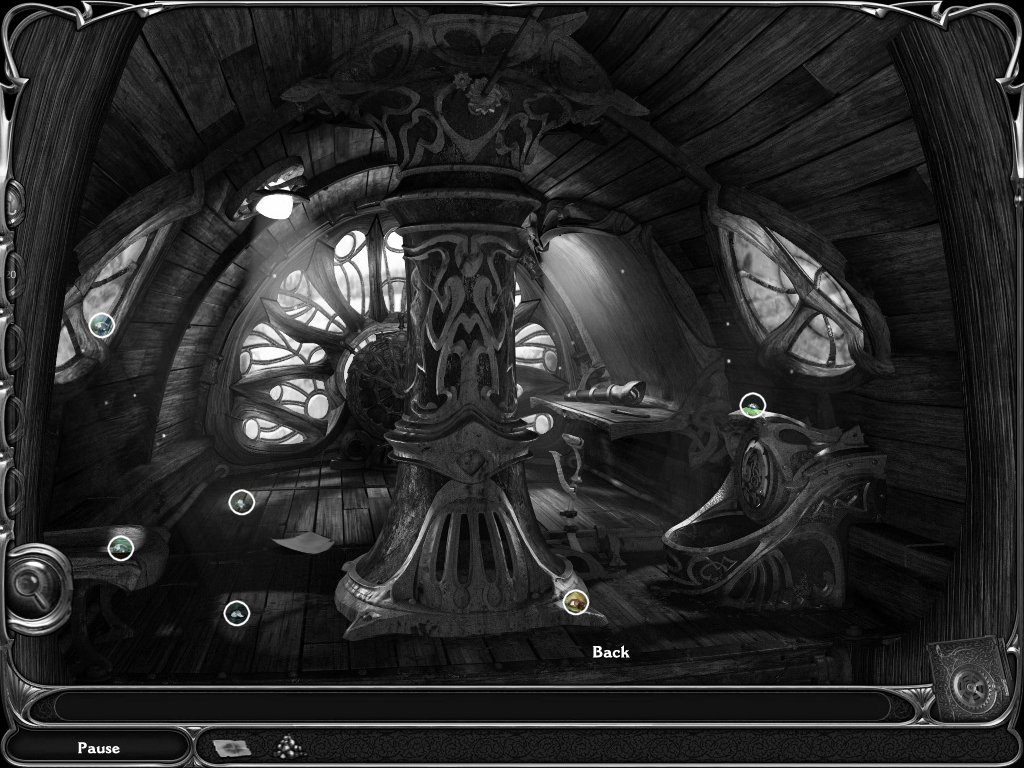
1. find 6 dream pieces
2. exit outside
Airship
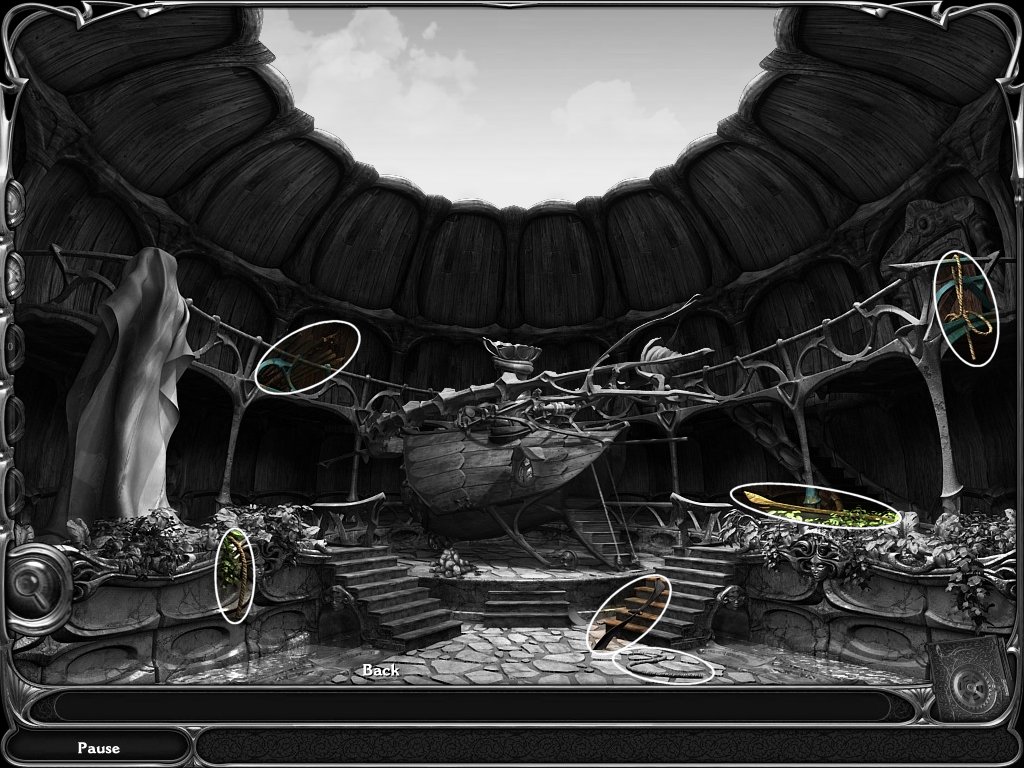
1. find the airships pieces
2. repair the ship
3. enter the airship
Inside the Airship
1. place the map on the wall
2. use the reveal dream jewel to find a new location
3. make note of the coordinates
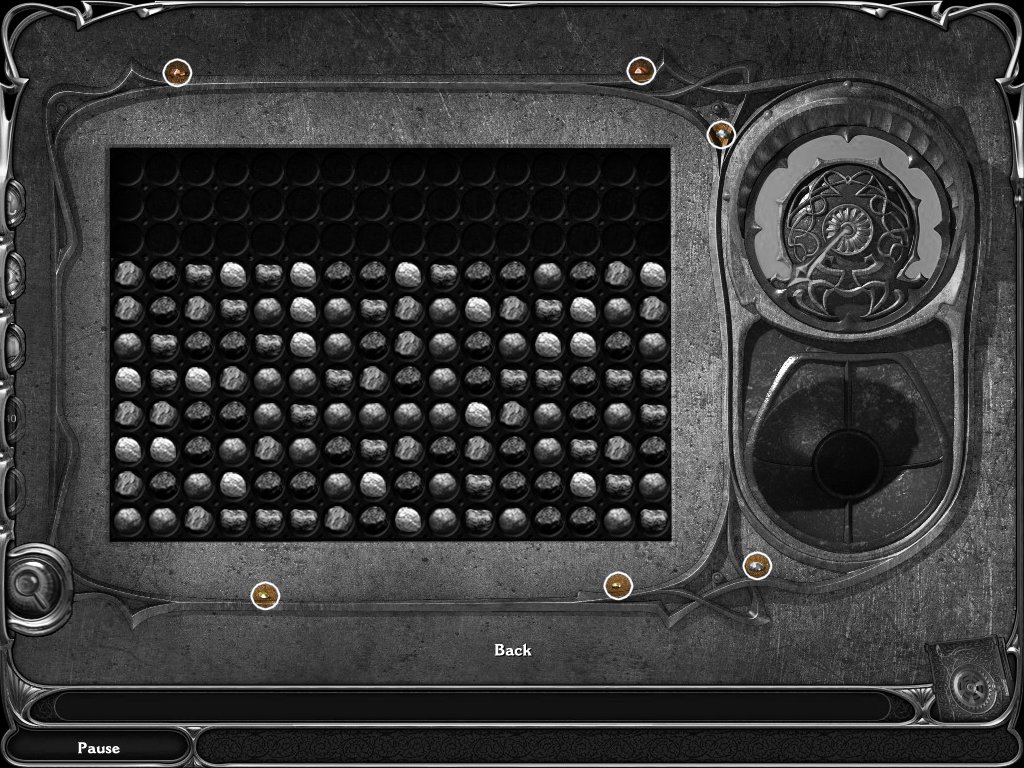
4. examine the device on the right side
· find 6 dream pieces
· place the colored stones into the hole on the right
· clear the stones
· try and clear stones of 3 or more
· you will sometimes have to clear just 1 to line them up
· you must have a full tank!
· tip: leave all the white ones until last
5. examine the control wheel at the front of the ship
6. turn the silver dial to the correct course and the gold dial to the correct heading
7. course and heading very per player
8. pull the lever
Chapter 3
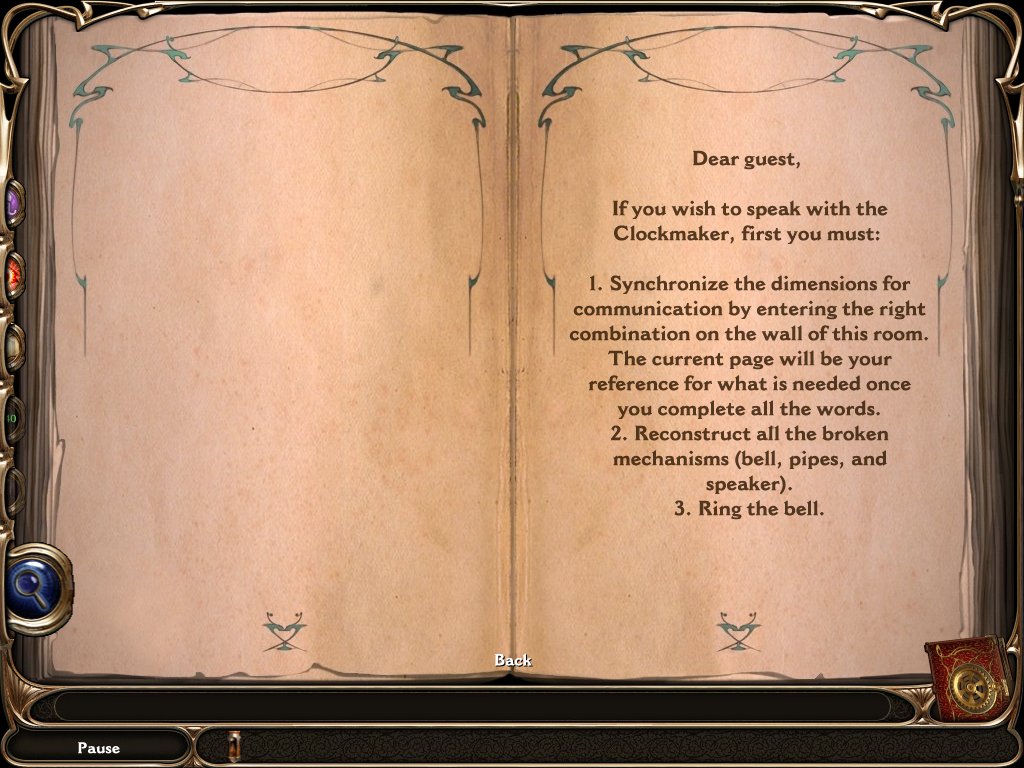
Outside the Clockmaker's
1. find 8 dream pieces
2. examine the door
3. exit back and look at the ground
4. the shadow of the house is pointing to the correct time
5. examine the door again
· use the large button to move the minute hand
· use the small button to move the hour hand
· move the hands until they are the correct time
· solution: 6 o'clock
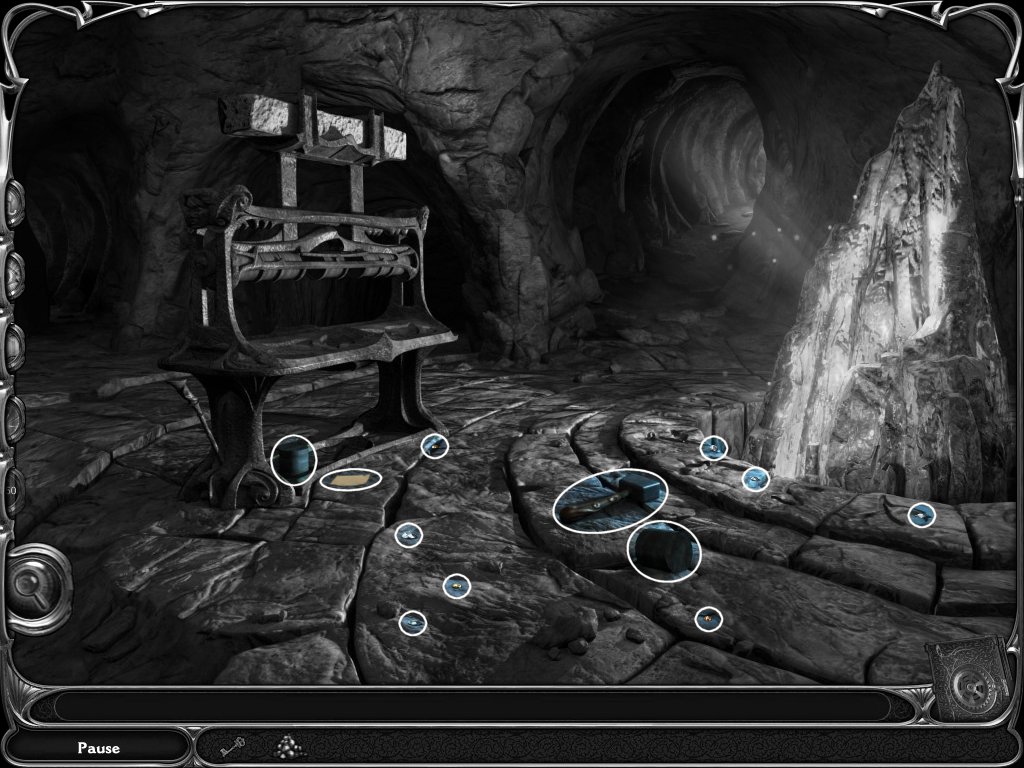
6. find 5 dream pieces
7. go upstairs
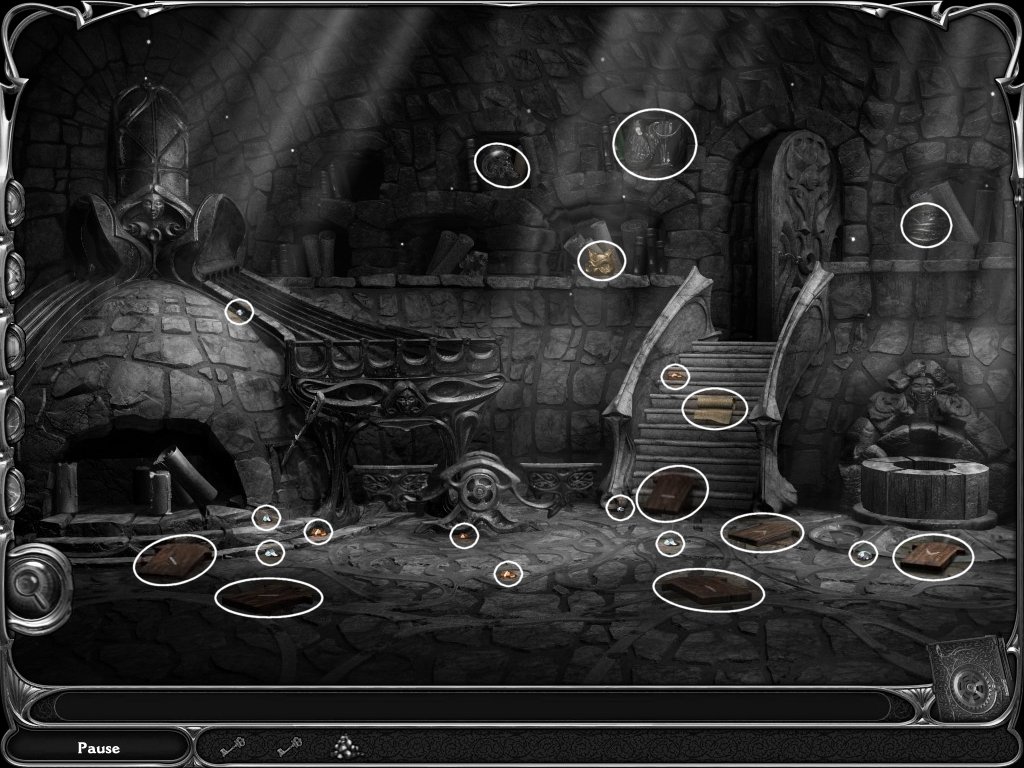
Clockmaker's House
1. find 7 dream pieces
2. examine the left door
· find 3 dream pieces
· exit out
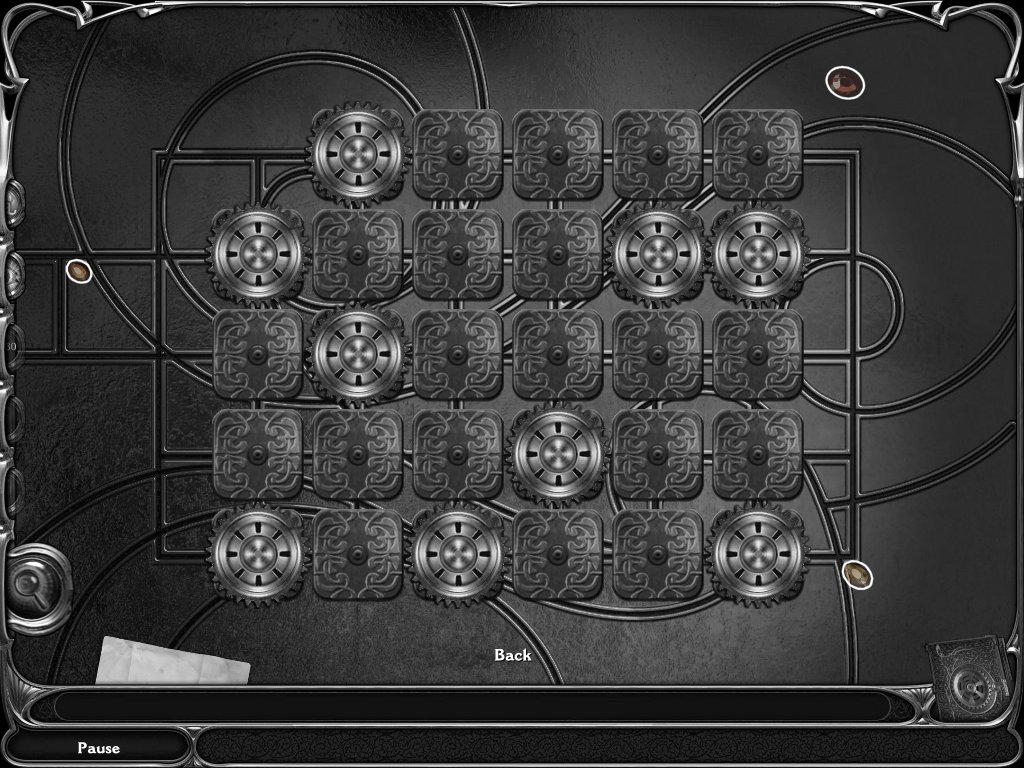
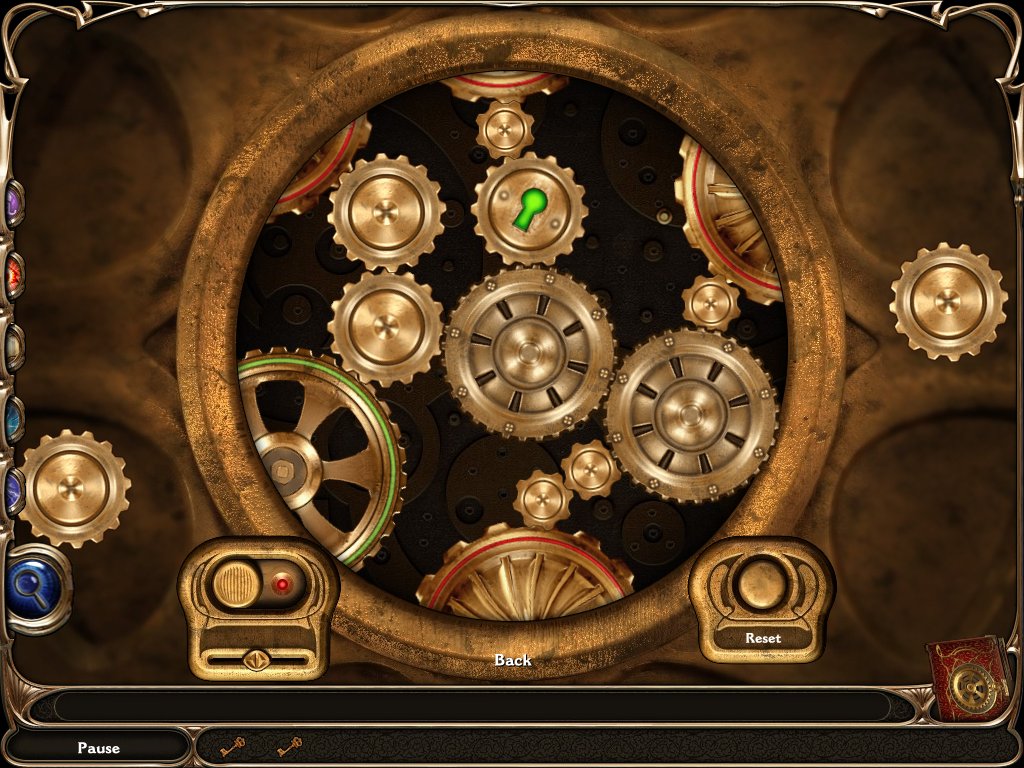
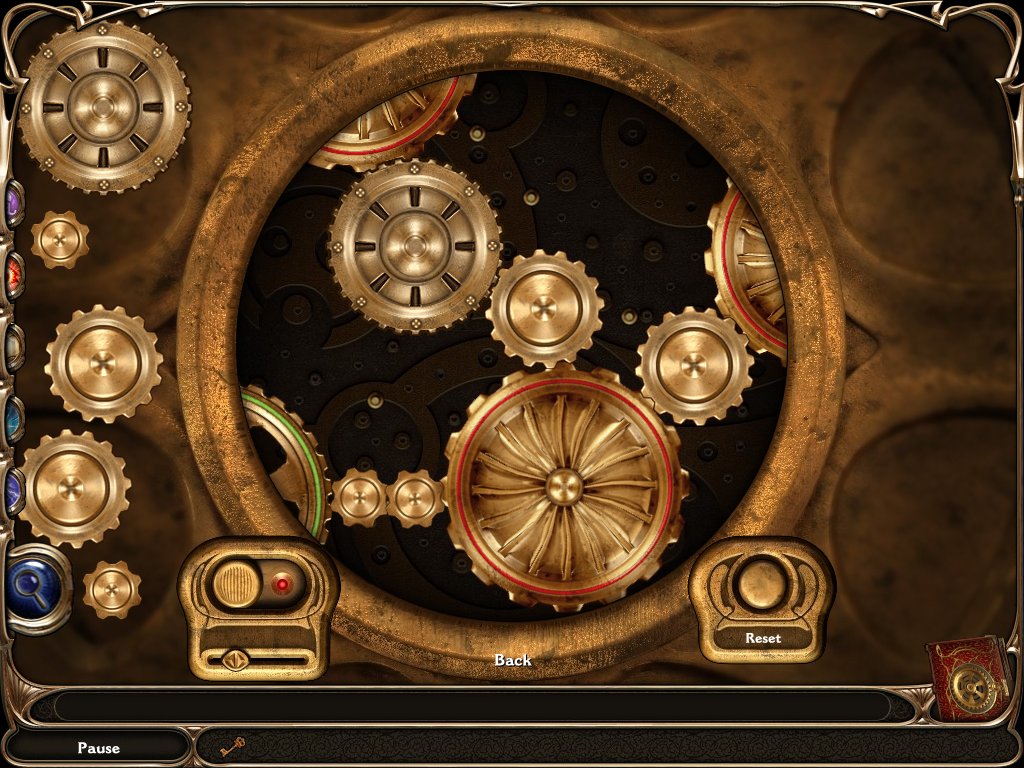
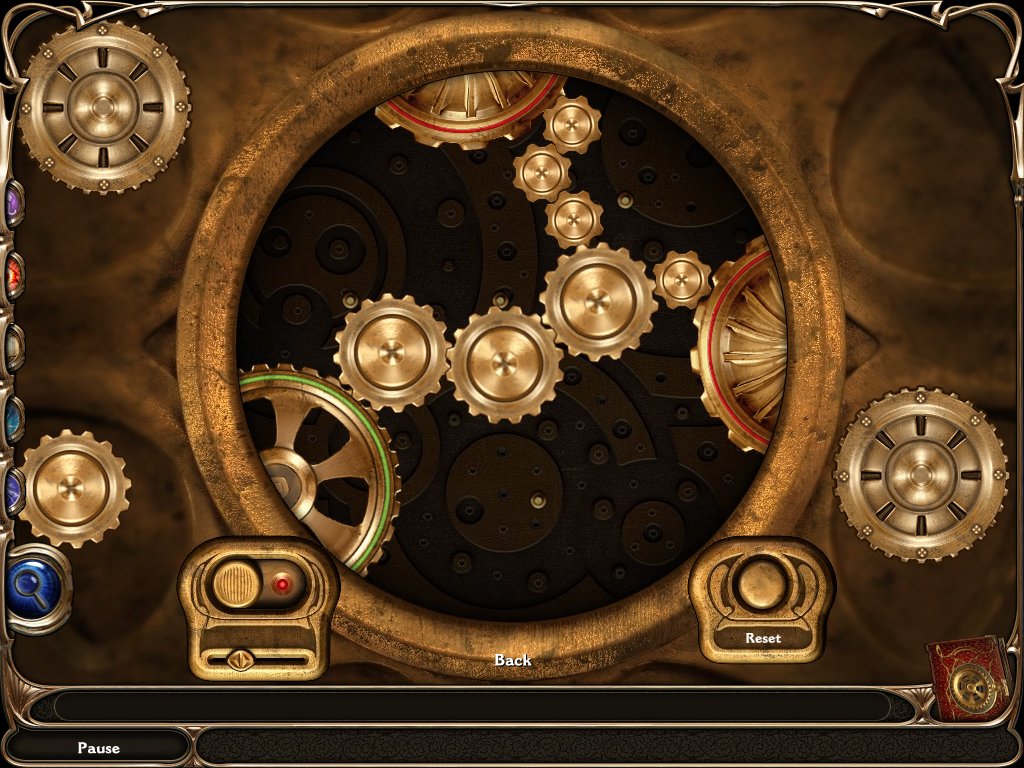
3. find the gears
4. examine the left door again
· place the gears on the door
· move the pieces around so that the gears touch
· they must go from the moving gear to the non-moving gear
· there are multiple solutions
5. enter lobby
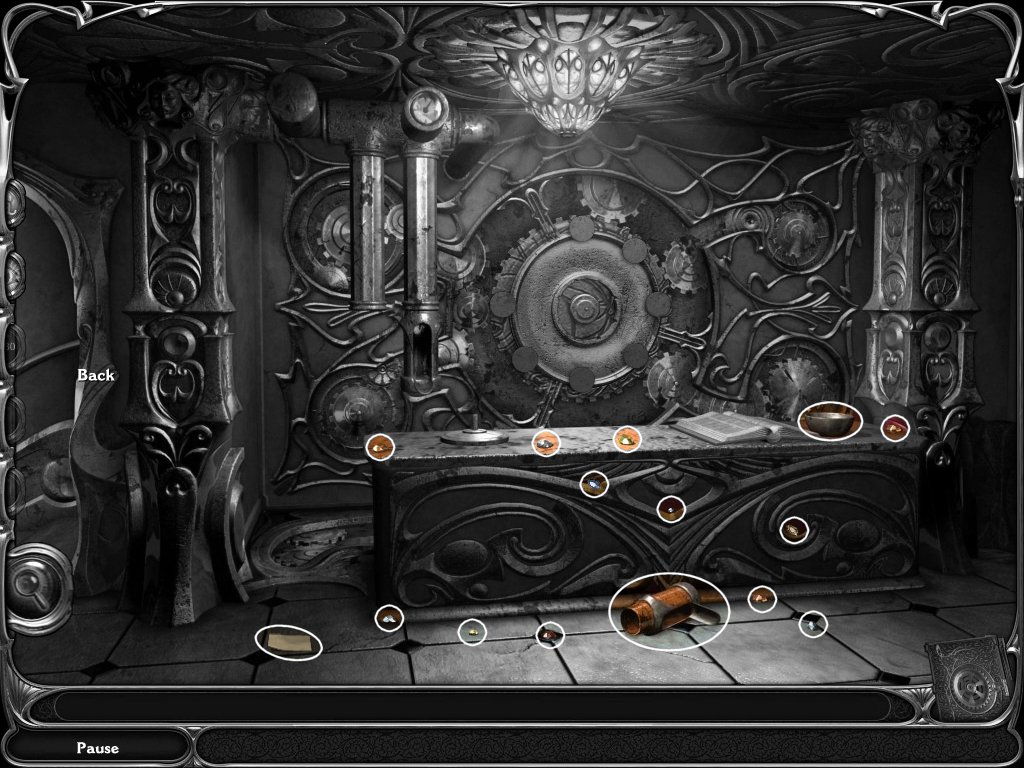
Lobby
1. find 12 dream pieces
2. pick up the pipe
3. replace the left pipe
4. pick up the metal bell
5. replace the bell
6. read the book
7. find 5 dream pieces
8. use the reveal dream jewel
· use the letters on the left to decipher the note
· solution: see screenshot
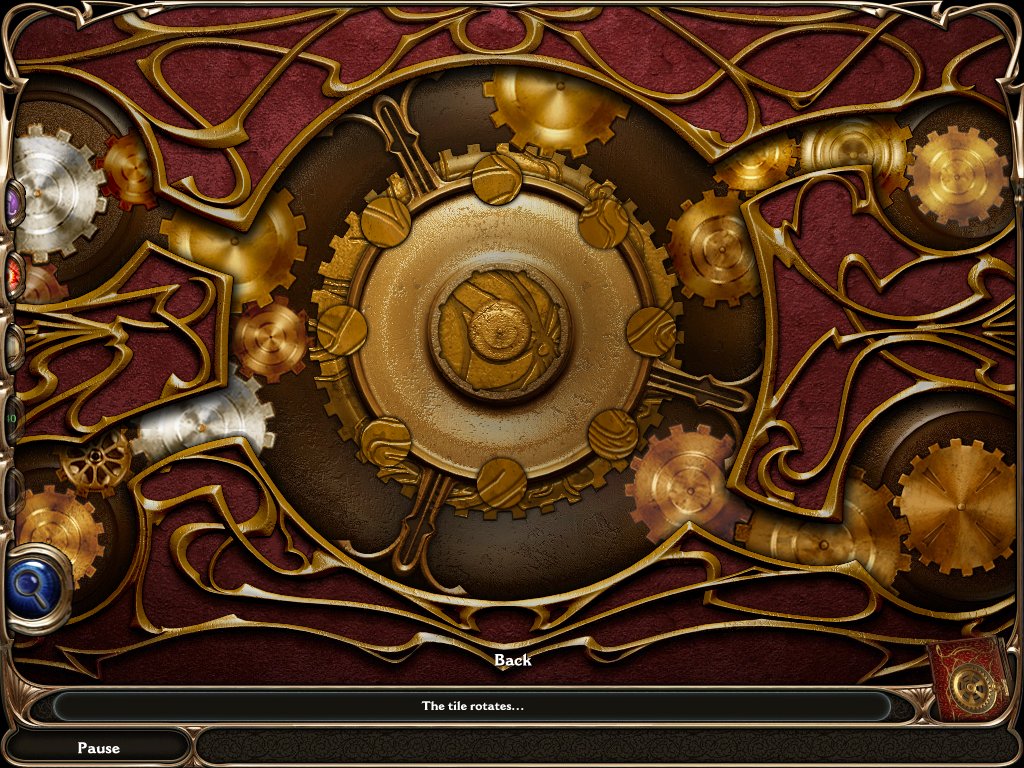
9. examine the mechanism on the wall
· find the 5 dream pieces
· place the missing disc on the puzzle
· rotate the pieces so the grooves on the side line up with the disc
· hint: examine the dream journal it will show you how to arrange the discs
· solution: see screenshot
10. ring the bell
11. talk to the clockmaker
12. exit
Clockmaker's House
1. examine the right door
2. collect 3 dream pieces
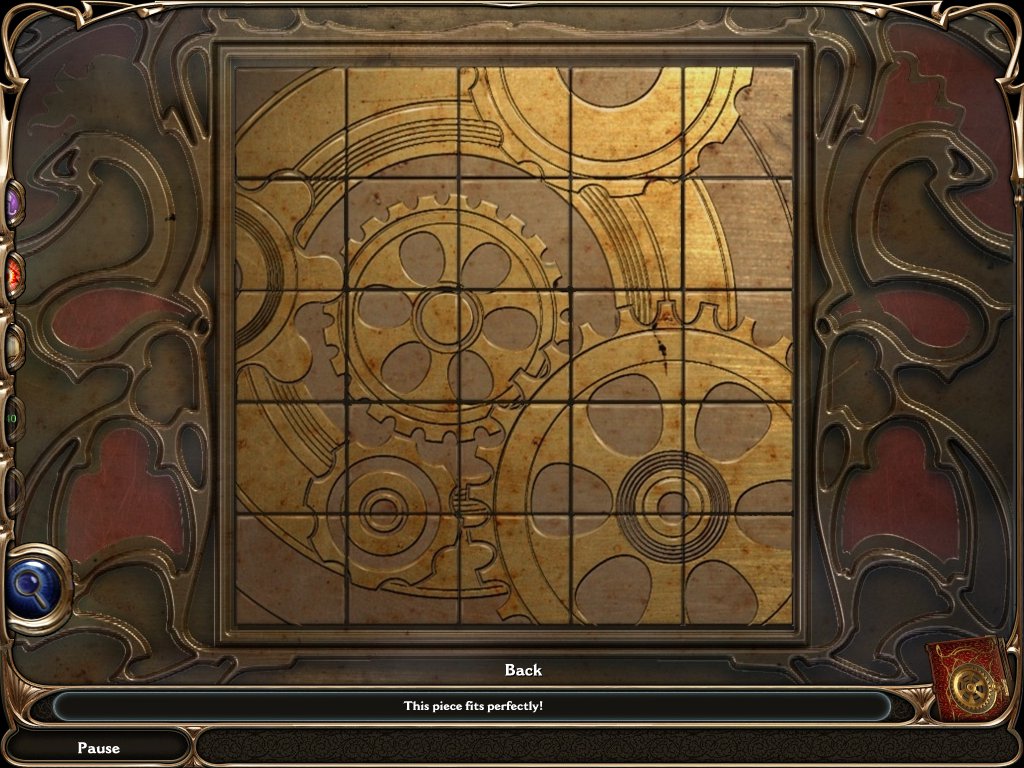
3. use the reveal dream jewel
· put the pieces together to reveal a clock
· tip: find the center and work out from there
· solution: see screenshot
4. enter
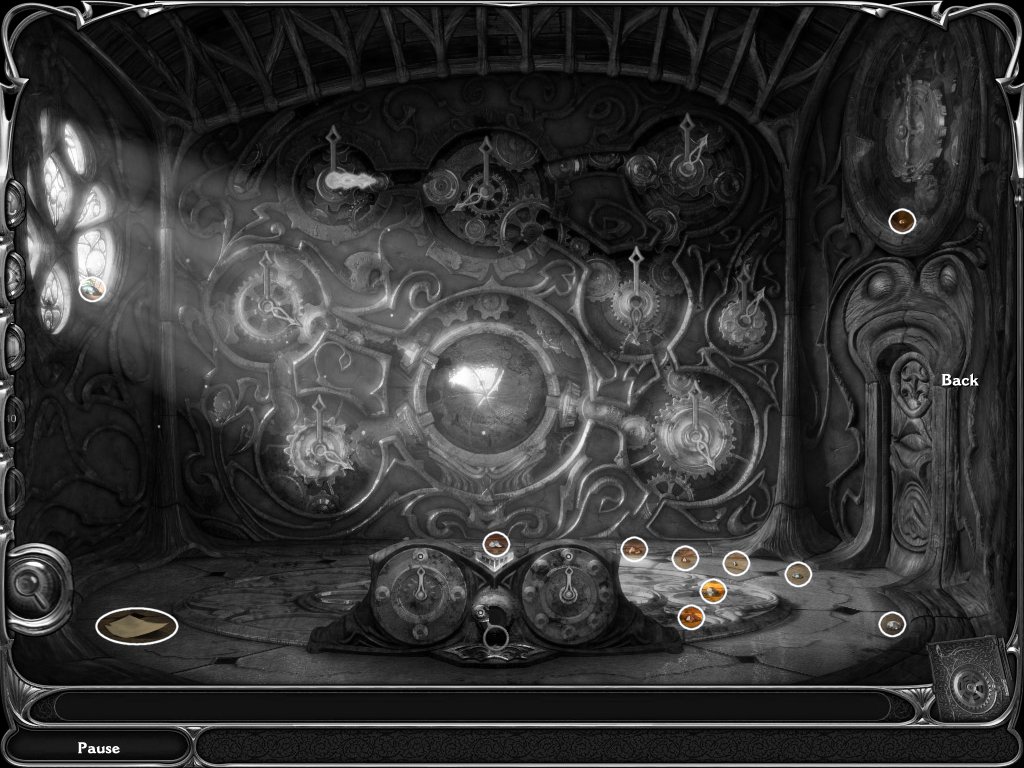
Clock Room
1. find 10 dream pieces
2. you need to set all the clocks to 6 o'clock
· click the silver device on the right and an hour hand will light up
· now click the switch in the middle to move the hand to 6
· continue to do this until all the clocks are set to 6
· the gold device will make the hands move faster or slower
· take the colored stones
3. go back to the airship
Airship
1. refuel the airship
2. go to the map and use the reveal dream jewel
3. fly to the new coordinates
Chapter 4
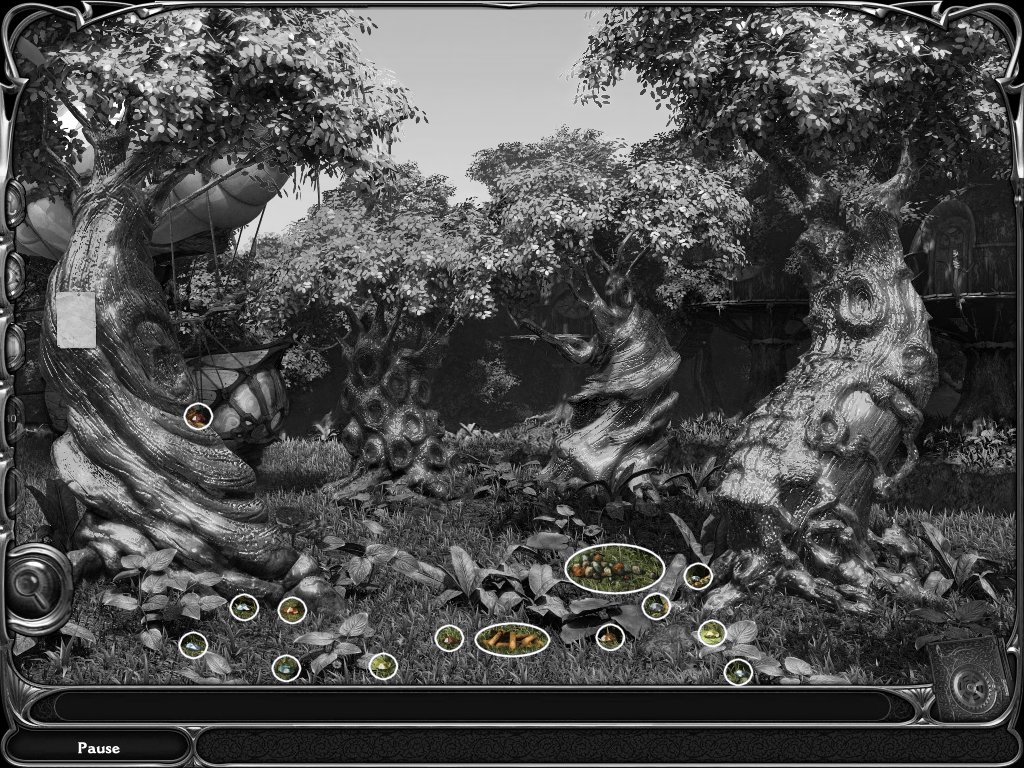
Trees
1. find 12 dream pieces
2. take the colored stones
3. pick up the pile of sticks
4. use the transmute dream jewel
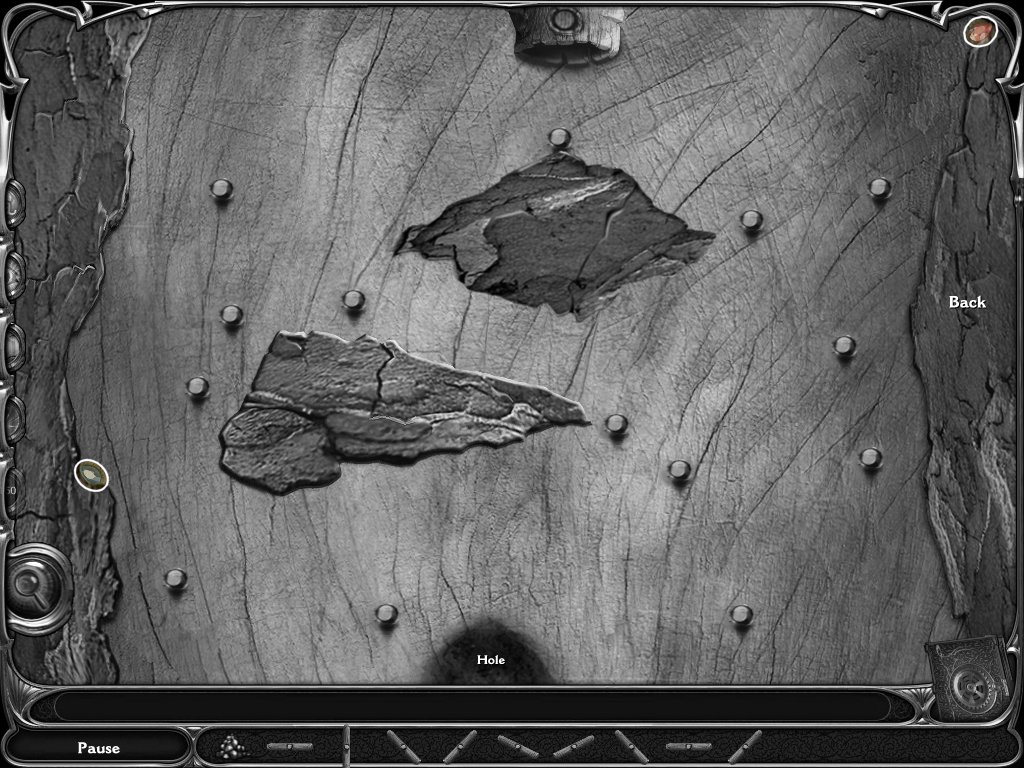
5. examine the left tree
· find 2 dream pieces
· push the button and a nut falls out
· the object is to get the nut from the tube into the hole at the bottom
· we need to make a path for the nut
· use the sticks and place them on the pegs
· solution: see screenshot
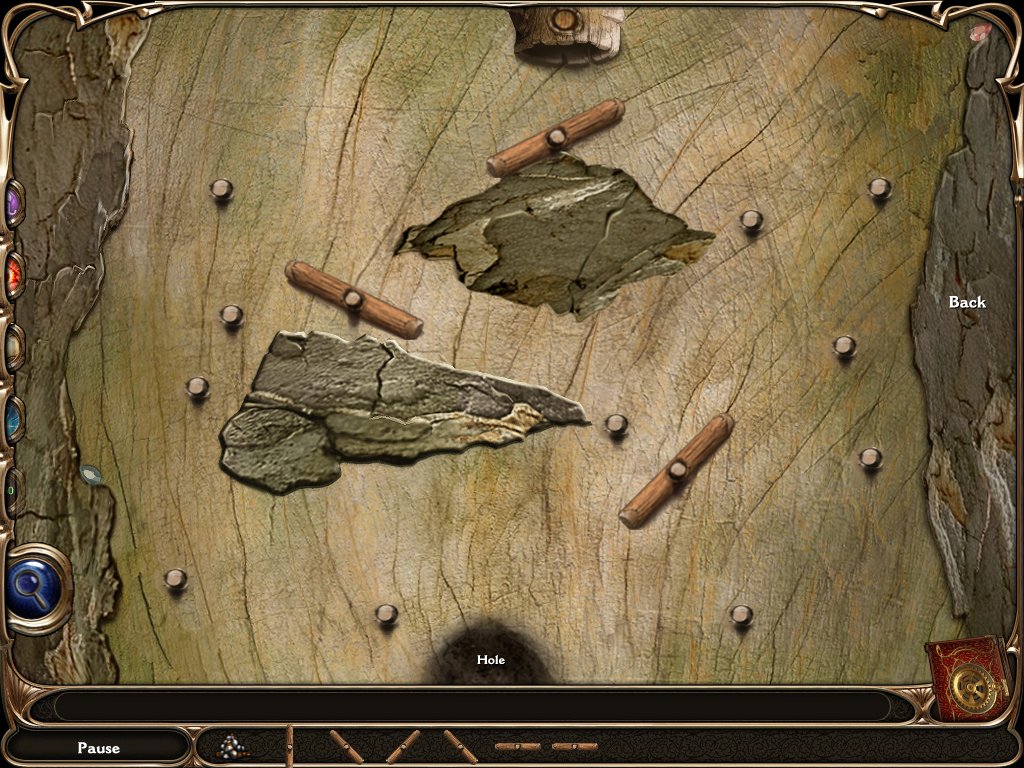
6. examine the next tree – second from left
· find 2 dream pieces
· solution: see screenshot
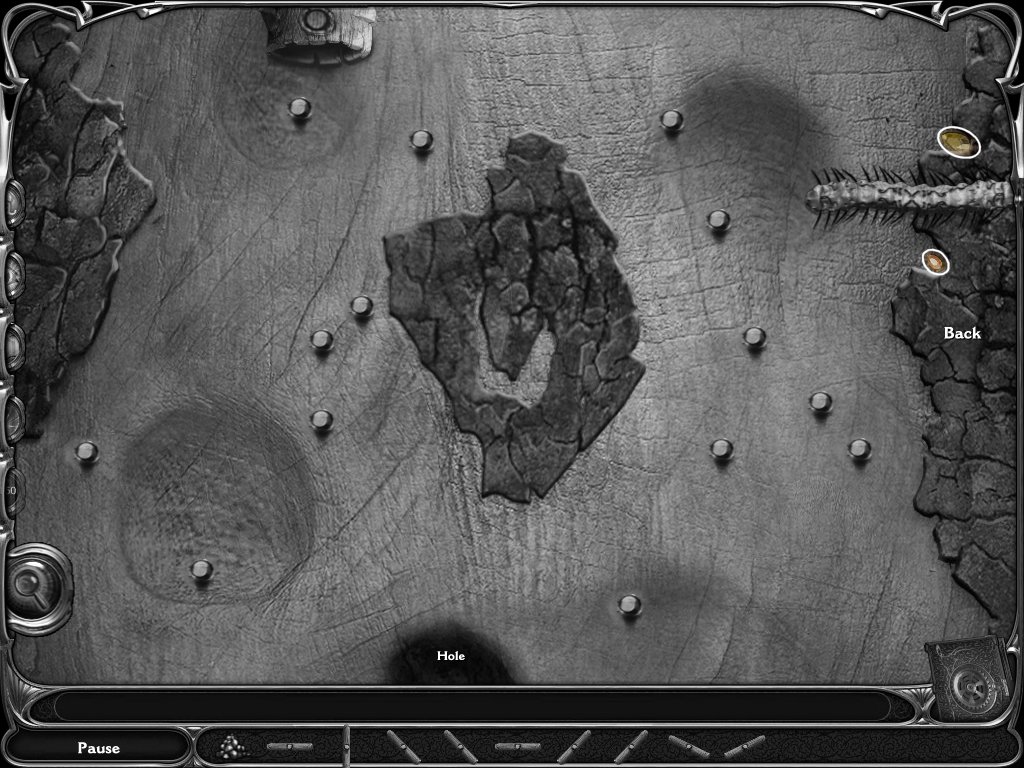
7. examine the next tree – third from left
· find 2 dream piece
· hint: use the caterpillar
· solution: see screenshot
8. examine the right tree
· find 2 dream pieces
· solution: see screenshot
9. take the key that appears
10. go back to the airship
Airship
1. refuel the airship
2. go to the map and use the reveal dream jewel
3. fly to the new coordinates
Chapter 5
Island
1. find 10 dream pieces
2. enter the castle
Castle
1. use brilliance dream jewel
2. take the colored stones
3. find 8 dream pieces
4. take the 2 metal cylinders
5. take the hammer
6. place the metal cylinders on the machine
7. use the hammer on the crystal mountain
8. exit out and upstairs
Upstairs
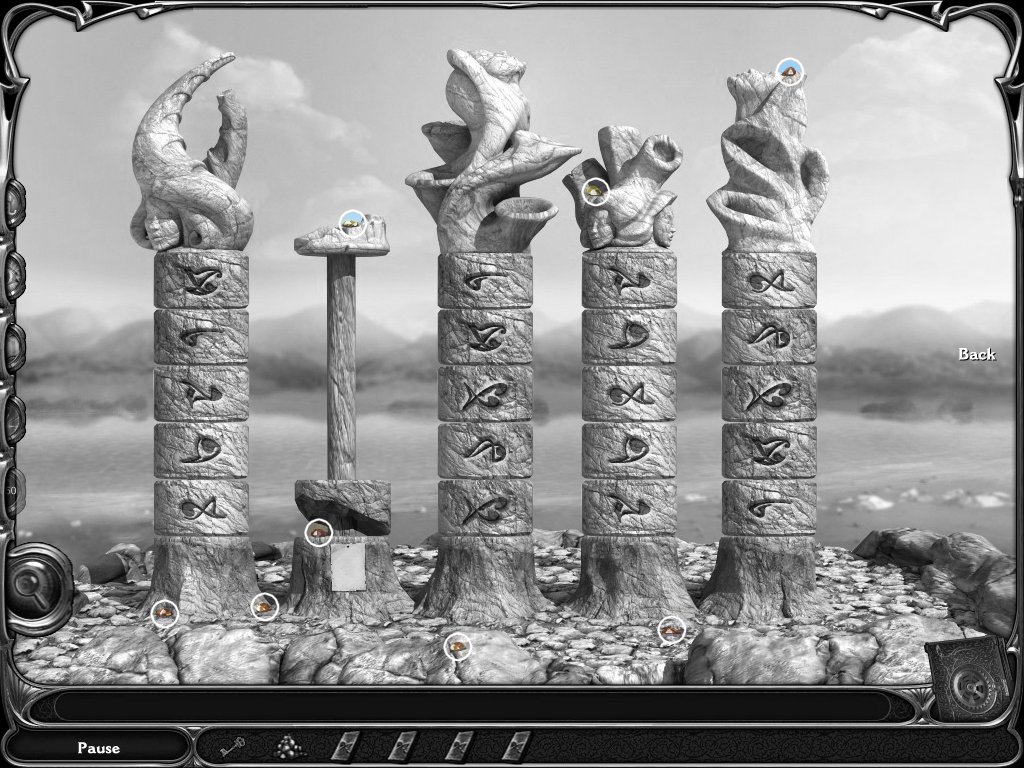
1. find 8 dream pieces
2. turn each of the column pieces until they turn green
3. some stones will turn other stones
4. make a note of all the symbols in order
5. go back inside the castle
Castle
1. click on the metal cylinders
2. rotate them to match the symbols on the first column
3. put the blue disc in the machine
4. pull the lever
5. repeat this for all 4 columns
6. tip: if you mess up, go outside, examine the left of the roof, and there will be rectangles – place them inside the rectangles to clear them and start over!
7. exit outside
Island
1. examine the left side of the roof
2. collect 8 dream pieces
3. place the first blue crystal in the first slot
4. exit back out
5. find all the broken pieces
6. repair the statues
7. go back to the roof
8. replace the remaining 3 blue crystals
9. return to the airship
Airship
1. refuel the airship
2. go back to the map and use the reveal dream jewel
3. fly to the new coordinates
Chapter 6
Water
1. pick up the colored stones
2. find 13 dream pieces
3. pick up the 3 pipe pieces
4. pick up the small key
5. replace the broken pipe attached to the small hut
6. use the thunder dream jewel
7. use the key on the small hut
8. go downstairs
Hut
1. use the brilliance dream jewel
2. find 10 dream pieces
3. pick up 6 boards
4. pick up the owl head, cup, bull head, chalice, and vase
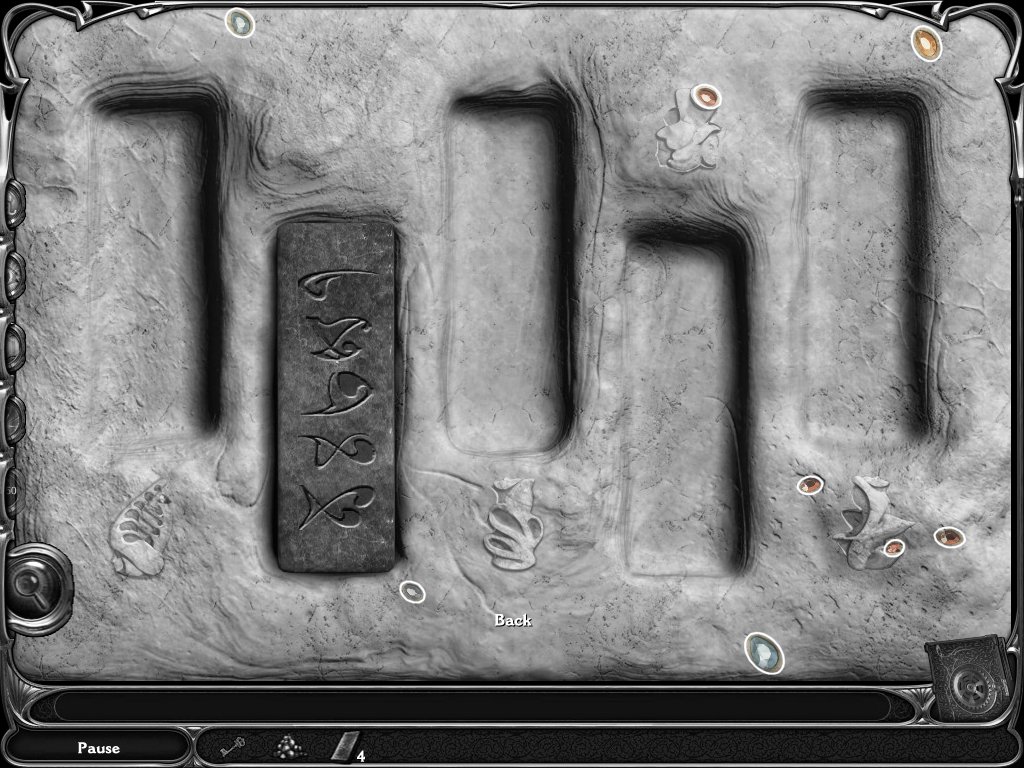
5. examine the wooden wheel
6. make note of the symbols
7. use the wood planks to create one of the symbols
8. place the planks into the slots on the machine at left
9. pull the lever
10. try and find which item balances the scale
11. listen for a bell
12. place the item that balances on the wooden wheel
13. make sure its place on the symbol you created with the planks
14. continue to do this until all the items are gone
15. once you receive the key exit back to the airship
Airship
1. refuel the airship
2. set the coordinates to the Clockmaker's
3. fly!
Chapter 7
Clockmakers
1. go upstairs
2. examine the top door
3. collect 3 dream pieces – sorry no screenshot
4. exit back and find the clock pieces
5. replace the pieces on door
6. replay the tune
7. enter the clock tower
Clock Tower
1. use the brilliance dream jewel
2. find 5 dream pieces
3. pick up the iron key
4. unlock the left door
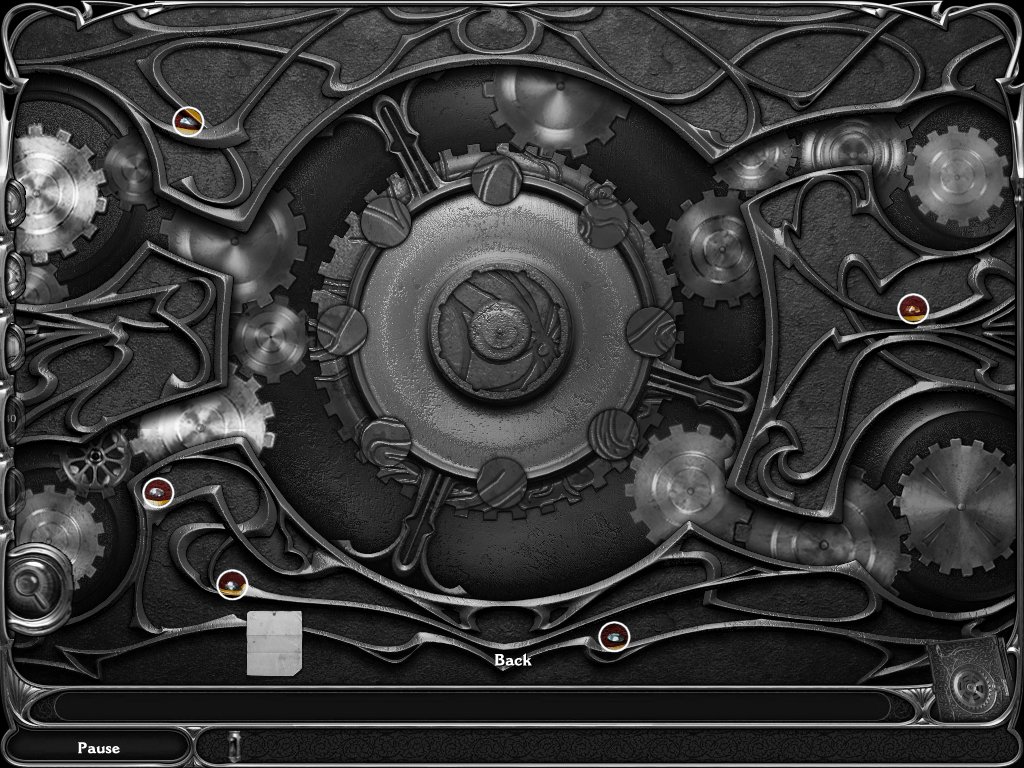
5. use the iron key to unlock the gear
6. put all the gears back properly
7. turn the machine on
8. unlock the middle door
9. put all the gears back properly
10. unlock the right door
11. put all the gears back properly
12. exit back to the airship
Airship
1. refuel the airship
2. you may need to go back and get colored stones
3. set the coordinates for home
4. fly home!
To be continued...
Overview: In the fourth installed of the Dream Chronicles series, you play the part of Lilith's daughter. She had a dream and everyone vanished, leaving her all alone her beloved town of Wish. Can you help her find her way?
Dream Journal: This will guide you through the game, check it often. It also holds the Dream Jewels, see below.
Dream Pieces: These are sparkling objects that go in your Dream Journal. They are needed to complete Dream Jewels to help you through the game.
Dream Jewels: Always pick these up right away, you can always return to where you saw them!
· Decipher: Deciphers strange symbols.
· Reveal: Shows things which are hidden.
· Transmute: Turns gold into wood.
· Brilliance: Turns dark into light.
· Thunder: Creates storms.
Letters: You will find letters in every locale, read them!
Locate: The magnifying glass helps you find dream pieces.
Levels:
Chapter 1
Wish
1. pick up the gear
2. use the gear on the side of the box
3. receive the dream journal
4. pick up the pieces of the statue
5. repair the statue
6. enter the school
School
1. find 11 dream pieces
2. examine the chalkboard
3. find 2 dream pieces
4. pull the handle
5. use the first dream jewel
6. examine the cabinet
7. you need to find a code
8. examine the book on the left, 2nd desk from the front – puzzle
· use the decipher dream jewel
· pick up 4 dream pieces
· figure out which letters belong on the right page
· hint: mathematical problem
· solution: E K P
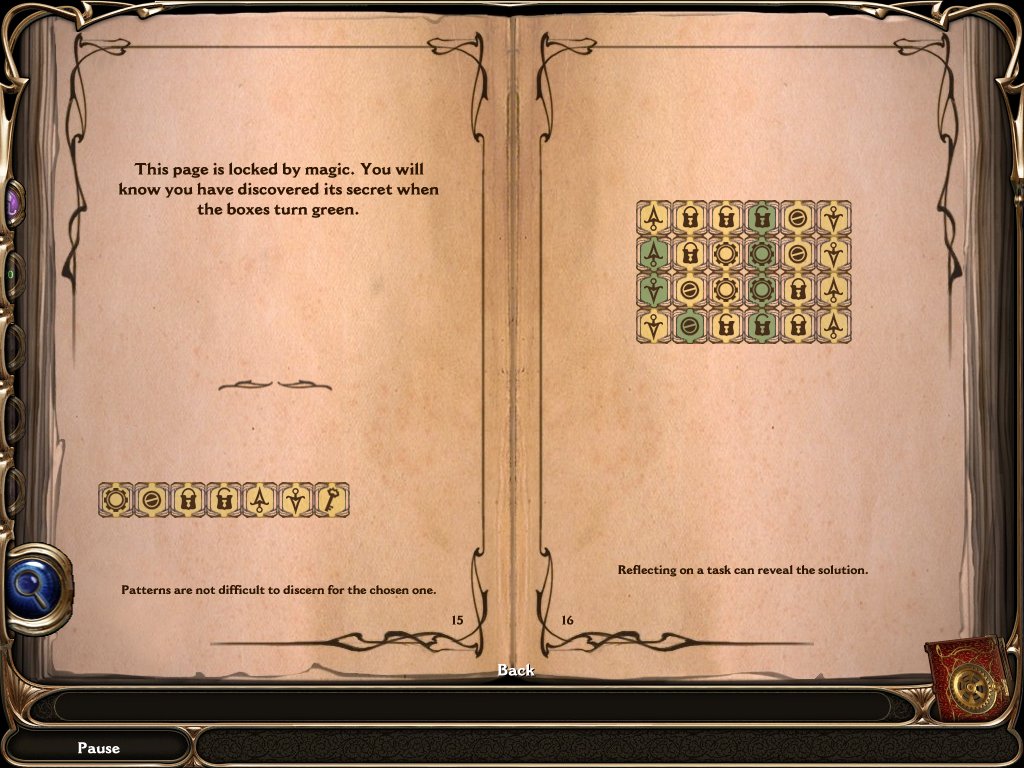
9. examine the book lying on right, 2nd desk from the front –puzzle
· use the decipher dream jewel
· figure out which symbol belongs in the pattern
· hint: mirror image
· solution: see screenshot
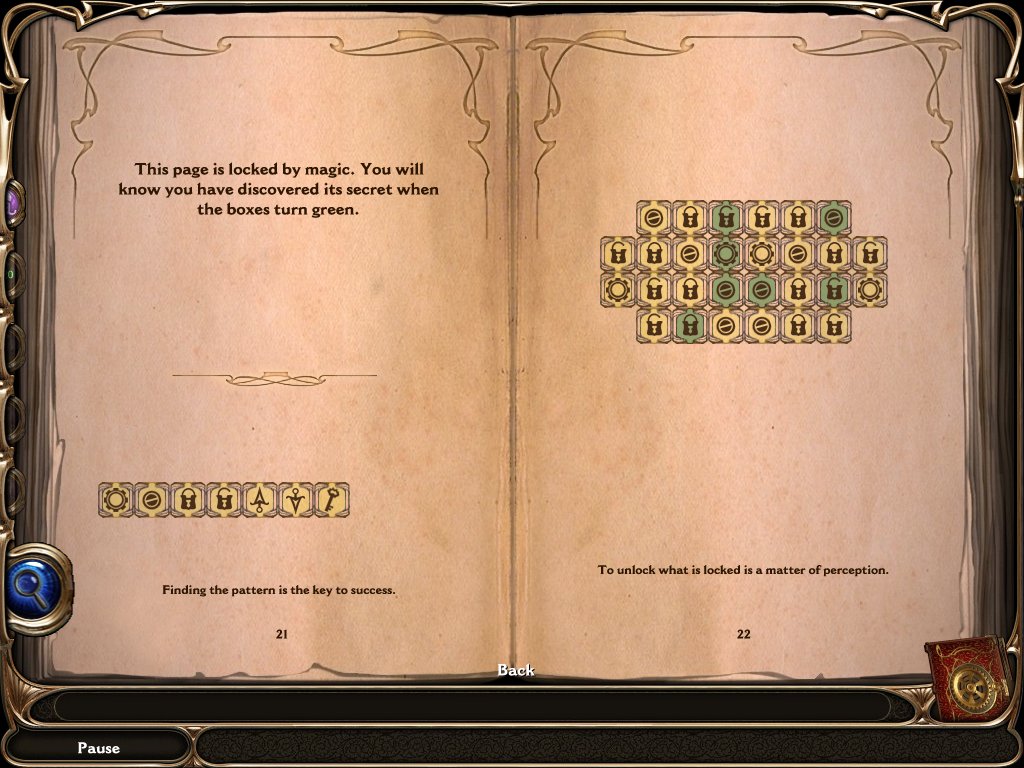
10. examine the book lying on the right, 4th desk from the front
· use the decipher dream jewel
· figure out which symbol belongs in the pattern
· hint: opposite mirror image
· solution: see screen shot
11. go back to the cabinet
12. insert the symbols the books revealed
· solution: varies per player
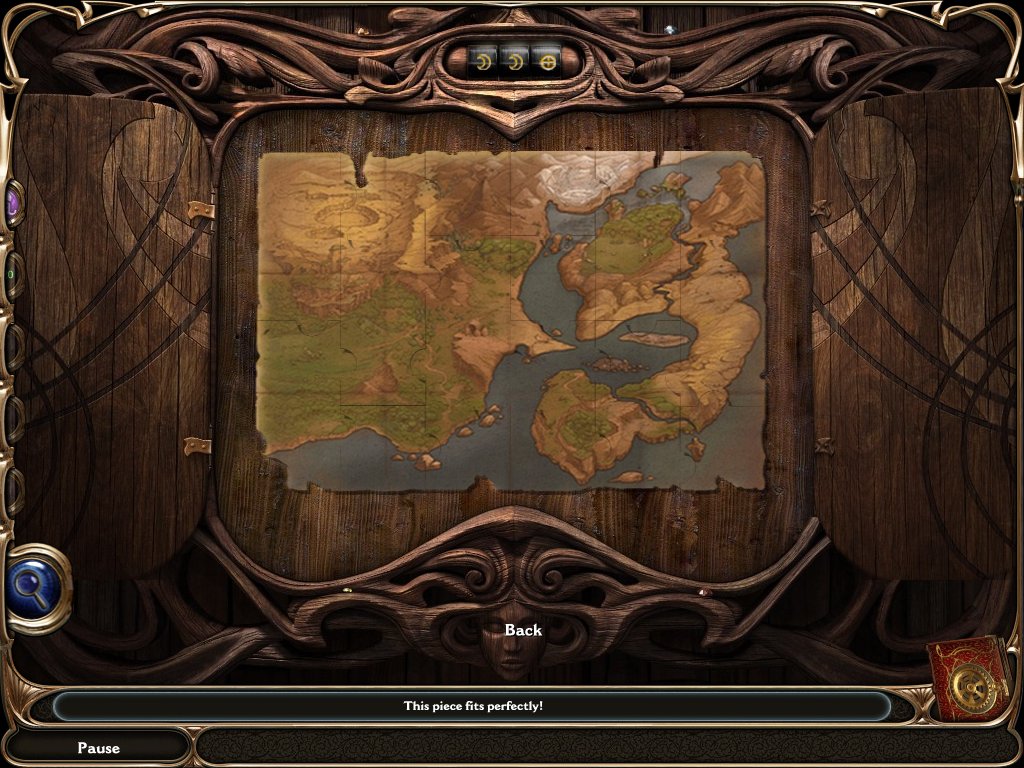
13. find the map pieces

14. go back to the cabinet
15. reassemble the map
16. find 4 dream pieces
17. examine the chalkboard
· use the decipher dream jewel
· look at the images on the left side
· find the words of those items in the word search
· words: vary per player

18. enter the portal
Chapter 2
Airship
1. read the letter
2. find 8 dream pieces
3. pick up the large key
4. pick up the colored stones
5. use the large key on the airships door
Inside Airship
1. find 6 dream pieces
2. exit outside
Airship
1. find the airships pieces
2. repair the ship
3. enter the airship
Inside the Airship
1. place the map on the wall
2. use the reveal dream jewel to find a new location
3. make note of the coordinates
4. examine the device on the right side
· find 6 dream pieces
· place the colored stones into the hole on the right
· clear the stones
· try and clear stones of 3 or more
· you will sometimes have to clear just 1 to line them up
· you must have a full tank!
· tip: leave all the white ones until last
5. examine the control wheel at the front of the ship
6. turn the silver dial to the correct course and the gold dial to the correct heading
7. course and heading very per player
8. pull the lever
Chapter 3
Outside the Clockmaker's
1. find 8 dream pieces
2. examine the door
3. exit back and look at the ground
4. the shadow of the house is pointing to the correct time
5. examine the door again
· use the large button to move the minute hand
· use the small button to move the hour hand
· move the hands until they are the correct time
· solution: 6 o'clock
6. find 5 dream pieces
7. go upstairs
Clockmaker's House
1. find 7 dream pieces
2. examine the left door
· find 3 dream pieces
· exit out
3. find the gears

4. examine the left door again
· place the gears on the door
· move the pieces around so that the gears touch
· they must go from the moving gear to the non-moving gear
· there are multiple solutions
5. enter lobby
Lobby
1. find 12 dream pieces
2. pick up the pipe
3. replace the left pipe
4. pick up the metal bell
5. replace the bell
6. read the book
7. find 5 dream pieces
8. use the reveal dream jewel
· use the letters on the left to decipher the note
· solution: see screenshot
9. examine the mechanism on the wall
· find the 5 dream pieces
· place the missing disc on the puzzle
· rotate the pieces so the grooves on the side line up with the disc
· hint: examine the dream journal it will show you how to arrange the discs
· solution: see screenshot
10. ring the bell
11. talk to the clockmaker
12. exit
Clockmaker's House
1. examine the right door
2. collect 3 dream pieces
3. use the reveal dream jewel
· put the pieces together to reveal a clock
· tip: find the center and work out from there
· solution: see screenshot
4. enter
Clock Room
1. find 10 dream pieces
2. you need to set all the clocks to 6 o'clock
· click the silver device on the right and an hour hand will light up
· now click the switch in the middle to move the hand to 6
· continue to do this until all the clocks are set to 6
· the gold device will make the hands move faster or slower
· take the colored stones
3. go back to the airship
Airship
1. refuel the airship
2. go to the map and use the reveal dream jewel
3. fly to the new coordinates
Chapter 4
Trees
1. find 12 dream pieces
2. take the colored stones
3. pick up the pile of sticks
4. use the transmute dream jewel
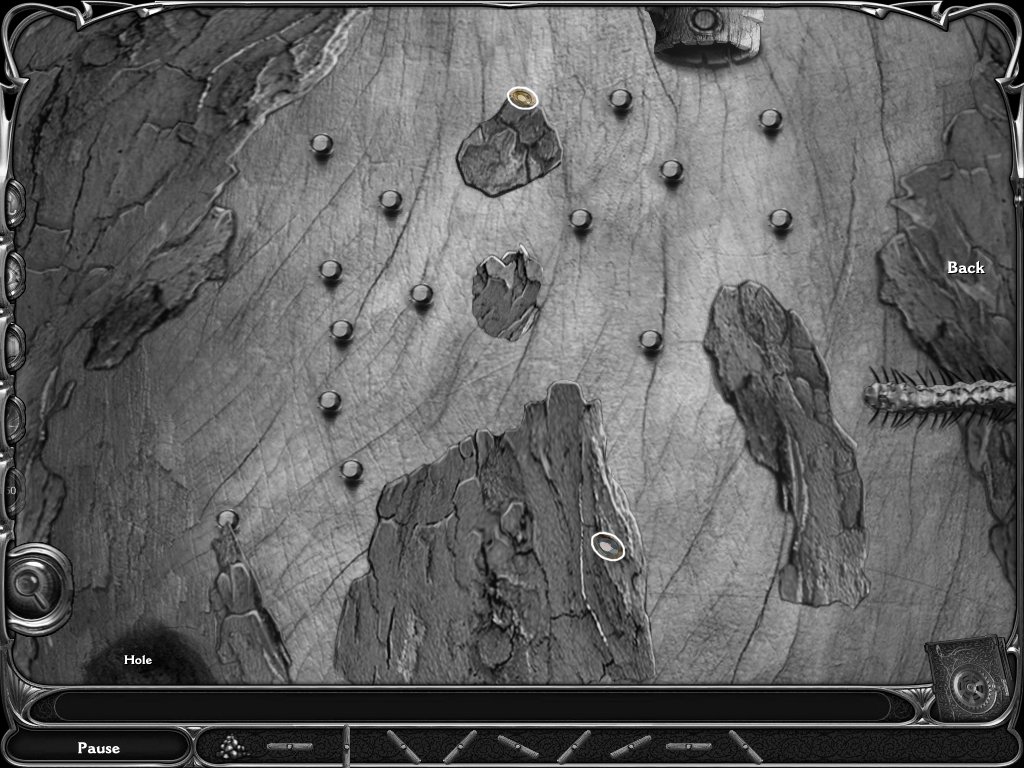
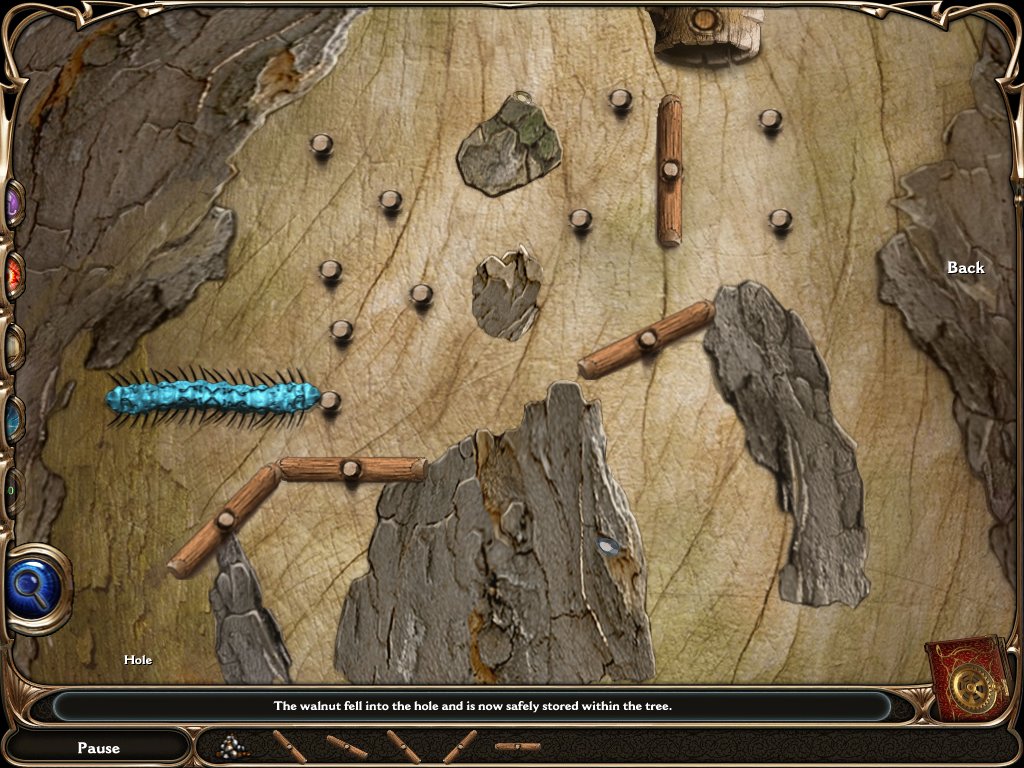
5. examine the left tree
· find 2 dream pieces
· push the button and a nut falls out
· the object is to get the nut from the tube into the hole at the bottom
· we need to make a path for the nut
· use the sticks and place them on the pegs
· solution: see screenshot
6. examine the next tree – second from left
· find 2 dream pieces
· solution: see screenshot

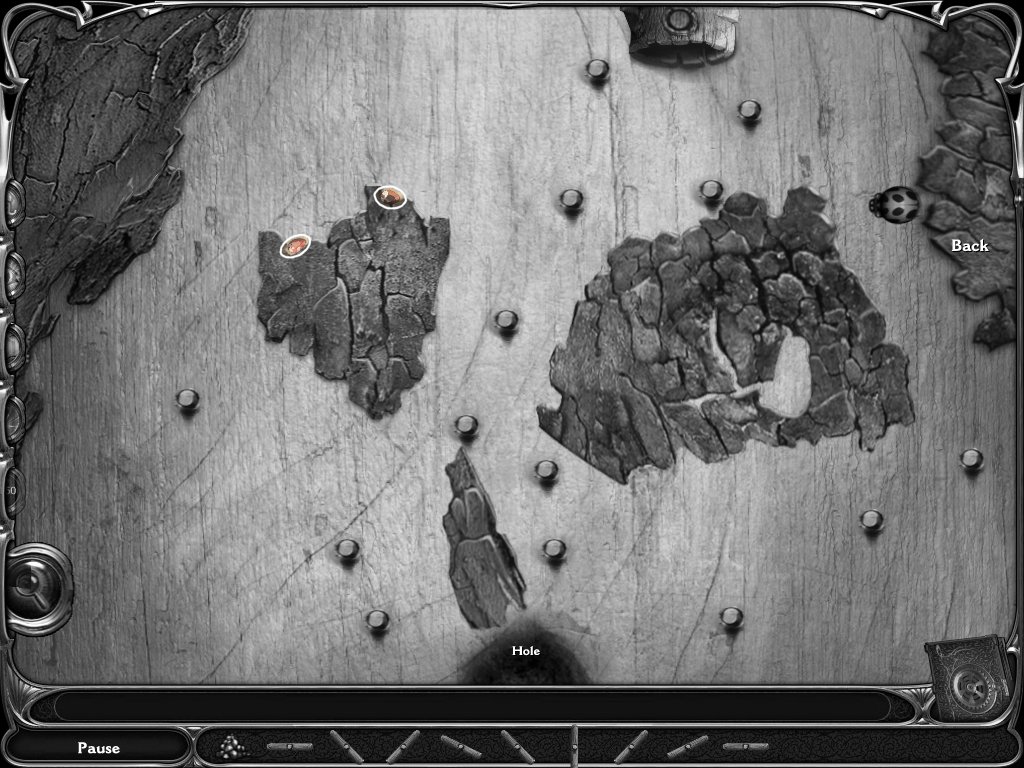
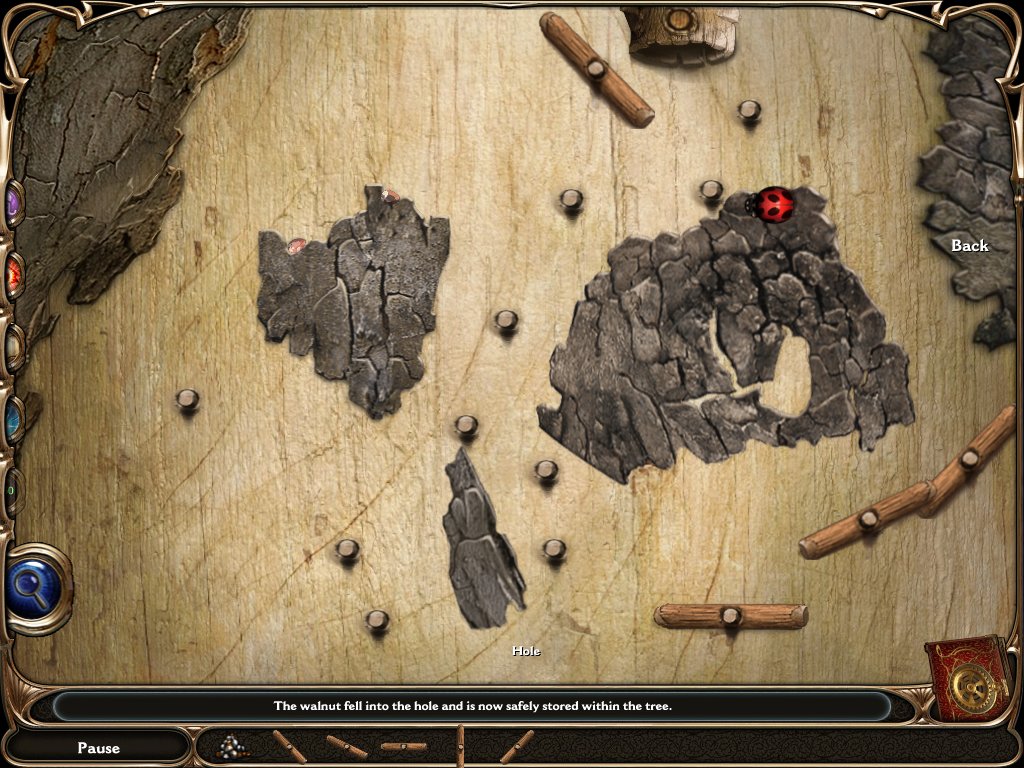
7. examine the next tree – third from left
· find 2 dream piece
· hint: use the caterpillar
· solution: see screenshot
8. examine the right tree
· find 2 dream pieces
· solution: see screenshot
9. take the key that appears
10. go back to the airship
Airship
1. refuel the airship
2. go to the map and use the reveal dream jewel
3. fly to the new coordinates
Chapter 5
Island
1. find 10 dream pieces
2. enter the castle
Castle
1. use brilliance dream jewel
2. take the colored stones
3. find 8 dream pieces
4. take the 2 metal cylinders
5. take the hammer
6. place the metal cylinders on the machine
7. use the hammer on the crystal mountain
8. exit out and upstairs
Upstairs
1. find 8 dream pieces
2. turn each of the column pieces until they turn green
3. some stones will turn other stones
4. make a note of all the symbols in order
5. go back inside the castle
Castle
1. click on the metal cylinders
2. rotate them to match the symbols on the first column
3. put the blue disc in the machine
4. pull the lever
5. repeat this for all 4 columns
6. tip: if you mess up, go outside, examine the left of the roof, and there will be rectangles – place them inside the rectangles to clear them and start over!
7. exit outside
Island
1. examine the left side of the roof
2. collect 8 dream pieces
3. place the first blue crystal in the first slot
4. exit back out
5. find all the broken pieces
6. repair the statues
7. go back to the roof
8. replace the remaining 3 blue crystals
9. return to the airship
Airship
1. refuel the airship
2. go back to the map and use the reveal dream jewel
3. fly to the new coordinates
Chapter 6
Water
1. pick up the colored stones
2. find 13 dream pieces
3. pick up the 3 pipe pieces
4. pick up the small key
5. replace the broken pipe attached to the small hut
6. use the thunder dream jewel
7. use the key on the small hut
8. go downstairs
Hut
1. use the brilliance dream jewel
2. find 10 dream pieces
3. pick up 6 boards
4. pick up the owl head, cup, bull head, chalice, and vase
5. examine the wooden wheel
6. make note of the symbols
7. use the wood planks to create one of the symbols
8. place the planks into the slots on the machine at left
9. pull the lever
10. try and find which item balances the scale
11. listen for a bell
12. place the item that balances on the wooden wheel
13. make sure its place on the symbol you created with the planks
14. continue to do this until all the items are gone
15. once you receive the key exit back to the airship
Airship
1. refuel the airship
2. set the coordinates to the Clockmaker's
3. fly!
Chapter 7
Clockmakers
1. go upstairs
2. examine the top door
3. collect 3 dream pieces – sorry no screenshot
4. exit back and find the clock pieces
5. replace the pieces on door
6. replay the tune
7. enter the clock tower
Clock Tower
1. use the brilliance dream jewel
2. find 5 dream pieces
3. pick up the iron key

4. unlock the left door
5. use the iron key to unlock the gear
6. put all the gears back properly
7. turn the machine on
8. unlock the middle door
9. put all the gears back properly
10. unlock the right door
11. put all the gears back properly
12. exit back to the airship
Airship
1. refuel the airship
2. you may need to go back and get colored stones
3. set the coordinates for home
4. fly home!
To be continued...
Content(s) of this game guide may not be copied or
published on any other site without permission from Casual Game Guides.
©CasualGameGuides.com 2006 - 2021