Time Mysteries: The Final Enigma: Chapter Seven: The Cursed Medallion
Allow our Time Mysteries: The Final Enigma Walkthrough to be your companion as you race to repair the past and save the future. Merlin, the most powerful wizard of all time, has been defeated, and you’ll need every trick in the book to face down the one responsible: the evil Man in Black, who has altered the past in the hopes of creating a magical apocalypse. Our insider tips, step-by-step instructions, and custom screenshots will help you as you race to set the past to rights before the future is lost forever.
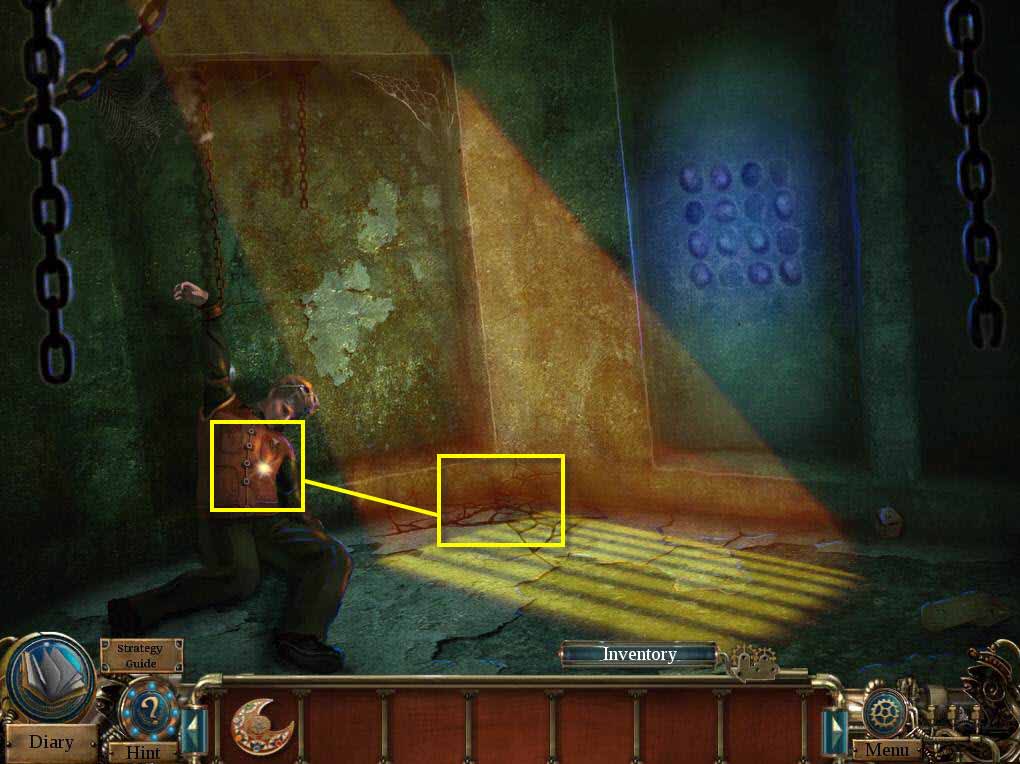
- Click on Michael to zoom in.
- Click on his pocket to open it.
- Take MICHAEL'S KNIFE.
- Click on the floor to zoom in.
- Use MICHAEL'S KNIFE to break the crack.
- Click to move the rocks.
-
Take the LODESTONE.
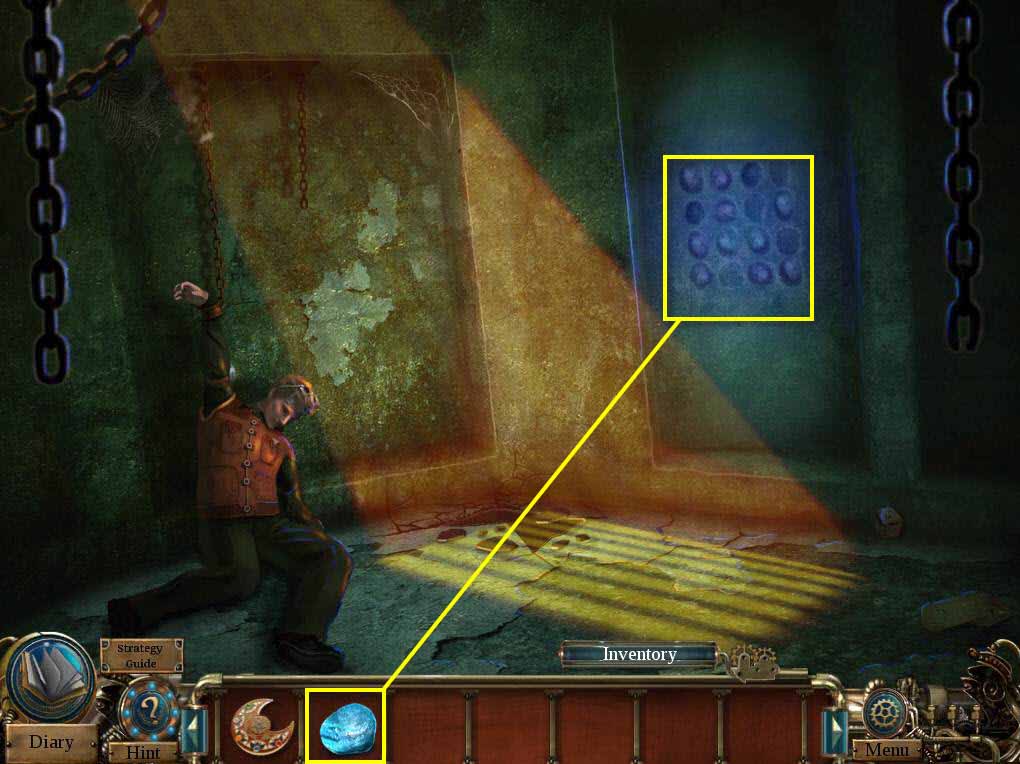
- Click to zoom in on the wall.
- Use the LODESTONE on the empty niche.
-
This will start a mini-game.
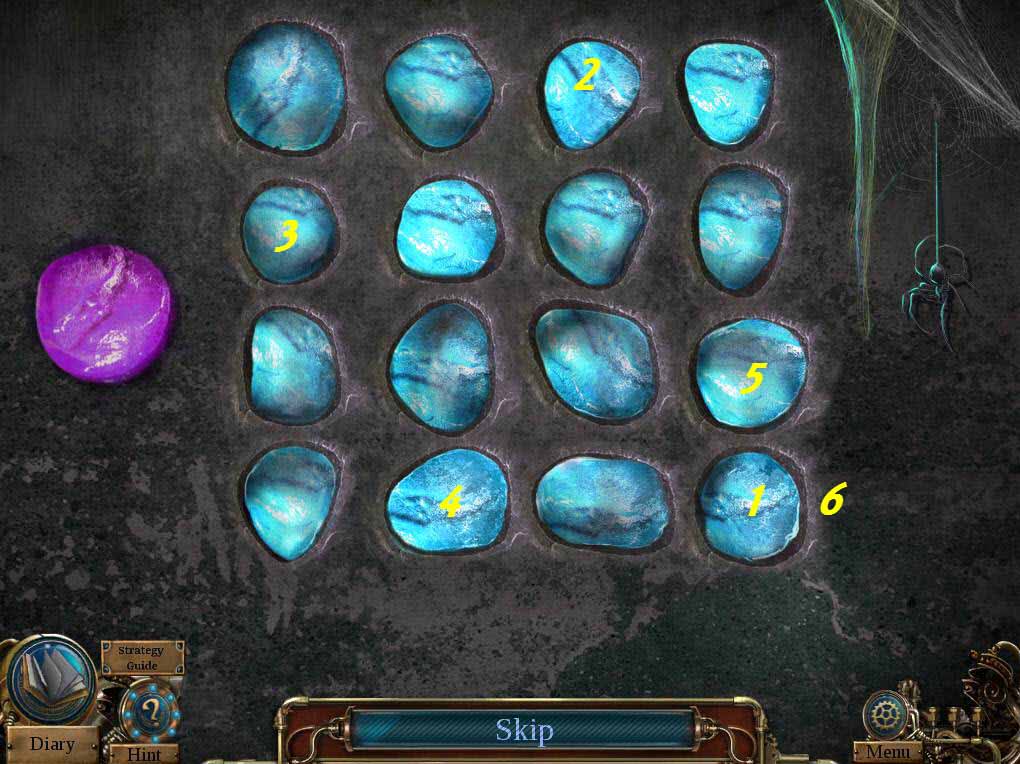
- The goal of the game is to click the stones in the right order.
- See the screenshot for the solution.
- When you're done, go forward.
- Watch the cut scene and then head to the right.
-
Click on the sparkles to play the HOS.
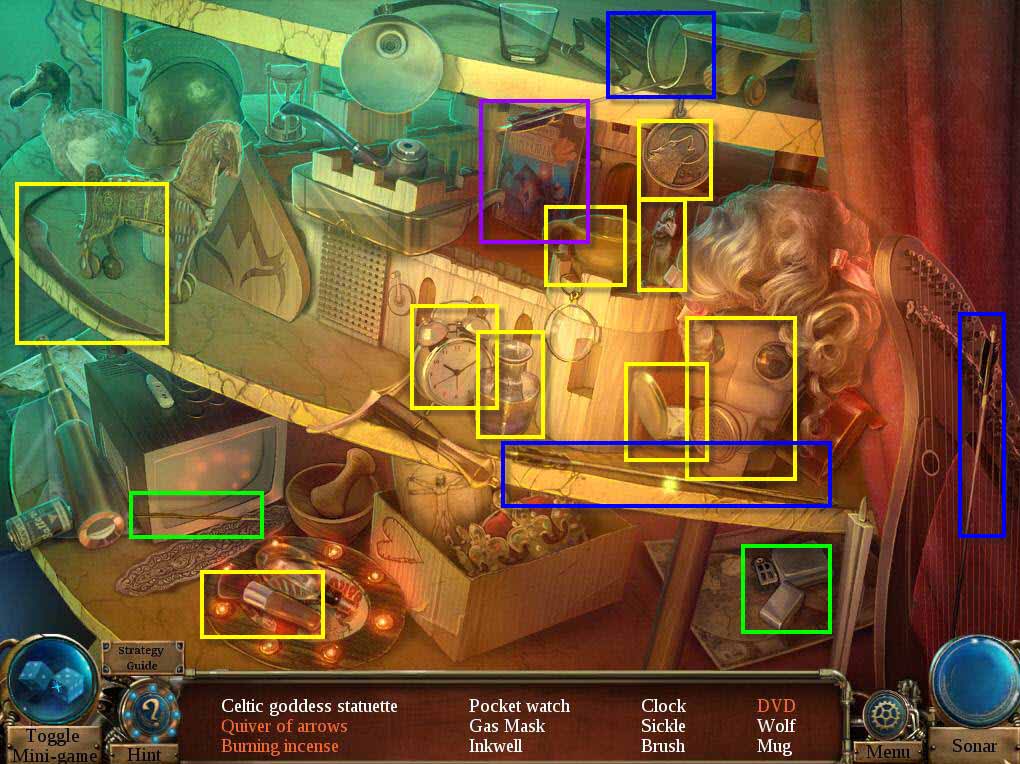
- Find all the items on the list.
- You will receive a CELTIC GODDESS STATUETTE.
-
Go back one screen.
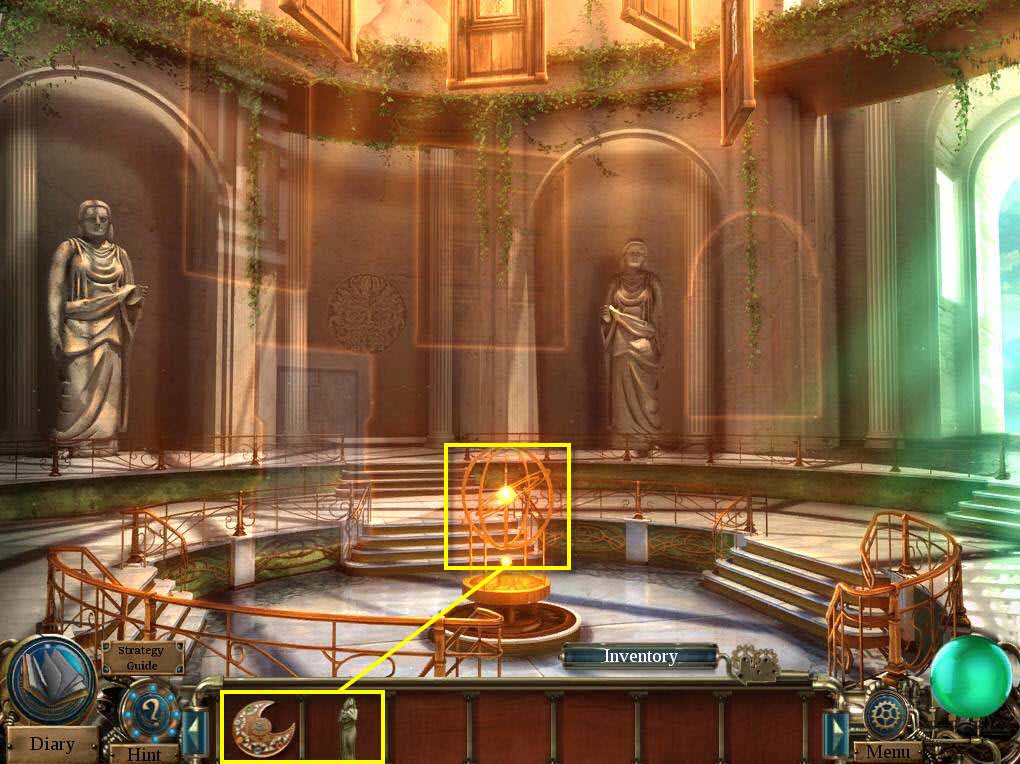
- Click on the globe to zoom in.
- Use the MEDALLION on the empty slot.
- Use the CELTIC GODDESS STATUETTE.
- Go through the door to the Celtic Times.
- Enter Merlin's Hut.
- Click on Nimue to talk to her.
-
Click on the sparkles to play the HOS.
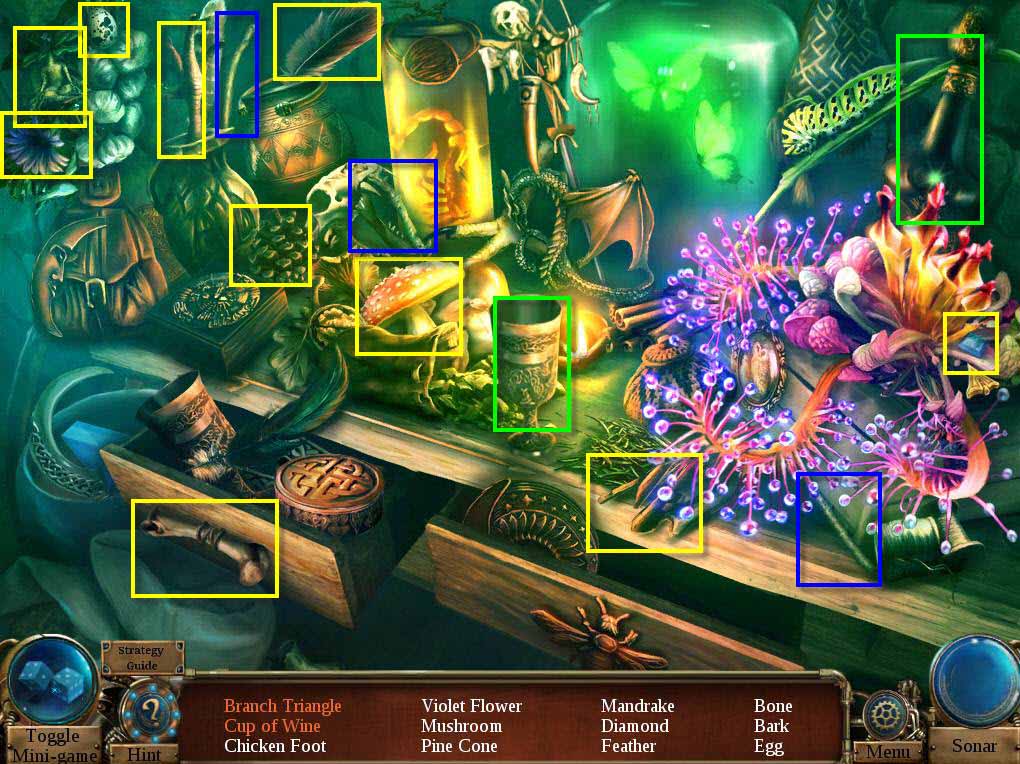
- Find all the items on the list.
- You will receive the DIAMOND.
- Click on Merlin's Crystal Ball.
-
Go back to the Time Museum Chamber.
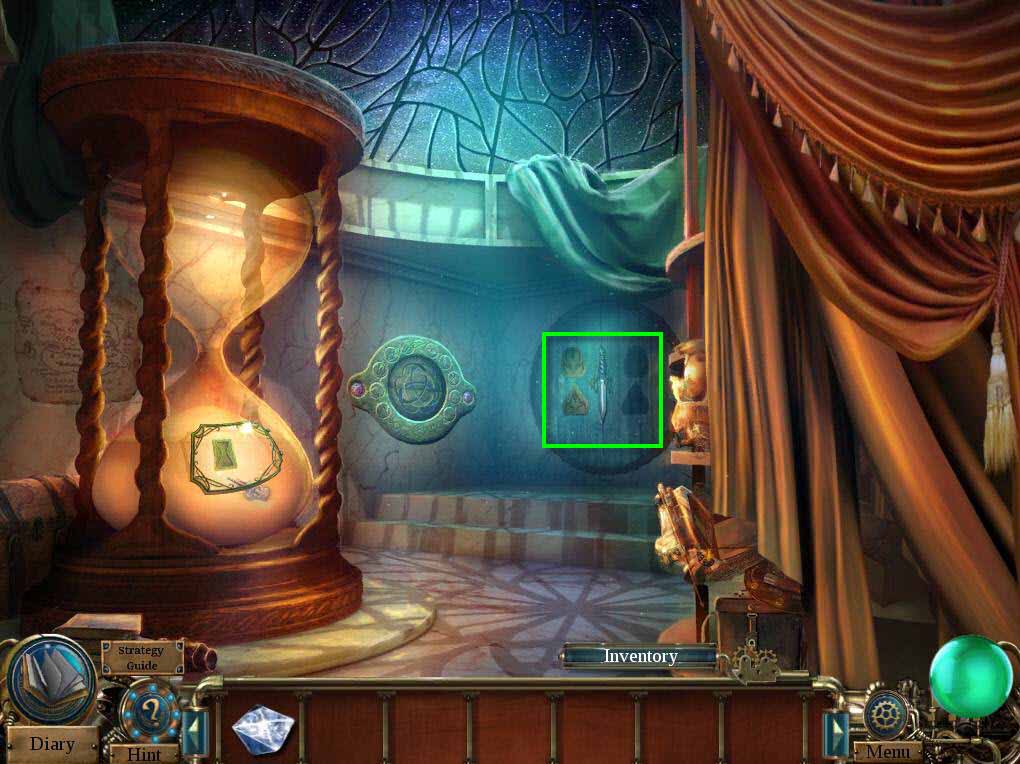
- Click on the wall to zoom in.
- Take the CELTIC DAGGER.
- Go back one screen.
- Go to the Celtic Times.
-
Enter the hut.
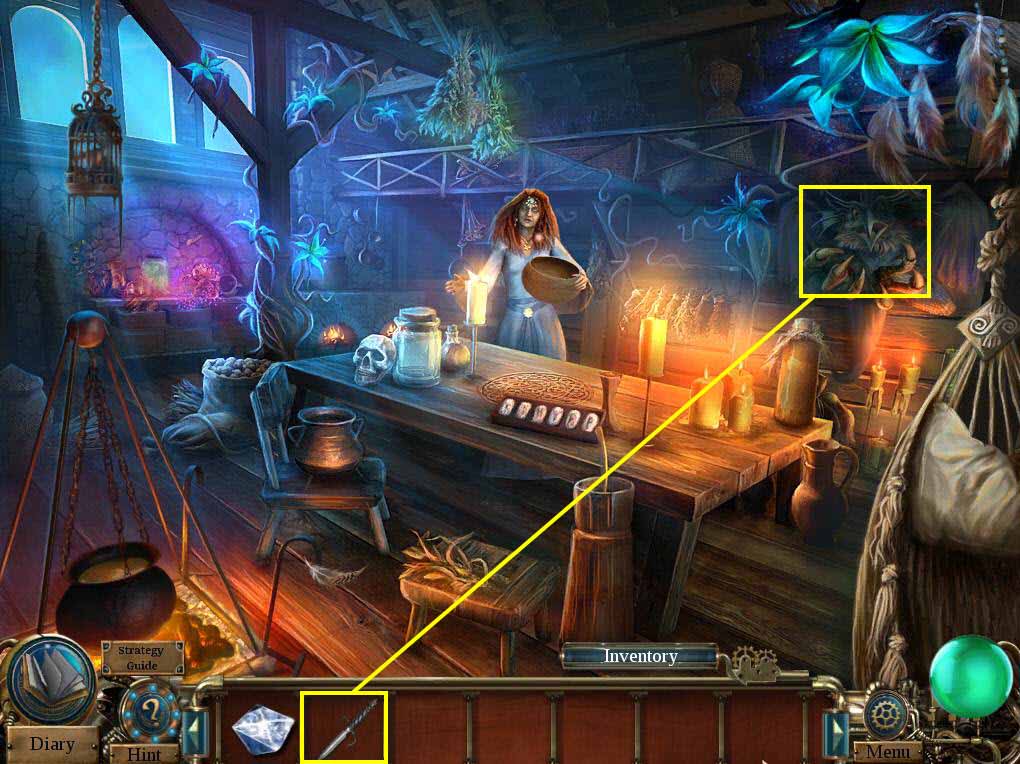
- Click on the creature on the right to zoom in.
- Use the CELTIC DAGGER on the container.
- Take the CHEST TOKEN.
- Go back to the Time Museum Chamber.
-
Click on the sparkles to play the HOS.
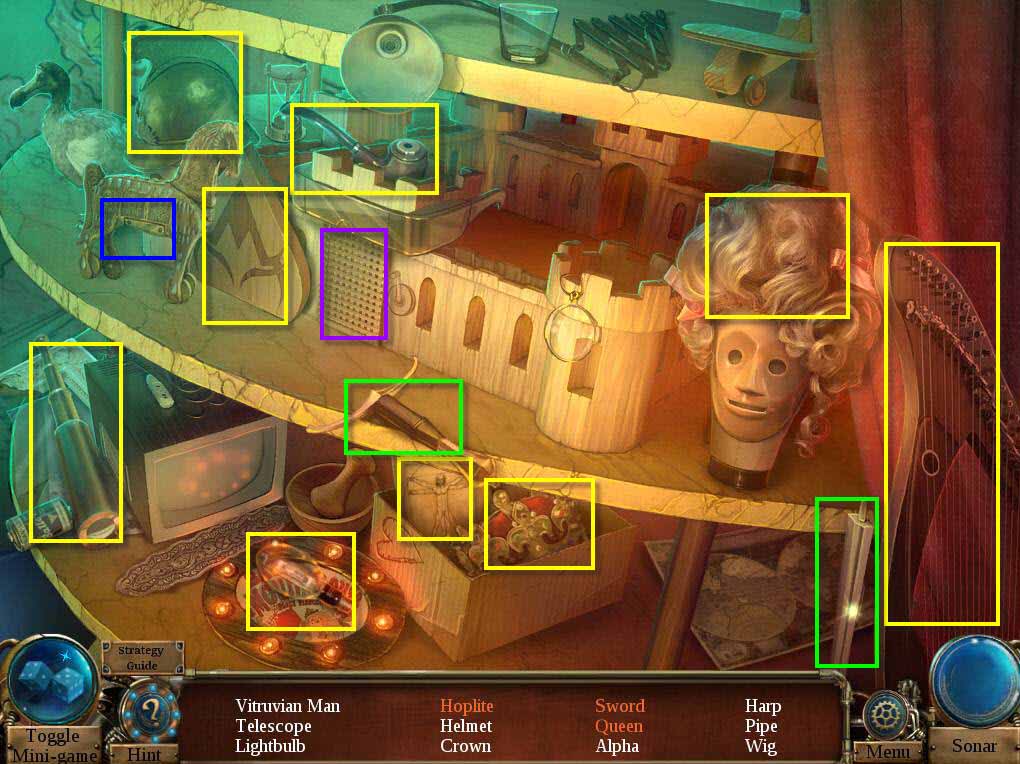
- Find all the items on the list.
-
You will receive the ALPHA.

- Click on the token panel to zoom in.
- Use the CHEST TOKEN on the slot.
-
This will start a mini-game.
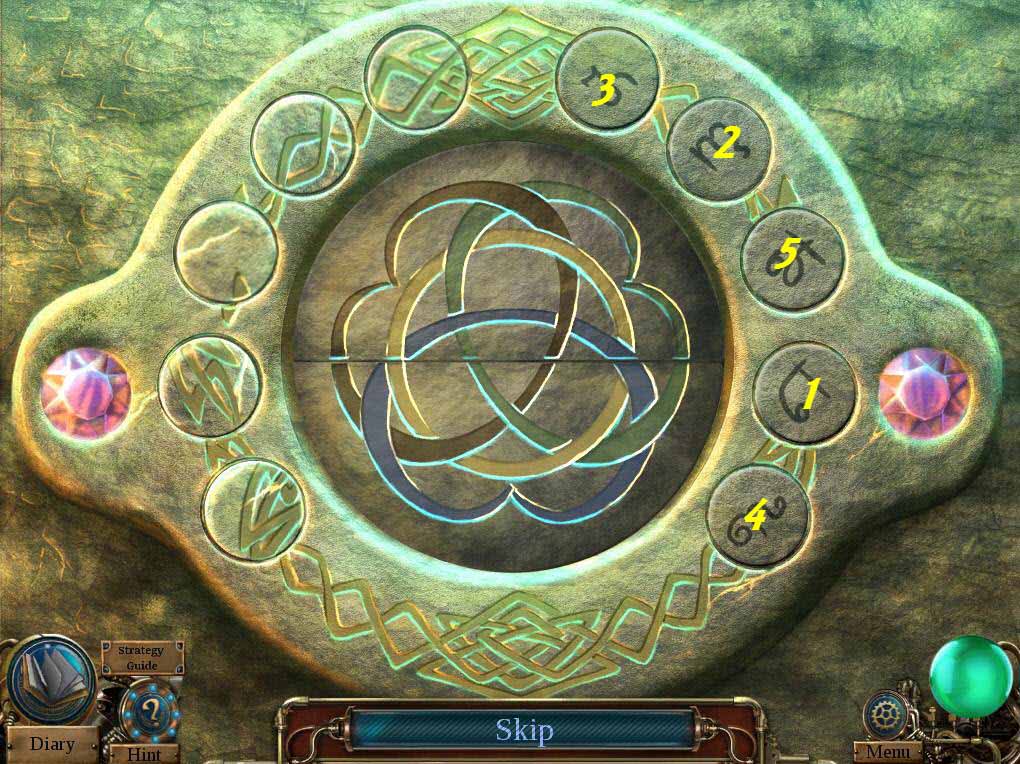
- This puzzle has three sections to it.
-
In the first part, you need to click the buttons on the right in the correct order.
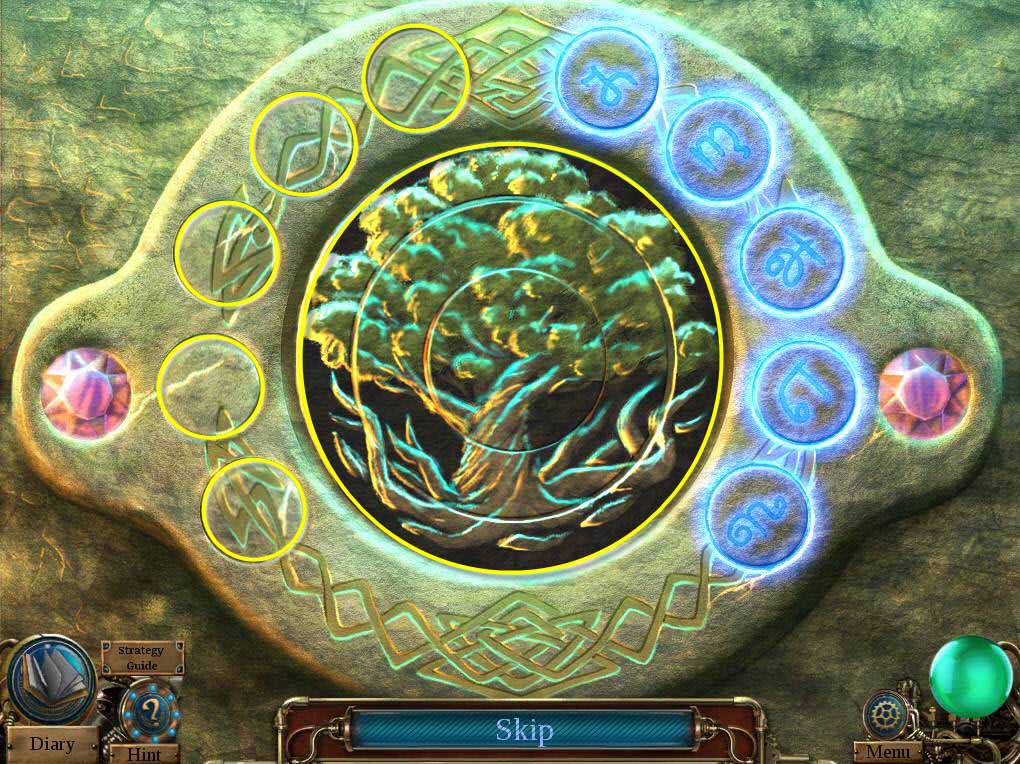
- In the second part, you need to move the times to the correct places.
- And finally, you need to rotate the parts to create the picture.
-
Take the OMEGA.
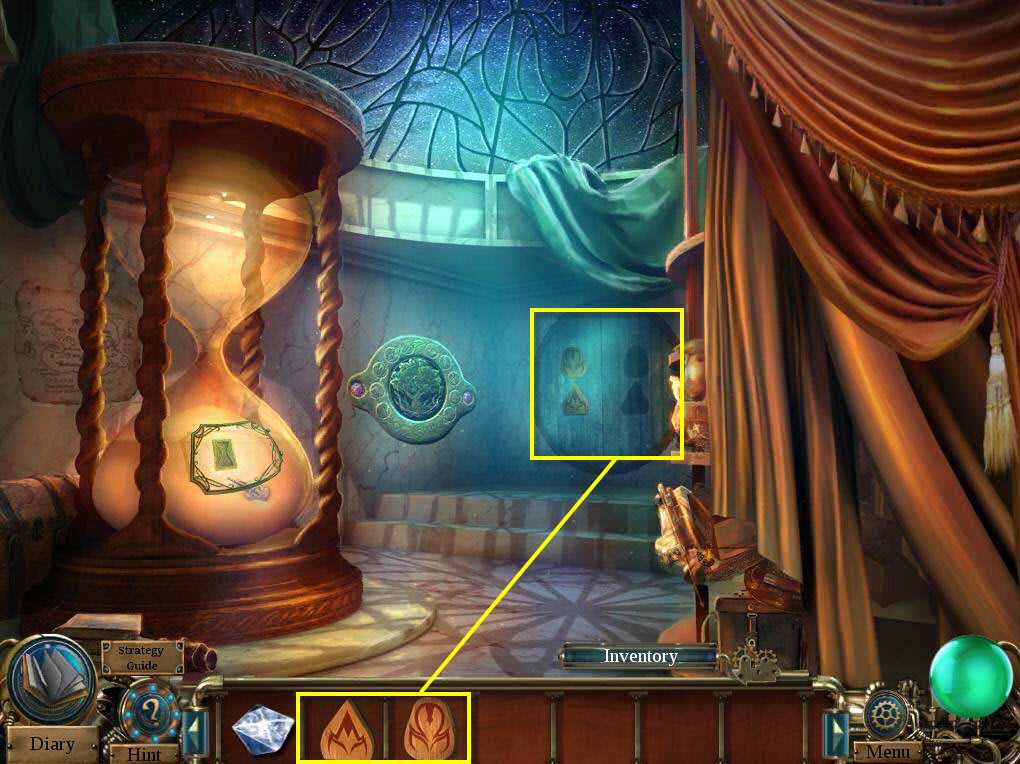
- Click on the wall to zoom in.
- Use the ALPHA and the OMEGA on the slots.
- Click on the box on the top shelf to open it.
- Take the handle and use i ton the box on the bottom shelf.
- Click to turn the handle.
- Take the sword from the jack-in-the-box.
- Use it on the slot in the stone.
- Take the key and use it on the box on the middle shelf.
-
Take the HOURGLASS TOKEN.
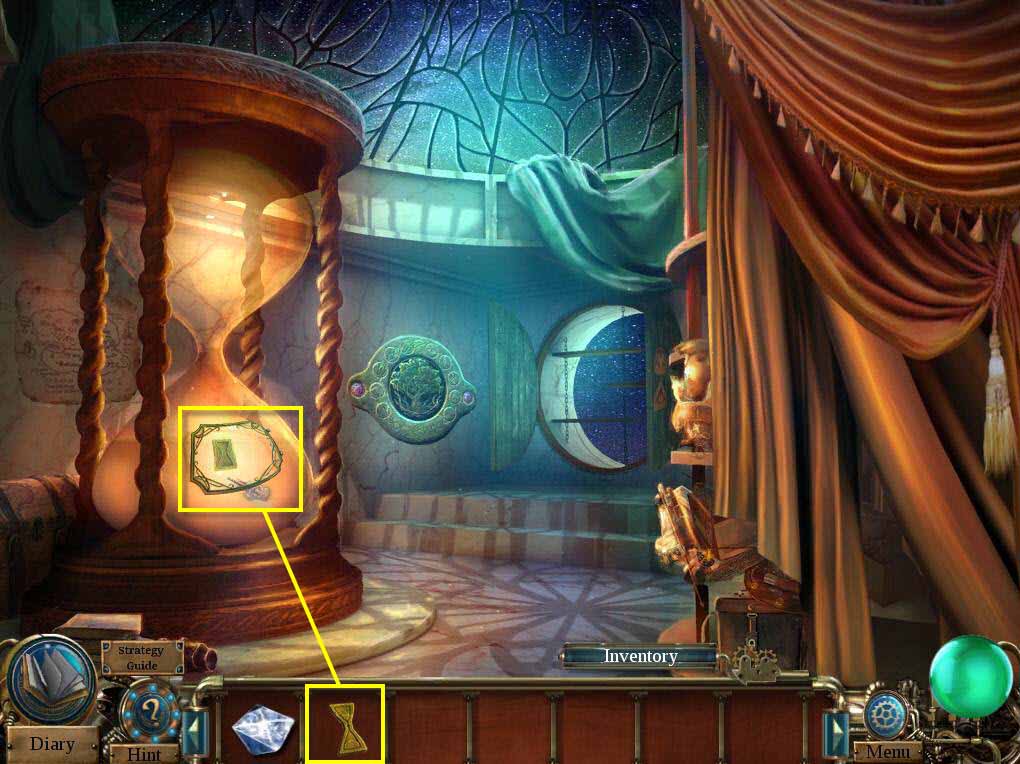
- Click on the hourglass to zoom in.
- Use the HOURGLASS TOKEN on the empty slot.
- Click to open the panel.
- Take the MOSCOW CHURCH FIGURINE.
-
Go back one screen.
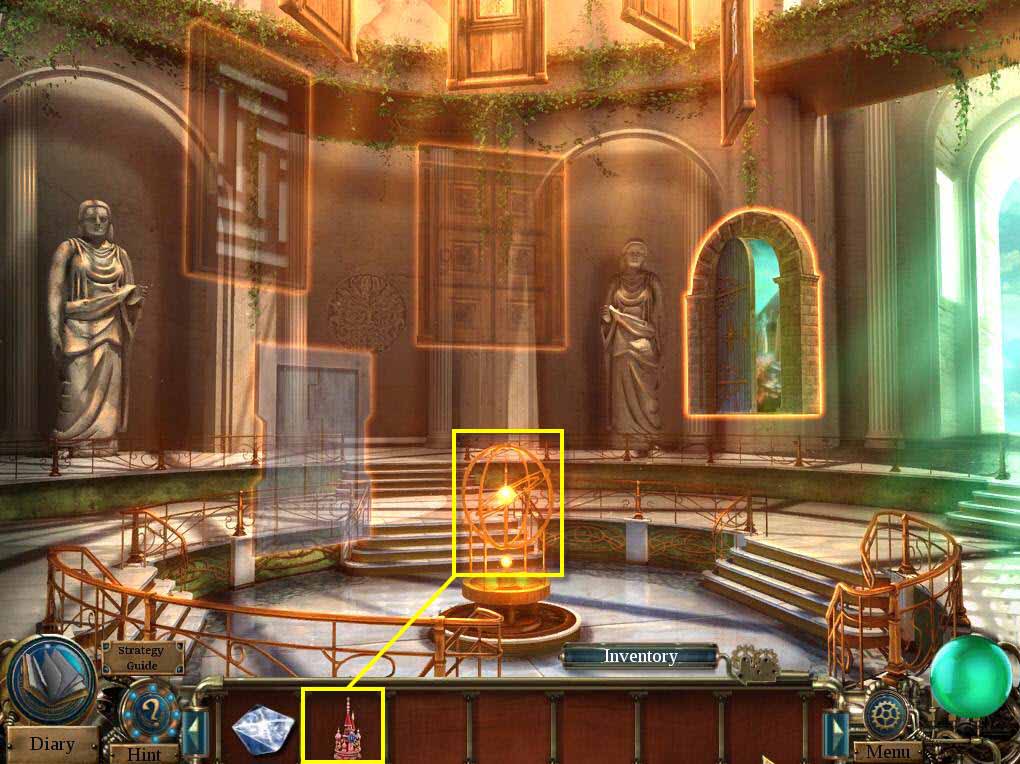
- Click to zoom into the globe.
- Use the MOSCOW CHURCH FIGURINE.
-
Go to Moscow 1913.
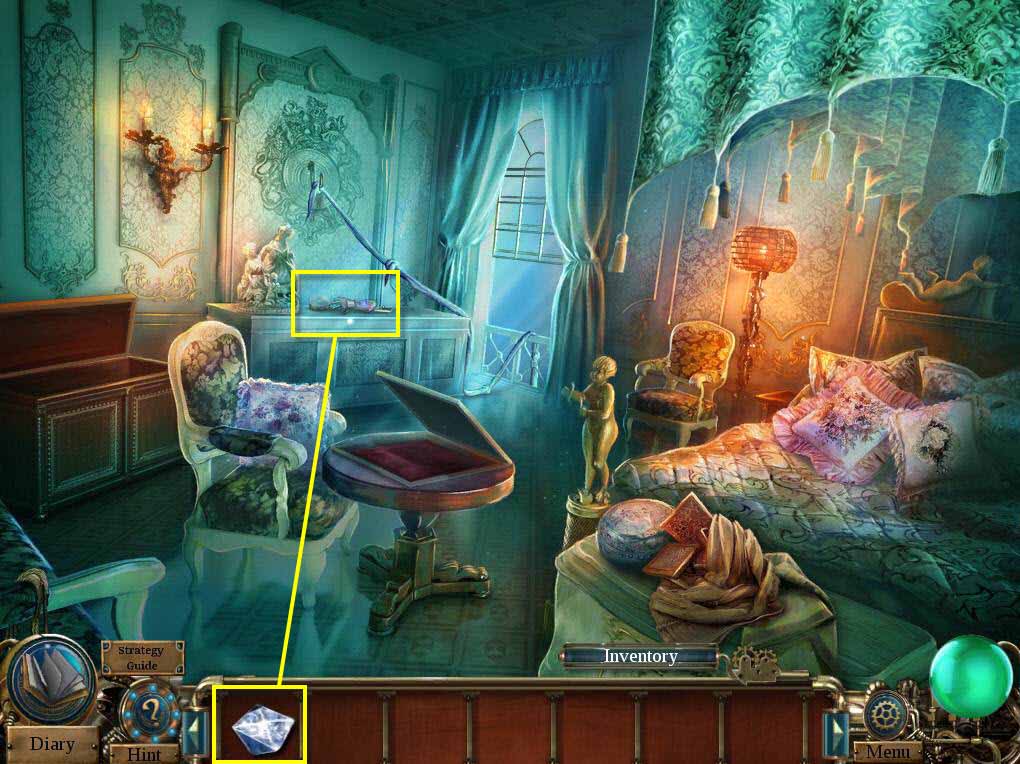
- Click to zoom in on the dresser.
- Use the DIAMOND on the slot.
- Take the MAGIC GLOVE.
-
Go back one screen and then go to the showroom.
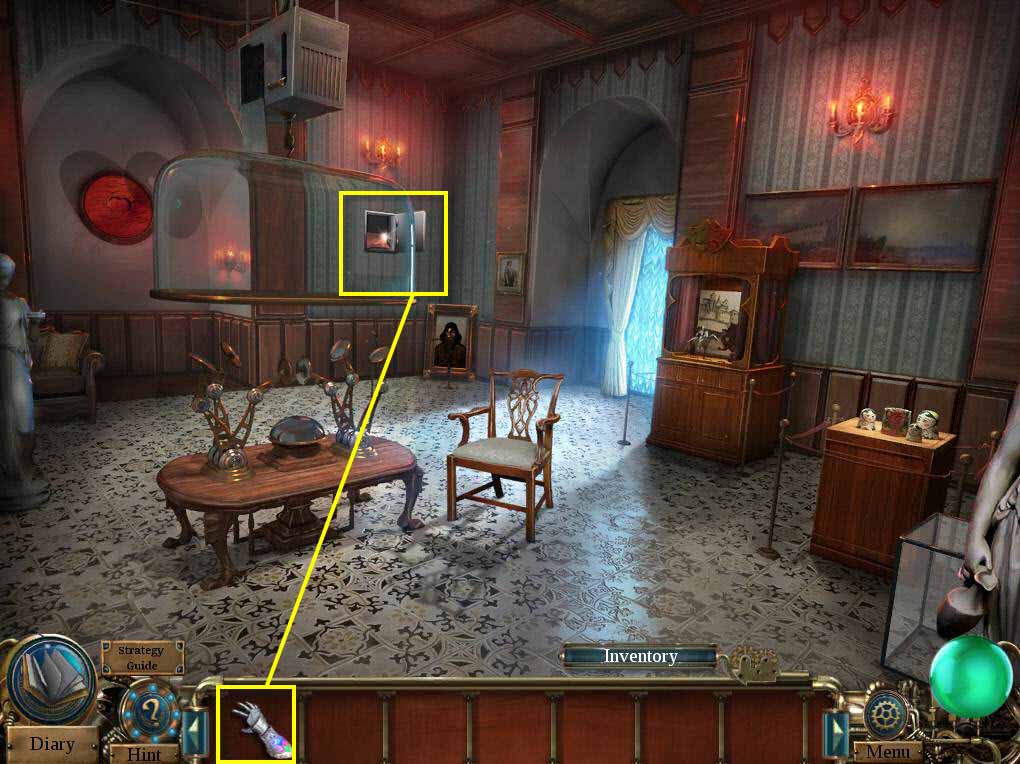
- Click to zoom in on the safe.
- Use the MAGIC GLOVE to take the CURSED MEDALLION.
- Go back to the Time Museum.
-
Go to the Celtic Times and enter the hut.

- Click on the table to zoom in.
- Use the CURSED MEDALLION on the table.
-
Zoom out and then click on the sparkles to play the HOS.
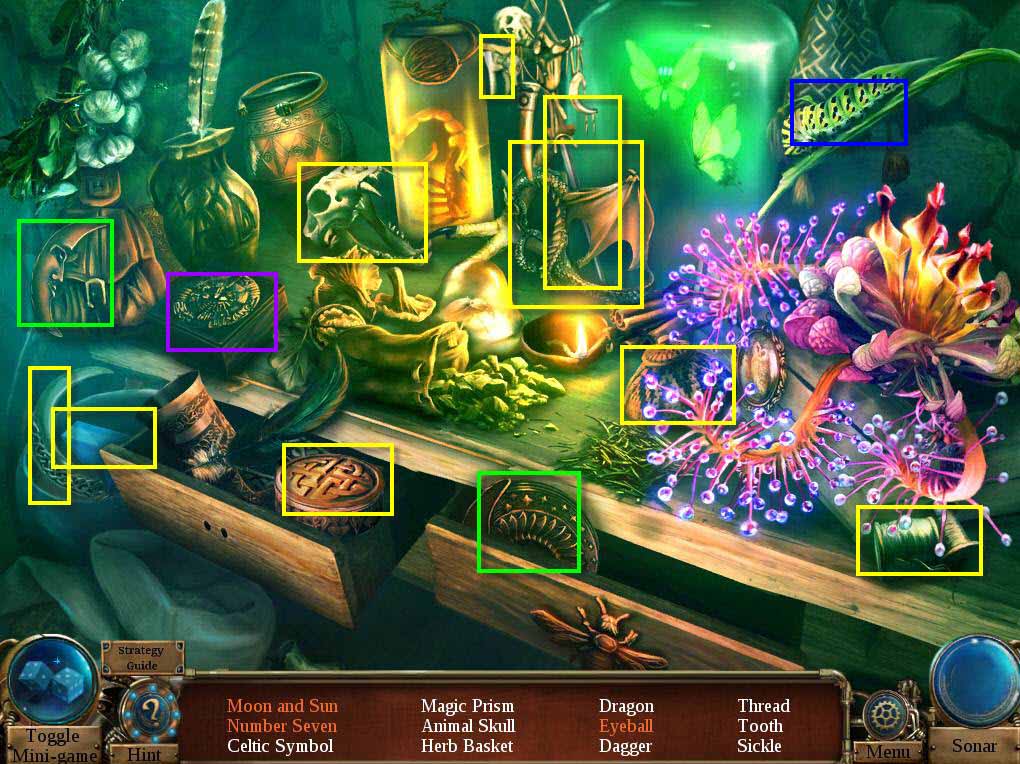
- Find all the items on the list.
-
You will receive the PRISM.

- Click on the table to zoom in.
- Use the PRISM on the table.
-
This will start a mini-game.
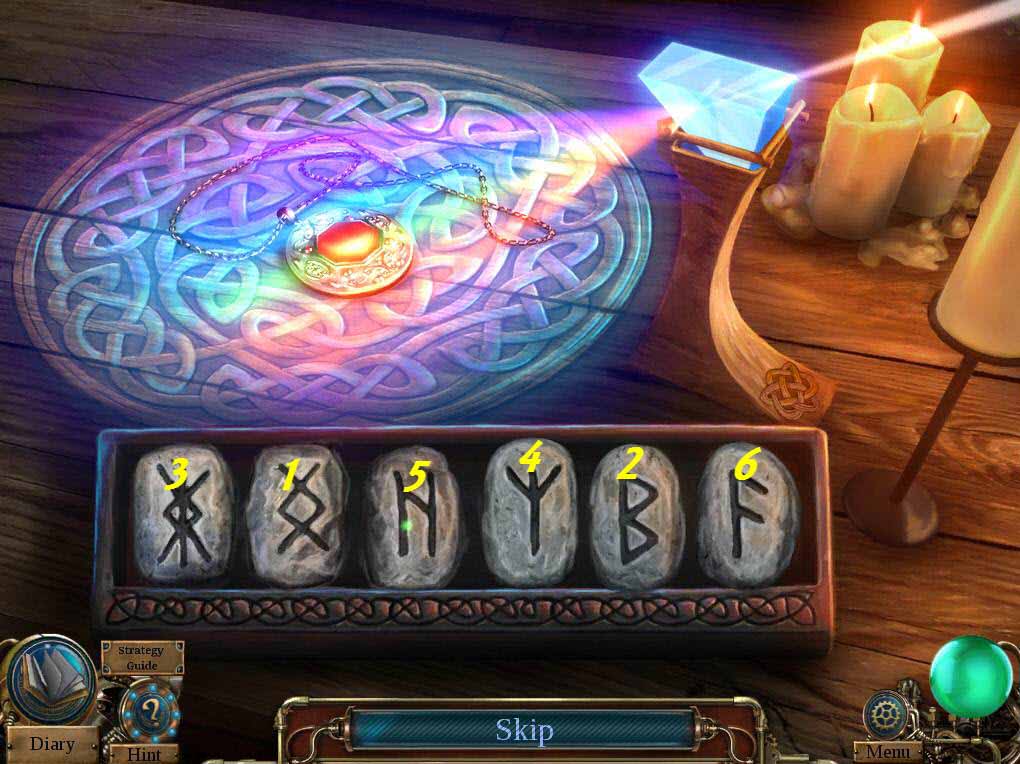
- The goal of the game is to click on the stones in the right order.
- See the screenshot for the solution.
- Click on Nimue to talk to her.
- Return to the Time Museum.
- Go to Moscow in 1913.
-
Click on the sparkles to play the HOS.
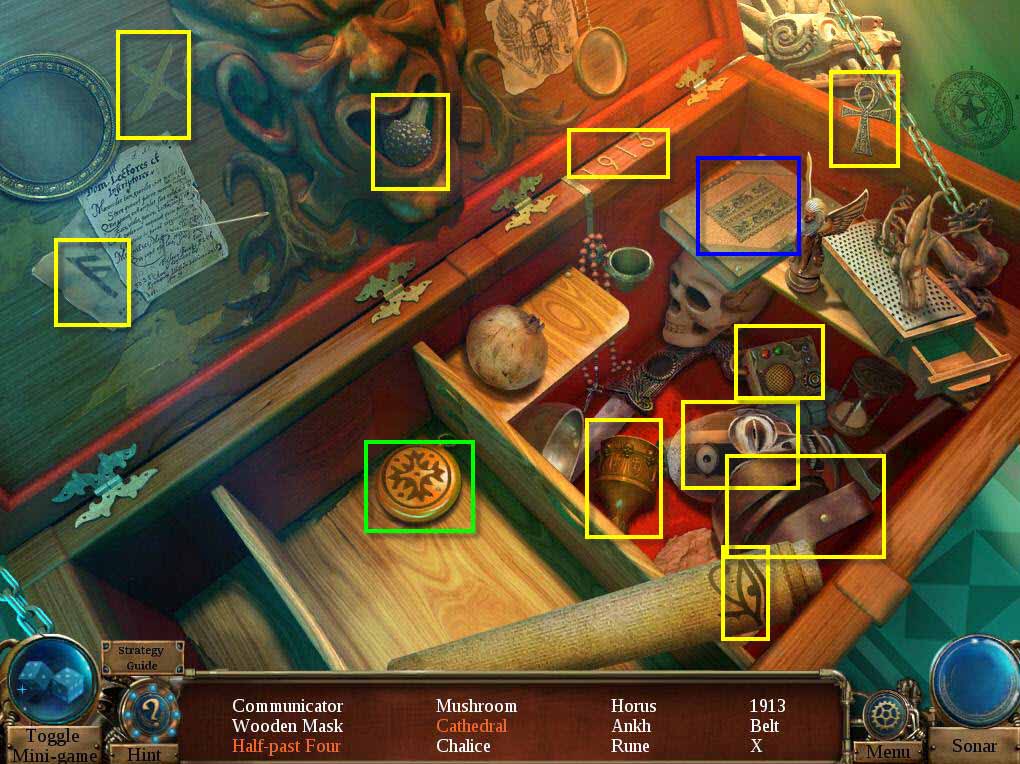
- Find all the items on the list.
- You will receive the COMMUNICATOR.
-
Return to the Time Museum Hall.
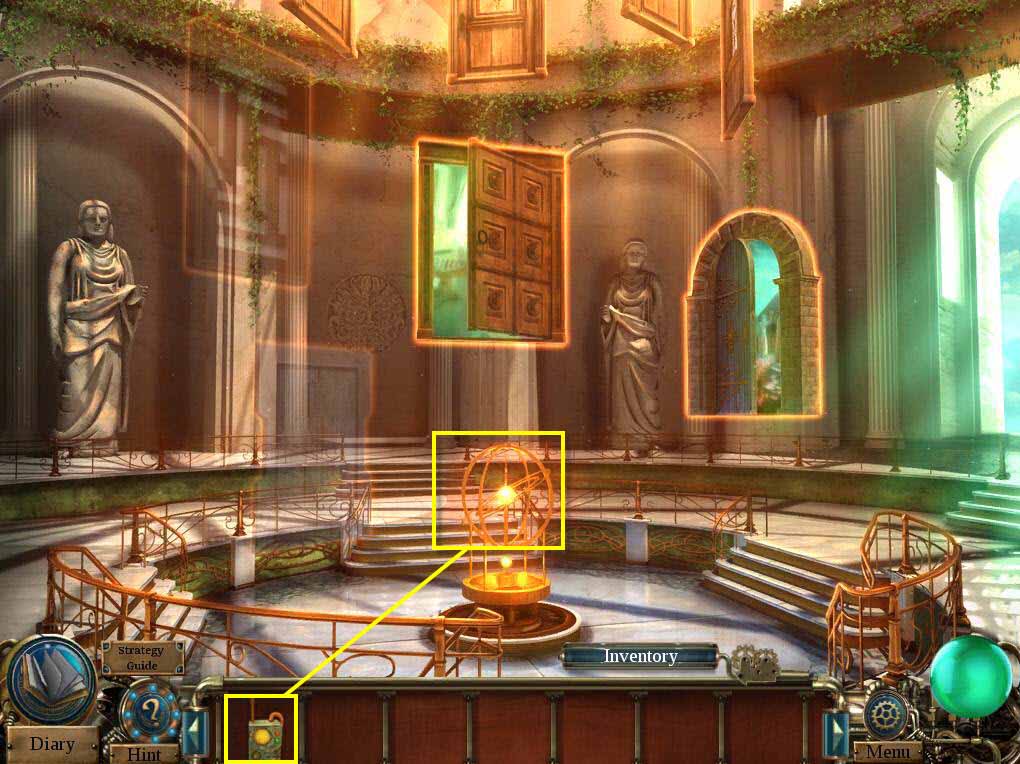
- Click on the globe to zoom in.
- Use the COMMUNICATOR.
-
Go to the future.
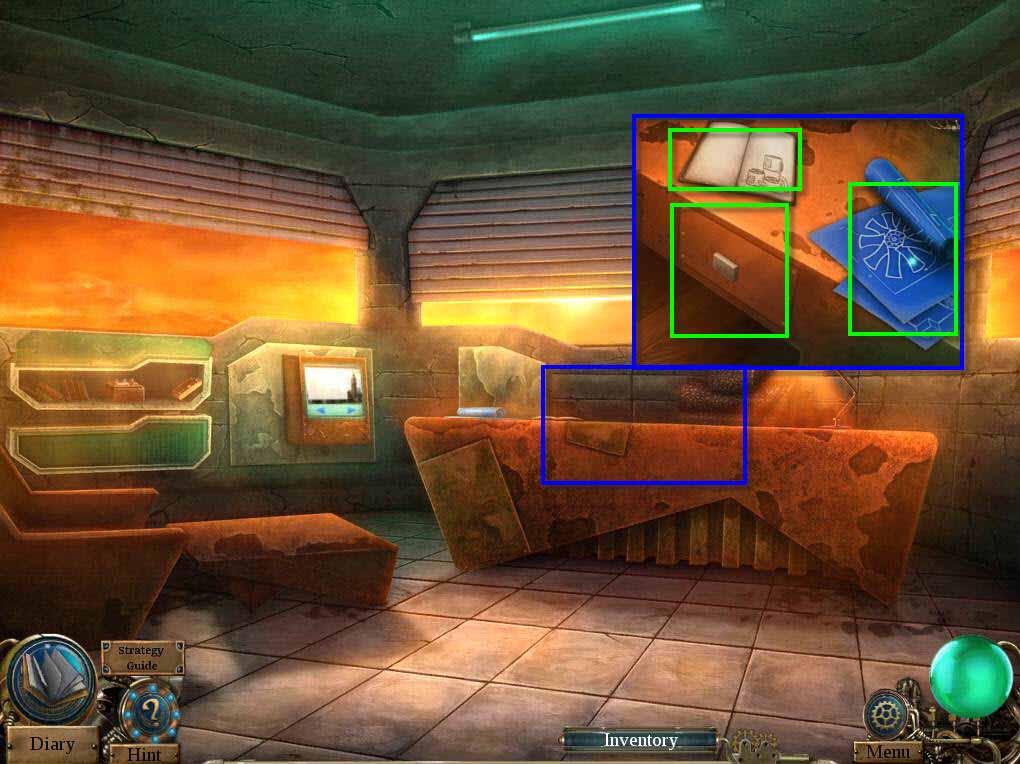
- Click on the desk to zoom in.
- Click to open the drawer.
- Read the note and take the BLUEPRINTS and the OLD BOOK.
-
Return to the Time Museum.
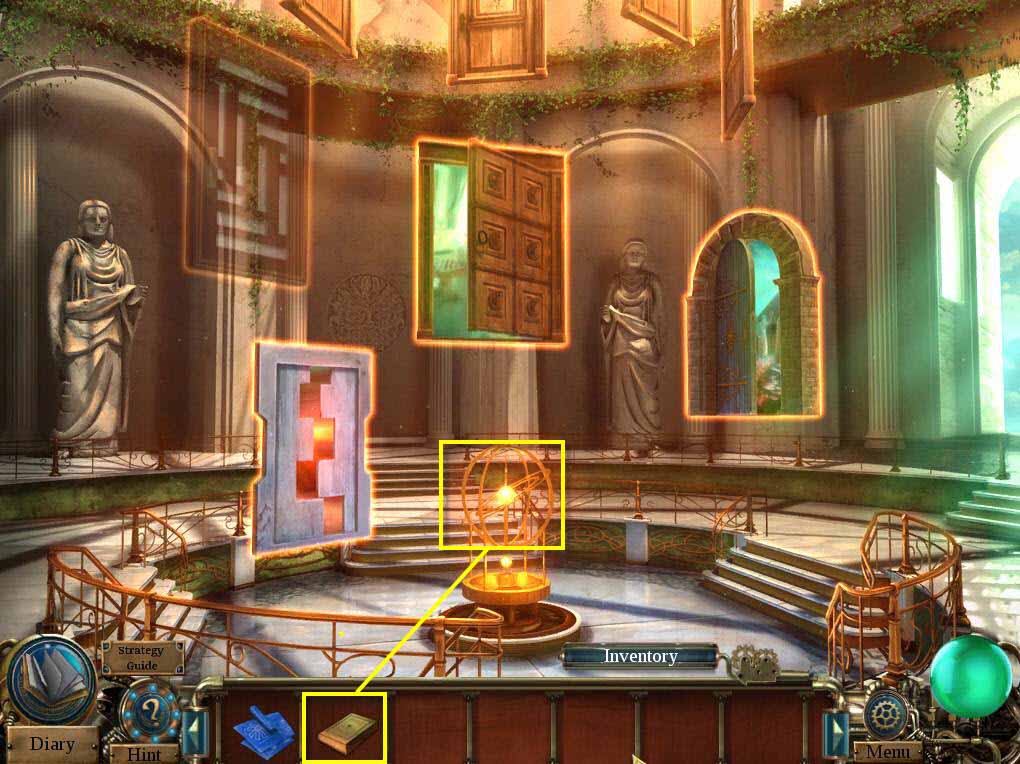
- Click on the globe to zoom in.
- Use the OLD BOOK.
-
Go to the Unknown Times.
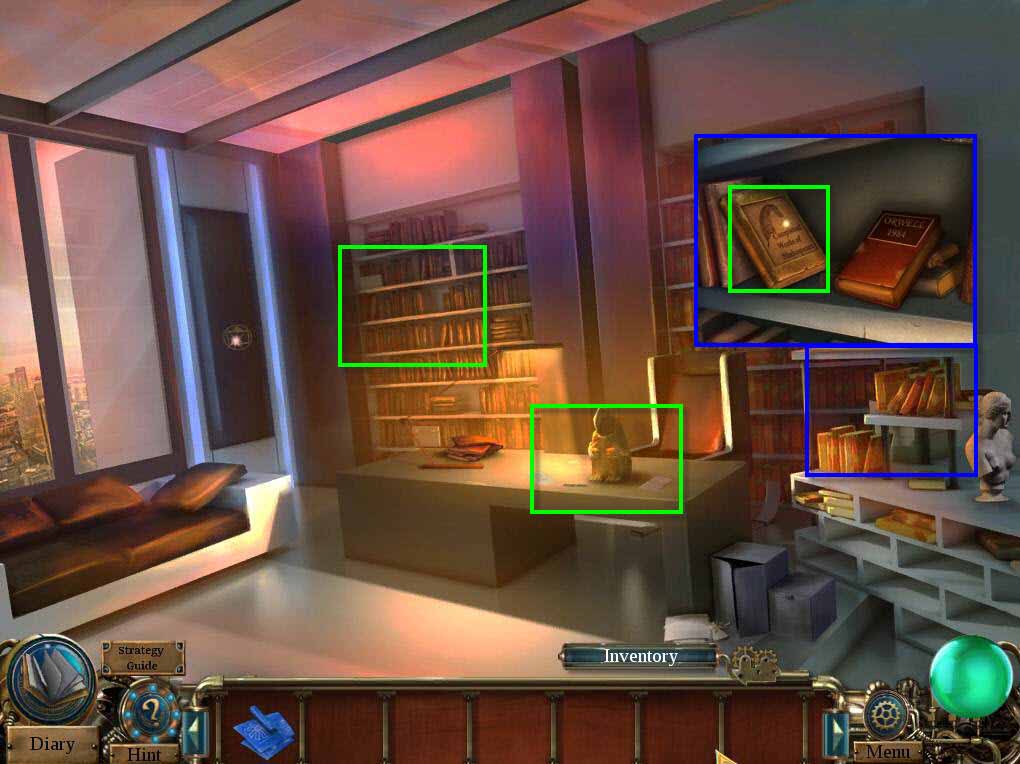
- Click on the desk to zoom in.
- Read the notes.
- Click on the bookshelf on the right to zoom in.
- Click on the Shakespeare book.
- Take the GARGOYLE HEAD.
- Click on the bookshelf on the left to zoom in.
-
This will start a mini-game.

- The goal of the game is to click on the books in the right order.
-
See the screenshot for the solution.
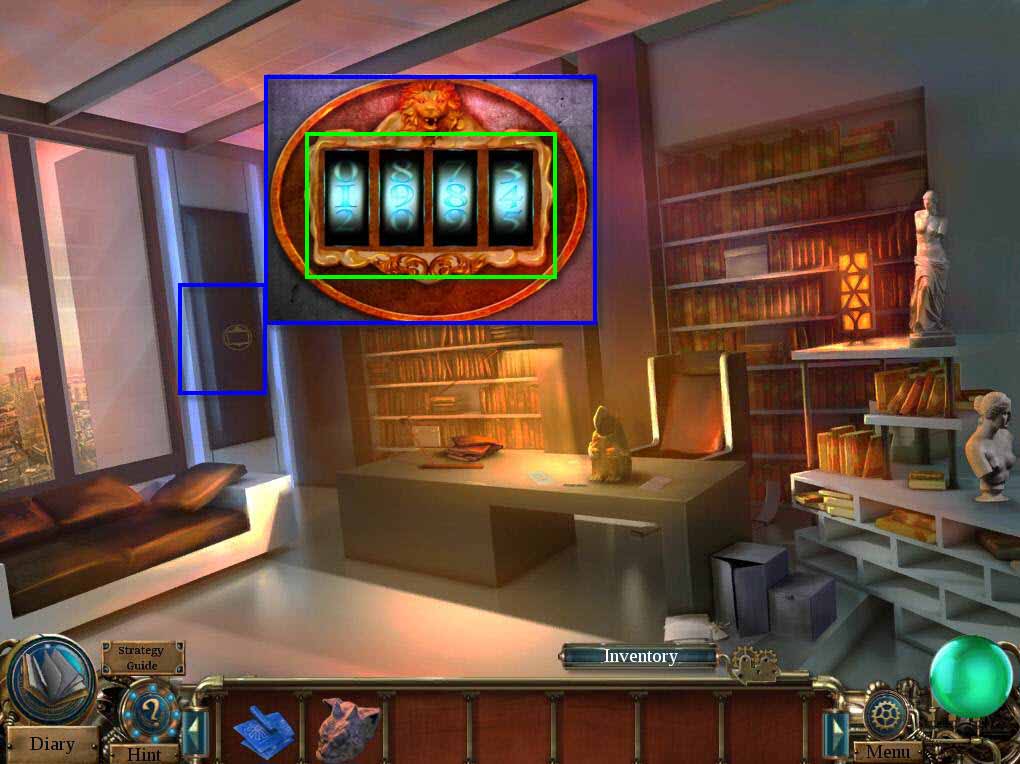
- Click to zoom in on the door.
- Use the code 1984.
-
Click on the sparkles to play the HOS.
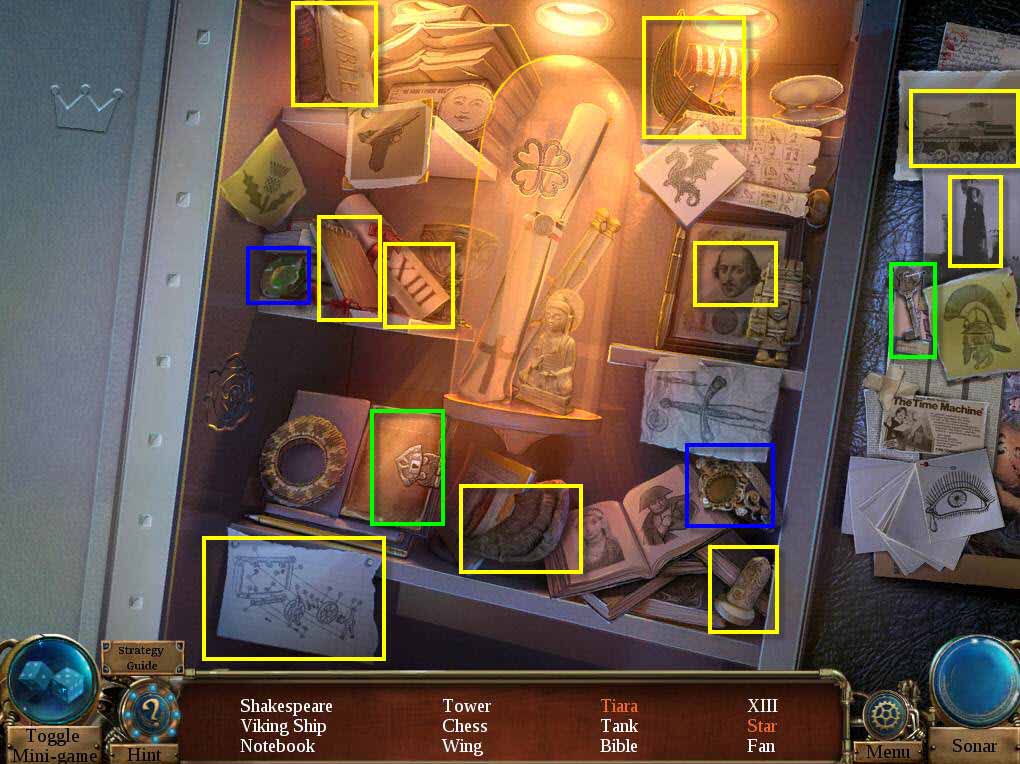
- Find all the items on the list.
-
You will receive the GARGOYLE WING.
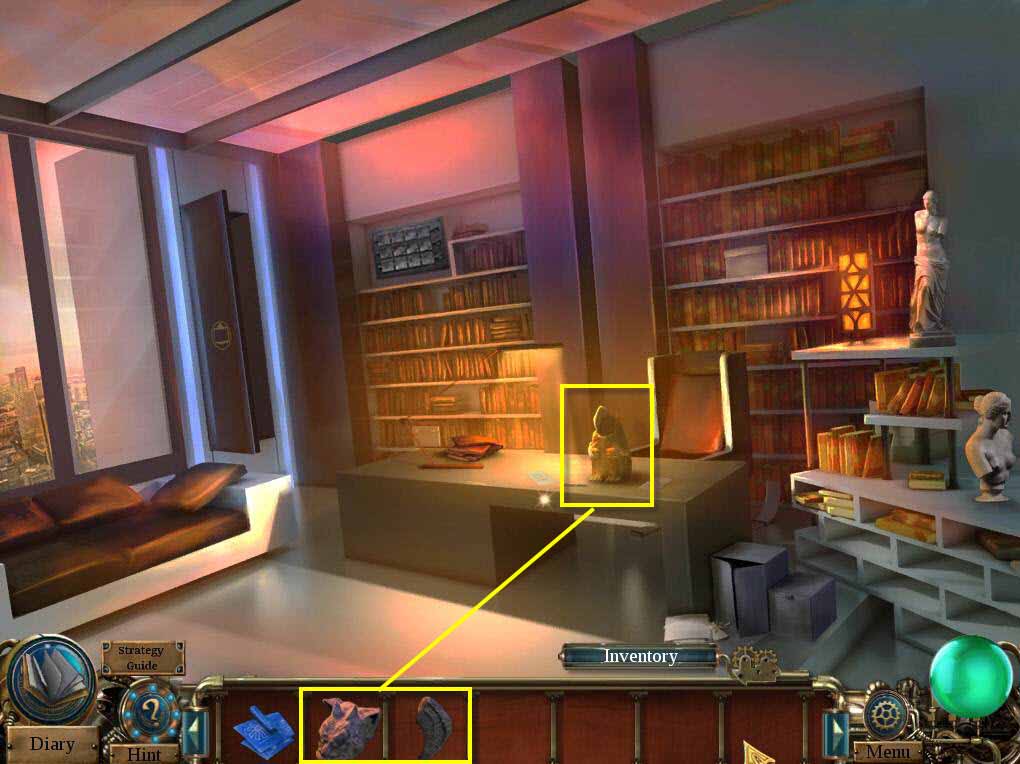
- Click to zoom in on the desk.
- Use the GARGOYLE HEAD and the GARGOYLE WING.
-
Take the STORY PUZZLE.
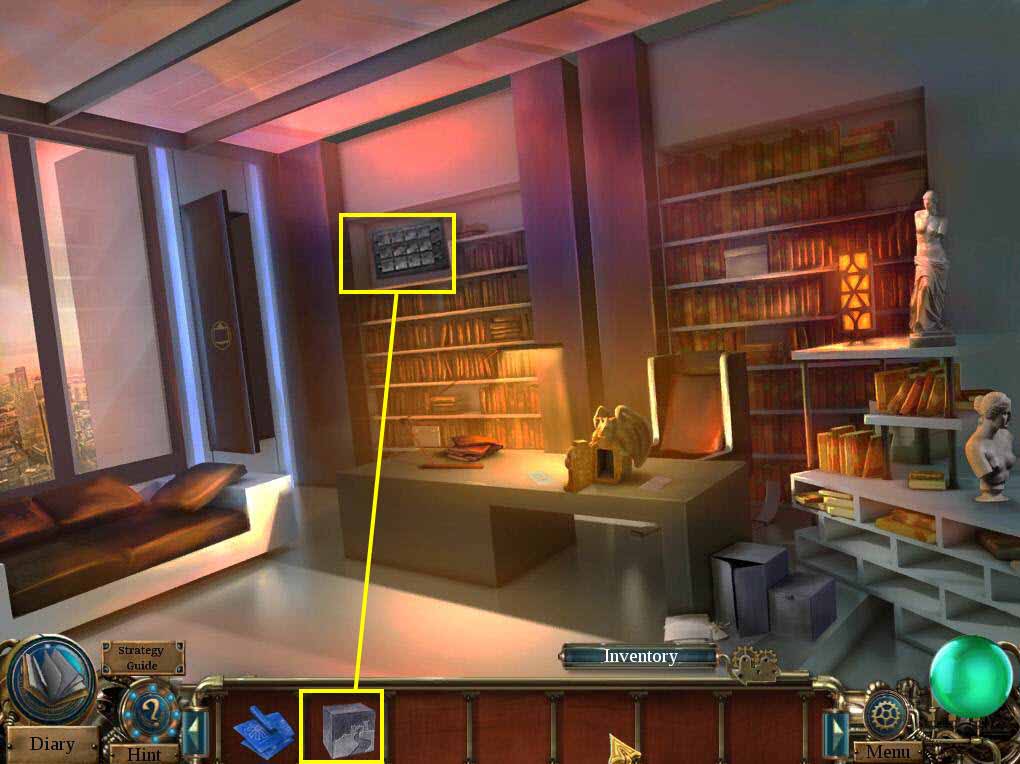
- Click on the wall to zoom in.
- Use the STORY PUZZLE on the board.
-
This will start a mini-game.
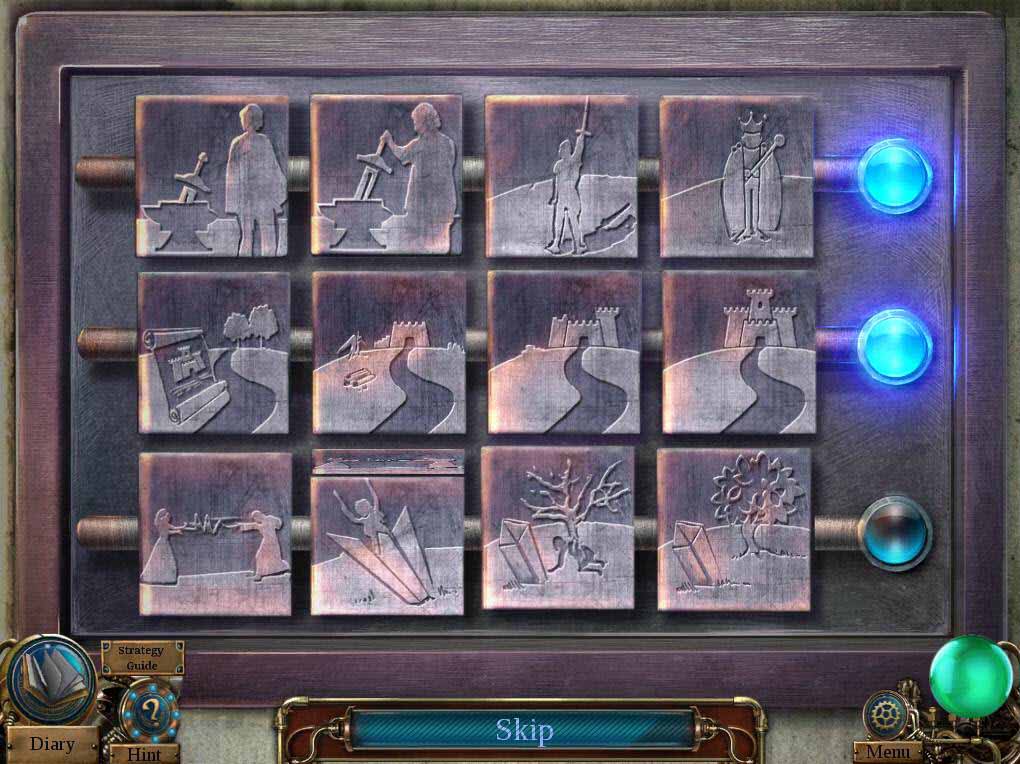
- The goal of the game is to turn the cubes to recreate the story.
-
See the screenshot for the solution.
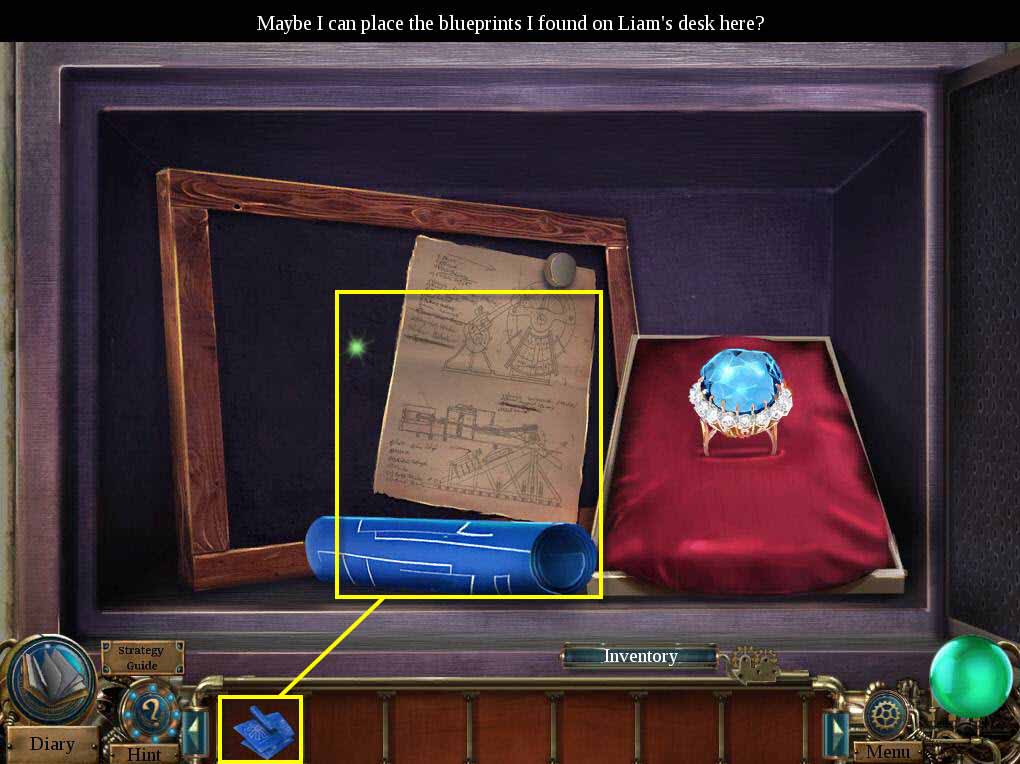
- Use the BLUEPRINTS on the diagram.
Congratulations! You've completed Time Mysteries: The Final Enigma!
