Time Mysteries: The Final Enigma: Chapter Six: The Garden
Allow our Time Mysteries: The Final Enigma Walkthrough to be your companion as you race to repair the past and save the future. Merlin, the most powerful wizard of all time, has been defeated, and you’ll need every trick in the book to face down the one responsible: the evil Man in Black, who has altered the past in the hopes of creating a magical apocalypse. Our insider tips, step-by-step instructions, and custom screenshots will help you as you race to set the past to rights before the future is lost forever.
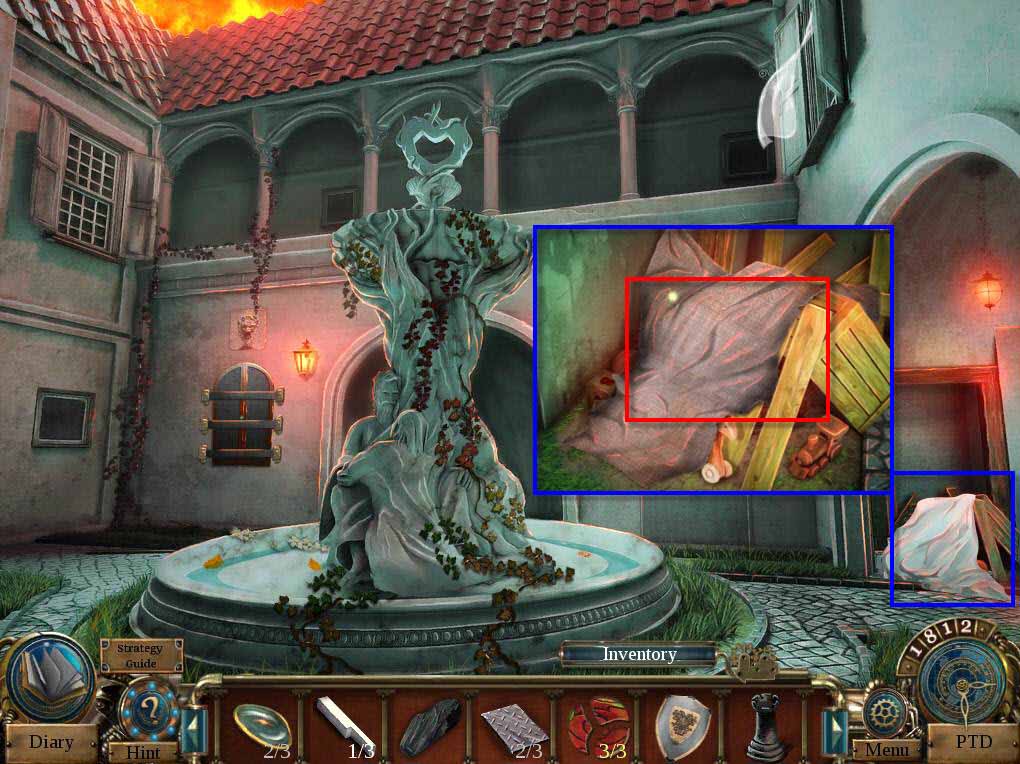
- Click on the blanket to zoom in.
- Click to remove the blanket.
- Click to move the planks.
-
Take the 2/3 PIANO KEY.
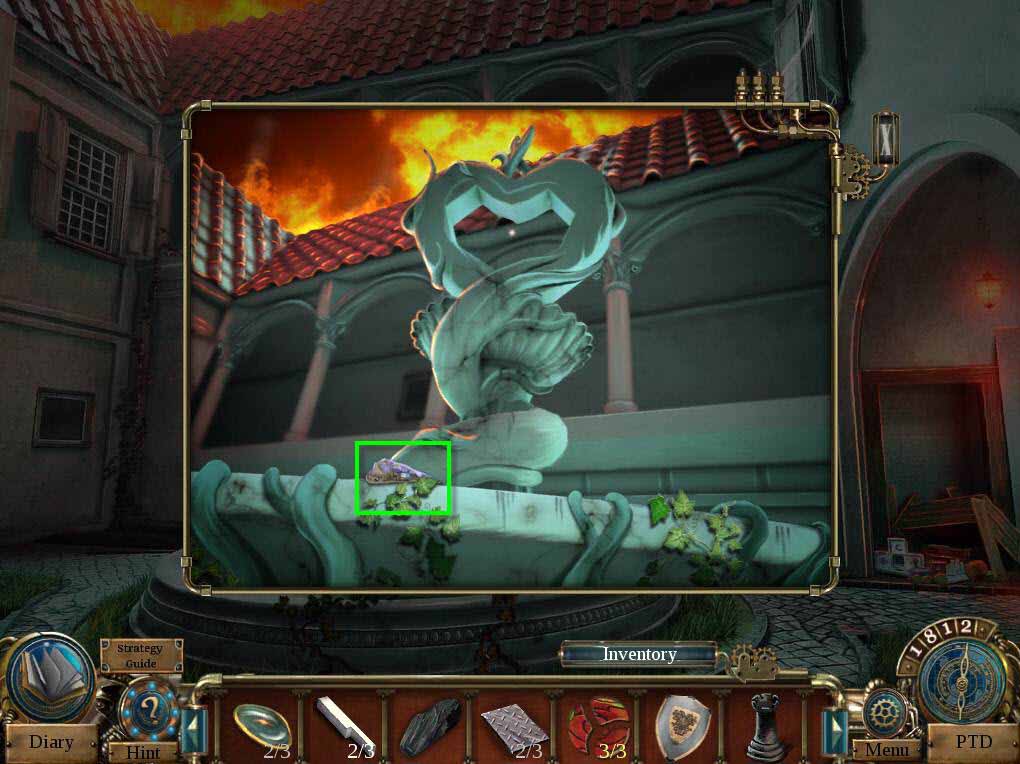
- Click on the fountain to zoom in.
- Take the GUARD PLATE.
- Click on the niche with the statues to zoom in.
-
This will start a mini-game.
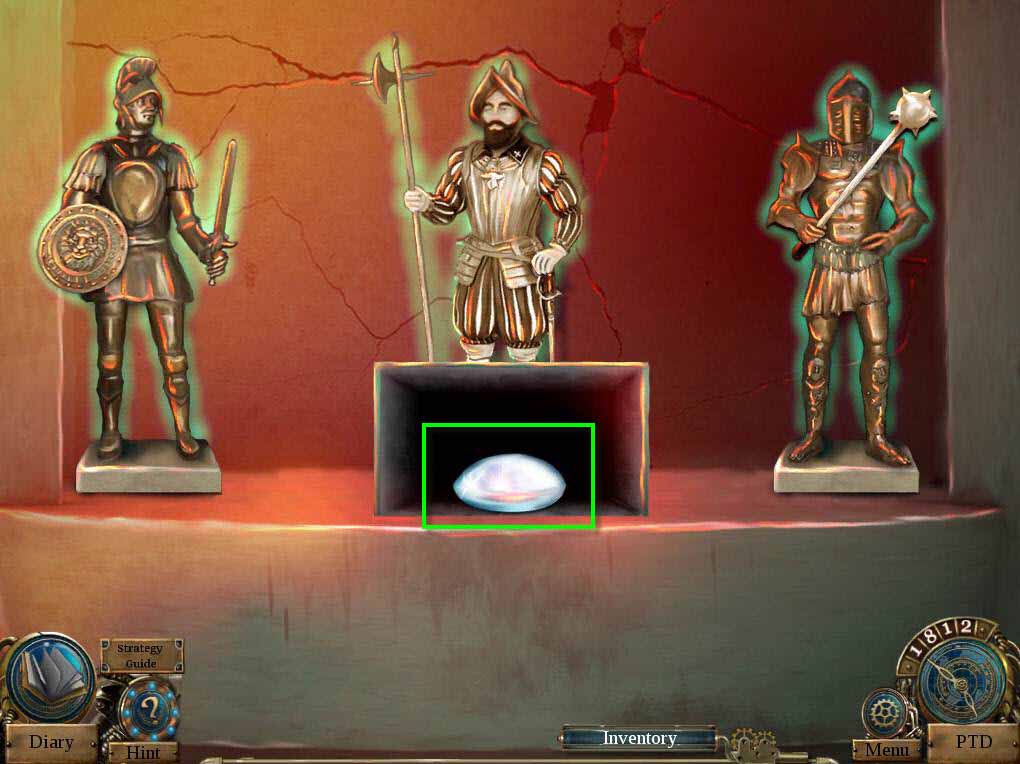
- The goal of the game is to move the weapons and the heads of the statues to find the correct poses.
- See the screenshot for the solution.
- Take the LENS.
-
Go back two screens.
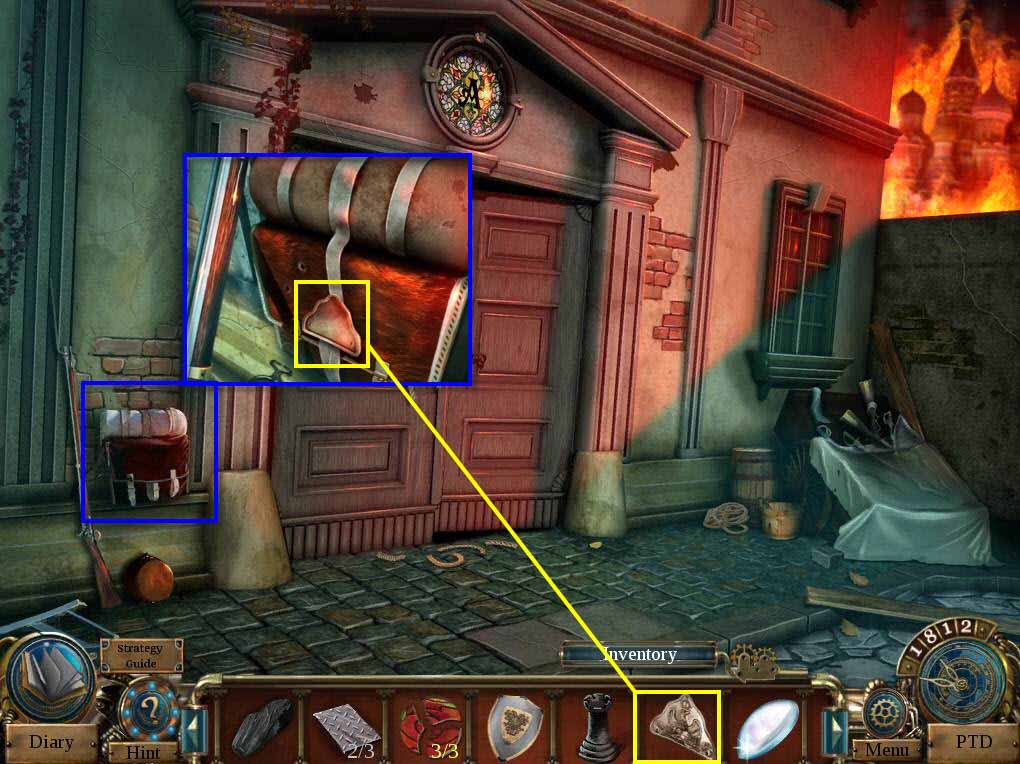
- Click on the bag to zoom in.
- Use the GUARD PLATE on the empty niche.
- Click to open the bag.
- Take the WINDER.
-
Go forward two screens to the garden.
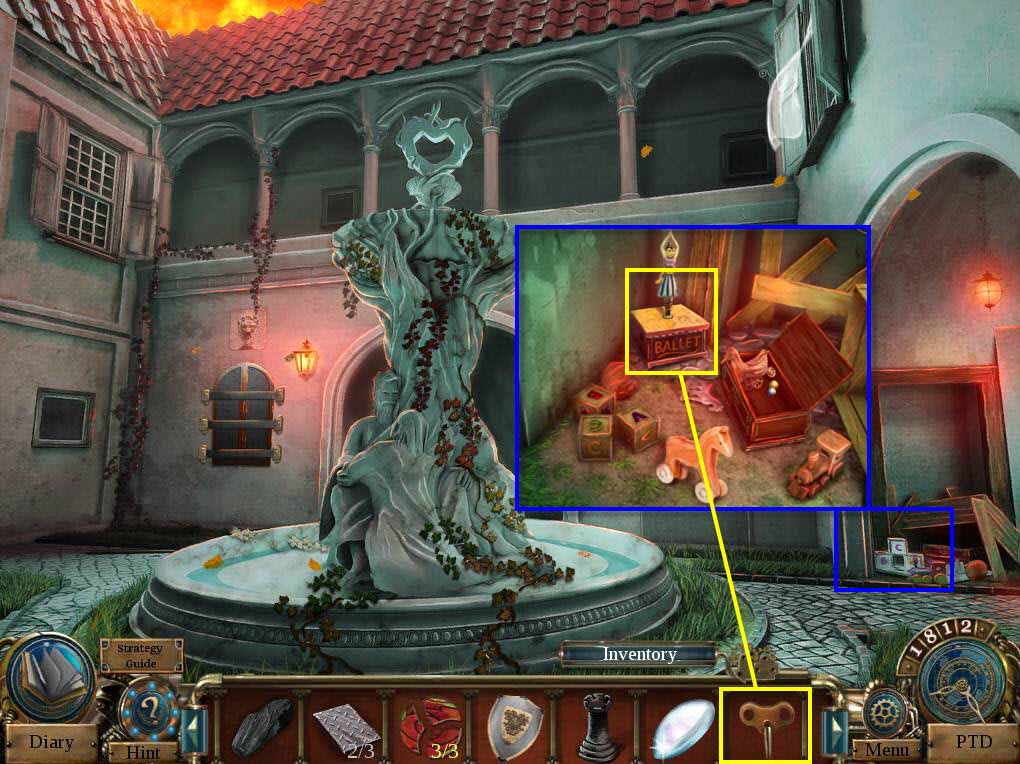
- Click on the toys to zoom in.
- Use the WINDER on the ballerina.
- Click on the winder twice.
- Take the 3/3 PIANO KEY.
- Take the 3/3 SMALL MIRROR.
-
Go back one screen.
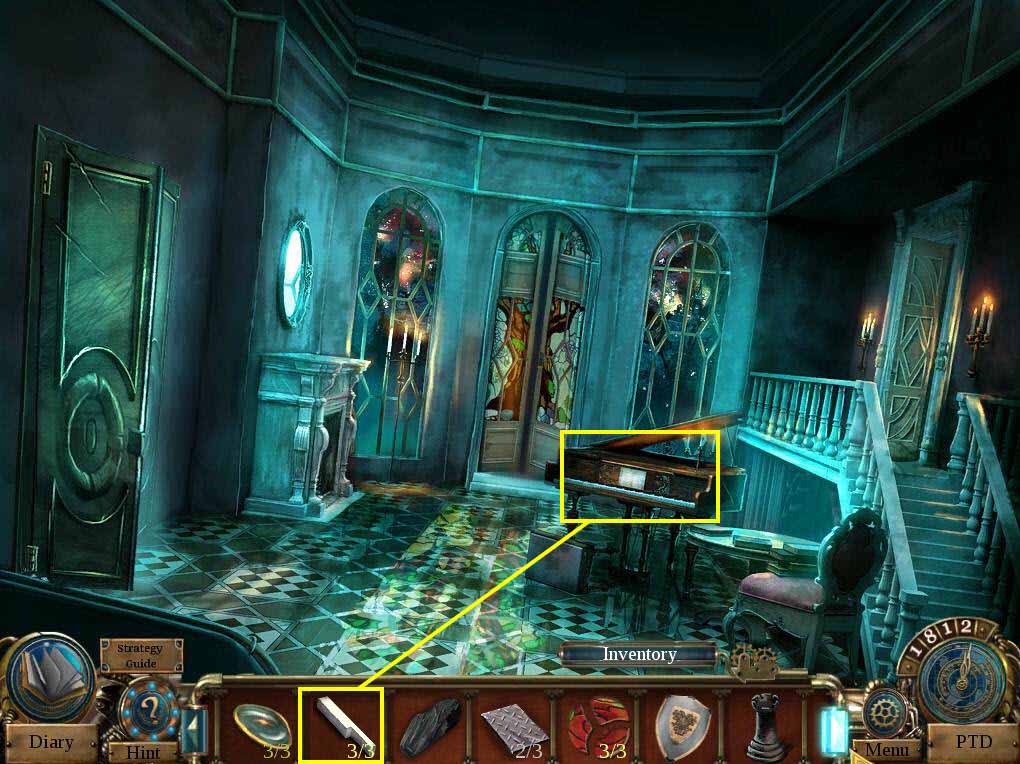
- Click on the piano to zoom in.
- Use the 3/3 PIANO KEYS on the piano.
-
This will start a mini-game.
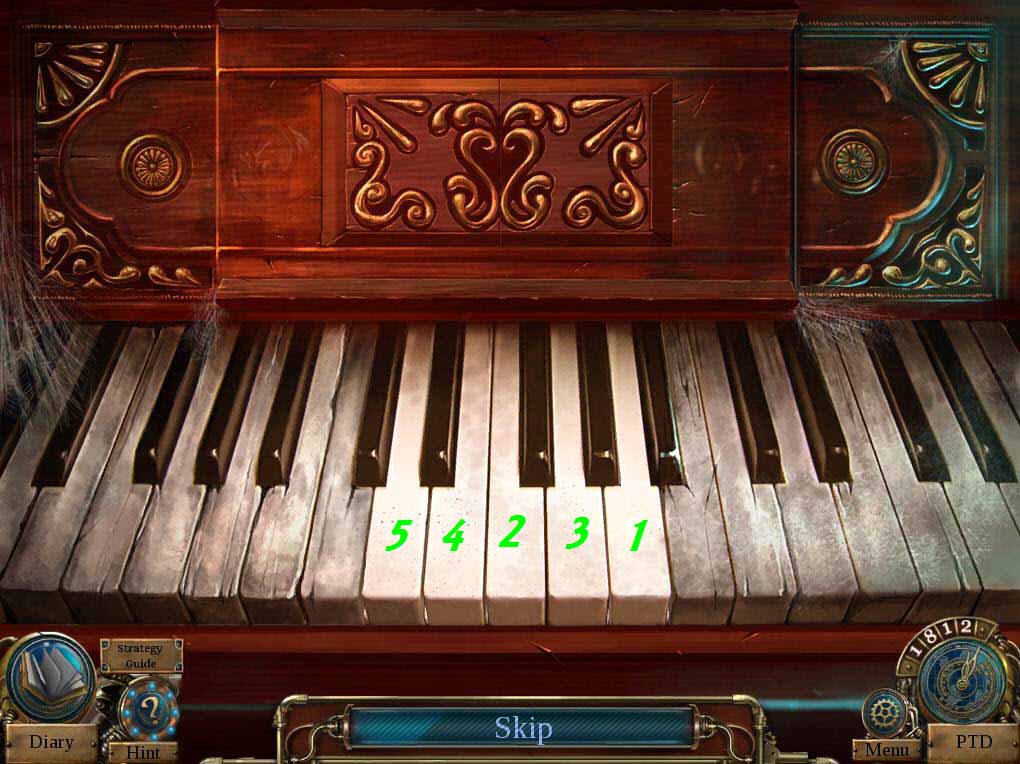
- The goal of the game is to play the correct sequence on the keys.
- Click on the compartment.
- Take the GEM PIECE.
-
Time travel to 1913 to the showroom.
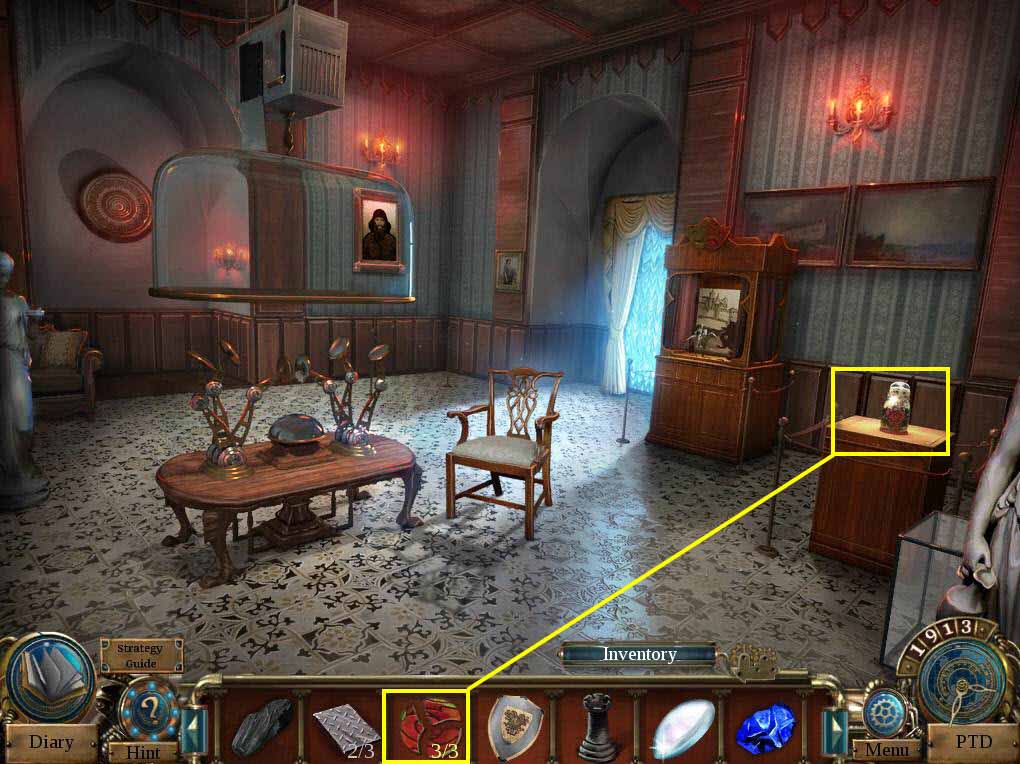
- Click on the doll to zoom in.
- Use the 3/3 RUSSIAN DOLL LOCKS on the doll.
- Click three times to remove the doll heads.
-
Take the BLACK BISHOP.
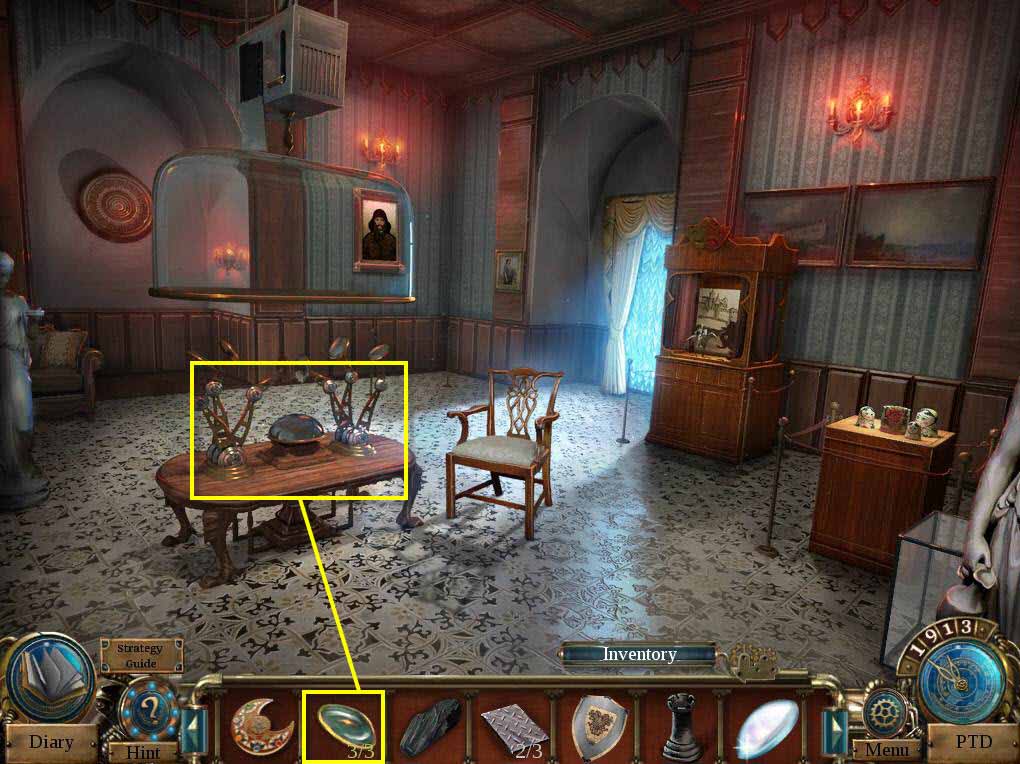
- Click to zoom in on the device.
- Use the 3/3 SMALL MIRRORS on the device.
-
This will start a mini-game.
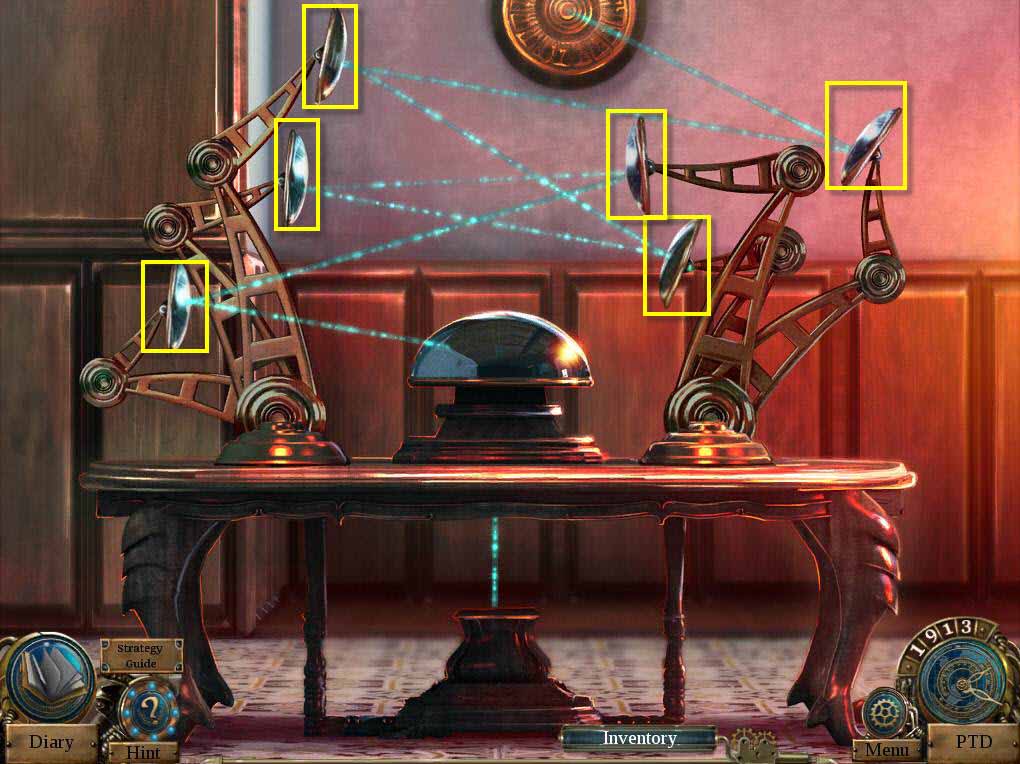
- To goal of the game is to move the mirrors so the light can reach the spot on the wall.
- See the screenshot for the solution.
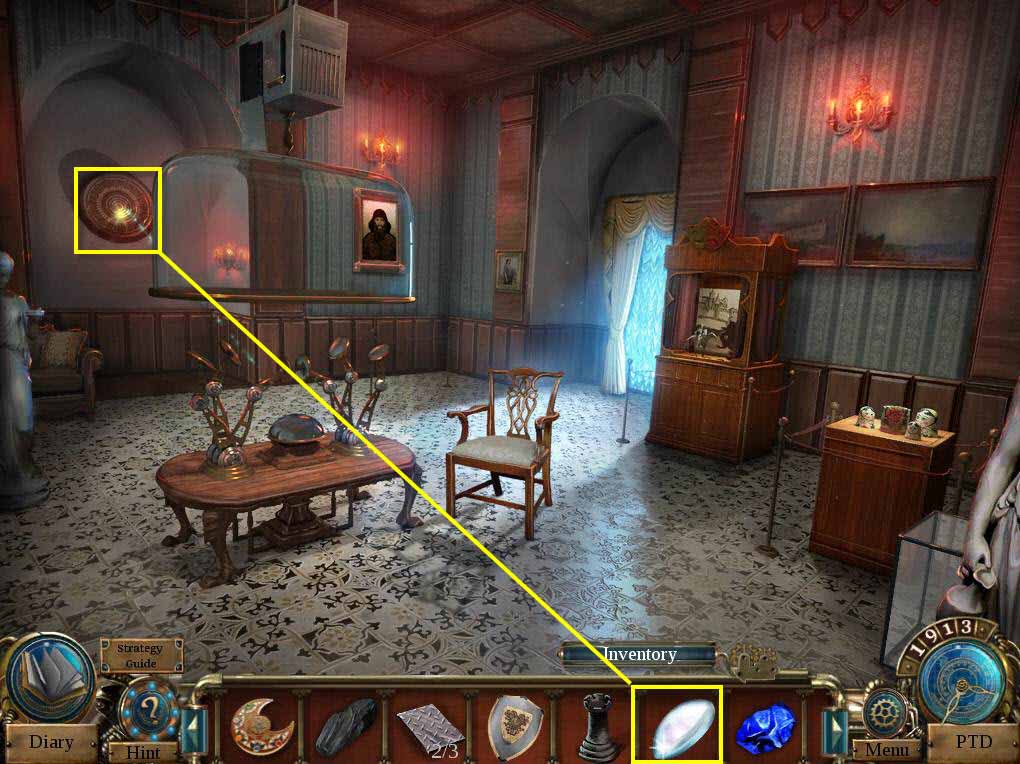
- Click on the wall to zoom in.
- Use the LENS on the spot.
- Take the FOUNTAIN HEART.
-
Time travel to 1812 to the garden.
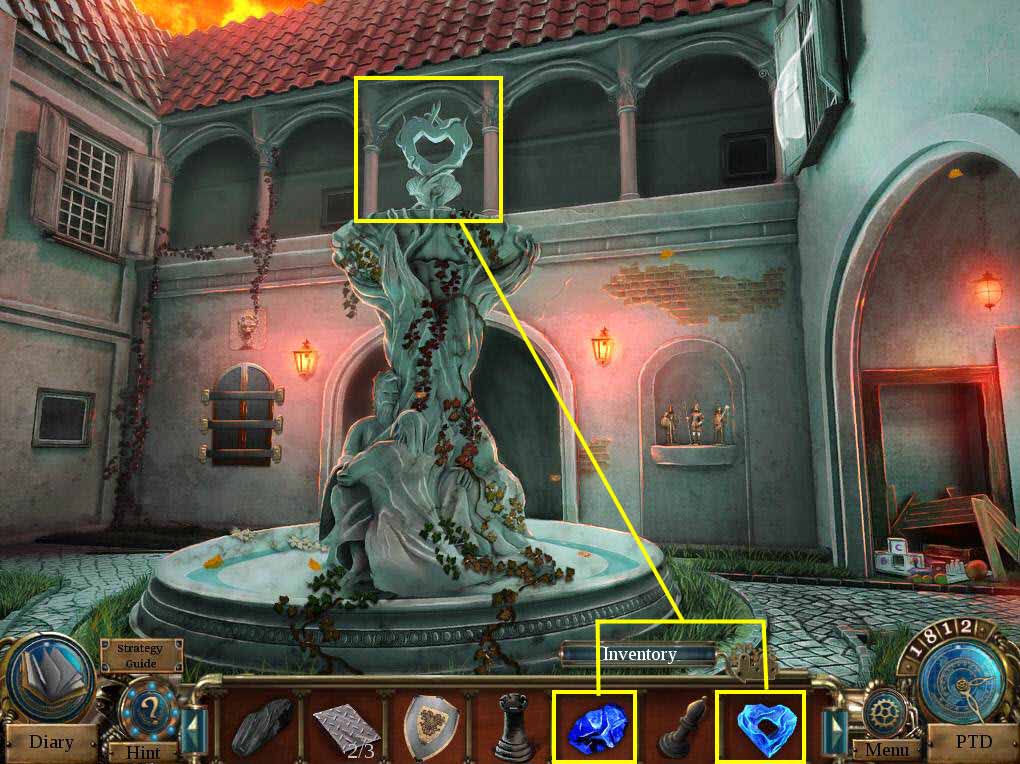
- Click on the fountain to zoom in.
- Use the FOUNTAIN HEART and the GEM PIECE on the fountain.
-
Time travel to 1913 to the garden.
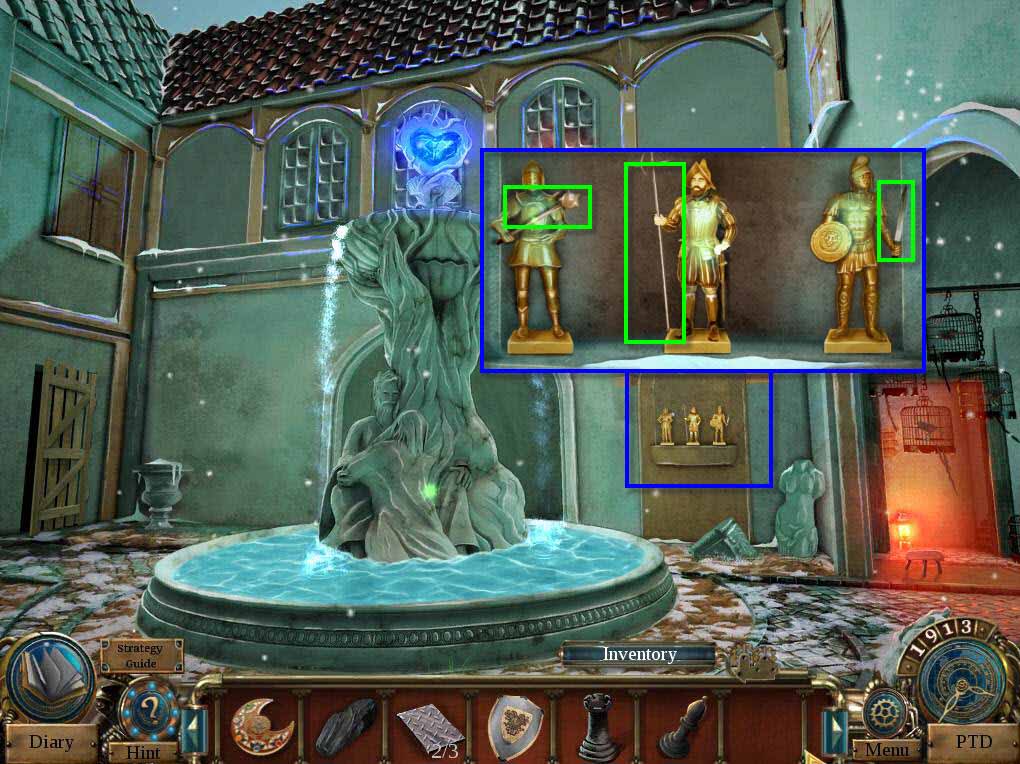
- Click on the figures to zoom in.
-
Take the MACE, the SWORD, and the SPEAR.
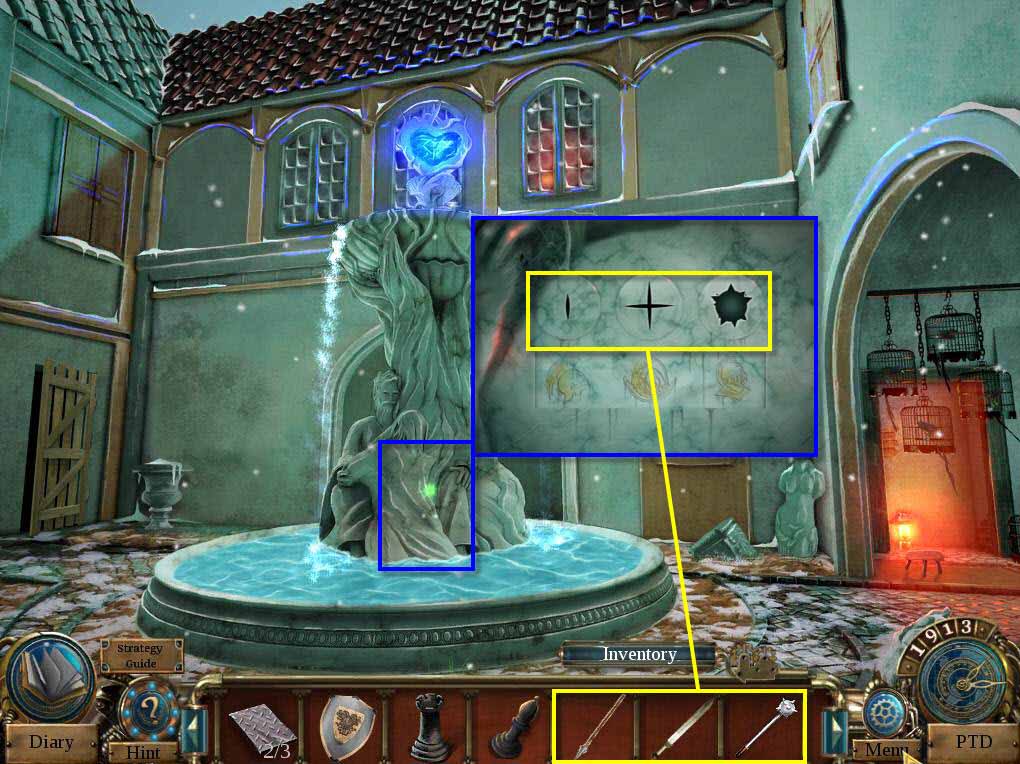
- Click on the fountain to zoom in.
- Use the SWORD, the SPEAR, and the MACE in the empty slots.
- Take the WHITE KING.
-
Go back one screen.
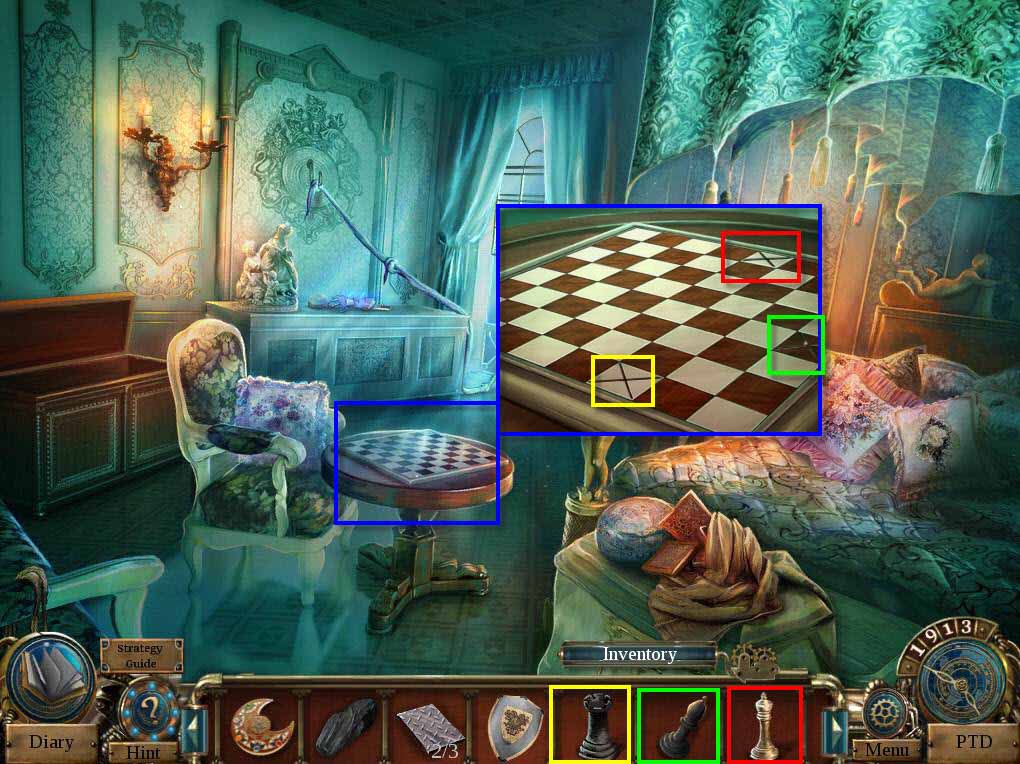
- Click on the chessboard to zoom in.
- Use the BLACK ROOK and the BLACK BISHOP on the board.
- Use the WHITE KING on the board.
- Take the DEMON SEAL.
-
Go back one screen and then go to the left to the showroom.
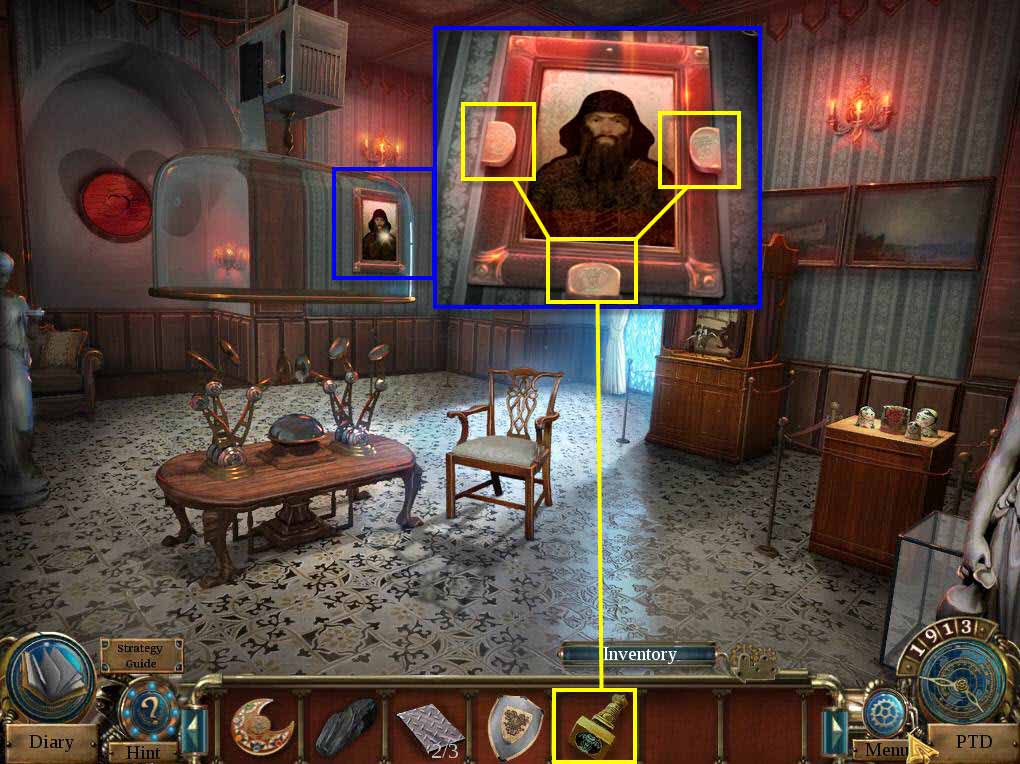
- Click on the picture to zoom in.
-
Use the DEMON SEAL on the plates marked above.
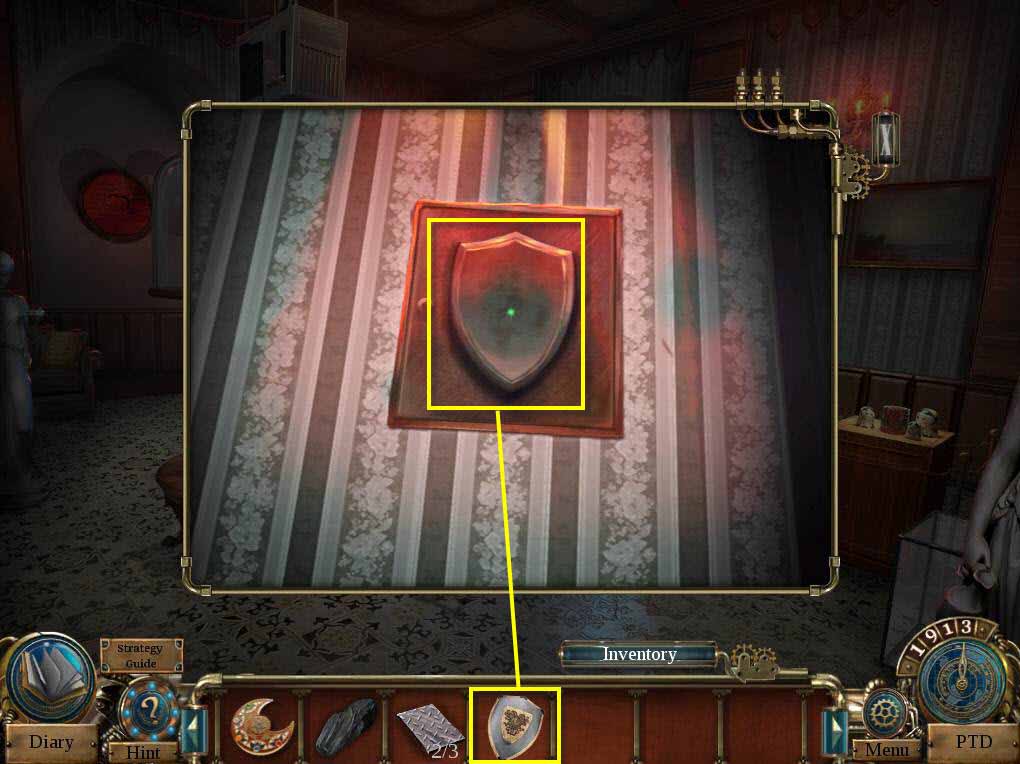
- Use the SHIELD on the slot.
- Click to open the door.
- Click to read the note in the door.
- Go to the garden.
-
Click on the sparkles to play the HOS.
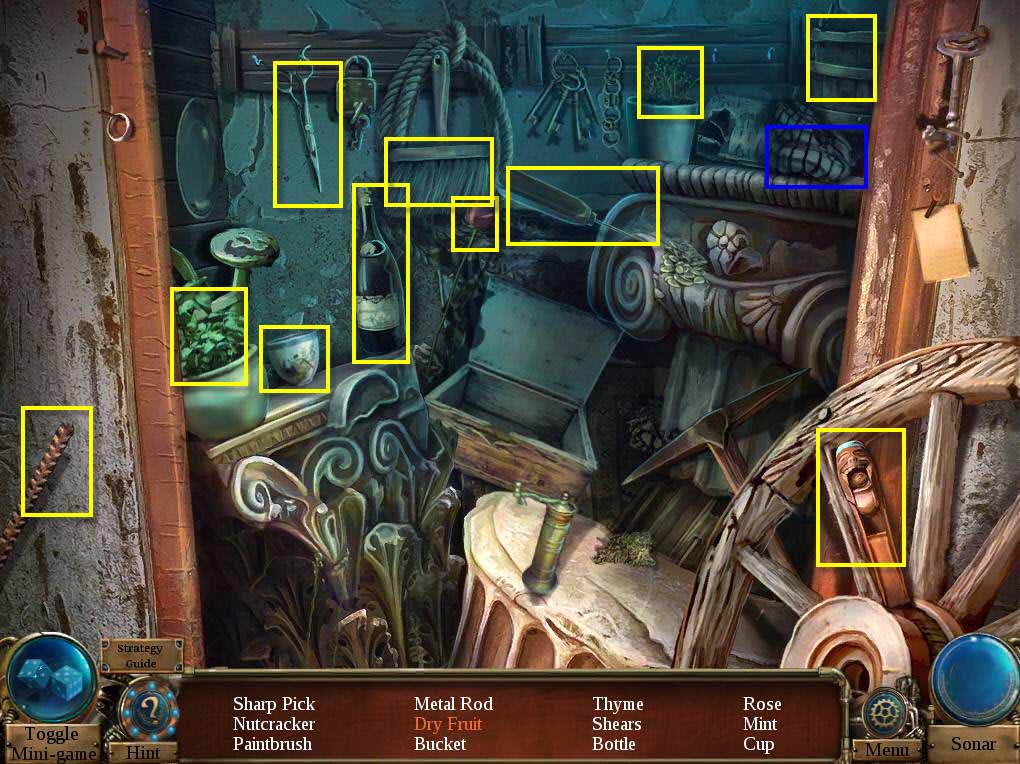
- Find all the items on the list.
- You will receive the SHARP PICK.
-
Time travel to 502 to Merlin's Hut.
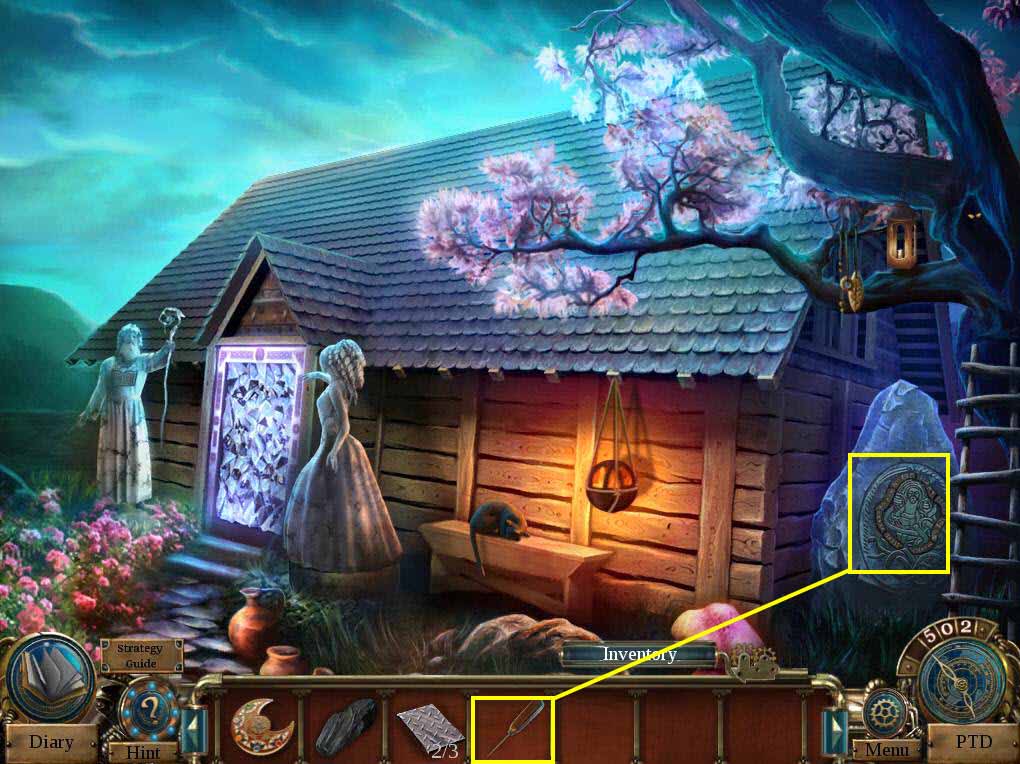
- Click on the rune stone to zoom in.
- Use the SHARP PICK on the rune.
-
This will start a mini-game.
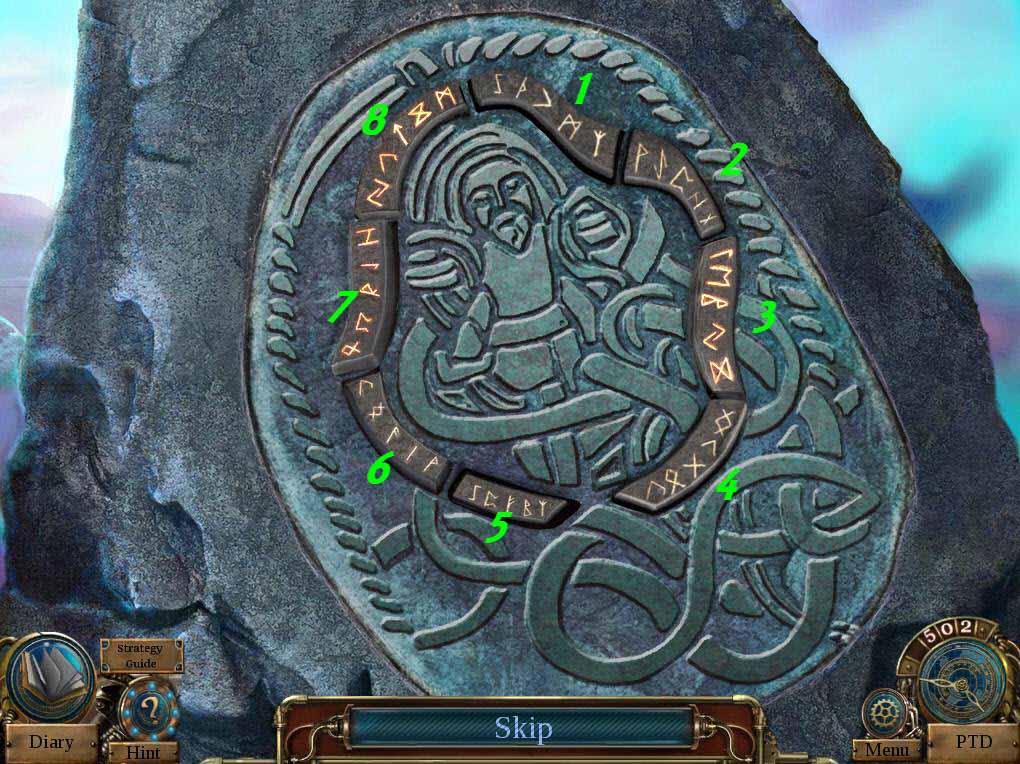
- The goal of the game is to activate all the runes.
- Click on the runes in the following order: 5, 1, 7, 4, 2, 4, 2, 8, 6, 8, 4, 8, 6, 1, 4, 8, 1, 5, 3, 4, 2, 8, 7, 4, 6.
-
Take the TRISKELE SYMBOL.
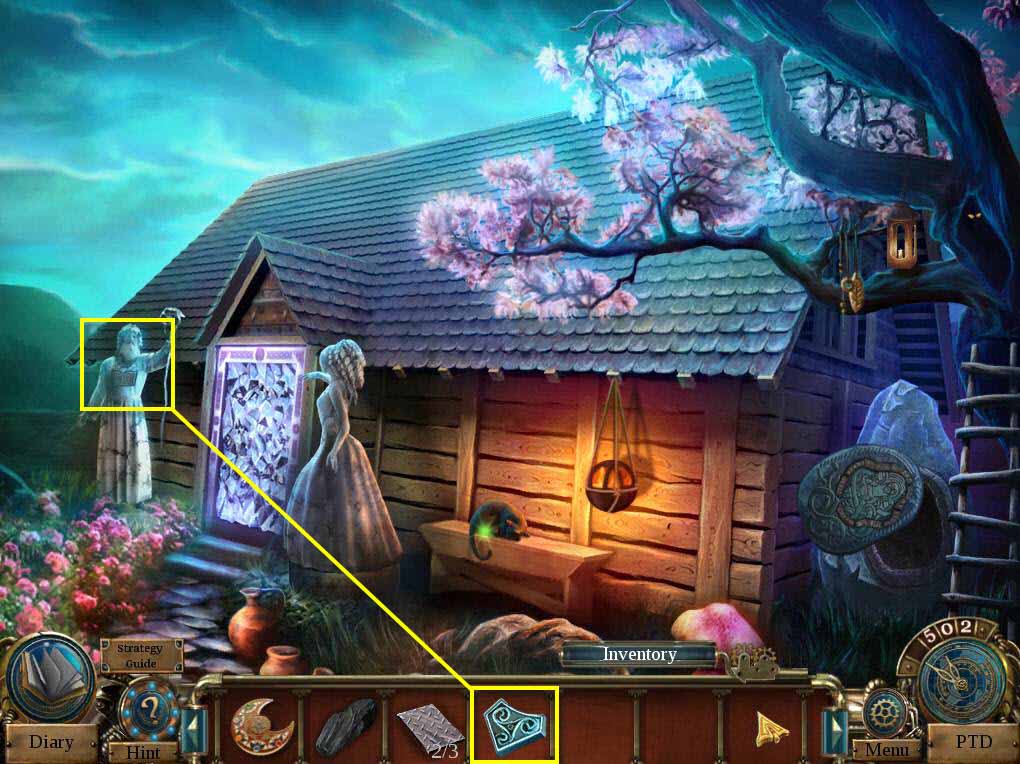
- Click on the statue of Merlin to zoom in.
- Use the TRISKELE SYMBOL on the empty slot.
-
Take the RING.
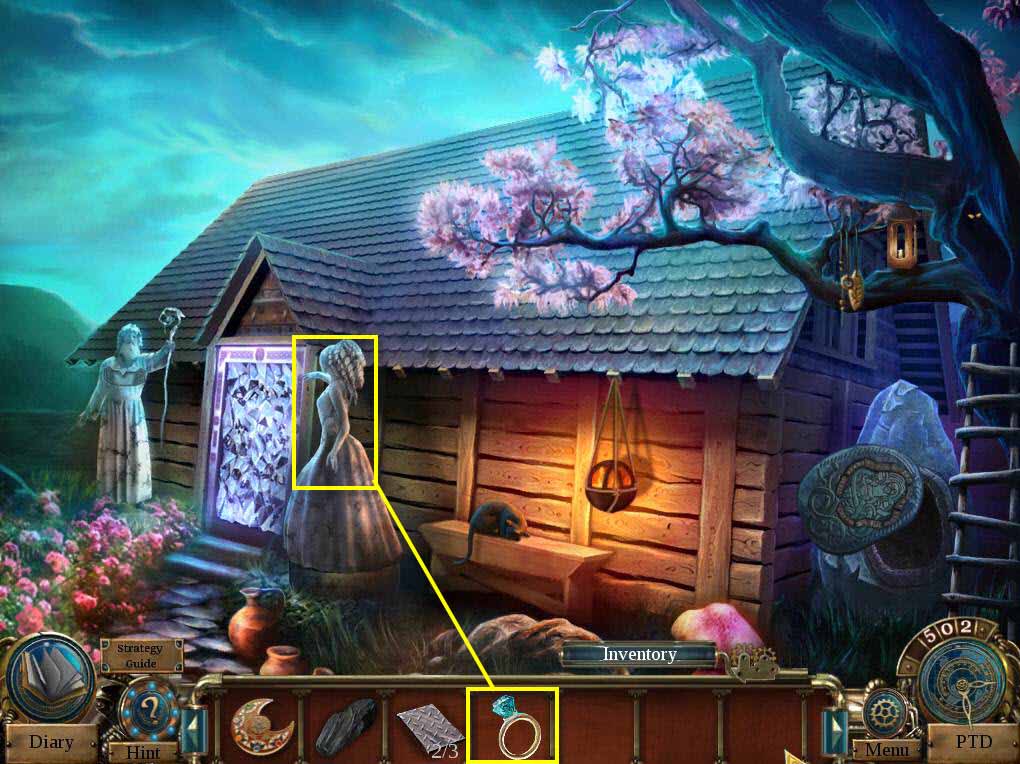
- Click on the statue of Viviane to zoom in.
- Use the RING on her finger.
- Click to zoom in on the door.
- Click on the gem.
-
Enter the hut.
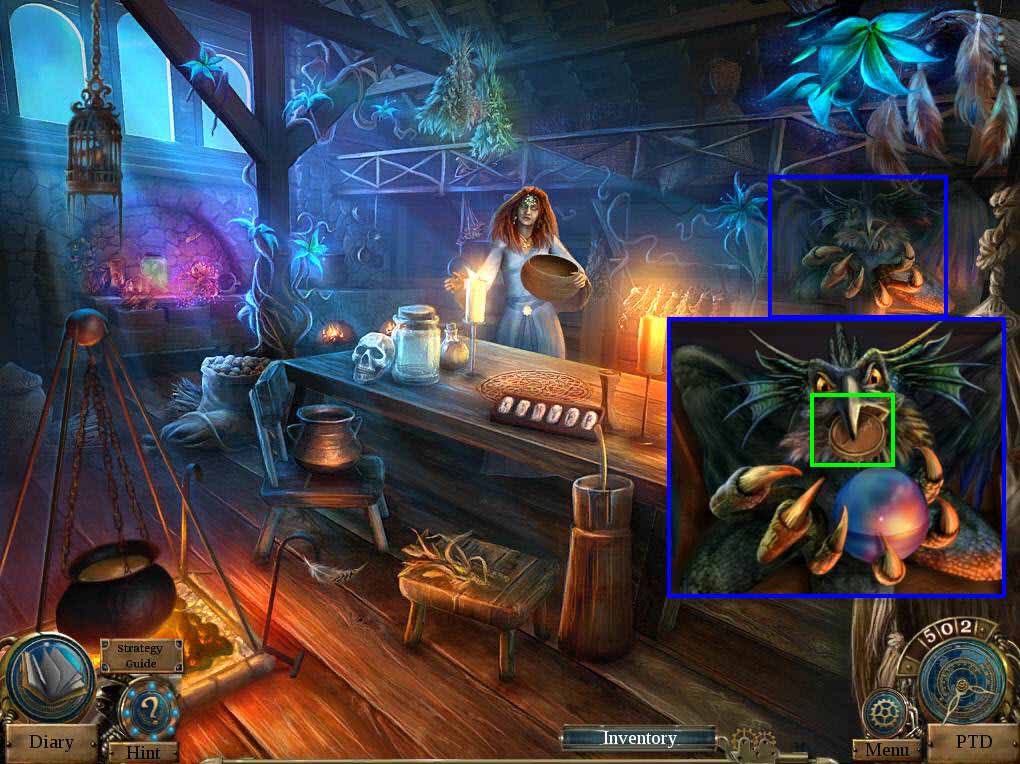
- Talk to Nimue.
- Click on the creature on the right to zoom in.
- Take the MAGIC SEAL.
- Time travel to 1812 to the bedroom.
-
Click on the sparkles to play the HOS.
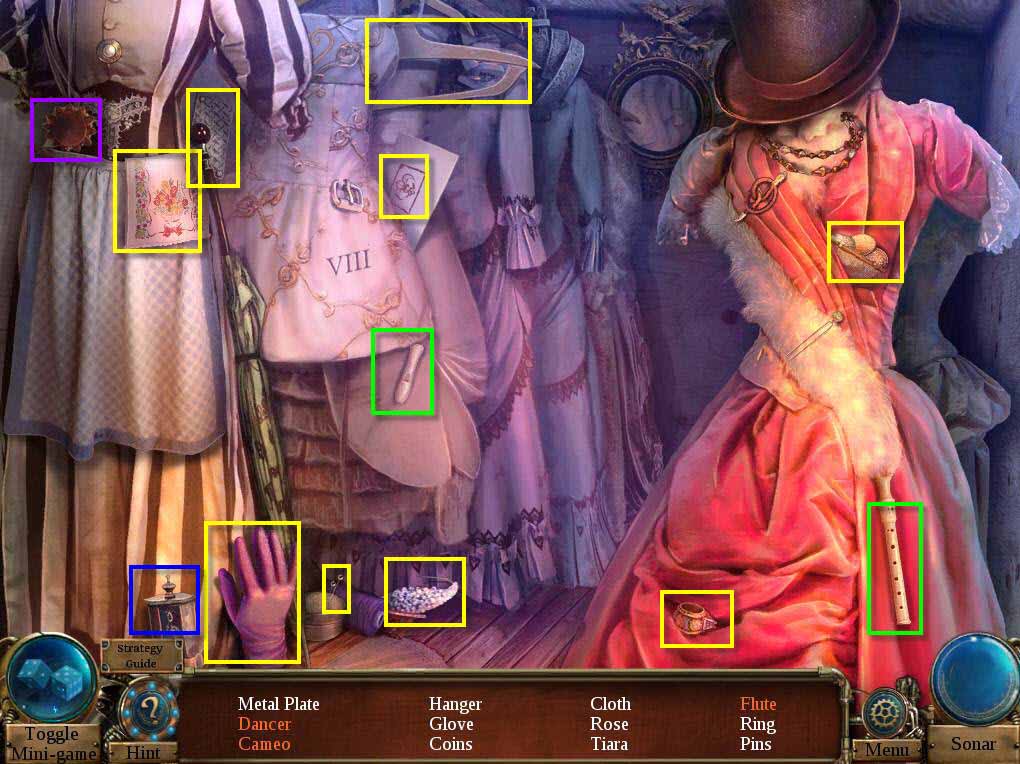
- Find all the items on the list.
- You will receive the 3/3 METAL PLATE.
- Go back two screens.
-
Click on the sparkles to play the HOS.
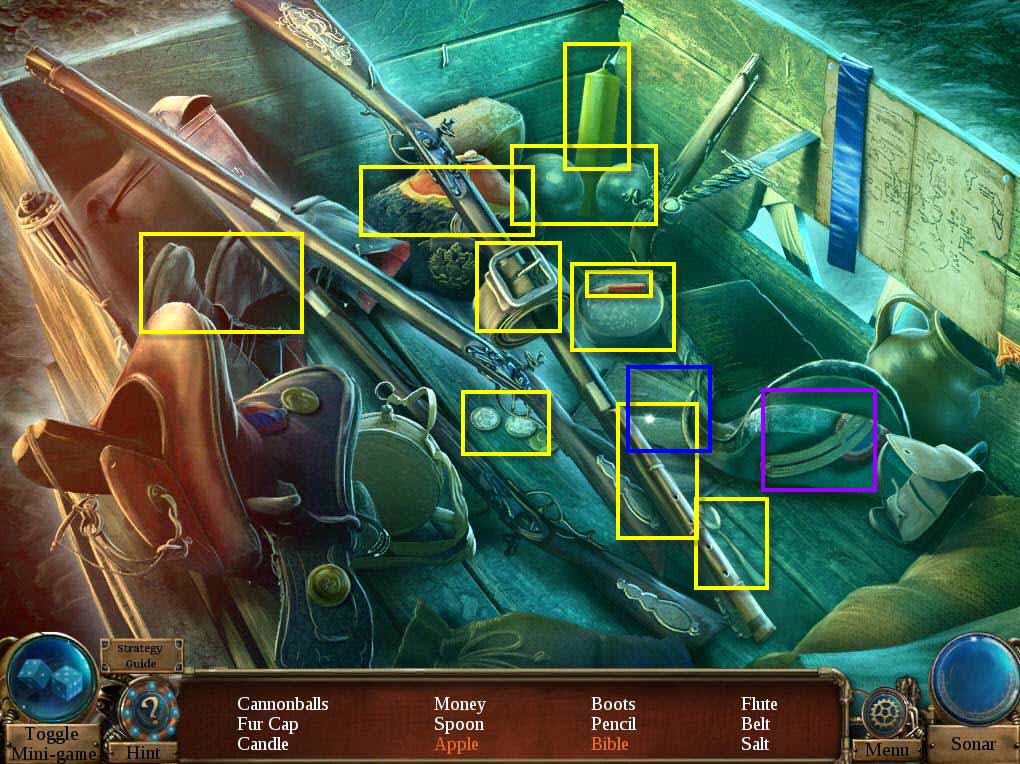
- Find all the items on the list.
- You will receive the CANDLE.
-
Go to the workshop.
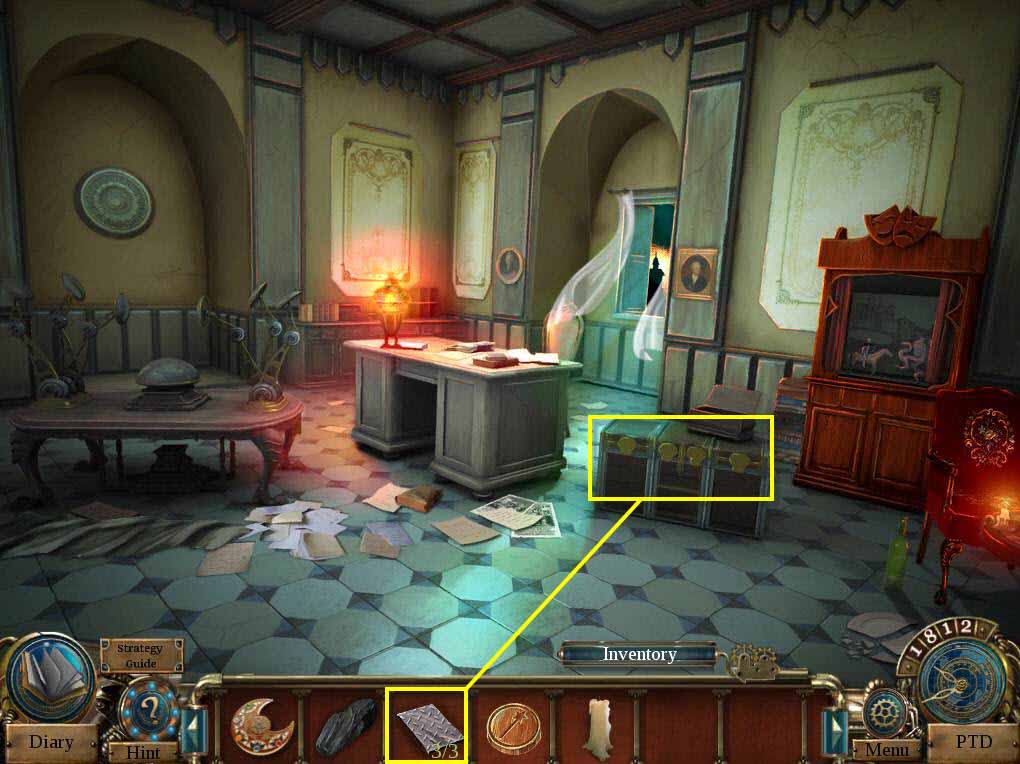
- Click on the chest to zoom in.
- Use the 3/3 METAL PLATES on the chest.
- Click to open and take the CIRCULAR SAW.
-
Time travel to 1796 to Uncle Sean's Lab.
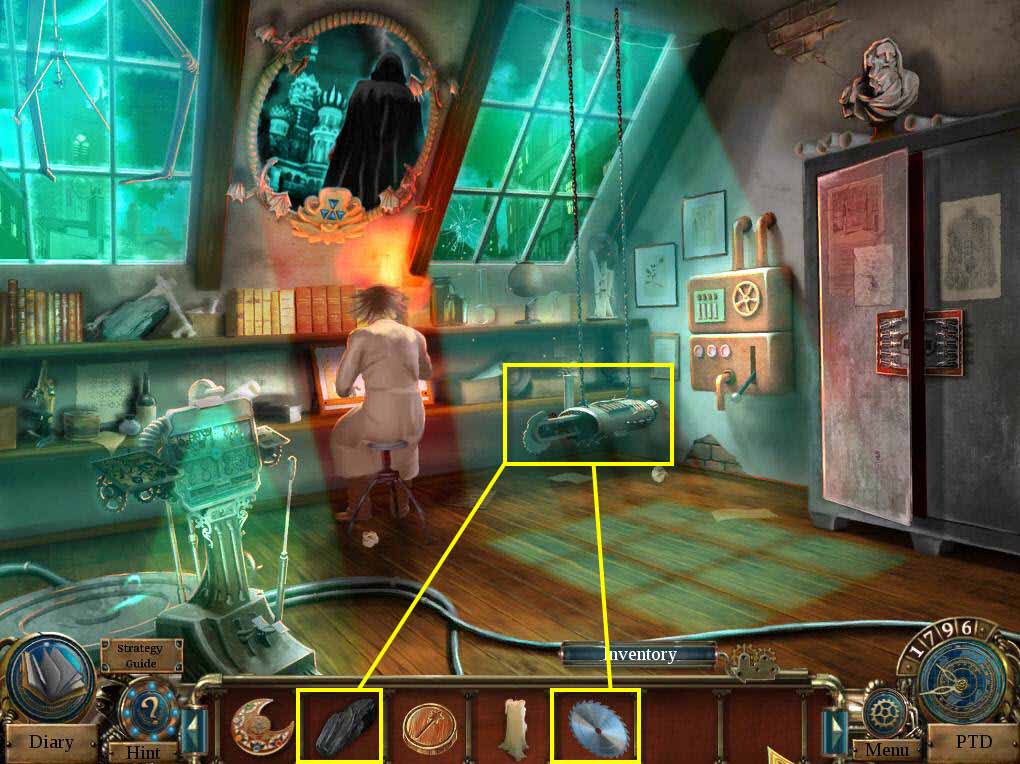
- Click on the saw to zoom in.
- Use the COAL on the empty slot.
- Use the CIRCULAR SAW to replace the old saw.
- Take the SAW PROTOTYPE.
-
Time travel to 487 to the meadow.
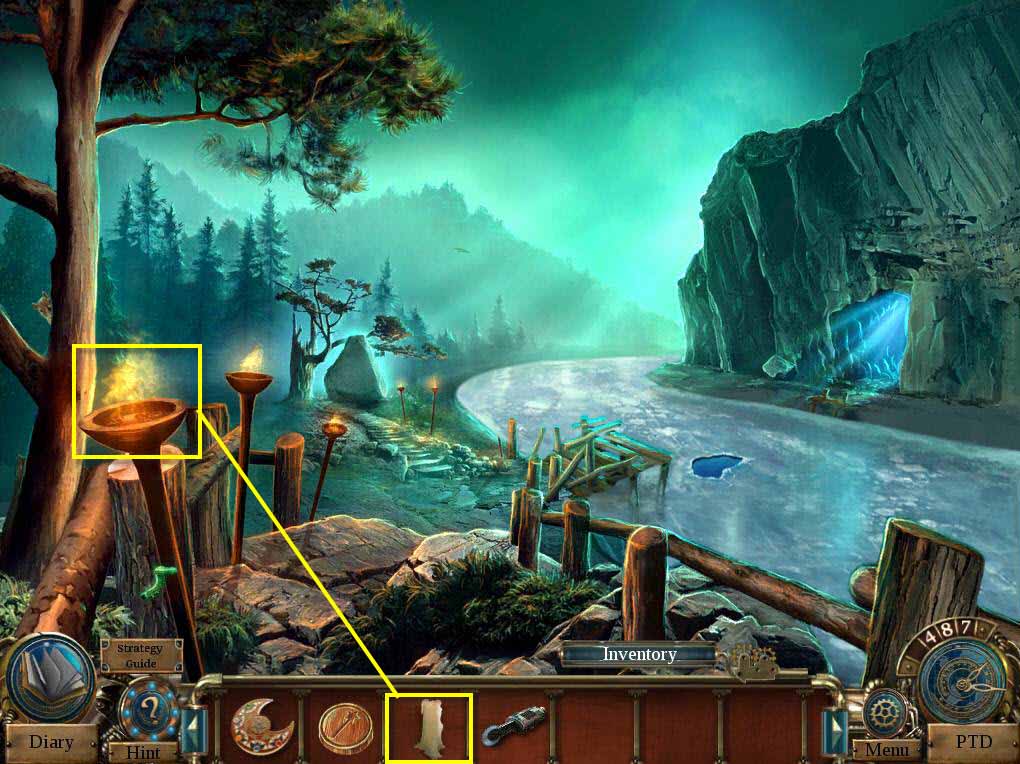
- Use the CANDLE on the torch.
- You will receive the BURNING CANDLE.
-
Time travel to 1812 to the garden.
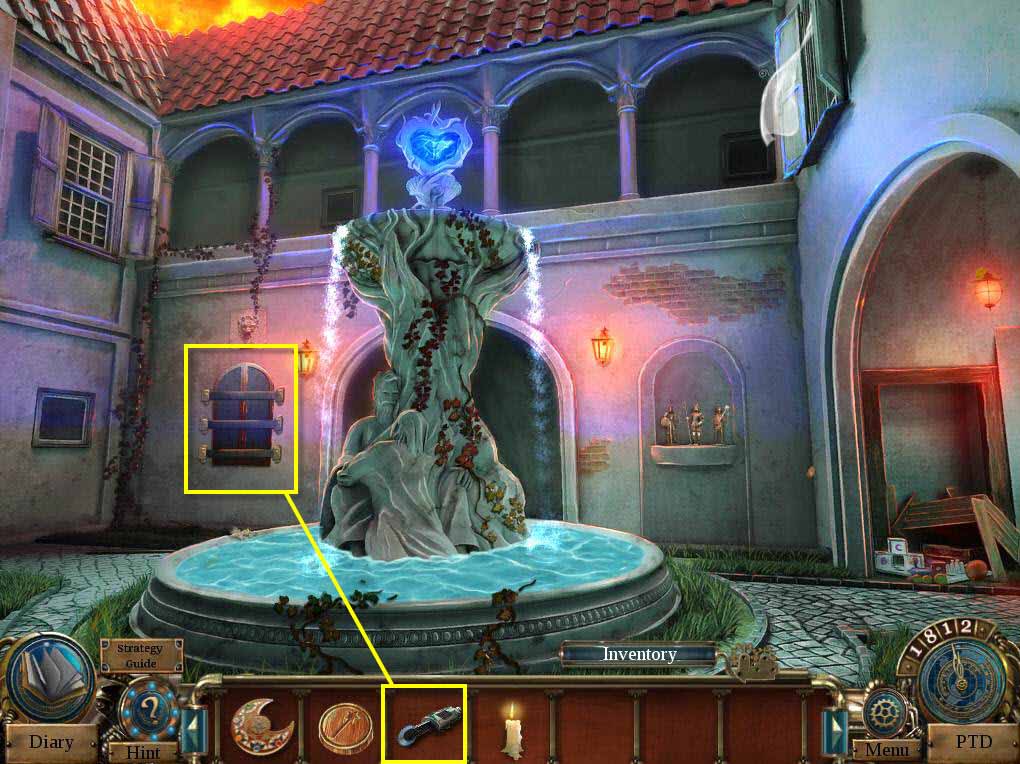
- Click on the window that's boarded up to zoom in.
- Use the SAW PROTOTYPE on the boards to cut them.
- Click to open the window.
- Click to move the cloth.
- Take the CRYSTAL BALL.
-
Time travel to 502 to Merlin's Hut.
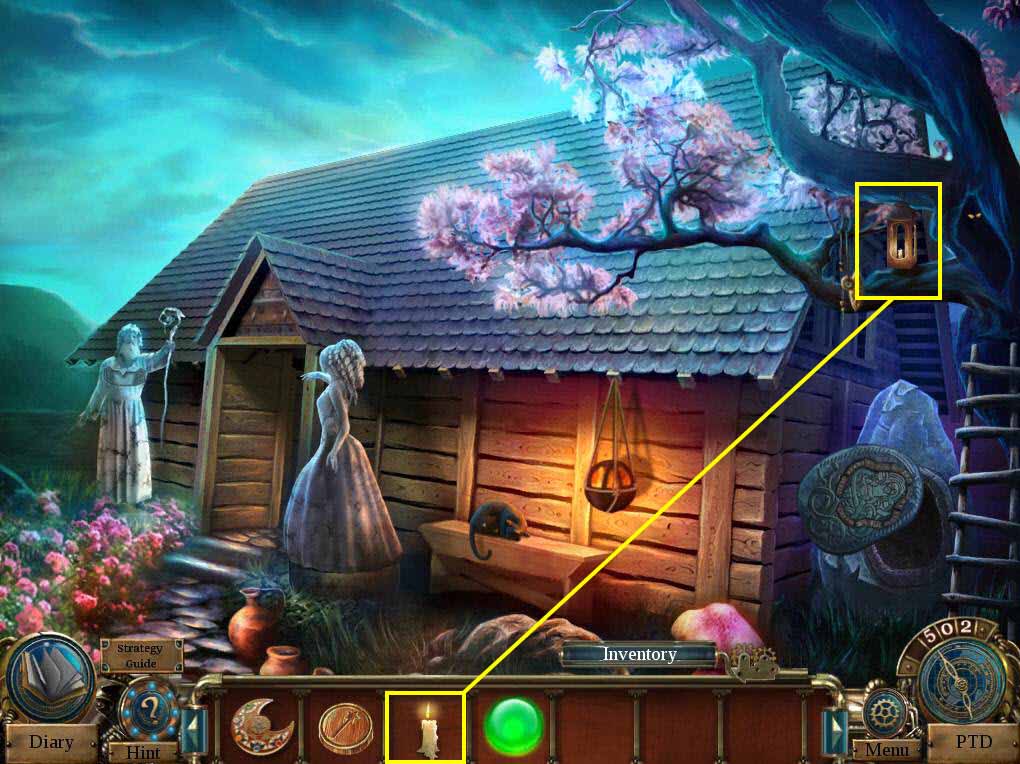
- Click on the tree to zoom in.
- Use the BURNING CANDLE on the lantern to light it.
- Take the EARTH SEAL.
-
Go back one screen.
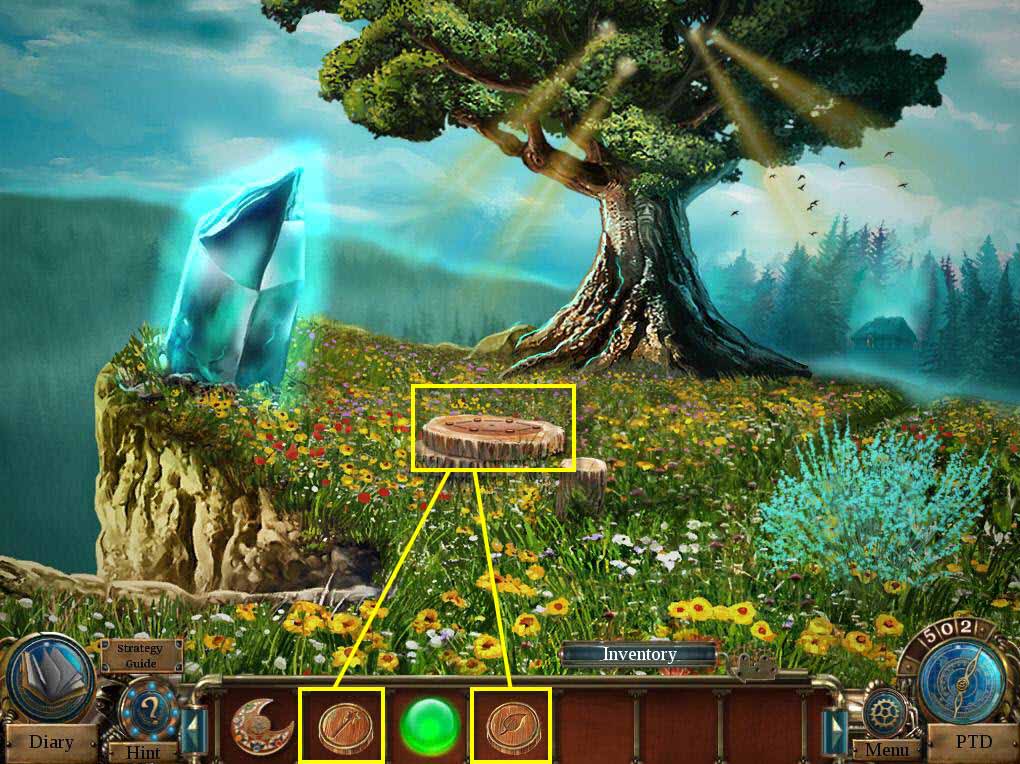
- Click on the wooden plate to zoom in.
- Use the MAGIC SEAL on the plate.
- Use the EARTH SEAL on the plate.
-
This will start a mini-game.
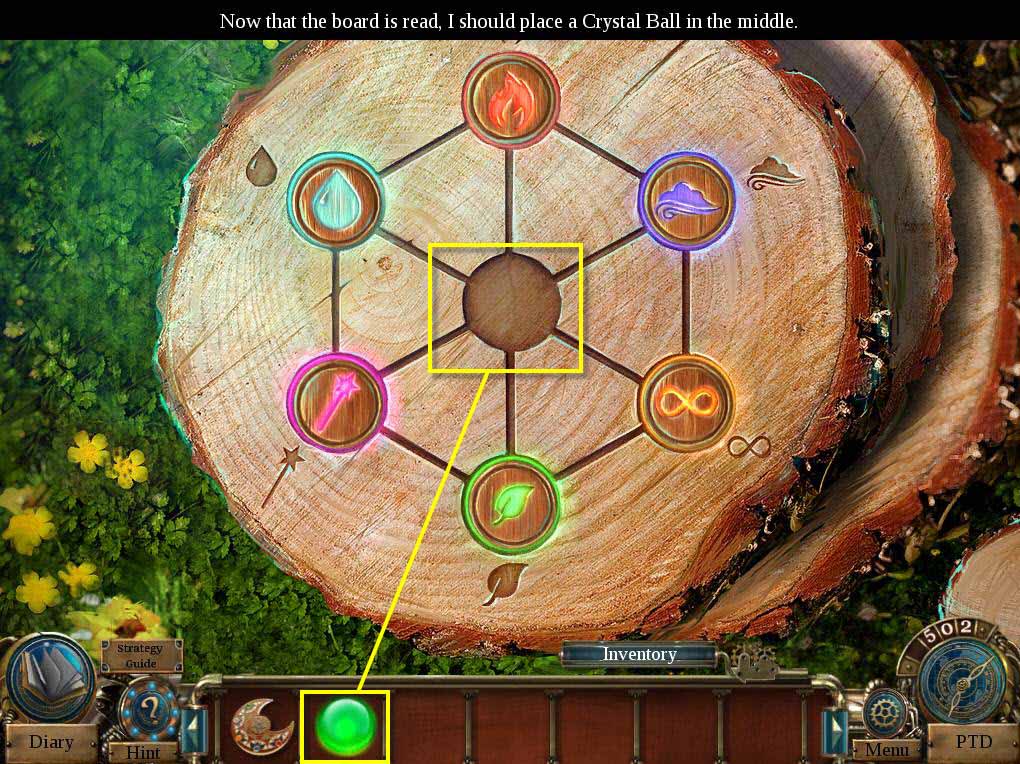
- The goal of the game is to move the seals to the correct position based on the symbols next to the spot.
- When you're done, use the CRYSTAL BALL on the middle area.
- You will receive MERLIN IN A CRYSTAL BALL.
-
Time travel to 1913 to the bedroom.
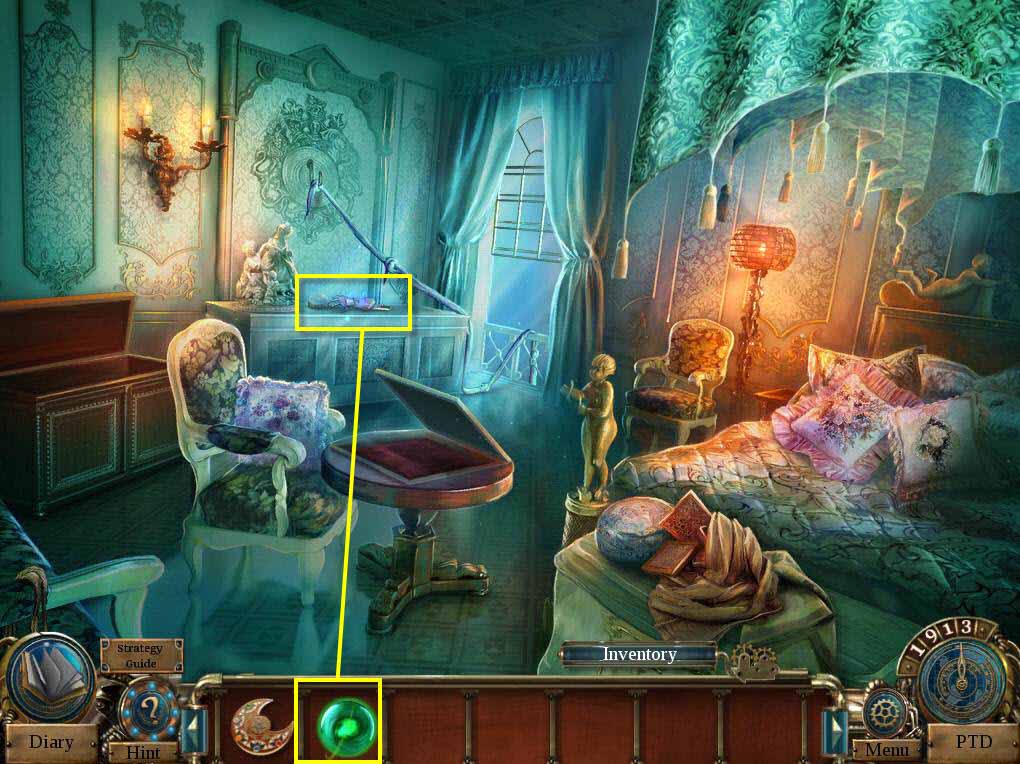
- Click on the dresser to zoom in.
- Use MERLIN IN A CRYSTAL BALL on the glove.
