
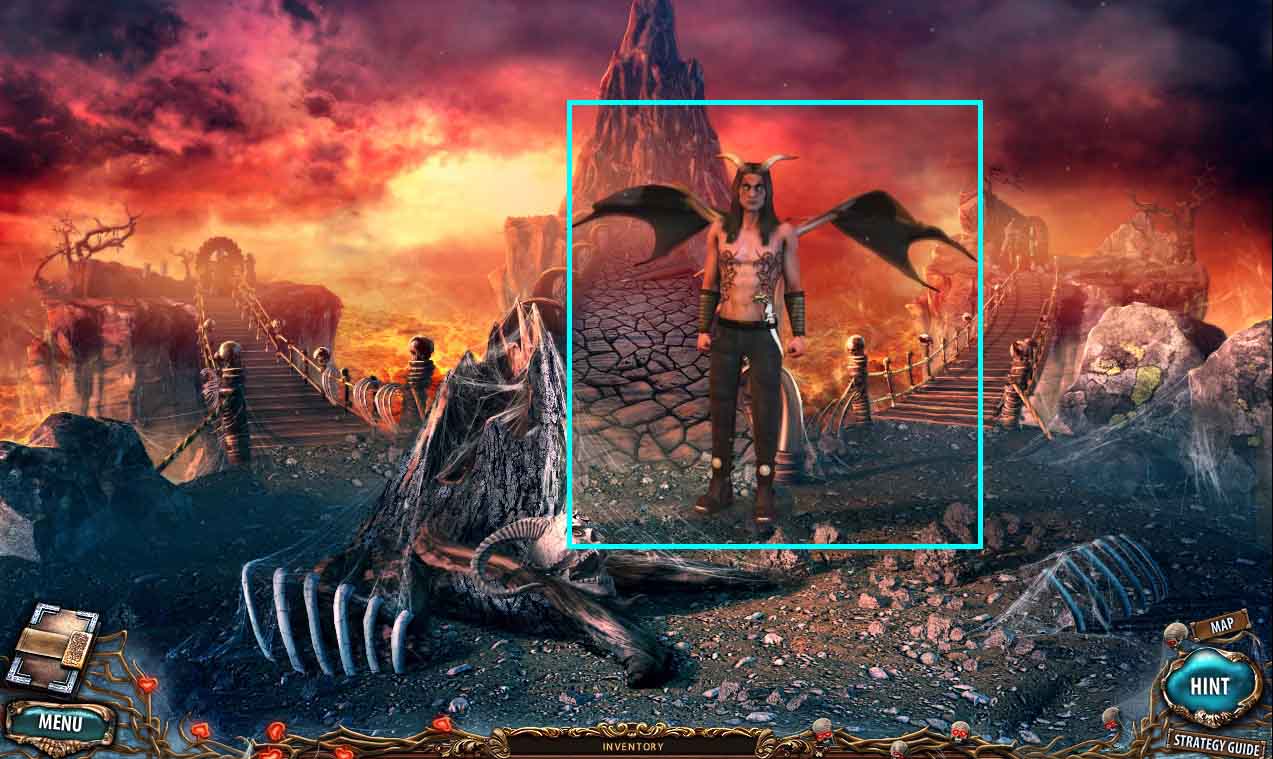
Sacra Terra: Kiss of Death: Bonus Chapter: Retribution
Our Sacra Terra: Kiss of Death Walkthrough will help strengthen your resolve as you delve deeper into this nightmare in order to rescue your fiancé. Face down this terrible creature that feeds off human suffering and use our easy-to-understand instructions, detailed screenshots, and puzzle solutions to free its victims from its terrifying torment.
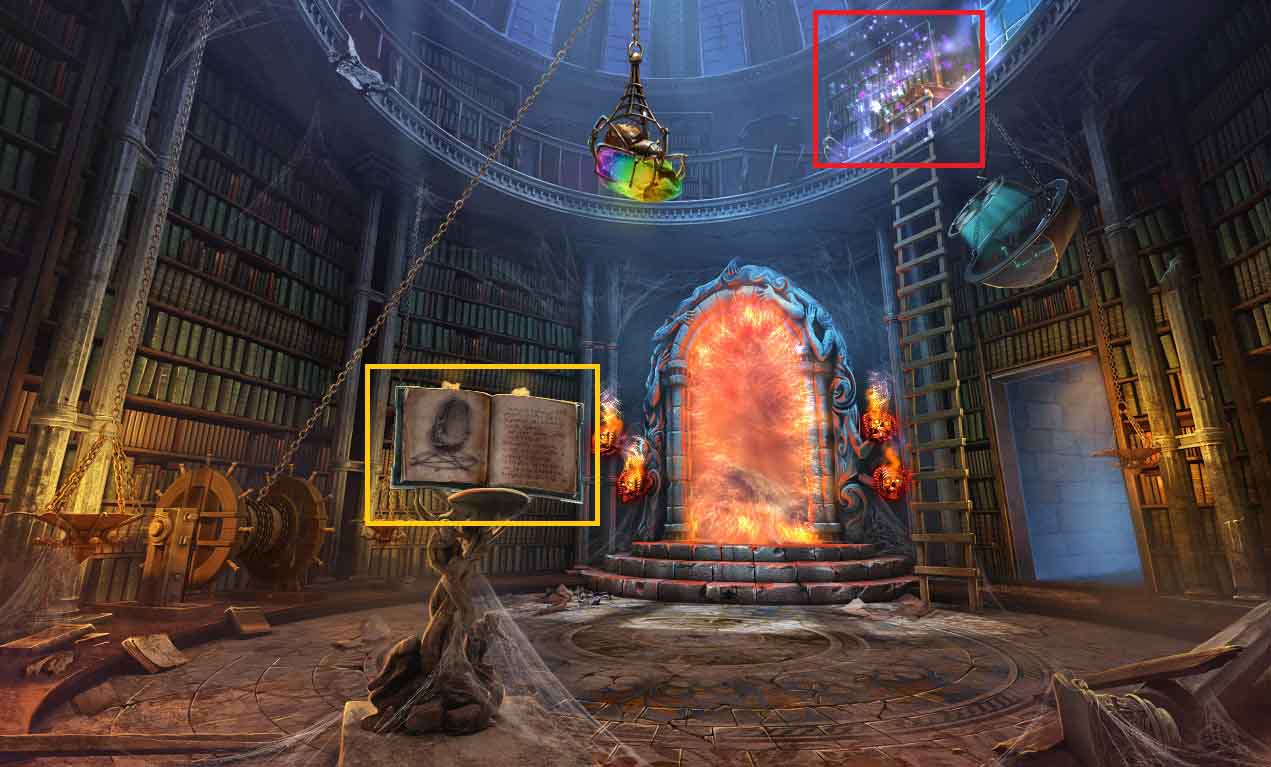
- Examine the magic book.
- Notice the ritual described.
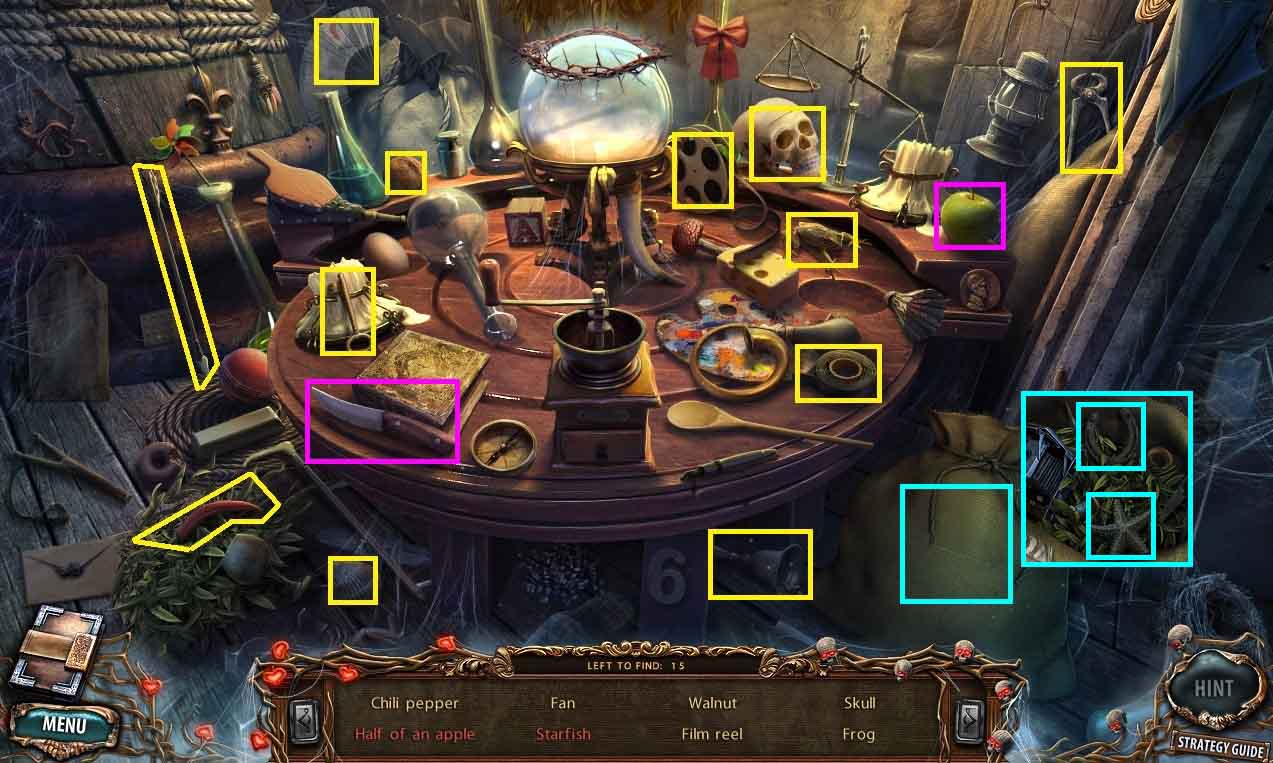
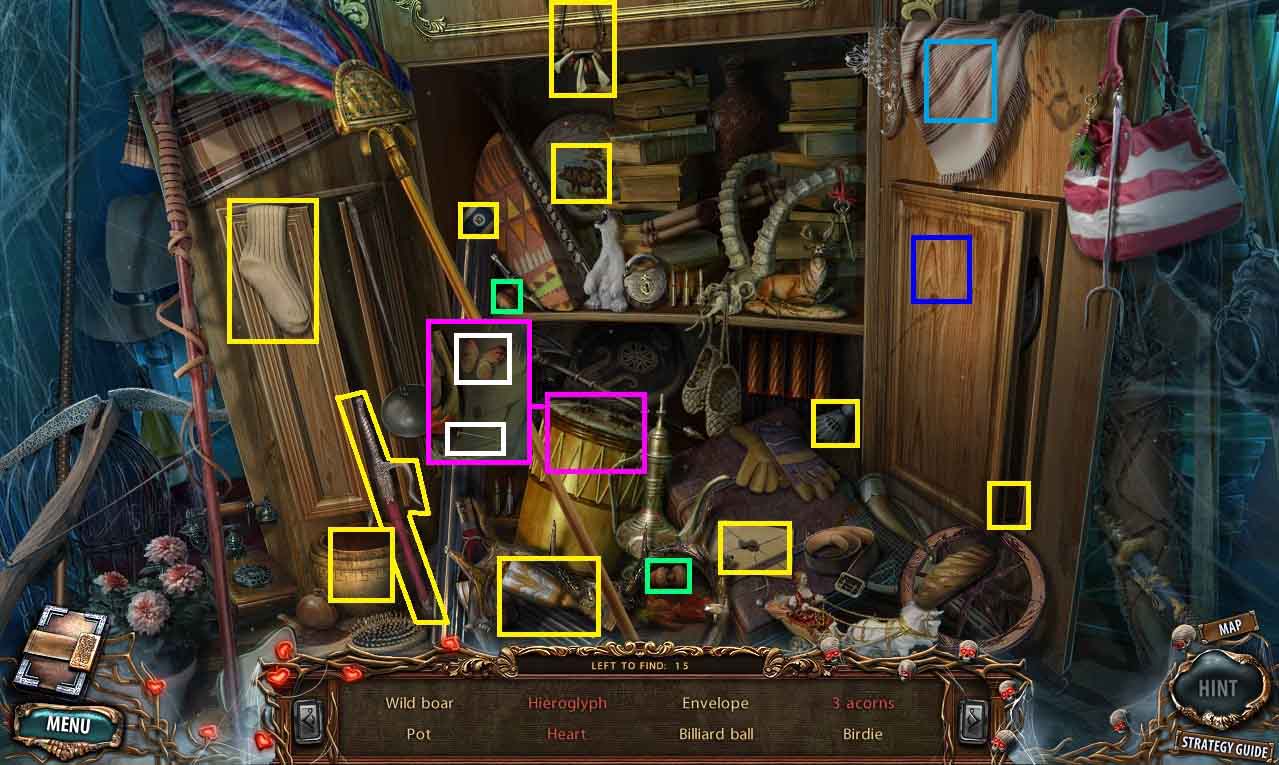
- Click the hidden objects area.

- Find the listed items.
- Collect the doll.
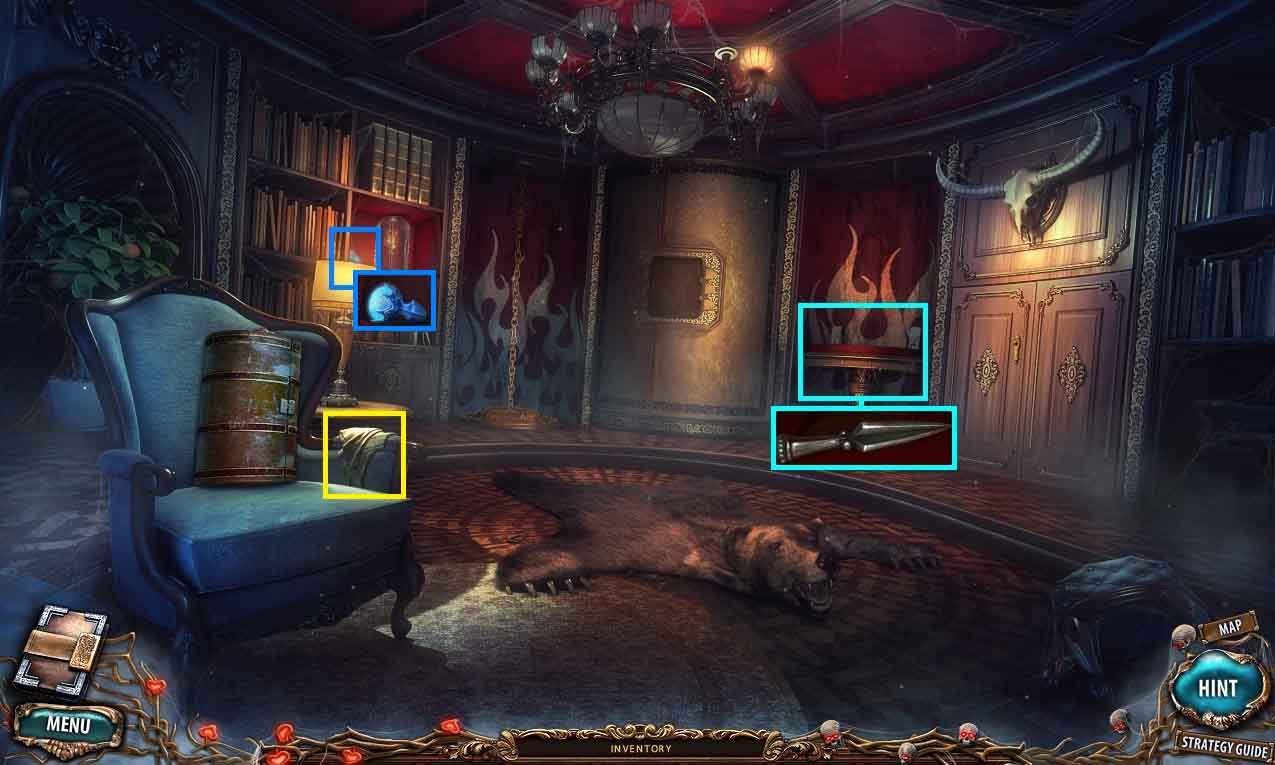
- Move to the meeting room.

- Collect the dagger from Tiffany.
- Move to the office.
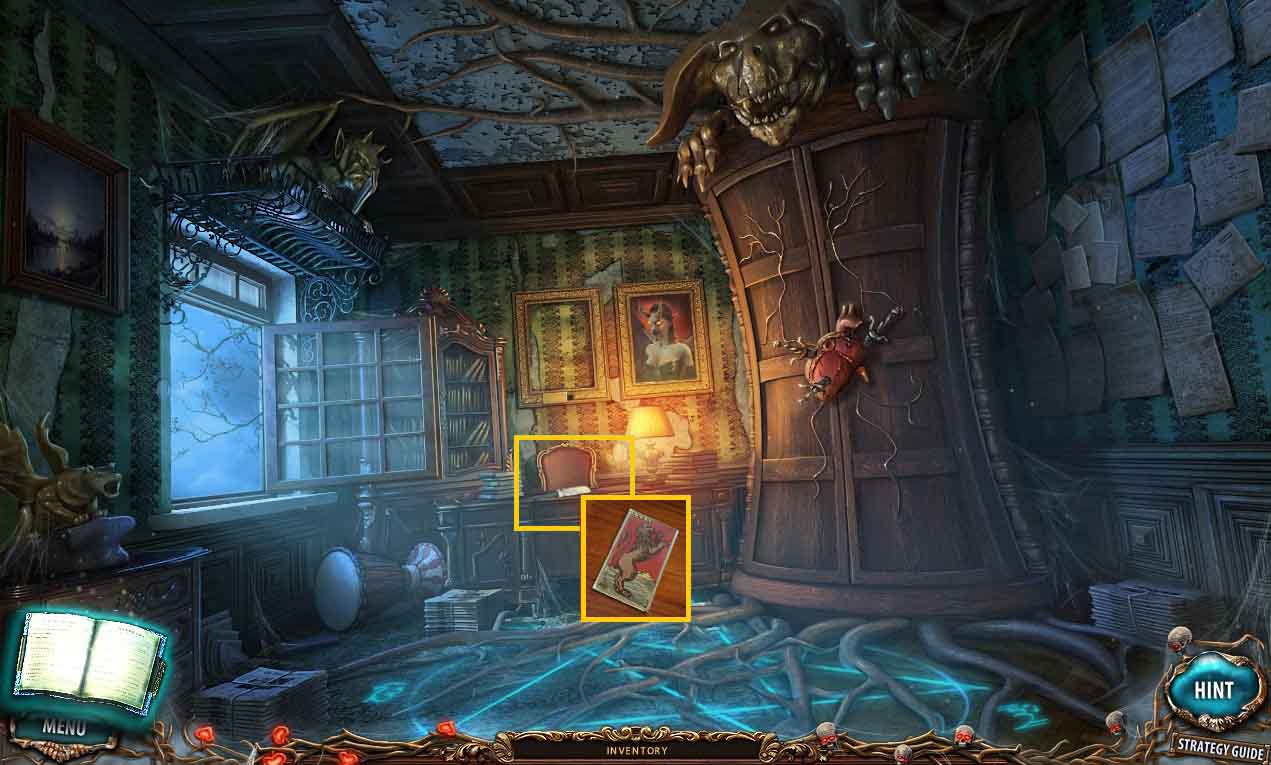
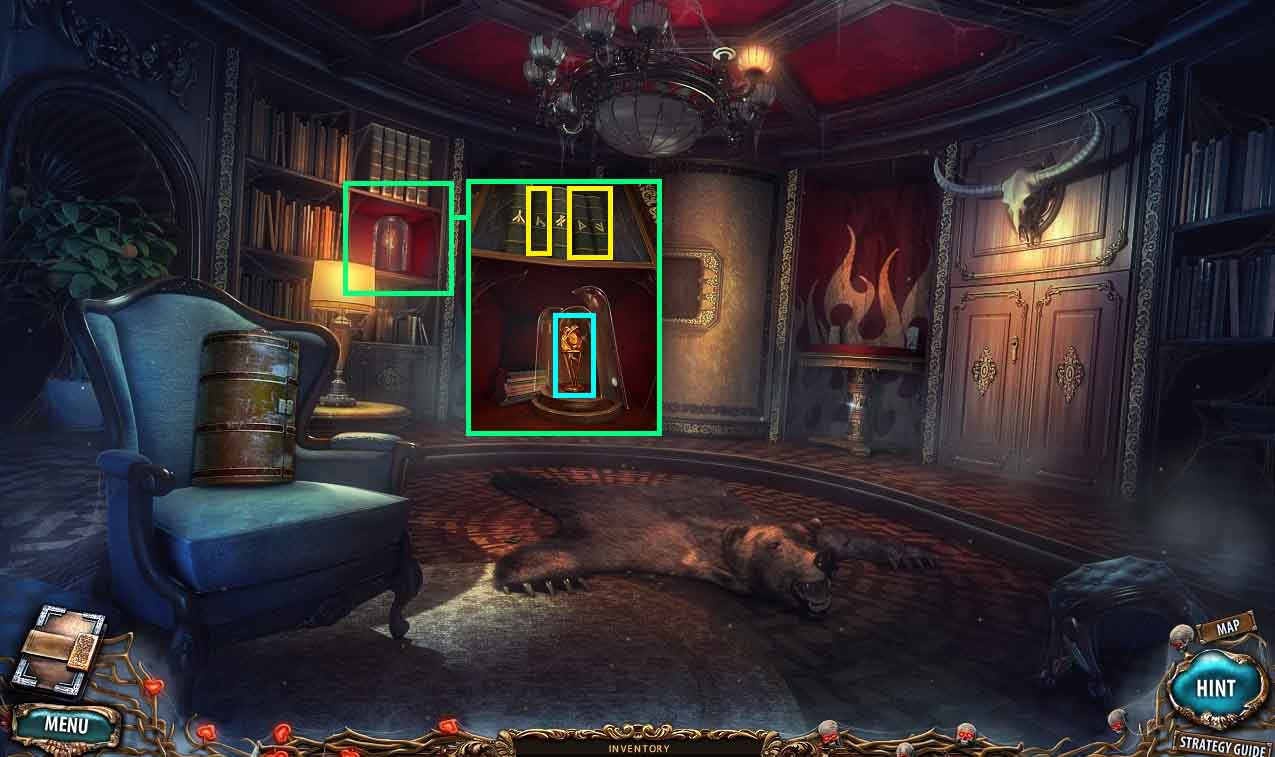
- Collect the tarot card.
- Move to the main hall.
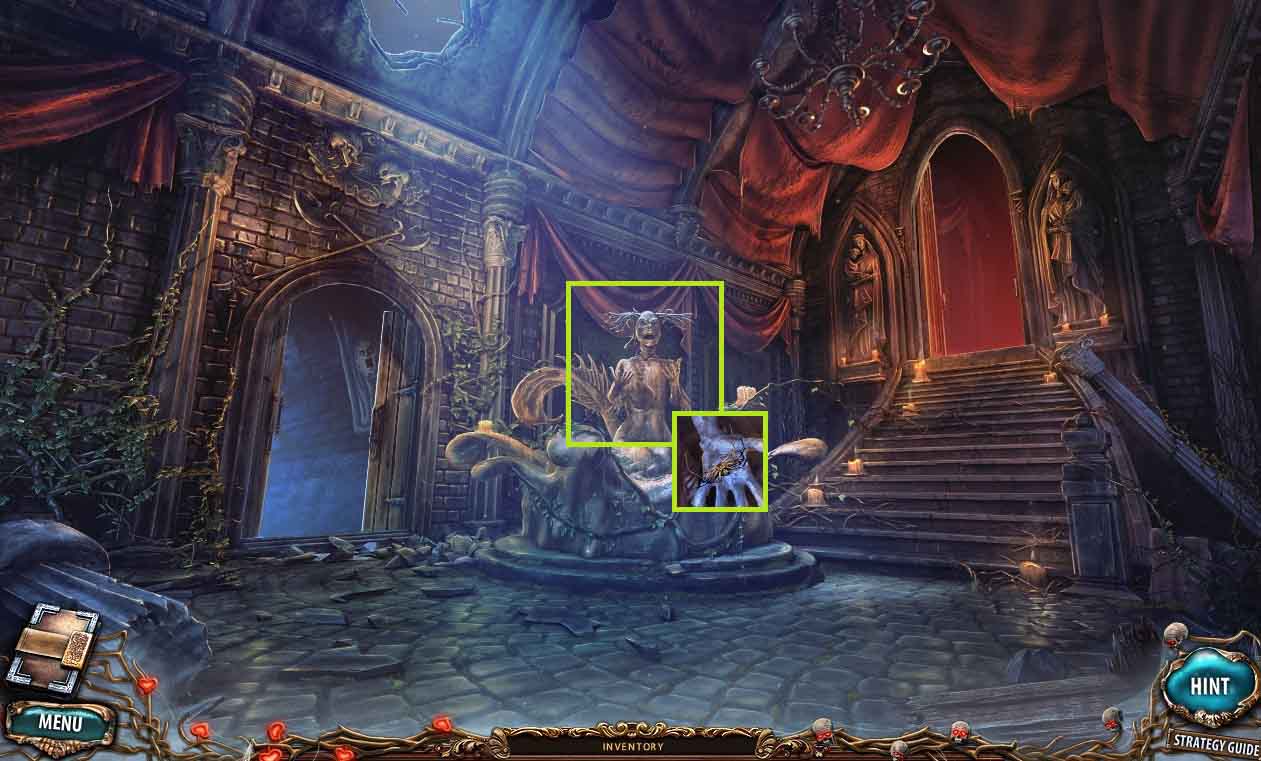
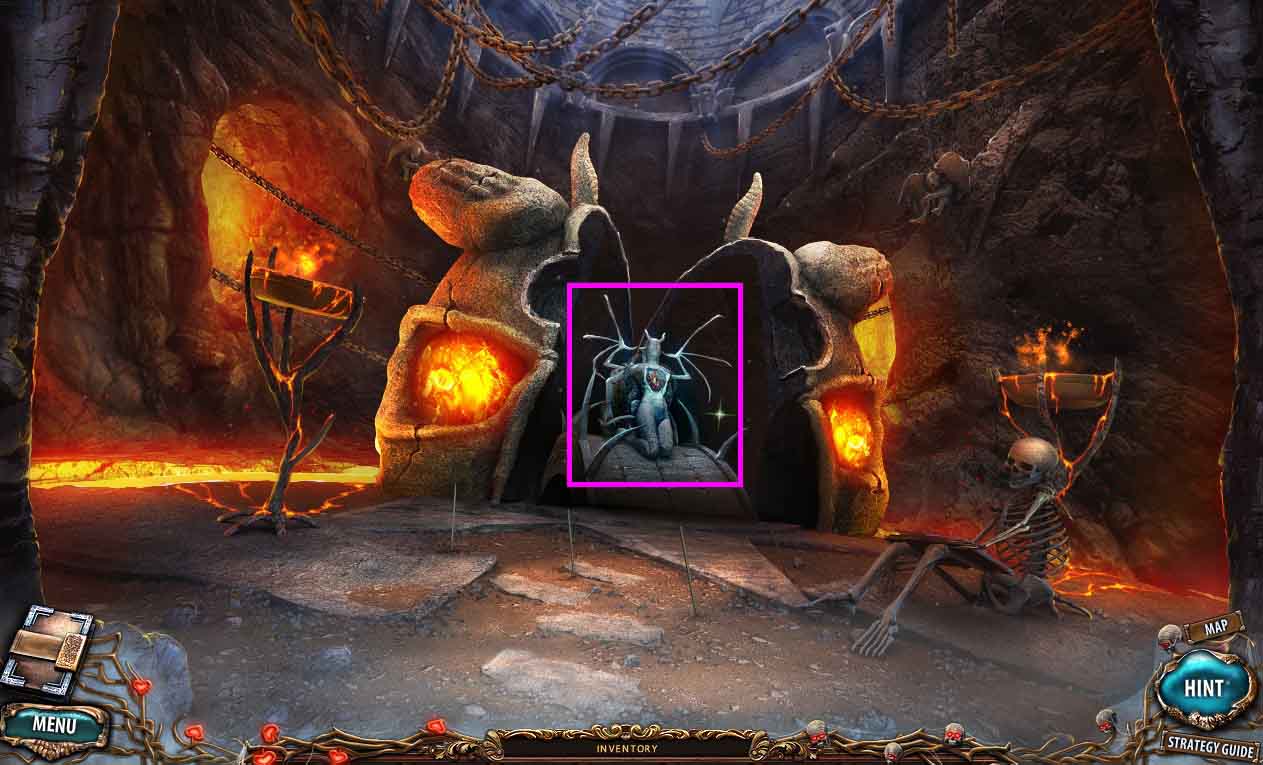
- Collect the spider.
- Move to the cellar stairs.

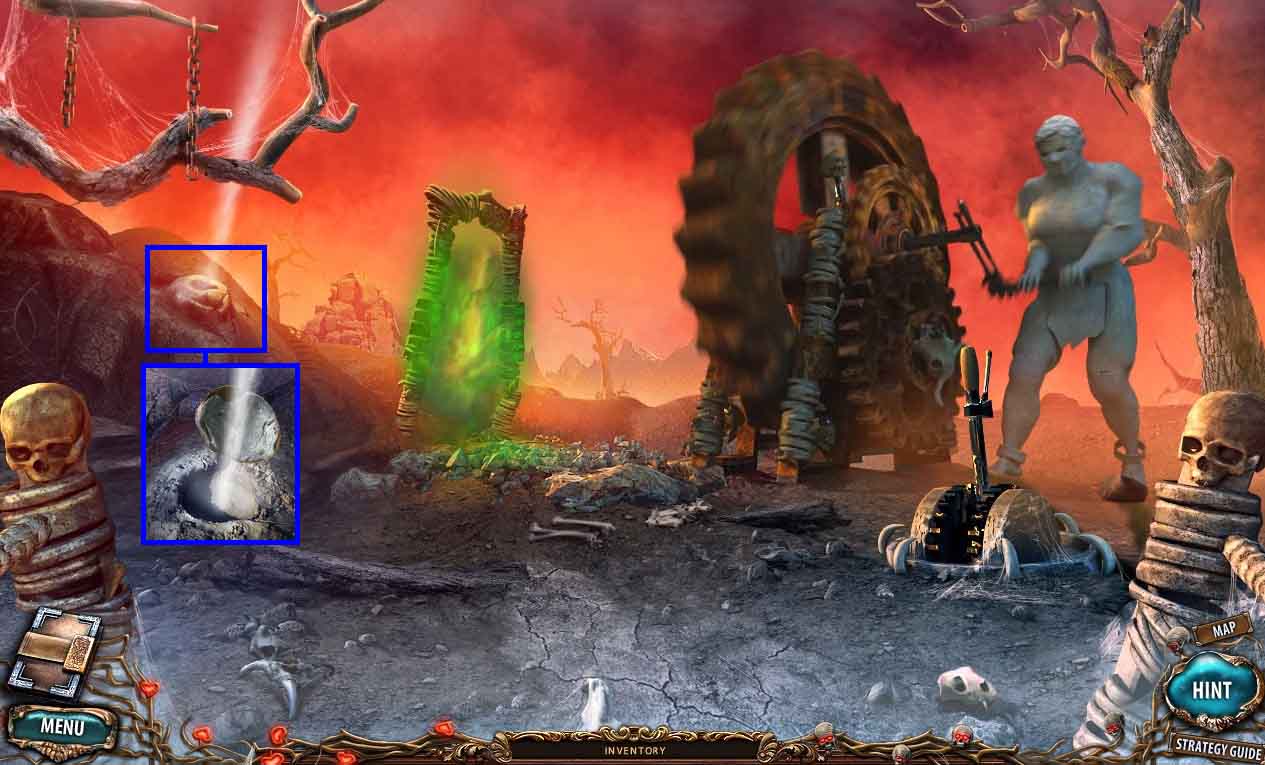
- Collect the head of grain.
- Examine the glowing symbol.
- Click the center stone.
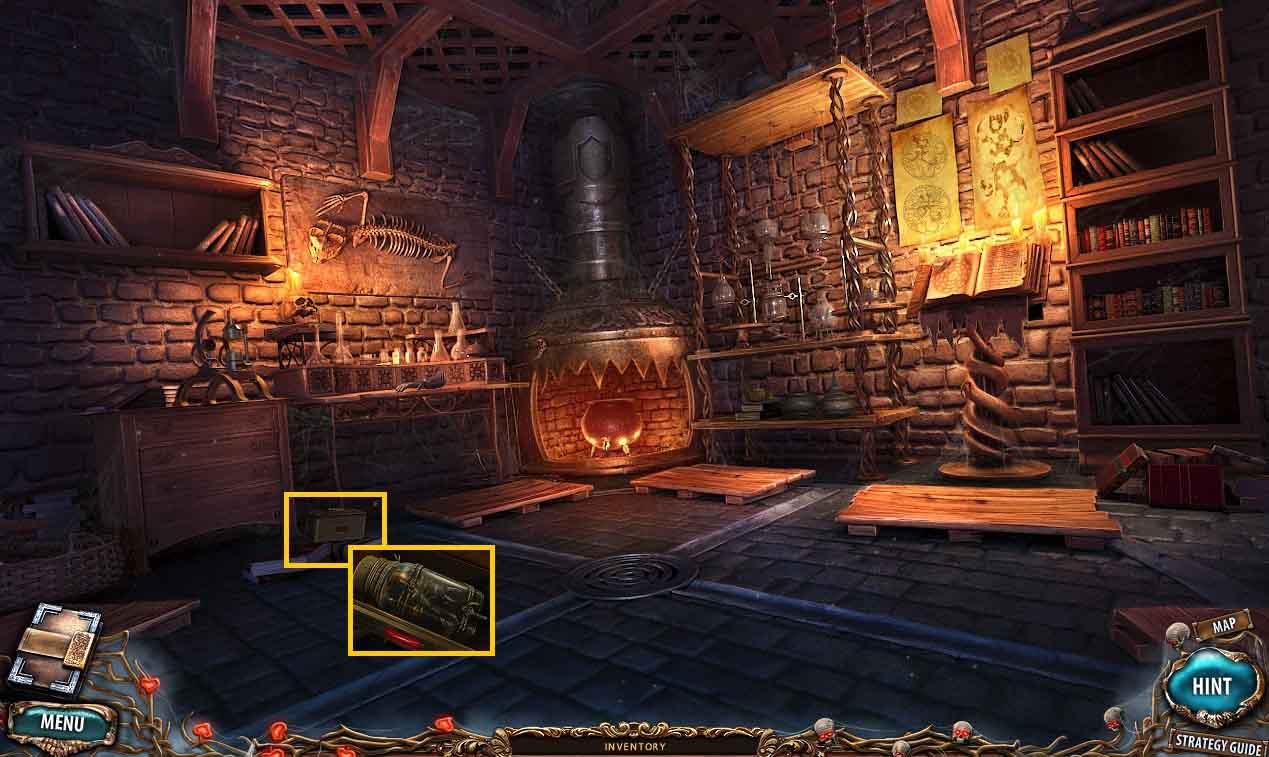
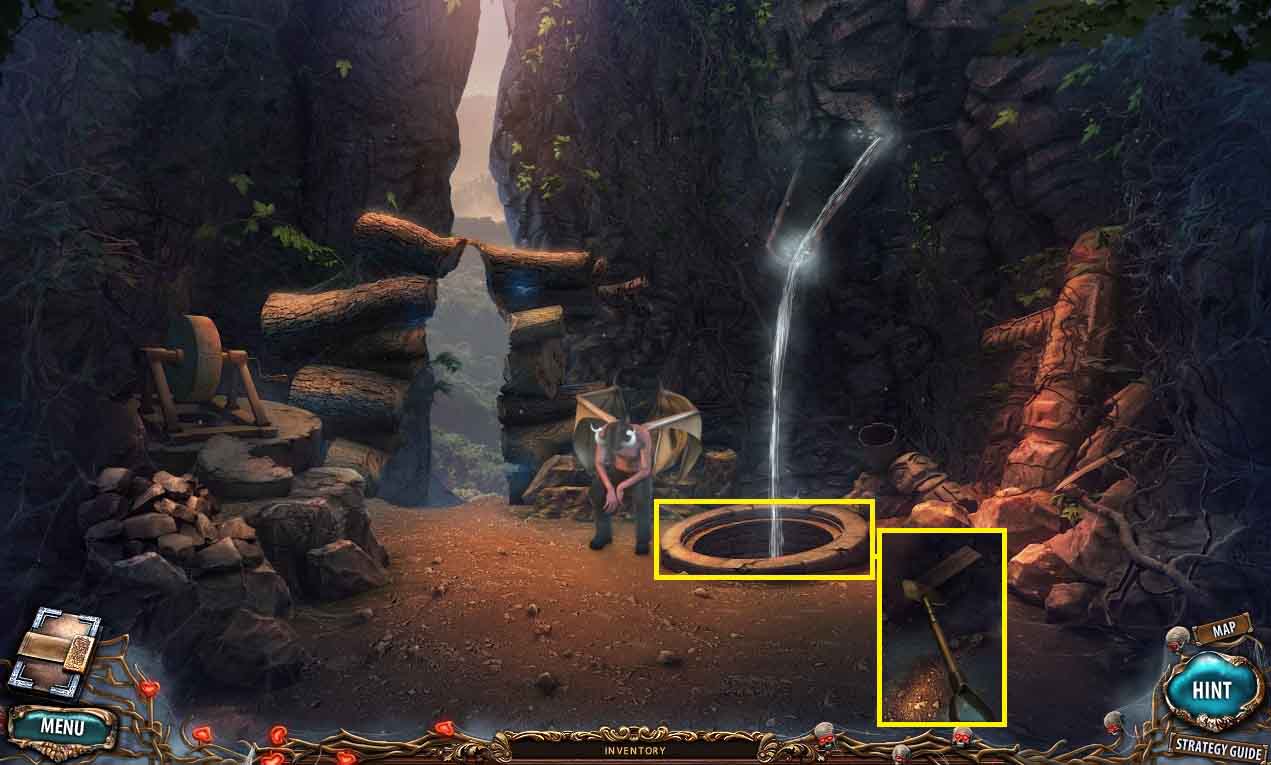
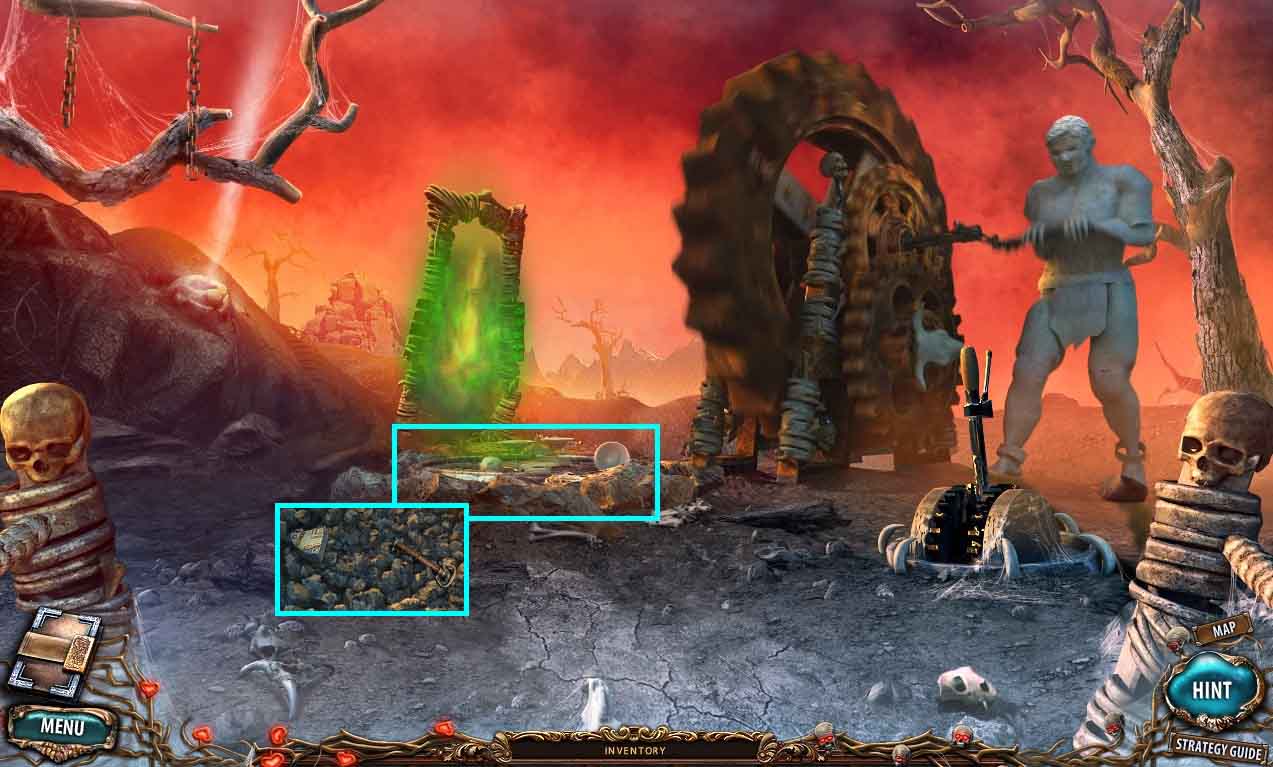
- Go into the cellar.
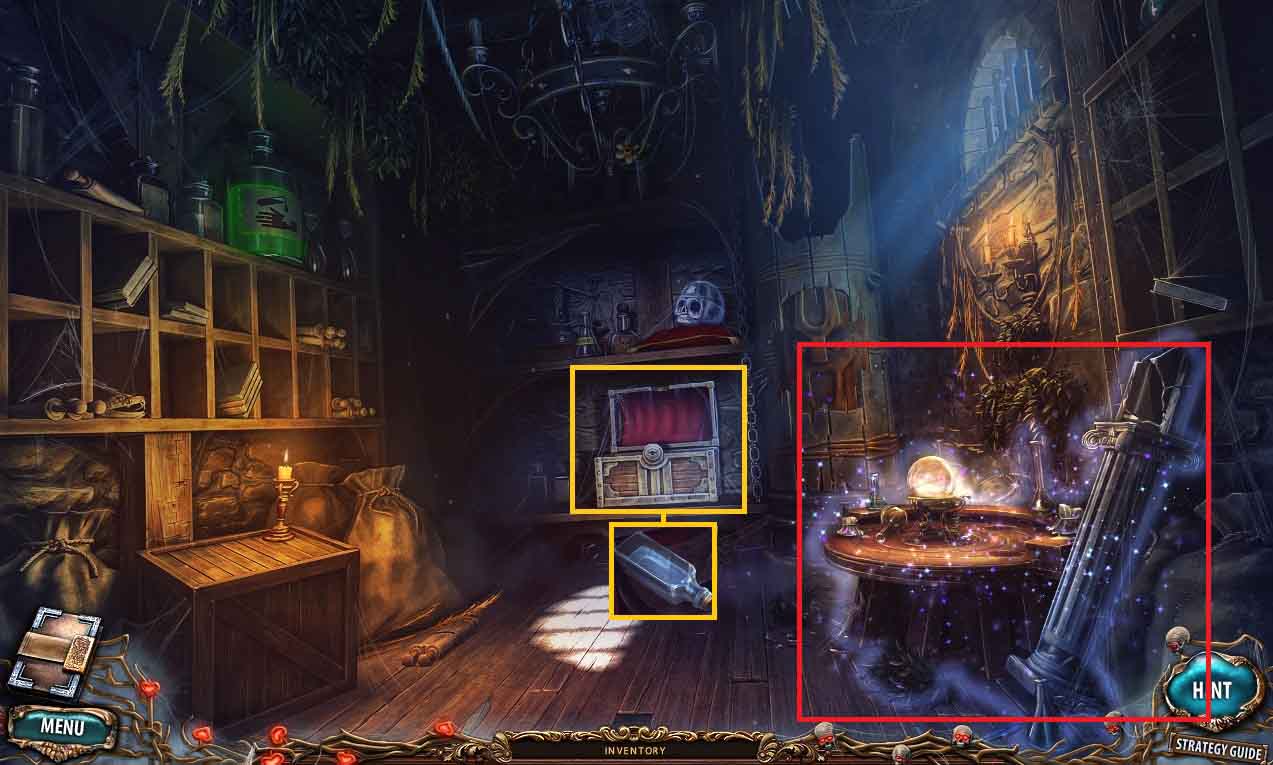
- Collect the bottle of water.
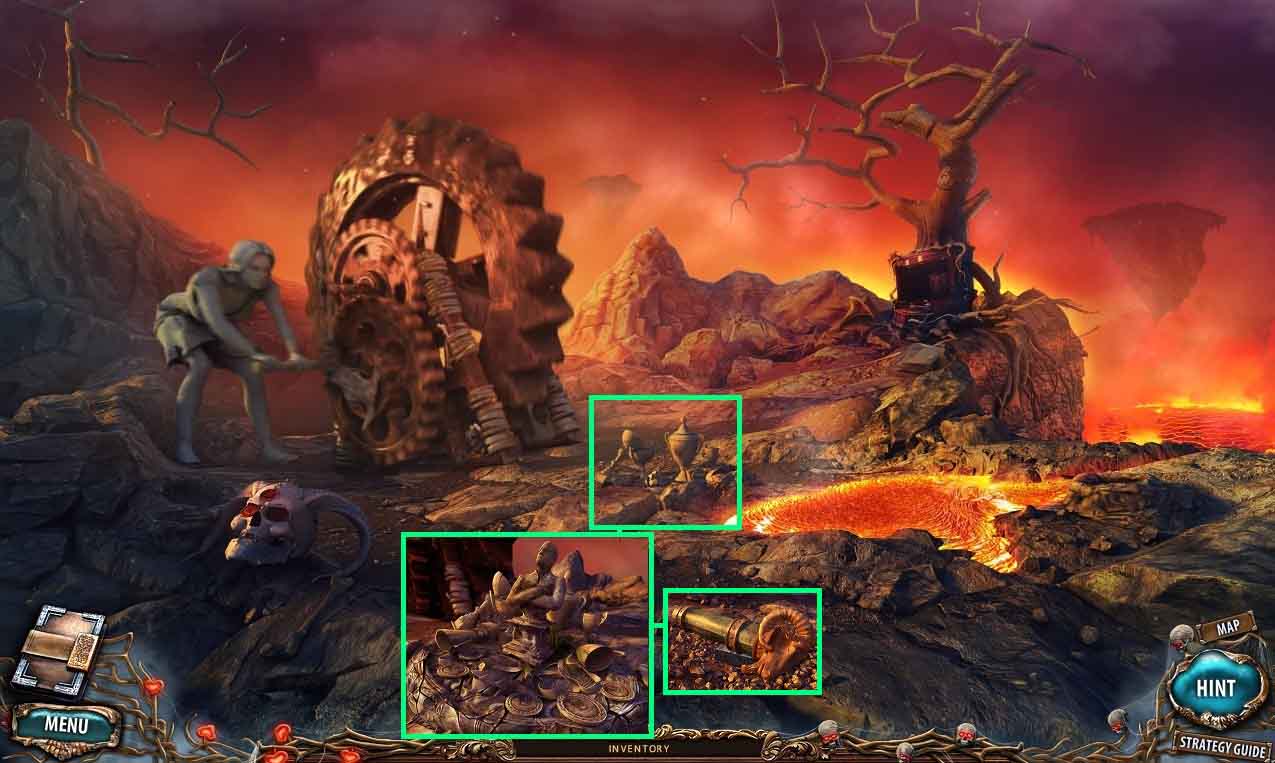
- Click the hidden objects area.
- Find the listed items.
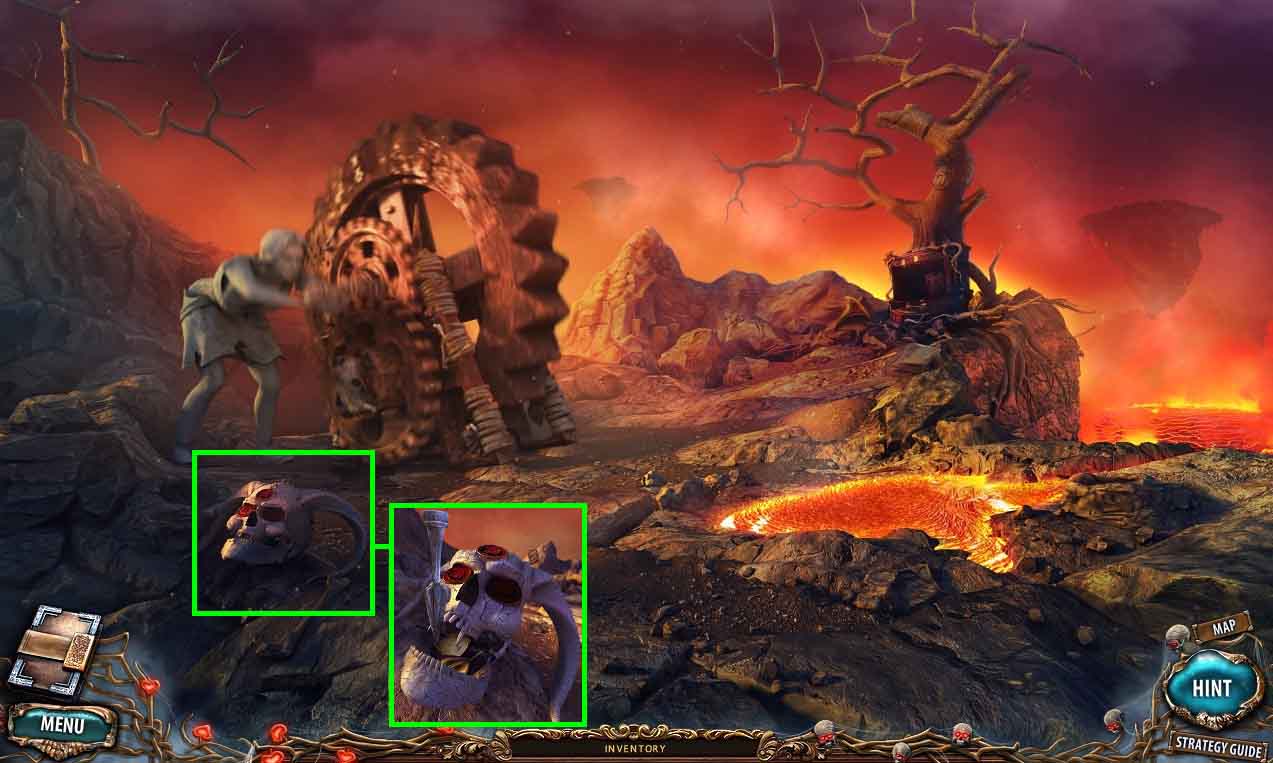
- Collect the skull.
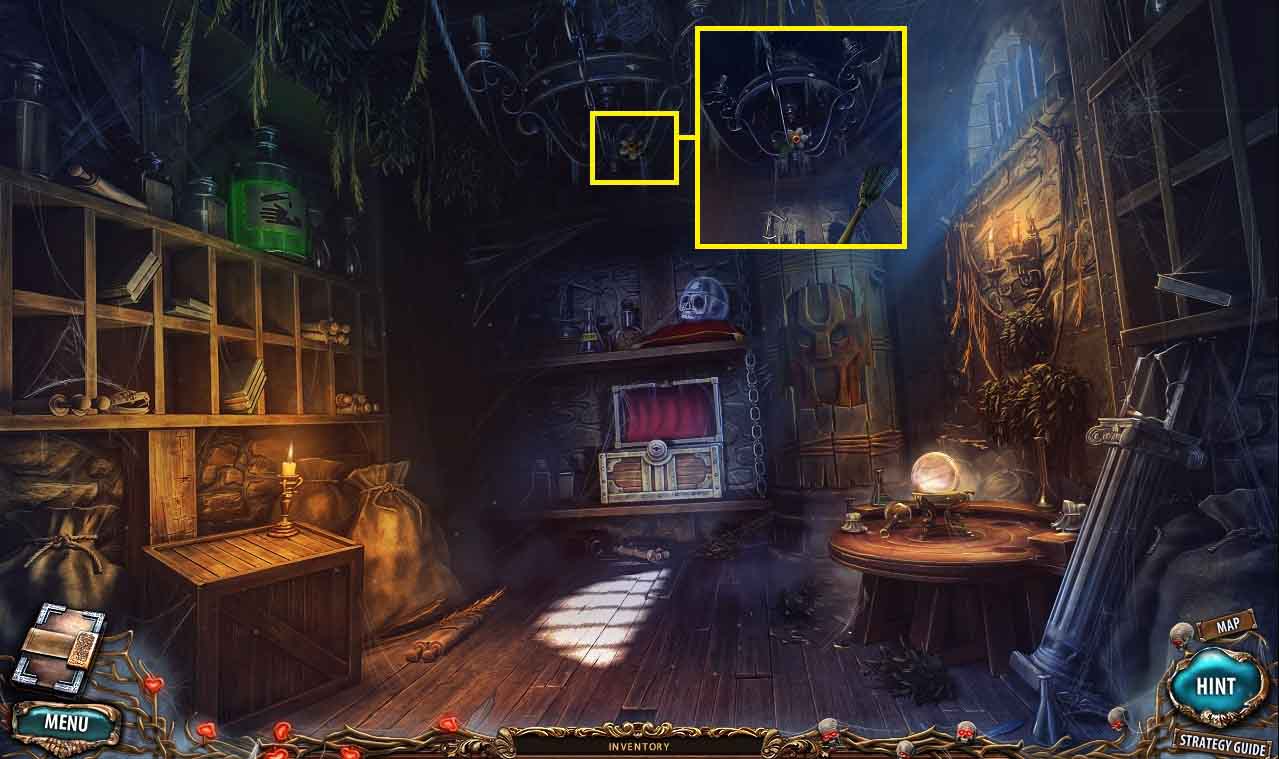
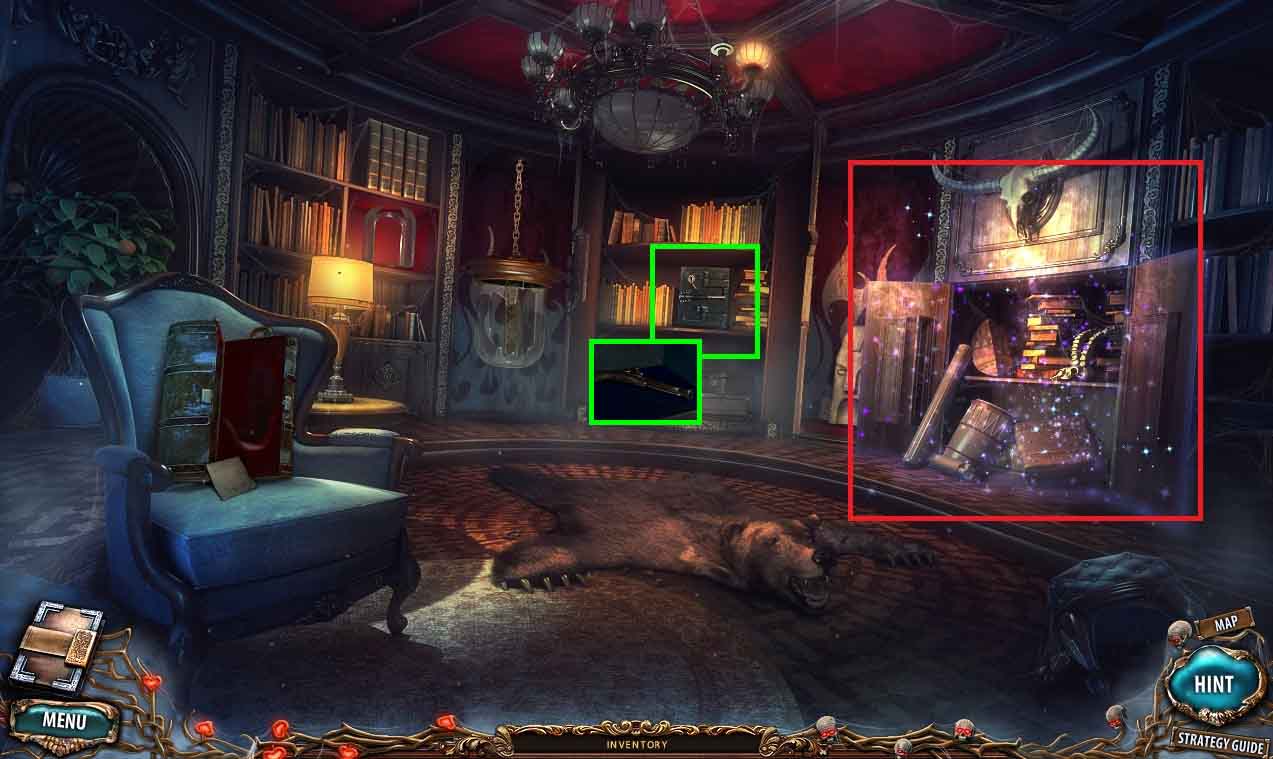
- Move to the secret room.
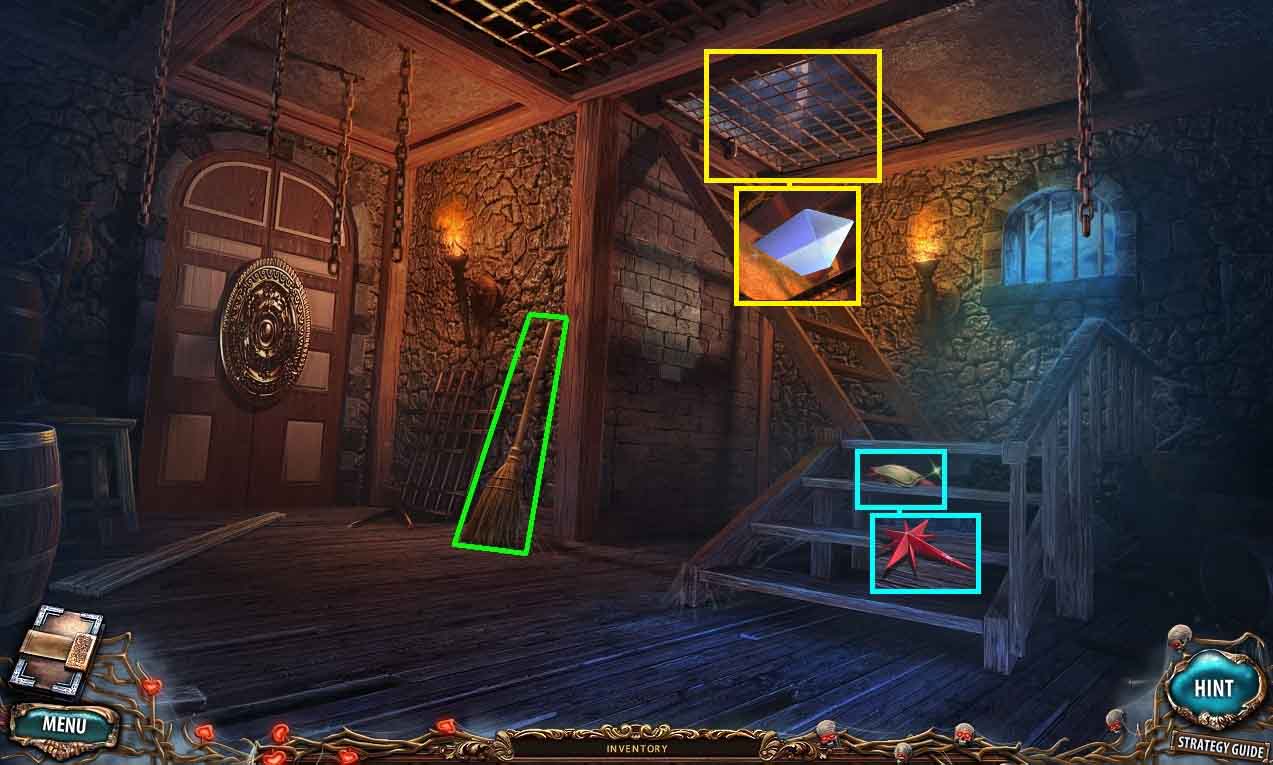
- Collect the broom.
- Collect the map and the crystal star underneath it.
- Collect the gem.
- Move to the cellar.
- Knock the flower down using the broom.
- Move to the meeting room.
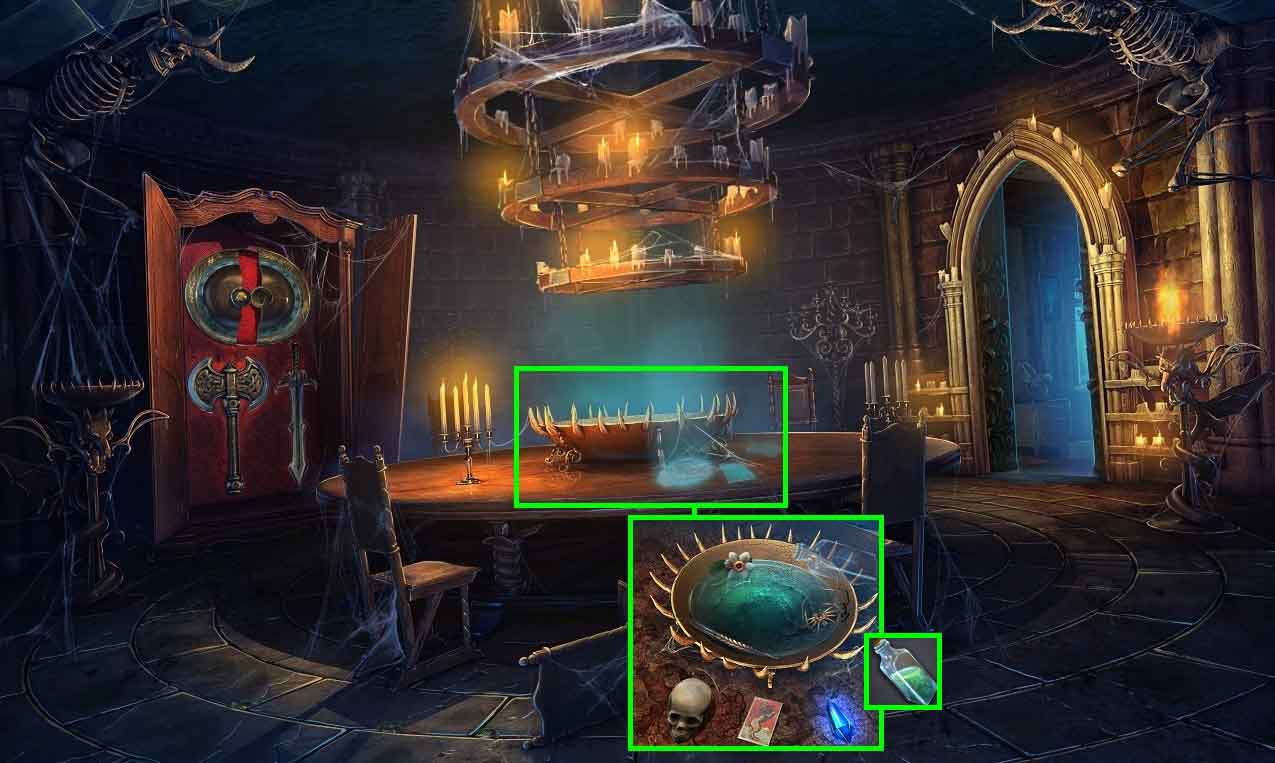
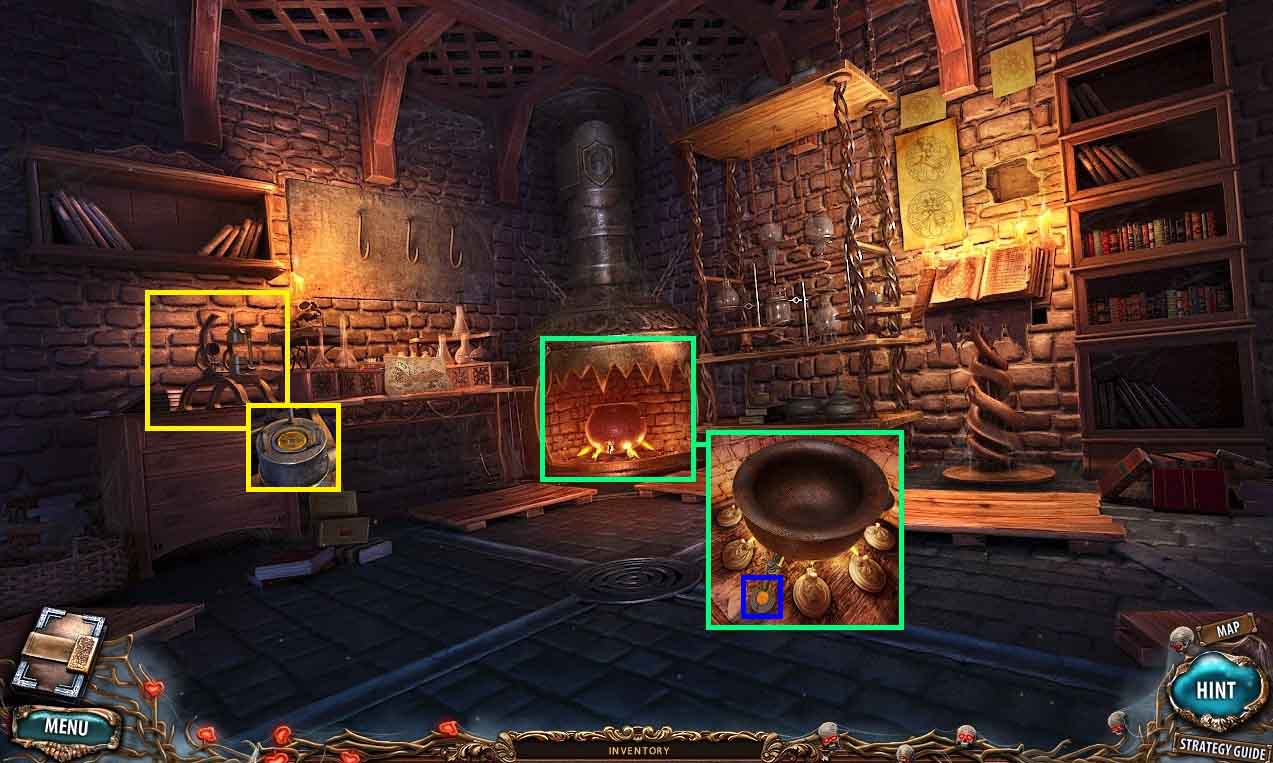
- Put the tarot card, skull and the gem onto the table.
- Put the spider, head of grain and the flower into the cauldron.
- Pour the bottle of water into the cauldron; collect the empty bottle.
- Place the empty bottle into the cauldron; collect the potion.
- Move to the office.

- Pour the potion onto the floor.
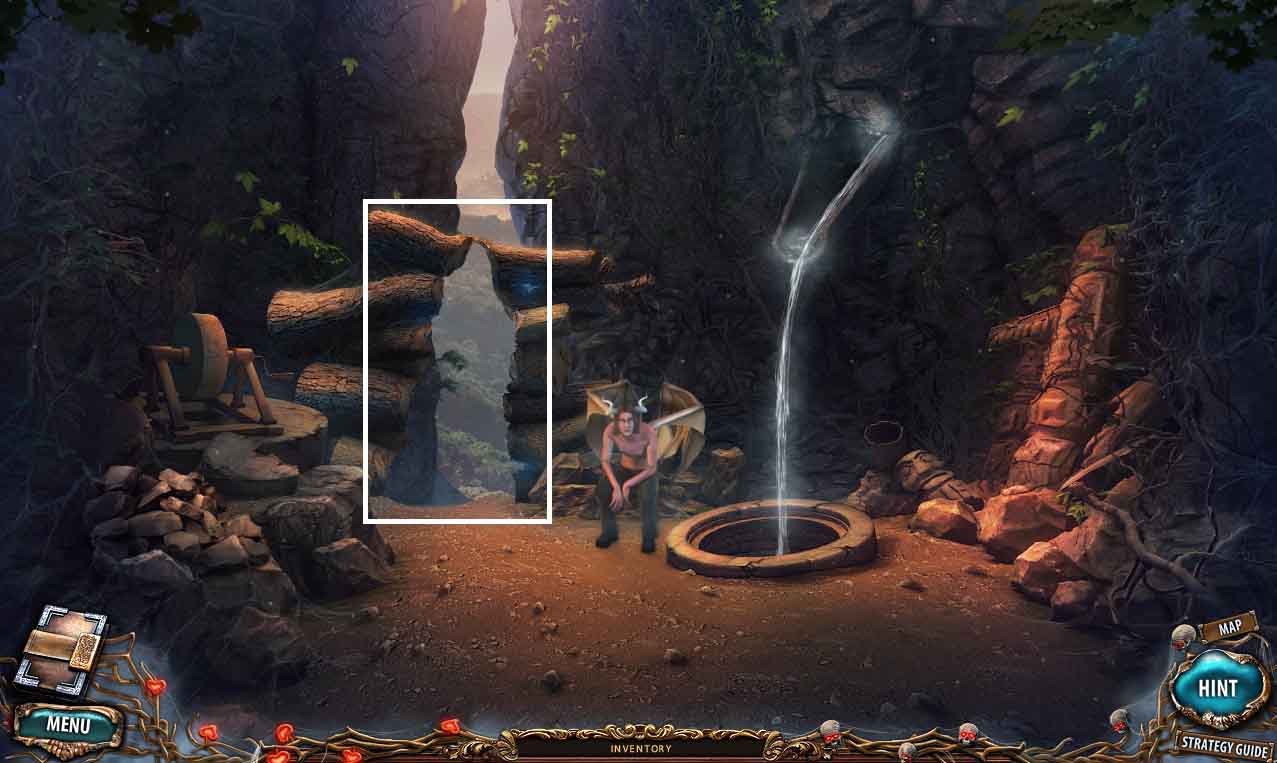
- Move to the bridge.
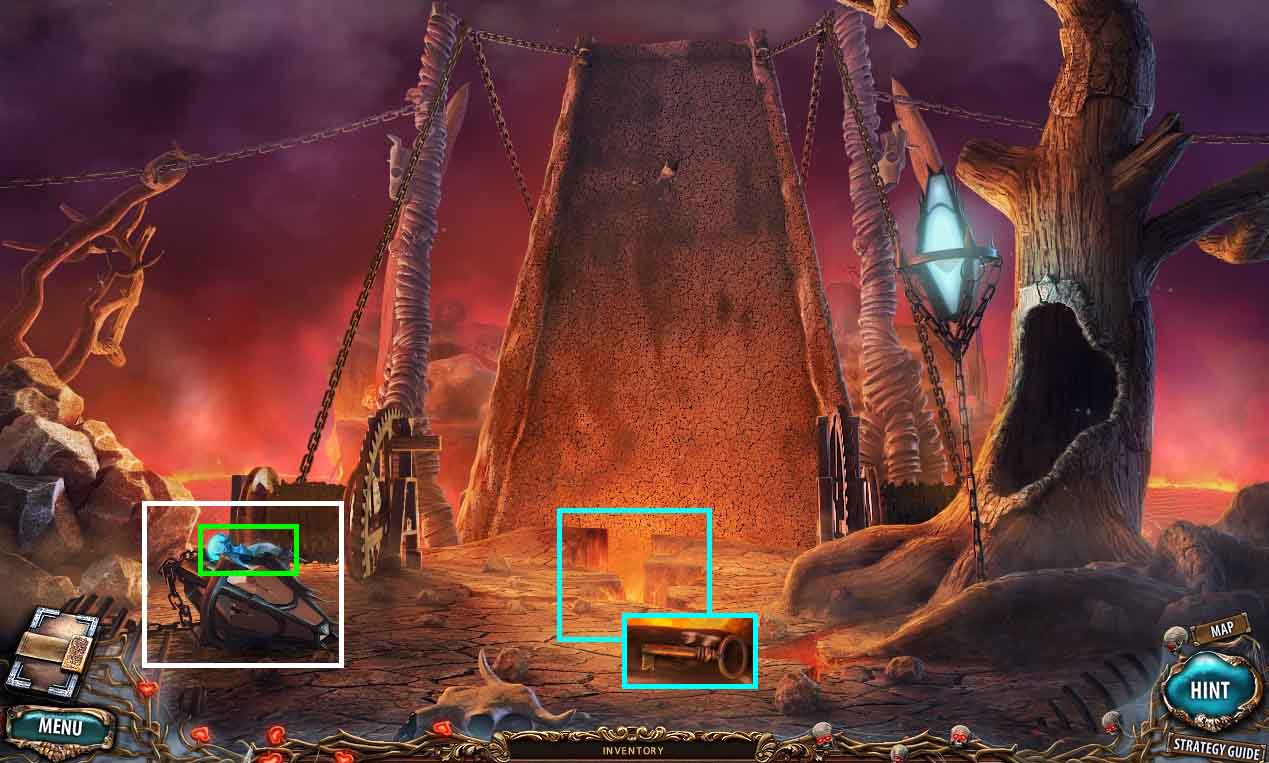
- Collect the laboratory key.
- Collect the rune.
- Insert the crystal star into the lantern.
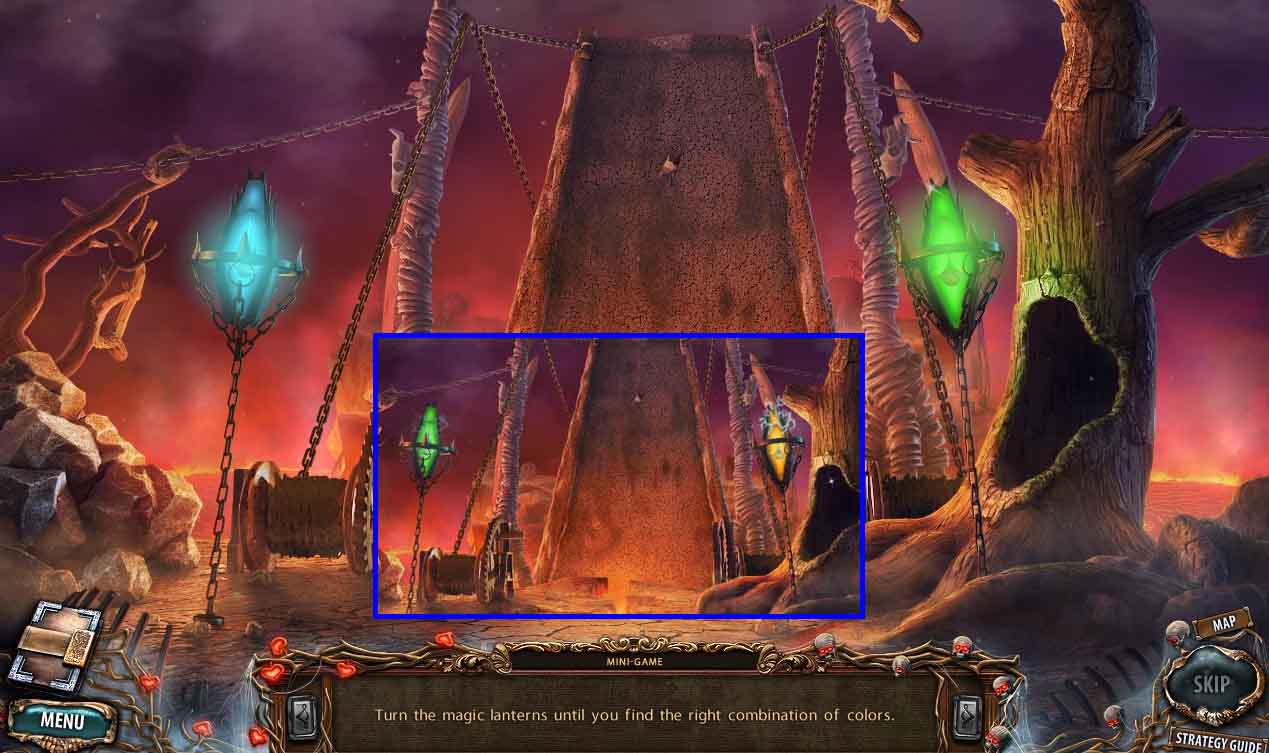
- Click the lanterns until the correct combination is found (green on the left and yellow on the right).
- Move to the secret room.
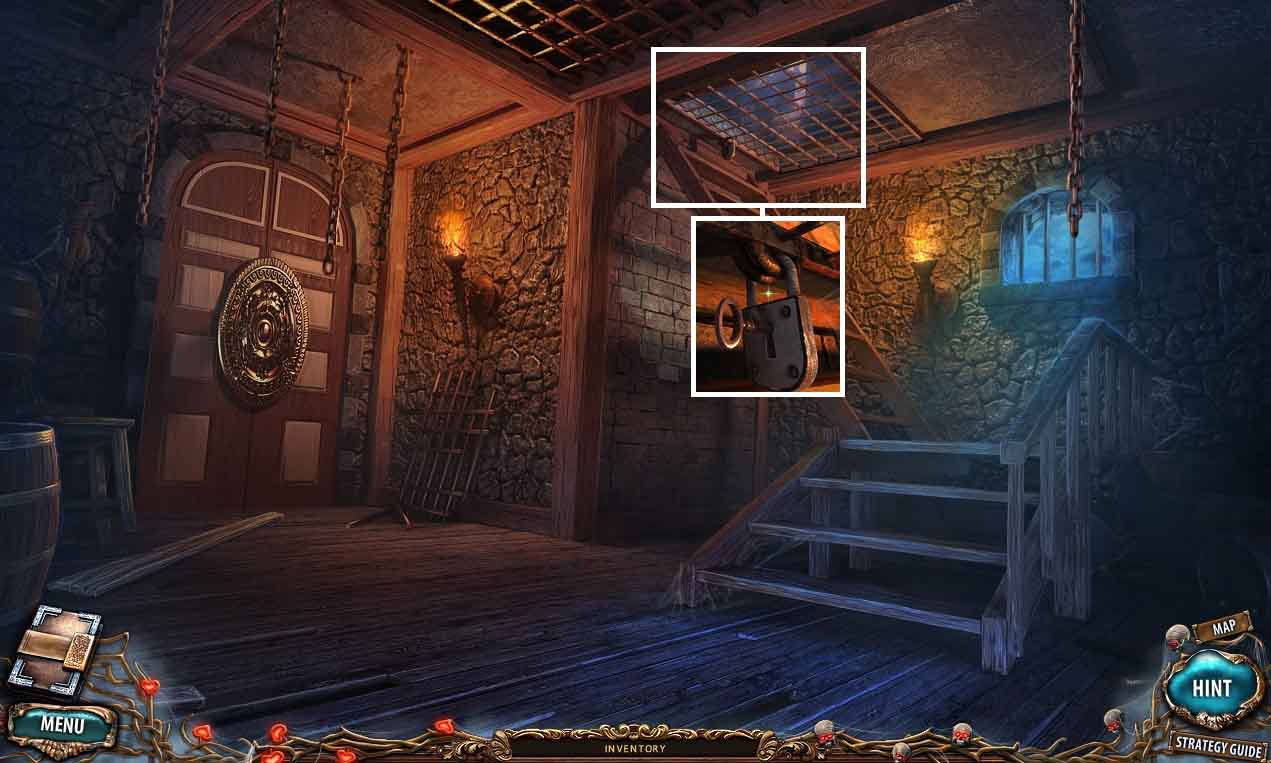
- Insert the laboratory key into the grate.
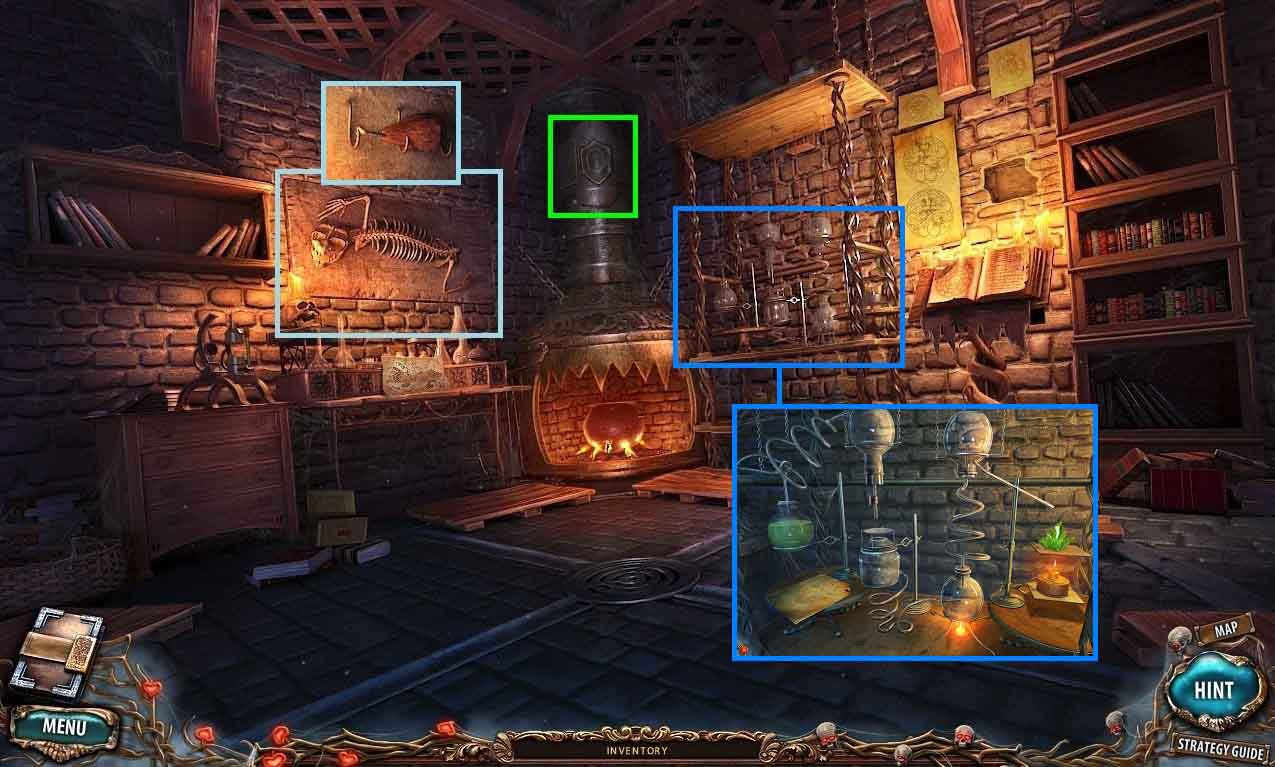
- Go into the laboratory.
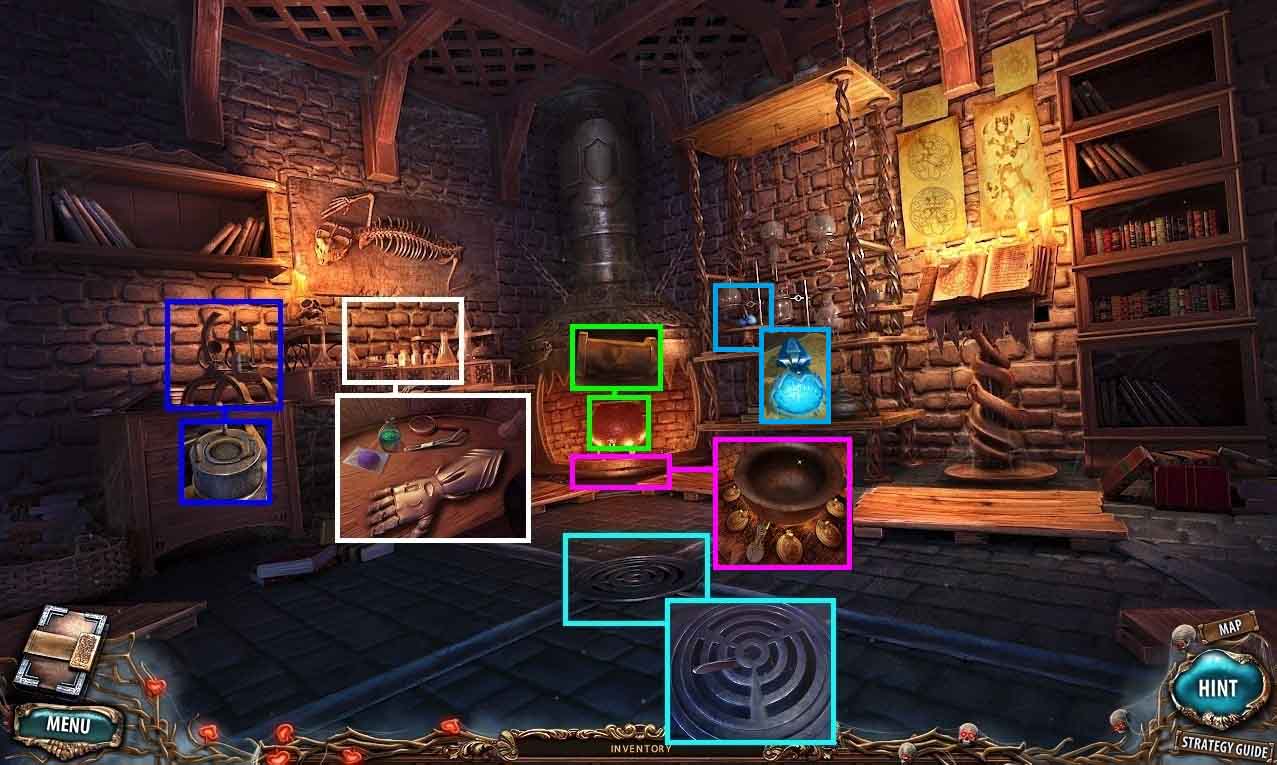
- Collect the chemicals and the tweezers.
- Collect the hook on a rope using the tweezers.
- Collect the mould.
- Collect the pipe.
- Put the mould at the bottom of the cauldron.
- Collect the rune.
- Move to the bridge.
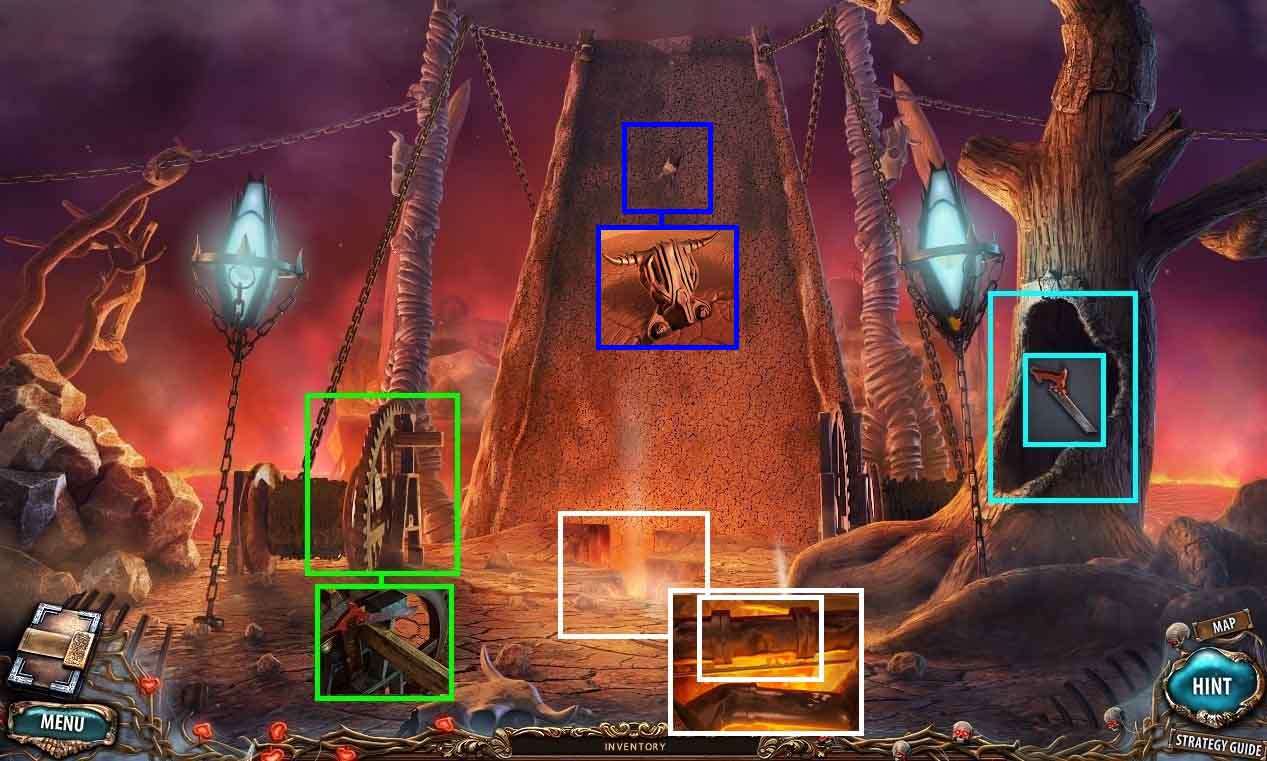
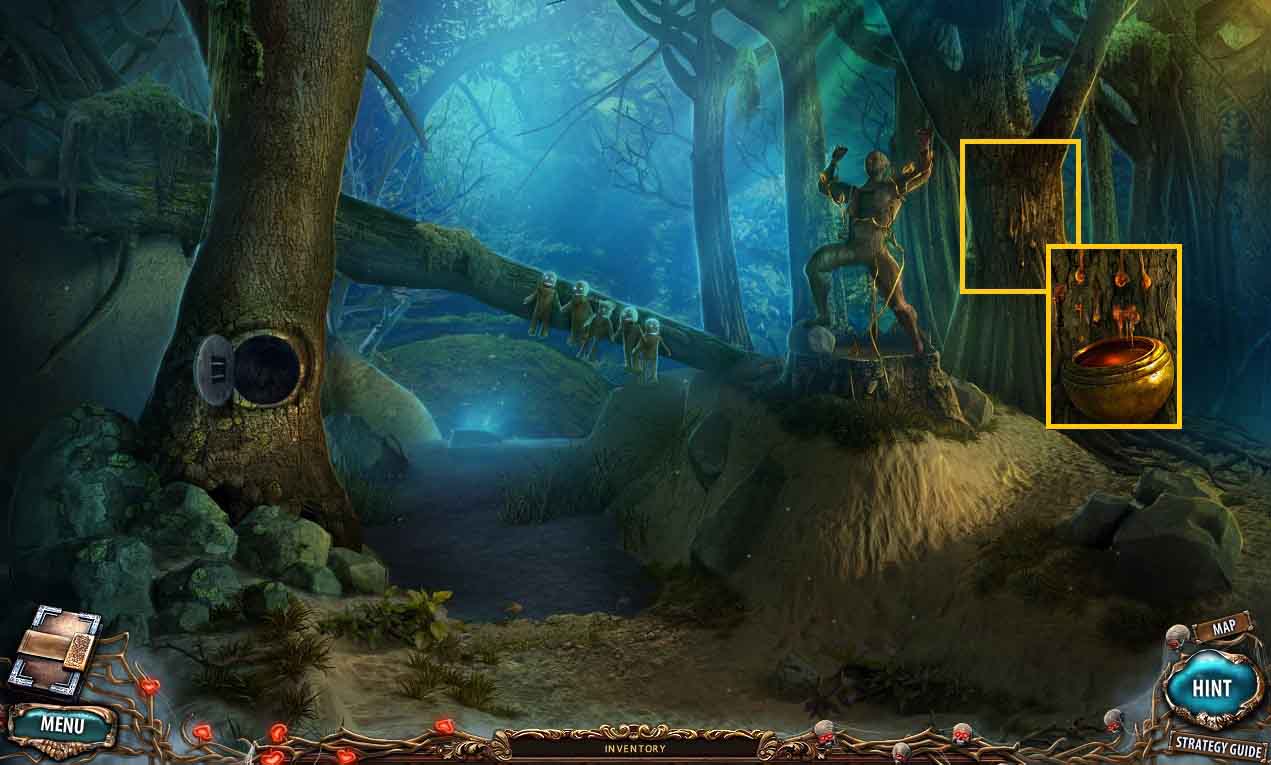
- Lower the hook on a rope into the tree hole; collect the saw.
- Place the saw into the mechanism.
- Saw through the plank; collect the plank.
- Place the pipe into the crack in the ground.
- Once the bridge is lowered; collect the bronze animal skull.
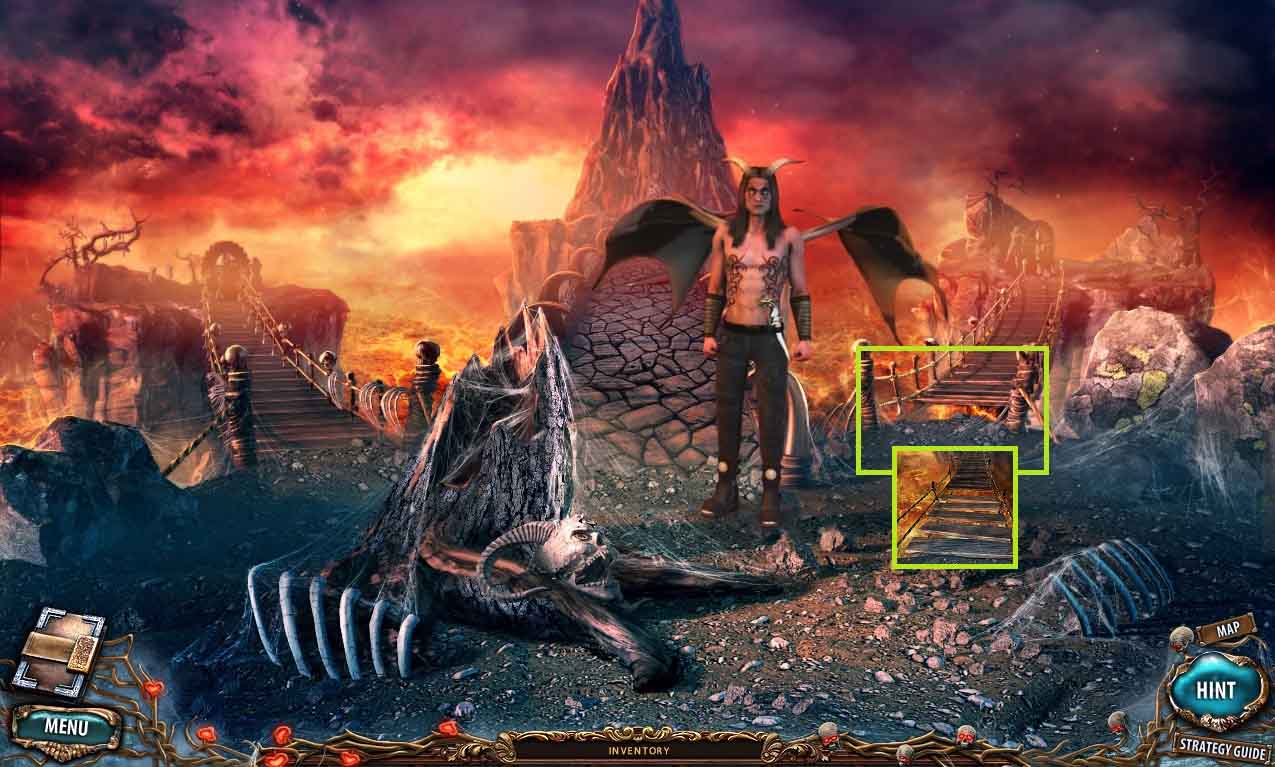
- Move to the hanging bridge.

- Click the demon.
- Collect the rune.
- Move to the left island.

- Collect the iron artifact.
- Move to the hanging bridges.
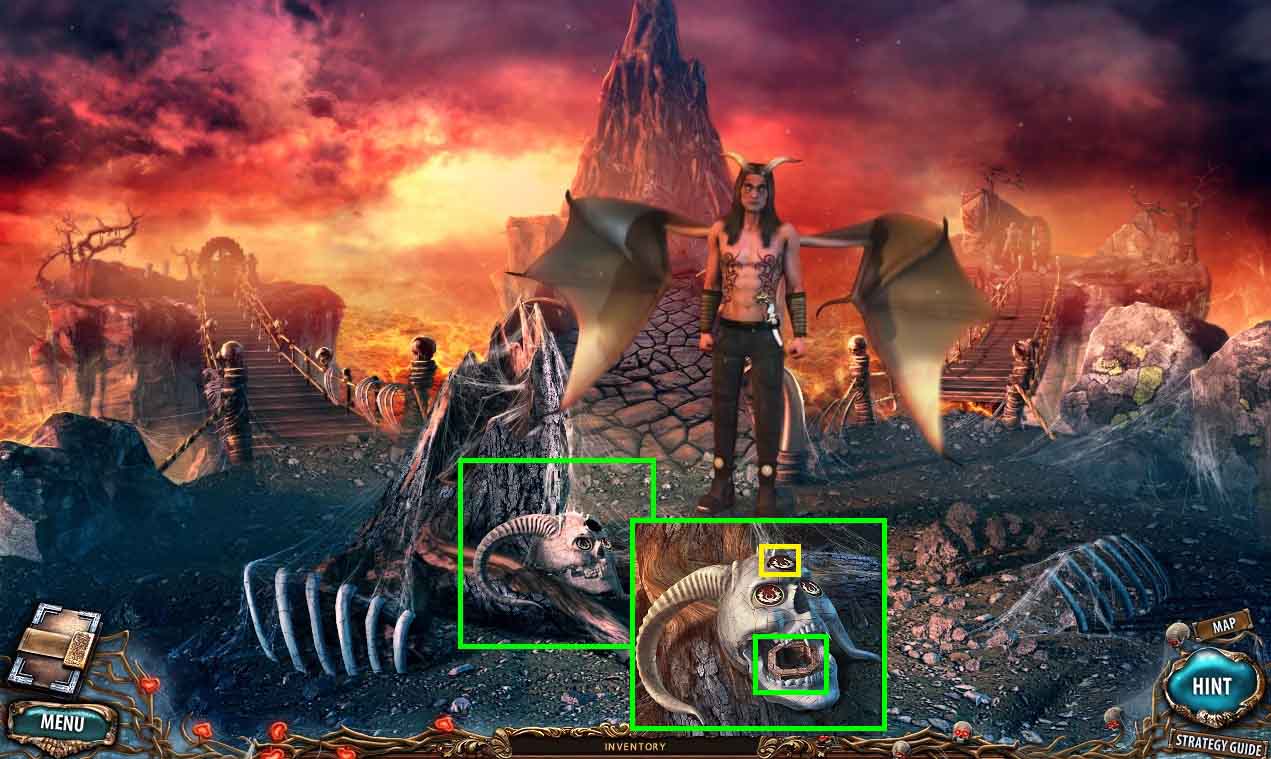
- Put the iron artifact onto the skull.
- Collect the ring with symbols from the mouth of the skull.
- Move to the left island.
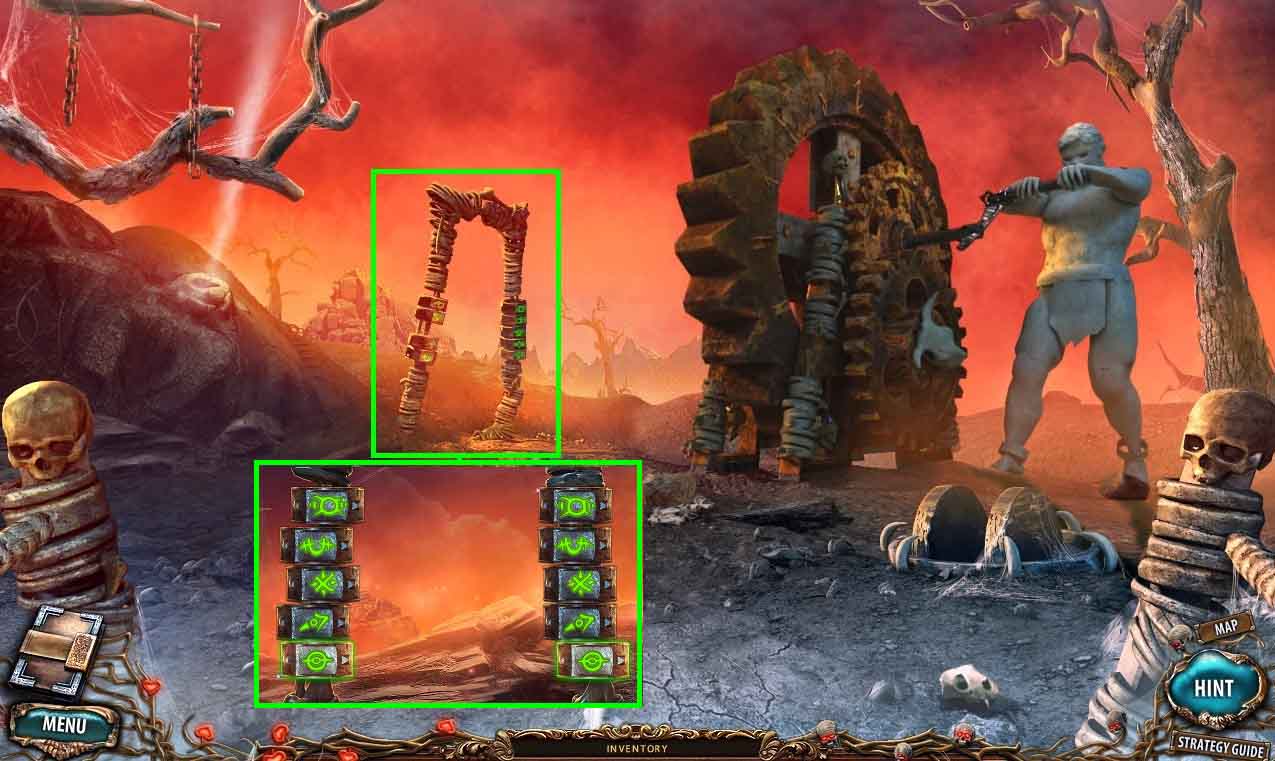
- Put the ring with symbols onto the portal.
- Click the rings to find the matching symbols.
- Move through the portal to the shore of the Peaceful River.
- Collect the plank.
- Collect the knife.
- Move to the hanging bridges.

- Remove the tree stump cobwebs using the knife.
- Collect the buttons and the empty bucket.
- Move to the Peaceful River.
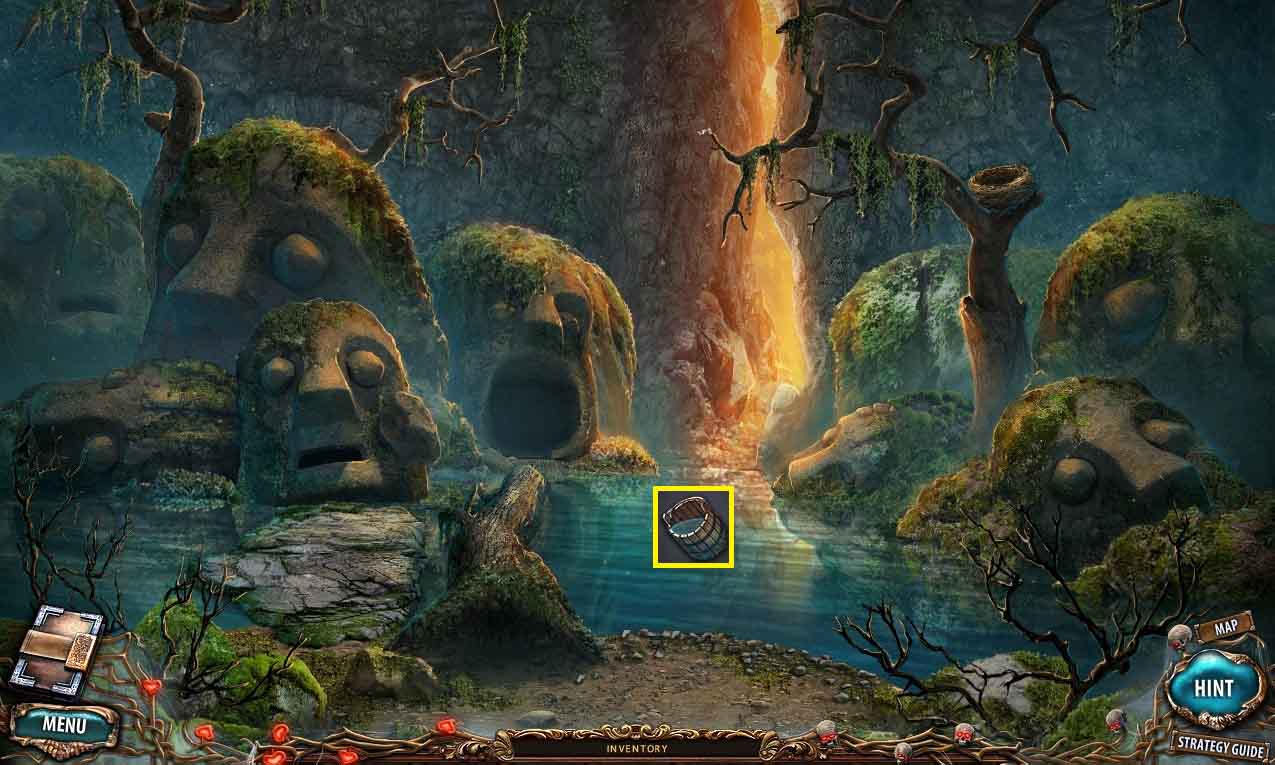
- Dip the empty bucket into the water; collect the bucket of water.
- Move to the left island.
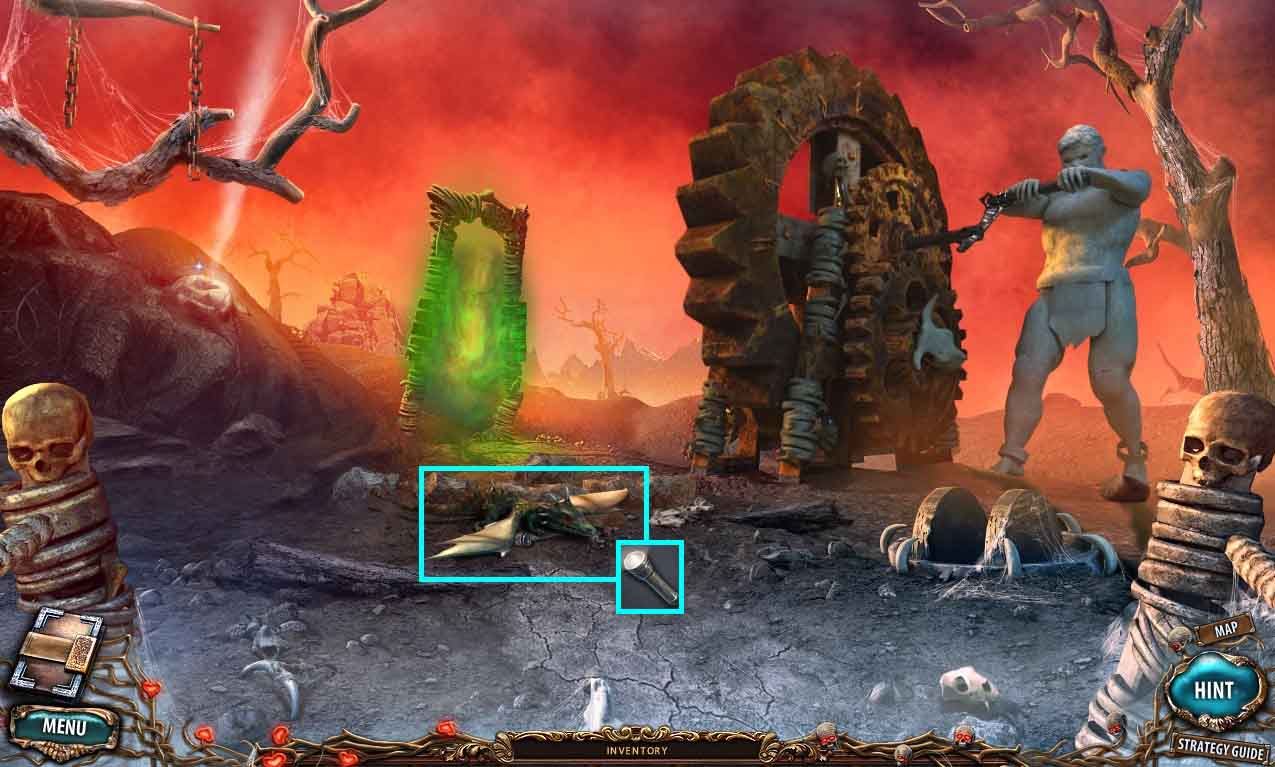
- Pour the bucket of water onto the winged creature.
- Collect the flashlight.
- Move to the Peaceful River.
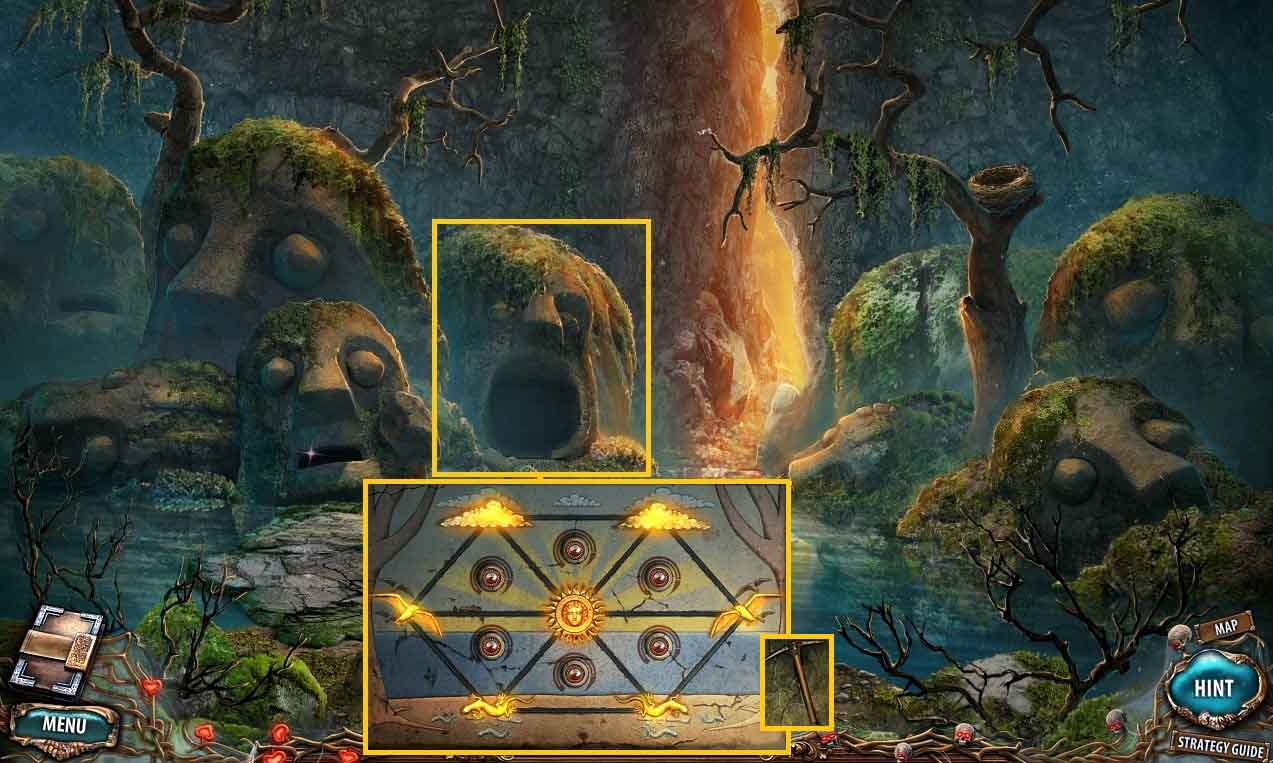
- Shine the flashlight into the statue.
- Put the buttons onto the mini-game.
- Move the figures to the correct spots.
- Collect the pickaxe.
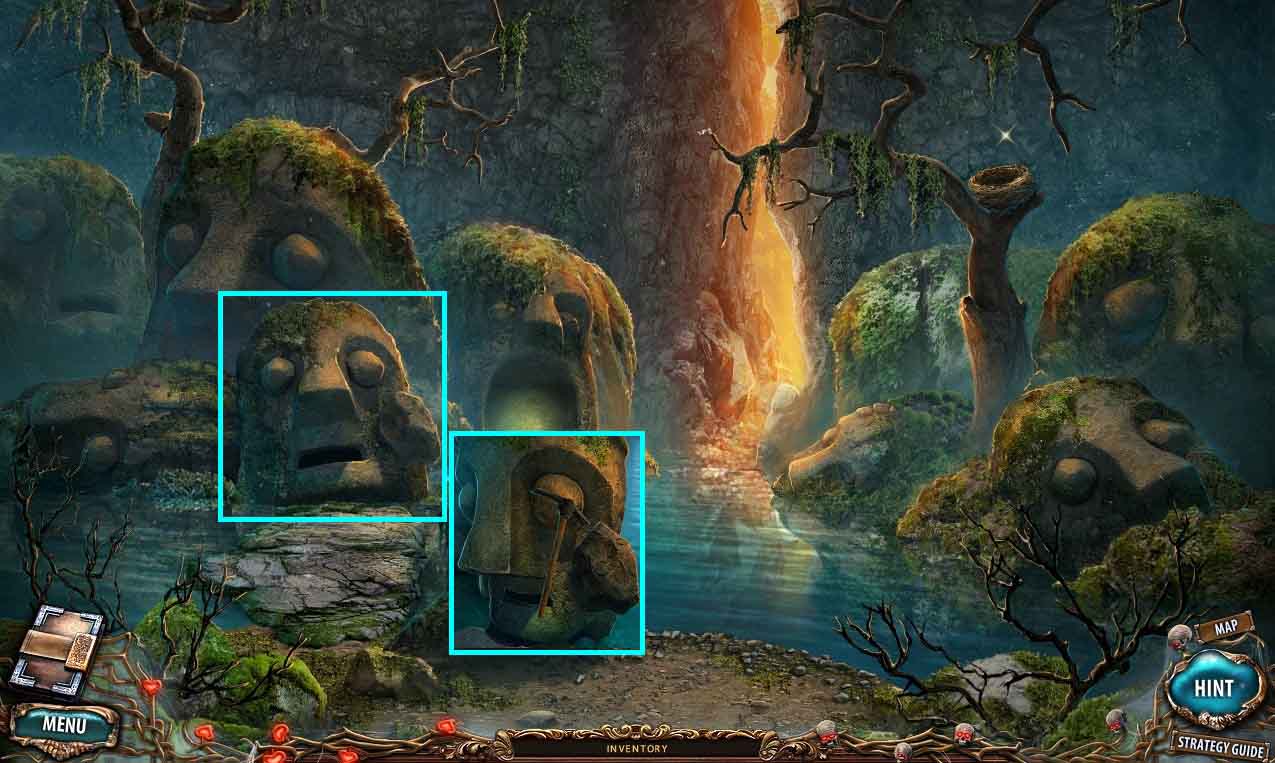
- Chip a piece of stone off of the statue using the pickaxe.
- Go to the Peaceful Ravine.
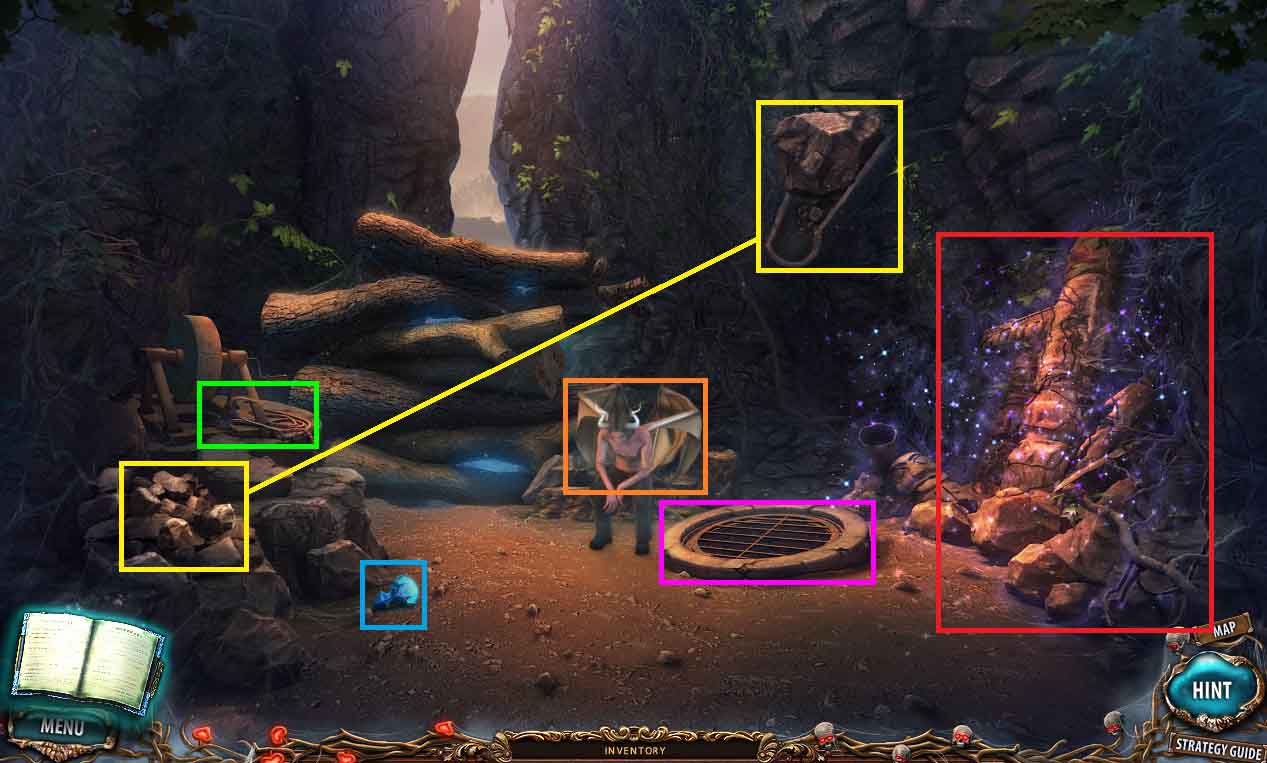
- Click the weakened demon.
- Collect the rune.
- Collect the grappling hook.
- Throw the 3 small stones towards the big rock.
- Collect the grate.
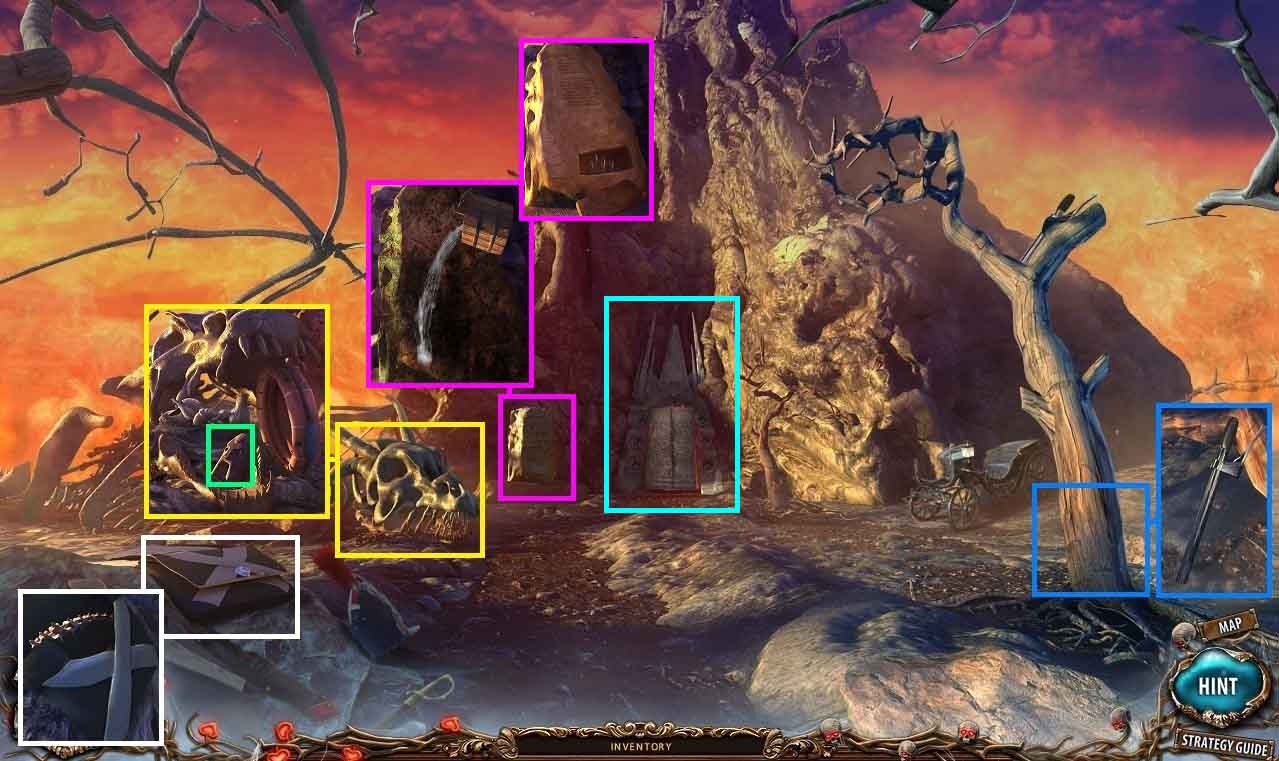
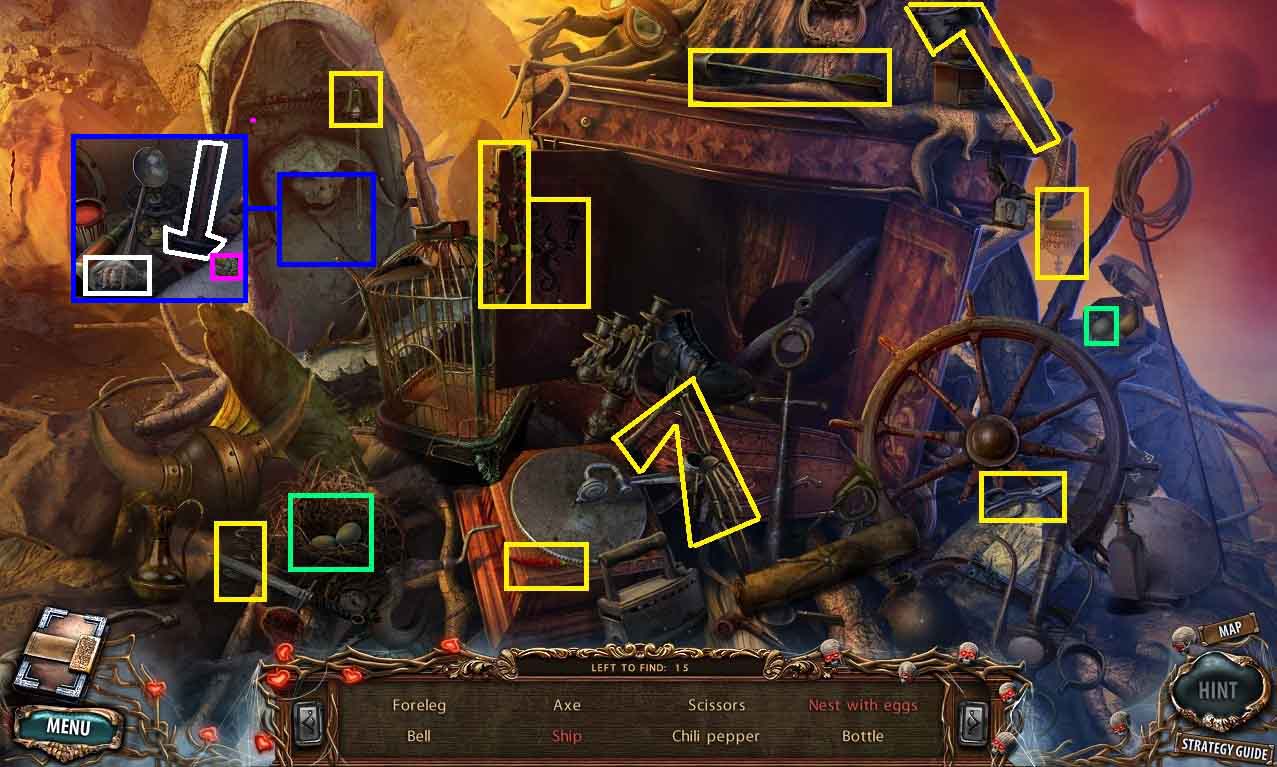
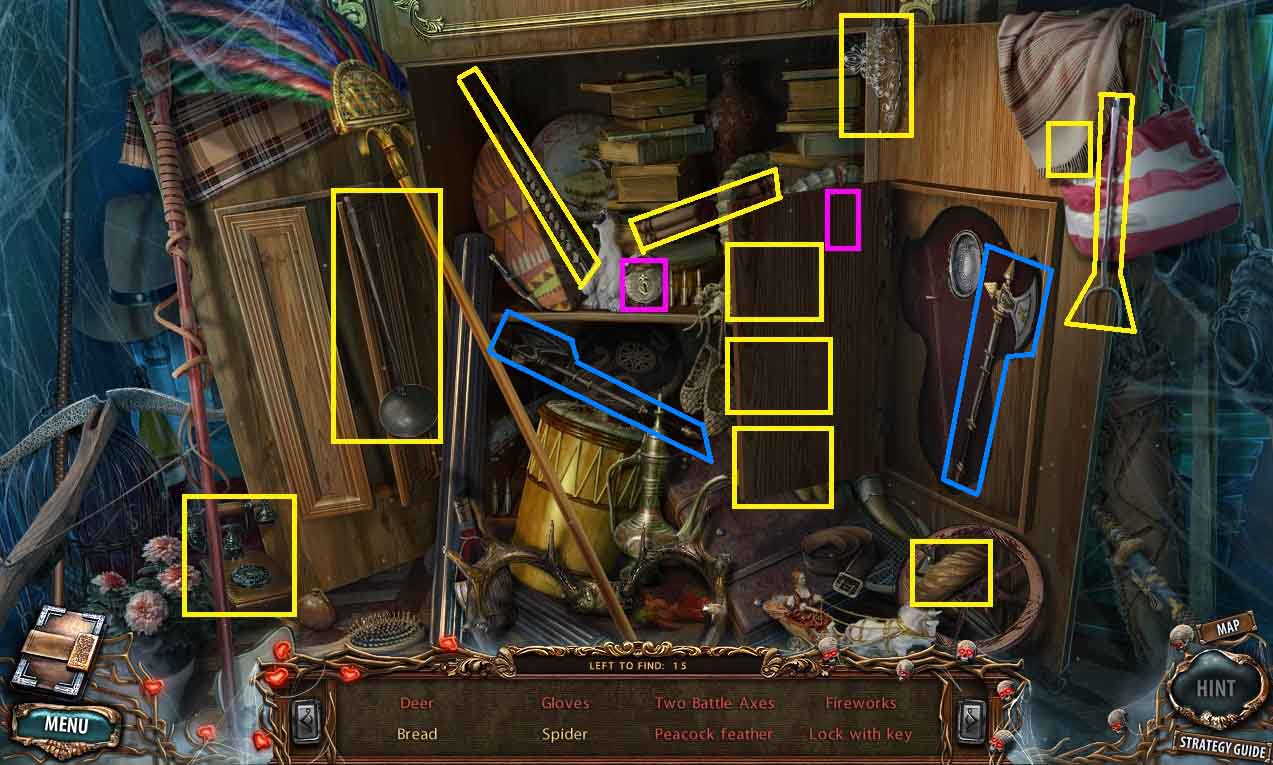
- Click the hidden objects area.
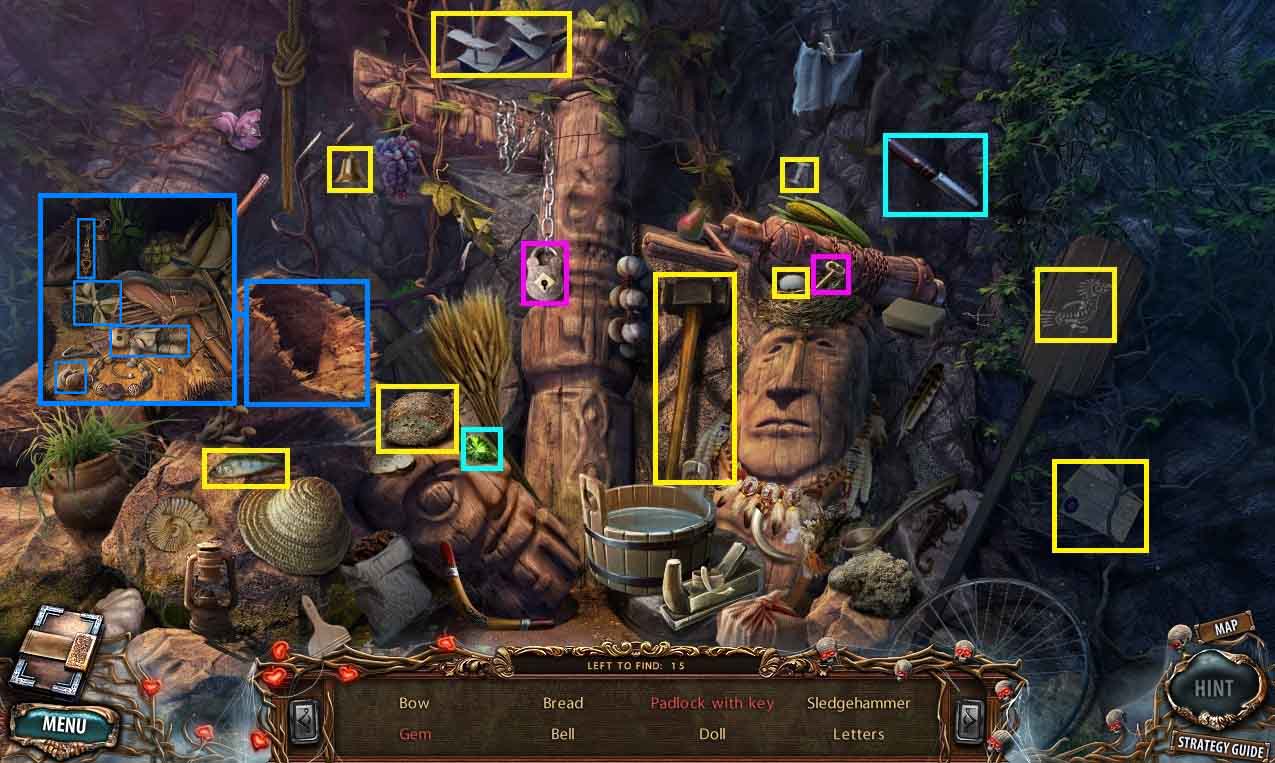
- Find the listed items.
- Collect the sledgehammer.
- Move to the Peaceful River.
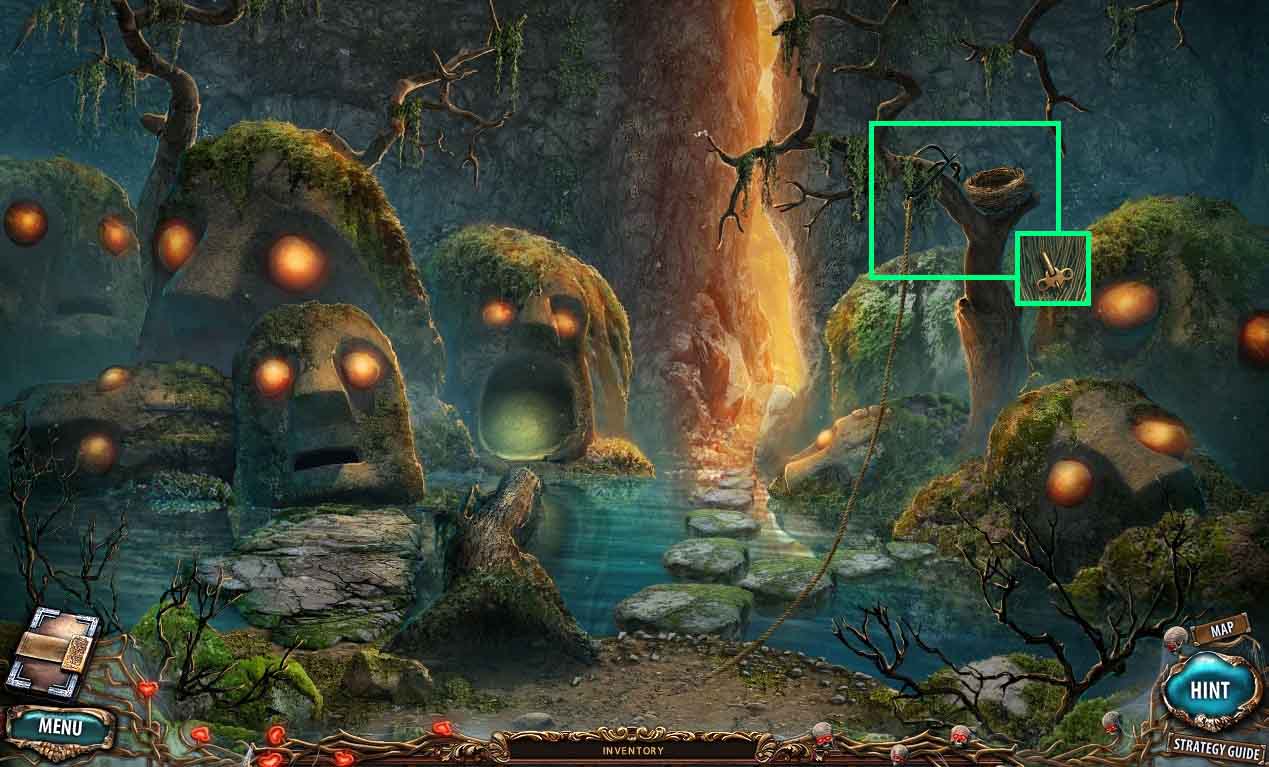
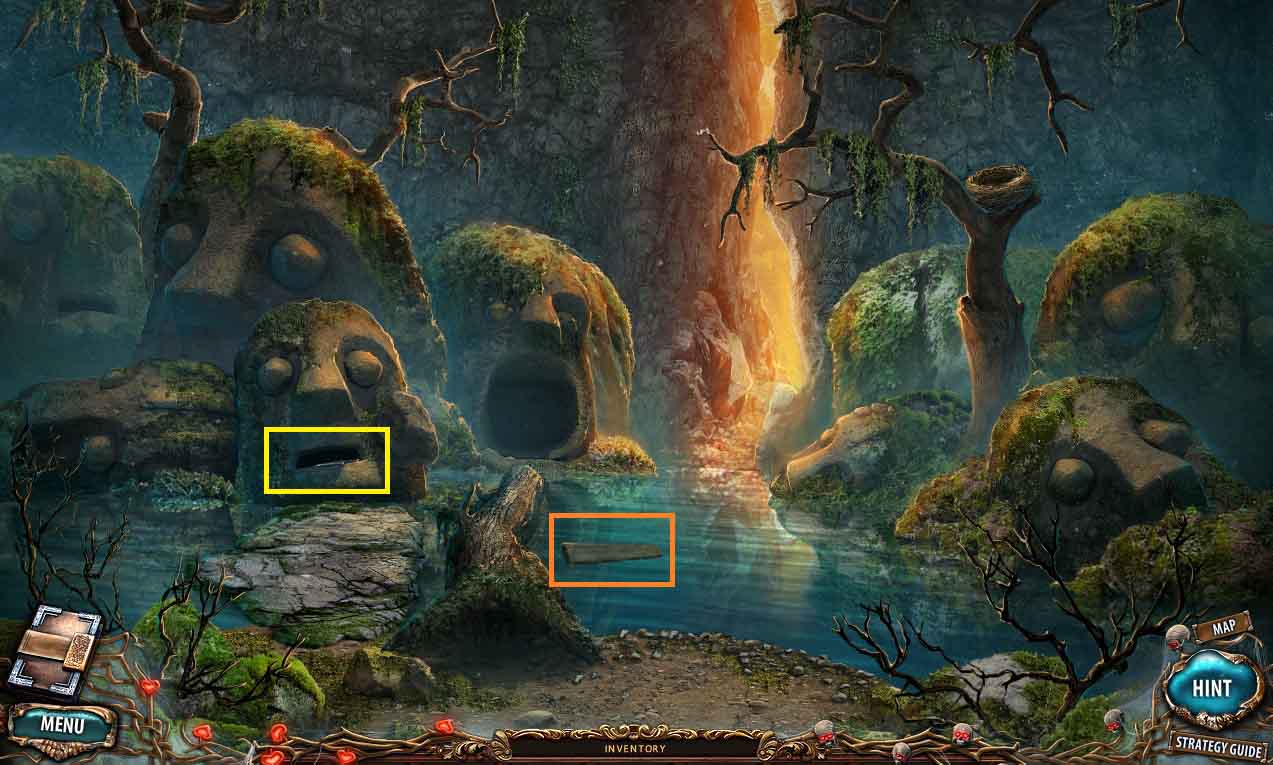
- Toss the grappling hook toward the nest.
- Examine the nest.
- Collect the key.
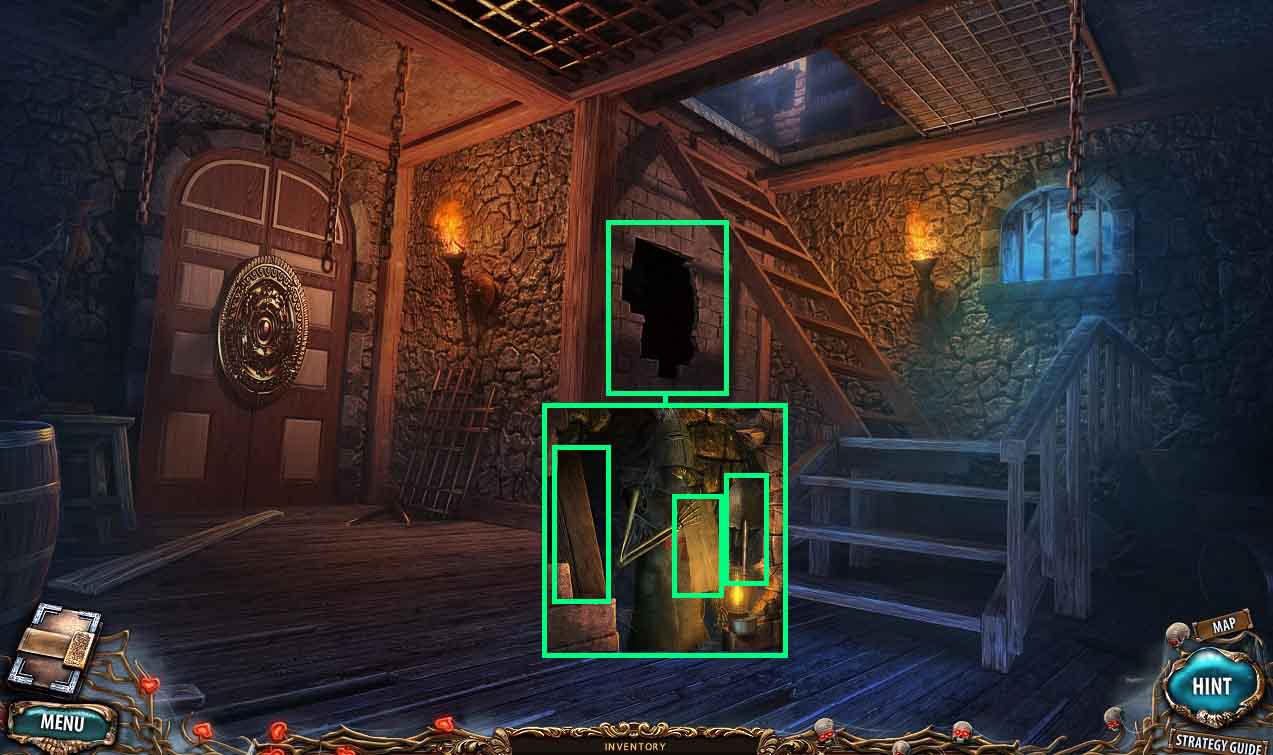
- Move to the secret room.
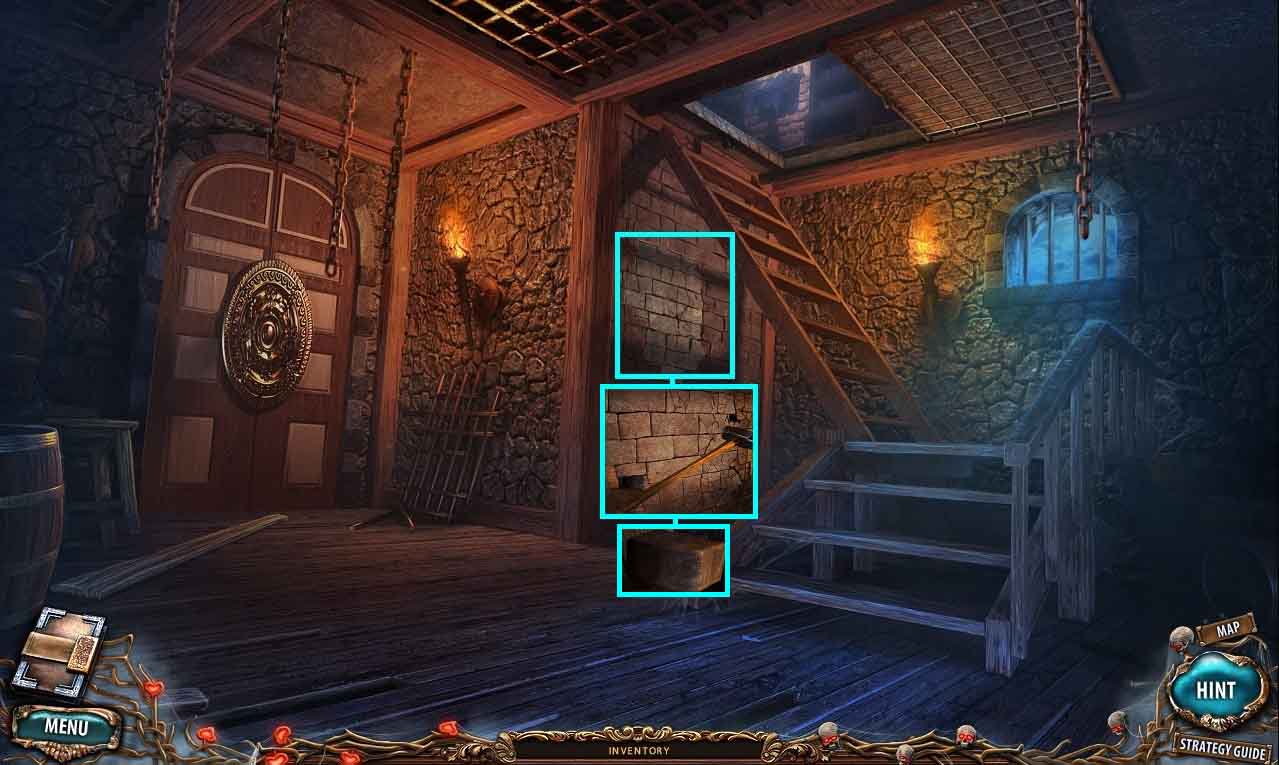
- Break the wall using the sledgehammer.
- Collect the brick.
- Move to the laboratory.
- Open the case using the key.
- Collect the termites.
- Move to the Peaceful Ravine.
- Pour the termites onto the fallen trees.
- Move to the Peaceful Forest.

- Put the doll onto the fallen tree.
- Collect the amber.
- Collect the golden leaf.
- Put the golden leaf onto the woodcutter statue.
- Zoom into the mini-game.
- Move the ball into the hole.
- Collect the lamp in the tree hole.
- Move to the secret room.
- Insert the lamp into the hole in the wall.
- Collect the plank, tracing paper and the shovel.
- Move to the laboratory.
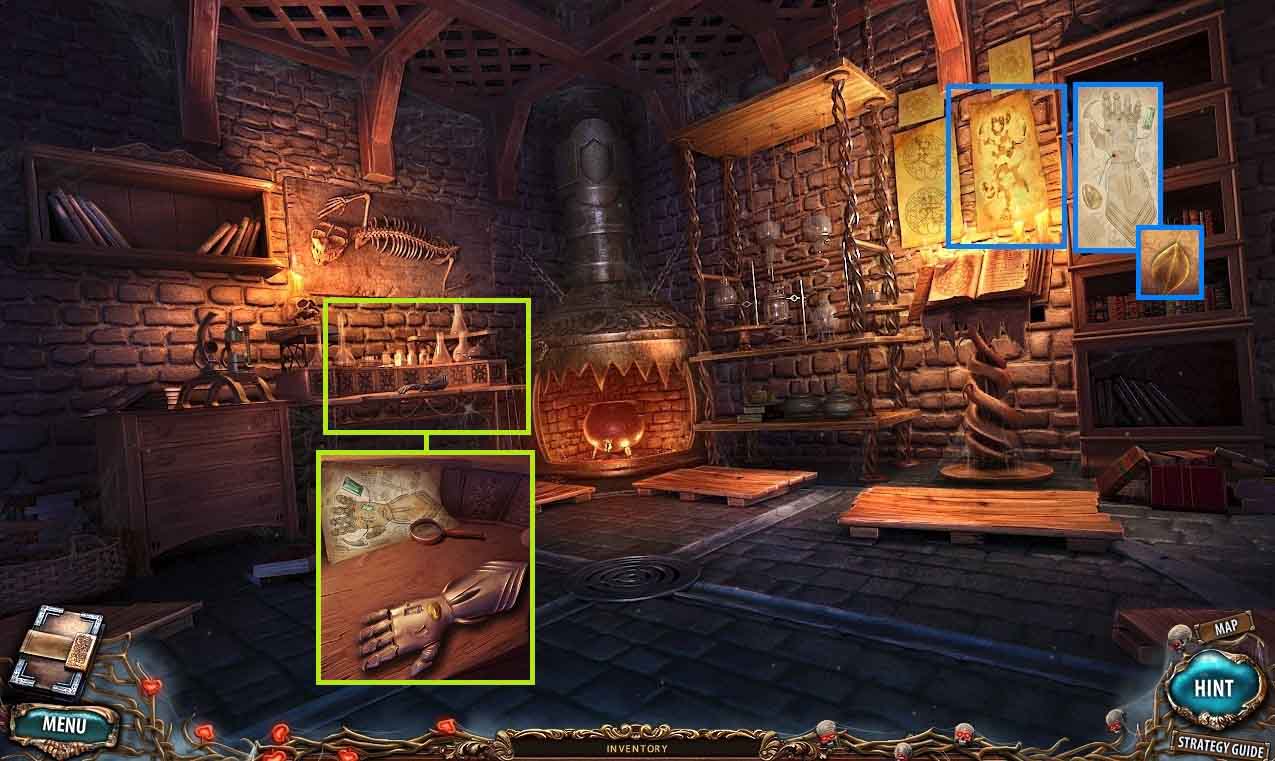
- Put the tracing paper on the parchment on the wall.
- Collect the gauntlet schematic.
- Collect the golden leaf.
- Put the gauntlet schematic onto the table.
- Put the amber into the niche and click it once.
- Move to the Peaceful Ravine.
- Dig up the plank using the shovel.
- Move to the hanging bridges.
- Put the planks onto the bridge.
- Move to the right island.

- Use the sledgehammer to break the stone.
- Collect the golden spider.
- Collect the tooth.
- Insert the bronze animal skull into the door.
- Click the hidden objects area.
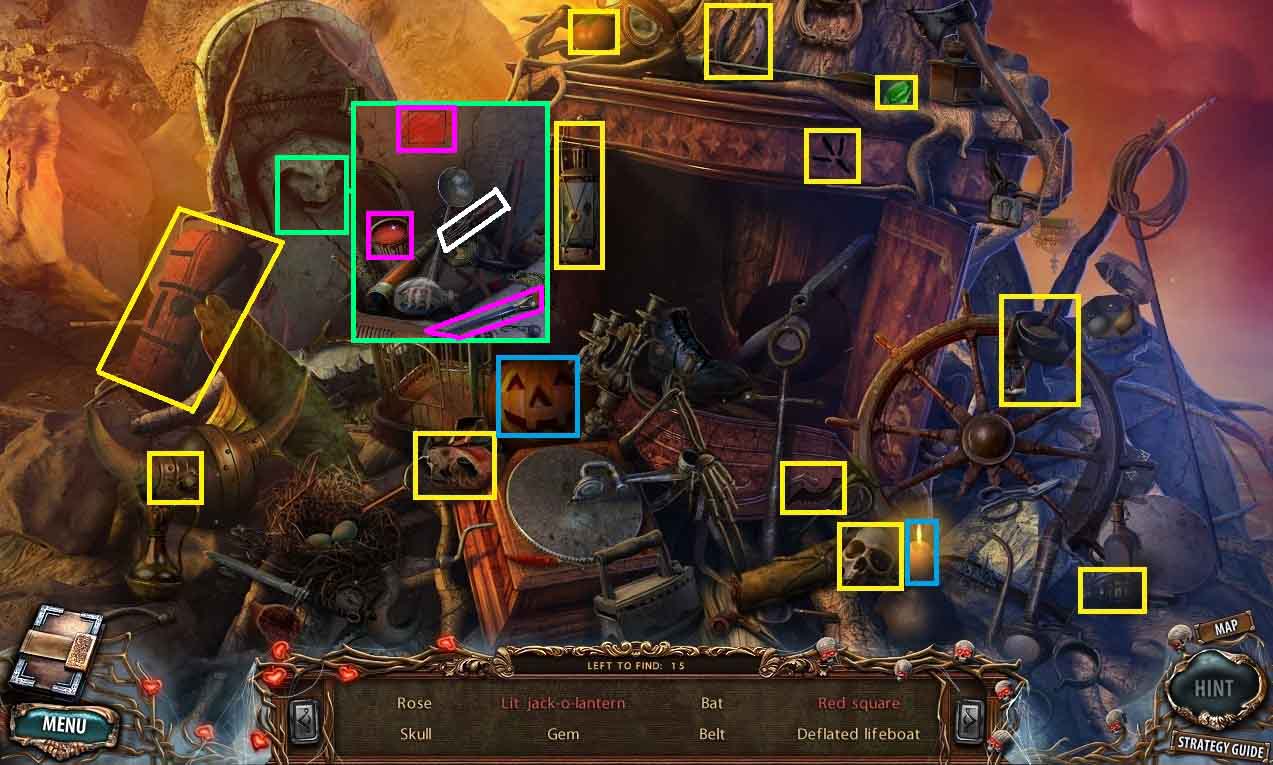
- Find the listed items.
- Collect the deflated lifeboat.
- Move to the library.
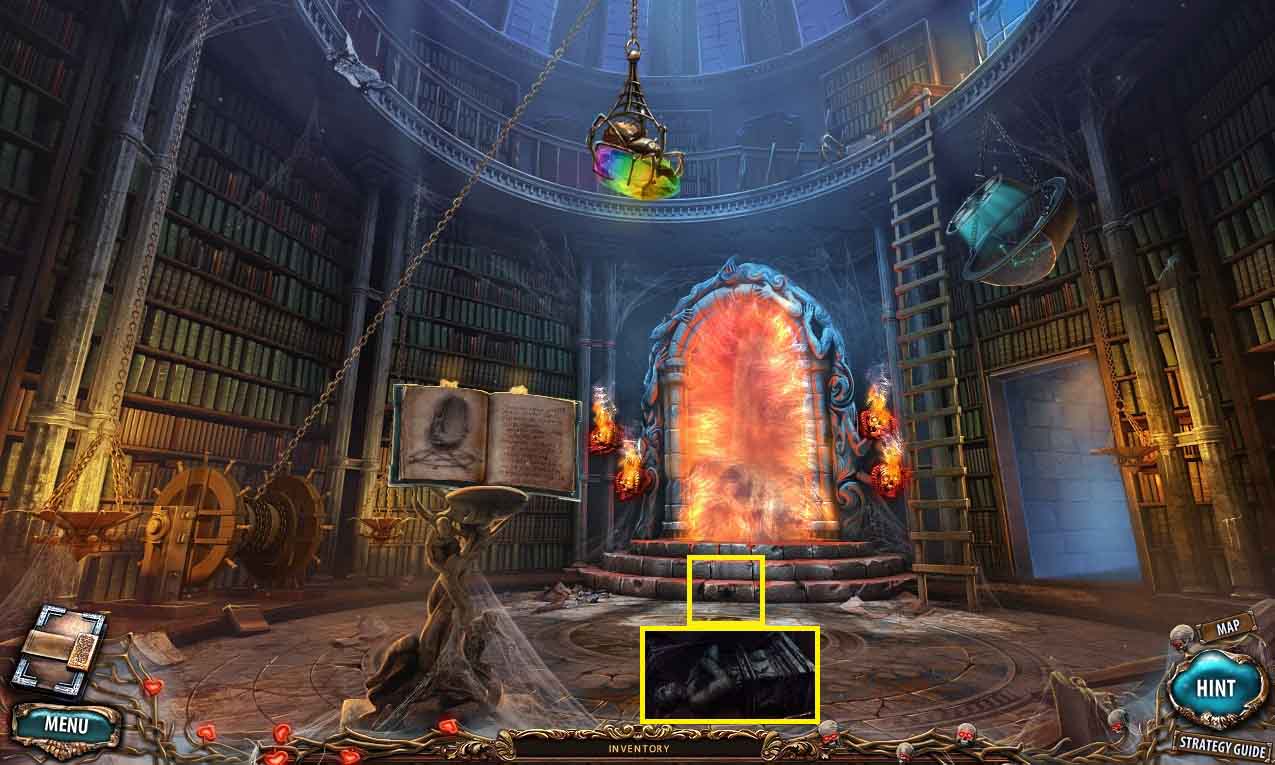
- Put the golden spider into the niche.
- Collect the bust of Morbile.
- Move to the Right Island.
- Put the Bust of Morbile onto the seal.
- Collect the battering ram and the lock part underneath.
- Move to the secret room.

- Put the battering ram onto the chains.
- Click the battering rams.
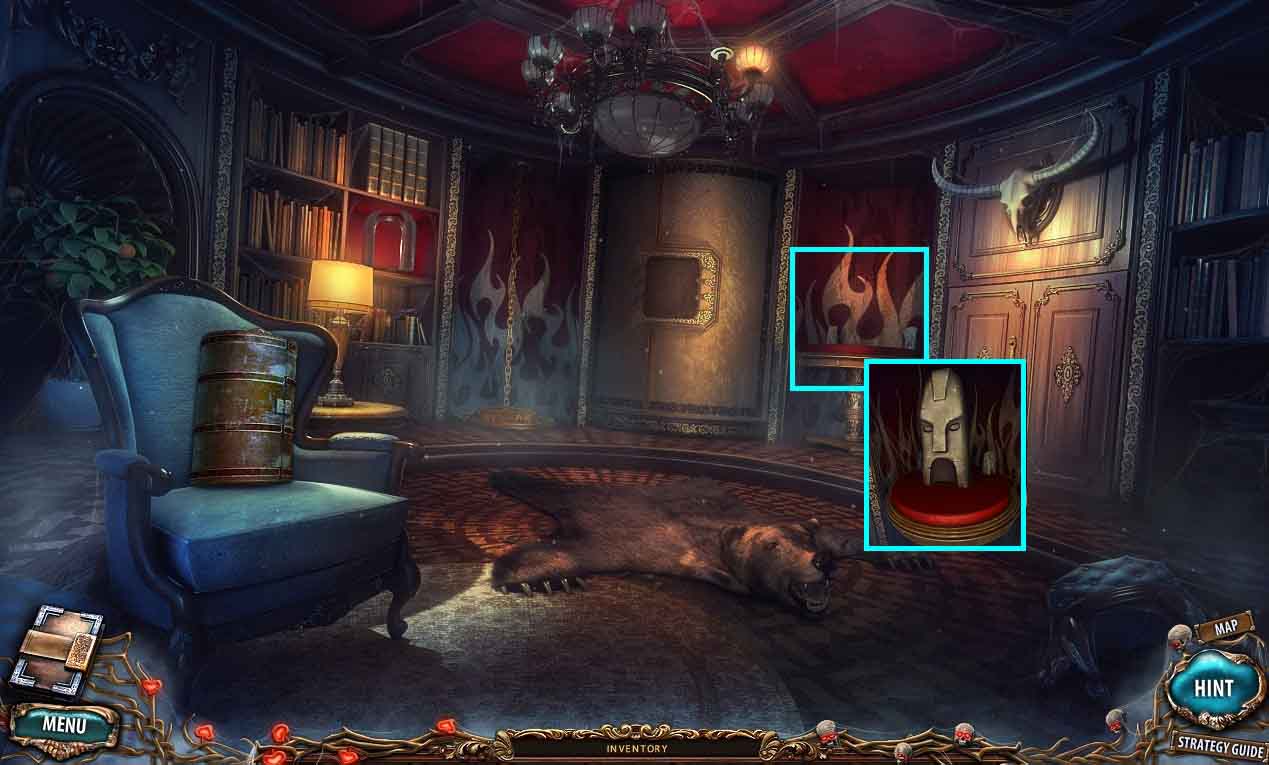
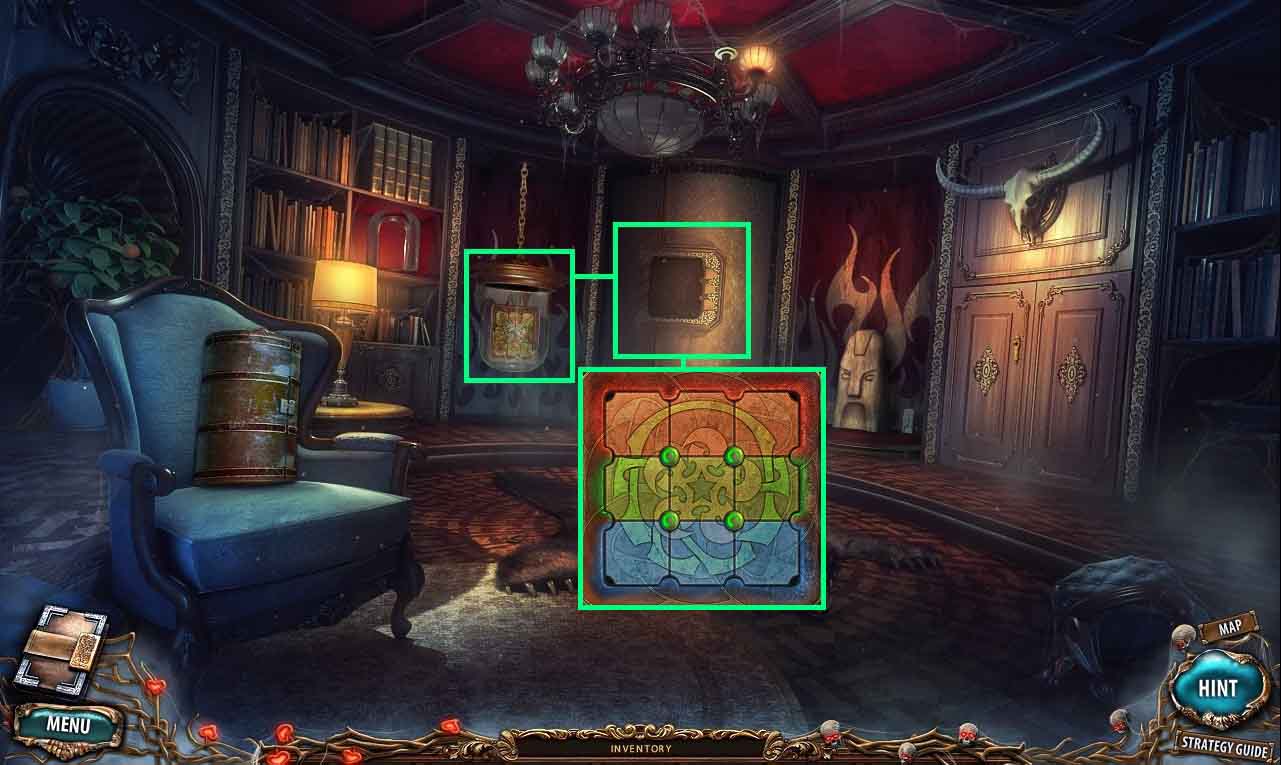
- Move into the Trophy Room.
- Collect the spearhead.
- Collect the rune.
- Collect the towel.
- Move to the Right Island.
- Open the skulls mouth using the spearhead.
- Collect the golden leaf.
- Examine the piece of paper and read the code.
- Move to the Trophy Room.
- Open the glass case by clicking the books in the correct order.
- Collect the golden rose.
- Move to the Peaceful Forest.
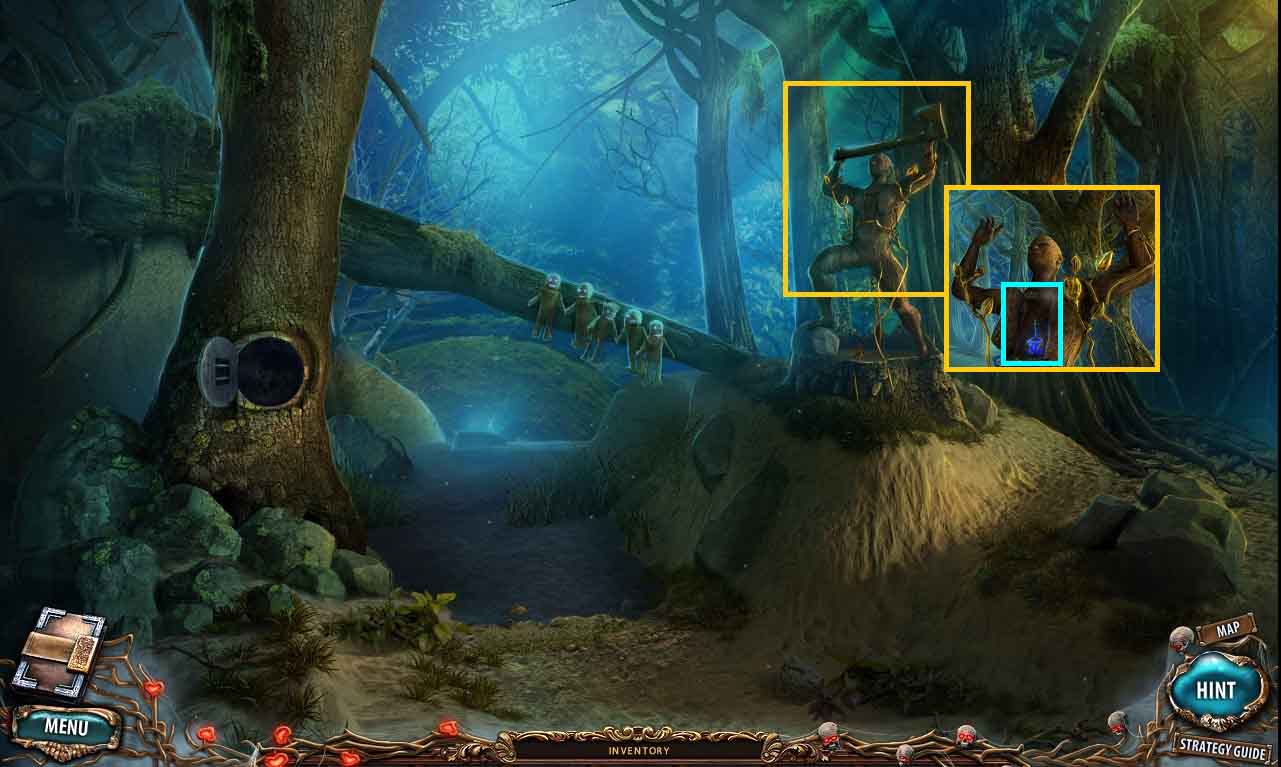
- Put the golden leaves and the golden rose onto the statue.
- Collect the rusty axe.
- Collect the vial of magic energy.
- Move to the Peaceful Ravine.
- Give the demon the vial of magic energy.
- Collect the emerald.
- Examine the grindstone; click it.
- Sharpen the rusty axe; collet the axe.
- Click the hidden objects area.
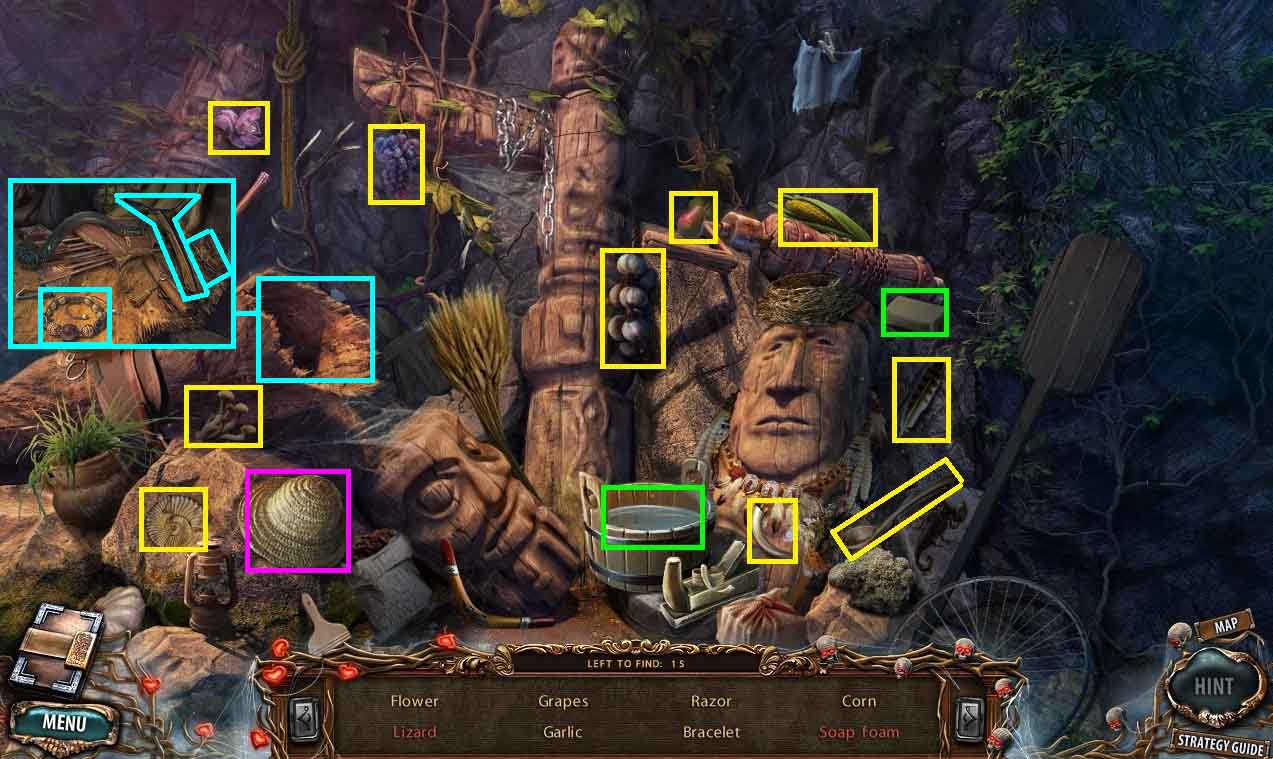
- Find the listed items.
- Collect the razor.
- Move to the laboratory.
- Insert the emerald and the tooth into the correct niches.
- Collect the magic gauntlet.
- Move to the hanging bridges.
- Give the demon the magic gauntlet.
- Move to the temple exterior.
- Cut the satchel open using the razor; collect the tail.
- Cut down the tree using the axe; collect the lever.
- Put the lifeboat under the dragons head.
- Click the lifeboat; collect the stone head.
- Pour the bucket of water onto the stone slab.
- Use the towel to wipe the slab.
- Click the cache; collect the glass coil.
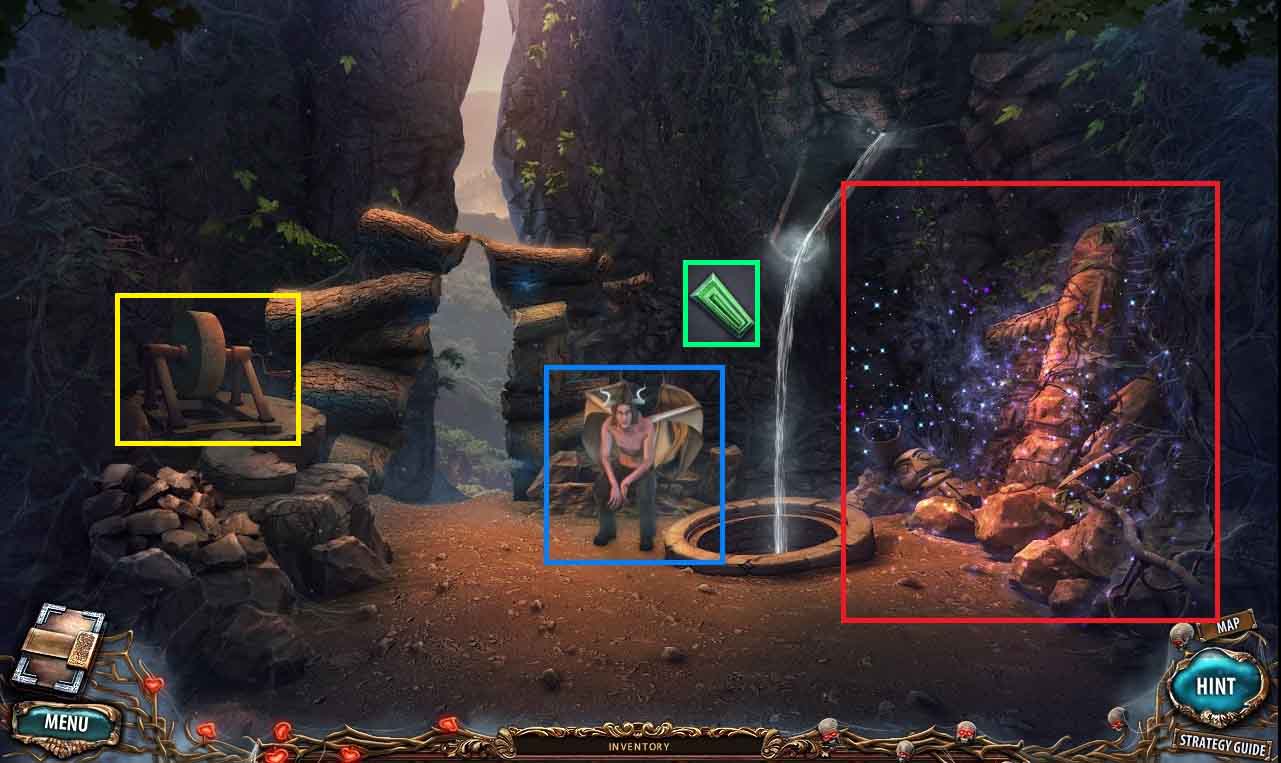
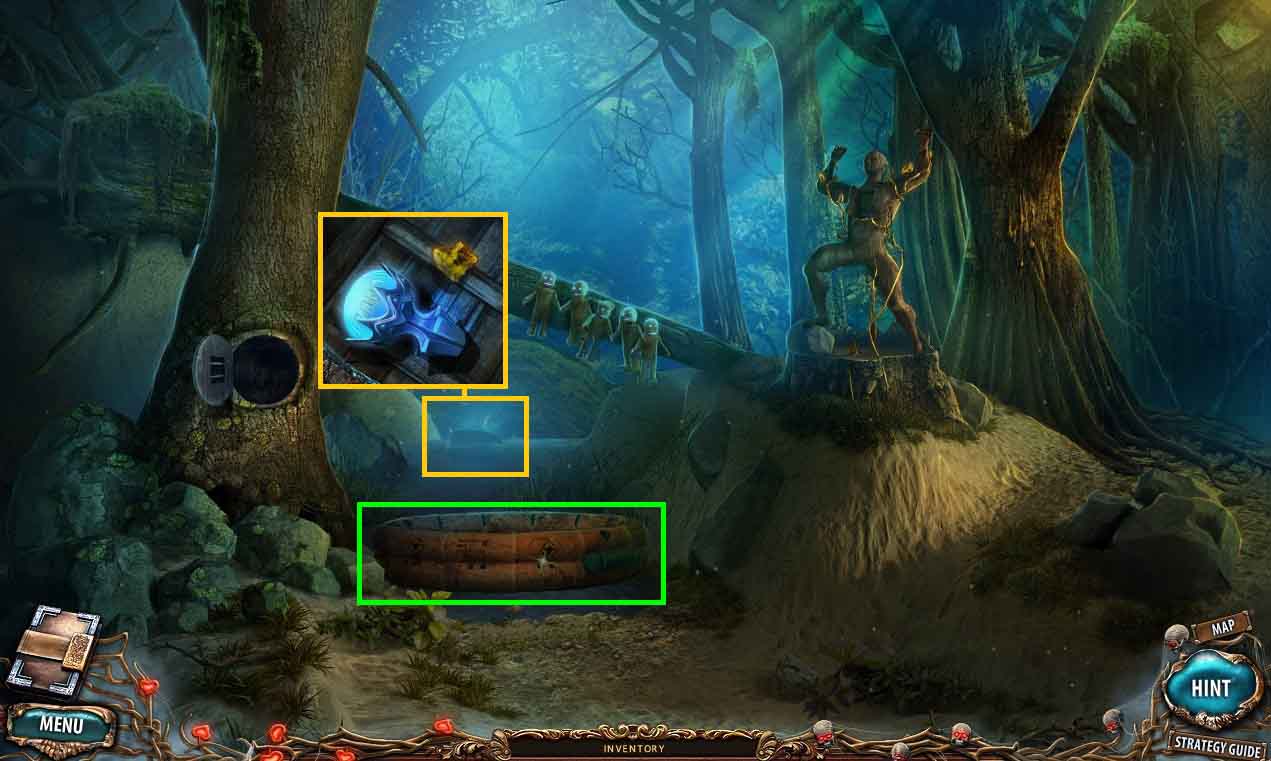
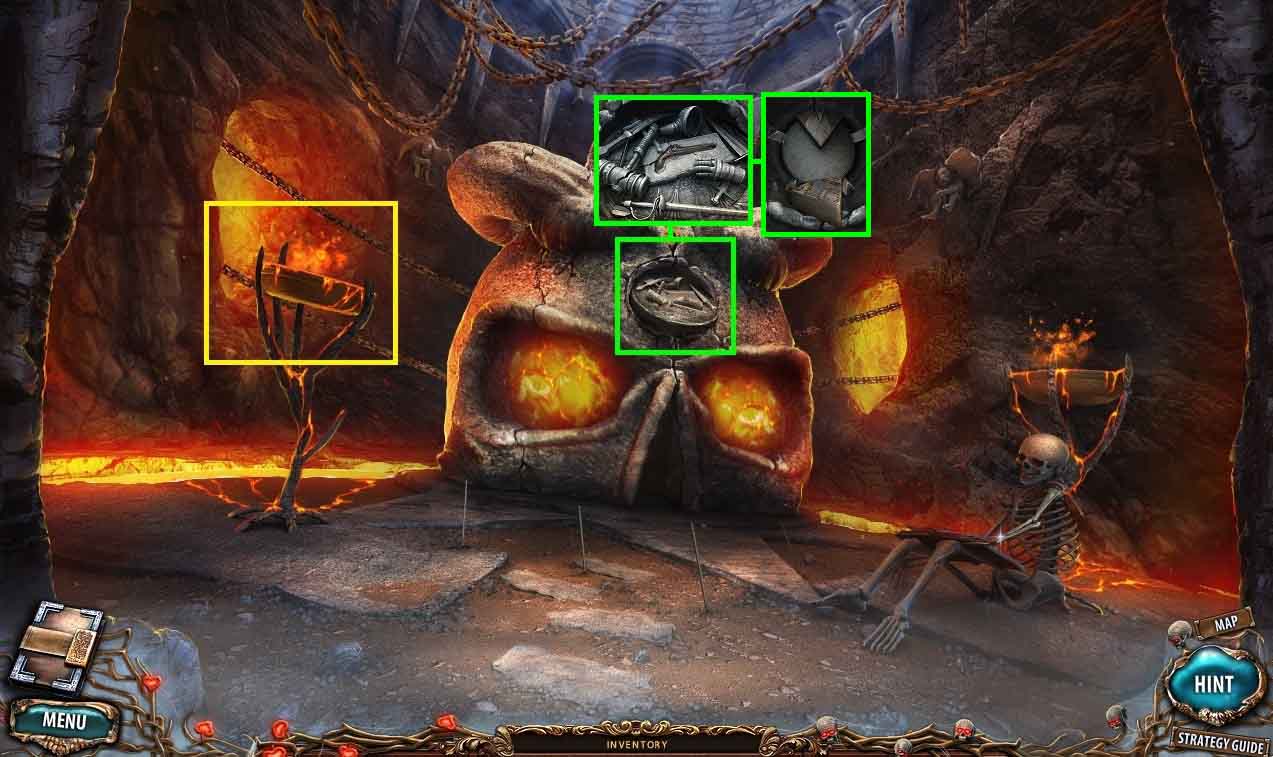
- Place the runes into the temple door frame.
- Move to the Left Island.

- Insert the lever into the mechanism; collect the lever.
- Collect the stone shield.
- Move to the Trophy Room.
- Put the stone head onto the table.
- Break the glass case using the brick.
- Collect the sarcophagus puzzle and insert it into the sarcophagus.
- Assemble the mosaic.

- Collect the retort and the cupboard handle.
- Zoom into the paper by the safe; note the code.
- Zoom into the chest; use the code to open it and collect the hind leg.
- Place the cupboard handle onto the cupboard.
- Click it open to access a hidden objects area.
- Find the listed items.
- Collect the empty pot.
- Move to the Peaceful Forest.
- Collect the pot of resin.
- Move to the Right Island.
- Put the grate over the pool of lava.
- Put the pot of resin onto the grate.
- Click the hidden objects area.
- Find the listed items.
- Collect the foreleg.
- Move to the laboratory.
- Place the tail, hind leg and the foreleg into the skeleton of the prehistoric animal.
- Collect the ham.
- Insert the stone shield above the fireplace.
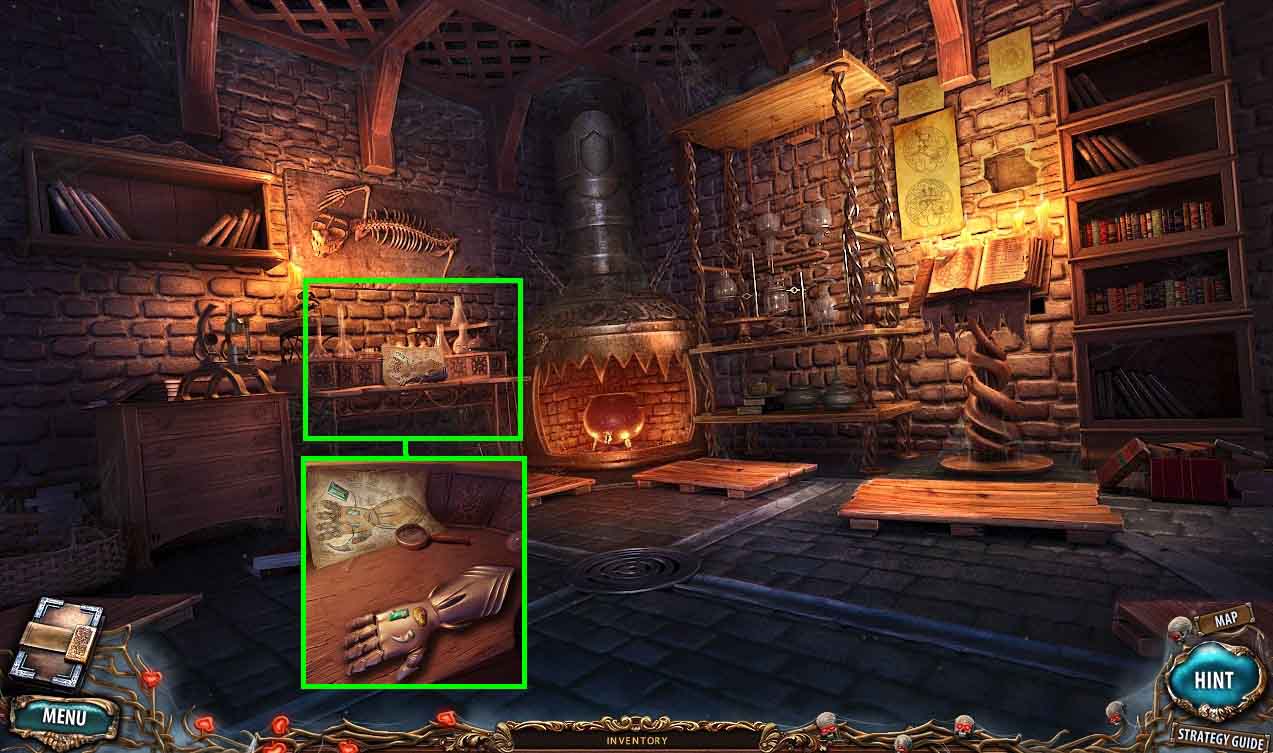
- Examine the chemistry equipment.
- Follow the instructions on making sulfur.
- Put the glass coil and the retort into the correct place.
- Place the filter to the glass container under the retort.
- Pour the chemicals into the flask of water.
- Collect the sulfur.
- Move to the Right Island.
- Put the sulfur into the pot of resin; collect the glue.
- Move to the temple exterior.

- Put the ham on the seal in the dragon’s mouth.
- Collect the lock part.
- Repair the lifeboat using the glue.
- Collect the lifeboat.
- Move to the Peaceful Forest.
- Toss the lifeboat into the swamp.
- Collect the rune and the gold nugget.
- Move to the Temple exterior.

- Insert the rune into the Temple door frame.
- Move to the Laboratory.
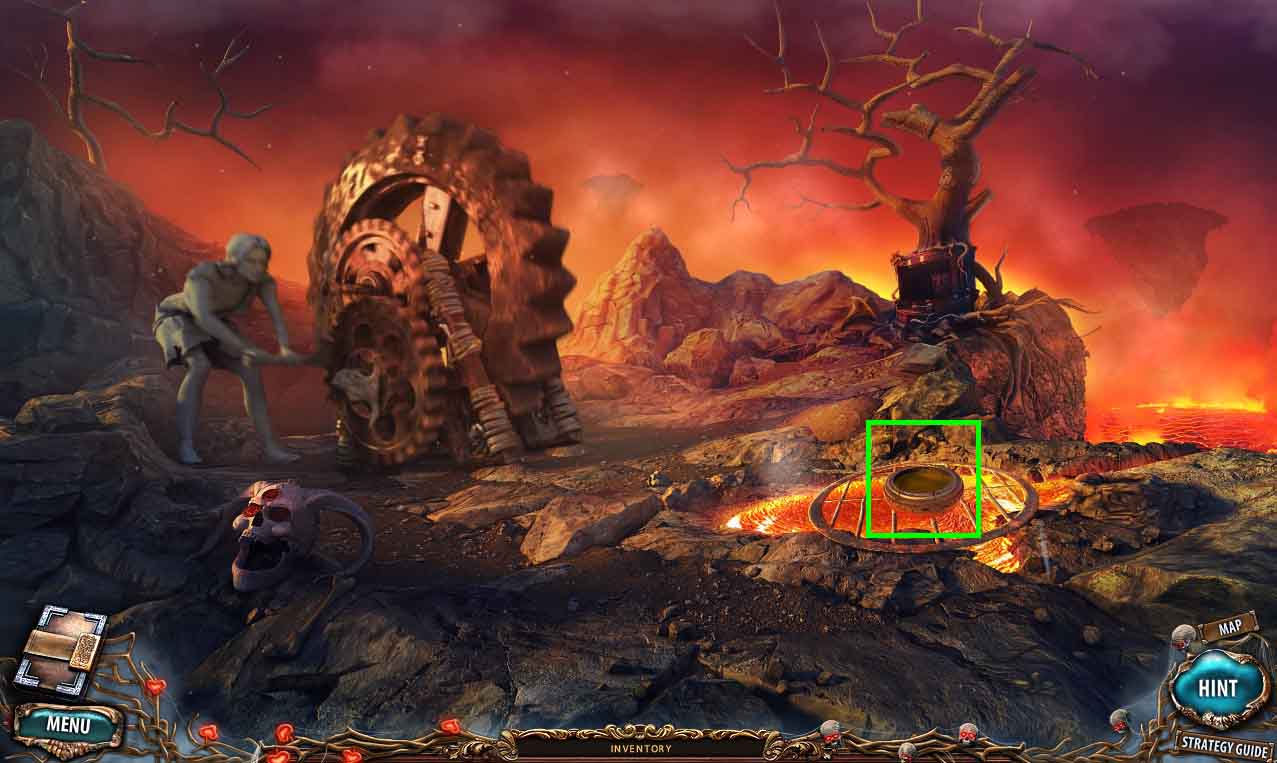
- Put the gold nugget into the cauldron.
- Click the tap.
- Collect the mould with melted gold.
- Put the mould with melted gold onto the coin press.
- Click the handle.
- Collect the coin.
- Move to the Left Island.
- Put the coin onto the seal.
- Collect the lock part and the safe key.
- Move to the trophy room.
- Open the safe using the key.
- Collect the gun.
- Click the hidden objects area.
- Find the listed items.
- Collect the fireworks.
- Move to the Temple of Lilith.
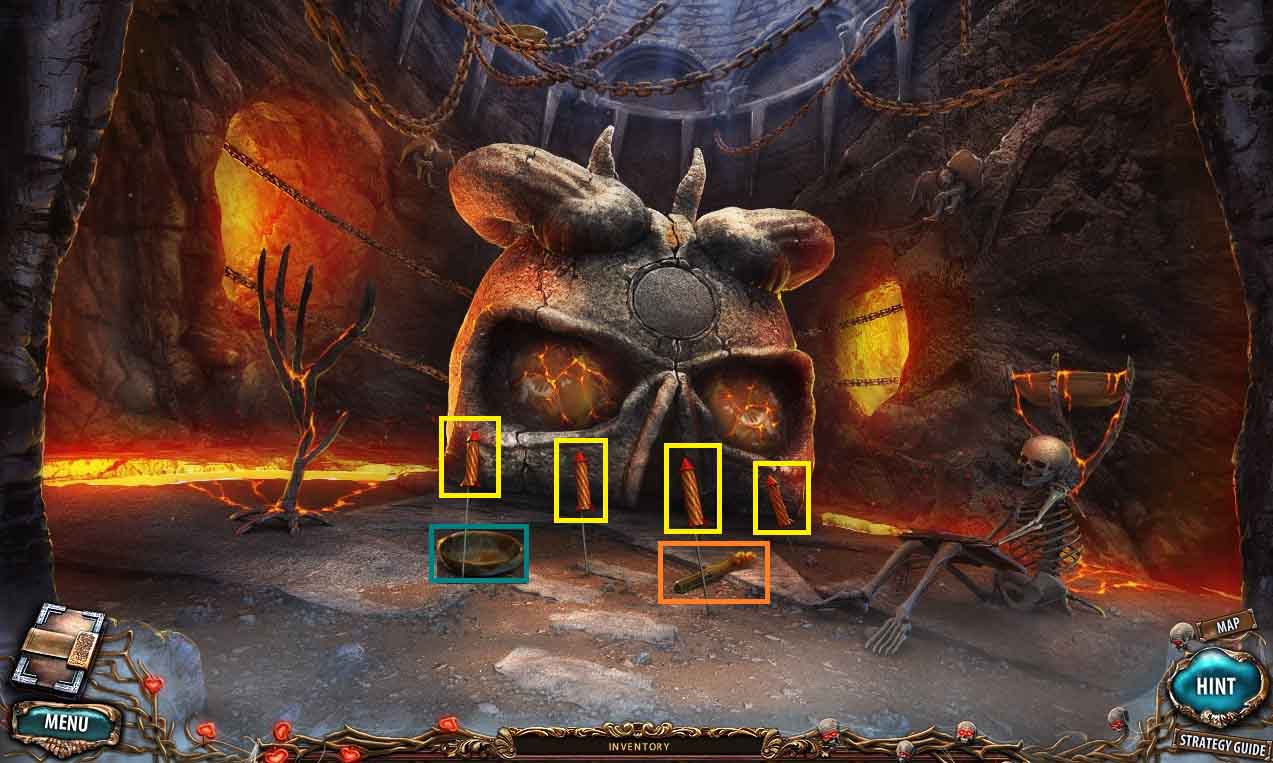
- Put the fireworks in front of the statue
- Light the fireworks using the torch.
- Collect the dirty bowl.
- Move to the Left Island.
- Clean the dirty bowl in the geyser.
- Collect the clean bowl.
- Move to the Right Island.
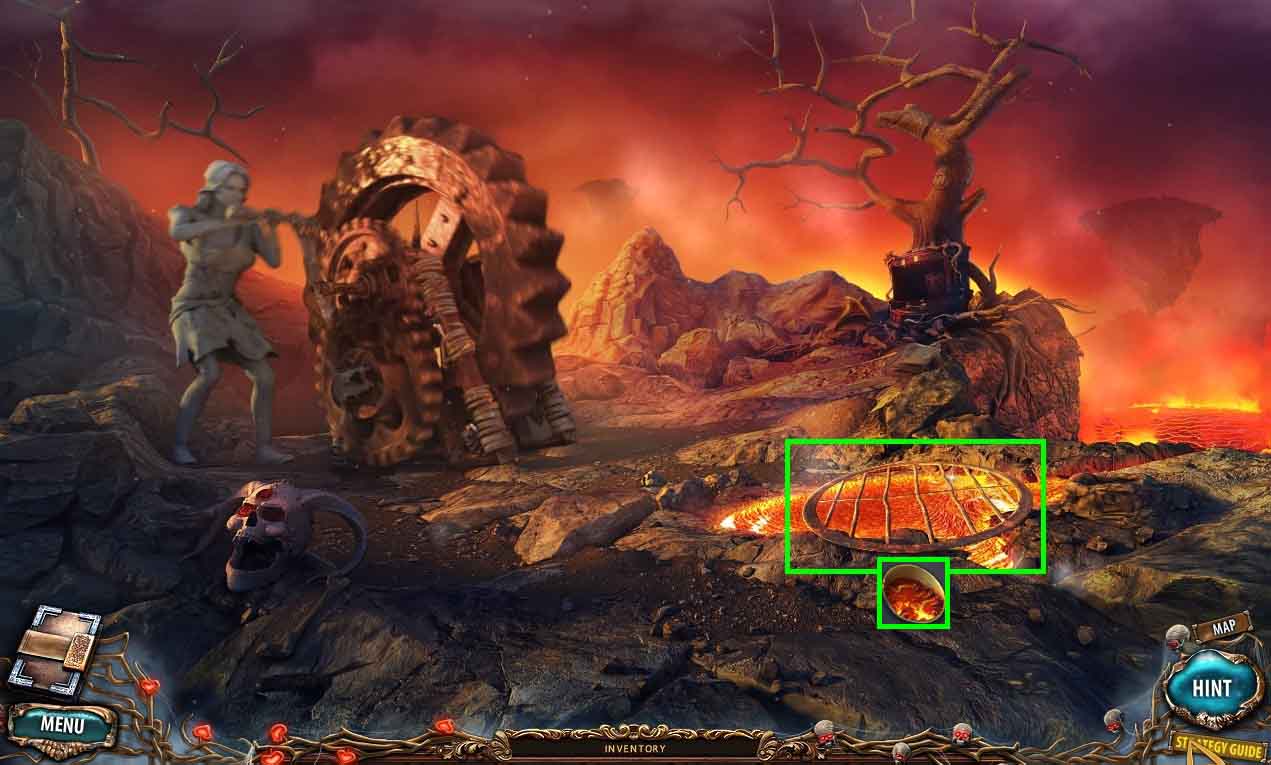
- Place the bowl into the lava; collect the bowl of lava.
- Move to the Temple of Lilith.
- Put the bowl of lava onto the pedestal.
- Put the gun onto the seal of rage.
- Collect the final lock part.

- Place the lock parts into the lock.
- Insert the dagger into Lilith’s heart.