
Sable Maze: Sullivan River: Bonus Game
Our Sable Maze Sullivan River Walkthrough will help you shake the feeling that something's watching you in this chilling hidden object adventure game. Journey back to the stomping grounds of your youth at the Sullivan River Campgrounds and discover what ancient evil you left behind there years ago, lurking in the labyrinth. With custom game screenshots marked with locations of key items and areas of interest along with easy to understand instructions, this Sable Maze Walkthrough will help guide you every step of the way.

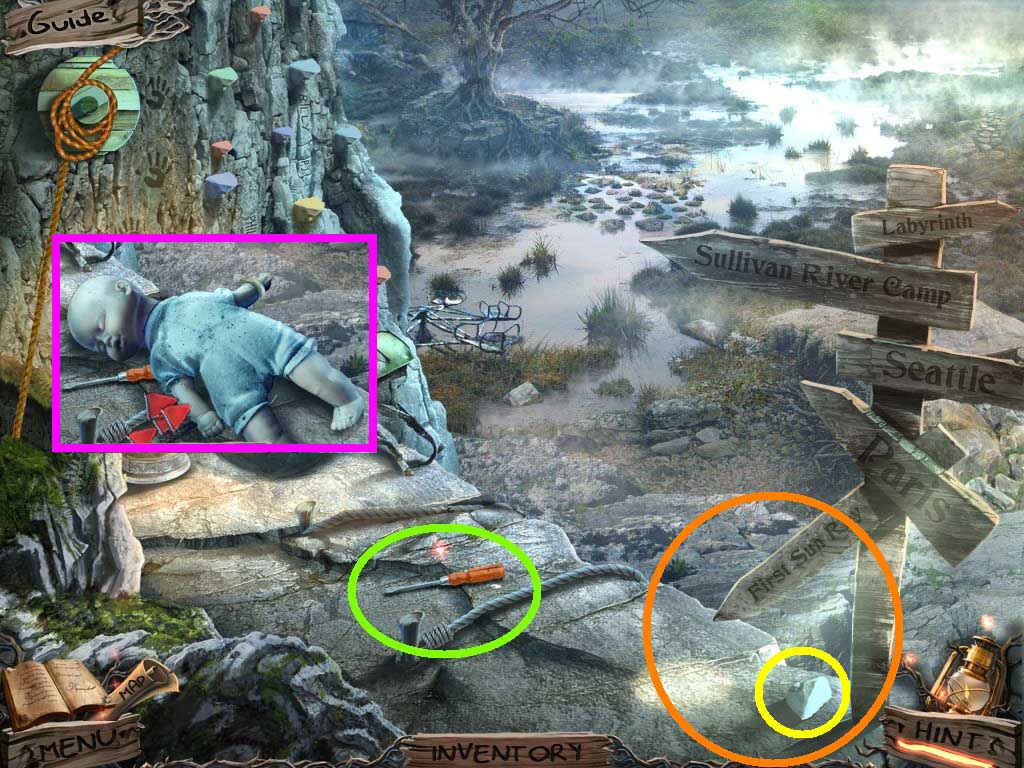
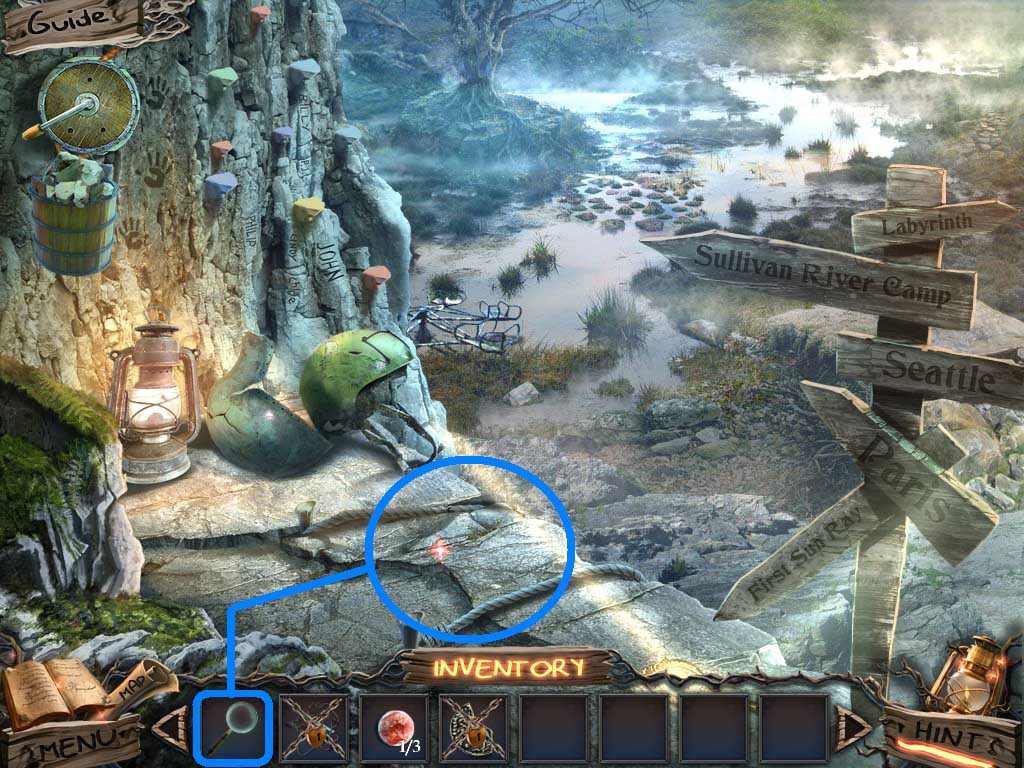
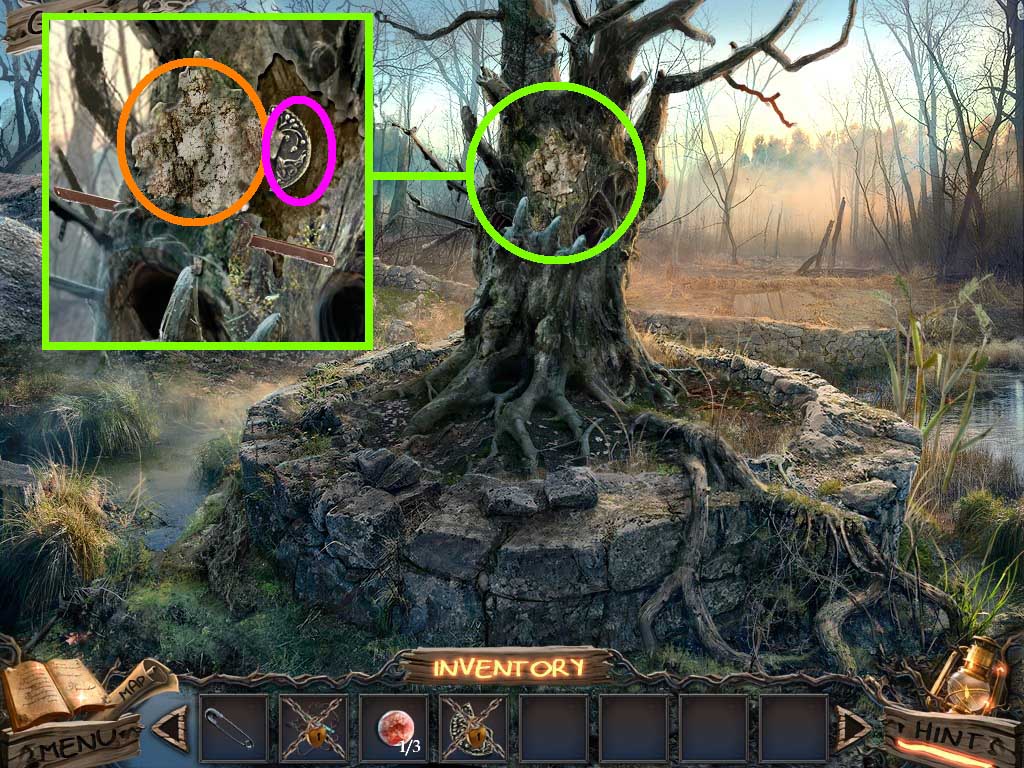
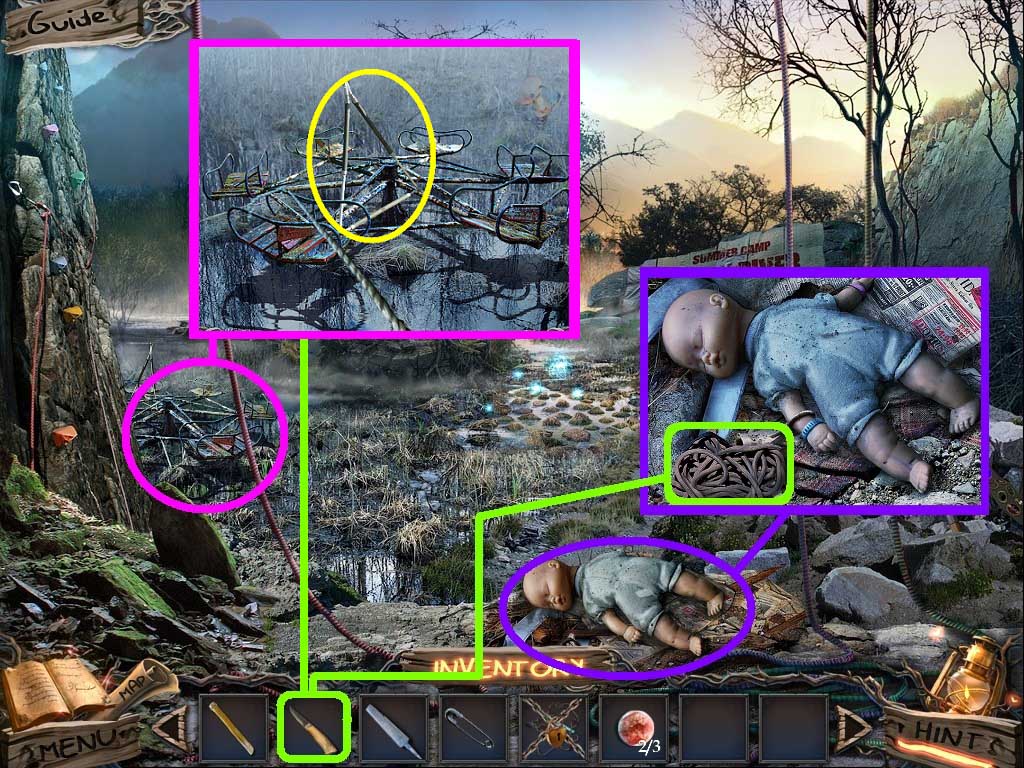
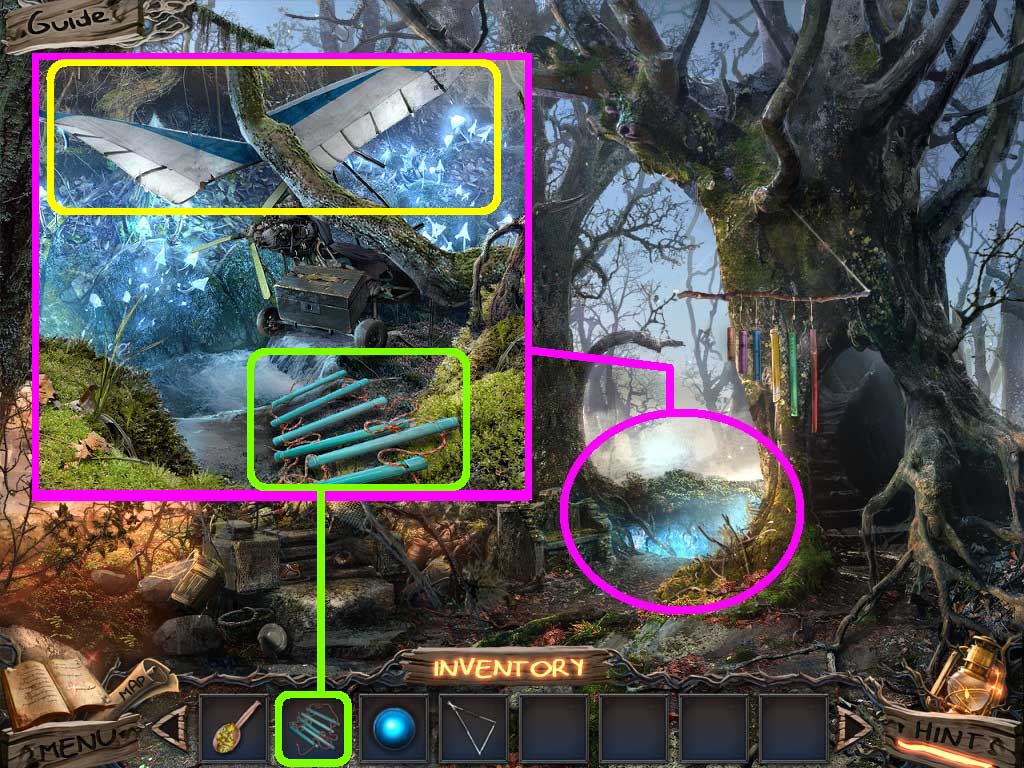
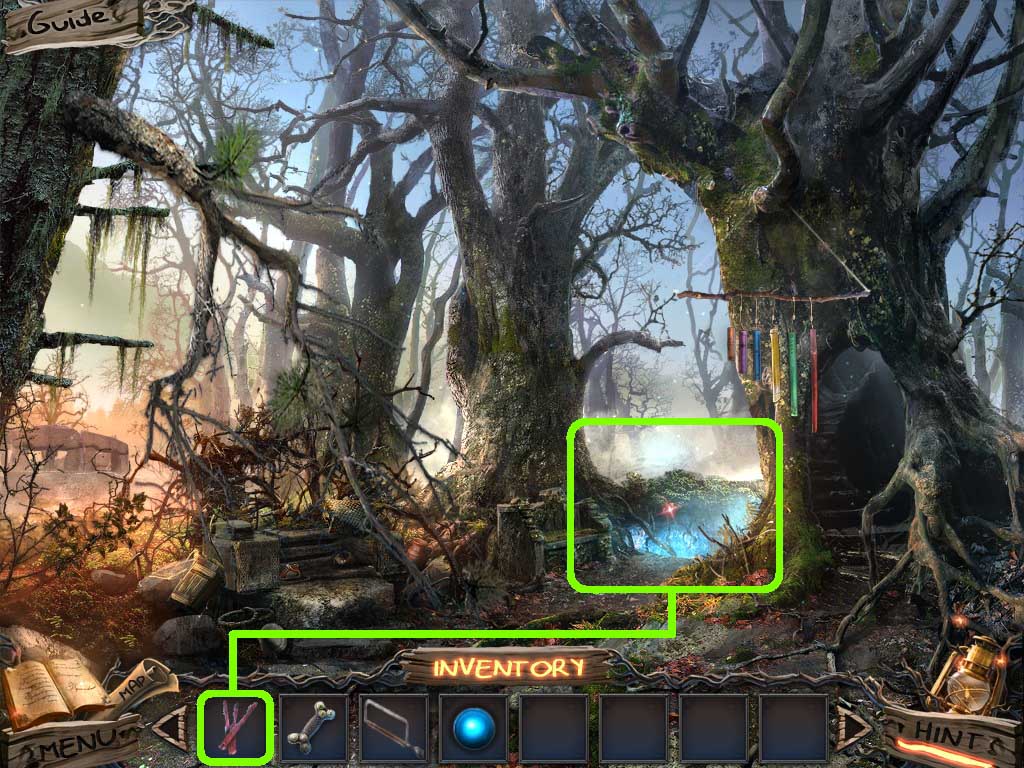
- Zoom into the rocks (yellow circle).
- Click the stone (pink circle).
- Collect the brush and the board (green circles).
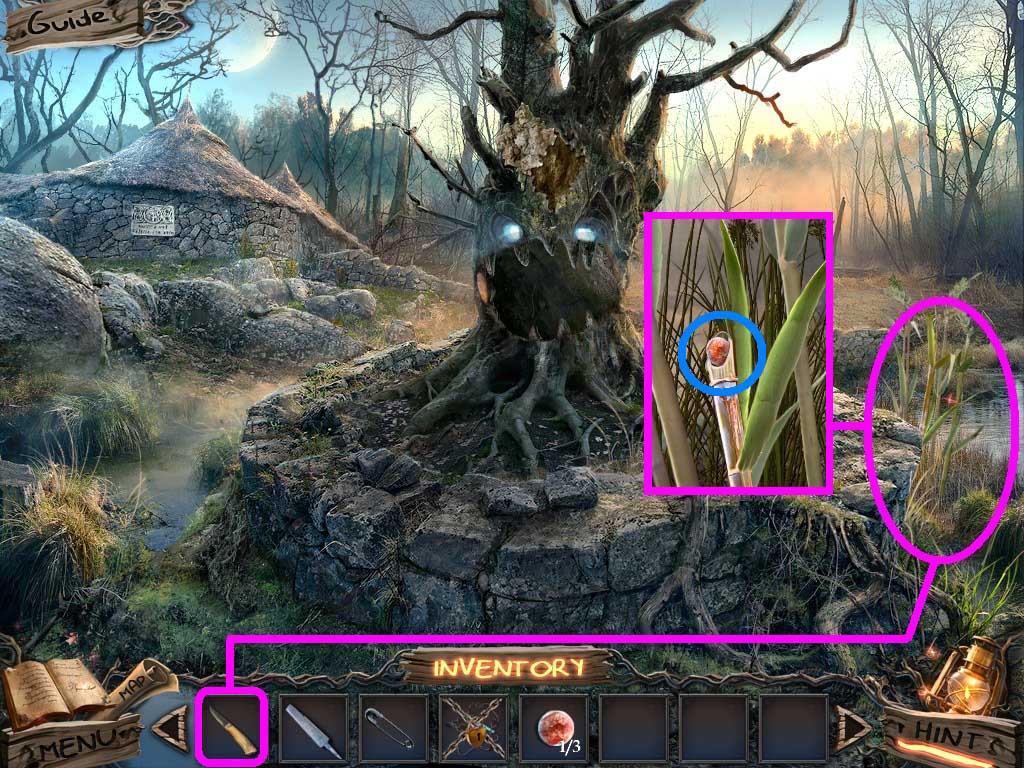
- Zoom into the doorway (blue circle).
- Collect the spear (orange circle).
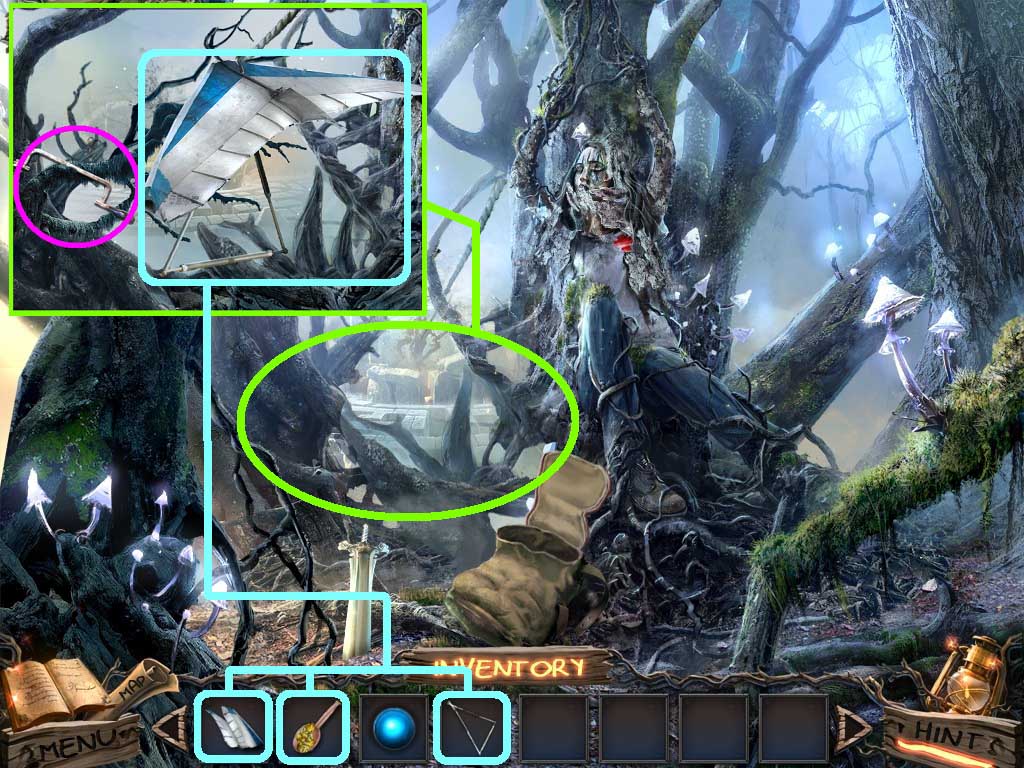
- Use the board on the wheel barrel (aqua circle).
- Use the spear on the rock (purple circle).
- Go to the excavation site.
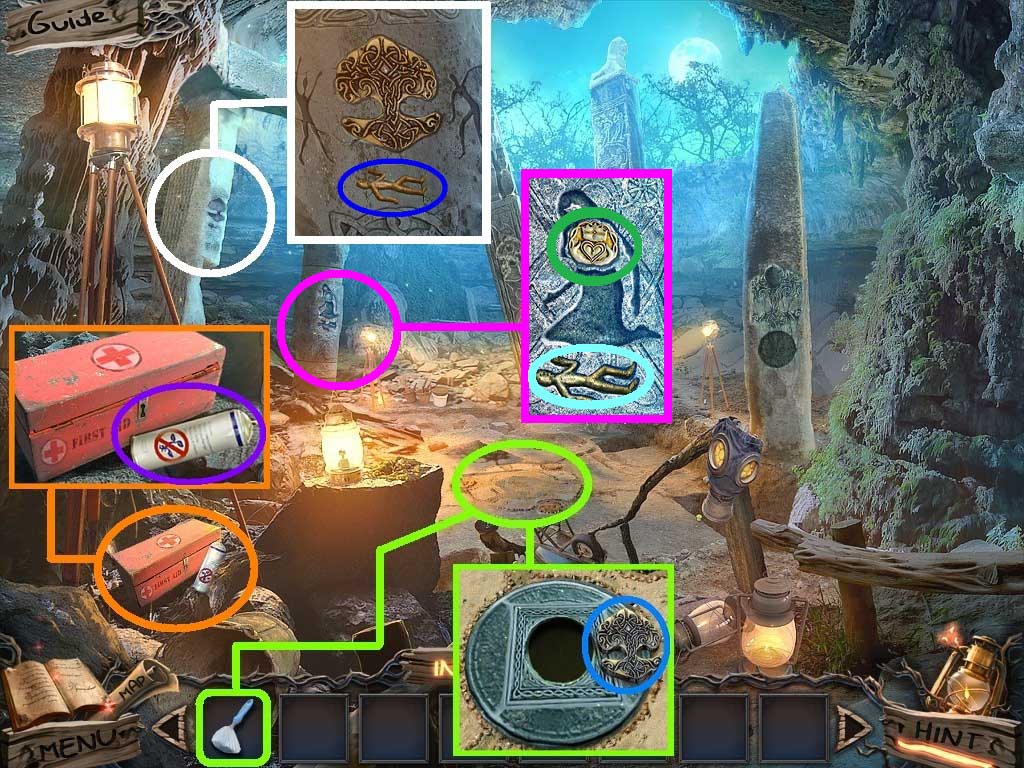
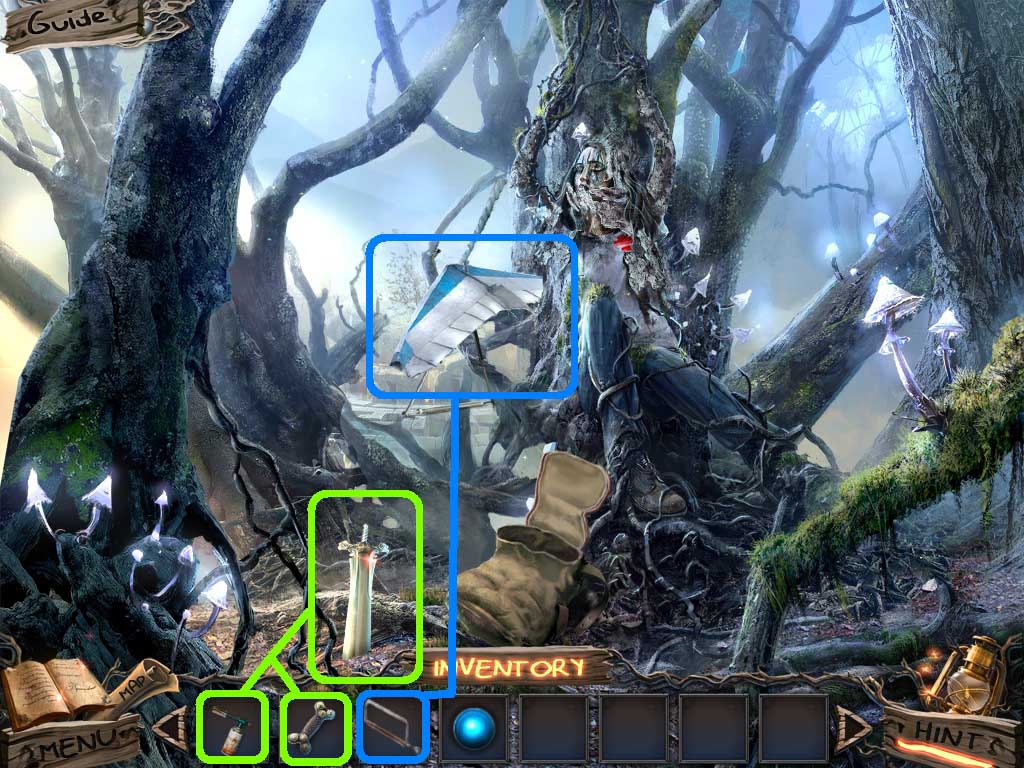
- Zoom into the sand mound (green circle).
- Pick the brush and click it 3 times on the sand.
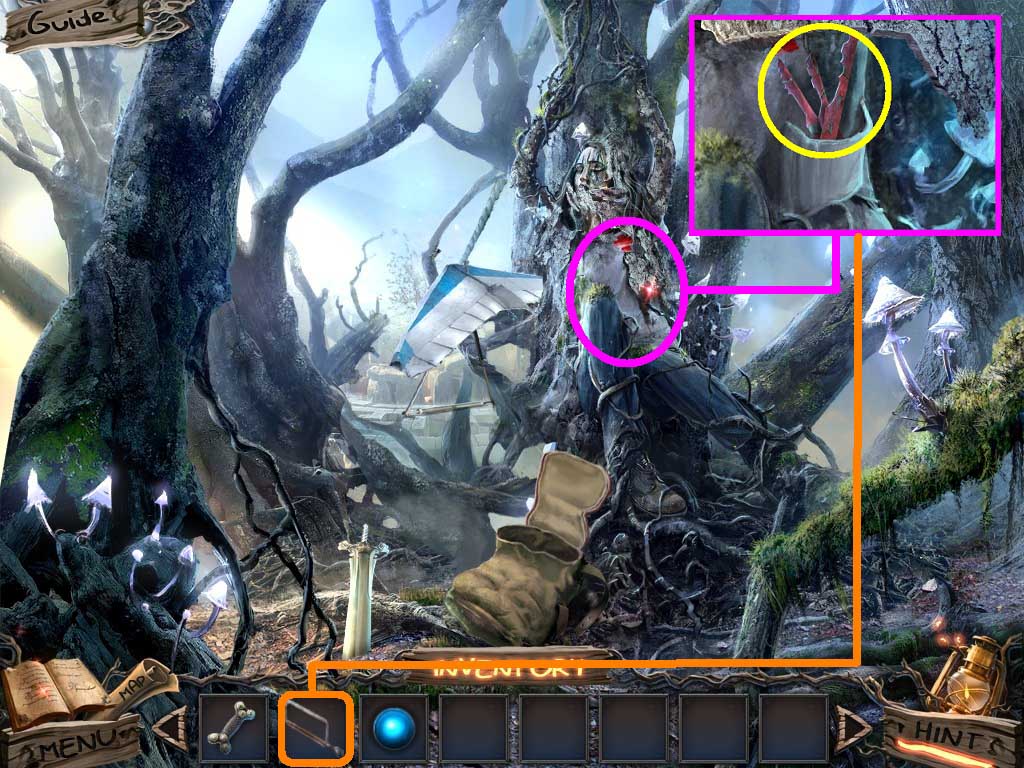
- Collect the tree emblem (blue circle).
- Zoom into the first aid kit (orange circle).
- Collect the herbicide spray (purple circle).
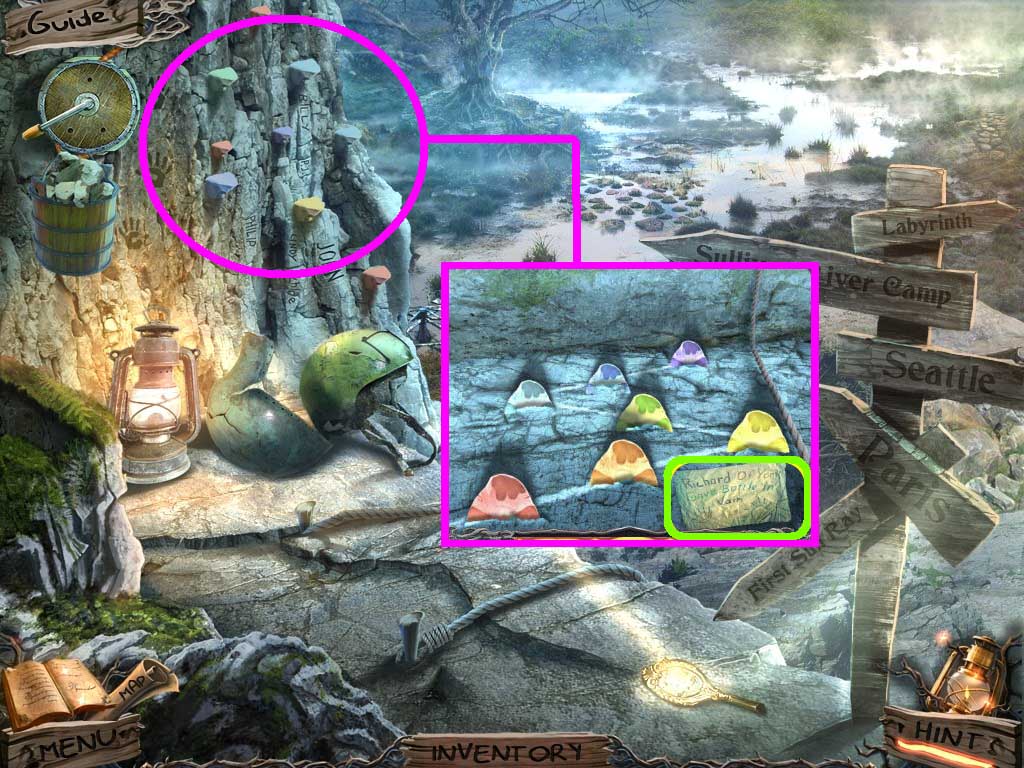
- Zoom into the pillar (white circle).
- Use the tree emblem in the space and collect the boy emblem (dark blue circle).
- Zoom into the pillar (yellow circle).
- Insert the boy emblem (aqua circle) and collect the heart emblem (dark green circle).

- Zoom into the pillar (green circle).
- Use the heart emblem in the space.
- Collect the apple emblem (orange circle).
- Zoom into the pillar (yellow circle).
- Use the apple emblem in the space.
- Collect the skull emblem (aqua circle).
- Zoom into the pillar (blue circle).
- Use the skull emblem in the space.
- Collect the face emblem (white circle).

- Zoom into the circle (orange circle).
- Use the face emblem in the space.
- Go into the tunnel.
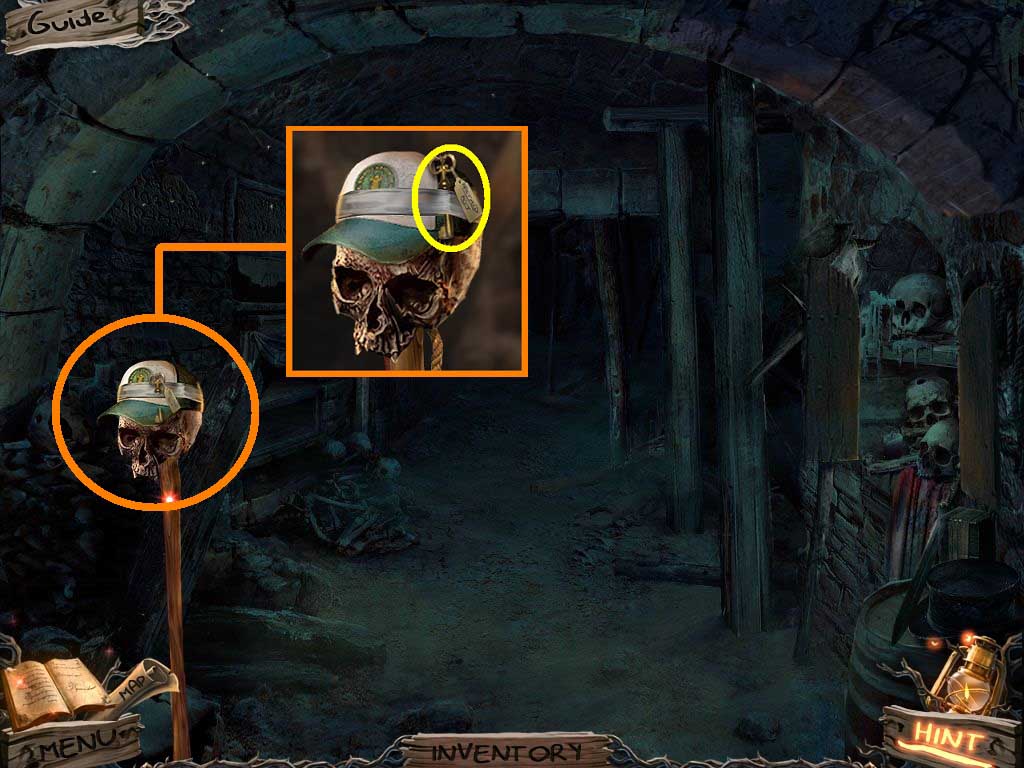
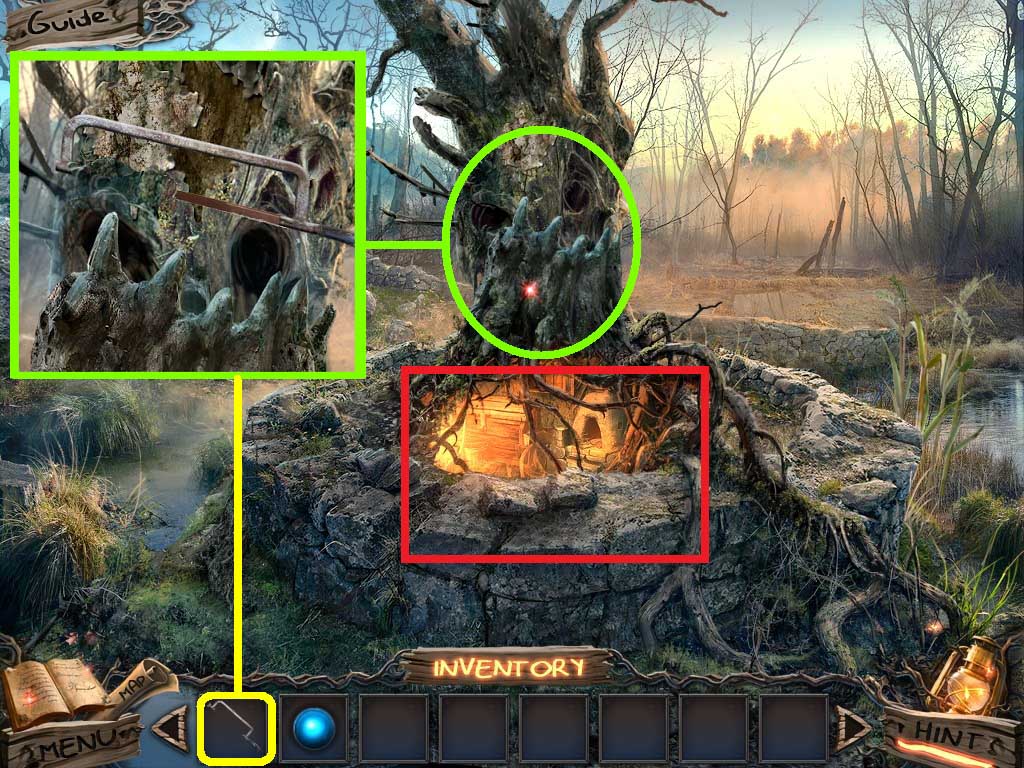
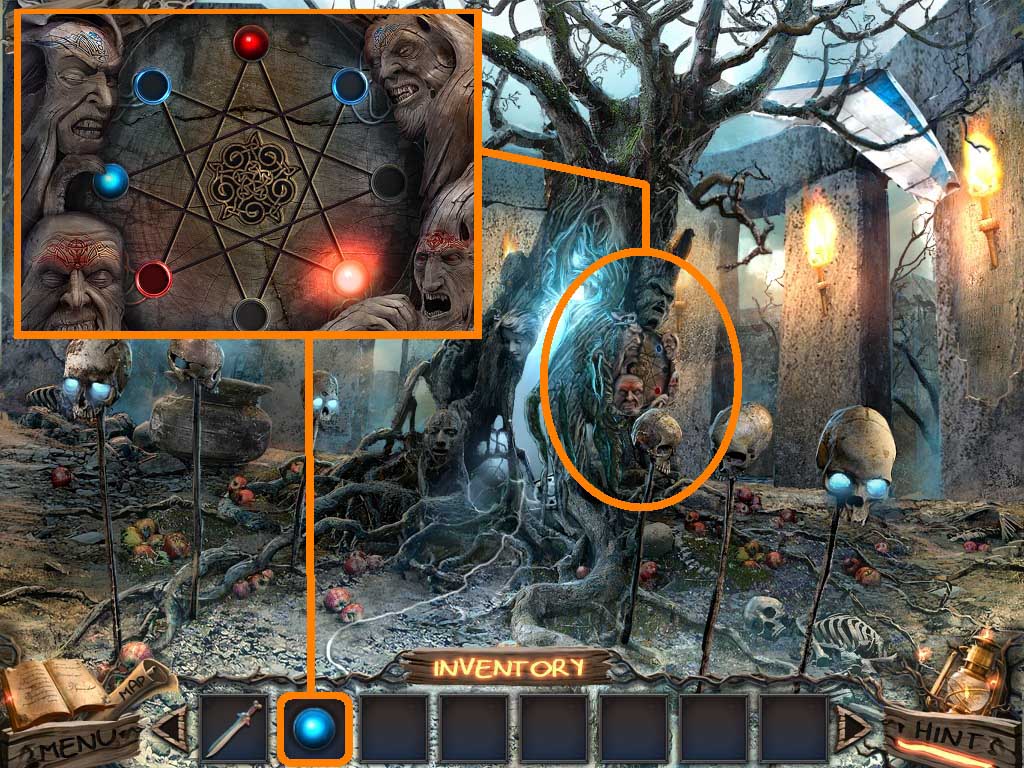
- Zoom into the skull (orange circle).
- Collect the key (yellow circle).
- Go back to the excavation site.
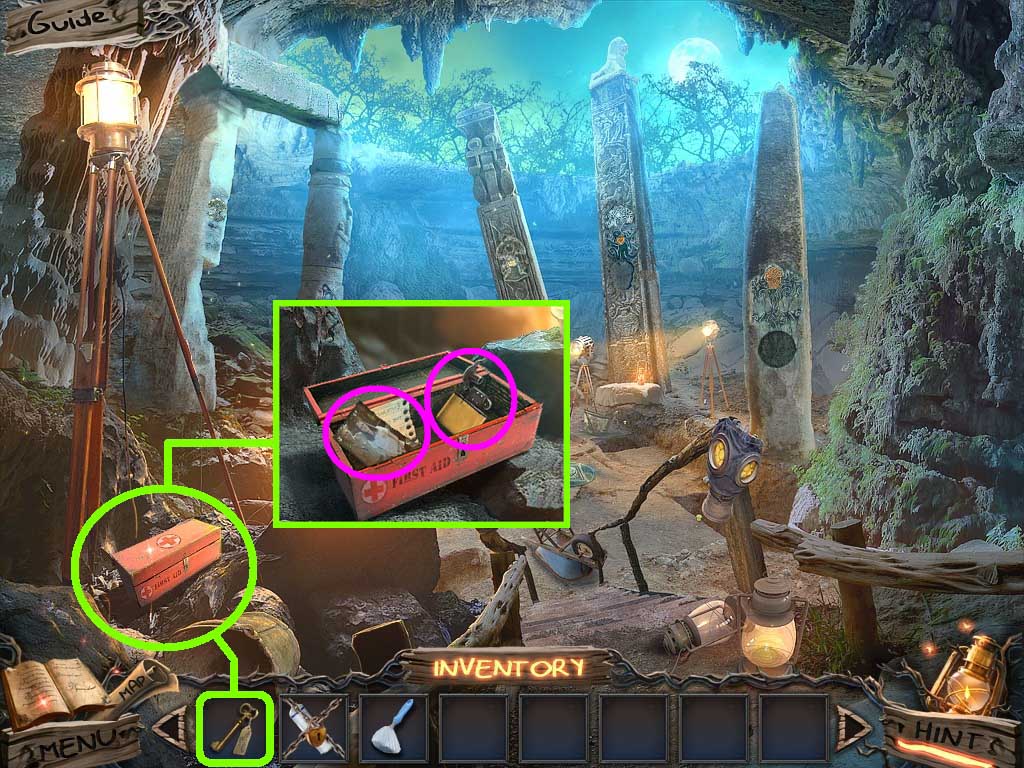
- Zoom into the first aid kit (green circle).
- Use the key to open it.
- Collect the picture, the note and the lighter (pink circles).
- Go into the tunnel.
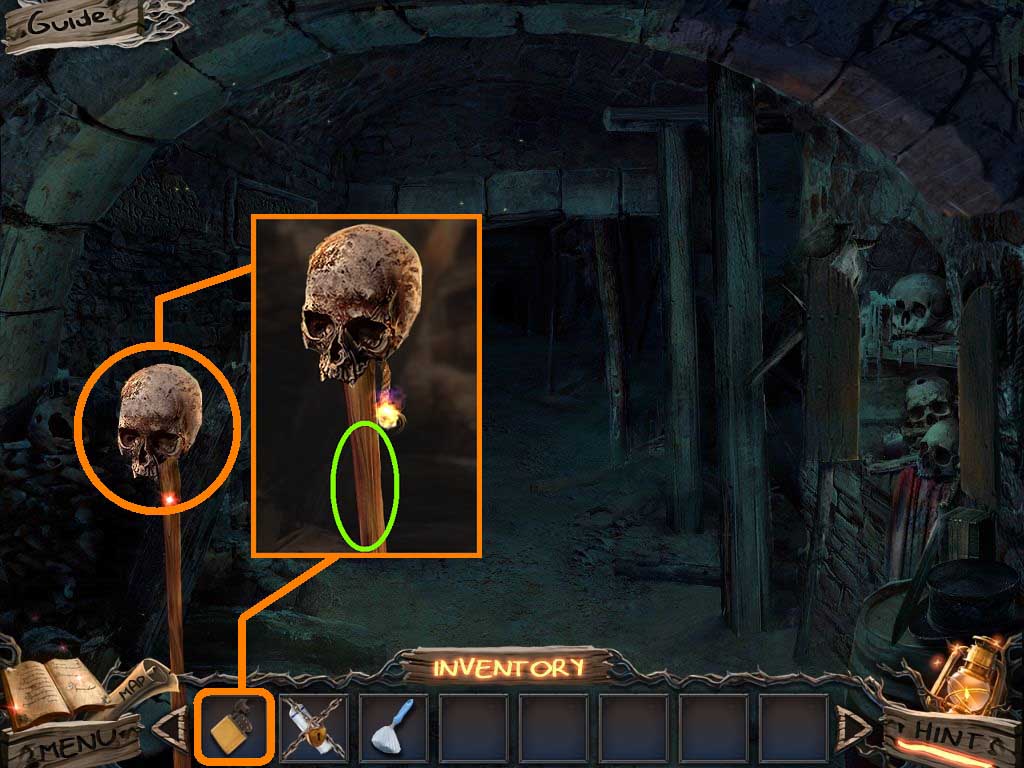
- Zoom into the skull (orange circle).
- Use the lighter on the rope.
- Zoom into the stick (green circle).
- Collect the stick.
- Go to the catacombs.

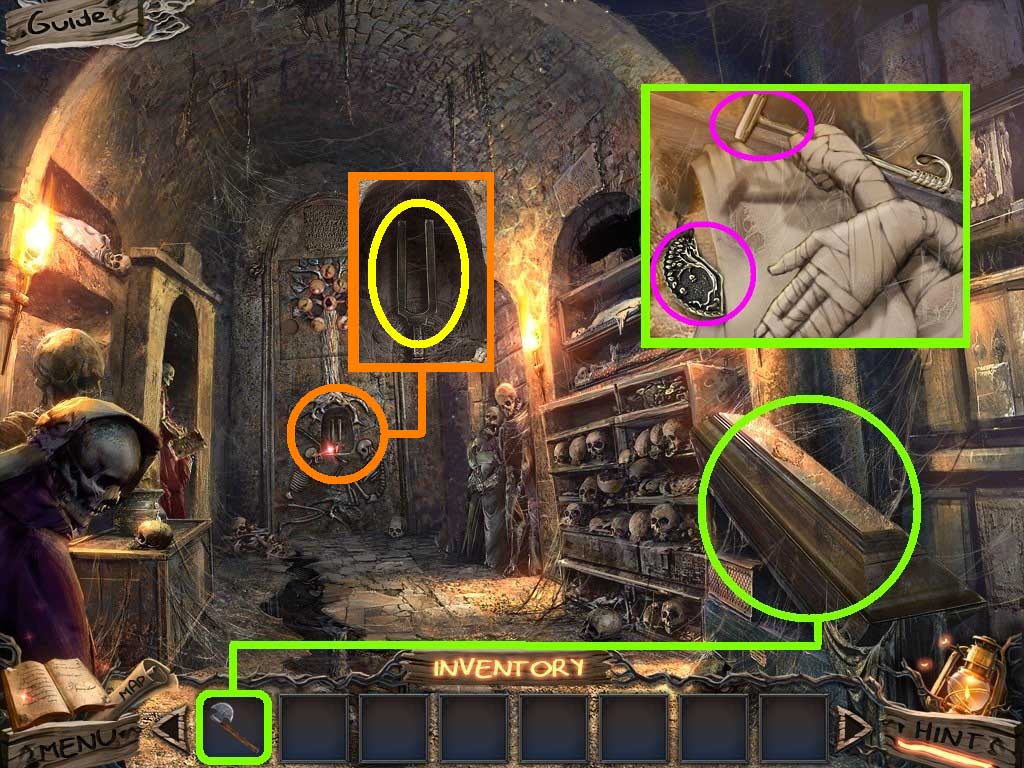
- Zoom into the alcove (yellow circle).
- Use the brush on the hand to clear away the web.
- Collect the nozzle.
- Go back one scene.
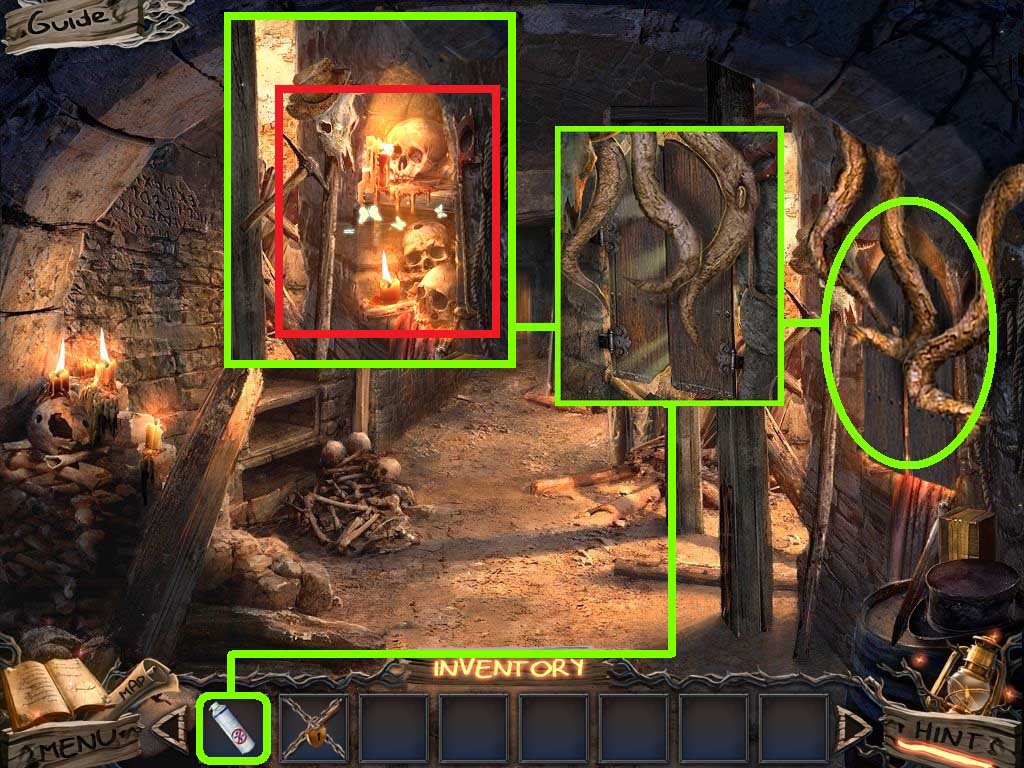
- Zoom into the roots (green circle).
- Use the herbicide on the roots.
- Zoom into the skulls (red rectangle) to access the hidden object area.
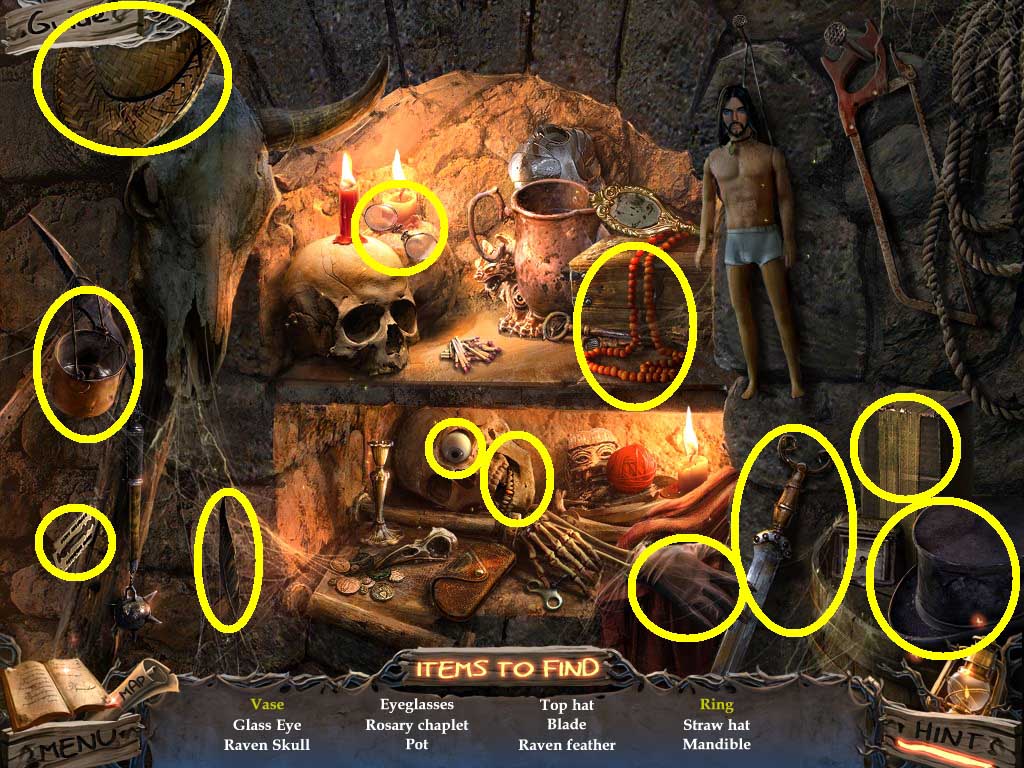
- Find the listed items (yellow circles).
- Collect the glass eye.
- Move forward.

- Zoom into the skeleton (orange circle).
- Use the glass eye (aqua circle) in the space on the book.
- Collect the apple medallion and the page (green circles).
- Zoom into the wall (blue circle).
- Use the apple medallion on the space to trigger a puzzle.
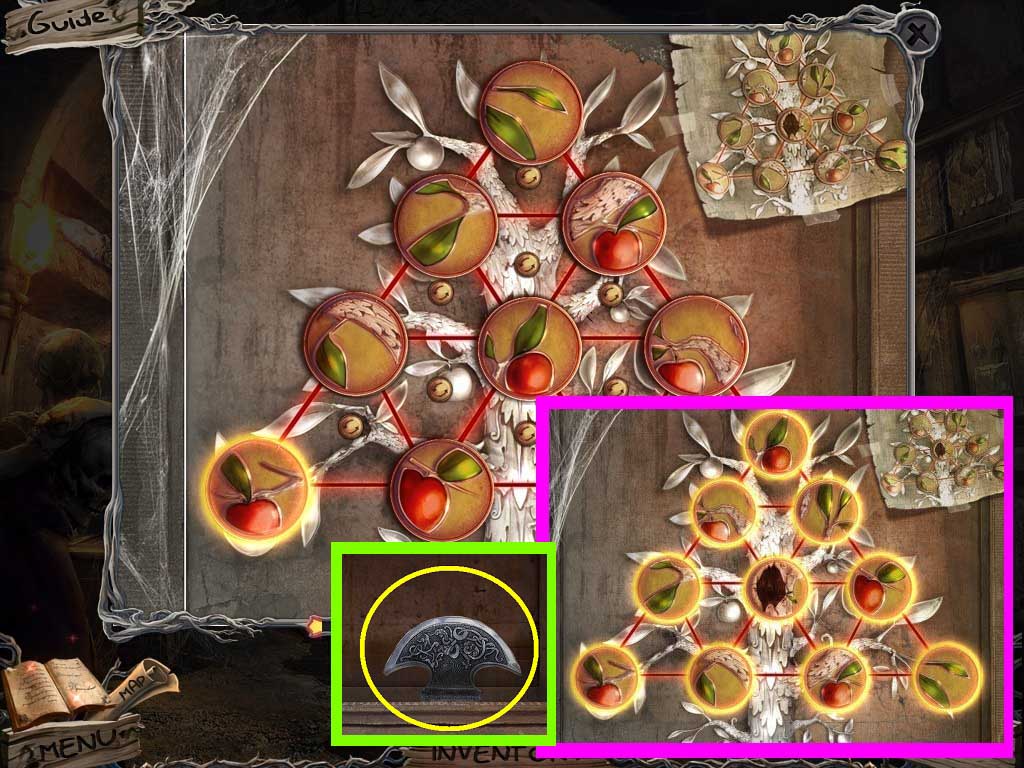
- Move the discs to complete the picture.
- Solve as shown above.
- Collect the axe head (yellow circle).
- Zoom into the casket (green circle).
- Use the poleaxe on the lid.
- Collect the amulet and the hammer (pink circles).
- Zoom into the bottom of the wall (orange circle).
- Use the hammer on the fork (yellow circle).
- Go into the doorway.
- Click the doll (pink circle).
- Collect the screwdriver (green circle).
- Zoom into the sign (orange circle).
- Collect the foot hold (yellow circle).
- Go to the tunnel.
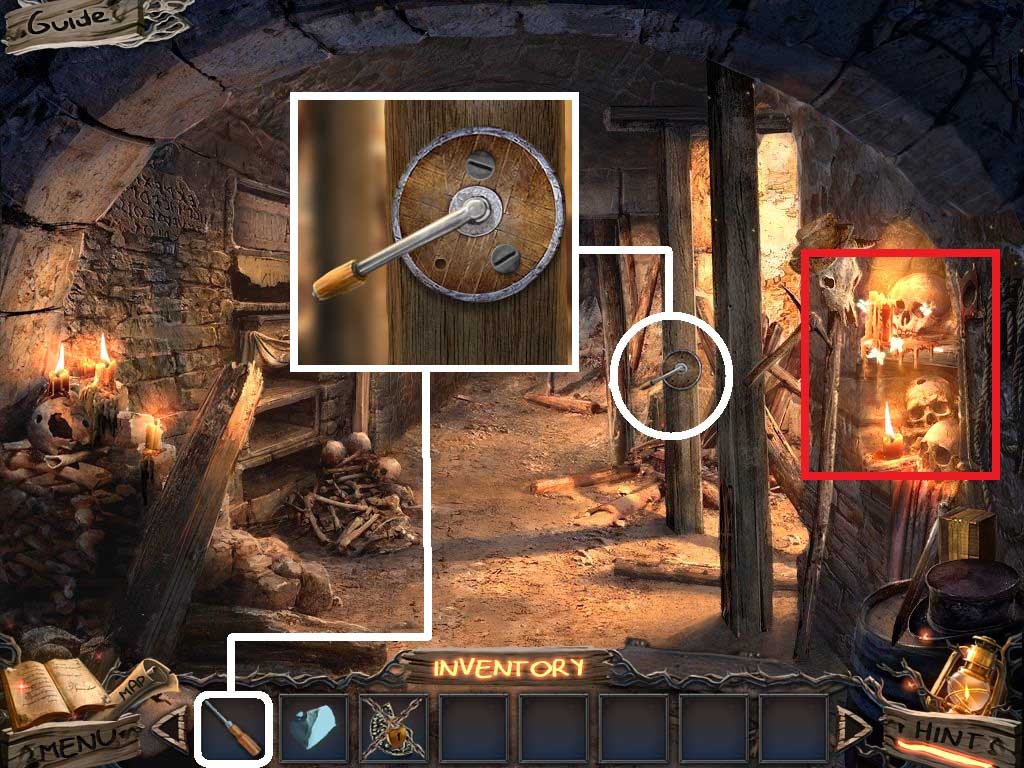
- Zoom into the disc (white circle).
- Use the screwdriver on the screws.
- Collect the spinner.
- Zoom into the skulls (red rectangle) to access the hidden object area.
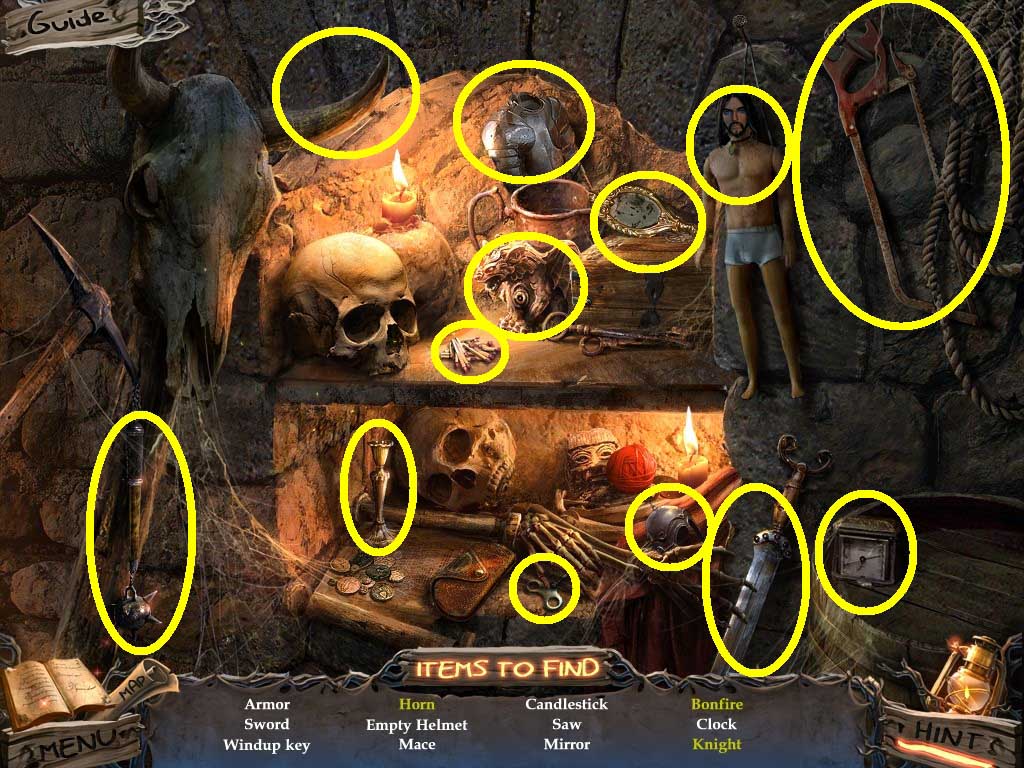
- Find the listed items (yellow circles).
- Collect the mirror.
- Go to the cliff.
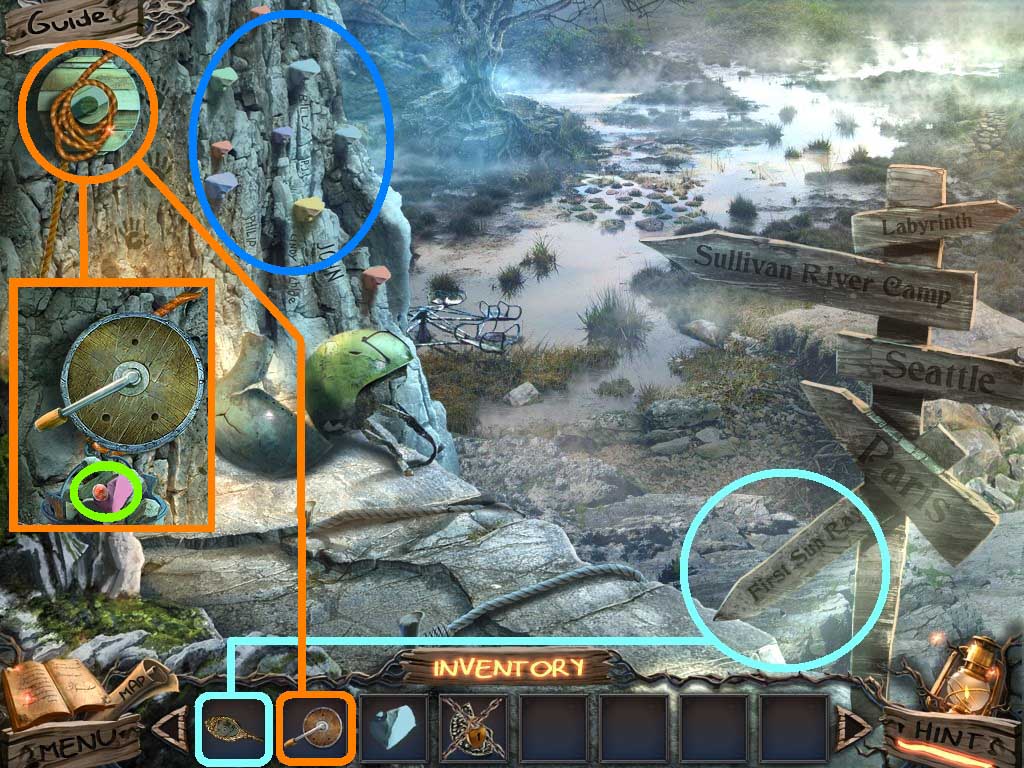
- Zoom into the sign (aqua circle).
- Use the mirror on the light beam.
- Zoom into the winch (orange circle).
- Use the spinner on it; click the spinner.
- Collect the marble and the 2nd foot hold (green circles).
- Zoom into the wall (blue circle).
- Insert the 2 foot holds to trigger a puzzle.
- Move the pegs in the color order as shown above.
- Use the note (green square) as a clue to the color pattern.
- Solve as shown above (pink square).
- Go to the marsh.
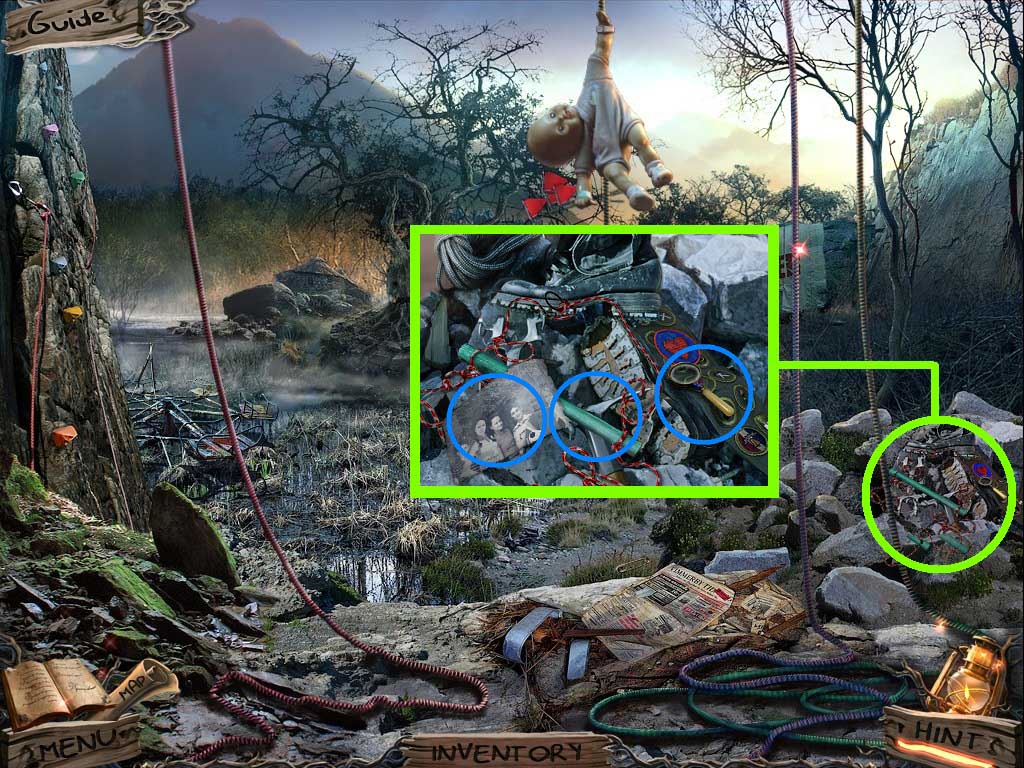
- Zoom into the mound of gear (green circle).
- Collect the photo, the ladder piece and magnifier (blue circles).
- Go to the cliff.
- Zoom into the ledge (blue circle).
- Use the magnifier on the rope.
- Go to the marsh.
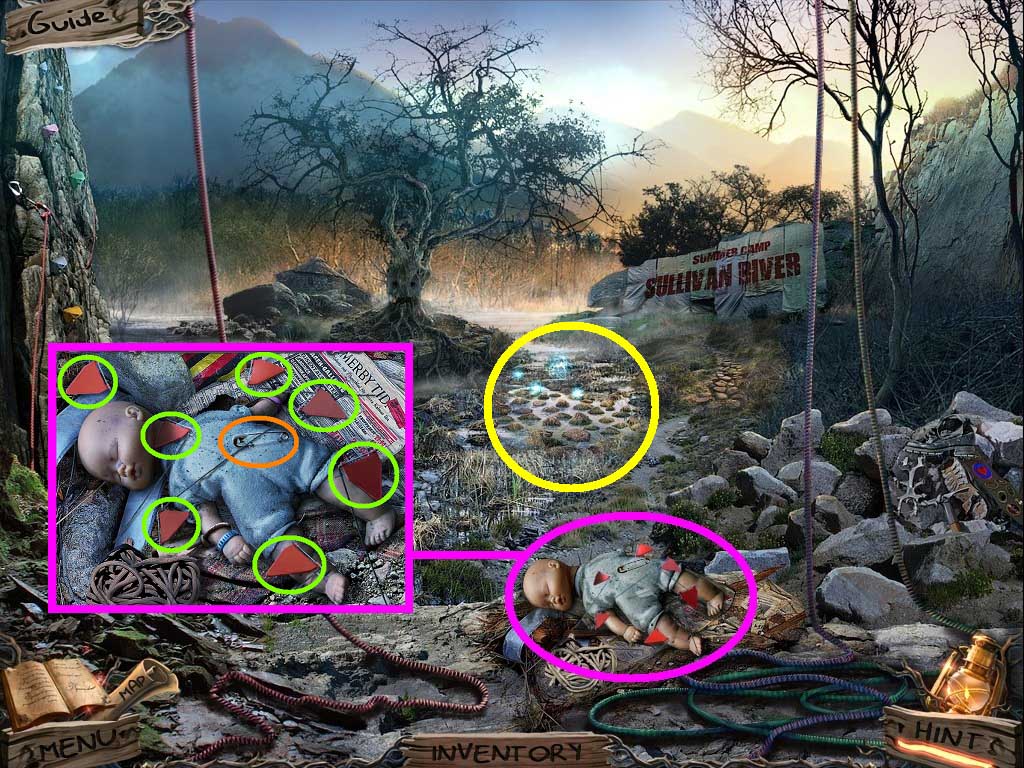
- Zoom into the doll (pink circle).
- Collect the 7 pennants (green circles).
- Collect the pin (orange circle).
- Zoom into the marsh (yellow circle) to trigger a puzzle.

- Move the pennants on the safe mounds.
- Solve as shown above.
- Go to the house on the marsh.
- Zoom into the tree (green circle).
- Click the fungus (orange circle).
- Collect the amulet part (pink circle).
- Go to the marshes.
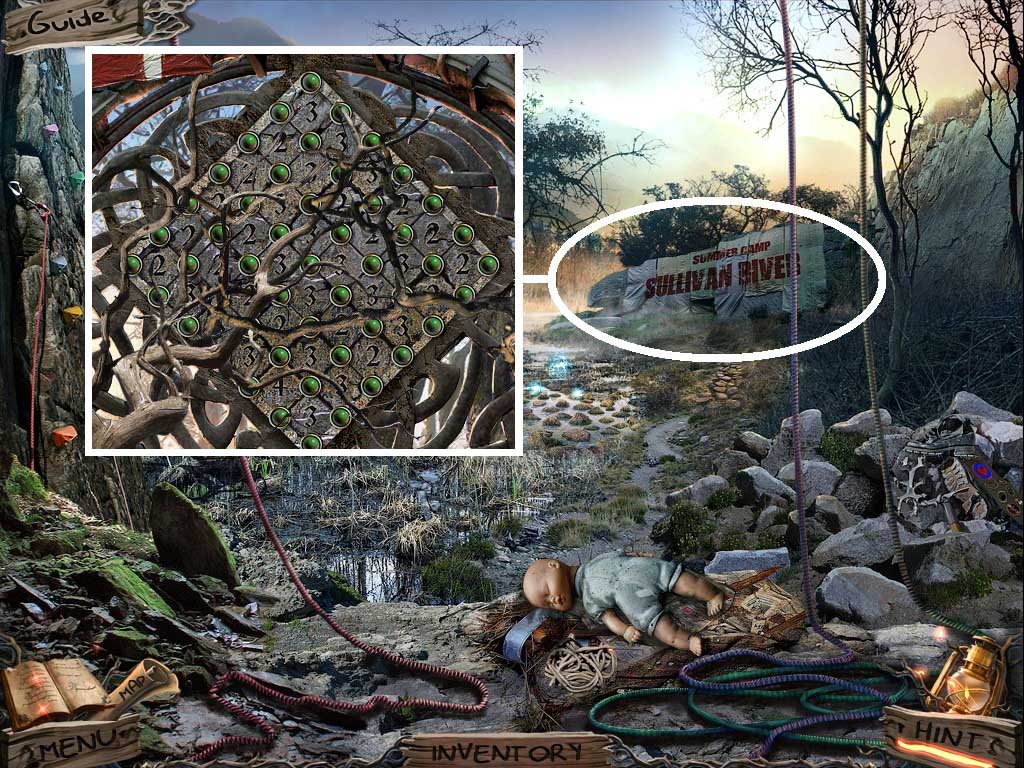
- Zoom into the sign (white circle).
- Click the four parts of the sign.
- Insert the amulet into the space to trigger a puzzle.
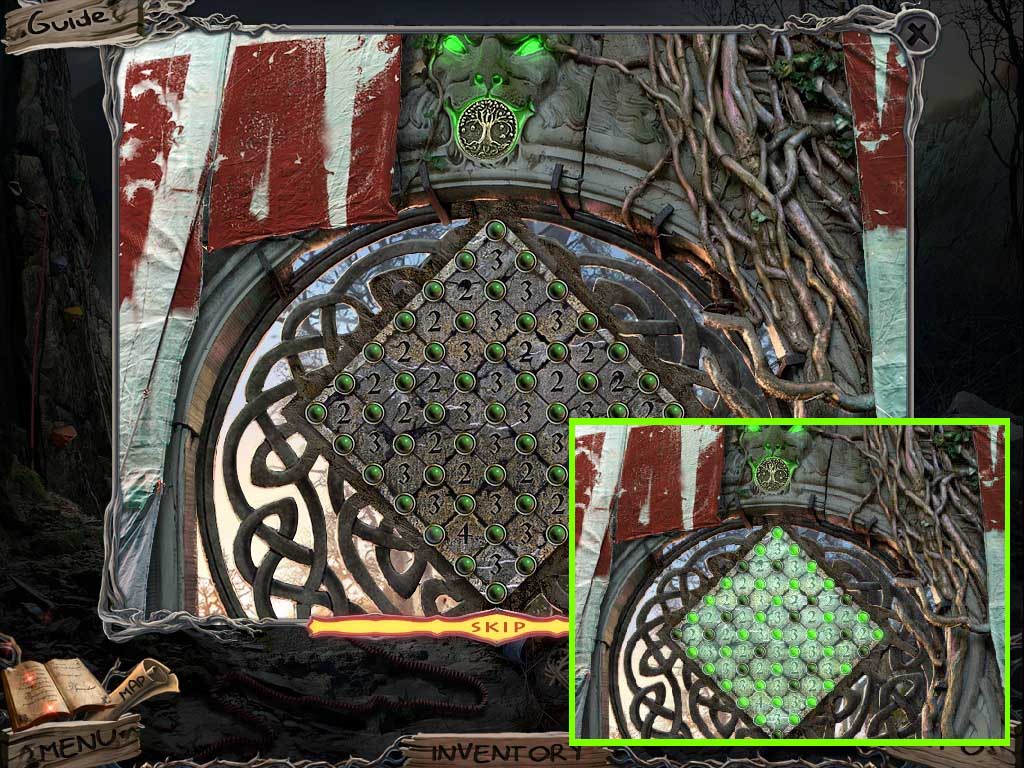
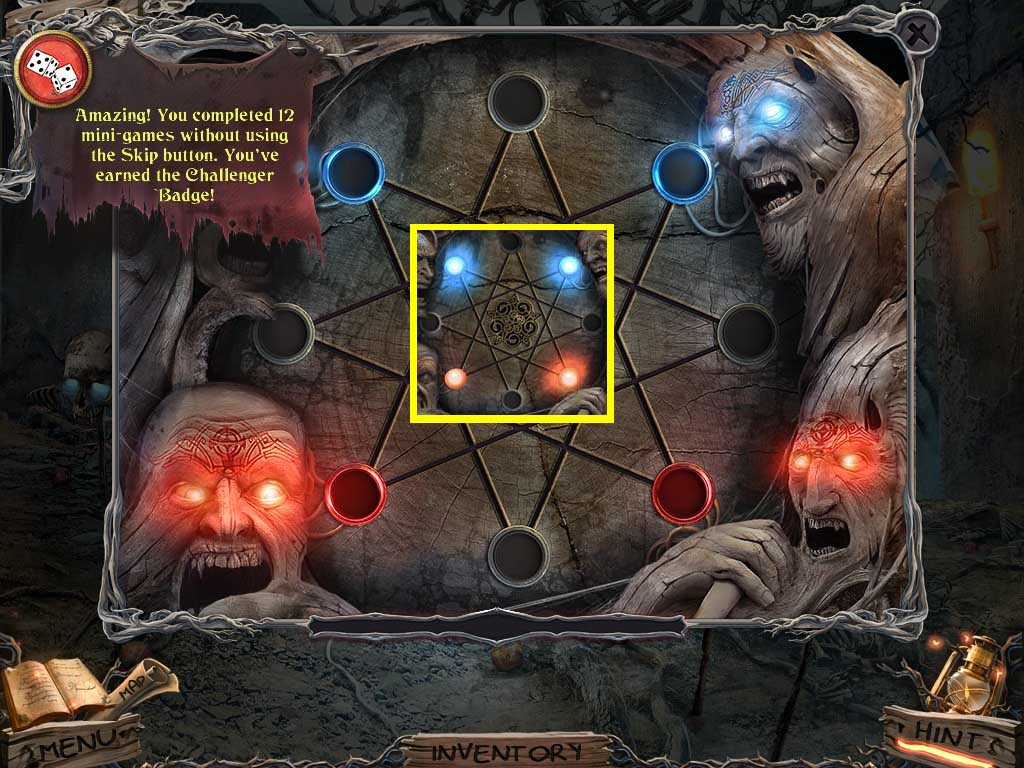
- Light the same number of lights as shown in the middle of the square.
- Solve as shown above.
- Go into the grove.

- Zoom into the space between the trees (green circle).
- Collect the rasp (yellow circle).
- Zoom into the bench (red rectangle) to access a hidden objects area.
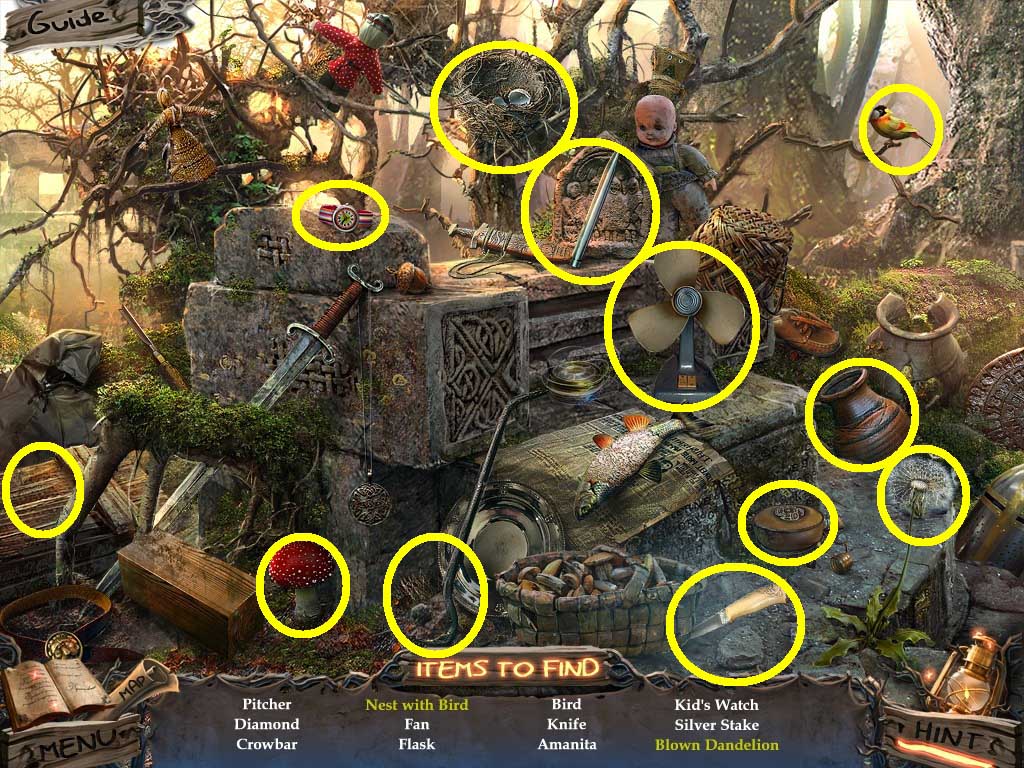
- Find the listed items (yellow circles).
- Collect the knife.
- Go to the house on the marsh.
- Zoom into the reeds (pink circle).
- Use the knife to cut and collect a reed.
- Collect the marble (blue circle).
- Go to the marshes.
- Zoom into the doll (purple circle).
- Use the knife (green square) to collect the rope.
- Zoom into the merry-go-round (pink circle).
- Use the rope on the merry-go-round.
- Collect the triangular frame (yellow circle).
- Go underneath the sign to the grove.
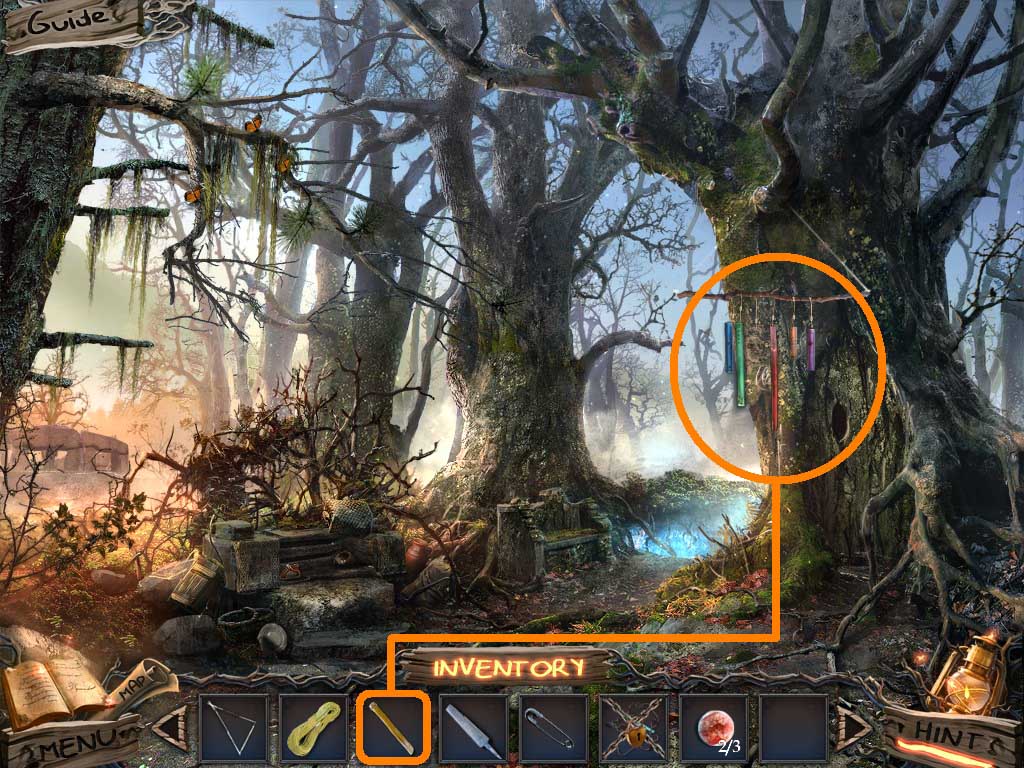
- Zoom into the pipes (orange circle).
- Hang the reed near the others, a puzzle will trigger.
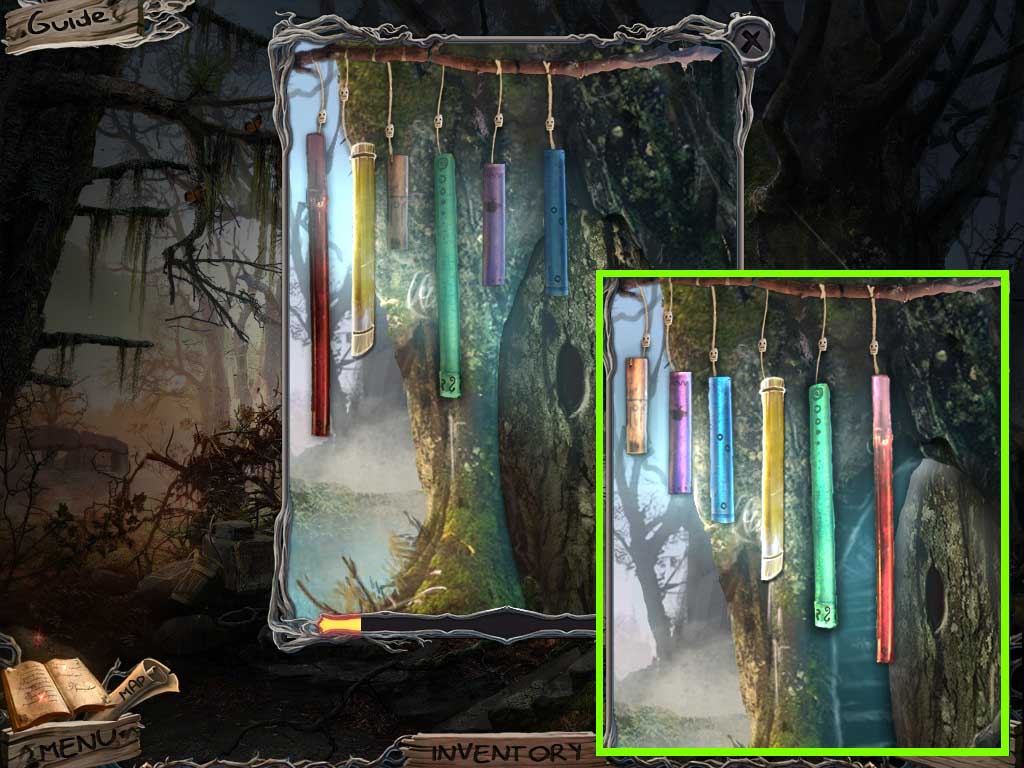
- Move the pipes from least to greatest.
- Solve as shown above (green square).
- Go into the tree.
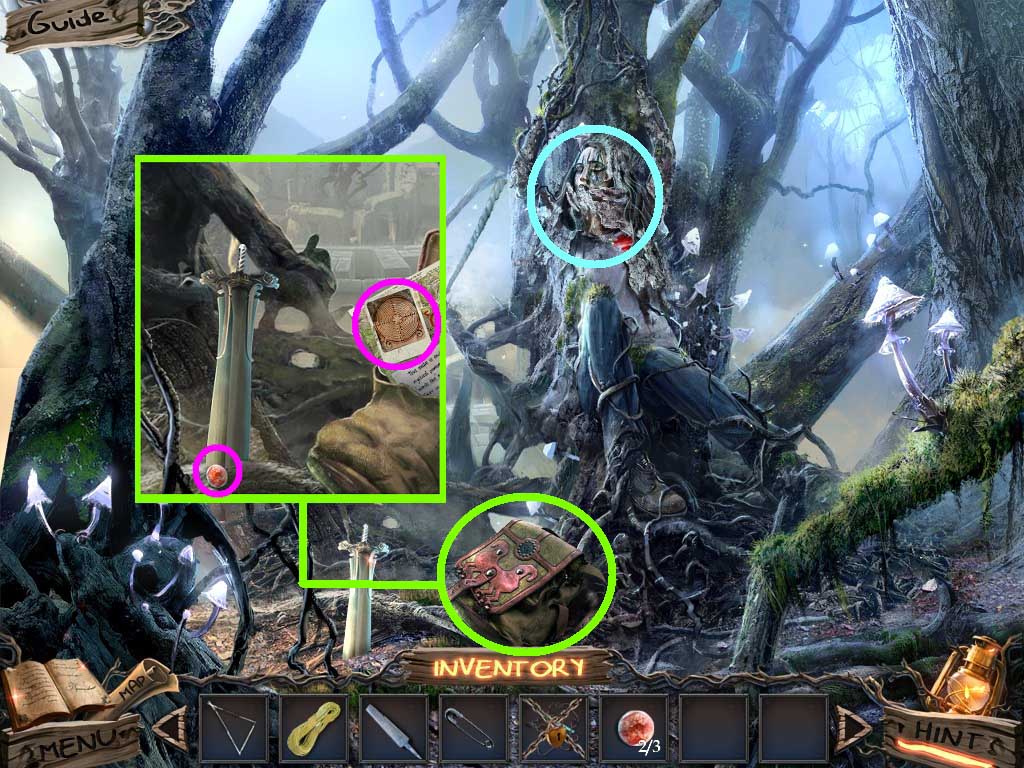
- Zoom into the bag (green circle).
- Click it.
- Collect the note, the scissors and the marble (pink circles).
- Click the face (aqua circle).
- Go to the grove.
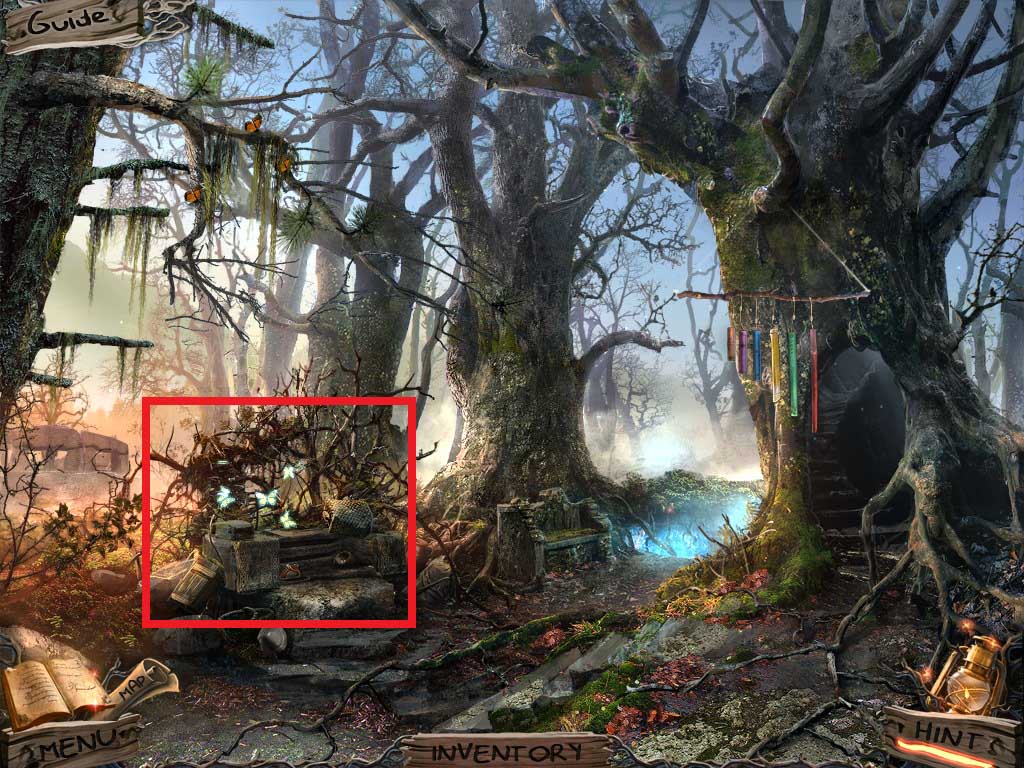
- Zoom into the bench (red rectangle) to access a hidden object area.

- Find the listed items (yellow circles).
- Collect the orb.
- Go to the marshes.
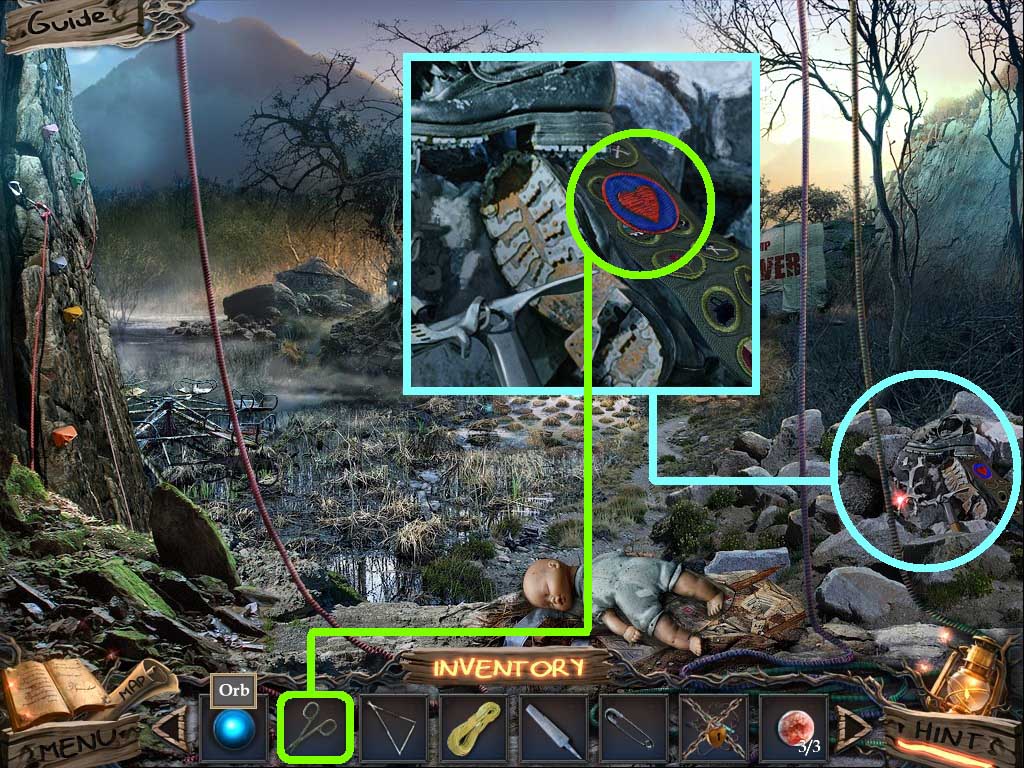
- Zoom into the gear (aqua circle).
- Use the scissors on the patch (green circle).
- Collect the heart badge.
- Go to the house on the marsh.
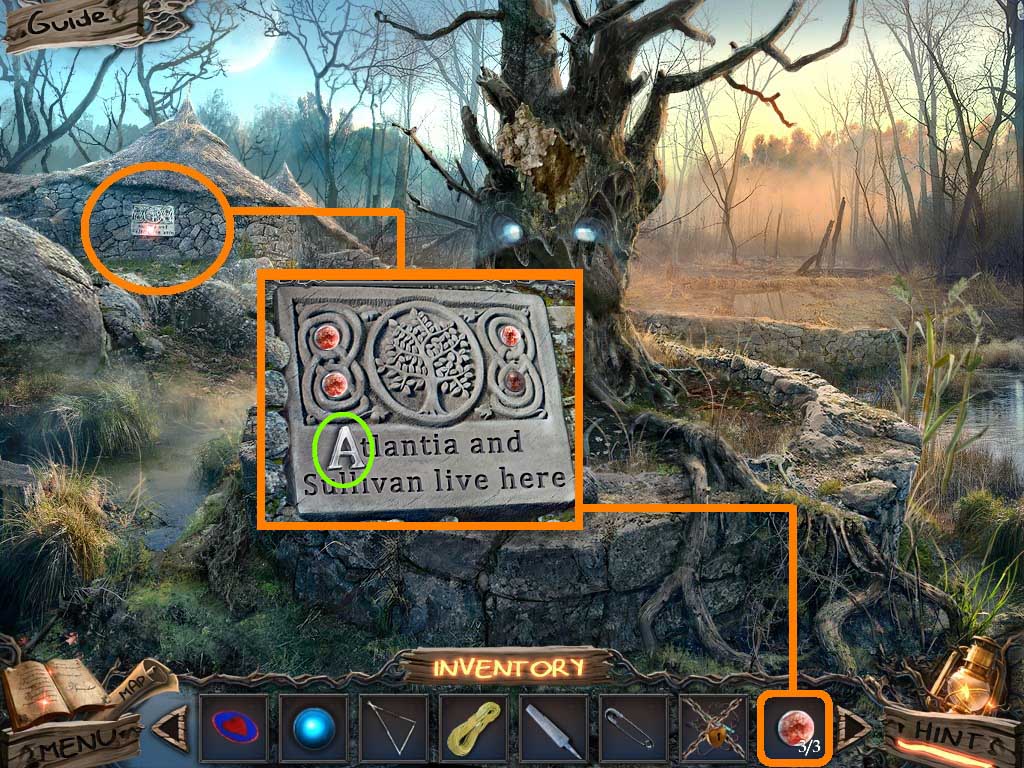
- Zoom into the plaque (orange circle).
- Insert the 3 marbles.
- Collect the letter “A” (green circle).
- Go to the tunnel.
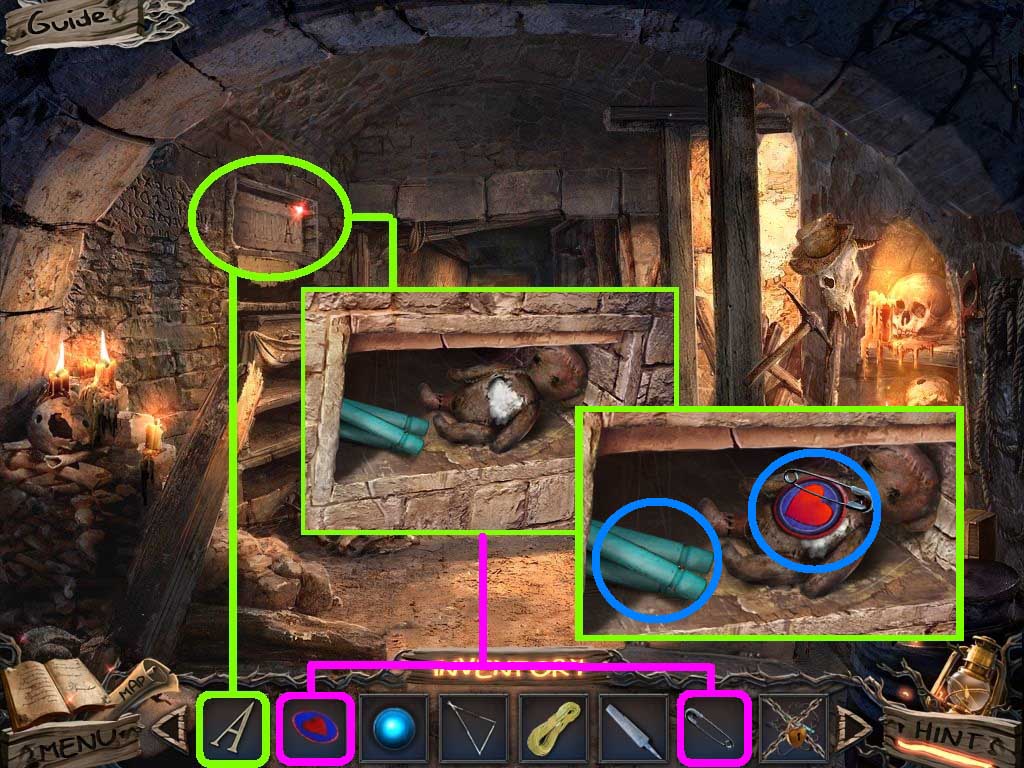
- Zoom into the brick (green circle).
- Insert the letter “A.”
- Place the heart badge and pin (pink squares) onto the teddy.
- Collect Sullivan’s teddy and the rungs (blue circles).
- Go to the house on the marsh.
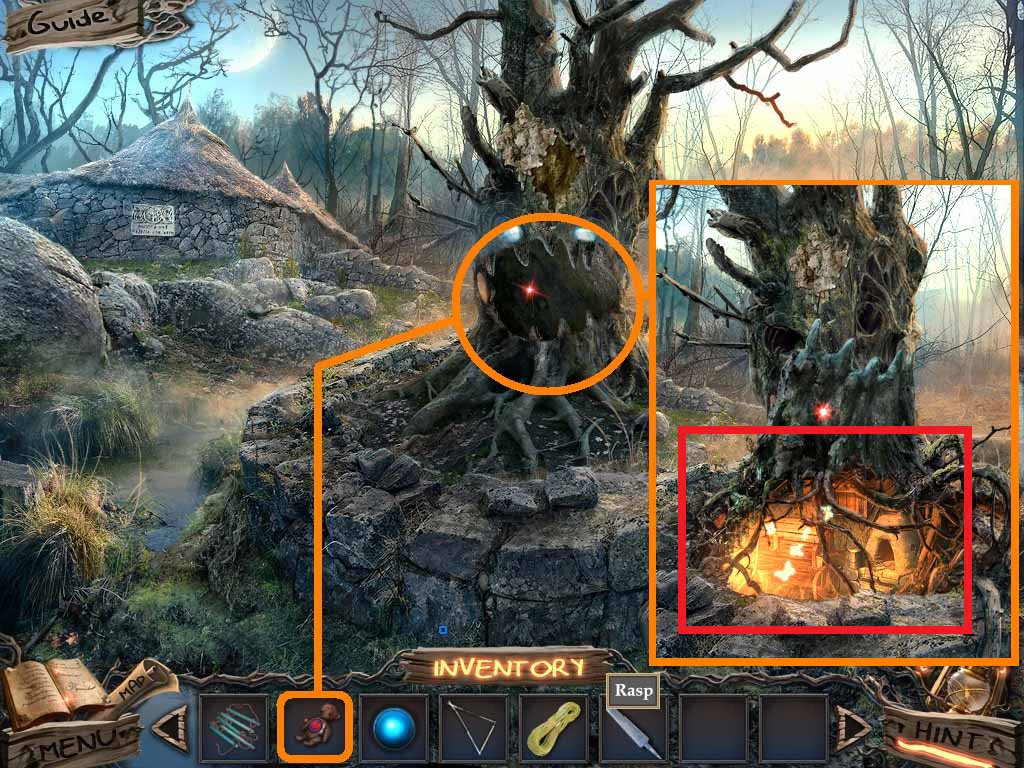
- Zoom into the tree (orange circle).
- Insert Sullivan’s teddy into the open space.
- Zoom into the tree base (red rectangle) to access a hidden object area.
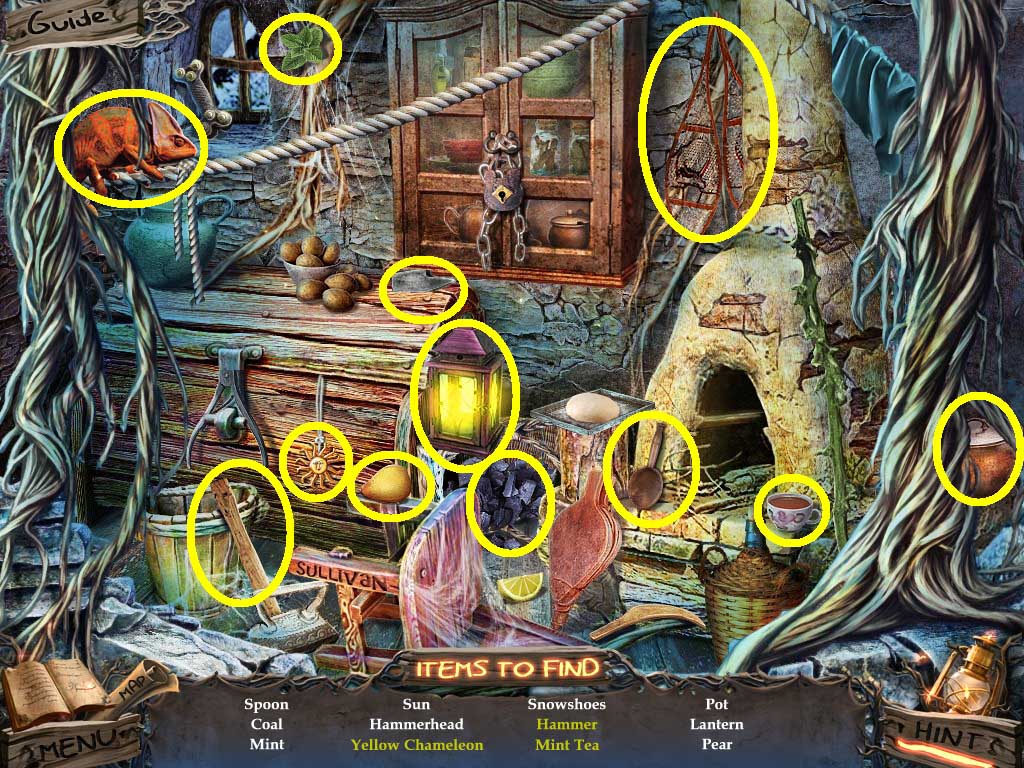
- Find the listed items (yellow circles).
- Collect the spoon.
- Go to the grove.
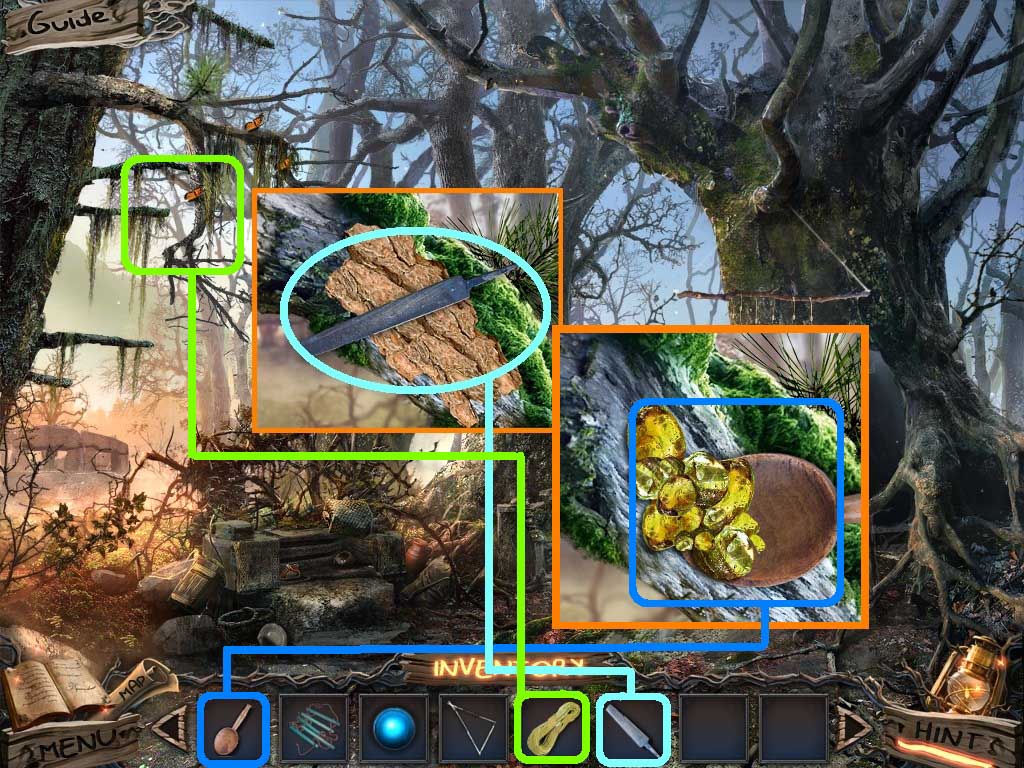
- Pick the rope (green square); use it on the branch (green circle).
- Zoom into the branch (orange circle).
- Use the rasp (aqua square) on the tree bark.
- Use the spoon (blue square) to get the tree sap spoon.
- Zoom into the space between the trees (pink circle); use the ladder (green square) on the slope.
- Collect the wings (yellow rectangle).
- Go into the tree.
- Zoom into the space between the trees (green circle).
- Hang the triangular frame (aqua square) on the rope.
- Use the spoon with the sap (aqua square) on the top and place the wings (aqua square) on top of it.
- Collect the handsaw part (pink circle).
- Go to the house on the marsh.
- Zoom into the tree (green circle).
- Use the handsaw (yellow square) part on the blade.
- Zoom into the tree base (red rectangle) to access a hidden object area.

- Find the listed items (yellow circles).
- Collect the sword hilt.
- Go to the grove and into the tree.
- Zoom into the tree (pink circle).
- Use the handsaw (orange square) on the bark.
- Collect the lock pick (yellow circle).
- Go to the grove.
- Zoom into the space between the trees (green rectangle).
- Use the lock pick on the box.
- Collect the blowtorch.
- Go into the tree.
- Zoom into the blade (green rectangle).
- Use the blowtorch and the sword hilt on the top.
- Collect the sword.
- Zoom into the glider (blue rectangle).
- Use the handsaw on the vines.
- Move forward with the glider.
- Zoom into the tree (orange circle).
- Place the orb on the board to trigger a puzzle.
- Placement of the balls will be varied.
- Move the balls to their color matched rings.
- Solve as shown above (yellow square).
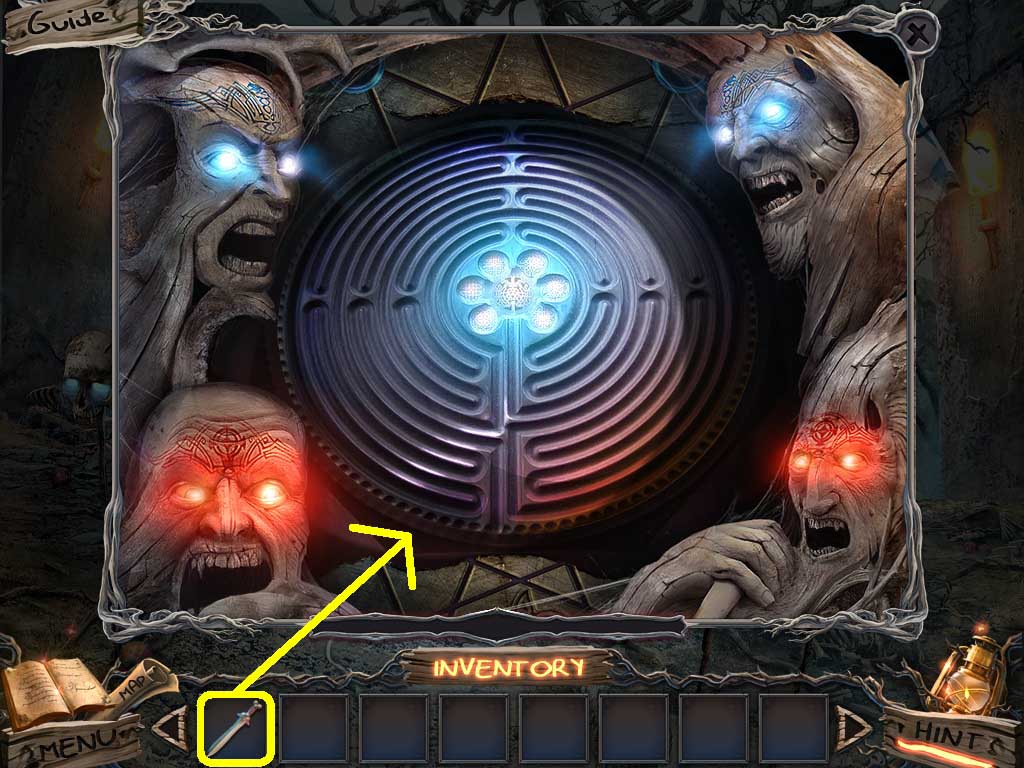
- Insert the sword on the maze.
- Congratulations! You have completed Sable Maze: Sullivan’s River.