
Sable Maze: Norwich Caves: Chapter One: Welcome to the University
Our Sable Maze Norwich Caves Walkthrough will be your personal guide as you navigate the treacherous twists and turns found deep in the underground caverns beneath the university. Rely on our detailed instructions, custom screenshots, and simple puzzle solutions to help you locate the missing students and escape the labyrinth before the swiftly rising waters spell your doom.
General Information & Tips
Chapter One: Welcome to the University
Chapter Two: Inside Buildson’s Office
Chapter Three: Hello Christine
Chapter Four: Through the Stadium
Chapter Five: The Records
Chapter Six: The Observatory
Chapter Seven: Hello Alex
Chapter Eight: Hello Buildson
Ask for help in the comments below!
Chapter One: Welcome to the University
Chapter Two: Inside Buildson’s Office
Chapter Three: Hello Christine
Chapter Four: Through the Stadium
Chapter Five: The Records
Chapter Six: The Observatory
Chapter Seven: Hello Alex
Chapter Eight: Hello Buildson
Ask for help in the comments below!
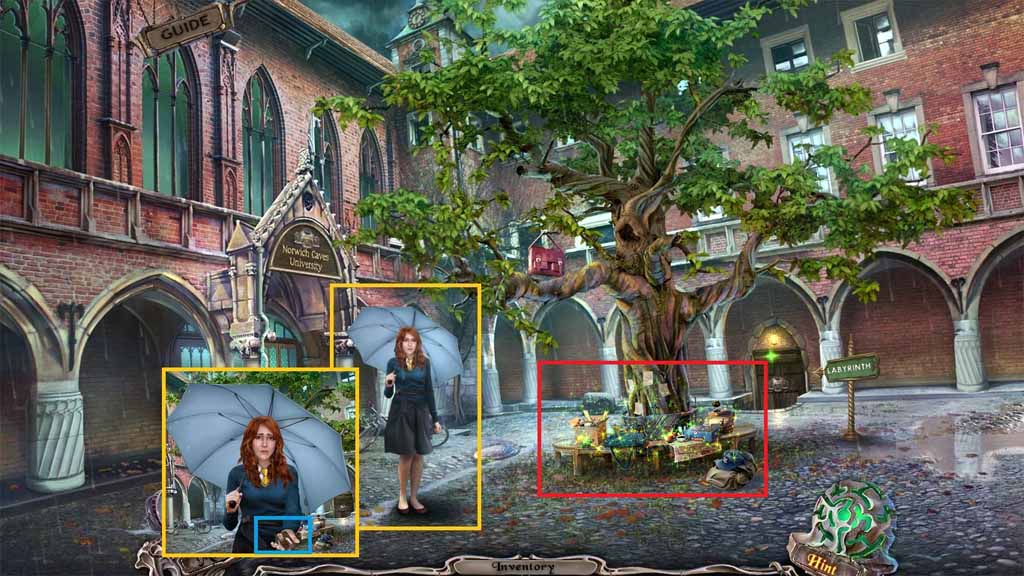
- Talk to Diana and collect the photo fragment.
- Click the bench to trigger a hidden objects area.
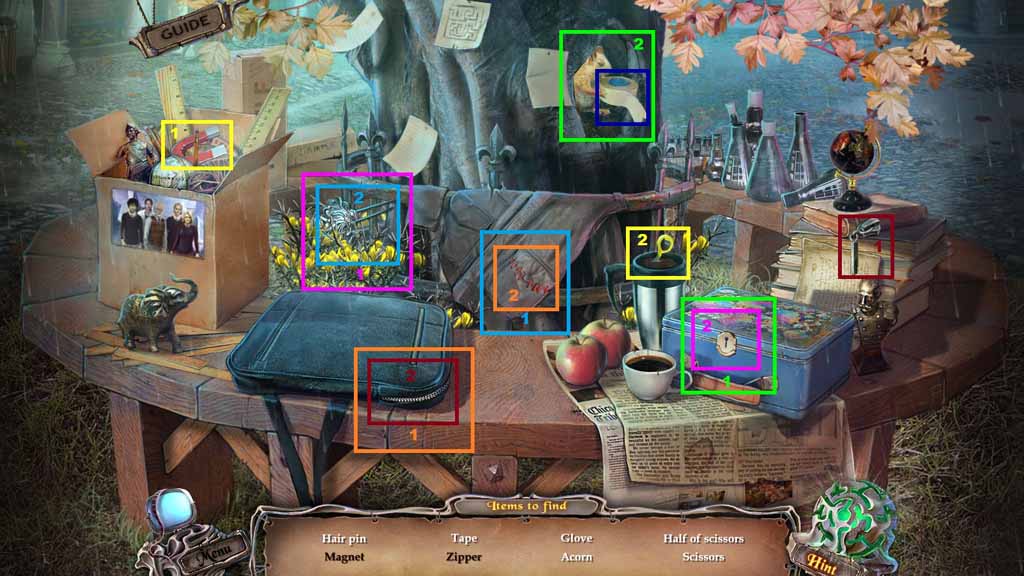
- Find the listed items.
- Collect the magnet and place it over the coffee mug to collect the half scissor.
- Collect the zipper and attach it to the bag; collect the half scissor.
- Place the 2 scissor halves together to collect the scissors.
- Select the scissors to cut the pocket seam; collect the glove.
- Select the glove and use it to remove the flowers to collect the hair pin.
- Select the hair pin and use it to open the lunchbox; collect the acorn.
- Select the acorn and give it to the squirrel; collect the tape.
- Collect the tape roll.

- Zoom into the University doorway.
- Select the tape roll to fix the yardstick.
- Collect the yardstick and the mathematics shield.
- Zoom into the tree.
- Select the yardstick to retrieve the bag.
- Zoom into the bag again; collect the Faber’s card and the ID card.
- Click the manhole cover and click the walkie-talkie.
- Zoom into the University doorway.
- Insert the ID card into the panel.
- Move into the building.
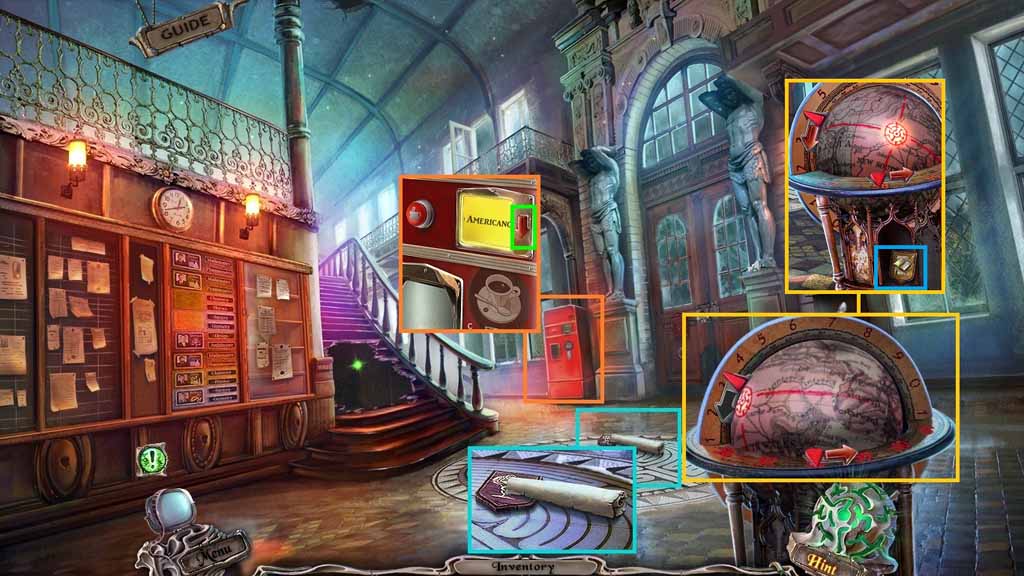
- Zoom into the floor.
- Collect the map and the medicine shield.
- Zoom into the drink machine; collect the down arrow button.
- Zoom into the globe and insert it into the empty slot.
- Click it 2 times then click the right arrow once.
- Click the glowing portion of the globe; collect the literature shield.
- Move down one time.
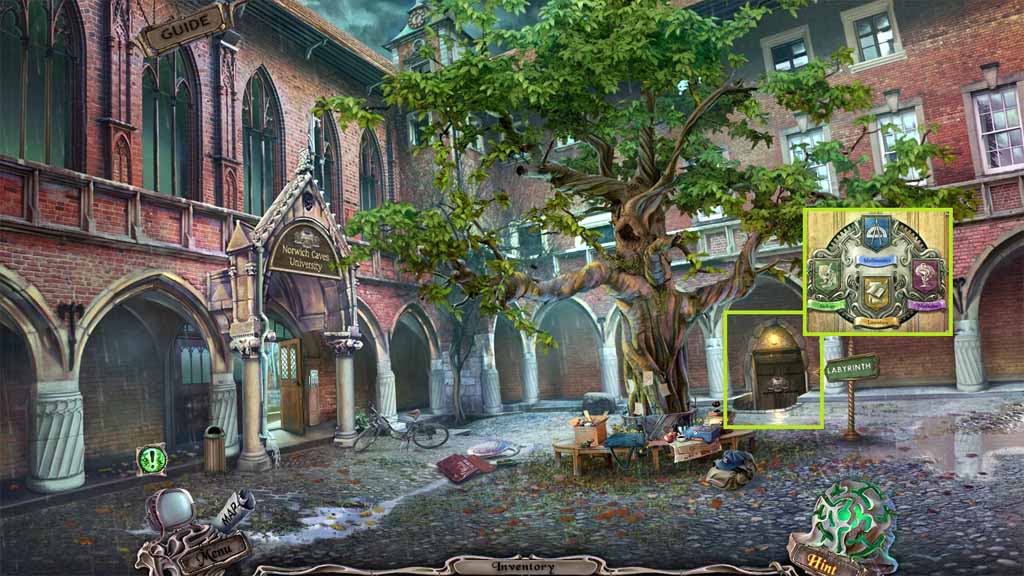
- Zoom into the cellar’s doorway.
- Insert the mathematics, literature and medicine shields into their slots.
- Move into the Cellar.
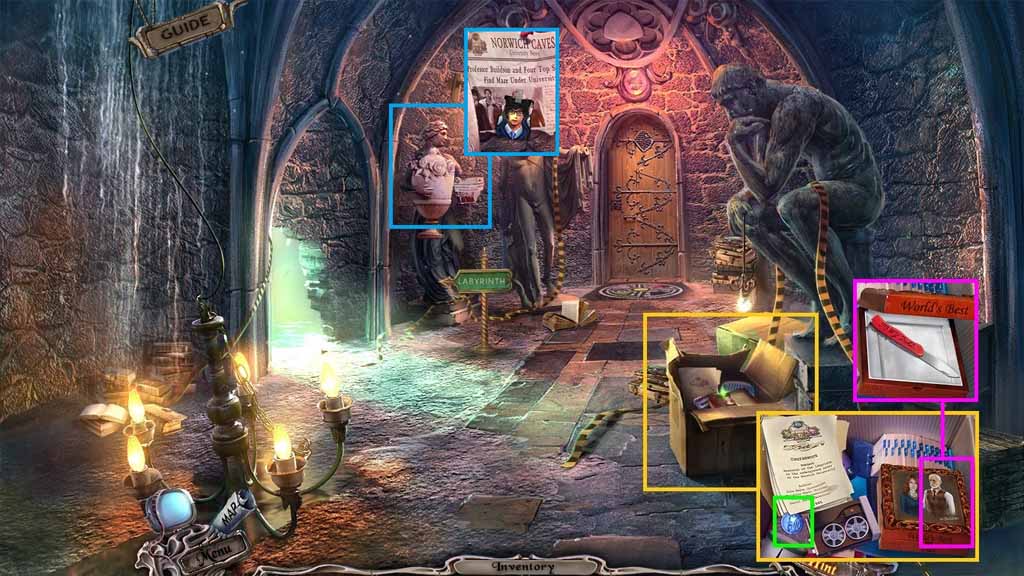
- Zoom into the box.
- Click the papers and collect the 1 / 3 face tokens.
- Put the photo fragment onto the box; collect the knife.
- Zoom into the bust; collect the 1 / 3 student photos.
- Move to the left.
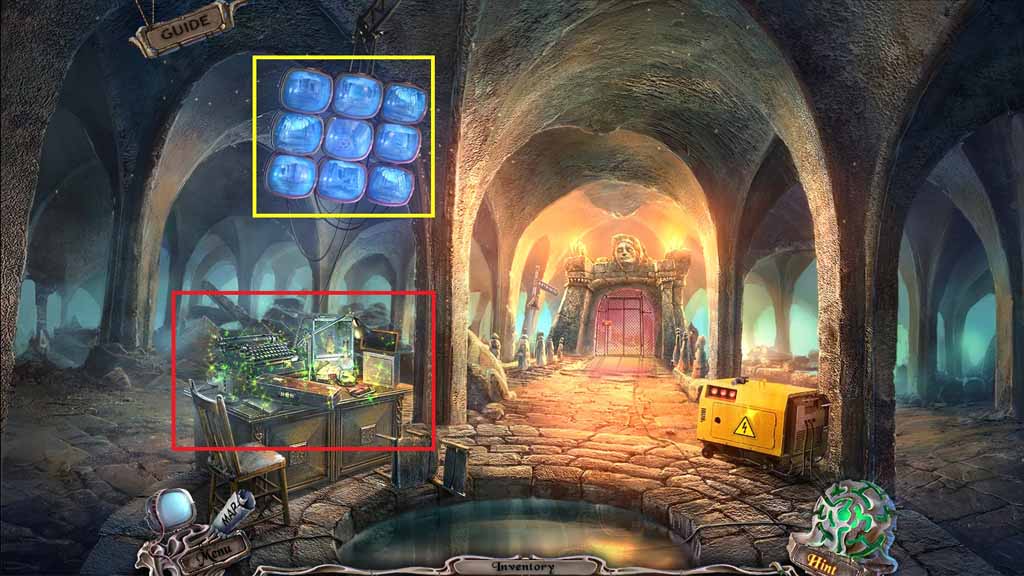
- Click the monitors 2 times.
- Click the desk to trigger a hidden objects area.
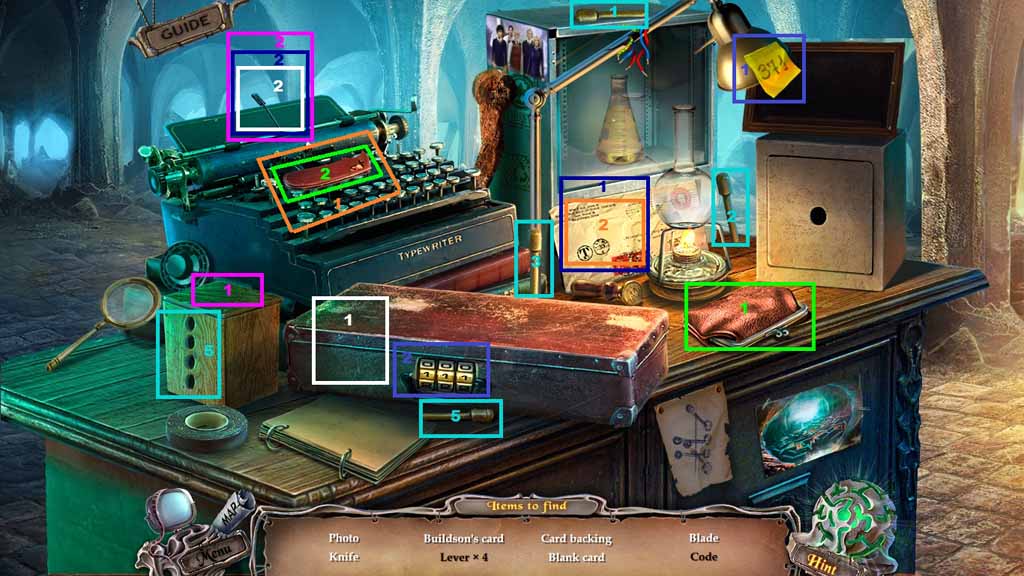
- Find the listed items.
- Collect the 4 levers and insert them into the box.
- Click the 2nd and 3rd levers down to uncover the card backing.
- Click the change purse and collect the blade.
- Select the blade and attach it to the handle; collect the knife.
- Select the knife and use it to open the envelope to uncover the photo.
- Select the code and place it onto the brief case lock; collect the blank card.
- Select the blank card and insert it into the typewriter.
- Select the photo and place it onto the blank card.
- Select the card backing and place it onto the blank card.
- Collect the Buildson’s Card.
- Move to Hudson Hall.
- Zoom into the fire cabinet.
- Collect the 2 / 3 student photos.
- Select the knife and use it to cut the rope on the handle.
- Click the handle and collect the rope inside.
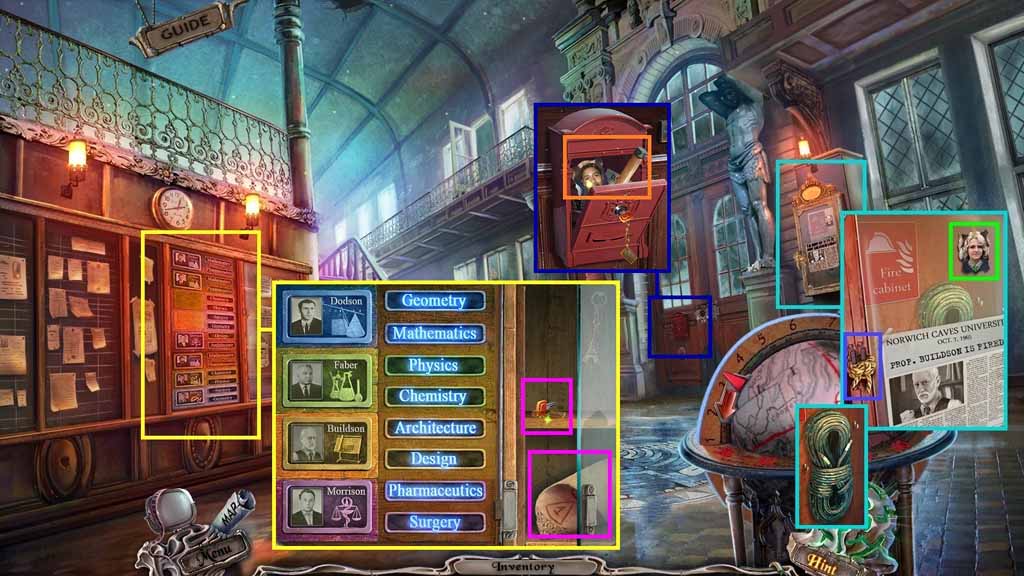
- Zoom into the board.
- Put Faber’s and Buildson’s cards onto the board to trigger a puzzle.
- Solve the puzzle by aligning the classes and the professors correctly.
- Solve as shown.
- Collect the key and the paper.
- Zoom into the mailbox and insert the key then click it.
- Collect the 3 / 3 student photos and the handle.
- Move to the Basement.

- Zoom into the generator.
- Attach the handle onto the hammer head; collect the hammer.
- Move down one time.

- Zoom into the bust.
- Select the hammer to smash the vase and collect the key.
- Move to the left.
- Click the desk to trigger a hidden objects area.
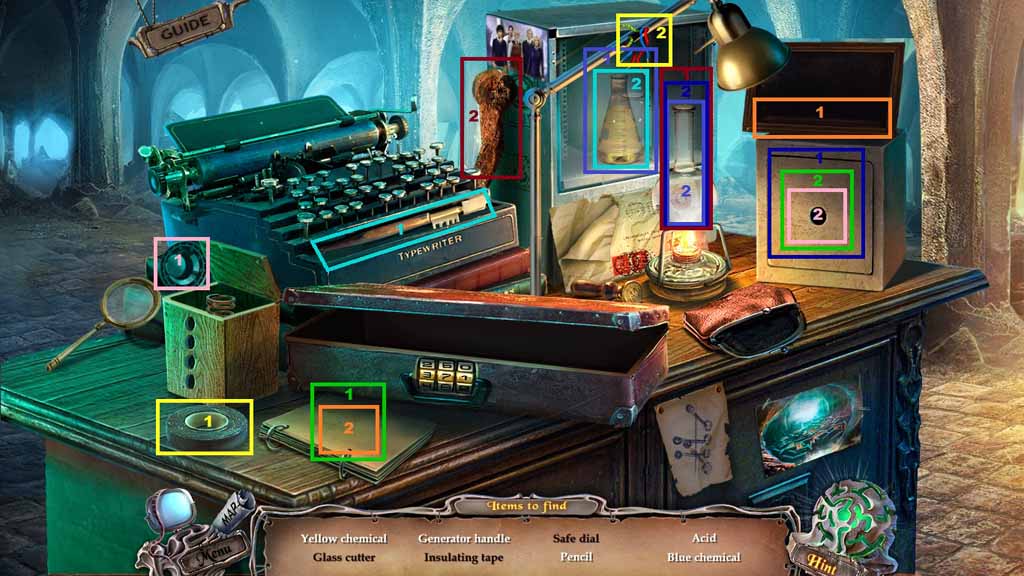
- Find the listed items.
- Select the glass cutter and use it to cut the glass; collect the yellow chemical.
- Pour the yellow chemical into the beaker.
- Select the insulating tape and use it to repair the wires and reveal the pencil.
- Select the pencil and place it onto the blank paper to reveal the code.
- Select the safe dial and attach it to the safe.
- Select the code and place it onto the safe to uncover the blue chemical.
- Select the blue chemical and pour it into the beaker and create acid.
- Select the acid and pour it onto the rust handle to uncover the generator handle.
- Collect the generator handle.
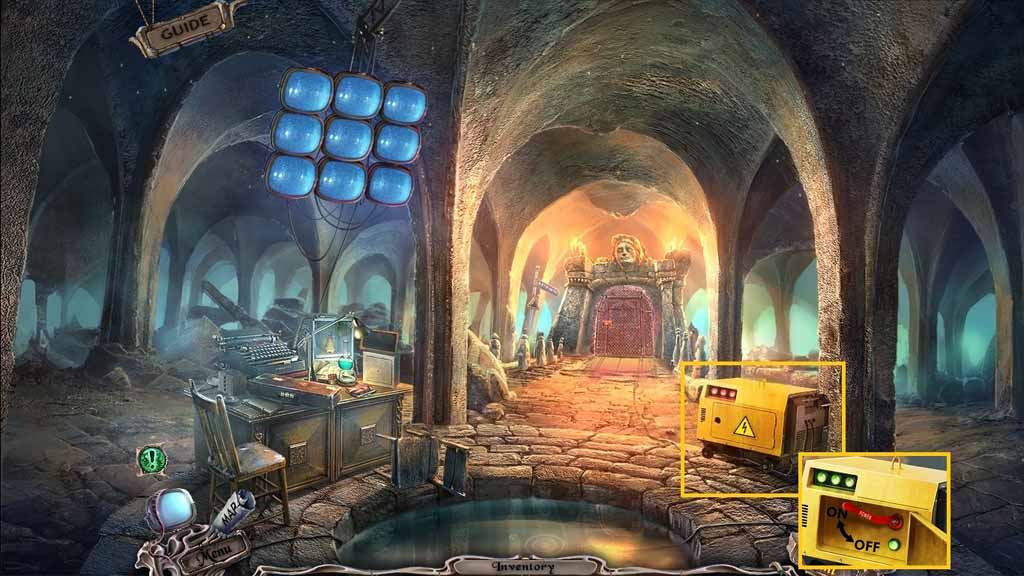
- Zoom into the generator.
- Select the key and insert it into the generator lock; click it once.
- Attach the generator handle and click it once.
- Move ahead into the Maze Entrance.
- Click the hand and attach the rope; collect the photo.
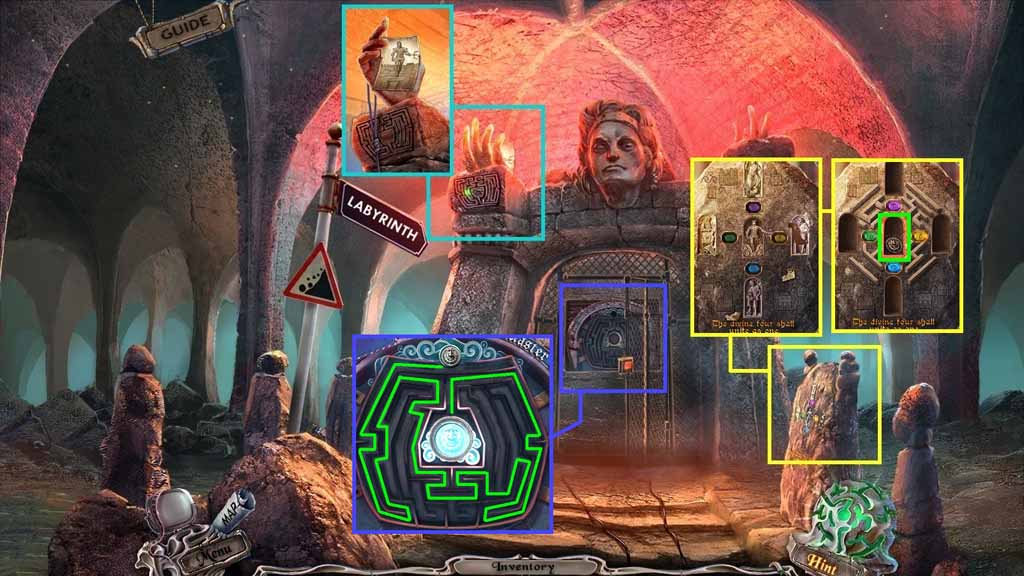
- Zoom into the stone to trigger a puzzle.
- Solve the puzzle by giving the founders the items that they are missing.
- Collect the tile.
- Zoom into the door and insert the tile to trigger a puzzle.
- Solve the puzzle by guiding the token to center of the maze.
- Move ahead.
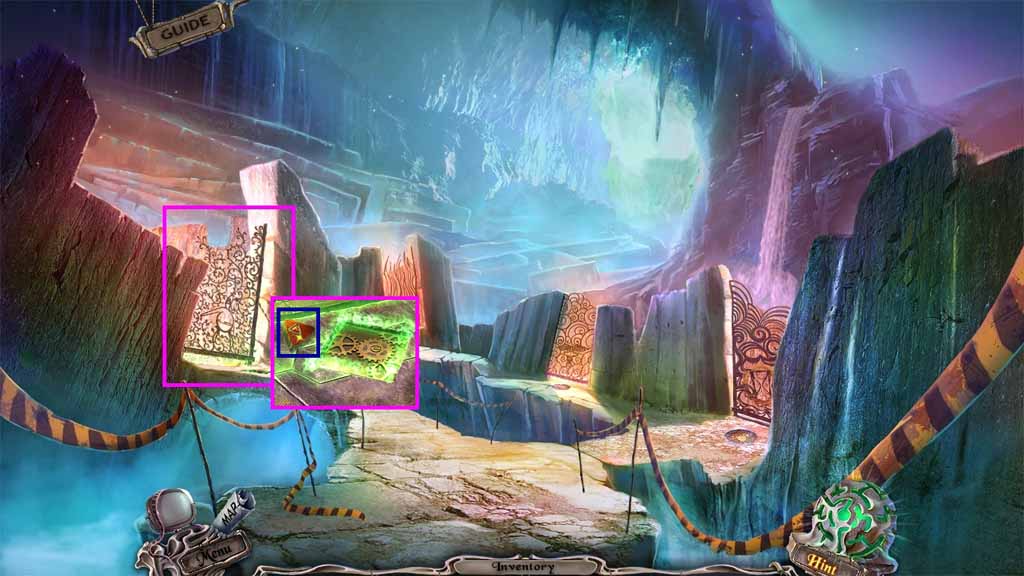
- Zoom into the gate.
- Collect the red stone.
- Move to the Cellar.
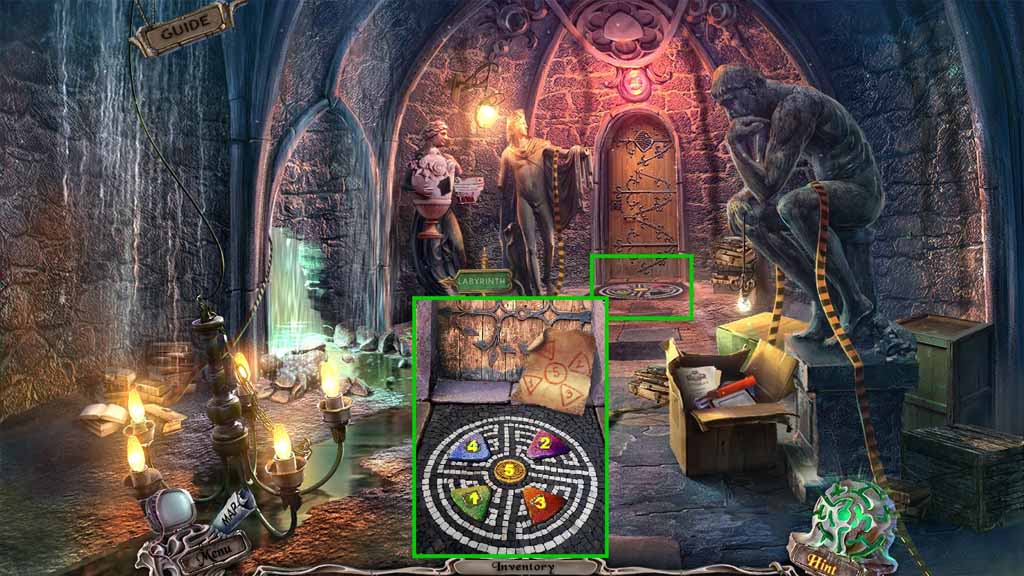
- Zoom into the floor tiles.
- Insert the red stone and click the stones in order 1-5.
- Move ahead.
General Information & Tips
Chapter One: Welcome to the University
Chapter Two: Inside Buildson’s Office
Chapter Three: Hello Christine
Chapter Four: Through the Stadium
Chapter Five: The Records
Chapter Six: The Observatory
Chapter Seven: Hello Alex
Chapter Eight: Hello Buildson
Ask for help in the comments below!
Chapter One: Welcome to the University
Chapter Two: Inside Buildson’s Office
Chapter Three: Hello Christine
Chapter Four: Through the Stadium
Chapter Five: The Records
Chapter Six: The Observatory
Chapter Seven: Hello Alex
Chapter Eight: Hello Buildson
Ask for help in the comments below!