
Sable Maze: Norwich Caves: Chapter Two: Inside Buildson’s Office
Our Sable Maze Norwich Caves Walkthrough will be your personal guide as you navigate the treacherous twists and turns found deep in the underground caverns beneath the university. Rely on our detailed instructions, custom screenshots, and simple puzzle solutions to help you locate the missing students and escape the labyrinth before the swiftly rising waters spell your doom.
General Information & Tips
Chapter One: Welcome to the University
Chapter Two: Inside Buildson’s Office
Chapter Three: Hello Christine
Chapter Four: Through the Stadium
Chapter Five: The Records
Chapter Six: The Observatory
Chapter Seven: Hello Alex
Chapter Eight: Hello Buildson
Ask for help in the comments below!
Chapter One: Welcome to the University
Chapter Two: Inside Buildson’s Office
Chapter Three: Hello Christine
Chapter Four: Through the Stadium
Chapter Five: The Records
Chapter Six: The Observatory
Chapter Seven: Hello Alex
Chapter Eight: Hello Buildson
Ask for help in the comments below!
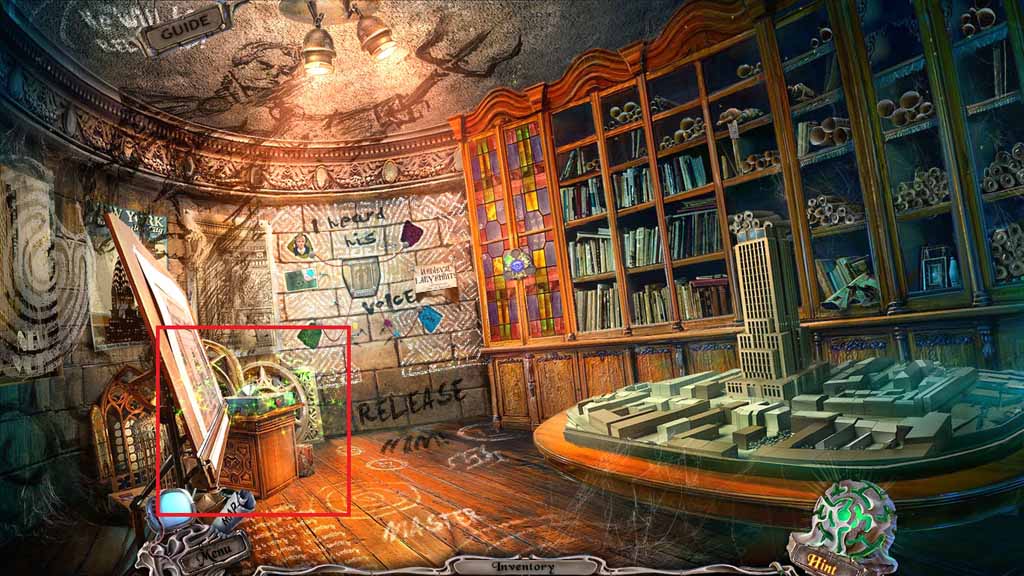
- Zoom into the window frame to trigger a hidden objects area.
- Find the listed items.
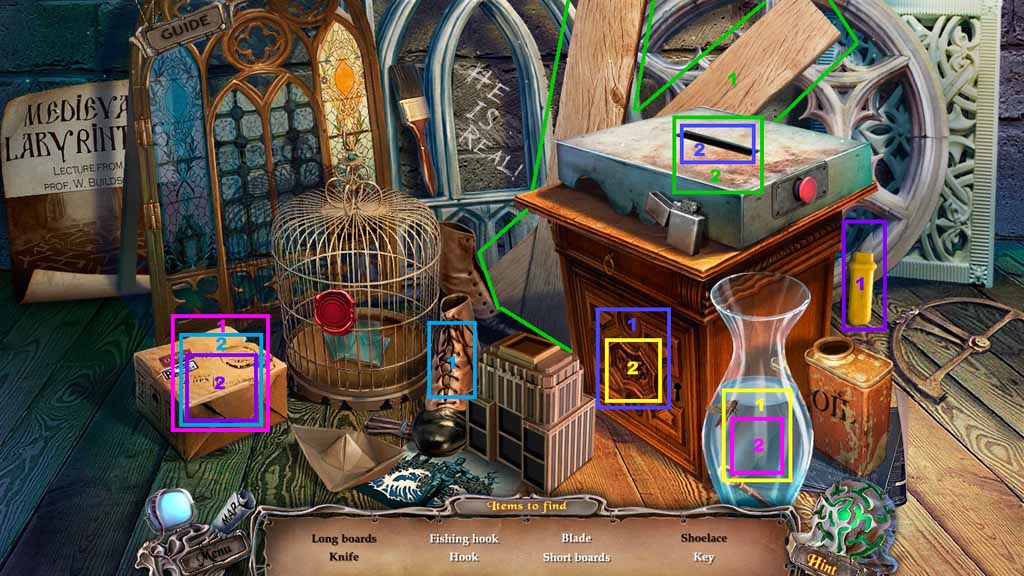
- Select the knife and use it to slice the box open and reveal the hook.
- Select the shoelace and attach it to the hook.
- Select the hook and use it to retrieve the key from the vase.
- Insert the key into the cabinet and reveal the saw blade.
- Select the blade and place it onto the saw; click the power button.
- Select the boards and place them onto the saw to create the short boards.
- Collect the boards.
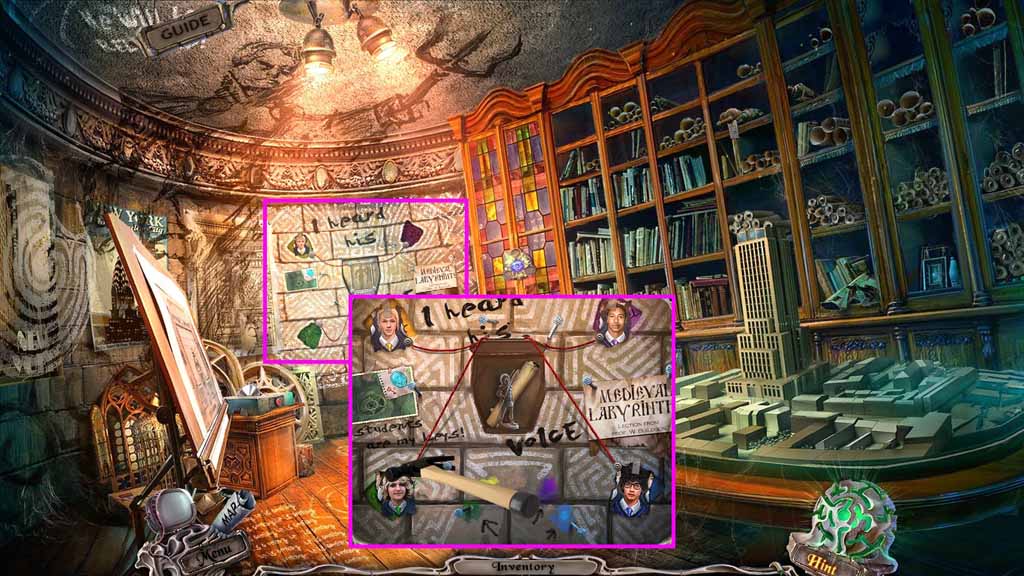
- Zoom into the photo wall.
- Insert the photo into the master recess.
- Insert the 2 student photos onto the sides and collect the statuette.
- Select the hammer to retrieve the nails.
- Zoom into the scroll.
- Move to Hudson Hall.
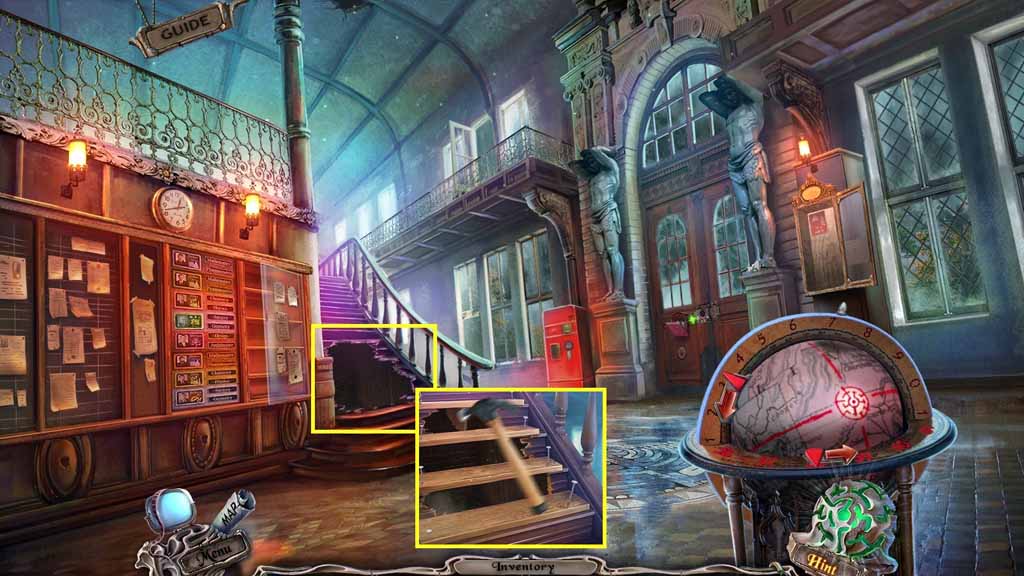
- Examine the stairs.
- Select the boards, the nails and the hammer to fix the stairs.
- Move upstairs.
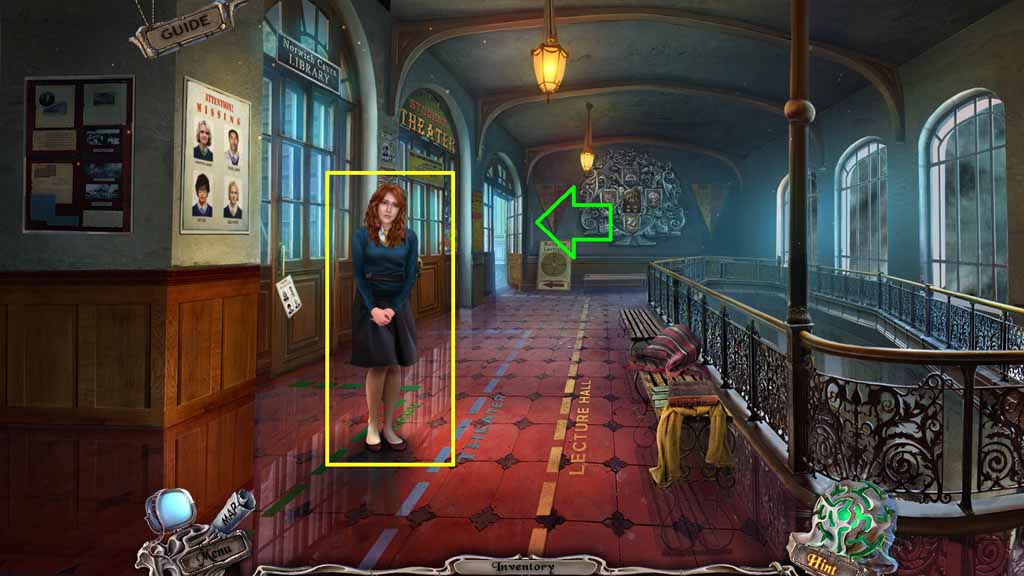
- Speak to Diana.
- Move into the Doorway.
- Click the window.
- Zoom into the desk; collect the bolt handle and the cup.
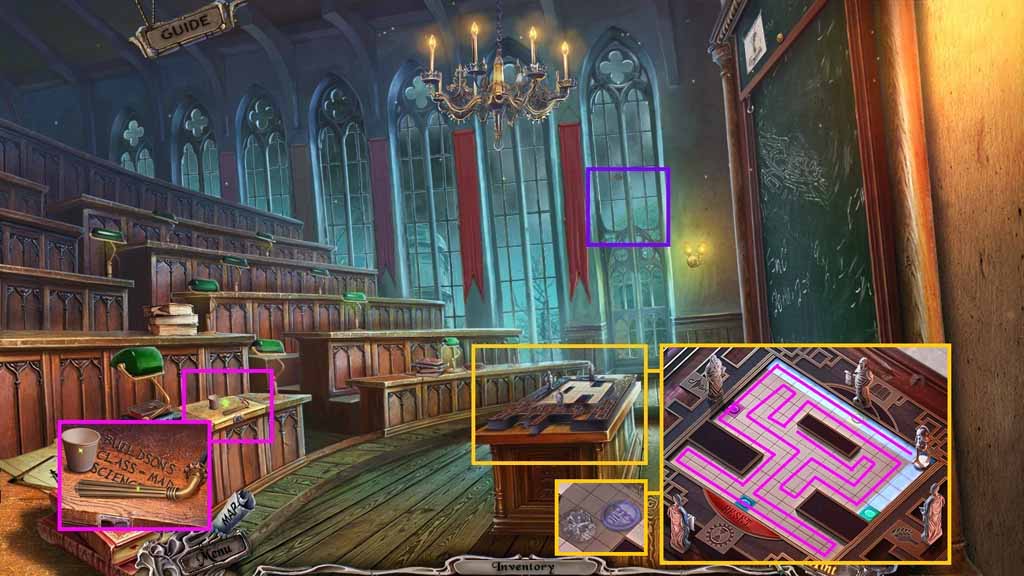
- Place the statuette onto the table to trigger a puzzle.
- Solve the puzzle by touching each square only once and gliding the statue along every square.
- Collect the 2/ 3 face tokens and the diamond.
- Move to Hudson Hall.
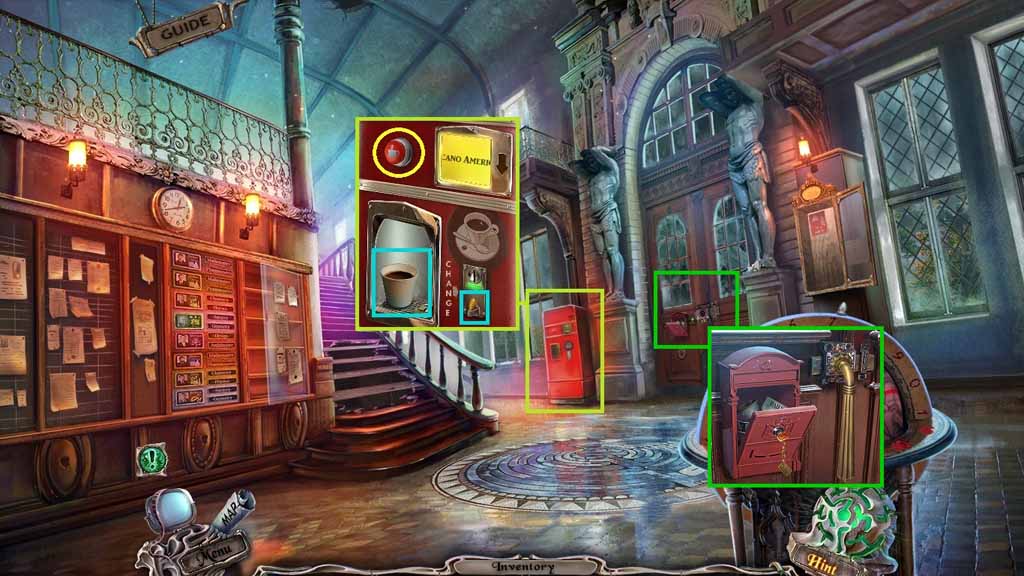
- Zoom into the coffee machine.
- Insert the cup into the holder and click the red button.
- Collect the cup of coffee and the 1 / 2 quarters.
- Zoom into the door and attach the bolt handle.
- Click it once.
- Move into the doorway.
- Move ahead and toward the path on the right.

- Collect the rake.
- Move back once.
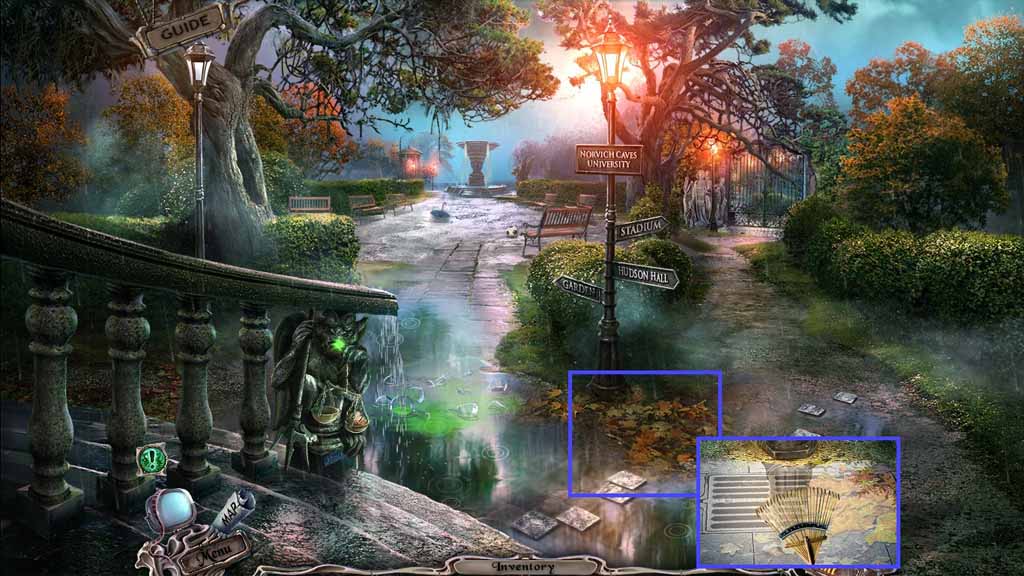
- Zoom into the leaves and use the rake to clear the path.
- Move toward the left path.
- Zoom into the stand; collect the 3 / 3 face tokens.
- Zoom into the stairs and collect the loop grabber and the pitcher of water.
- Move back once.
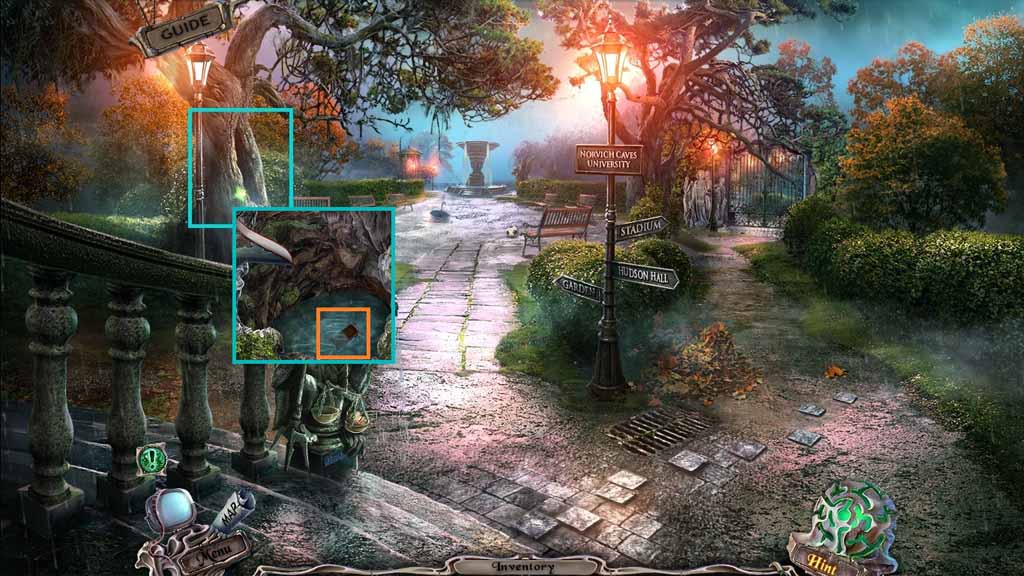
- Zoom into the tree hollow; pour in the pitcher of water.
- Collect the lock part.
- Move to the Lecture Hall.
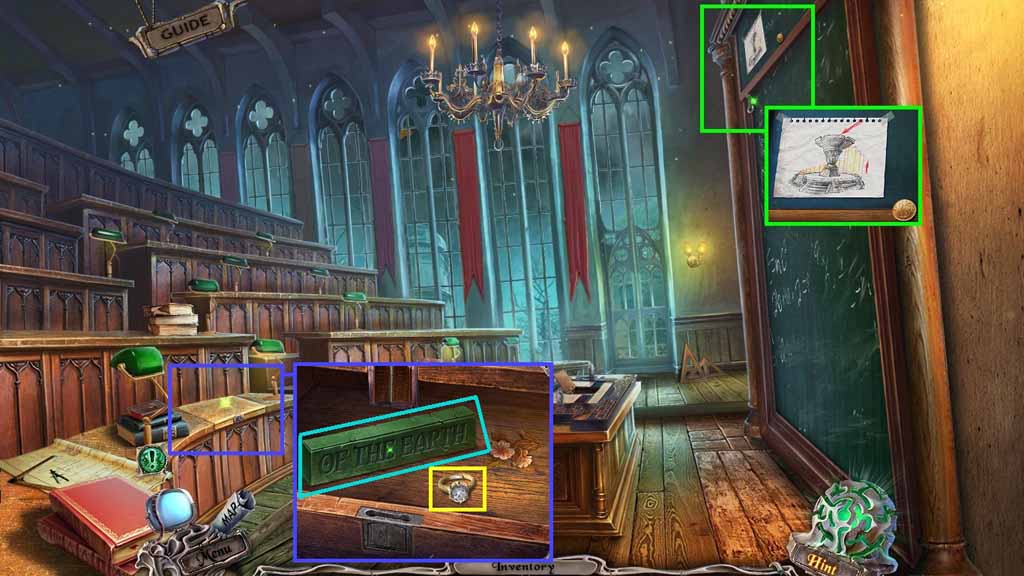
- Zoom into the top of the chalkboard.
- Select the loop grabber to use on the hook and bring the chalk board down.
- Collect the 2/ 2 quarters and zoom into the diagram.
- Zoom into the desk and insert the lock part.
- Insert the diamond into the ring and collect the earth tile and diamond ring.
- Move back one time.
- Zoom into the back wall.
- Insert the 2 quarters.
- Click the compartment on the upper left; collect the fire tile.
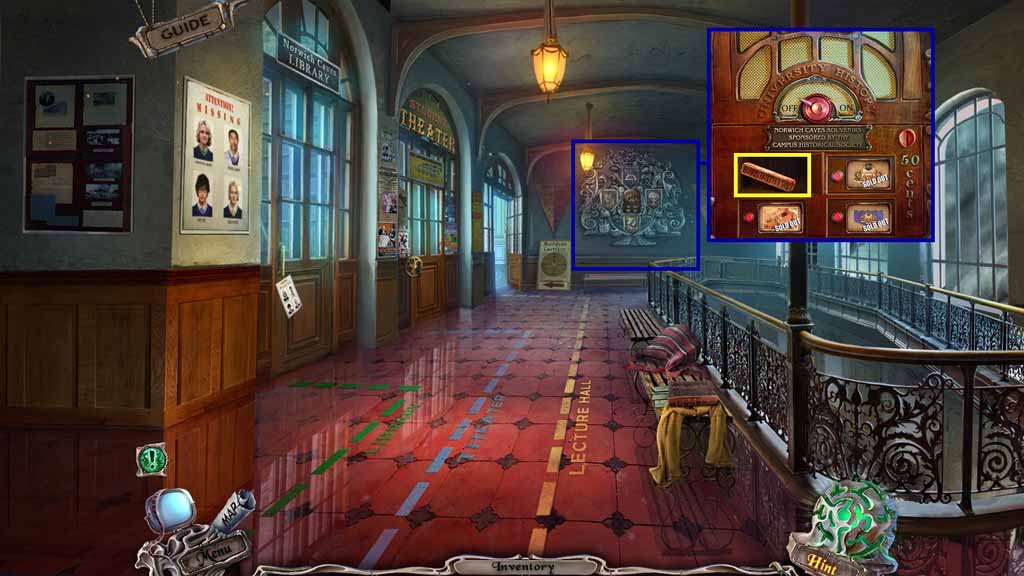
- Move into Buildson’s Office.

- Zoom into the cabinet.
- Insert the 3 face tokens into the cabinet lock.
- Collect the 1 / 5 slides and read the diagram.
- Click the window frames to trigger a hidden objects area.
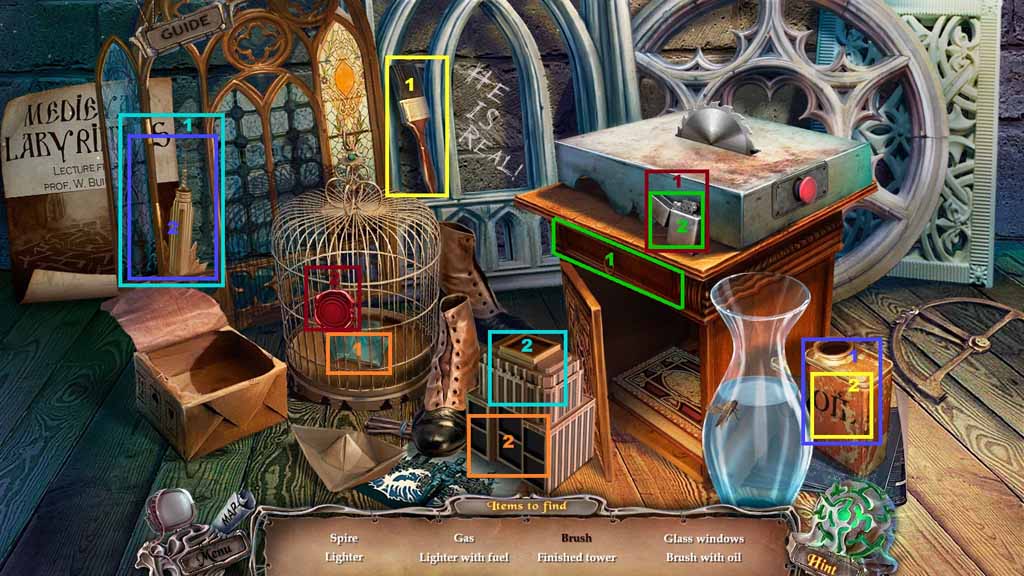
- Find the listed items.
- Select the brush and dip it into the oil.
- Use the oiled brush on the window frame to reveal the tower top.
- Select the tower top and place it onto the building to create the spire.
- Click the drawer to collect the gas and pour it into the lighter to create the lighter with fuel.
- Select the lighter to remove the seal and reveal the glass windows.
- Select the glass windows and place them into the tower to create the finished tower.
- Collect the tower top.
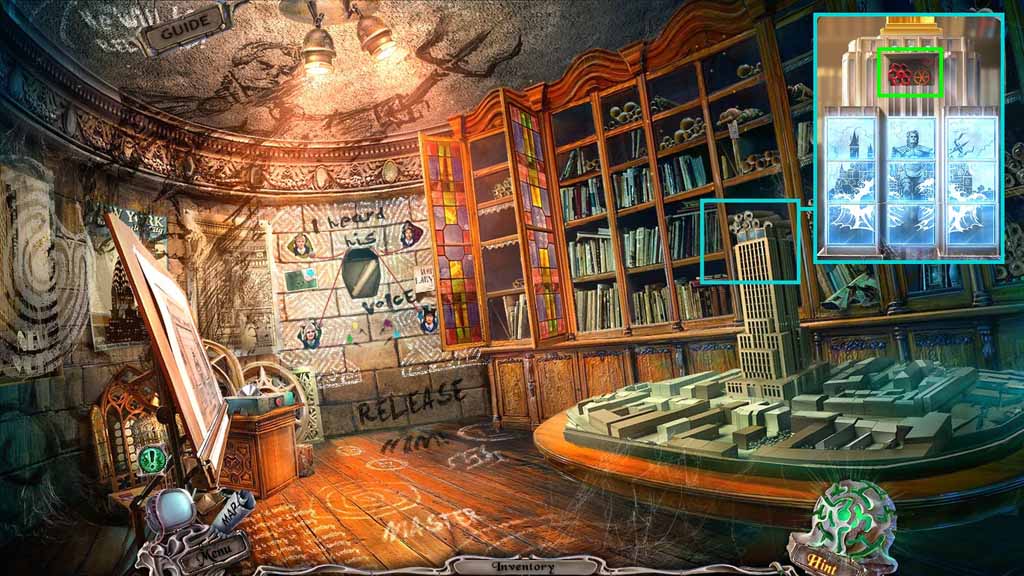
- Zoom into the building.
- Attach the tower top onto the building to trigger a puzzle.
- Solve the puzzle by switching the tiles and creating the image shown.
- Collect the valve.
- Move to the Fountain.
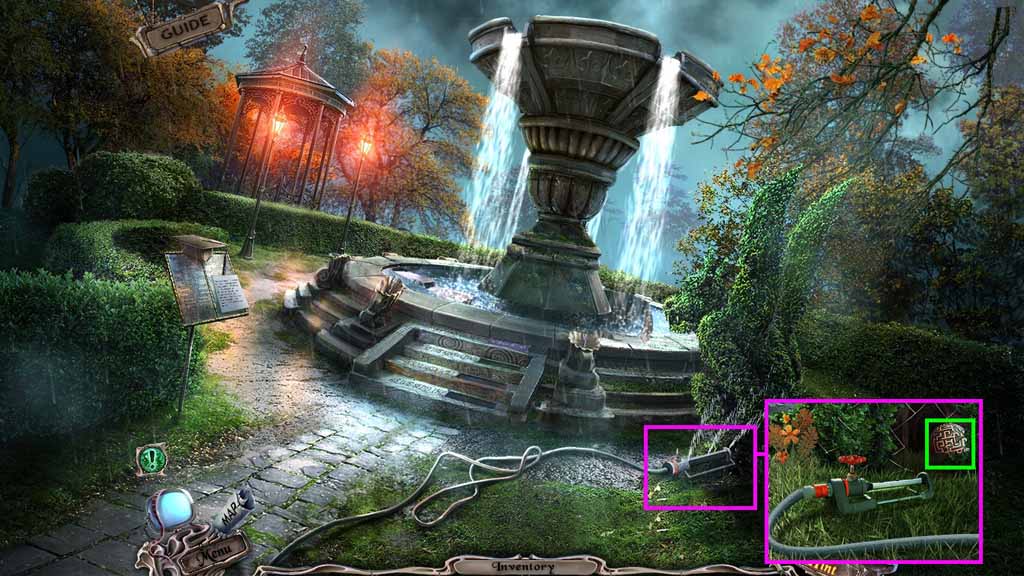
- Zoom into the sprinkler.
- Attach the valve onto the sprinkler stem and click it once.
- Collect the stone labyrinth.
- Move back once.
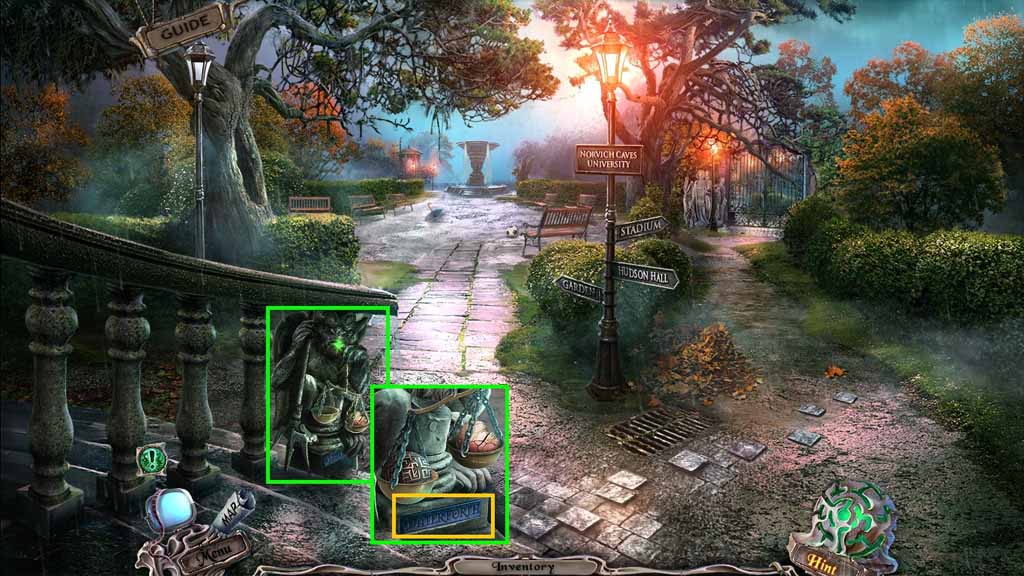
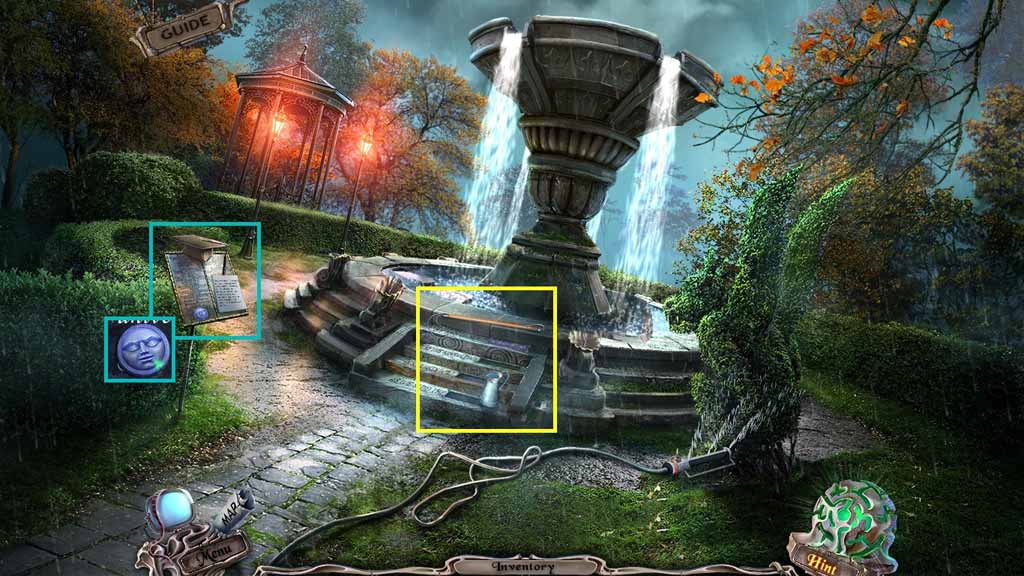
- Zoom into the scale.
- Put the stone labyrinth onto the scale; collect the water tile.
- Move to the Fountain.
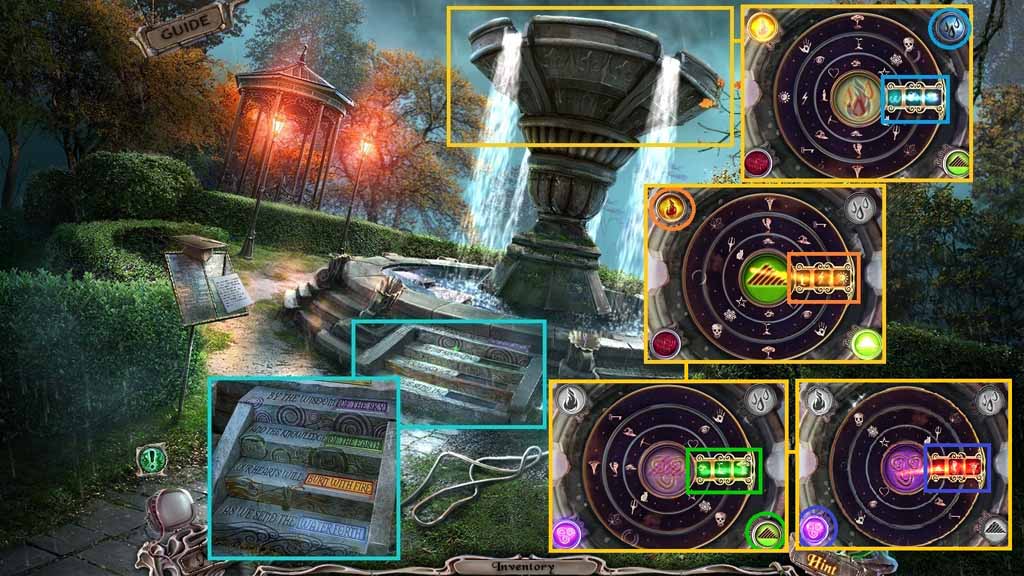
- Zoom into the steps.
- Insert the fire, earth and water tiles into the steps.
- Zoom into the fountain to trigger a puzzle.
- Solve the puzzle by aligning the symbols to match the elements.
- Collect the ornate tile.
- Move to the Labyrinth.
General Information & Tips
Chapter One: Welcome to the University
Chapter Two: Inside Buildson’s Office
Chapter Three: Hello Christine
Chapter Four: Through the Stadium
Chapter Five: The Records
Chapter Six: The Observatory
Chapter Seven: Hello Alex
Chapter Eight: Hello Buildson
Ask for help in the comments below!
Chapter One: Welcome to the University
Chapter Two: Inside Buildson’s Office
Chapter Three: Hello Christine
Chapter Four: Through the Stadium
Chapter Five: The Records
Chapter Six: The Observatory
Chapter Seven: Hello Alex
Chapter Eight: Hello Buildson
Ask for help in the comments below!