Ominous Objects: Family Portrait: Chapter Five: Through the Maze
Our Ominous Objects: Family Portrait Walkthrough will be your trusted guide as you explore your new home in search of an evil presence terrifying your family. Trust our detailed instructions, our custom marked screenshots, and our simple puzzle solutions to help save your family and drive away the evil that haunts them.
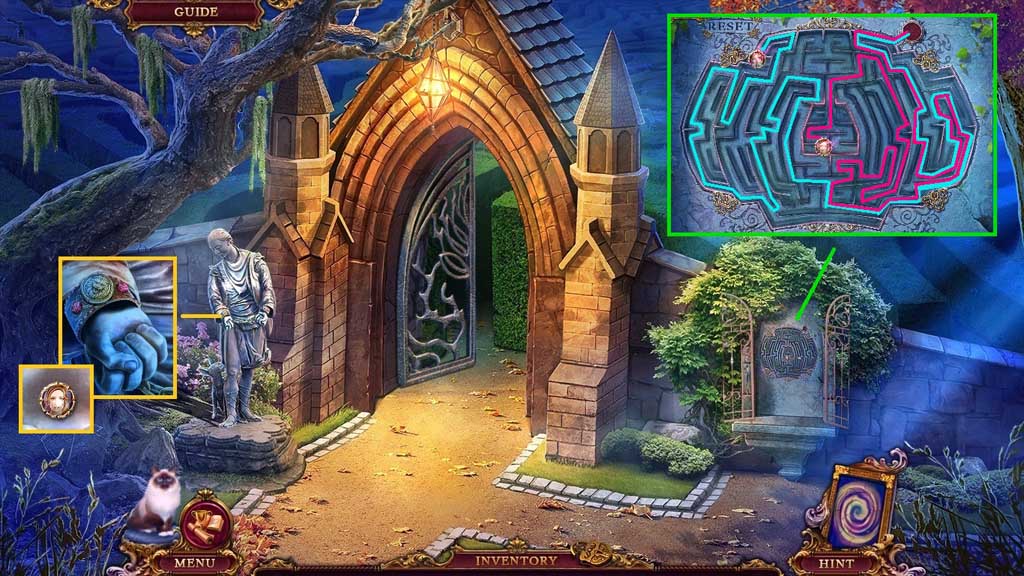
- Insert the lion tile and click it 3x’s.
- Collect the Anna tile.
- Insert the Anna tile to trigger a mini game.
- Solve the game by guiding the children to the exit.
- Collect the wing tile.
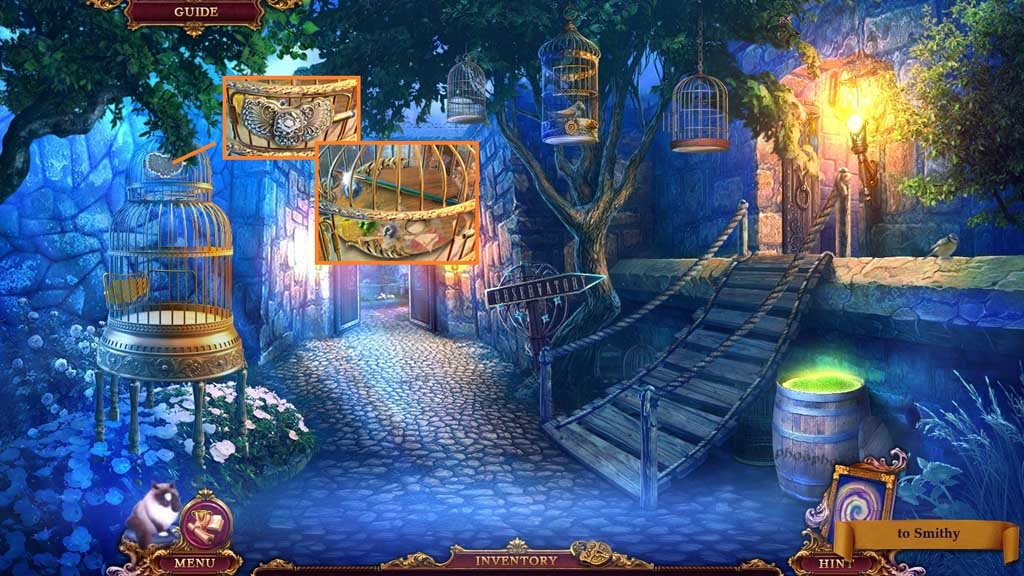
- Move to the Dovecote.
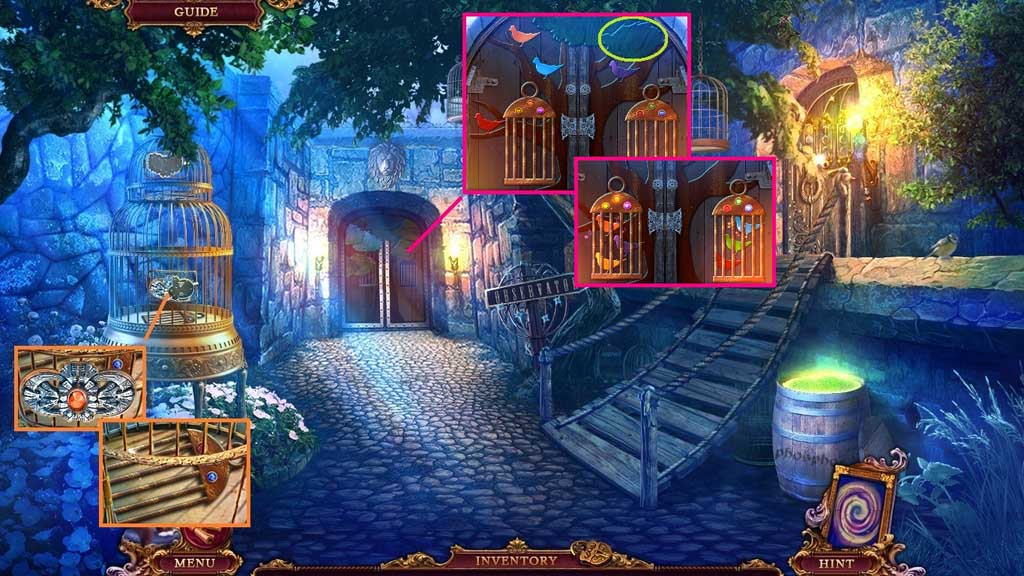
- Insert the wing tile; collect the cage.
- Insert the cage; click the leaves away.
- Arrange the doves correctly.
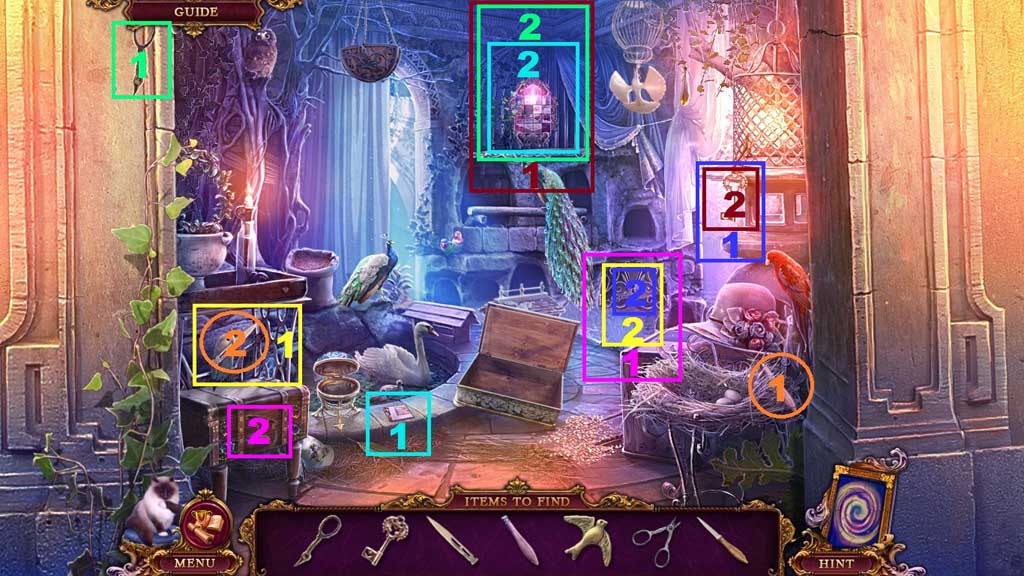
- Move ahead and click the hidden objects area.
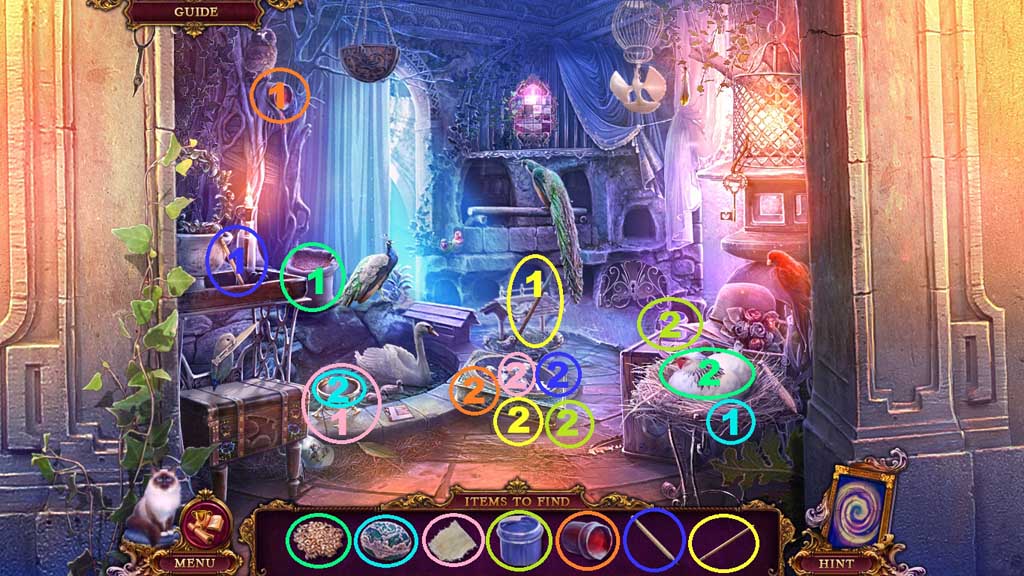

- Find the items.
- Select the red paint and place it next to the box.
- Select the paint brush and place it onto the box.
- Select the grain and give it to the chicken; collect the egg.
- Place the egg onto the pedestal; collect the canvas.
- Place the canvas onto the box.
- Select the pencil to draw on the canvas.
- Select the blue paint and place it next to the box.
- Paint the box using the paints.
- Collect the hook.

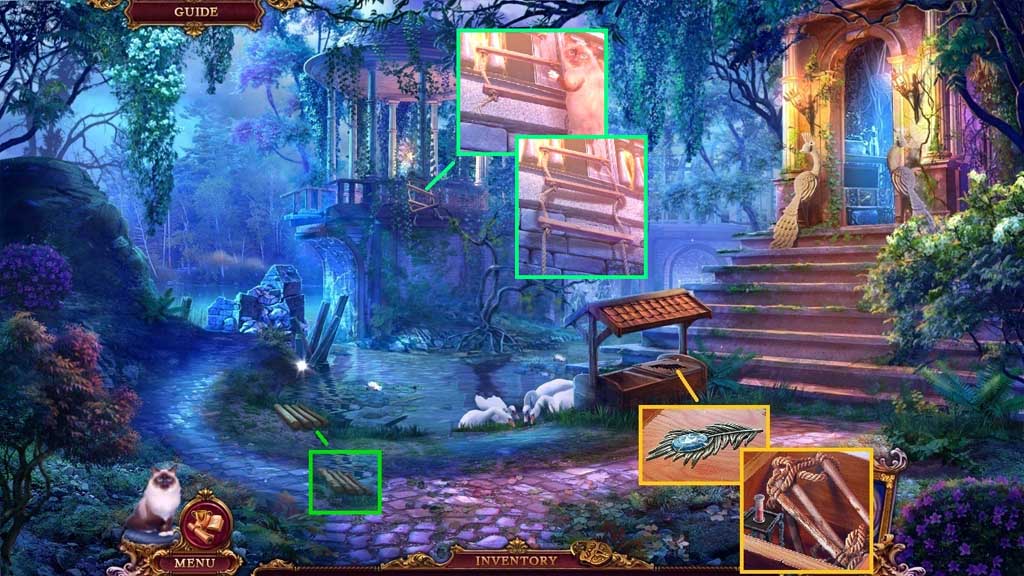
- Align the logs.
- Collect the handle and attach it to the feeder; collect the grain.
- Select the grain to feed the swans; collect 2 /2 balls using the hook.
- Move down once.
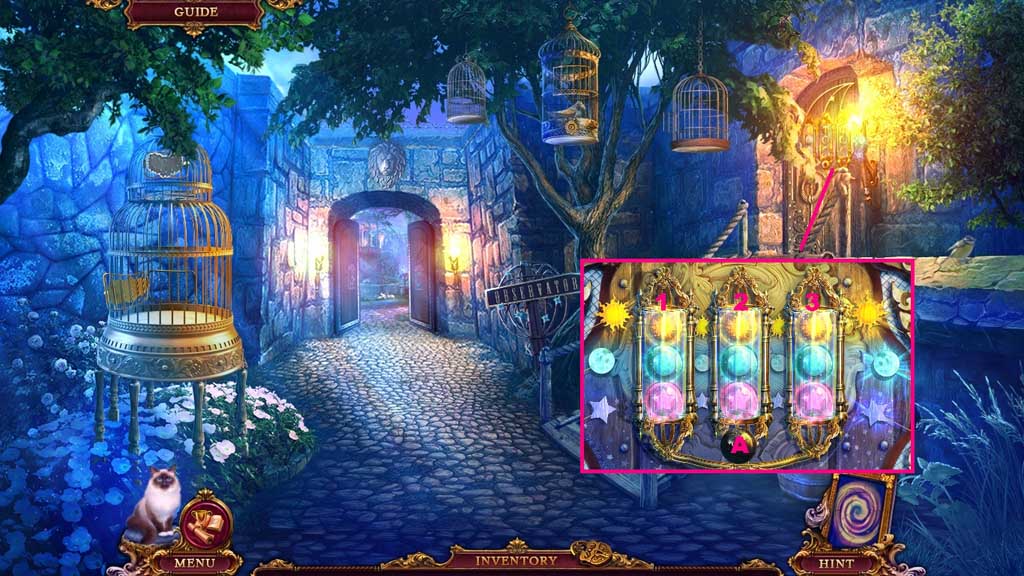
- Insert the 2 balls to trigger a mini game.
- Solve the game by aligning the balls correctly.
- Use the following sequence to solve: A3 – A1 – A2 – A1 – A3 – A3 – A2 – A2 – A3
- Move to the right.
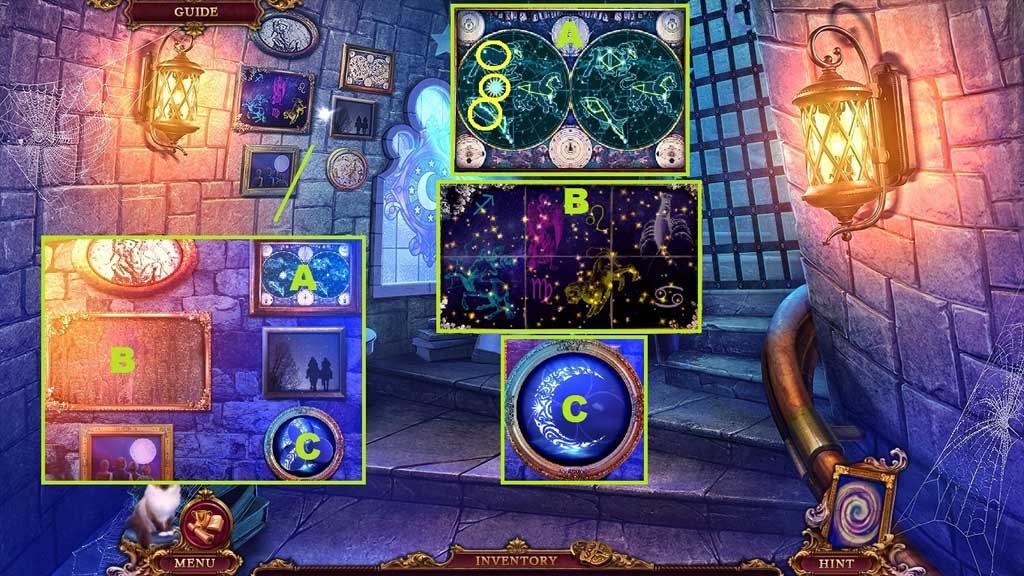
- Zoom into the frames to trigger 3 mini games.
- Spot the differences; collect 1 /2 codes.
- Clear the dust and arrange the images correctly; click the picture to collect the note.
- Adjust the dials to align the image correctly; collect 2/2 codes.
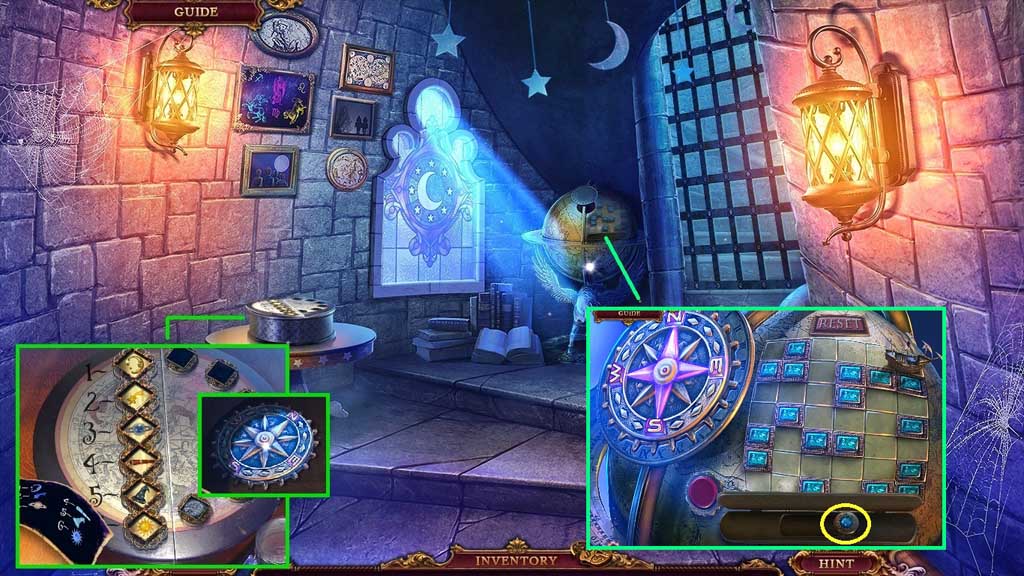
- Zoom into the table to trigger a mini game.
- Click the symbols as shown in the diagram to solve the game.
- Collect the compass.
- Insert the compass into the globe to trigger a mini game.
- Solve the game by finding the shortest route from the ship to the flag.
- Use the following sequence to solve: E – N – E x 3 – N x 2 – W x 2 – N x 3 – E x 3
- Click the lever.
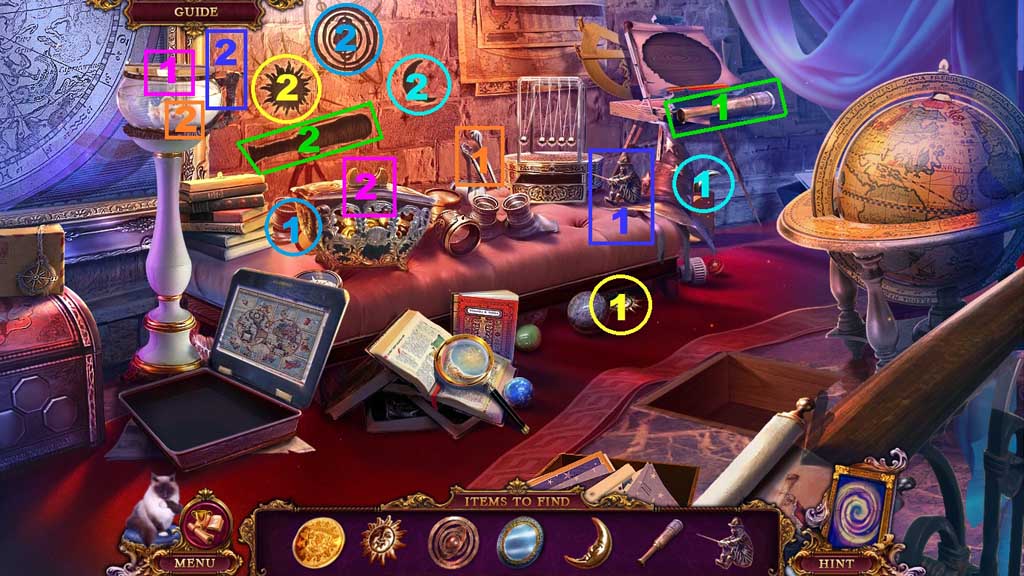
- Move upstairs and click the hidden objects area.
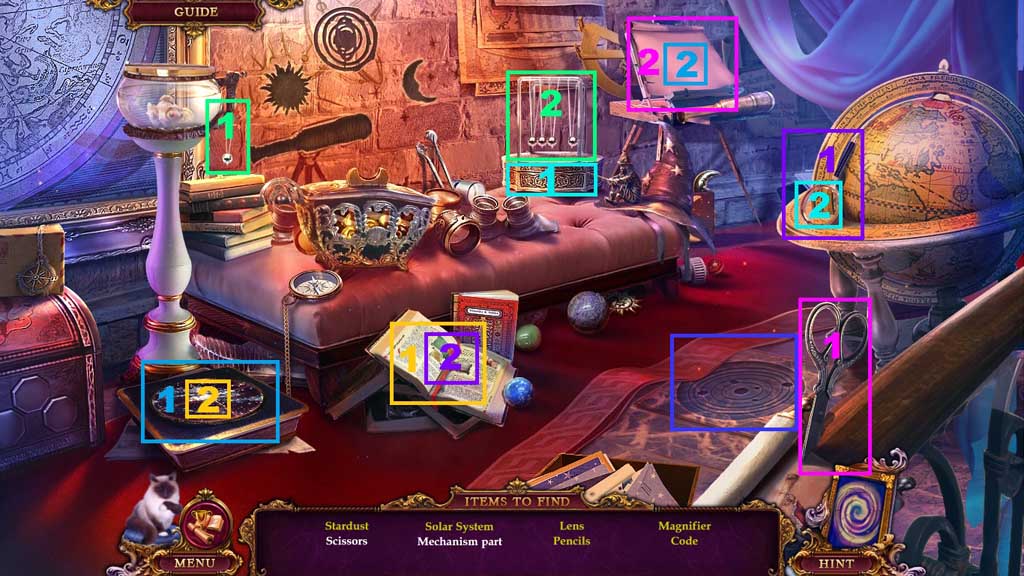
- Find the items.
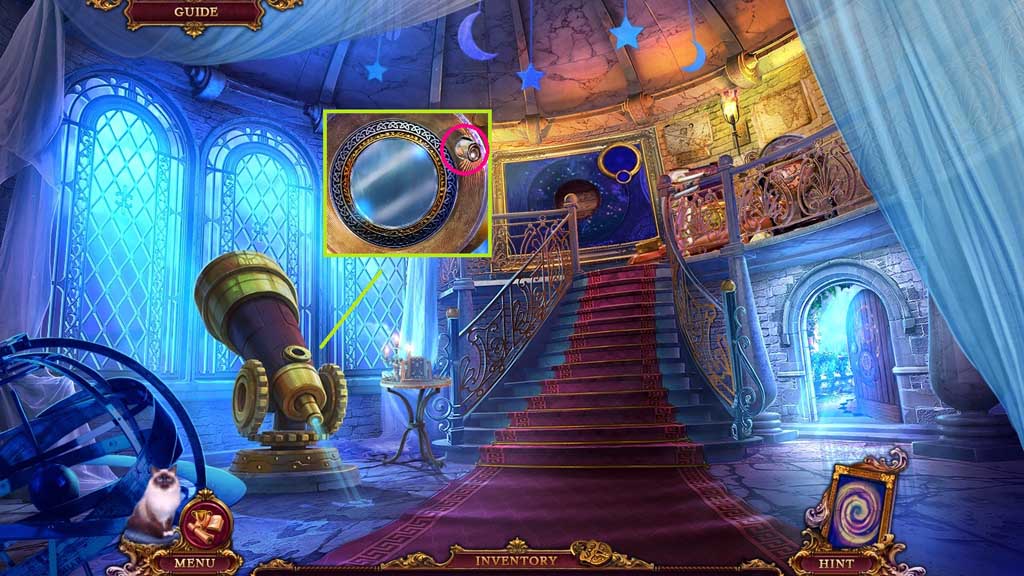
- Select the mechanism part and place it into the mechanism; collect the lens.
- Place the lens into magnifier frame; collect the magnifier.
- Place the magnifier onto the book to reveal a symbol code.
- Recreate the symbol code on the tiles; collect the pencils.
- Use the pencils on the paper; create the solar system.
- Select the scissors to cut out the paper solar system.
- Place the paper solar system onto the floor print.
- Collect the stardust.
- Move down once.
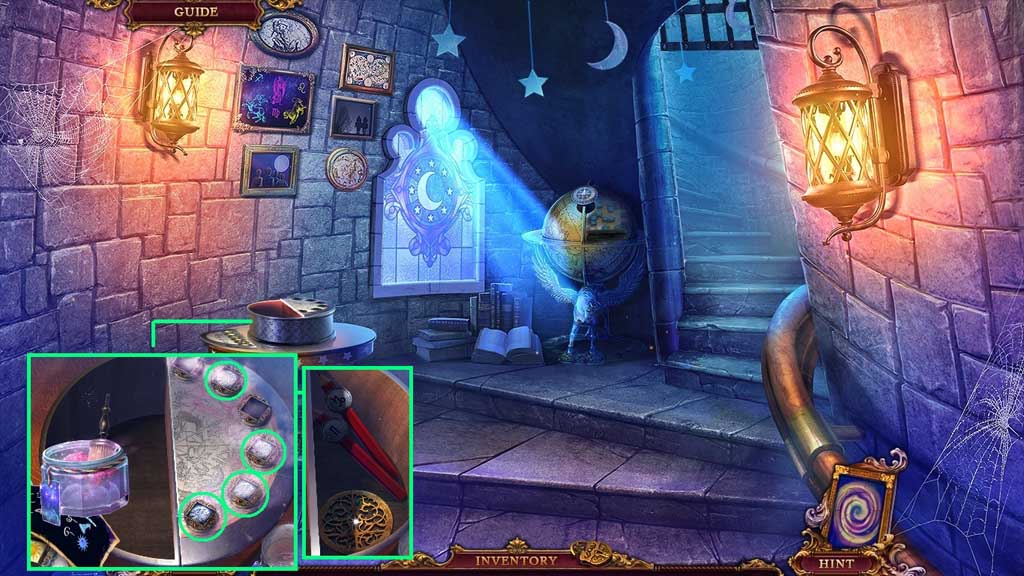
- Zoom into the table.
- Select the stardust to reveal the prints.
- Click the 4 buttons that have prints.
- Collect the astrolabe part and the pencils.
- Move ahead.
- Insert the astrolabe part to trigger a mini game.
- Solve the game by connecting the stars to create a palette.
- Move to Balcony.
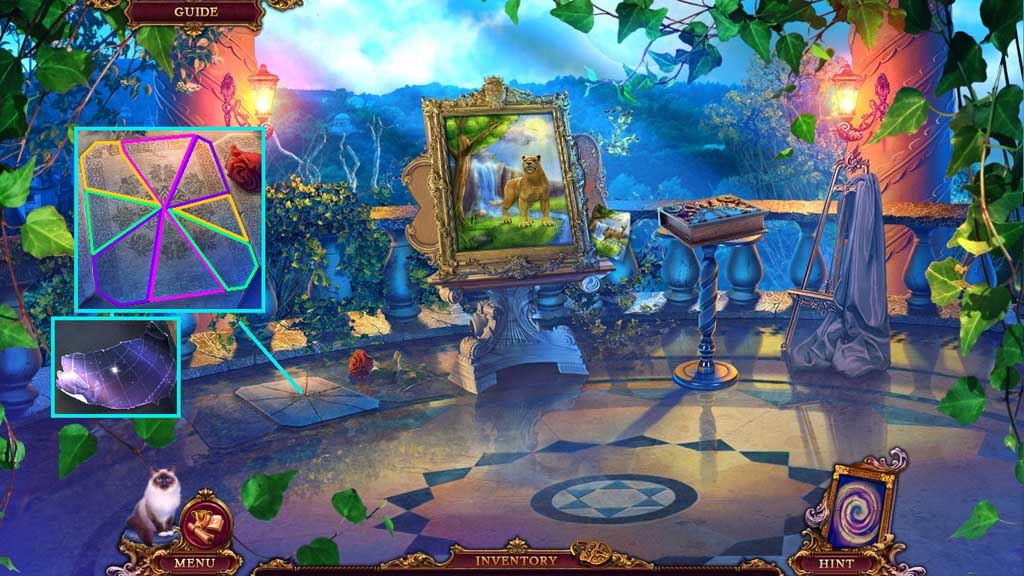
- Click the painting.
- Zoom into the broken floor tile to trigger a mini game.
- Solve the game by finding the matching symbols on the broken tile pieces.
- Collect the part of the star map.
- Move down once.
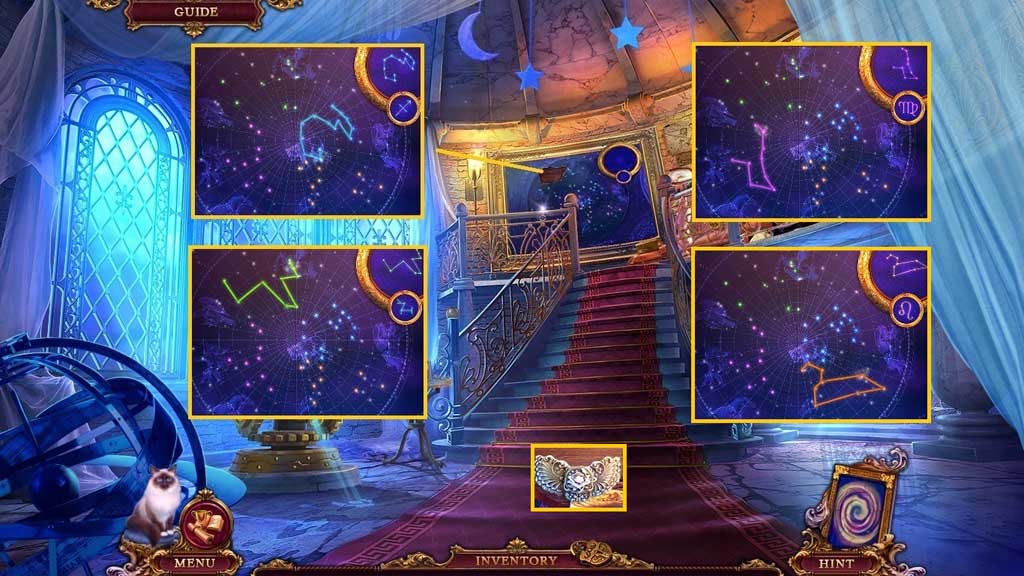
- Insert the star map to trigger a mini game.
- Solve the game by recreating the constellation.
- Collect the lock part.
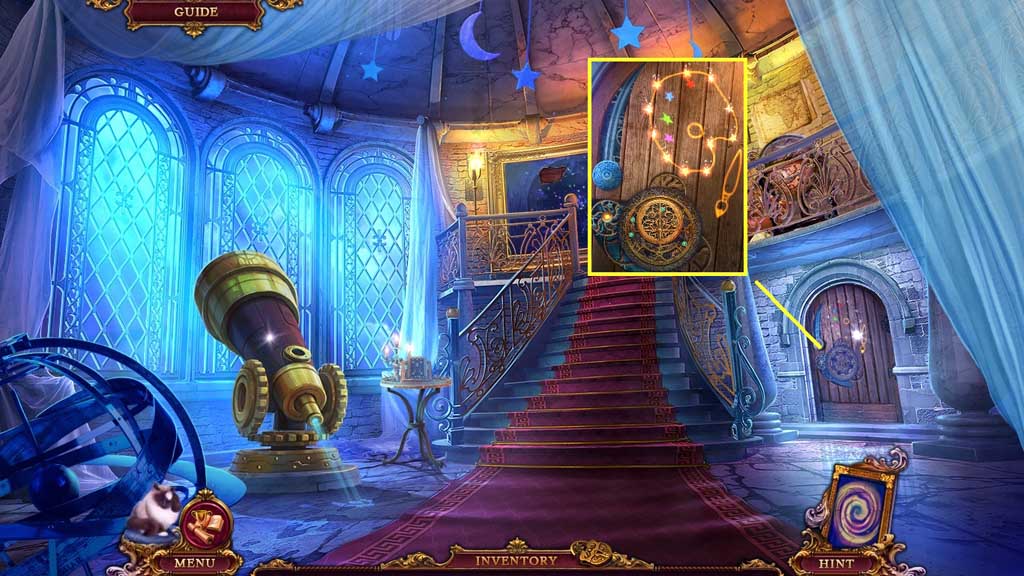
- Move down 2x’s.
- Insert the lock part.
- Collect the brush.
- Move to the right and go upstairs; click the hidden objects area.
- Find the items.
- Select the fisherman and place him onto the fish bowl.
- Select the tongs to retrieve the coin from the fish bowl.
- Insert the coin into the machine; collect the galaxy.
- Insert the galaxy into the imprint.
- Collect the lens.
- Insert the lens; collect the picture piece.
- Move to the right.
- Place the brush and palette next to the canvas to trigger a mini game.
- Solve the game by correctly painting the picture.
- Place the pencils to trigger a mini game.
- Solve the game by picking the pencil pairs.
- Collect Themis, the clock hands and 1 /4 rune books.
- Move down once.
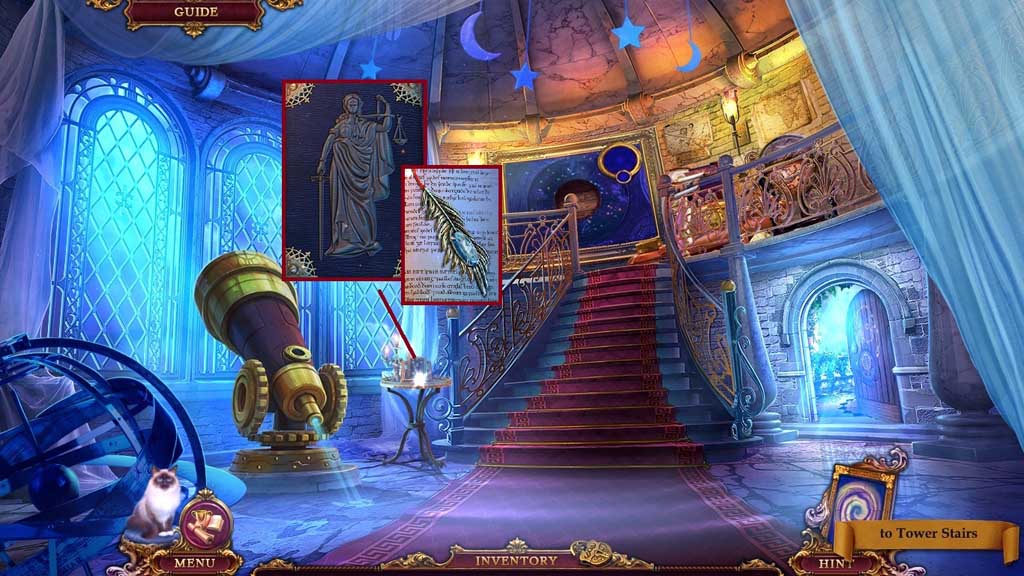
- Insert Themis; collect the feather.
- Move to the Poultry Yard and click the hidden objects area.
- Find the items.
- Select the handle and place it onto the blade; collect the dagger.
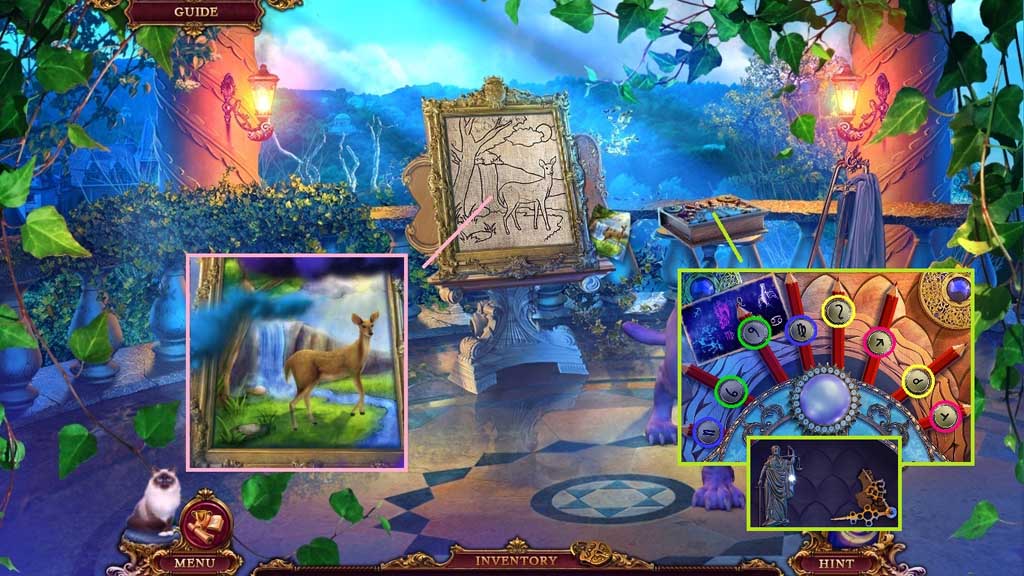
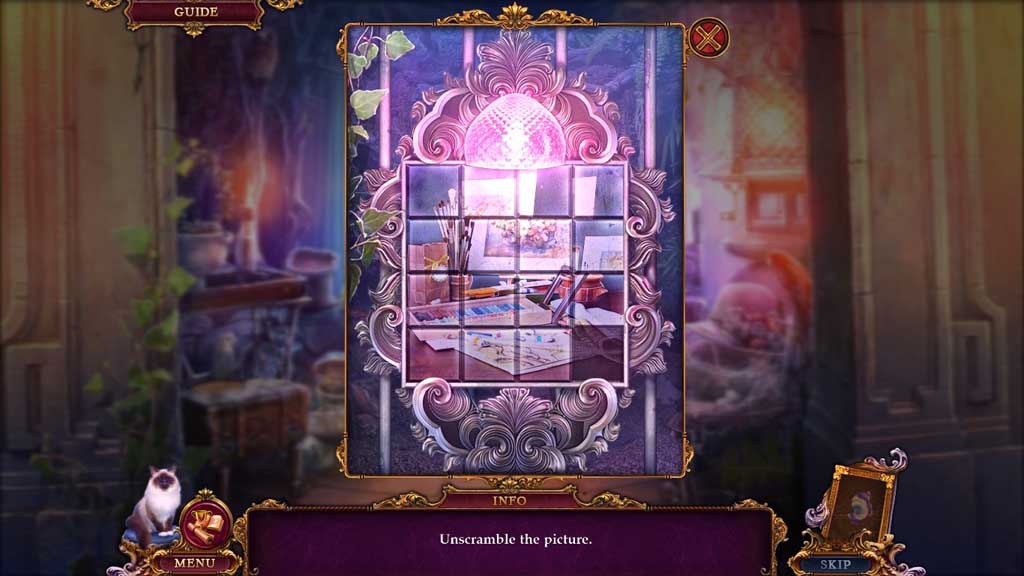
- Select the picture piece and place it into the frame to trigger a mini game.
- Solve the game by unscrambling the image; reveal the scissor half.
- Select the scissor half and place it along with the other scissor half to create and collect the scissors.
- Use the scissors to cut the key free.
- Insert the key into the grate lock.
- Select the dagger to slice the package; collect the bird.
- Insert the bird into the groove.
- Collect the vines.
- Insert the feather.
- Collect the red paint and the rope ladder.
- Select the vines to tie the logs together and create a raft.
- Select Mr. Jenkins to loosen the broken rope ladder; attach the complete rope ladder to it.
- Move ahead.