Myths of the World: Black Rose: Chapter Four: The Crypt
Our Myths of the World: Black Rose Walkthrough is here to help as you and your partner embark on a good old fashioned vampire hunt. It seems a vampire is in possession of a rare and dangerous artifact and now it's up to you to track him down before he can use it. When you're not sure who you can trust, remember you can always trust our detailed gaming instructions, our simple puzzle solutions, and our custom marked screenshots to see you through.
General Information & Tips
Chapter One: Aboard the Steamboat
Chapter Two: Entering Eastmire
Chapter Three: Town Hall Tour
Chapter Four: The Crypt
Chapter Five: The Manor
Ask for help in the comments below!
Chapter One: Aboard the Steamboat
Chapter Two: Entering Eastmire
Chapter Three: Town Hall Tour
Chapter Four: The Crypt
Chapter Five: The Manor
Ask for help in the comments below!
- Select the vial of light to collect the orbs.
- Click the symbols in the correct order.
- Click the hidden objects area.
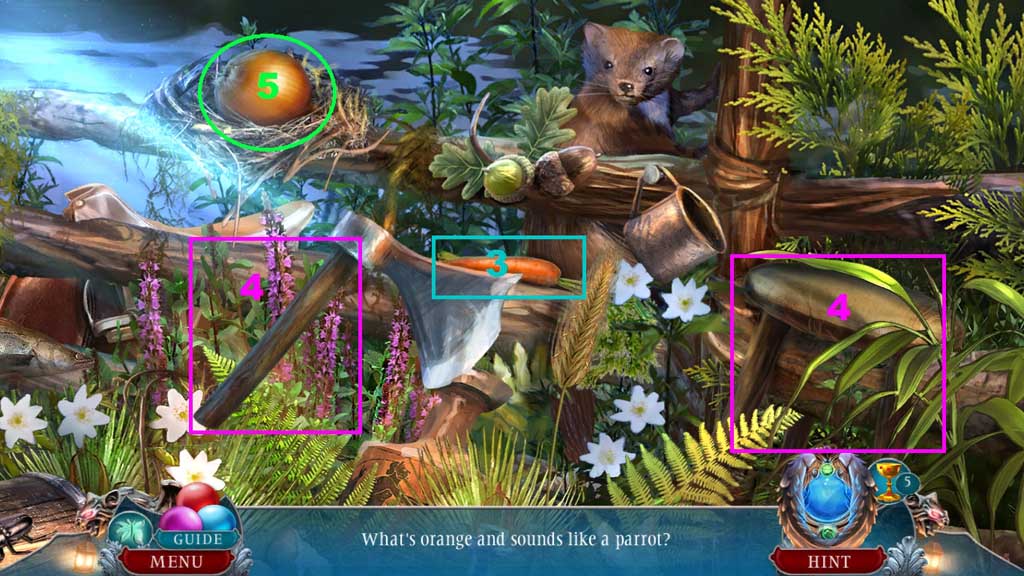
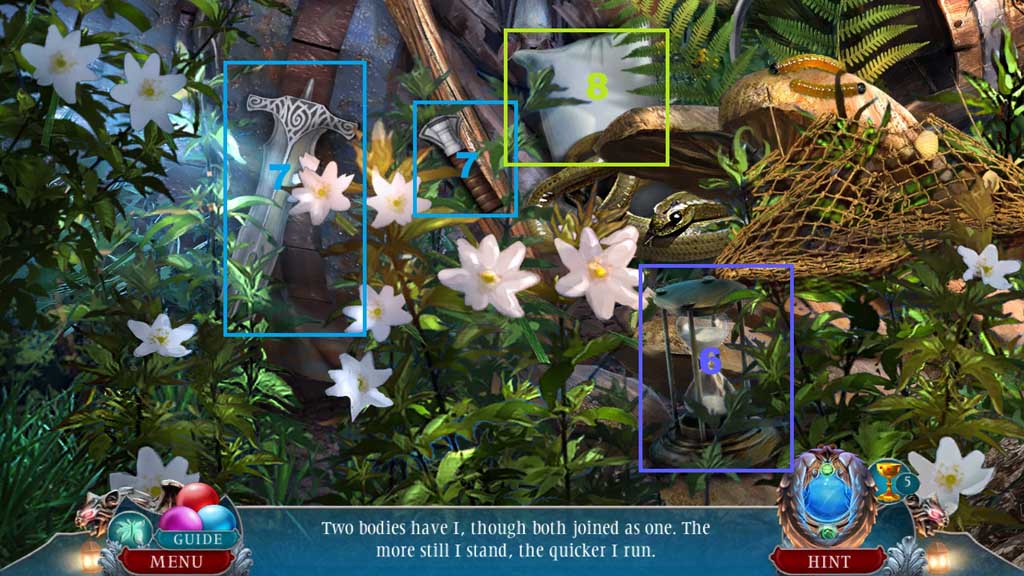
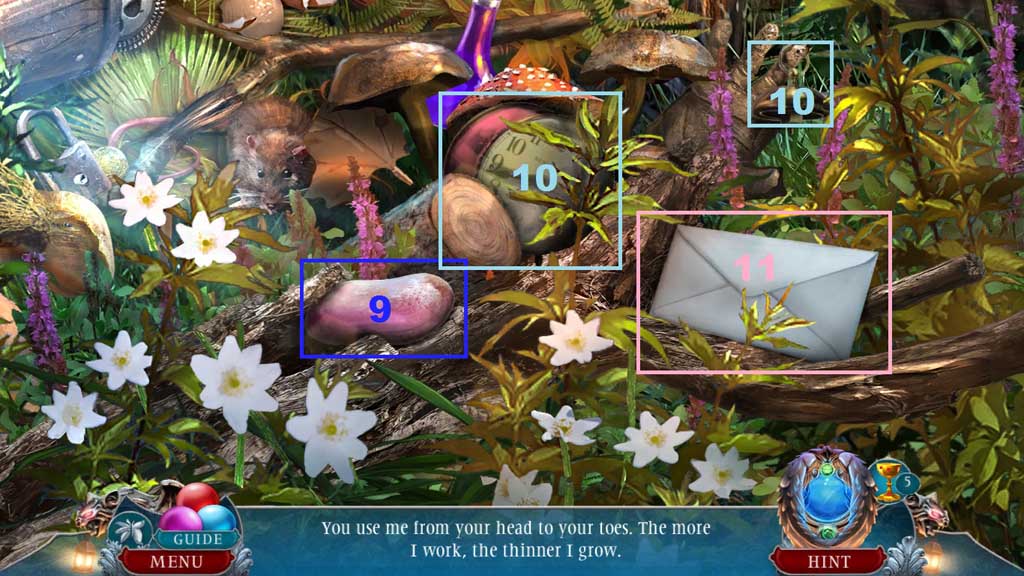

- Find the items based on the clues.
- Select the leg and place it onto the stool.
- Select the handle and place it onto the blade; collect the sword.
- Select the bell and place it onto the clock; collect the alarm clock.
- Collect the net.
- Collect the signpost and the pitchfork.
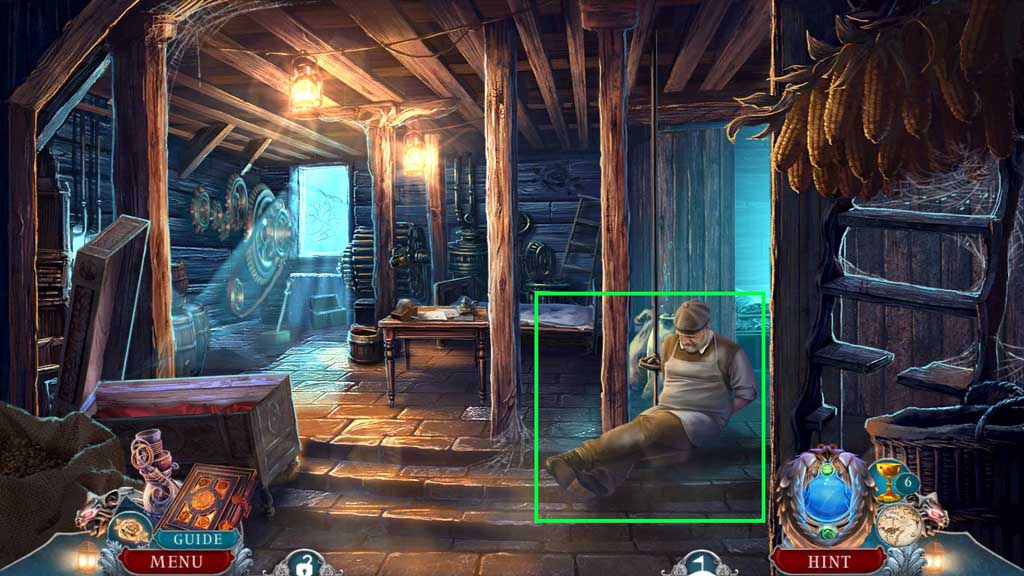
- Move to the left.
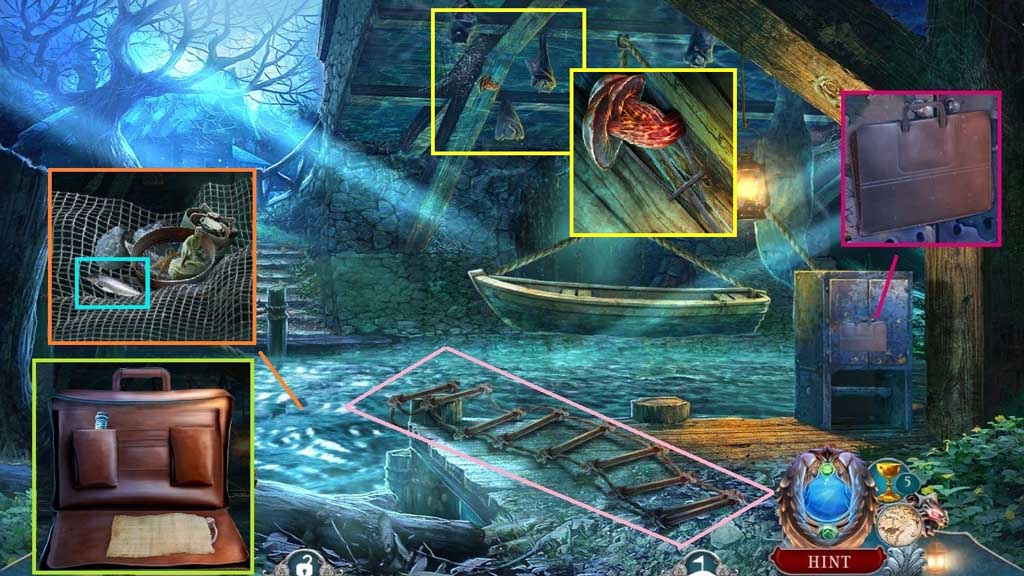
- Collect the rope ladder.
- Collect the bag and click it 2x’s; collect the poison phial, the note and the linchpin.
- Select the net to toss into the water.
- Zoom into the net; click the items aside to collect the fish.
- Collect the gear token.
- Select the pitchfork to collect the fungus.
- Move down once.
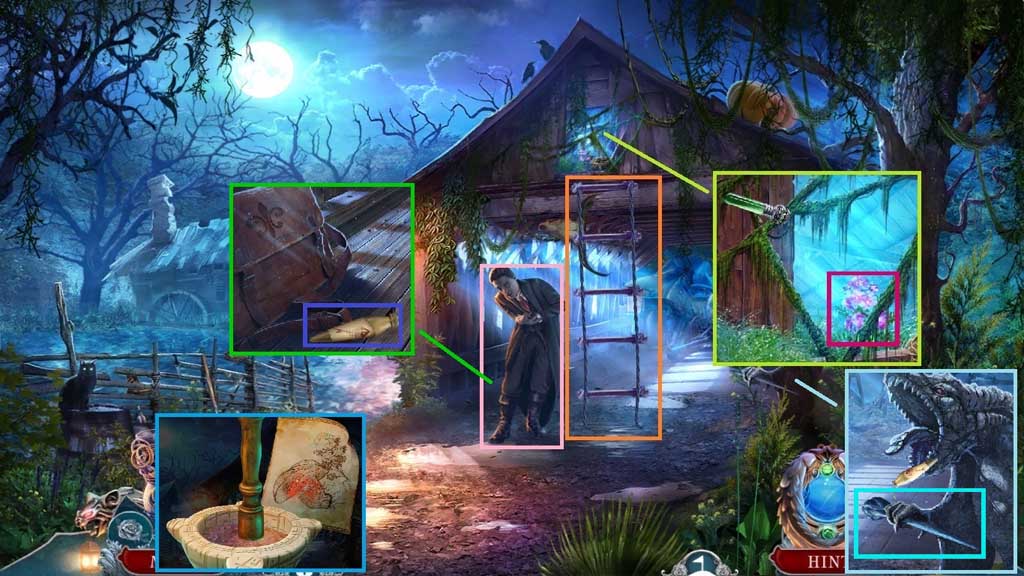
- Place the rope ladder.
- Select the poison phial to remove the vines; collect the living beauty root.
- Zoom into the mortar and pestle and place the fungus and the living beauty into it; crush it to create the cure.
- Give the cure to Benjamin.
- Give the fish to the cat; collect the fish oil and use it to collect the spike.
- Move to the left.
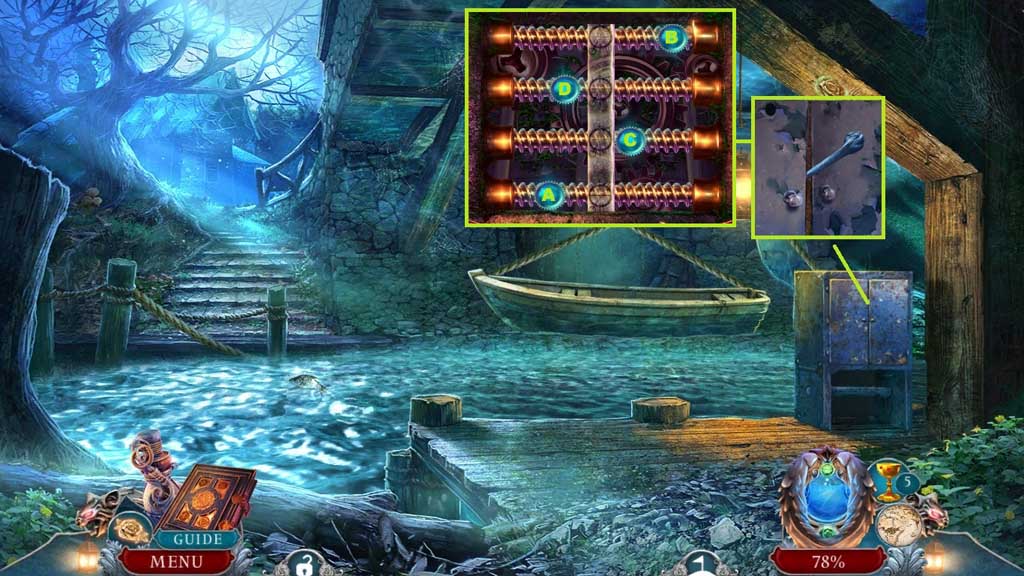
- Select the spike to open the cabinet and trigger a mini game.
- Solve the game by sliding the orbs into the center bar.
- Slide them in ABC order to solve.
- Move to the left to Edgemire Mill.
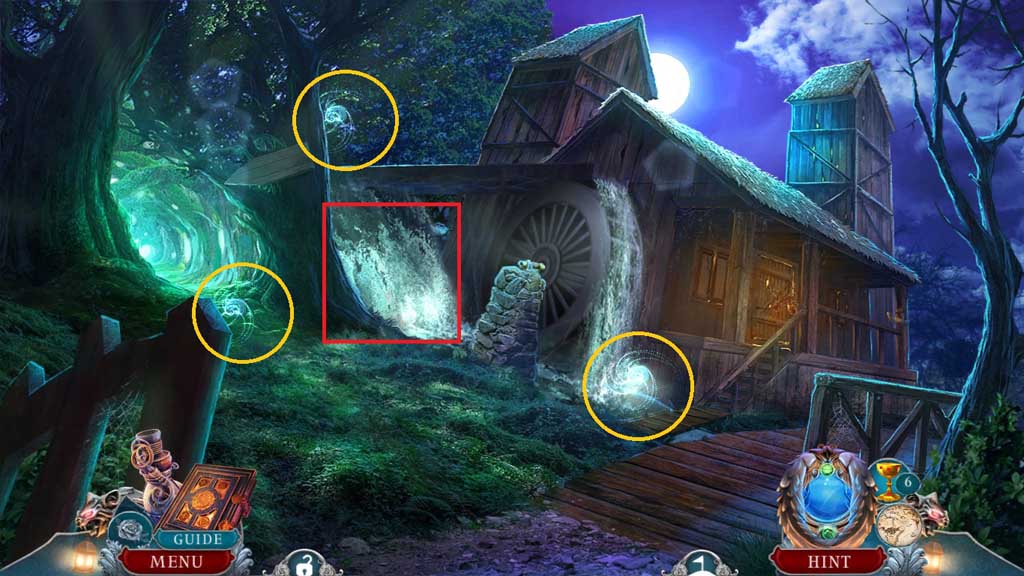
- Collect 3 /5 life essences.
- Place the signpost into the waterfall.
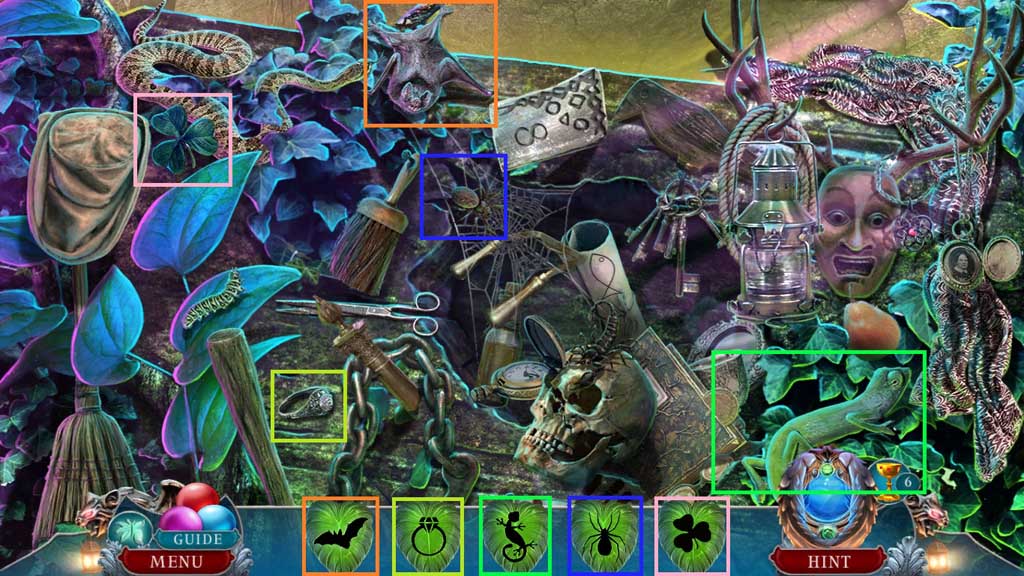
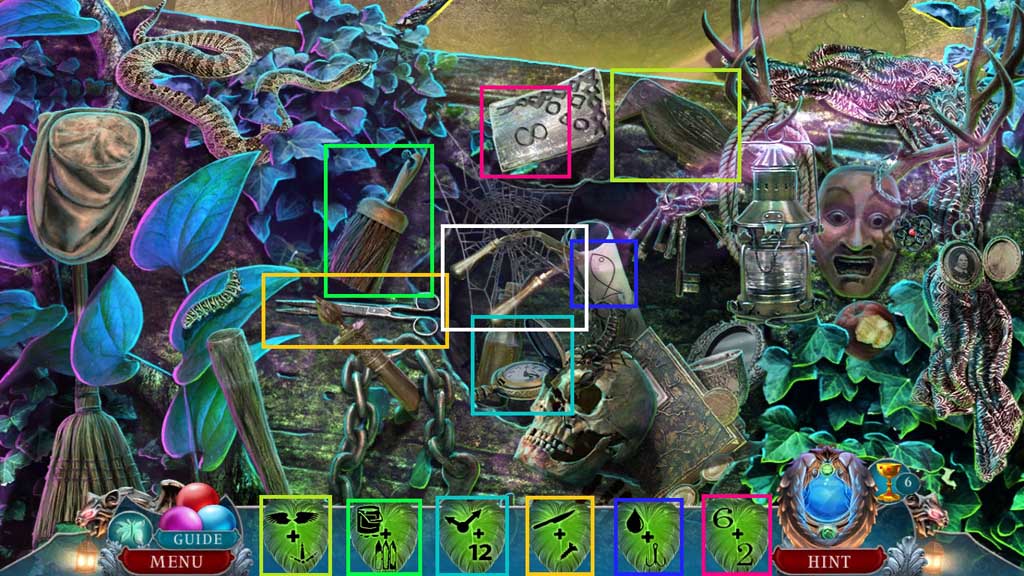
- Click the hidden objects area.
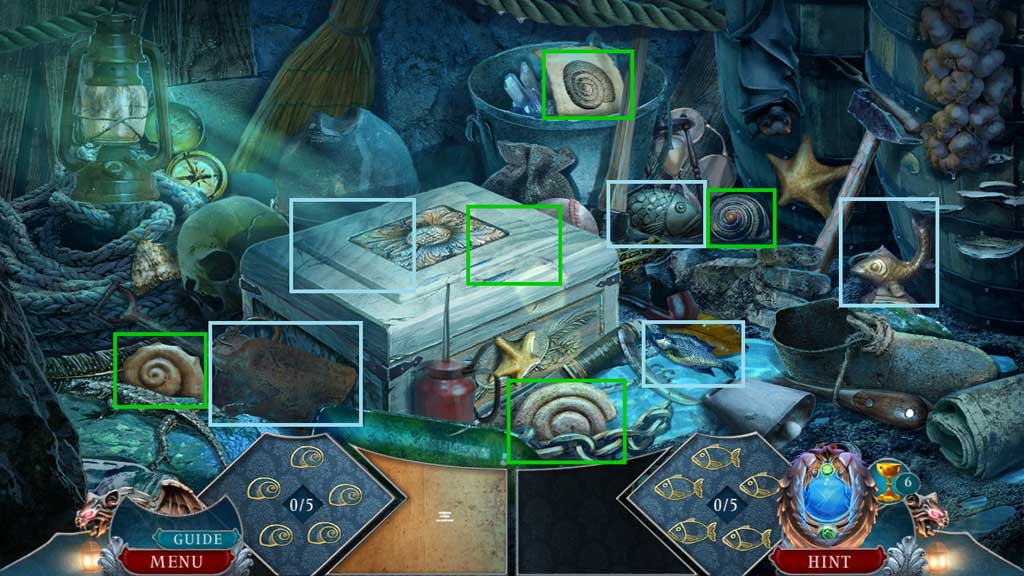
- Find the items.
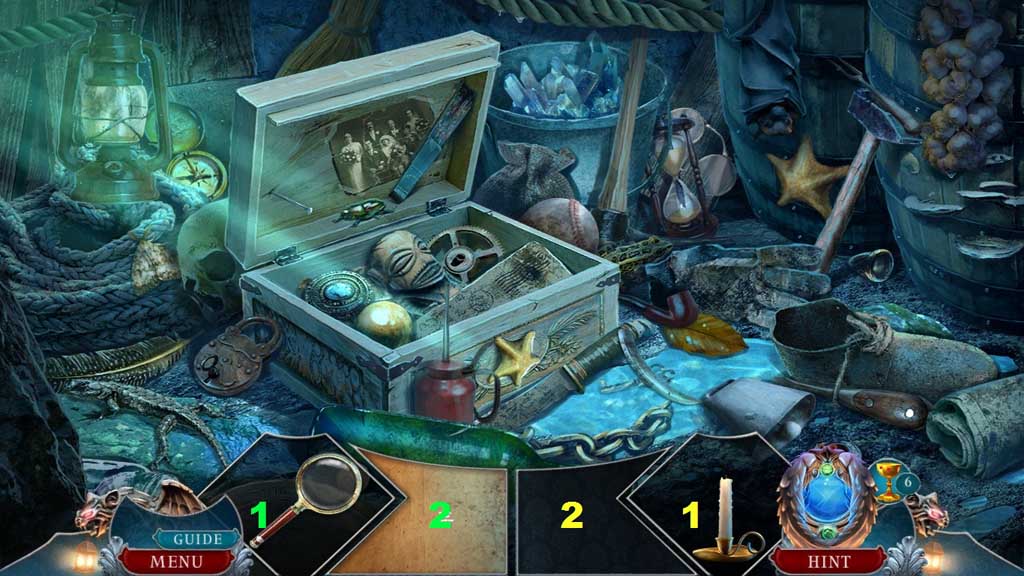
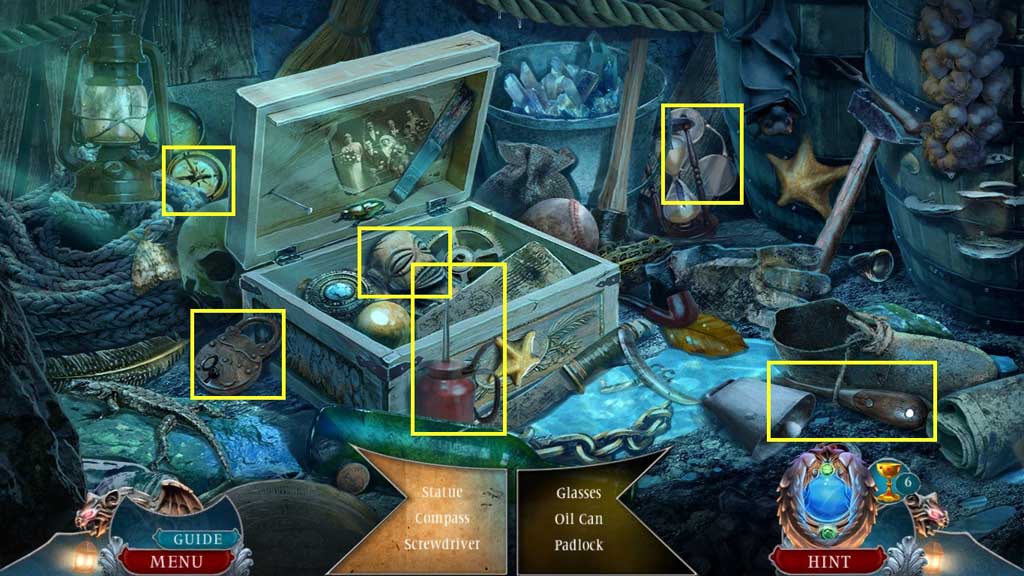
- Select the magnifying glass to reveal the listed items.
- Select the candle to reveal the listed items.
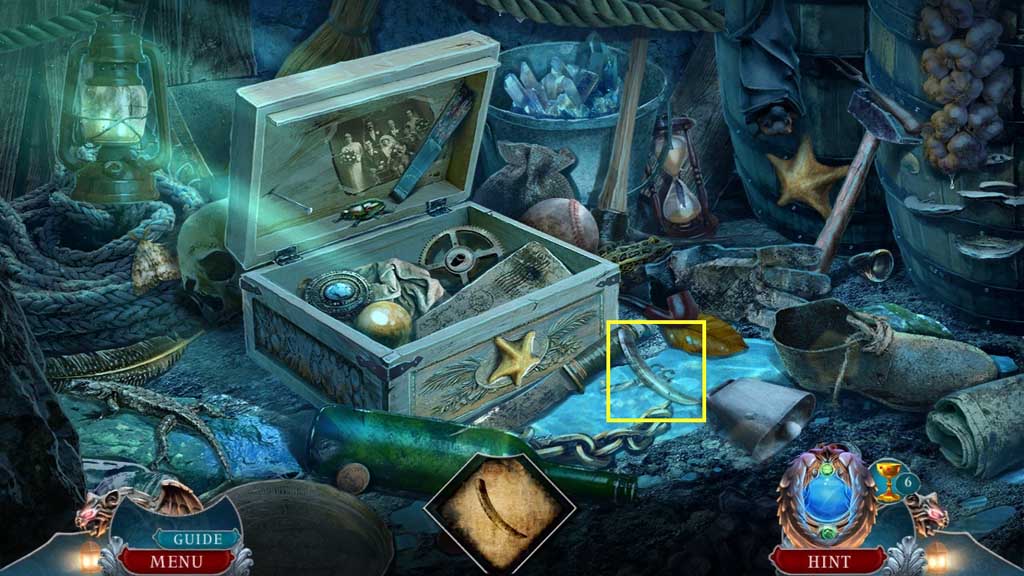
- Collect 1 /2 tusks.
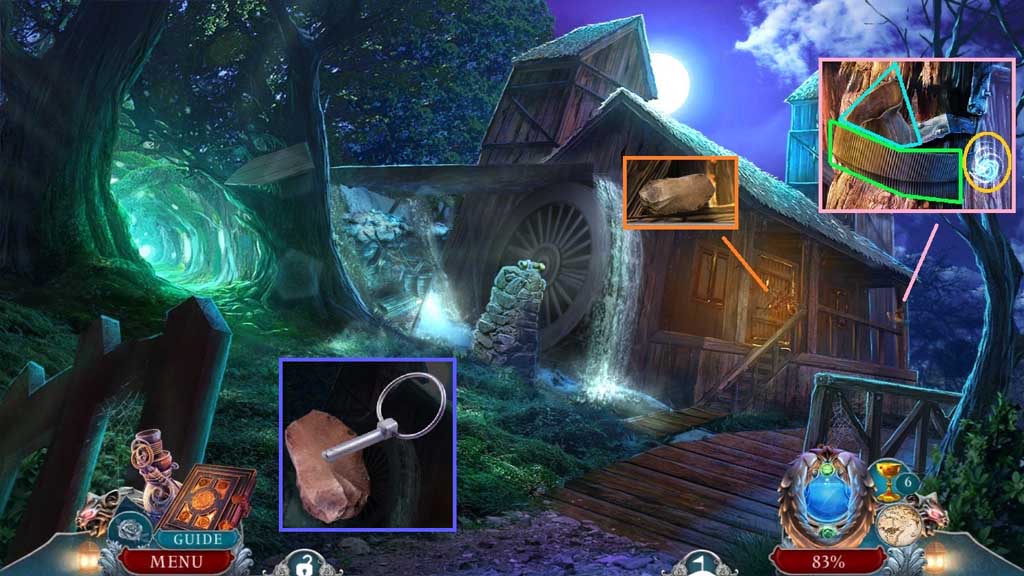
- Collect the conveyor belt, empty pouch and 4 /5 life essences.
- Collect the flint and click it; attach the linchpin to create the flint and steel.
- Move to the left.
- Select the flint and steel to ignite the candles.
- Collect the note, the ruby locket and 5 /5 life essences.
- Click the vampire hunting manual to trigger a mini game.
- Solve the game by clicking the segments to re-create the symbol in the diagram.
- Collect the miniature shield.
- Move down once.
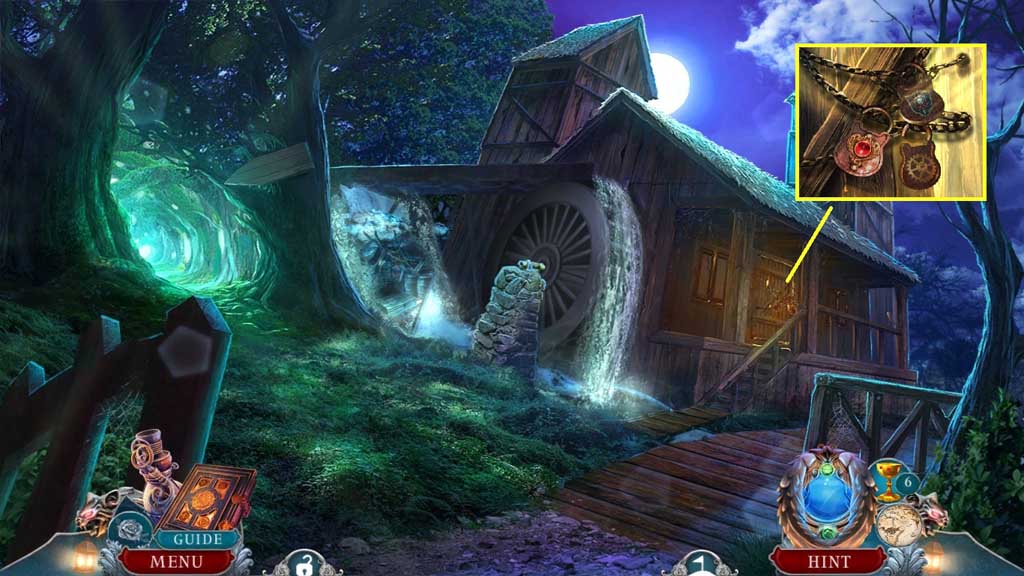
- Insert the gear token, the ruby locket and the miniature shield.
- Move to the Mill Interior.
- Collect the hollow Capricorn horn.
- Insert the fan and the mayor’s figurine.
- Collect the rope and the queen’s crown.
- Click the drawer; collect the rune stone.
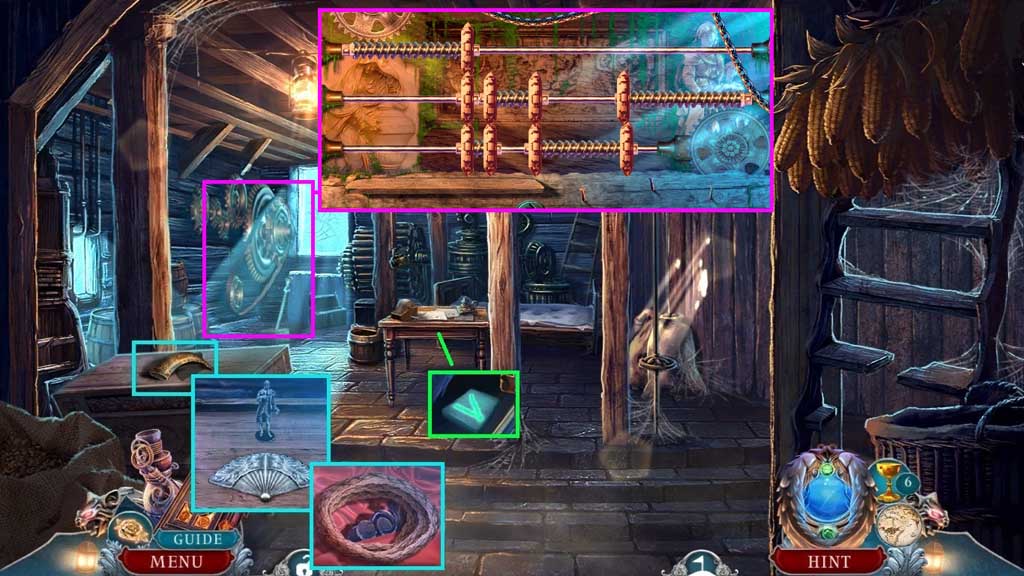
- Click the lever and attach the conveyor belt.
- Click the lever and zoom into the gears to trigger a mini game.
- Solve the game by aligning the shafts and cogs correctly.
- Select the life essences to break the trance.
- Select the manacles to shackle him.
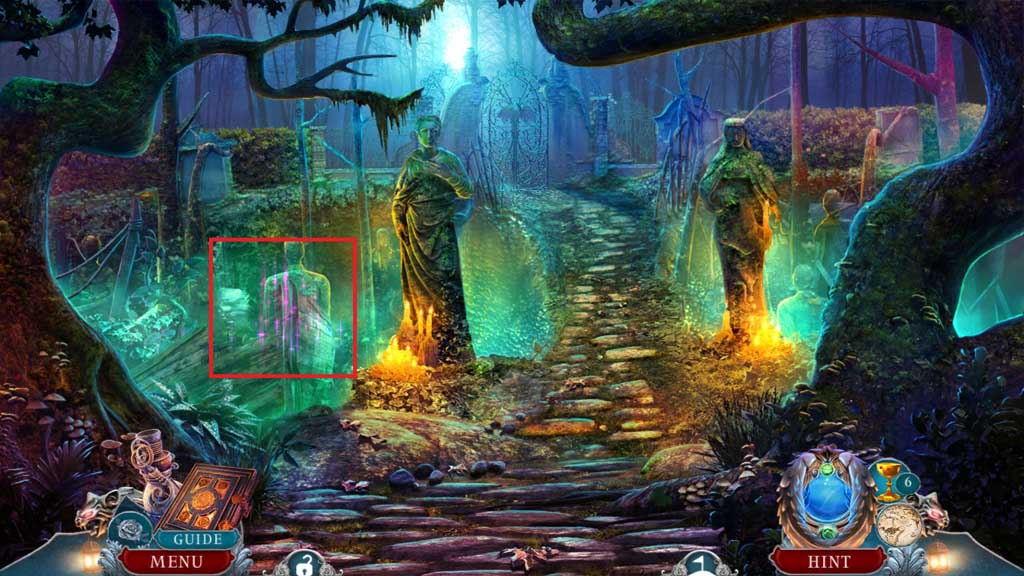
- Move to the Cemetery Path.
- Select the rope to pull the boat and click the hidden objects area.
- Find the items.
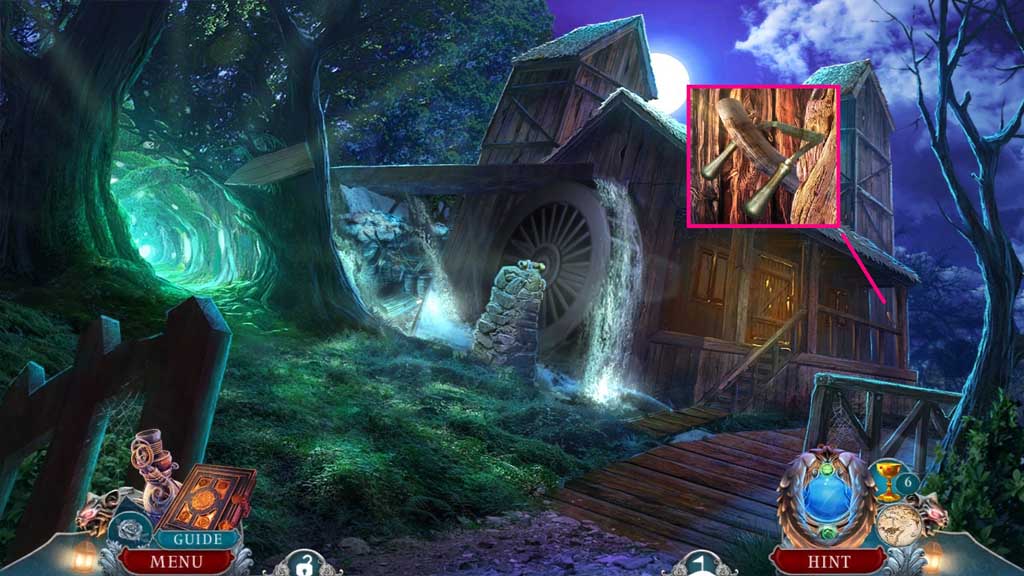
- Collect the dull spoke shave.
- Place the queen’s crown.
- Collect the decorative flower.
- Move to the Mill Interior.
- Select the dull spoke shave and place it onto the grinder.
- Collect the sharpened spoke shave.
- Move down once.
- Select the sharpened spoke shave to collect 2 /2 tusks.
- Move to the Mill Interior.
- Select the tusks to hoist the lid; collect the scepter.
- Click the jewelry aside; collect the broken statue piece.
- Move to the Cemetery Path.
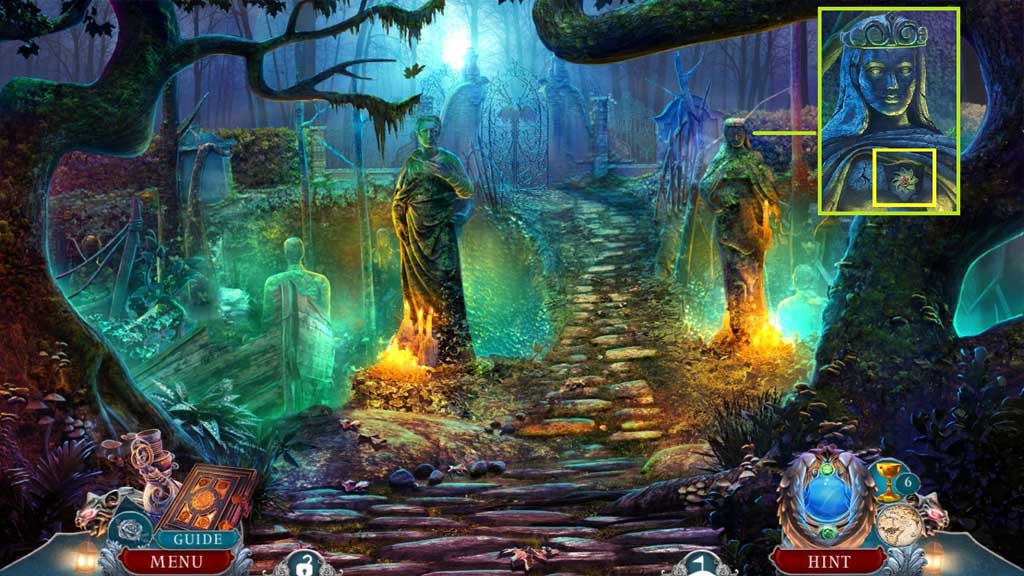
- Place the scepter; collect 1 /2 red jaspers.
- Move ahead to the Graveyard.
- Attach the broken statue piece.
- Collect the raven brooch.
- Attach the decorative flower; collect the ornate frame.
- Collect the ancient jeweled key.
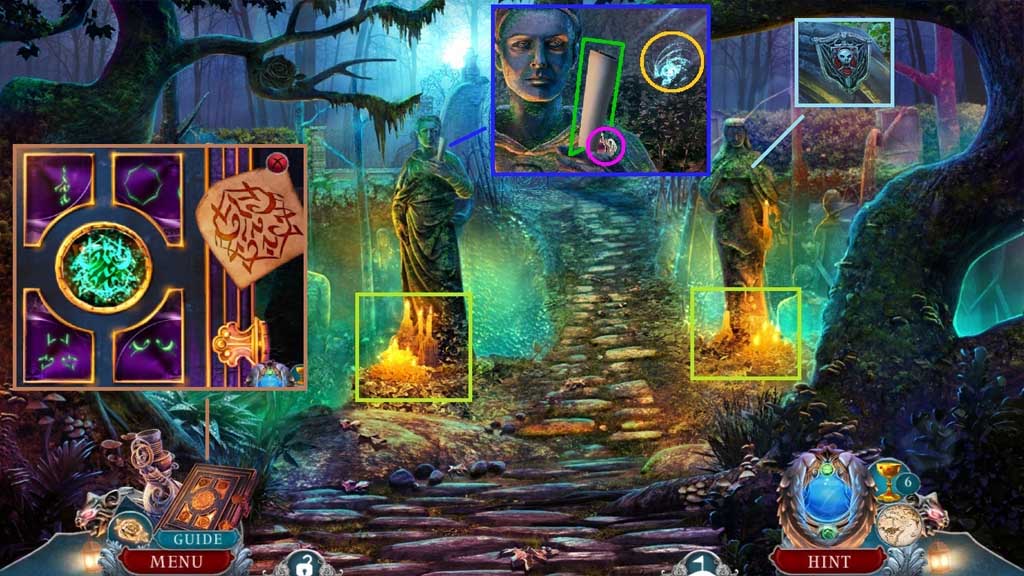
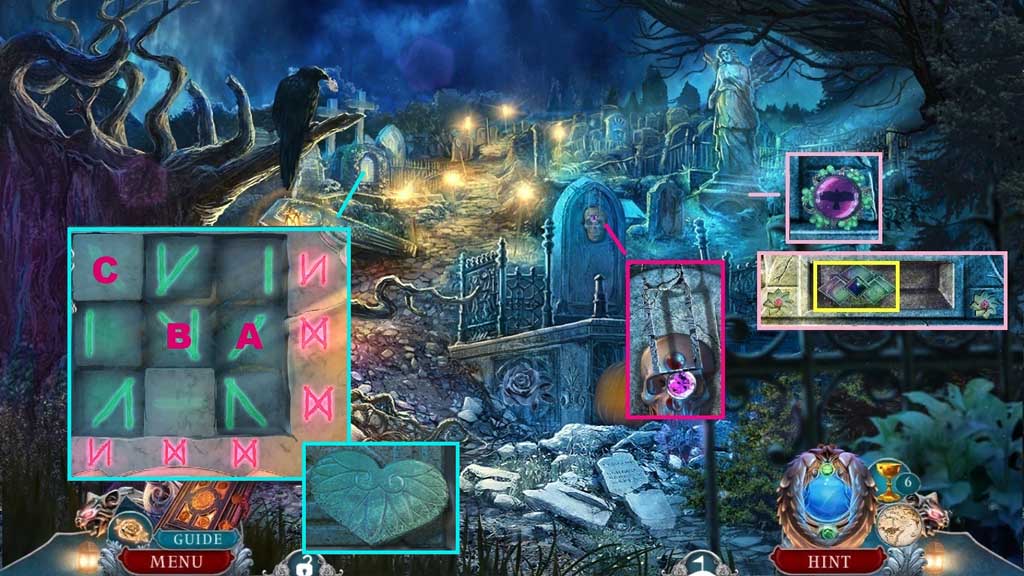
- Insert the rune stone to trigger a mini game.
- Solve the game by clicking the runes to create the markings shown.
- Collect the heart piece.
- Move ahead.
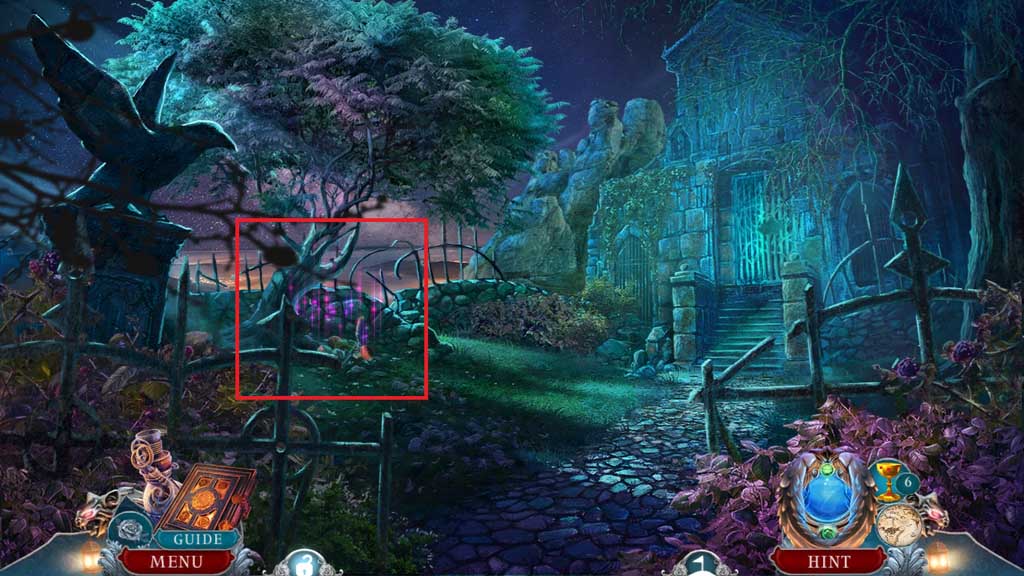
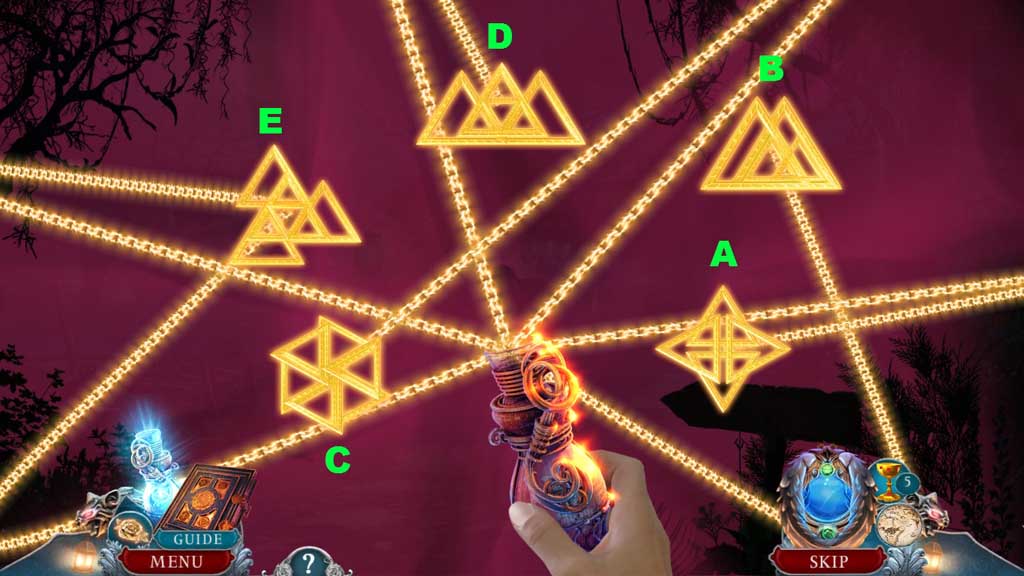
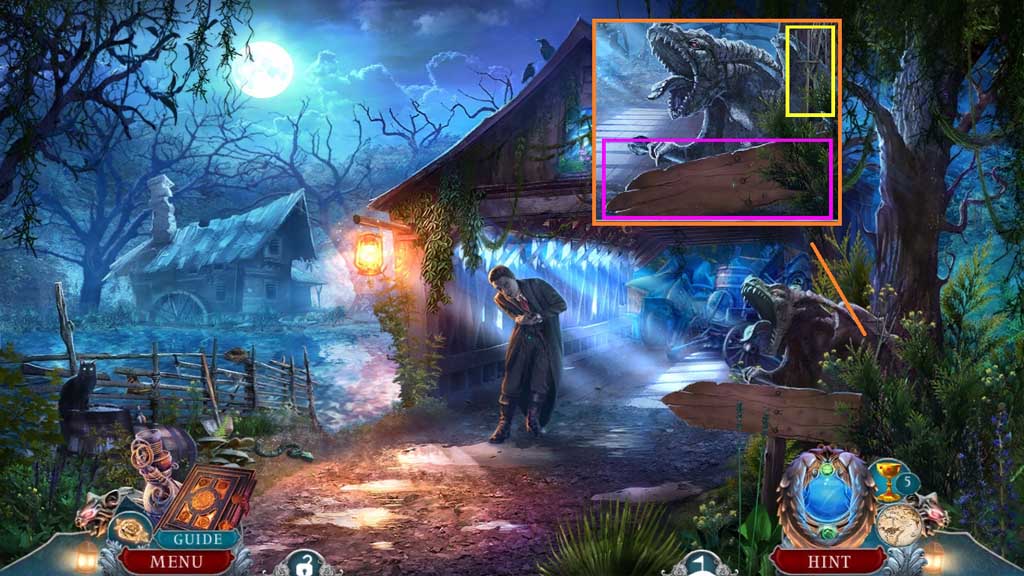
- Select the pitchfork to use on the tree and trigger a hidden objects area.
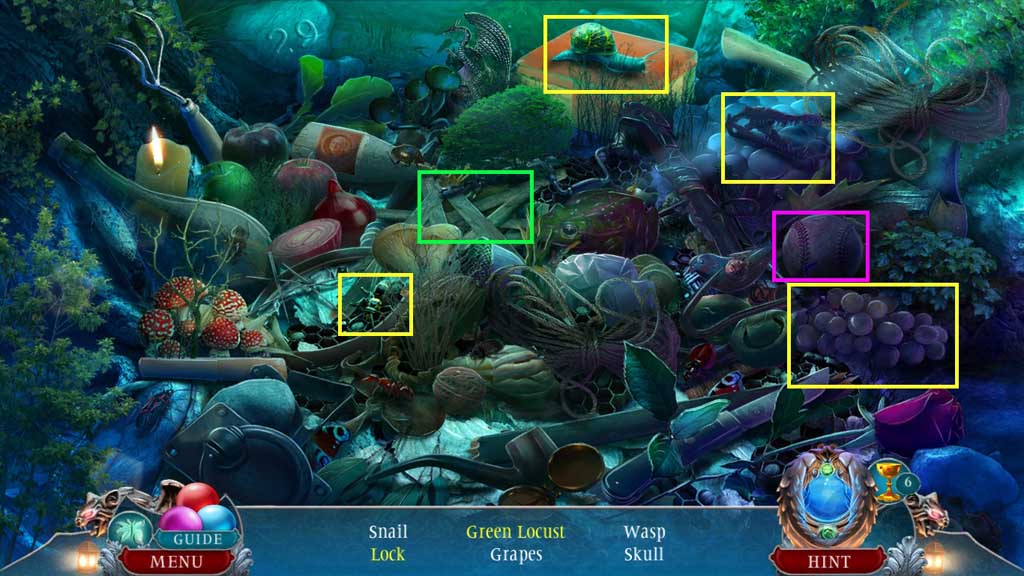
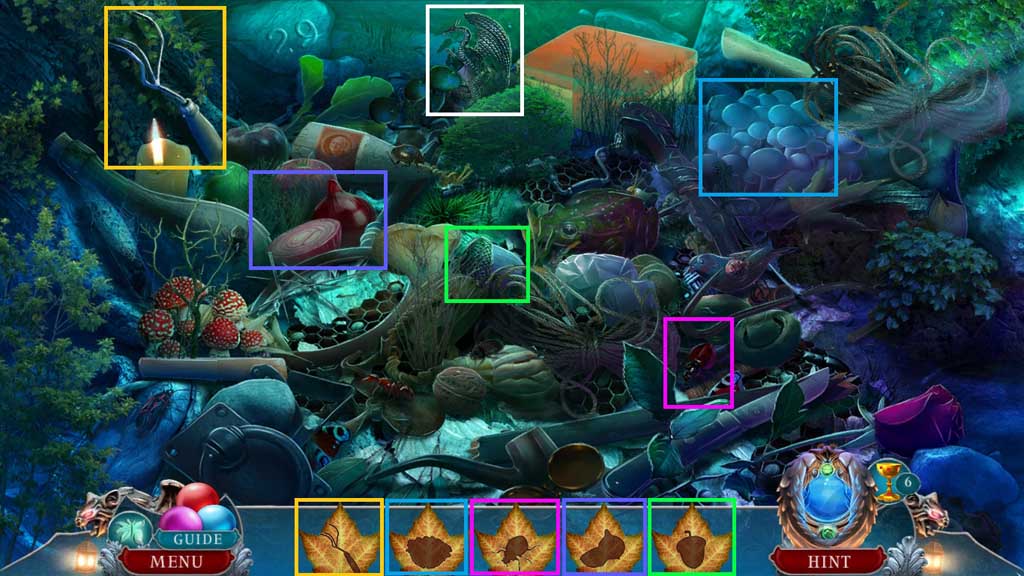
- Find the items.
- Click the boards; collect the lock.
- Click the baseball; collect the green locust.
- Collect the dragon crest.
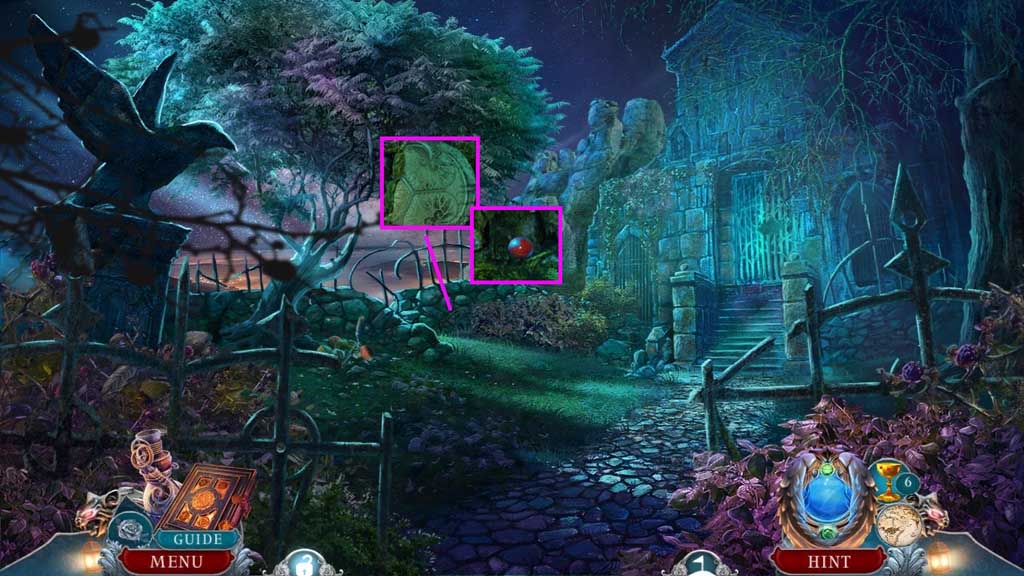
- Click the moss aside; insert the heart piece.
- Collect 2 /2 red jaspers.
- Move down once.
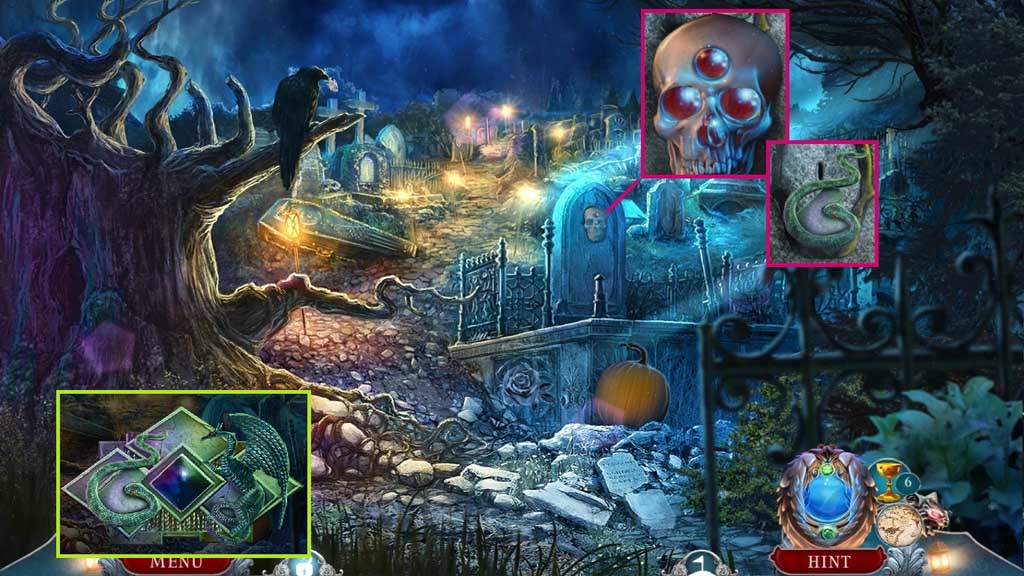
- Place the 2 red jaspers; collect the serpent crest.
- Zoom into the ornate frame; attach the dragon and serpent crests.
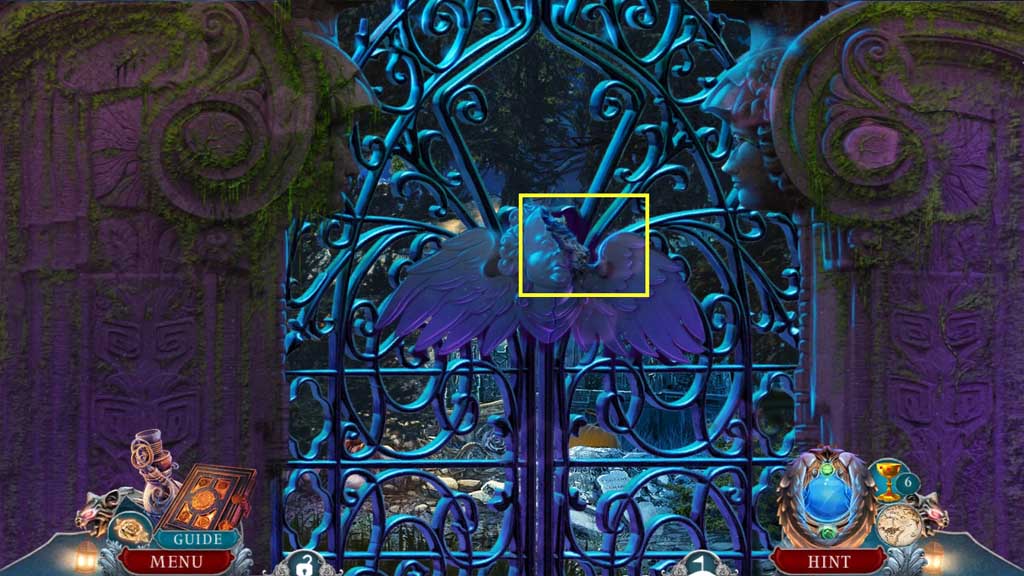
- Move ahead.
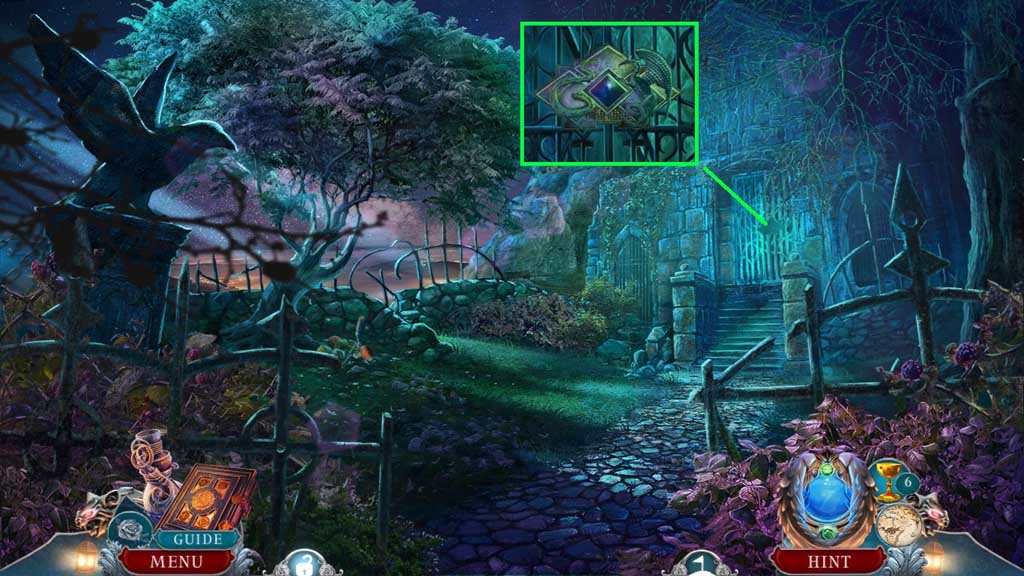
- Place the ornate frame.
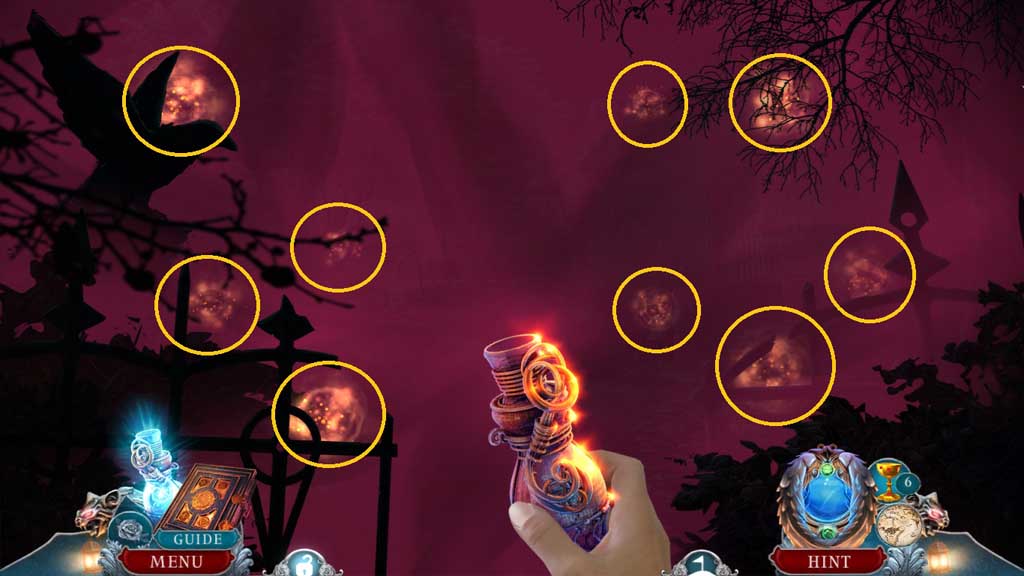
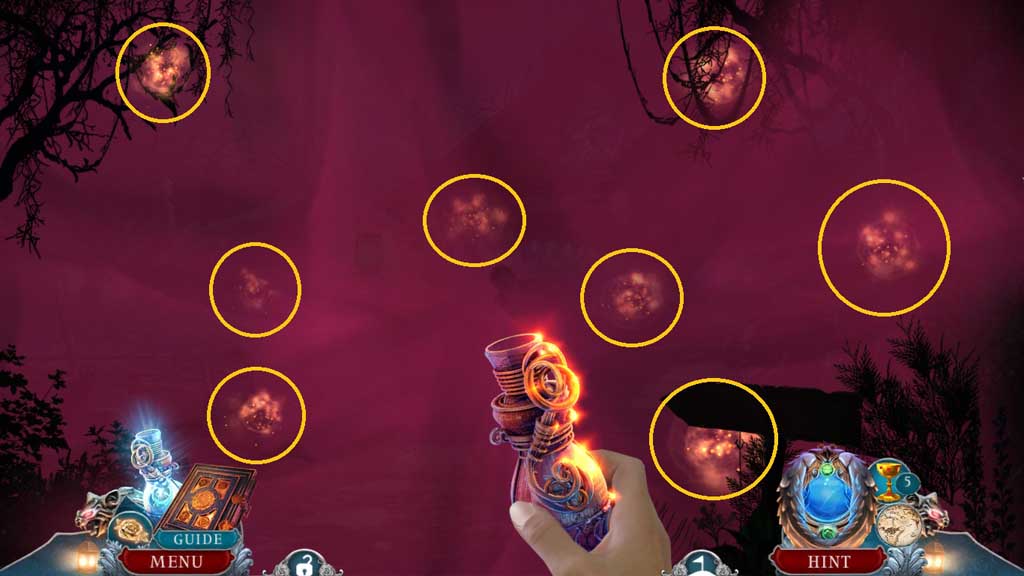
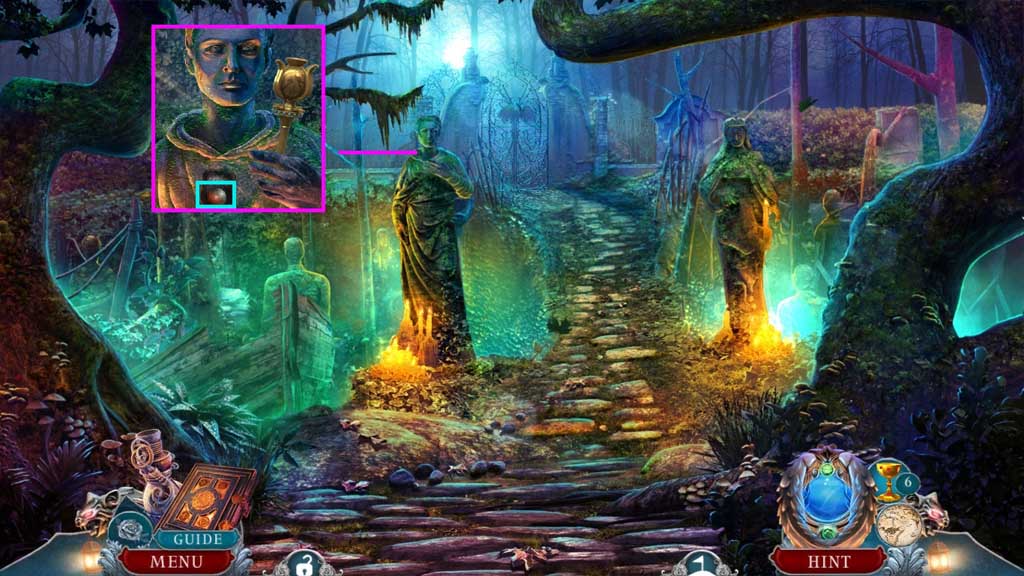
- Select the vial of light to collect the orbs.
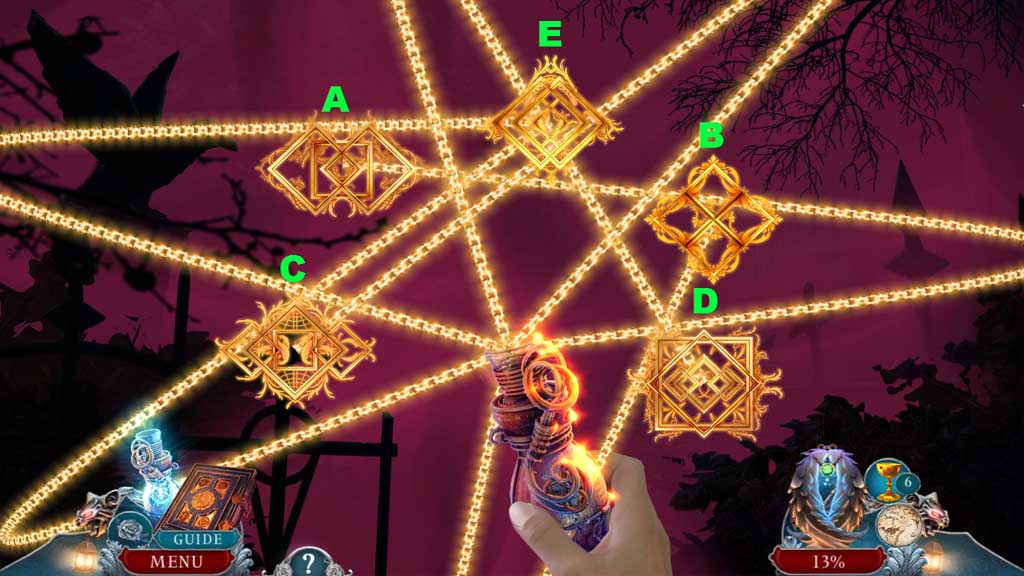
- Click the symbols in ABC order.
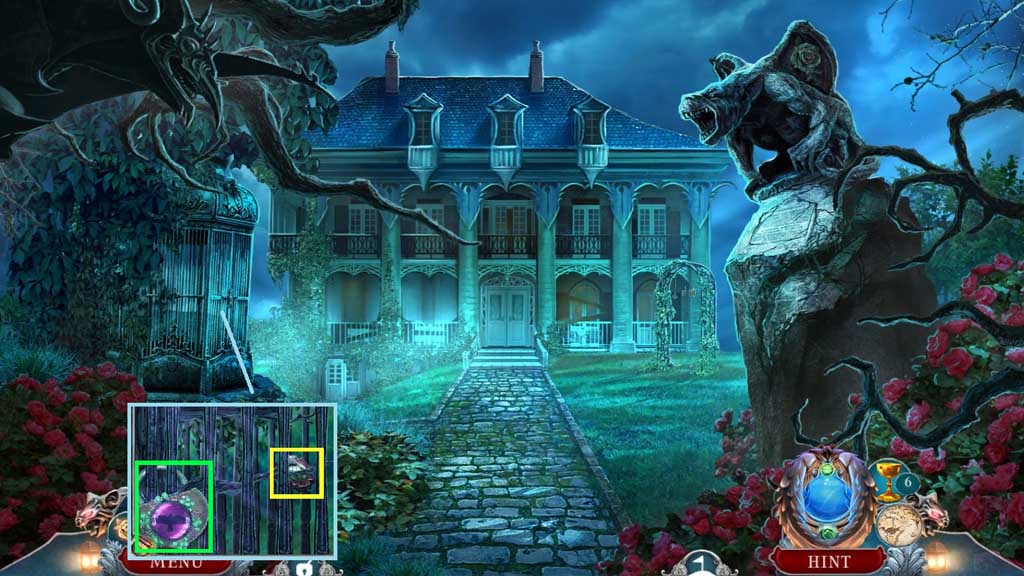
- Move ahead into Rose’s Crypt.
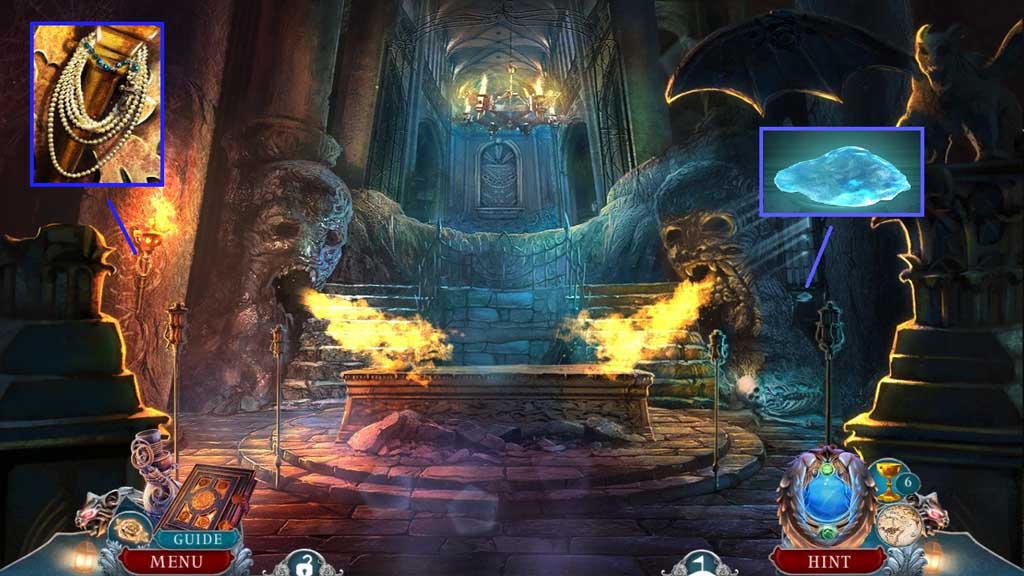
- Collect the moonstone.
- Collect the pearl necklace.
- Move to the Graveyard.
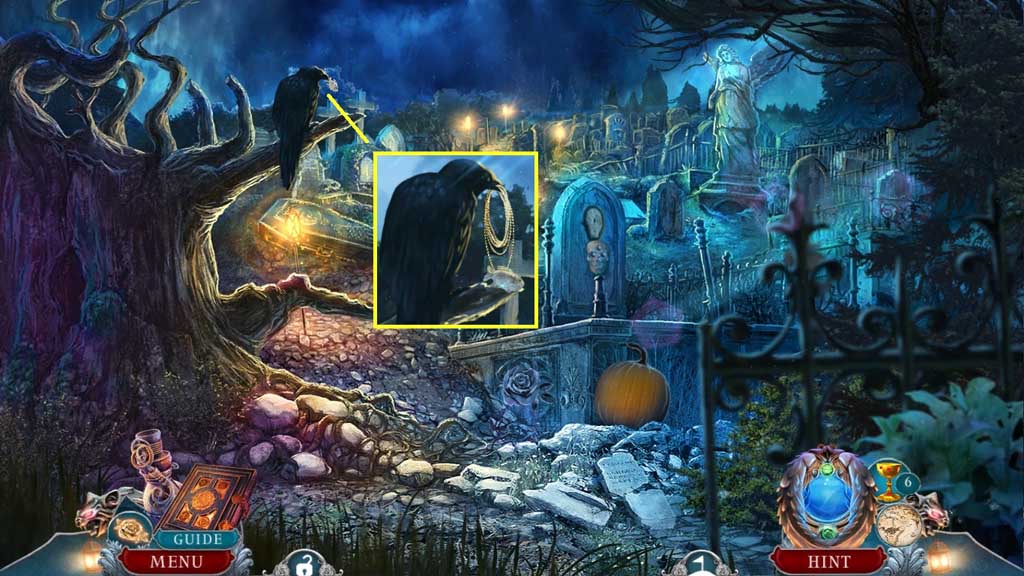
- Give the bird the pearl necklace; collect the stone fish.
- Move to Rose’s Crypt.

- Insert the stone fish; click the plaque.
- Select the empty pouch to collect the grave dirt.
- Insert the ancient jeweled key to trigger a mini game.
- Solve the game by aligning the rings so that the symbols make sense with the emblems.
- Move ahead.
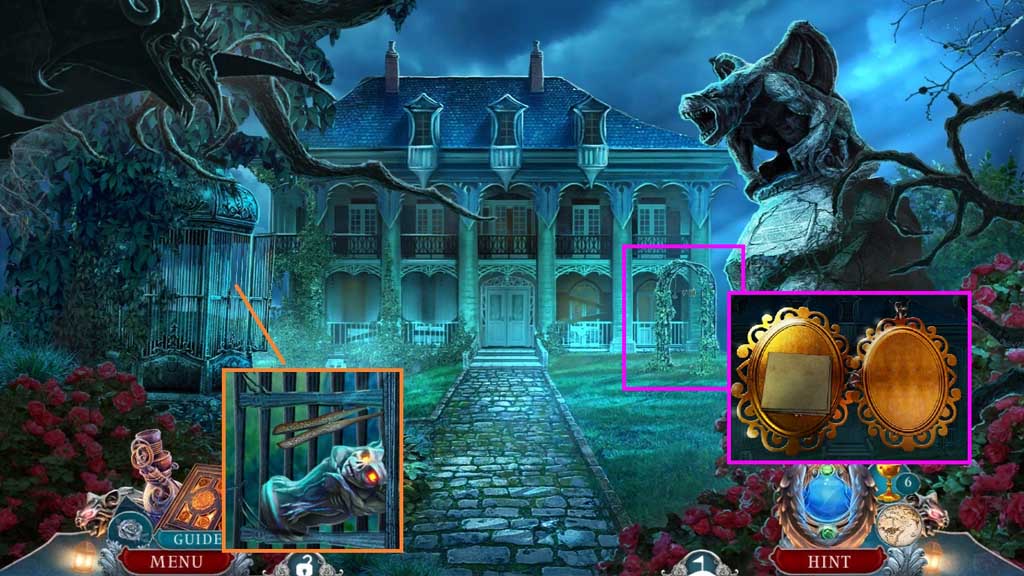
- Place the raven brooch; collect the buckle.
- Move to the Basement.
- Place the moonstone into the slot; click the button.
- Collect the moonstone powder.
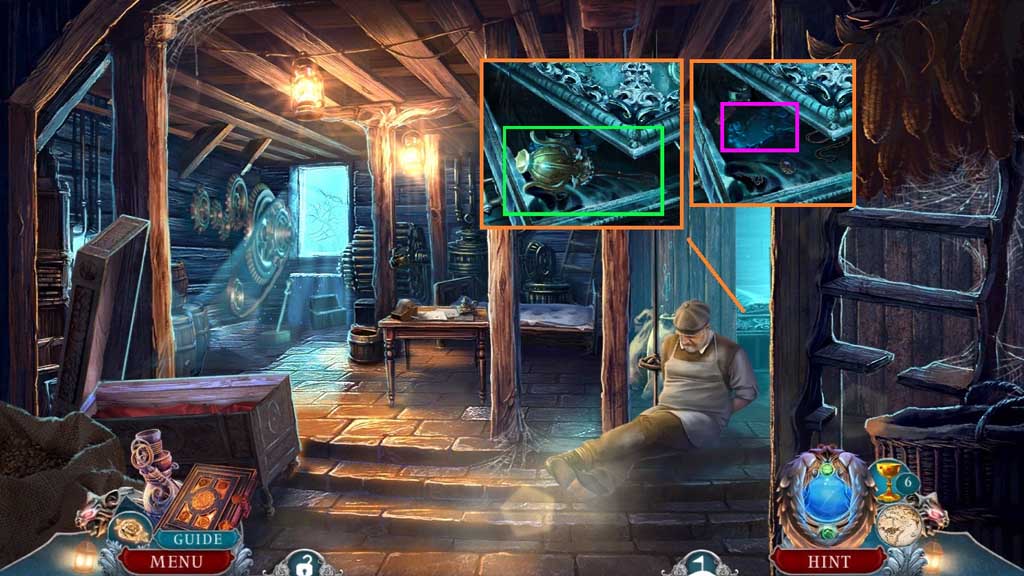
- Collect the glove stretcher.
- Move down once.
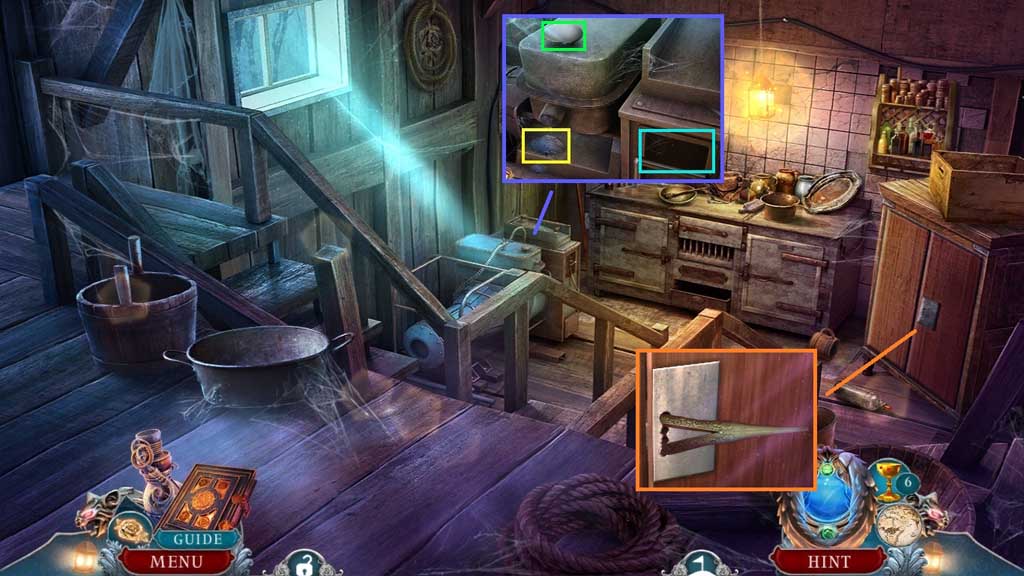
- Select the glove stretcher to adjust the bars; collect the imp statuette.
- Collect the locket and click it 2x’s; collect the revelation tonic recipe and the small key.
- Move to the Basement.
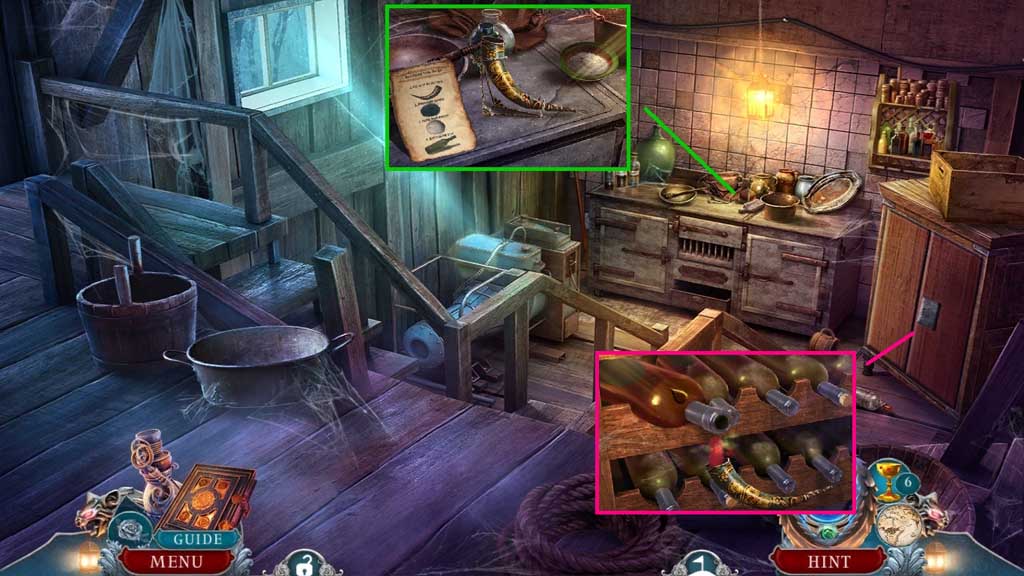
- Click the bottles; click the case.
- Place the revelation tonic recipe, the hollow Capricorn horn and the moonstone powder.
- Pour the powder into the horn; collect the incomplete revelation tonic.
- Insert the small key; click the bottles.
- Zoom into the bottle; select the incomplete revelation tonic to create the revelation tonic.
- Move down once to the Manor Entrance.
- Select the revelation tonic to use on the plaque.
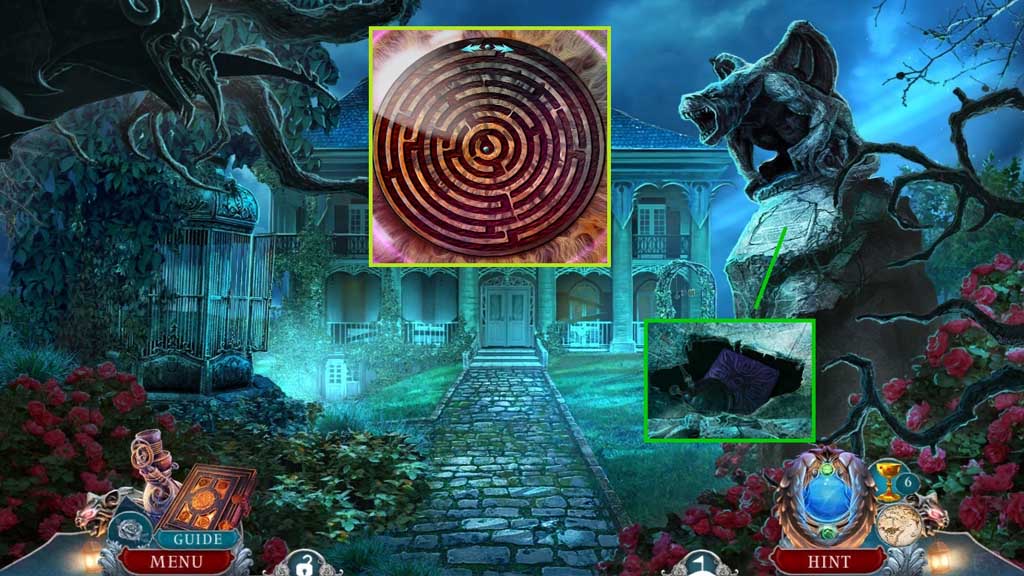
- Collect the Jupiter moon model and the wooden carving to trigger a mini game.
- Solve the game by guiding the ball to the center of the maze.
- Use the following sequence to solve: left – down – left – down – right – down – right – down – right – down – right – down – left – down – left – down.
- Move ahead.
General Information & Tips
Chapter One: Aboard the Steamboat
Chapter Two: Entering Eastmire
Chapter Three: Town Hall Tour
Chapter Four: The Crypt
Chapter Five: The Manor
Ask for help in the comments below!
Chapter One: Aboard the Steamboat
Chapter Two: Entering Eastmire
Chapter Three: Town Hall Tour
Chapter Four: The Crypt
Chapter Five: The Manor
Ask for help in the comments below!