Mystery Trackers: The Four Aces: Chapter Two: The Dead End Street
Our Mystery Trackers Four Aces Walkthrough is the detailed dossier you need to help solve the mysteries plaguing the city of Brightfield. After several bizarre animal attacks, the city is being evacuated, leaving the streets ready for your investigation. It doesn't take long to see that something is seriously wrong in Brightfield, and it's going to take all your detective skills to unearth who is behind this dastardly scheme. Using the detailed instructions and custom screenshots in our Mystery Trackers Walkthrough, you'll have no problem sleuthing out the real villains in this exciting new addition to the Mystery Trackers franchise.
General Info and Tips
Chapter One: Brightfield
Chapter Two: The Dead End Street
Chapter Three: Enter the Post Office
Chapter Four: Enter the Chapel
Chapter Five: Enter the Sewer
Chapter Six: Enter into the Museum Office
Chapter Seven: Gone to the Heliport
Chapter Eight: Enter into the Bunker Office
Bonus Game
Ask for help in the comments below!
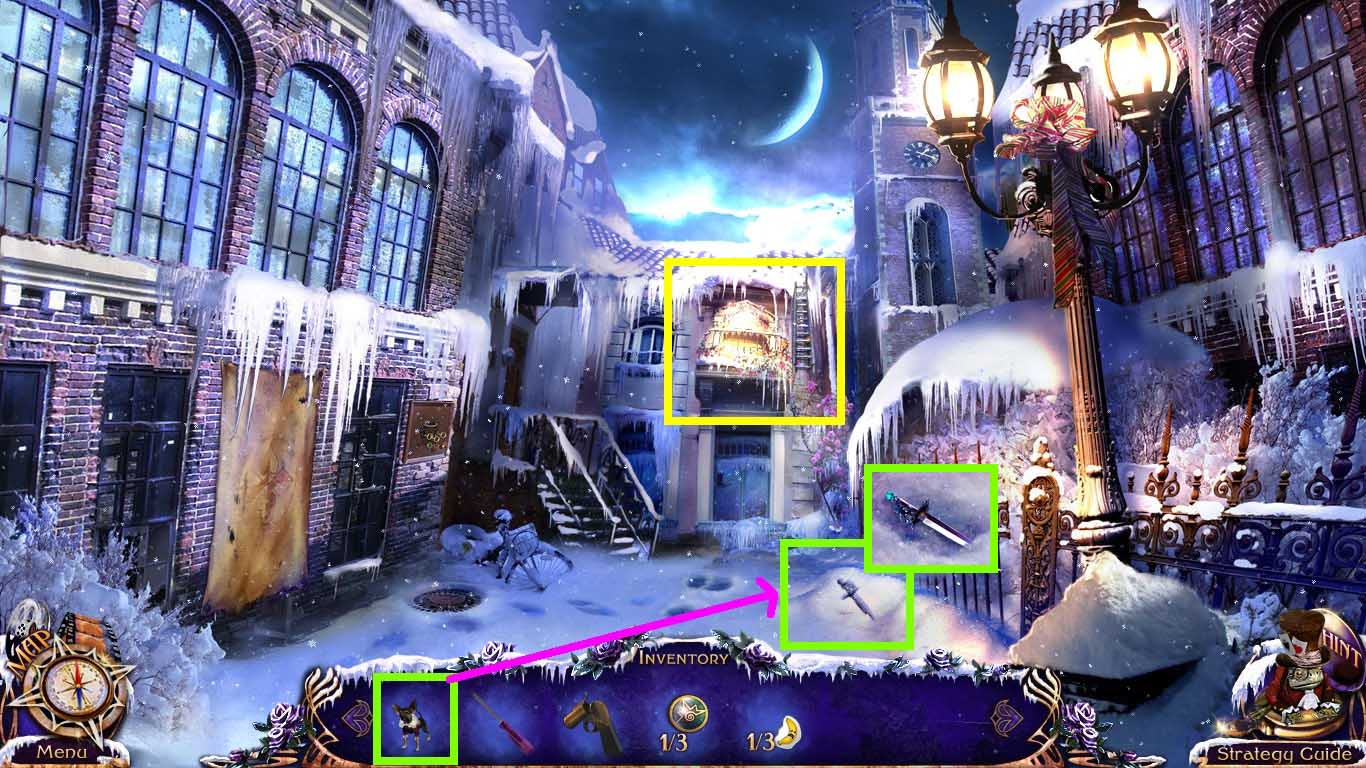
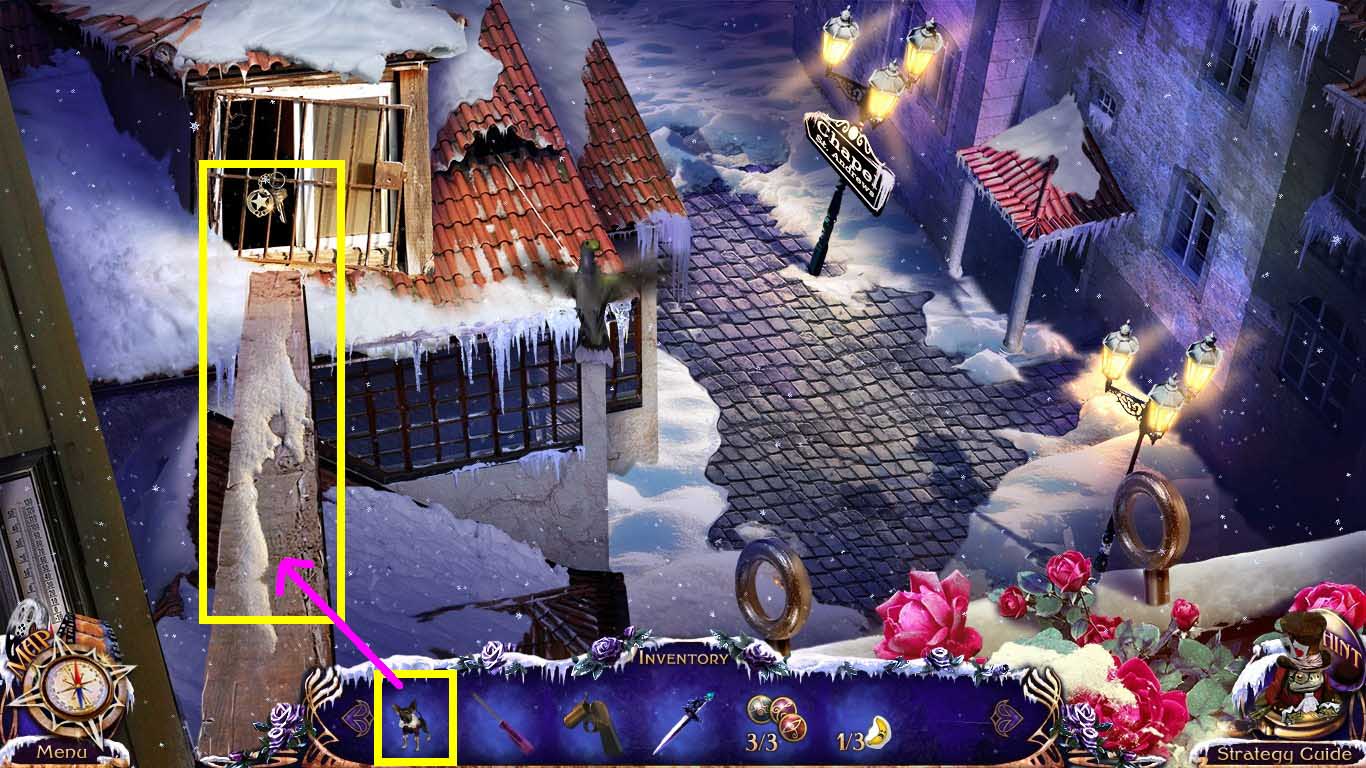
- Click on the balcony marked in yellow.
- Click the snow to zoom in.
- Remove the snow with the elf.
- Take the dagger.
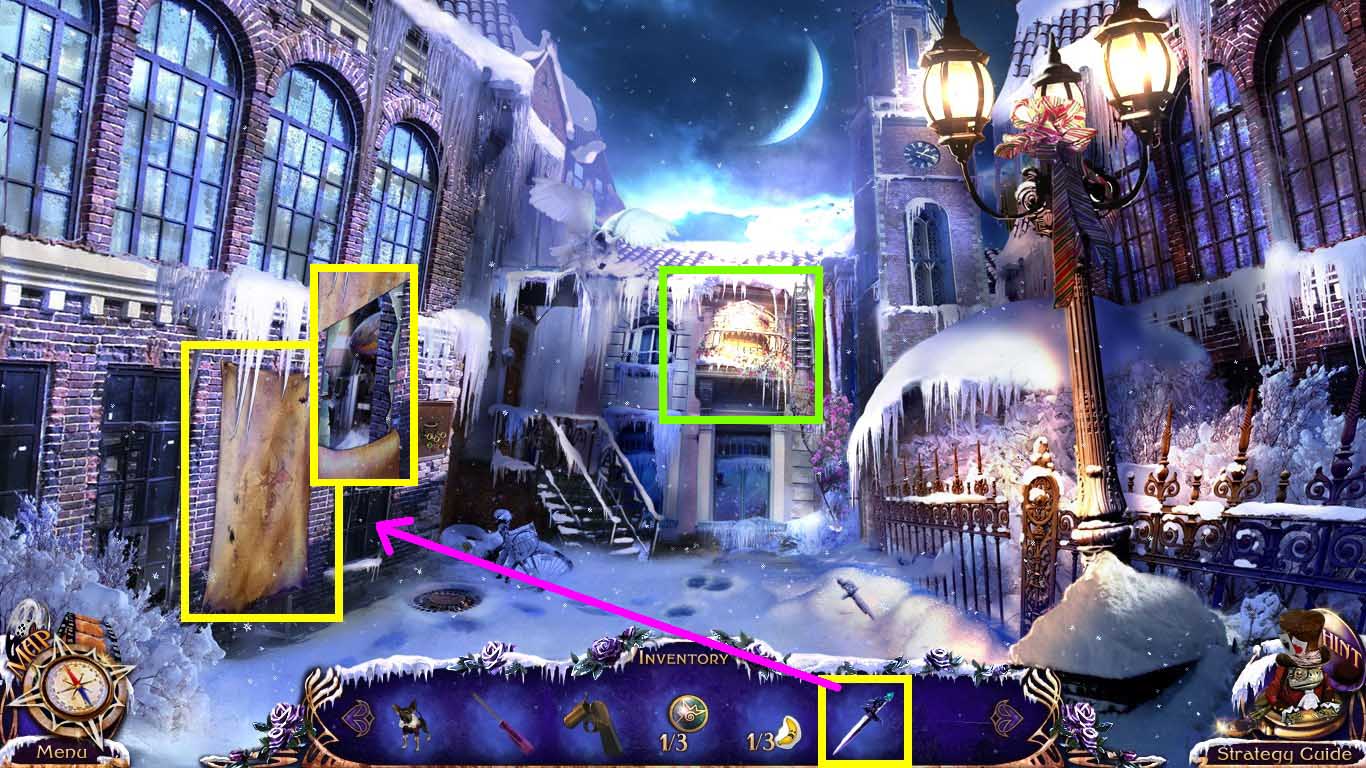
- Click the covered window to zoom in.
- Use the dagger to cut the cloth.
- Click the balcony to zoom in.
- Lower the ladder.
- Go up the ladder.

- Click the safe to zoom in.
- Move the keys left to right in the following order:
- Red – Yellow – Green
- Take the 50 chips.
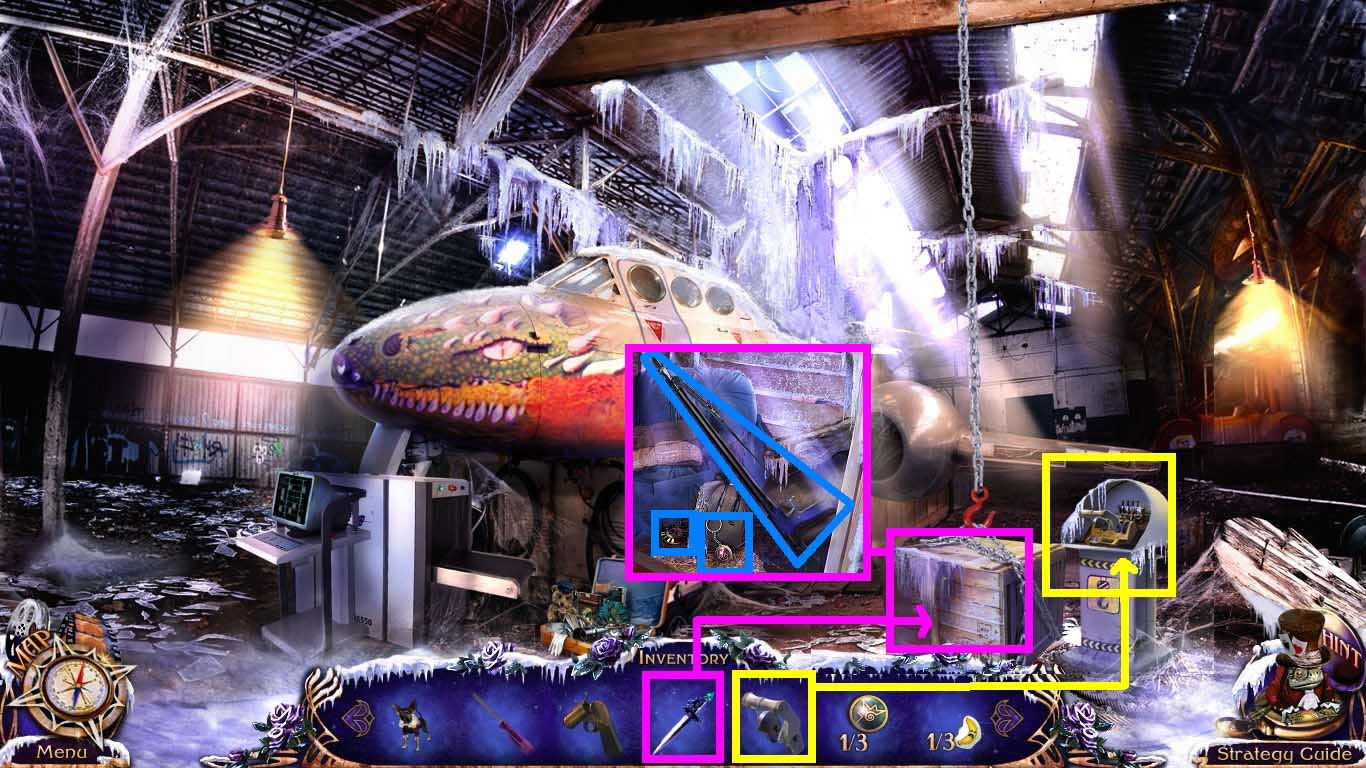
- Take a left into the hanger.

- Click the control panel to zoom in.
- Collect the access card and chip.
- Click the baggage scanner and insert the access card into the slot.
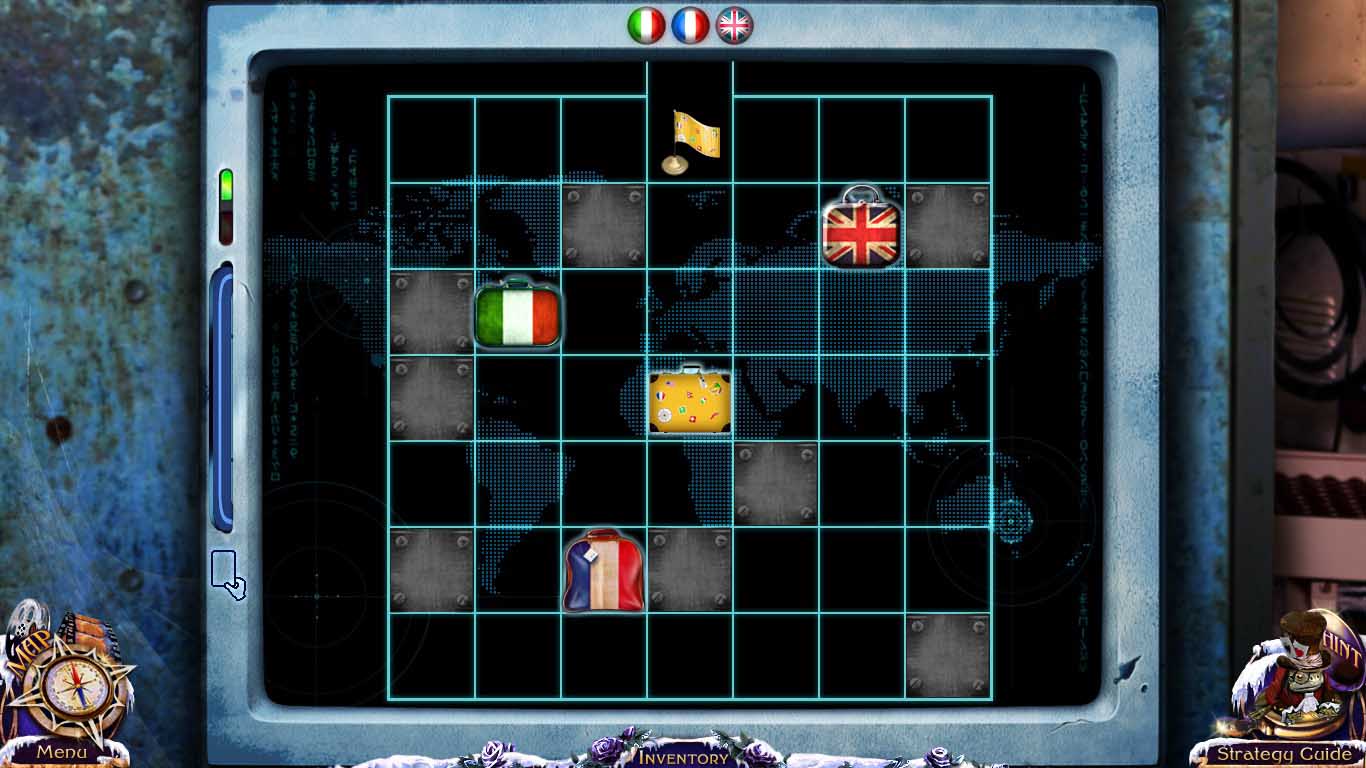
- Solutions vary.
- Solve as shown above.
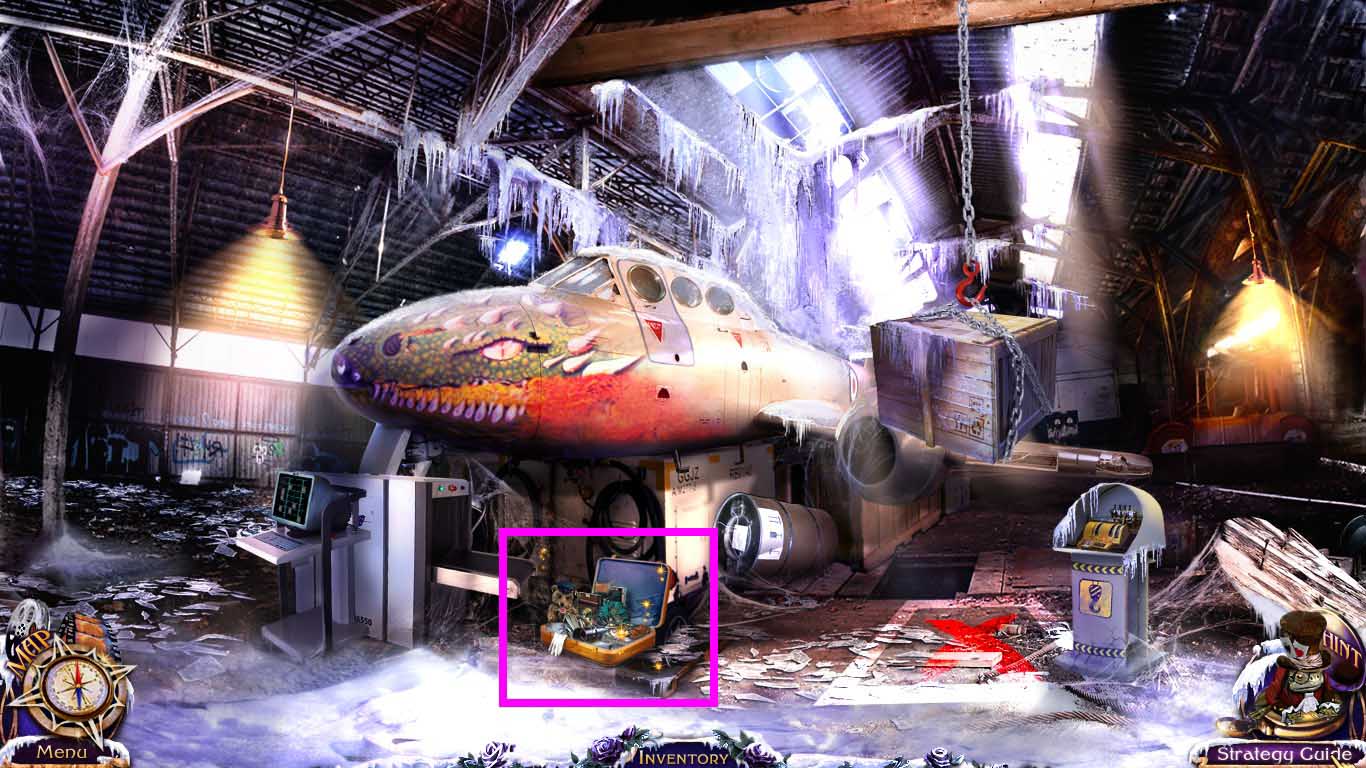
- Click the suitcase to access the hidden objects area.
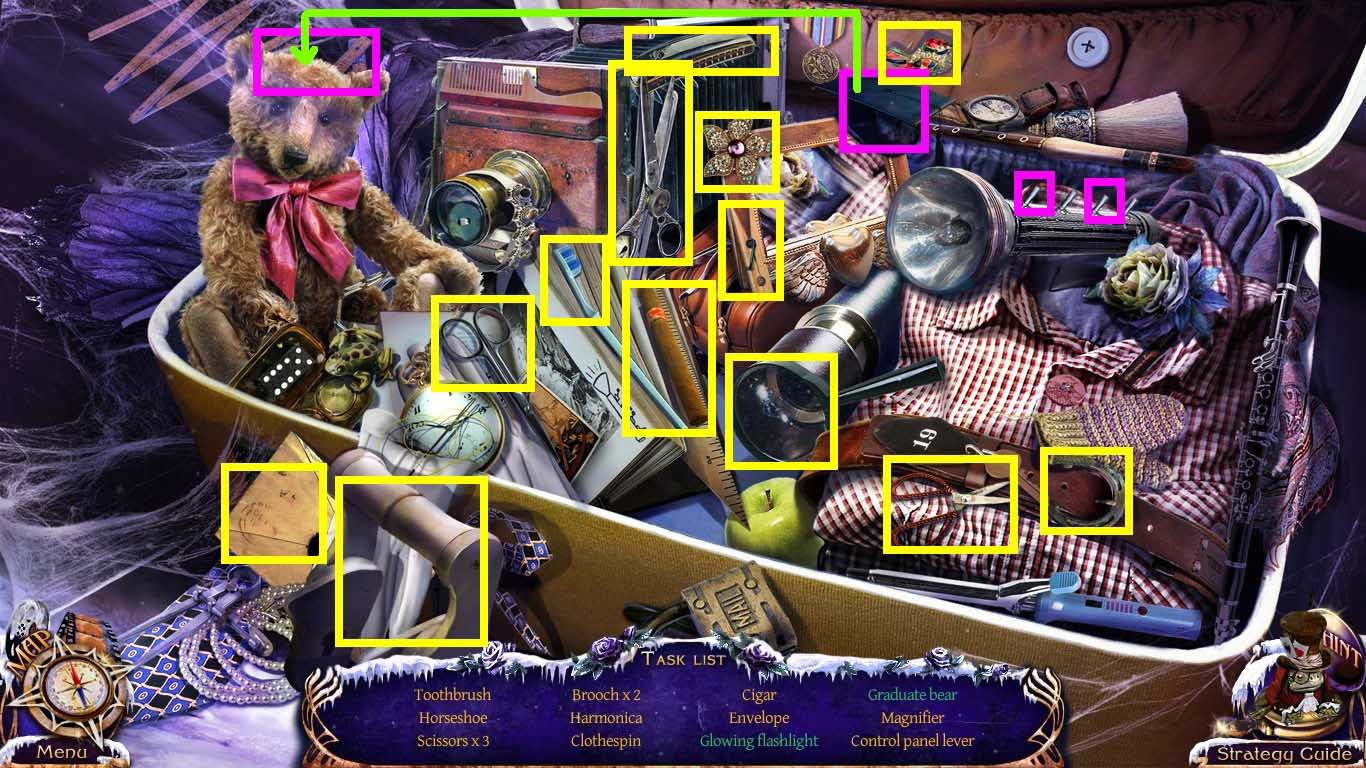
- Find the listed items.
- Collect the control panel lever.
- Click the control panel to zoom in.
- Insert the control panel lever.
- Click the lever.
- Click the box.
- Use the dagger to cut the box open.
- Collect the chip, the 2/3 post office trinket and the loaded spear gun.
- Go to the dead end.
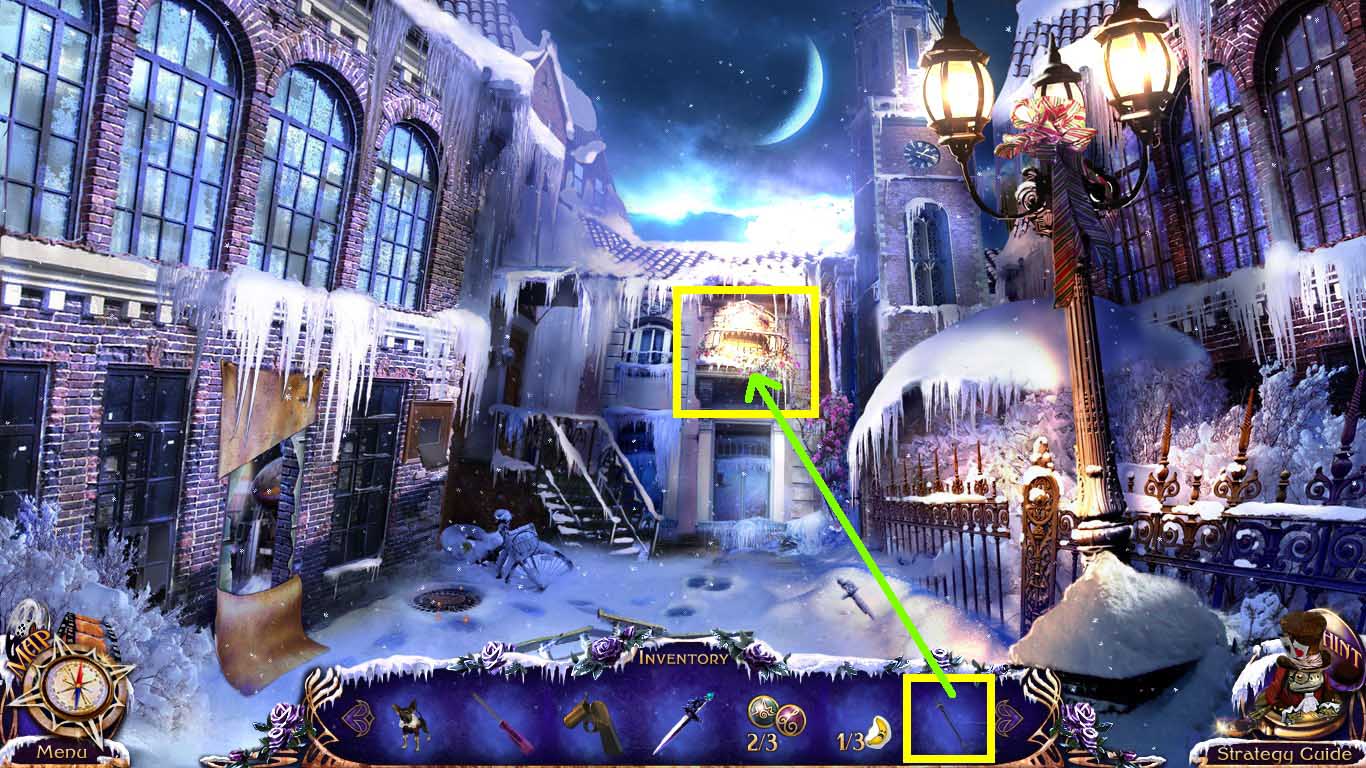
- Use the spear gun on the balcony.
- Go into the lair.
- Click anywhere to trigger a cut scene.
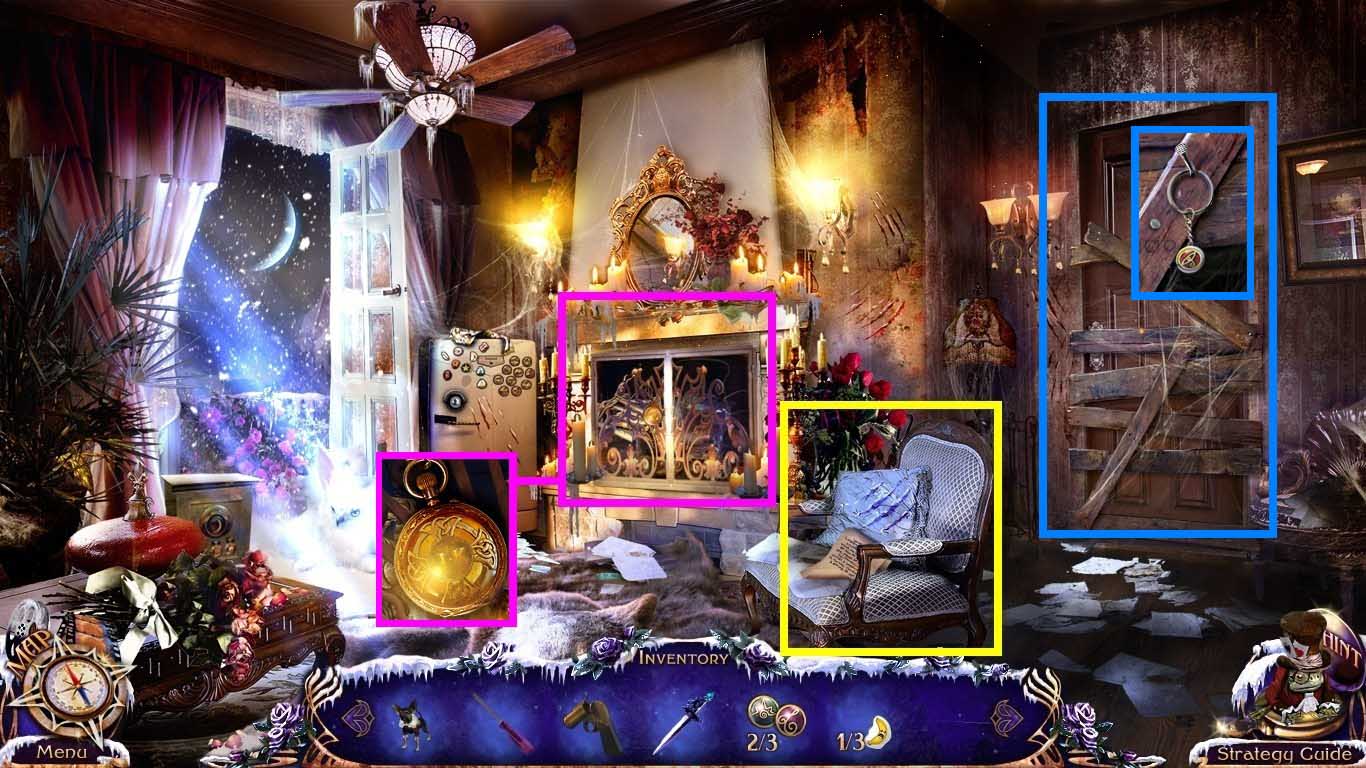
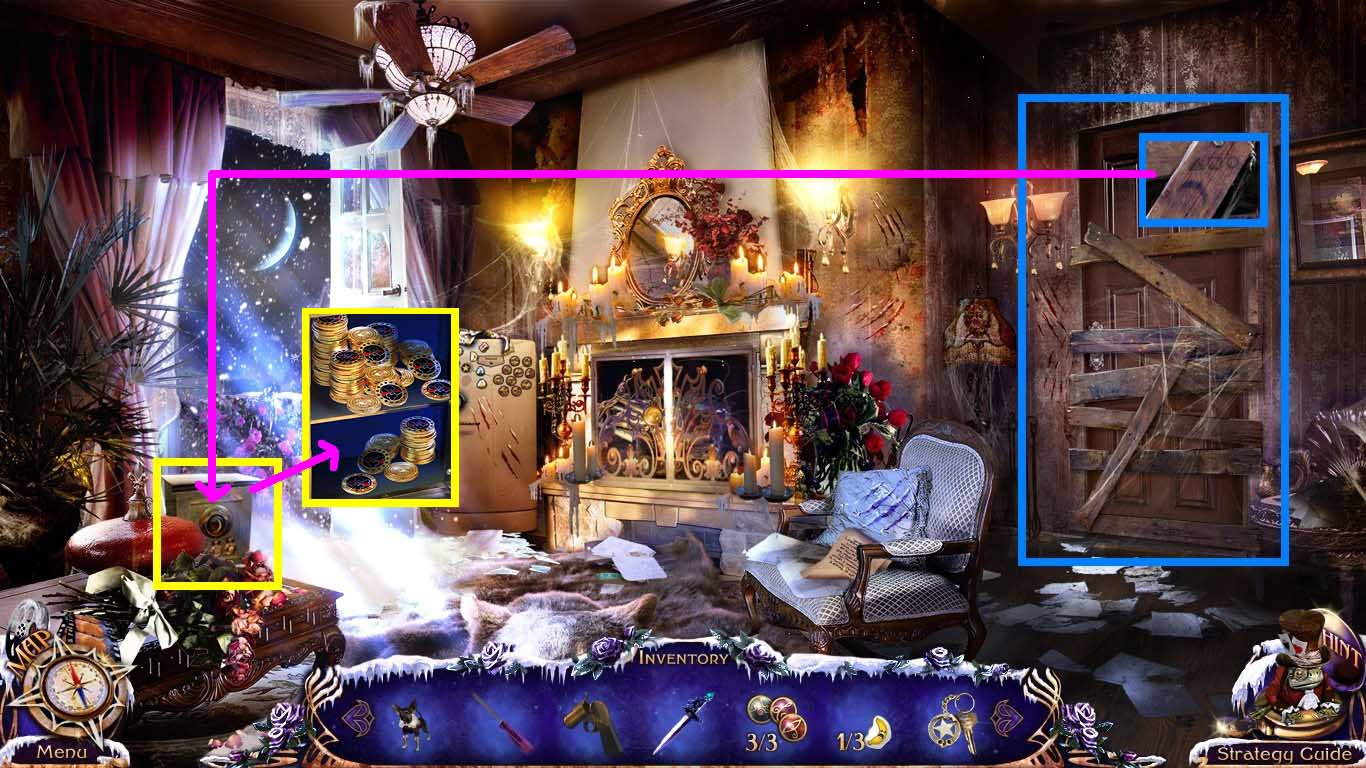
- Click the chair to zoom in.
- Read the letter.
- Click the fireplace to zoom in.
- Click the medallion to trigger a cut scene.
- Click the blocked door.
- Collect 3/3 post office trinket.
- Turn left and go to the balcony.
- Use Elf to uncover the wooden board.
- Take the police car key.
- Go to the lair.
- Click the blocked door to zoom in.
- Notice the code.
- Click the safe to zoom in.
- Click the buttons to adjust the symbols.
- Press the code from the blocked door.
- Collect the 50 chips.
- Go to the side street.
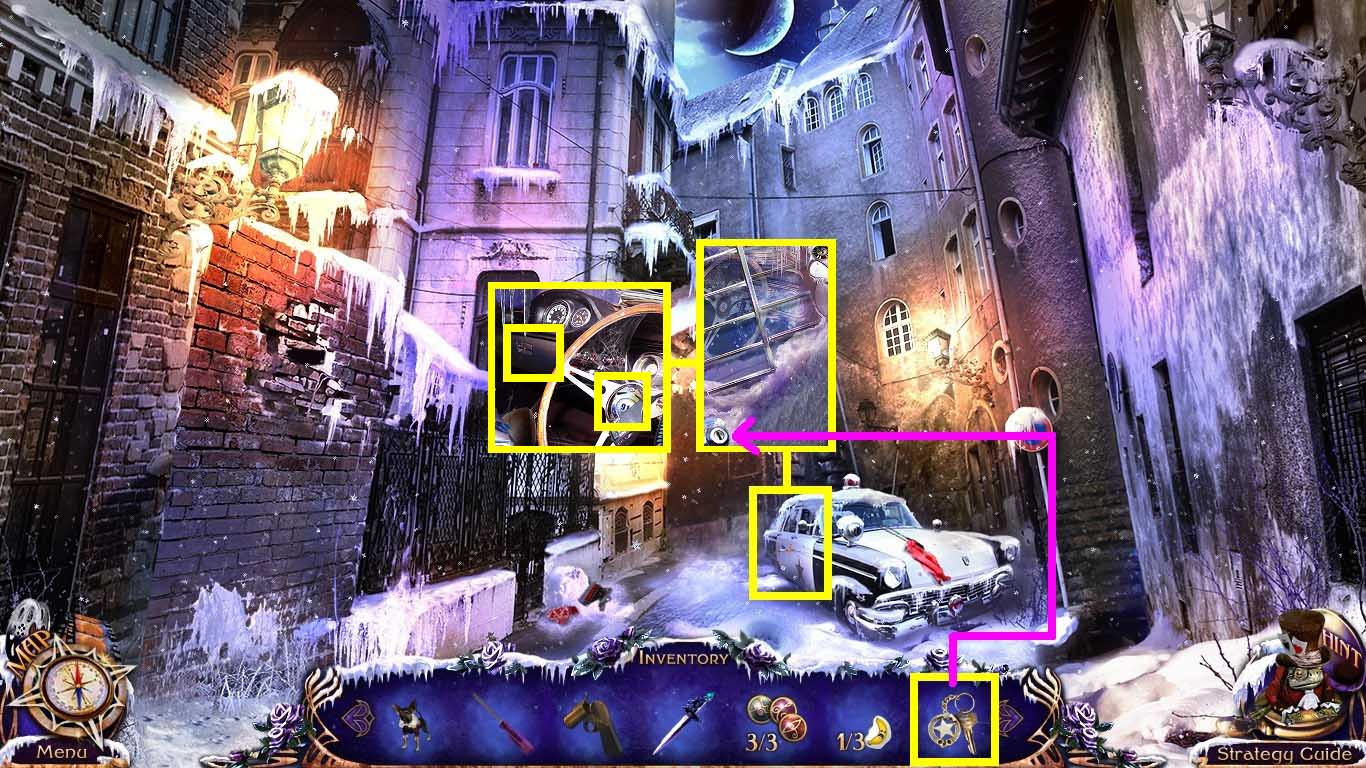
- Click the back of the police car to zoom in.
- Collect the chip.
- Insert the police car key into the lock and click it once.
- Go to the police car on the right.
- Collect the police badge and trigger a cut scene.
- Click the compartment to zoom in.
- Click it open and collect the 3 chips.

- Click the safe to zoom in.
- Press the code V – III – IX – X.
- Collect the 50 chips.
- Go to the fire station.
![]()
- Click the safe to zoom in.
- Insert the police badge into the slot.
- Press in the code 9 – 1 – 1.
- Click the switch to open the safe.
- Collect the oxygen mask, the wolf paw medallion, and the 50 chips behind the oxygen mask.
- Go to the crossroads.
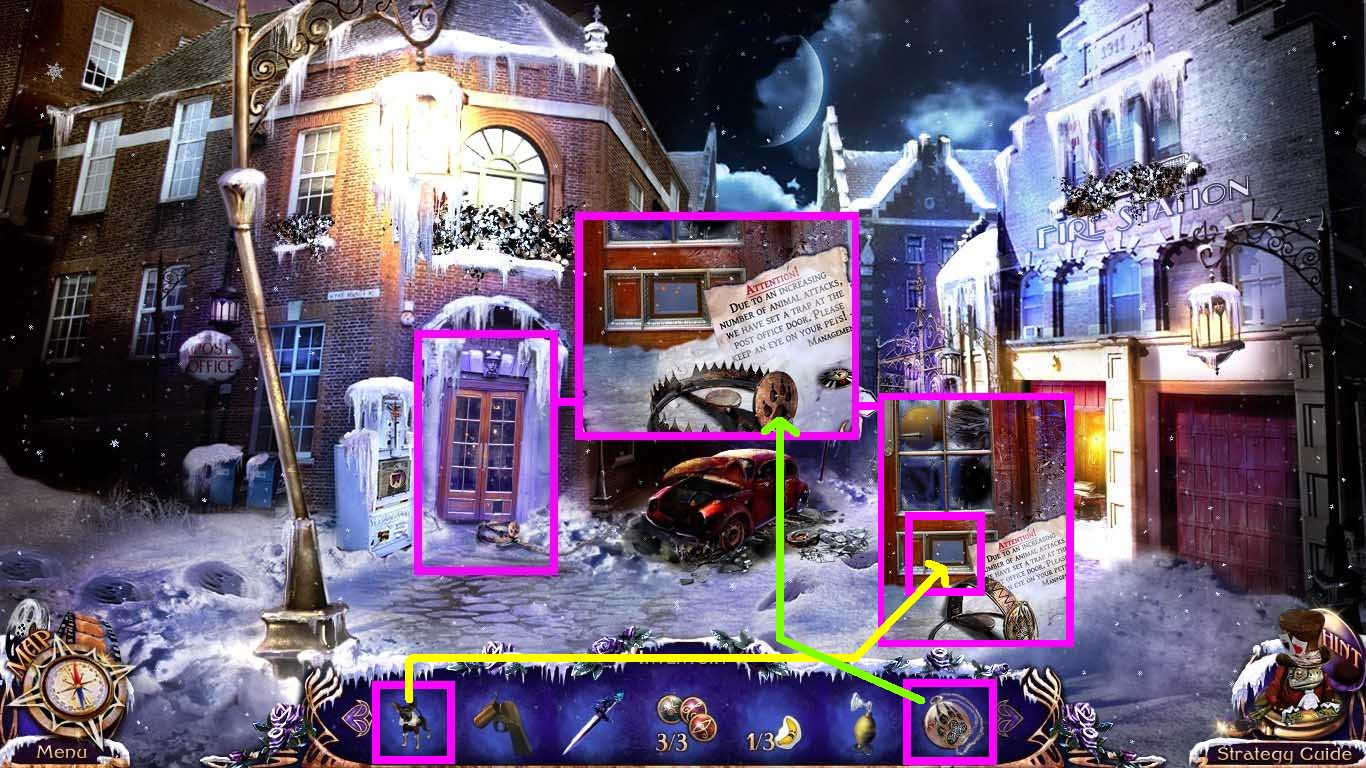
- Click the post office entrance to zoom in.
- Take the chip.
- Disarm the trap by using the wolf paw medallion.
- Send Elf through the doggie door.
- Go into the post office.
General Info and Tips
Chapter One: Brightfield
Chapter Two: The Dead End Street
Chapter Three: Enter the Post Office
Chapter Four: Enter the Chapel
Chapter Five: Enter the Sewer
Chapter Six: Enter into the Museum Office
Chapter Seven: Gone to the Heliport
Chapter Eight: Enter into the Bunker Office
Bonus Game
Ask for help in the comments below!
Chapter One: Brightfield
Chapter Two: The Dead End Street
Chapter Three: Enter the Post Office
Chapter Four: Enter the Chapel
Chapter Five: Enter the Sewer
Chapter Six: Enter into the Museum Office
Chapter Seven: Gone to the Heliport
Chapter Eight: Enter into the Bunker Office
Bonus Game
Ask for help in the comments below!