
Living Legends: Frozen Beauty: Chapter Six: Strolling the Lakeside
Our Living Legends Frozen Beauty Walkthrough is the perfect place to go for advice as you begin your journey to free your sister from the clutches of the evil Queen. Rely on our custom screenshots, carefully marked with all key item locations, our simple and easy-to-understand puzzle solutions, and our step-by-step instructions so you can tell this evil witch that she messed with the wrong family because there is no way you're letting her hurt your baby sister.
General Information & Tips
Chapter One: Walking the Riverside
Chapter Two: Oh Gnome!
Chapter Three: The Forest
Chapter Four: Gnomes Gone Wild
Chapter Five: Girls, Girls, Girls
Chapter Six: Strolling the Lakeside
Chapter Seven: Oh, Mother!
Chapter Eight: Castle Adventures
Chapter Nine: The Queen
Ask for help in the comments below!
- Click the hammer; collect the hammer.
- Move ahead.
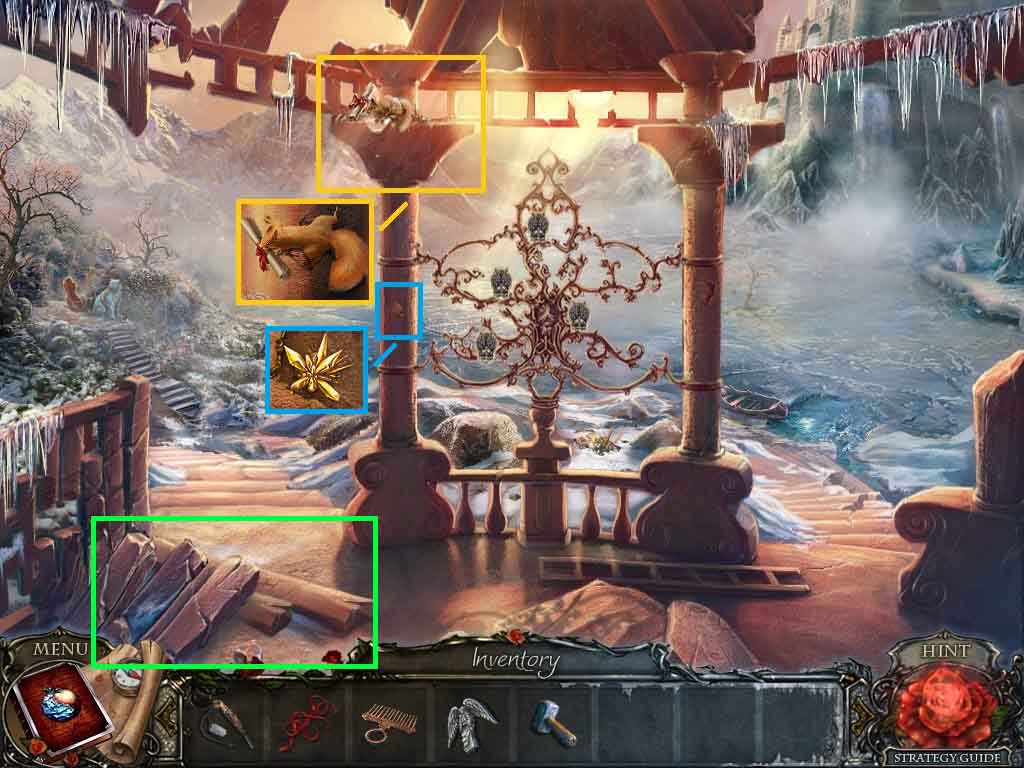
- Click the pillar and toss the nuts to the top and send the squirrel after them.
- Click the squirrel; collect the scheme and the squirrel.
- Click the flake; collect the yellow crystal.
- Click the pile of pillars 3 times; collect the swan neck.
- Move up the path on the left.
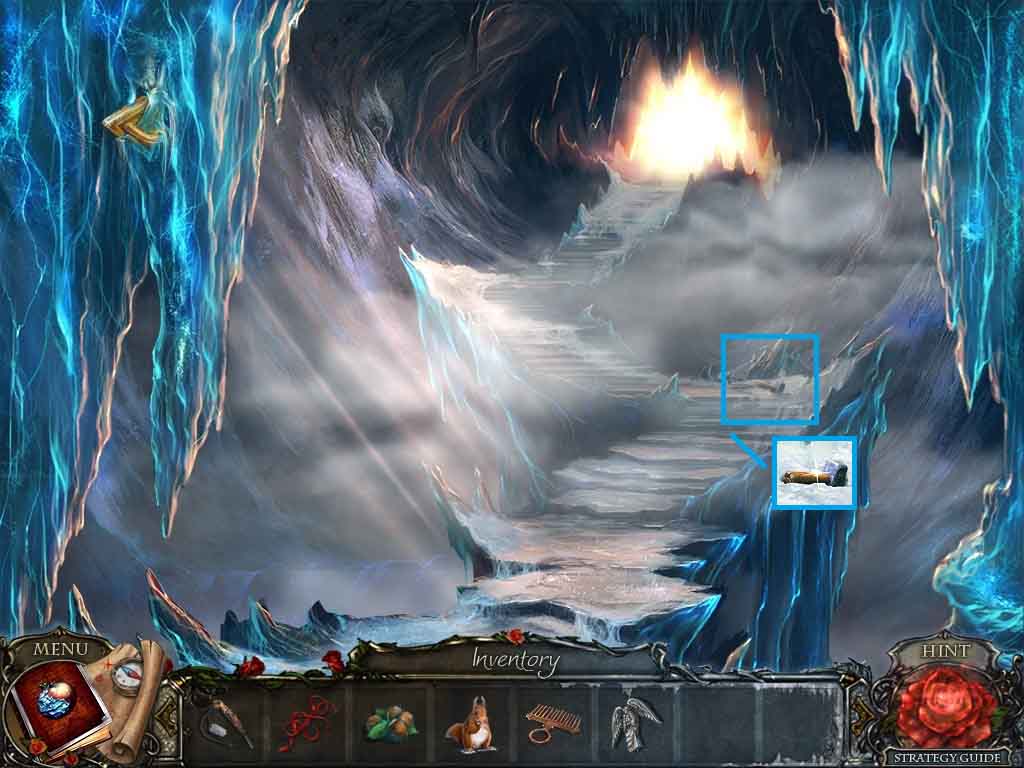
- Click the sleigh to access the hidden objects area.

- Find the listed items.
- Insert the nuts into the cracker; collect the cracked nuts.
- Insert the key into the padlock; collect the ice pick.
- Move back once and move ahead on the right.
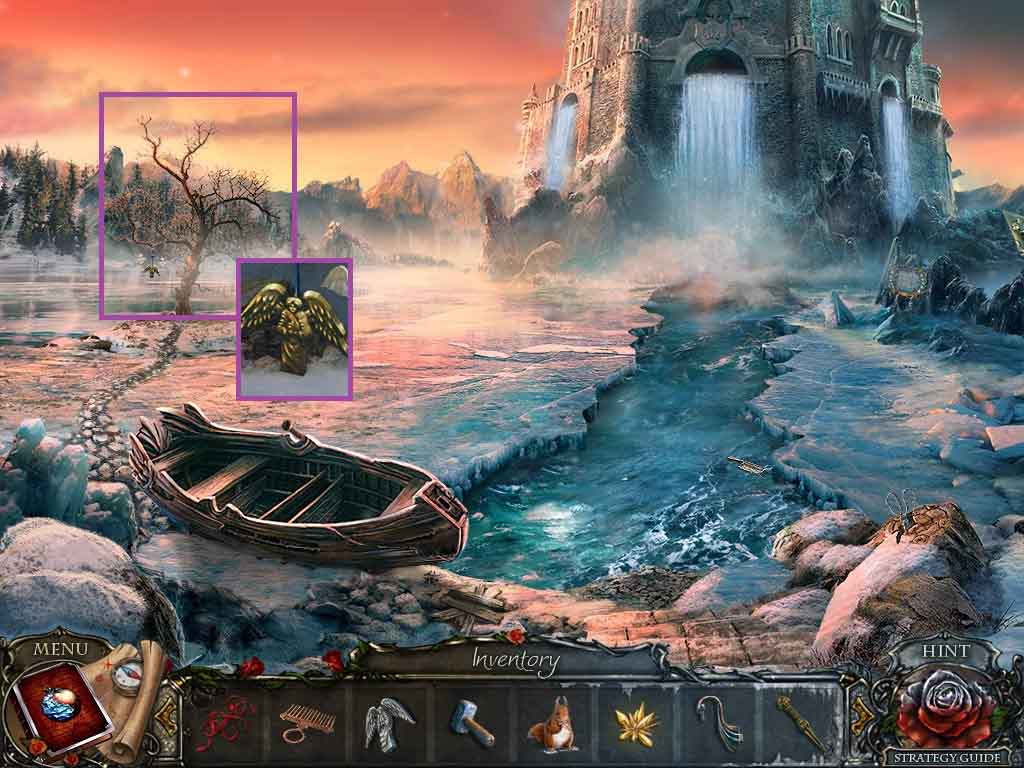
- Click the tree; collect the 2nd angel figure.
- Move back 2 times.
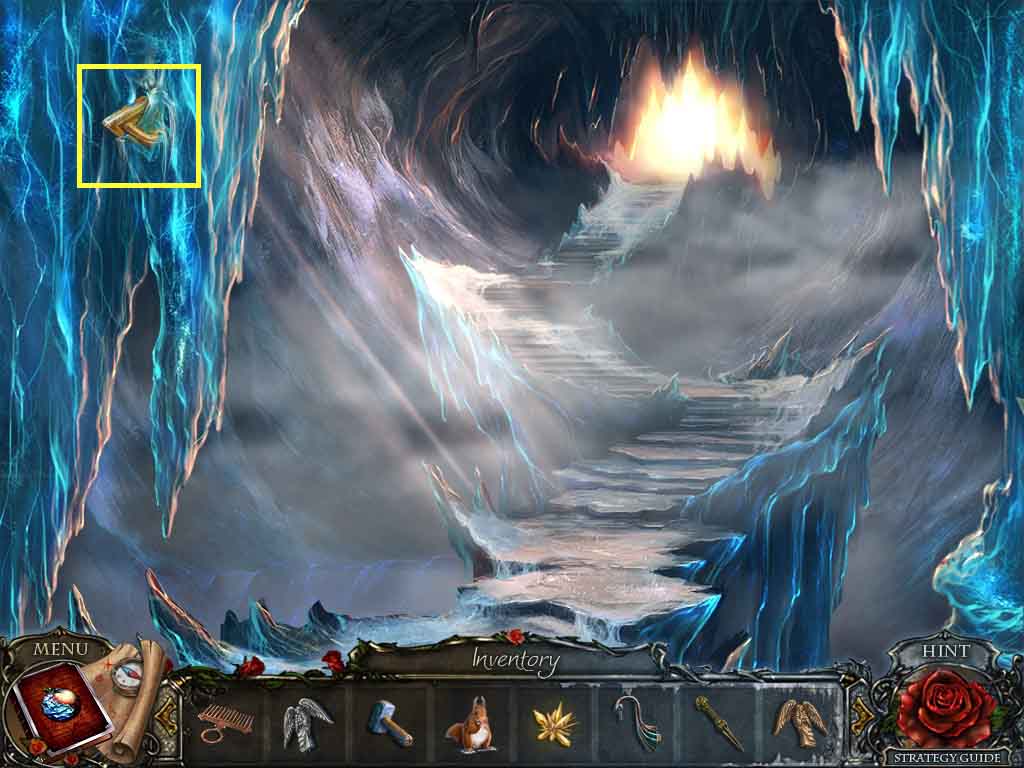
- Click the handle.
- Select the ice pick and use it to collect the triangular handle.
- Move to the Mirror Chamber.

- Click the compartment on the right and insert the triangular handle and click it.
- Collect the 3rd angel figure and the squirrel emblem.
- Move to the Frozen Pyramid.
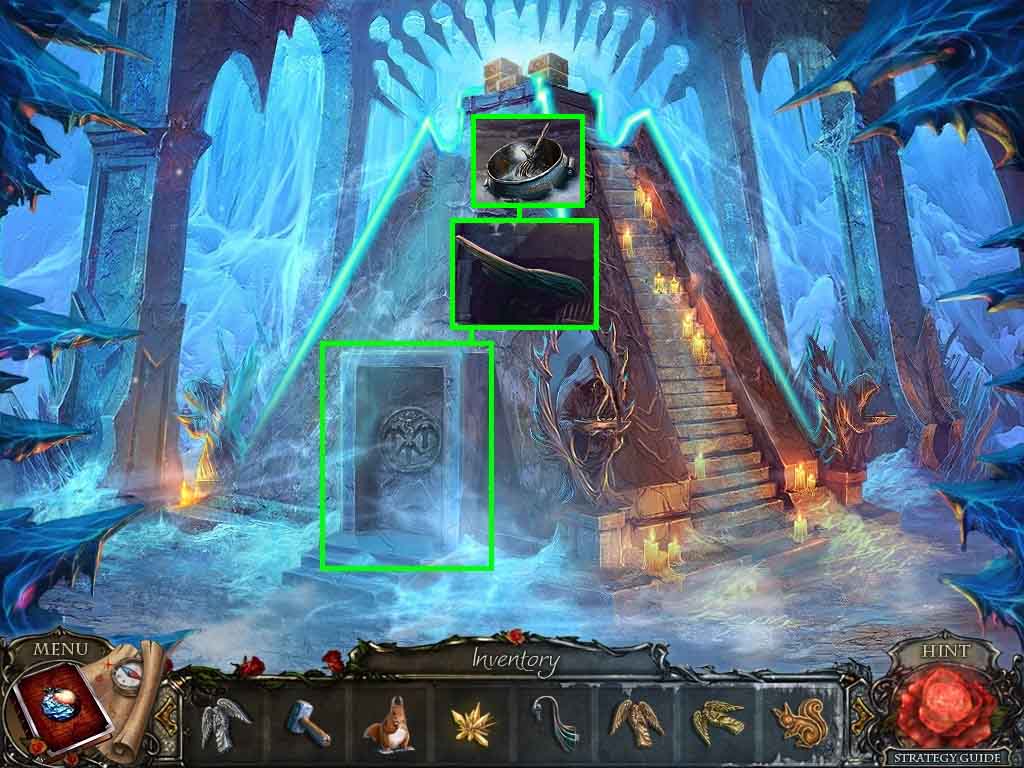
- Click the pyramid door and insert the 3 angel figures.
- Zoom into the pyramid and collect the swan wing and the vat.
- Move to the Bear Statue.
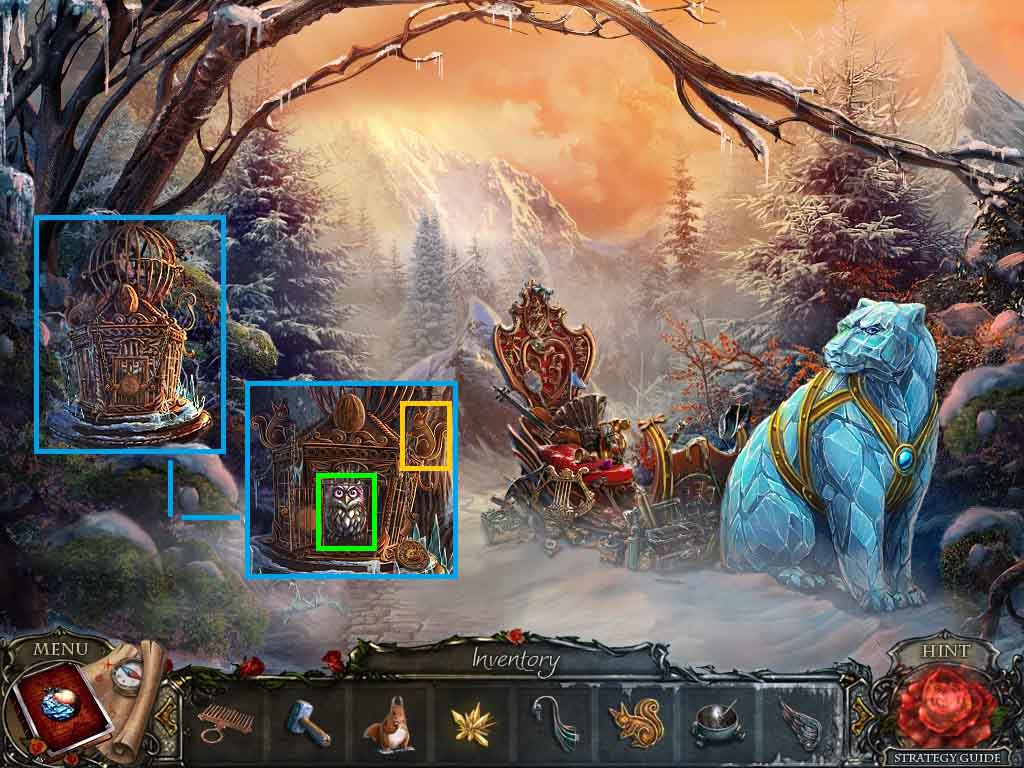
- Click the cage and insert the squirrel emblem.
- Click the cage door and collect the owl.
- Move to the Lake Shore.
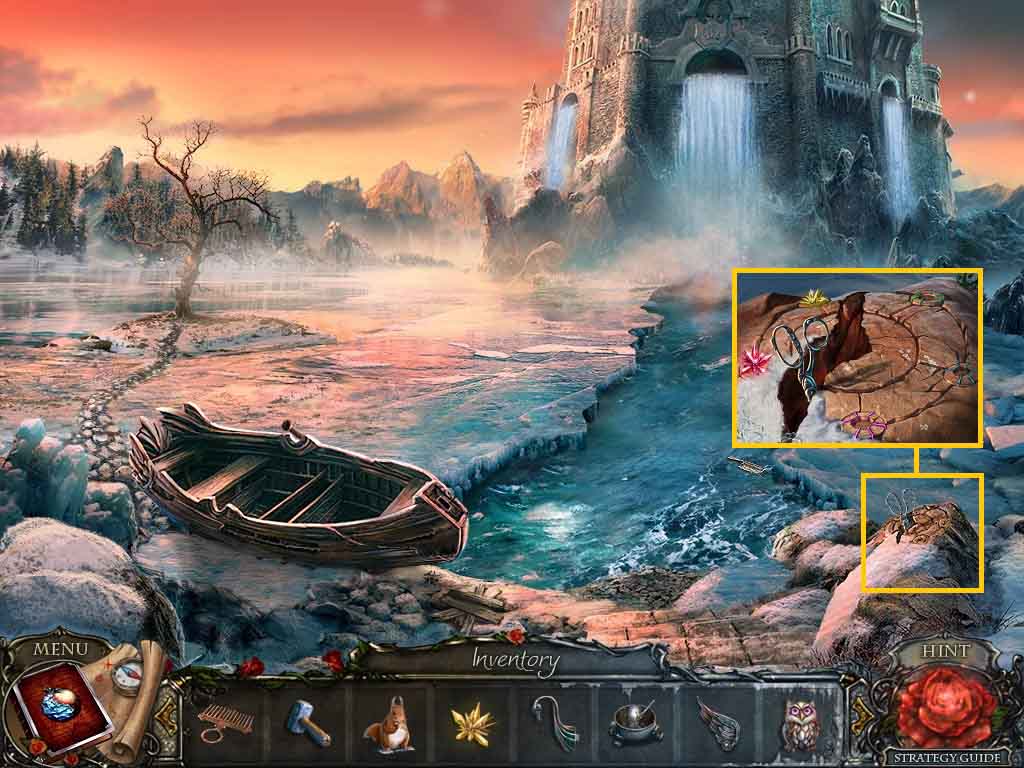
- Click the stone and insert the yellow stone; collect the scissors.
- Move to the Stone Bridge.
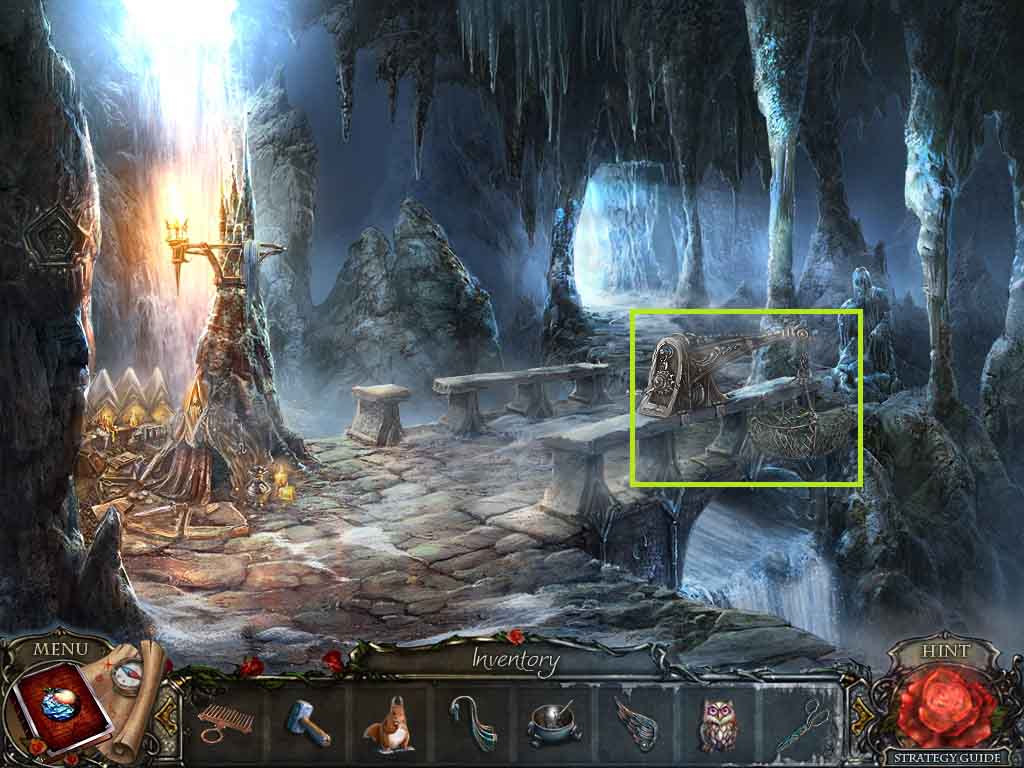
- Click the crane.
- Select the scissors to cut and collect the net.
- Move to the Cave Mouth.
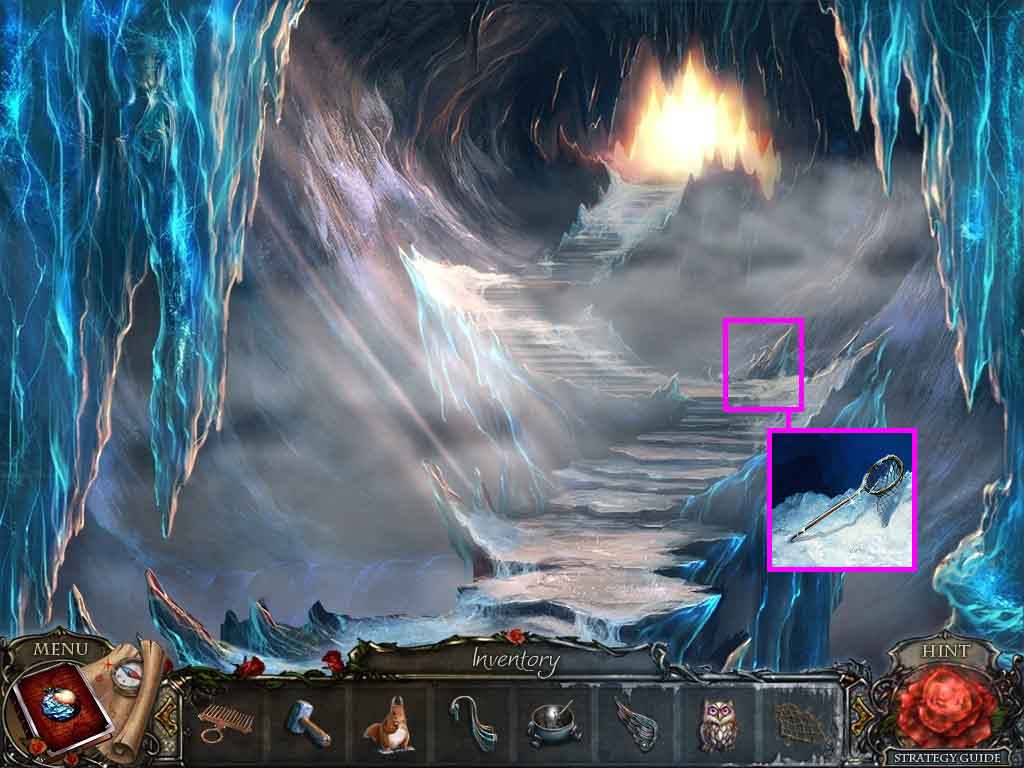
- Click the broken net and replace the net; collect the scoop net.
- Move to the Lake Shore.
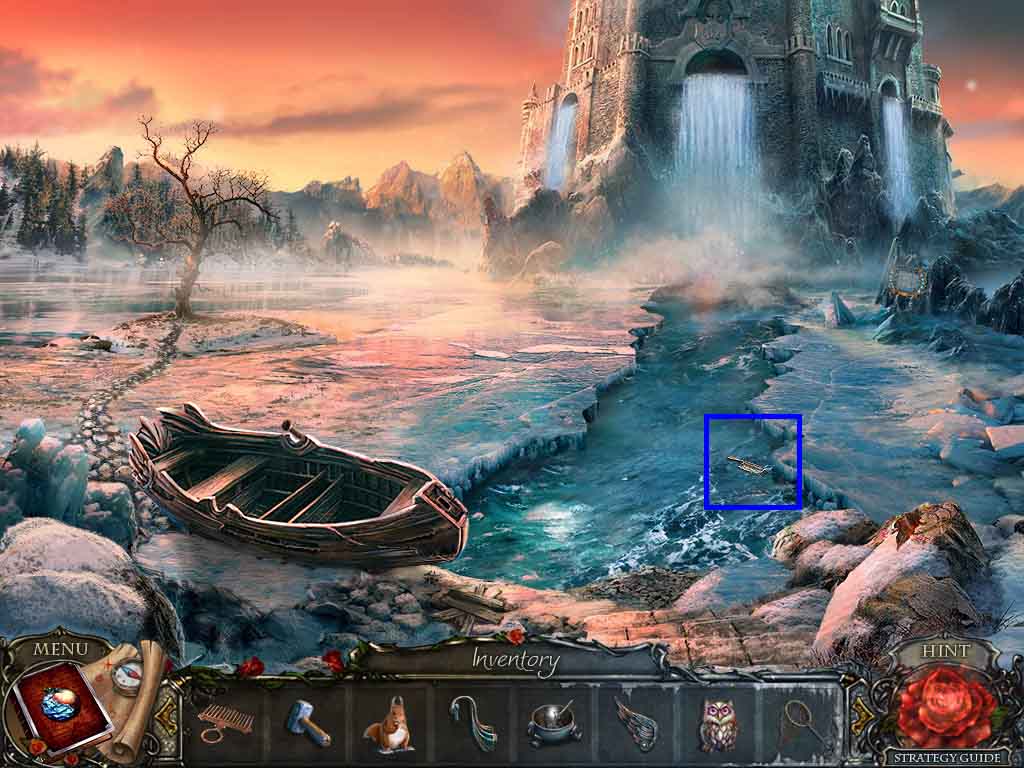
- Click the water and dip the scoop net into it; collect the brush.
- Move to the Bear Statue.
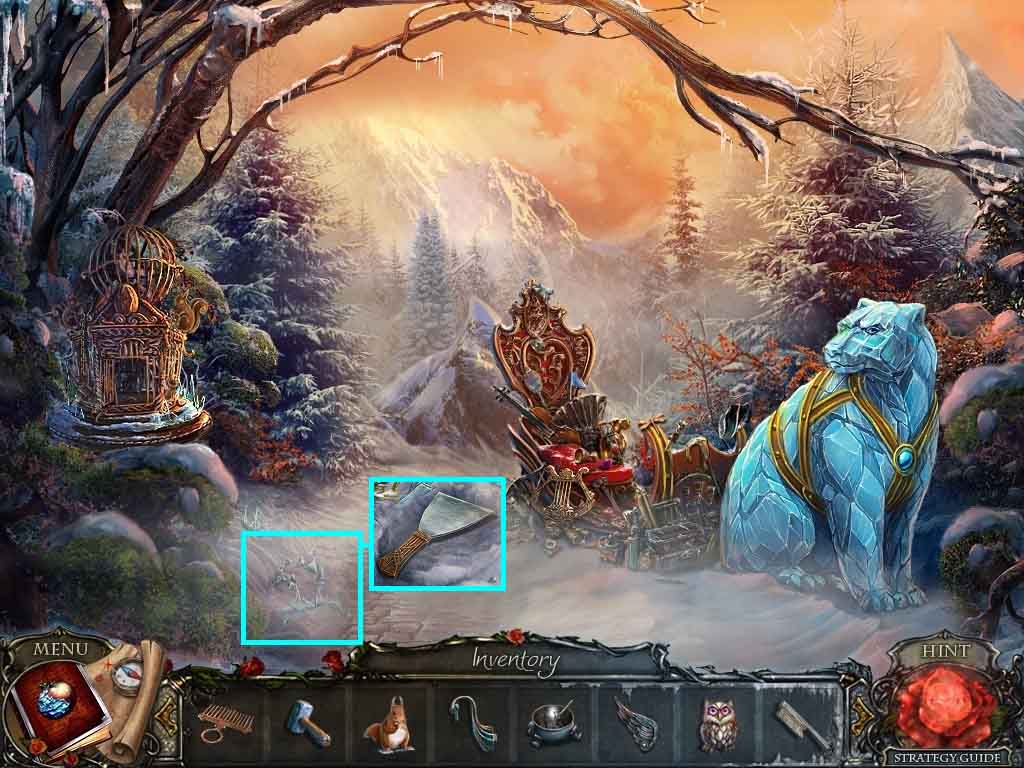
- Click the glass shards.
- Select the brush and use it on the shards 2 times; collect the scraper.
- Move to the Lake Shore.
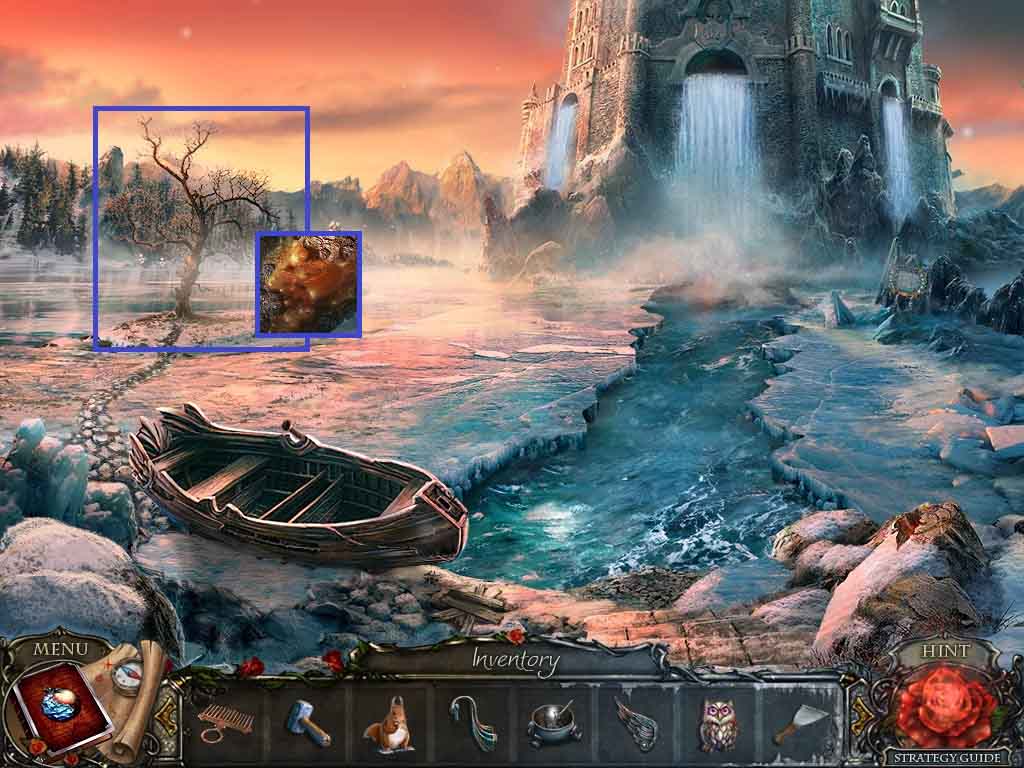
- Click the tree.
- Select the scraper to collect the resin.
- Move to the Mirror Chamber.
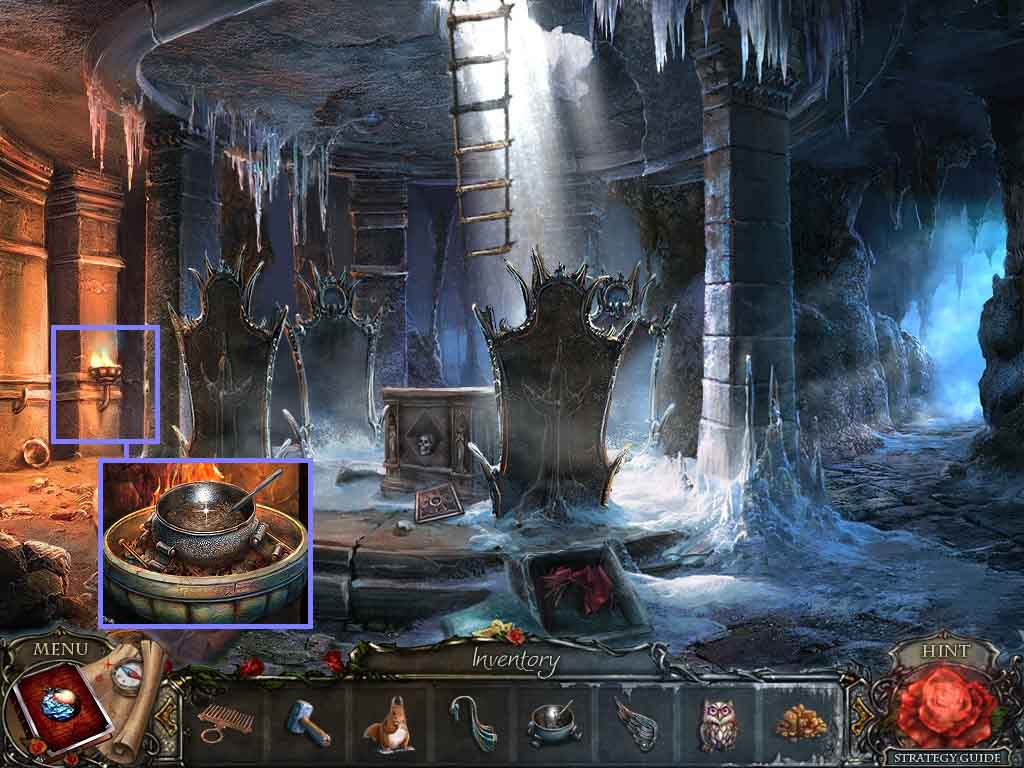
- Click the brazier and place the vat and resin onto it; collect the vat with resin.
- Move to the Lake Shore.

- Click the boat and place the following items down: the hammer, swan neck, swan wing, and vat with resin to trigger a puzzle.
- Select the resin to use on the bow.
- Place the items as follows onto the boat interior: boards, nails and select the hammer to secure them.
- Place the swan neck and the swan wing onto the bow.
- Click the boat and move ahead on it; collect the skull.
- Move to the Stone Bridge.

- Click the stone on the left and insert the skull; collect the 2nd owl.
- Move to the Summer Gazebo.
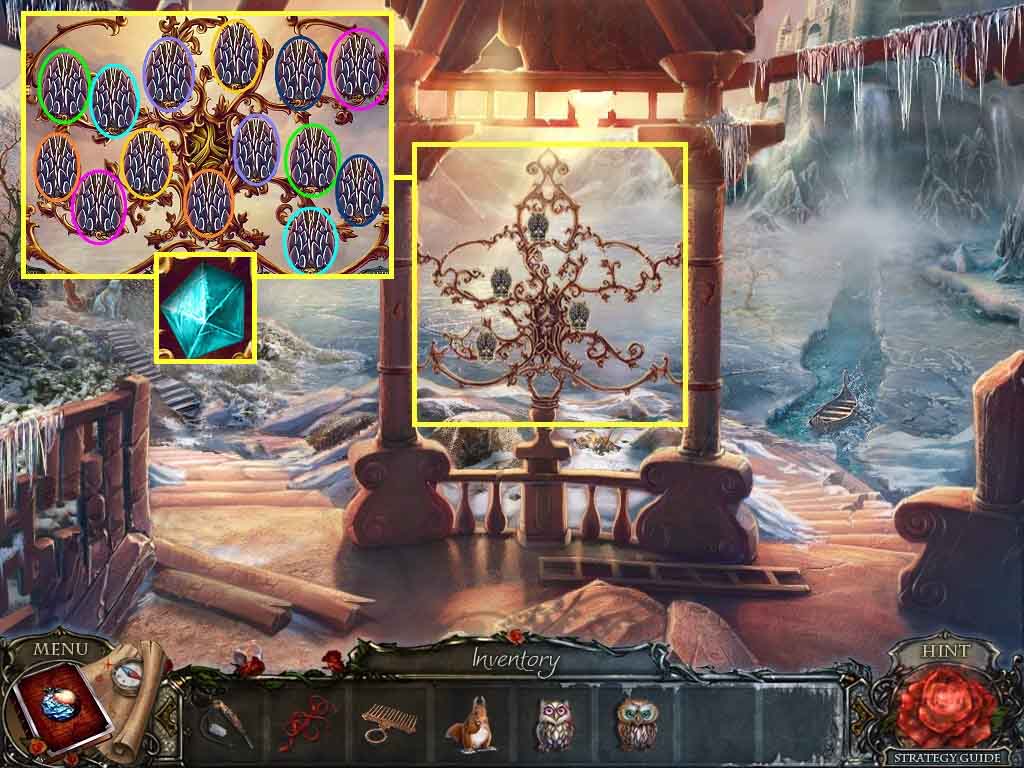
- Click the owls and insert the 2 owls to trigger a puzzle.
- Select the matching pairs.
- Collect the gem.
- Move to the Waterfall Entrance.
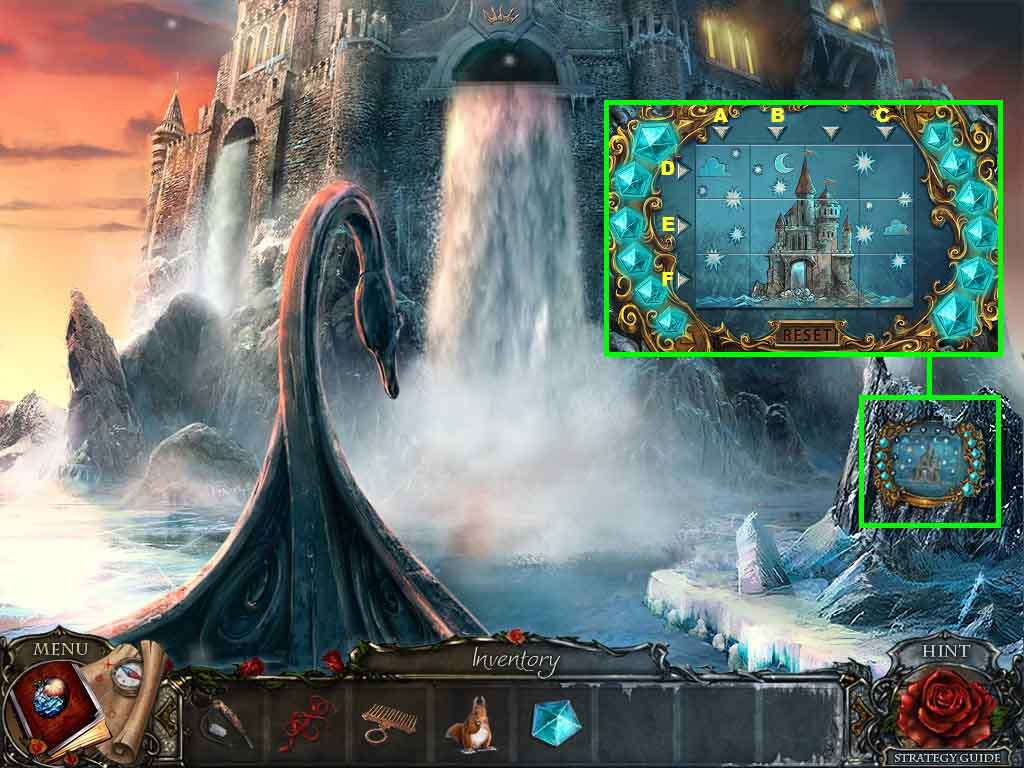
- Click the stone and insert the gem to trigger a puzzle.
- Click the tiles to collect 12 stars.
- Click the arrows in the following order to solve.
- D – B – C – E – A – F
- Move ahead.
General Information & Tips
Chapter One: Walking the Riverside
Chapter Two: Oh Gnome!
Chapter Three: The Forest
Chapter Four: Gnomes Gone Wild
Chapter Five: Girls, Girls, Girls
Chapter Six: Strolling the Lakeside
Chapter Seven: Oh, Mother!
Chapter Eight: Castle Adventures
Chapter Nine: The Queen
Ask for help in the comments below!
Chapter One: Walking the Riverside
Chapter Two: Oh Gnome!
Chapter Three: The Forest
Chapter Four: Gnomes Gone Wild
Chapter Five: Girls, Girls, Girls
Chapter Six: Strolling the Lakeside
Chapter Seven: Oh, Mother!
Chapter Eight: Castle Adventures
Chapter Nine: The Queen
Ask for help in the comments below!