
Haunted Legends: The Undertaker: Chapter 6: Discovering the Market
Our Haunted Legends The Undertaker Walkthrough will help you survive the current infestation of the undead, as they roam the streets of this once quaint fishing village helping themselves to whatever or whoever gets in their way. With clear chapter-by-chapter instructions and detailed screenshots showing every hidden object scene and puzzle or mini-game you'll encounter, you'll have no trouble discovering the truth behind this mysterious curse.
General Info and Tips
Chapter 1: Introduction to Mrs. Fisher
Chapter 2: Exploring the Underground Crypt
Chapter 3: Inside the Hospital
Chapter 4: Welcome to the Fort
Chapter 5: Bell Tower View
Chapter 6: Discovering the Market
Chapter 7: A Look into the Lighthouse
Chapter 8: Hotel Access
Chapter 9: The End
Bonus Game
Ask for help in the comments below!

- Zoom into the platform.
- Place the fuse, the matches, the gunpowder and the rocket casing down to trigger a puzzle.
- Scrape the casings front with the scraper.
-
Place these items in this specific order onto the casing:
- 1. Place the glue on the rim.
- 2. Place the top on.
- 3. Place the fuse on the top.
- 4. Pour in the gunpowder into the top.
- 5. Place the glue on the side of the canister.
- 6. Put on the side pieces.
- 7. Click the match to light the fuse.
- Go to the roof.
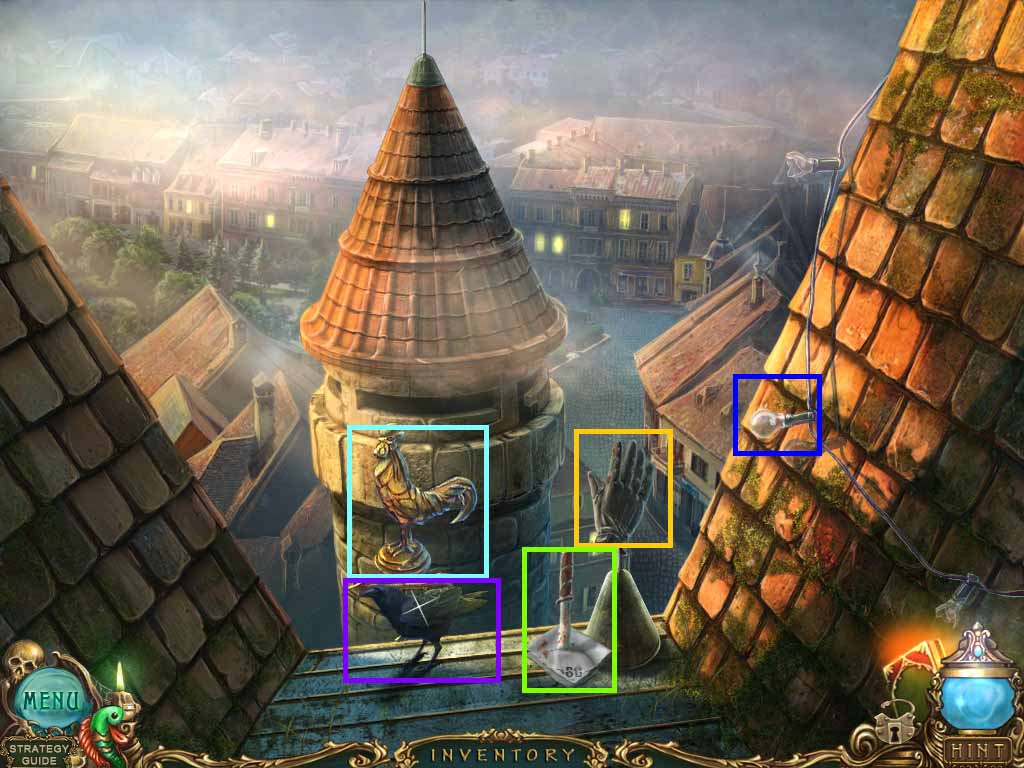
- Collect the light bulb.
- Take the glove and collect the flagpole.
- Give the crow the worm and collect the weathervane.
- Walk down two times.
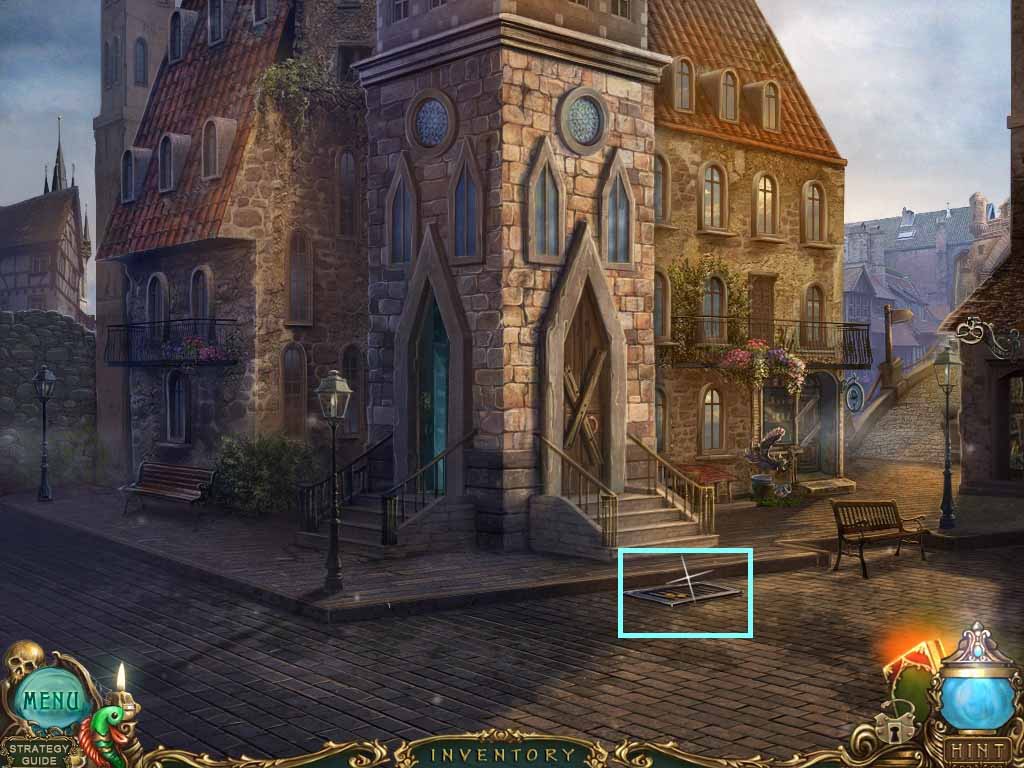
- Examine the grate.
- Use the flagpole to lift it.
- Place the empty watering can into the water; collect the can with water.
- Move right.
- Chapter-6-04-Lantern
- Examine the lantern.
- Place the light bulb into it and collect it.
- Go to the bell tower.

- Examine the area under the platform using the lantern.
- Examine the nest and get the nail using the oven fork.
- Walk down one time and move right.

- Place the ladder into the side of the building.
- Examine the window.
- Place the weathervane onto the hook and enter the window.
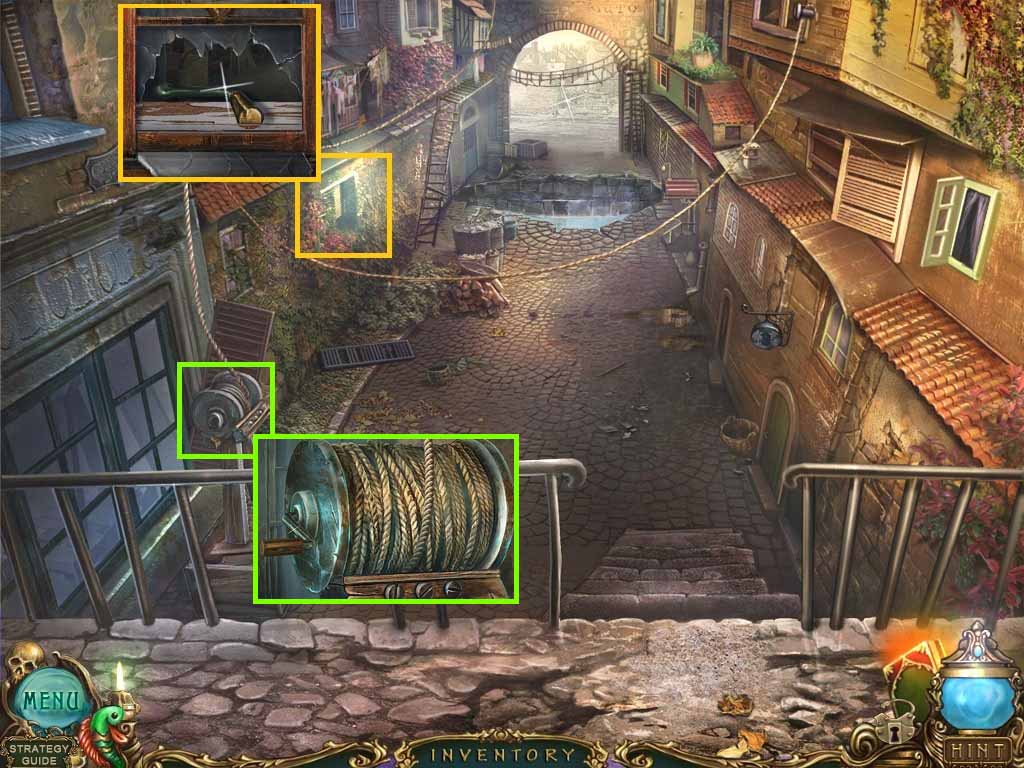
- Zoom into the window; remove the paint using the nail.
- Break the window and collect the handle.
- Examine the winch; place the handle onto it and click the handle.
- Collect the handle.
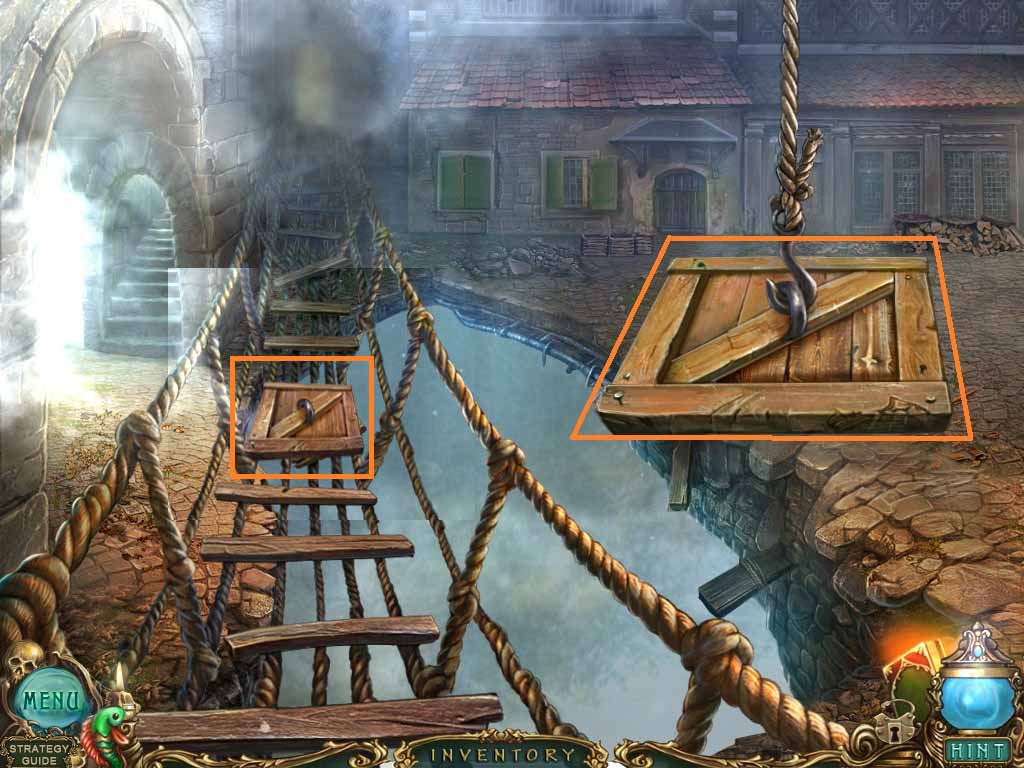
- Examine the bridge; collect the wooden lid.
- Place the wooden lid onto the bridge and move left to get to the market.
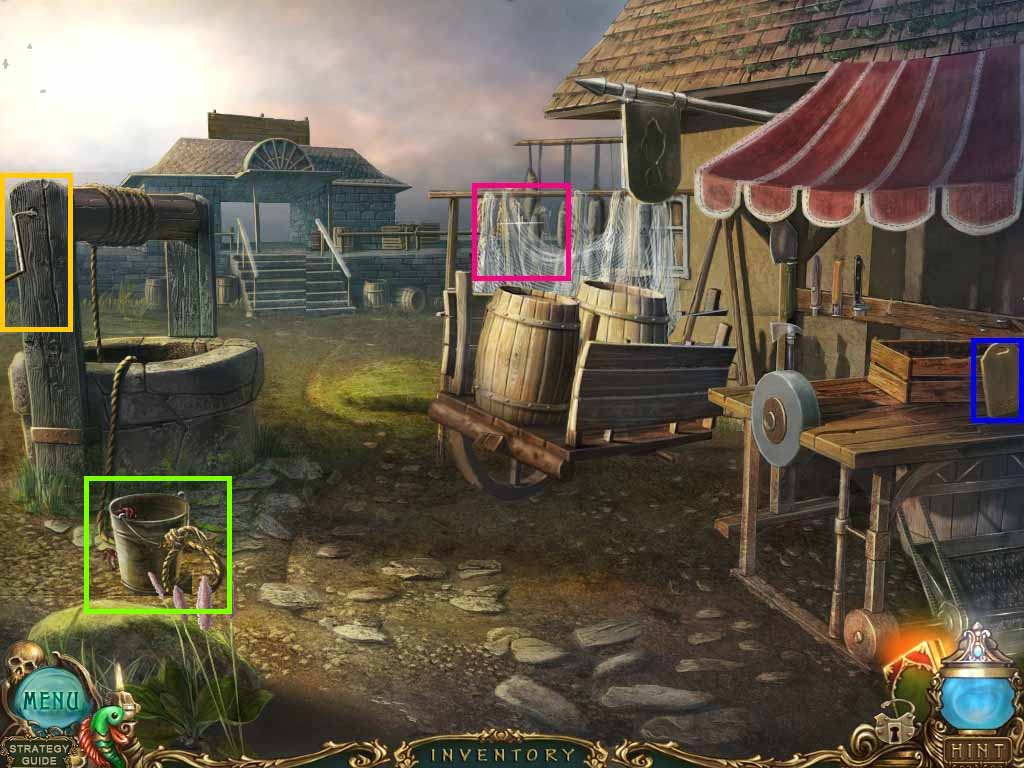
- Examine the cutting board.
- Zoom into the nets; click the right net and collect the sawfish.
- Place the handle onto the well and click the handle.
- Zoom into the bucket to trigger a puzzle.
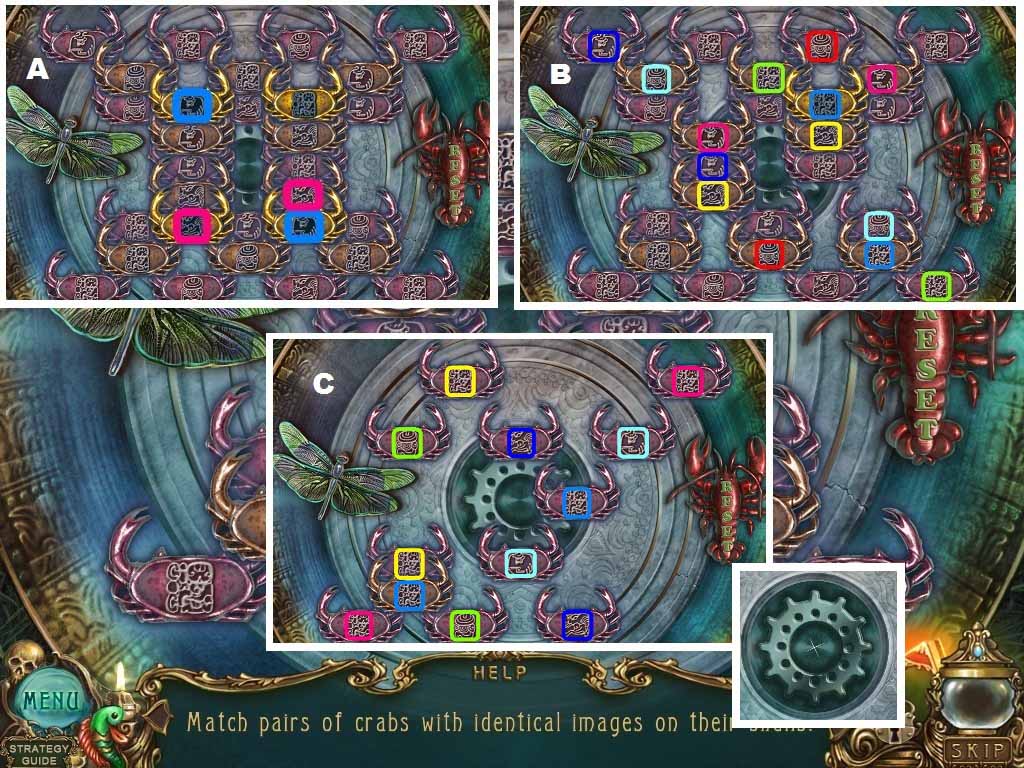
- Match the crab pairs.
- Solve as shown below in the shots marked (A – C).
- Remove the pairs in the following order:
- Blue – Hot Pink – Aqua – Green – Yellow – Dark Blue –Red
- Collect the gear wheel.
- Move forward.
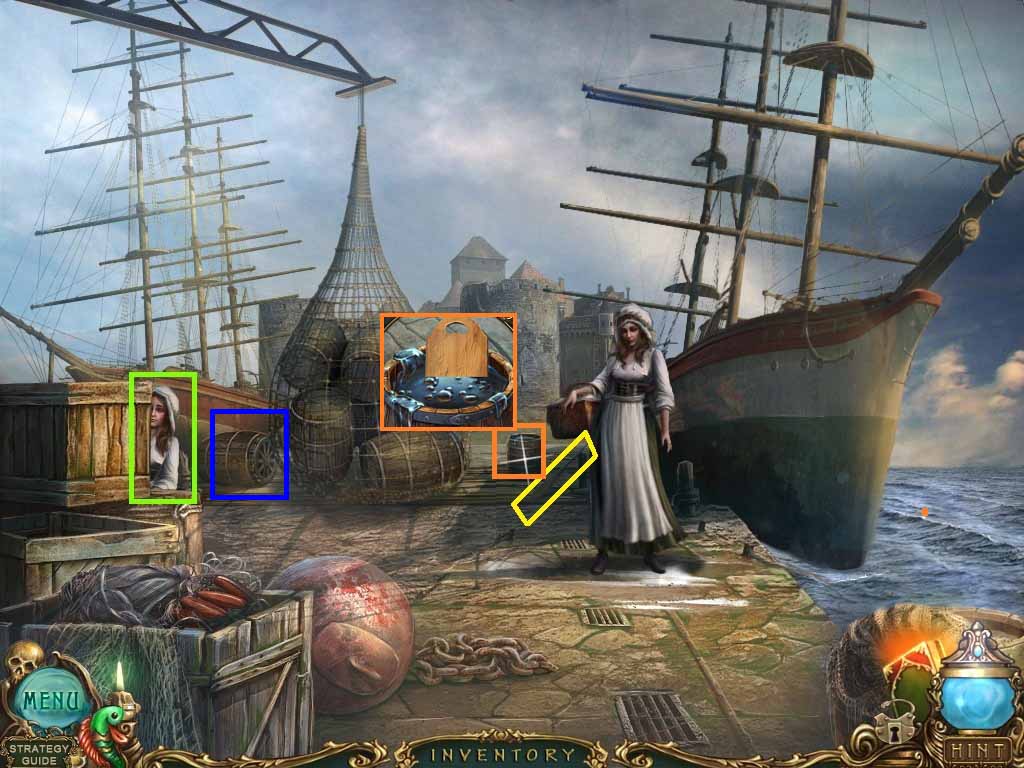
- Collect the note on the screen.
- Zoom into the girl behind the crates; click her when she comes out.
- Collect the oar.
- Examine the barrel; collect the wheel.
- Examine the barrel; place the cutting board into it and collect the board with tar.
- Walk down three times.

- Examine the ground.
- Collect the tree scale and the spoon.
- Go to the market.
- Place the wheel onto the cart and click the cart.
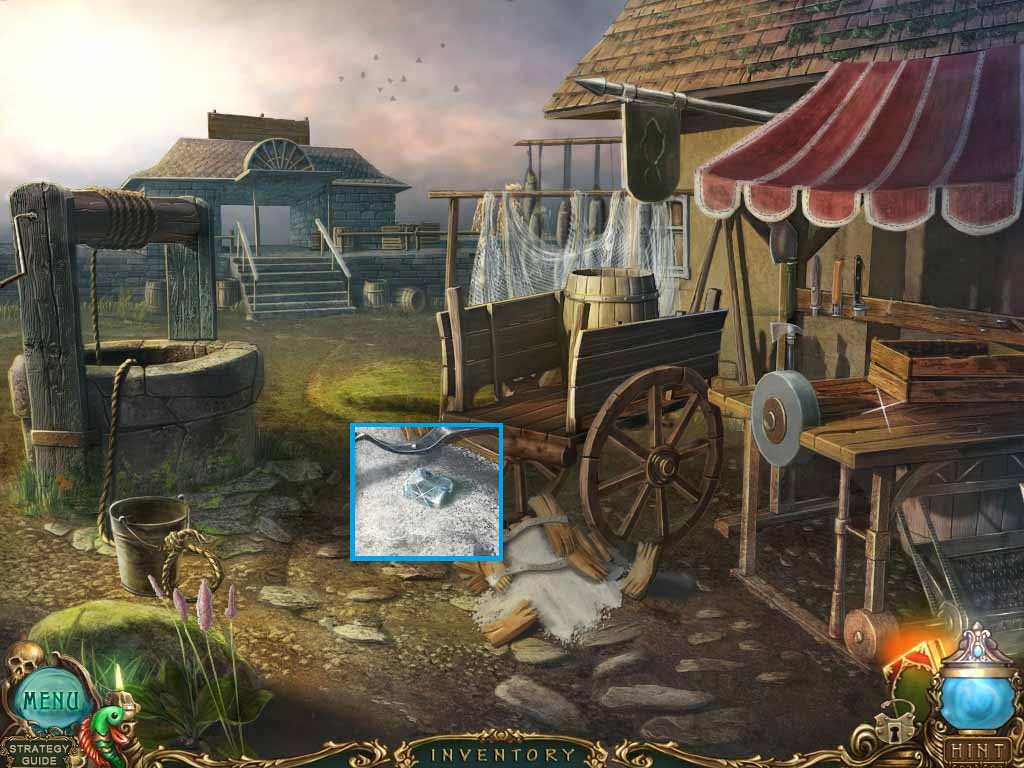
- Examine the broken barrel.
- Place the spoon into the salt and collect the potassium chlorate crystal.
- Walk down 5 times, move left, go through the right path and up the tower and finally upstairs.
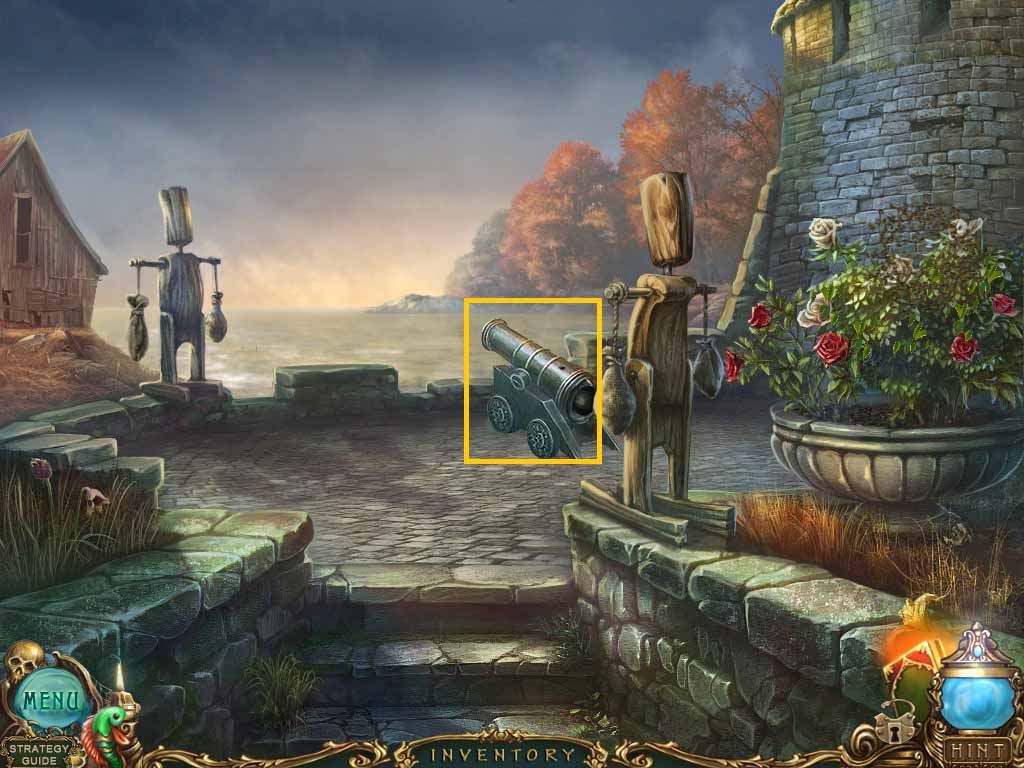
- Click open the cannon’s lid if it’s not already open.
- Pour the can with water onto the plants; the bees will swarm the plant.
- Examine the cannon and collect the stone.
- Walk down one time and enter the door on the right and then the window.
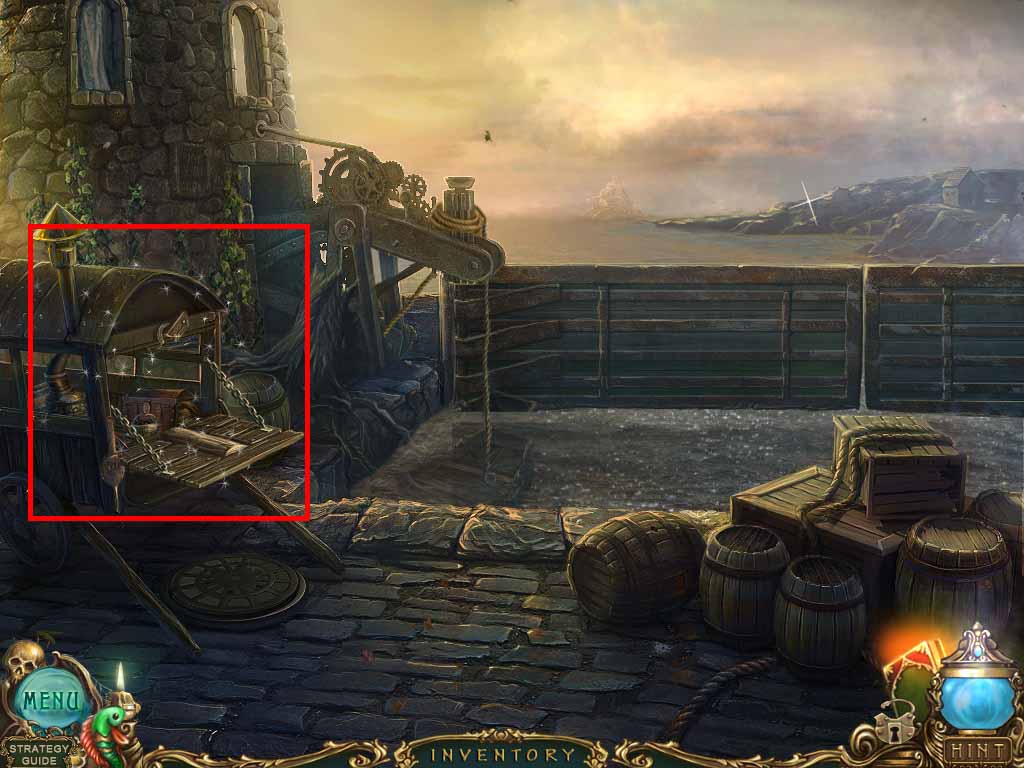
- Zoom into the boards.
- Use the sawfish on the boards to activate a hidden objects area.
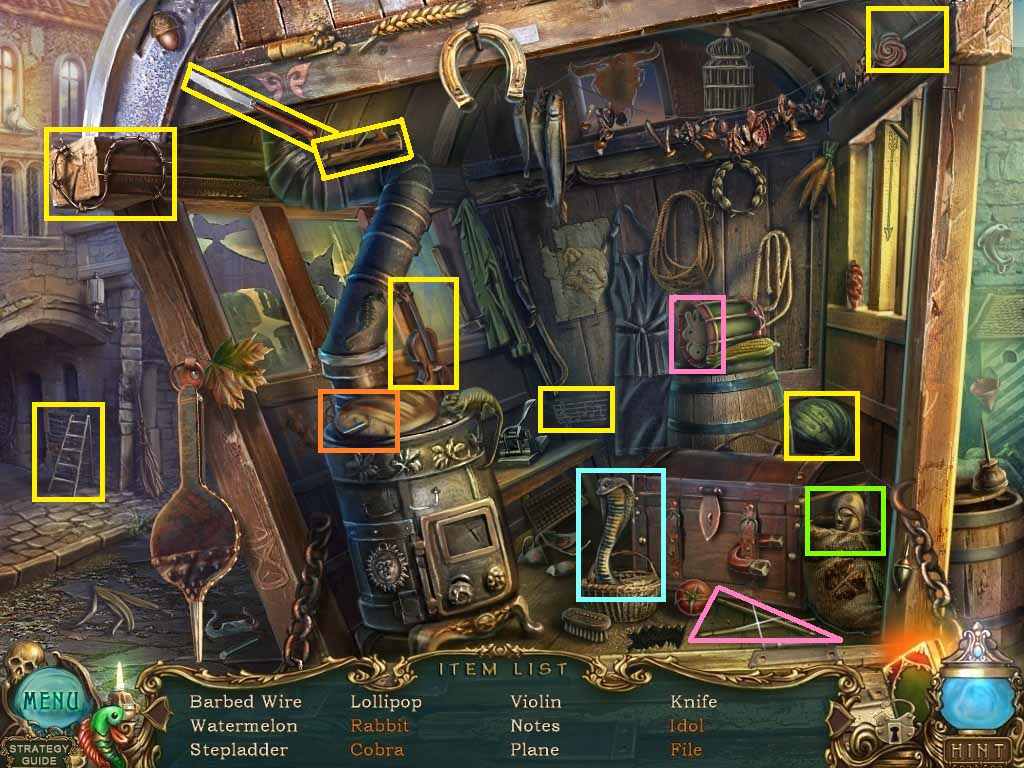
- Click the basket and collect the cobra.
- Use the drumsticks on the drum and collect the rabbit.
- Click the sack open and collect the idol.
- Click the bread and collect the file.
- Collect the knife.
- Walk down three times.
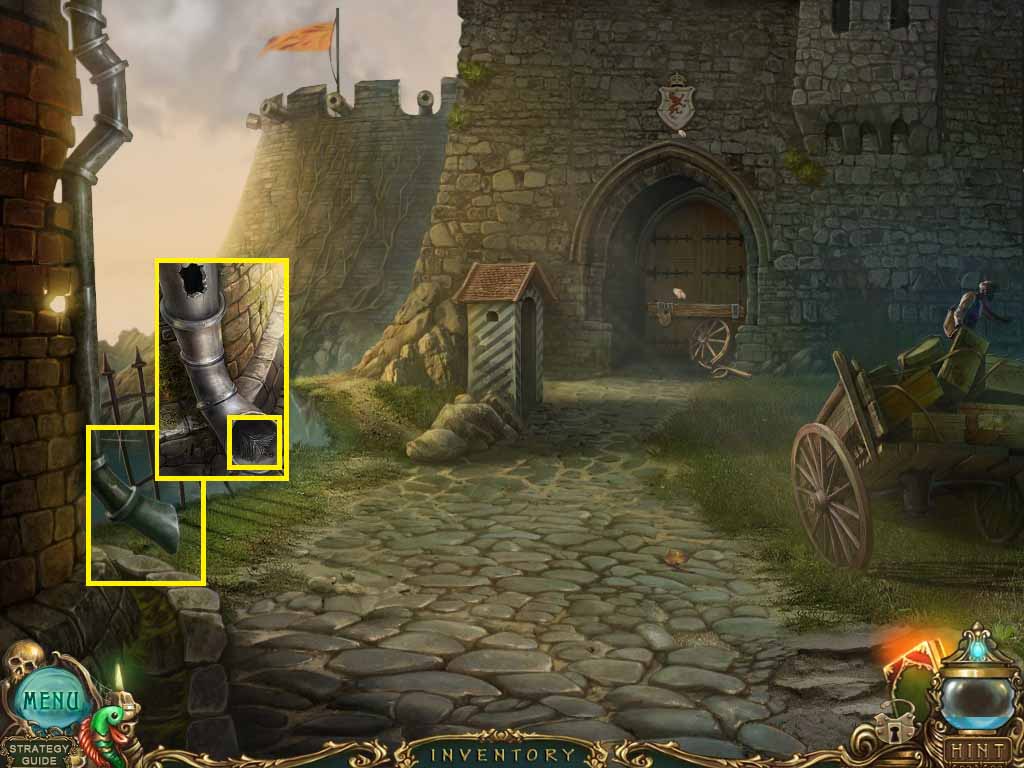
- Examine the drain pipe.
- Place the stone into the hole.
- Collect the chimney brush.
- Go up the tower and access the hidden objects area.
General Info and Tips
Chapter 1: Introduction to Mrs. Fisher
Chapter 2: Exploring the Underground Crypt
Chapter 3: Inside the Hospital
Chapter 4: Welcome to the Fort
Chapter 5: Bell Tower View
Chapter 6: Discovering the Market
Chapter 7: A Look into the Lighthouse
Chapter 8: Hotel Access
Chapter 9: The End
Bonus Game
Ask for help in the comments below!
Chapter 1: Introduction to Mrs. Fisher
Chapter 2: Exploring the Underground Crypt
Chapter 3: Inside the Hospital
Chapter 4: Welcome to the Fort
Chapter 5: Bell Tower View
Chapter 6: Discovering the Market
Chapter 7: A Look into the Lighthouse
Chapter 8: Hotel Access
Chapter 9: The End
Bonus Game
Ask for help in the comments below!