
Grim Tales: Bloody Mary: Chapter Three: Mirror, Mirror
Hold tight to our Grim Tales: Blood Mary Walkthrough as you dare to tread through the halls of Bloody Mary's domain. Danger lurks in every shadow, in every reflection a pair of crimson eyes appear, watching you, waiting for you to let your guard down. But with our detailed instructions, custom screenshots, and puzzle solutions, you'll be able to put an end to Blood Mary's reign of terror.
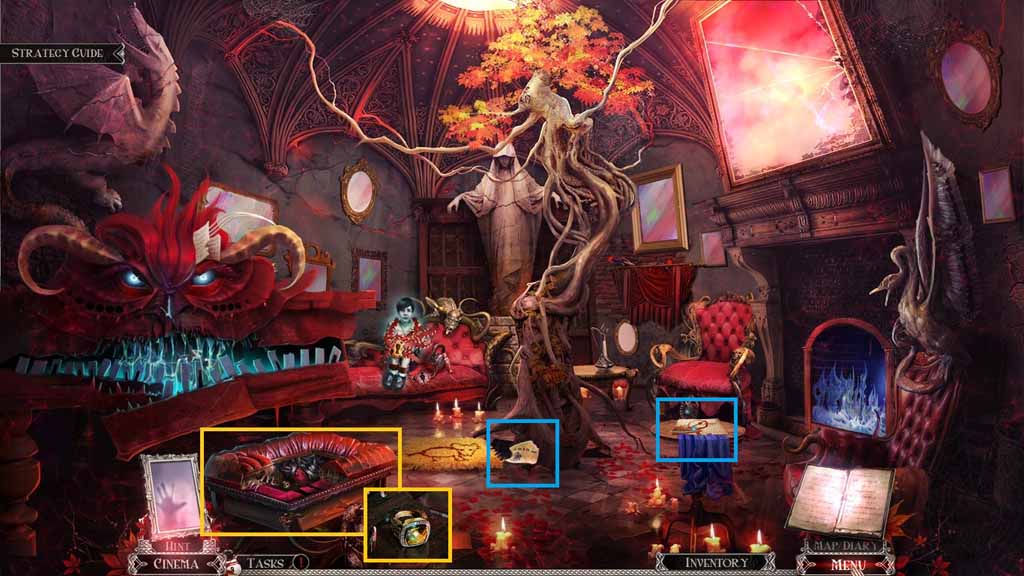
- Click the armchair; collect the 3 / 4 rings.
- Read the 2 notes.
- Move to the Foyer.
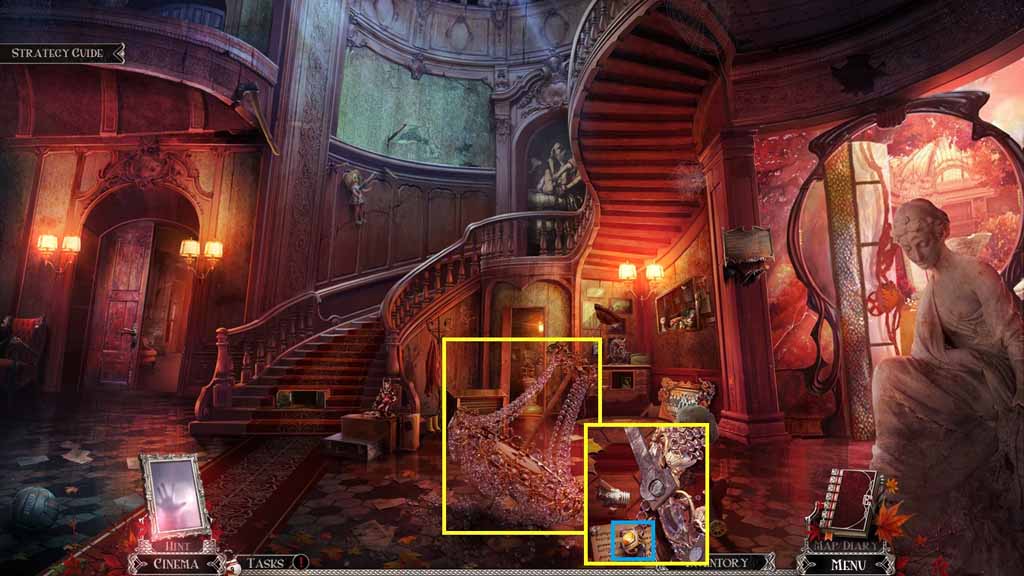
- Click the chandelier.
- Select the wrench to remove the bolt.
- Collect the 4 / 4 rings.
- Move to the Garden.
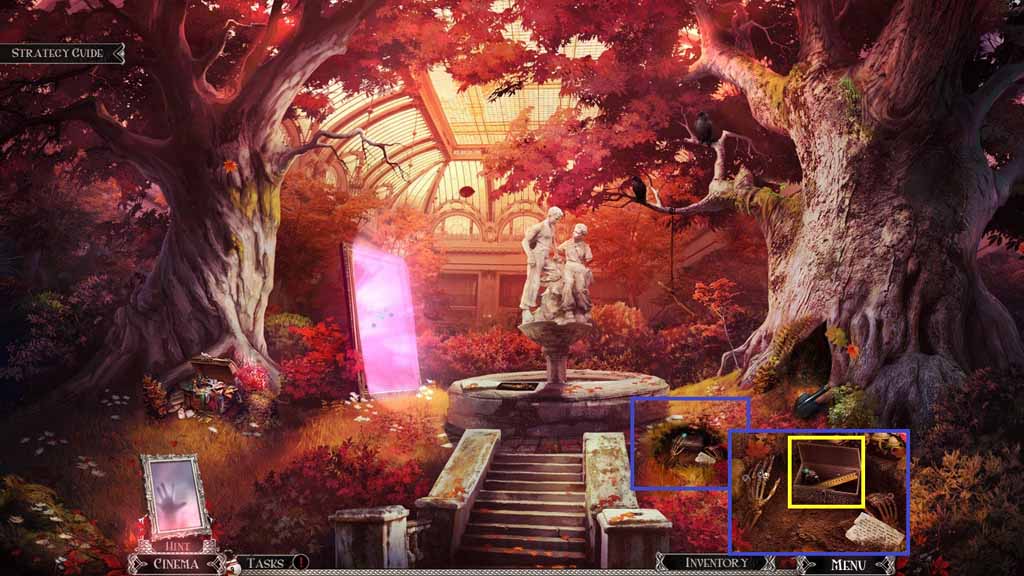
- Click the ground and place the 4 rings onto the hand.
- Collect the Imp amulet and the ruler.
- Move to the Recital Hall.
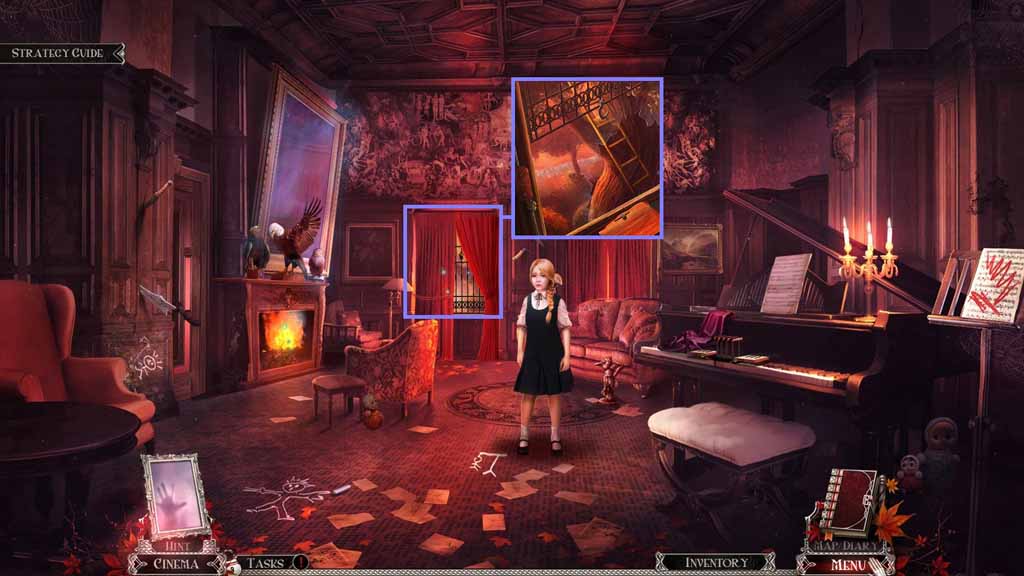
- Click the window.
- Select the ruler to open it and collect the ladder.
- Move to the 2nd floor.
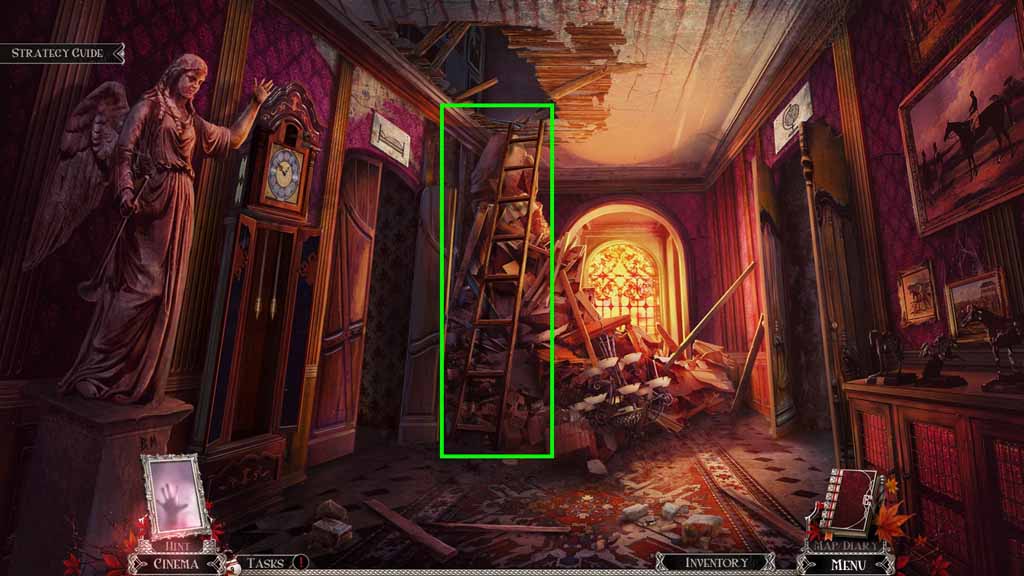
- Click the debris.
- Place the ladder next to the debris.
- Move up the ladder to the 3rd floor.
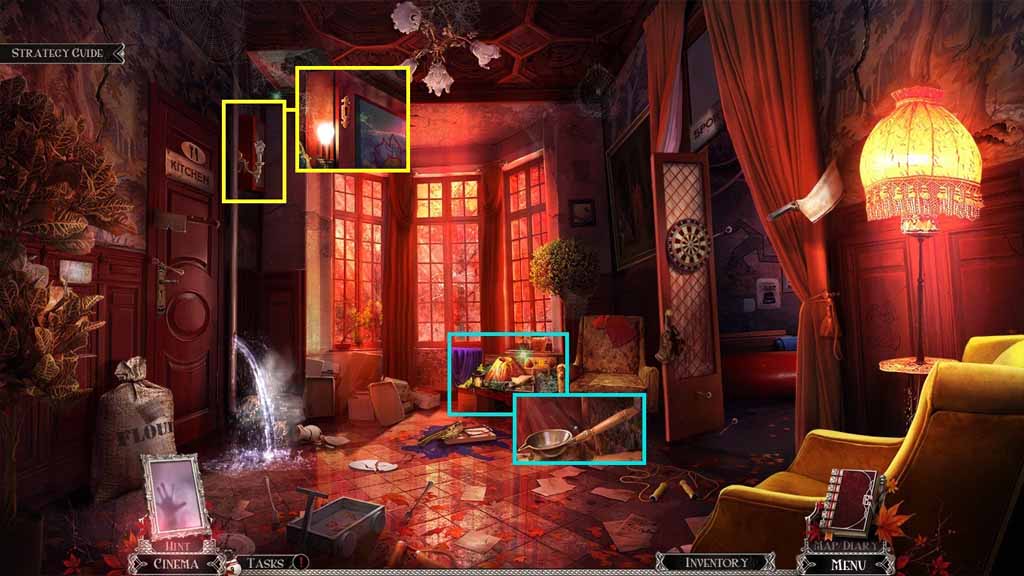
- Click the table; collect the pot.
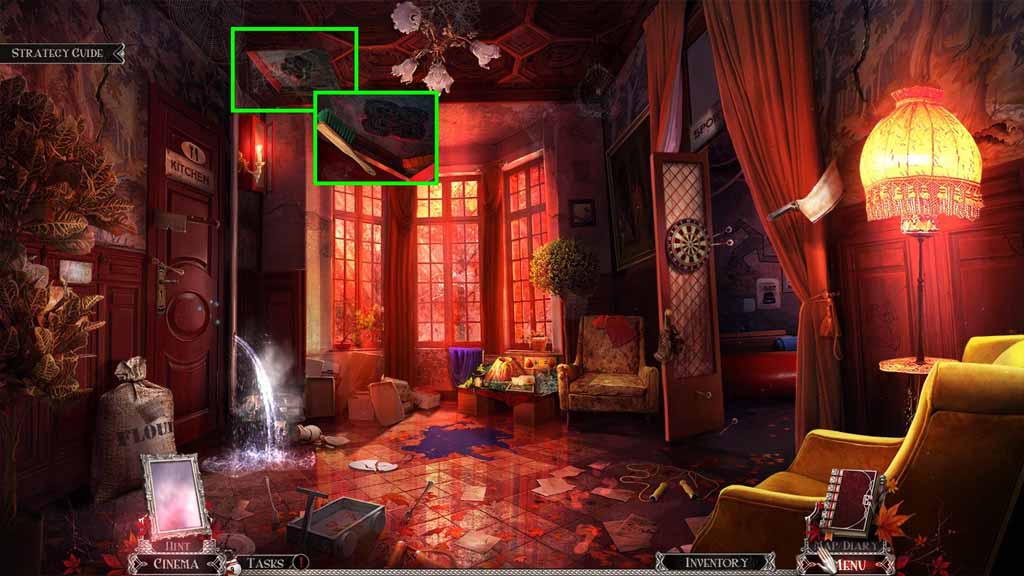
- Click the wall.
- Click the broken light bulb ad replace it with the bulb.
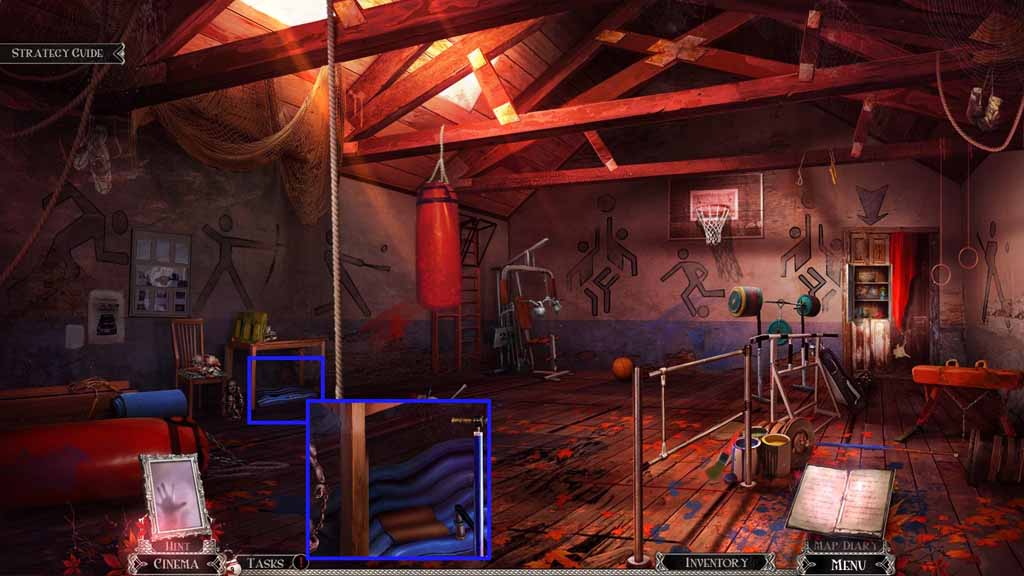
- Move into the Gym.
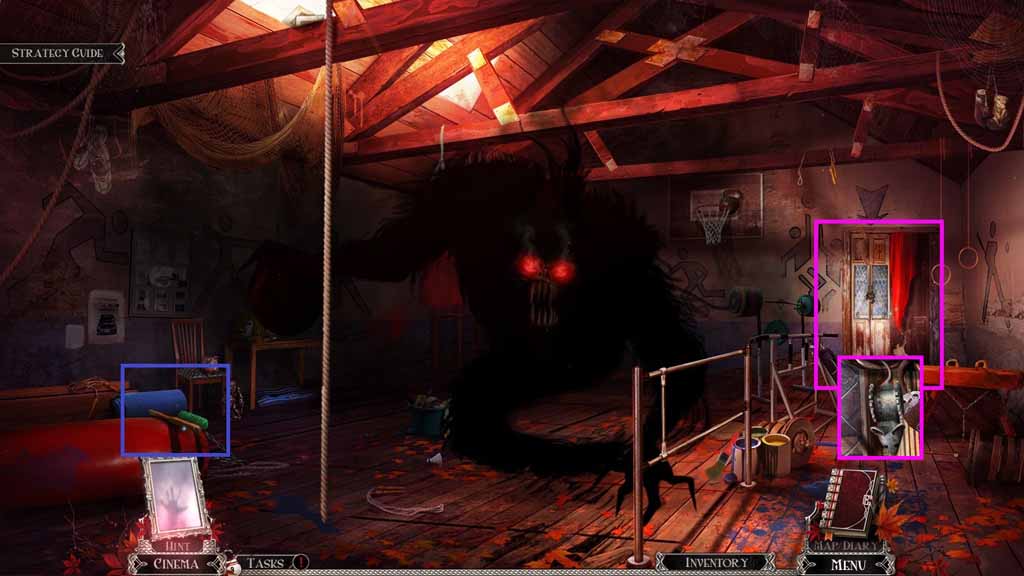
- Collect the brush.
- Click the cabinet and collect the toy mouse.
- Move down once.
- Insert the toy mouse into the mouse trap.
- Collect the mouse trap and collect the 1 /2 angel amulet.
- Move to the Mirrored Hall.
- Place the mouse trap down.
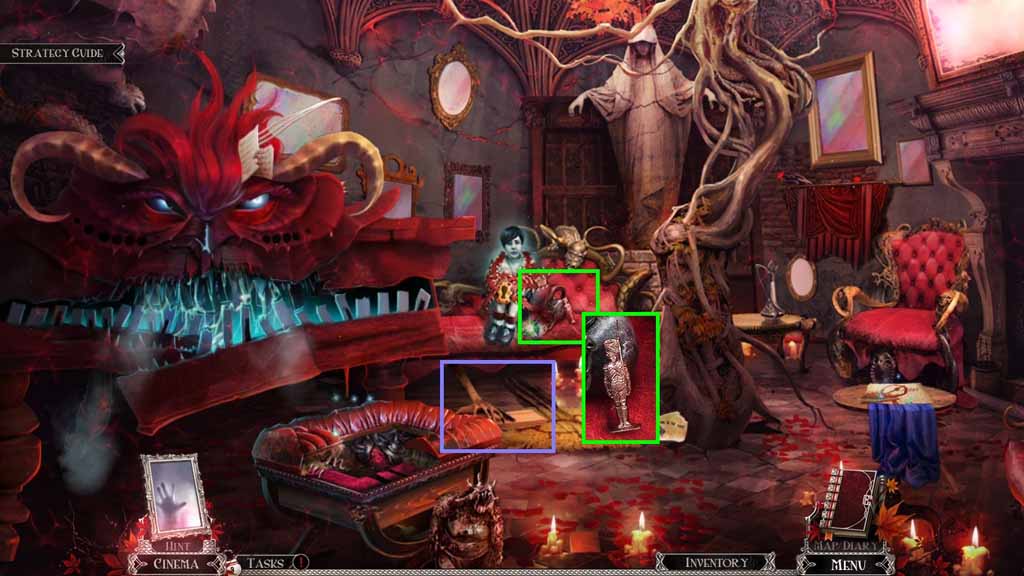
- Click the sofa; collect the tin soldier.
- Move to the Recital Hall.
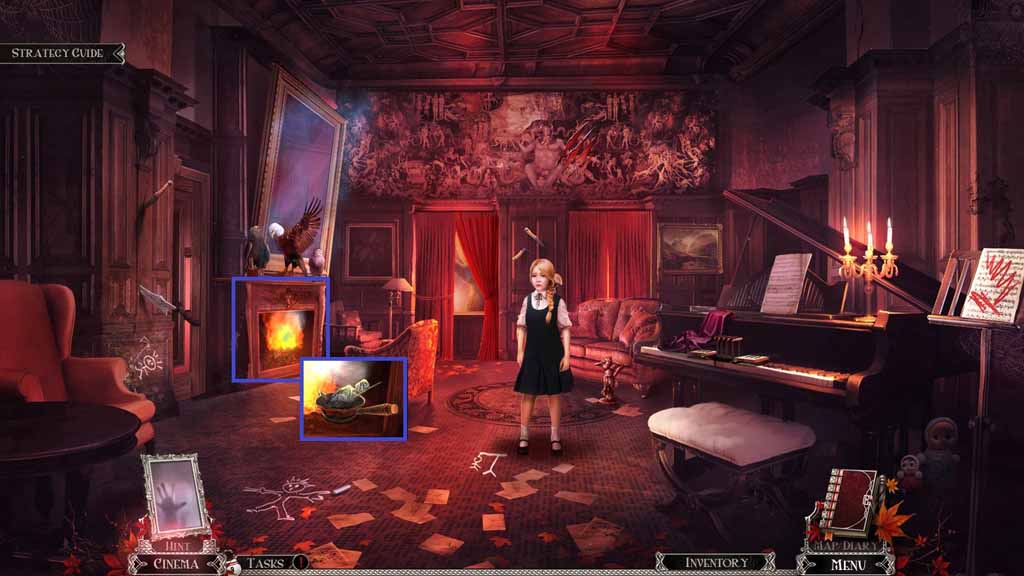
- Click the fireplace.
- Place the pot into the fireplace and place the tin soldier into the pot.
- Collect the pot with tin.
- Move to the 3rd floor.
- Click the table.
- Pour the pot with tin into the mold.
- Collect the fire cabinet key.
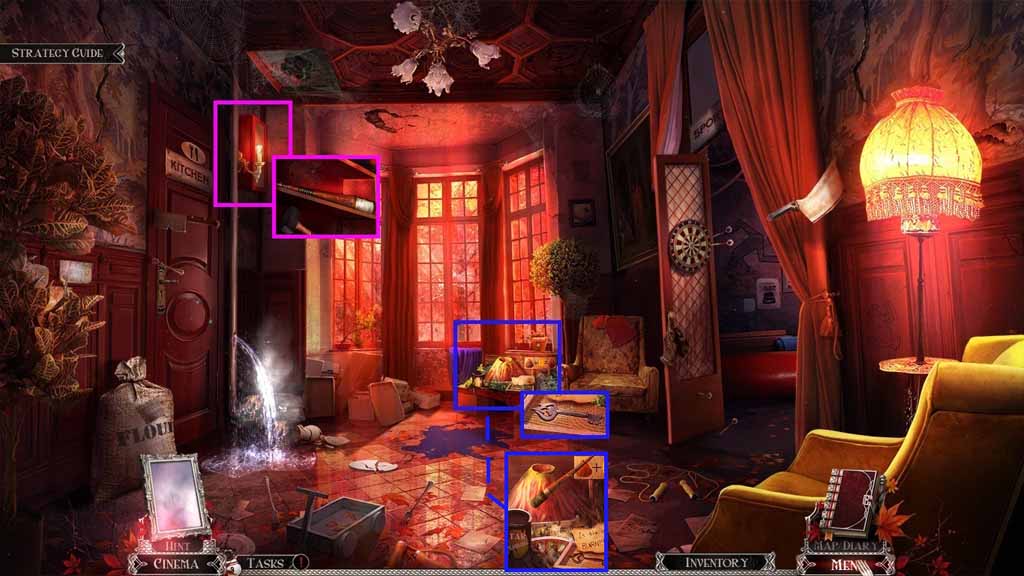
- Click the wall.
- Insert the fire cabinet key and click it.
- Collect the dowel with cloth and the hammer.
- Click the table.
- Place the dowel with cloth into the can; collect the torch.
- Move to the Recital Hall.

- Click the fireplace; place the torch into the fire.
- Collect the burning torch.
- Move to the Mirrored Hall.
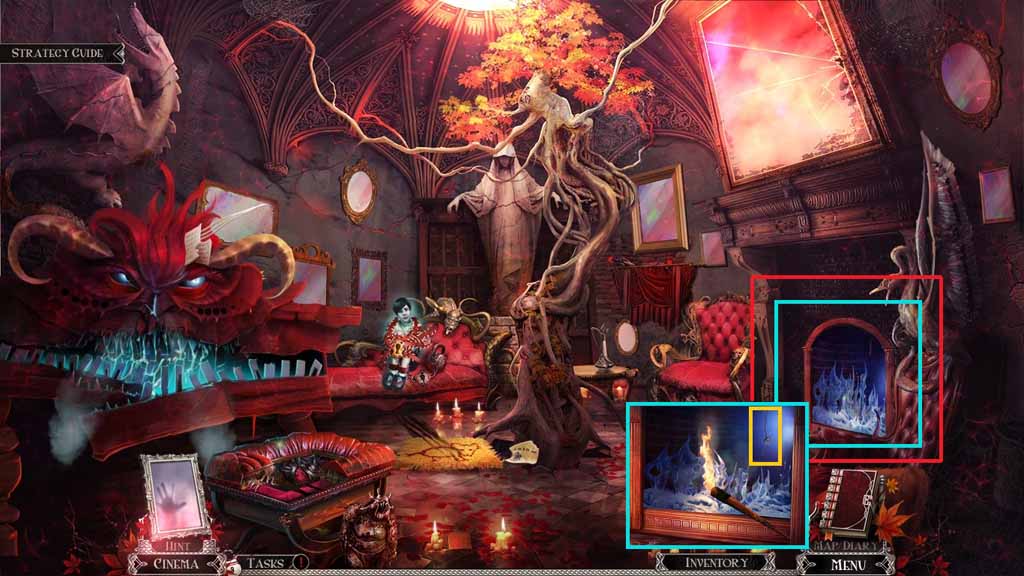
- Click the fireplace.
- Select the burning torch to melt the ice.
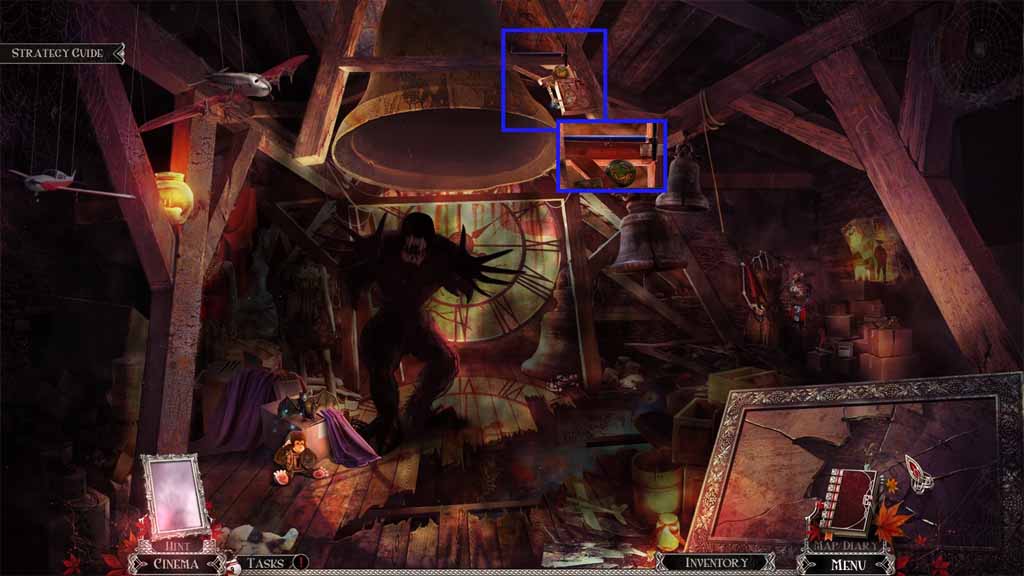
- Select Chucky and send him up the rope.
- Click the hidden objects area.
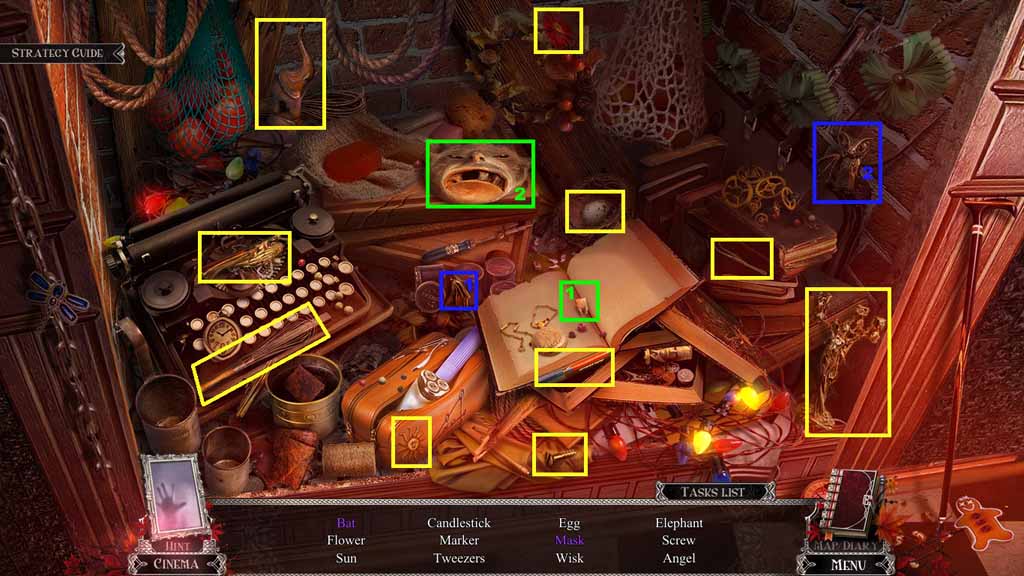
- Find the listed items.
- Select the wing and attach it onto the bat; collect the bat.
- Select the tooth and place it into the mask; collect the mask.
- Collect the 2 / 2 angel amulets.

- Click the sofa; insert the 2 angel amulets.
- Insert the Imp amulet and collect the cartridge.
- Click the sofa and collect the 1 / 2 weights.
- Move to the Foyer.

- Click the chandelier.
- Insert the cartridge into the flare gun.
- Collect the flare gun.
- Move to the Gym.
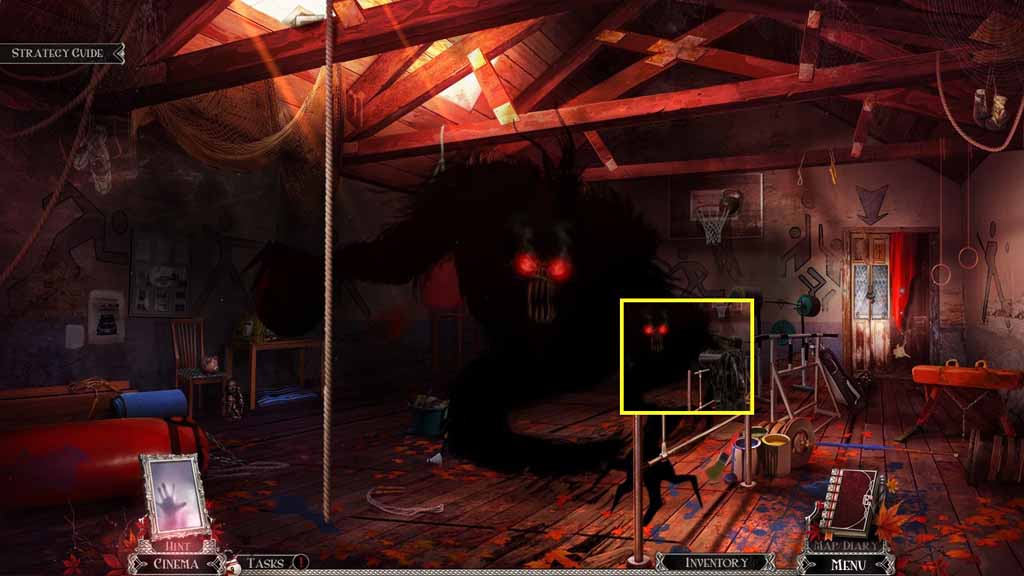
- Shoot the flare gun toward the monster.

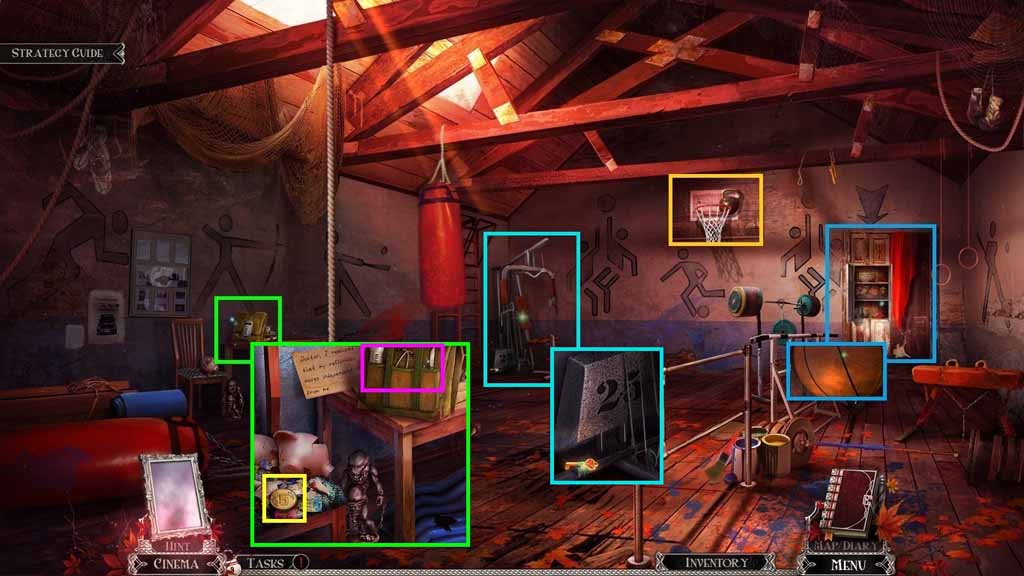
- Click the cabinet.
- Select the hammer to break the chain.
- Collect the pack of soda and the pepper pot.
- Place Chucky onto the rope; collect the slides.
- Move down once.
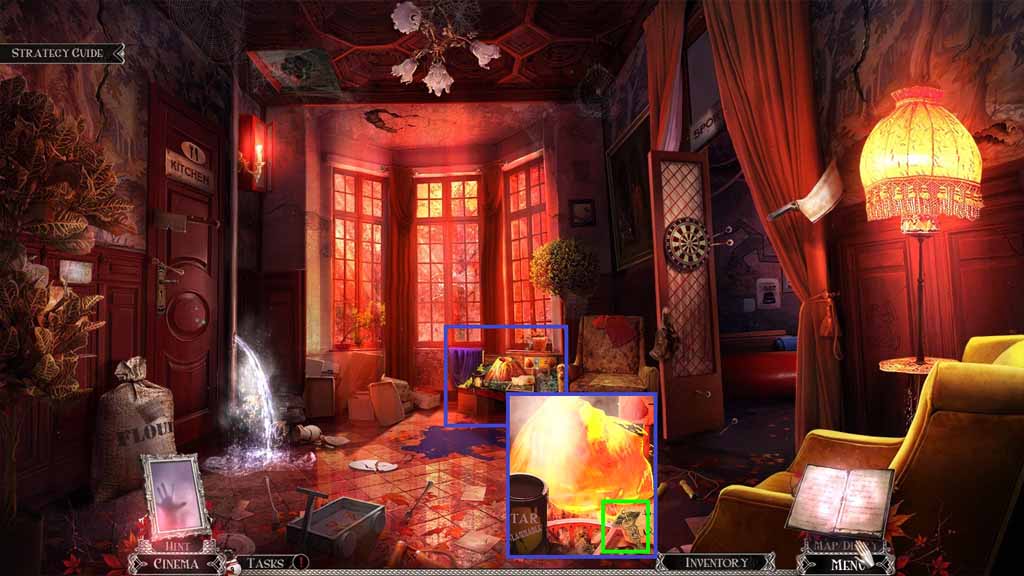
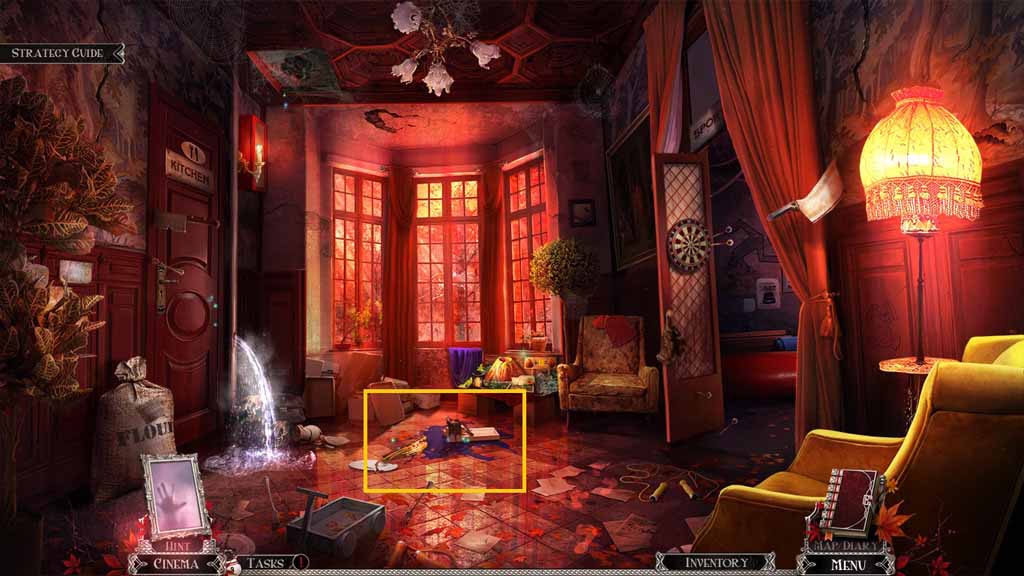
- Click the table.
- Pour the soda onto the volcano; collect the Caduceus amulet.
- Move to the Mirrored Hall.
- Toss the pepper pot into the monster’s mouth.
- Place the slides into the projector.
- A mini-game will trigger.
- Solve the mini-game using the following directions:
- Down – right – right – right – right – right – up – up – up – left – left – left – left – up – up – up – right – down – right – right – down – right – up – up – up – left – left – left – down – left – up – left – up – up – right – right – up – left – left – up – right – right – up – right – right – down.
- Move to the 3rd floor.
- Click the wall.
- Use the brush to clear the cobwebs.
- Insert the attic key and enter the Attic.
- Click the ceiling.
- Collect the pump.
- Move to the Gym.
- Click the cabinet.
- Use the pump to inflate and collect the basketball.
- Throw the ball into the basket; collect the 2 / 2 weight.
- Click the table and insert the Caduceus amulet.
- Smash the piggy bank using the hammer.
- Collect the coin, the cotton wool, the stethoscope and the scalpel.
- Click the weight machine.
- Attach the 2 weights; collect the heart key.
- Move to the Mirrored Hall.
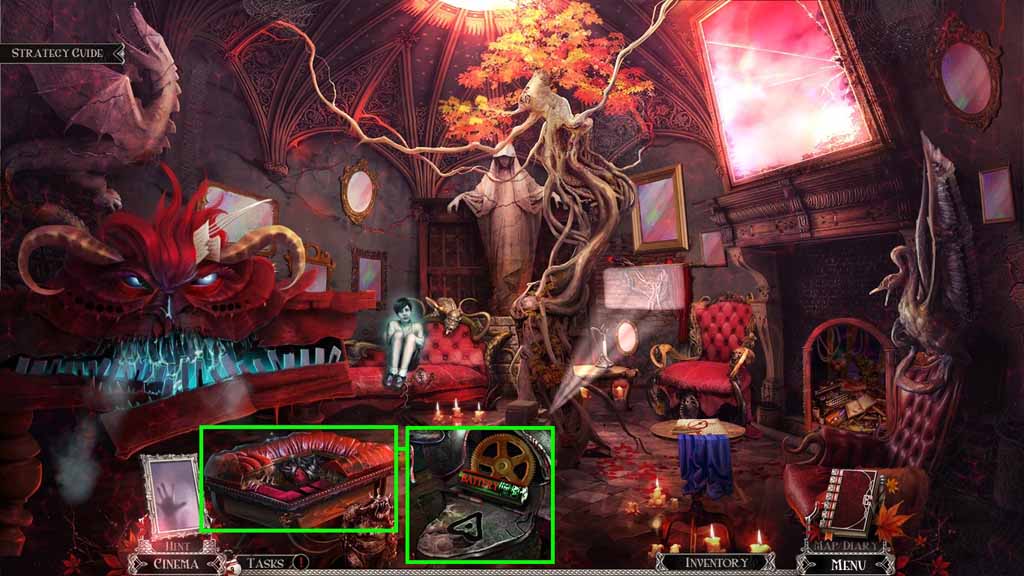
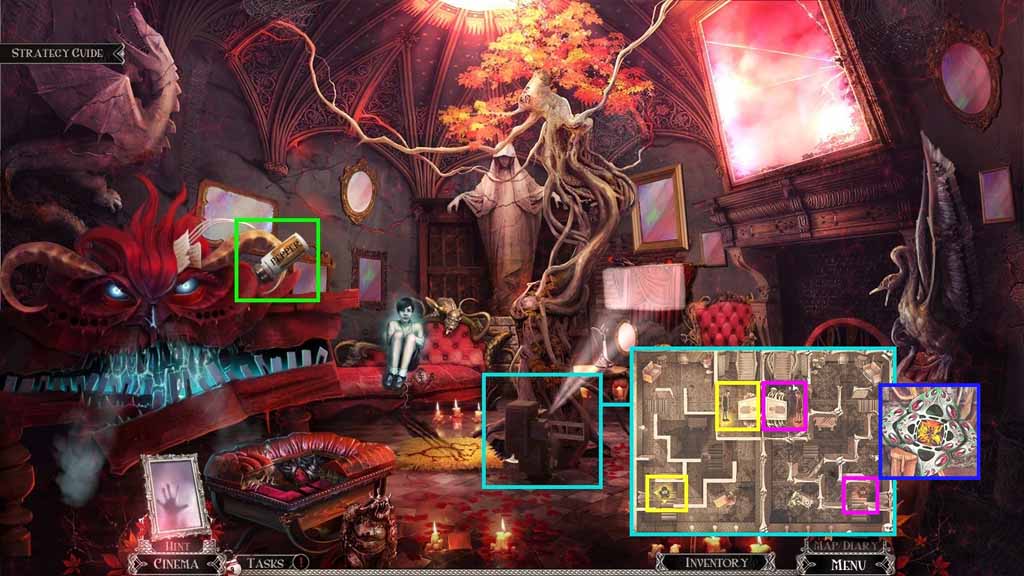
- Click the arm chair; insert the heart key.
- Click it once and collect the gear and battery.
- Move to the Attic.
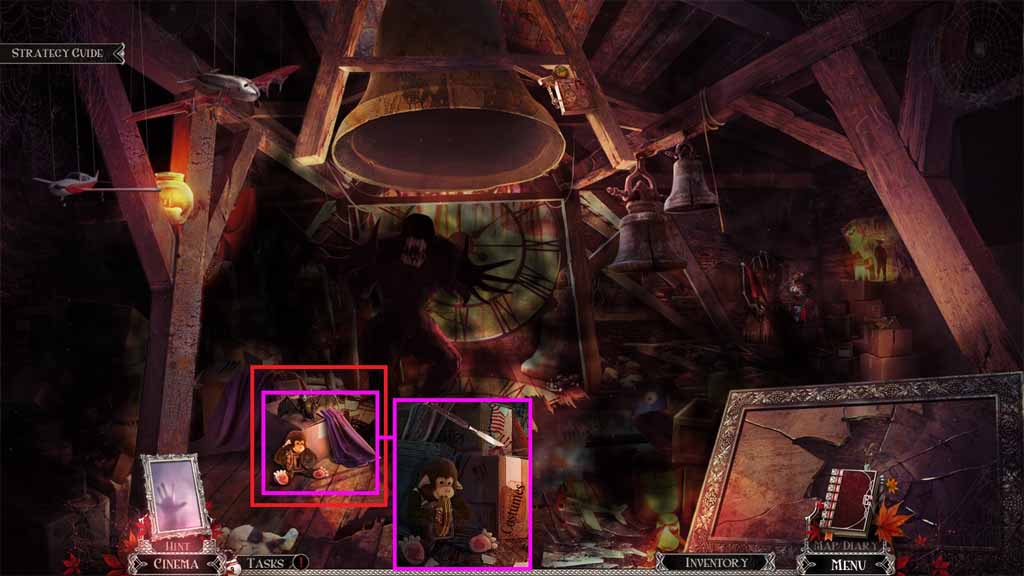
- Click the crate.
- Insert the battery into the monkey.
- Use the scalpel to open the crate.
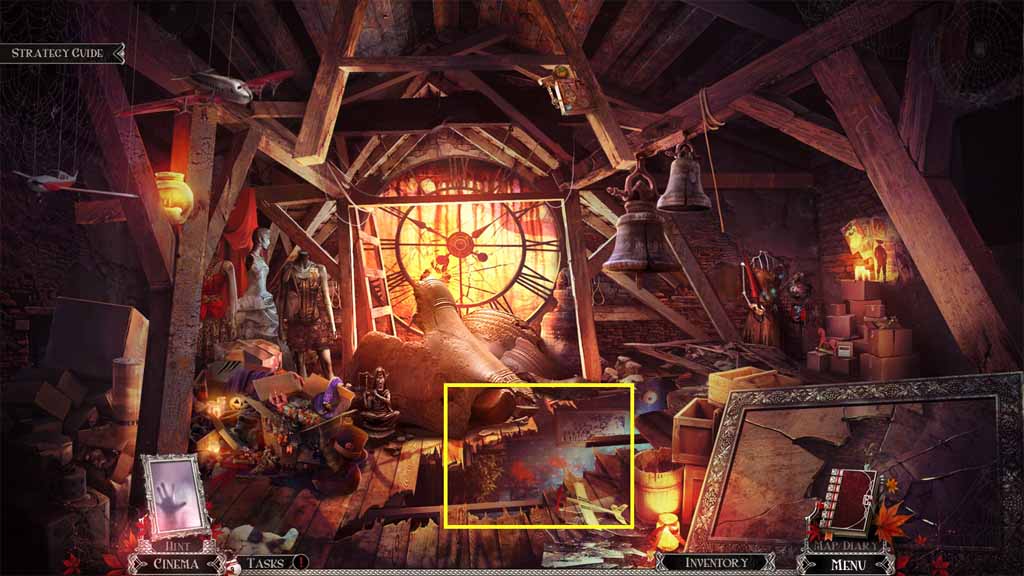
- Click the hidden objects area.
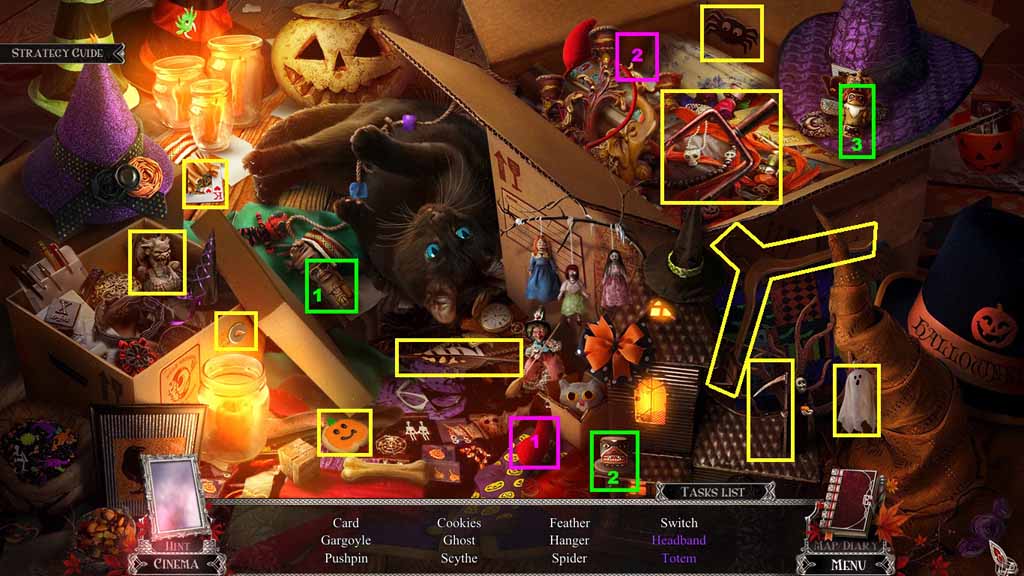
- Find the listed items.
- Select the horn and attach it to the headband; collect the headband.
- Collect the totem pieces and attach them together; collect the totem.
- Collect the switch.
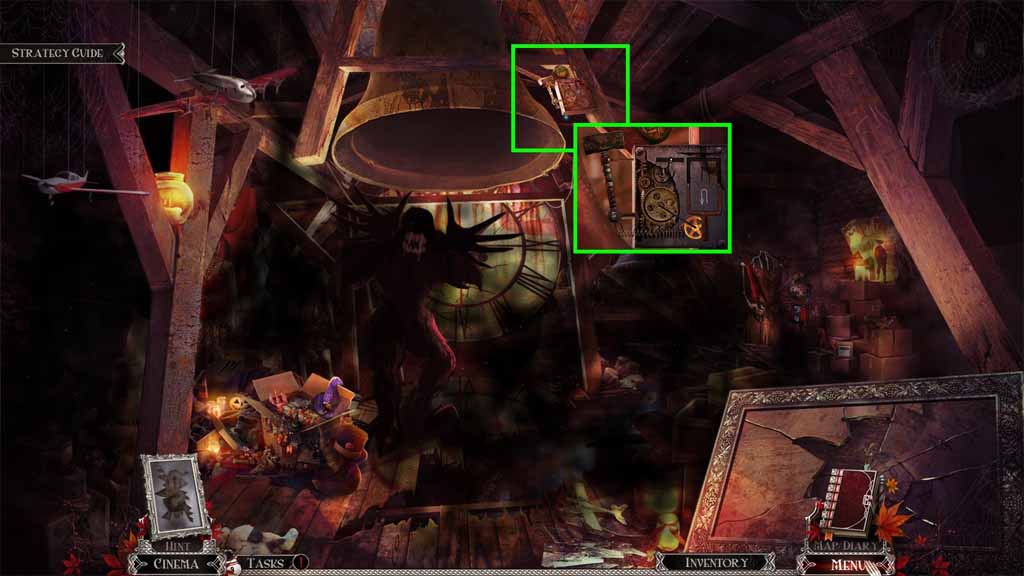
- Click the mechanism and insert the gear.
- Attach the switch to it and click the switch.
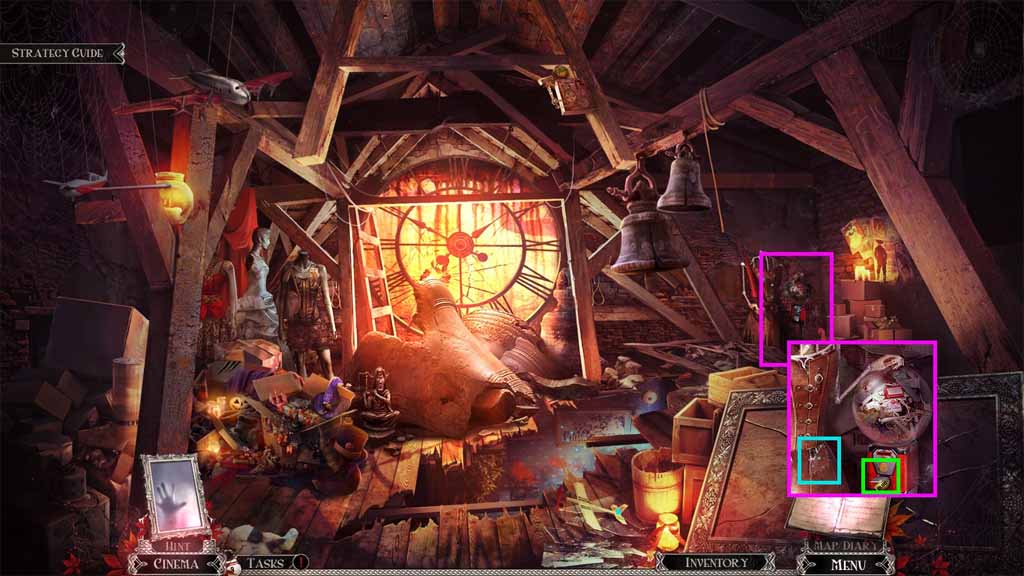
- Zoom into the gum machine and insert the coin.
- Collect the leather patch and the glue.
- Move to the Gym.
- Click the table.
- Spread the glue onto the hole and place the leather patch onto it.
- Select the pump to pump the mattress; collect the mattress.
- Move to the Attic.
- Click the floor.
- Place the mattress down.
- Move down to the Headmaster’s Office.