
Forest Legends: The Call of Love: Chapter Six: Mastering the Maze
Our Forest Legends: Call of Love Walkthrough will help you reunite star-crossed lovers Aurelio and Eveline, werecat and human, caught in an unjust war between their kind. Our detailed instructions, simple puzzle solutions, and beautifully marked custom screenshots will guide you as you help Eveline save her beloved and discover the truth about her destiny.
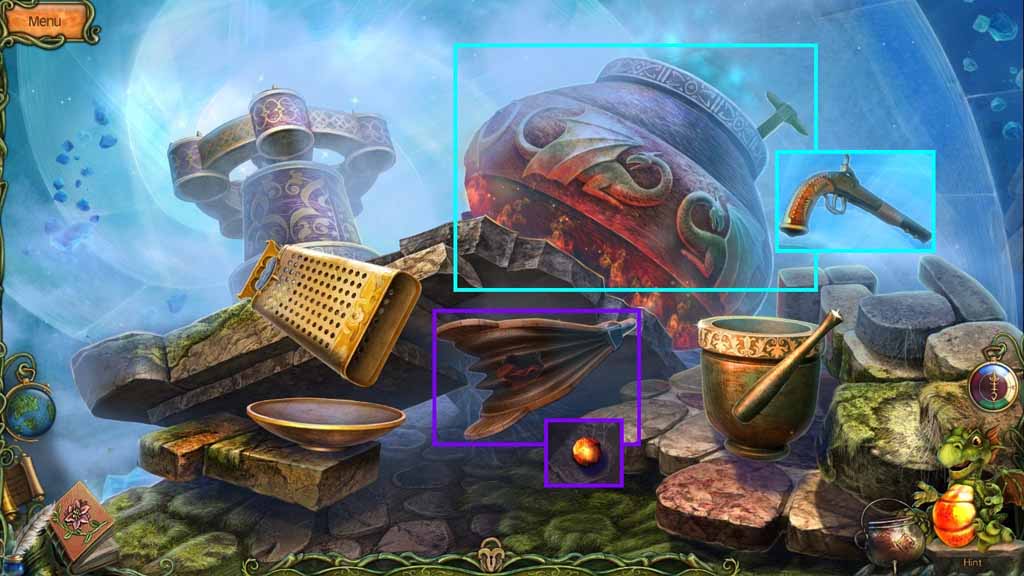
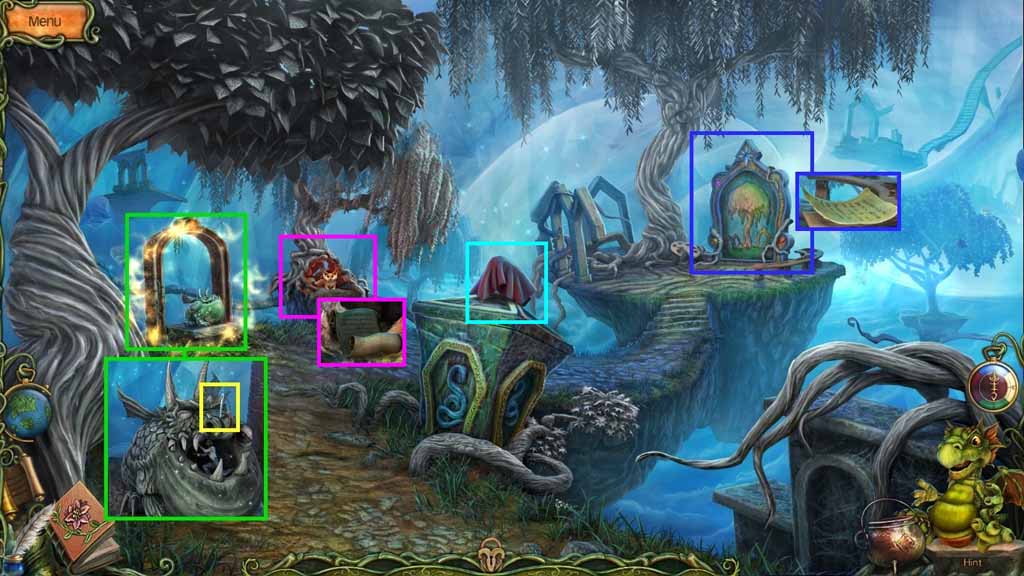
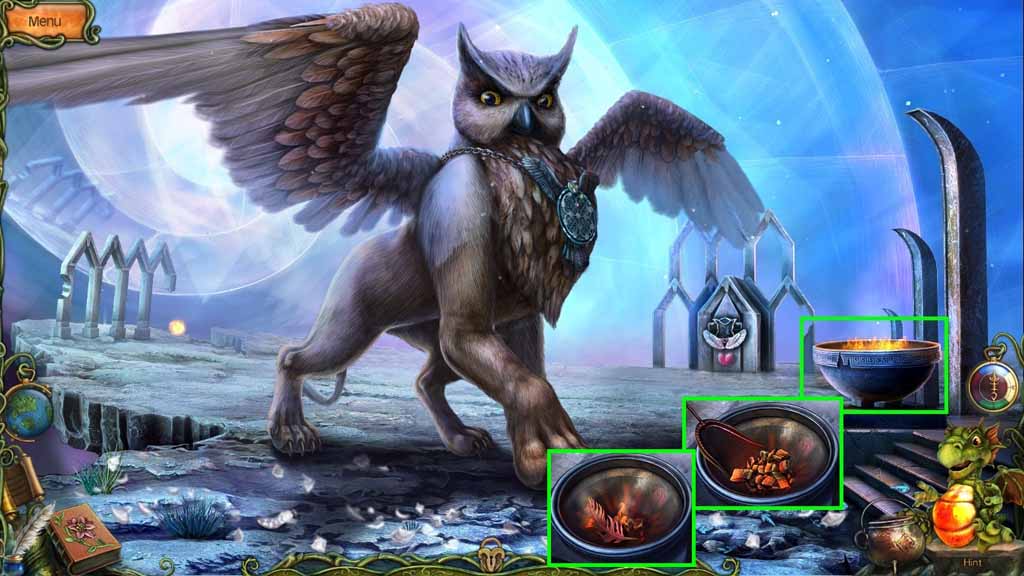
- Zoom into the bellows; collect the red eye.
- Zoom into the cauldron; collect the musket.
- Move to the Mirror Hall.
- Enter the left portal.
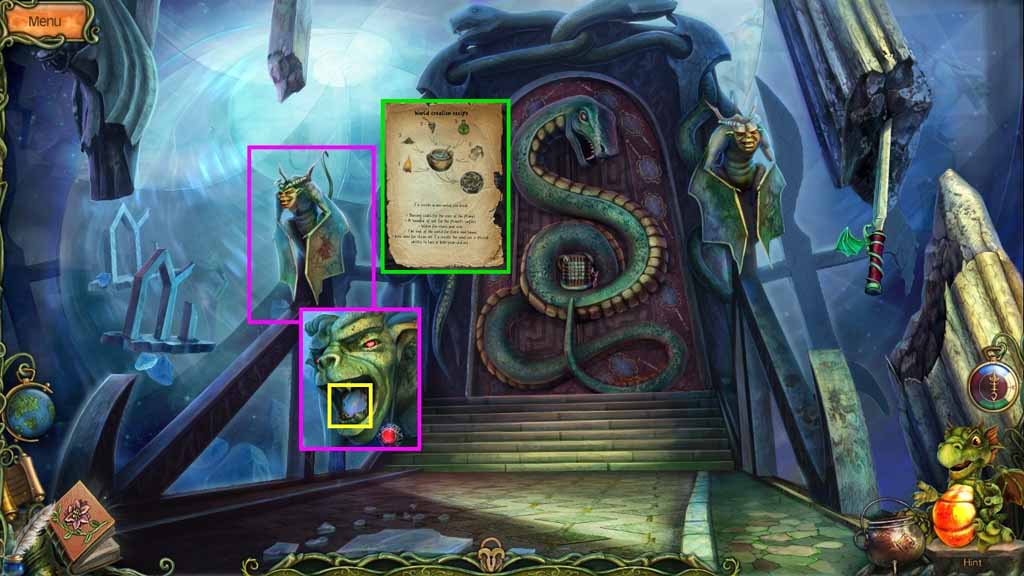
- Insert the red eye into the socket of the gargoyle on the left.
- Read the World Creation recipe.
- Collect the mirror.
- Click the door.
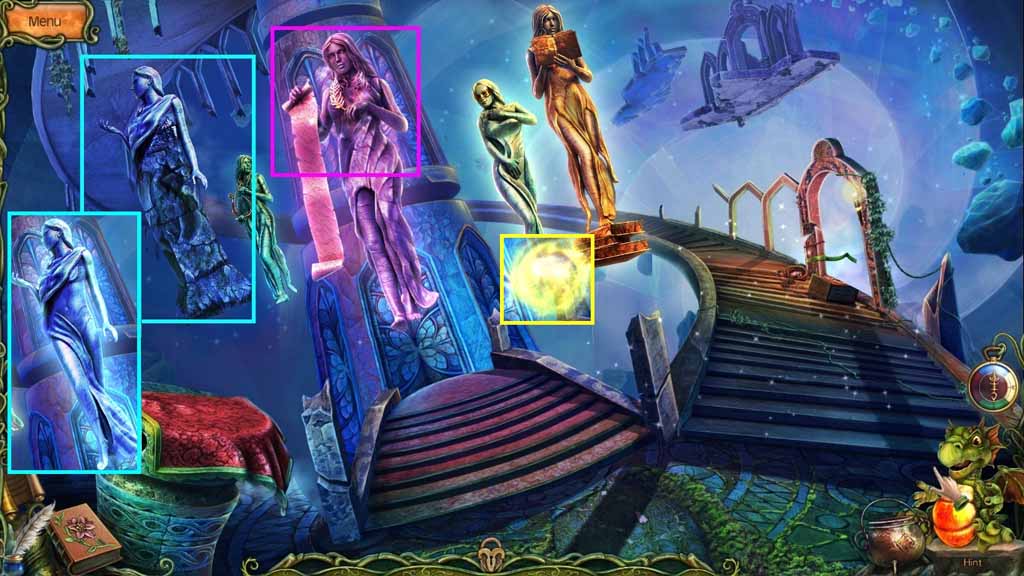
- Put the mirror into Selena’s hand to trigger a mini-game.
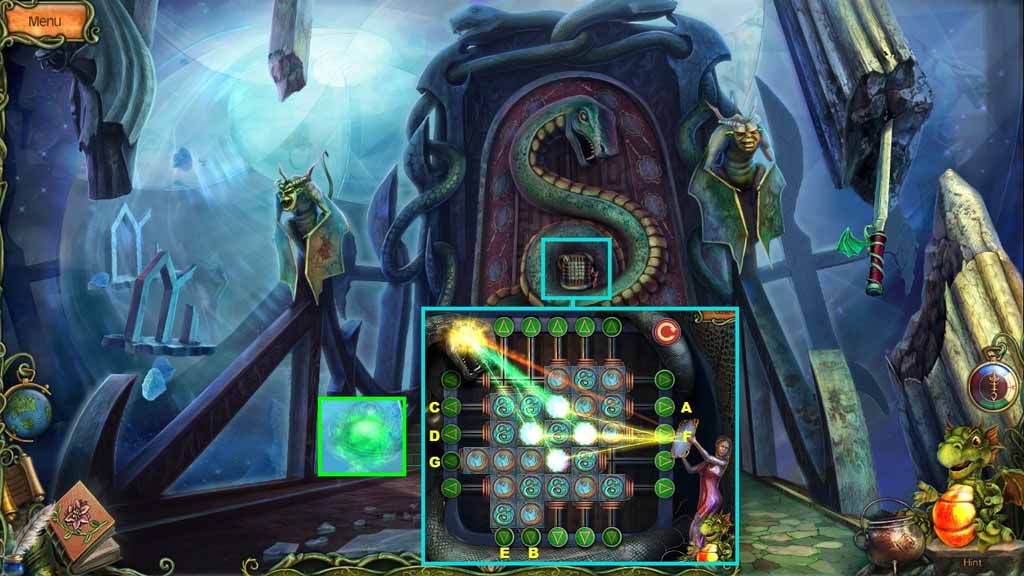
- Align the mirror tiles so that the beams of light will hit them to solve the game.
- Collect the green aura: “Recollection.”
- Move through the gate.
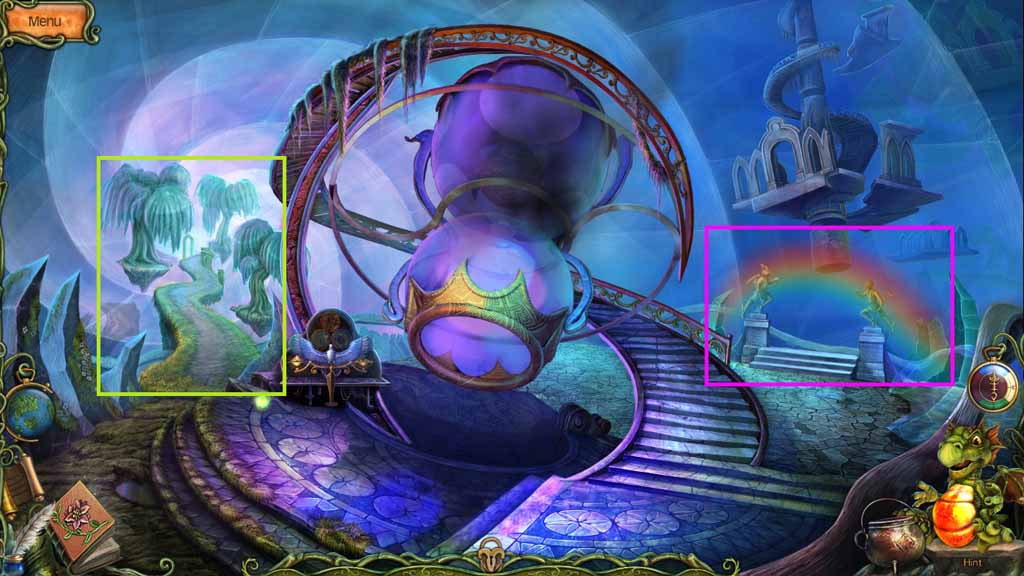
- Click the rainbow; collect the rainbow fragment.
- Move down the path on the left to Rainbow Tree Alley.
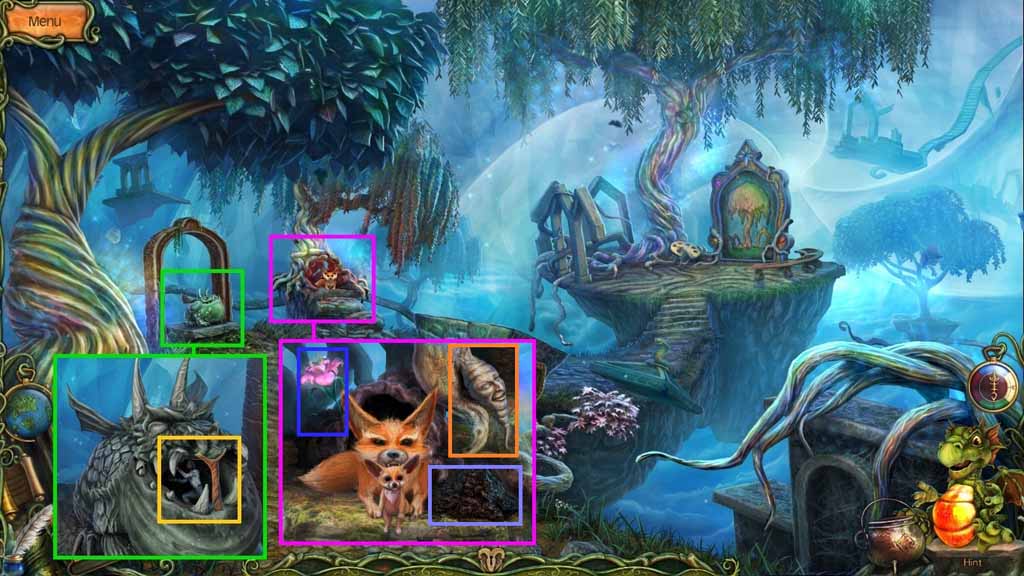
- Click the belcherog; collect the needle.
- Zoom into the fox den; read the memo.
- Collect the silk scarf.
- Zoom into the painting; read the memo.
- Move to the Hourglass.
- Zoom into the statue on the right.
- Select the silk scarf to collect the blue eye from the vines.
- Move to the Dragon Gate.

- Zoom into the gargoyle on the right.
- Insert the blue eye into the socket.
- Collect the gold coins.
- Move to the Pot.
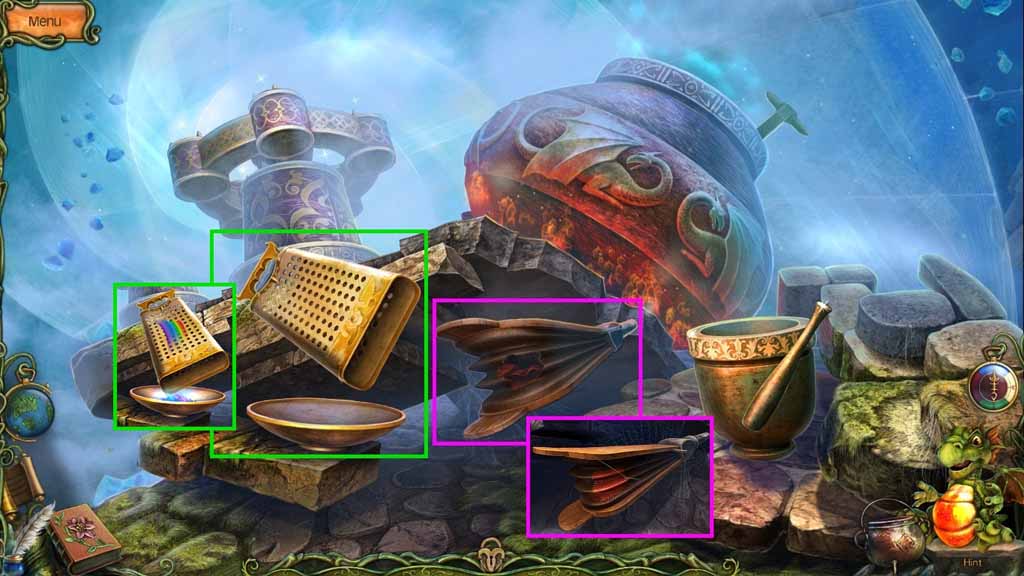
- Zoom into the bellows.
- Select the needle to mend and collect the bellows.
- Grate the rainbow fragment; collect the grated rainbow.
- Move to the Hourglass.
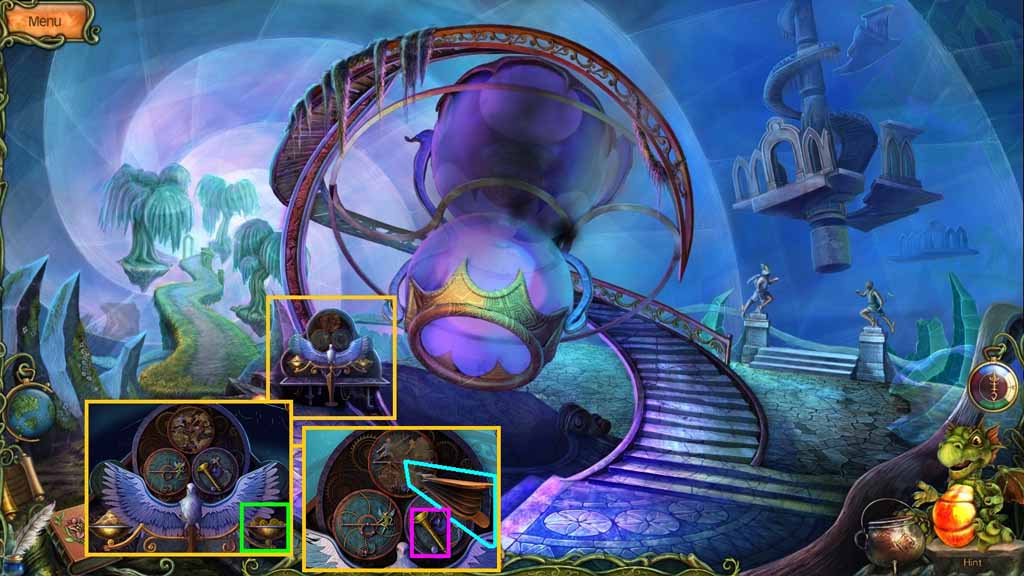
- Zoom into the scales.
- Place the gold coins onto the scale.
- Select the bellows to clear the sand from the mechanism.
- Collect the bugle.
- Move to Rainbow Alley.
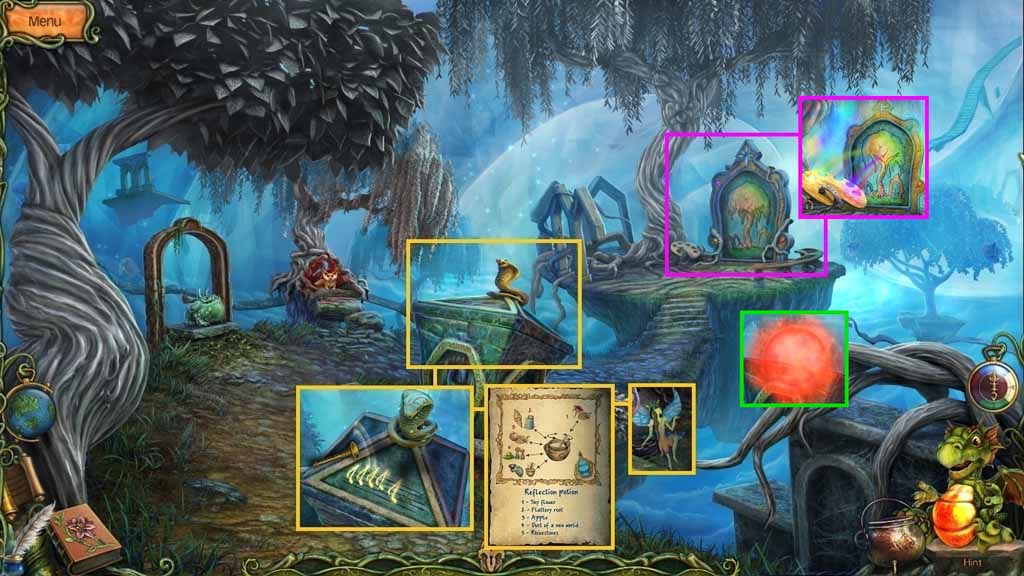
- Play the bugle for the snake.
- Read the Reflection Potion recipe.
- Collect the pixie figurine.
- Zoom into the palette and place the grated rainbow onto it.
- Collect the red aura called, “Experience.”
- Move to the Hourglass.

- Zoom into the scales.
- Place the pixie figurine along with the others.
- Collect the small key.
- Collect the blue aura called, “Power.”
- Go to Rainbow Tree Alley.
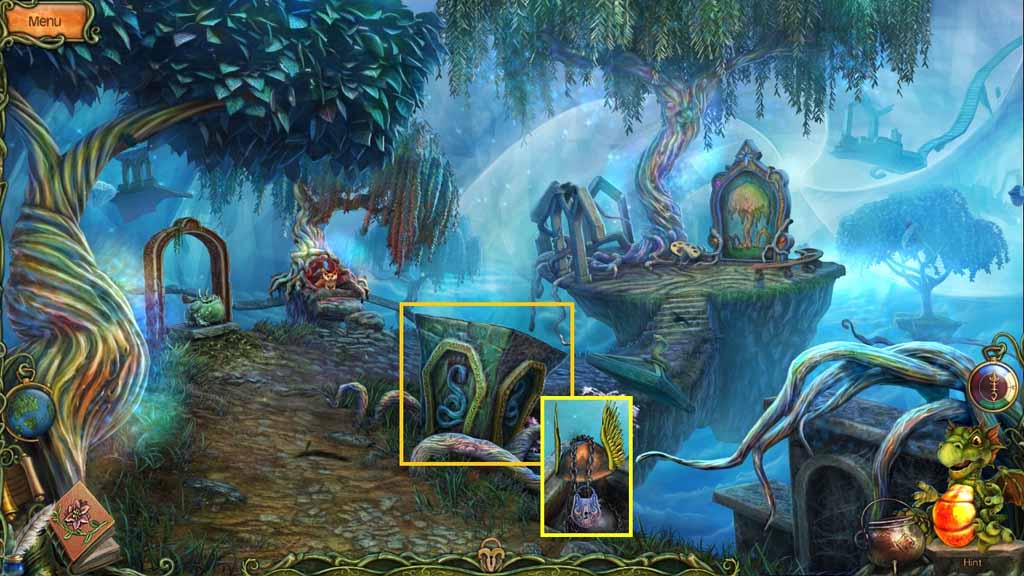
- Zoom into the snake base.
- Select the small key to unlock the padlock.
- Collect the winged helmet.
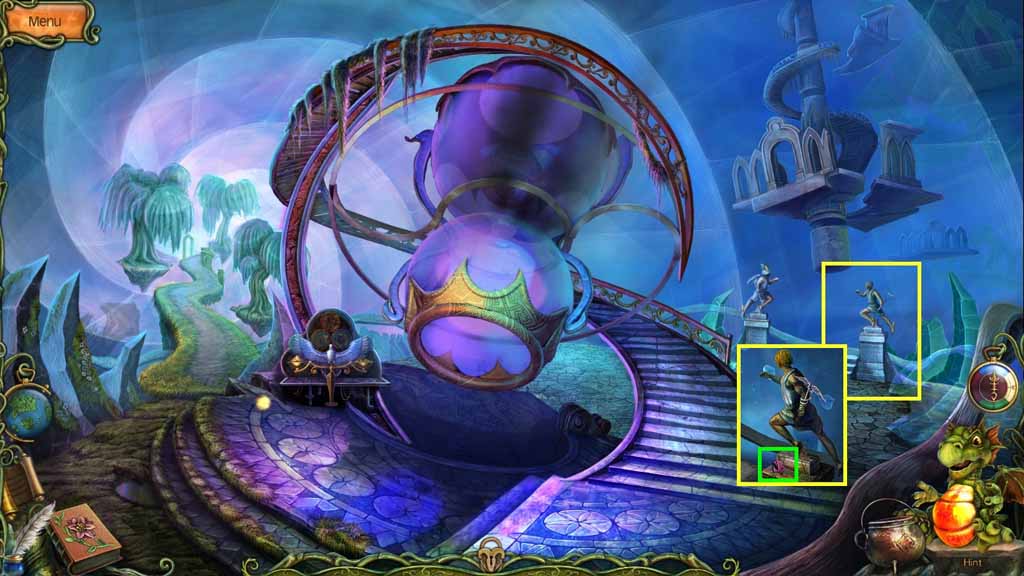
- Move to the Hourglass.
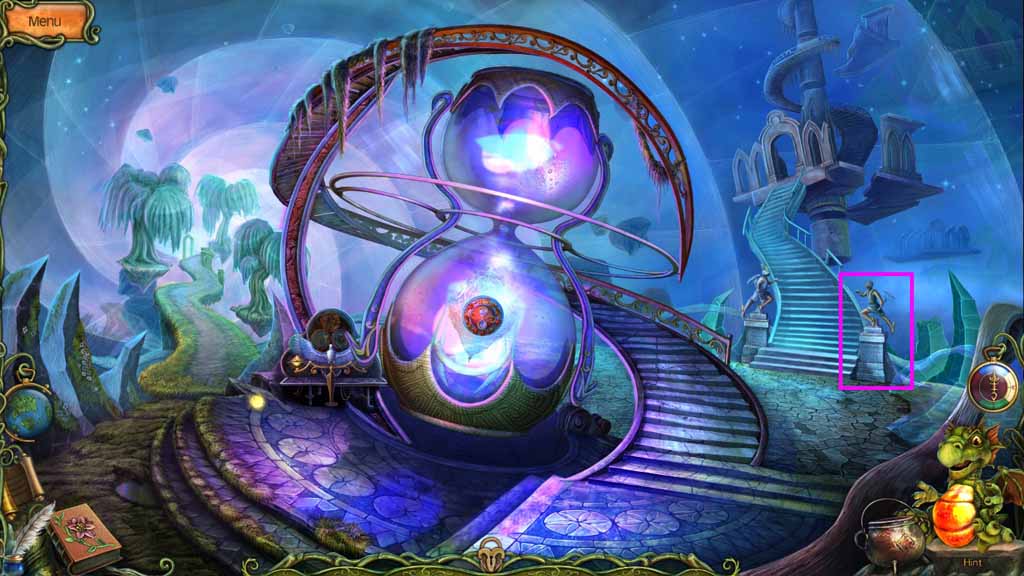
- Place the winged helmet onto the statue next to the Hourglass.
- Move upstairs.
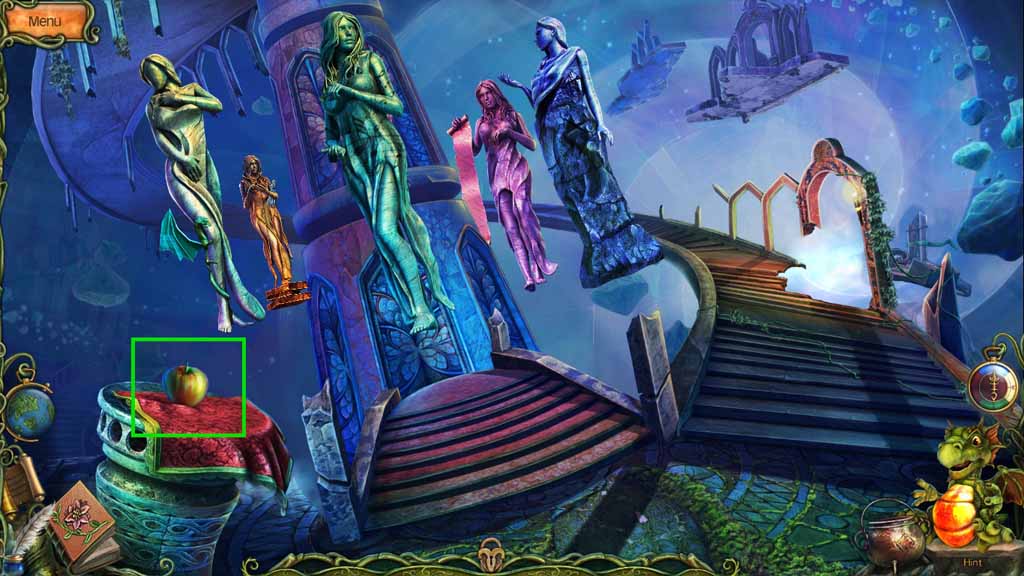
- Collect the apple.
- Move up the stairs next to the stone muses.
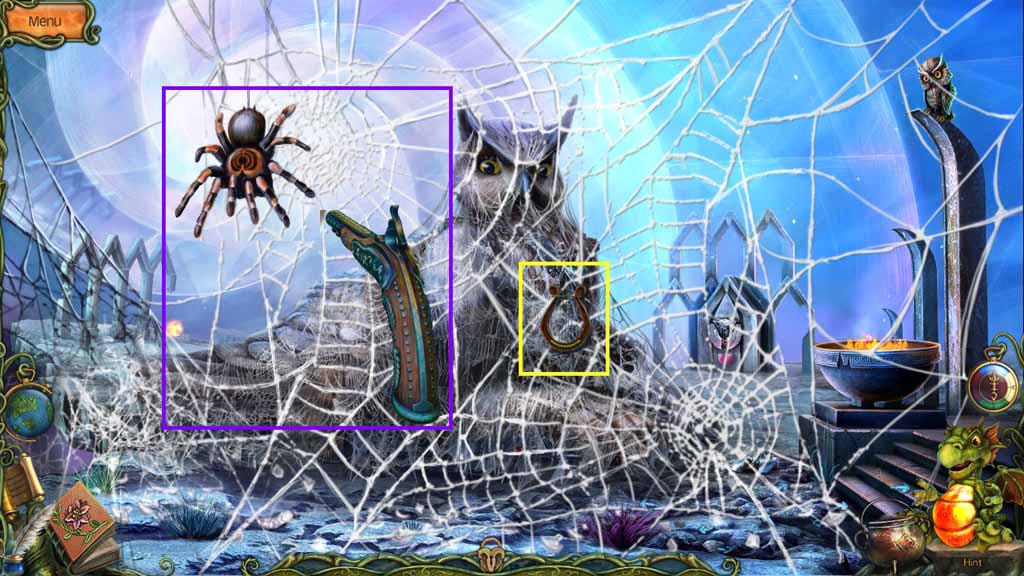
- Attempt to collect the lyre.
- Select the musket to shoot the spider.
- Collect the lyre.
- Move to the Stone Muses.

- Place the lyre with the muse in the middle.
- Collect the dragon.
- Move to the Dragon gate.
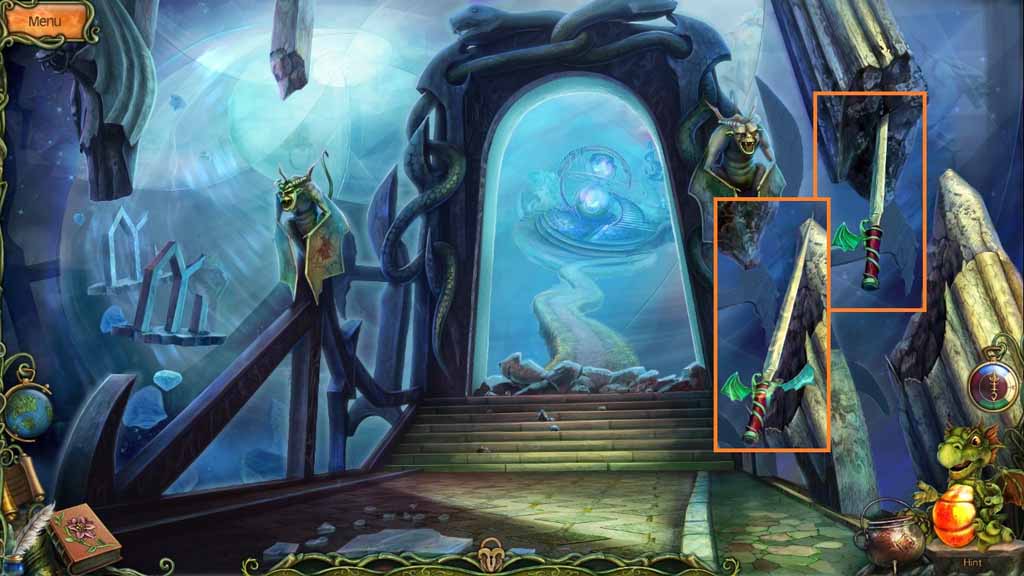
- Place the dragon onto the hilt of the sword.
- Collect the fire sword.
- Move to the Owl Griffin.
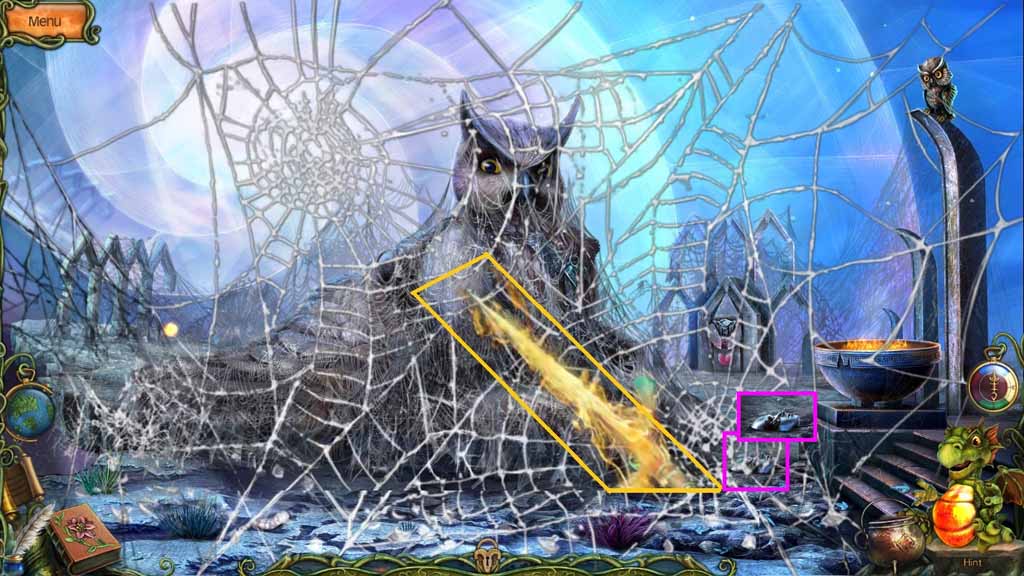
- Select the fire sword and use it to slice through the webs.
- Collect the stone mask.
- Move to the Stone Muses.
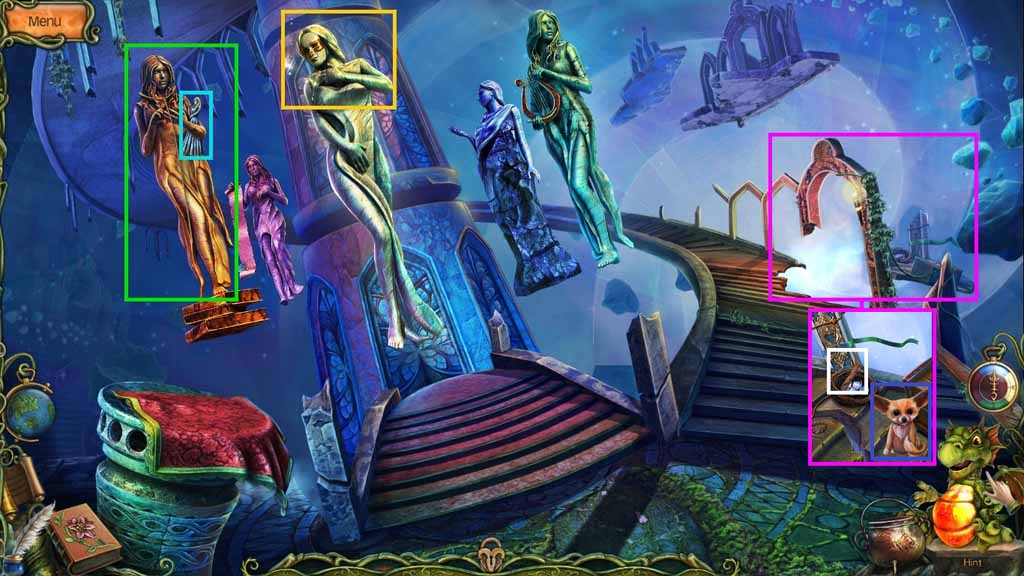
- Give the middle muse the stone mask.
- Collect the lasso.
- Collect the girl figurine.
- Zoom into the broken staircase.
- Select the lasso to collect the broken piece floating nearby.
- Collect the prop.
- Collect the small fox.
- Move to the Rainbow Tree Alley.
- Select the prop to open the belcherog’s mouth.
- Collect the boy figurine.
- Give the baby fox to the mommy fox; collect the soil.
- Collect the flattery root and the sky flower.
- Move to the Owl Griffin.
- Insert the girl and boy figurines into the slots.
- Collect the hourglass, the silver ladle and the owl’s head.
- Read the memos.
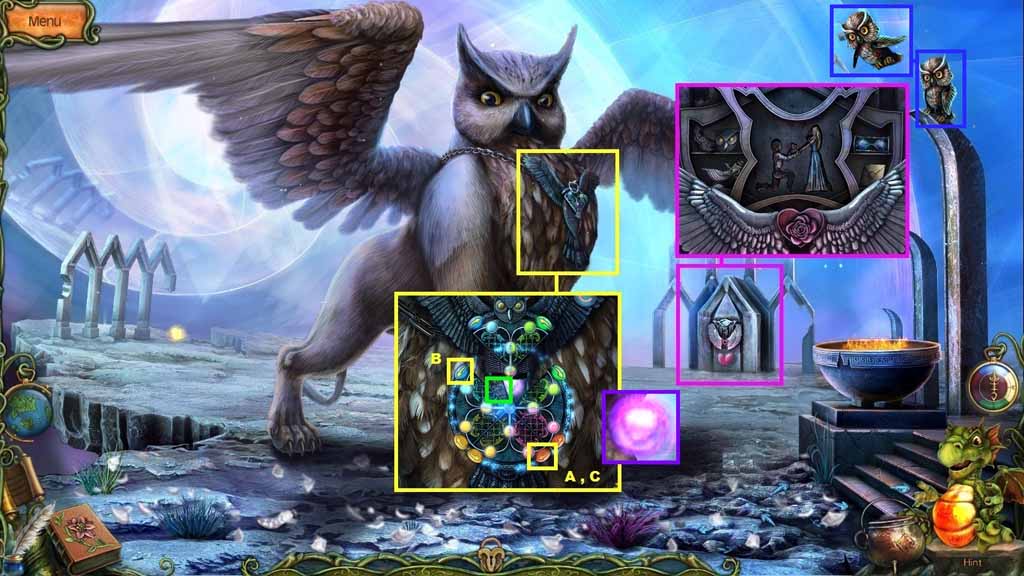
- Select the owl’s head and attach it onto the griffin’s amulet to trigger a mini-game.
- Click the buttons in ABC order to solve the game.
- Collect the whistle.
- Collect the pink aura called, “Wisdom.”
- Select the whistle to lure the owl; collect the owl.
- Move to the Hourglass.
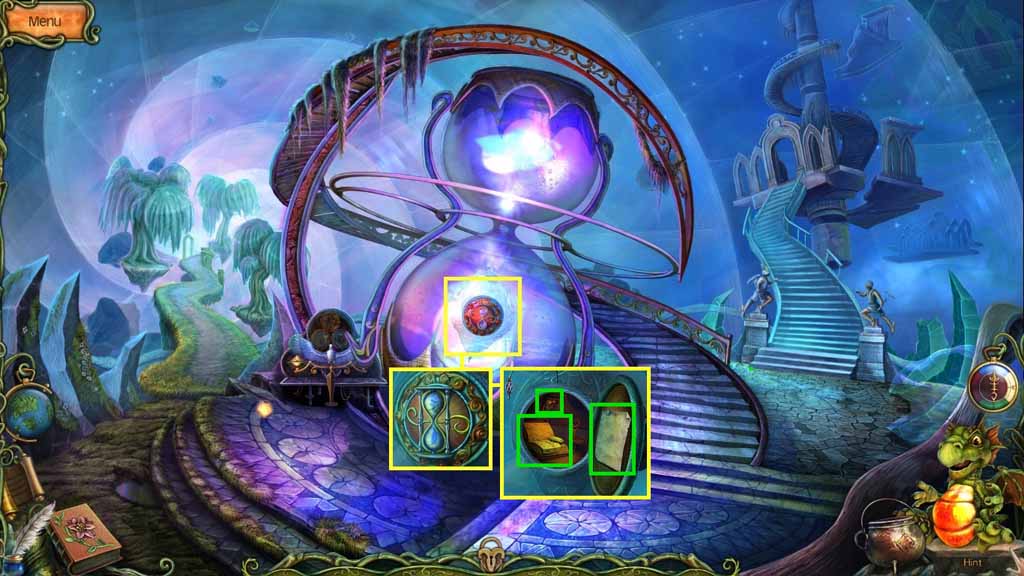
- Select the hourglass to open the door on the hourglass.
- Collect the stone book.
- Read the memos.
- Move to the Stone Muses.
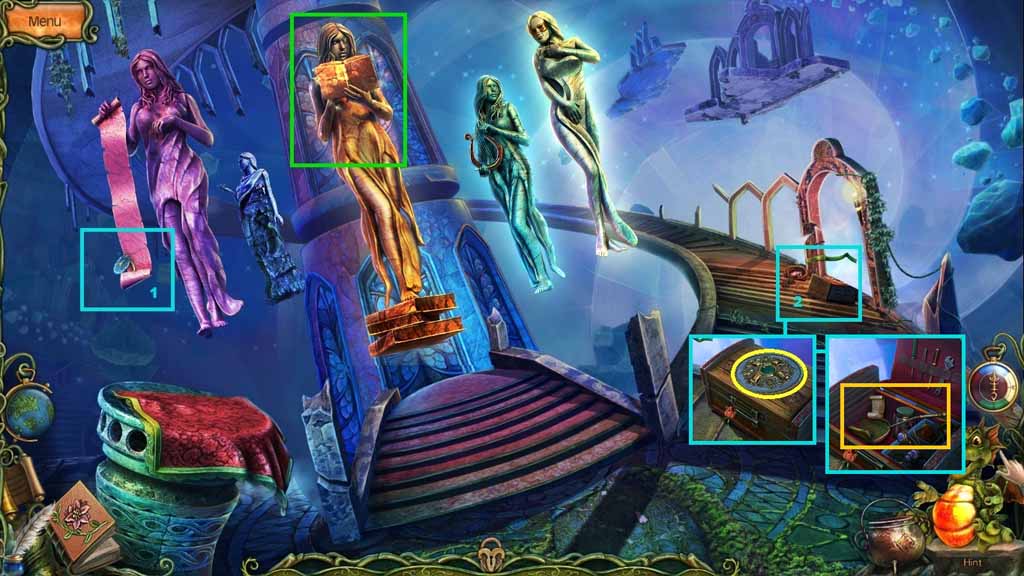
- Give the middle muse the stone book.
- Collect the signet ring; use it to open the chest on the stairs.
- Collect the brush, the chisel and the scoop.
- Read the memo.
- Move to the Owl Griffin.
- Select the scoops; use them to collect the burning coals.
- Collect the stone quill.
- Move to the Stone Muses.
- Select the stone quill and place it with the middle muse.
- Select the chisel to remove the excess stone from the muse.
- Collect the yellow aura called, “Inspiration.”
- Move to the Pot.
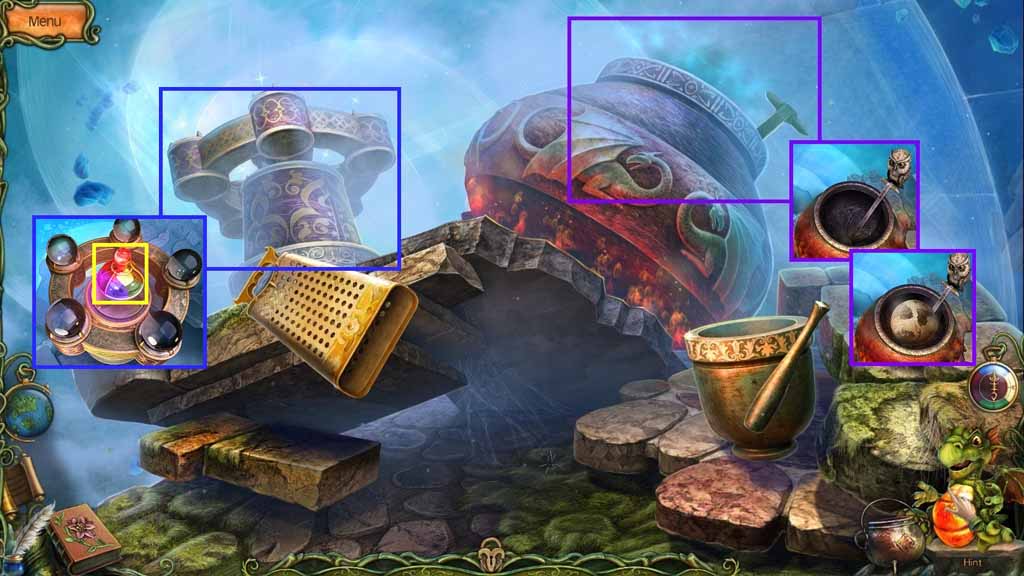
- Select the brush and use it to scrub the pot.
- Place the owl onto the pole.
- Place the burning coals and soil into the pot.
- Zoom into the centrifuge.
- Place the aura’s: Recollection – Inspiration – Wisdom – Experience and Power into the centrifuge.
- Collect the Spirit of Peace.
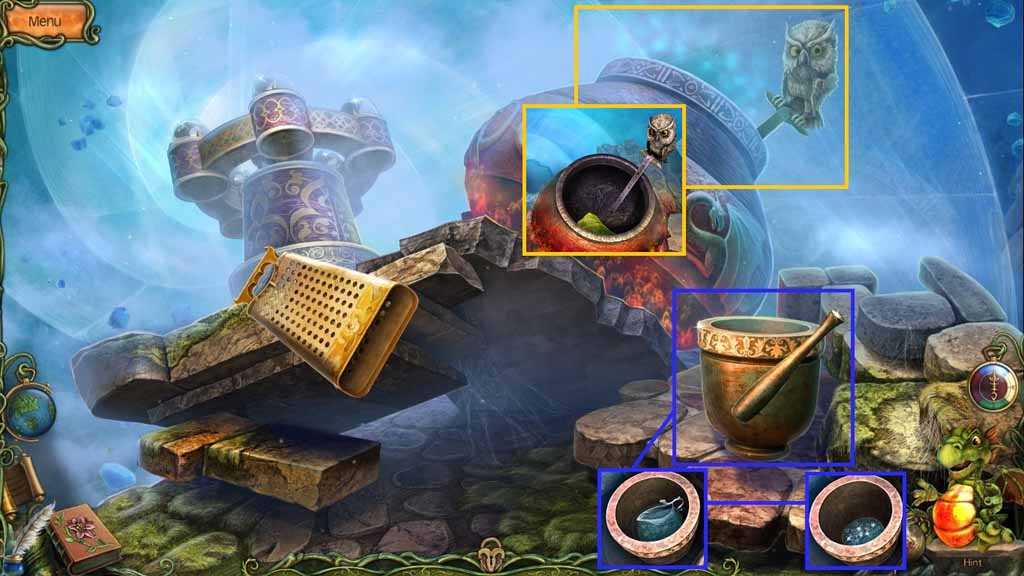
- Dip the silver ladle into the mortar; collect the water.
- Collect the rhinestones.
- Zoom into the pot.
- Pour the water and the Spirit of Peace into the pot.
- Collect the Dust of a New World.
- Create the Reflection Potion.
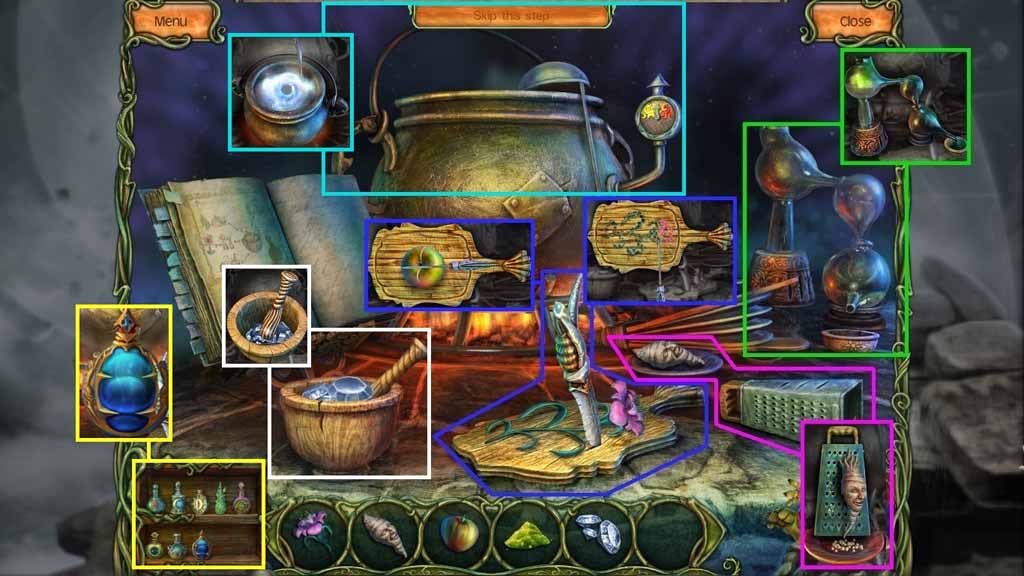
- Place the sky flower onto the cutting board.
- Chop it up.
- Grate the flattery root.
- Place the apple onto the cutting board; chop it up.
- Place the Dust of a New World into the distillery.
- Place the rhinestones into the mortar and crush them.
- Stir the ingredients; collect the Reflection Potion.
- Move to the Mirror Hall.
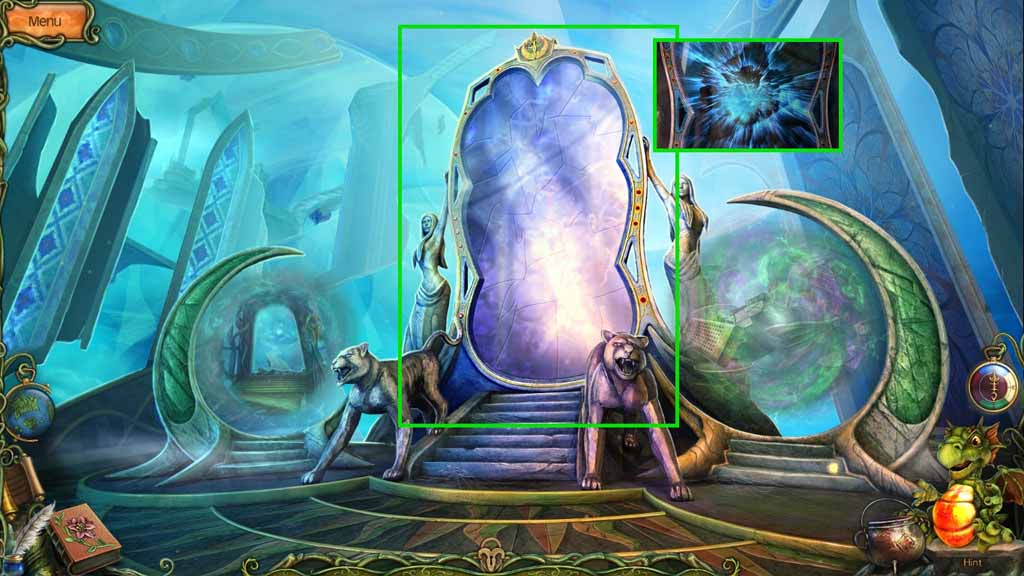
- Pour the Reflection Potion onto the mirror.
- Watch the video.
- Congratulations! You have successfully completed the main game of Forest Legends: The Call of Love Collector’s Edition