
Cursed Fates: The Headless Horseman: Chapter Two
Our Cursed Fates: The Headless Horseman Walkthrough will help you keep your head as you face down the grisly legend that haunts the tiny town of Sleepy Hollow. Armed with detailed solutions to puzzles, custom screenshots depicting exact locations of key items, and step-by-step instructions on how to persevere, you'll have no trouble helping this man of science combat the forces of darkness.
General Info and Tips
Chapter One
Chapter Two
Chapter Three
Chapter Four
Chapter Five
Bonus Chapter
Ask for help in the comments below!
Chapter One
Chapter Two
Chapter Three
Chapter Four
Chapter Five
Bonus Chapter
Ask for help in the comments below!
- Go forward and talk to the boy who wants his sword
- Note the headless statue, empty well, locked door, and strange locked gate
- Go forward to the left
- Pick up the STATUE HEAD
- Note the fishing pier and something in the nest.
- You need a pass to leave
- town-square
- Return to the square
- Place the STATUE HEAD on the statue
- Pick up the now exposed SWORD and give it to the boy
- Receive the TAVERN KEY
- Examine the door and use the KEY

- Enter the tavern
- Pick up the PHONOGRAPH CRANK and PHONOGRAPH
- Examine the record player and place the PHONOGRAPH and CRANK
- Click on the record player
- A key will drop out and the bartender will wake up
- He needs his pince-nez, which are at the midwife's house
- Pick up the KEY TO THE BACKDOOR and the SULFUR on the table
- Examine the door and use the KEY
- Go out the back door
- Pick up the GEAR WHEEL and TABLEUX PIECE
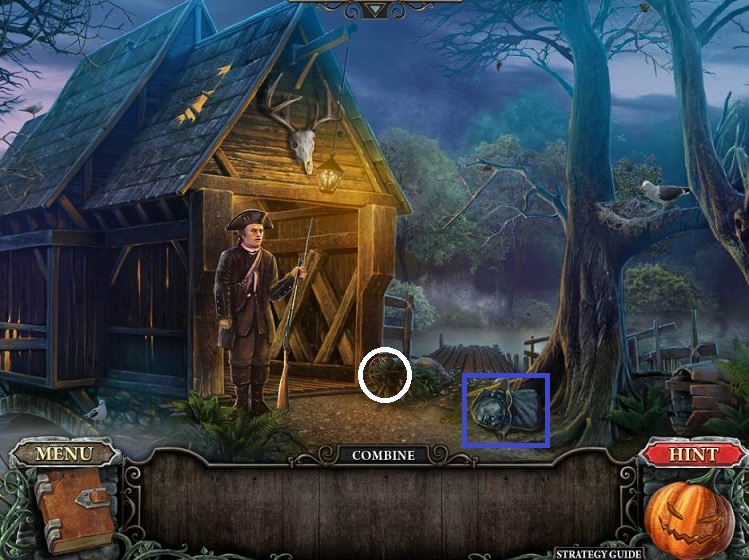
- After a bit, the headless horseman will knock the lantern down and a little boy will pop out from behind the tree; he wants you to save the midwife
- Note the pouch in the tree and hole in the tree roots
- Go forward to the windmill
- Pick up the LATCH, LAMP PART, and SACK
- Return to the tavern
- Examine the cellar door and place the LATCH
- Click on the latch
- Do the Hidden Object Scene
- Receive another TABLEUX PIECE
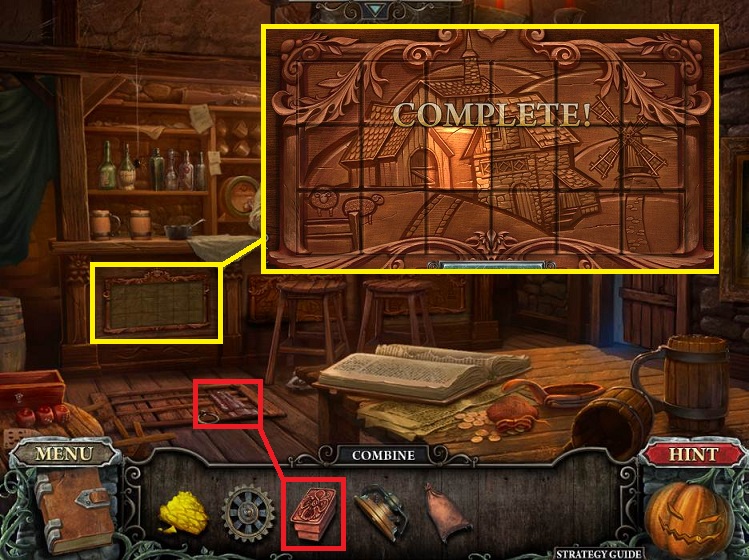
- Examine the board on the front of the bar
- Place the puzzle pieces to match the pattern and rotate as needed
- Pick up the KEY TO THE MILL
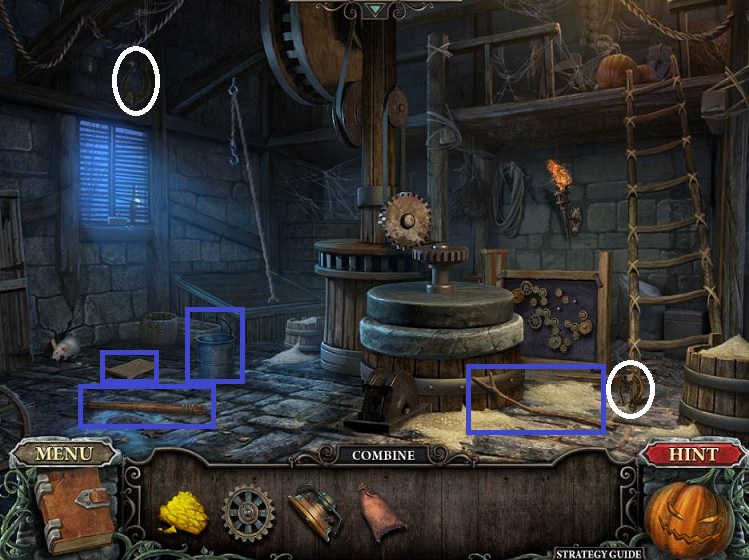
- Return to the mill and use the KEY
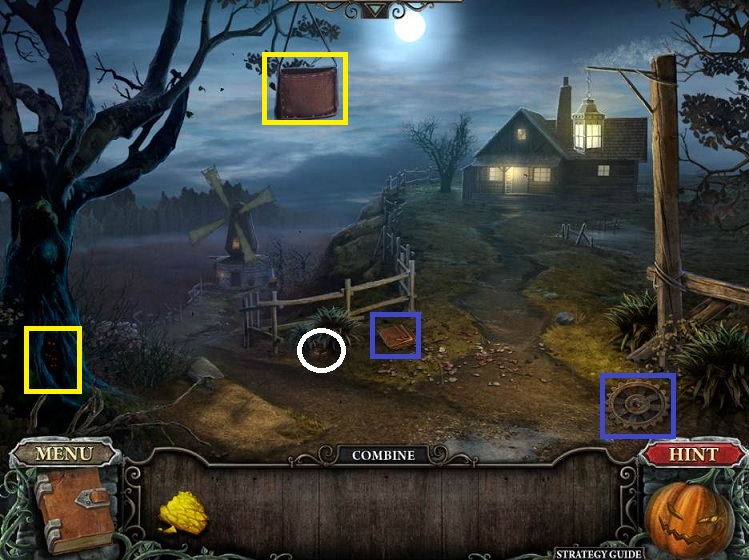
- Pick up the HANDLE, BUCKET, STICK, and page for your book
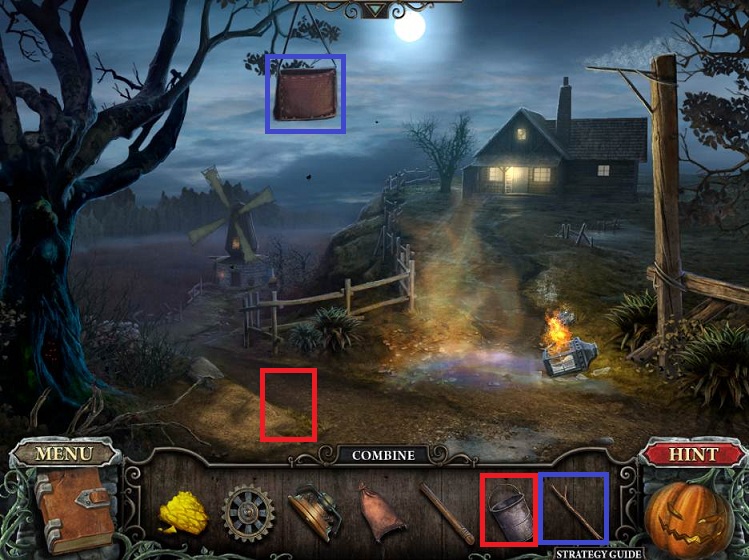
- Back up twice
- Use the STICK to get the bag down out of the tree
- Pick up the CHEESE
- Place the BUCKET next to the sand pile
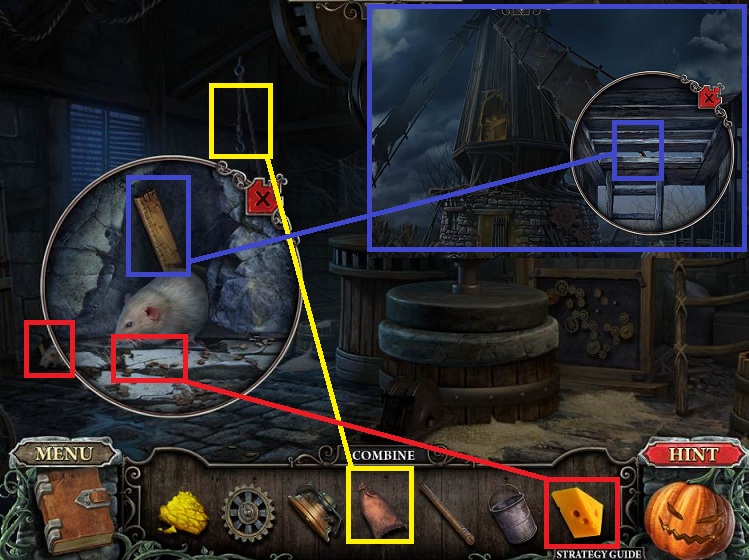
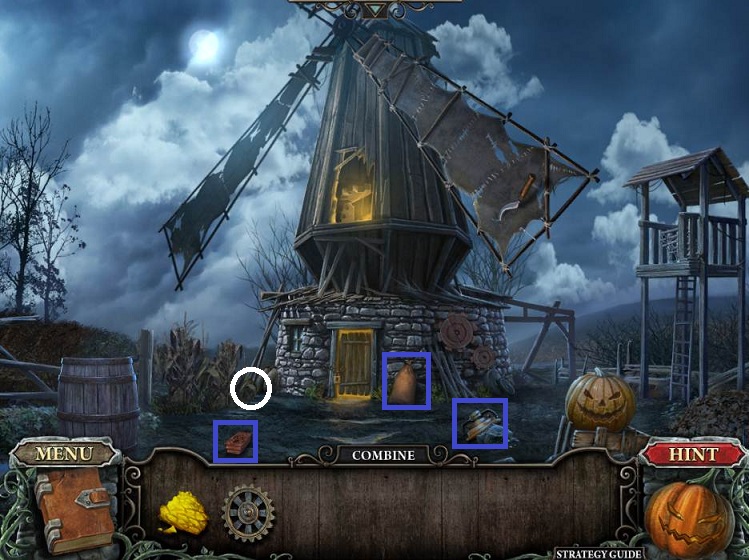
- Return to the mill
- Examine the mouse and place the CHEESE
- Pick up the RULER
- Hang the SACK on the hook over the cellar door
- There is a nail puller that is unreachable
- Go outside
- Examine the tower
- Use the RULER to open the hatch
- Pick up the ROPE LADDER
- Return to the mill
- Examine the cellar door
- Place the LADDER
- Pick up the NAIL PULLER
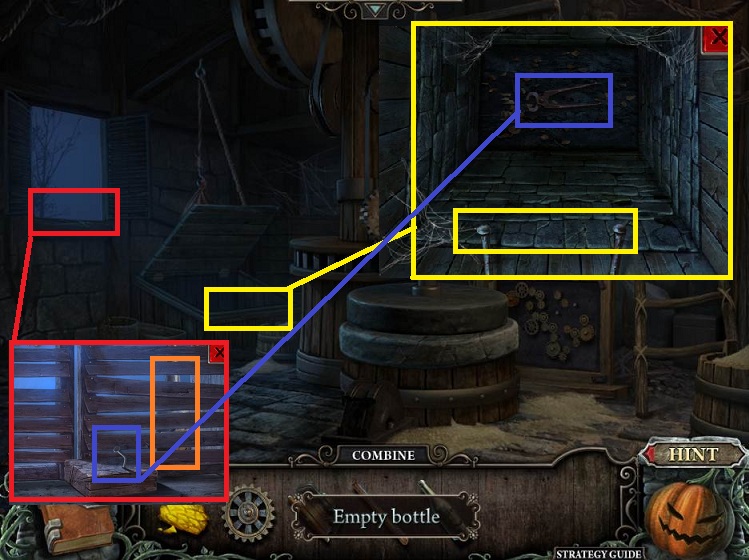
- Examine the window
- Use the NAIL PULLER
- Pick up the EMPTY BOTTLE

- Return to the tavern
- Place the EMPTY BOTTLE on the shelf
- Examine the shelf; you need to replay the tune.
- When you make a mistake, the bottle will turn red; just build up the tune piece by piece until you have it down
- Pick up the GEAR WHEEL
- Return to the mill
- Examine the gear board to the left of the ladder
- Place the GEAR WHEELS
- Do the Hidden Object Scene at the top of the ladder
- Receive the KNIFE
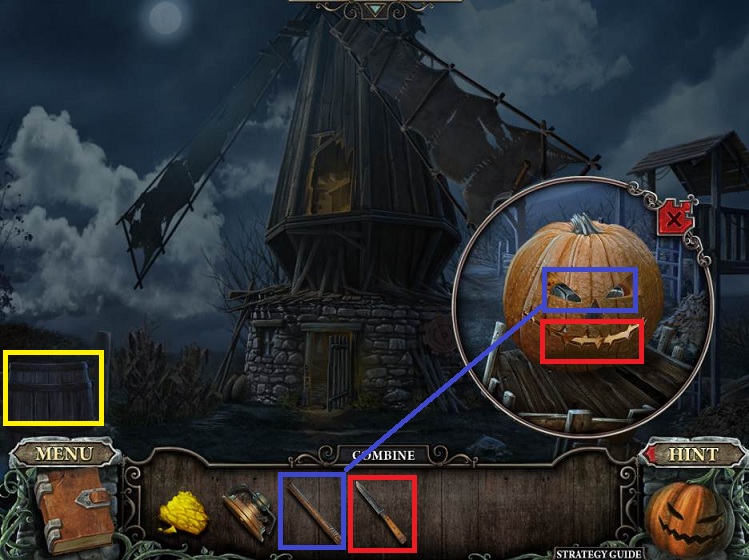
- Go outside
- Examine the pumpkin and use the KNIFE
- Pick up the HAMMER HEAD
- Combine the HAMMER HEAD and HANDLE to get the SLEDGEHAMMER
- Use the SLEDGEHAMMER on the barrel
- Pick up the GEAR LEVER
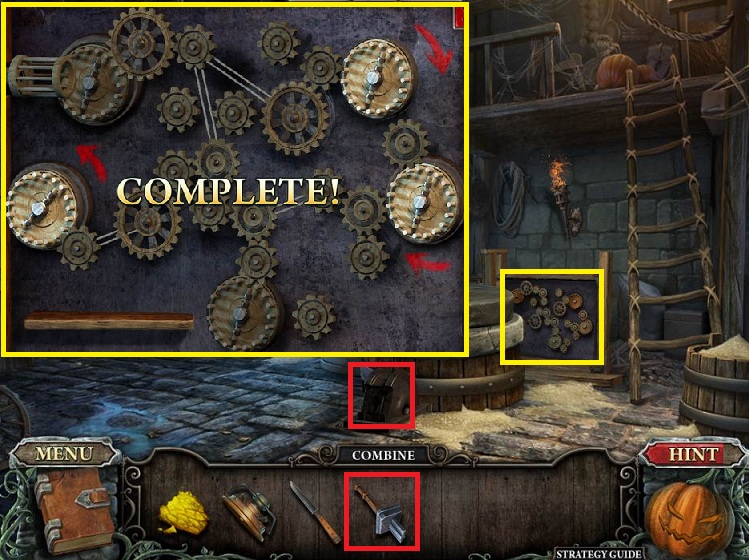
- Go inside the mill
- Place the GEAR LEVER and click
- Examine the gear board
- Place the pulleys as indicated
- Receive the PULLEY

- Go outside
- Place the PULLEY on the gears; the windmill will turn
- Pick up the SICKLE
- Examine the corn to the left and use the SICKLE 3 times
- Pick up the SHOVEL
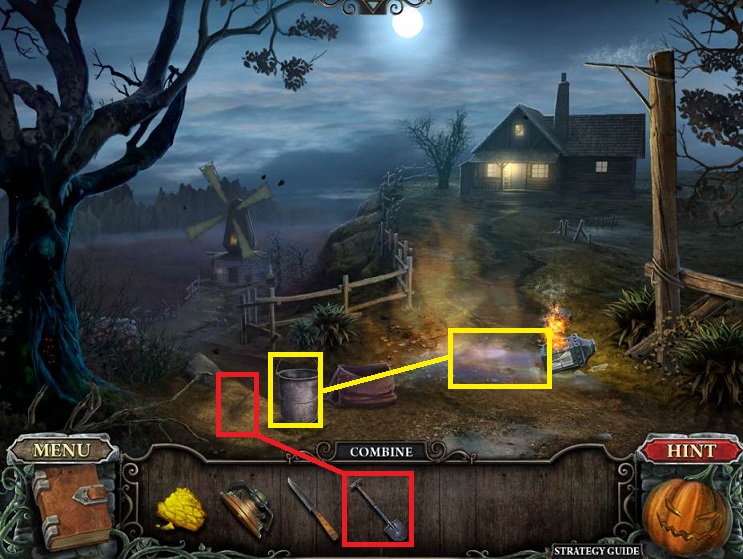
- Back up and use the SHOVEL to place sand in the BUCKET
- Pick up the BUCKET and use on the fire
- Go forward
- Pick up the NITER and CANDLE
- Note the bat in the tree and the dry flower

- Return to the mill
- Examine the torch on the wall
- Use the CANDLE to get a LIT CANDLE

- Do the Hidden Object Scene at the top of the ladder
- Receive a SCREWDRIVER
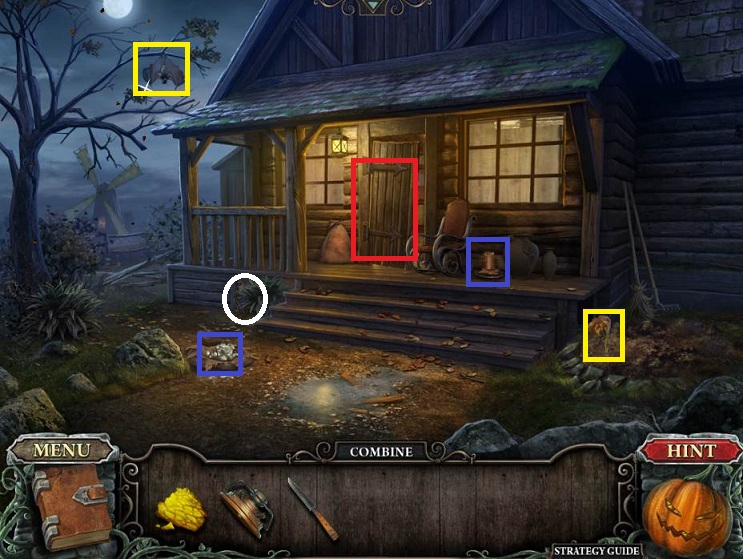
- Return to the house and examine the door
- Use the SCREWDRIVER
- Enter the house
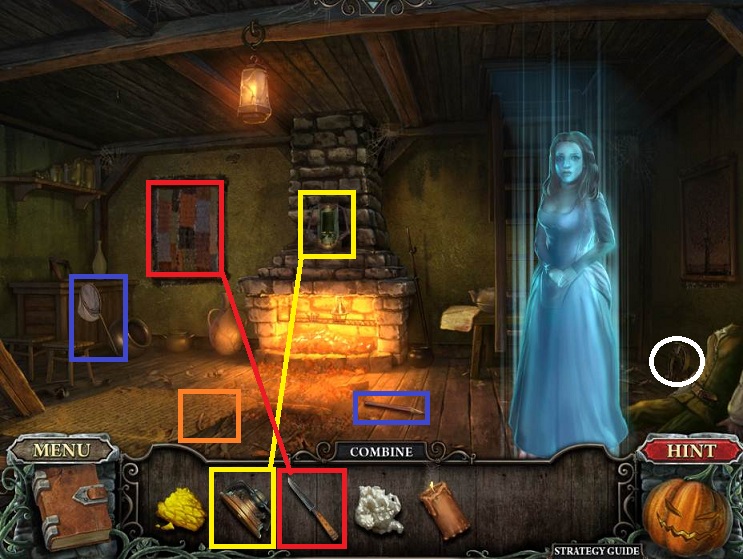
- Click on the body on the floor
- The female ghost wants you to find her son in the cellar
- Examine the lantern on the mantle
- Place the LANTERN PIECE
- Pick up the BUTTERFLY NET and PENCIL
- Click on the rug to expose the lock on the cellar door
- Use the KNIFE on the frame to expose a number lock safe
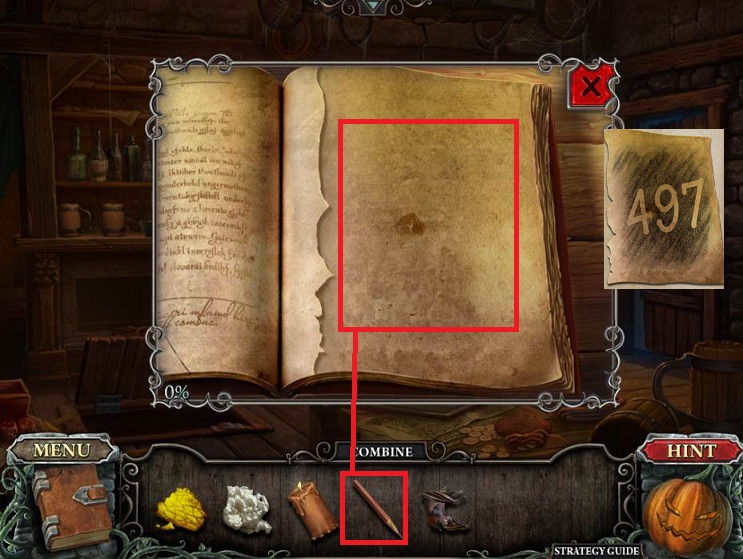
- Return to the tavern
- Use the PENCIL on the book to rub the indentation
- Receive the number for the safe
- Return to the house
- Examine the safe
- Enter the number and click on the handle
- Pick up the KEY TO THE BASEMENT
- Examine the floor
- Use the KEY
- Enter the basement
- Notice the locked chest, crusher, statue with empty hands, and a recipe book
- Pick up the PINCENEZ and WATERING POT

- Go outside
- Use the WATERING POT on the dead flower
- Pick up the LILY FLOWER
- Use the BUTTERFLY NET on the bat
- Receive the BAT
- Return to the tavern
- Give the PINCNEZ to the bartender
- Receive a GINSENG ROOT
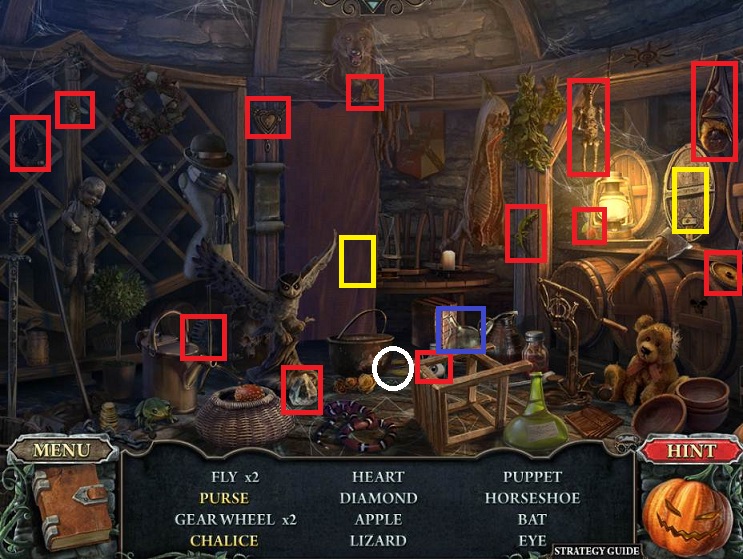
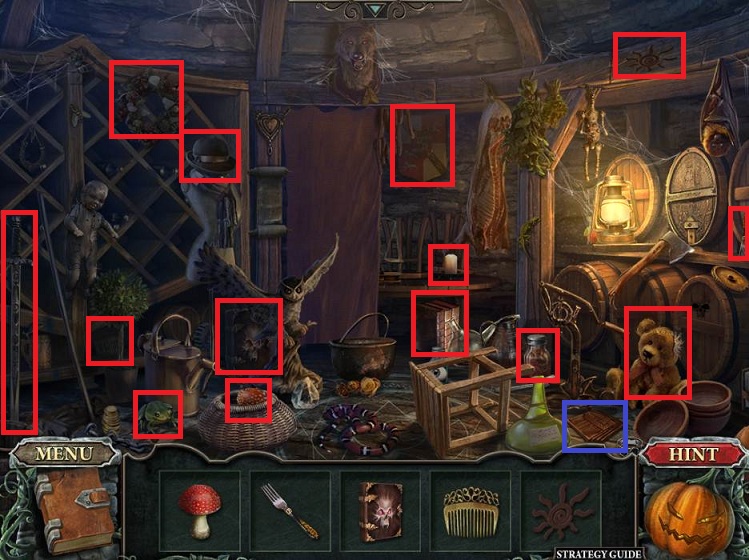
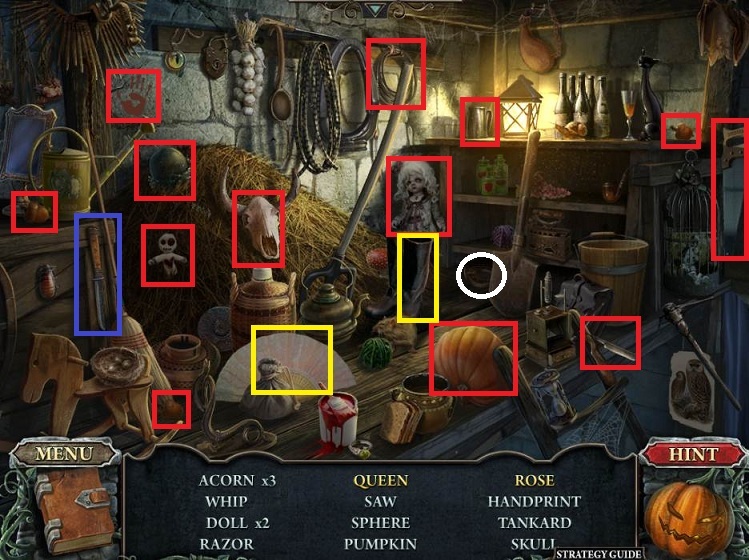
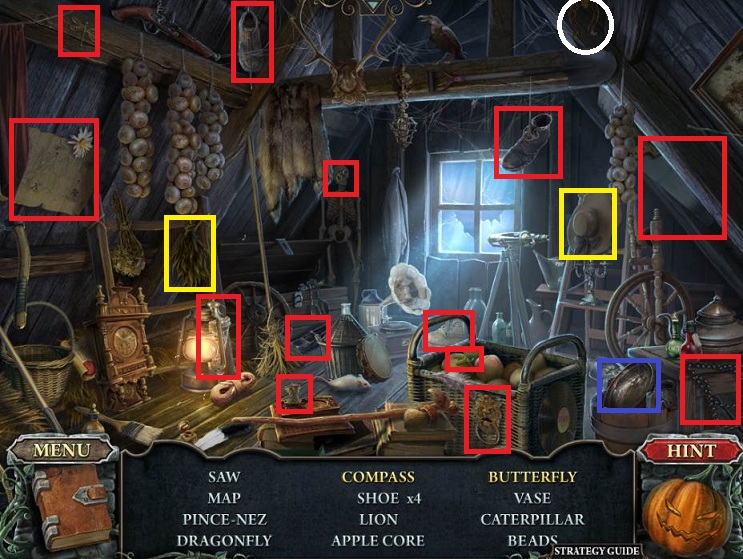
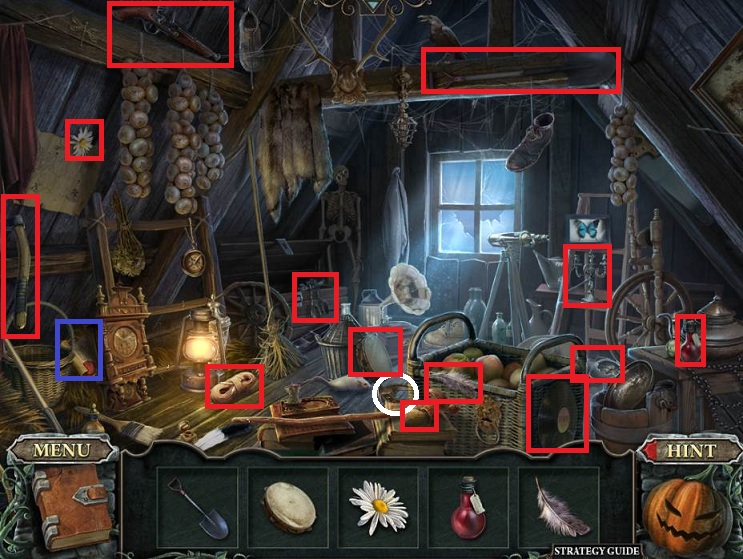
- Do the Hidden Object Scene in the cellar in the tavern
- Receive the RETORT
- Note you can't pick up the horseshoe (hidden) until you pick up the eye
- Return to the house
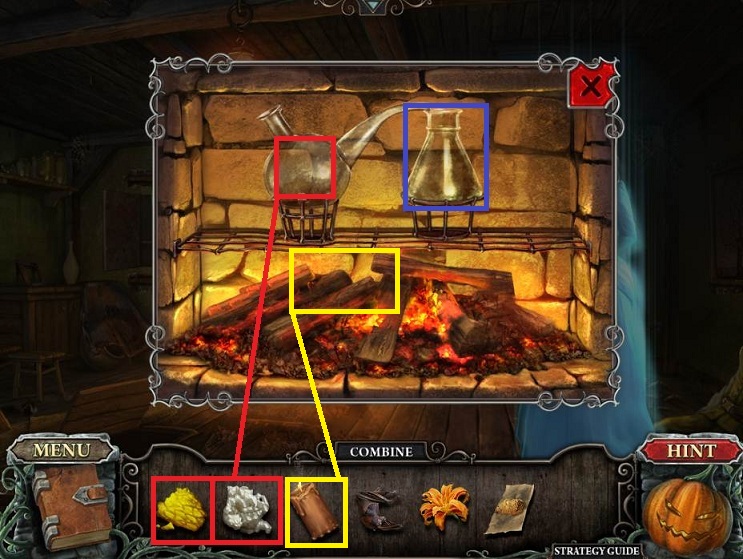
- Examine the fireplace
- Place the RETORT in the open holder
- Put the NITER (white) and SULFUR (yellow) into the retort
- Use the LIT CANDLE to light the fire
- Pick up the SULFURIC ACID
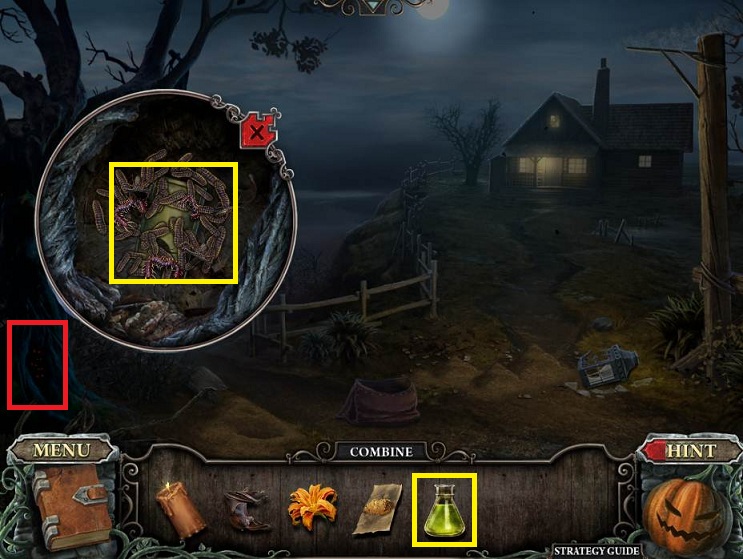
- Back up twice
- Examine the tree roots
- Use the SULFURIC ACID
- Pick up the LAMP PART
- Go back into the house and examine the mantle
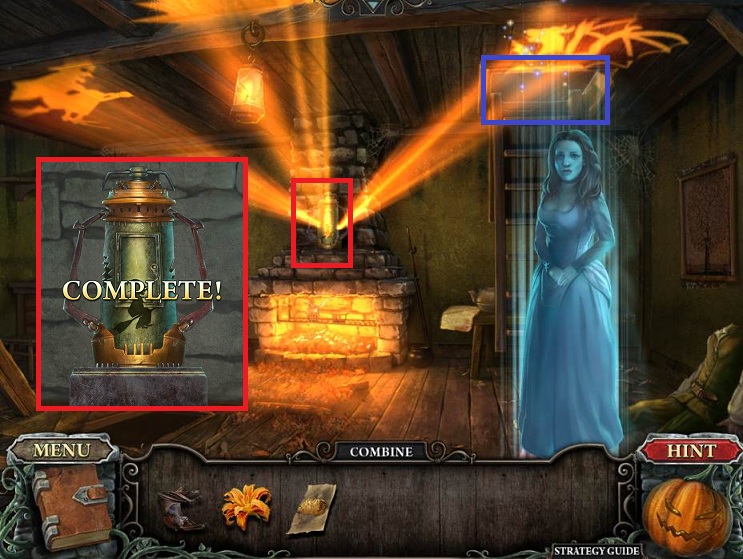
- Place the LAMP PART on the lantern which triggers a puzzle
- Assemble the lantern from bottom to top
- Examine again
- Click on the door
- Place the CANDLE
- Do the Hidden Object Scene at the top of the ladder to the right
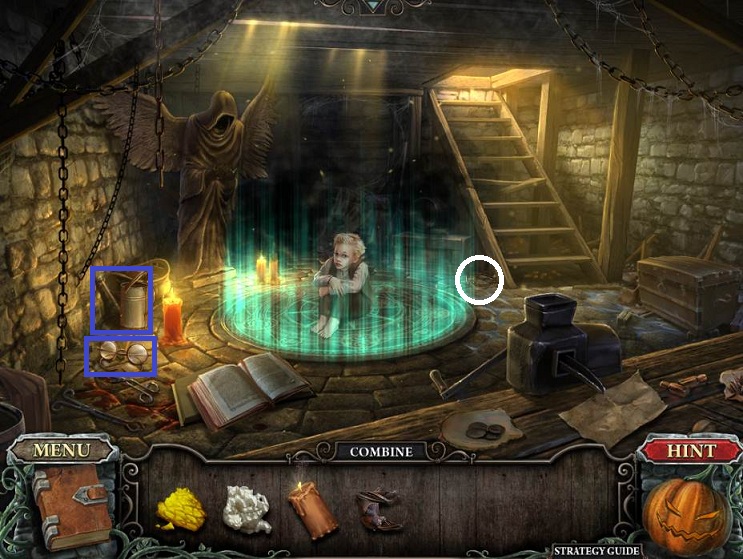
- Receive the RITUAL BOWL
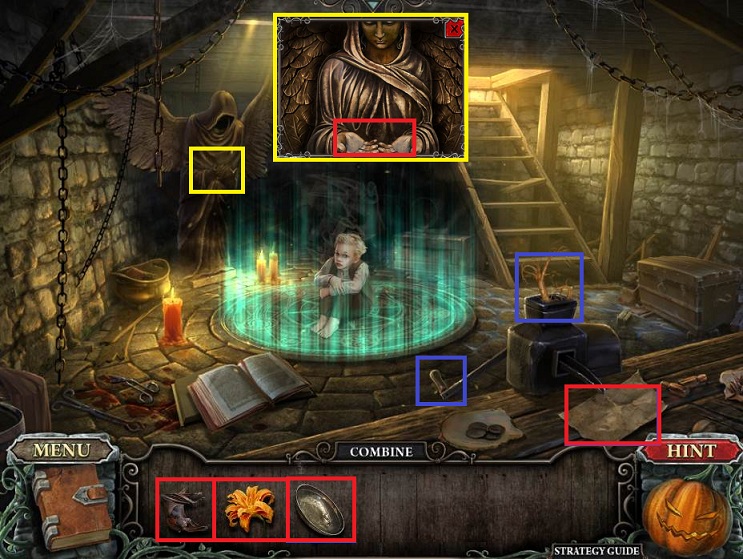
- Go into the basement
- Put the GINSENG ROOT in the crusher and click the handle
- Pick up POWDERED GINSENG ROOT
- Examine the statue
- Place the BOWL in the statue's hands
- Place the BAT, GINSENG, and LILY in the bowl
- The little boy is released and gives you his TOY
- Go upstairs and give the ghost the BOY'S TOY
- She will give you the CHEST KEY
- Return to the Basement
- Examine the chest and use the CHEST KEY
- Pick up the PASS FRAGMENT
- Go upstairs and do another Hidden Object Scene at the top of the ladder
- Receive the PASS FRAGMENT
- Combine the 2 fragments together to get the PASS
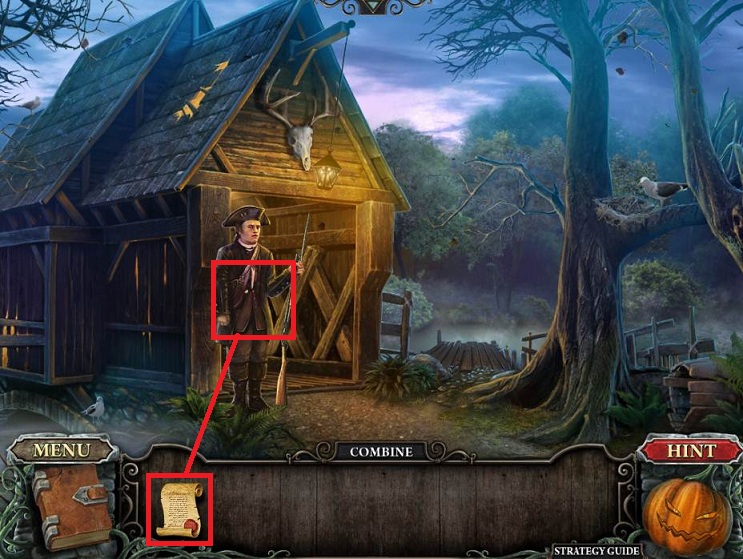
- Return to the guard at the covered bridge
- Give him the PASS
- Go into the bridge to end the chapter
General Info and Tips
Chapter One
Chapter Two
Chapter Three
Chapter Four
Chapter Five
Bonus Chapter
Ask for help in the comments below!
Chapter One
Chapter Two
Chapter Three
Chapter Four
Chapter Five
Bonus Chapter
Ask for help in the comments below!