Cruel Games: Red Riding Hood: Chapter Four: The Casino
Take our Cruel Games: Red Riding Hood Walkthrough along on your adventure as insurance against the evil Storyteller and his dark and twisted plans as you are forced to act out the role of Red Riding Hood for his sick enjoyment in order to save your fiancé. You'll enjoy the endless supply of helpful hints and tips along with step-by-step instructions, puzzle solutions, and detailed screenshots showing you exactly how to best this evildoer.
General Info and Tips
Chapter One: The Cemetery
Chapter Two: The Town
Chapter Three: The Bar's Roof
Chapter Four: The Casino
Chapter Five: The Balcony
Ask for help in the comments below!
Chapter One: The Cemetery
Chapter Two: The Town
Chapter Three: The Bar's Roof
Chapter Four: The Casino
Chapter Five: The Balcony
Ask for help in the comments below!
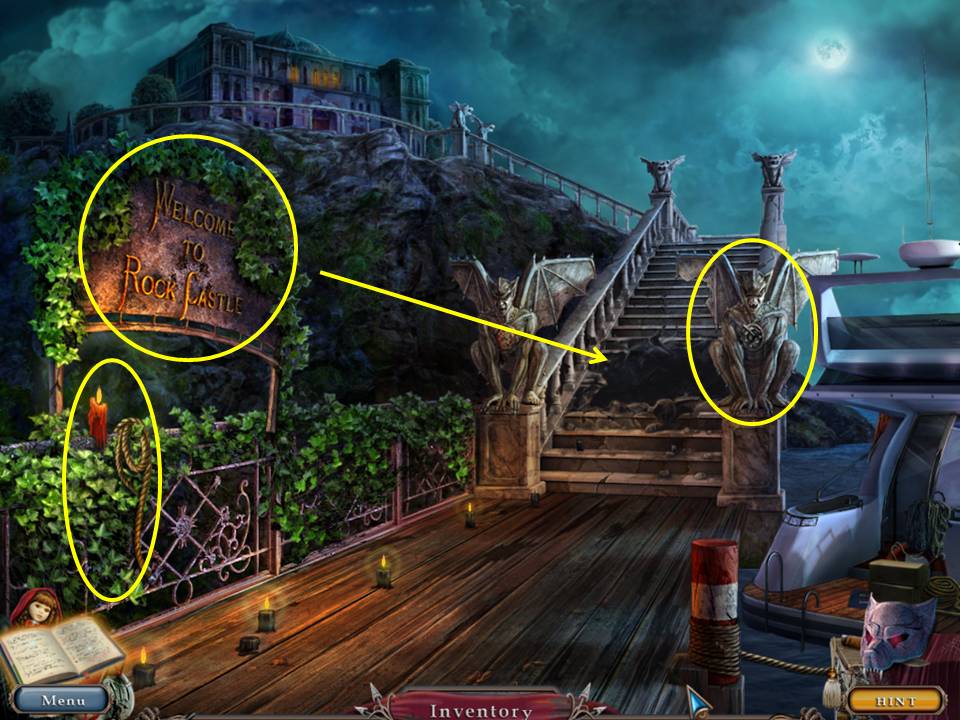
- Take the ROPE and CANDLE.
- Click the sign three times to take the SIGN.
- Zoom into the right gargoyle.
- Take the CHISEL.
- Place the SIGN in the gap.
- Go forward.
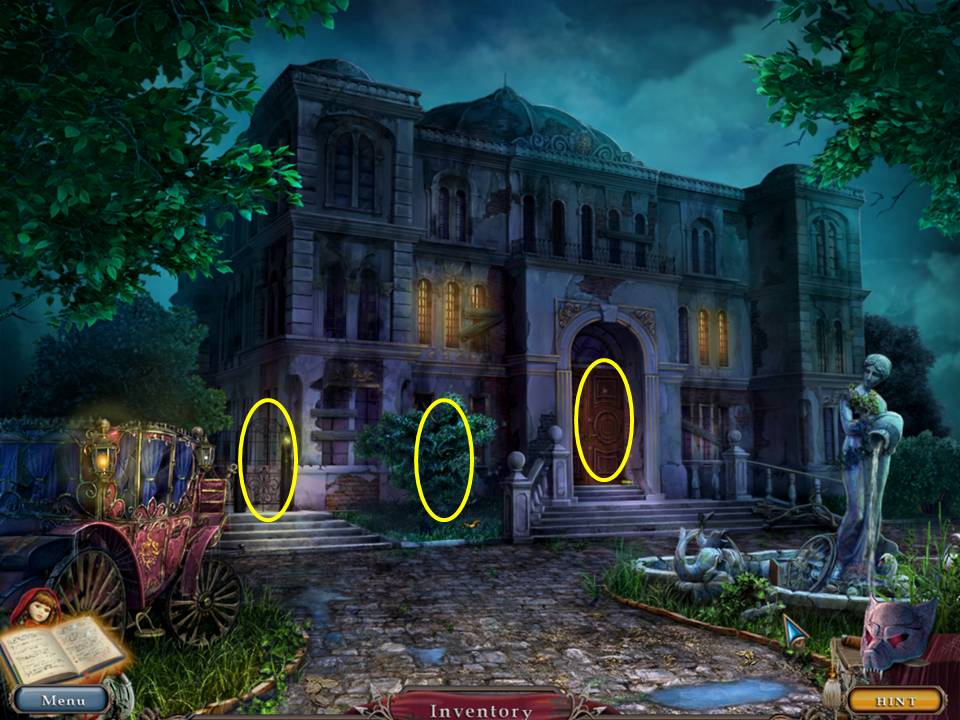
- Zoom into the gate.
- Take the ANKH.
- Zoom into the bush.
- Take the PHOENIX.
- Zoom into the door.
- Take the ANTI-RUST SPRAY.
- Insert the STRANGE KEY into the lock.
- Enter the building.
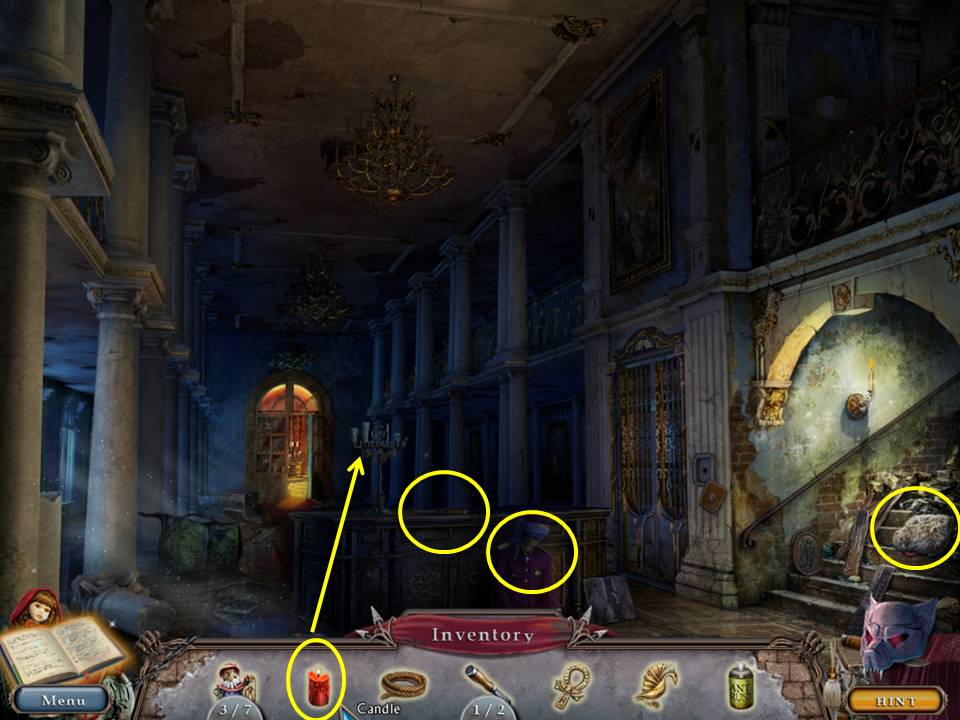
- Light the candlestick with the CANDLE.
- Zoom into the table.
- Take the HAMMER to make the HAMMER AND CHISEL.
- Zoom into the figure.
- Take the SCARF, the note, and the ELEVATOR BUTTON.
- Take the ROOM KEY.
- Zoom into the stairs.
- HAMMER AND CHISEL the large rock.
- Take the VALVE.
- Click down.
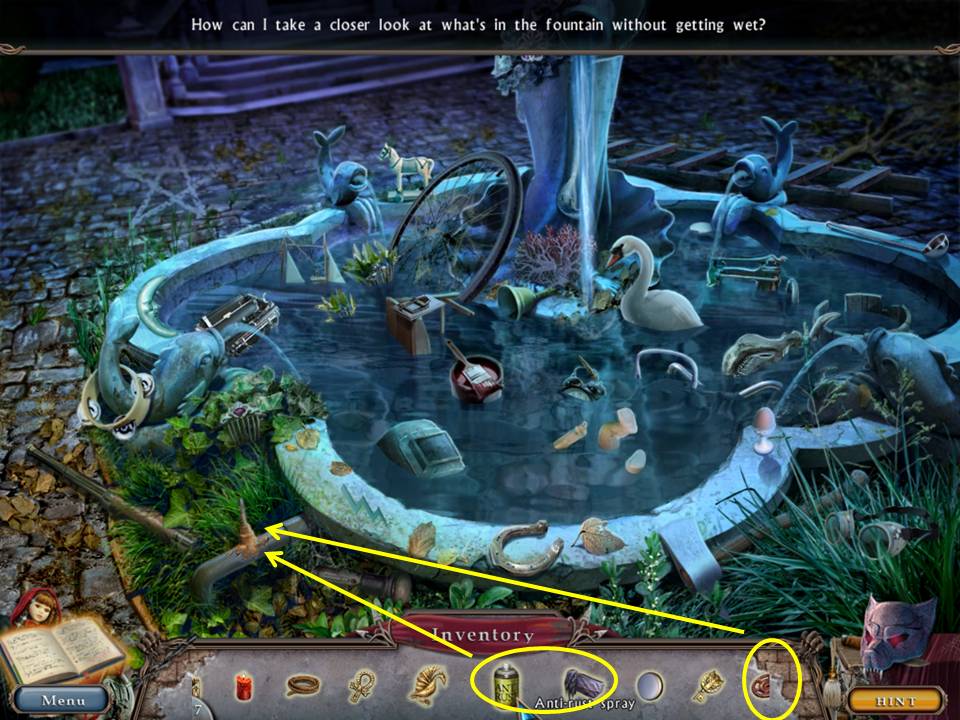
- Zoom into the fountain.
- Spray the pipe with the ANTI-RUST SPRAY.
- Rub the pipe with the SCARF.
- Place the VALVE on the pipe.
- Click the valve.
- Play the HOA.
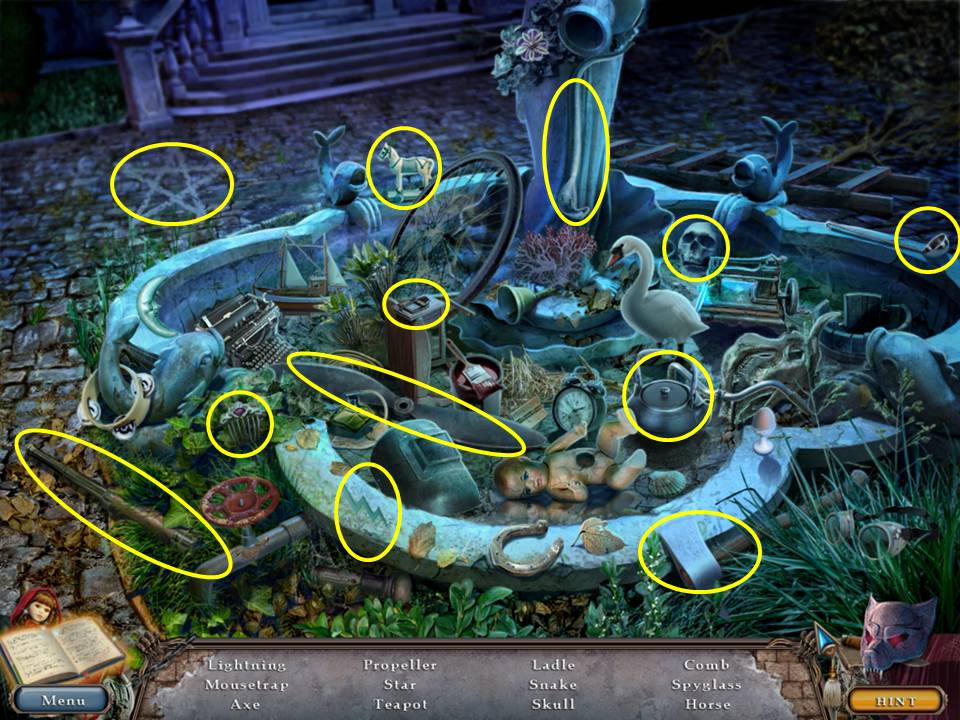
- Find the items listed.
- Receive the AXE.
- Go forward two times.
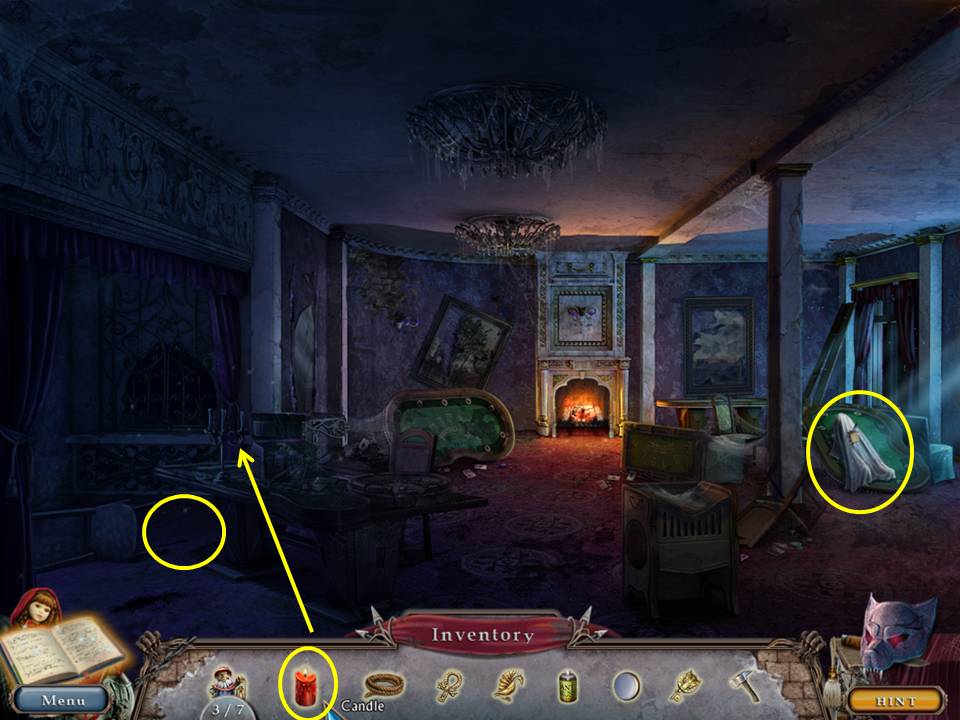
- Light the candlestick with the CANDLE.
- Zoom into the broken table.
- Take the note and the KNIFE.
- Click the sheet covering the figure.
- Click the arm on the figure.
- Zoom into the floor.
- Cut the carpet with the KNIFE.
- Chop the planks with the AXE.
- Place the ROPE at the opening.
- Descend the rope.
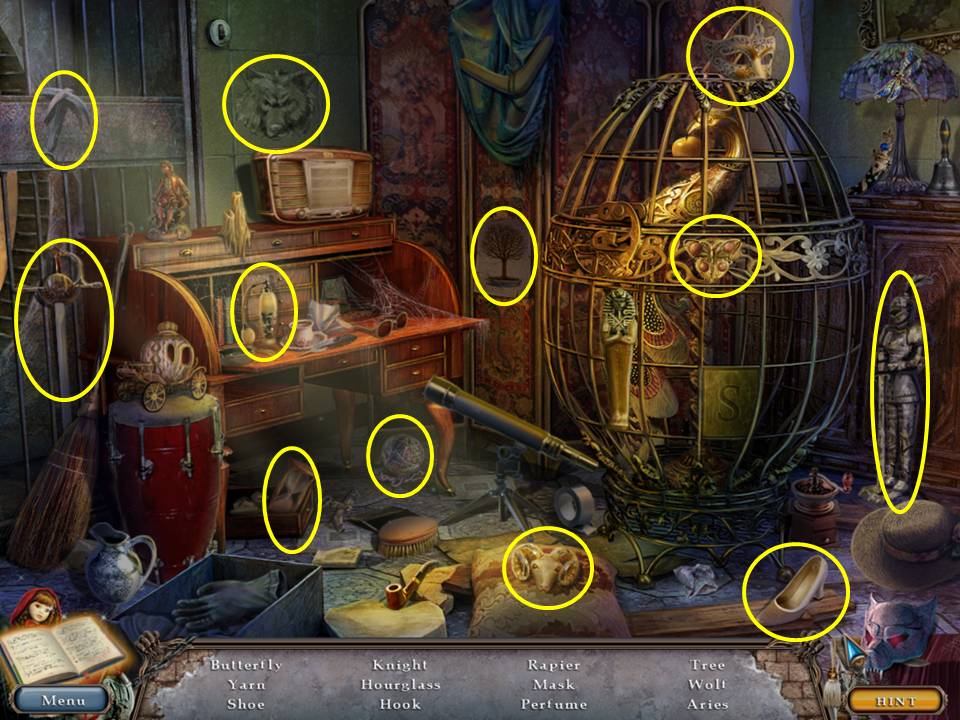
- Zoom into the wall.
- Click the light switch.
- Zoom into the wall cabinets.
- Open the doors.
- Take the screwdriver.
- Play the HOA.Find the items listed.
- Receive the GRAPPLING HOOK.
- Attach the rope to the GRAPPLING HOOK.
- Swing it through the opening and return the same way you came down.
- Click down.
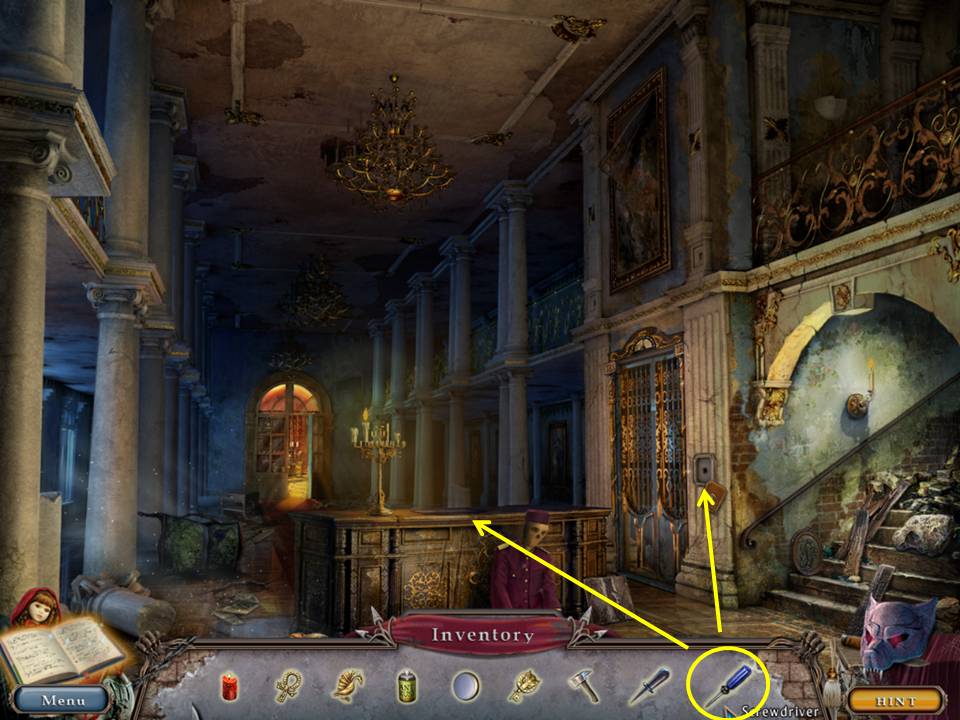
- Zoom into the table.
- Unscrew the glass display with the SCREWDRIVER.
- Receive the SCREWS.
- Take the LOCKET.
- Zoom into the elevator panel.
- Put the SCREWS into the display and screw them down with the SCREWDRIVER.
- Place the ELEVATOR BUTTON into the space.
- Enter the elevator.
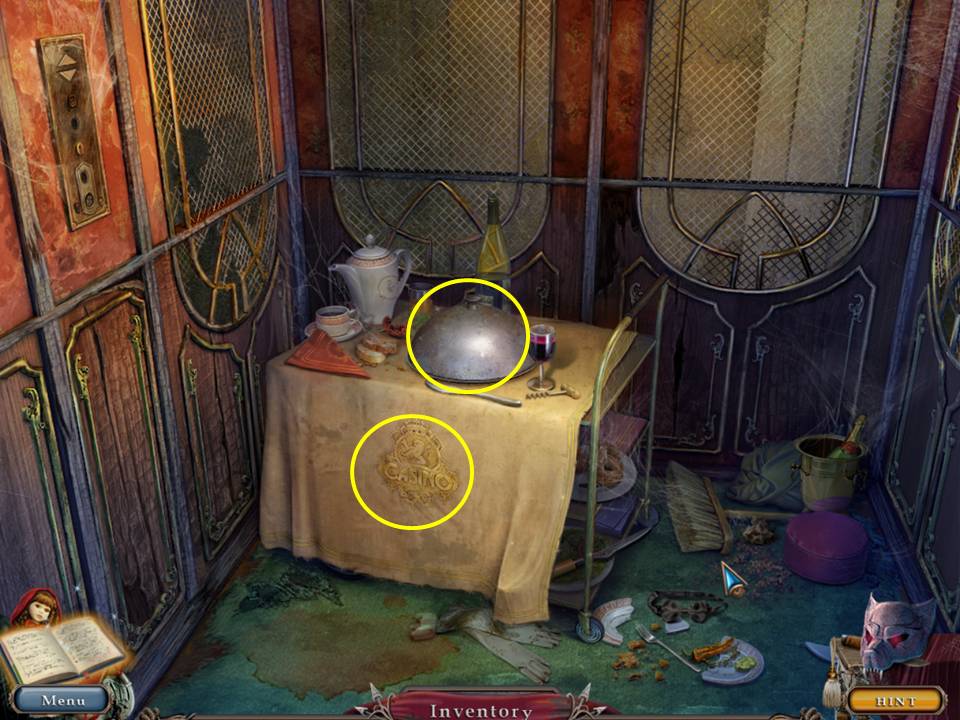
- Click the lid.
- Take the EGG TOP and note underneath.
- Click the tablecloth.
- Take the first PRUNING SHEARS PART.
- Click down.
- Go forward.
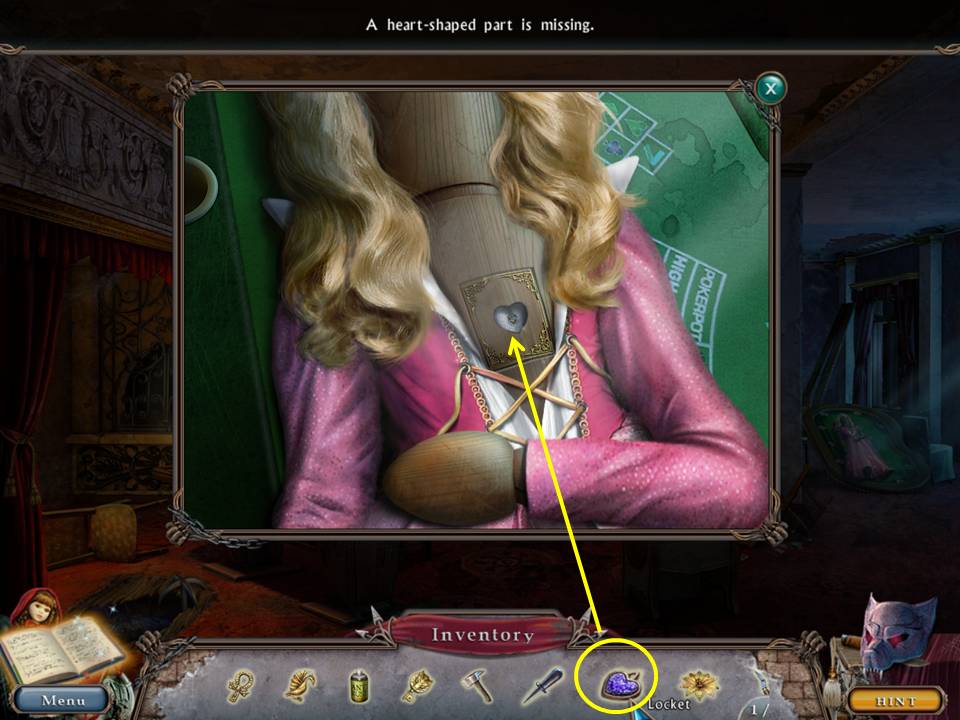
- Zoom into the broken table.
- Place the LOCKET in the space.
- Take the SAFE DIAL.
- Descend the rope.
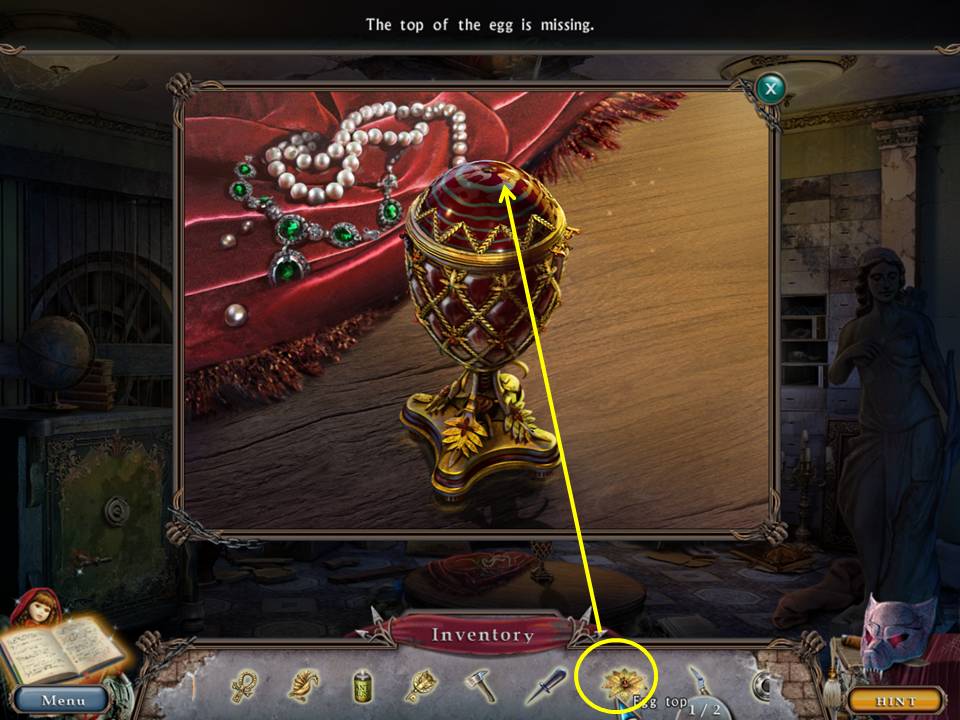
- Zoom into the table.
- Reunite the EGG TOP with the egg.
- Take the SECOND FLOOR BUTTON.
- Go up the rope.
- Click down.
- Enter the elevator.
- Zoom into the panel.
- Place the SECOND FLOOR BUTTON in the appropriate space.
- Click the button.
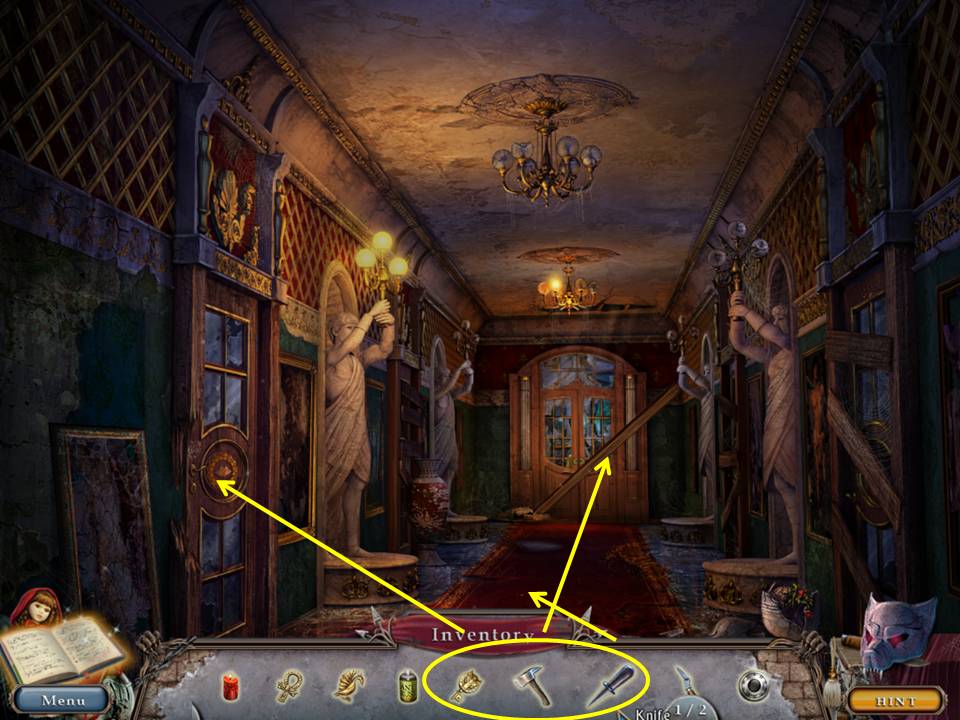
- Zoom into the carpet.
- Slice the carpet with the KNIFE.
- Take the first TRANQUILIZER GUN.
- Zoom into the door at the end of the hall.
- Chop the plank with the AXE.
- Zoom into the door at left.
- Insert the ROOM KEY into the lock.
- Enter the room.
- Play the HOA.
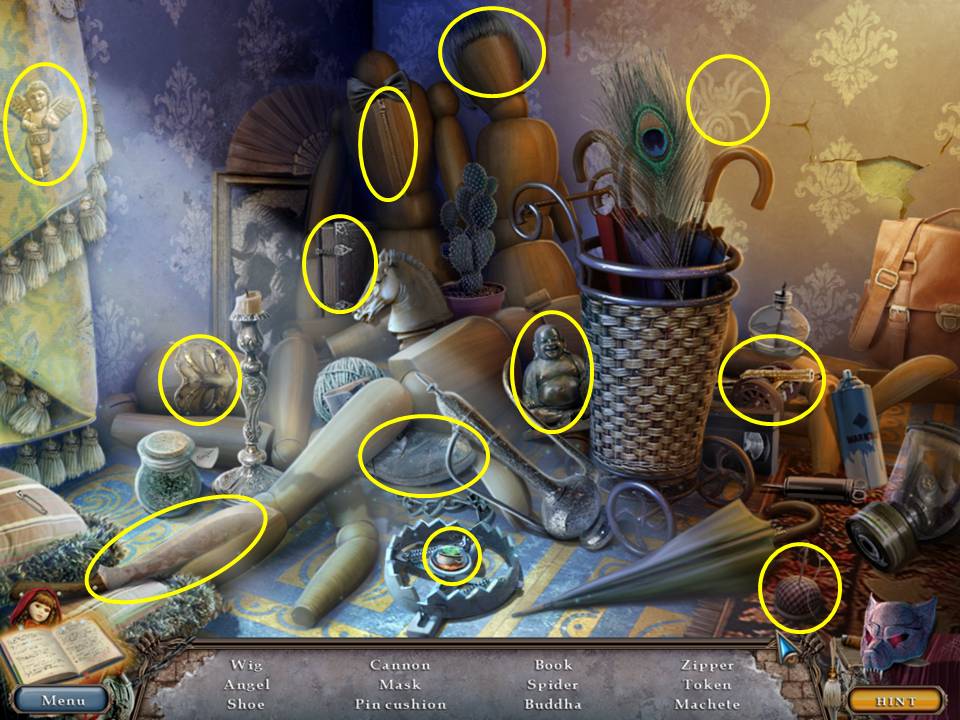
- Find the items listed.
- Receive the first of three TOKENS.
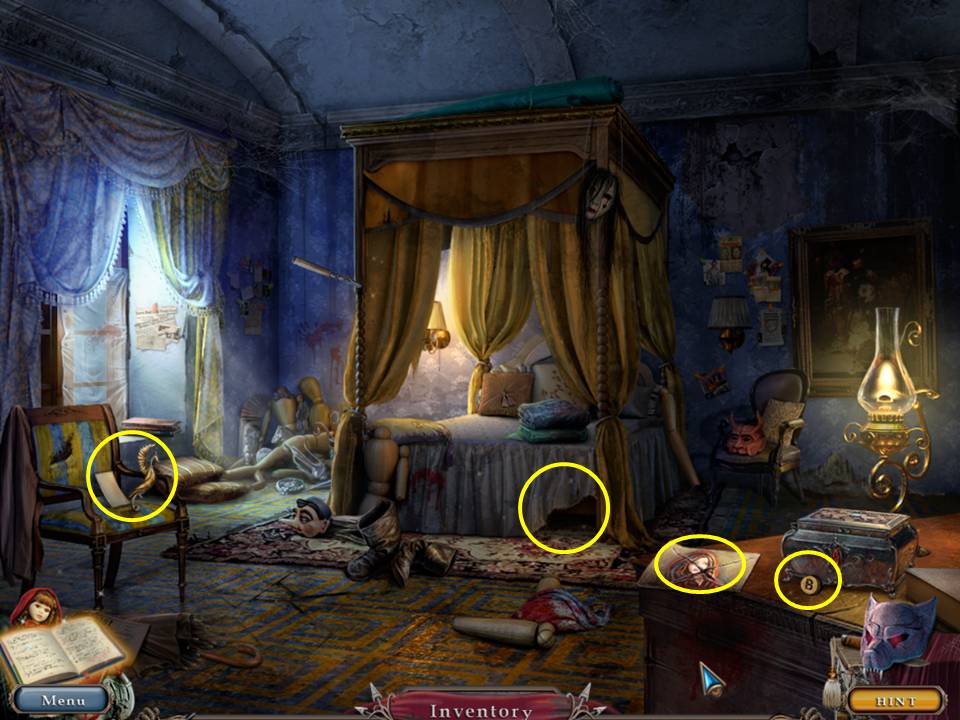
- Take the note, the PHOENIX, and the CELLAR BUTTON.
- Zoom under the bed.
- Place the CANDLE.
- Take the fourth GARDEN GNOME, the SAFETY DEPOSIT BOX KEY, and the CANDLE.
- Look at the photo.
- Click down two times.
- Push the first floor button.
- Click down.
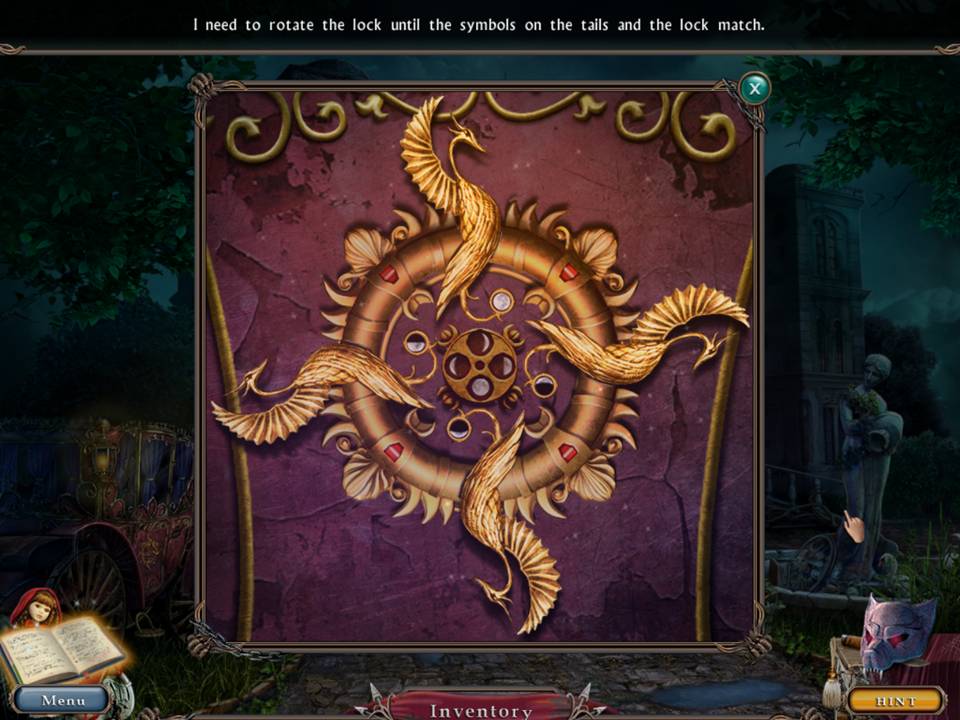
- Zoom into the carriage.
- Place the two PHOENIXES to initiate a puzzle.
- Turn the lock two times to solve the puzzle.
- When finished, play the HOA.

- Find the items listed.
- Receive the KEY WITH A SYMBOL.
- Enter the casino.
- Go forward.
- Descend the rope.
- Play the HOA.
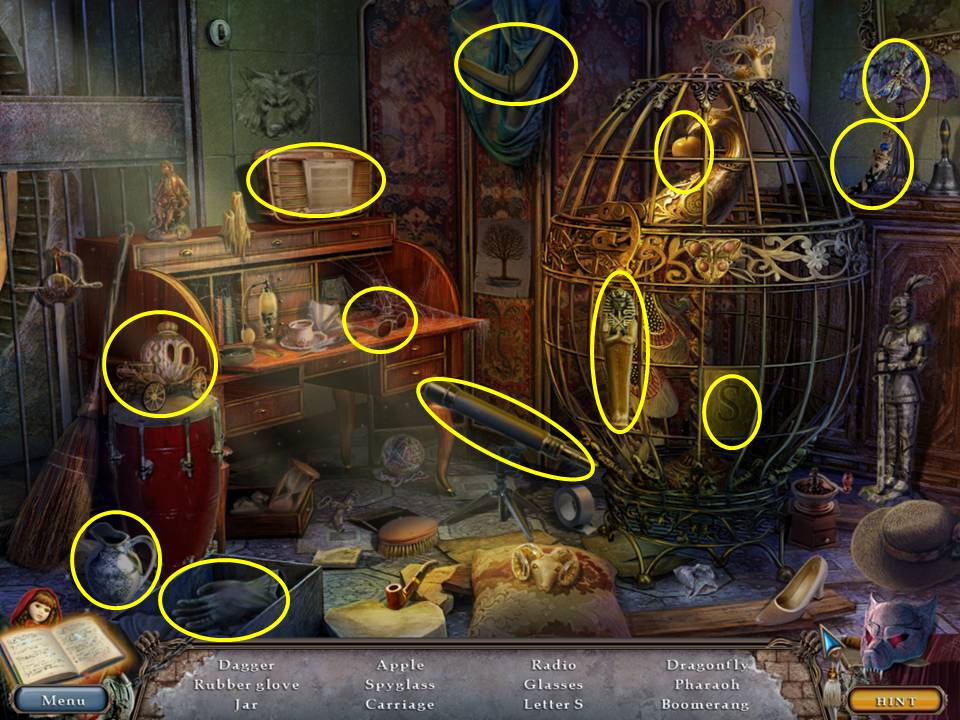
- Find the items listed.
- Receive the RUBBER GLOVE.
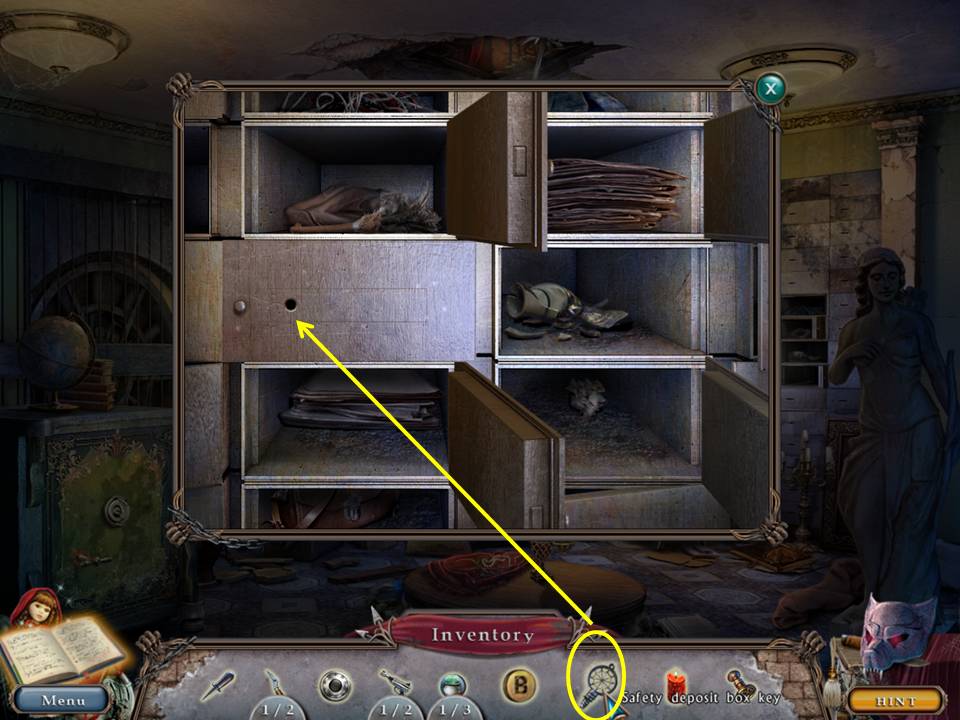
- Zoom into the wall cabinet.
- Insert the SAFETY DEPOSIT BOX KEY into the lock.
- Take the drawing.
- Go up the rope.
- Click down.
- Enter the elevator.
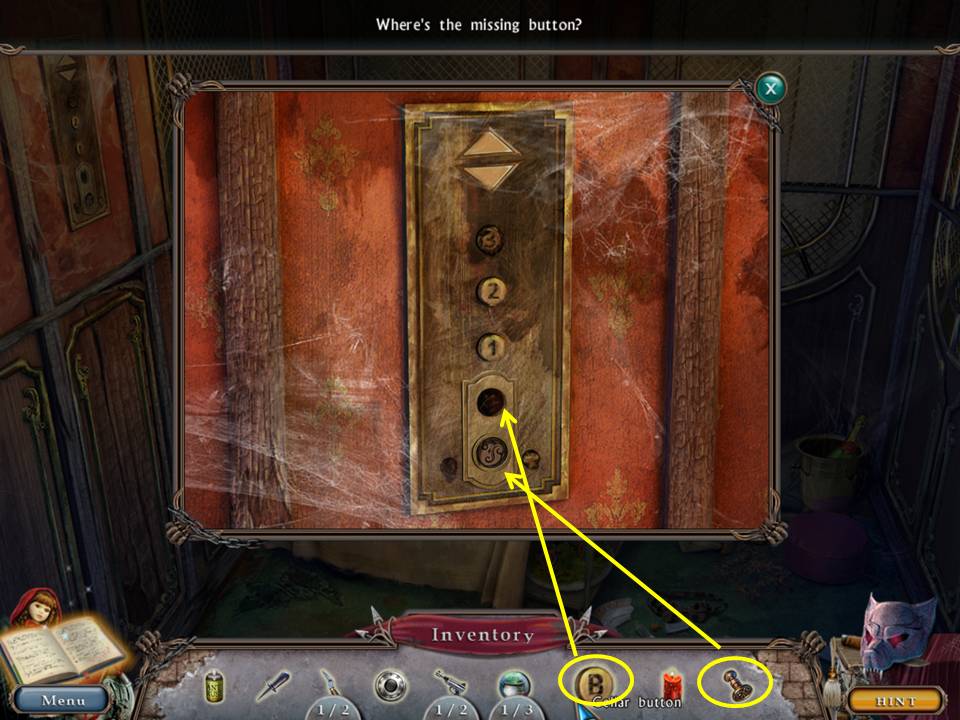
- Zoom into the panel.
- Place the CELLAR BUTTON into the space and the KEY WITH A SYMBOL into the slot.
- Push the cellar button.
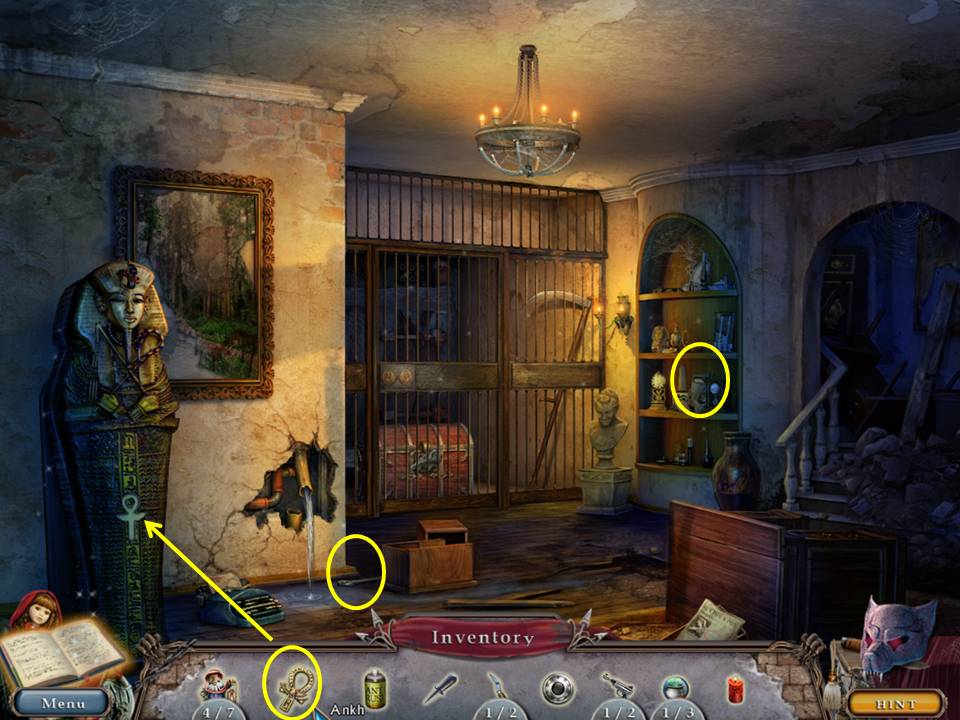
- Place the ANKH on the sarcophagus.
- Zoom into the wall.
- Take the WRENCH.
- Zoom into the shelf.
- Take the note and picture.
- Zoom into the grille to initiate a mini-game.
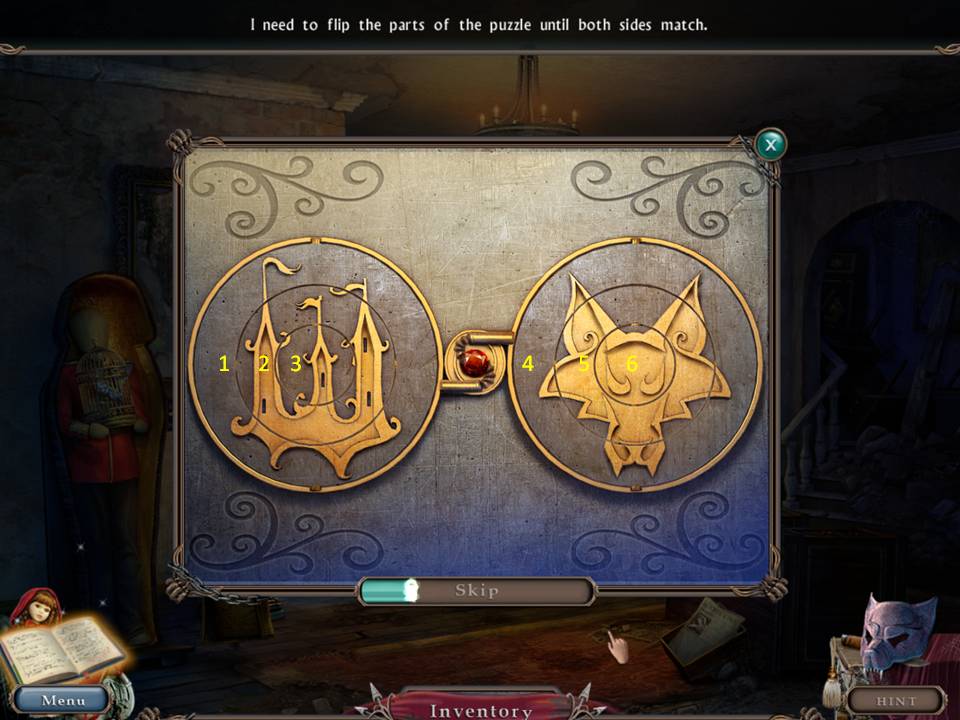
- The object of the game is to rotate the rings to correctly show the image.
- Assuming the rings are numbered 1 to 3 from outer to inner on the left and 4 to six from outer to inner on the right, click in this order: 1, 4, 3, 5, 1. When finished, take the SCYTHE. Click down.
- Press the first floor button.
- Click down two times.
- Zoom into the left gargoyle to initiate a mini-game.
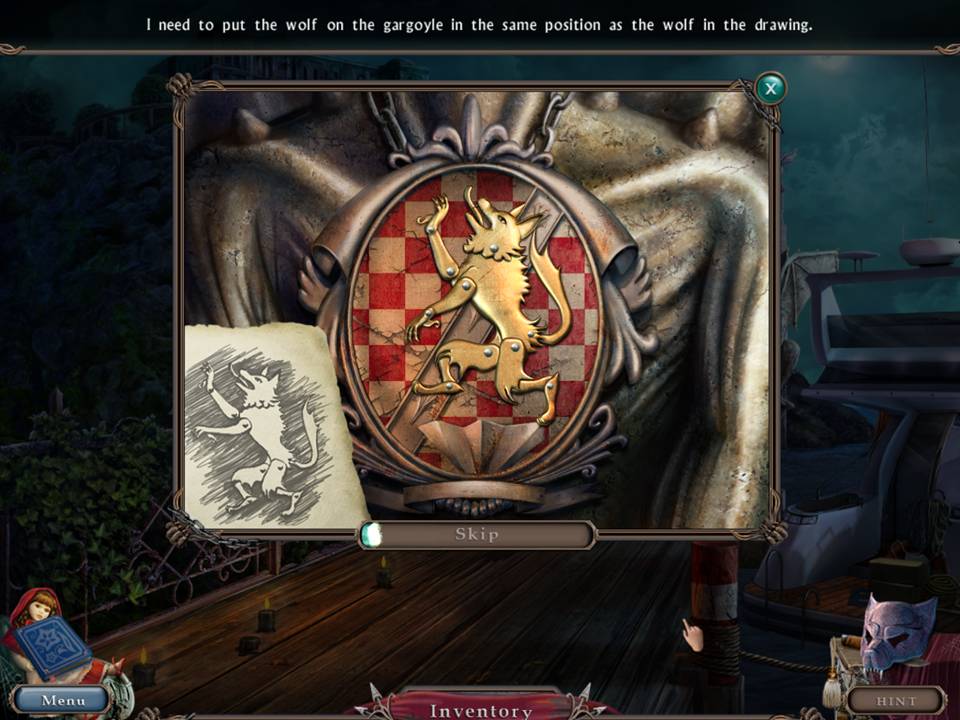
- The object of this game is to move the wolf into the correct position.
- Use the sketch in the corner for the correct positioning.
- When finished take the second TOKEN.
- Go forward two times.
- Enter the elevator and push the second floor button.
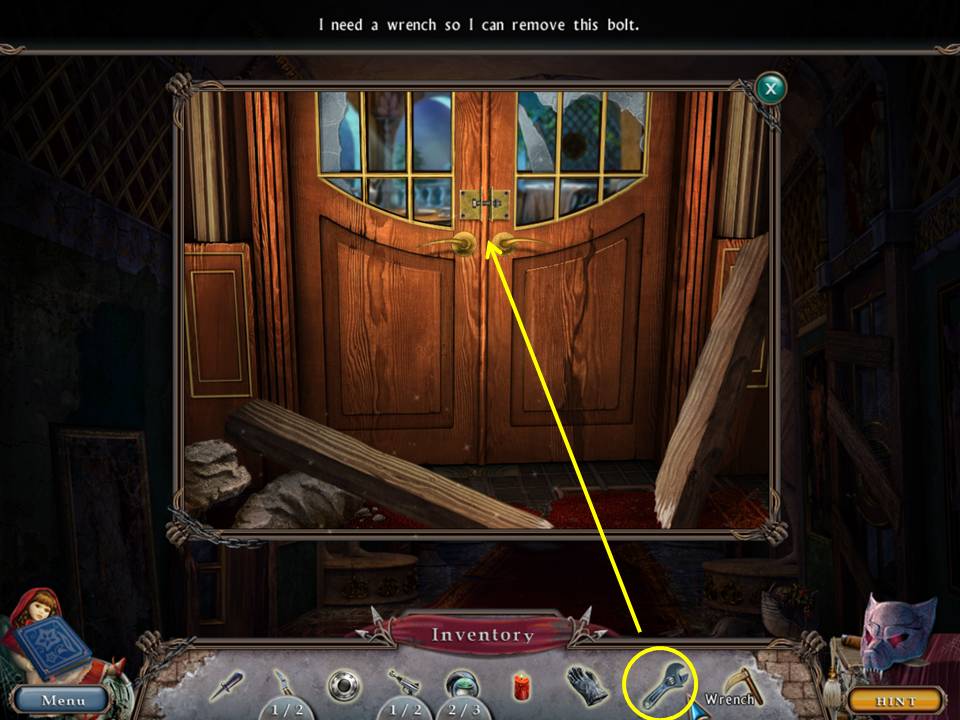
- Zoom into the door.
- Remove the bolt with the WRENCH.
- Click the handle.
- Go forward.
- Zoom into the table.
- Pluck the shards with the RUBBER GLOVE.
- Receive the WIND-UP BIRD.
- Take the note.
- Click down.
- Zoom into the door.
- Take the BEAM.
- Go forward.
- Zoom into the balcony.
- Place the BEAM in the scene.
- Go forward.
General Info and Tips
Chapter One: The Cemetery
Chapter Two: The Town
Chapter Three: The Bar's Roof
Chapter Four: The Casino
Chapter Five: The Balcony
Ask for help in the comments below!
Chapter One: The Cemetery
Chapter Two: The Town
Chapter Three: The Bar's Roof
Chapter Four: The Casino
Chapter Five: The Balcony
Ask for help in the comments below!
