
Brink of Consciousness: The Lonely Hearts Murders: Chapter One: Where is Olivia?
Rely on our Brink of Consciousness The Lonely Hearts Murders Walkthrough to help you navigate the dark streets of London, as you desperately search for the missing Olivia Wright, the latest victim of the maniacal man known only as The Lonely Hearts Killer. Our walkthrough will guide your steps during your search, providing you with in-depth instructions, sturdy advice, solutions to puzzles, and custom screenshots. Can you find Olivia Wright and stop the Lonely Hearts Killer before it's too late? With our Brink of Consciousness Walkthrough at your side, it will be an open and shut case.
Chapter One: Where is Olivia?
Chapter Two: Welcome to the Wharf
Chapter Three: Exploring Chinatown
Chapter Four: Inside Archie's Estate
Bonus Game
Ask for help in the comments below!
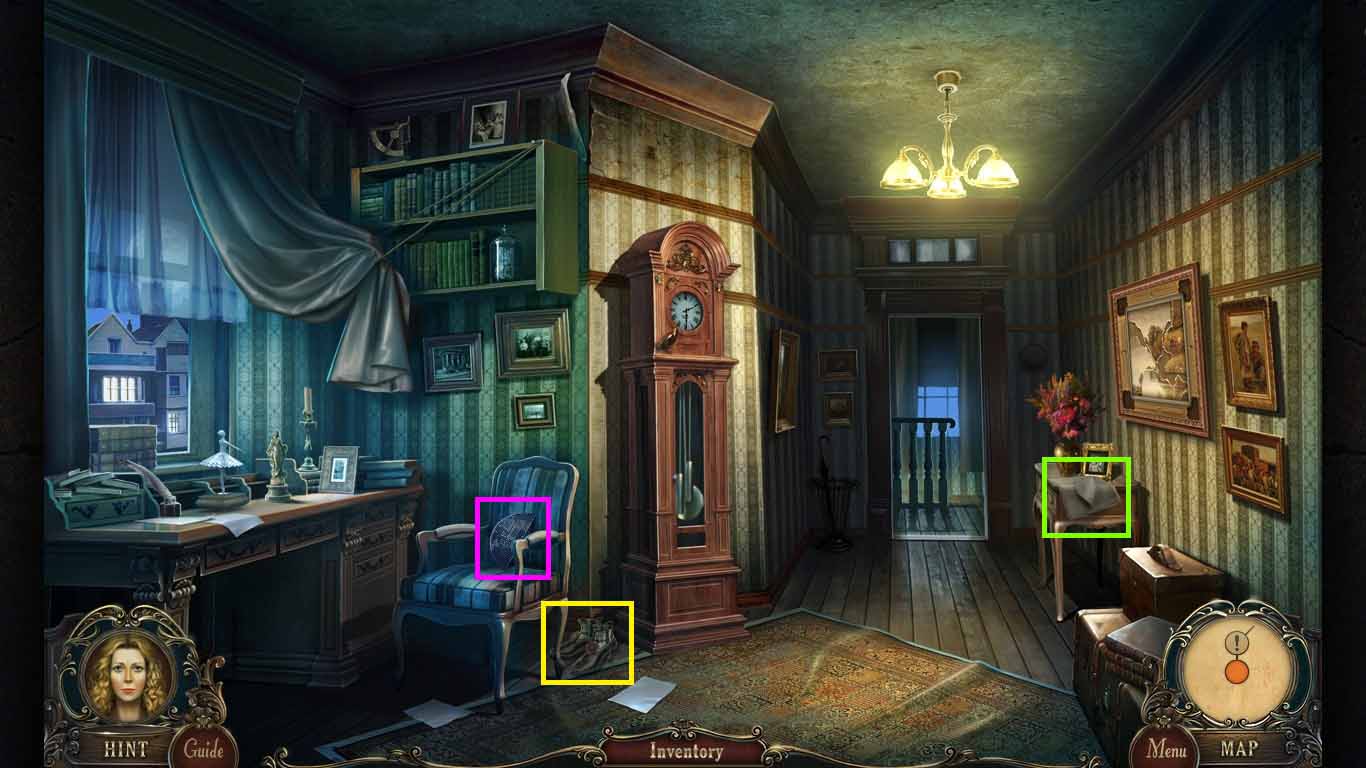
- Collect the wooden crescent.
- Collect the 1st pair of shoes.
- Collect the towel.
- Move forward.
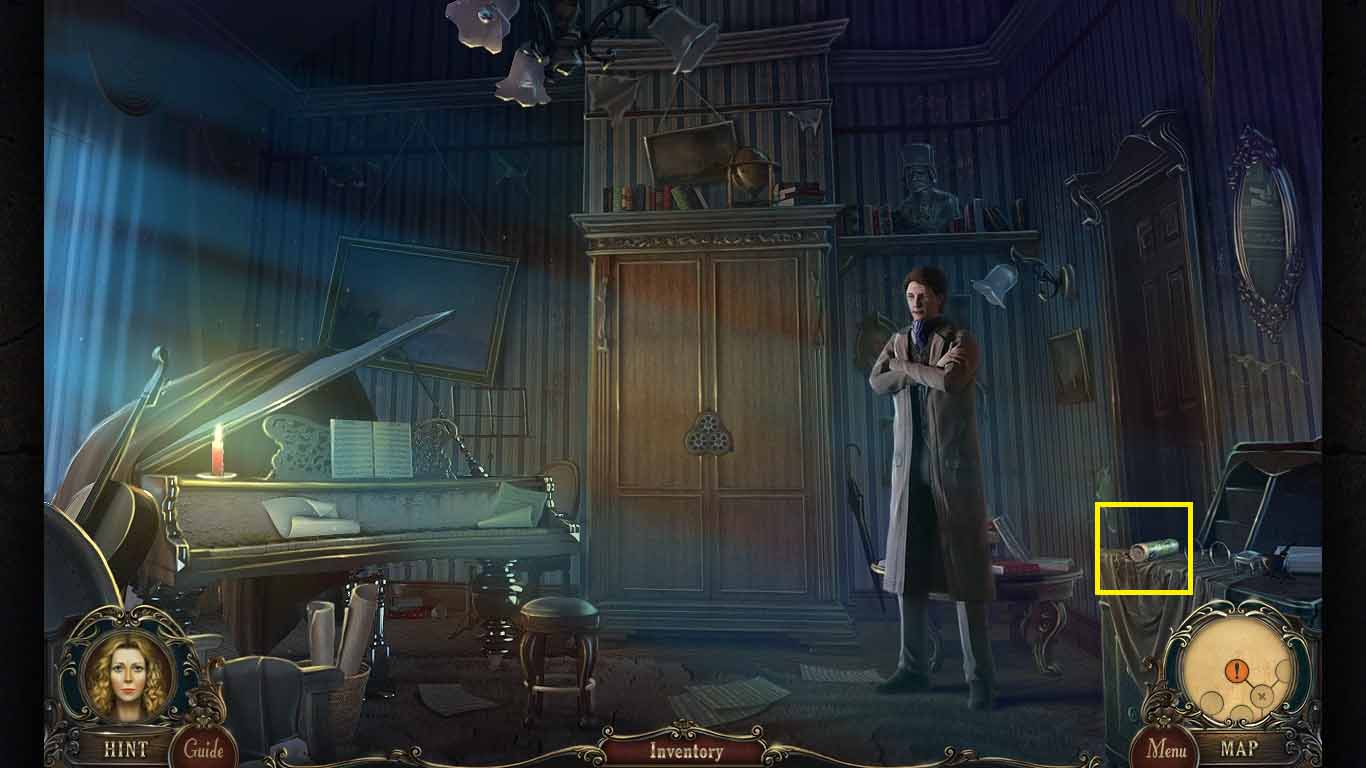
- Collect the 1st mechanism handle.
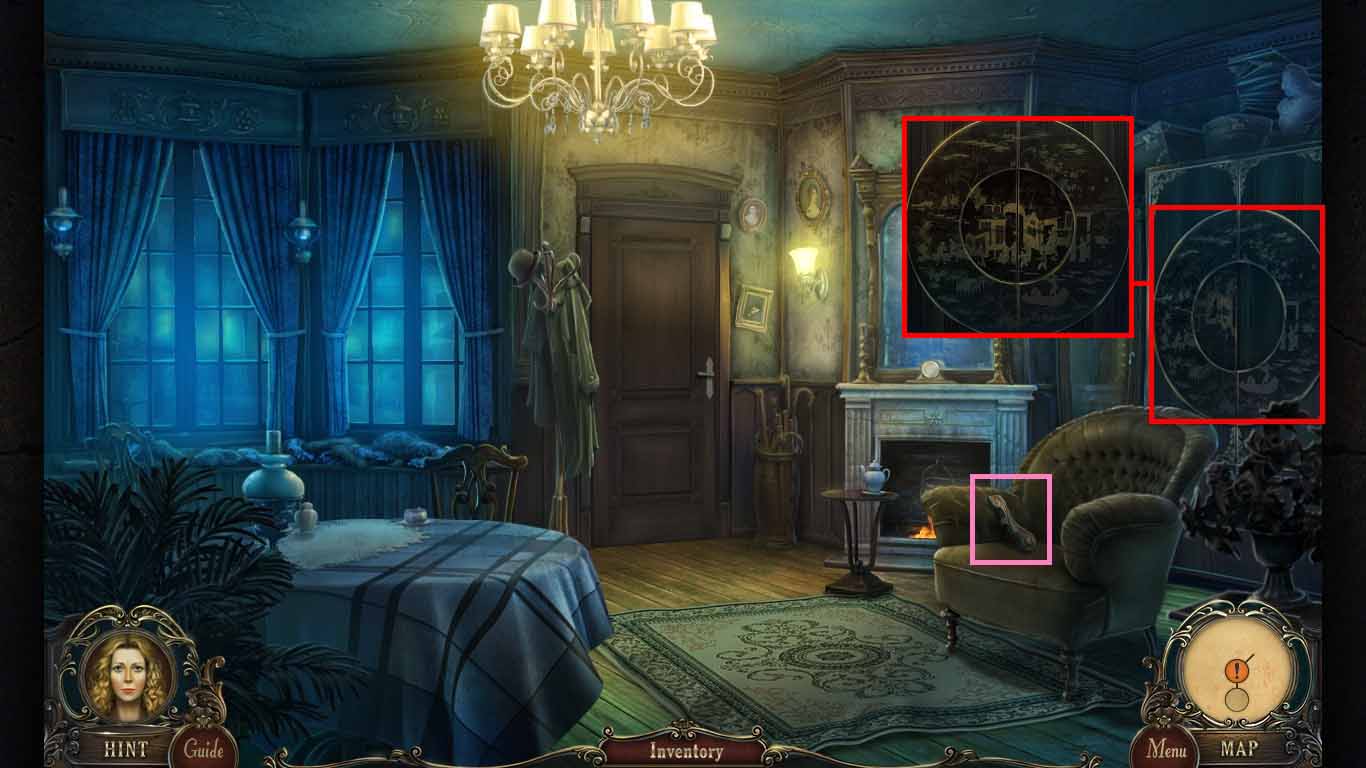
- Examine the wardrobe; insert the wooden piece into the middle.
- Click and drag the middle circle to finish the design.
- Click the wardrobe to access the hidden objects area.
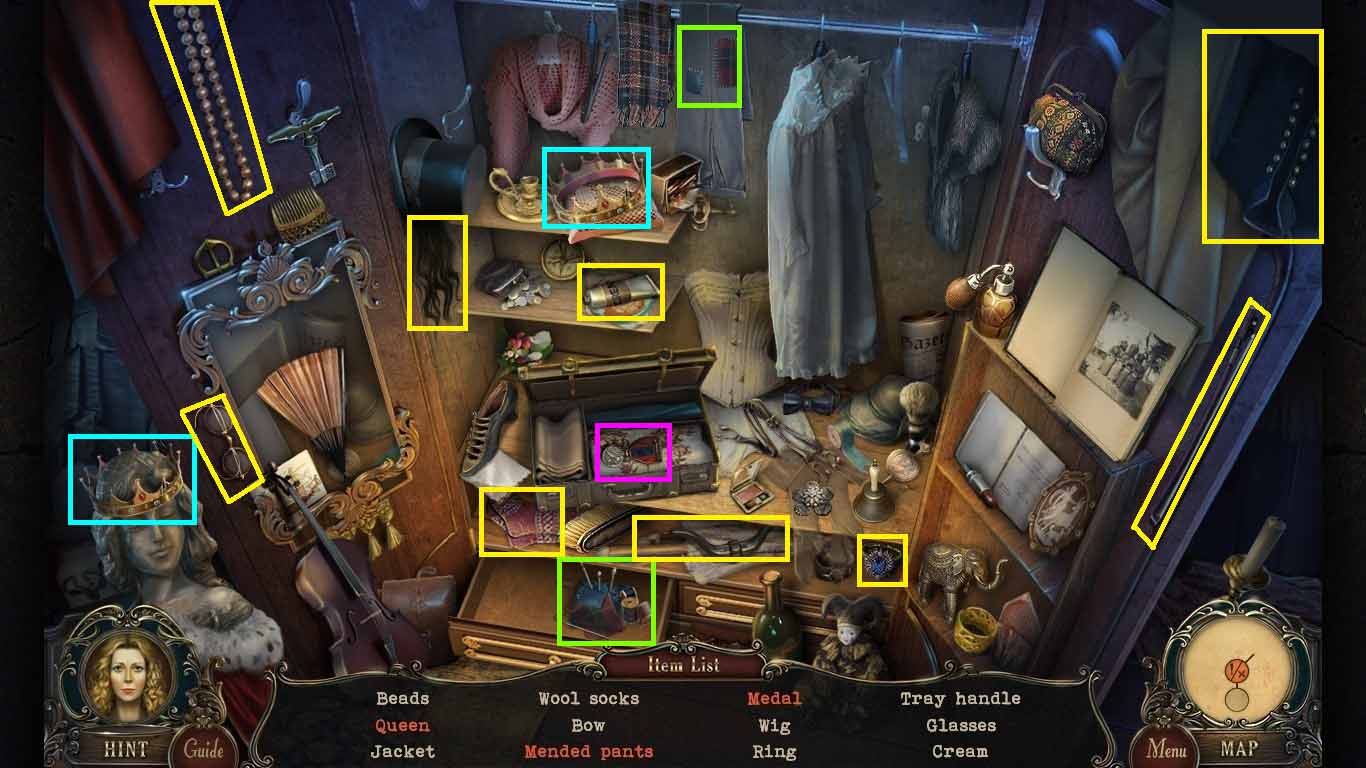
- Find the listed items.
- Click the case to collect the medal.
- Move the crown to the statue to create the queen.
- Click the drawer; move the patch to the pants two times to mend the pants.
- Collect the tray handle.
- Walk down once.
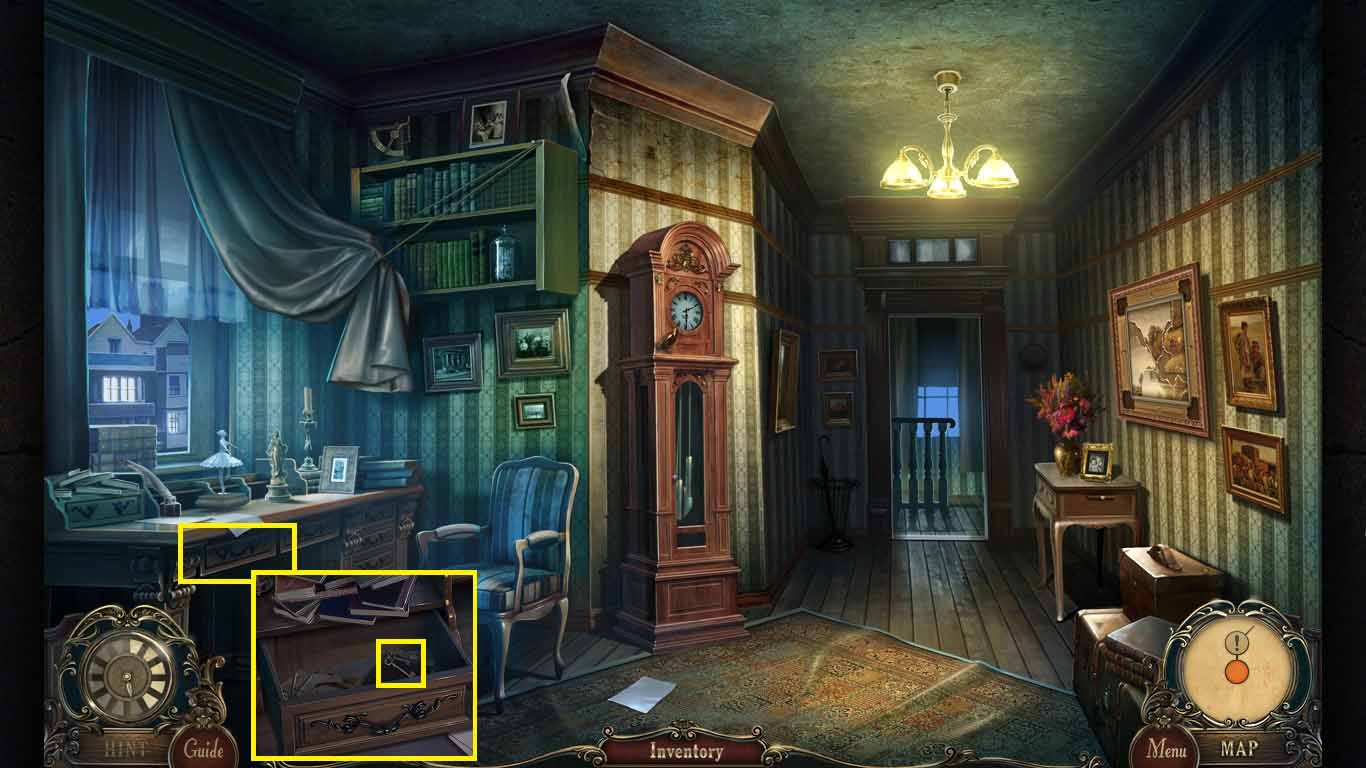
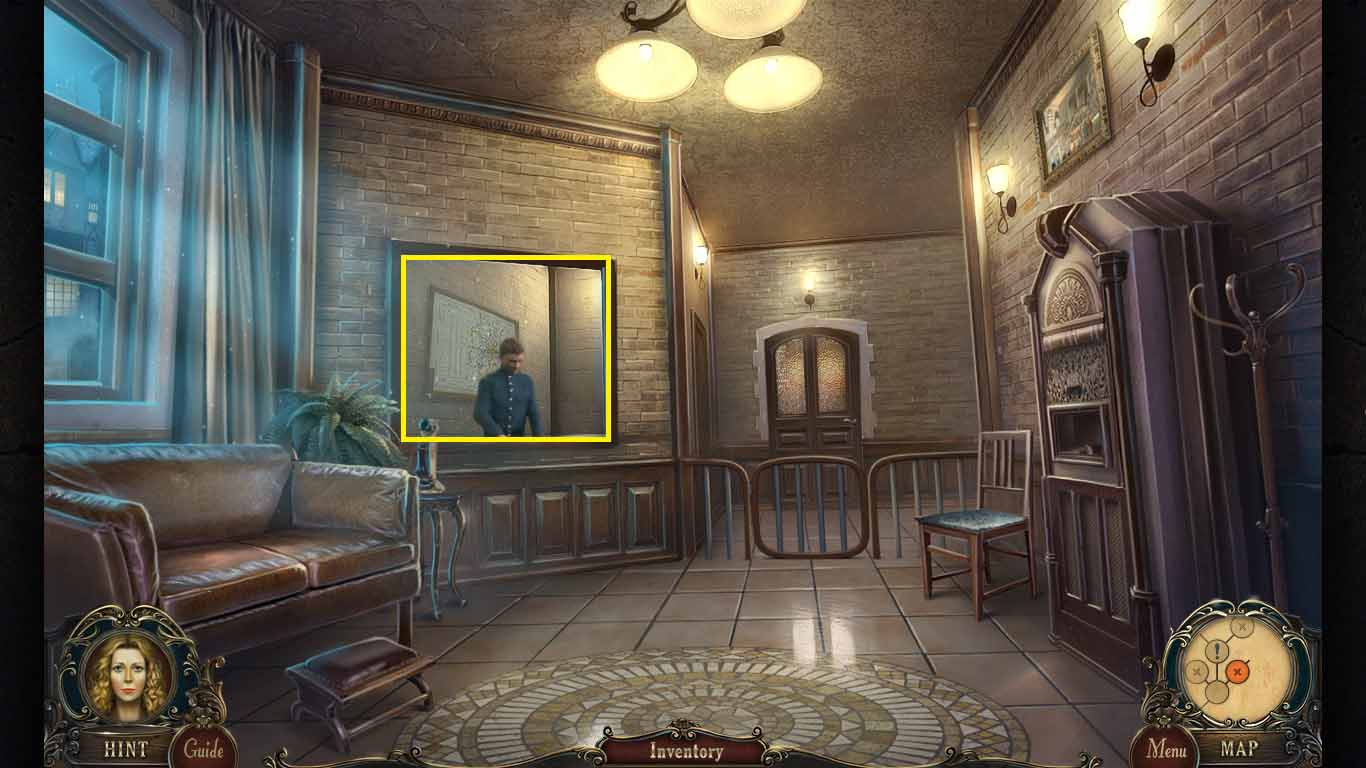
- Examine the desk; use the tray handle on the drawer.
- Collect the front door key.
- Move forward one time.
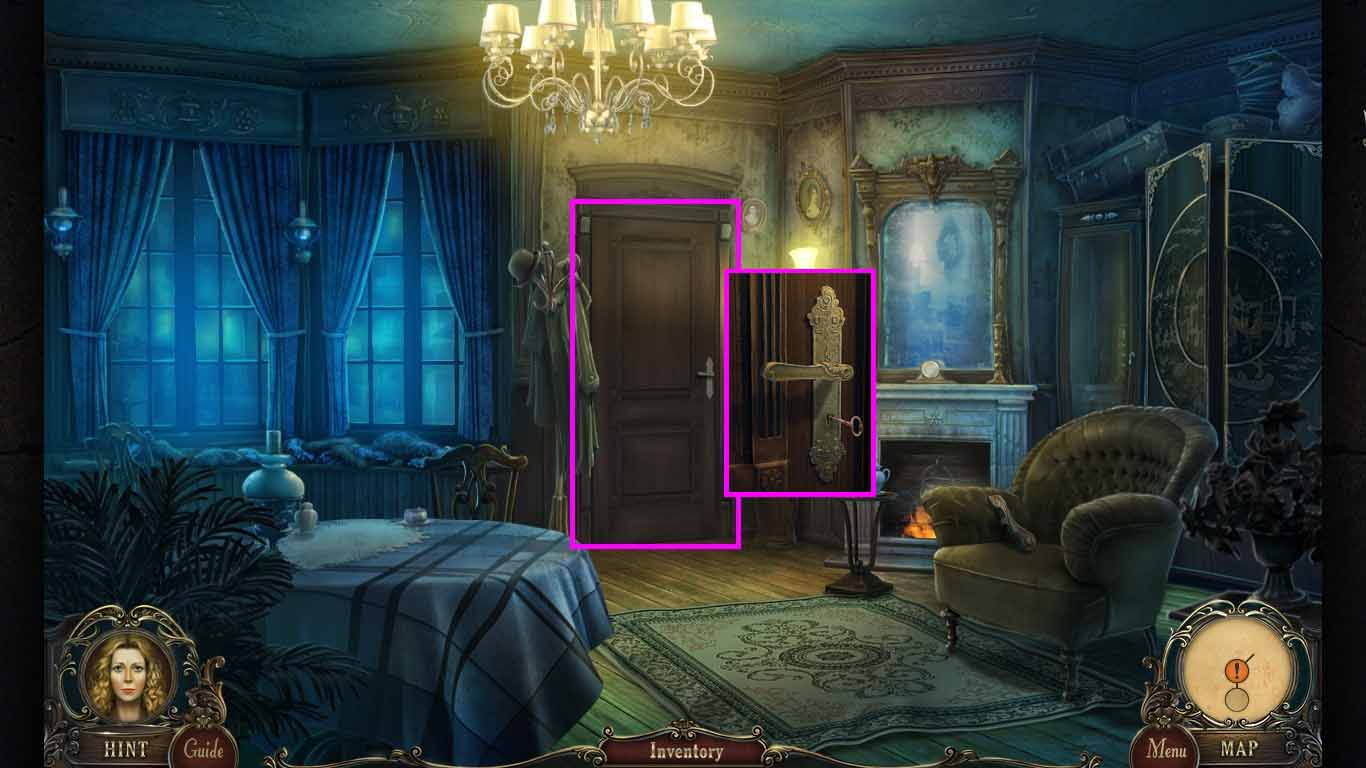
- Examine the door; insert the front door key into the lock.
- Click the handle.
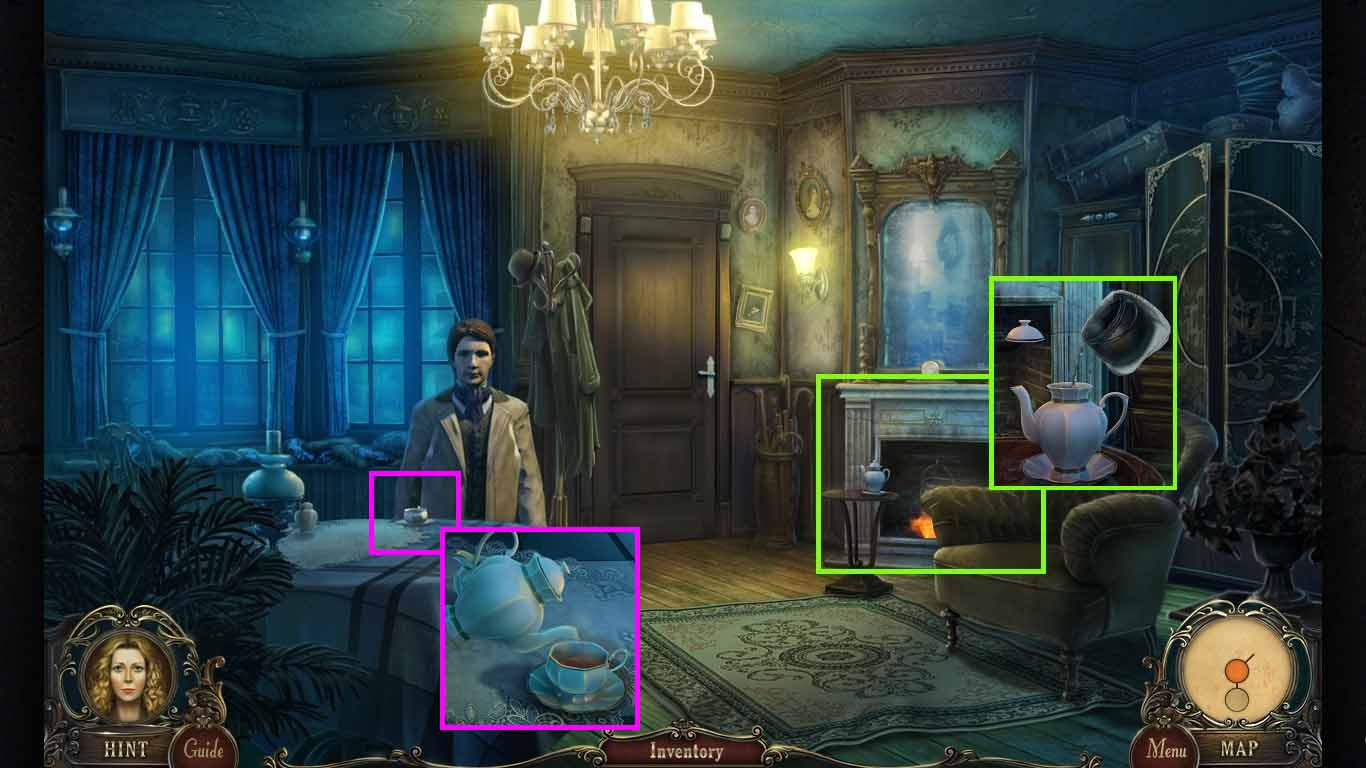
- Zoom into the fireplace; use the towel on the cauldron.
- Collect the boiled water.
- Use the boiled water in the tea pot; collect the hot tea.
- Zoom into the table; pour the hot tea into the cup.
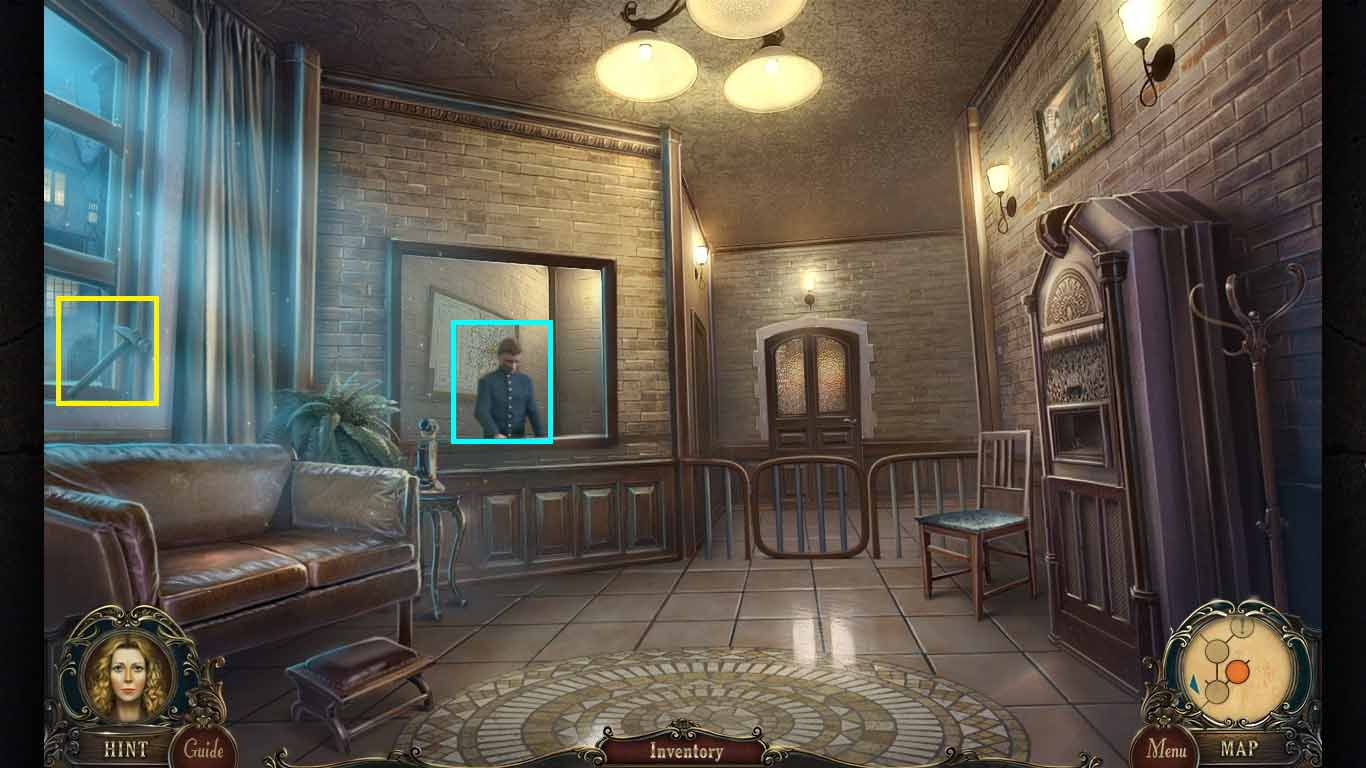
- Exit out of the front door.
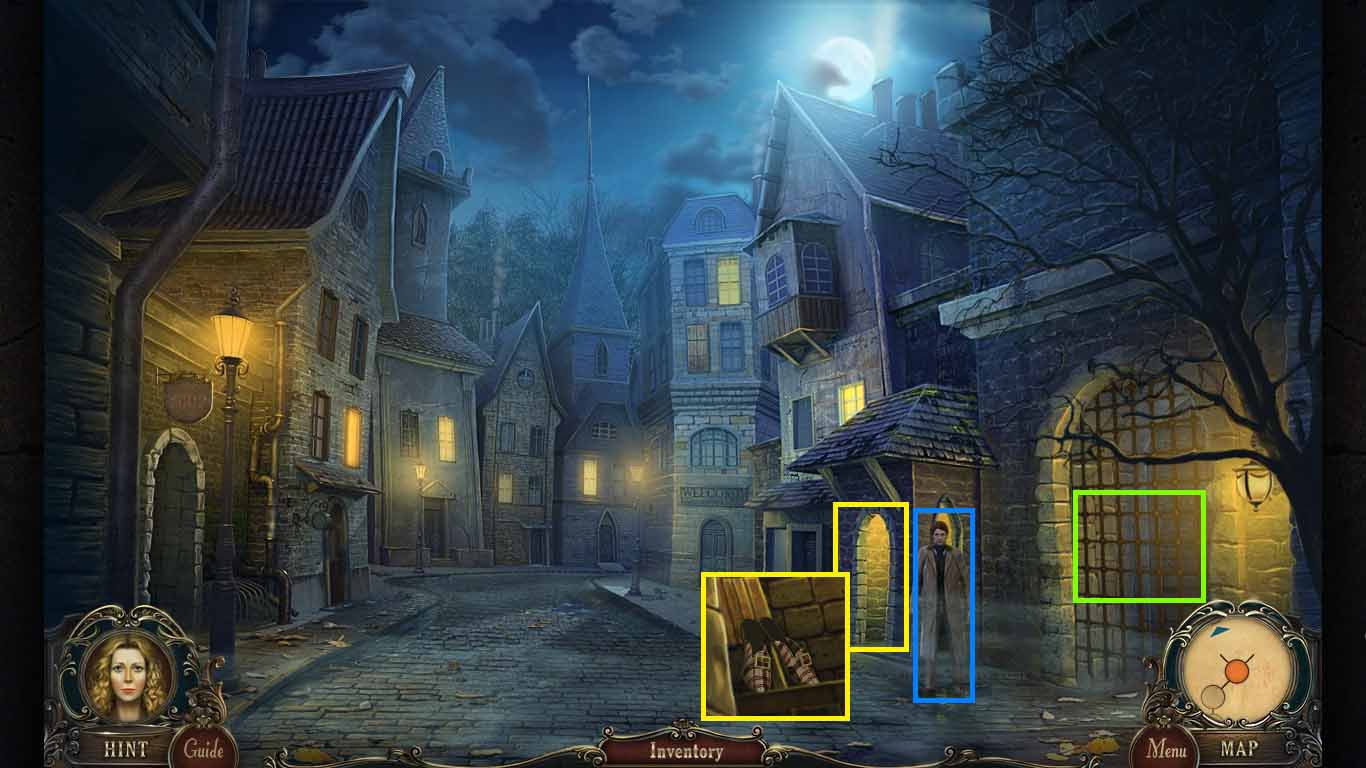
- Zoom into the gatehouse.
- Collect the 2nd pair of shoes.
- Click Logan.
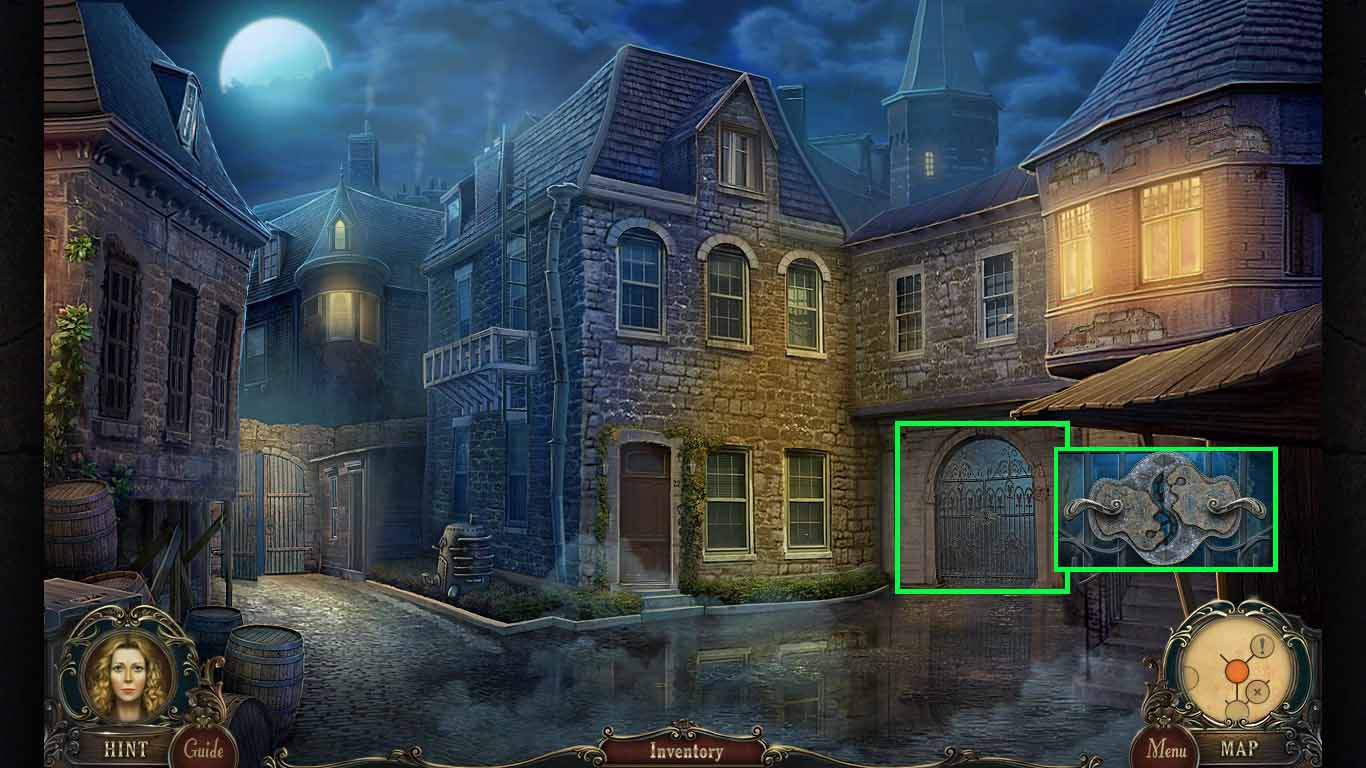
- Notice the gate on the right.
- Move forward one time.
- Collect the gear.
- Move forward once.
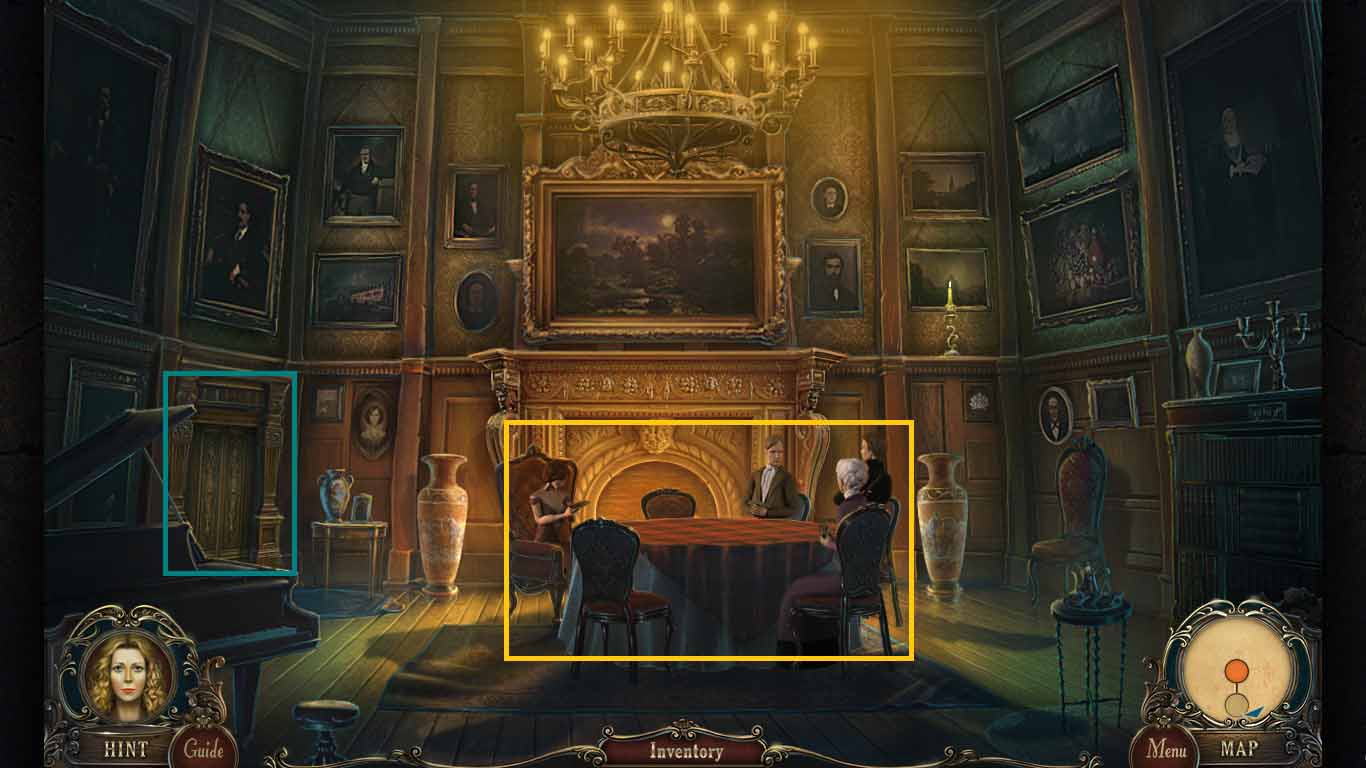
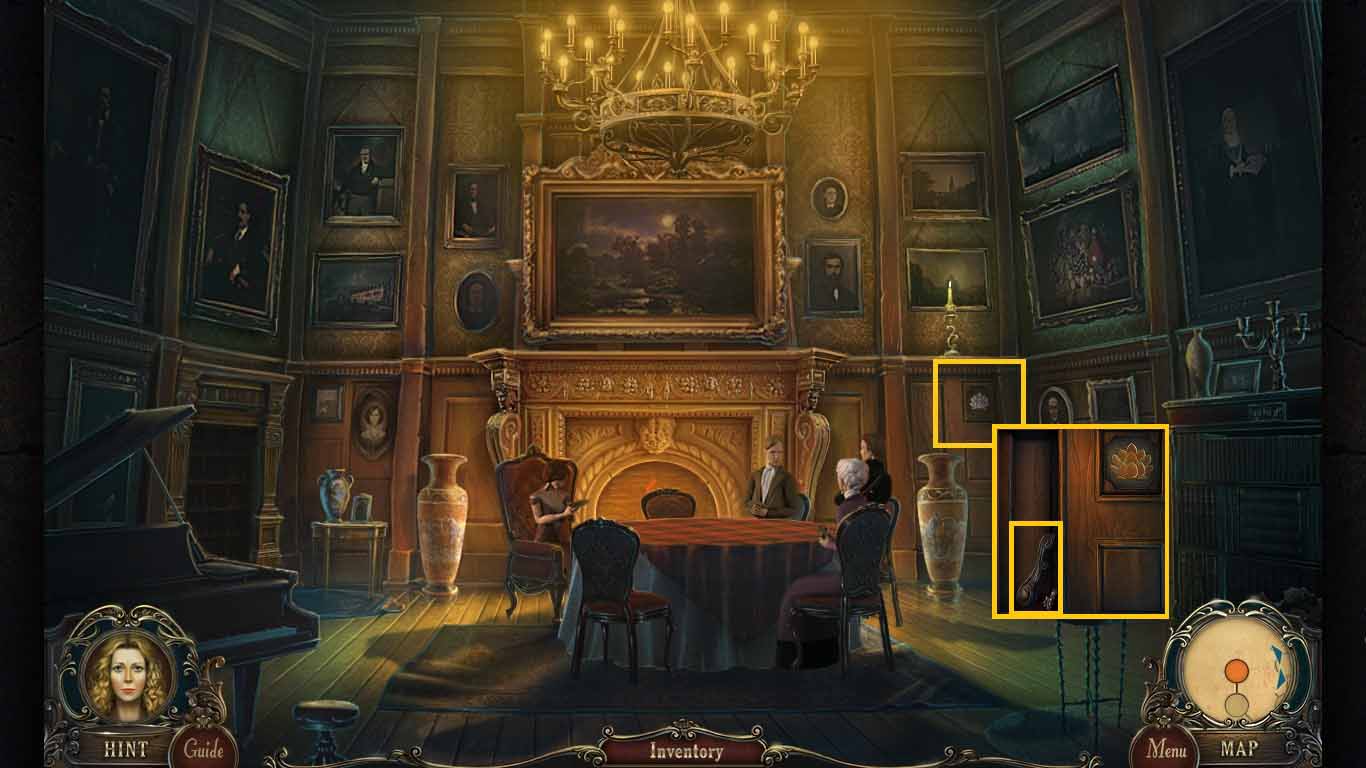
- Click the 4 people at the table.
- Zoom into the cabinet on the left side; click the doors to access a mini-game.
- Insert the 2 pairs of shoes onto the shelves to trigger a mini-game.

- Match the shoes.
- Solve as shown.
- Collect the family medallion.
- Walk down once.
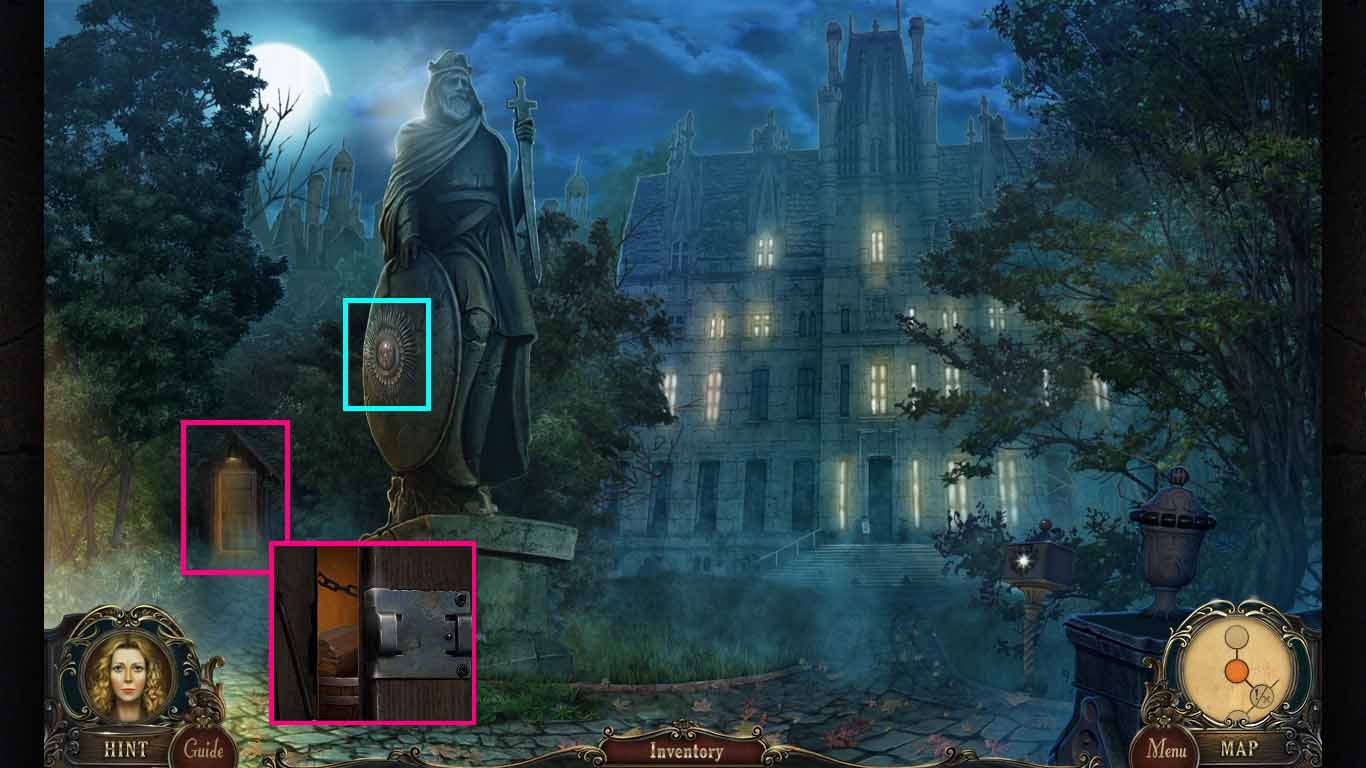
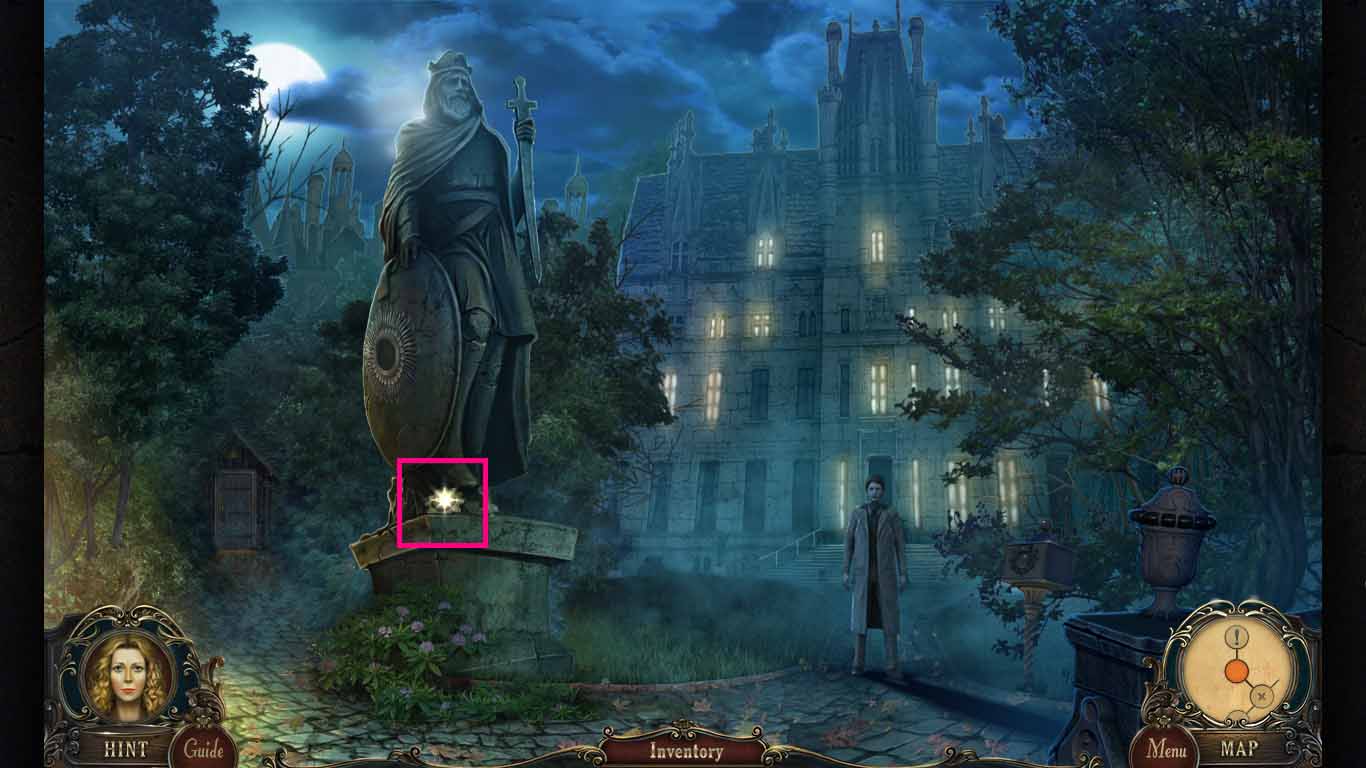
- Zoom into the statue’s shield; insert the family medallion into the middle.
- Examine the shed and remove the chain.
- Examine the door and collect the chain.
- Exit the scene and walk down one time.
- Zoom into the gatehouse.
- Insert the gear and the chain into the box.
- Click the lever.
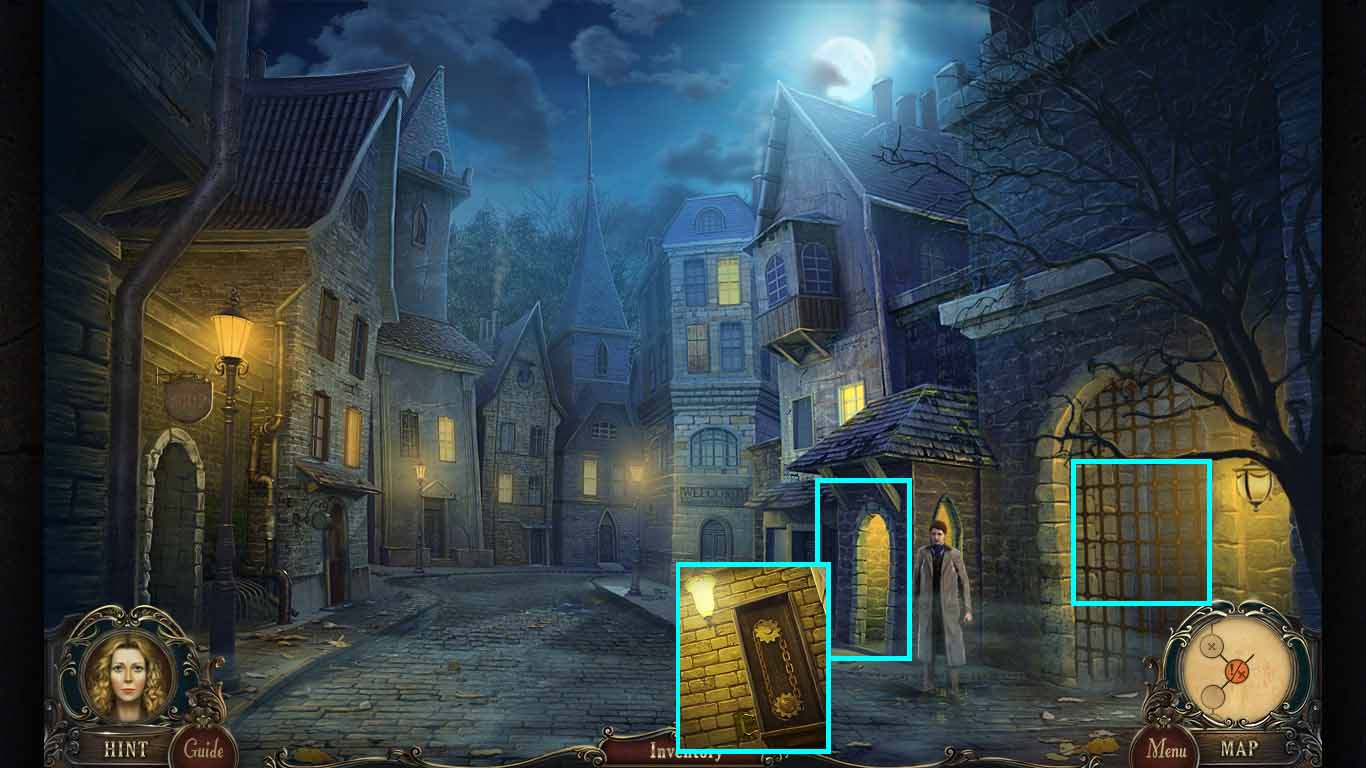
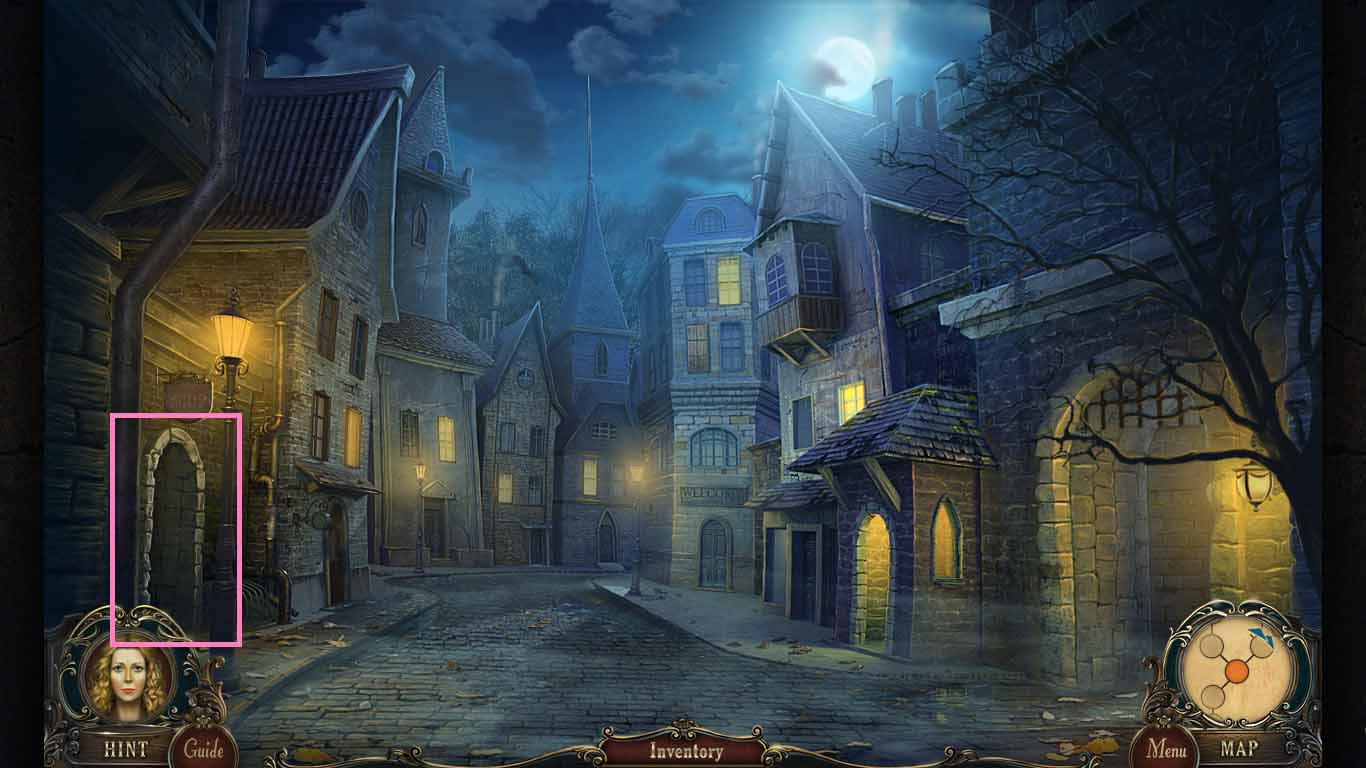
- Go through the gate and continue to the right.
- Attempt to get into the park.
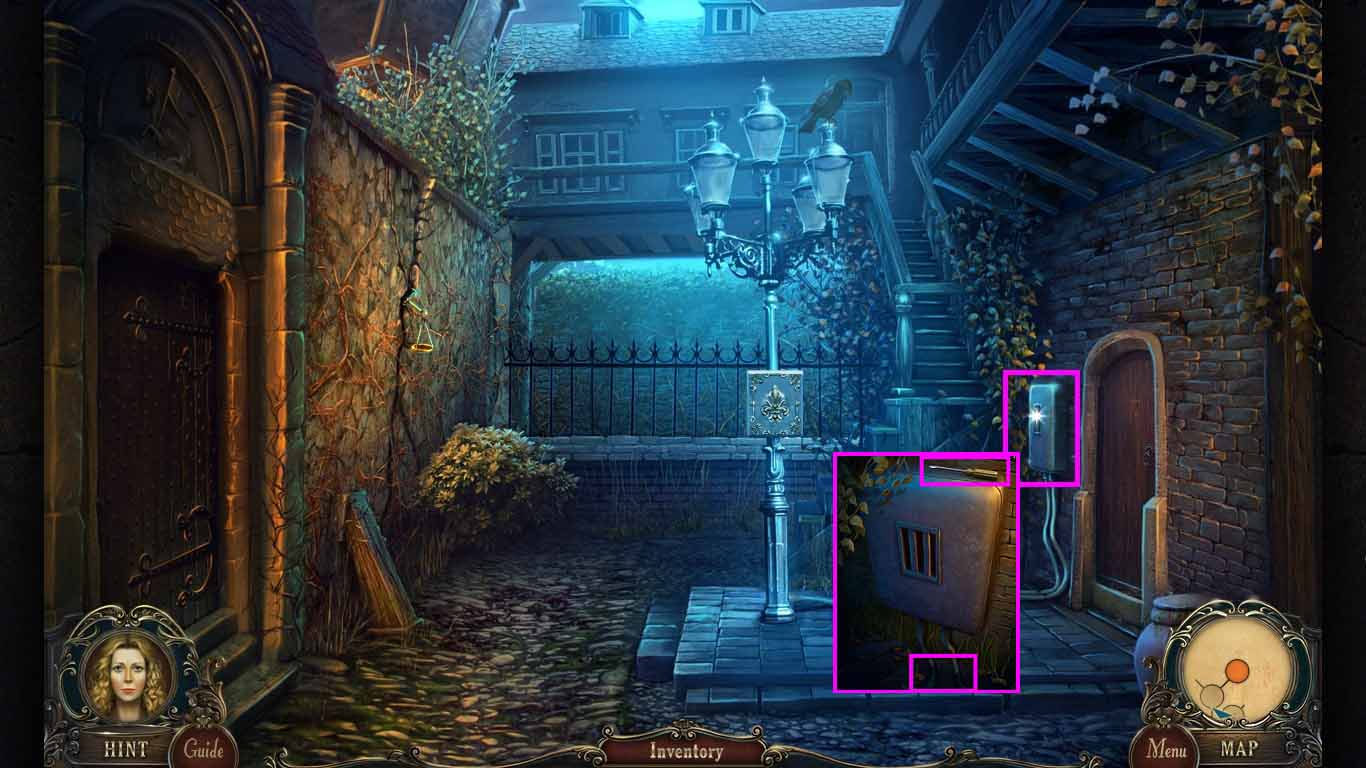
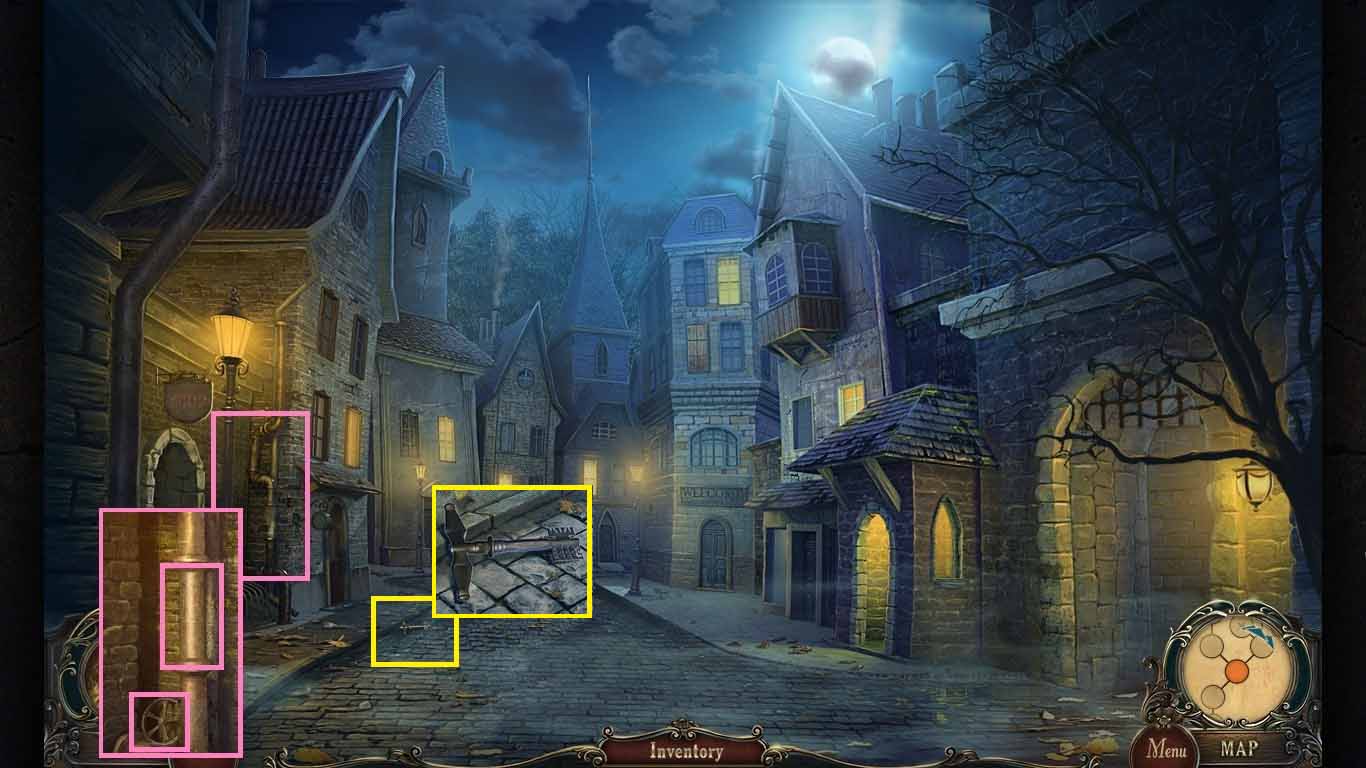
- Notice the street.
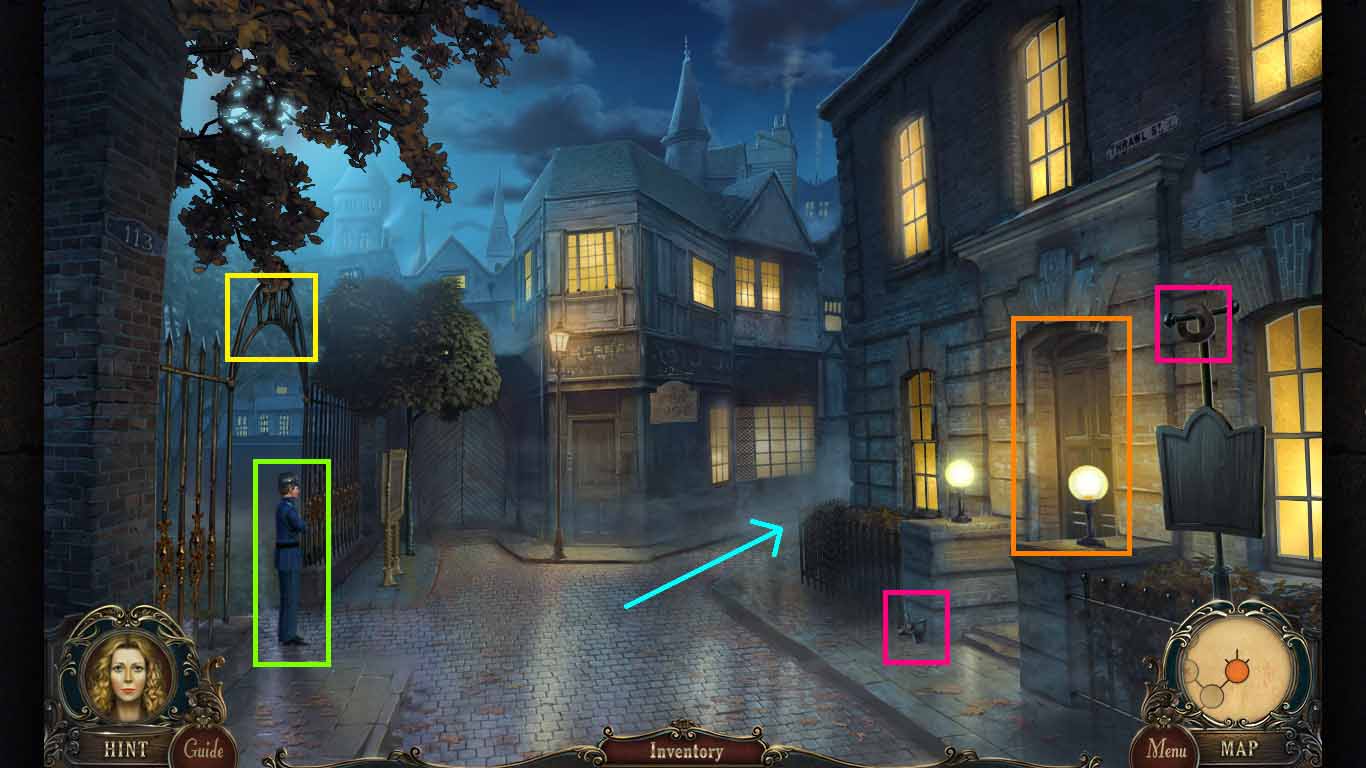
- Collect the electrical tape and the 1st valve handle.
- Go into the police station on the right side.
- Collect the hammer.
- Click the officer.
- Walk down one time; then go between the 2 buildings on the right.
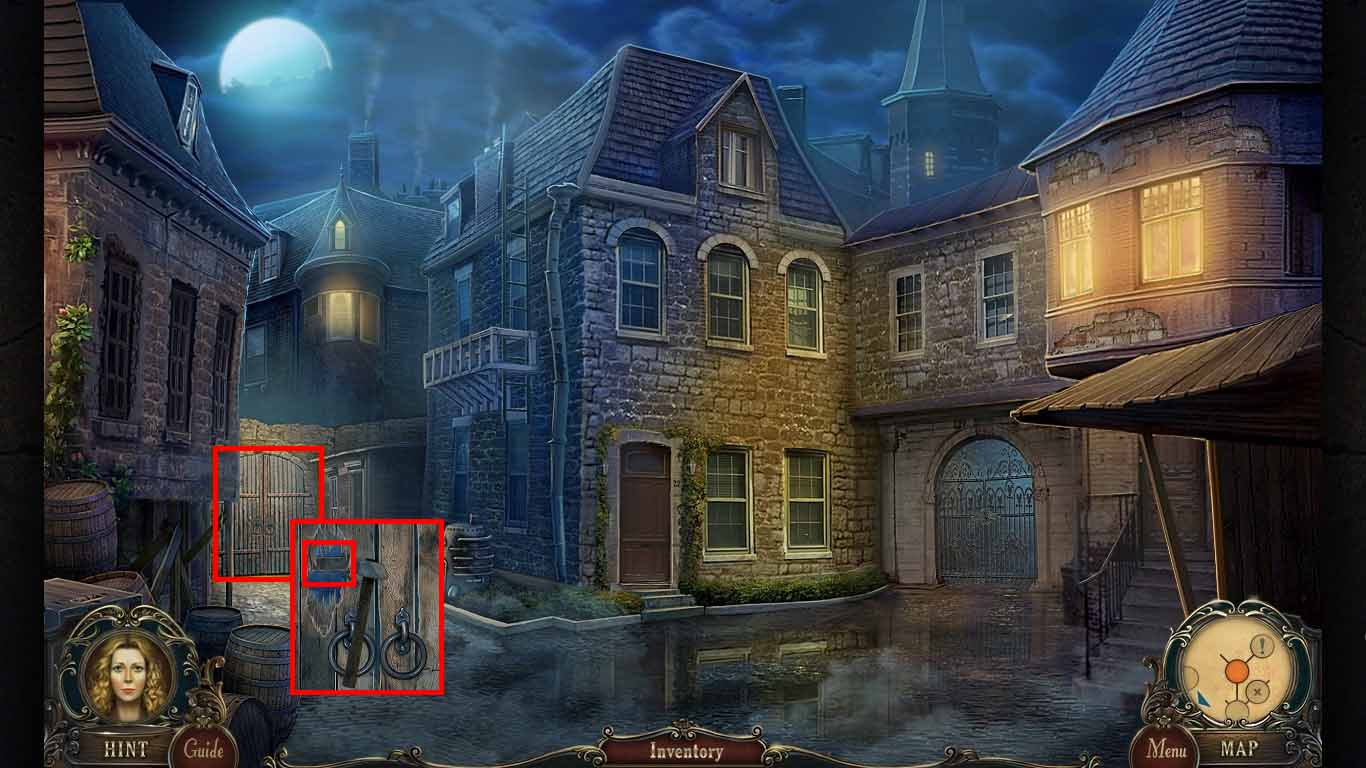
- Zoom into the gate.
- Use the hammer to crack the wood and slide the latch.
- Click the gate to access a hidden objects area.
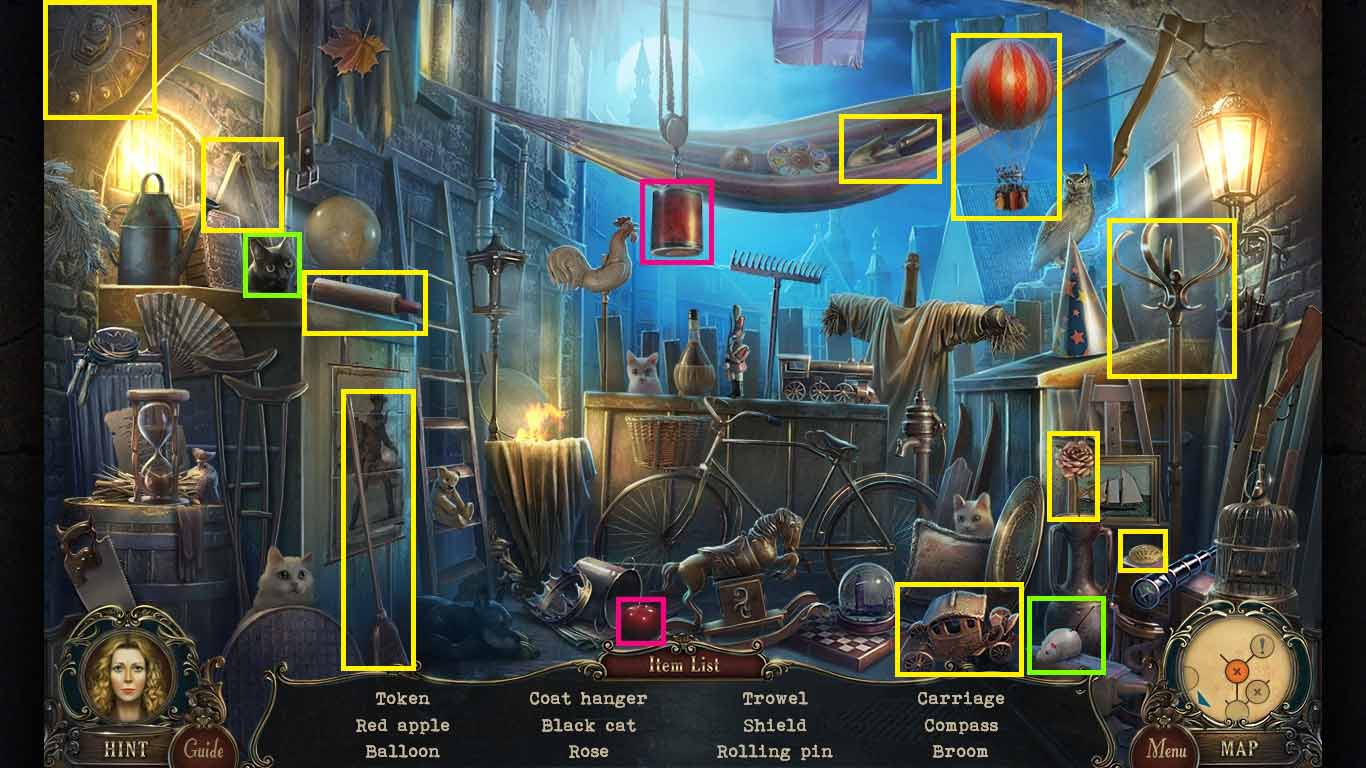
- Find all the listed items.
- Click and tip the paint can to create a red apple.
- Click the mouse; the black cat will come out although its location will vary.
- Collect the token.
- Walk down one time; go into the police station.
- Zoom into the machine; insert the token.
- Collect the 1st frame corner and the can tab.
- Walk down two times and move forward.
- Zoom into the shed and then the toolbox.
- Use the can tab on the lock.
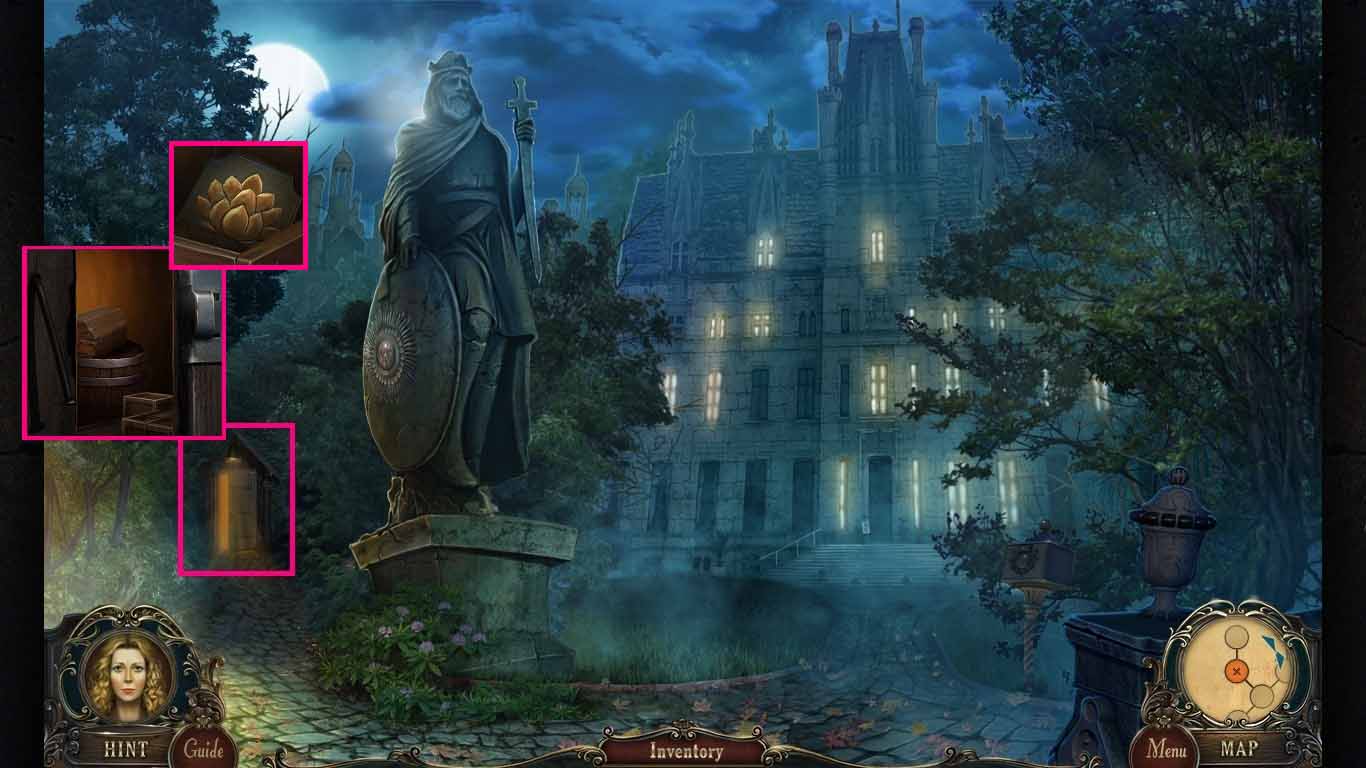
- Collect the lotus medallion.
- Move forward.
- Zoom into the wall.
- Insert the lotus medallion and click the medallion.
- Collect the 2nd mechanism handle and the 2nd frame corner.
-
Walk down two times.
- Zoom into the door on the left side and insert the 2 mechanism handles.
- Click the handle to trigger a mini- game.
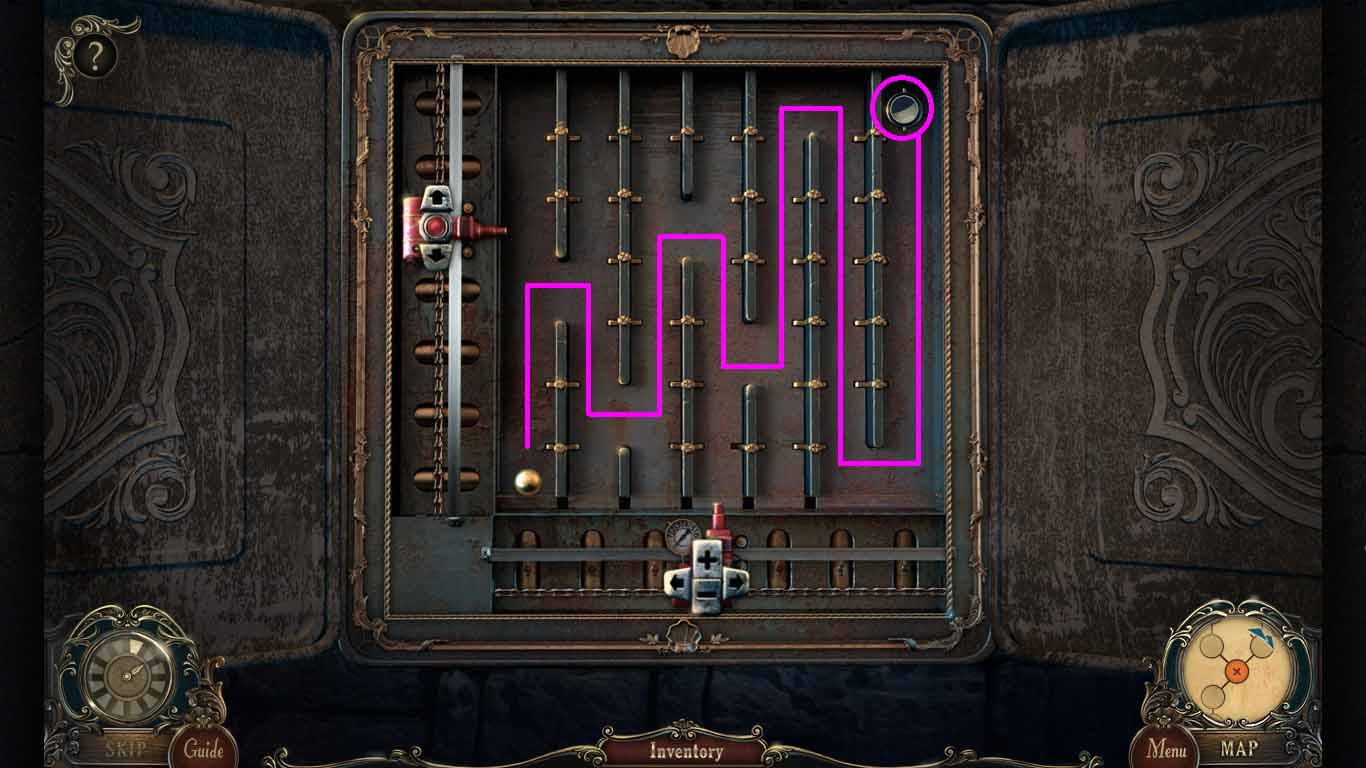
- Move the ball into the hole using the controls.
- Collect the gate handle.
- Go right and turn right again between the buildings.
- Zoom into the gate on the right side.
- Insert the handle into the control and click it.
- Move to the right.
- Zoom into the control and collect the screwdriver.
- Use the electrical tape on the wires.
- Walk down two times.
- Zoom into the billboard; use the screwdriver to unscrew the screws.
- Collect the 3rd frame corner.
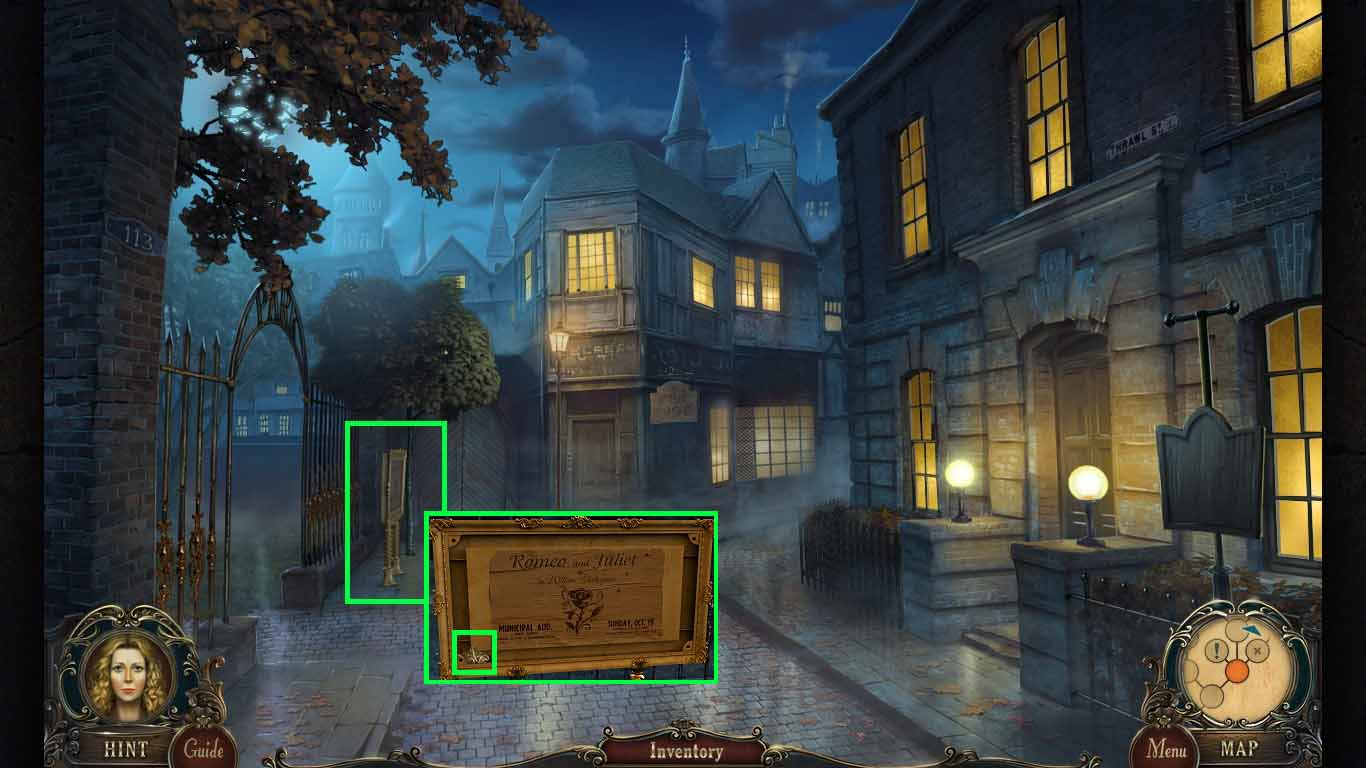
- Go left into the park.
- Collect the police station permit.
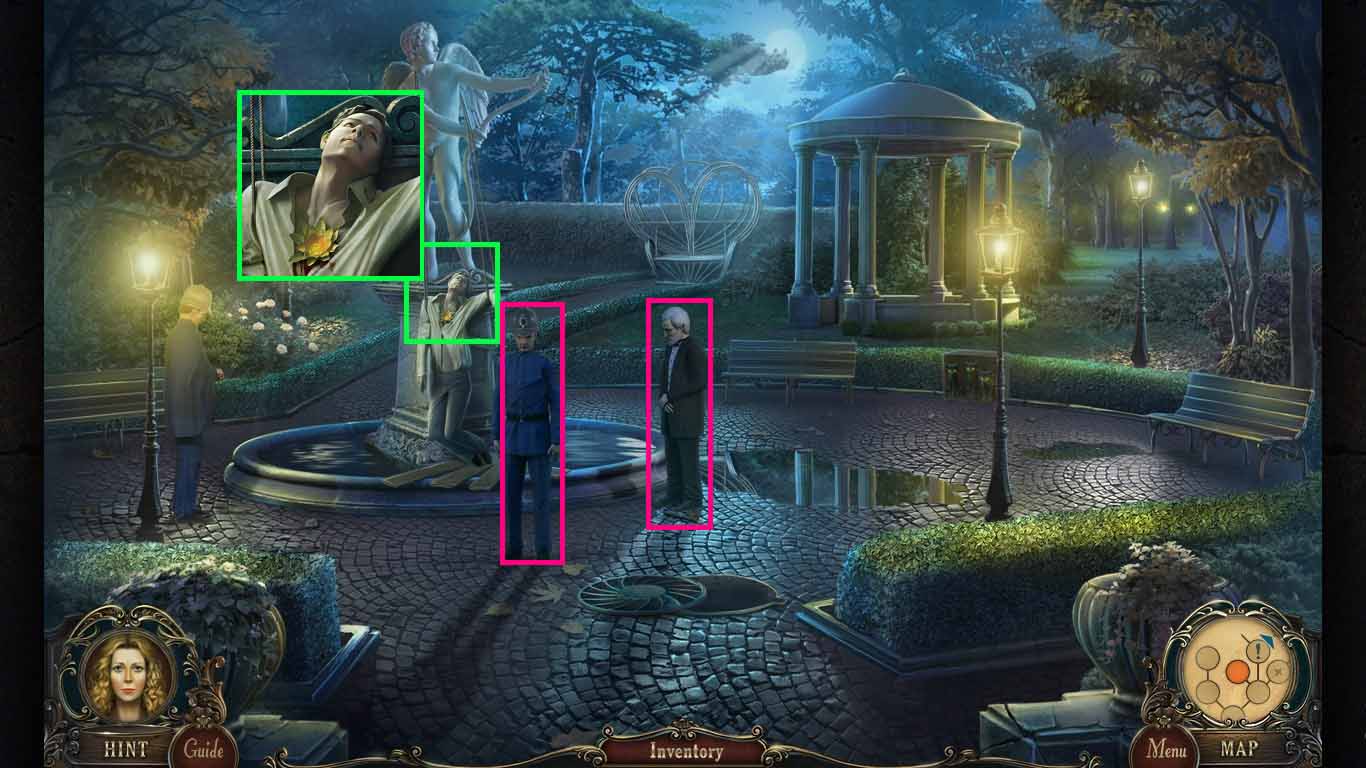
- Notice the body.
- Click the officer and Mr. Ross.
- Walk down once and go into the police station.
- Give the officer the police station permit.
- Move forward.
- Zoom into the safe; collect the 4th frame corner.
- Zoom into the box and click the knob down.
- Collect the hose.
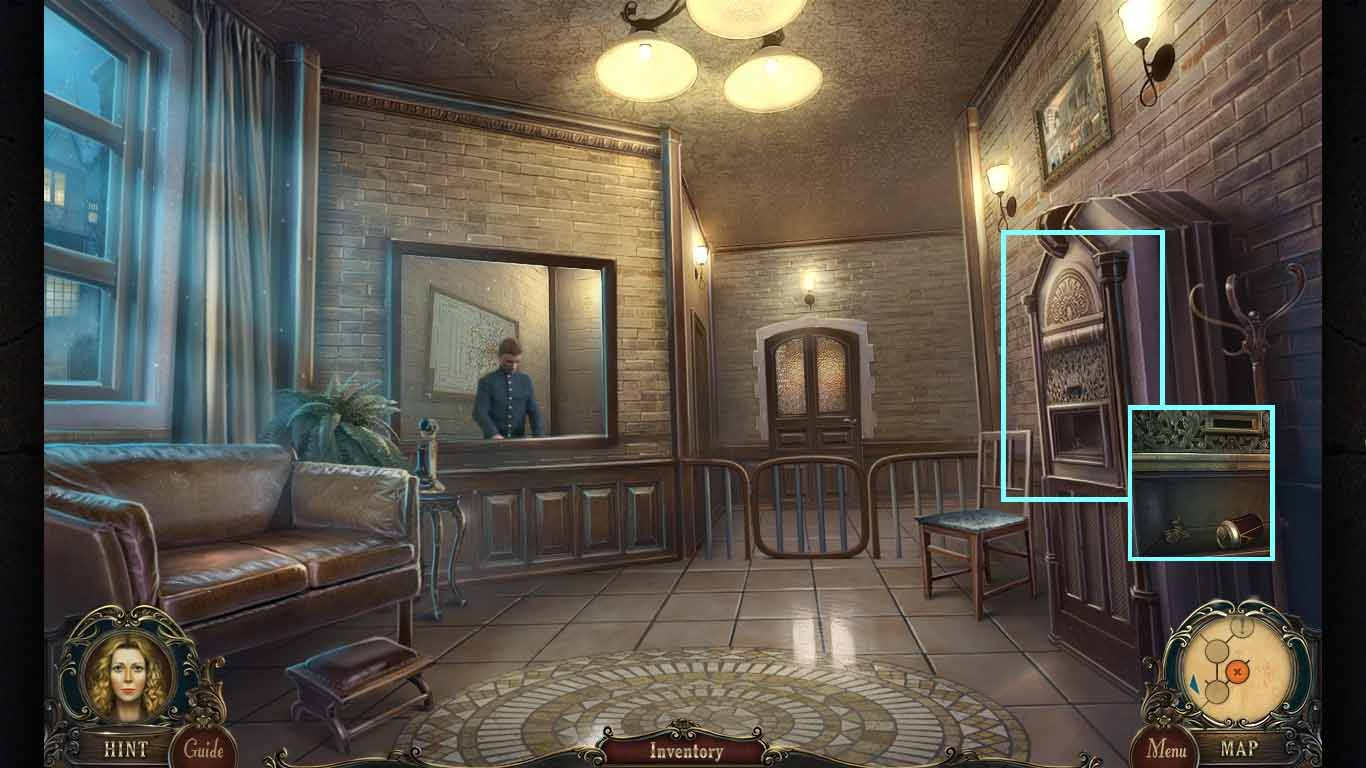
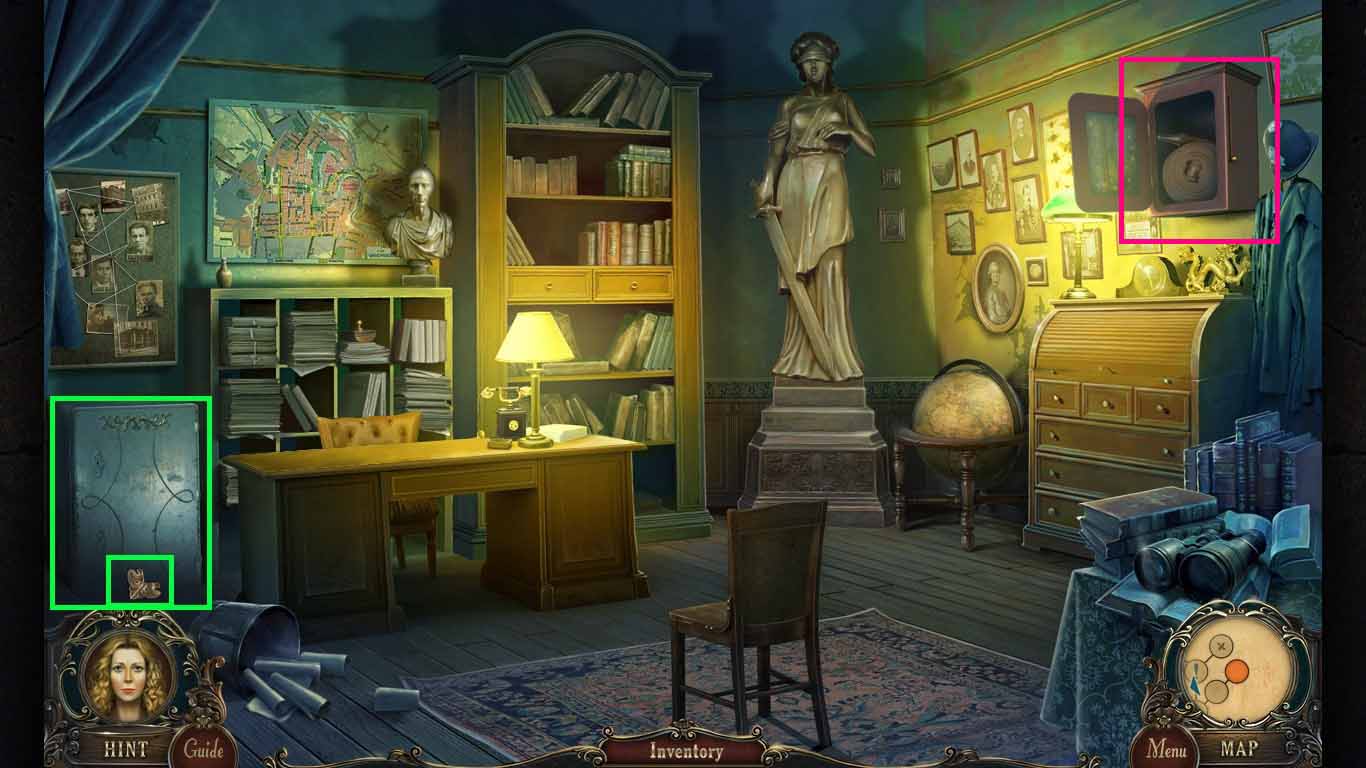
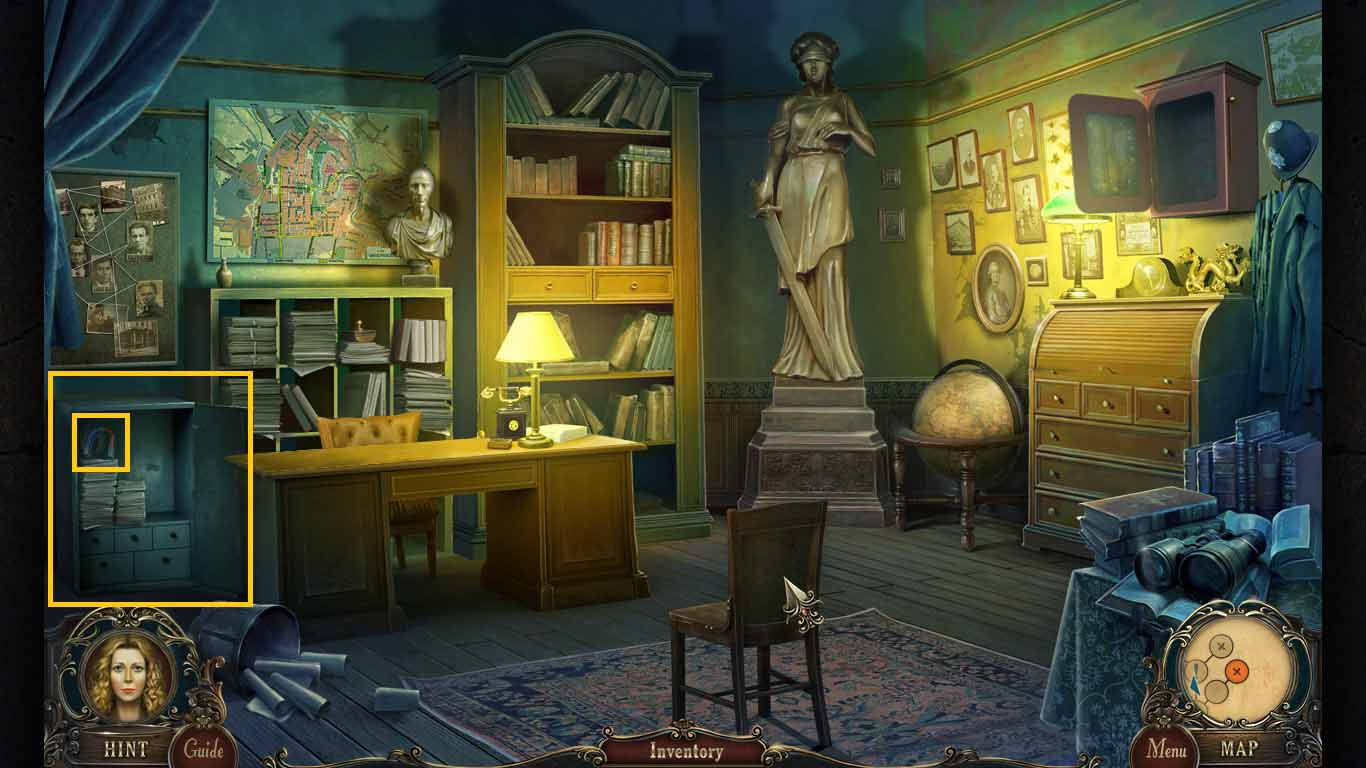
- Walk down 4 times and click the wardrobe to access a hidden objects area.
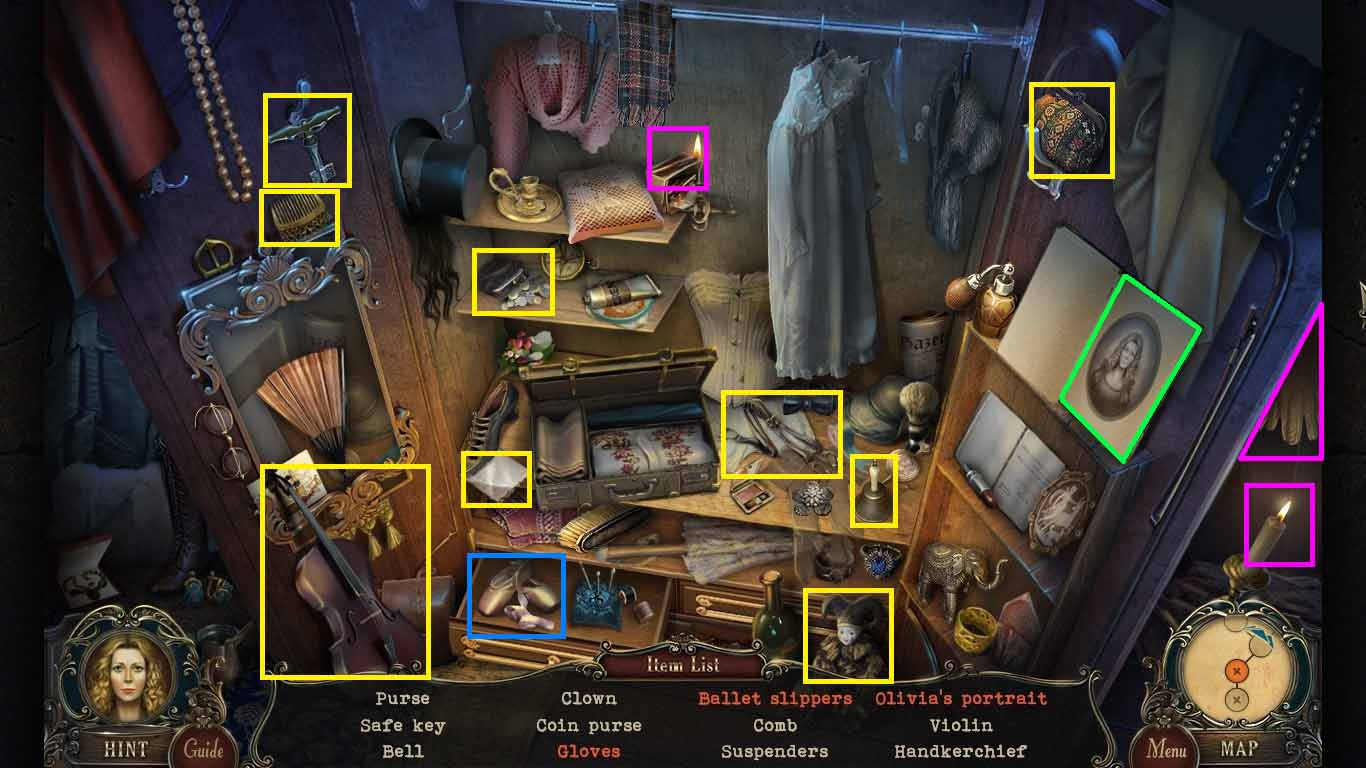
- Find the listed items.
- Click the drawer to find the ballet slippers.
- Click the book pages to collect Olivia’s portrait.
- Use the match the light the candle; collect the gloves.
- Collect the 1st safety key.
- Walk down one time.
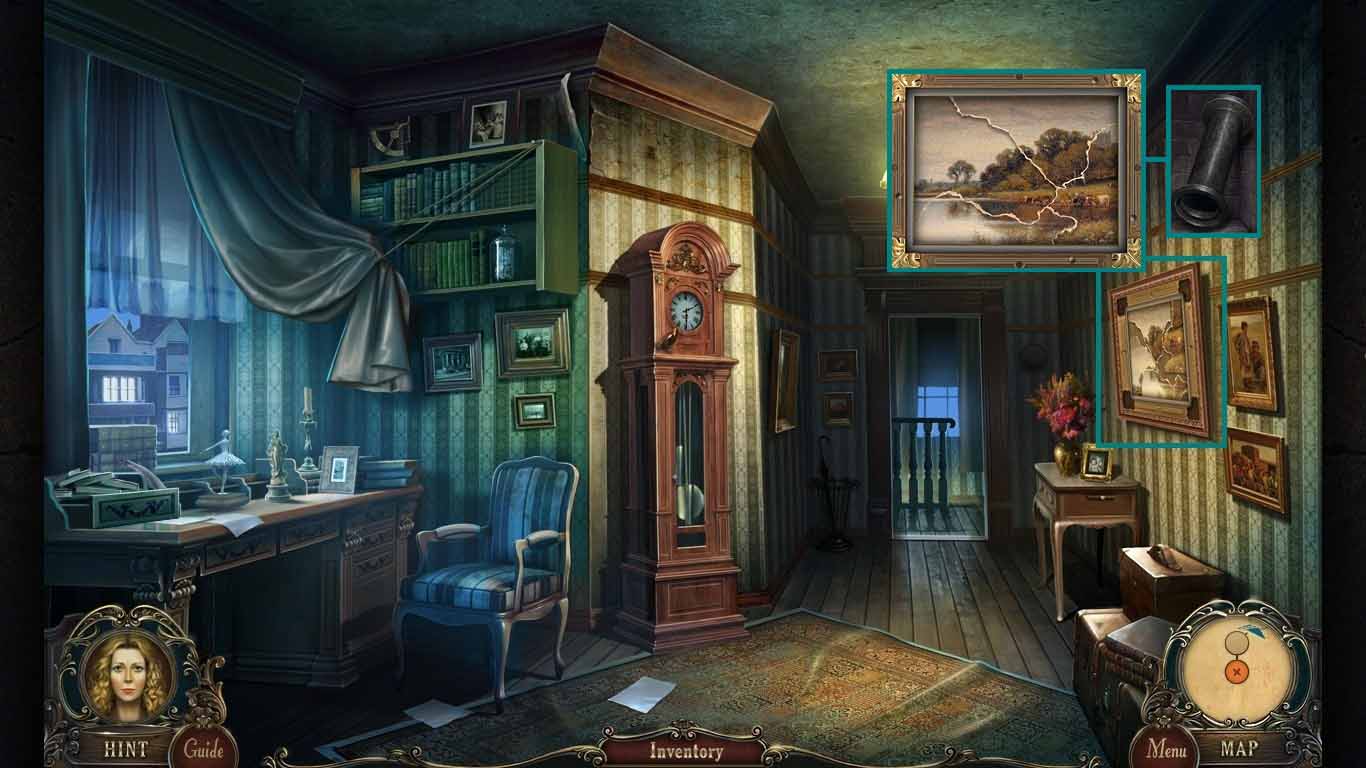
- Zoom into the painting and insert the 4 frame corners onto the painting.
- Restore the torn painting using the slides.
- Collect the length of pipe.
- Move forward two times.
- Zoom into the pipes and collect the 2nd valve handle.
- Insert the length of pipe into the open space.
- Zoom in and collect the 2nd safe key.
- Move right and go into the police station and move forward one more time.
- Zoom into the safe.
- Insert the safe keys and click them.
- Collect the magnet.
- Walk down two times and go into the park.
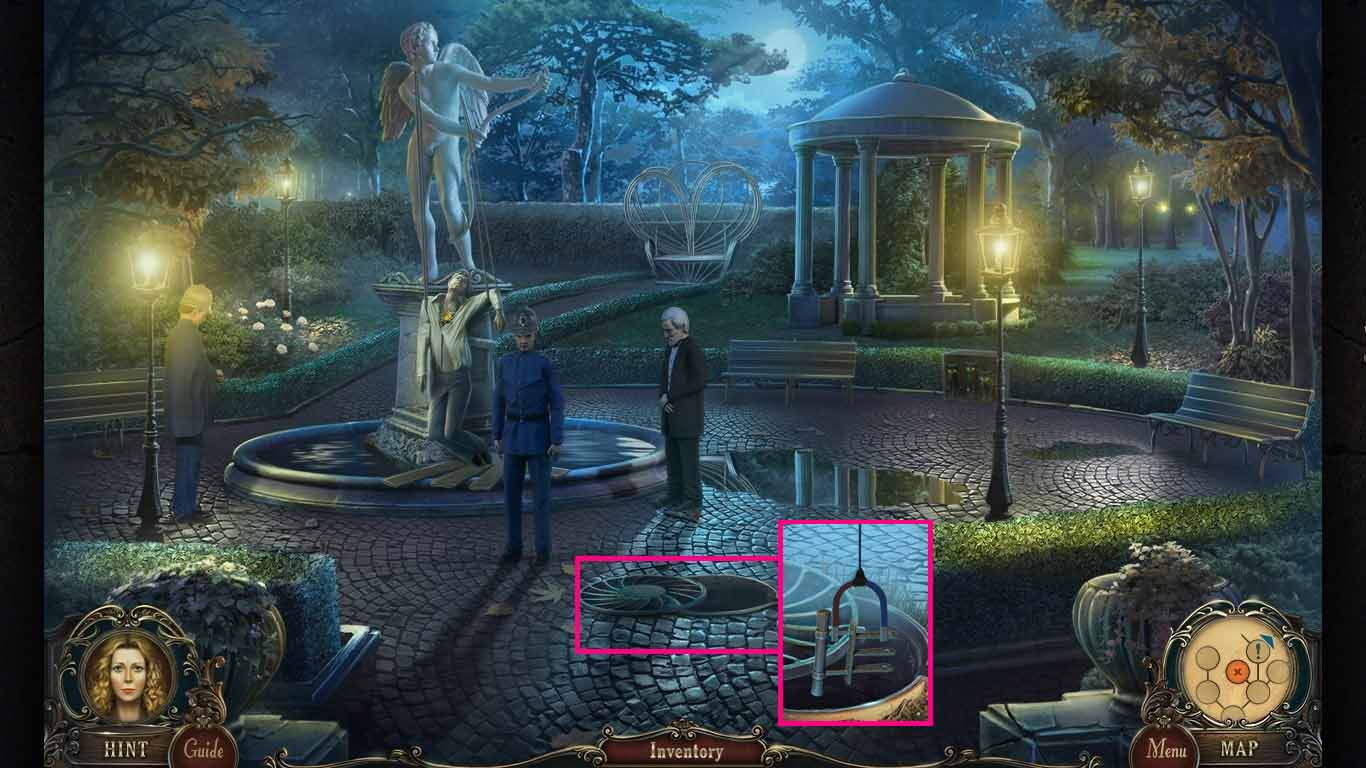
- Zoom into the manhole; put the magnet over it.
- Move the magnet down until it grabs the circuit breaker lever.
- Collect the circuit breaker lever.
- Walk down once and go right to the dead end.
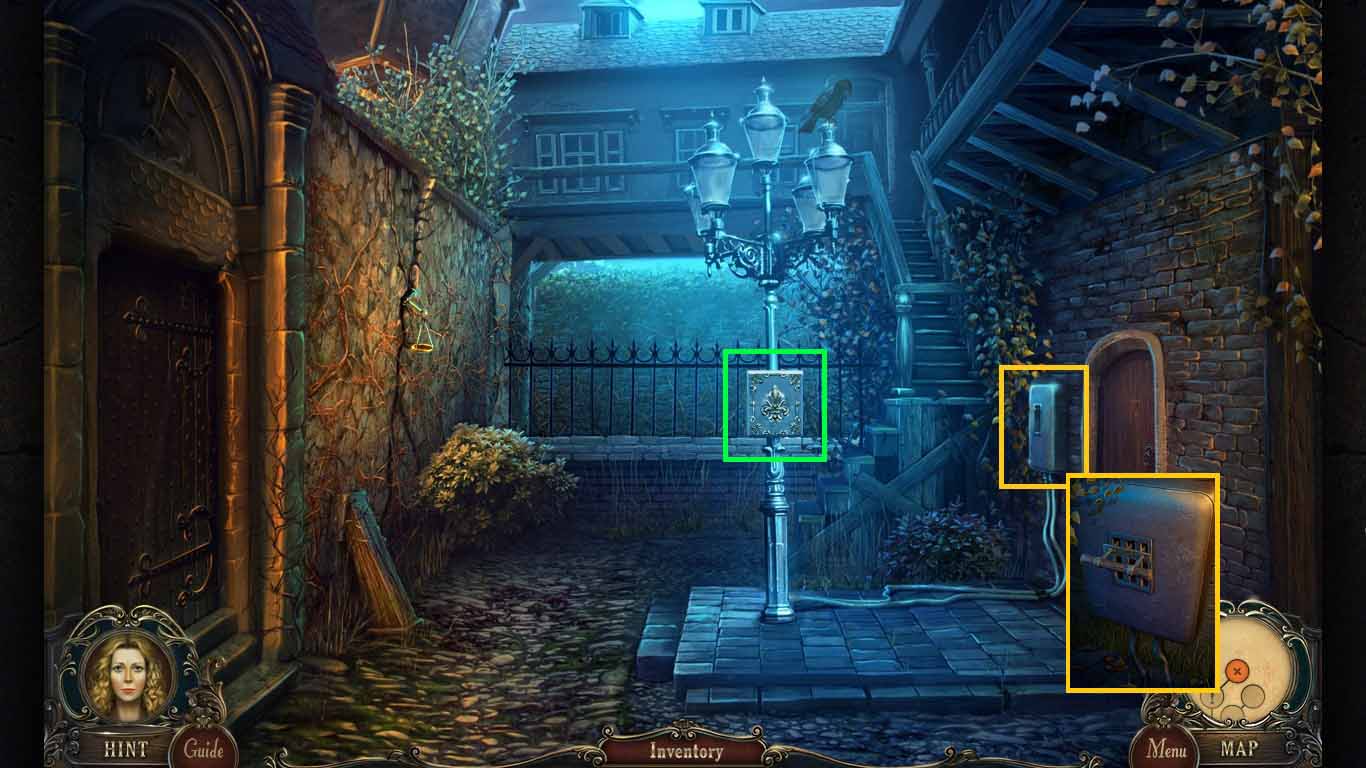
- Zoom into the breaker box and insert the circuit breaker lever.
- Click the lever down.
- Zoom into the electrical box on the light pole to trigger a mini-game.
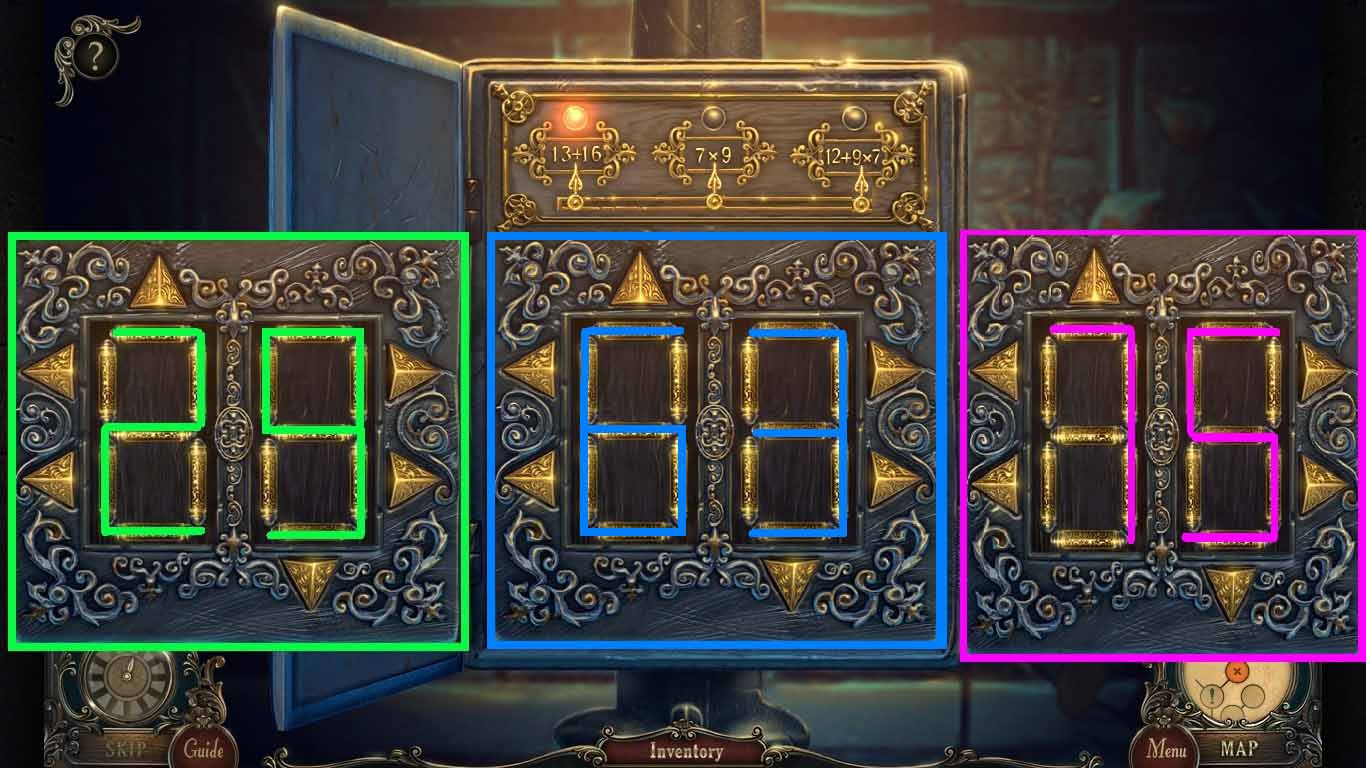
- Solve as shown above.
- Collect the mailbox key.
- Walk down 3 times and move forward.
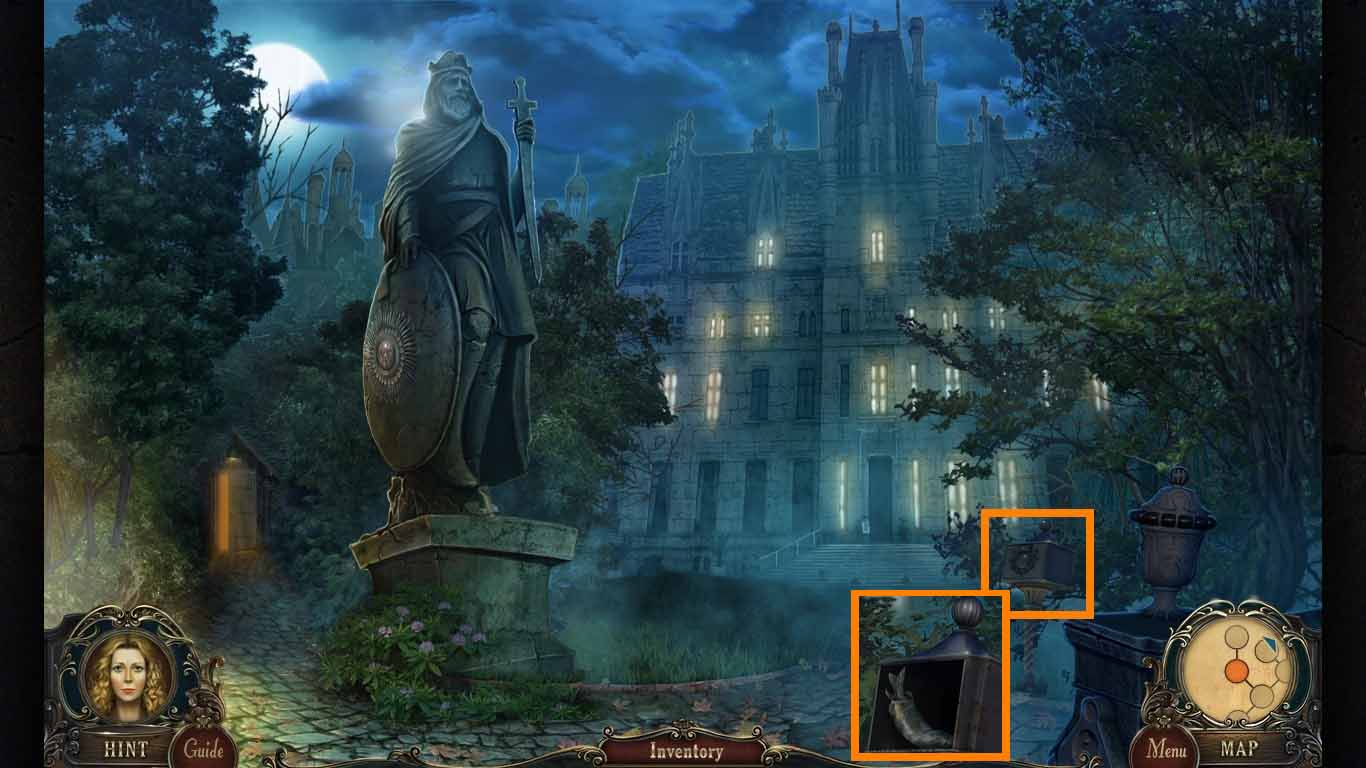
- Zoom into the mailbox.
- Insert the mailbox keys into the lock and click it.
- Collect the fish.
- Walk down once, turn right and go into the park.
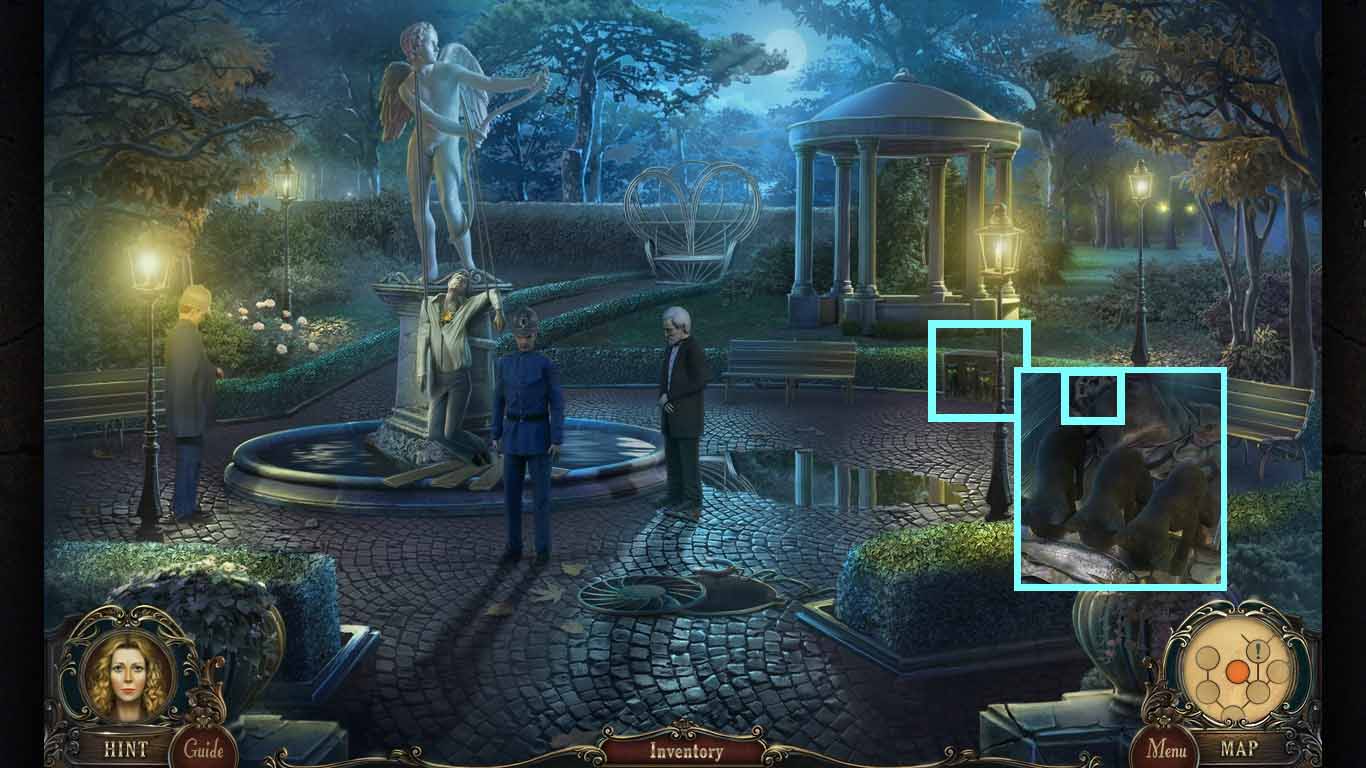
- Zoom into the cats and give them the fish.
- Collect the 3rd valve handle.
- Walk down once and move forward.
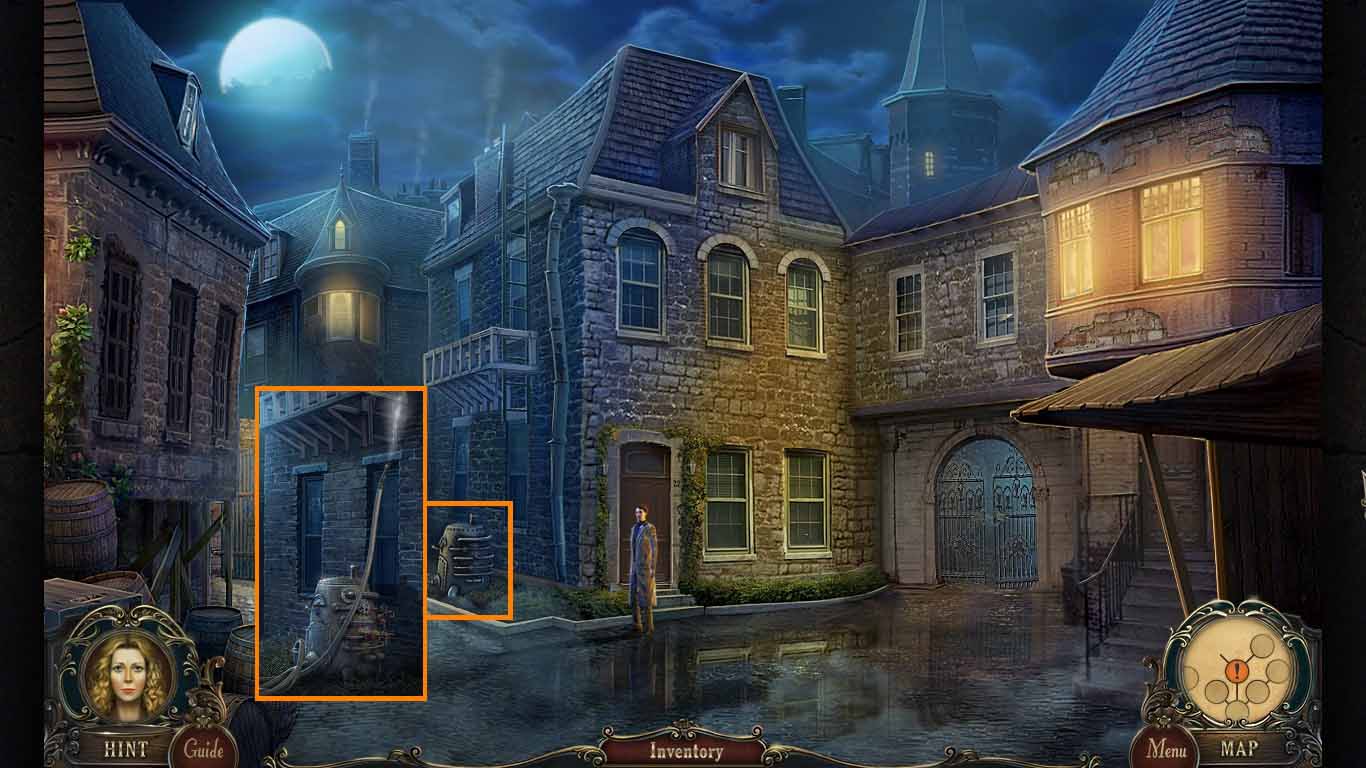
- Zoom into the device; insert the 3 valves and the hose.
- Click the lever.
- Aim the hose at the ladder and climb the ladder.
- Collect the firecracker.
- Walk down one time and walk right.
- Zoom into the wall.
- Insert the firecracker into the crack.
- Click the detonator cord.
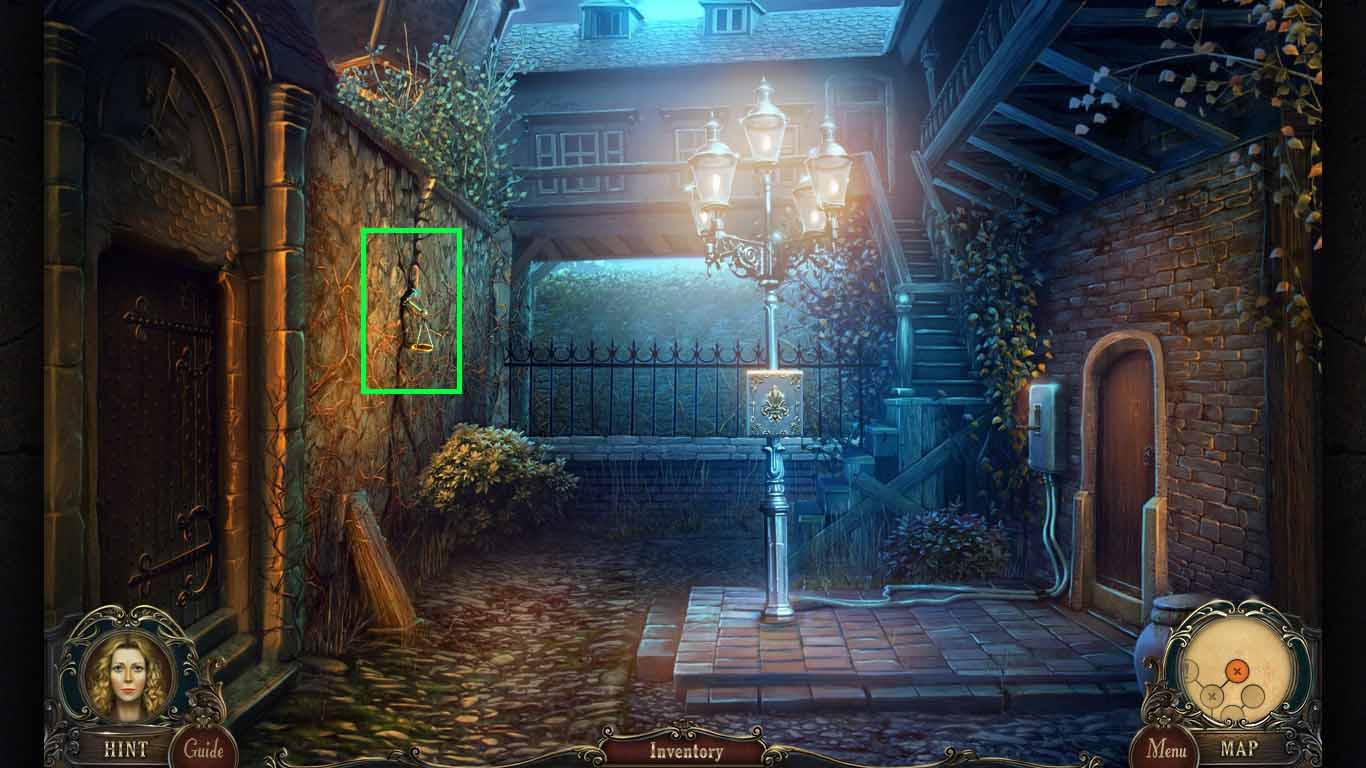
- Collect the scales of justice.
- Walk down once and click the gate to access a hidden objects area.
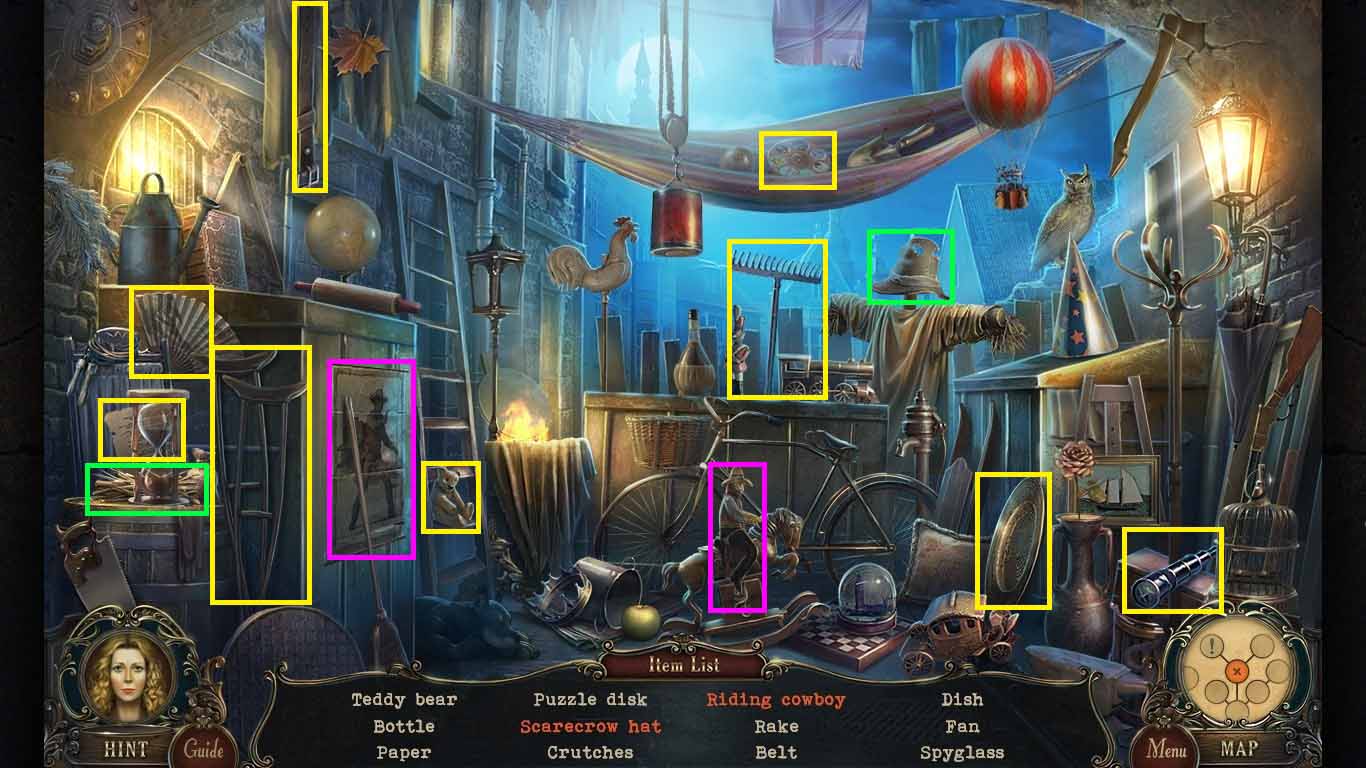
- Find the listed items.
- Use the poster on the horse to collect the riding cowboy.
- Make the scarecrow hat suing the straw on the scarecrow head.
- Collect the 1st puzzle disc.
- Walk down once and into the police station and move forward.
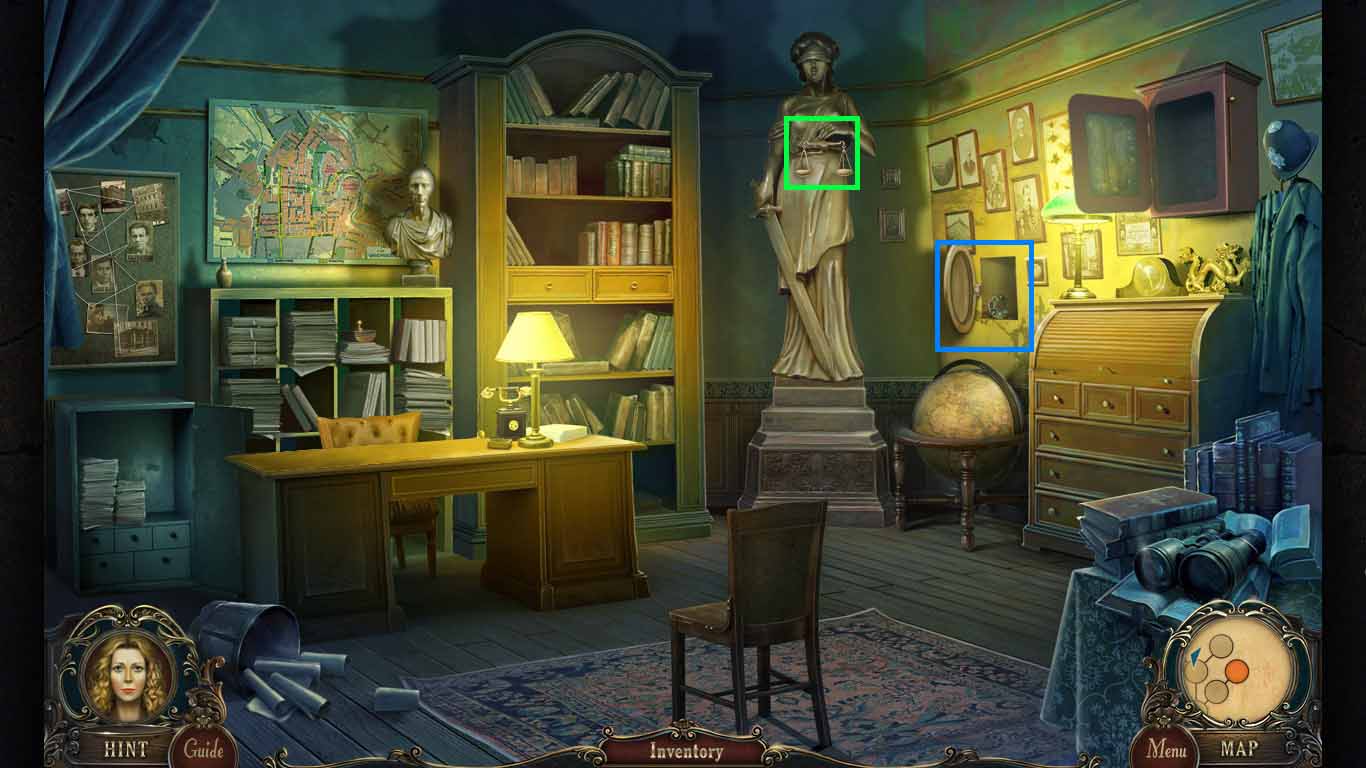
- Insert the scales of justice into the statue’s hand.
- Zoom into the safe; collect the 2nd puzzle disc and the golden cuckoo.
- Walk down 5 times.
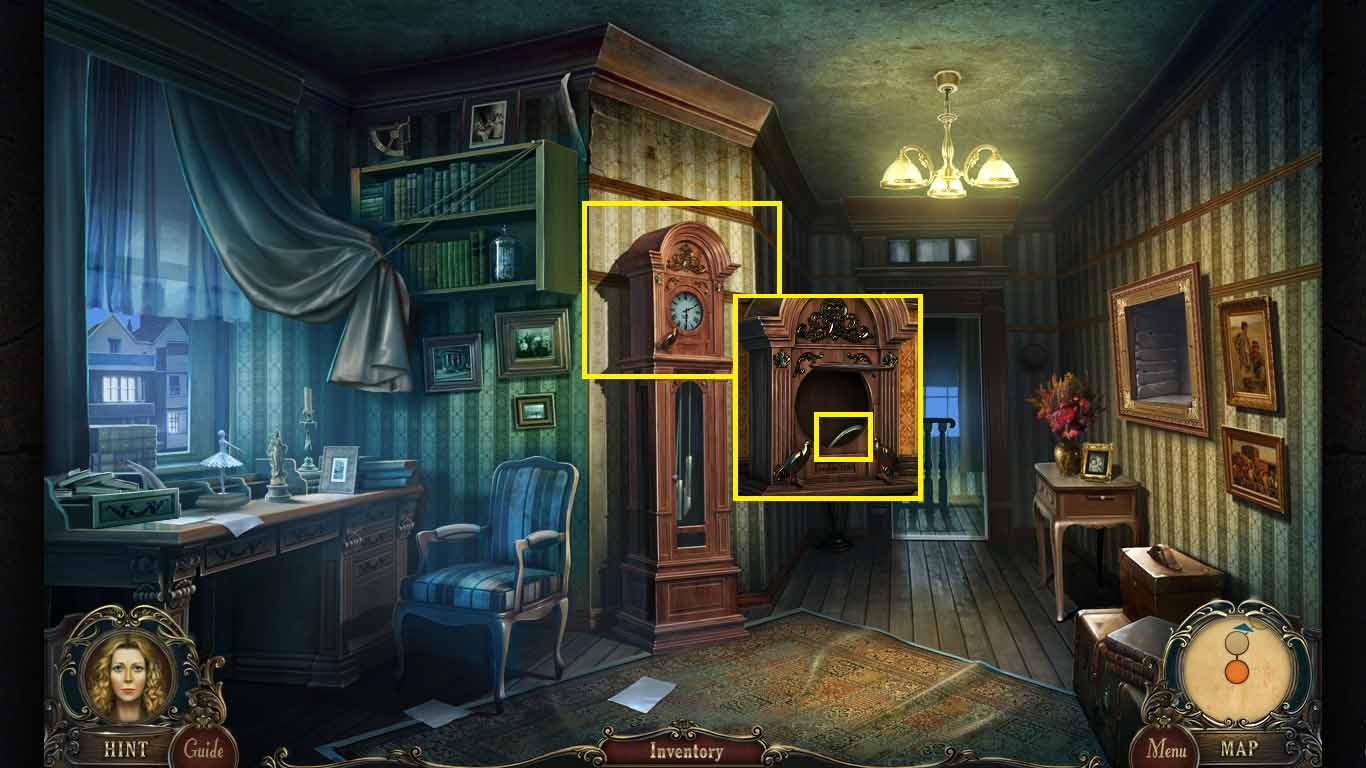
- Zoom into the grandfather clock.
- Insert the golden cuckoo on the right.
- Collect the silver ram.
- Move forward 4 times and into Charlotte’s living room.
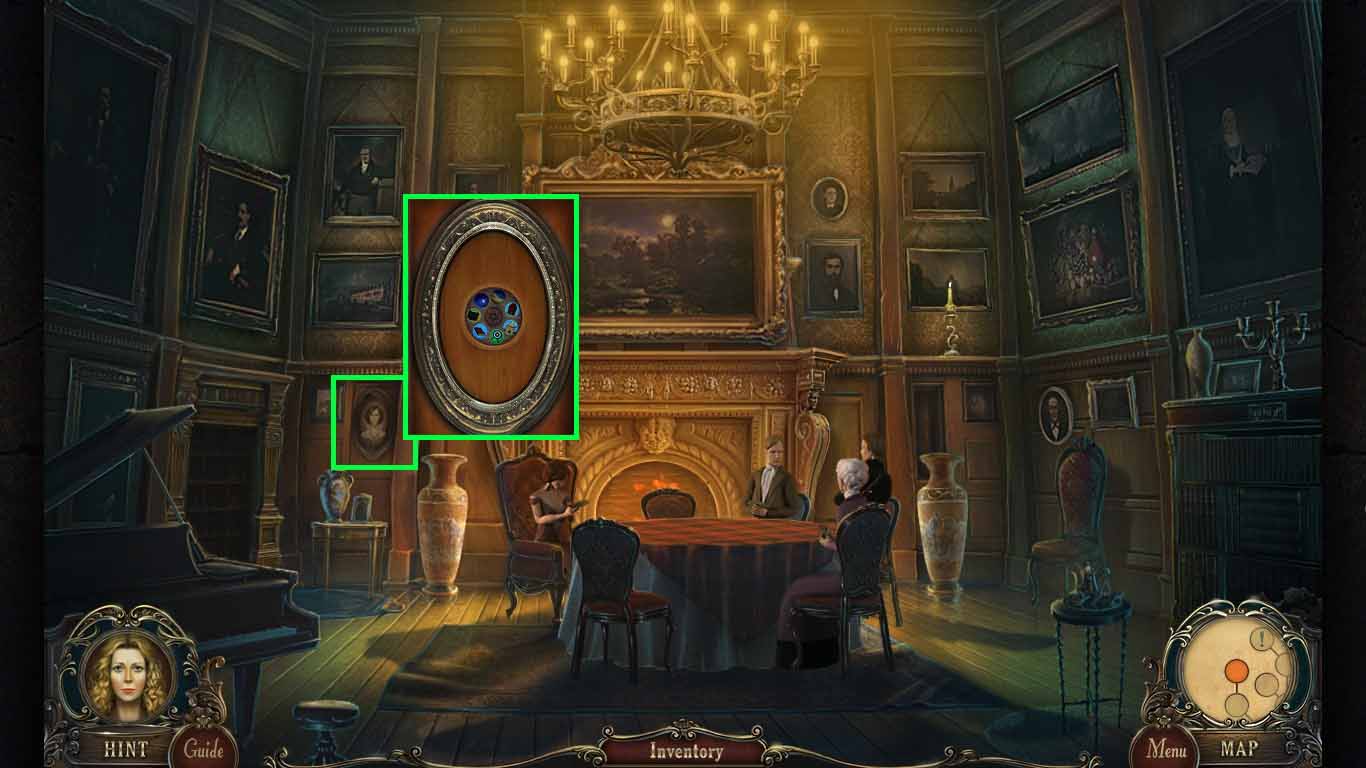
- Zoom into the portrait.
- Put the silver rim onto it and click it open.
- Collect the 3rd puzzle disc.
- Walk down two times, go right and move forward and then up the ladder.
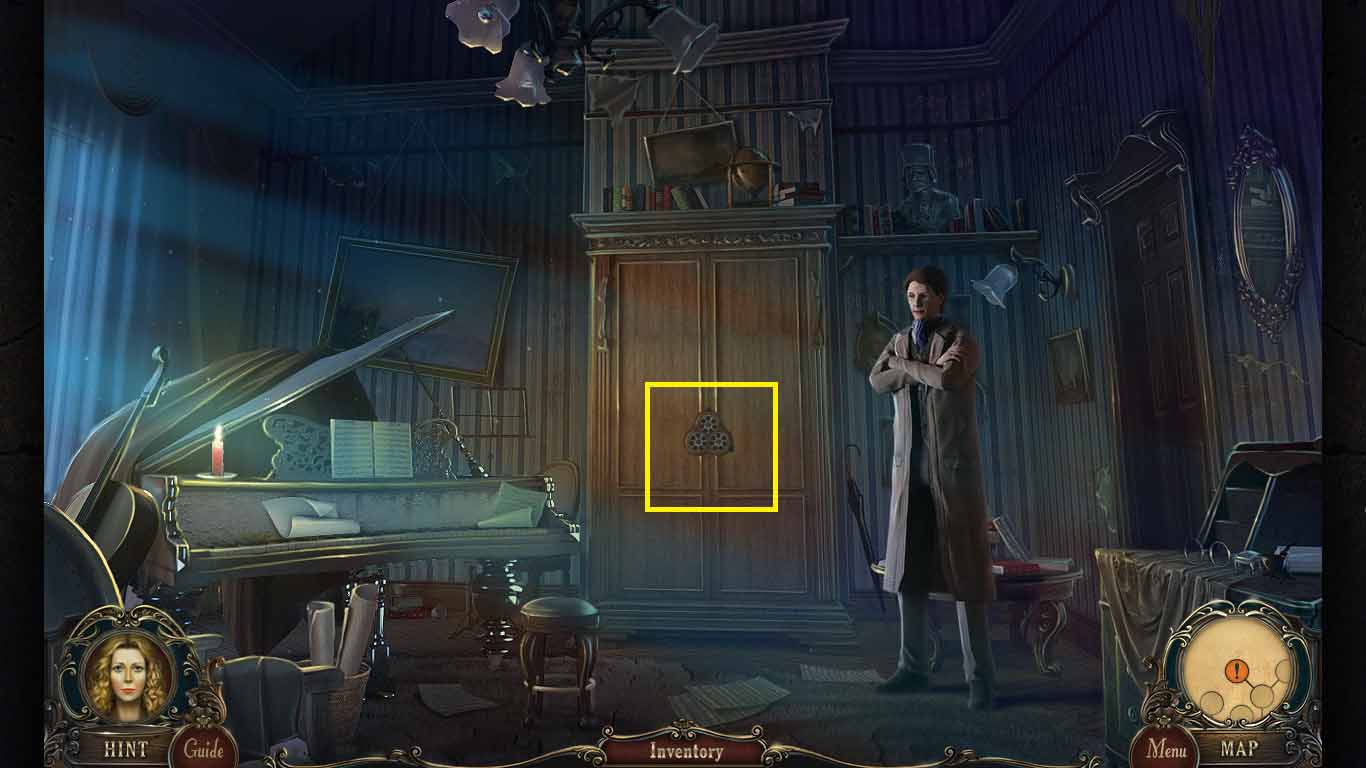
- Zoom into the wardrobe to access a mini-game.
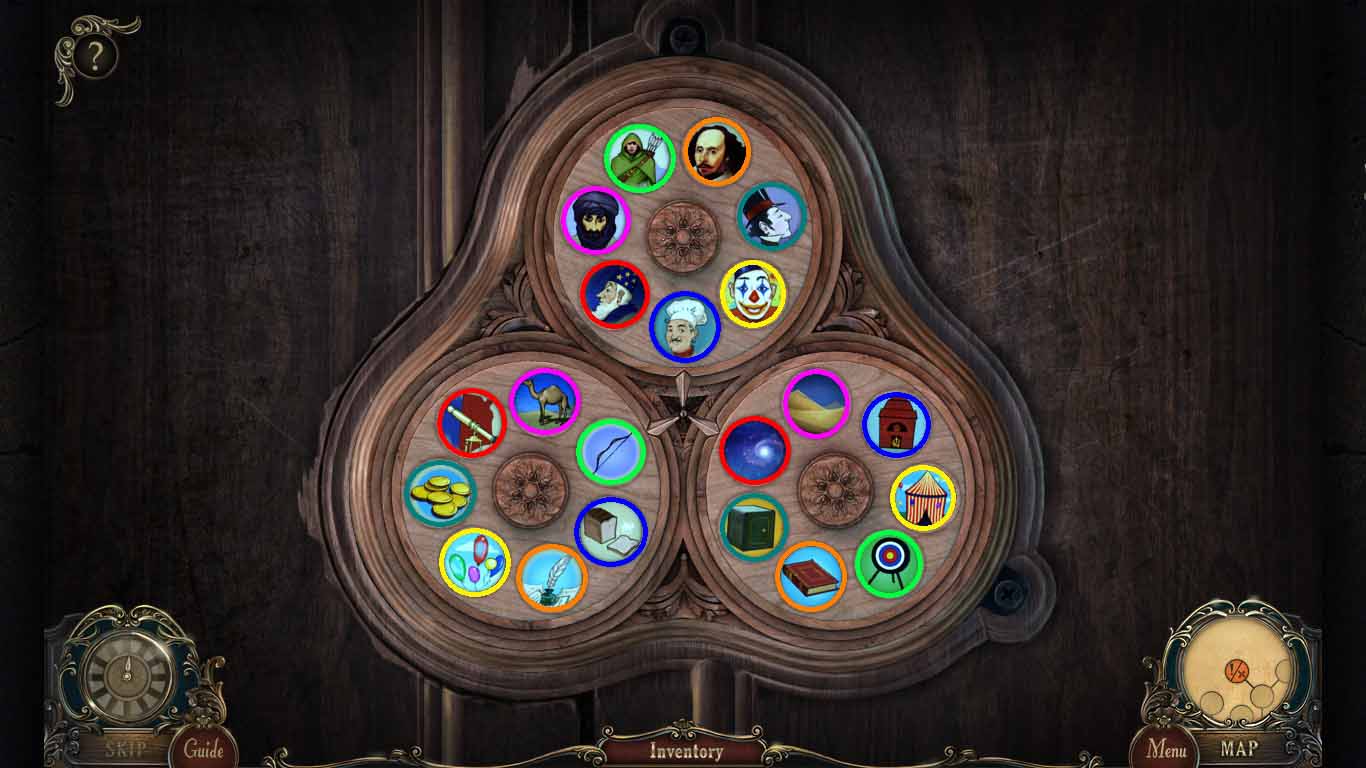
- Insert the 2 puzzle discs into the wardrobe to trigger a mini-game.
- Match the picture matches as shown via the color matches.
Chapter One: Where is Olivia?
Chapter Two: Welcome to the Wharf
Chapter Three: Exploring Chinatown
Chapter Four: Inside Archie's Estate
Bonus Game
Ask for help in the comments below!