Botanica: Into the Unknown: Chapter Five: Aquez
Our Botanica Into the Unknown Walkthrough is the missing link you need to solve the mystery of this beautiful hidden object adventure game. We've made sure to include plenty of screenshots clearly marking all key objects and detailed instructions so you'll be able to help Ellie on her journey to discover this new world of wonder filled with curious creatures, exotic plantlife, and unknown dangers. Don't hesitate to step into unknown adventures with our Botanica Into the Unknown Walkthrough at your side.
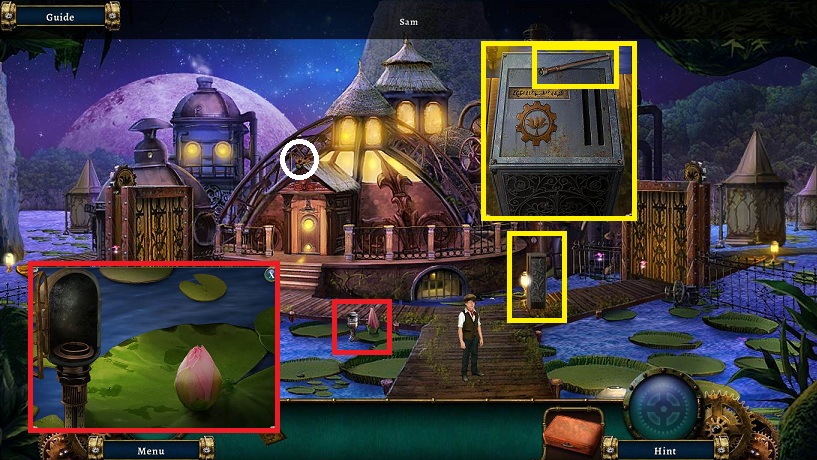
- Examine the pedastal
- Pick up the LADDER RUNG
- Note a lever is missing
- Examine the water lily
- Note the empty bulb cage
- Enter the open door
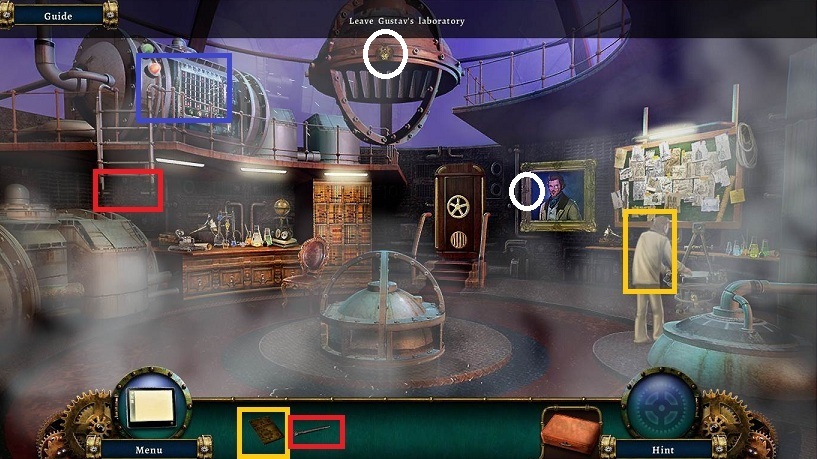
- Talk to Gustav
- Pick up collectible
- Examine the ladder
- Place the LADDER RUNG and click on the ladder to lower it
- Examine the machine

- The goal here is to get all the pistons into a position where all the lights are green
- One way to do this is to place all the pistons at the top
- Pull the blue bar down so you can see all of them
- Pull the lever
- Then move all the ones that did not light green down one and repeat
- Unfortunately they do not stay lit so you'll have to use your memory a little bit
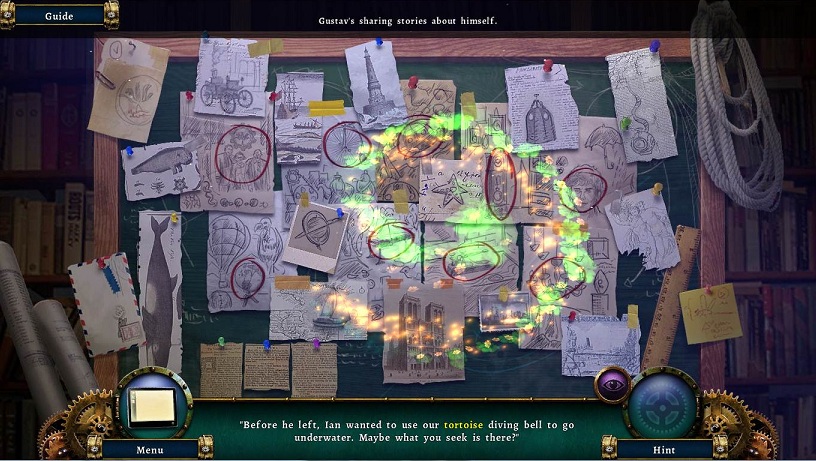
- Give Gustav the ROBOT PLATE
- Click on pictures that match with Gustav's story
- Receive the BLUE KEY CARD
- Examine Gustav's portrait
- Pick up Collectible
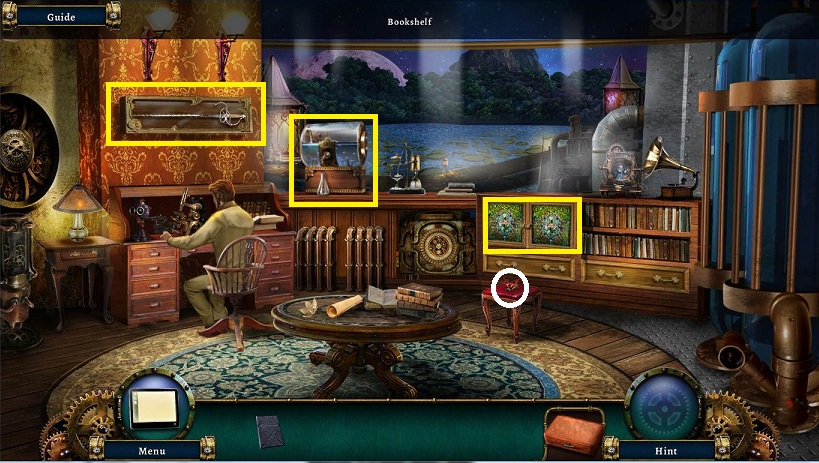
- Go through door
- Examine Gustav's study
- There is a sword that is locked onto the wall
- Pick up collectibe
- There is a container of solution missing a valve
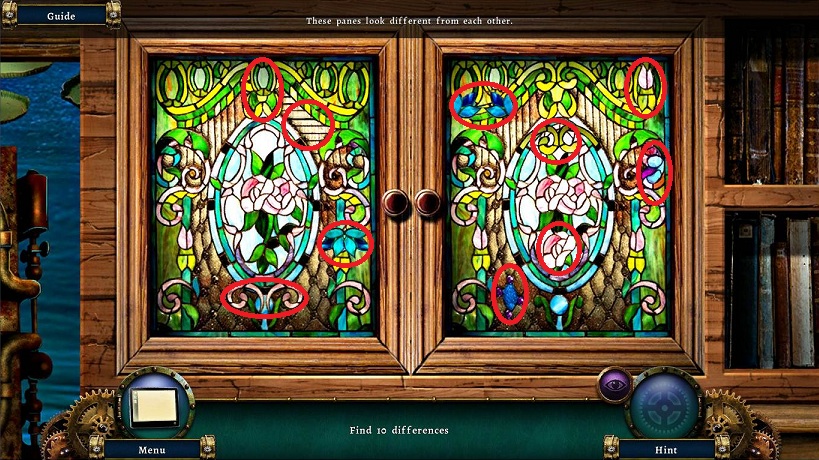
- Examine the cabinet and find 10 differences
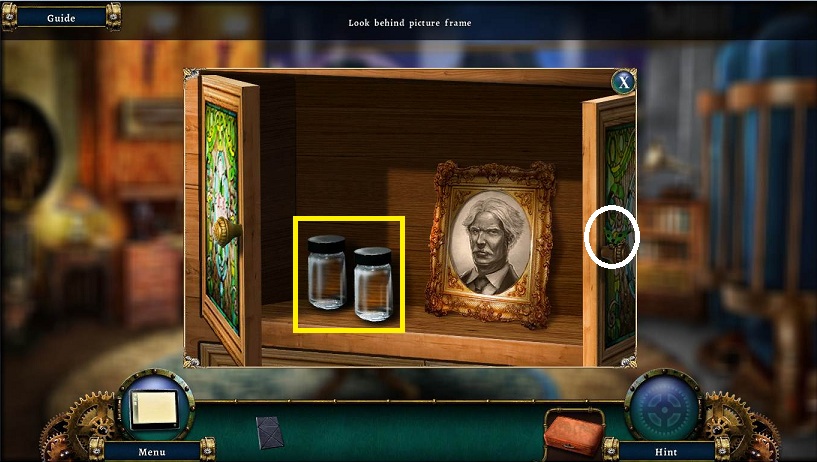
- Pick up 2 EMPTY BOTTLES
- Examine behind the picture frame
- Pick up collectible on the open door
- Return outside
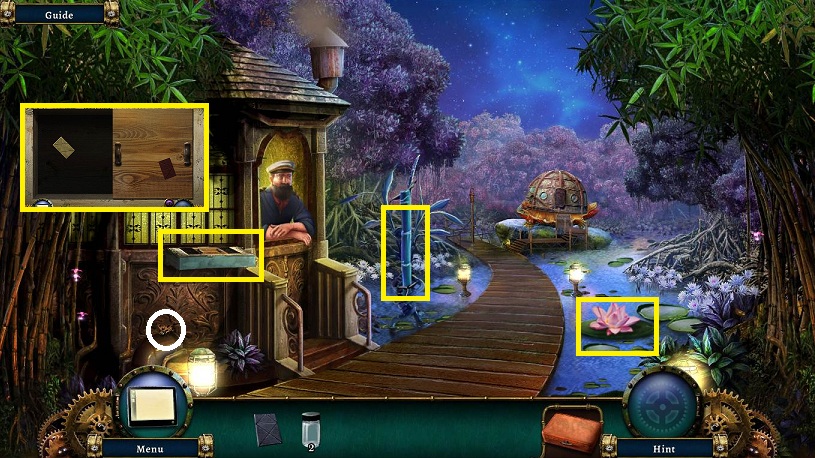
- Examine the right gate
- Use the BLUE KEY CARD
- Go through the gate to the dock
- Pick up collectible
- Talk to Harbormaster; the tortoise has lost her baby
- Examine the shelf to the left
- Match up the cards
- You need to slide the wood piece right and left to expose all the cards
- Some cards to be matched are hidden on both sides
- Pick up the last RED KEY CARD
- Examine the open flower; it has a light to make it bloom
- Use an EMPTY BOTTLE on the flower to pick up a pollen sample
- Examine the bamboo; you need something to cut it with.
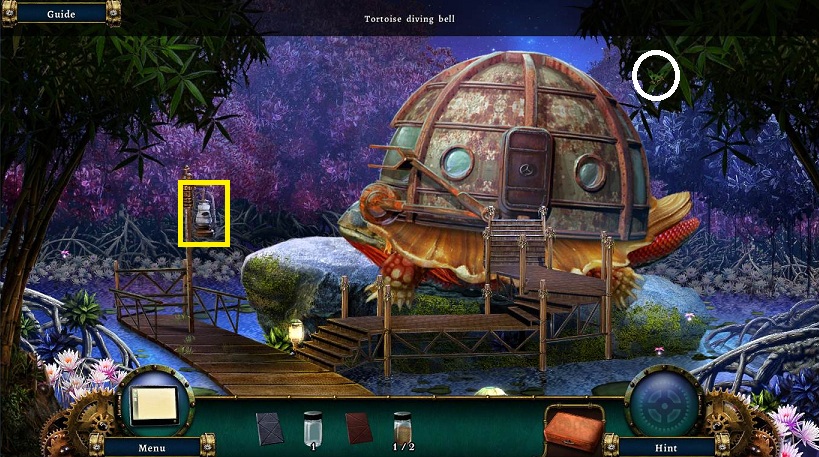
- Go forward to the tortoise diving bell
- Examine the lantern
- Pick up the PALETTE KNIFE
- Pick up collectible
- Return to start point and examine the left gate
- Use the RED CARD KEY and enter
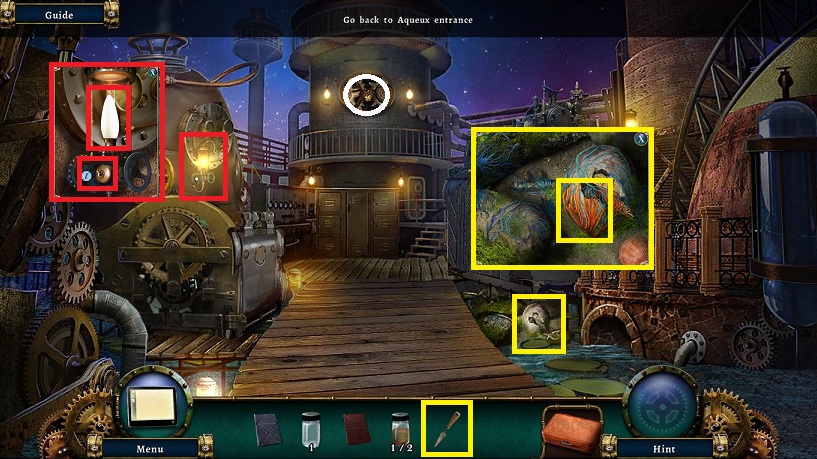
- Examine the machine to the left
- Flip the switch below the light
- Pick up the LIGHT BULB
- Examine the tool locker; it is locked
- Pick up collectible
- Examine the baby tortoise to the right
- The baby tortoise and LEVER are encrusted in moss
- Use the PALETTE KNIFE on the orange bit of moss
- Back up once
- Examine the flower
- Place the LIGHT BULB and click
- Use the EMPTY BOTTLE on the now open flower
- Enter the study
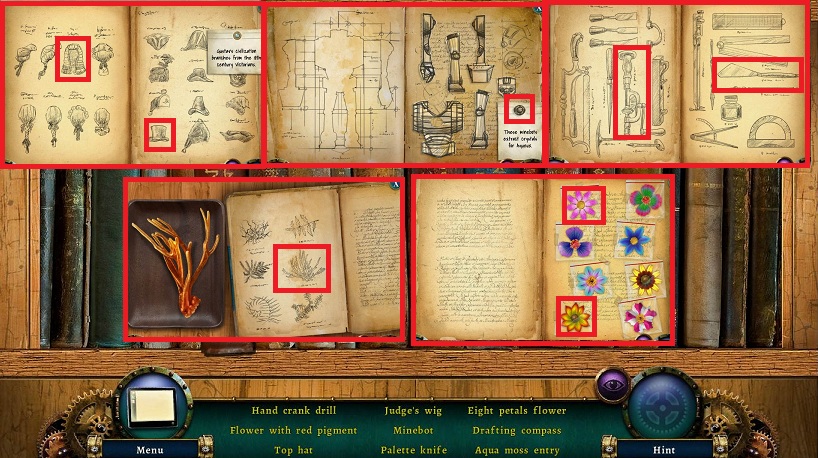
- Examine the bookshelf
- Place the MOSS SAMPLE on the mat to the left
- From left to right as you examine the books, five of them will pull out
- Clicking on the left most one, reveals a judge's wig and top hat
- Next book requires you to place the minibot pieces on the schematic to the left
- Note the circle piece on the note
- Next book exposes hand crank drill, drafting compass, and palette knife
- Next one reveals the aqua moss entry
- Last book reveals the 2 flowers
- Receive a receipe book
- Flip through the pages of the book
- Click on the plant picture
- Pick up the DISPLAY CASE KEY
-
Pick up collectible
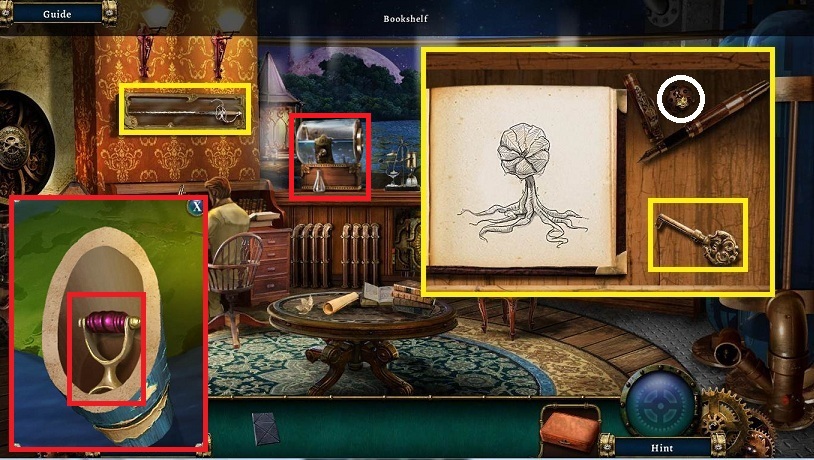
- Examine the sword
- Use the DISPLAY CASE KEY
- Pick up the SWORD
- Return outside
- Head right
- Examine the bamboo
- Use the SWORD
- Pick up the VALVE
- Return to the study
- Examine the solution
- Use the VALVE on the solution container
- Click on it
- Pick up the vial of solution and LOCKER KEY hidden behind it
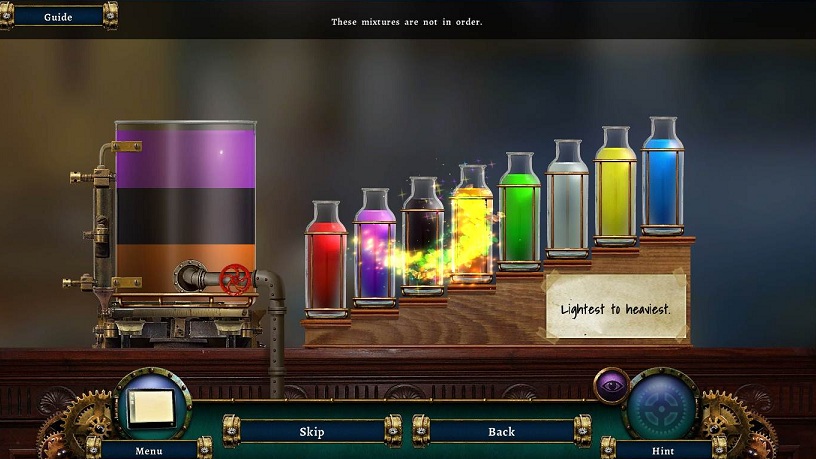
- Open the Botanist Kit
- Place the colored mixtures with the lightest on the left
- The container to the right will have the heaviest mixture drop to the bottom to help you sort
- After filling it with 3 colors, click on the red dial and it will empty
- Receive MOSS EATING ALGAE
- Return outside and to the left
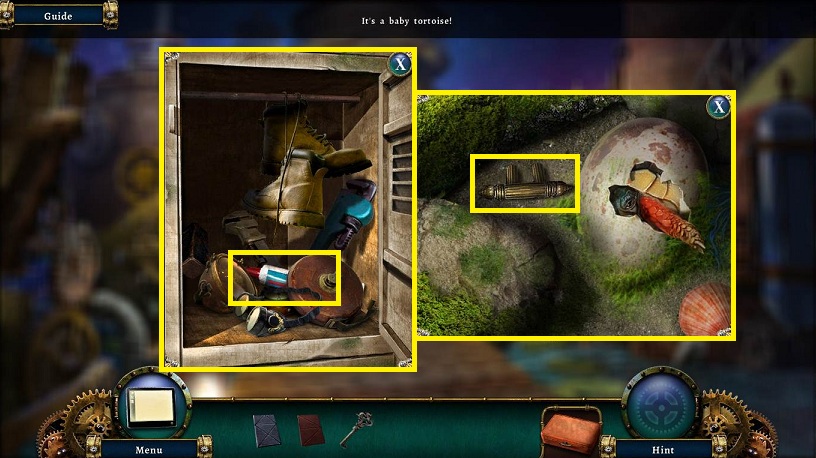
- Examine the baby tortoise
- Use the dropper to remove the moss
- Pick up the LEVER
- The baby tortoise will swim away
- Examine the locker
- Use the LOCKER KEY
- Move items so you can pick up the GREASE
- Back up once
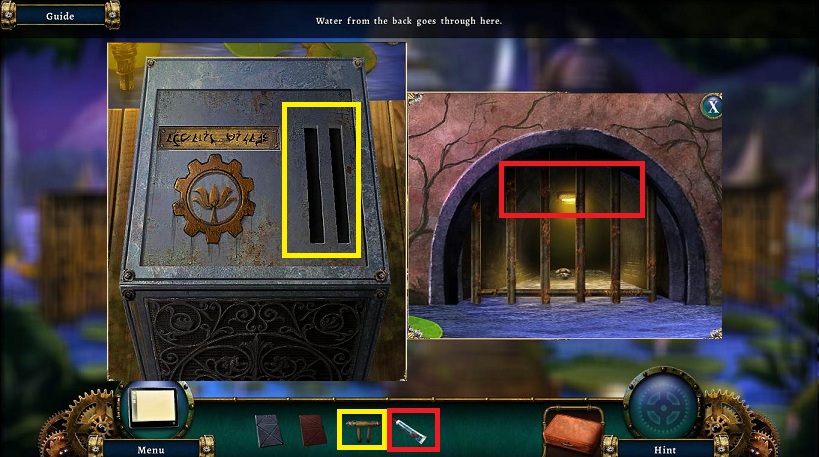
- Examine the pedastal
- Place the LEVER
- Examine the grate
- Use the GREASE on the grate
- Flip the LEVER now
- Pick up the BABY TORTOISE
- Return to the right and the tortoise diving bell
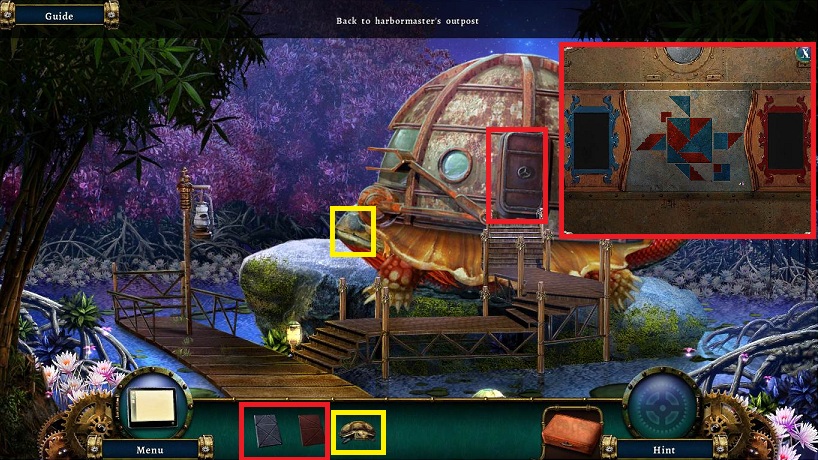
- Place the BABY TORTOISE on the mama
- Examine the door
- Place the RED AND BLUE KEYS CARDS on the puzzle lock
- Place the shapes below onto the images above.
- No flipping is needed
- Enter the diving bell
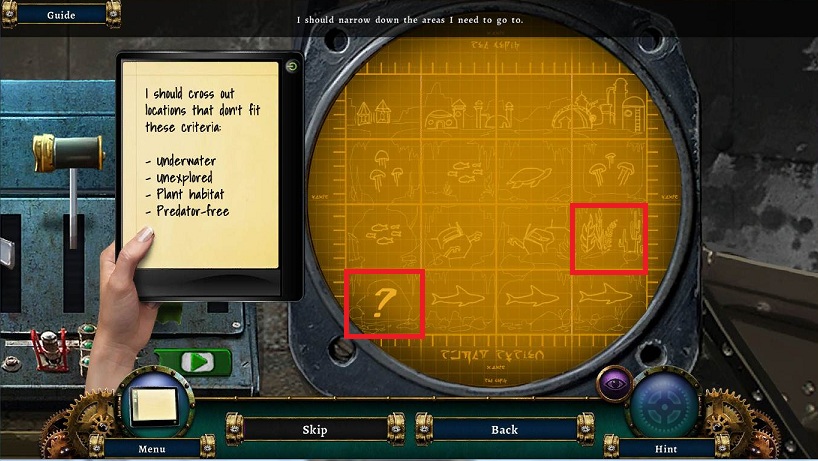
- Examine the Select Destination yellow circle
- Cross out every square but the one that fits the criteria
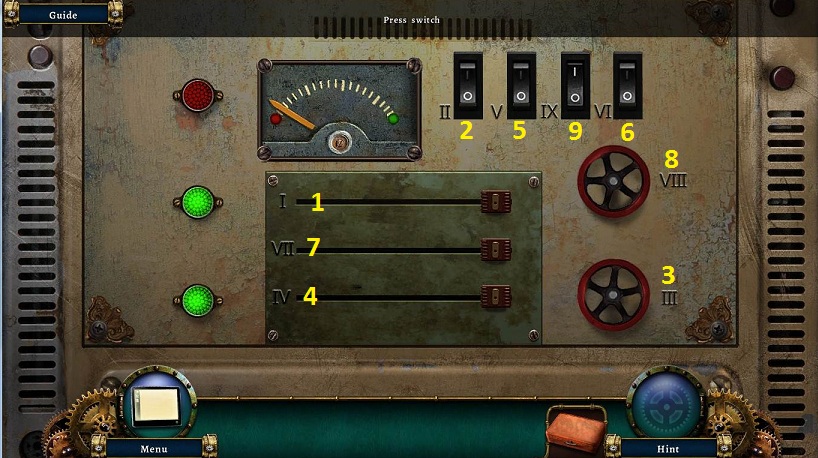
- Examine the center console
- Slide the slider, flip the switch, or turn the dial in numerical order
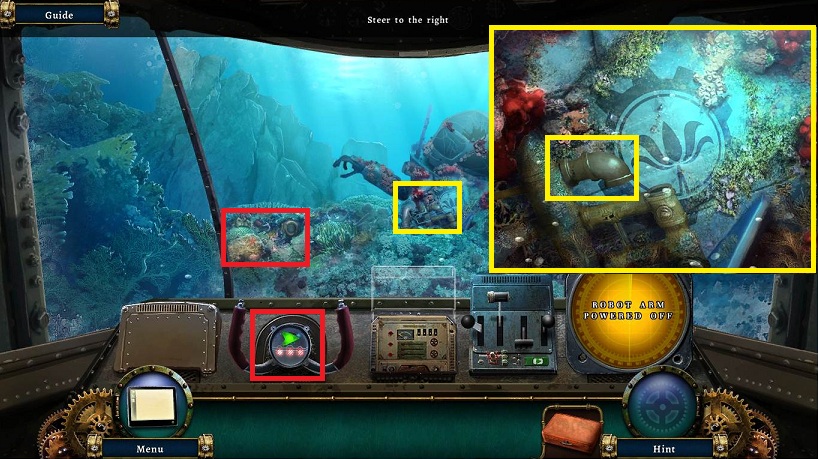
- Examine the wrecked machine
- Pick up the PIPE JOINT
- Examine the pile to the left of the machine
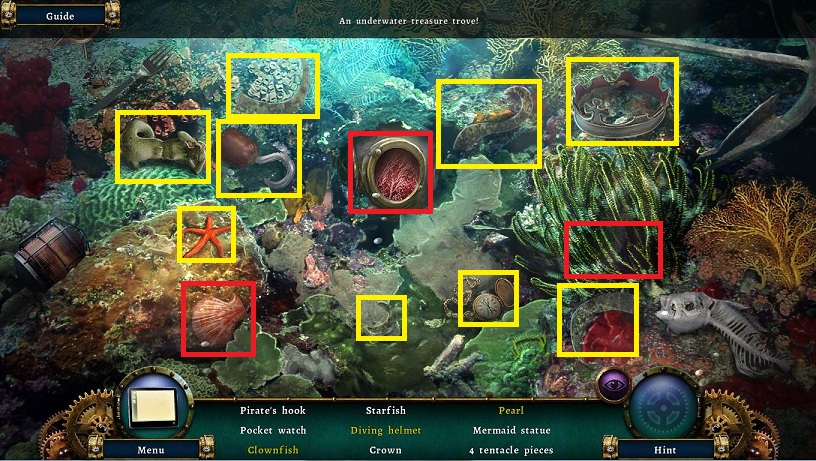
- Clownfish: Slide the kelp out of the way.
- Diving helmet: Click on the helmet and then the ducky. Pick up the face plate.
- Pearl: Slide the shell out of the way.
- Receive 4 TENTACLES
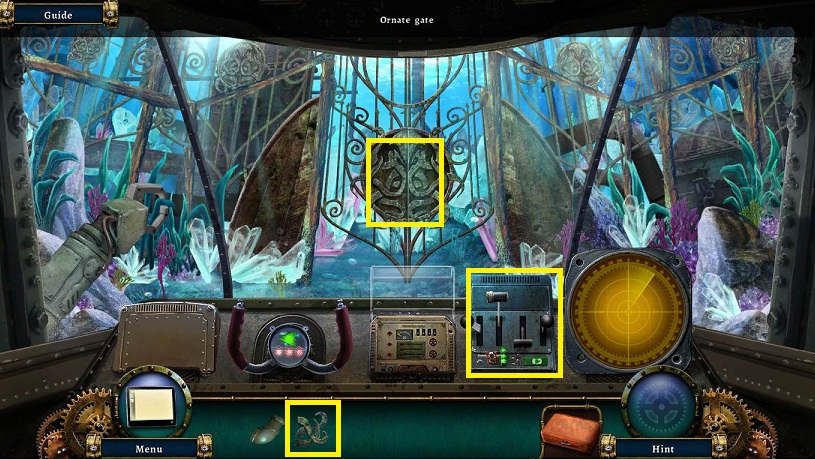
- Click on the green arrow on the steering device
- Examine the ornate gate.
- Place the TENTACLE PIECES
- Examine the crystal
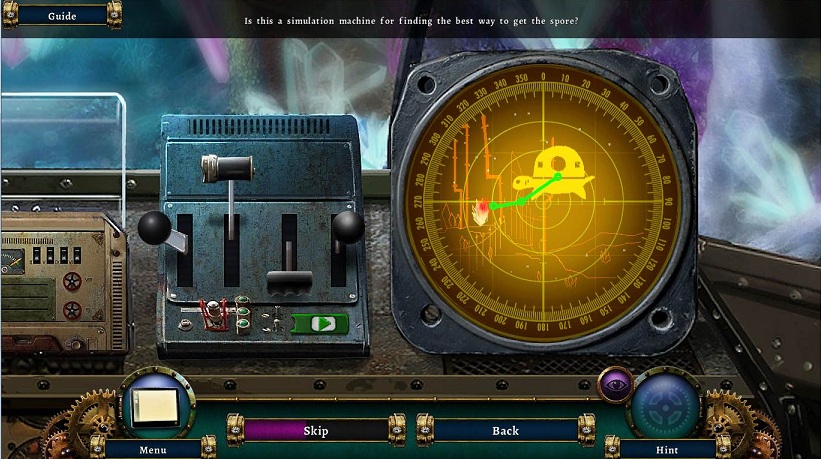
- Examine the robot arm controls
- Flip the levers and then the green arrow
- If the lines to the right turn red, then you flipped the proper switch
- The 2nd control is the first section
- The 4th controls the 2nd section
- The 3rd controls the 3rd section
- The 1st controls the 4th section
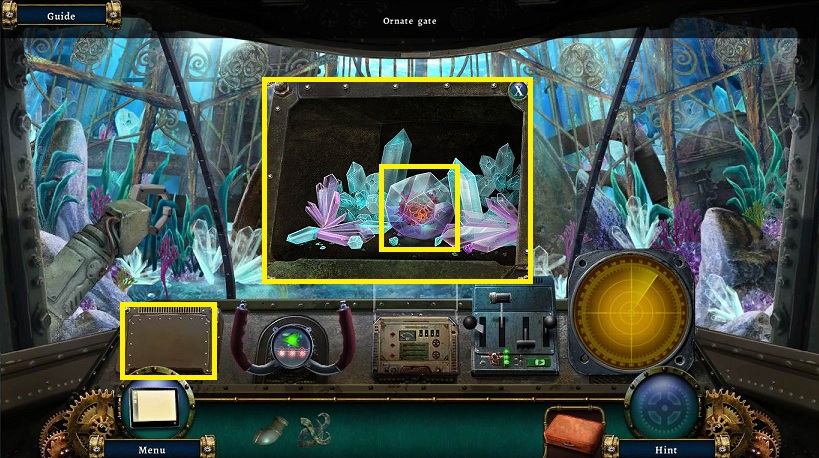
- Examine the compartment to the left
- Pick up the SPORE
- Watch cut scene
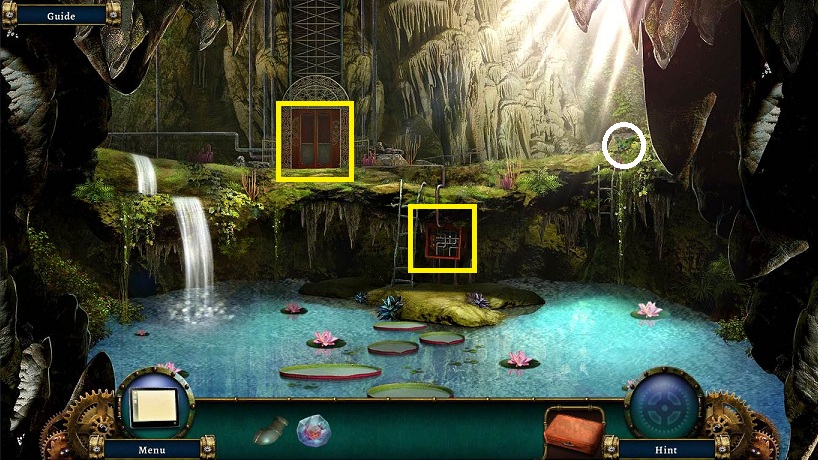
- Pick up collectible
- Examine the pipes directly ahead
-
Place the PIPE JOINT
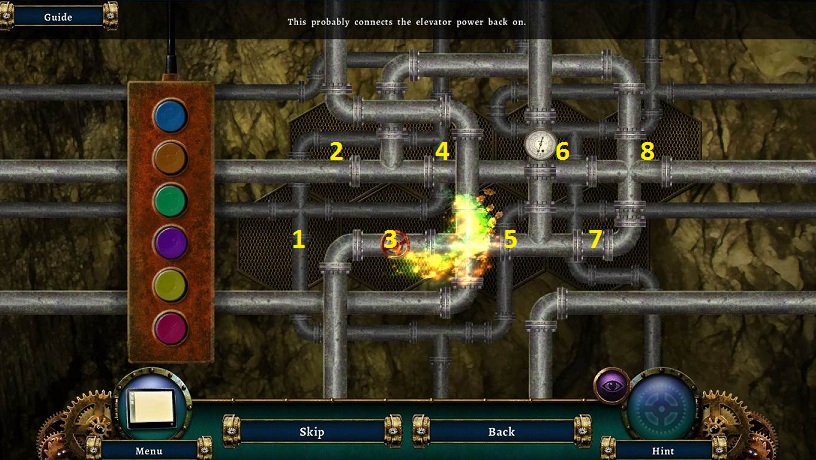
- The puzzle requires you to turn the hexagonal pieces until the pipes are all connected.
- Blue turns 5 and 6
- Orange turns 2
- Green turns 1, 6, and 8
- Purples turns 5
- Yellow turns 2, 3, and 7
- Red turns 1 & 4
- Press green until 8 is in place
- Press yellow until 7 is in place
- Press red until 4 is in place
- Press blue until 6 is in place
- If necessary press orange and purple to move 2 and 5
- Enter the elevator
- Watch cut scene to end chapter
