
Botanica: Into the Unknown: Bonus Chapter: Epilogue
Our Botanica Into the Unknown Walkthrough is the missing link you need to solve the mystery of this beautiful hidden object adventure game. We've made sure to include plenty of screenshots clearly marking all key objects and detailed instructions so you'll be able to help Ellie on her journey to discover this new world of wonder filled with curious creatures, exotic plantlife, and unknown dangers. Don't hesitate to step into unknown adventures with our Botanica Into the Unknown Walkthrough at your side.
For Collector's Edition of the game only:
- Note that Eddie needs to be fed
- Note the box at the bottom of a tree needs a star shape
- Note the thorns in front of Eddie
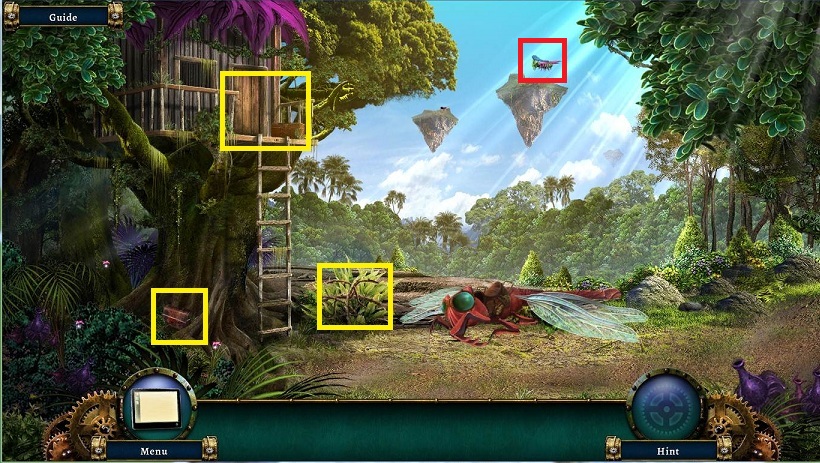
- Note the MOTH
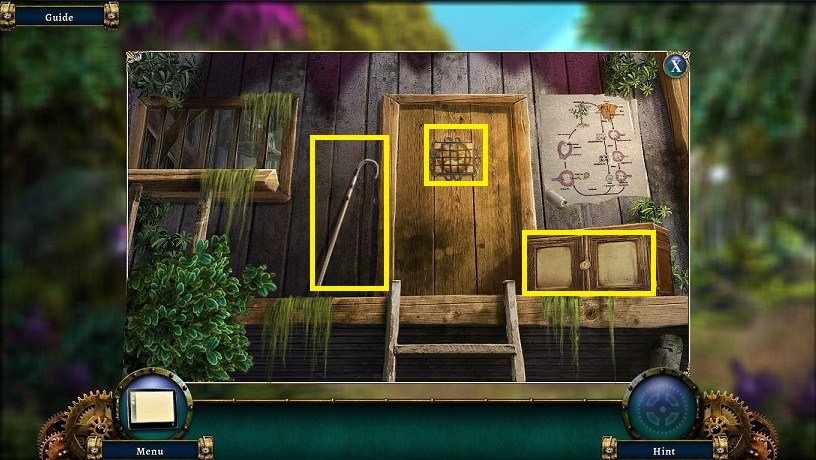
- Examine the tree house
- Pick up the WALKING STICK
- Note the door is missing a piece
- Note the locked chest
- Head right
- Examine the hole in the tree
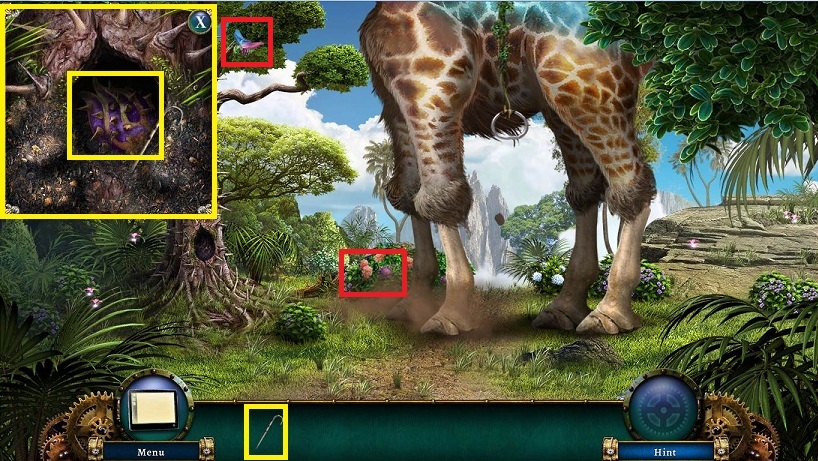
- Use the WALKING STICK 3 times and pick up TIGERFRUIT
- Note the MOTHS
- Examine the bushes in front of the ZEBRAFFE
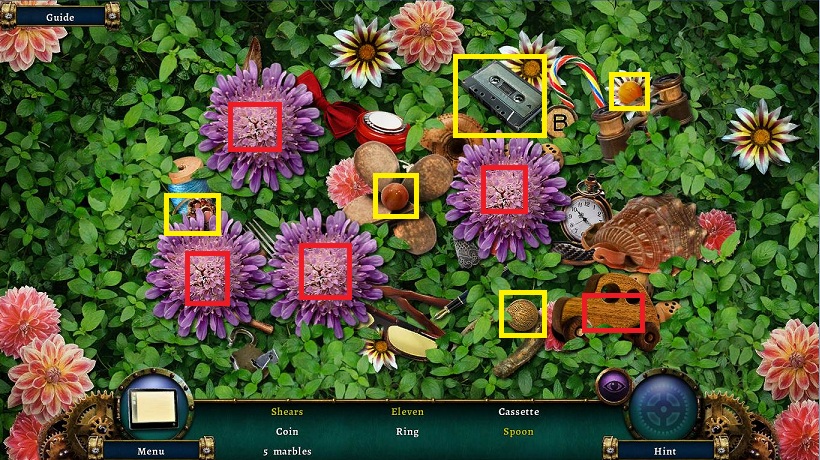
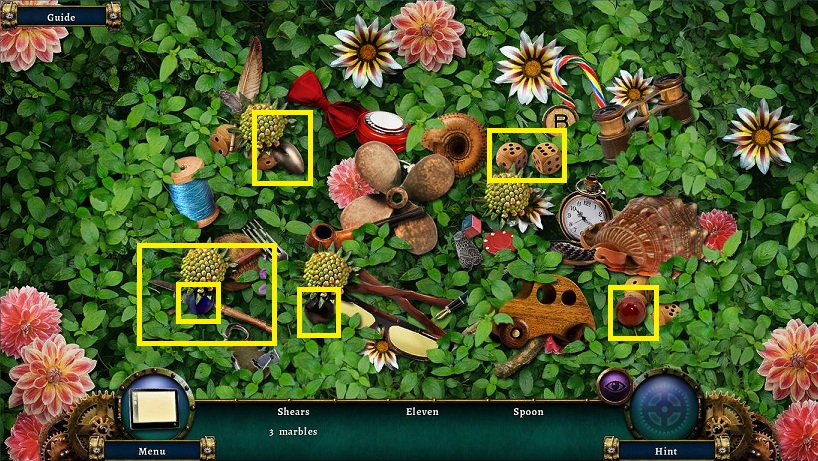
- Find the available objects
- Move the toy car
- Click on the 4 purple flowers to temporarily cause them to close
- Receive SHEARS
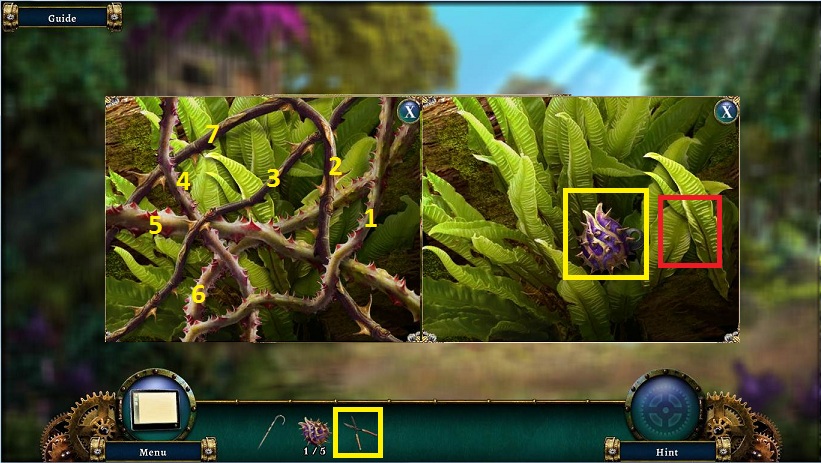
- Return and examine the thorns
- Use the SHEARS on the outermost vine and then on in
- Move the leaves
- Pick up TIGERFRUIT (2/5)
- Pick CHEST KEY
- Examine tree house
- Use CHEST KEY on chest
- Pick up ROPE and NET
- Use NET on the MOTH (1/5)

- Go right
- Use NET on the MOTH (2/5)
- Use ROPE on zebraffe rung
- Climb up
- Pet the zebraffe; you need to make a trade for leaves to get the TIGERFRUIT
- Use WALKING STICK on the nest 3 times and receive TIGERFRUIT (2/5)
- Use NET on 3 MOTHS (3/5, 4/5, 5/5)
- Pick up TIGERFRUIT (3/5) on the right and then the LEAF (1/5) next to it
- Pick up 4 more LEAVES
- Give the zebraffe the LEAVES
- Go back
- Pick up TIGERFRUIT (4/5) on the ground
- Examine the nest
- Give the baby bird the MOTHS
- Pick up the TIGERFRUIT (5/5)
- Back up
- Give Eddie the TIGERFRUIT
- Pick up the TOKEN he drops
.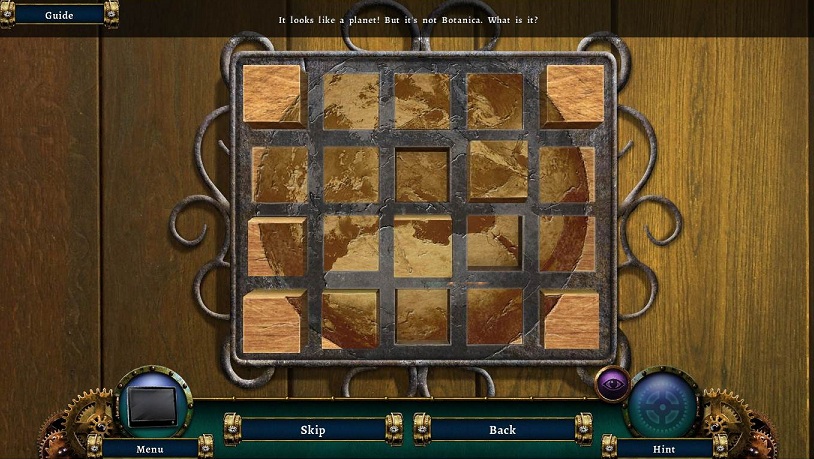
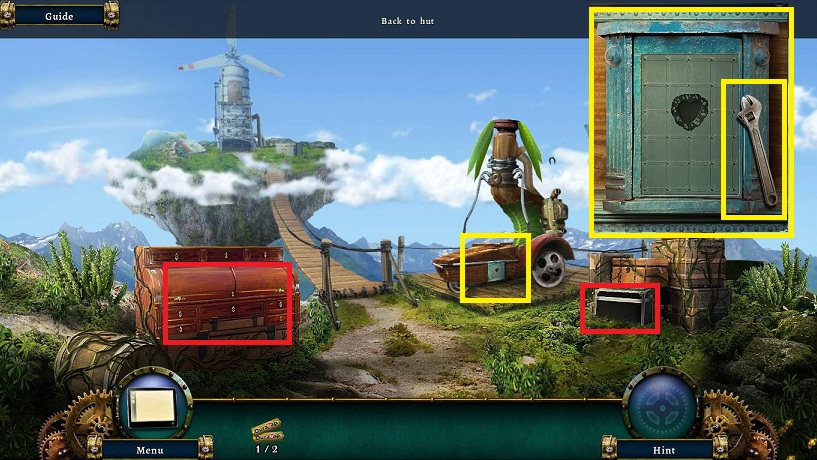
- Examine the tree house door
- Use the TOKEN on the door
- Click on the blocks to raise and lower them to make a plant
- Note the very faint outline on the metal grids; you want to match those
- You can also see the valleys to match up
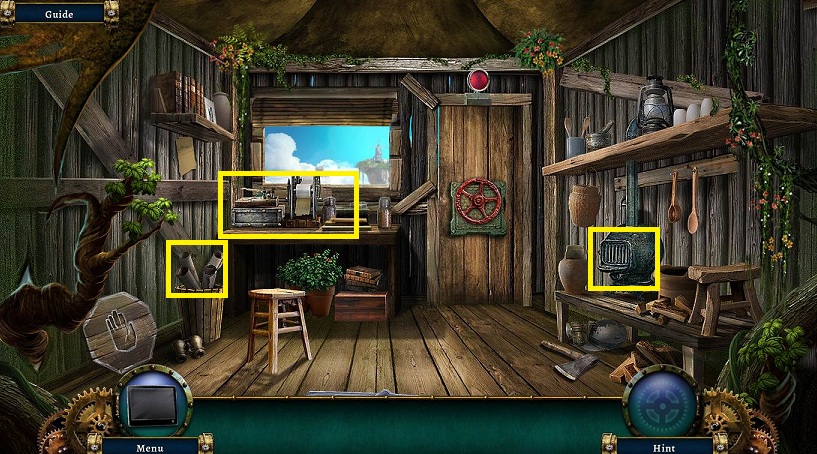
- Enter shed
- Examine the basket to the left
- Click to remove all the papers
- Pick up the STAR
- Back up

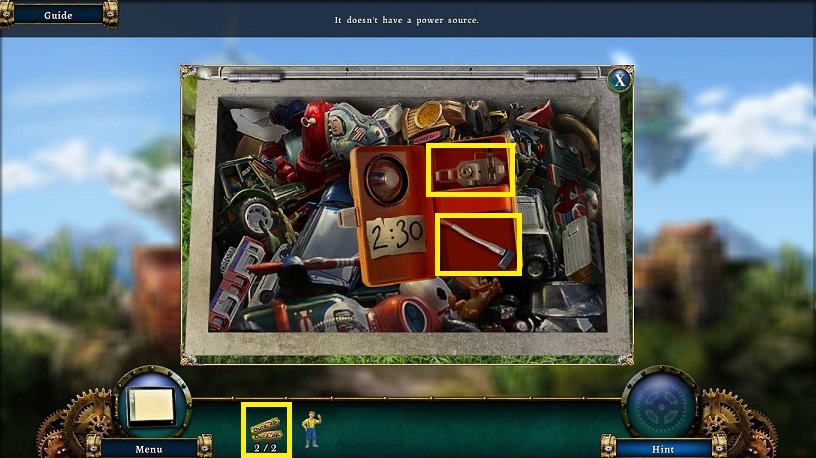
- Examine lunchbox
- Place the STAR and click on it
- Pick up the CODE BOOK and AWL
- Go back into the shed
- Examine the cook stove
- Use the AWL on the hinge
- Pick up the SLATS
- Examine the back table
- Click on the cover and click again
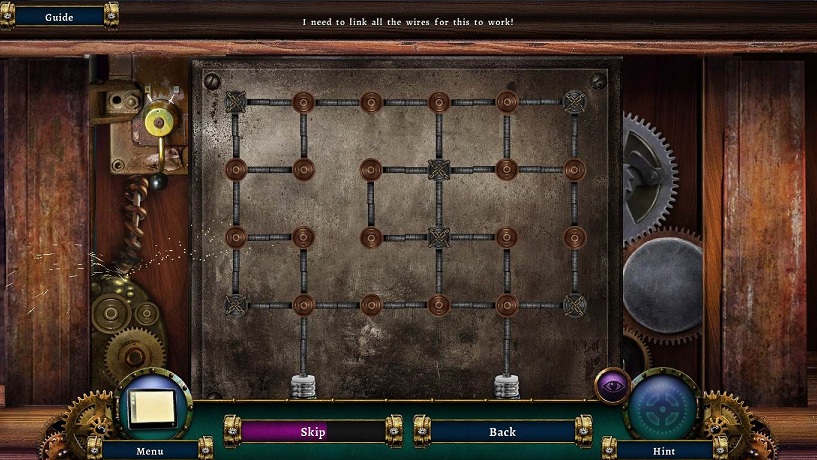
- Trade the tiles around until you get all the wires connecting
- Note you can start with the edge pieces first
- Place the CODE BOOK
- Click on the machine
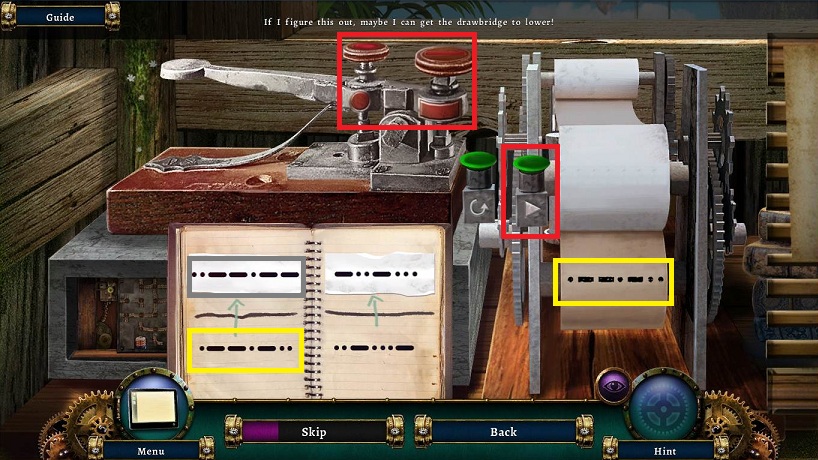
- Click on the dot or dash button to match the code shown
- Use the redo button if you make a mistake
- Press the play button and you will receive a reply
- Flip through the code book to find the matching code on the bottom of the page
- Enter in the top code and enter
- Do this 3 times
- Turn the red door handle
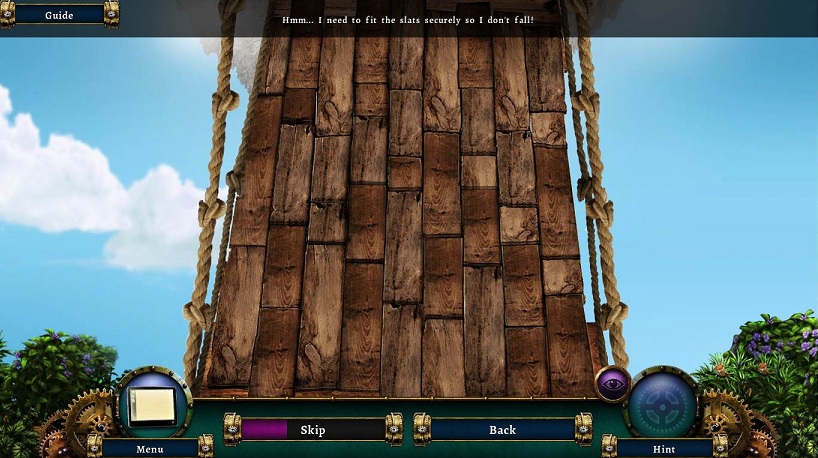
- Place the SLATS on the bridge
- Place the individual slats in the correct spot
- They will click into place if they are in the correct place
- Head across the bridge
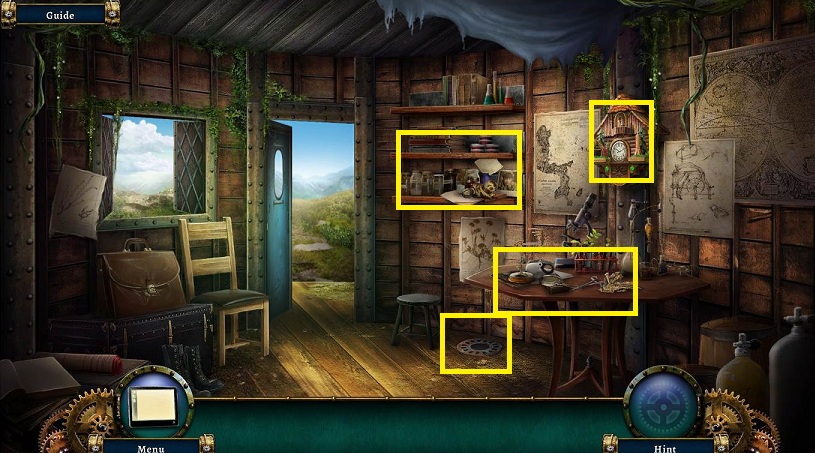
- Examine the table
- Pick up the BATTERY (1/2)
- Examine the clock
- Examine the drain in the floor
- Examine the bookshelf
- Head out
- Examine the flying machine
- Pick up WRENCH
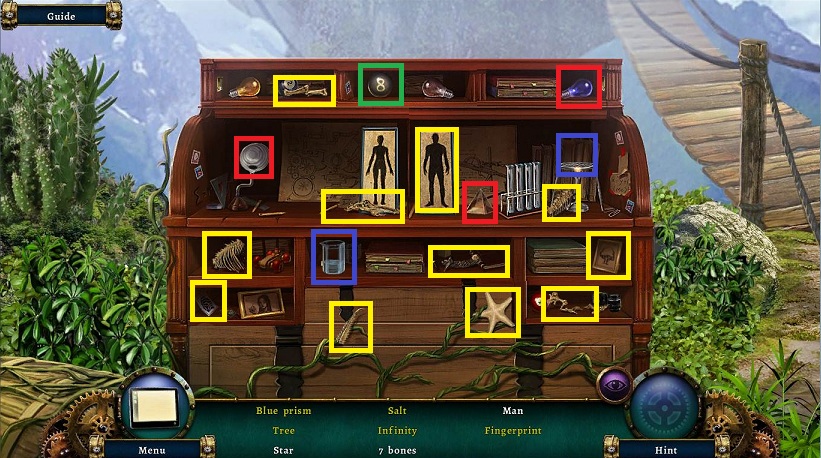
- Examine the desk
- Click on the various drawers to find all the objects
- Blue prism: Place the blue light bulb into the lamp. Place the glass prism on the blue light.
- Salt: Place beaker of solution on top of the burner
- Infinity: Click on the 8 ball to turn it on its side.
- Receive SMALL BONES
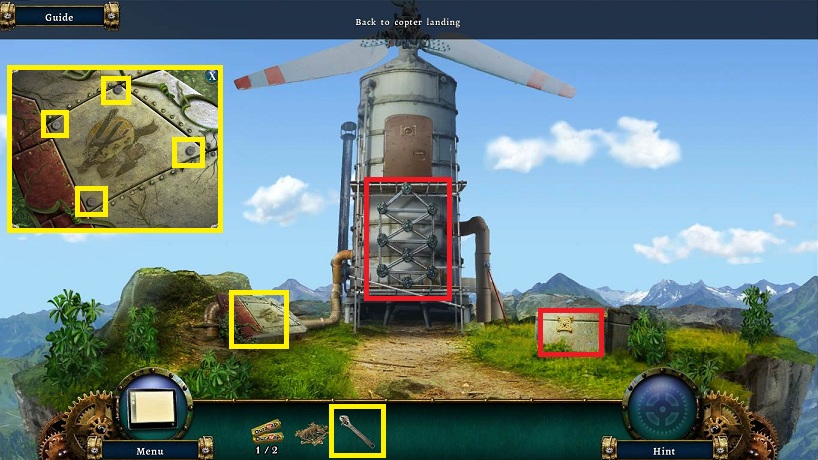
- Cross the bridge
- Examine panel to the left
- Use the WRENCH on the 4 nuts
- Pick up the SLIDE
- Pick up HOOKED SPEAR at the side of the turbine
- Note the metal chest
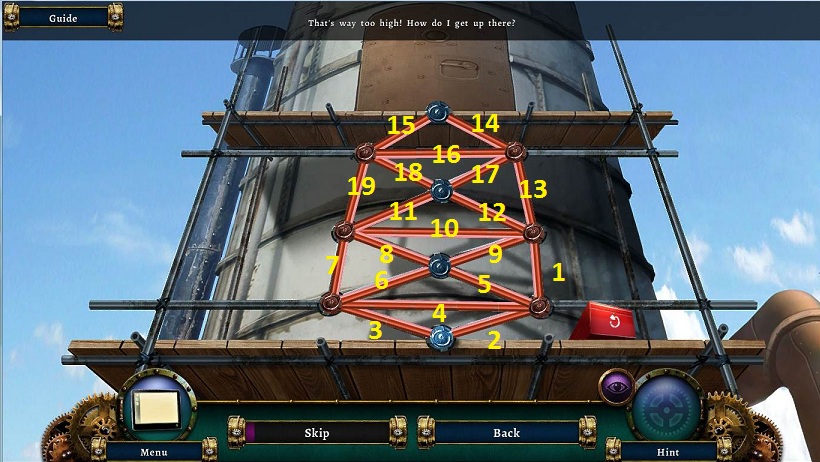
- Examine turbine
- Click on the circles to turn all the red lines to green without duplication
- You can cross over the lines.
- One solution is above. There are many more.
- Open the door
- Pick up the BATTERY (2/2)
- Note it's dark.
- Back up twice
- Examine the table
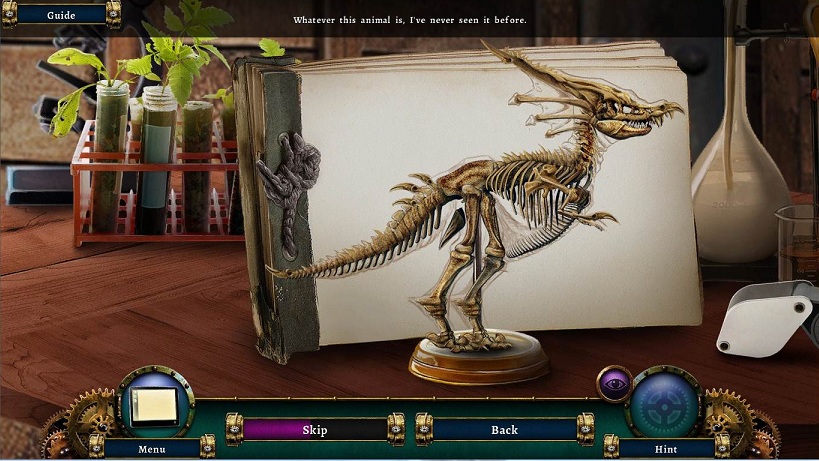
- Place the BONES on the toy man
- Arrange the bones to make a dinosaur according to the drawing
- Pick up the TOY WOODCUTTER

- Use the SLIDE on the microscope
- Use the 3 dials to bring the numbers into focus
- From the start it is twice for each one, but you probably did not count so keep at it.
- You can match 2 to get a clear number and then try the third. If that does not work, click to match 2 in another fashion and keep trying
- Receive a NUMBER CODE
- Examine the grate
- Use the HOOKED SPEAR to pick up the METAL KEY
- Go forward once
- Examine the crate to the right
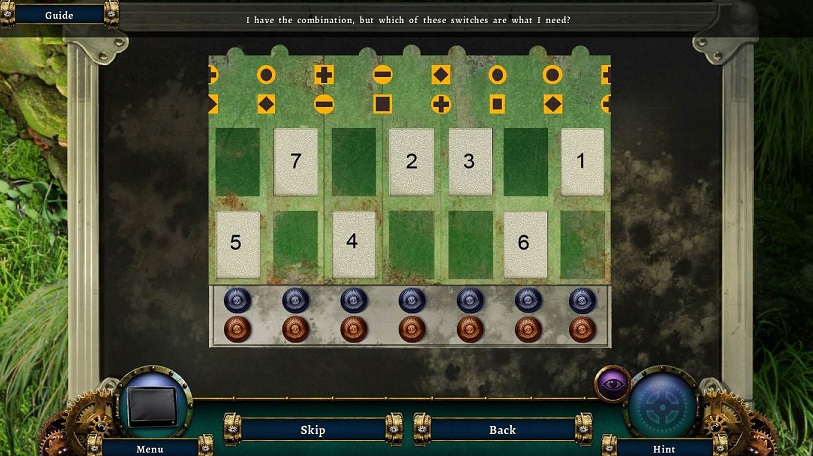
- Use the NUMBER CODE on the lock
- First you need to get 4 holes on the top and 3 holes on the bottom (this is not alternating)
- Second you need to do this while matching the yellow and black patterns above
- Third, click the blue buttons to get the correct top numbers visible in the window and the red button to get the bottom numbers visible
- 7 2 3 1
- 5 4 6
- Click on the flashlight
- Examine the time setting, which goes in the journal
- Pick up the TOY AXE
- Place the BATTERIES
- Close the flashlight and pick it up
- Go forward once
- Examine the metal chest
- Use the METAL KEY
- Pick up a time setting, which goes in the journal
- Pick up TOY DOG
- Back up twice
- Examine the clock
- Place the WOODCUTTER on the right
- Place the AXE in his hand
- Set the time from where you got the AXE (2:30
- The green button turns the minute hand
- The red button turns the hour hand
- Place the TOY DOG on the left
- Set the clock to 4:15
- Pick up the now exposed WINDER
- Examine the shelf
- Place the WINDER in the cat and click on it
- Note the time on the cat's paw
- Pick up the TOY BIRD
- Return to the clock
- Place the TOY BIRD
- Set the time to 9:10
- Pick up the METAL SHAPE
- Go forward once
- Examine the copter
- Place the METAL SHAPE
- Pick up the TURBINE MANUAL
- Go forward to the turbine
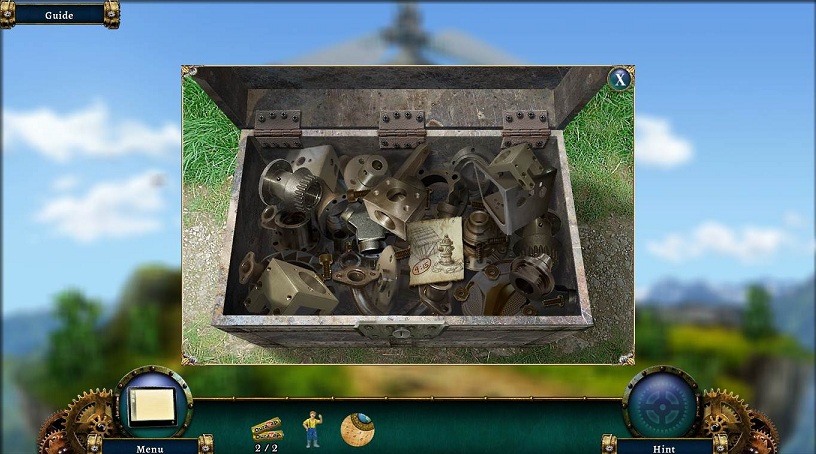
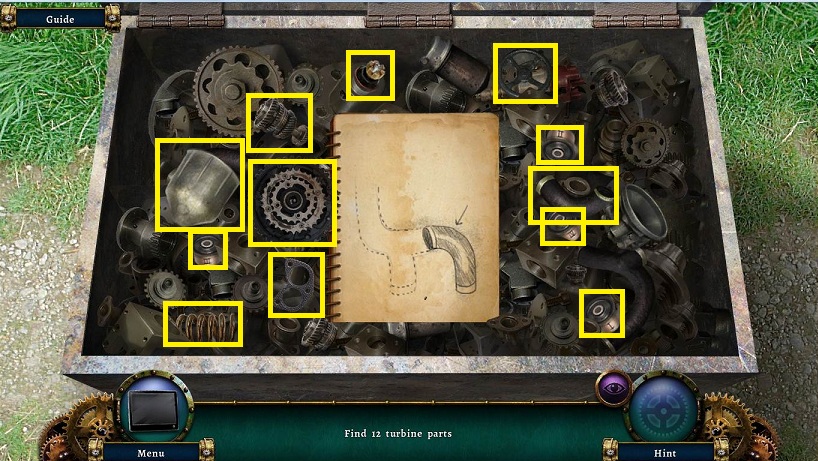
- Examine the crate with the parts
- Use the TURBINE MANUAL on the parts
- Find the matching part
- Click on the manual to turn the page and find the next parts
- Receive the TURBINE PARTS
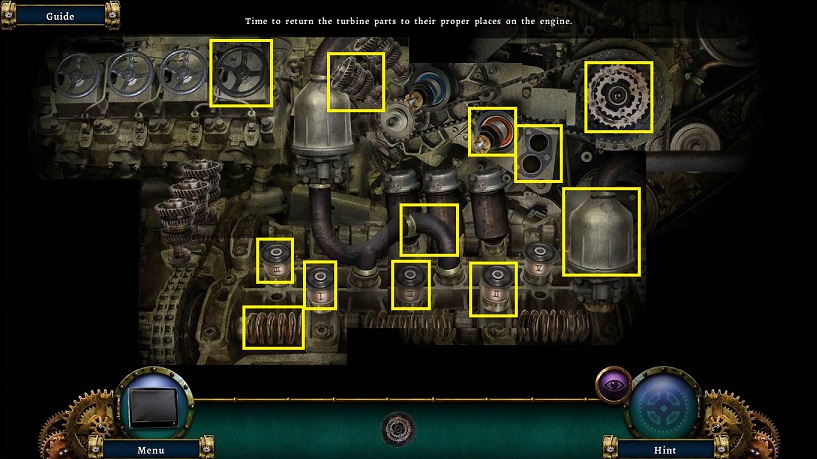
- Examine the turbine
- Use the FLASHLIGHT
- Place the parts in the correct place to fix the turbine
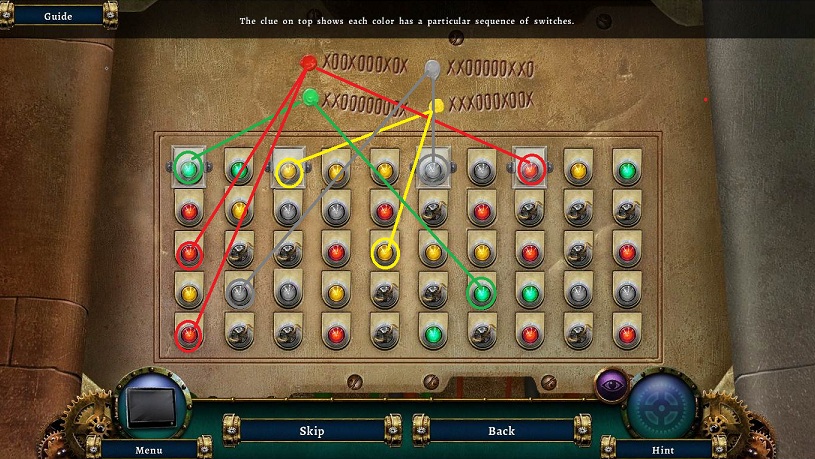
- Examine the panel to the left and click on it
- Your goal is to turn on the correct light in the correct order.
- With each color there is a pattern of X (on) and 0 (off).
- These patterns overlap with each other.
- There are some lights already fixed on.
- There are some unlit area that are fixed also.
- Start with green, then yellow in the first open lights after green, then gray, then red.
- On the 3rd line, iit's red, yellow, gray, green, and then red.
- See above for solution.
- Return to copter
- Flip the switch
- Ride the copter to finish the game