
Awakening: The Sunhook Spire: Chapter Four: Inside Close Quarters
Our Awakening: The Sunhook Spire Walkthrough is a tell-all guide to helping Sophia find the enchantress who may have the power to break the spell holding her parents in their magical slumber. Trust our beautiful custom marked screenshots, our step-by-step instructions, and our simple puzzle solutions to help Sophia scale the heights of the Sunhook Spire and discover the mysteries that await her in this enchanting hidden object adventure game.
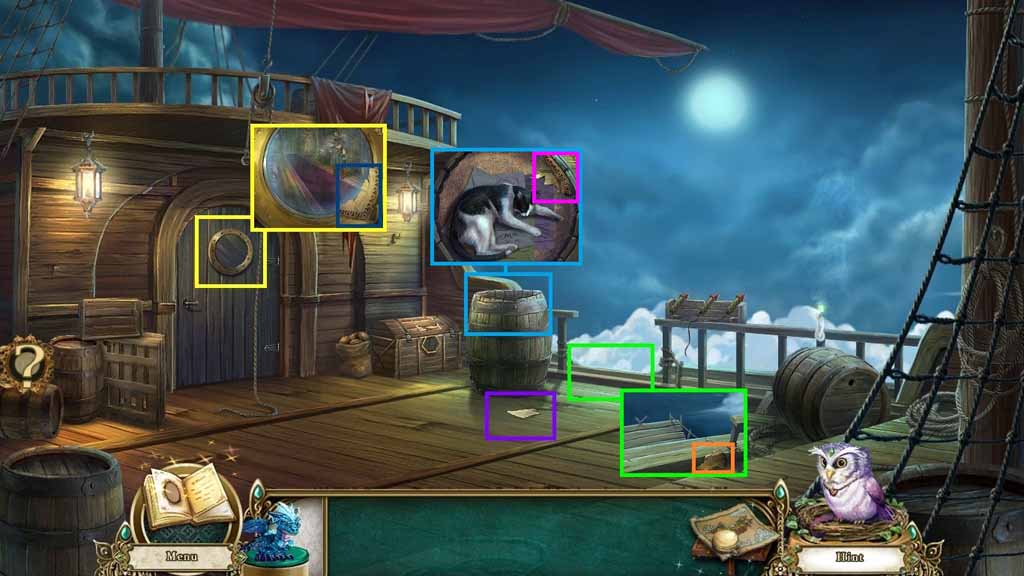
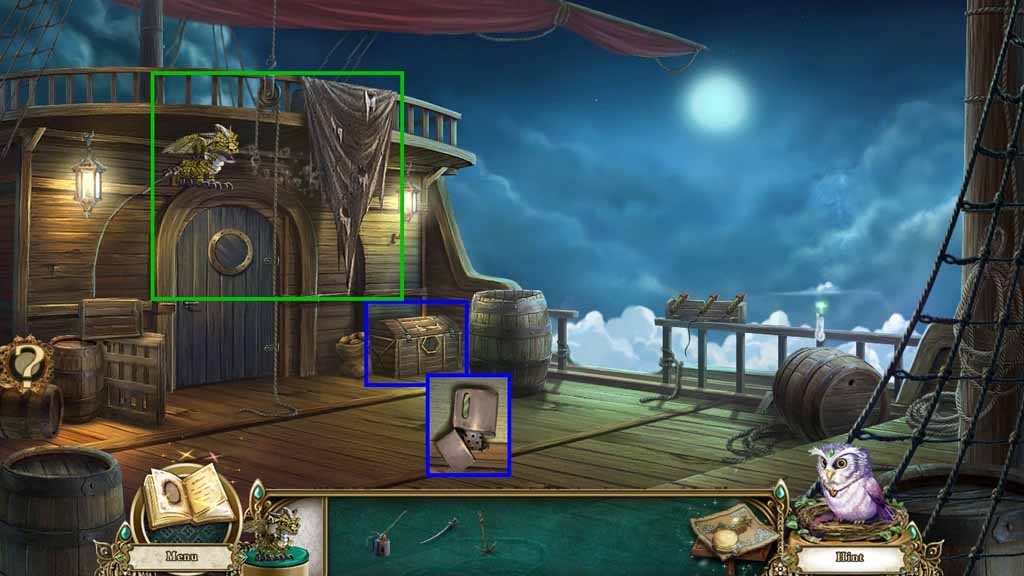
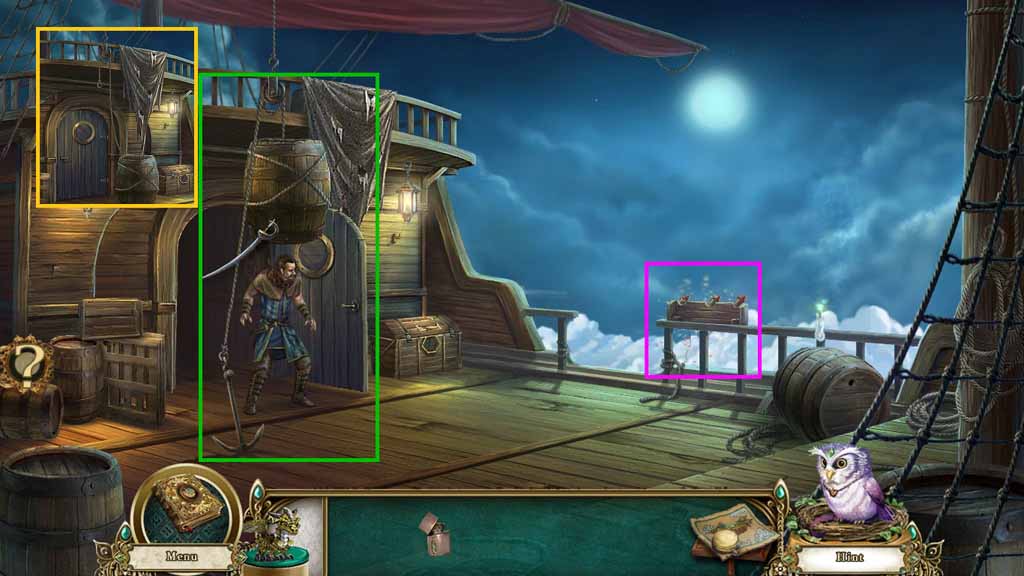
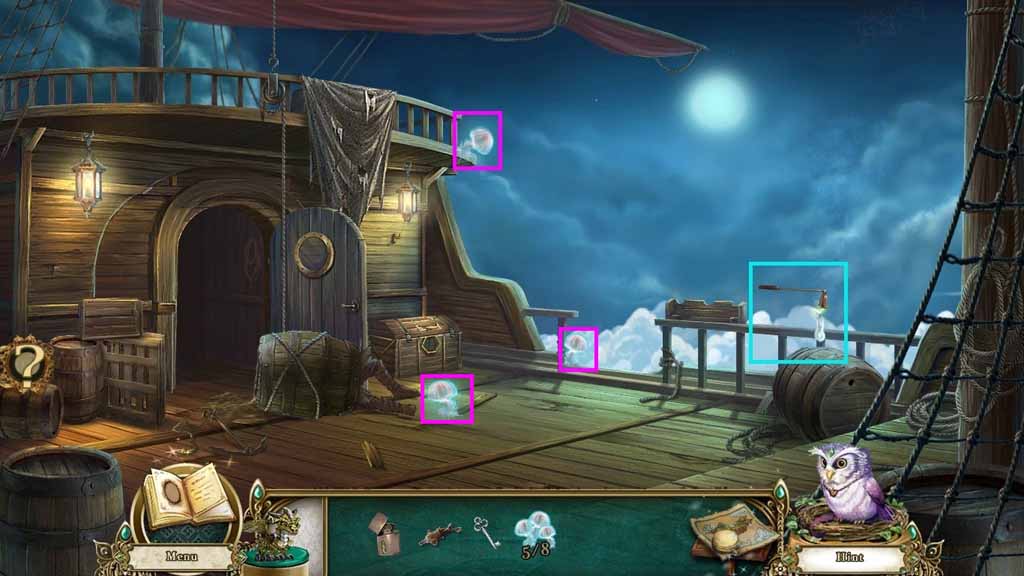
- Zoom into the porthole; collect the 1 /4 blueprint pieces.
- Collect the 2 / 4 blueprint pieces.
- Zoom into the side of the ship; collect the 3 / 4 blueprint pieces.
- Zoom into the barrel; collect the 4 / 4 blueprint pieces.
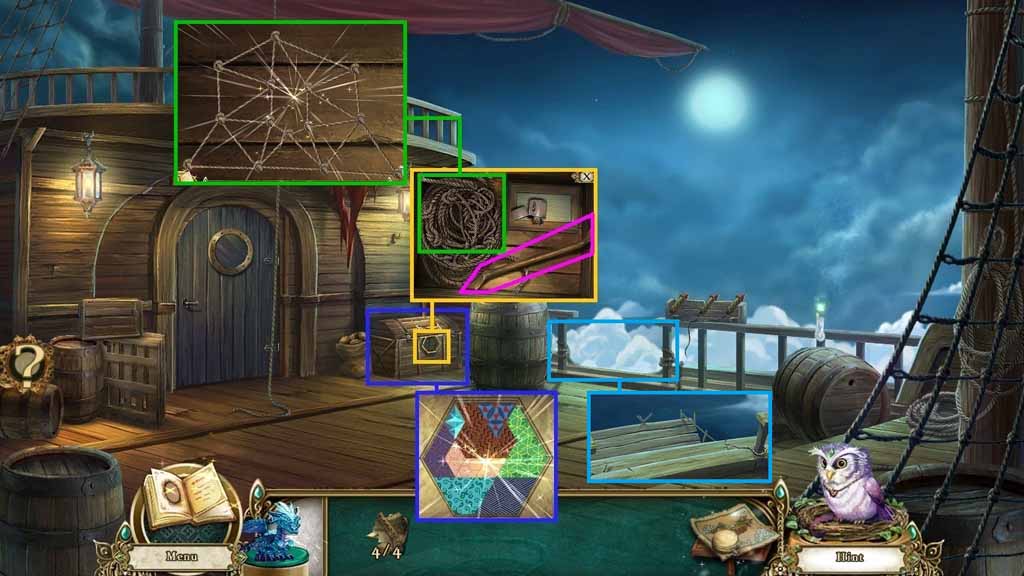
- Zoom into the chest and insert the blueprint pieces into the top to trigger a mini-game.
- Arrange the pieces to create a hexagon to solve the game.
- Collect the goblin relic; insert the goblin relic into the chest lock.
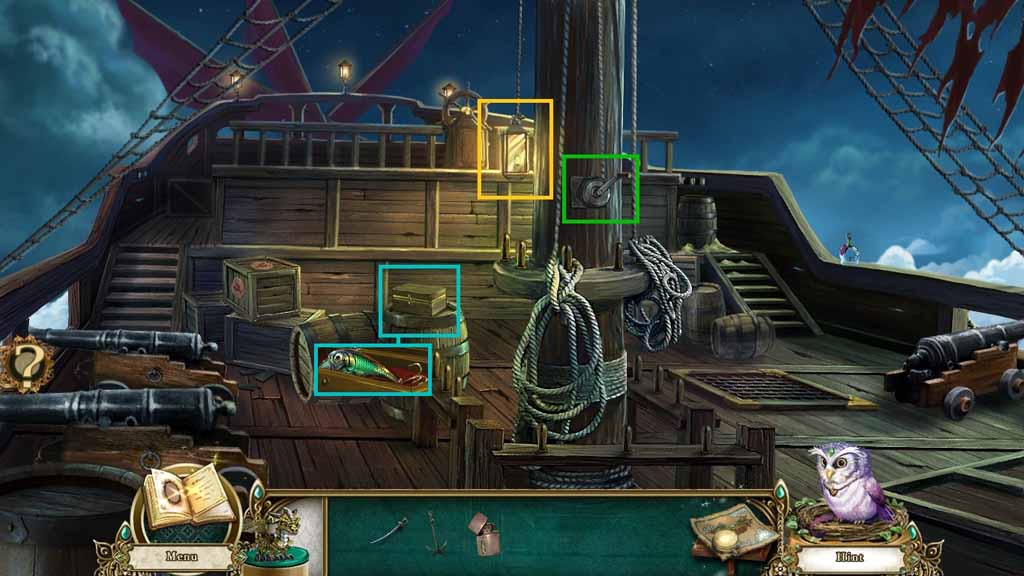
- Collect the crowbar.
- Click the rope ladder to trigger a mini-game.
- Solve the game by clicking and dragging the knots so that they do not cross one another.
- Collect the rope ladder.
- Zoom into the side of the ship and hang the rope ladder.
- Move down the Side of the Ship.
- Collect the lighter fuel.
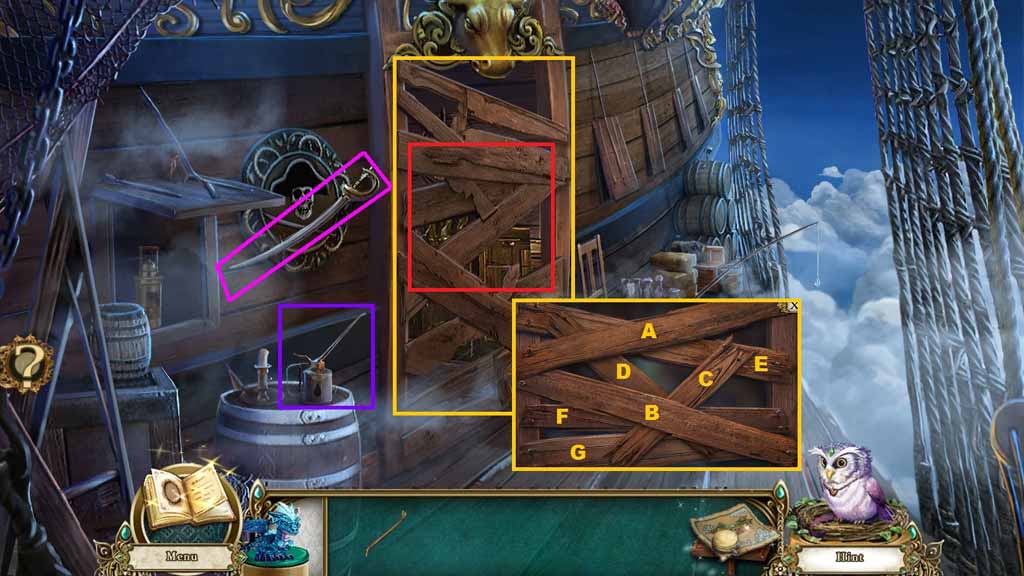
- Collect the cutlass.
- Zoom into the boarded up area.
- Select the crowbar to remove the boards to trigger a mini-game.
- Solve the game by clicking the boards in ABC order.
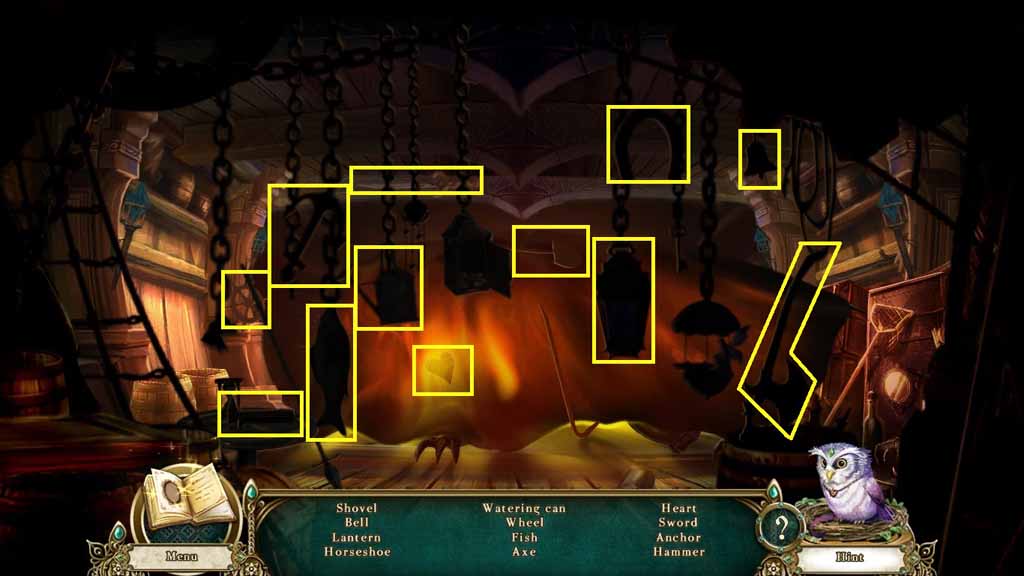
- Zoom into the opening to trigger a hidden objects area.
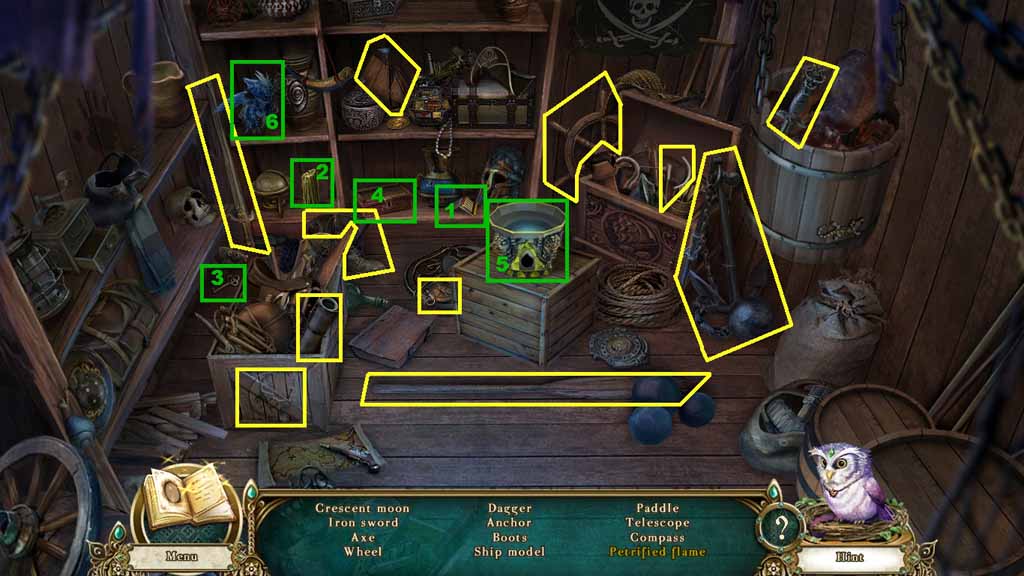
- Find the listed items.
- Select the matches to light the candle; pick up the key and insert it into the lock box.
- Collect the dragon crest and insert it into the altar.
- Select the dragon and place him onto the altar, then use him on the candle.
- Collect the petrified flame.
- Collect the anchor.
- Move down once.
- Zoom into the chest.
- Pour the lighter fuel into the lighter; collect the lighter.
- Select the stone dragon to use on the sail.
- Move up the sail.
- Select the lighter and use it to ignite the lamp.
- Click the winch 2 times.
- Click the wooden box and collect the fishing lure.
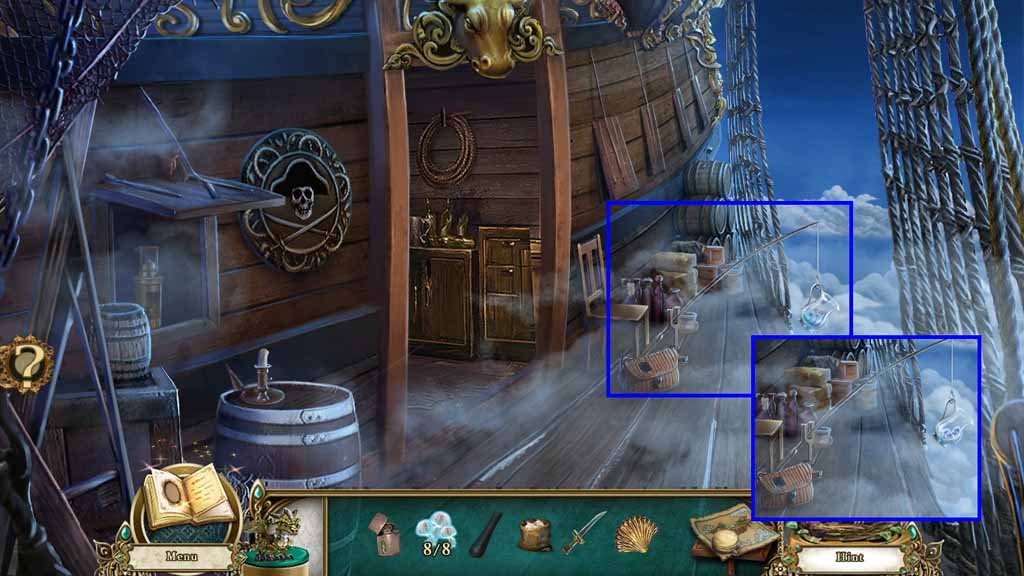
- Move to the Side of the Ship.
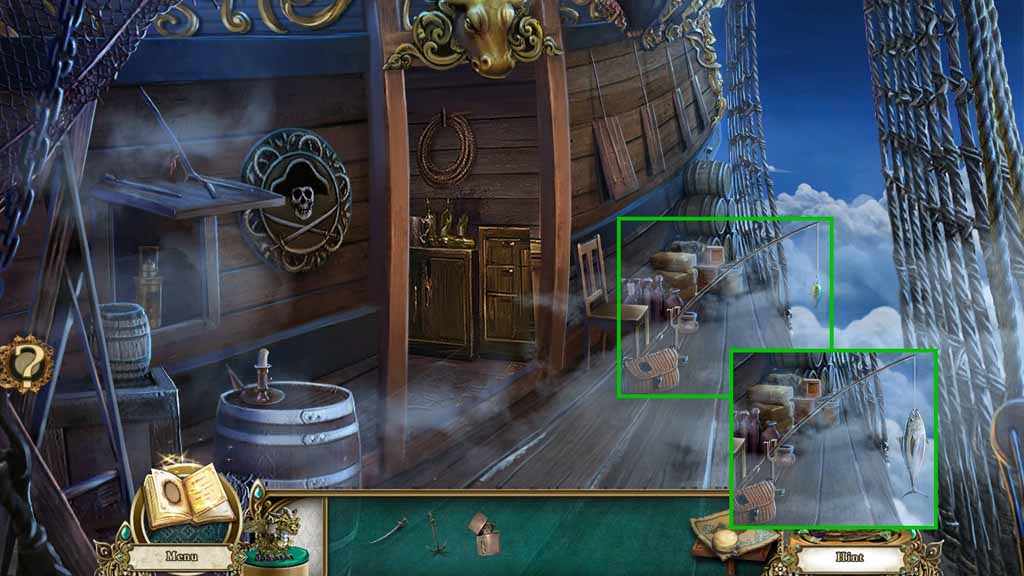
- Attach the fishing lure onto the fishing rod; click the rod.
- Click the rod again to collect the fresh fish.
- Move down once.
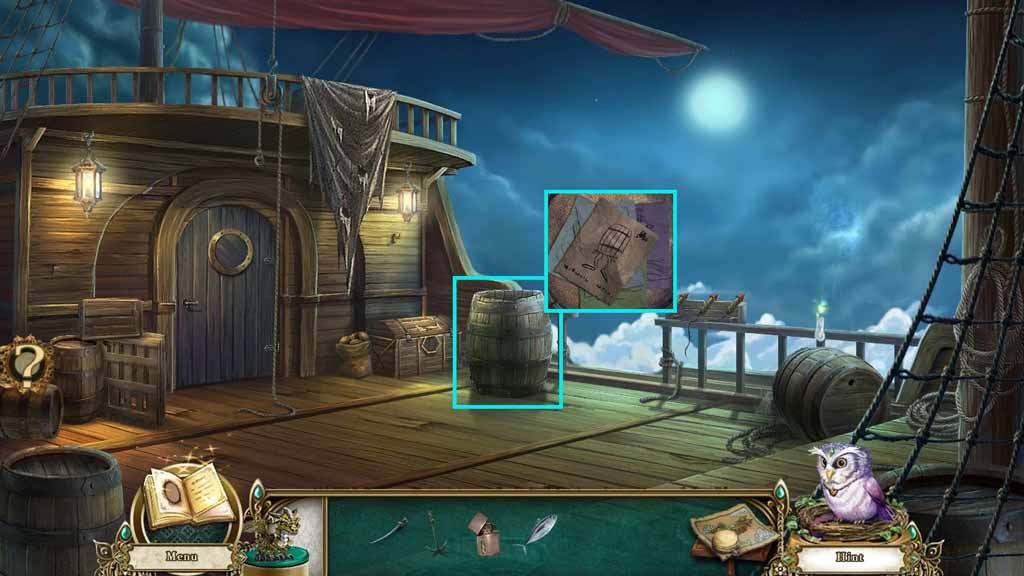
- Zoom into the barrel.
- Give the cat the fresh fish.
- Examine the humorous drawing; collect the barrel.
- Place the barrel next to the rope; attach the anchor to the rope.
- Select the lighter to ignite the fireworks.
- Select the cutlass to cut the rope.
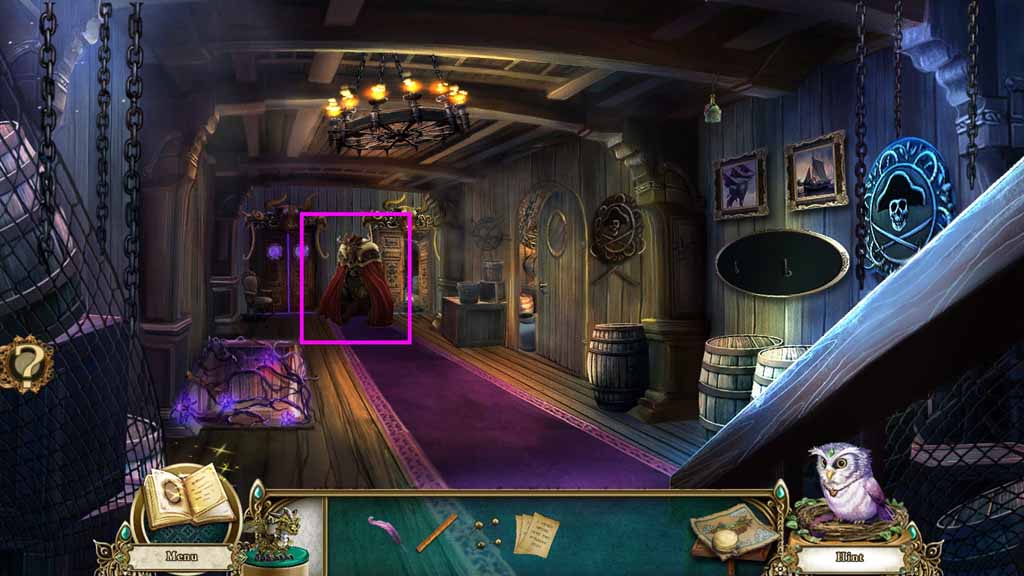
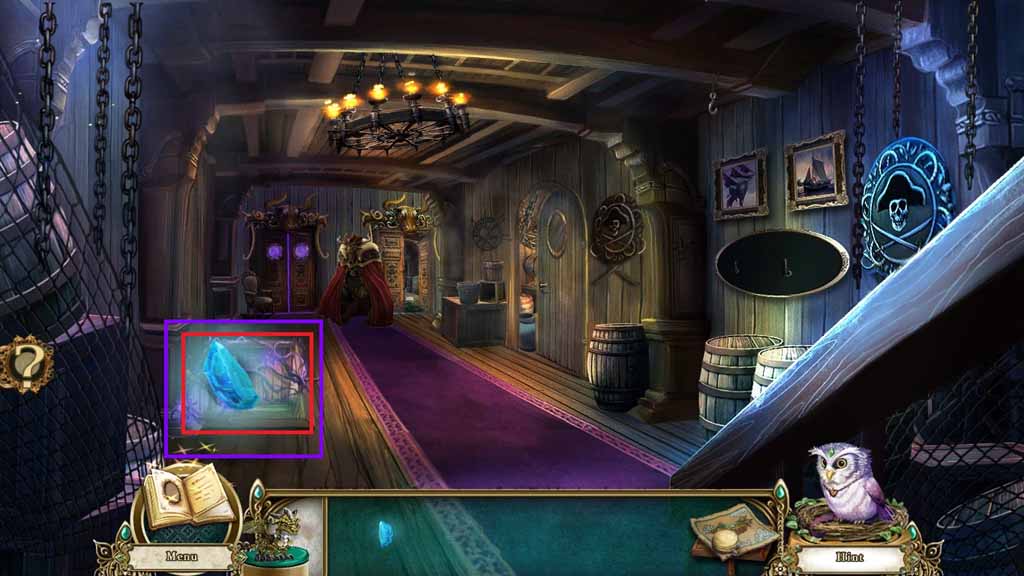
- Move into the Ship Hallway.
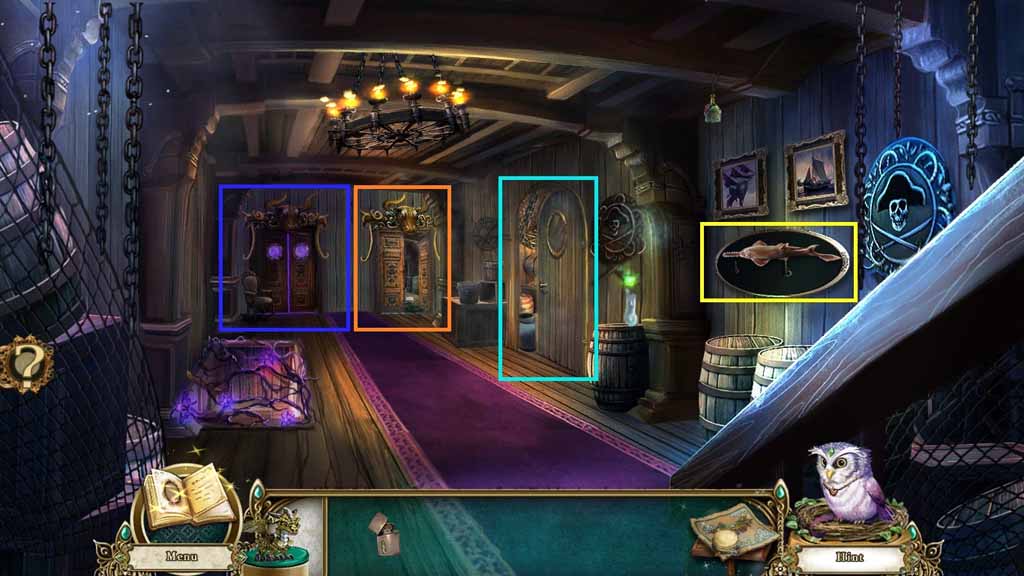
- Examine the door to the Captain’s Cabin.
- Collect the sawfish.
- Notice the door to the Galley.
- Move to the Brig.
- Zoom into the drawers.
- Click the top drawer; collect the galley cabinet key.
- Click the bottom drawer; collect the candle snuffer.
- Speak to Shelsea.
- Select the candle snuffer and use it on the spirit candle.
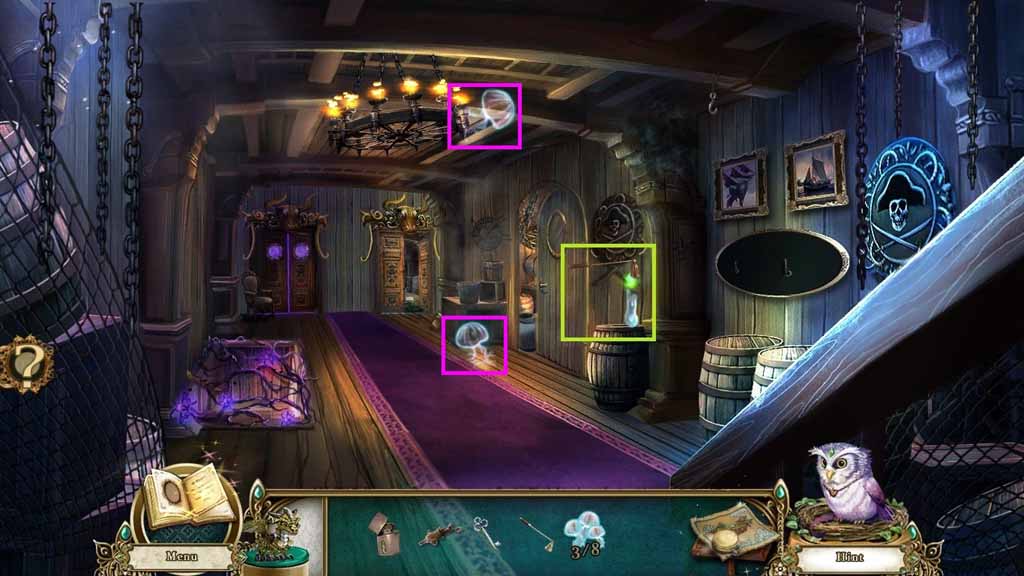
- Collect the 1 / 8, 2 /8 and 3 /8 ghost mushrooms.
- Move down once.
- Select the candle snuffer and use it to snuff the spirit candle.
- Collect the 4 /8 and 5/ 8 ghost mushrooms.
- Move down once.
- Select the candle snuffer and use it to snuff the spirit candle.
- Collect the 6 / 7, 7/ 8 and the 8 / 8 ghost mushrooms.
- Move to the Galley.
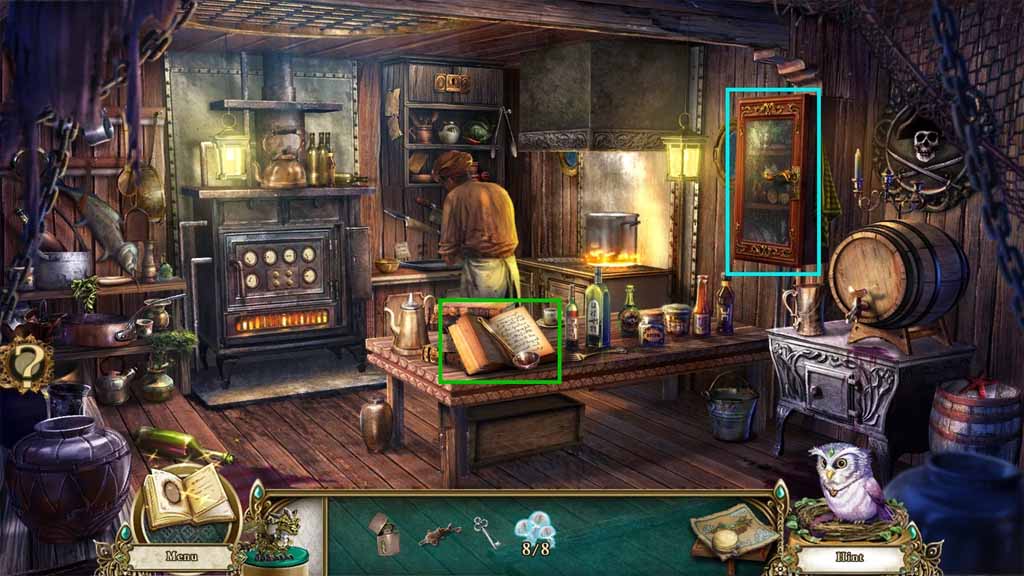
- Collect the ladle and read the cookbook.
- Select the galley cabinet key and insert it into the cabinet.
- Zoom inside to trigger a mini-game.
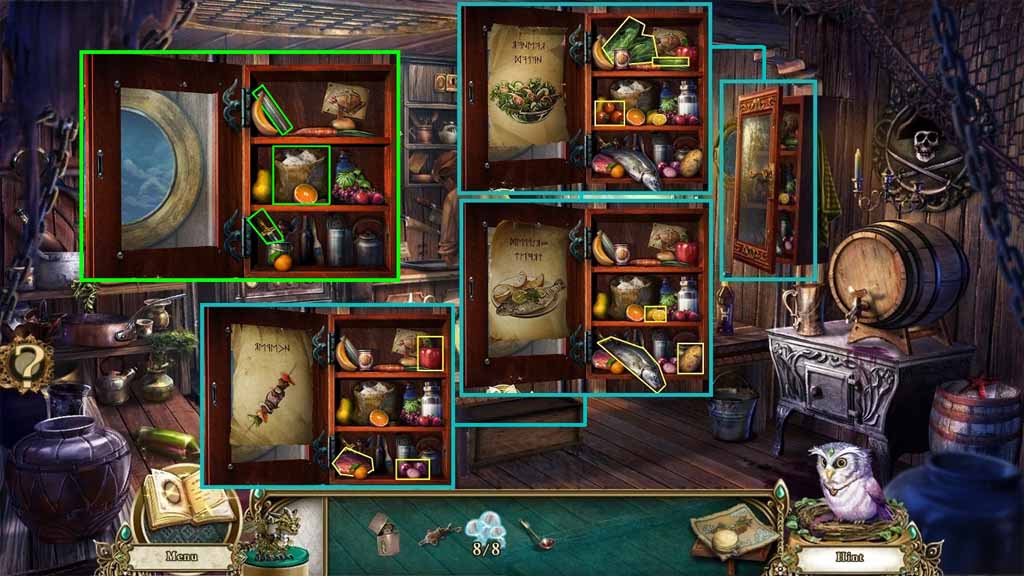
- Solve the game by finding the ingredients as shown in the picture on the left.
- Collect the flour, the pestle and the cooking knife.
- Move down 2 times and move to the Upper Deck.

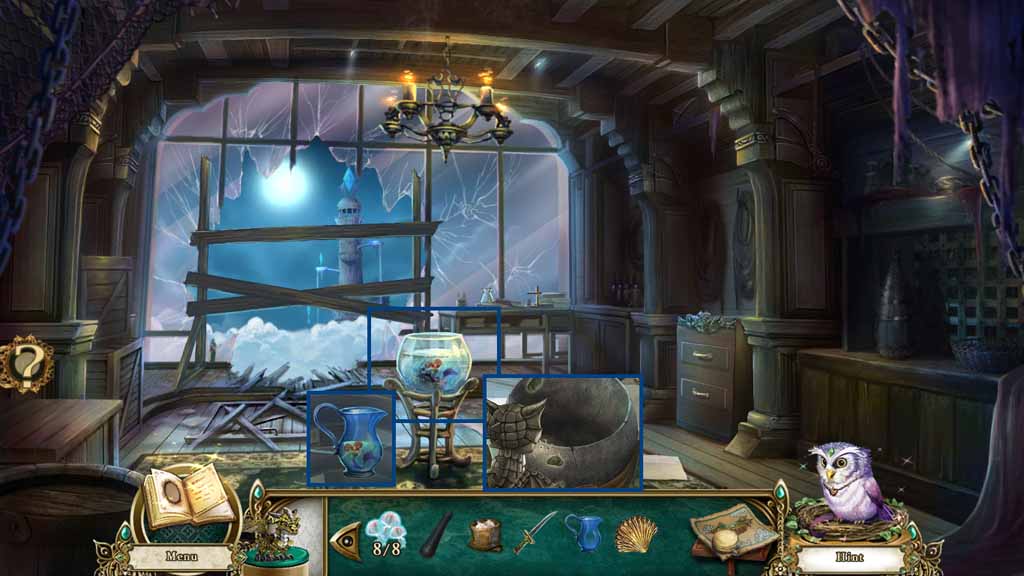
- Zoom into the cargo; use the sawfish to open it up.
- Collect the pitcher.
- Zoom into the barrel of sand.
- Select the ladle to uncover the shells and trigger a mini-game.
- Solve the game by selecting the matching pairs.
- Collect the golden shell.
- Move to the Brig.
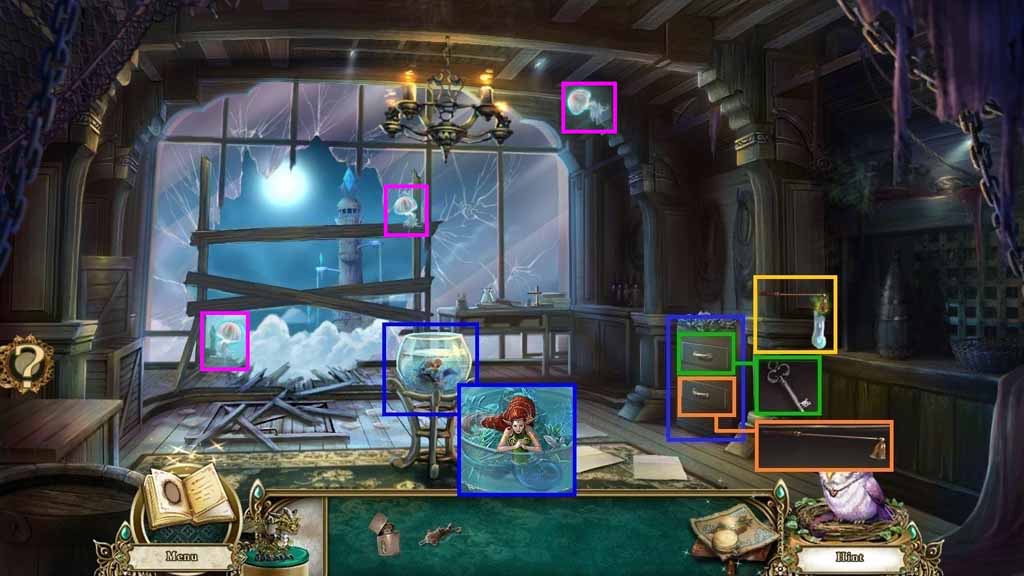
- Zoom into Shelsea.
- Select the pitcher to collect Shelsea.
- Select the stone dragon to use on the bowl.
- Move to the Side of the Ship.
- Zoom into the fishing pole and place Shelsea onto it; click the rod.
- Click the rod again; collect the sea water and the mermaids’ tears.
- Move to the Brig.
- Zoom into the counter.
- Place the mushrooms onto the cutting board.
- Select the cooking knife to slice them.
- Select the golden shell and place it into the mortar and insert the pestle.
- Place the chopped mushrooms and the shell powder into the flask.
- Pour in the mermaid tears.
- Select the lighter to ignite the candle; collect the flask of Curse be Gone.
- Select the sea water and place it onto the burner; collect the sea salt.
- Move to the Upper Decks.
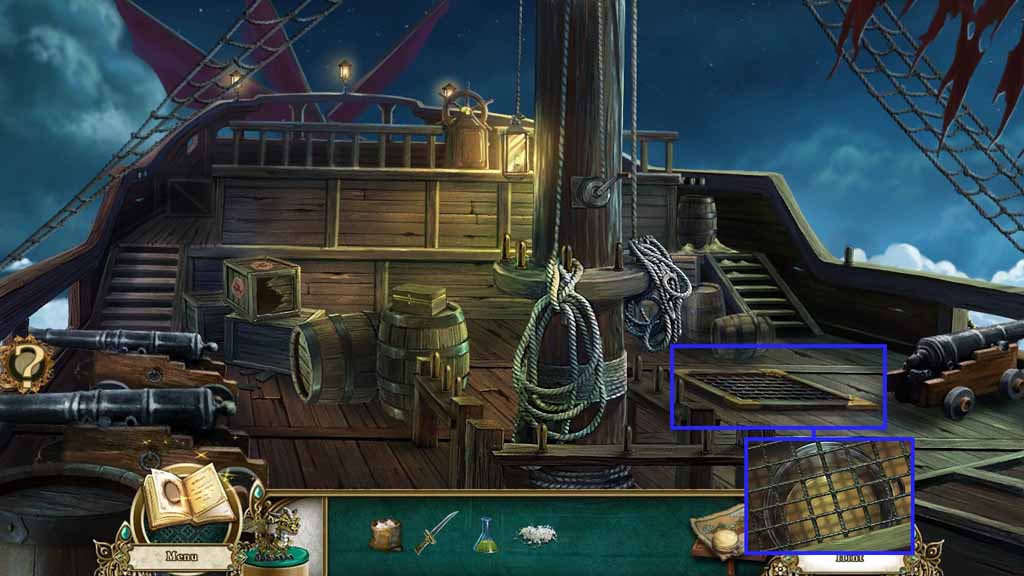
- Zoom into the grate and pour the Curse be Gone into the stew.
- Move down once and go into the Ship Hallway.
- Examine the door to the Captain’s Cabin; then enter the cabin.

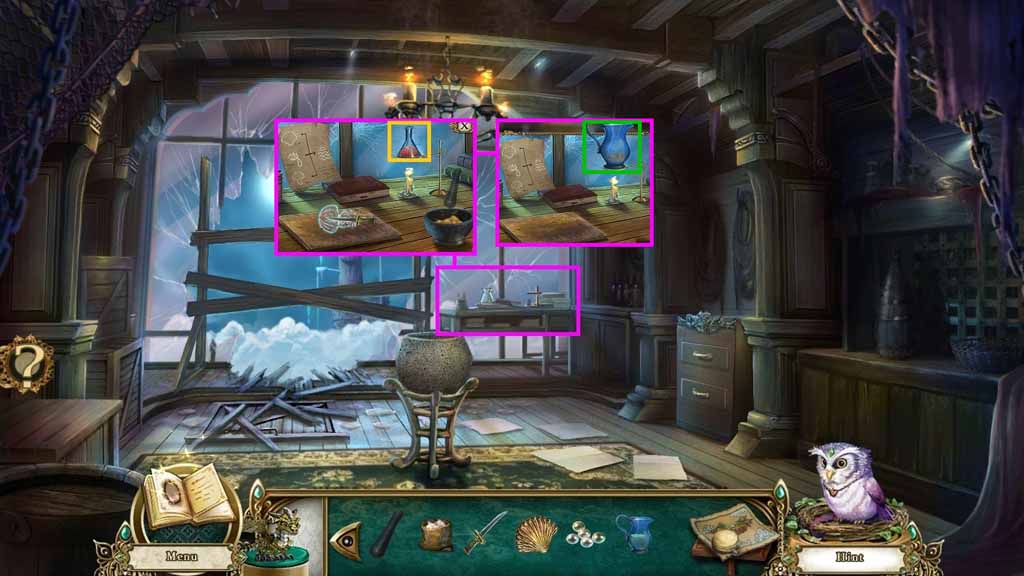
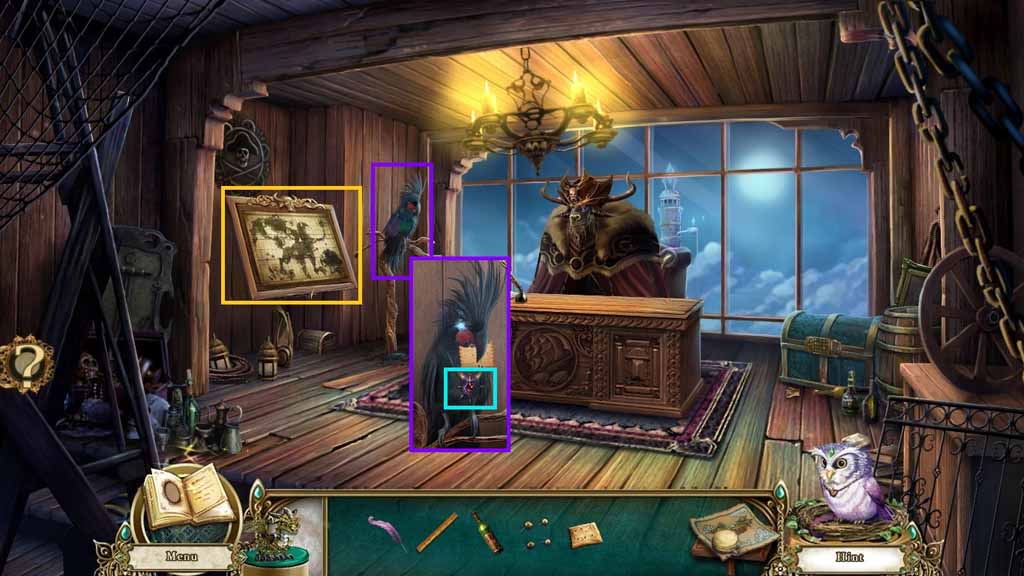
- Zoom into the desk; collect the quill.
- Zoom into the chest; collect the oil and the bottle label.
- Notice the evil parrot.
- Move down once and go into the Galley.
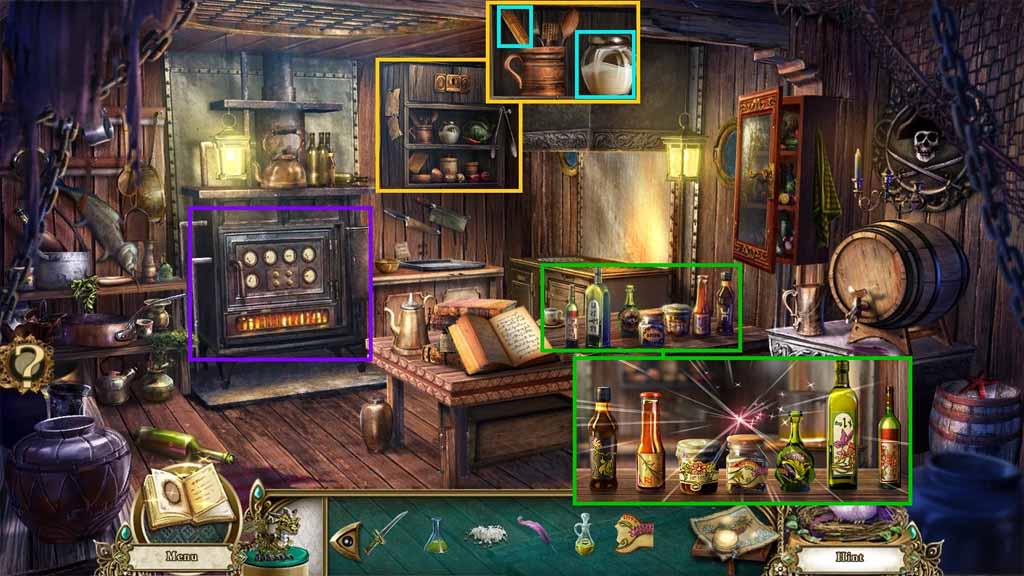
- Zoom into the shelf.
- Collect the ruler and the sugar.
- Notice the oven.
- Zoom into the bottles.
- Attach the bottle label onto the middle bottle to trigger a mini-game.
- Solve the game by aligning the bottles based on the pictures on the labels.
- Collect the catoblepas acid.
- Zoom into the counter; collect the pins.
- Select the flour, sea salt, oil, sugar and curse begone and place them into the bowl.
- Move the dough from the bowl and place it onto the tray.
- Select the cooking knife and use it to slice the dough.
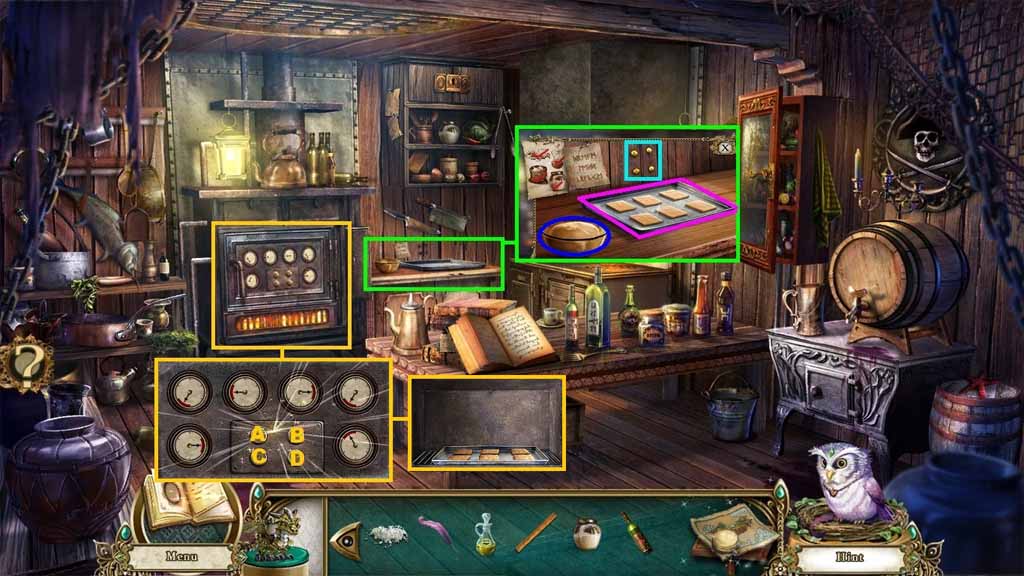
- Select the tray and click the oven to trigger a mini-game.
- Solve the game by moving the needles to the red zone.
- Click the buttons as follows: A – A – A – A – A – B- B- B – B – B – C –C – C –C – C – D- D – D – D – D
- Insert the tray into the oven; collect the Curse Begone crackers.
- Move to the Captains’ Cabin.
- Notice the strategy board.
- Give the curse begone crackers to the evil parrot; collect the grimbles trinket.
- Move to the Brig.
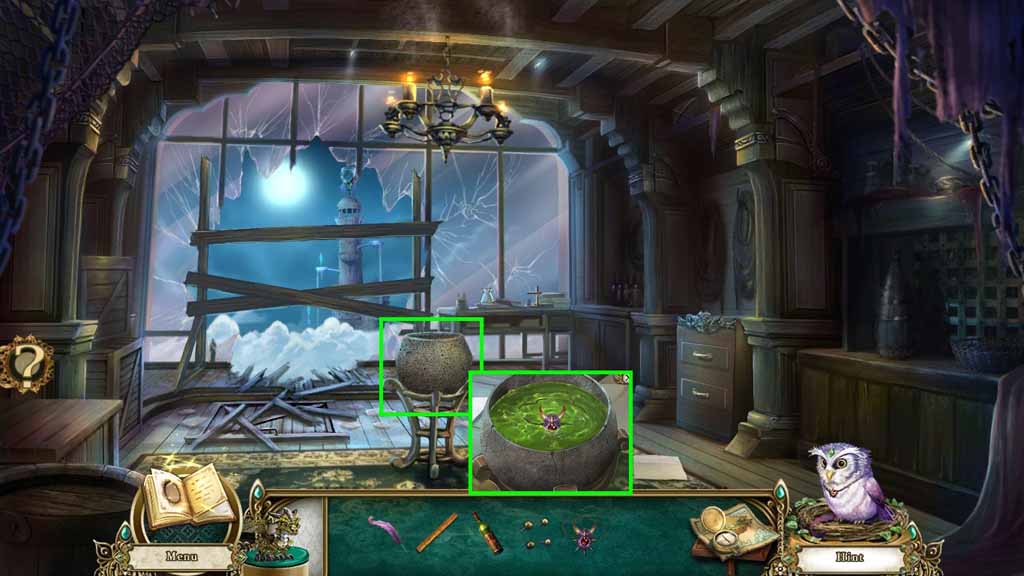
- Zoom into the stone bowl.
- Select the grimbles trinket and the catoblepas acid and place them into the bowl.
- Collect the trinket in the bowl.
- Move to the Galley.
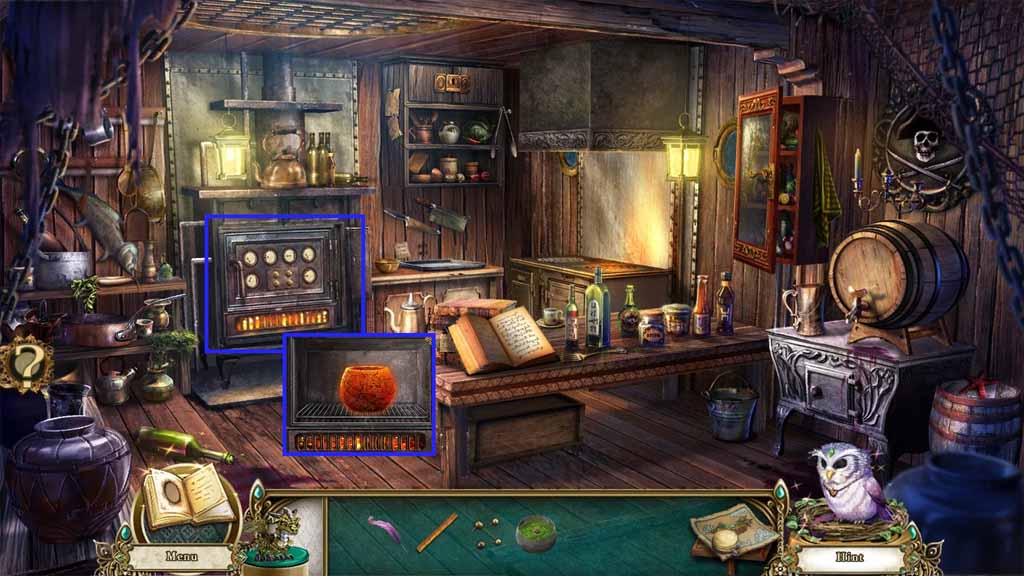
- Insert the trinket bowl into the oven.
- Move down once.
- Speak to the Captain; collect the Ironhoof’s Guide to Riches.
- Move into the Captain’s Cabin.

- Zoom into the strategy board.
- Place Ironhoof’s Guide to Riches, the ruler, pins and the quill onto the board to trigger a mini-game.
- Move the boat by reviewing the clues then clicking the items on the map to solve the game.
- Collect the chest tile.
- Zoom into the Captain’s Stash; insert the chest tile to trigger a mini-game.
- Solve the game by connecting the gemstones.
- Collect the light crystal.
- Move down once.
- Zoom into the Cursed Door and insert the light crystal.
- Examine the Cargo Hold to trigger a hidden objects area.
- Find the listed items.