
Awakening: The Redleaf Forest: Chapter Three: The Patch
Our Awakening: The Redleaf Forest Walkthrough will be your helpful companion as you guide Queen Sophia through the final chapter of her journey to defeat Dreadmyre and reunite with her parents once and for all. Rely on our trusted directions, our simple puzzle solutions, and our custom marked screenshots to see you through the Redleaf forest and the forging of the Blade of Courage in this amazing hidden object adventure game.
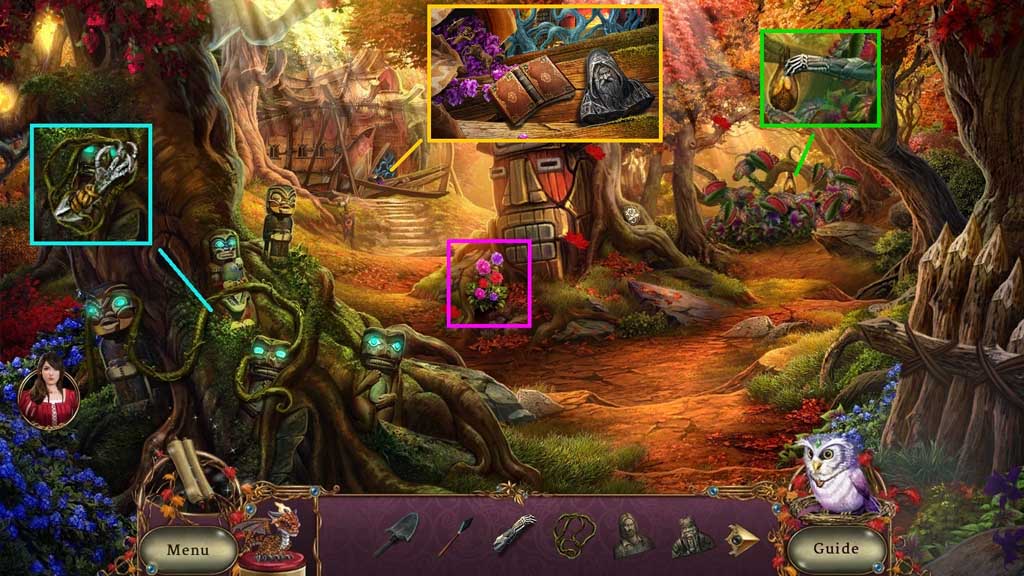
- Attach the vines and the large claw; create and collect the grappling hook.
- Use the gauntlet to collect the honeycomb.
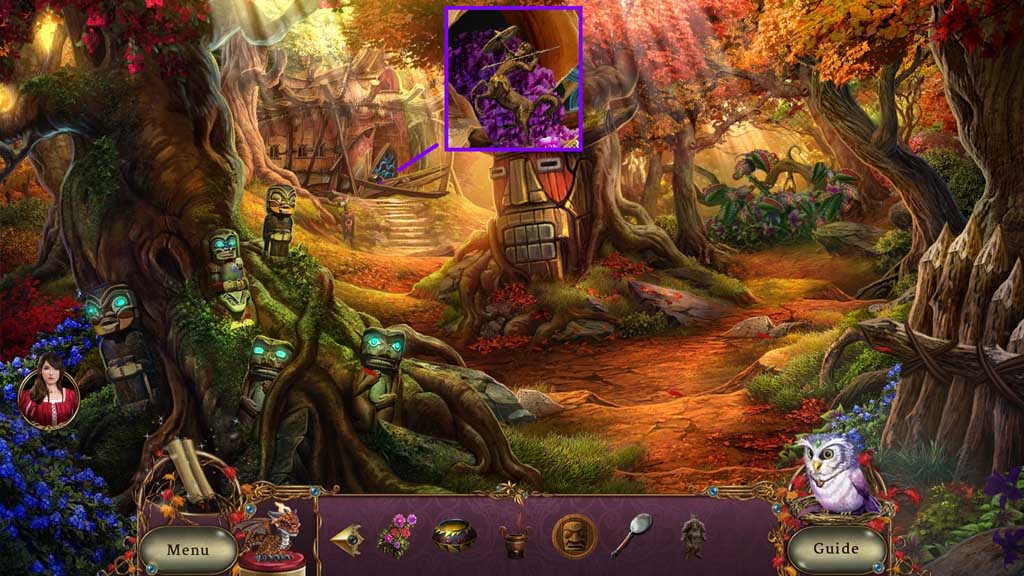
- Collect the scented flowers.
- Click the flowers and read the book.
- Collect the dreadmyre bust.
- Move down once.
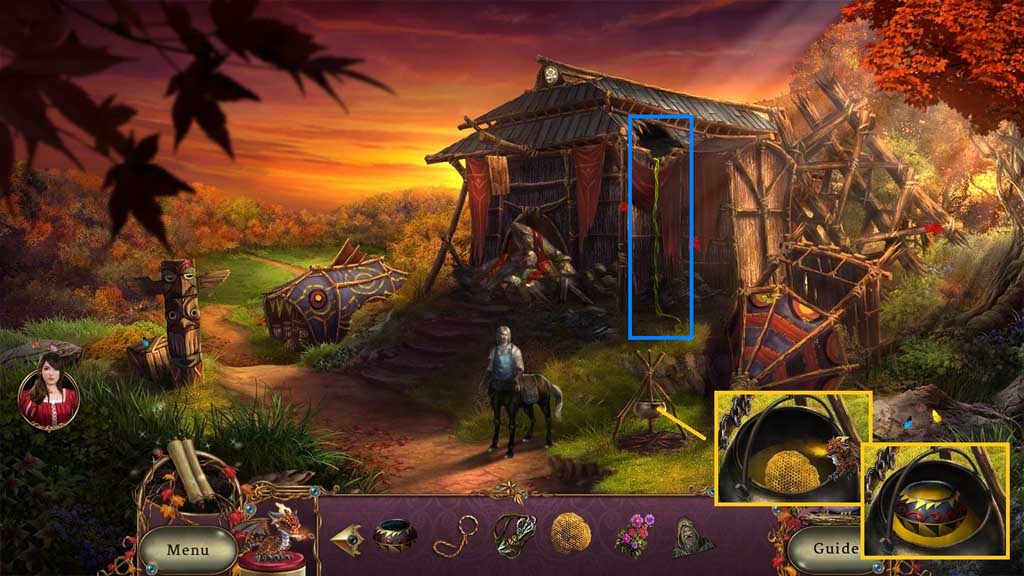
- Select the honey comb and the dragon to melt the wax.
- Dip the empty wax pot to collect the bees wax.
- Toss the grappling hook into the hole in the roof.
- Move into the Library Interior.
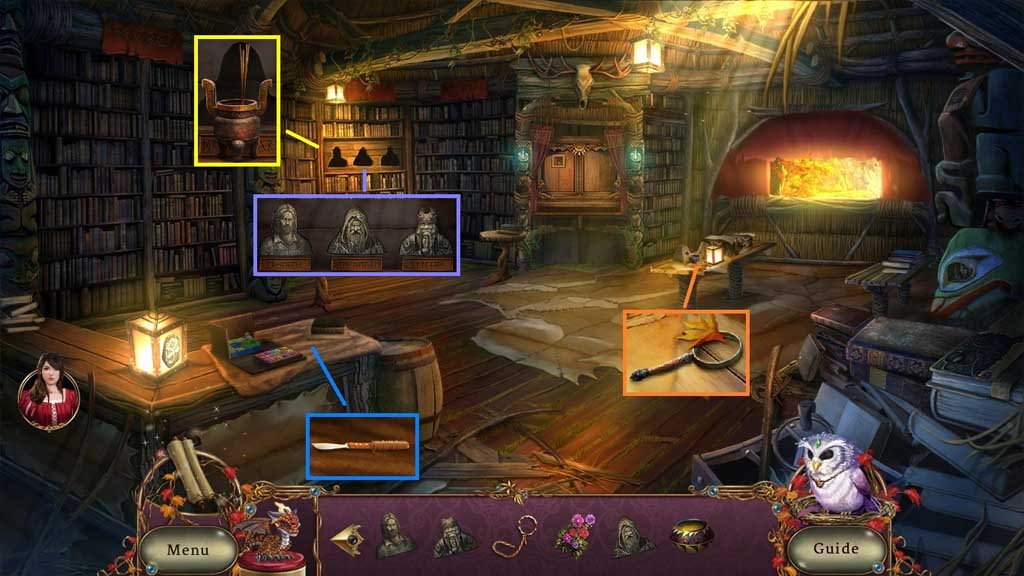
- Click the leaves; collect the lens less magnifier.
- Collect the carving scalpel.
- Collect the incense stick.
- Place down the blacksmith, dreadmyre and the dwarf busts.
- A hidden objects area will trigger.

- Find the items and play the mini games within the hidden objects area.
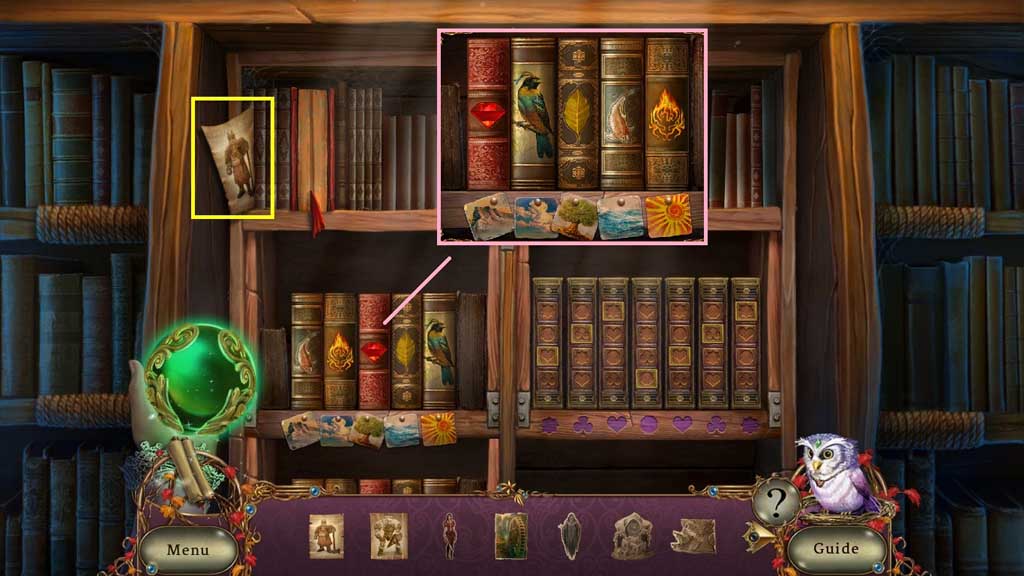
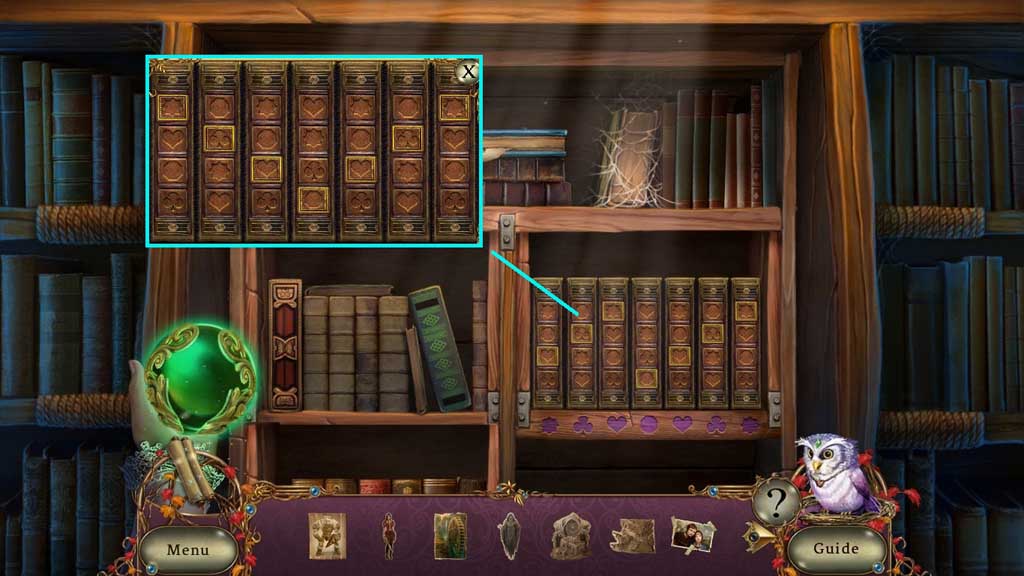
- Arrange the books according to the elements beneath them.
- Align the icons as shown.
- Click the books to find certain items.
- Select the feather to remove the cobwebs; click the book behind the web to uncover more items.
- Click the book and assemble the pieces to collect the final item.
- Collect the knowledge sphere.
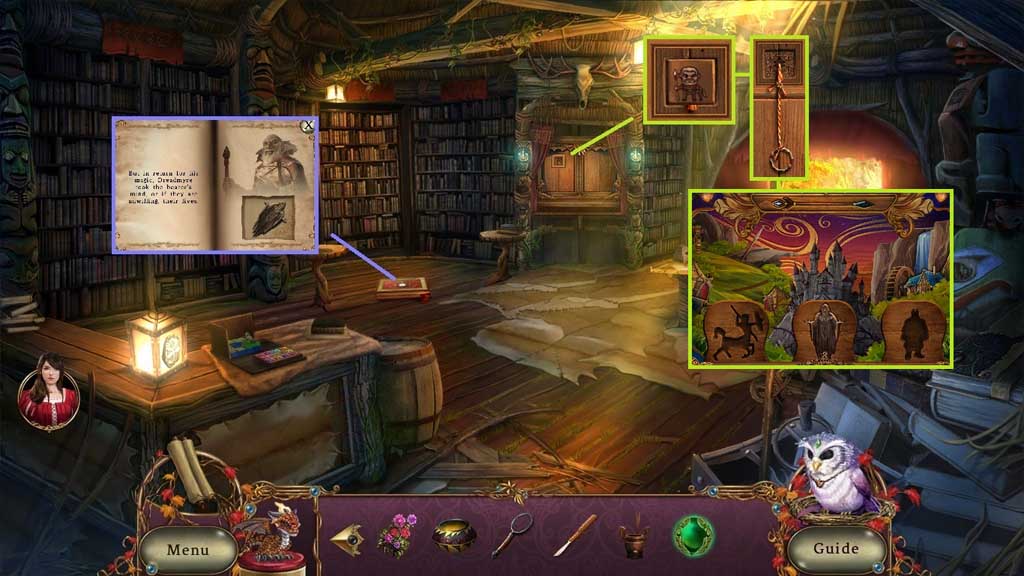
- Click 3 pages; collect the shadow figurine.
- Collect the wooden square.
- Attach the pull string and click it once.
- Place the shadow figurine and the arrow.
- Move down once.
- Give the blacksmith the knowledge sphere.
- Collect the centaur coin.
- Use the carving scalpel to remove the lens.
- Insert it into the lens less magnifier; collect the magnifying lens.
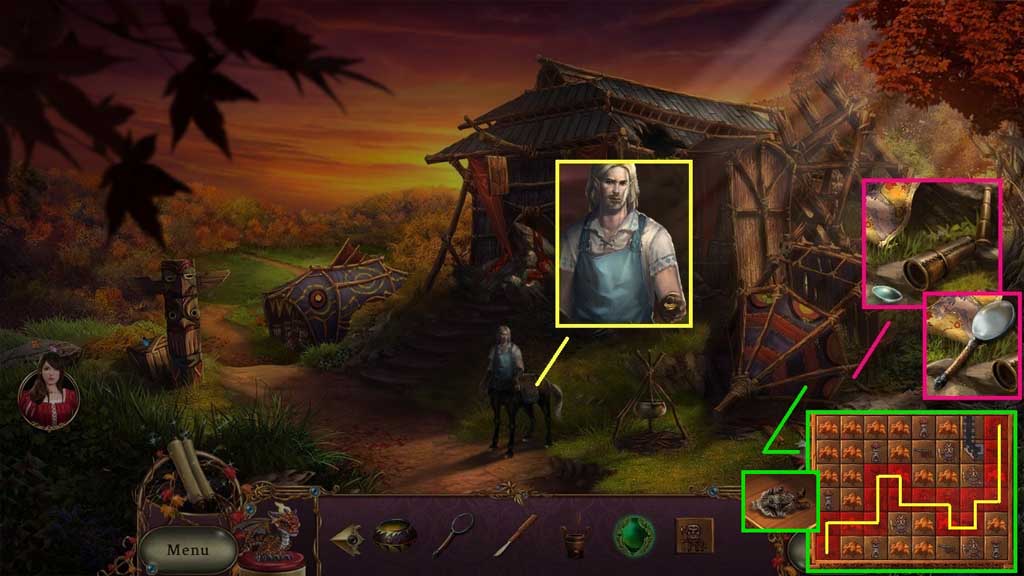
- Insert the wooden square to trigger a mini game.
- Solve the game by clicking the squares in the correct pattern.
- Collect the dwarf figurine.
- Move to the left.
- Use the bees wax to mend and collect the centaur figurine.
- Move down once and go to the right.
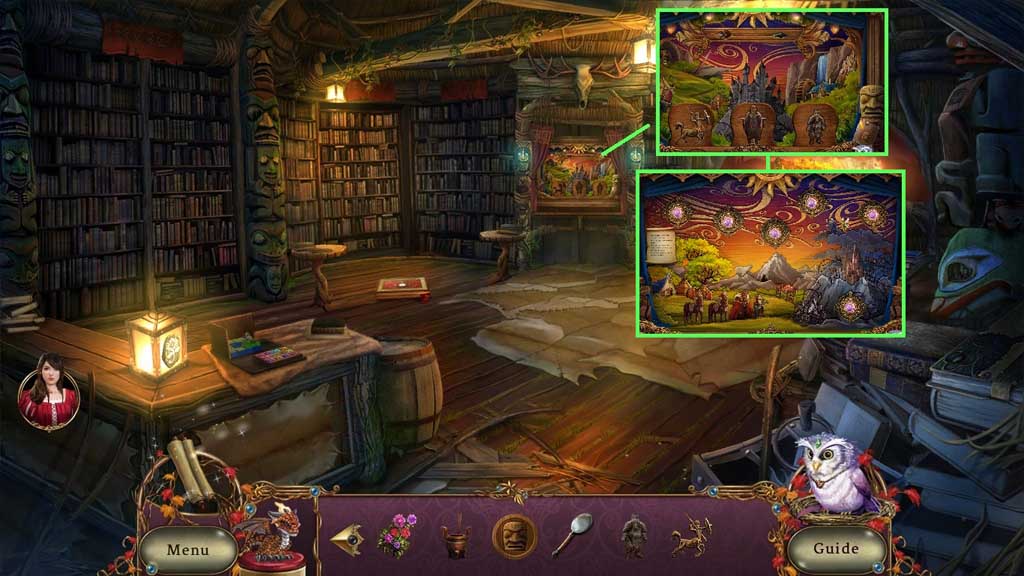
- Insert the centaur and dwarf figurines along with the centaur coin to trigger a mini game.
- Solve the game by clicking the buttons to create the proper scenery in the diorama.
- In the final scene, use the magnifying glass to collect the treasure map.
- Move down once.

- Use the shovel to collect the dwarf plaque.
- Move to the left.
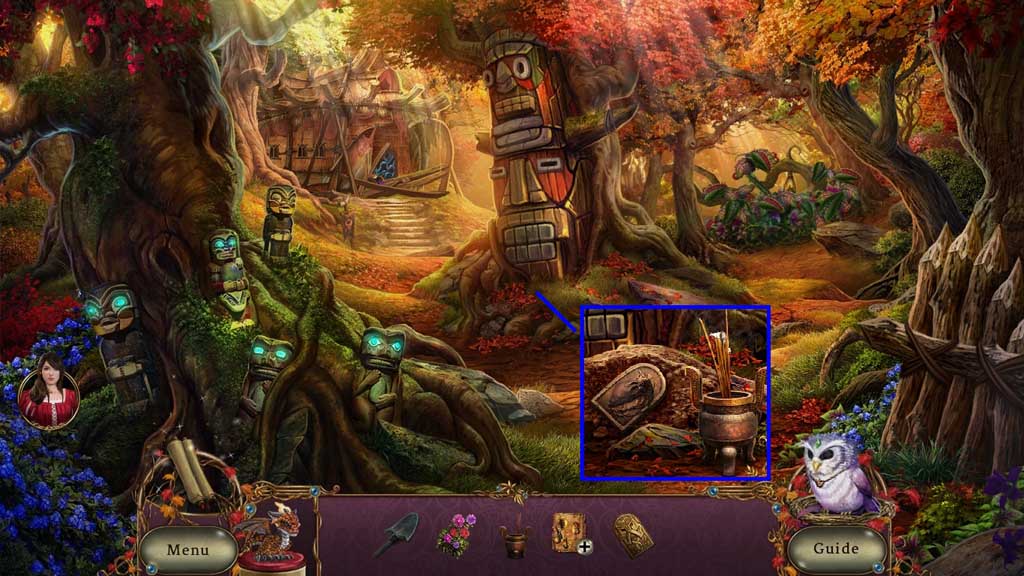
- Use the shovel to create a space to place the incense stick.
- Use the dragon to light the incense; collect the dwarf currency and the centaur plaque.
- Move down 2 times.
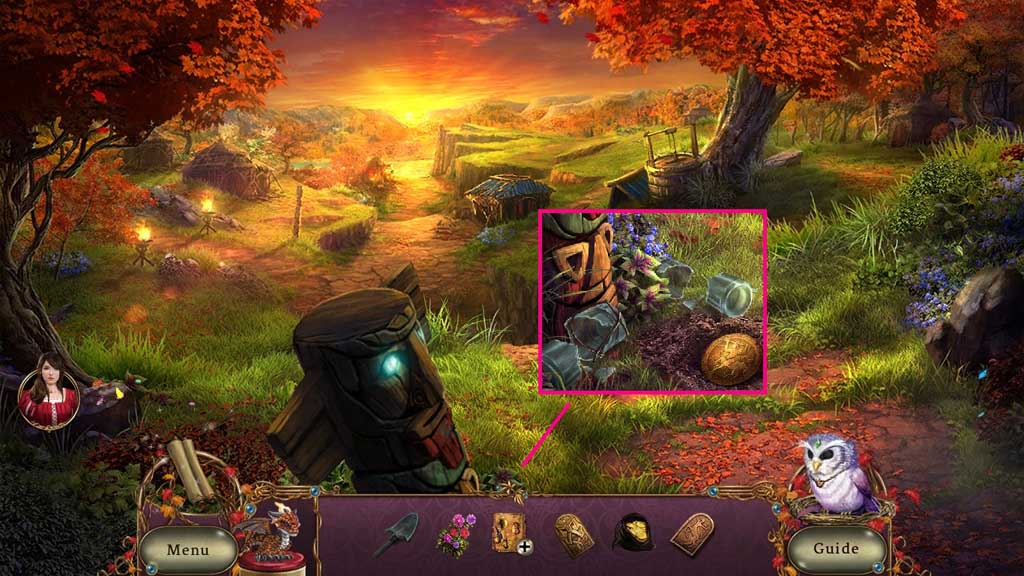
- Use the shovel to uncover and collect the centaur emblem.
- Move to the Forest Fork.

- Attach the centaur emblem and plaque.
- Insert the dwarf plaque.
- Move to the right.
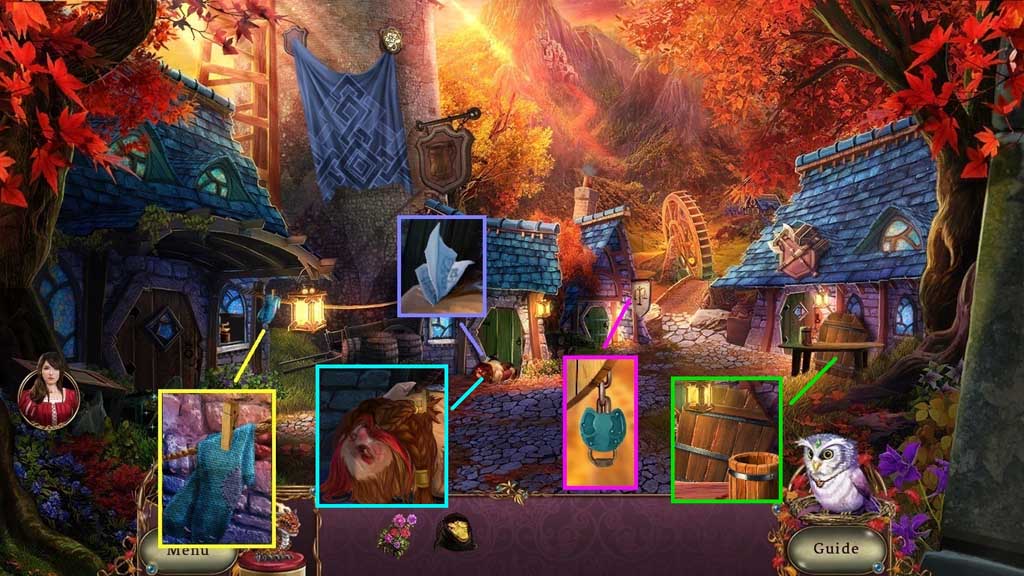
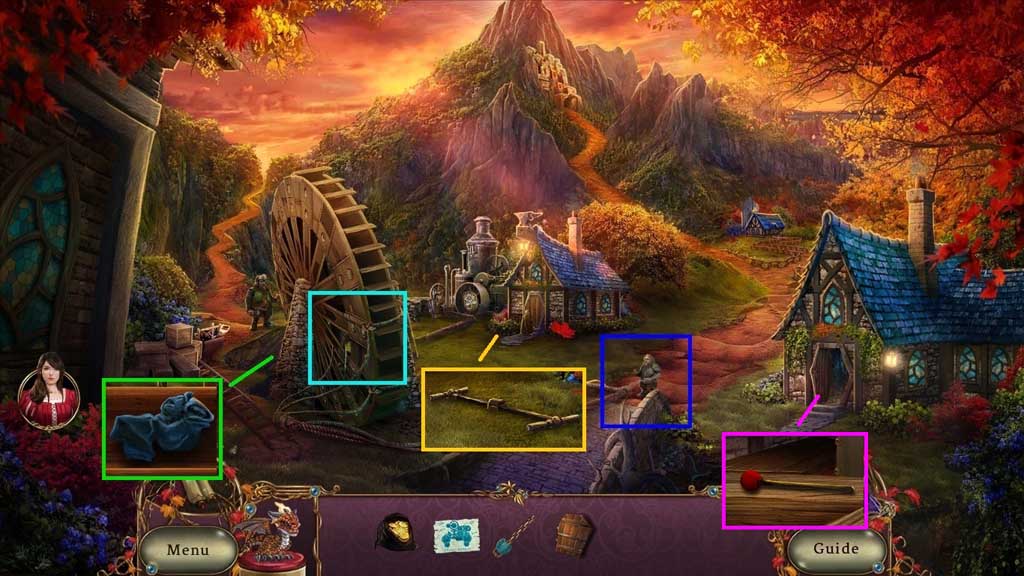
- Use the scented flowers to freshen the smelly rag.
- Collect the clothespin.
- Collect the waterwheel blueprints, the fastener and the broken door.
- Use the clothespin to pin back the beard.
- Move ahead.
- Speak to the dwarf.
- Use the fastener to replace the broken one.
- Speak to the dwarf again.
- Collect the dirty napkin, the gong mallet and the handcart handle.
- Move ahead.