
Awakening: The Golden Age: Chapter Three: Escape
Our Awakening: The Golden Age Walkthrough holds the key to surviving the Minotaur invasion of your village as they search for Prince Cedric, the person they hold responsible for their famine. Trust our custom marked screenshots, our detailed game instructions, and our simple puzzle solutions to help you reveal what's really been happening in this supposed Golden Age of humanity in another thrilling addition to the Awakening games.
General Information & Tips
Chapter One: Village View
Chapter Two: Frozen Lake
Chapter Three: Escape
Chapter Four: The Hut
Chapter Five: Tree
Chapter Six: Castle
Ask for help in the comments below!
Chapter One: Village View
Chapter Two: Frozen Lake
Chapter Three: Escape
Chapter Four: The Hut
Chapter Five: Tree
Chapter Six: Castle
Ask for help in the comments below!
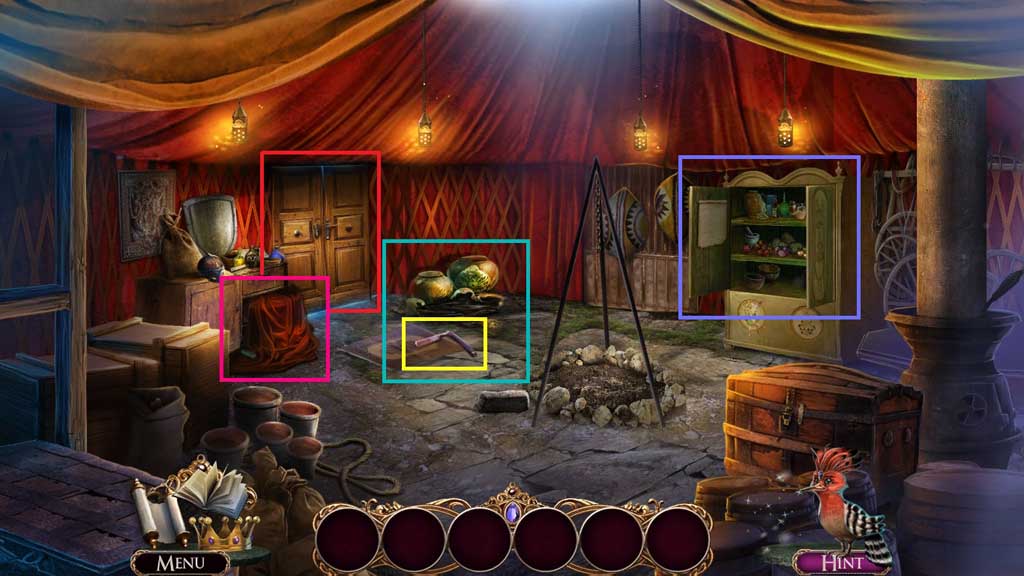
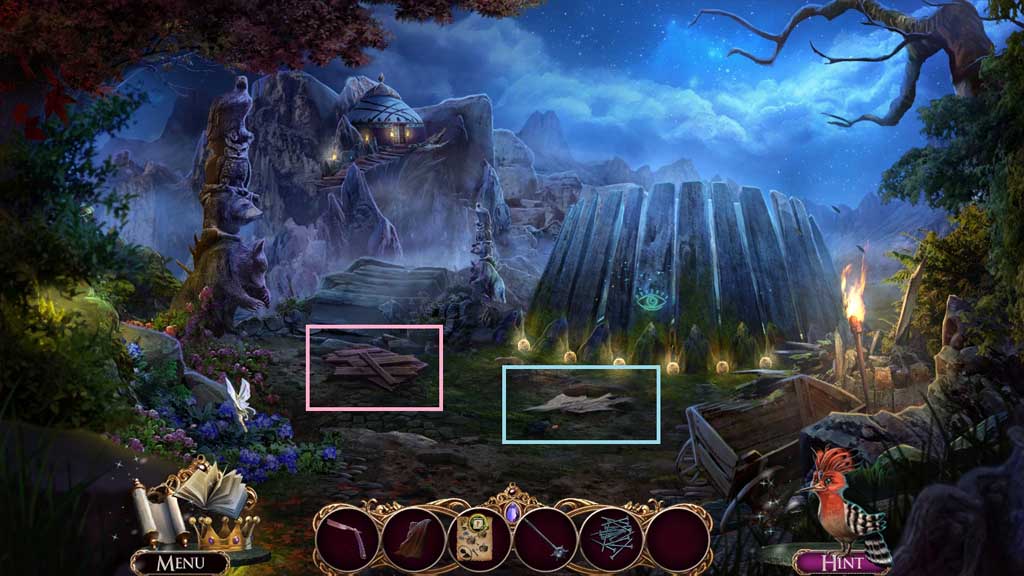
- Click the pots; collect the razor.
- Click the cupboard, the drawer and the door.
- Click the hidden objects area.

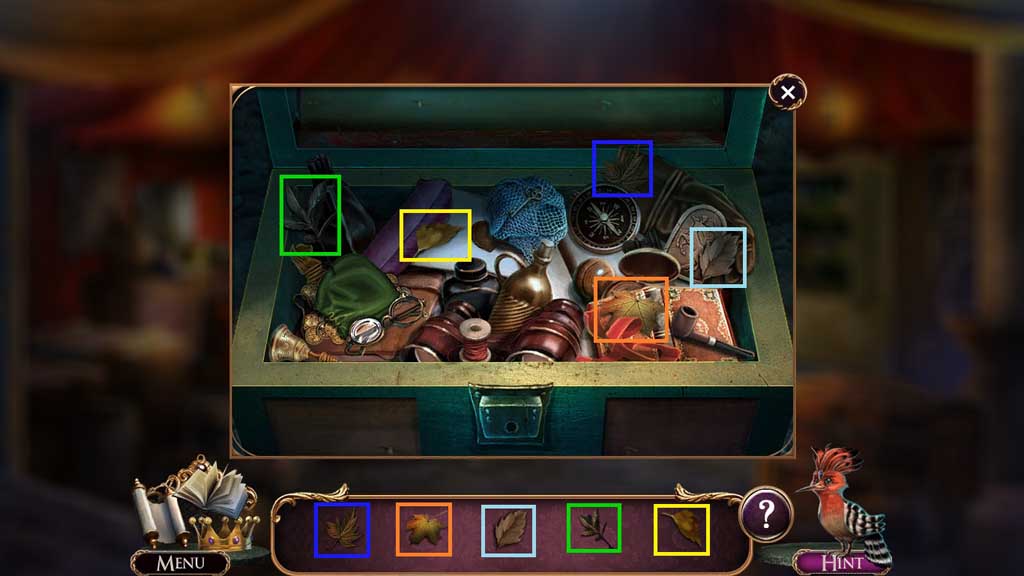
- Find the items.
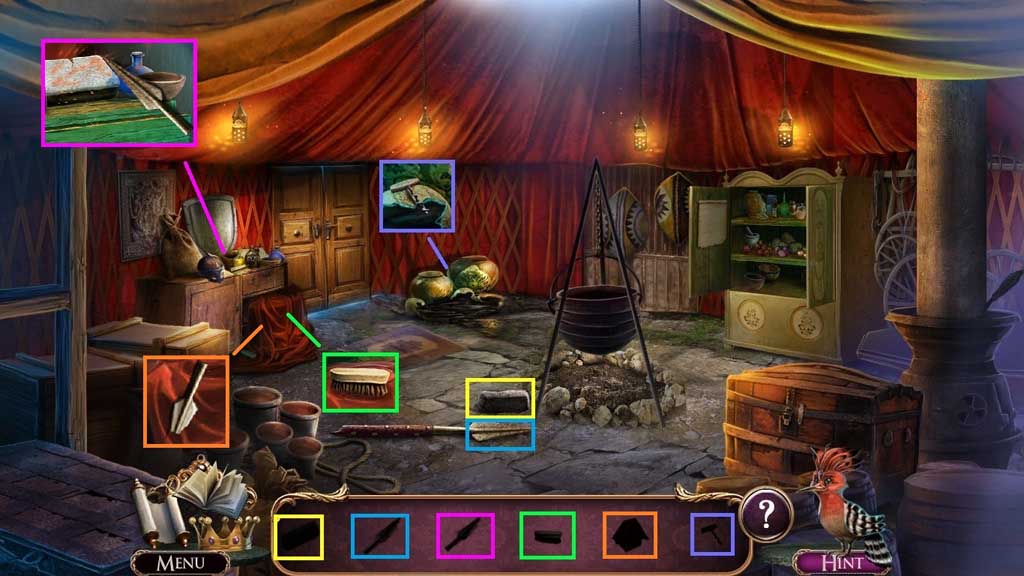
- Select the stone (yellow) to collect the spear head (blue).
- Select the spear head (blue) and place it onto the stone; collect the sharpened spear head (pink).
- Select the sharpened spear head (pink) to slice the cloth; collect the rag (orange).
- Click the bottles aside and use the corkscrew to remove the cork; combine the rag and oil to create the oiled rag (aqua).
- Use the oiled rag to clean the tar; collect the metal needles (purple).
- Use the metal needles on the chest lock to trigger a mini game.
- Solve the game by clicking the locks in ABC order.
- Another mini hidden objects area will trigger; find the items.
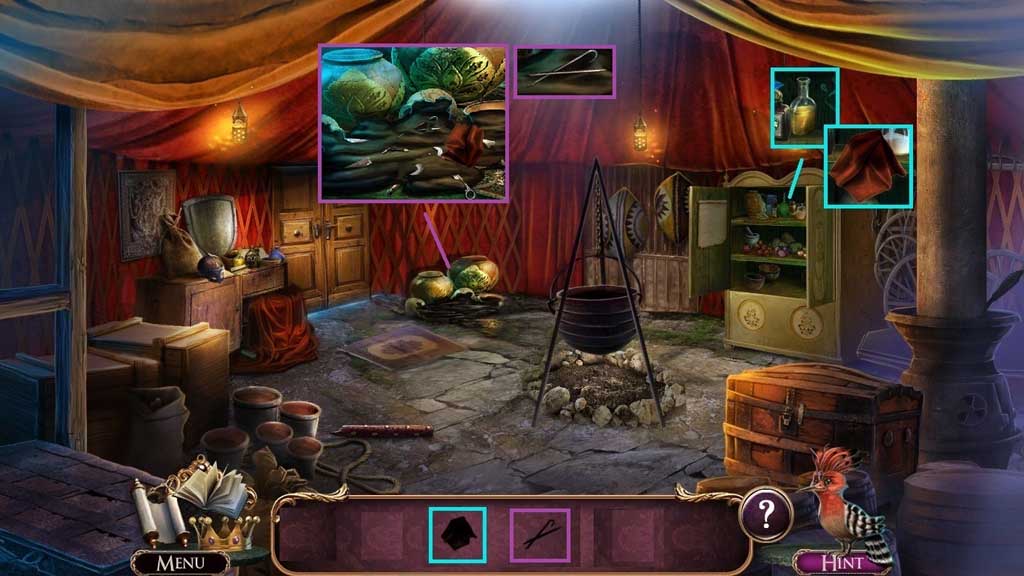
- Collect the nuts.

- Select the nuts to place into the cauldron.
- Speak to the Longhorn.
- Move ahead.
- Collect the bed sheet.
- Move ahead.
- Zoom into the camp fire.
- Collect the black charcoal recipe and the pole.
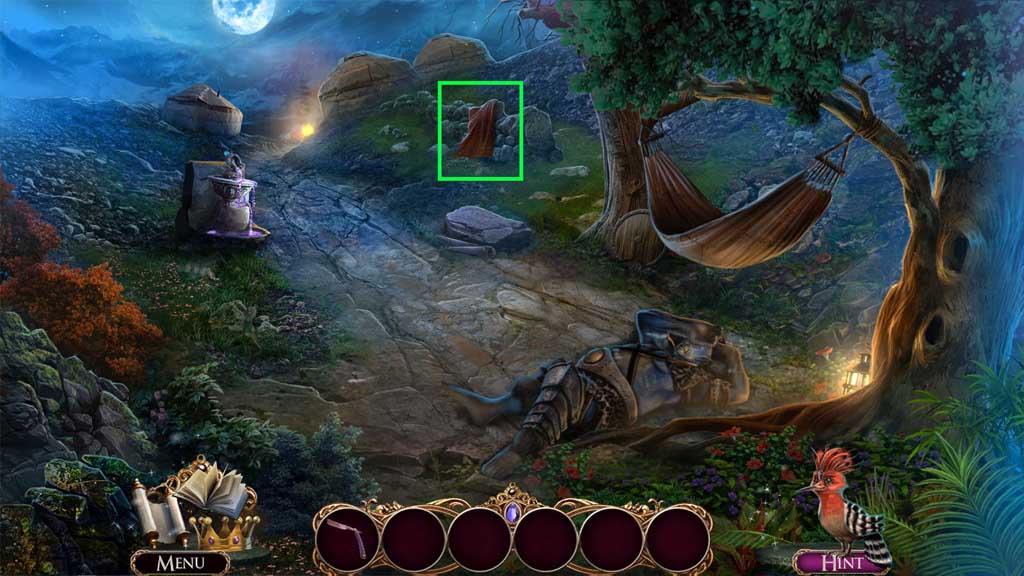
- Select the razor to collect the vine.
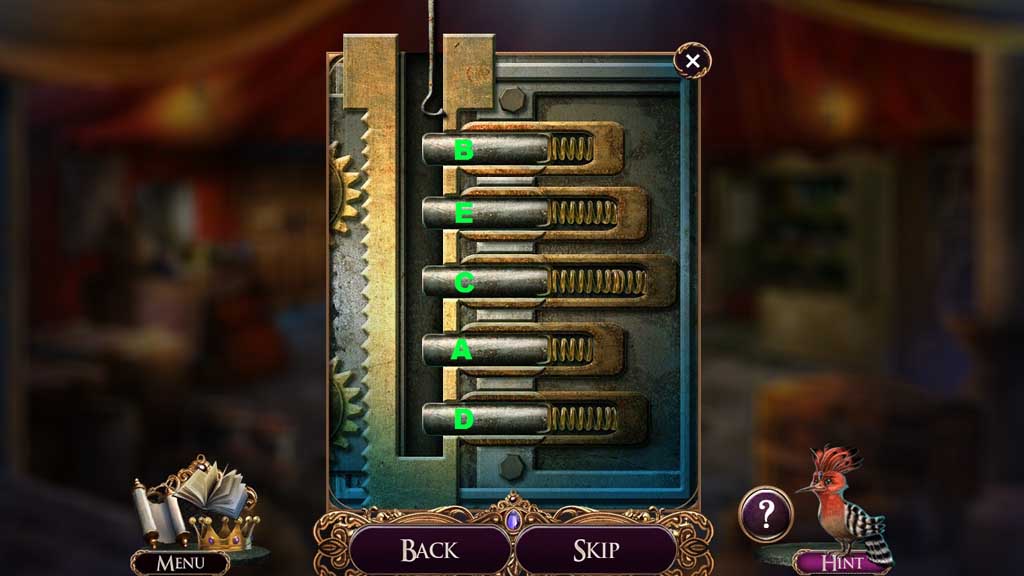
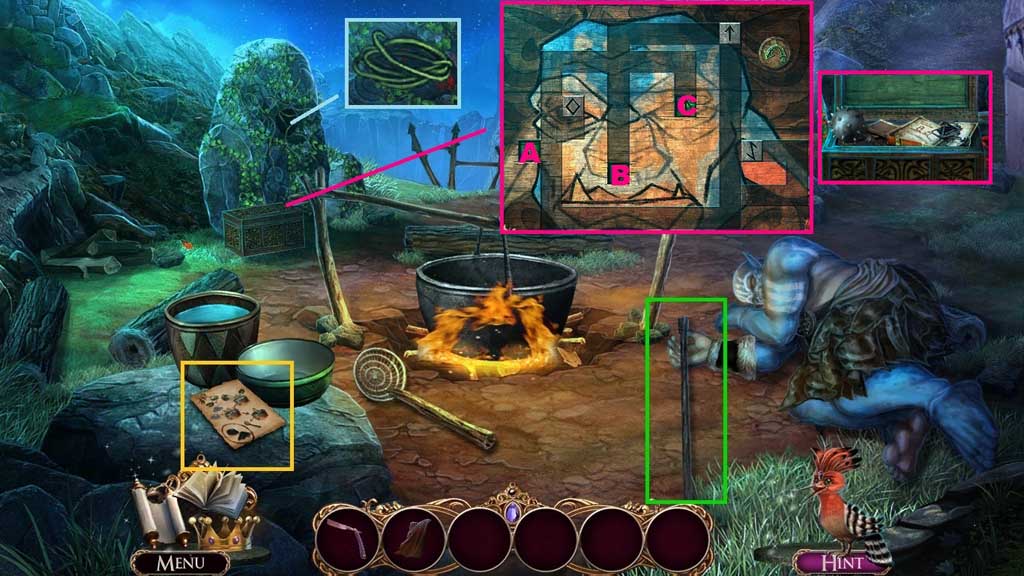
- Zoom into the chest to trigger a mini game.
- Solve the game by guiding the blocks to the correct spaces.
- Use the following sequence to solve: B – down / B – left / A – left / A – down / A – left / A – up / A – left / B – right / C – down / C – left / C –up / C- right / C – down / B – left / B – down / B – right / B – up / B –left / B – down
- Collect the mace and the nails.
- Exit the close-up and move to the right.
- Click the broken pole; replace it using the pole and vine.
- Move down once and go to the left.
- Collect the blank tapestry piece and the uncut planks.
- Move down 2x’s.
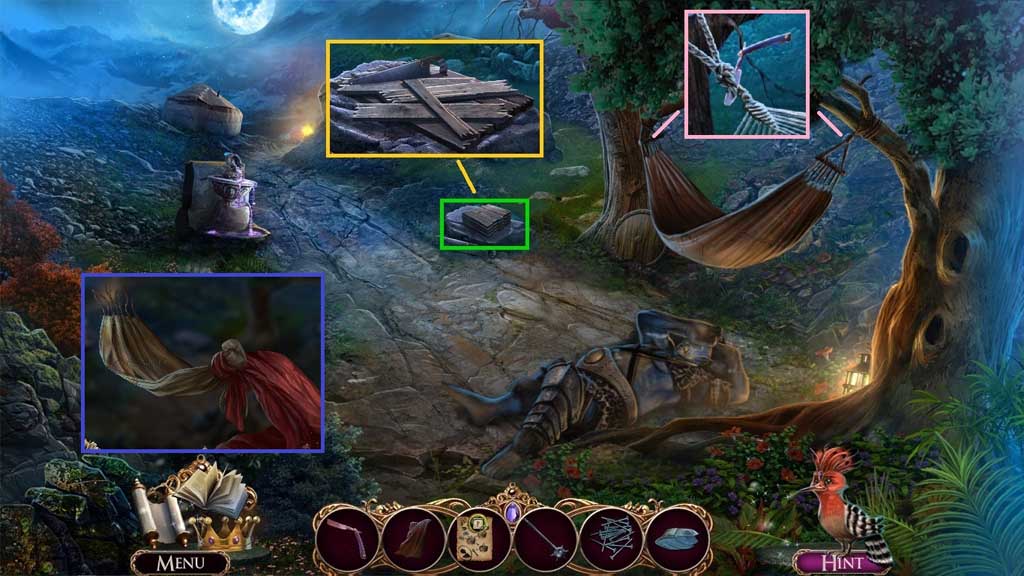
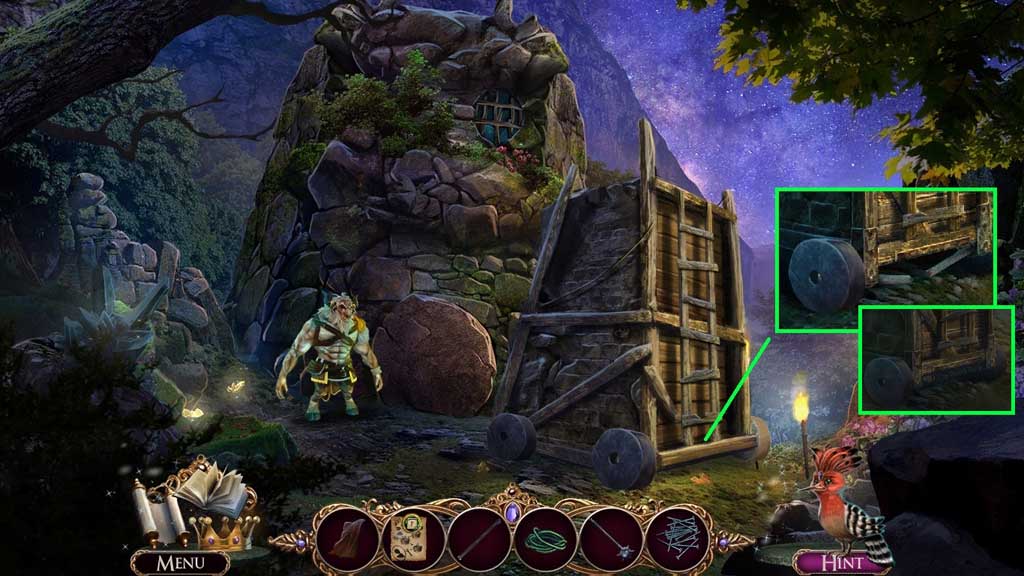
- Place the uncut planks onto the rock and select the saw to trim them down; collect the cut planks.
- Select the razor to slice the ties 2x’s; collect the hammock.
- Attach the bed sheets onto the hammock; click it 2x’s and collect the long sheet.
- Move ahead and go to the right.
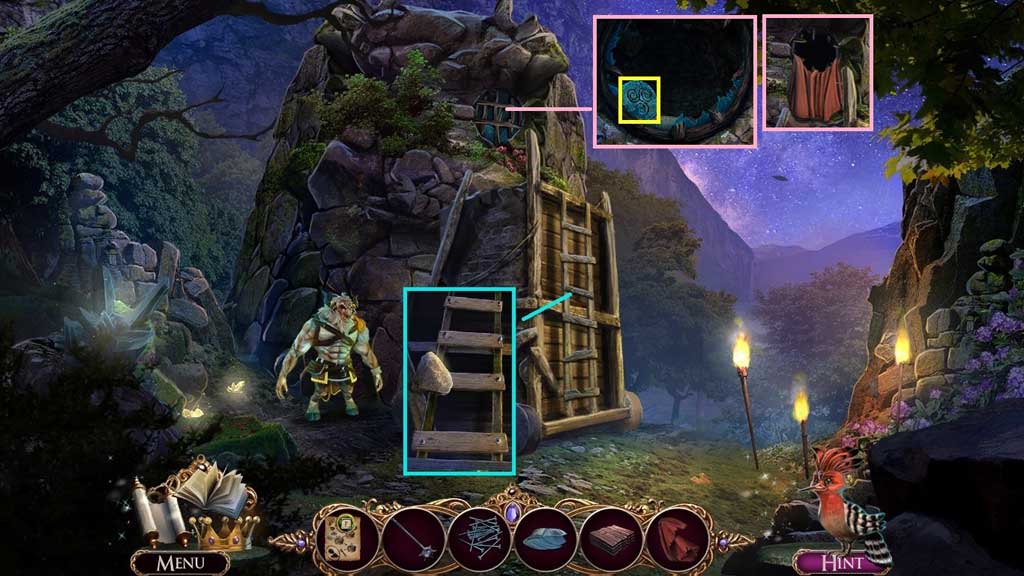
- Click and replace the old planks using the cut planks and nails.
- Select the stone to strike the nails 4x’s.
- Select the mace to smash the glass; collect the stone disc.
- Attach the long sheet.
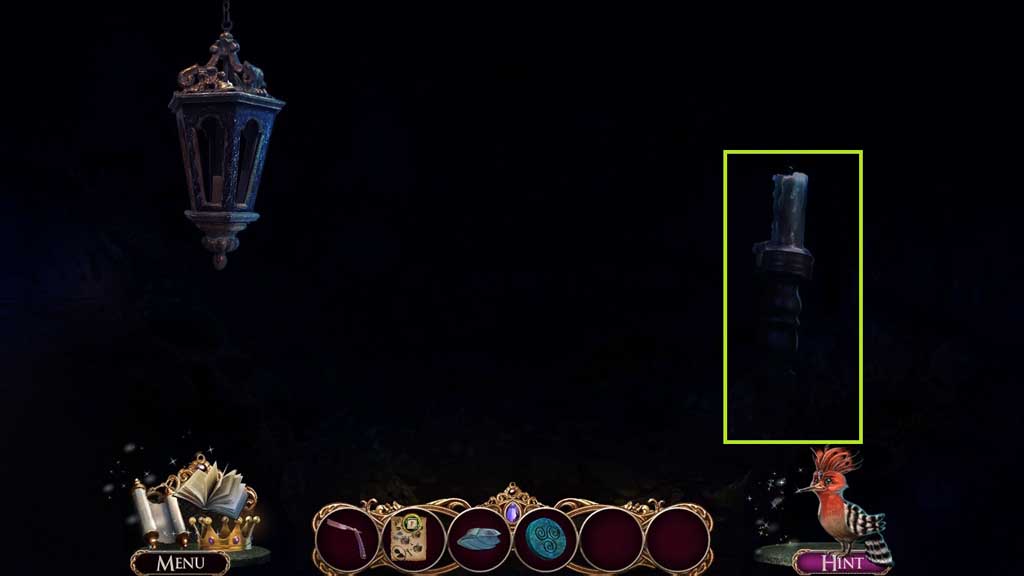
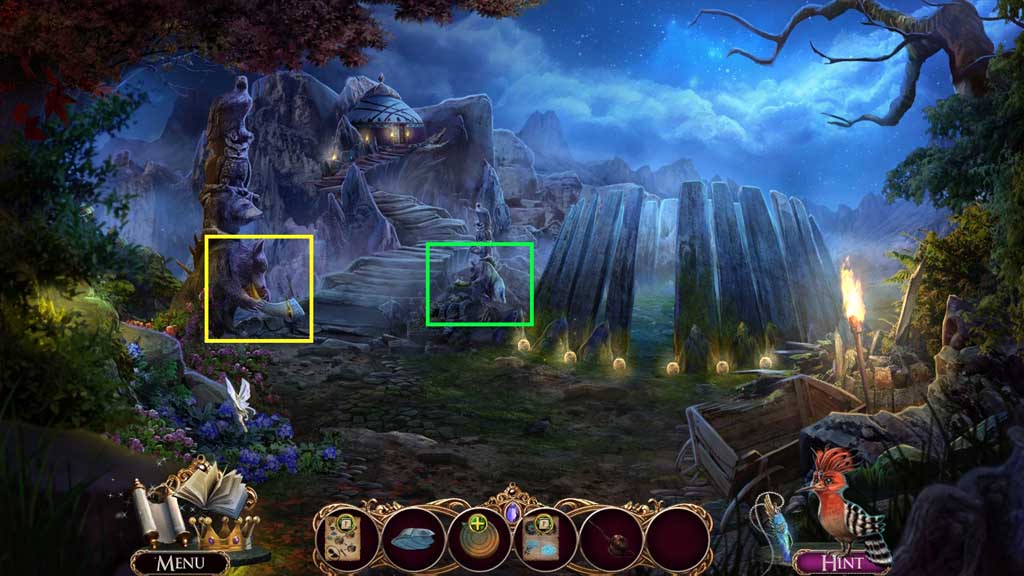
- Collect the unlit lighting pole.
- Move down once.
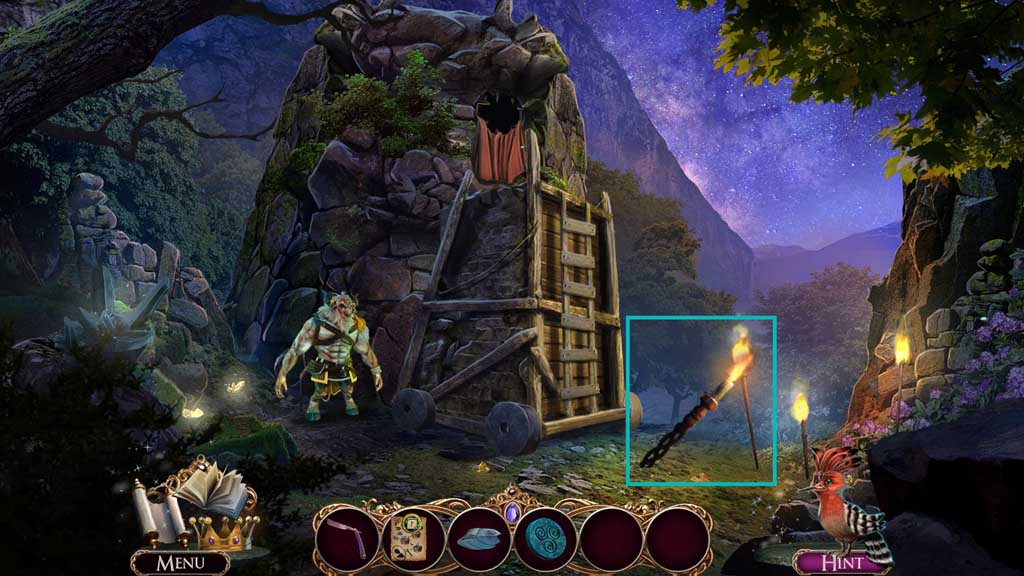
- Dip the unlit lighting pole into the flame; collect the lit lighting pole.
- Move ahead.

- Select the lit lighting pole to reveal the hidden objects area.
Chapter-3-13A-H-O-2
- Find the lighting sources.
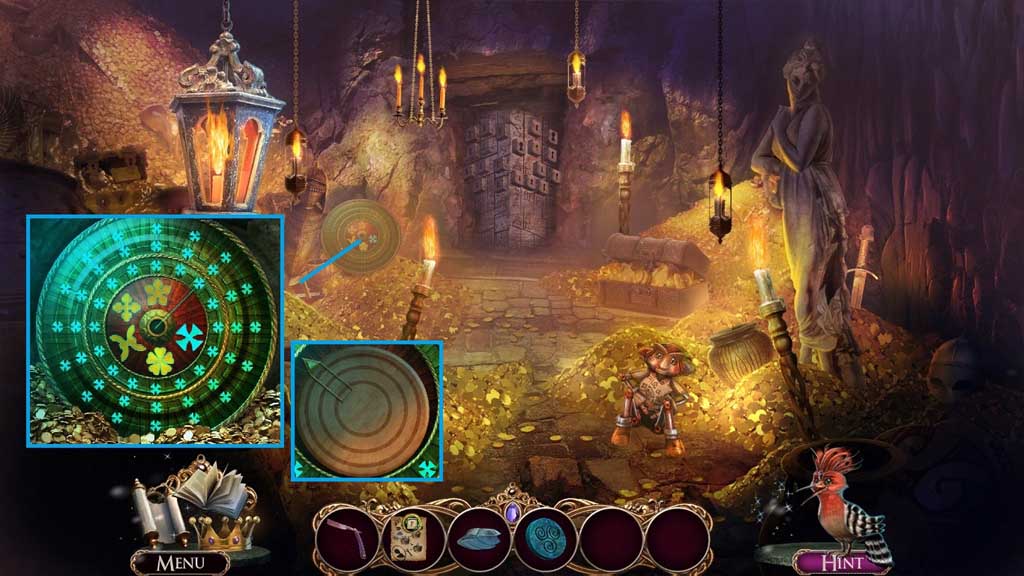
- Zoom into the shield to trigger a mini game.
- Solve the game by converting all of the symbols to the blue cross.
- The solution is random.
- Collect the cipher base.
- Move down 2x’s.

- Zoom into the camp fire.
- Insert the stone disc to trigger a mini game.
- Solve the game by clicking the stones in the correct sequence based on the clues on the right.
- Collect the drawing and click it 2x’s; collect the red charcoal stick.
- Exit the close-up and move to the right and ahead once.
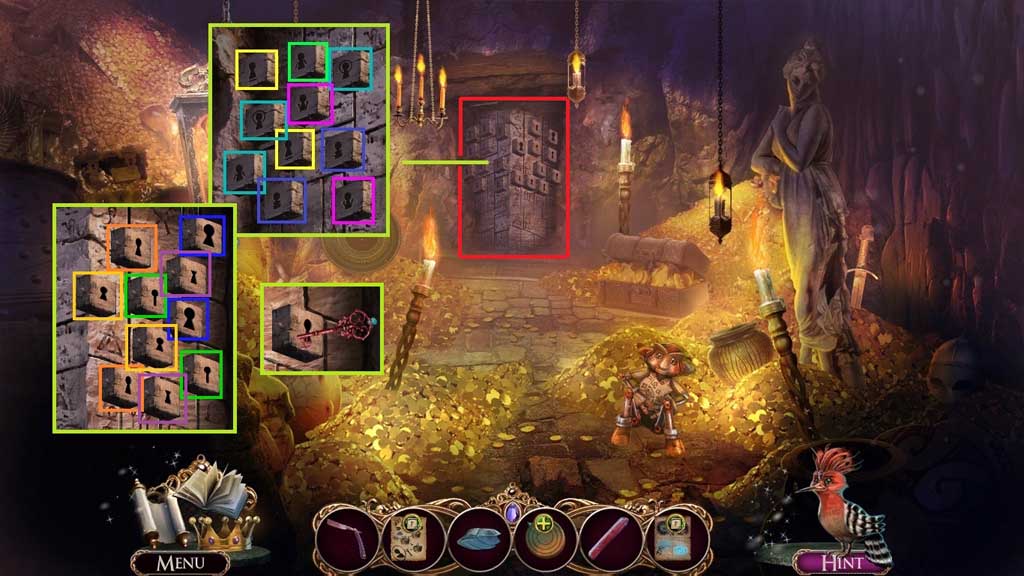
- Select the red charcoal stick to trigger a mini game.
- Solve the game by matching the keyholes.
- The solution is random.
- Insert the key into the lock to trigger a hidden objects area.
- Find the items.
- Collect the uncharged pendant.
- Move down 3x’s.
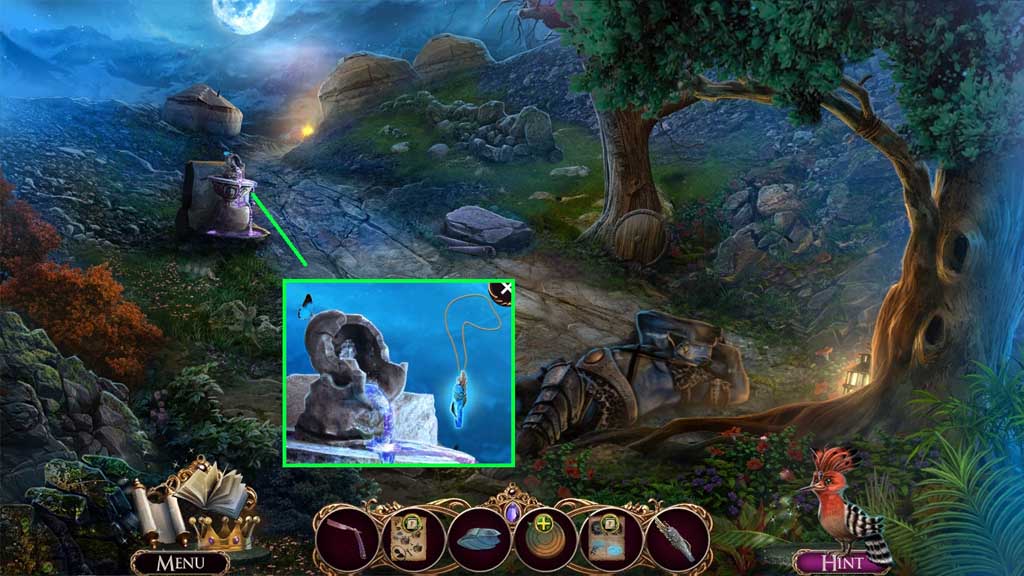
- Place the uncharged pendant into the fountain; collect the all-seeing pendant.
- Move ahead.
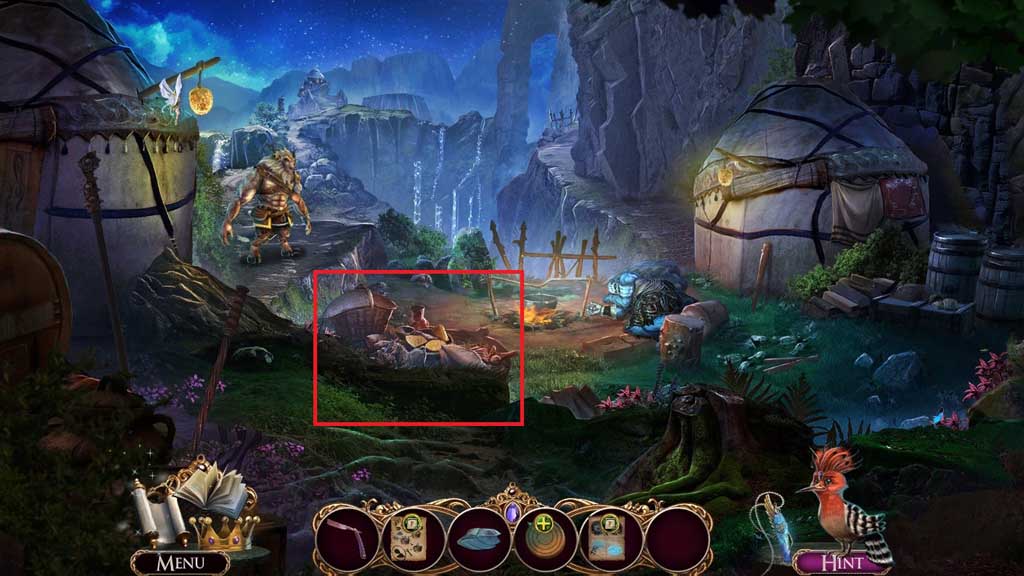
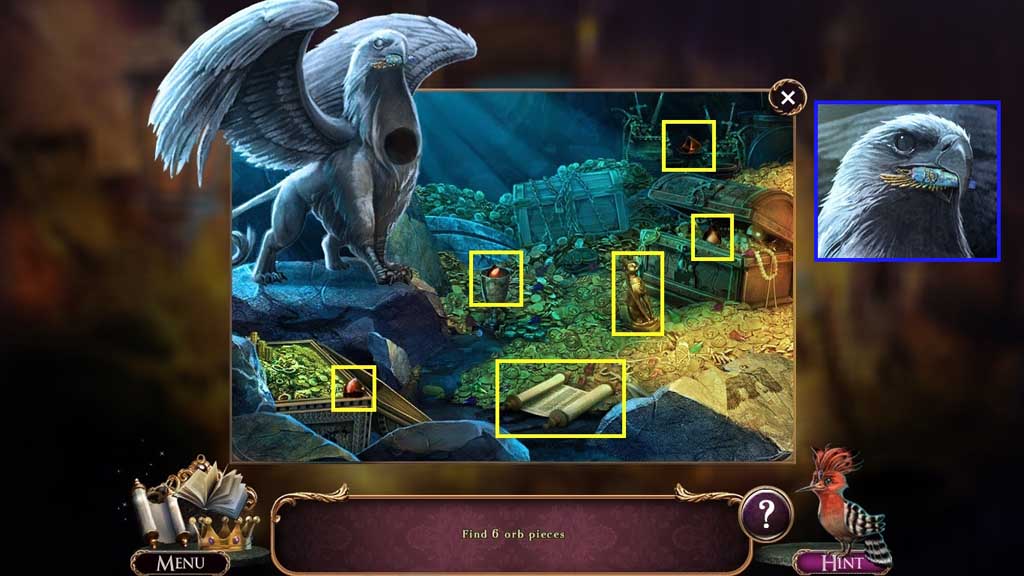
- Click picnic area and trigger a hidden objects area.
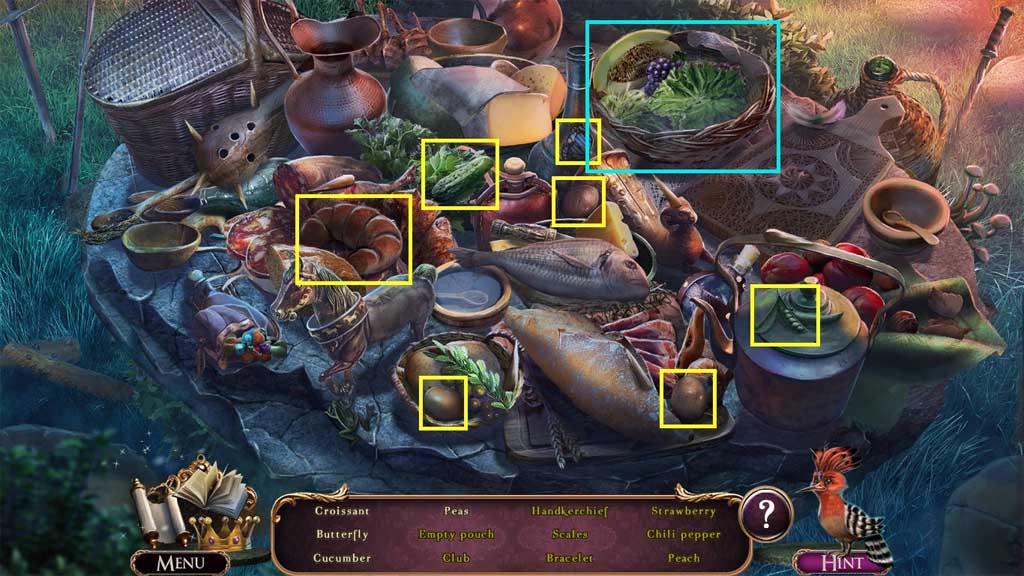
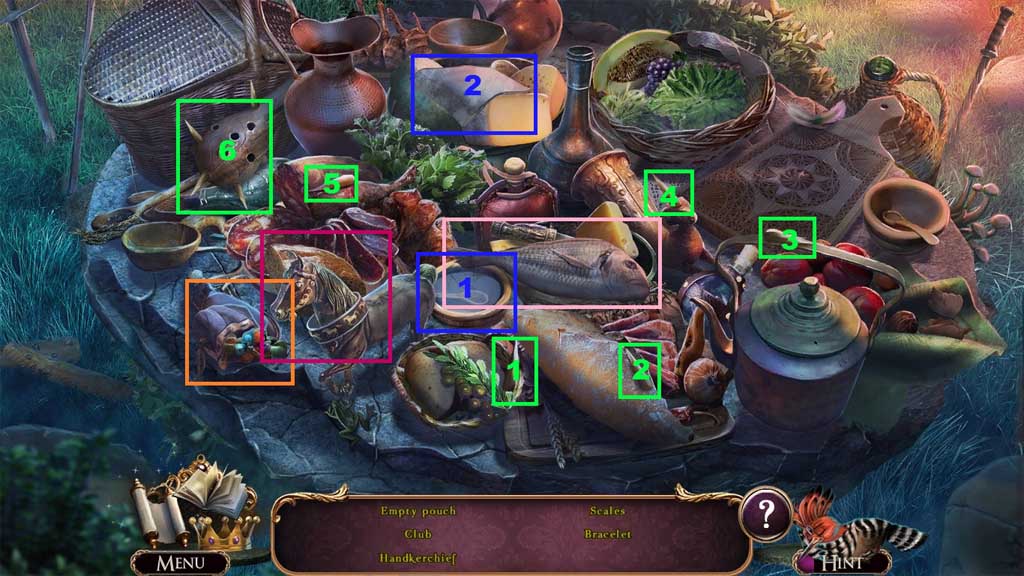
- Find the items.
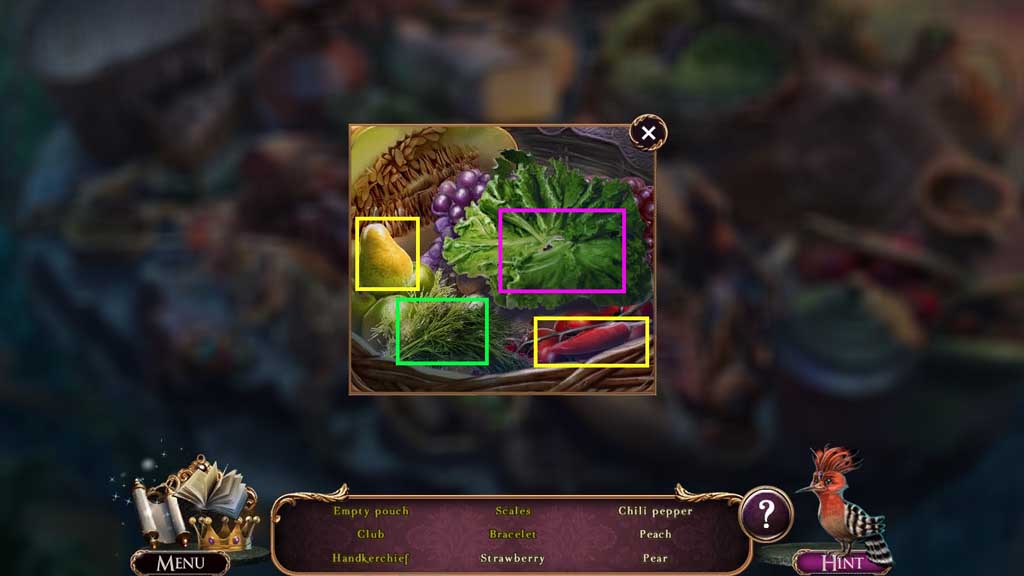
- Zoom into the bowl to uncover more items.
- Click the lettuce to collect the strawberry.
- Click the herbs to collect the peach.
- Click the items from the pouch; collect the empty pouch.
- Select the spikes and place them into the holes; collect the club.
- Select the bowl of water to use on the handkerchief; collect the handkerchief.
- Click the fish 2x’s to collect the scales.
- Click the spikes on the horse 3x’s; collect the bracelet.
- Collect the blue charcoal stick.
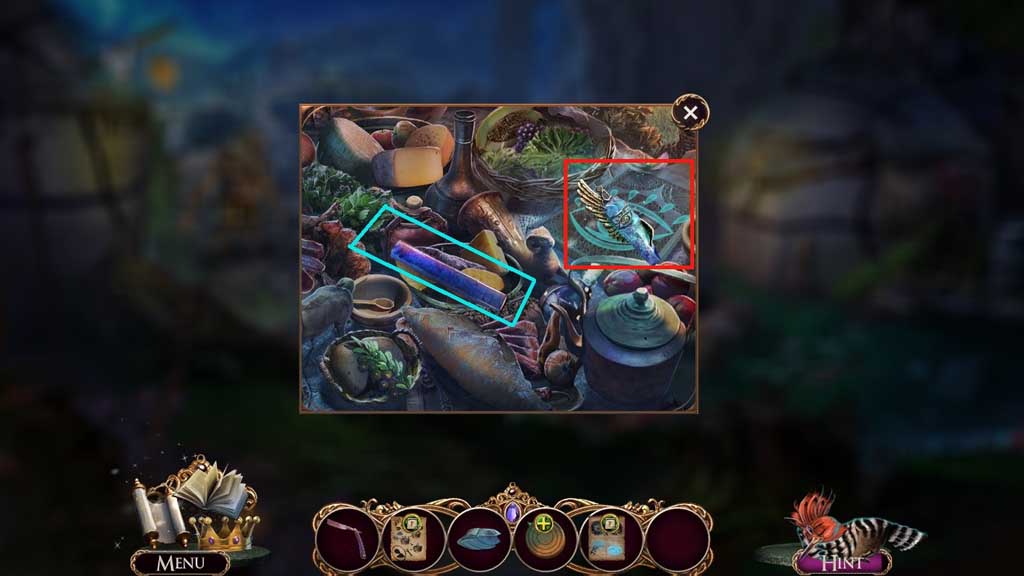
- Select the all-seeing pendant to reveal the hidden objects area.

- Find the items.
- Collect the gold war horn.
- Move to the left.
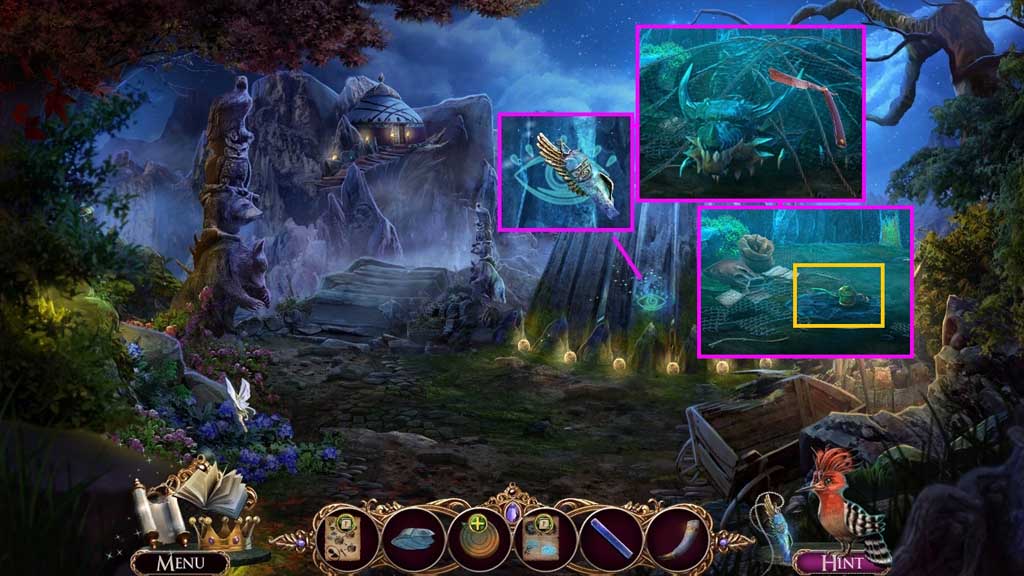
- Select the all-seeing pendant to reveal the dragon.
- Select the razor to slice the net 4x’s; click the dragon.
- Collect the oil can.
- Move down 3x’s.
- Select the blue charcoal stick to complete the glowing eye and the all- seeing pendant to reveal the compartment.
- Click the compartment; collect the ivory war horn.
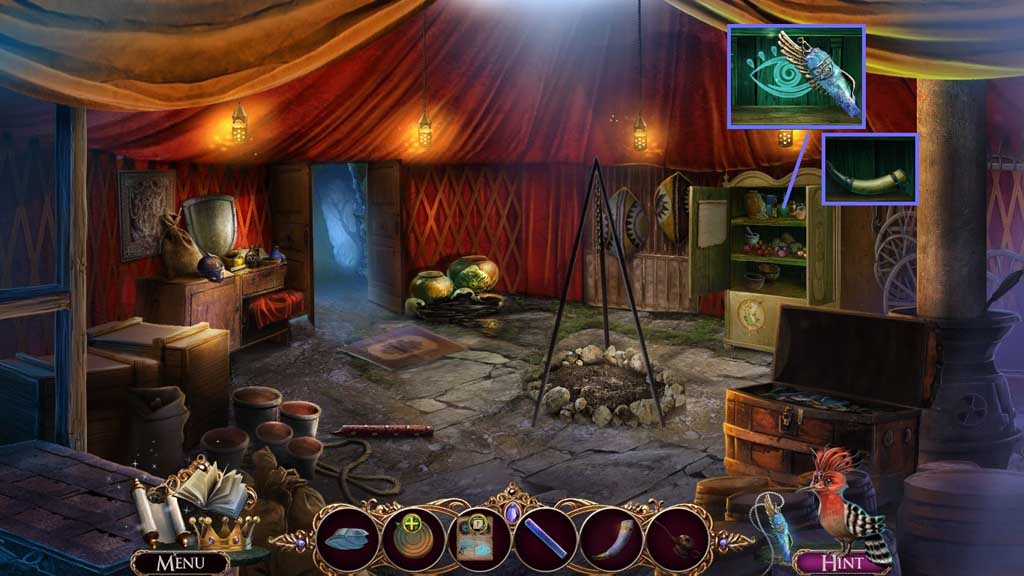
- Move ahead 2x’s and go to the left.
- Attach the gold and ivory war horns.
- Move down once, go right and move ahead.
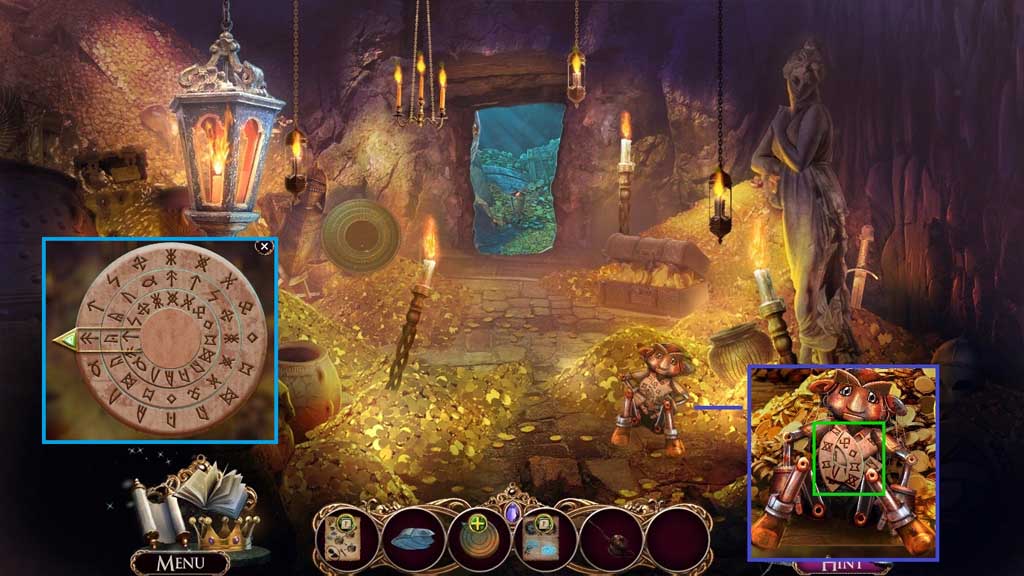
- Select the oil can to lubricate the puppet 6x’s; collect the cipher parts.
- Attach the cipher parts onto the cipher base.
- Arrange the cipher parts correctly to collect the clan cipher.
- Move down 2x’s and go to the left.
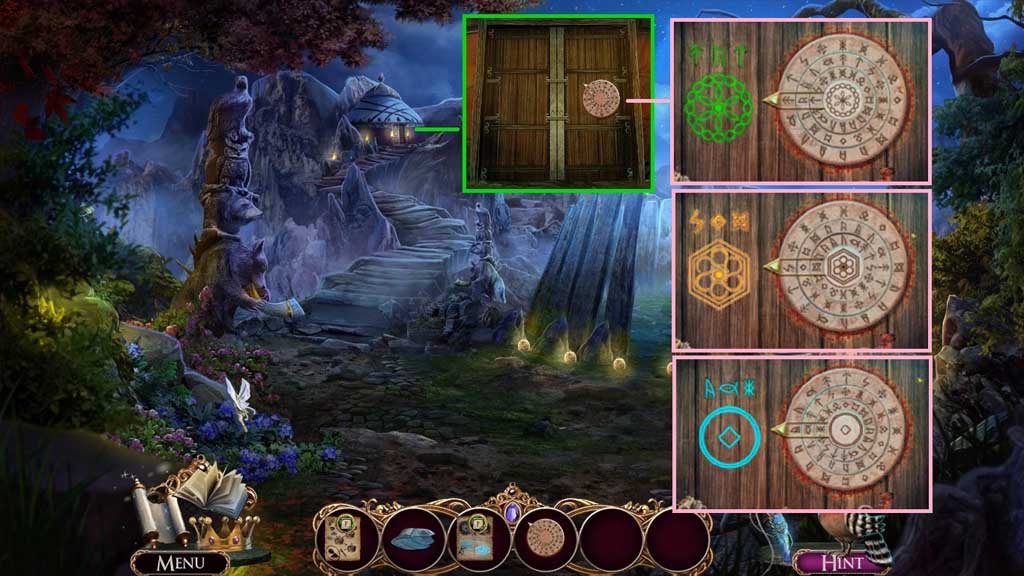
- Insert the clan cipher into the door to trigger a mini game.
- Solve the game by adjusting the cipher to re-create the correct patterns.
- Move ahead.
General Information & Tips
Chapter One: Village View
Chapter Two: Frozen Lake
Chapter Three: Escape
Chapter Four: The Hut
Chapter Five: Tree
Chapter Six: Castle
Ask for help in the comments below!
Chapter One: Village View
Chapter Two: Frozen Lake
Chapter Three: Escape
Chapter Four: The Hut
Chapter Five: Tree
Chapter Six: Castle
Ask for help in the comments below!