
Awakening: Moonfell Wood: Chapter Two: Teardrop Falls
Awakening 2 Moonfell Wood Walkthrough guides you through the game as you help the princess travel through Moonfell Wood. All levels are covered and feature detailed images of the puzzles for when you get stuck.
General Info and Tips
Chapter One: The River
Chapter Two: Teardrop Falls
Chapter Three: The Moonbridge
Chapter Four: Herb Garden
Chapter Five: The Witches Tower
Chapter Six: The Griffins Eyrie
Awakening 2: Der Mondenwald Abschnitt 1
Awakening 2: Der Mondenwald Abschnitt 2
Awakening 2: Der Mondenwald Abschnitt 3
Ask for help in the comments below!
Outside of the Pavilion
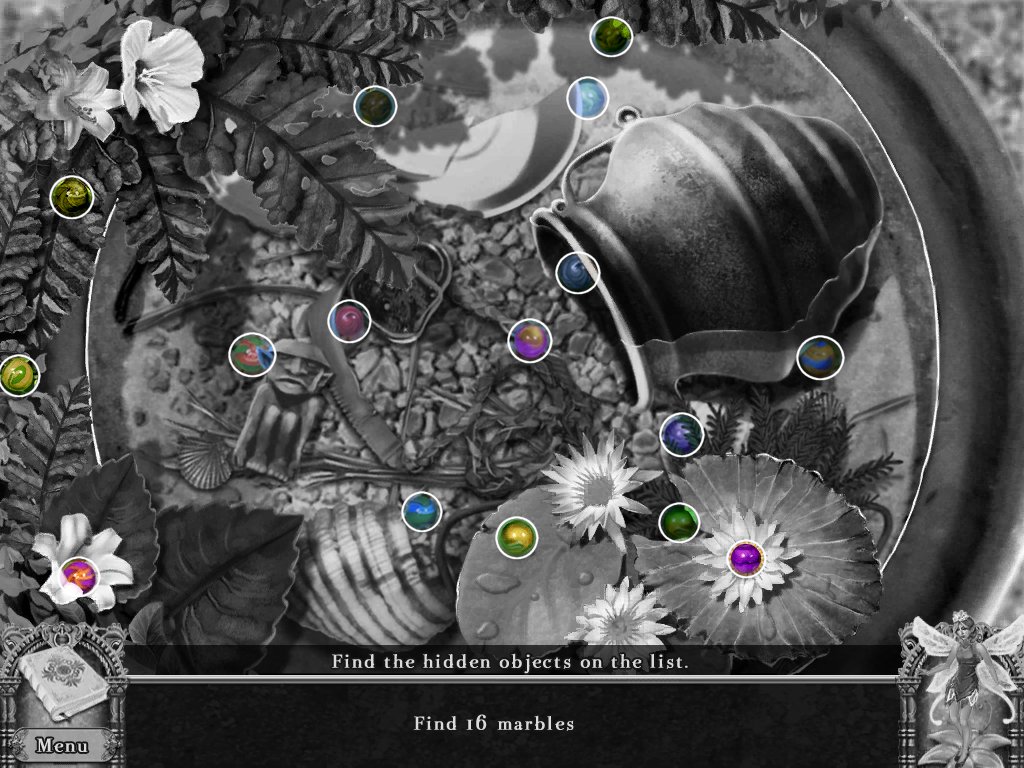
- Examine the fountain – puzzle
- Find sixteen marbles
-
Return to path to overlook
Path to Overlook
- Examine the tree
- Put the oil tap in tree if you haven’t done so already
- Use the empty oil flask on tree
-
Return to cliffside pool
Cliffside Pool
- Use the fishing pole on the brook
-
Return to outside of the pavilion
Outside of the Pavilion

- Examine the cat (Mr. Muffins)
- Feed him the fish
- Examine the envelope
- Take the witches card – puzzle
- Find twelve stars
-
Return to path to the pavilion
Path to the Pavilion
- Examine the lantern
- Use the oil flask on the lantern
- Use the pocket dragon to light the lantern
- Take the lantern
- Hang the lantern back up
- Take the key
- Examine the storage box
- Use the key on the right door
- Take marbles and runes
- Return to outside the pavilion
Outside the Pavilion
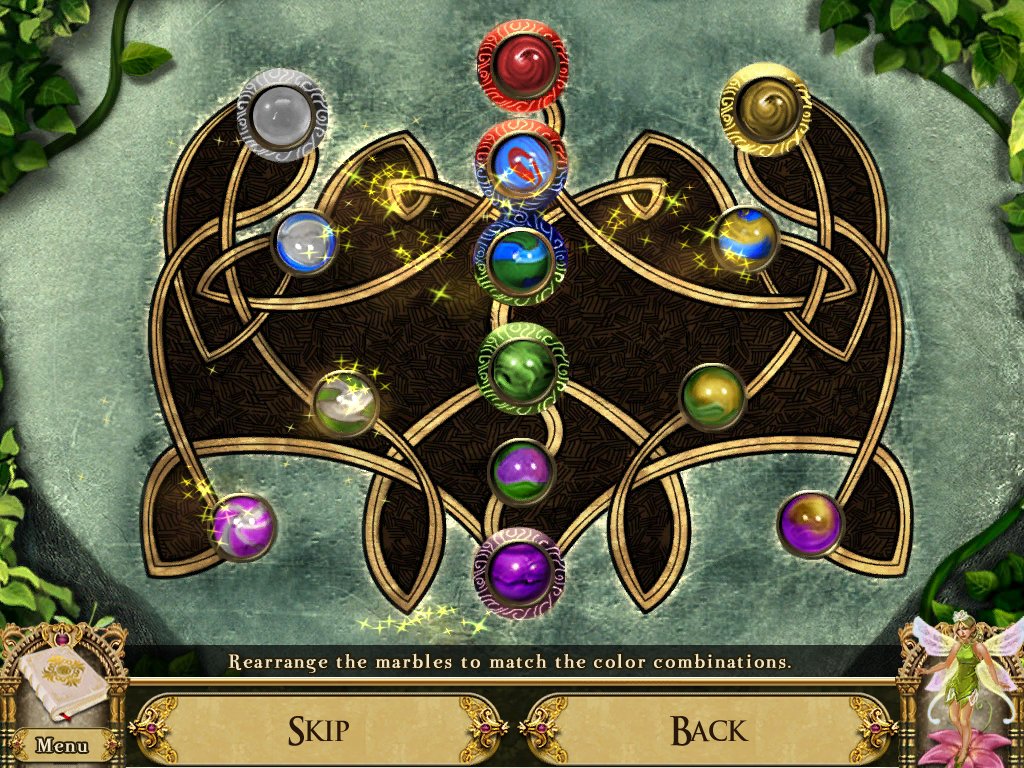
- Examine the pavilion – puzzle
- Use the marbles on the gates
- Rearrange the marbles so they match the colored rings
- The holes without colors match to the upper marbles
- Enter the pavilion
Pavilion
- Take the incense censer
-
Examine the marble stand – puzzle
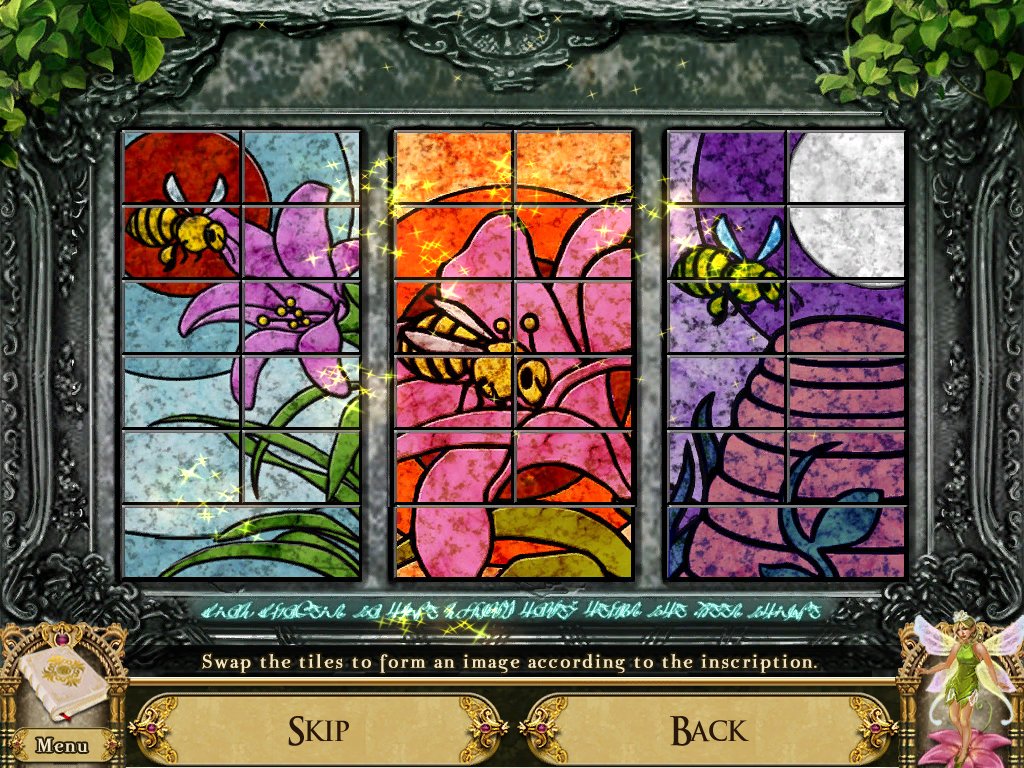
- Read the writing
- "From flower to hive, making honey helps the bees thrive”
- Arrange the tiles according to the riddle
- Take wax knife and smoky incense
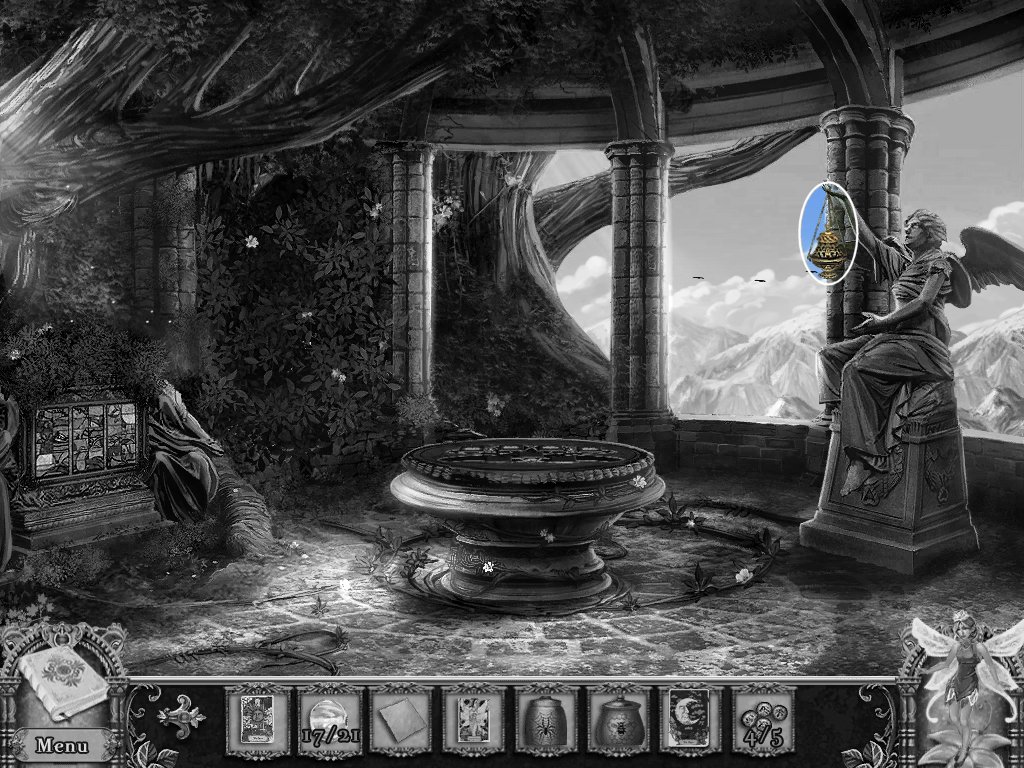
- Examine the stone table
- Place the four cards you’ve found in the top slots
- Take the fairy beads
- Return to path to overlook
Path to Overlook
- Use incense censer on beehive
- Use smoky incense on censer
- Use pocket dragon to light censer
- Use empty honey jar on beehive
- Use wax knife on beeswax
- Return to teardrop falls
Teardrop Falls
- Give the fairy beads to the Fairy Queen
-
Return to outside the pavilion
Outside the Pavilion
- Examine the cat
- Place the letter in the envelope
- Use the wax on the envelope
- Use the pocket dragon to heat the wax
- Use the signet ring on the wax
- Use the blank paper on the tablet
- Use the wooden branch on the paper
- Take the run
-
Return to teardrop falls
Teardrop Falls
- Examine the alcove – puzzle
- Use the runes
- Examine your journal
- Make note of the symbols
- Press the runes in the correct order
- Read them on the paper from left to right
- Take ornate key and stone tile
- Examine the cave
- Use the ornate key to open the gate
- Enter the cave
Waterfall Cave
- Examine the cobweb alcove (right)
- Collect all the spiders (eek!)
- Use the pocket dragon to clear the cobwebs – puzzle
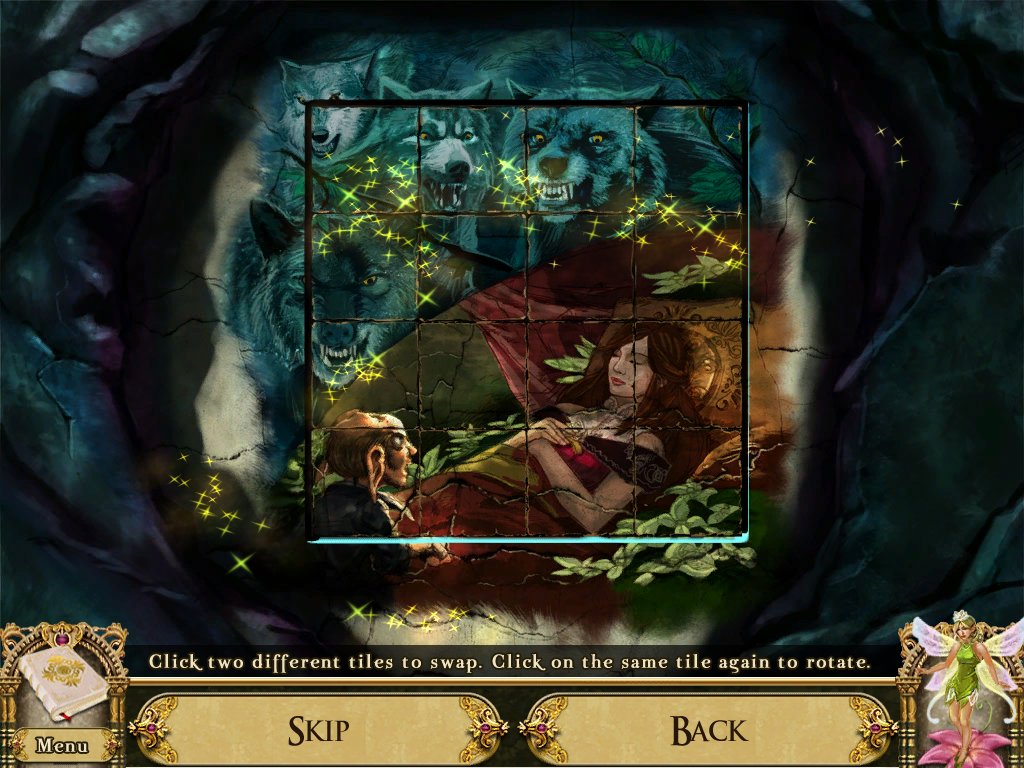
- Swap the pieces to complete the picture
- Click a tile once to rotate it
-
Take the wooden disc
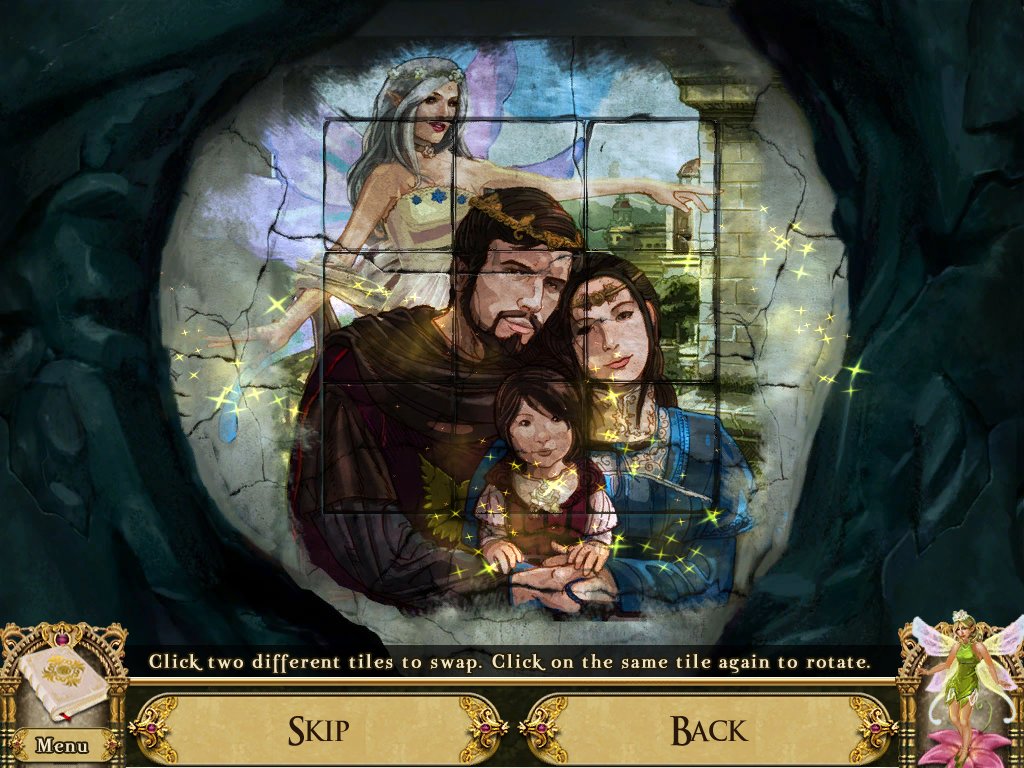
- Examine the middle alcove – puzzle
- Replace the tile
- Swap the pieces to complete the picture
- Click a tile once to rotate it
-
Take the wooden disc
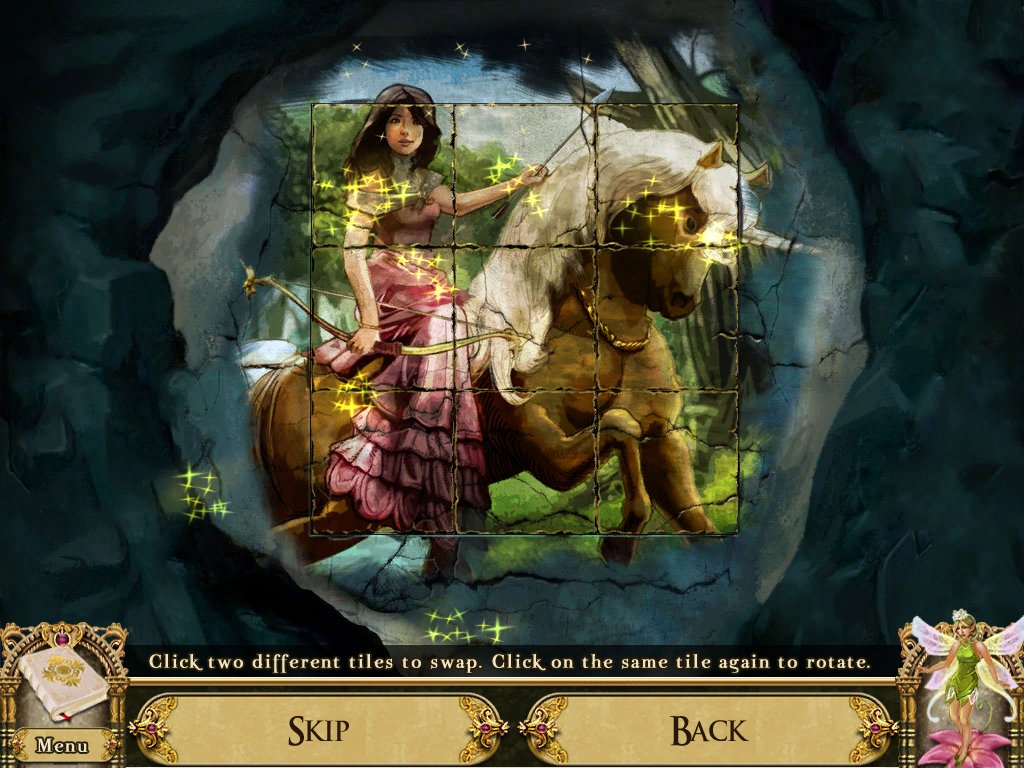
- Examine the left alcove – puzzle
- Swap the pieces to complete the picture
- Click a tile once to rotate it
-
Take the wooden disc
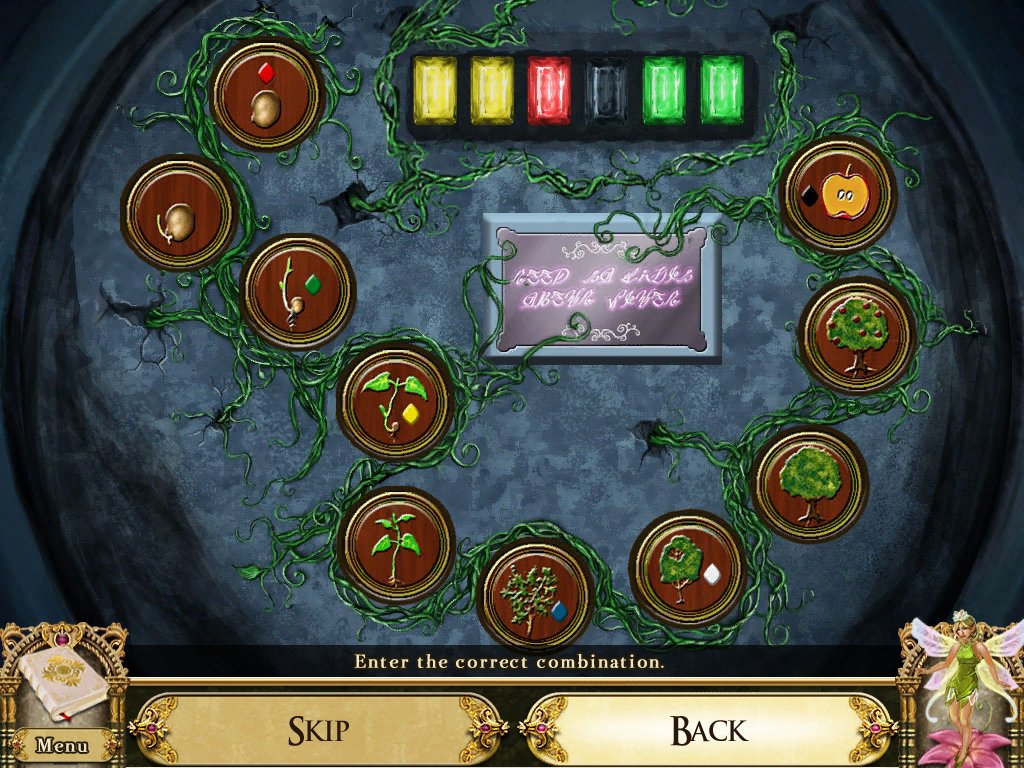
- Examine the portal – puzzle
- Read the writing
- "From seed to spout, a tree grows proud and fruitful”
- Arrange the wooden discs from seed to a full grown tree
- Click the gems to rotate the colors
- Use the wooden discs as a guide to the correct order
- Solution: red, green, yellow, blue, white, black
- Enter portal
Gate of Sun and Moon
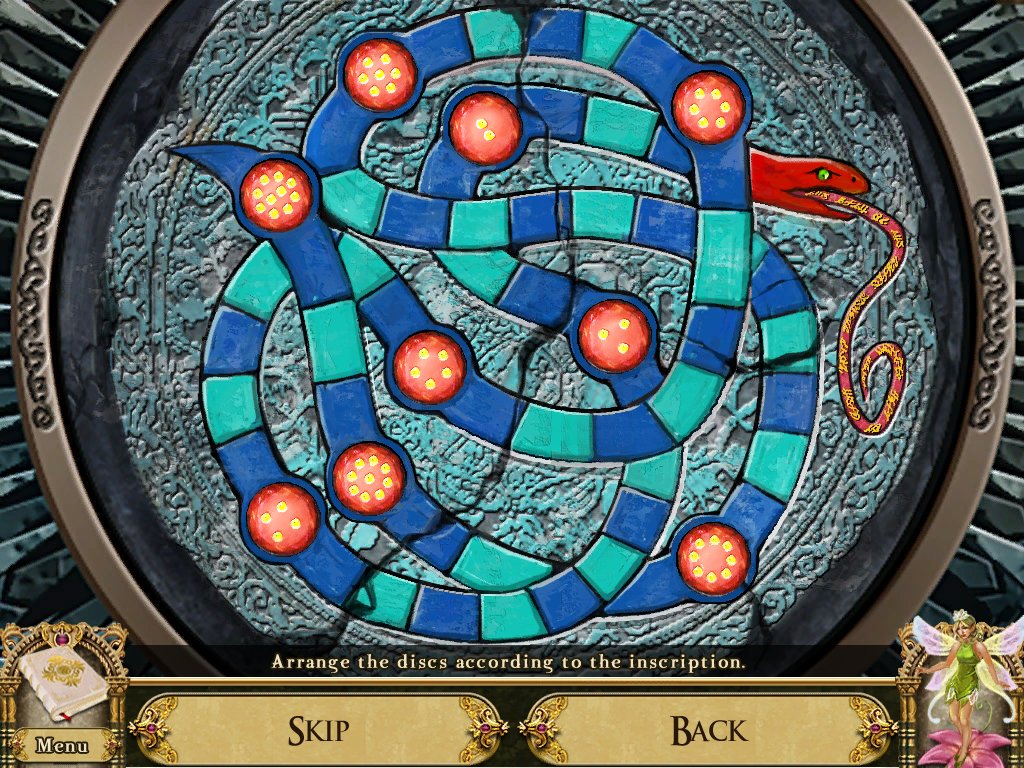
- Examine the gate – puzzle
- Read the writing on the snakes tongue
- "Ten to one, the eye shall open”
- Swap the tiles in order from ten to one along following the snakes body
- Enter the gate
- Exit to overlook
General Info and Tips
Chapter One: The River
Chapter Two: Teardrop Falls
Chapter Three: The Moonbridge
Chapter Four: Herb Garden
Chapter Five: The Witches Tower
Chapter Six: The Griffins Eyrie
Awakening 2: Der Mondenwald Abschnitt 1
Awakening 2: Der Mondenwald Abschnitt 2
Awakening 2: Der Mondenwald Abschnitt 3
Ask for help in the comments below!
Chapter One: The River
Chapter Two: Teardrop Falls
Chapter Three: The Moonbridge
Chapter Four: Herb Garden
Chapter Five: The Witches Tower
Chapter Six: The Griffins Eyrie
Awakening 2: Der Mondenwald Abschnitt 1
Awakening 2: Der Mondenwald Abschnitt 2
Awakening 2: Der Mondenwald Abschnitt 3
Ask for help in the comments below!