
Awakening: Moonfell Wood: Chapter Four: Herb Garden
Awakening 2 Moonfell Wood Walkthrough guides you through the game as you help the princess travel through Moonfell Wood. All levels are covered and feature detailed images of the puzzles for when you get stuck.
General Info and Tips
Chapter One: The River
Chapter Two: Teardrop Falls
Chapter Three: The Moonbridge
Chapter Four: Herb Garden
Chapter Five: The Witches Tower
Chapter Six: The Griffins Eyrie
Awakening 2: Der Mondenwald Abschnitt 1
Awakening 2: Der Mondenwald Abschnitt 2
Awakening 2: Der Mondenwald Abschnitt 3
Ask for help in the comments below!
Herb Garden
- Examine the patch of gourds – puzzle
- Find the matching pairs
-
Take the giant gourd
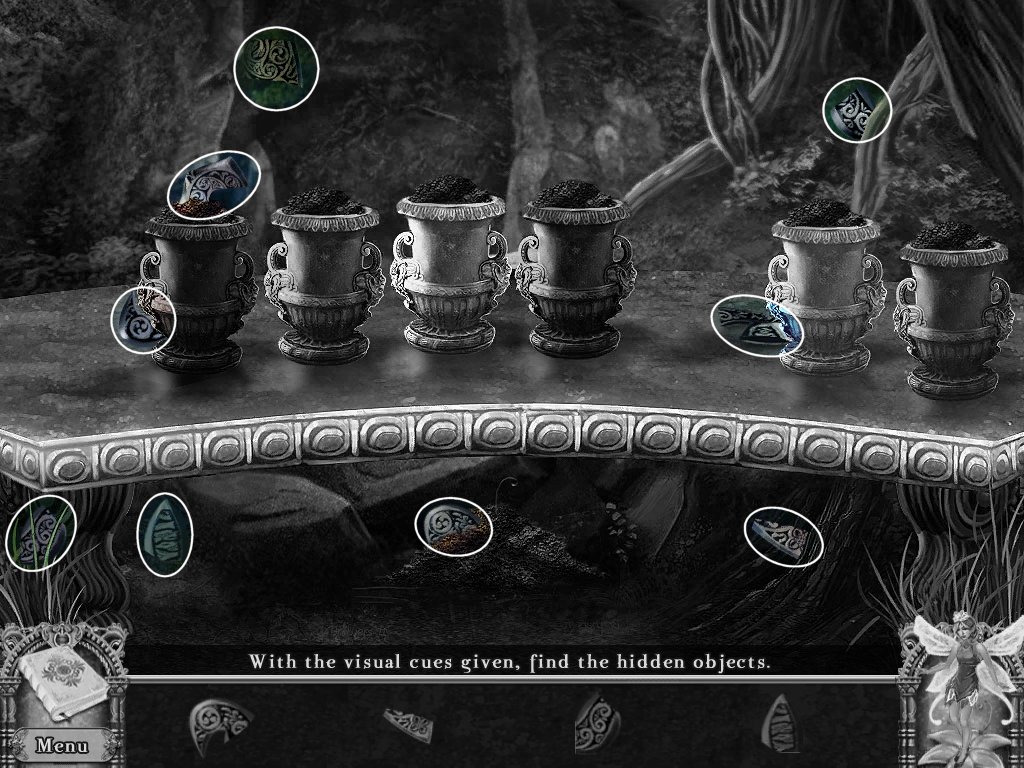
- Examine the flower pots
- Find the pieces shown across the bottom
-
Examine the door – puzzle
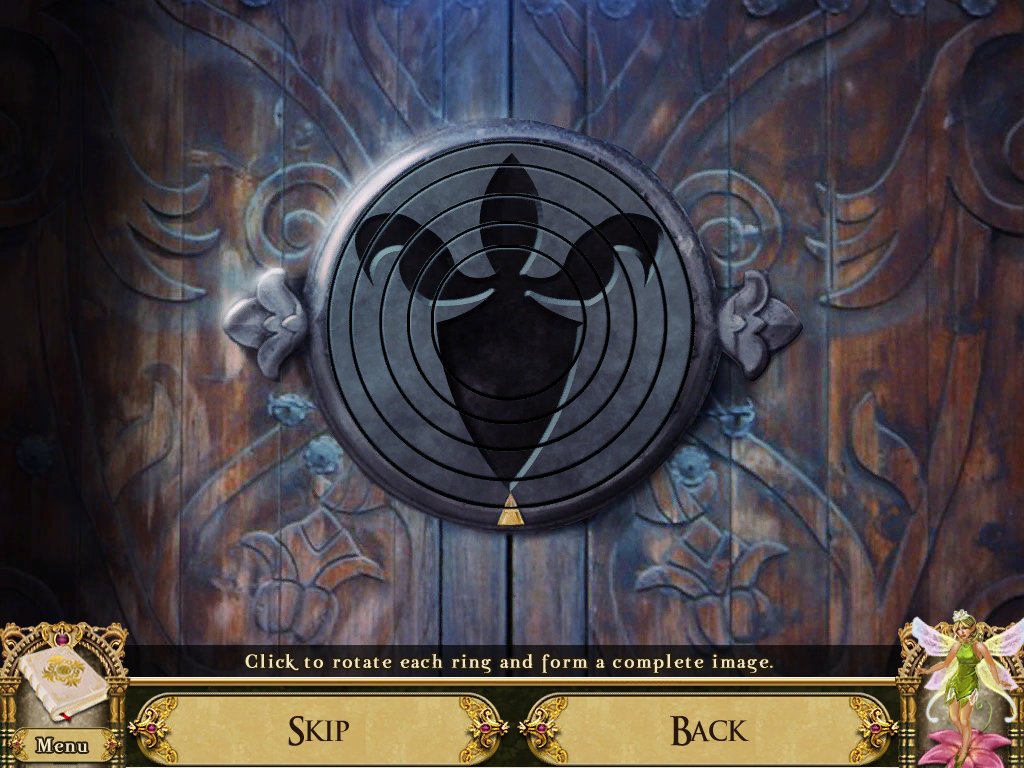
- Rotate the rings to create a picture
-
Use the key pieces on the door
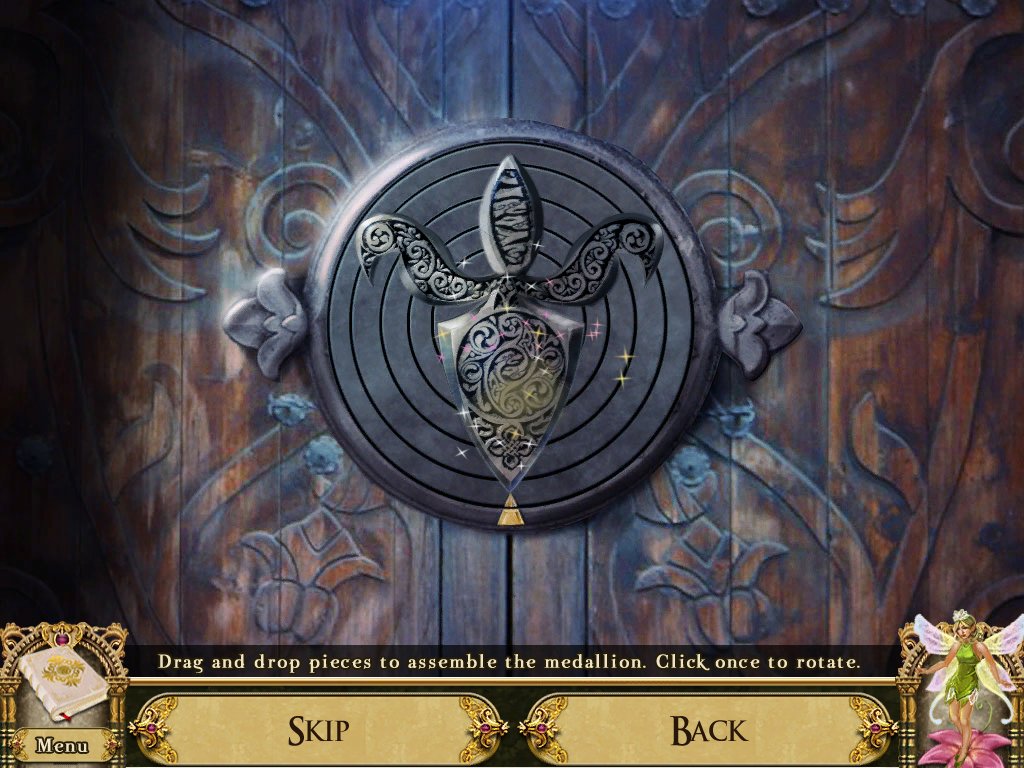
- Use the pieces to fill in the picture
- Enter the tower
Witches Tower – Lower Floor
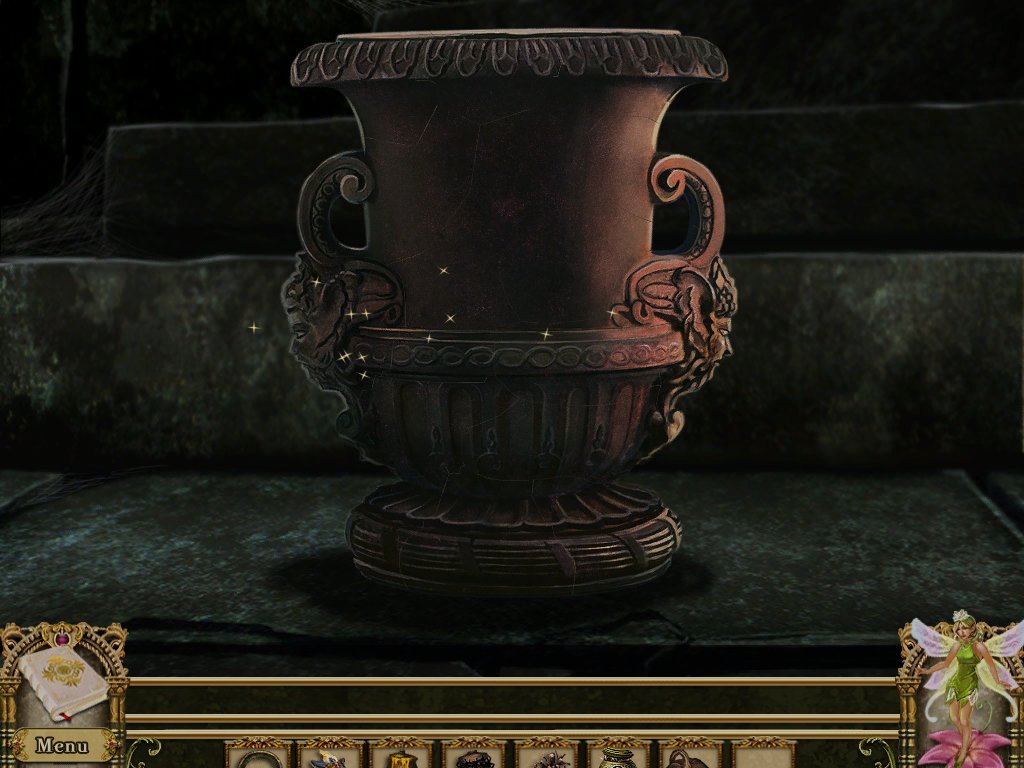
- Examine the broken clay pot - puzzle
- Reassemble the clay pot
-
Click once to rotate
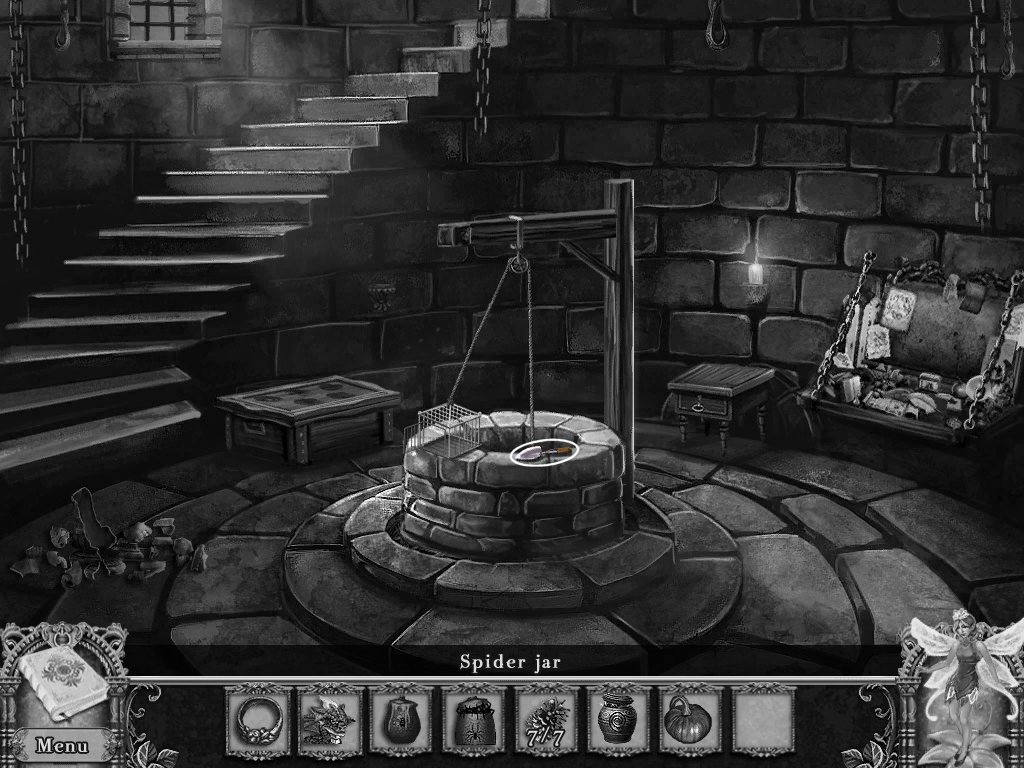
- Take the shovel
- Examine the open chest – hidden object area
- Take the book
- Go down to herb garden
Herb Garden
- Examine the flower pots
- Place the clay pot with the others
- Use the shovel to dig dirt from mound underneath the bench
- Put the dirt in the empty pot
- Continue until it’s full
- Go up to the witches tower and ascend the stairs
Witches Tower – Middle Floor
- Examine the plant
- Take the doorknob
- Examine the bookshelf
- Place the book on the shelf – puzzle
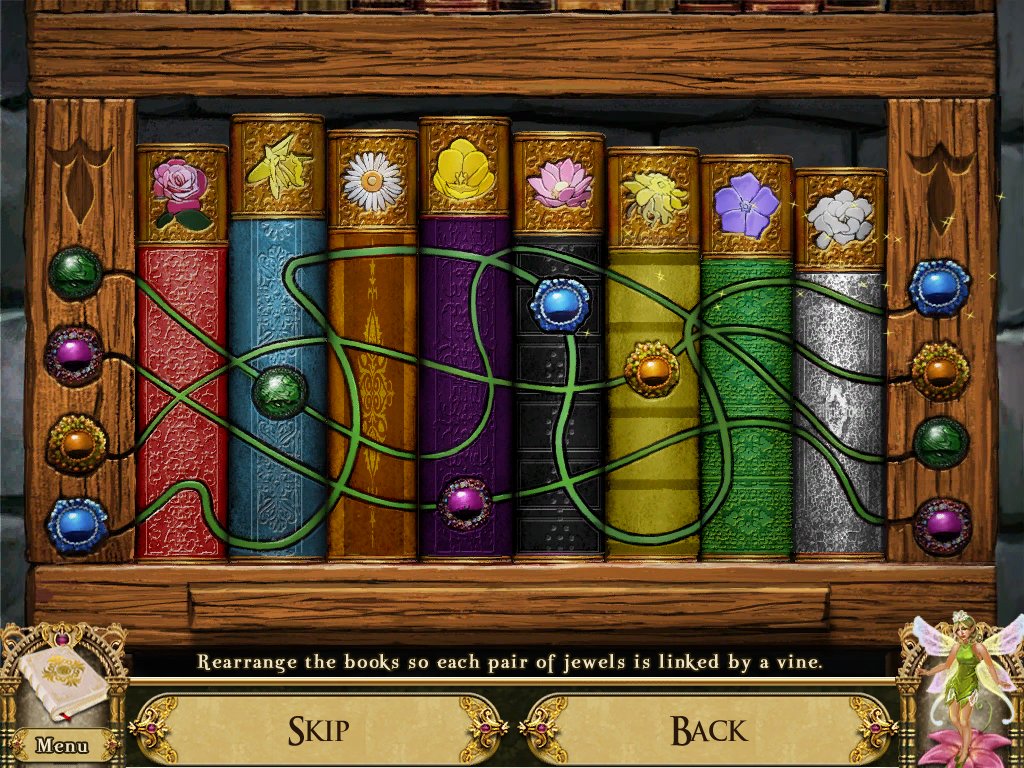
- Rearrange the books so the vines line up
- Return to the herb garden
Herb Garden
- Examine the shed
- Replace the doorknob
-
Open the door – hidden object area
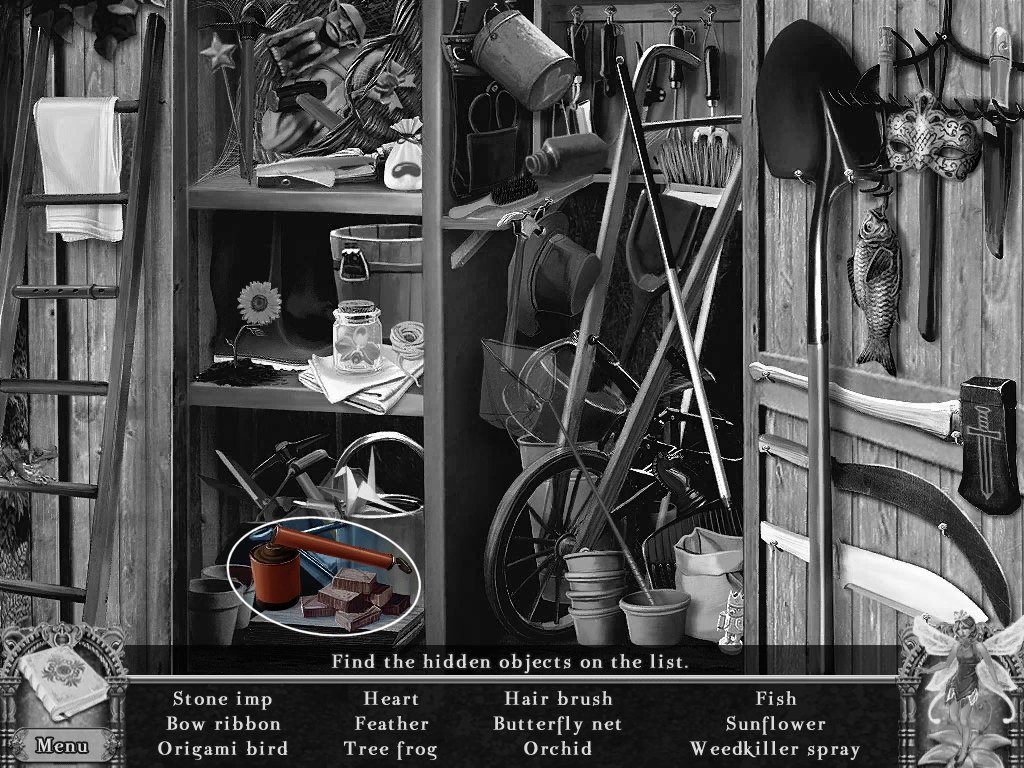
- Take weed killer spray
- Go up to the middle floor
Witches Tower – Middle Floor
- Examine the plant
- Use the weed killer on the plant
- Take the pot
-
Take the witches card

- Find twelve gemstones
- Take the magical beans
- Return to the herb garden
Herb Garden
- Examine the flower pots
- Place the flower pot on the bench
-
Place the magical beans in the flower pots – puzzle
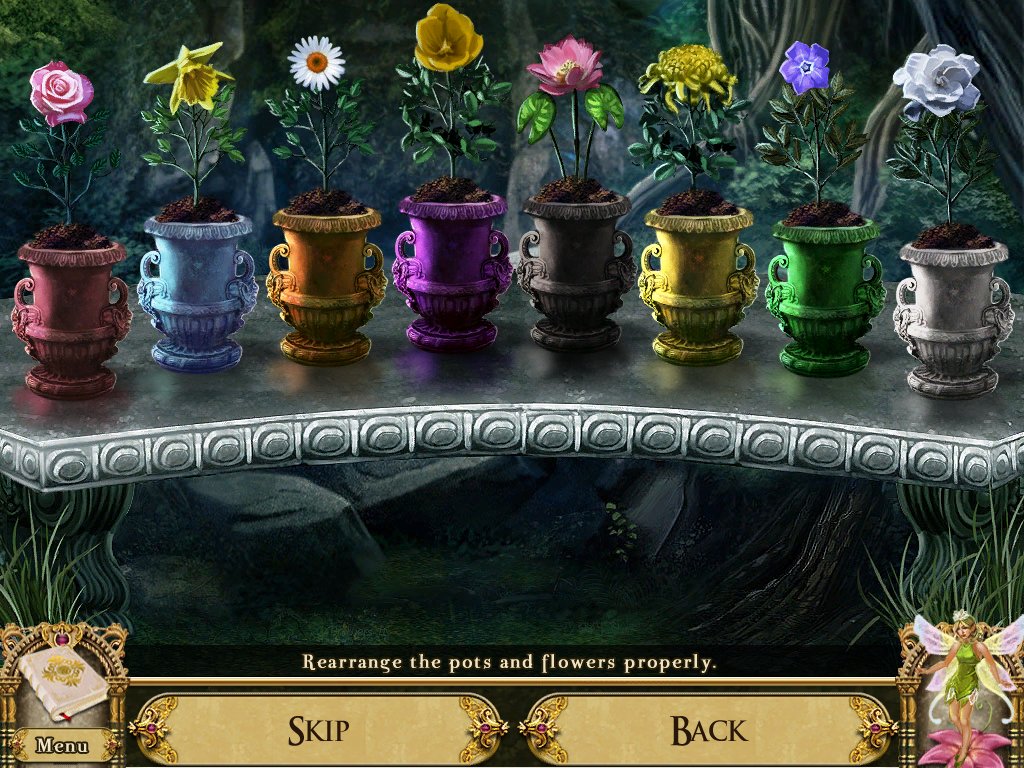
- Look in your journal
- Make a note of the order of the books colors
- Arrange the pots in the same order
- Make a note of the order of the flowers on the top of the books
- Arrange the pots according to the order of those flowers
- Take the gems
- Go up to the middle floor
Witches Tower – Middle Floor
- Examine the left picture
-
Place the rose gem in the top – puzzle
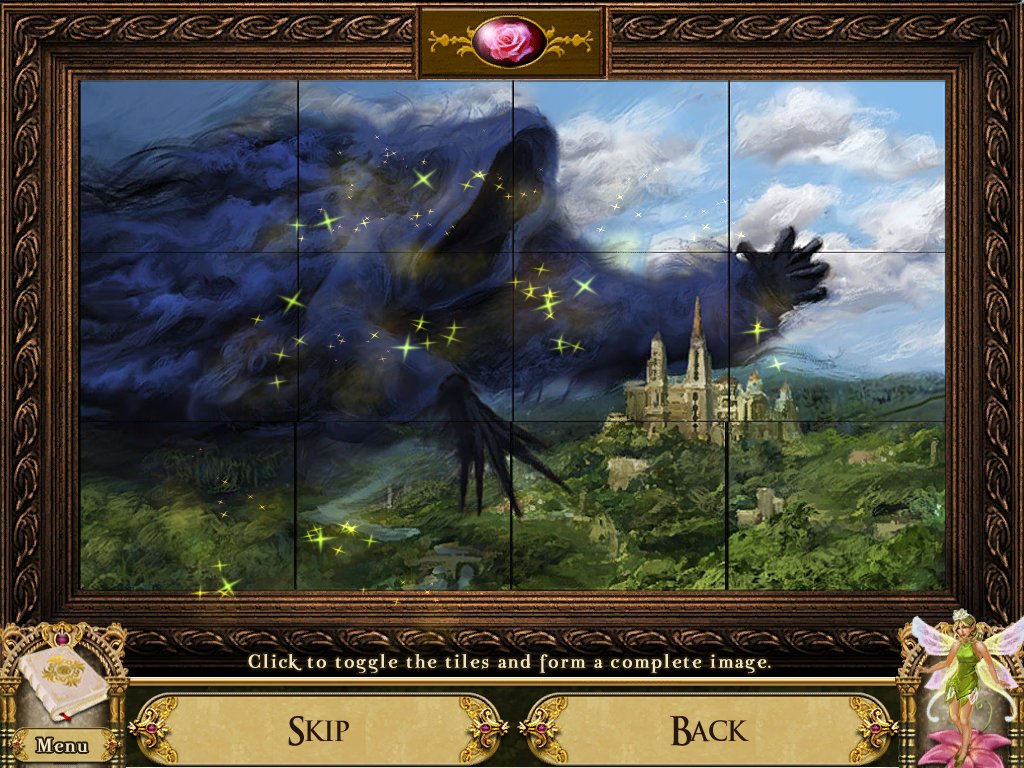
- Click the tiles to toggle them
- Toggle each tile until you complete the picture
- Take the rotary dials
- Push the red button
- Examine the next picture
-
Place the amethyst gem in the top – puzzle
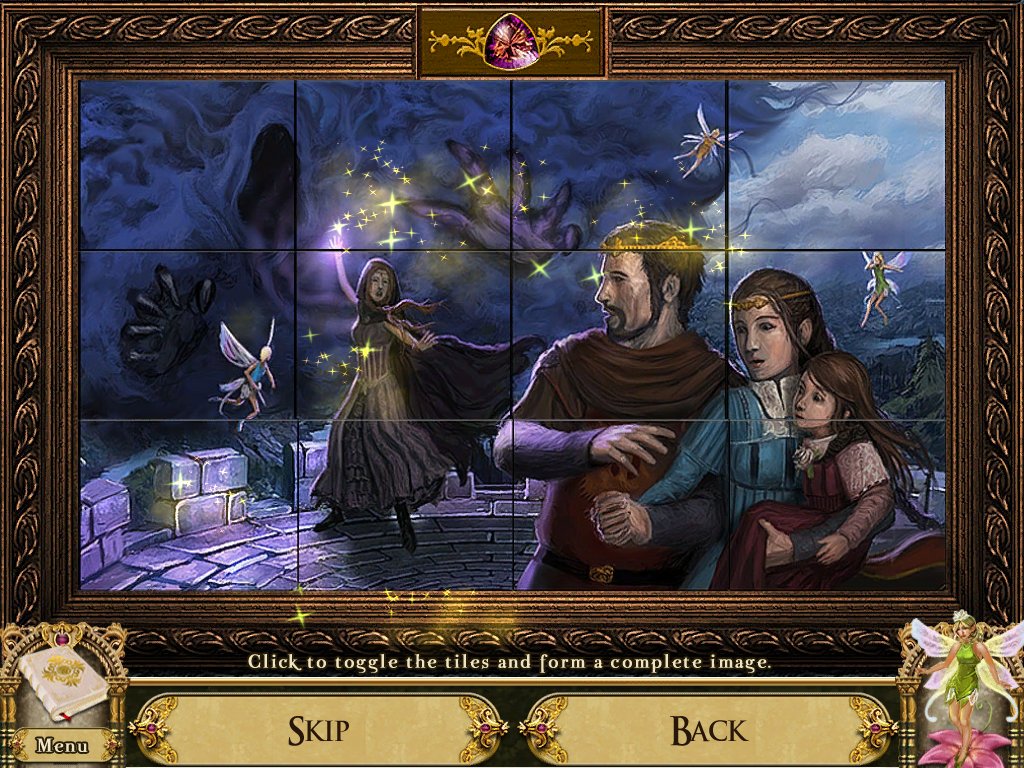
- Click the tiles to toggle them
- Toggle each tile until you complete the picture
- Take the rotary dials
- Push the blue button
- Examine the next picture
-
Place the citrine gem in the top – puzzle
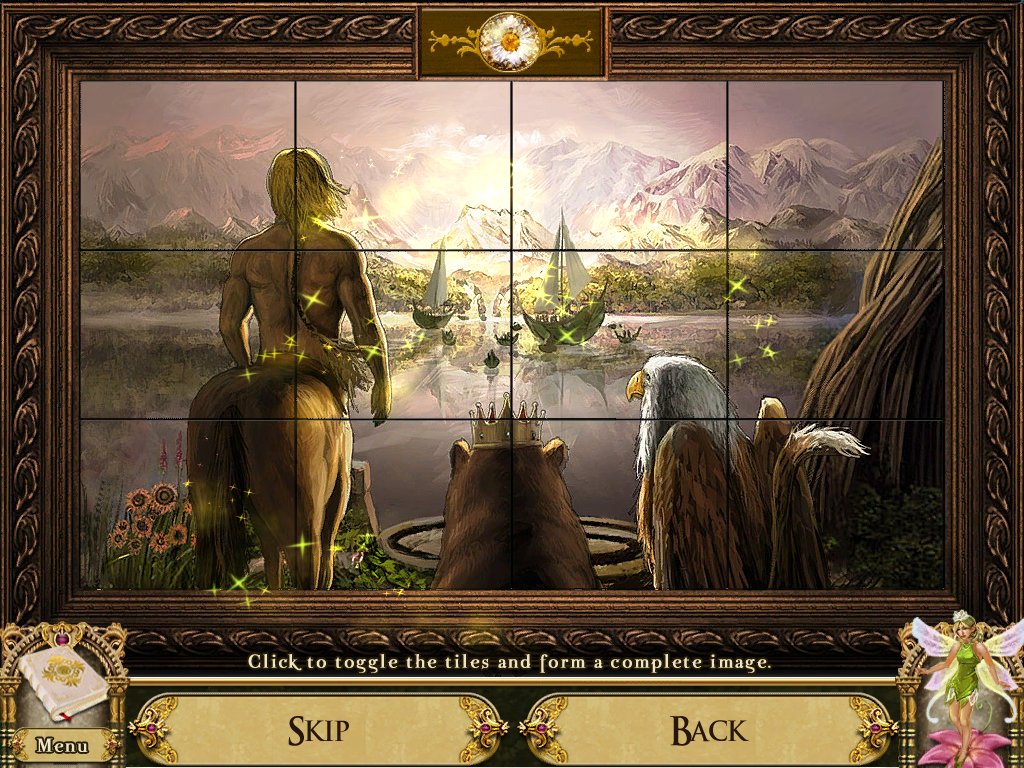
- Click the tiles to toggle them
- Toggle each tile until you complete the picture
- Take the rotary dials
- Push the yellow button
- Examine the last picture
-
Place the sapphire gem in the top – puzzle
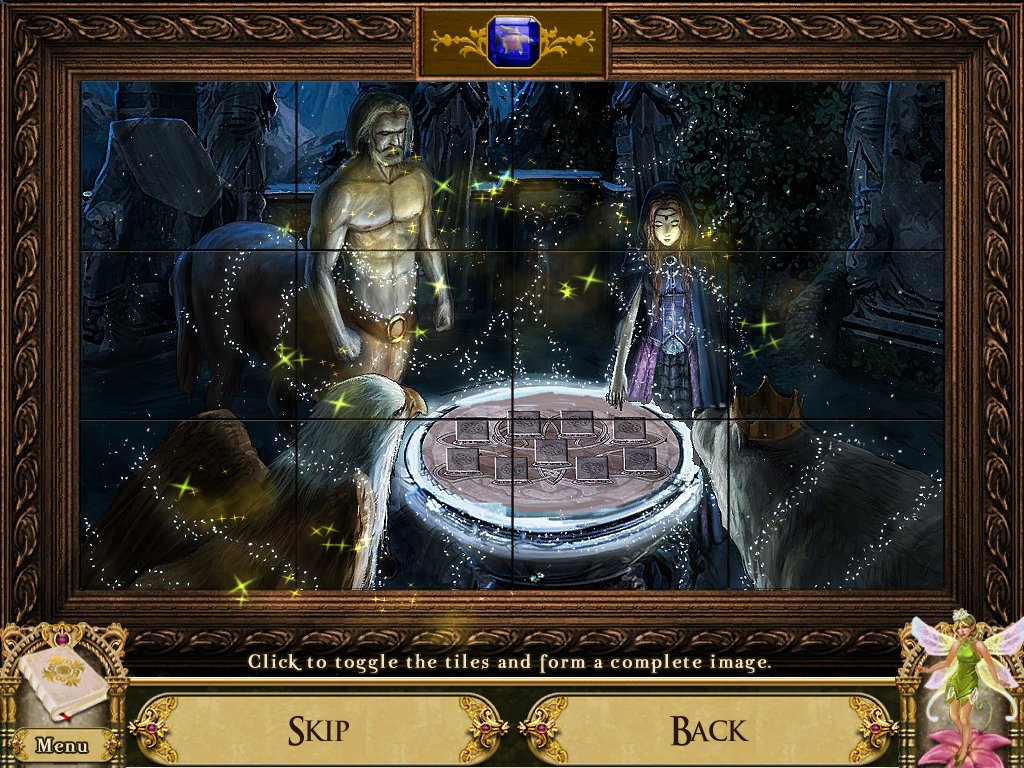
- Click the tiles to toggle them
- Toggle each tile until you complete the picture
- Take the rotary dials
- Push the green button
- Return to the pavilion
Pavilion
- Examine the stone table
- Place the card in the slot
- Take the disc of sun and moon
- Go up to the middle floor
Witches Tower – Middle Floor
- Examine the wrought gate
- Place the disc in the middle
- Push the disc
- Go up to the upper floor
Witches Tower – Upper Floor
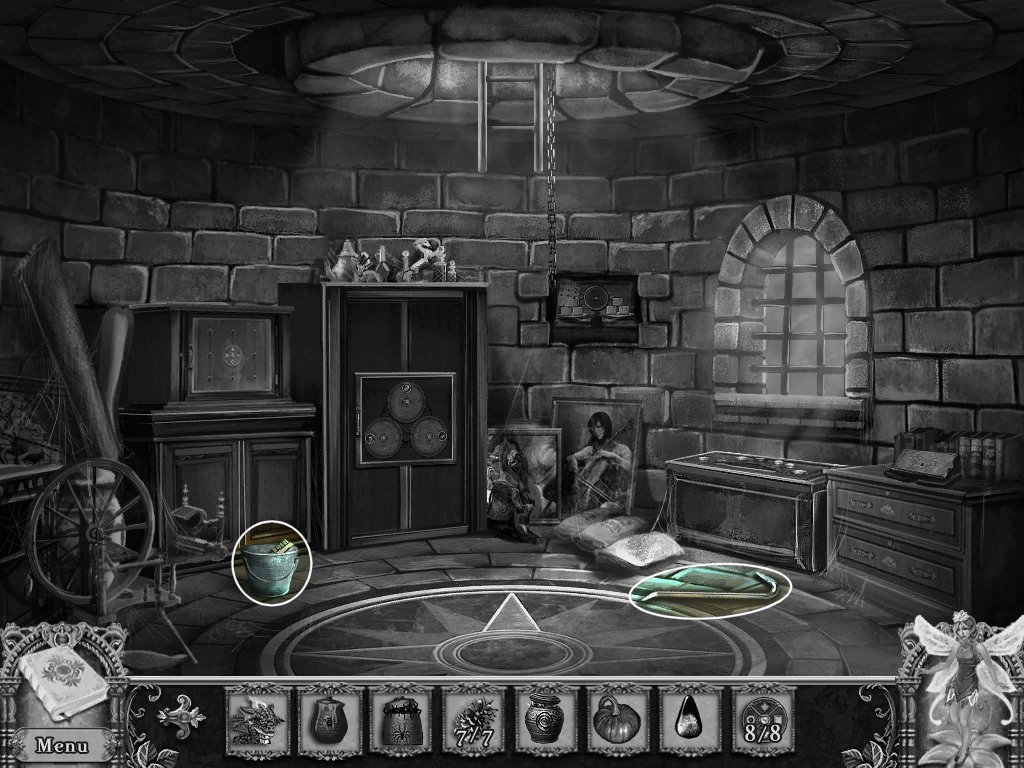
- Take the crowbar
- Examine the bucket
- Take the wire brush and oil can
- Examine the cabinet
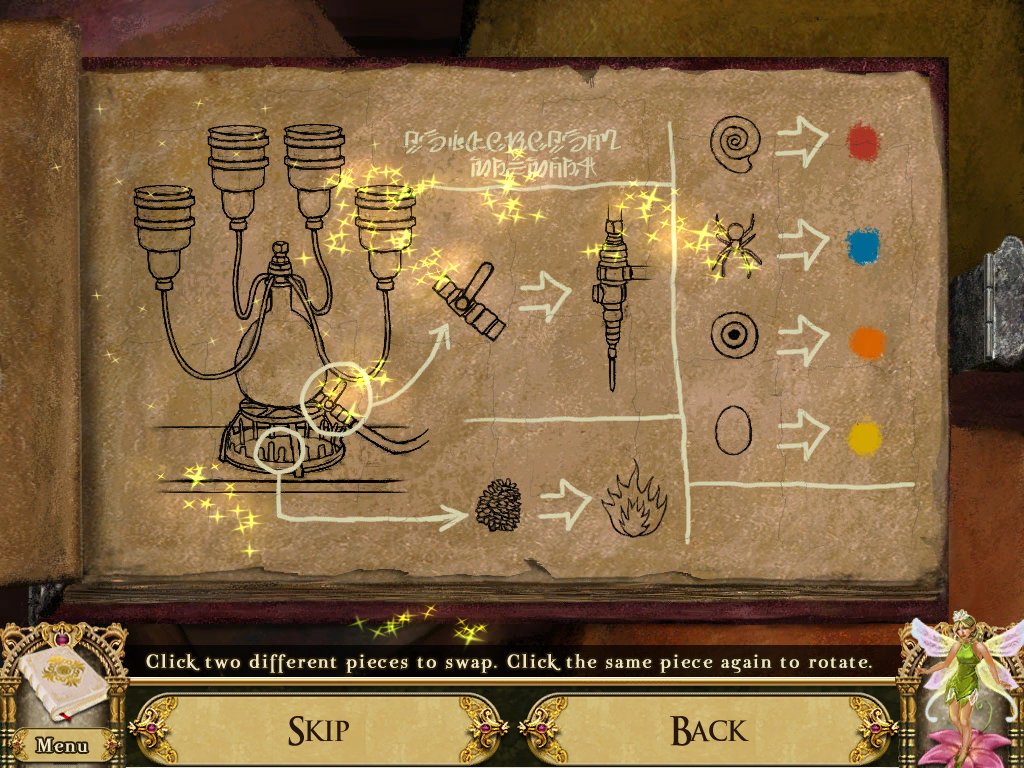
-
Open the cabinet door - puzzle

- Place the rotary dials on the door
-
Swap and rotate the dials so the symbols match each other
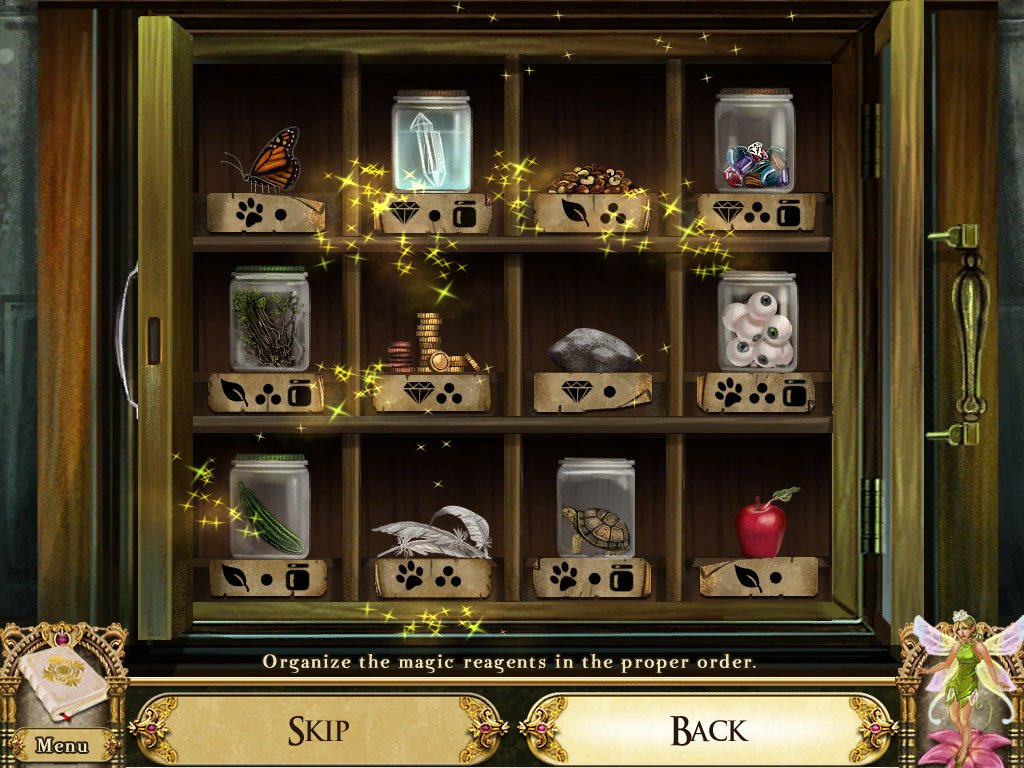
- Organize the magical elements
- Use the symbols beneath them as clues
- Guide: paw = animal/insect; gem = gem/rocks; leaf = plant/food; one dot = single item; three dots = multiple items; jar = item is in a jar
- Take jar of eyes
-
Examine the weights – puzzle
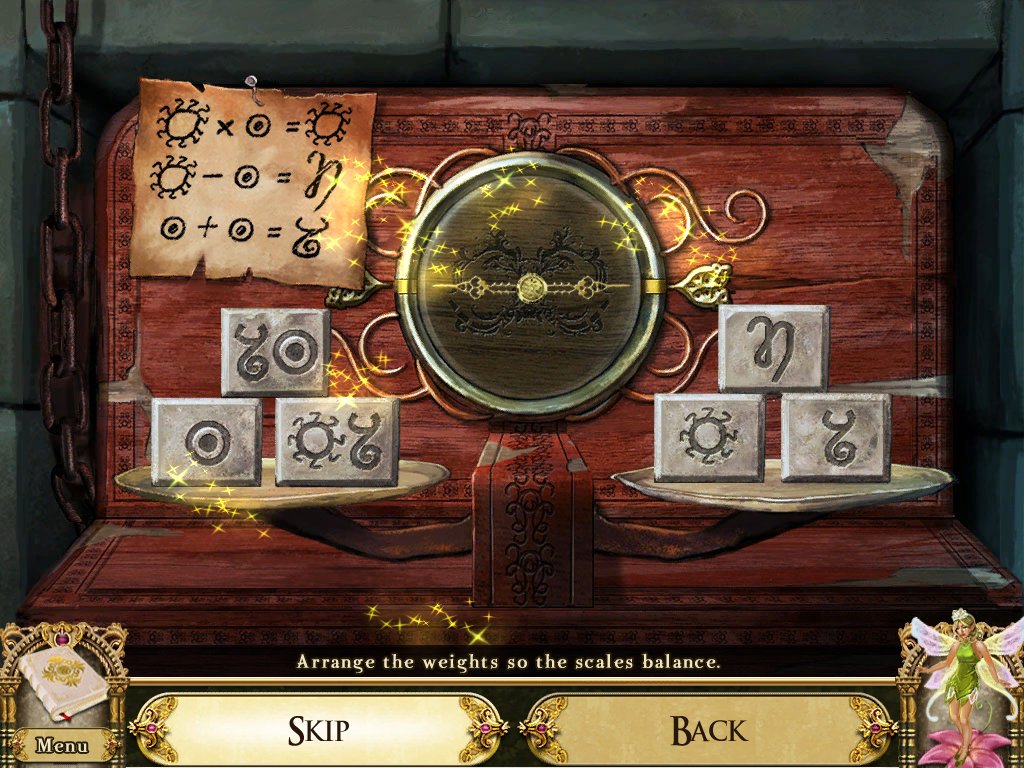
- Arrange the weights so the scales balance
-
Examine the grimoire – puzzle
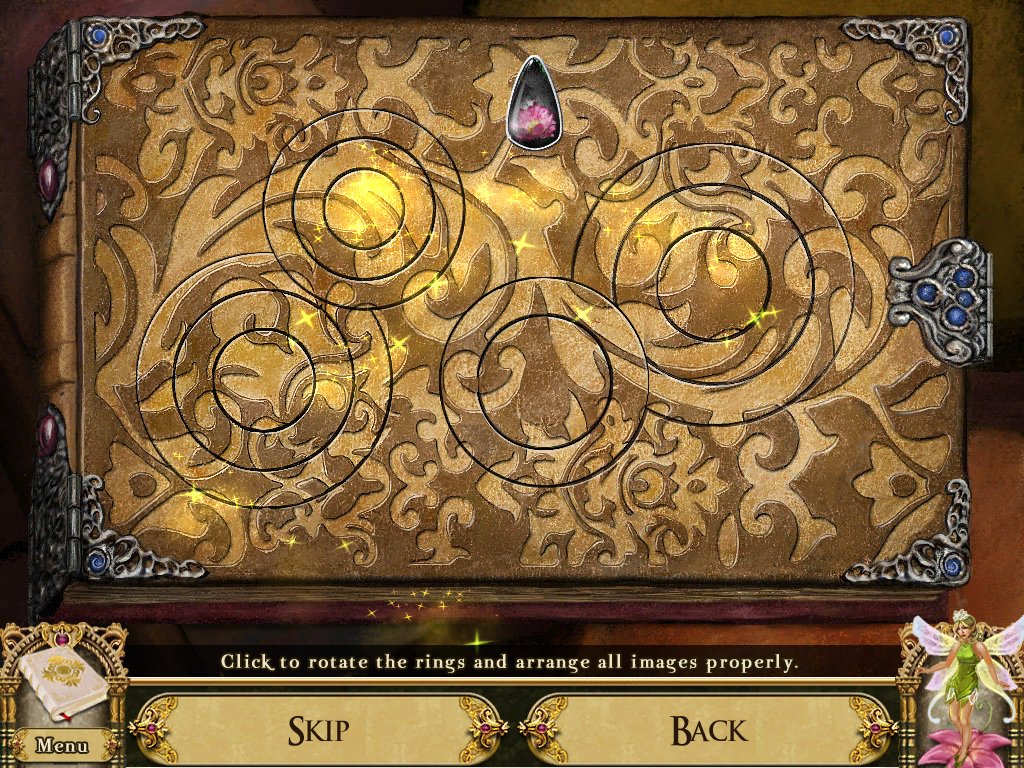
- Place the black gem in the top
-
Rotate the dials to create the pattern
- Swap and rotate the pieces to complete the diagram
- Go up into the ventilation shaft
Ventilation Shaft
- Examine the birds nest
- Take the birdseed and birds egg
- Examine the window
- Use the crowbar on the boards
- Enter the rooftop
Witches Tower – Rooftop
- Talk to the Mysterious Goblin
- Take the twilight gem
- Examine the towers edge
- Drop the giant gourd off the edge
- Go down to the herb garden
General Info and Tips
Chapter One: The River
Chapter Two: Teardrop Falls
Chapter Three: The Moonbridge
Chapter Four: Herb Garden
Chapter Five: The Witches Tower
Chapter Six: The Griffins Eyrie
Awakening 2: Der Mondenwald Abschnitt 1
Awakening 2: Der Mondenwald Abschnitt 2
Awakening 2: Der Mondenwald Abschnitt 3
Ask for help in the comments below!
Chapter One: The River
Chapter Two: Teardrop Falls
Chapter Three: The Moonbridge
Chapter Four: Herb Garden
Chapter Five: The Witches Tower
Chapter Six: The Griffins Eyrie
Awakening 2: Der Mondenwald Abschnitt 1
Awakening 2: Der Mondenwald Abschnitt 2
Awakening 2: Der Mondenwald Abschnitt 3
Ask for help in the comments below!