
Amusement World!: Chapter Three: Plunder Island
Allow our Amusement World! Walkthrough to be your personal navigator as you explore four magical, fun-filled lands in this delightful, family-friendly game. Amusement World! is packed full of puzzles, games, and hidden object scenes that provide a truly sensational trip down memory lane featuring games like skee-ball, darts, and target shooting, as well as tons of hidden object scenes to please even the most hardcore HOG fan. Our comprehensive Amusement World! Walkthrough offers plenty of tips, advice, and solutions to all games, puzzles, and hidden object areas to help you make the most of your gameplay.
Chapter One: Whimsy Wonders
Chapter Two: Titanopolis
Chapter Three: Plunder Island
Chapter Four: Haunted Grove
Ask for help in the comments below!
Quest 9: The Pillory
Step 1: Find the Clue Envelope
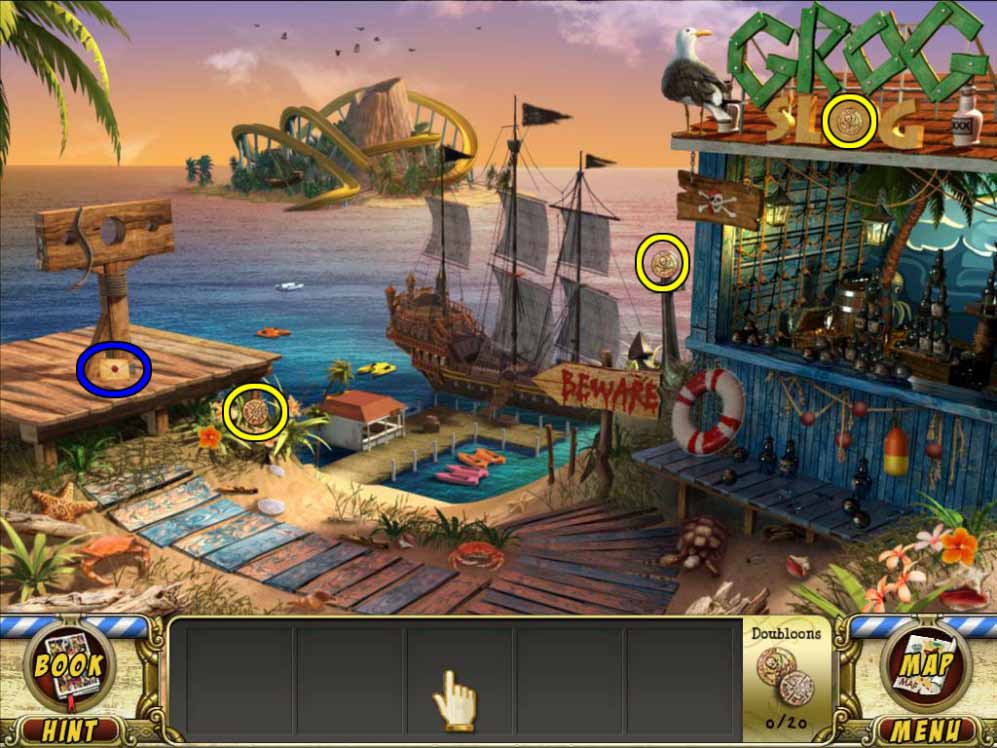
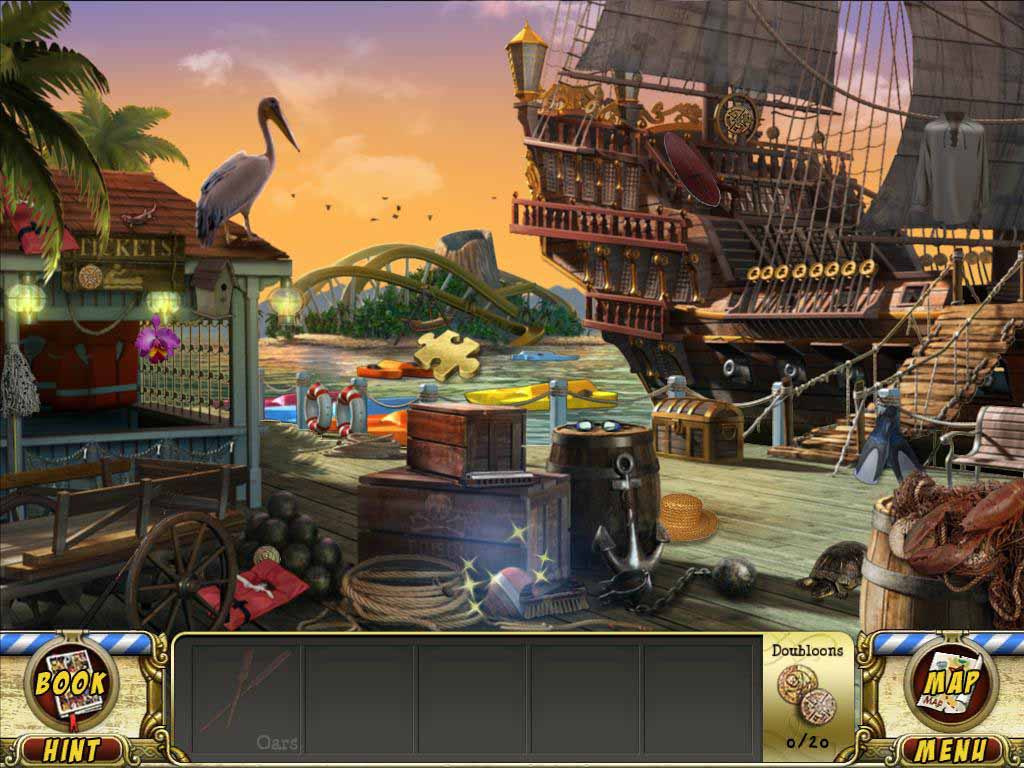
Following the opening cinematic, locate the Clue Envelope found at the base of the Pillory in the Harbor Entrance. Click on the shining Pillory to proceed. There are 3 Doubloons found within this scene.
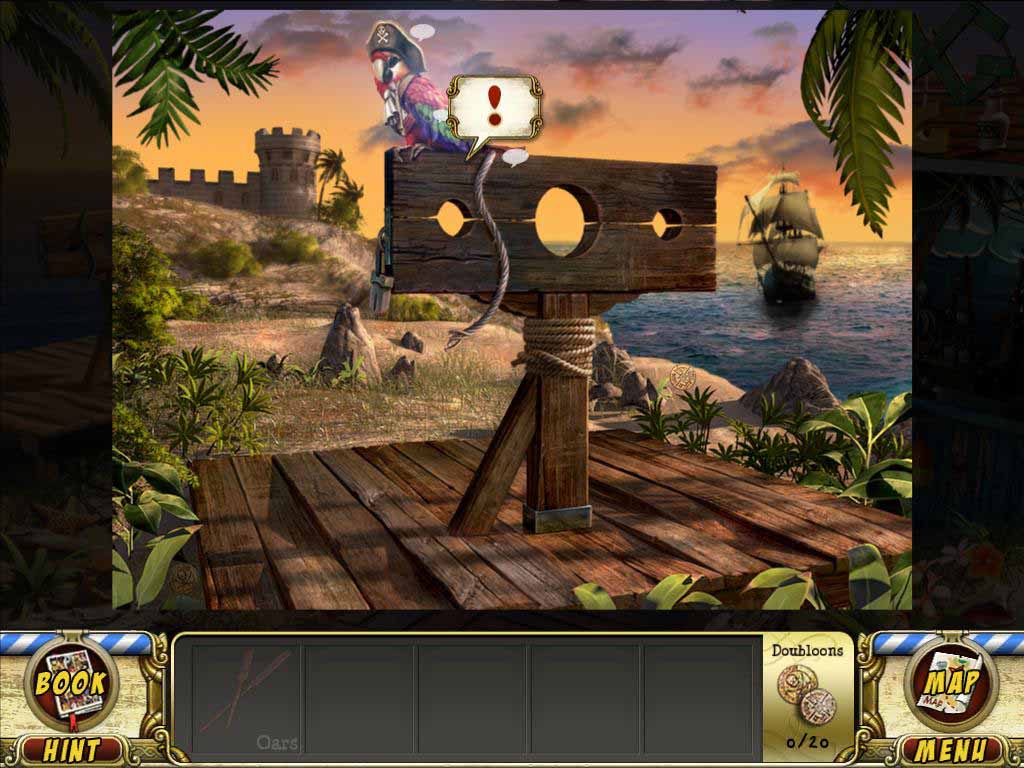
Step 2: Speak to Parrot
Talk with the Parrot. He advises that you must first go to the Marina in order to then reach Plunder Island. Go to the Marina. There are 2 Doubloons found within this scene.

Step 3: Complete Marina HOS
These objects comprise the first possible list of hidden items in the Marina HOS. There are 3 Doubloons found within this scene.
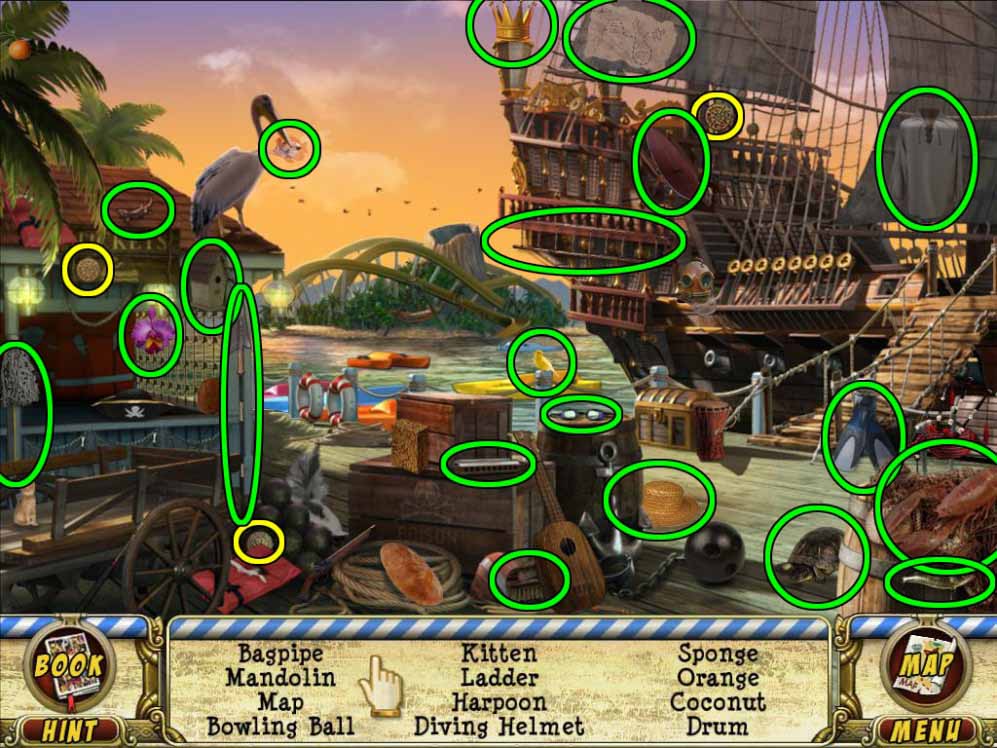
These objects comprise the second possible list of hidden items in the Marina HOS.
Step 4: Return to Parrot
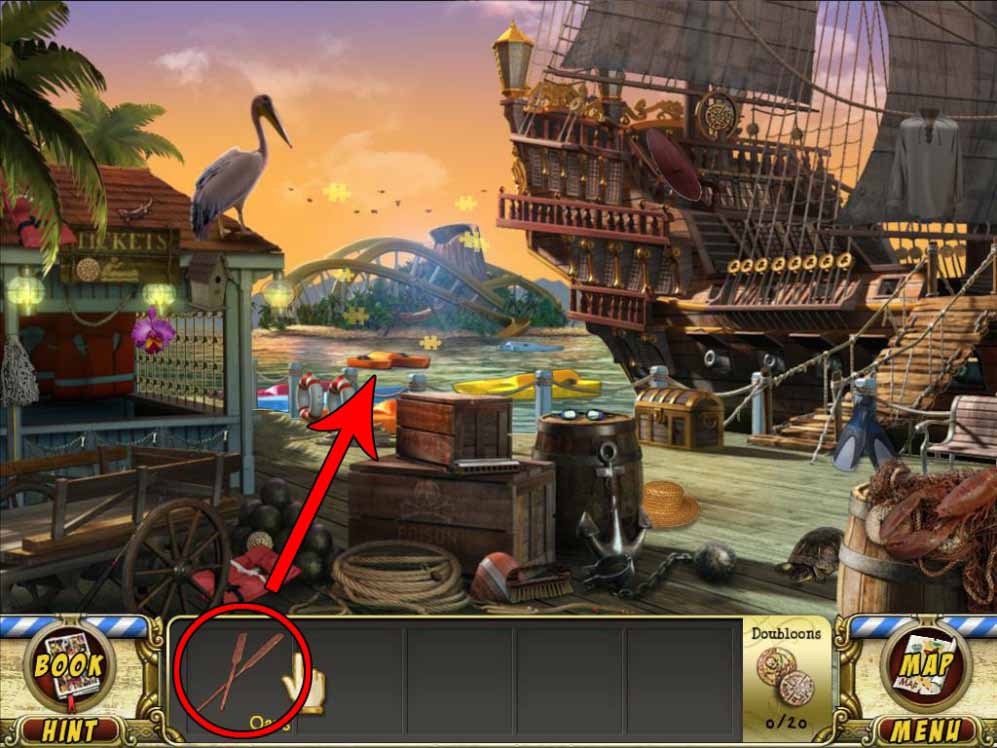
A boat is needed to travel to Plunder Island. There is one available, but the Oars are missing. Go back to the Harbor Entrance.
Select the Speech Balloon to talk with the Parrot, who asks you to find him a companion in order for him to help you.
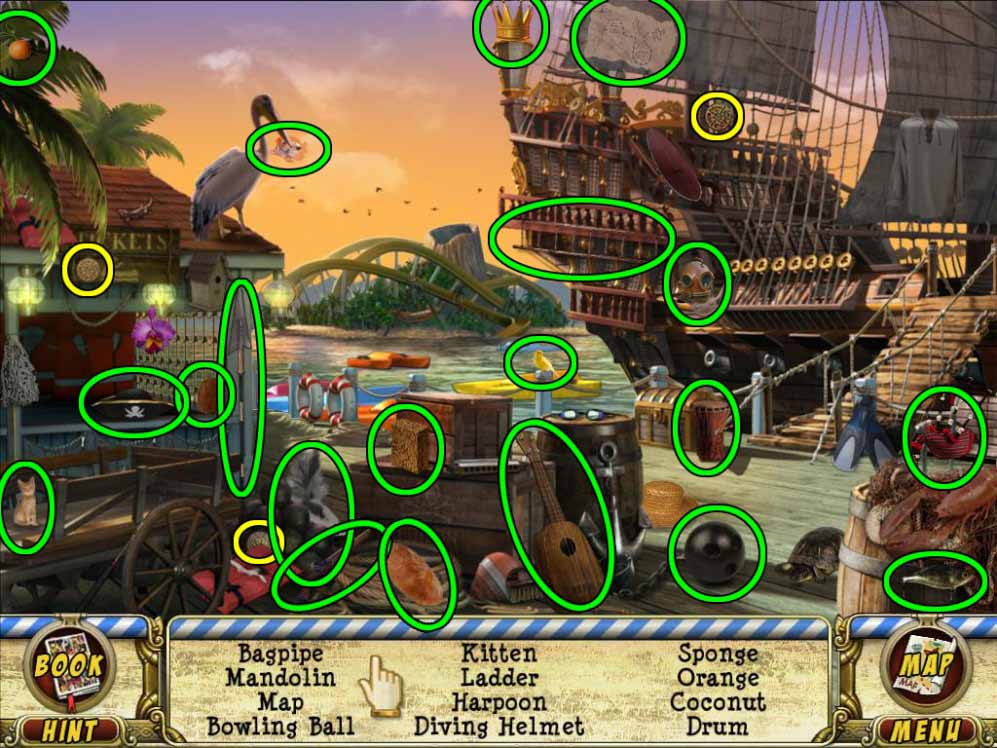
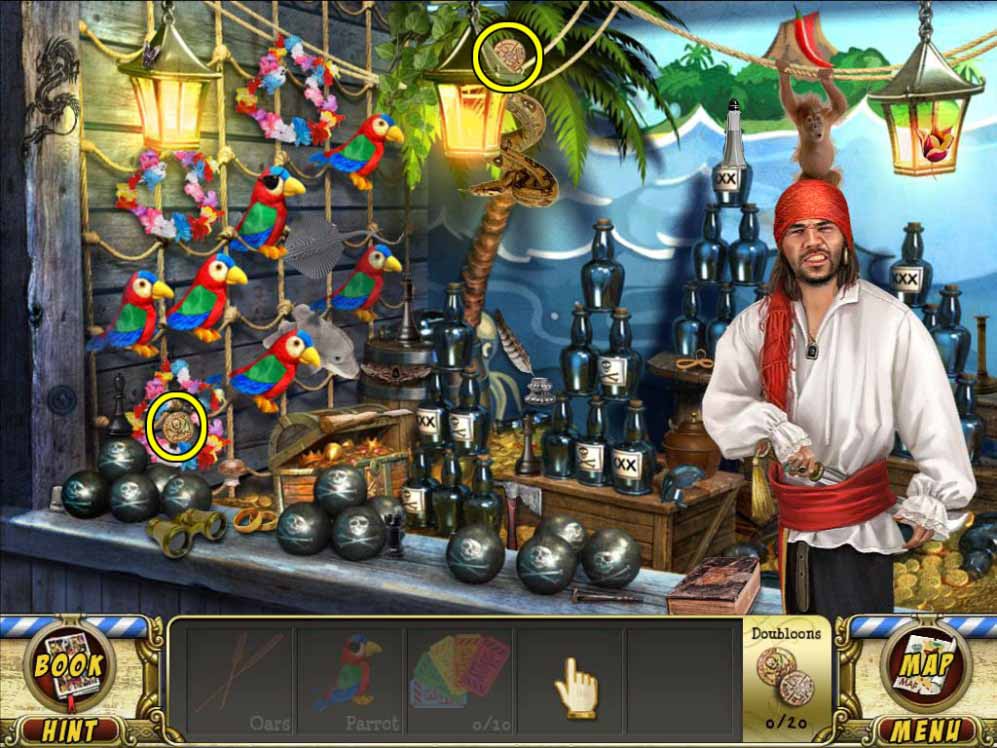
Step 5: Talk to Grog Slog Operator
Go to the Grog Slog booth. Speak with the Pirate to initiate his quest of finding 10 Tickets. There are 2 Doubloons found within this scene.
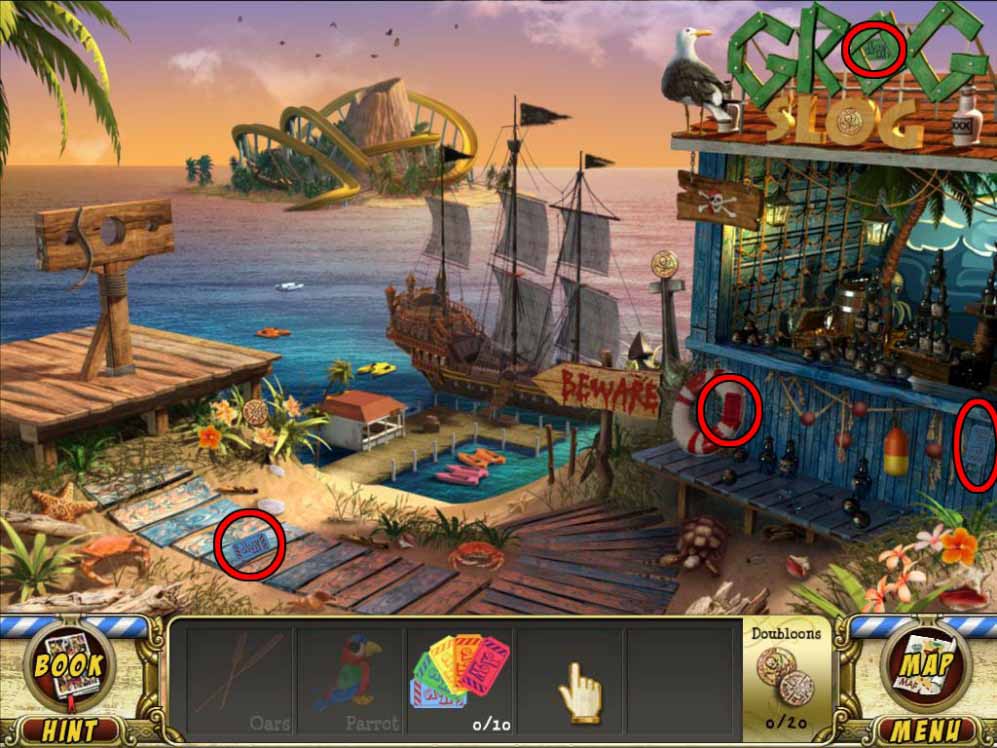
Step 6: Collect 10 Tickets
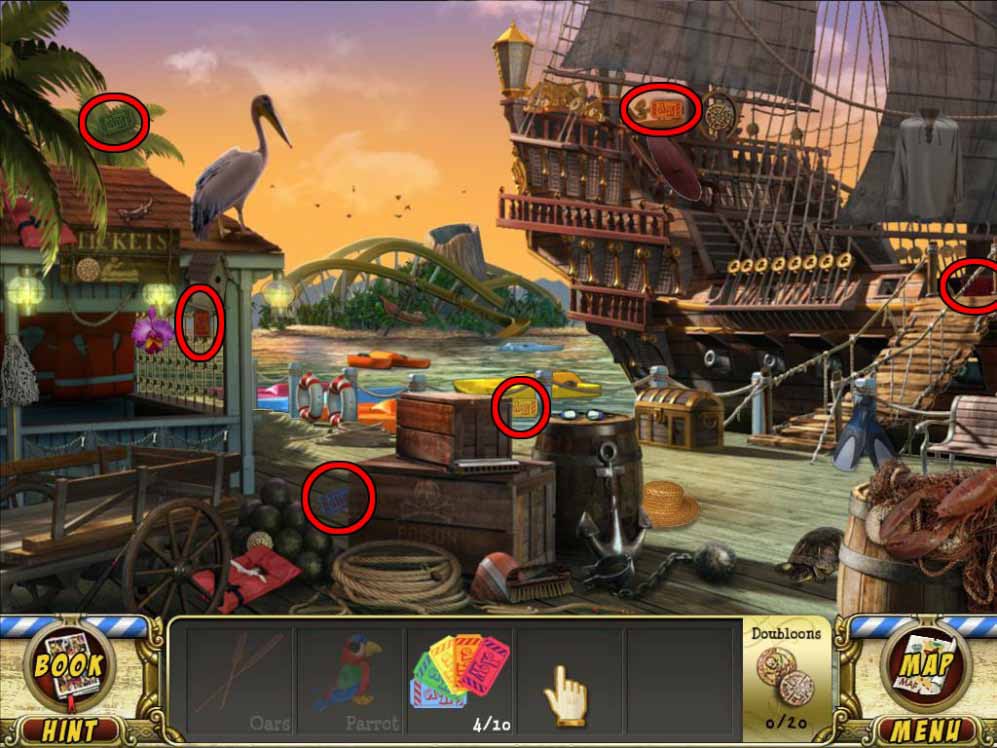
Return to the Harbor Entrance where there are 4 Tickets to be found.
The final 6 Tickets can be recovered in the Marina.
Step 7: Redeem Tickets
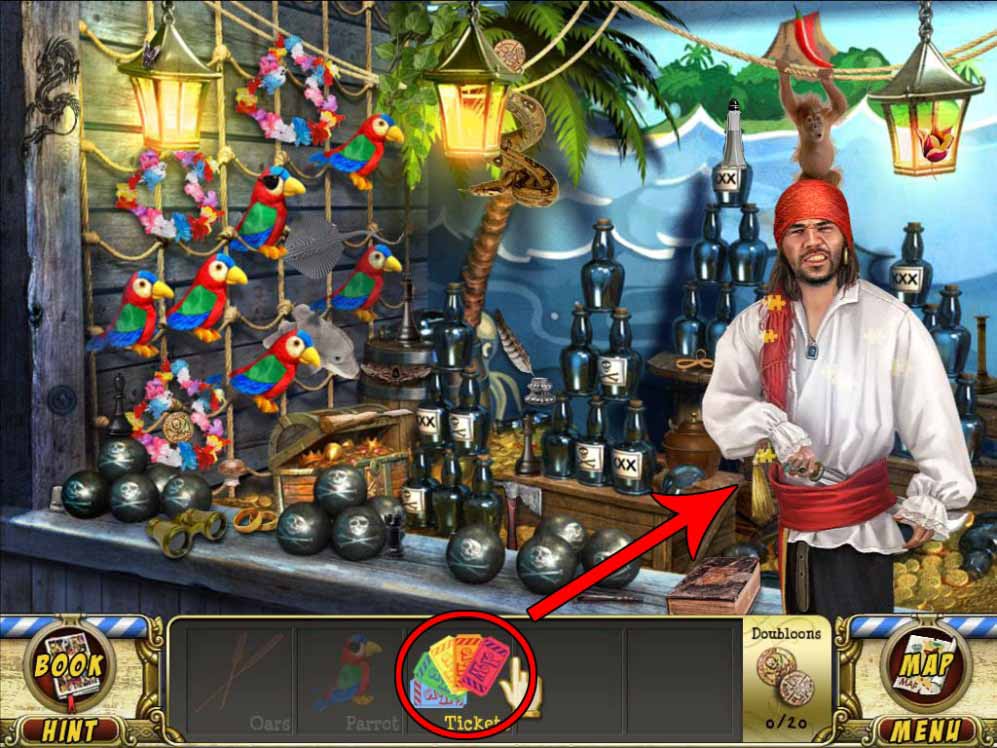
Go back to the Grog Slog booth. Select the Tickets and then click on the Pirate to redeem them. This will begin the Grog Slog HOS.
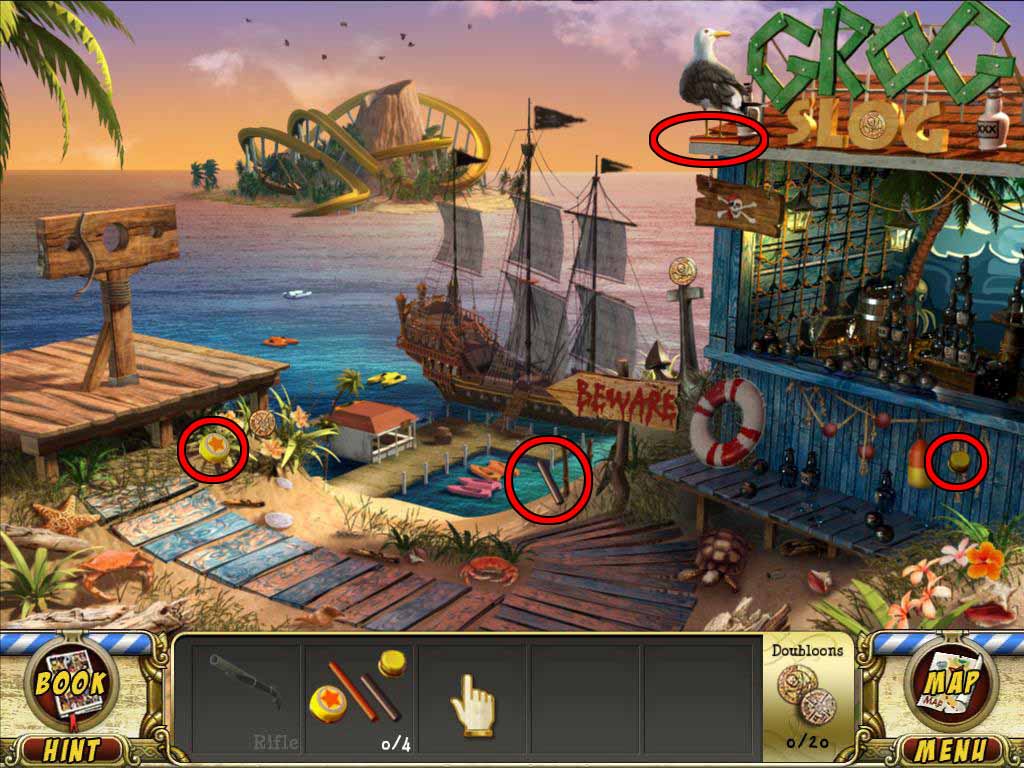
Step 8: Complete Grog Slog HOS
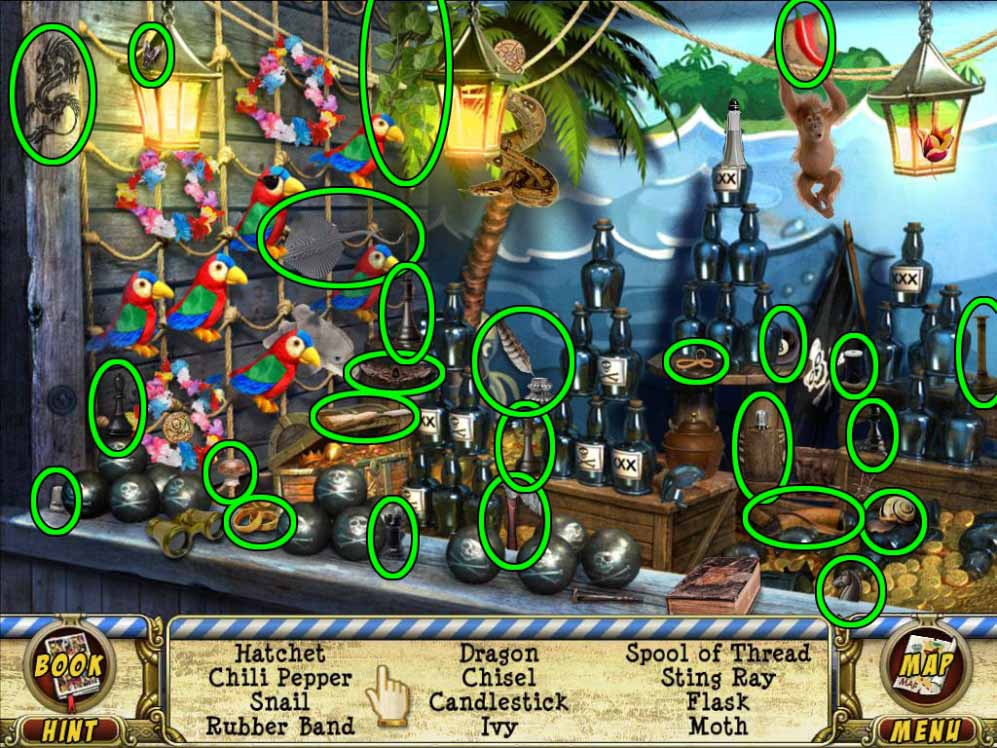
These objects comprise the first possible list of hidden items in the Grog Slog HOS.
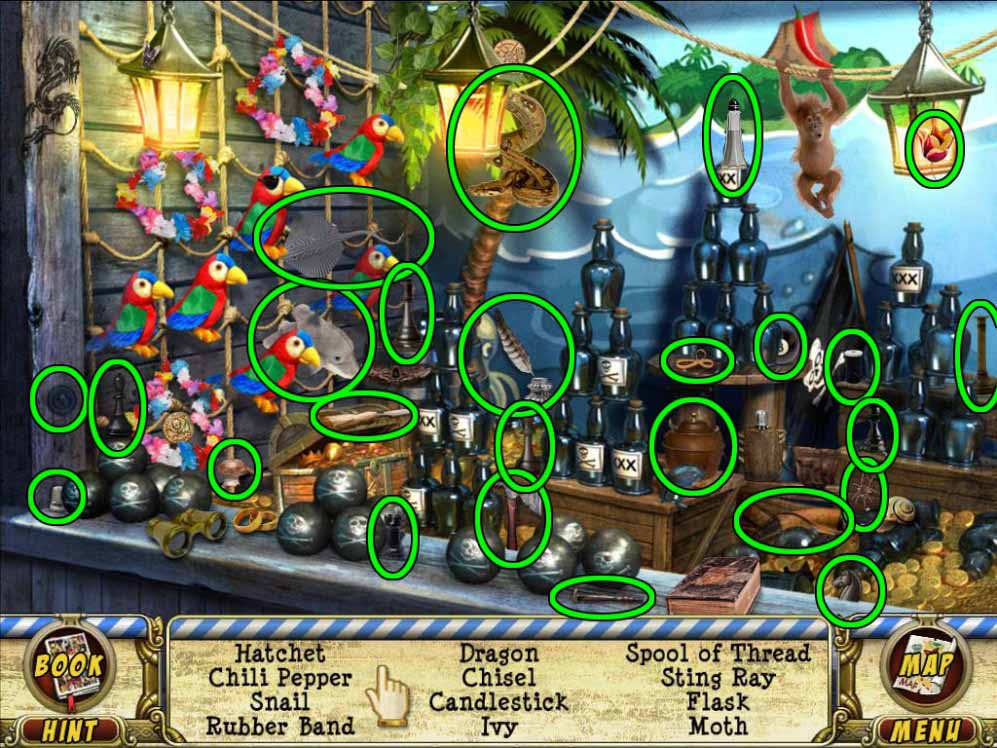
These items comprise the second possible list of hidden items in the Grog Slog HOS.
After completing the Grog Slog HOS, the Pirate will reward you with a Stuffed Parrot Doll.
Step 9: Give Parrot Doll to Parrot
Go back to the Pillory. Select the Stuffed Parrot Doll and then click on the Pillory.
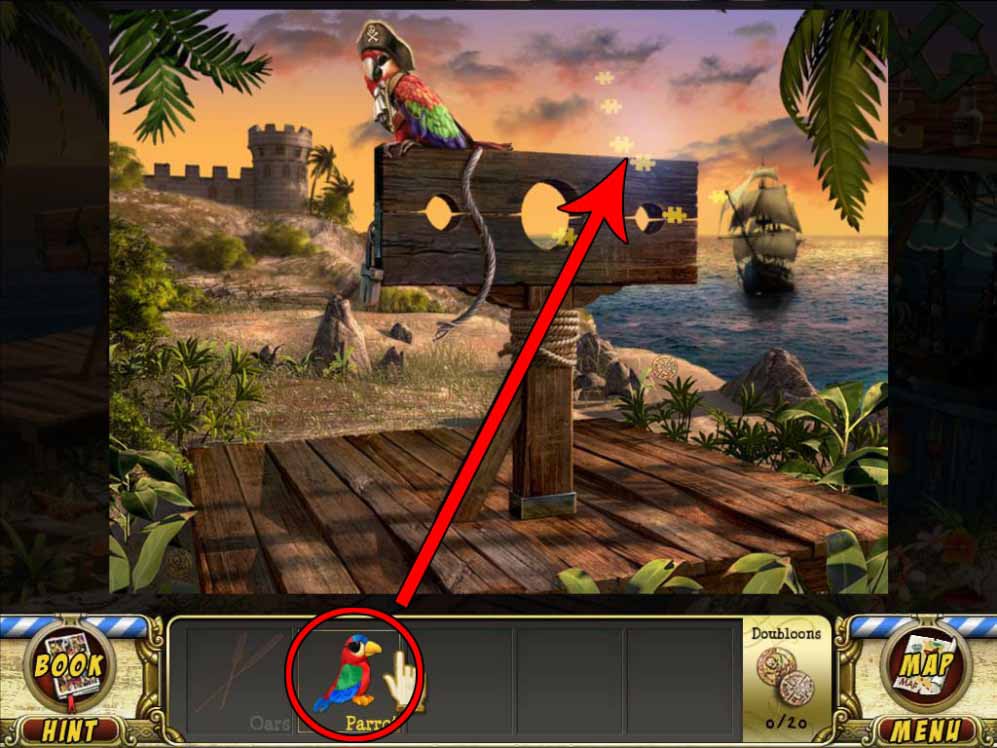
The Parrot will give you a pair of Oars that you can use these to reach Plunder Island.
Step 10: Paddle to Plunder Island
Go to the Marina. Select the Oars and then click on Plunder Island to access this next area.
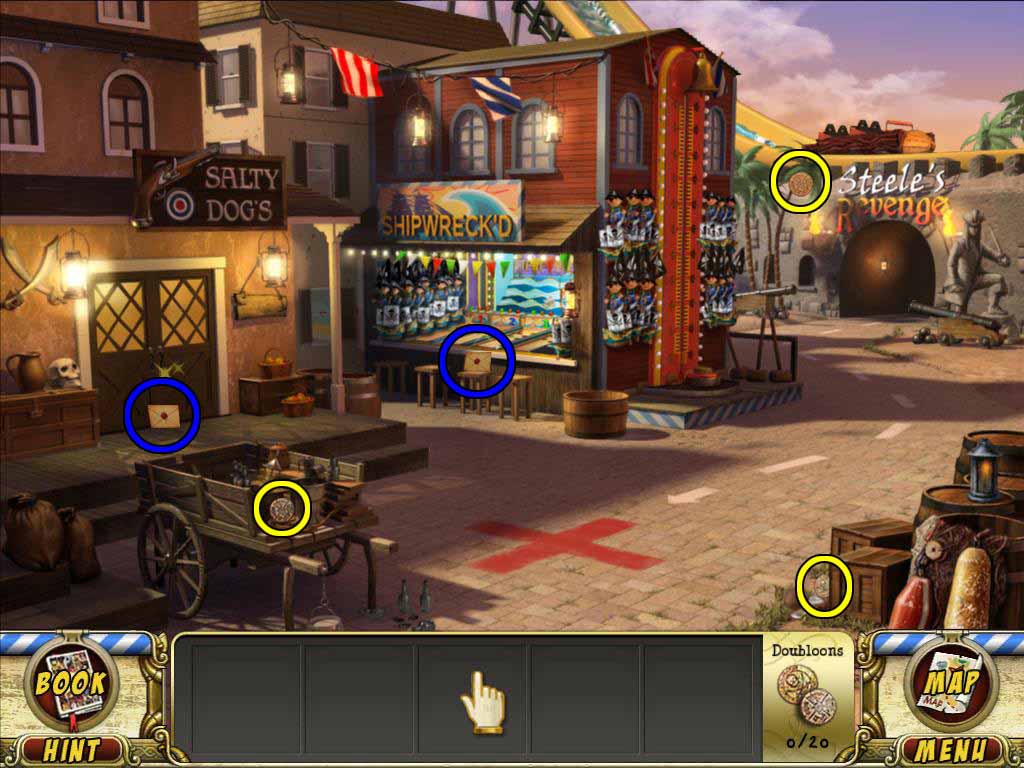
Quest 10: Salty Dog's Shooting Gallery
Step 1: Find the Clue Envelope
Locate the Clue Envelope at the left of the screen, in front of the doors to Salty Dog’s. Click on the shining Salty Dog’s entrance to proceed. There are 3 Doubloons found within this scene.
NOTE: You can also choose to do the Quest 11: Shipwreck’d at this time.
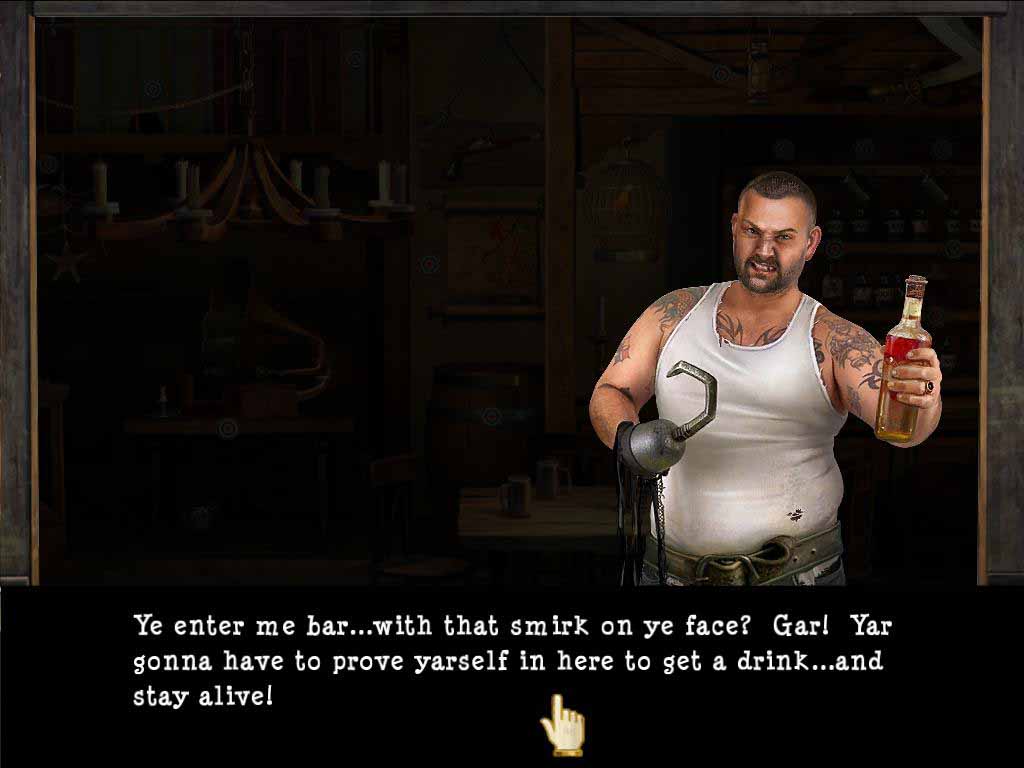
Step 2: Speak to Salty Dog
Speak with the Salty Dog. You will need to find a Rifle to move on. In the meantime, Salty Dog will give you a Small Mallet. Go back to Plunder Island.
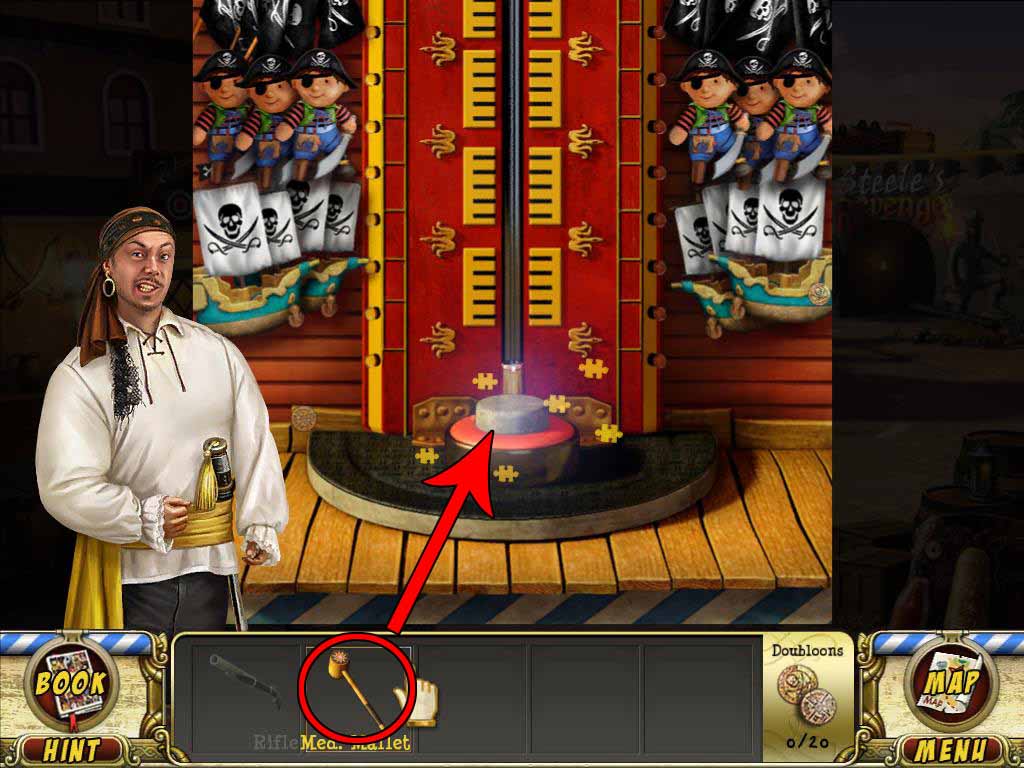
Step 3: Use Small Mallet at Test Yar Strength
Select the shining Test Yar Strength game. Select the Small Mallet, and then click on the Target to swing the Mallet. There are 2 Doubloons found within this scene.
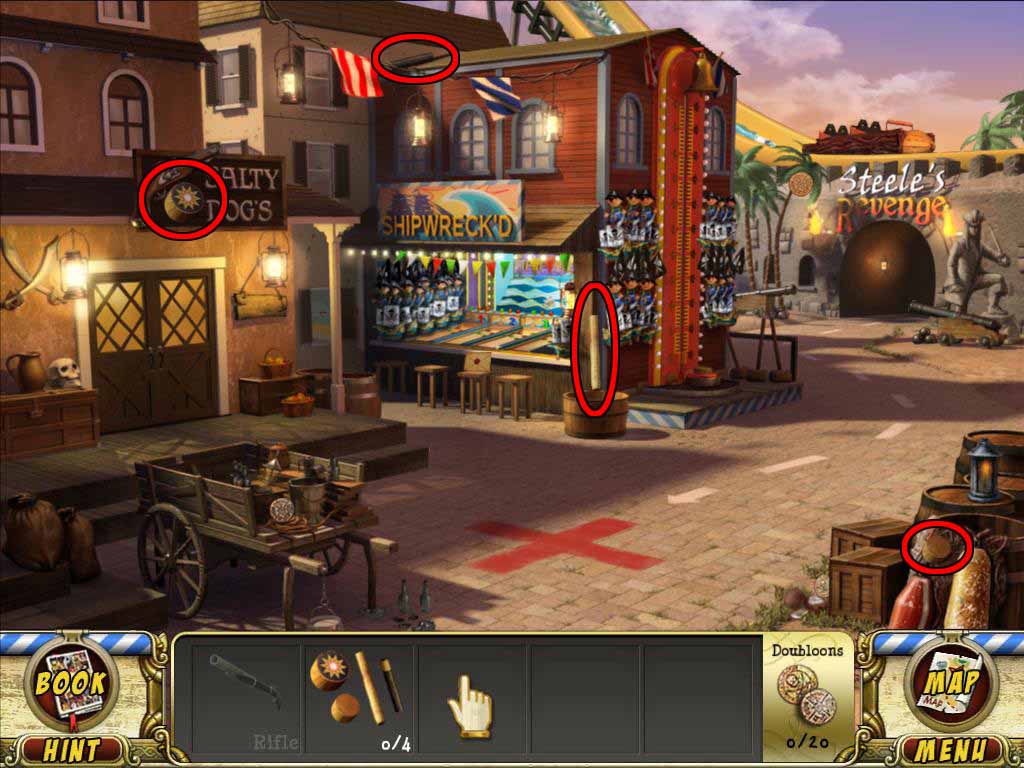
Step 4: Find a Bigger Mallet
The Small Mallet was not big enough to do the job. You must locate pieces for the Medium Mallet. All four Mallet Pieces are located in Plunder Island.
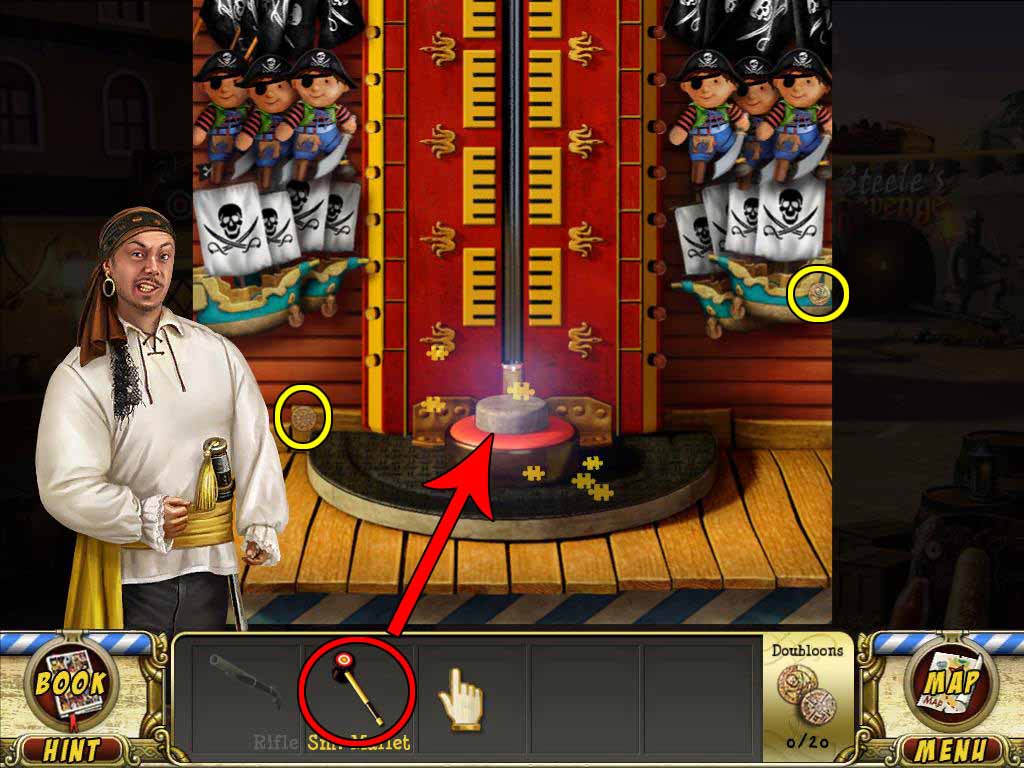
Step 5: Use Medium Mallet at Test Yar Strength
Go back to Test Yar Strength. Select the Medium Mallet and then click on the Target to swing the Mallet.
Step 6: Find an even Bigger Mallet
The Medium Mallet was still not enough. You must locate the Large Mallet.
Go back to the Harbor Entrance. All 4 Mallet Pieces of the Large Mallet can be recovered at the Harbor Entrance.
Step 7: Use Large Mallet at Test Yar Strength
Go back to Plunder Island with the Large Mallet. Select the Test Yar Strength game.
Select the Large Mallet and then click on the Target to swing the Mallet. You are finally successful at ringing the bell! You receive the Rifle.

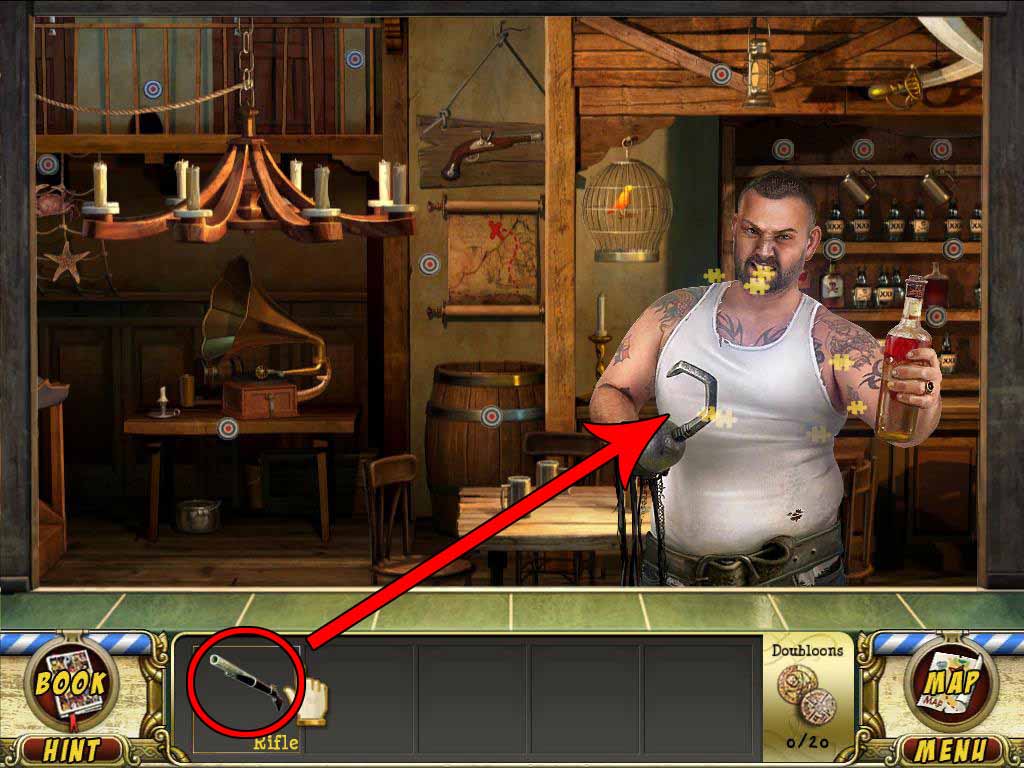
Step 8: Give Rifle to Salty Dog
Go back to Salty Dog’s. Select the Rifle and then click on Salty Dog to begin the carnival game.
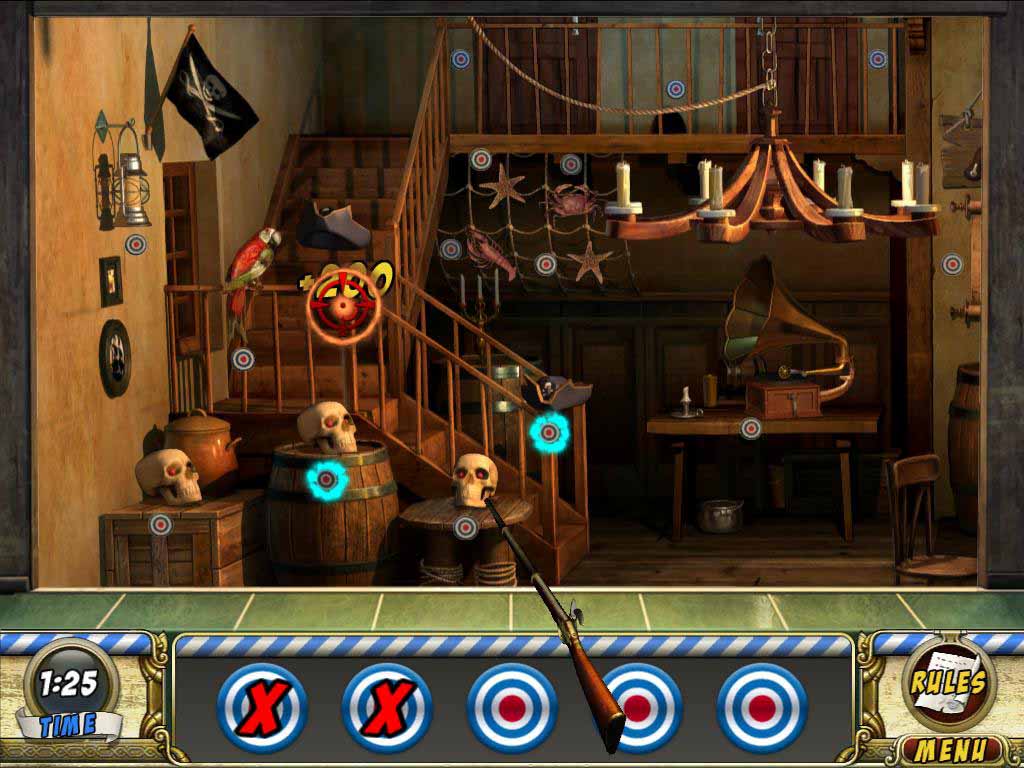
Step 9: Win Salty Dog Small Prize
Test your aim by shooting the targets and be rewarded with Pirate Statues. Don’t worry about stray bullets. Just have some fun and fire away!
Tip: Be sure to aim the center dot of the Reticule over the intended lit Target. This will ensure a hit.
Casual Mode Details
Time Allotted: 2:00
Goals
- 1 Statue to receive 1 Star
- 2 Statues to receive 2 Stars
-
3 Statues to receive 3 Stars
Expert Mode Details
Time Allotted: 1:30
Goals
- 1 Statue to receive 1 Star
- 2 Statues to receive 2 Stars
-
3 Statues to receive 3 Stars
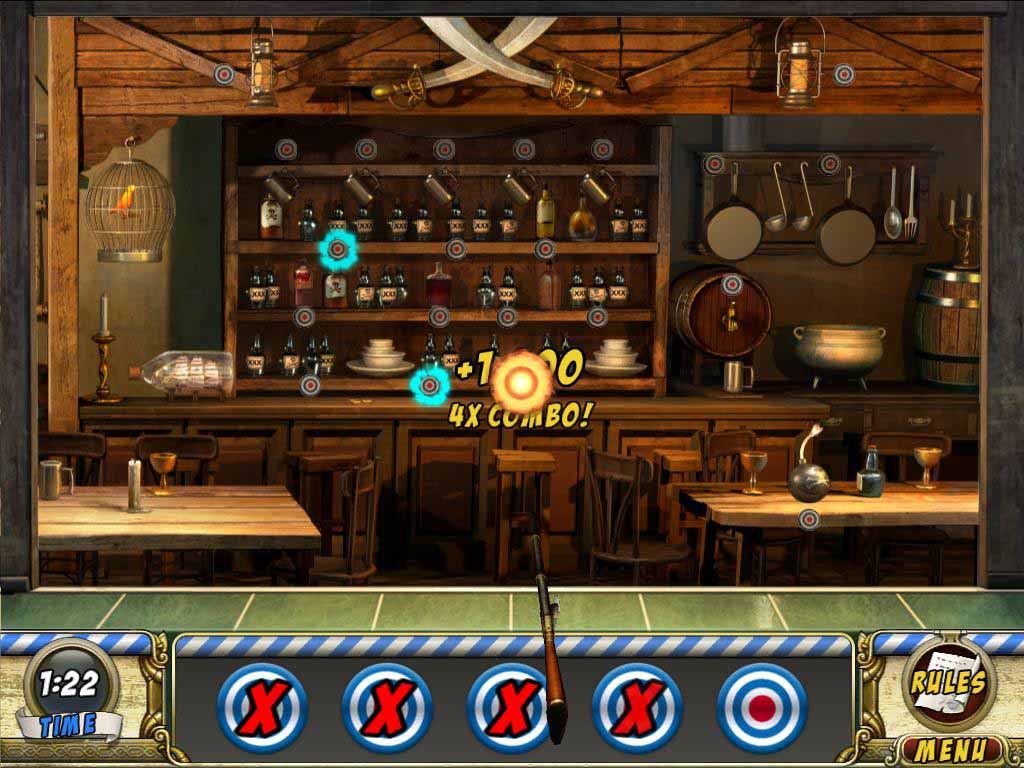
Step 10: Win Salty Dog Medium Prize
Salty Dog’s has two screens worth of targets. There’s plenty to shoot throughout both!
Tip: On Expert, you need to shoot 5 targets consecutively in order to move to collecting the Pirate Statue each round.
Casual Mode Details
Time Allotted: 2:30
Goals
- 1 Statue to receive 1 Star
- 2 Statues to receive 2 Stars
-
3 Statues to receive 3 Stars
Expert Mode Details
Time Allotted: 2:00
Goals
- 2 Statues to receive 1 Star
- 3 Statues to receive 2 Stars
-
4 Statues to receive 3 Stars
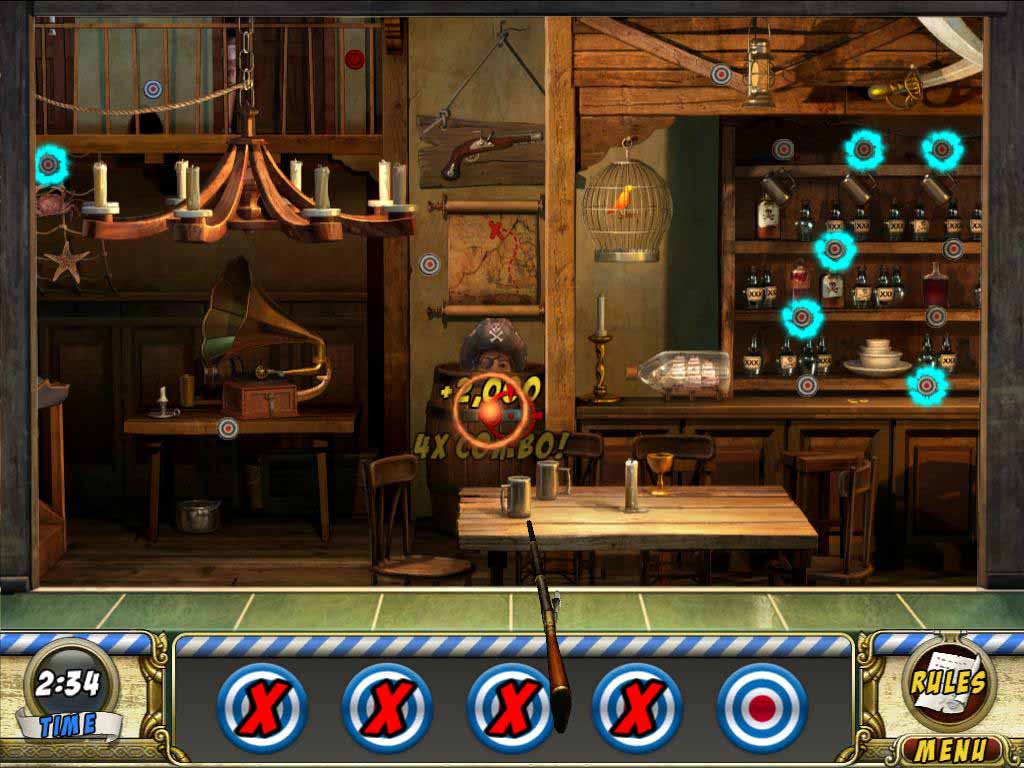
Step 11: Win Salty Dog Large Prize
This is your final shot at shooting up the bar. Open fire at everything that’s not nailed down!
Tip: Lit targets move around even more quickly this time. On Expert, you still need to shoot consecutive targets to complete each round.
Casual Mode Details
Time Allotted: 3 minutes
Goals
- 1 Statue to receive 1 Star
- 2 Statues to receive 2 Stars
-
3 Statues to receive 3 Stars
Expert Mode Details
Time Allotted: 3:00
Goals
- 3 statues to receive 1 Star
- 4 Statues to receive 2 Stars
-
5 Statues to receive 3 Stars
Quest 11: Shipwreck'd
Step 1: Find the Clue Envelope
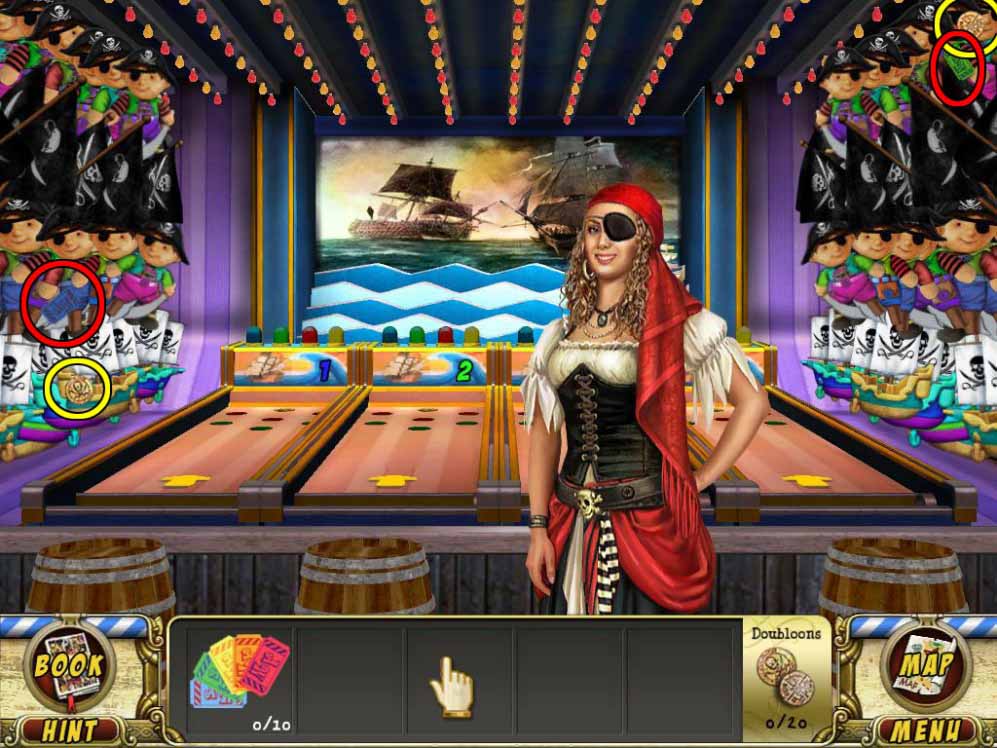
Locate the Clue Envelope to the right of the screen, on a stool at the Shipwreck’d booth. Select the shining Shipwreck’d booth to enter the scene.
NOTE: If you haven’t already, you can also choose to do the Quest 10: Salty Dog’s Shooting Gallery at this time.

Step 2: Collect 10 Tickets
The Lady Buccaneer requires 10 Tickets to play her game. There are 2 Tickets and 2 Doubloons found within this scene.
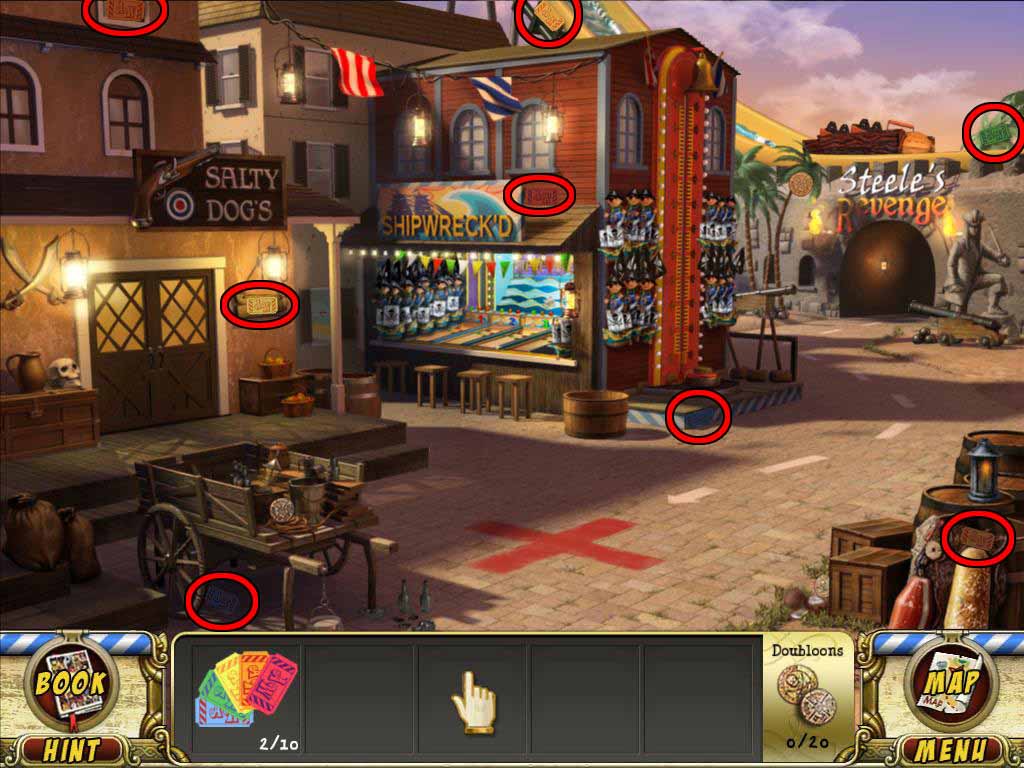
There are 8 Tickets to recover in Plunder Island. Go back to Shipwreck’d.
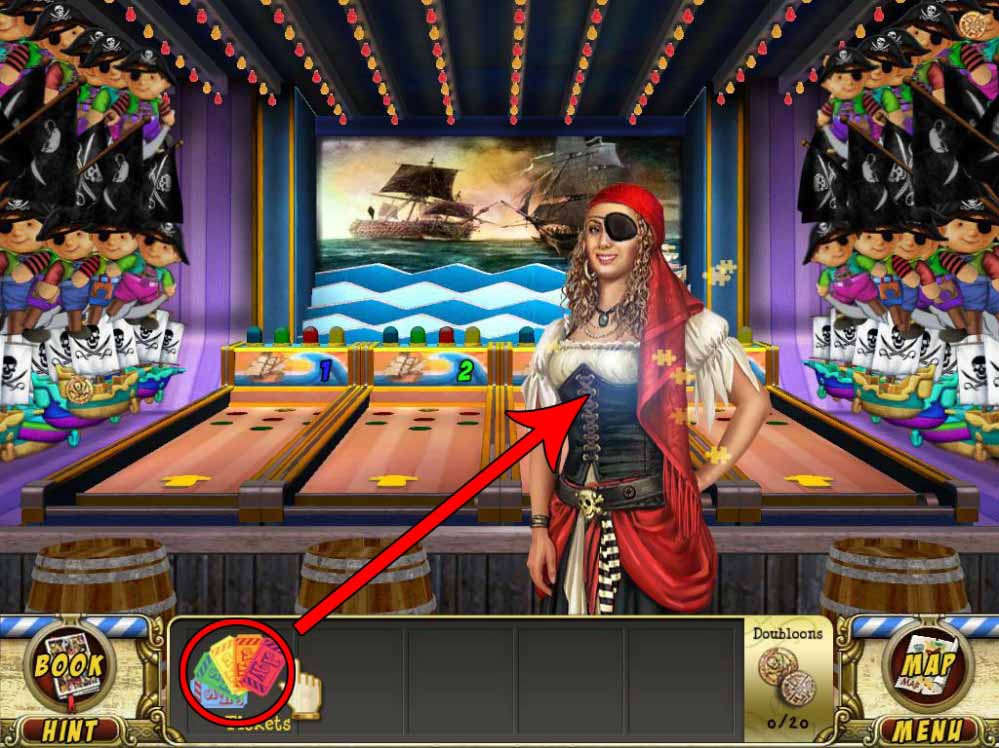
Step 3: Redeem Tickets
Once at Shipwreck’d, click on the Tickets and then click on the Lady Buccaneer to redeem them.
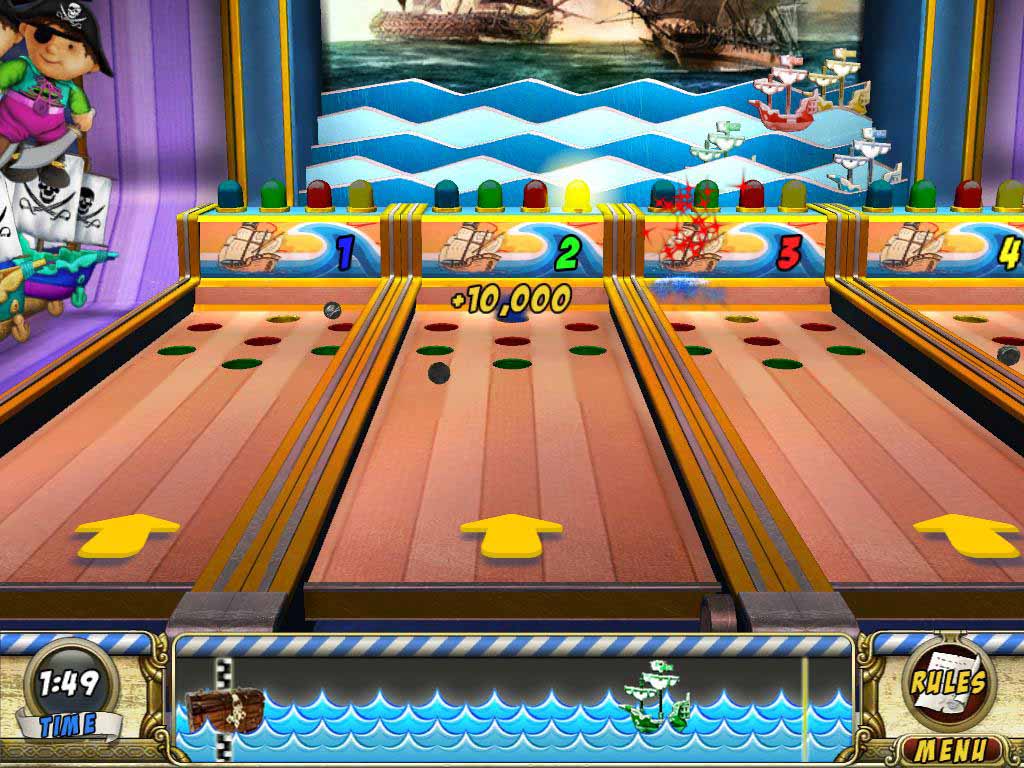
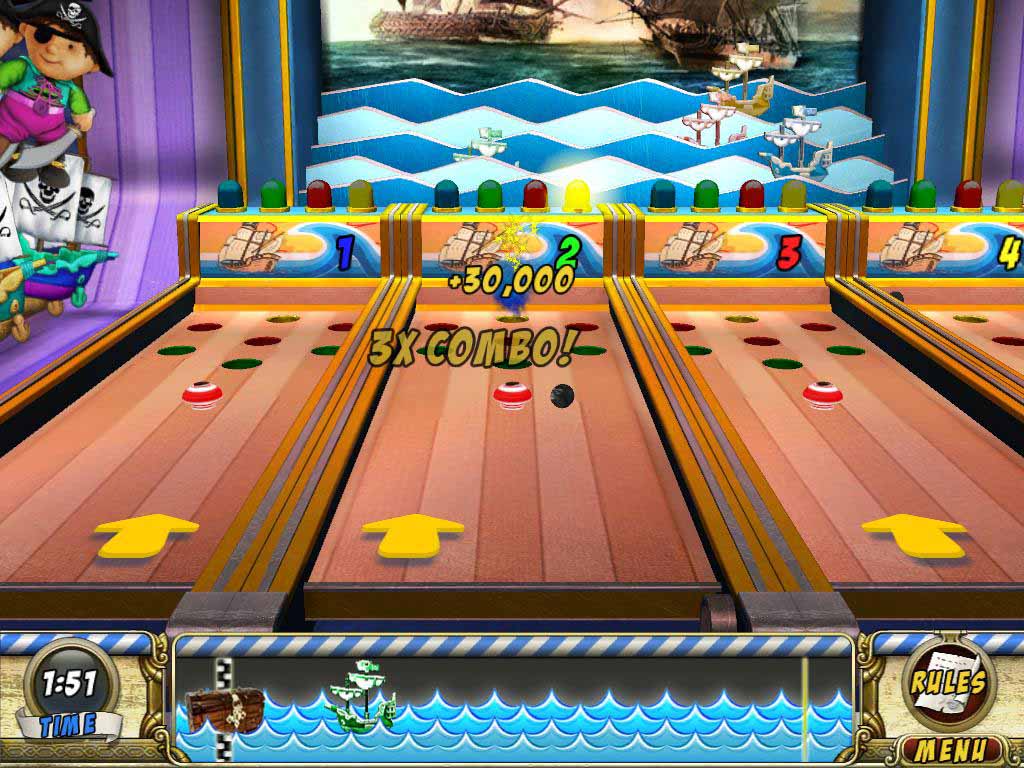
Step 4: Win Shipwreck'd Small Prize
Race your Ship to the finish! Roll Cannonballs down the lane and into the colored Holes to move your Ship across the sea. Beat the other Ships to the booty.
Tip: The different colored Holes propel the Ship forward different amounts. Green is worth 1, Red is worth 2, and Yellow is worth 3.
Casual Mode Details
Time Allotted: 2:00
Moves Required: 8
Expert Mode Details
Time Allotted: 2:00
Moves Required: 12
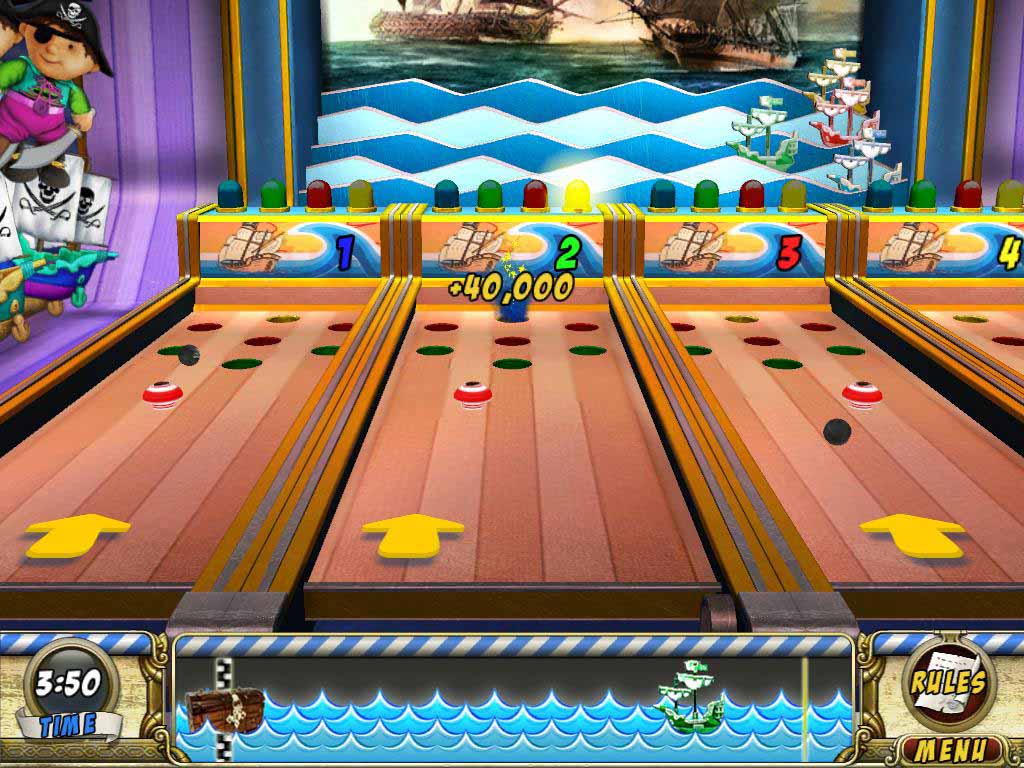
Step 5: Win Shipwreck'd Medium Prize
In the Medium Prize game, those scurvy dogs have placed a Bumper in the middle of your lane! You’re going to have to angle the ball around the bumper if you want to reach the Yellow Hole.
Tip: While holding the left mouse, move the mouse to the left or right to aim in the Directional Arrow.
Casual Mode Details
Time Allotted: 2:30
Moves Required: 10
Expert Mode Details
Time Allotted: 2:30
Moves Required: 15
Step 6: Win Shipwreck'd Large Prize
In the Large Prize Game, the Bumper now will move left and right, so shots must be both aimed and timed.
Tip: In this round, the Bumper is traveling faster, so it’s a good idea to aim your shots from the edges of the lane. This gives you maximum time to power up your shot while avoiding the bumper.
Casual Mode Details
Time Allotted: 3:00
Moves Required: 12
Expert Mode Details
Time Allotted: 4:00
Moves Required: 20
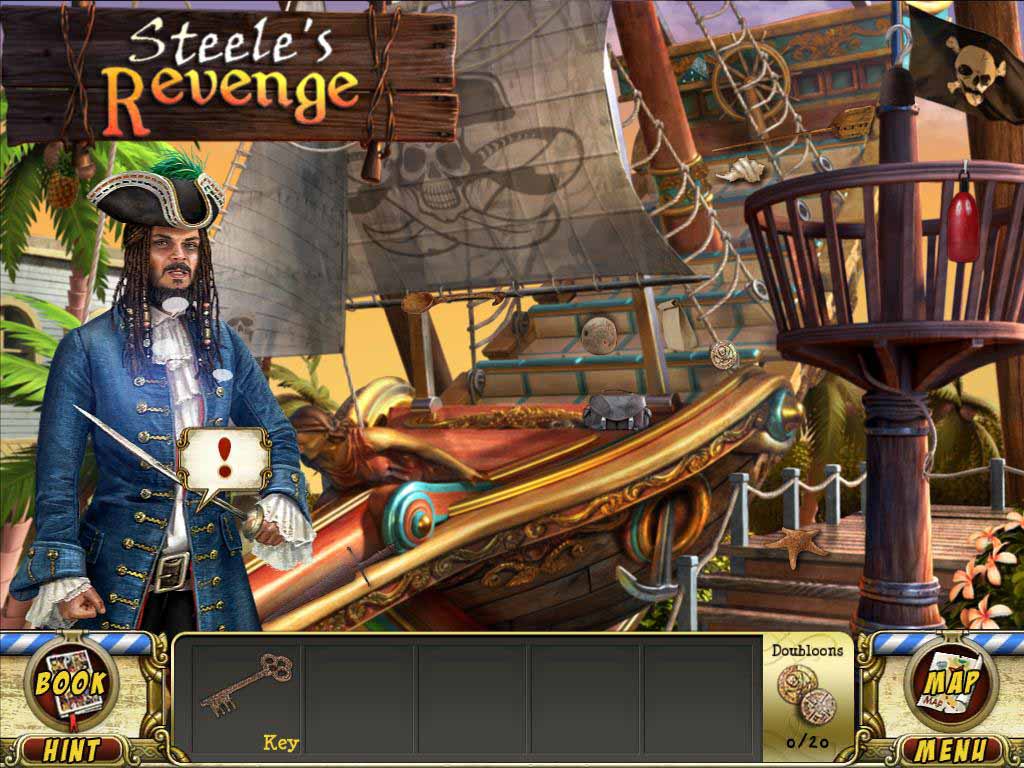
Quest 12: Steele's Revenge
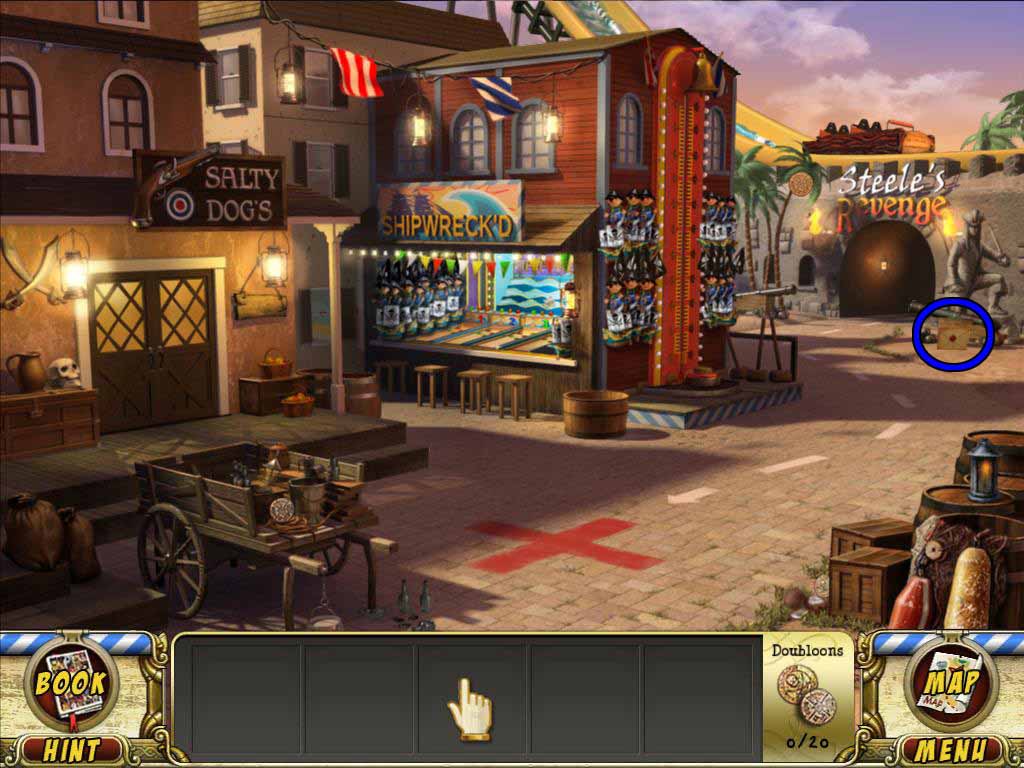
Step 1: Find the Clue Envelope
Locate the Clue Envelope at the base of the statue at Steele’s Revenge. Click on the shining Steele’s Revenge to continue.
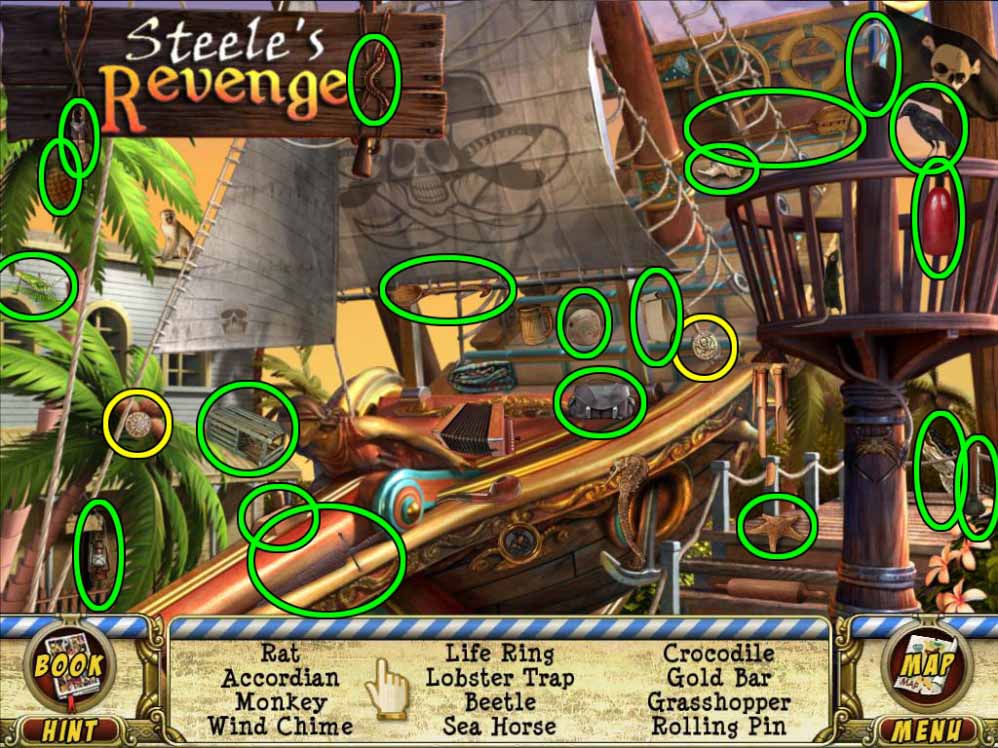
Step 2: Complete Steele's Revenge HOS
These objects comprise the first possible list of hidden items in the Steele’s Revenge HOS. There are 2 Doubloons found within this scene.
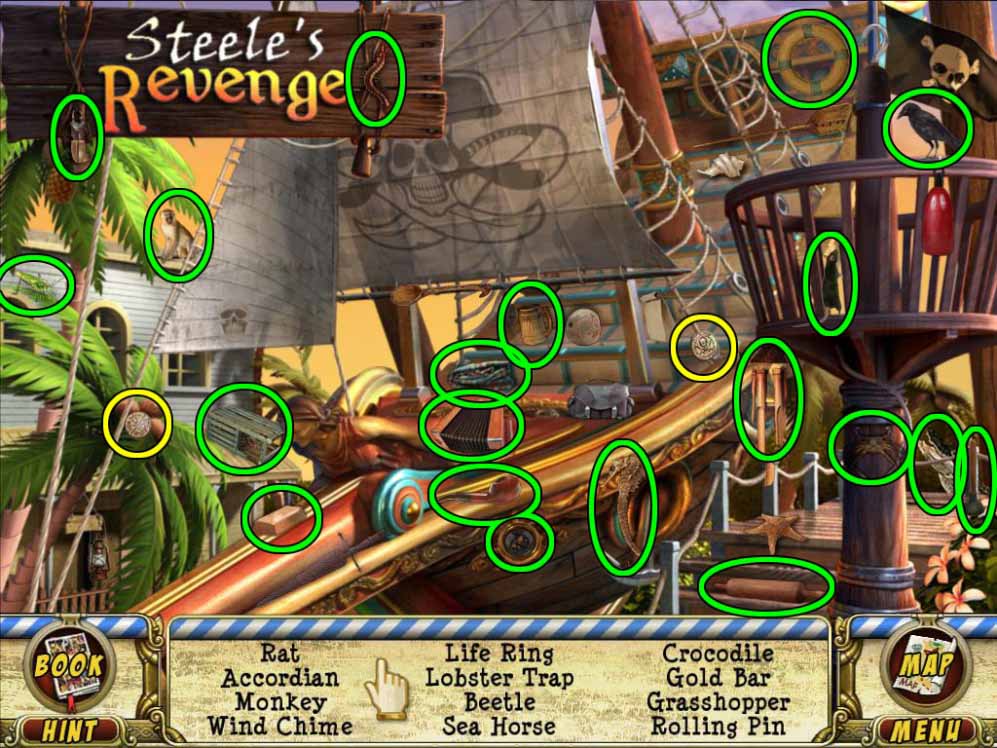
These objects comprise the second possible list of hidden items in the Steele’s Revenge HOS.
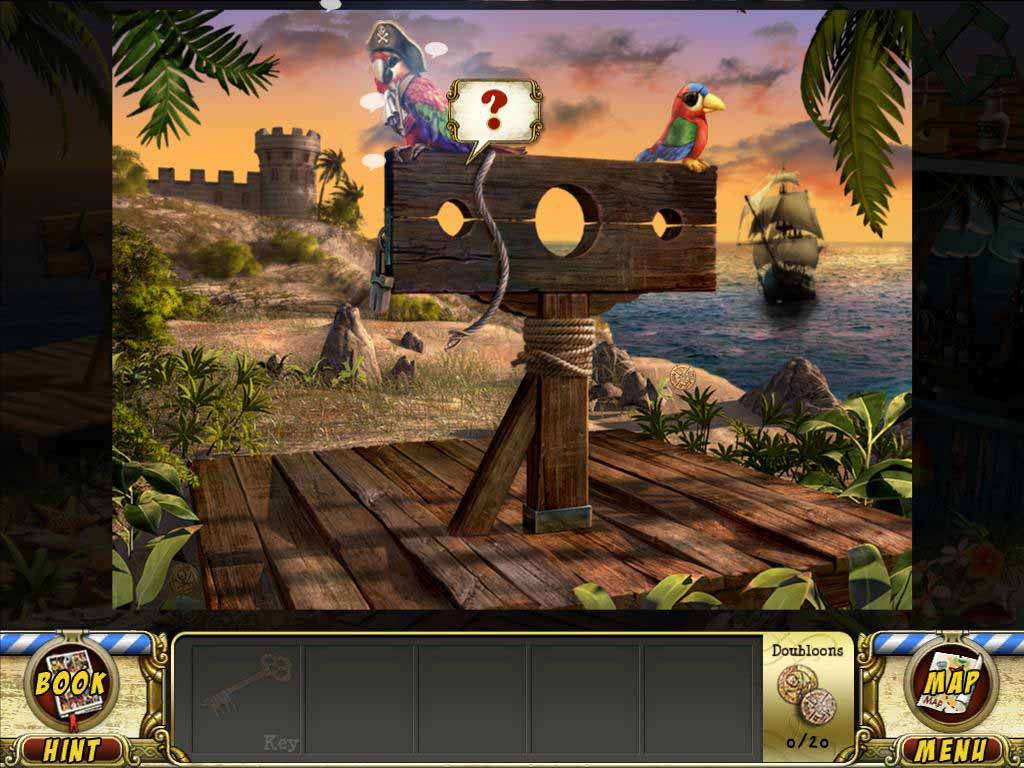
Step 3: Return to Parrot
Go back to the Pillory to locate Captain Steele’s Key. Select the Speech Bubble to talk with the Parrot. He requests 10 Crackers in return for his help.
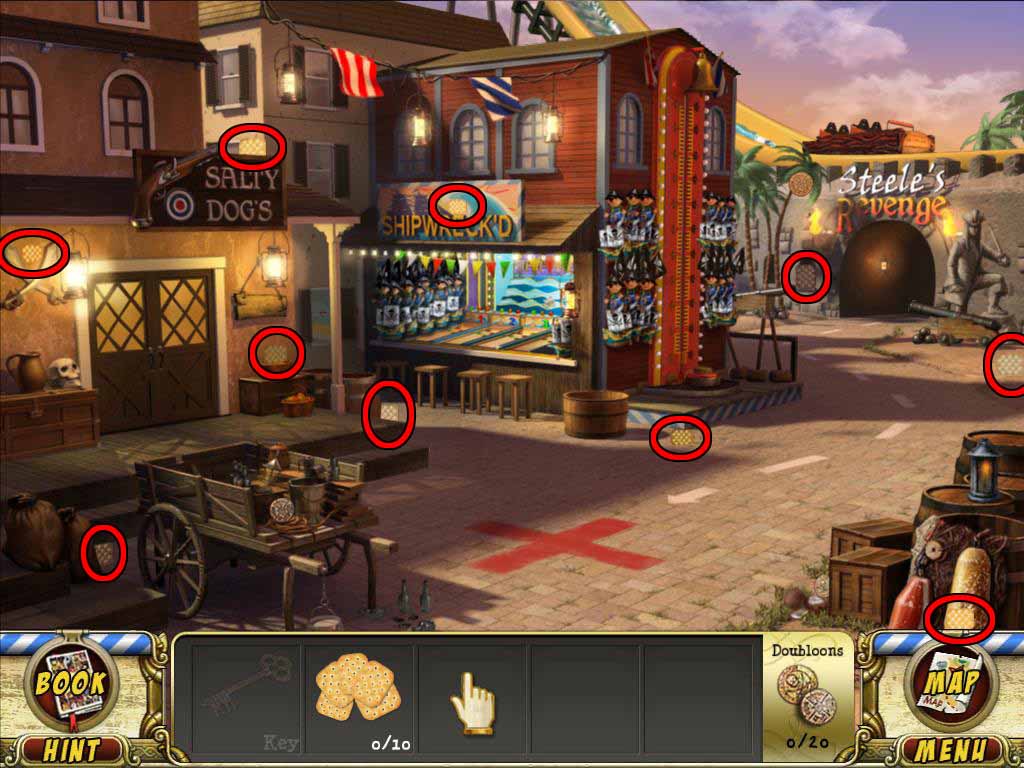
Step 4: Find 10 Crackers
All 10 Crackers are located within the Harbor Entrance.

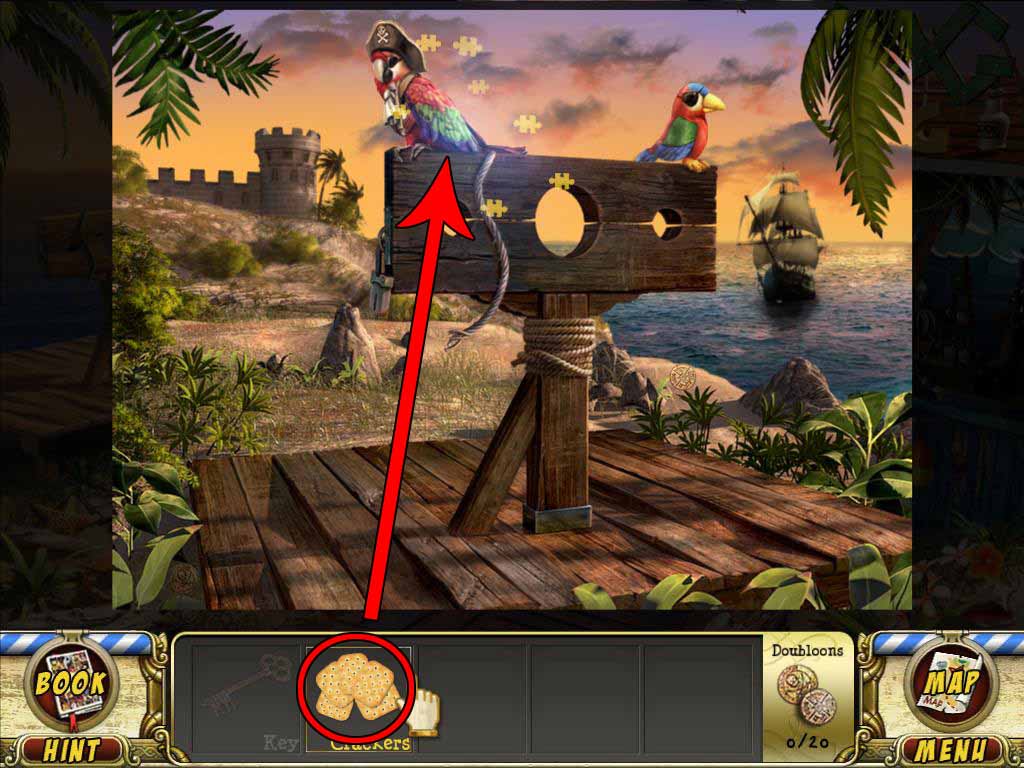
Step 5: Give Crackers to Parrot
After finding the Crackers, go back to the Pillory. Select the Crackers and then click on the Parrot to give them to him.

The greedy bird now demands an additional 10 Crackers to lavish on his companion. Go to Plunder Island.
Step 6: Collect 10 More Crackers
These 10 Crackers can all be found in Plunder Island.
Step 7: Give Crackers to Parrot
After finding all of the Crackers in Plunder Island, return to the Pillory. Select the Crackers and then click on the Parrot to give them to him.
You will receive Captain Steele’s Treasure Chest Key. We’re not sure where the Parrot was keeping it, though.
Step 8: Return to Captain Steele
Go back to Steele’s Revenge with the Treasure Chest Key. Select the Speech Balloon to talk to Captain Steele and he will take you to his Treasure Chest.
Step 9: Open Treasure Chest
Select the Key and click on the Treasure Chest to open it to reveal the treasure within. There is 1 Doubloon found within this scene.
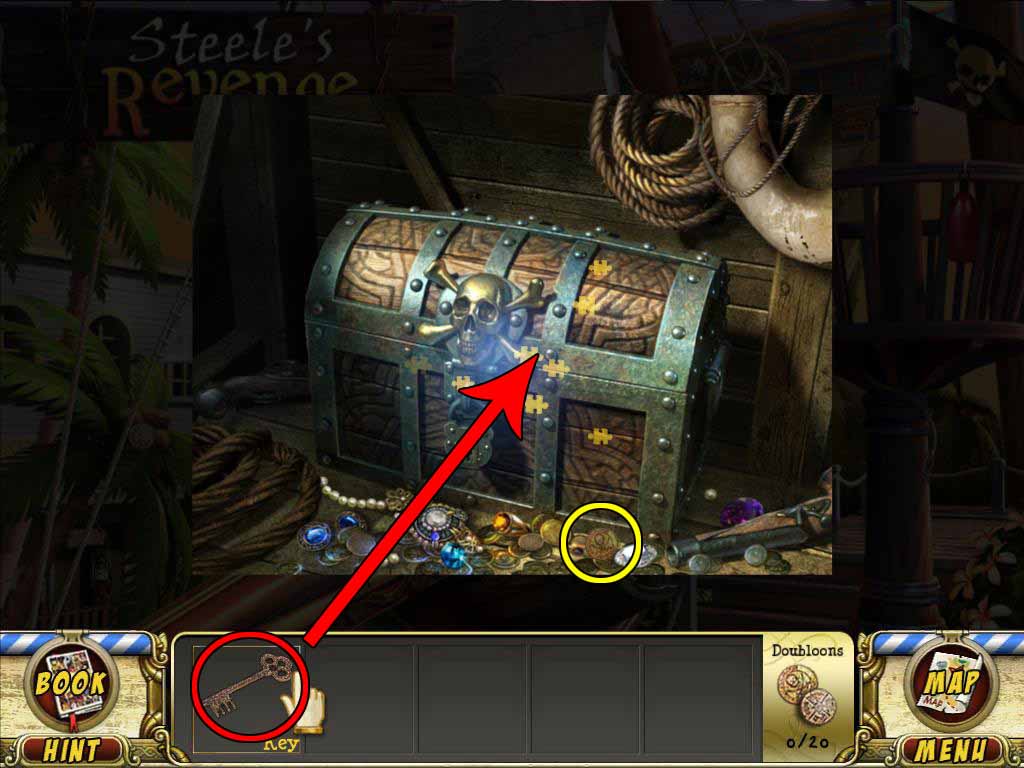
This will complete the pirate quest. Captain Steele thanks you for your help in Plunder Island, and the Chapter is now complete.
NOTE: If you fail to acquire the Doubloon near the Treasure Chest, you will have to come back to Plunder Island later to pick it up.
Chapter One: Whimsy Wonders
Chapter Two: Titanopolis
Chapter Three: Plunder Island
Chapter Four: Haunted Grove
Ask for help in the comments below!