
Amaranthine Voyage: The Tree of Life: Chapter Two: The Forest and Temple
Our Amaranthine Voyage: The Tree of Life Walkthrough will be your guide as you face the unknown to save a dying world. There are times as an archaeologist when you hold a piece of history in your hands and know it’s significant; when you found your current artifact, you knew it to be such a moment. The strange orb seems to indicate that the mythical Tree of Life may be more than just legend but your expedition takes a turn for the dangerous, though, when your airship is attacked by strange red wisps. Now you must uncover not only the truth behind the Tree of Life, but also how its survival is attached to a dying world. Our helpful hints, step-by-step instructions, and custom screenshots are sure to help you as you struggle to find a way to save the world and yourself.
Chapter One: The Airship
Chapter Two: The Forest and Temple
Chapter Three: Coming Soon!
Ask for help in the comments below!
- Click on the obelisk, turn the pyramid twice, and then take the first ALTAR.
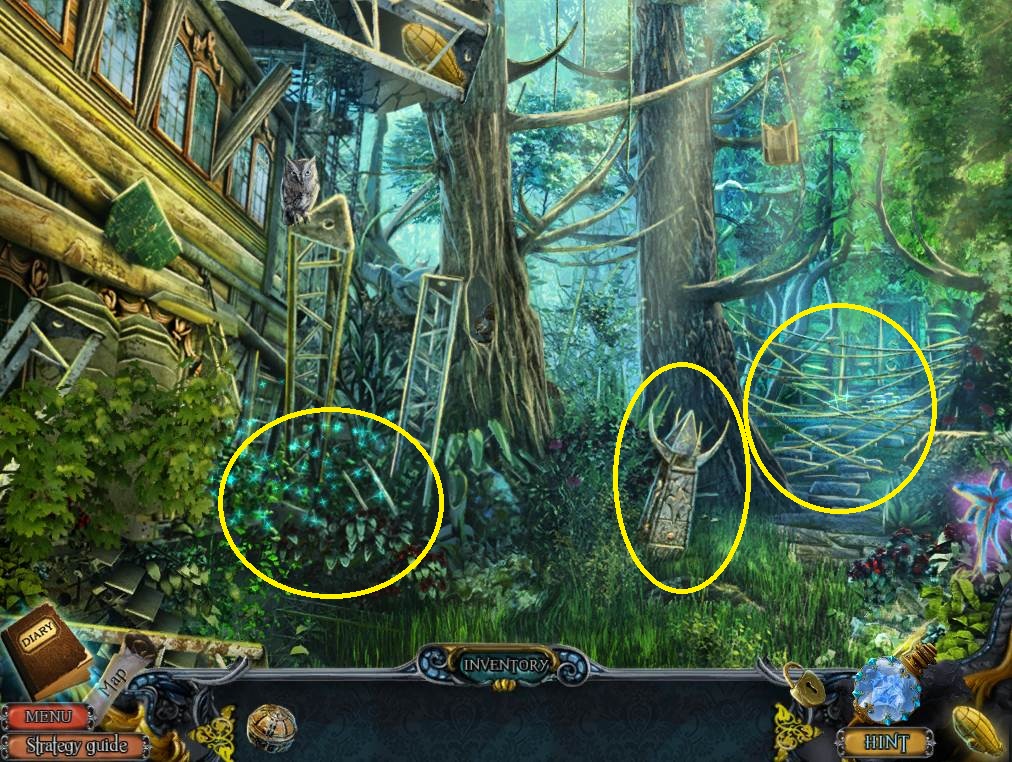
- Click on the vines to see they’re blocking the way.
- Click on bushes to trigger a hidden object area.
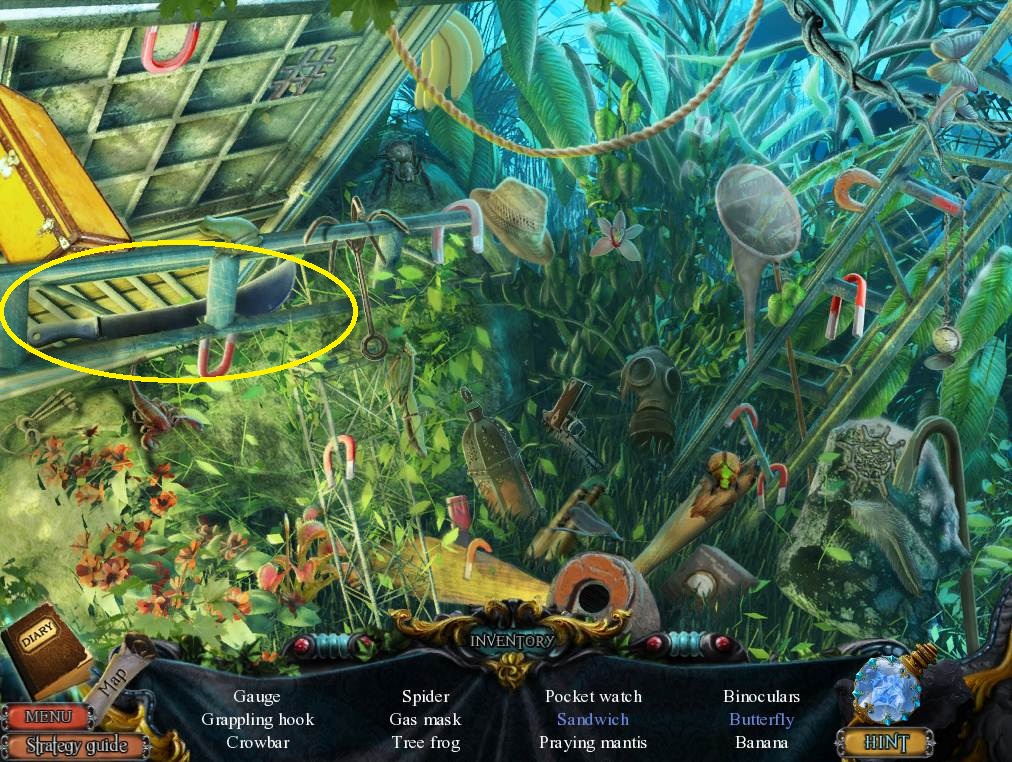
- Collect the items on the list. The items vary quite a bit from player to player, so all I’ve circled is the final riddle item that will eventually go into your inventory (in this case the MACHETE). I’ll be doing this for the remainder of the game except for in the areas where you have to collect multiples of the same item. In those cases I’ll show you where all the items are.
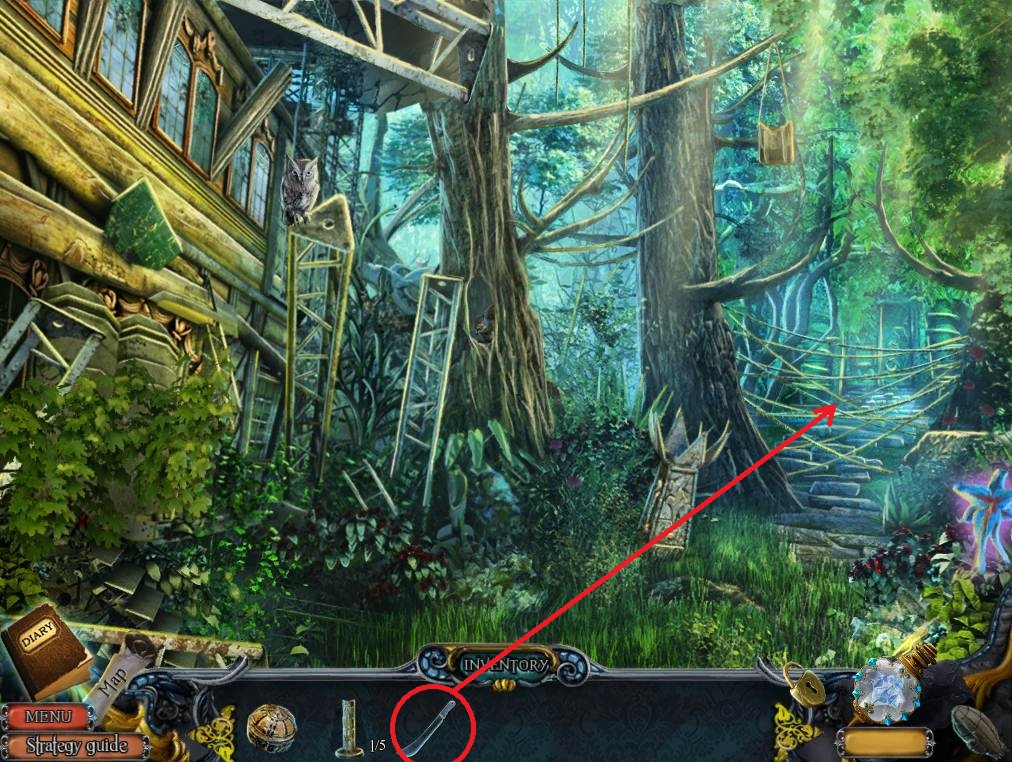
- Use the MACHETE on the vines three times to unblock the path.
- Go forward to the gate.
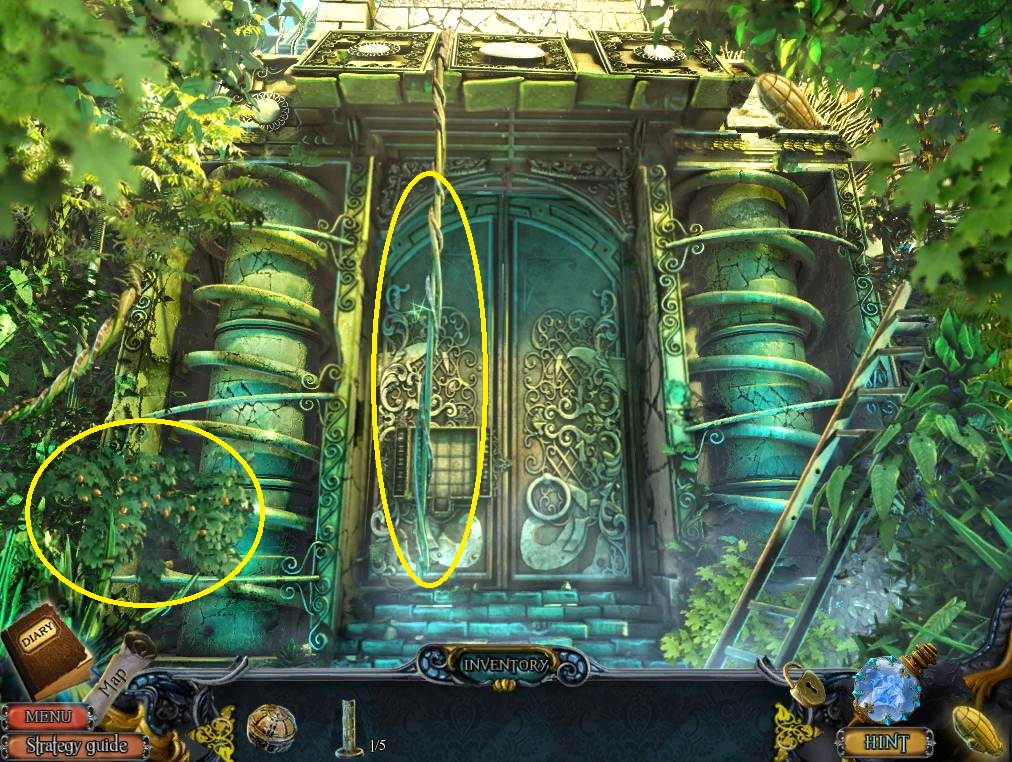
- Click on the VINE to add it to your inventory.
- Click on the bush.
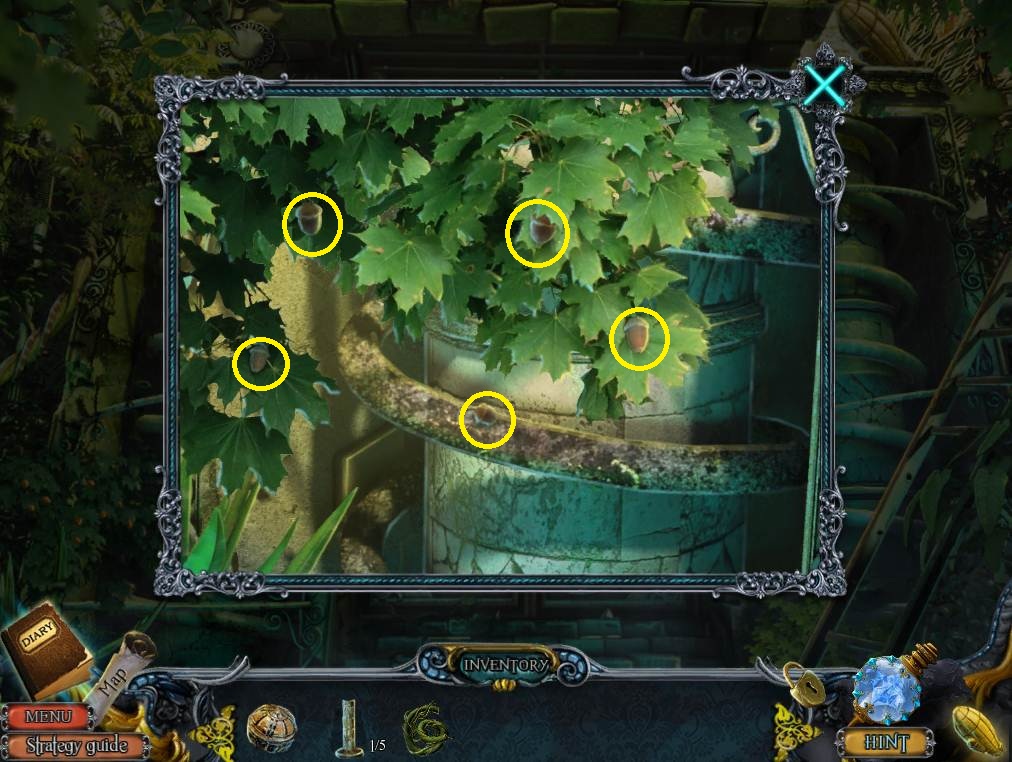
- Collect the five ACORNS as shown above.
- Note the mini-game on the door.
- Go back once.
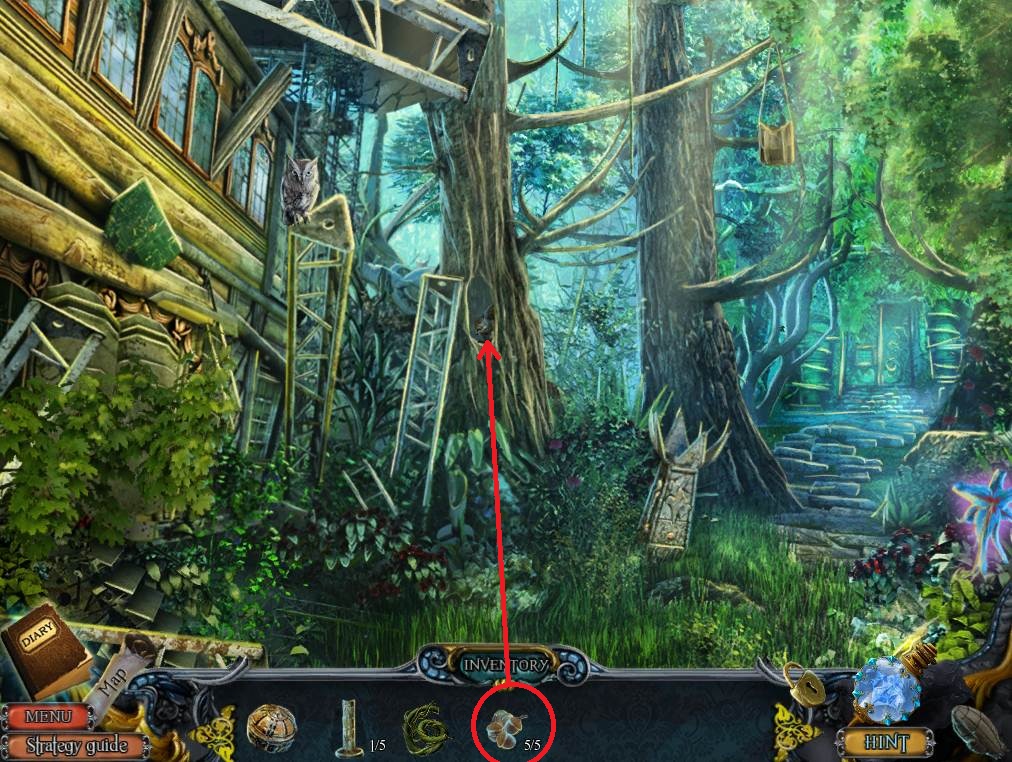
- Give the ACORNS to the squirrel.
- Take the second ALTAR and the MYSTERIOUS ITEM.
- Go back to the gate and use the MYSTERIOUS ITEM on the door to trigger the mini-game.
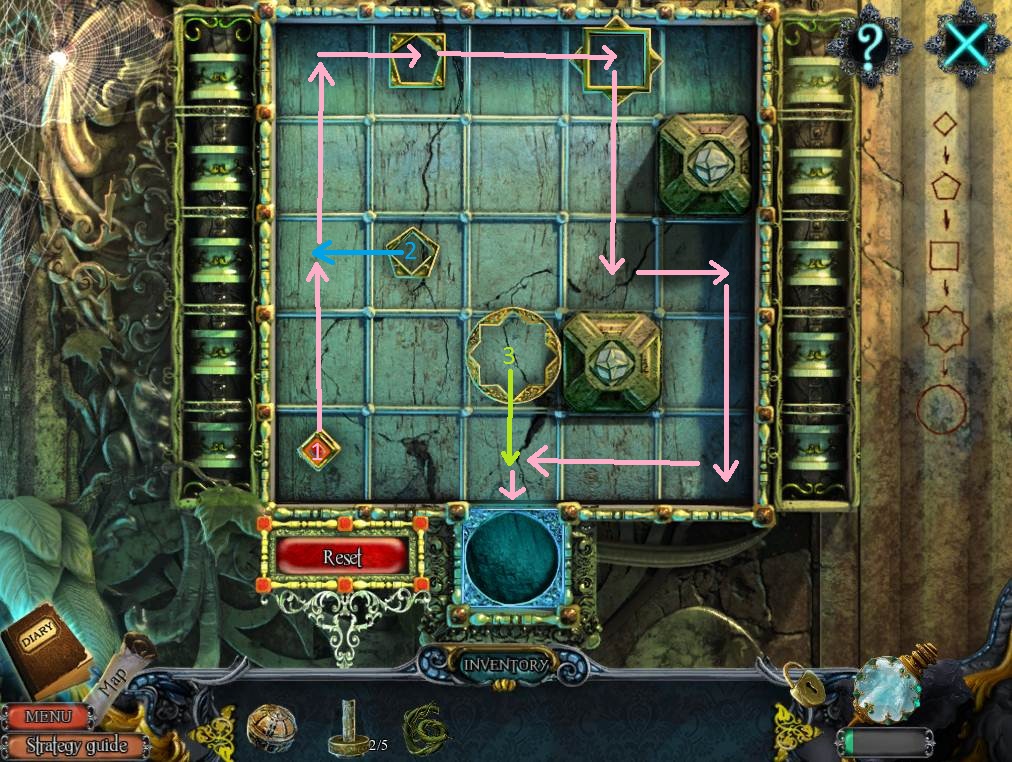
- The goal is to stack the elements from smallest to largest. You must select an element and then choose an arrow to move it in that direction.
- Move 2 to the left and then 3 down. Move 1 up twice, then right twice, then down, then right, then down, then left, and finally down.
- Turn the valve.
- Go forward and into the square west.
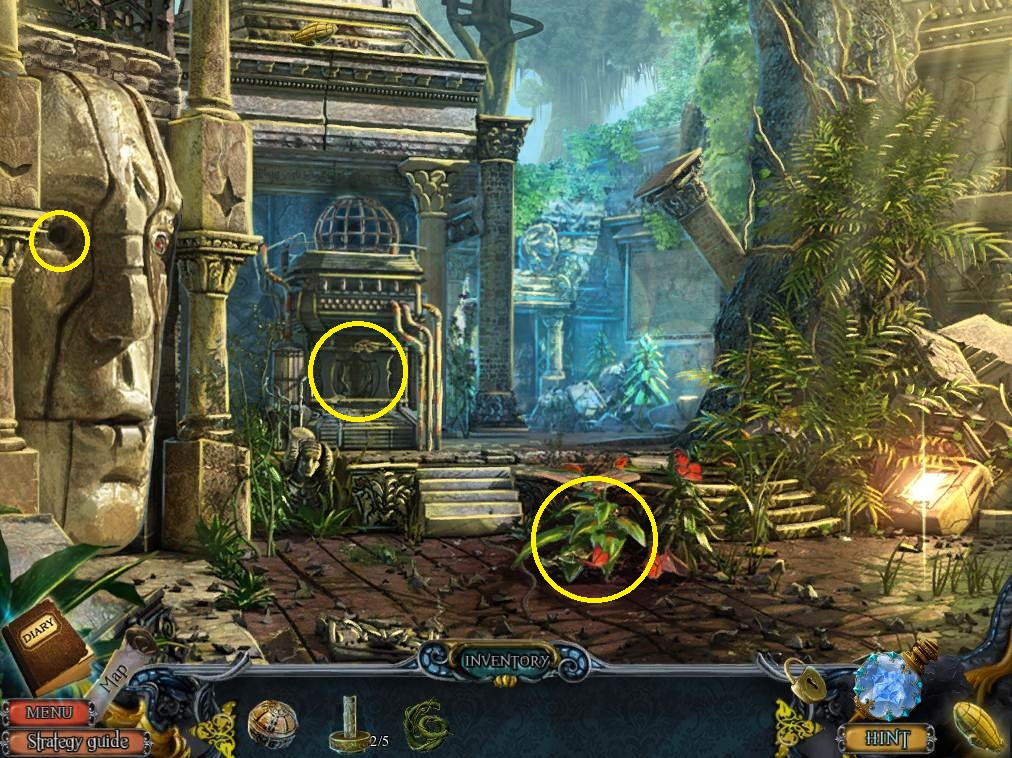
- Click on the stone head and take the CRYSTAL.
- Click on the bushes to find the FORKED STICK.
- Click on the cage to find a mini-game (you’ll need to come back to this later).
- Go forward to find square east.
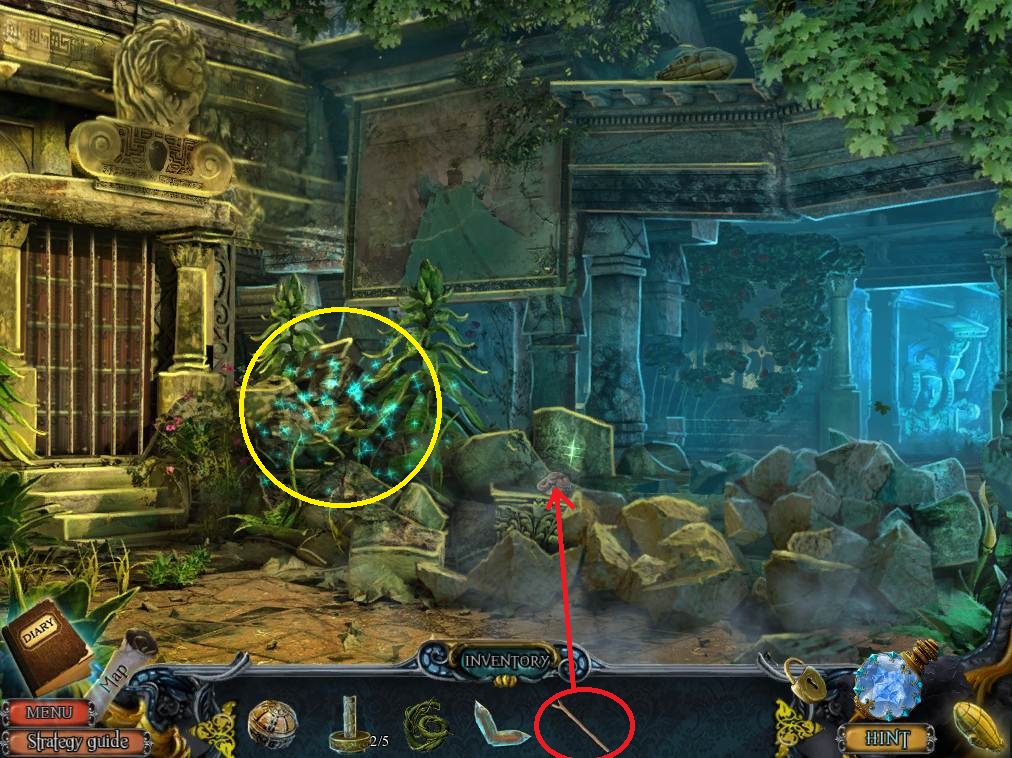
- Click on the bushes and use the FORKED STICK to move the snake.
- Take the third ALTAR.
- Look at the mural and move the debris for trigger a hidden object area.
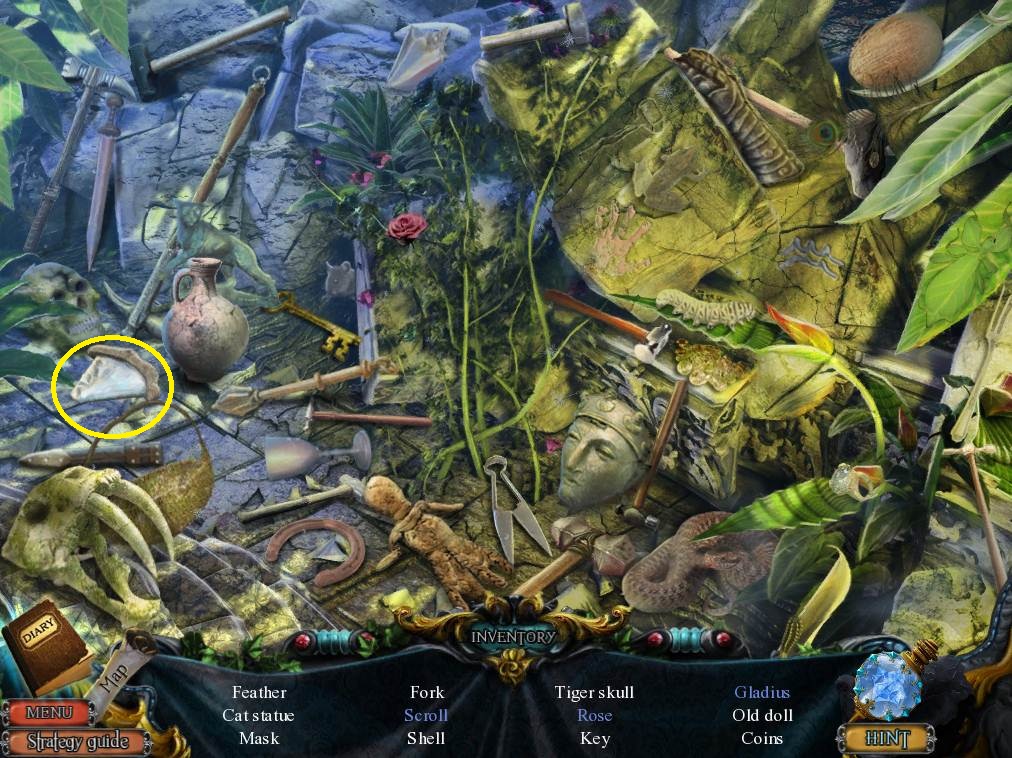
- Collect the items and take the DIAMOND BLADE, which is the riddle item.
- Go back once and hang a right to return to the courtyard.
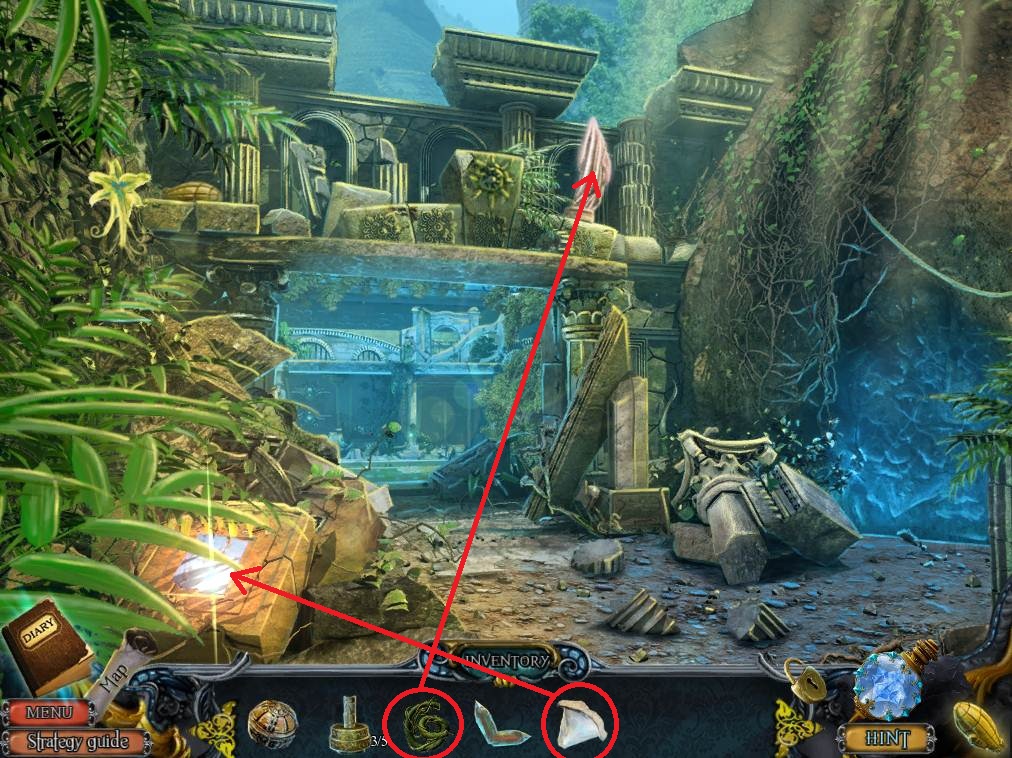
- Click on the crate, move the branch, and then use the DIAMOND BLADE to get the mirror.
- Put the CRYSTAL in the indentation.
- Use the vine on the statue on the roof.
- Click on the rubble to activate a hidden object area.
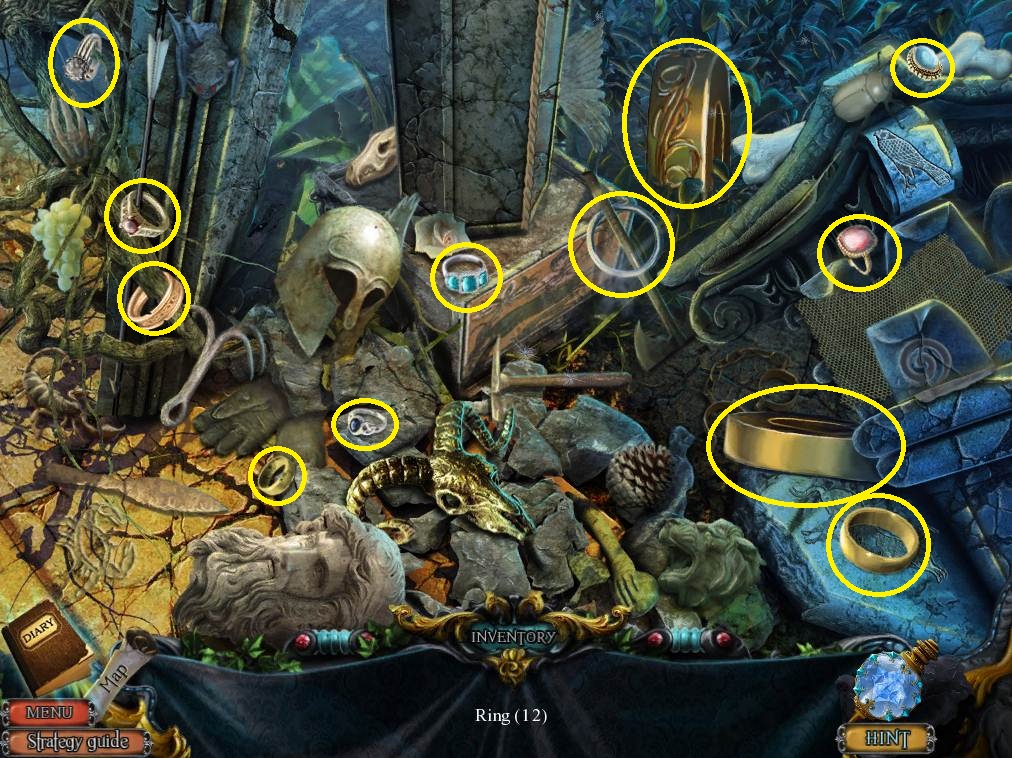
- Use the screenshot above to locate all twelve rings.
- Take the fourth ALTAR.
- Go forward to the pond.
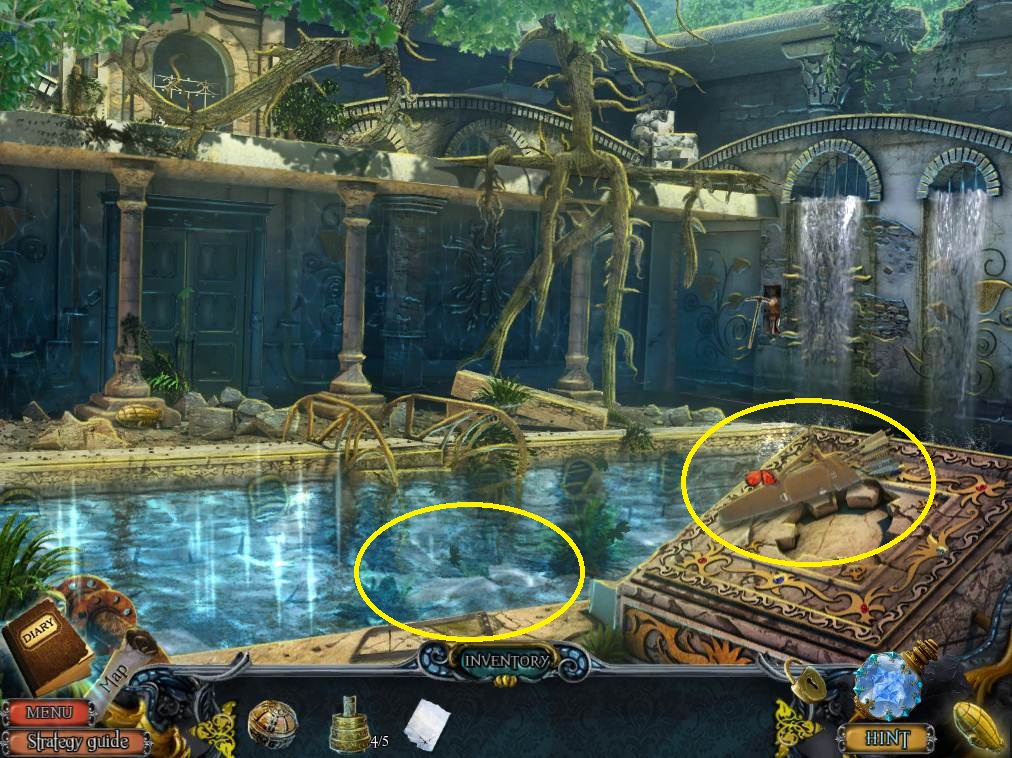
- Take the QUIVER.
- Look in the water to find the fifth and final ALTAR.
- Go back twice.
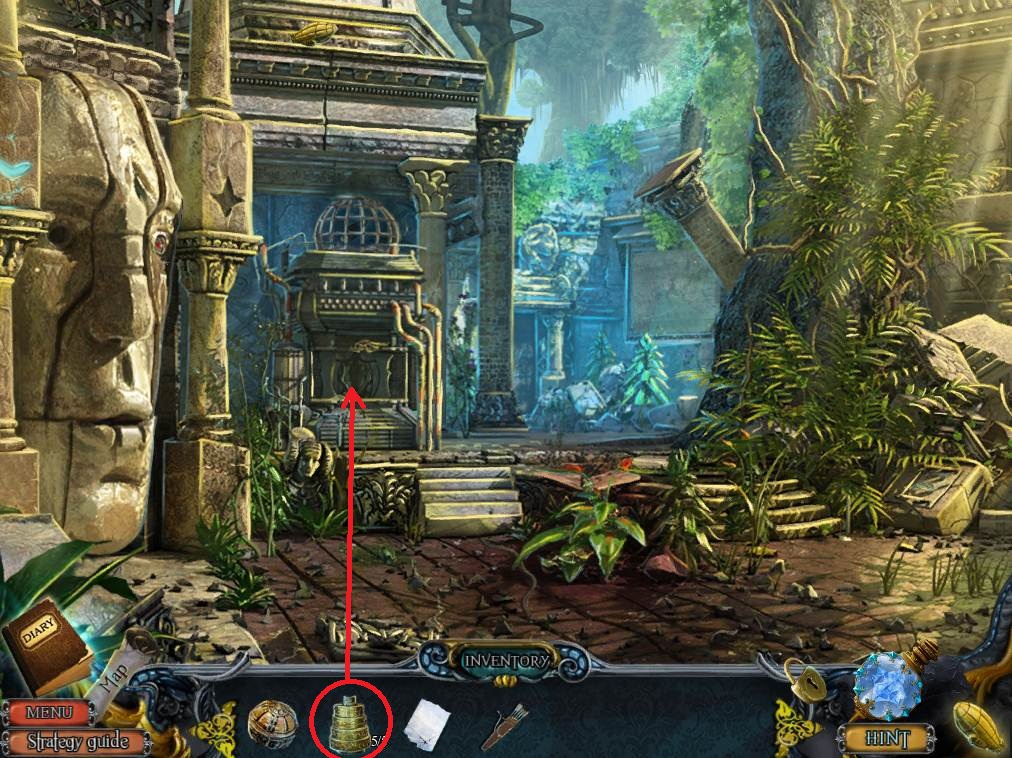
- Use the five ALTARS on the mini-game under the cage to start a mini-game.
- The goal is to get the stack of rings from the first column to the third. You cannot put a ring on one smaller than itself. From left to right consider the towers as numbered 1, 2, and 3, then move the top ring on the stack in the following order: 1 to 2, 1 to 3, 2 to 3, 1 to 2, 3 to 1, 3 to 2, 1 to 2, 1 to 3, 2 to 3, 2 to 1, 3 to 1, 2 to 3, 1 to 2, 1 to 3, and 2 to 3.
- Take the BLACK DIAMOND.
- Go forward to the square east.
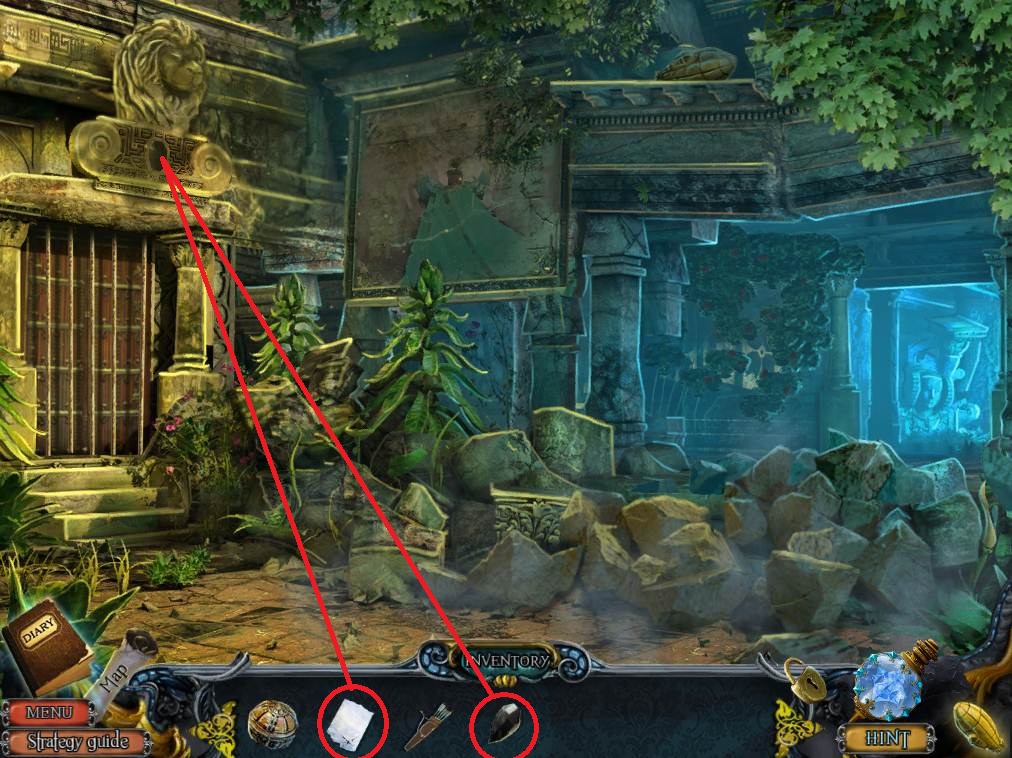
- Put the BLACK DIAMOND in the niche on the lion’s head.
- Use the MIRROR on the black diamond.
- Go left to enter the temple.
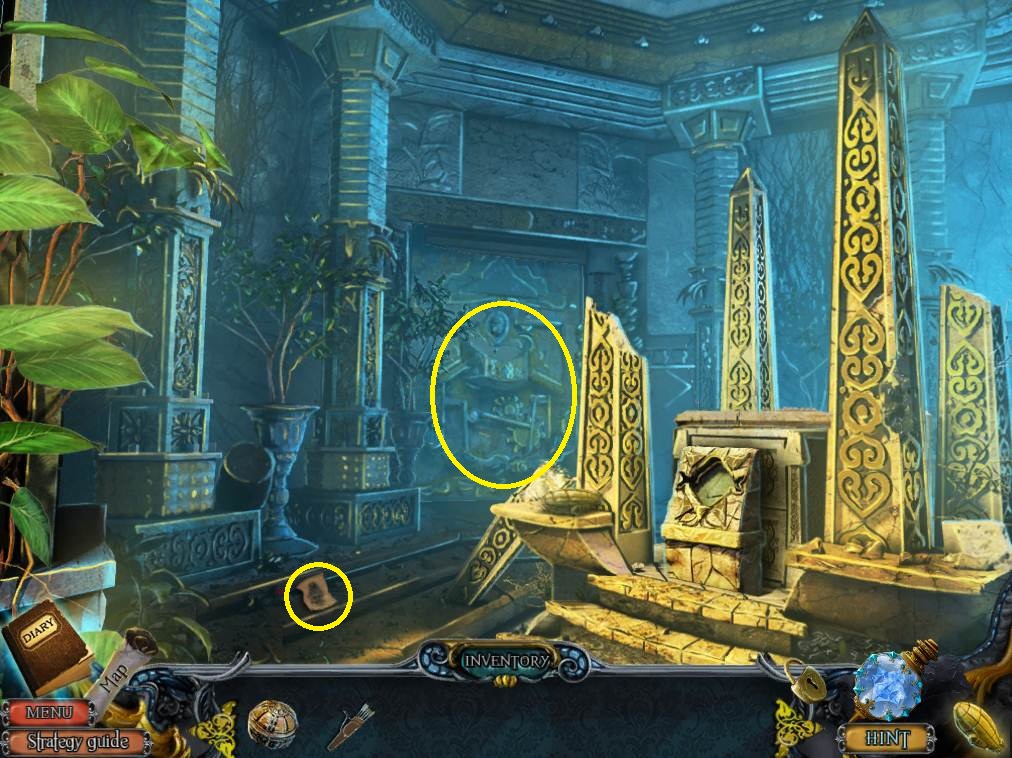
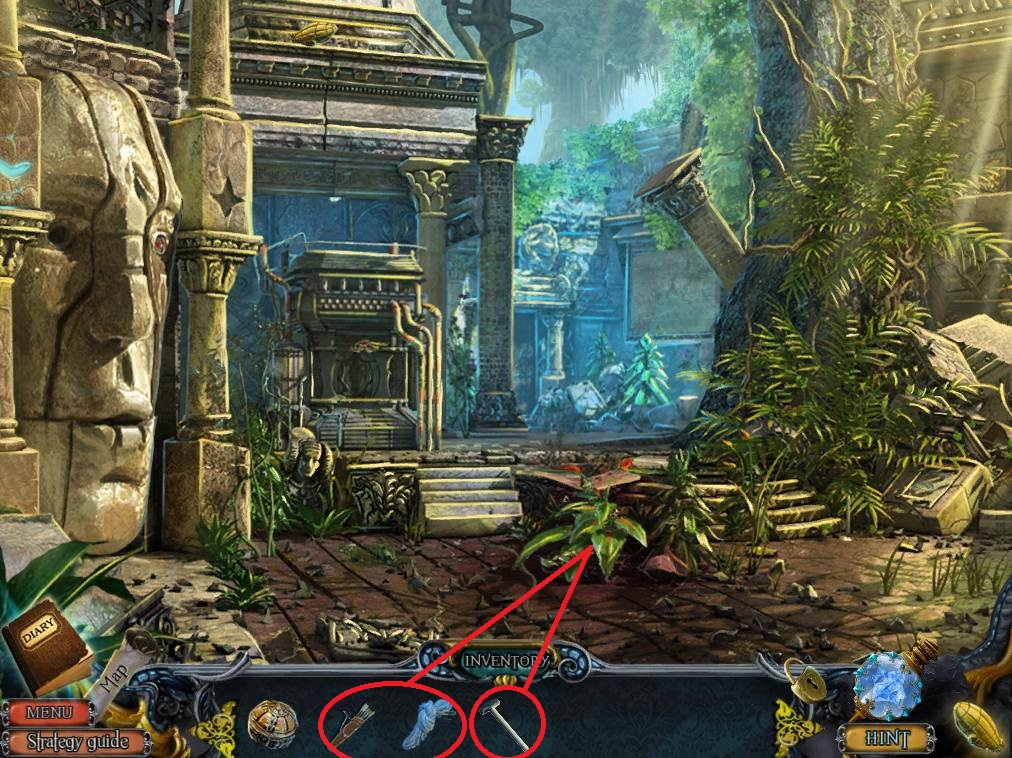
- Click on the floor, look at the drawing, and take the STRING.
- Note that the gate is powered by water.
- Go back.
- Click on the rubble to trigger a hidden object area.
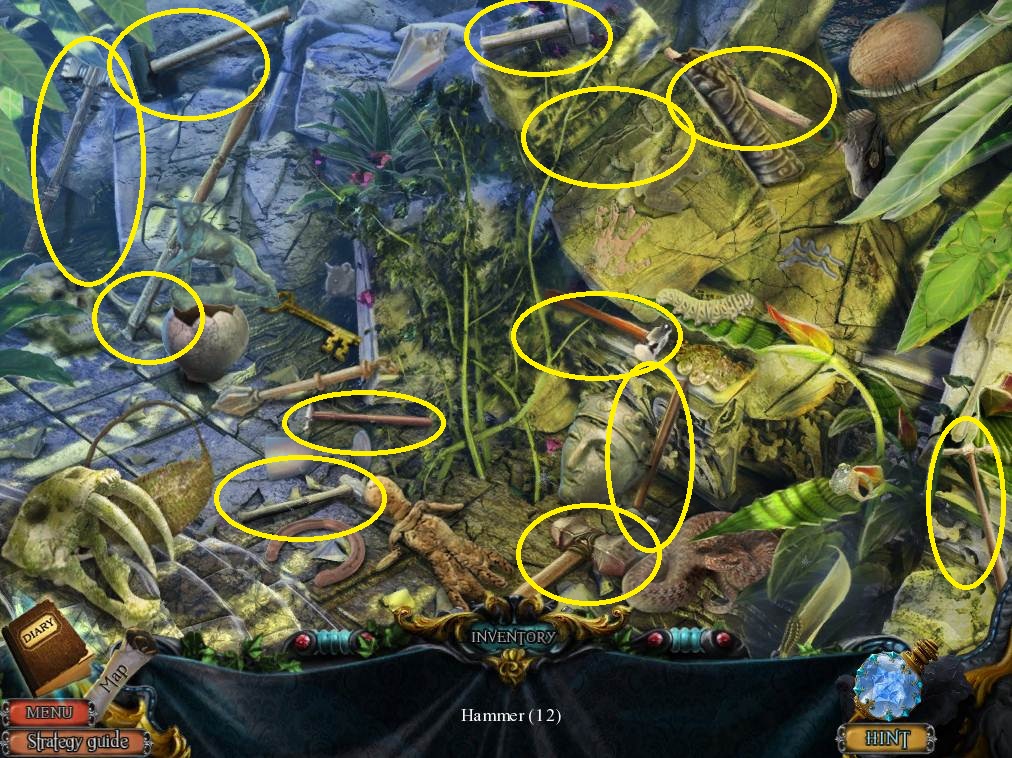
- Use the screenshot to find the twelve hammers.
- Take the HAMMER.
- Go back once.
- Click on the bushes and put the QUIVER and the STRING with the bow to get the BOW AND ARROW.
- The bow and arrow will go to your control panel.
- Use the HAMMER on the tiles to get the first GOLD LOCK PIECE.
- Go back twice.
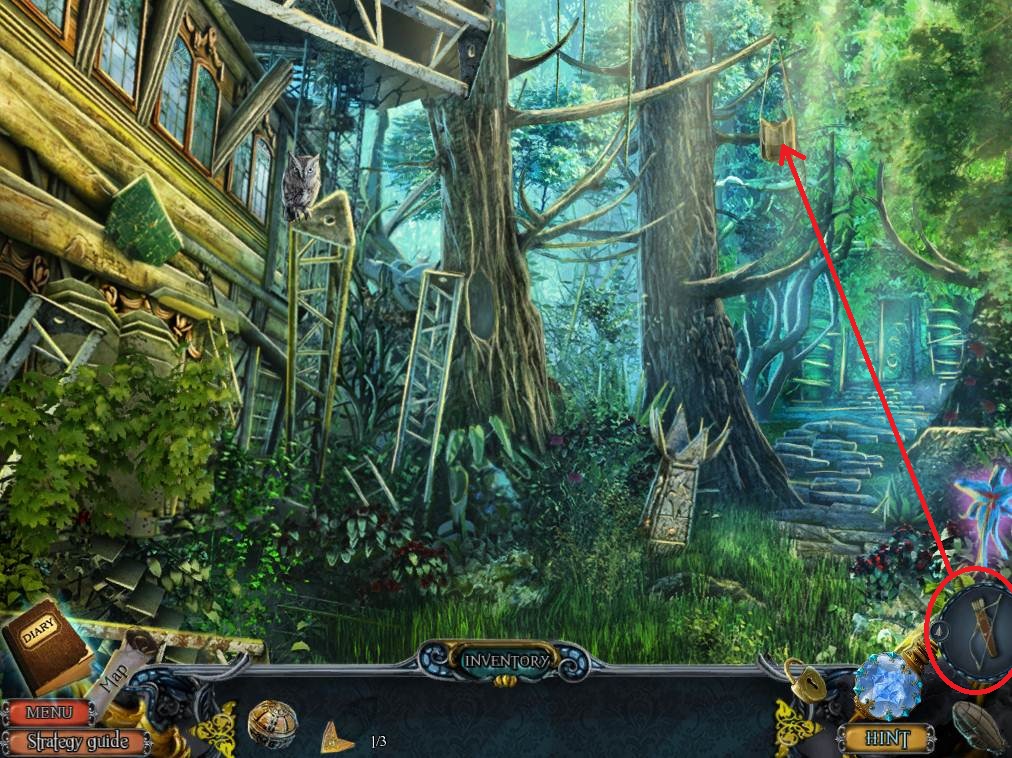
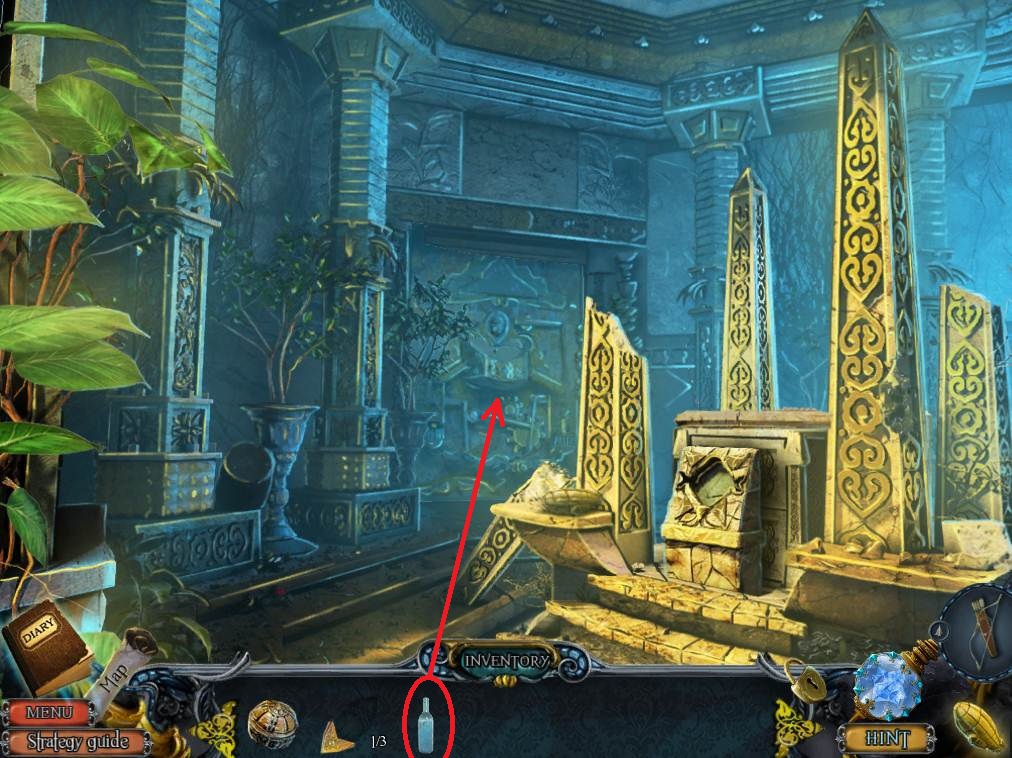
- Use the BOW AND ARROR on the hanging bah, then look at the bag to get the EMPTY WATER BOTTLE.
- Return to the courtyard by going forward twice and then handing a right.
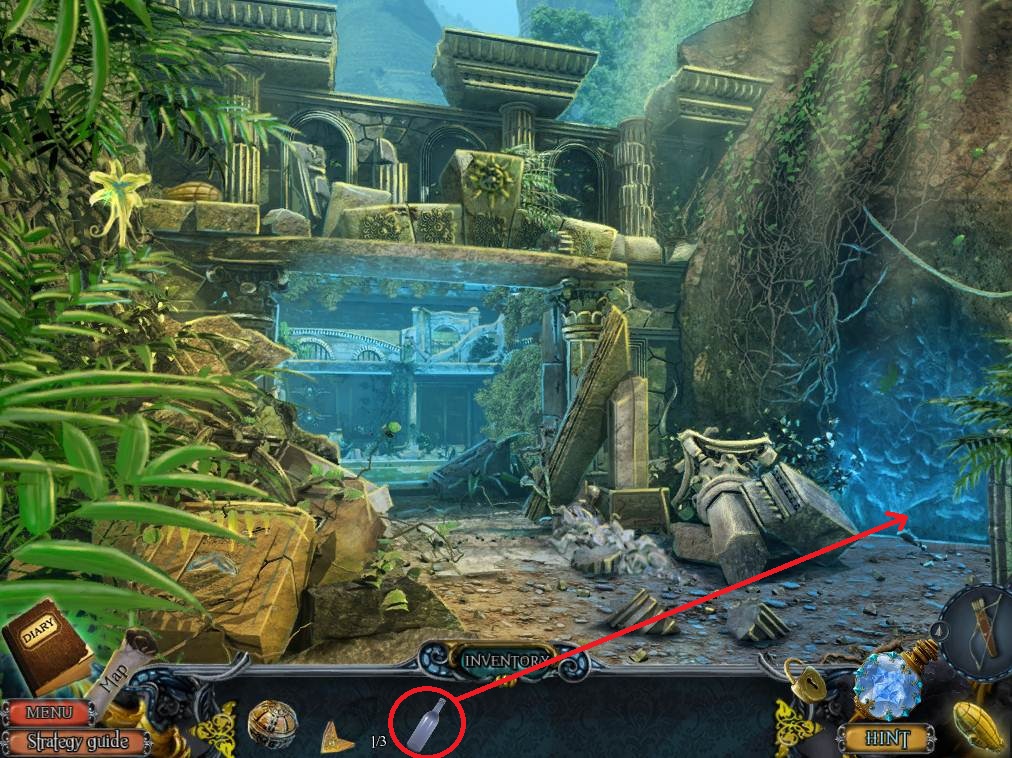
- Use the EMPTY WATER BOTTLE on the water in the crevice to get the WATER BOTTLE.
- Go back once, then forward and take a left.
- Use the WATER BOTTLE on the reservoir to open the door.
- Go through.
Chapter One: The Airship
Chapter Two: The Forest and Temple
Chapter Three: Coming Soon!
Ask for help in the comments below!