
Amaranthine Voyage: The Obsidian Book: Chapter One: Canvass the Campsite
Our Amaranthine Voyage: The Obsidian Book Walkthrough is just what you need to help you navigate the icy terrain of the Icelandic mountainside. Look to the easy step-by-step instructions, clearly marked screenshots, and mini game and hidden object solutions to help you discover the truth about what happened to the harmonium radiation research team and their sought-after research findings! Let us help you solve the mystery of this compelling hidden objects adventure game!
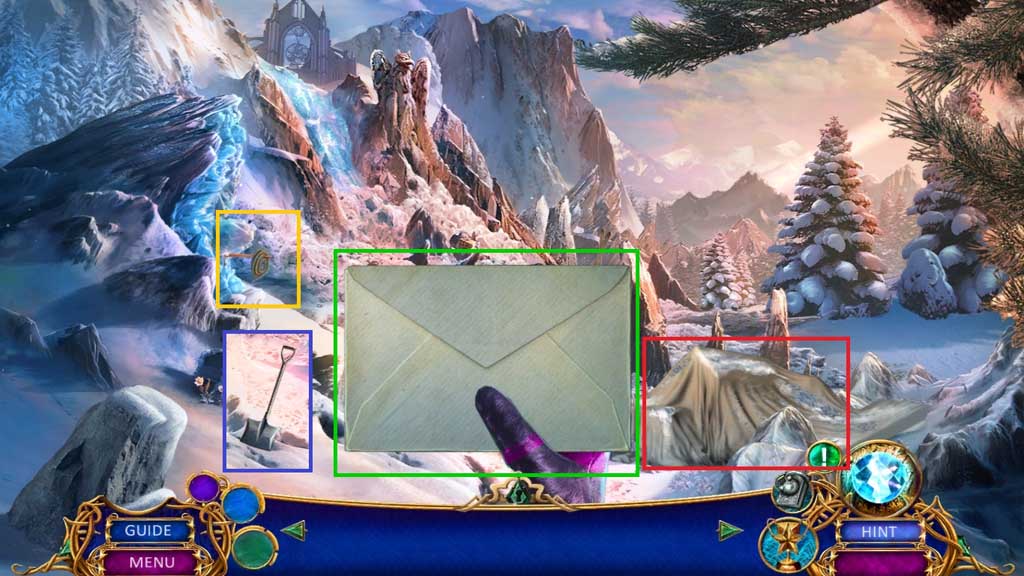
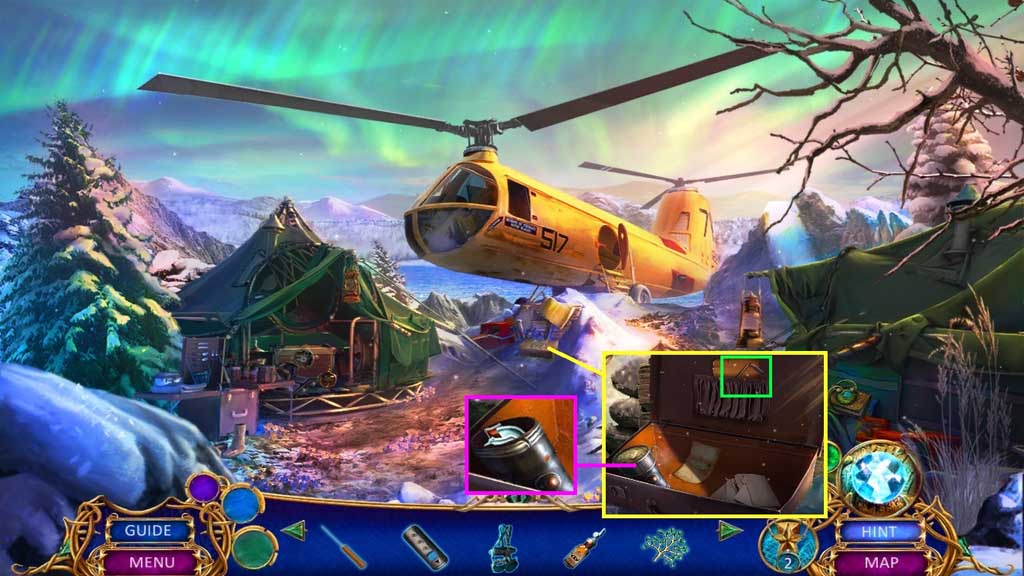
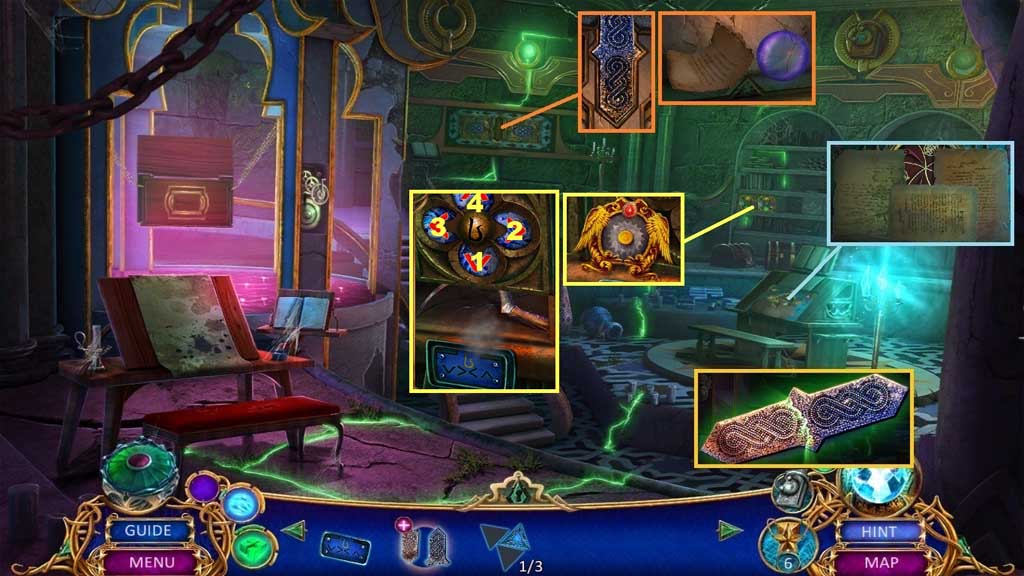
- Click the envelope open.
- Collect the rope and the shovel.
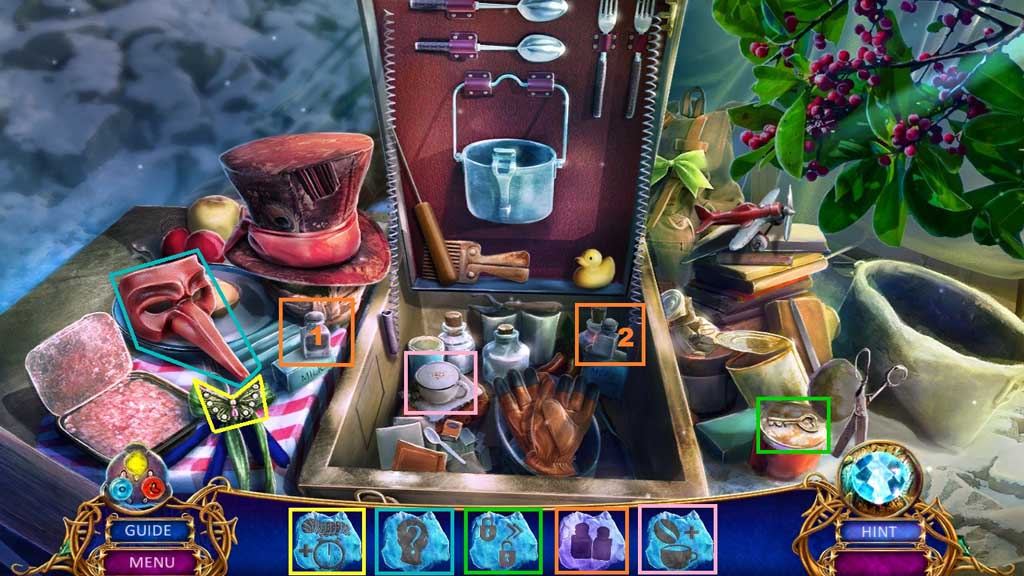
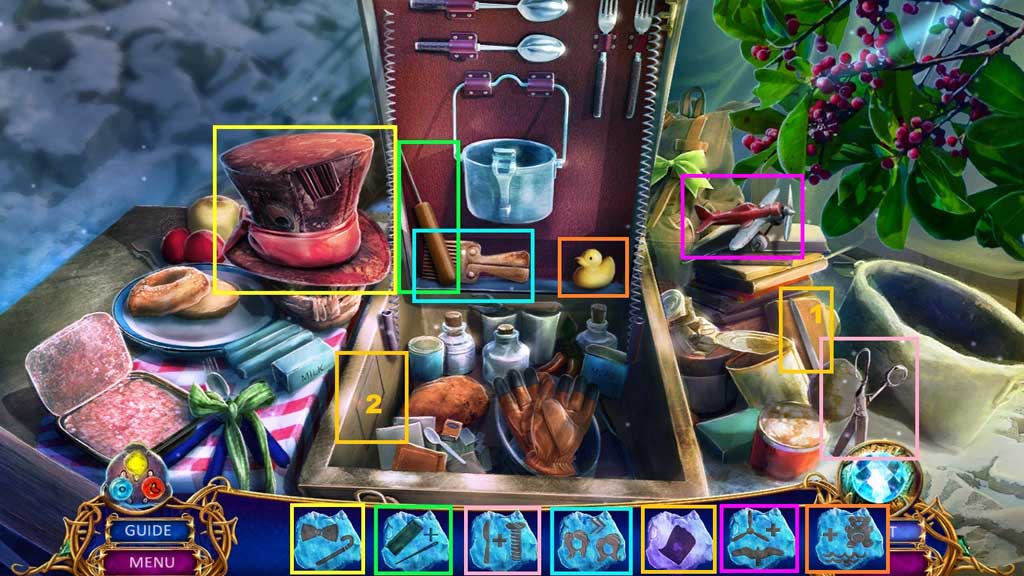
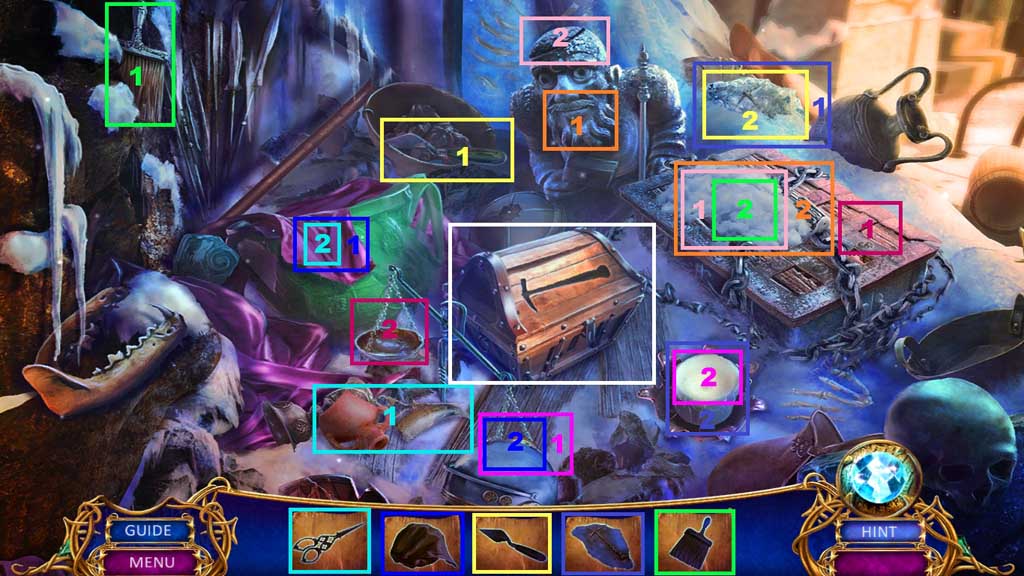
- Click the sheet to trigger a hidden objects area.
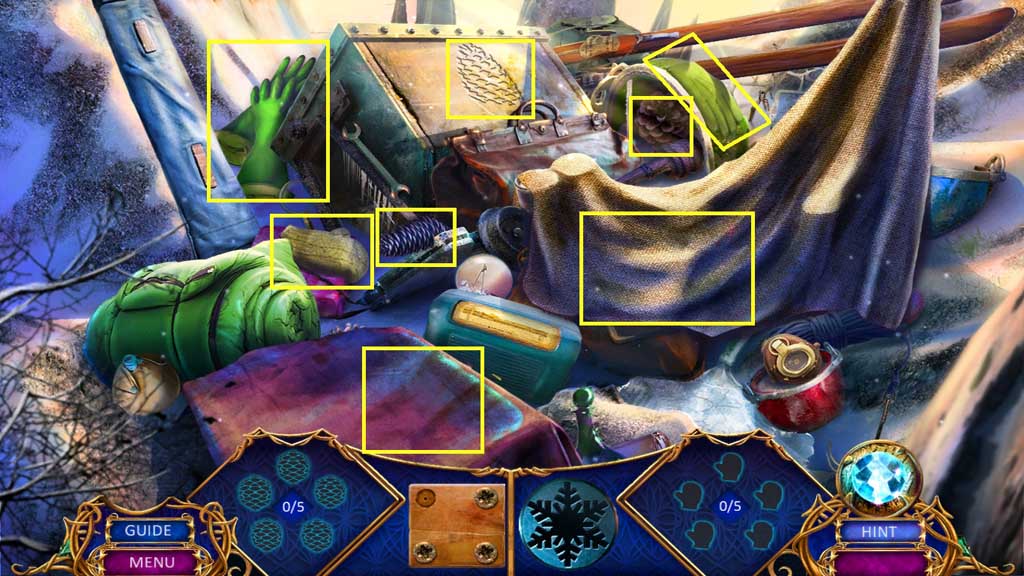
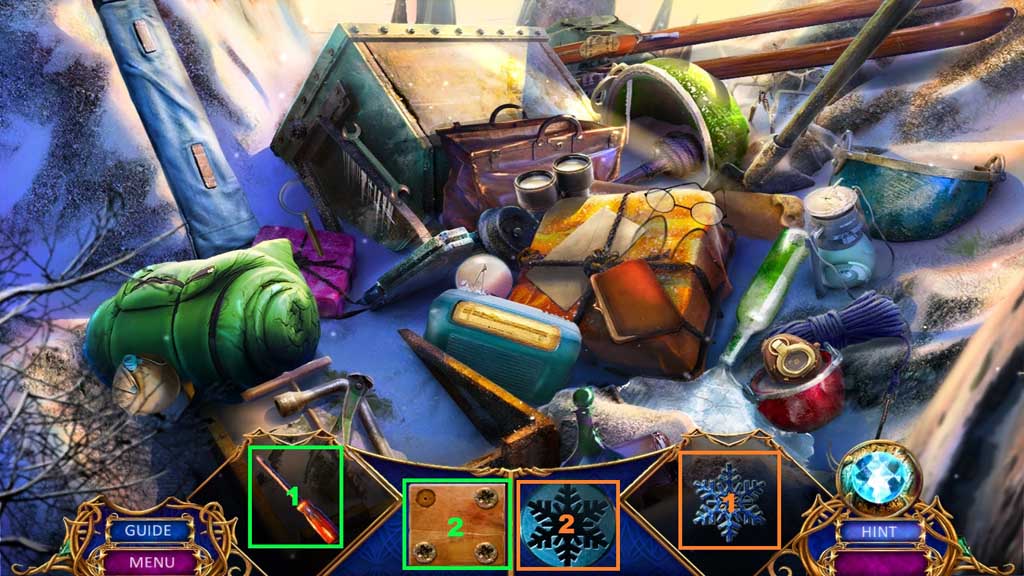
- Find the items.
- Collect the torch.
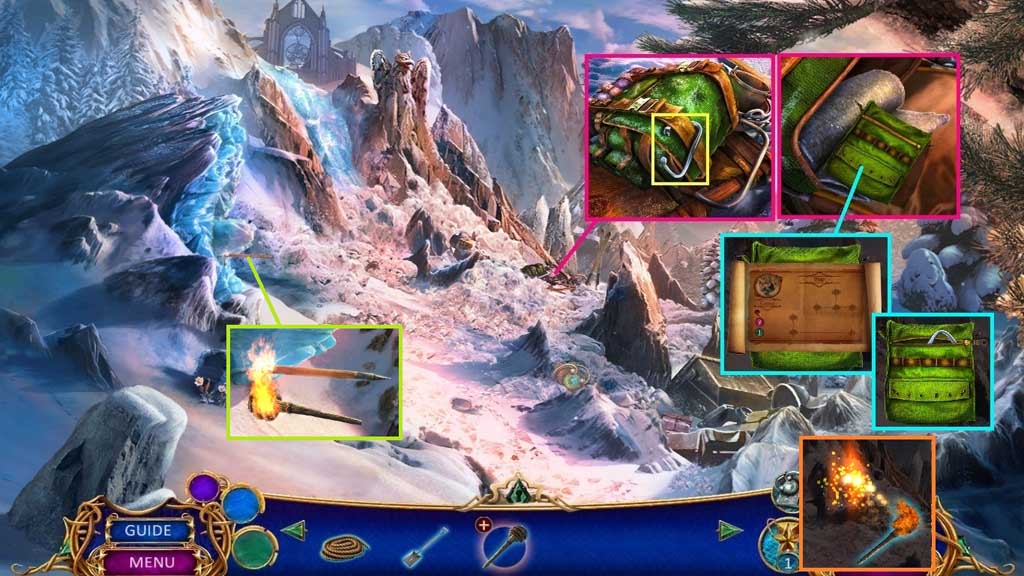
- Select the shovel to collect 1 /2 carabineers.
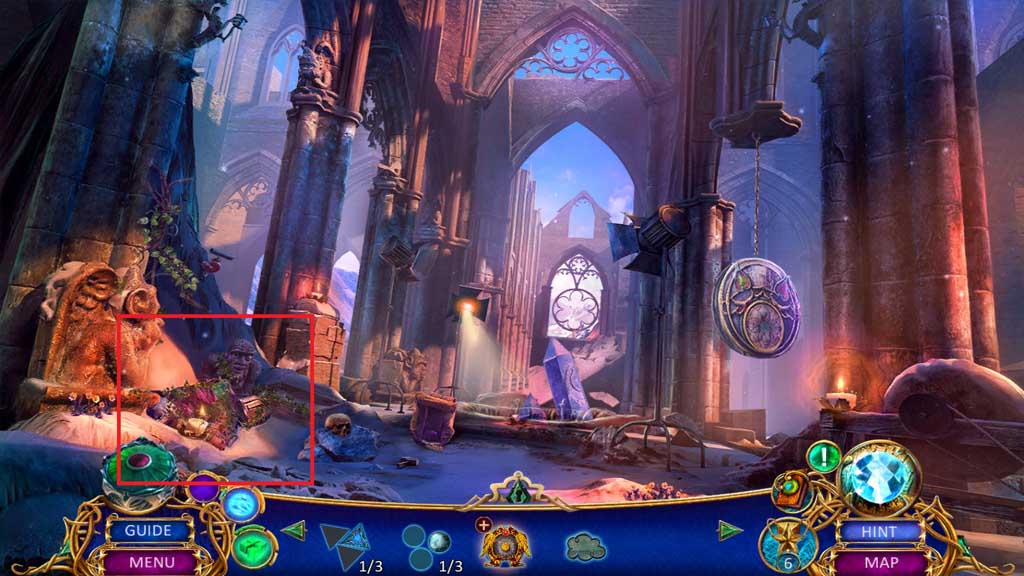
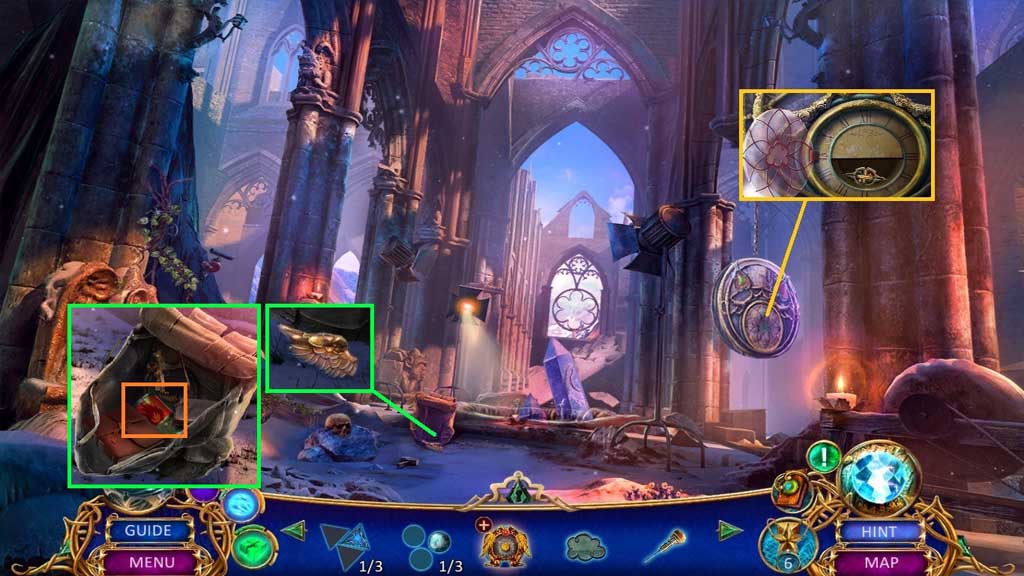
- Click the backpack; collect the zippered bag, the blanket and the matches.
- Click the zippered bag; collect the map and 2 /2 carabineers.
- Select the matches to ignite the torch and use it to collect the pickaxe.
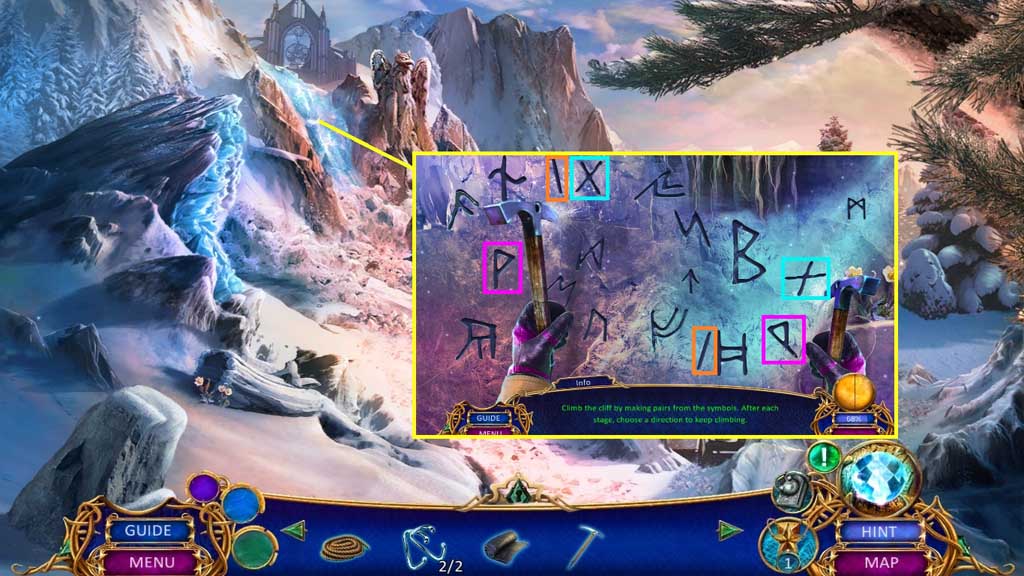


- Select the pickaxe to climb the ice and trigger a mini game.
- Solve the game by finding the matching symbols and directing the climb correctly.
- Move left – right and then right and up.
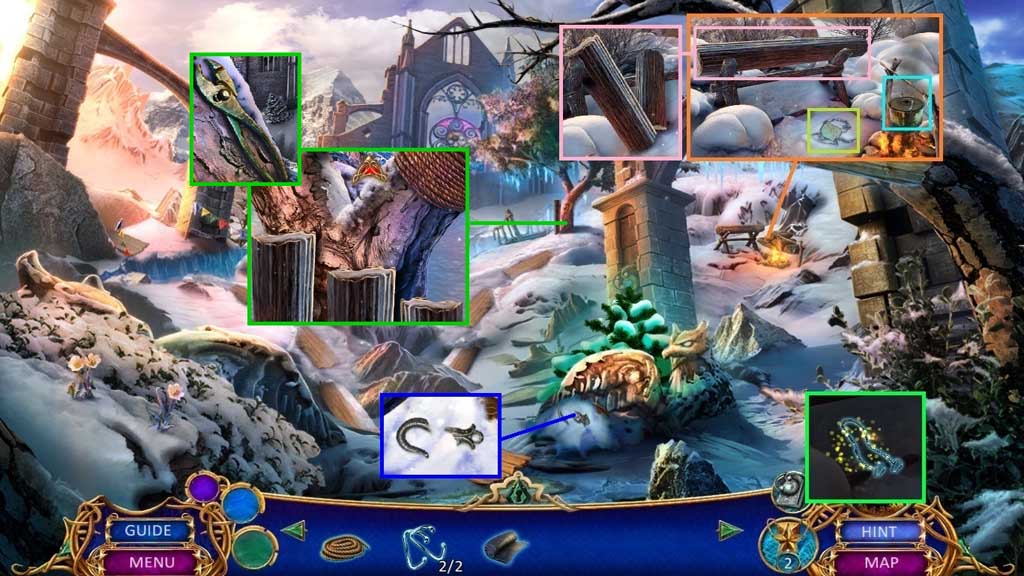
- Collect the hot pot and read the note.
- Collect the chainsaw part and attach the 2 carabineers.
- Select the improvised chainsaw to cut the log; collect the stumps.
- Collect the metal hook.
- Select the stumps to place near the tree.
- Move up and collect the pliers.
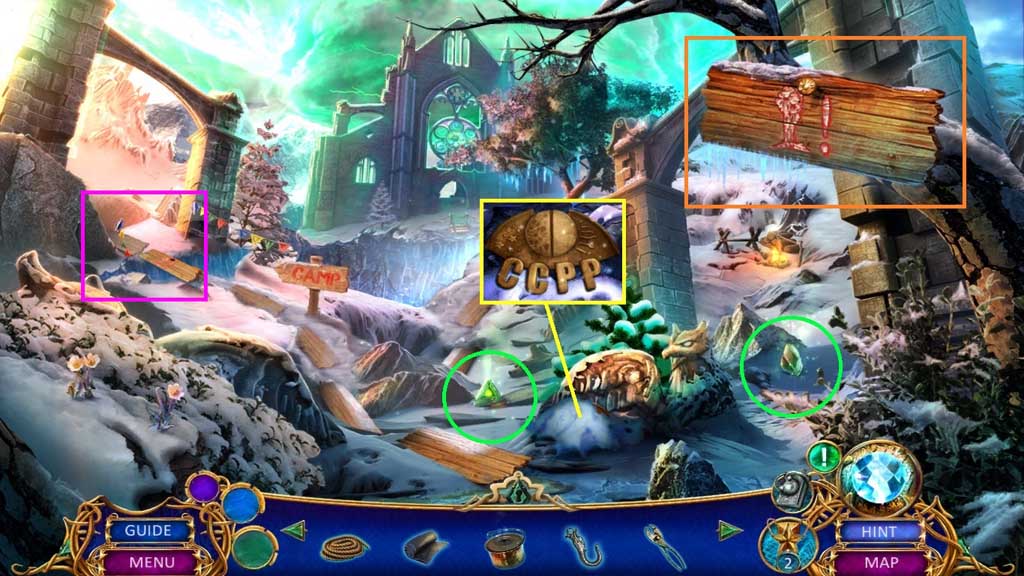
- Collect 1 / 4 and 2 /4 green crystals.
- Select the hot pot to collect the CCPP emblem.
- Select the pliers to collect the wooden sign and place it across the gap.
- Move to the Campsite.

- Click the rope and give Julian the blanket.
- Collect 3 /4 and 4 / 4 green crystals.
- Collect the cold tea.
- Insert the CCPP emblem to trigger a hidden objects area.
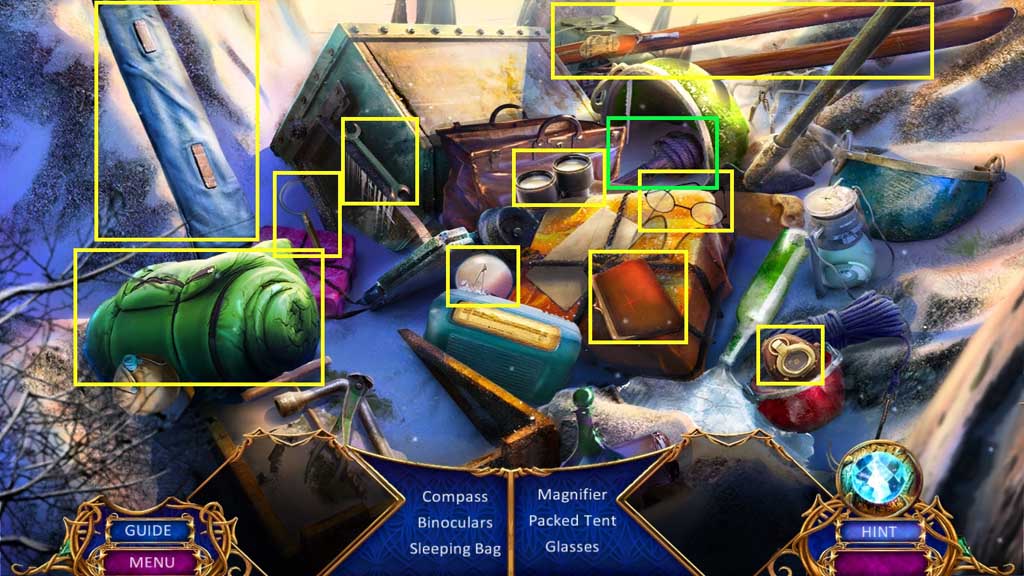
- Find the items.
- Collect the ice pick.
- Move down once.

- Place the cold tea onto the campfire.
- Move to the Campsite.
- Give Julian the hot tea.
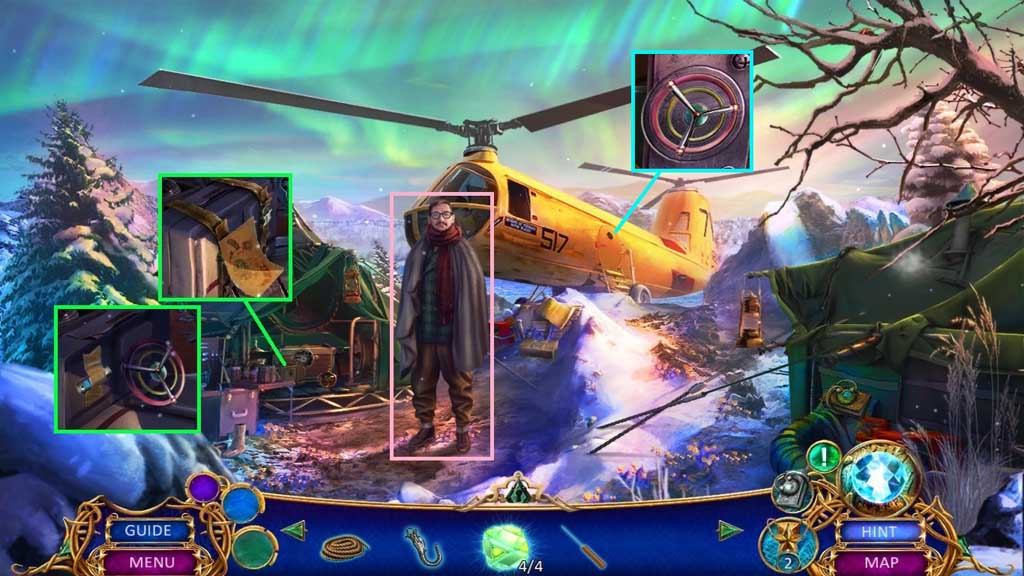
- Click the tent.
- Examine the note and click the bag.
- Collect the propeller key and the signal decoder.
- Insert the propeller key and click it once.
- Move inside the Helicopter.
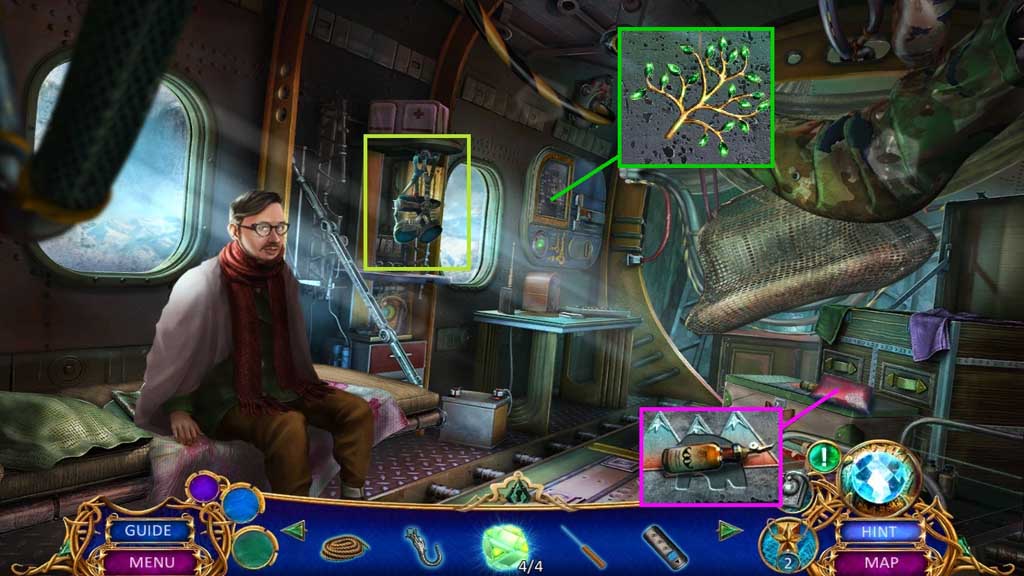
- Collect the parachute harness.
- Click the pillow; collect the oil.
- Collect the jeweled tree.
- Move down once.
- Insert the jeweled tree.
- Read the note and collect the hex key.
- Select the ice pick to collect the shattered bear charm.
- Move into the helicopter.
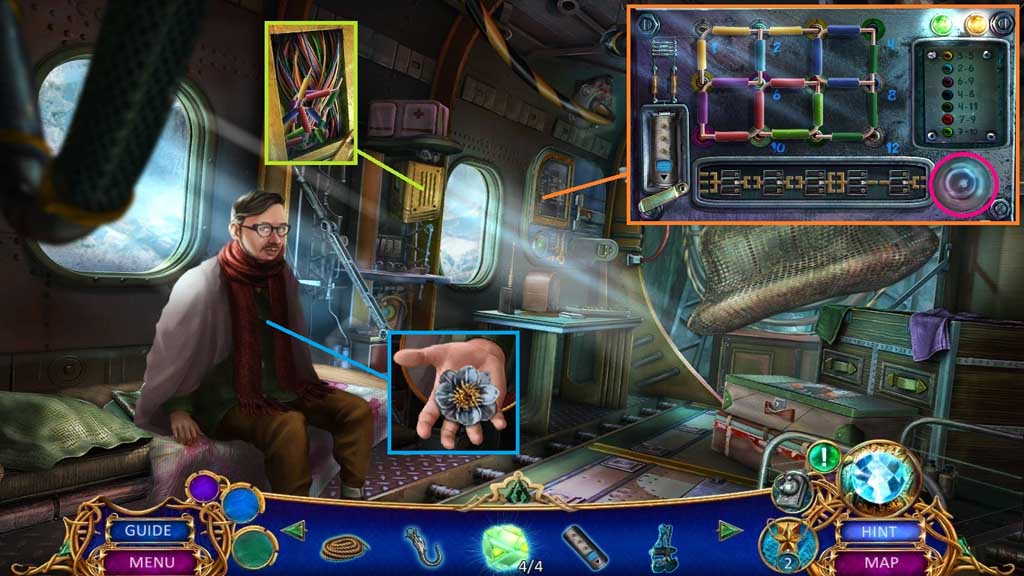
- Insert the hex key; collect the wires.
- Insert the signal decoder and the wires to trigger a mini game.
- Solve the game by aligning the wires and the transistors correctly.
- Collect the bulb and the white dryad.
- Move down once.

- Insert the white dryad.
- Read the note; collect the harmonium collector and click it 3x’s.
- Insert the green crystal; collect the mending power.
- Click the shattered bear charm and assemble the pieces and use the mending power to repair it.
- Collect the polar bear.
- Move into the Helicopter.
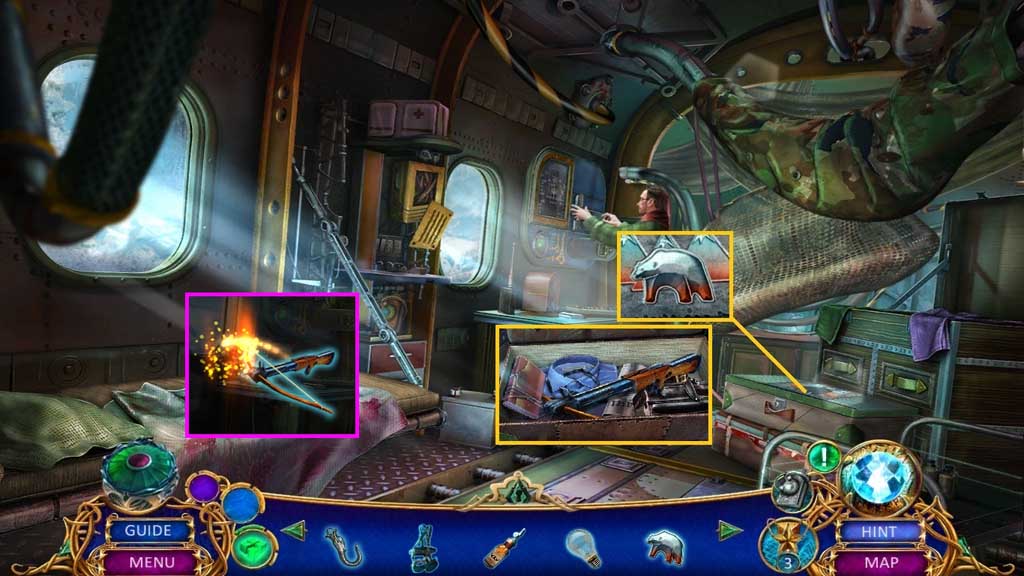
- Insert the polar bear.
- Examine the book; collect the crossbow and attach the rope.
- Move to the Crevasse.
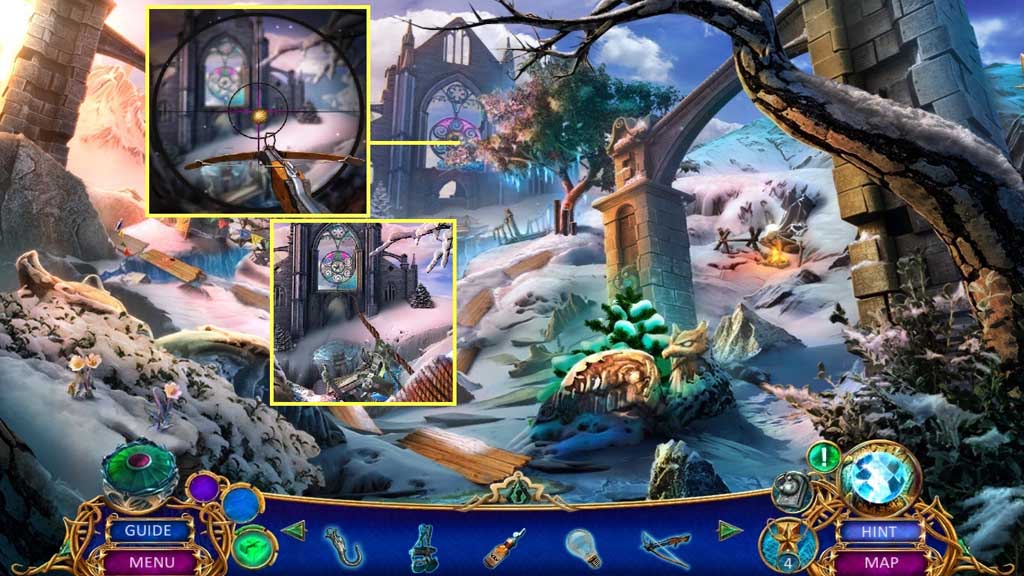
- Zoom into the stained glass.
- Select the crossbow with rope and click it 2x’s to trigger a mini game.
- Solve the game by clicking the ball successfully 2x’s while it is in the center of the crosshairs.
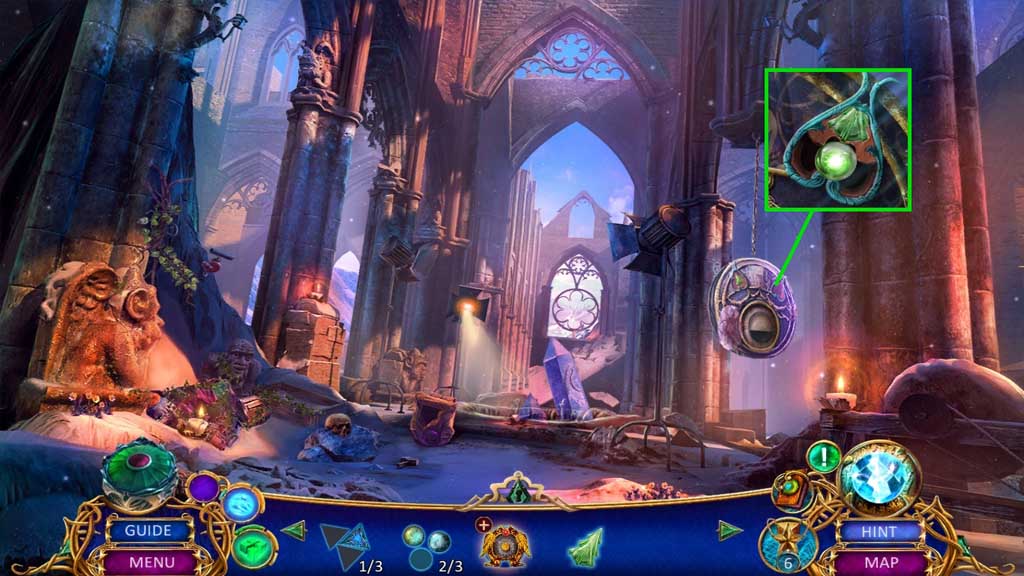
- Select the parachute harness and place it onto the rope.
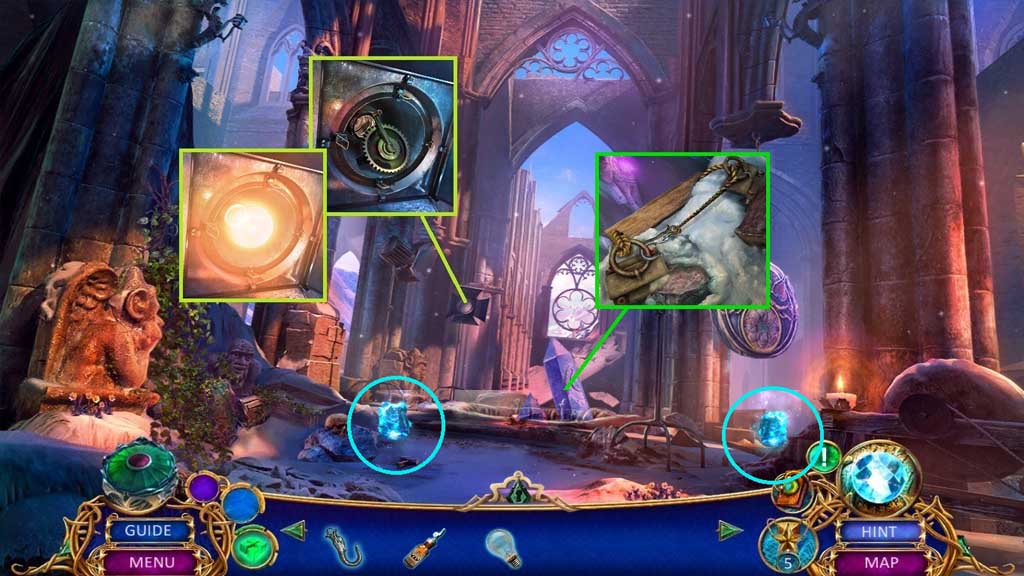
- Select the oil to lubricate the latches on the light; collect the handle.
- Insert the bulb.
- Collect the metal ornament.
- Hook the metal hook and click it once.
- Collect 1 /4 and 2 /4 blue crystals.
- Move to the Undercroft.
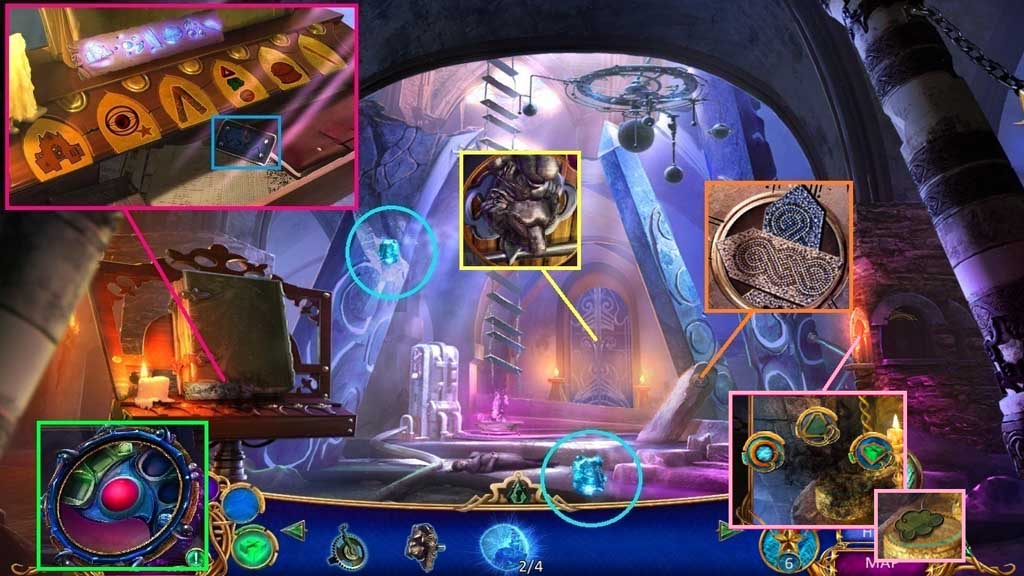
- Collect 3 / 4 and 4 /4 blue crystals.
- Insert the blue crystal into the harmonium collector; collect the cleanse power.
- Click the black shadow and use the power of cleansing.
- Click the cleanse harmonium collector to trigger a mini game.
- Solve the game by clicking the symbols to reflect the diagram.
- Collect the blue coded plate.
- Click the black shadow and use the cleansing power on it; collect the glass cloud.
- Collect the broken tile.
- Insert the metal ornament.
- Move ahead.
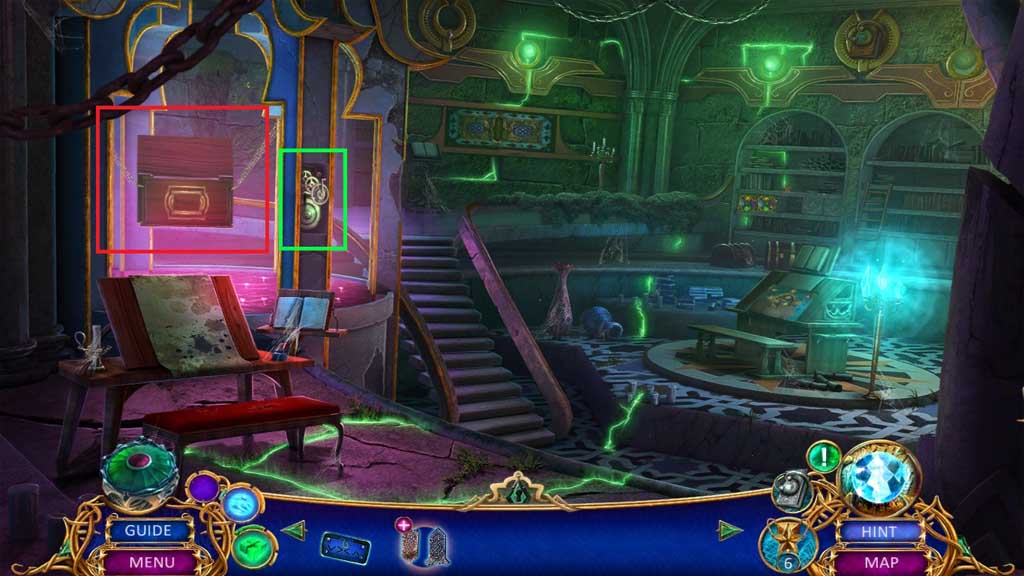
- Attach the handle to trigger a hidden objects area.
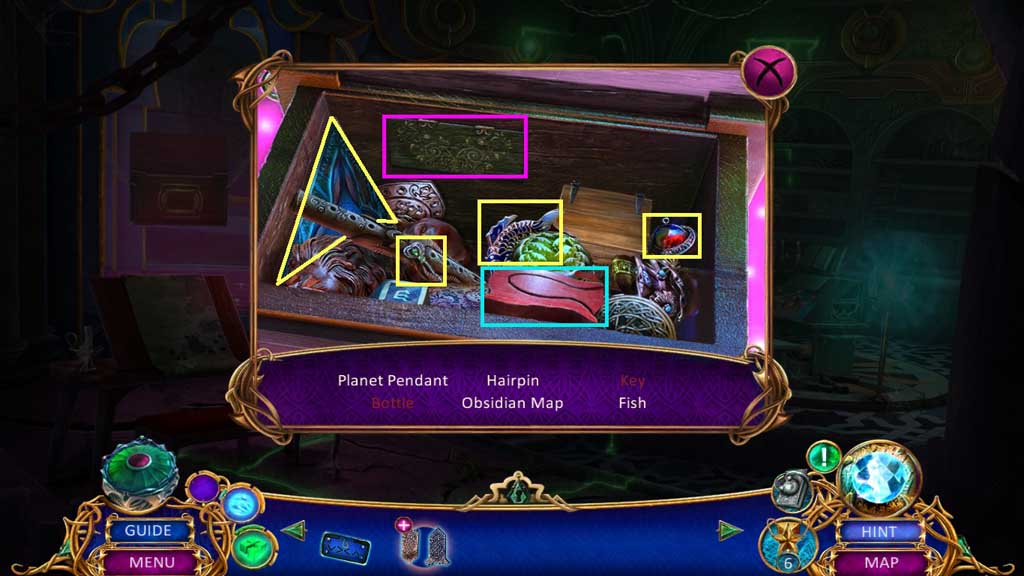
- Find the items.
- Collect 1 /3 obsidian maps.
- Click the 3 notes.
- Click the pieces of broken tile and click both pieces.
- Select the mending power to repair the tile; insert the tile, click the note and collect 1 /3 travel hemispheres.
- Collect the frame.
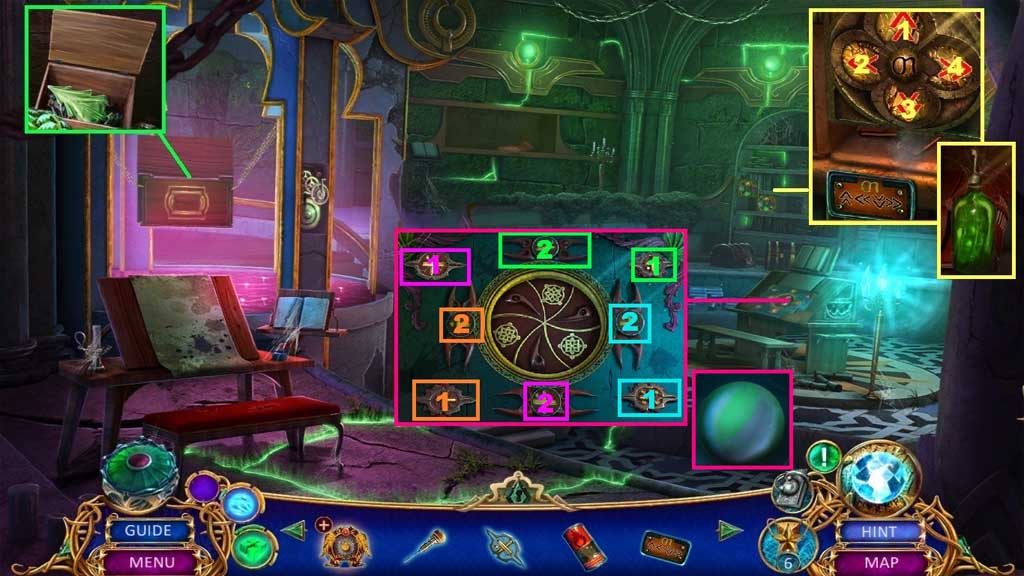
- Insert the blue coded plate to trigger a mini game.
- Use the following solution 1 – 2 – 3 – 4.
- Collect the sickle.
- Move to the Monastery Ruins.
- Select the sickle to remove the bush and trigger a hidden objects area.
- Find the items.
- Collect the engraving tools.
- Insert the glass cloud; click the clock face to collect the crystal knob.
- Collect the statue part.
- Click the sack and click the items aside; collect the fire extinguisher.
- Move to the Undercroft.

- Attach the statue part.
- Collect the yellow coded plate.
- Move ahead.
- Select the engraving tool to pry the box open; collect the glass tree.
- Insert the yellow coded plate and click the buttons on order; collect the petroleum bottle.
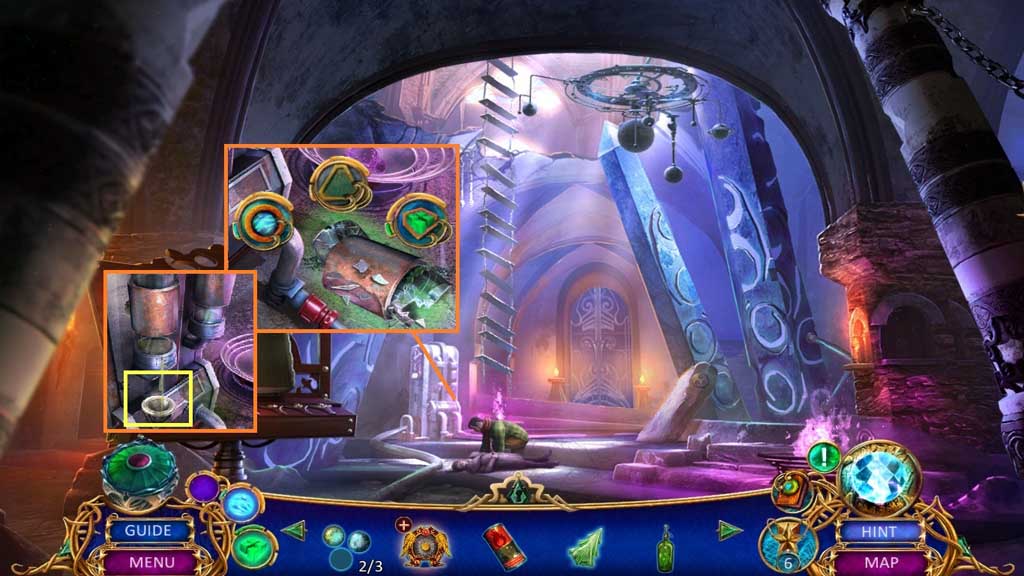
- Attach the crystal knob to trigger a mini game.
- Solve the game by placing the knobs correctly.
- Collect 2 /3 travel hemispheres.
- Move down once.
- Select the fire extinguisher to douse the flames.
- Click the pieces 4x’s and use the mending power.
- Click the pipe and select the petroleum bottle to pour into the nozzle.
- Move to the Monastery Ruins.
- Insert the glass tree.
- Collect 3 /3 travel hemispheres.
- Move to the Undercroft.
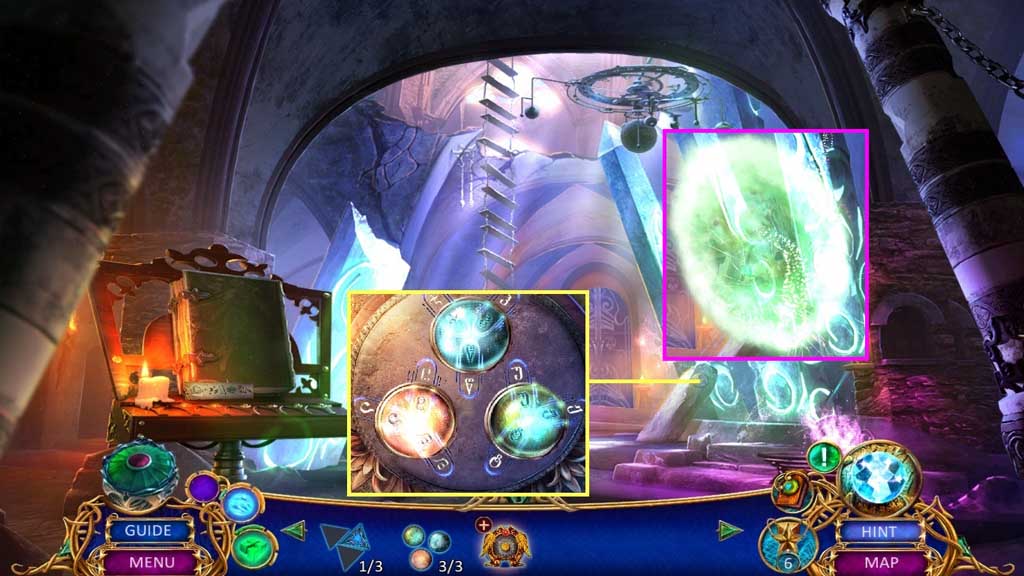
- Insert the 3 travel hemispheres.
- Arrange them correctly and click them into the proper alignment.
- Move into the Portal.