Treasure Seekers: The Time Has Come
Treasure Seekers: The Time Has Come Walkthrough has step-by-step instructions on how to beat the game from start to finish. It includes detailed screenshots of all locations and hidden object areas as well as videos of how to solve certain puzzles. Treasure Seekers: The Time Has Come is a Hidden Object Adventure game chock full of exciting puzzles and challenging hidden object areas. Can you help Tommy save his sister Nelly, find the Holy Grail, and save the world from almost certain destruction?
Treasure Seekers: The Time Has Come
Game Objective: Help Nelly and Tom save the world....
General Information
Task Window - This will show your current tasks as well as the number of tasks you have completed out of the total available in that particular chapter. Once tasks are completed, they will disappear.
Eye Cursor - When you are able to zoom in on something, your cursor will turn into an eye. Click on that area to zoom in.
Gear Cursor - When you are able to use an object or open a key object, your cursor will turn into two small gears.
Puzzle Box Cursor - When you need to play a puzzle, the cursor will turn into a puzzle box.
Inventory - Located in the bottom right, your inventory will hold objects that you find during the game. To use an object click on it and bring it to the area you want to use it on.
Key Object - This will open when you need to find objects in the scene in order to make something work. Find the objects shown in the picture, click on them, and then bring them over to the picture. If the image flashes, you have it in the right spot. Click to place the object.
Sparkles - Sparkles indicate a hidden object area you need to play. Click on the scene in order to access it.
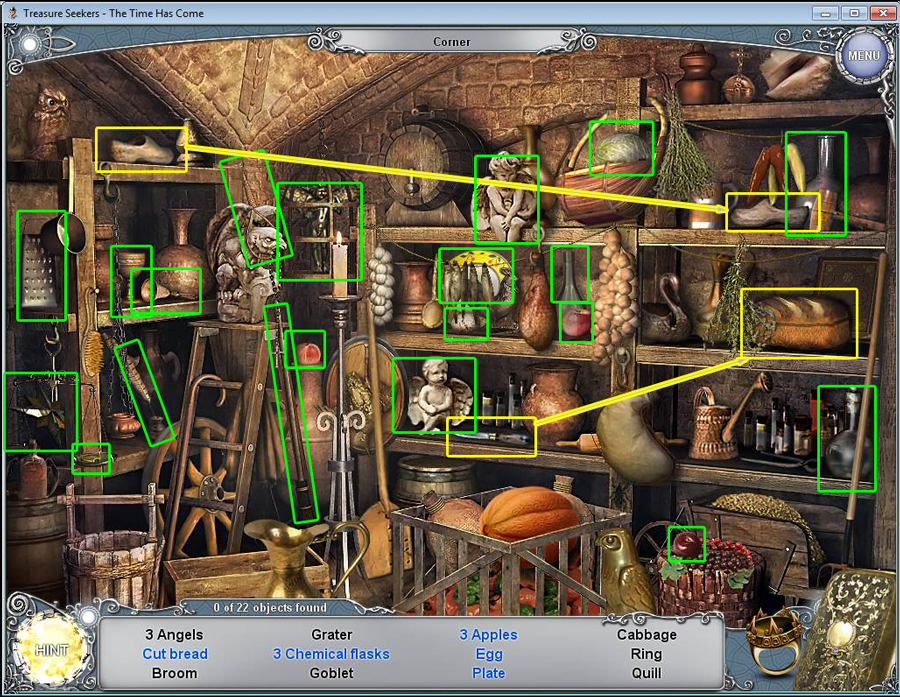
Blue Items - In the hidden object areas, certain items will be listed in blue. This means you have to take an extra step in order to collect them. This could mean you have to open something or use an object on another object to get the right results.
Arrow - An arrow indicates that you can move to another area of the chapter.
Chapter 1: Paris France, 1932
Excavation Camp
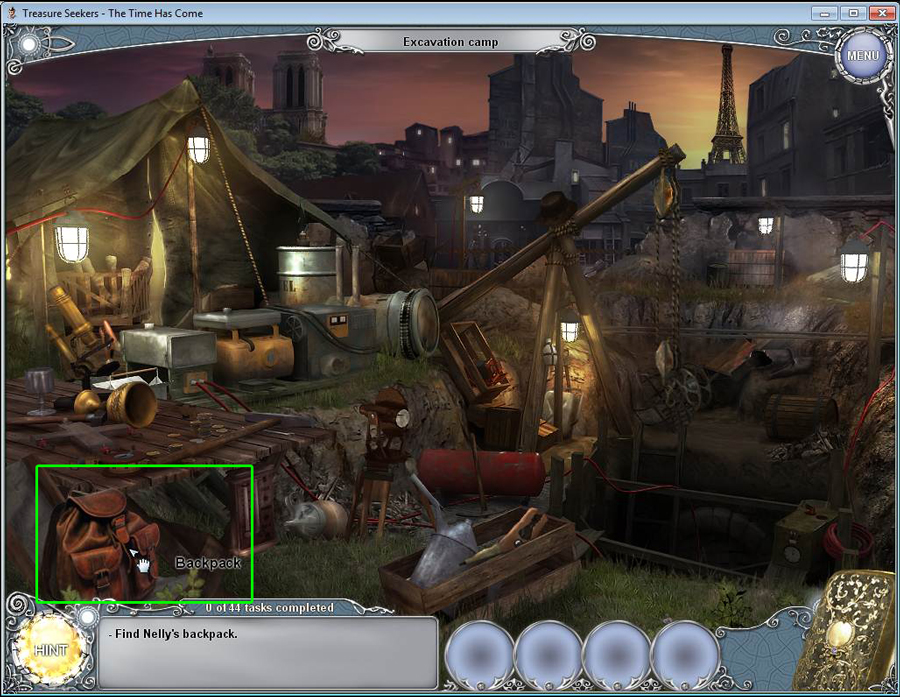
- Click on Nelly's backpack in the bottom left corner.
- Click on the diary in the backpack to open it.
- The page in the diary is torn. Click on the x to close out the diary. You need to find a pencil to see what was written.
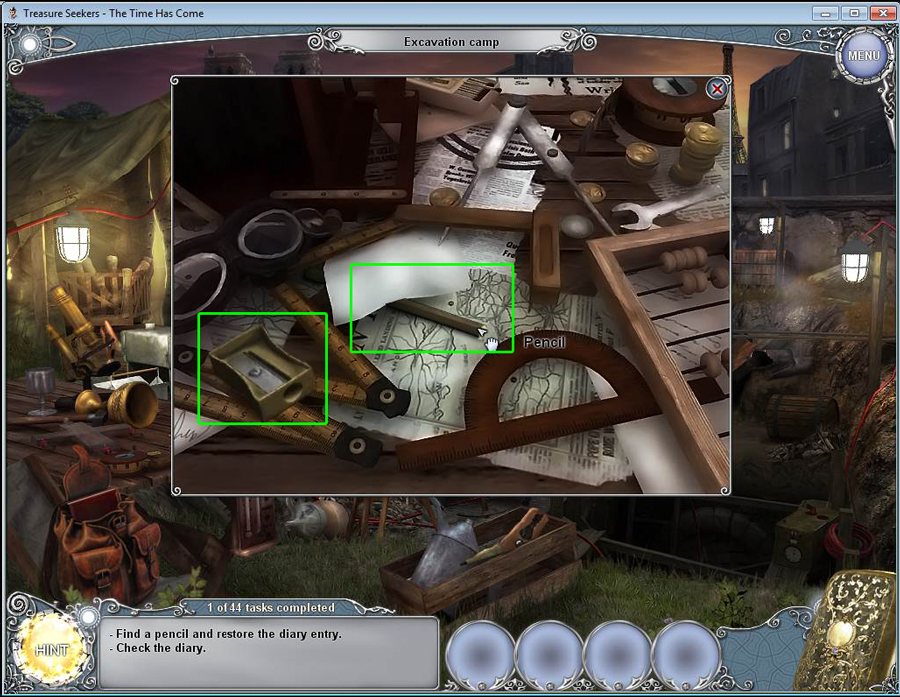
- Click on the table to zoom in on it.
- Click on the pencil. It's dull and you need to sharpen it.
- Use the pencil on the sharpener to sharpen it.
- Click on the diary to open it.
- Click on the pencil in your inventory, and use it on the page until the whole message is revealed.
- Go down to the excavation site.
- It's too dark to see right now. Go back to the excavation site.
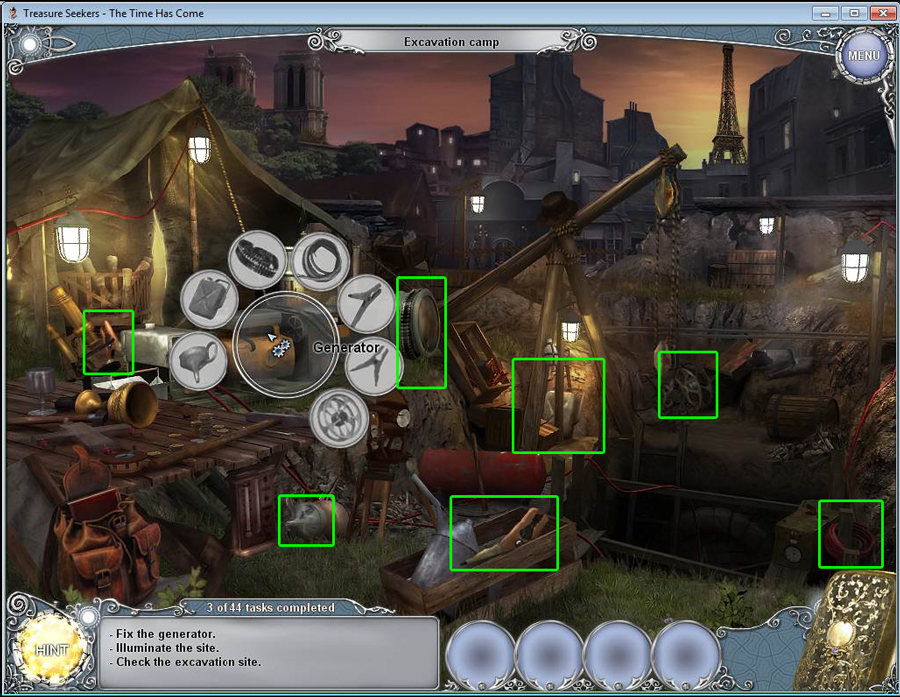
- Click on the generator to open the key object.
- Find all the objects shown in the key object in the scene. Click on them and then drag them to the right image. The image will flash when you have the right object
- Go back down to the excavation site.
- A light bulb is missing, and it's still too dark. Go back up to the camp to find a lightbulb.
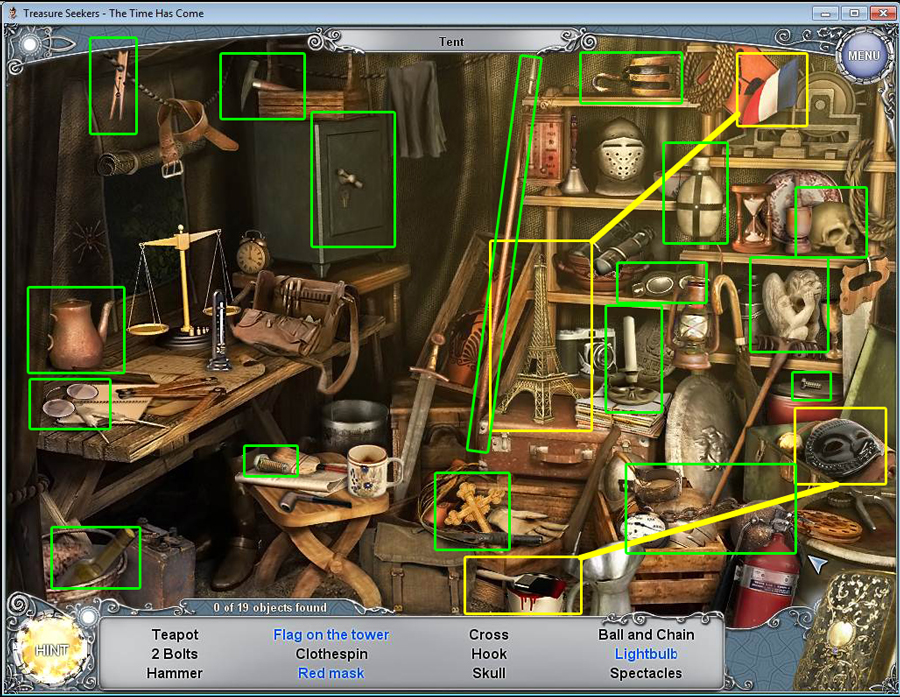
- Click on the hidden object scene to access it.
- Once you have found all the hidden objects, you will receive the lightbulb.
- Go back down to the excavation site and use the lightbulb on the lamp at the top of the screen.
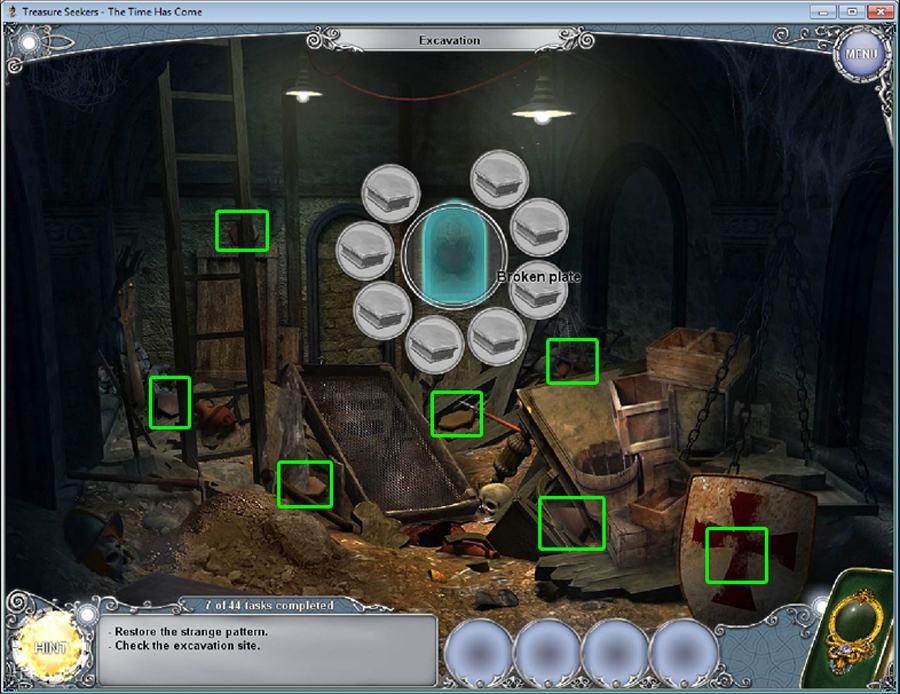
- Click on the broken plate at the back of the room to open the key object.
- Find 7 hexagon shapes in the scene. One is behind the shield and one is behind the plastic hanging.
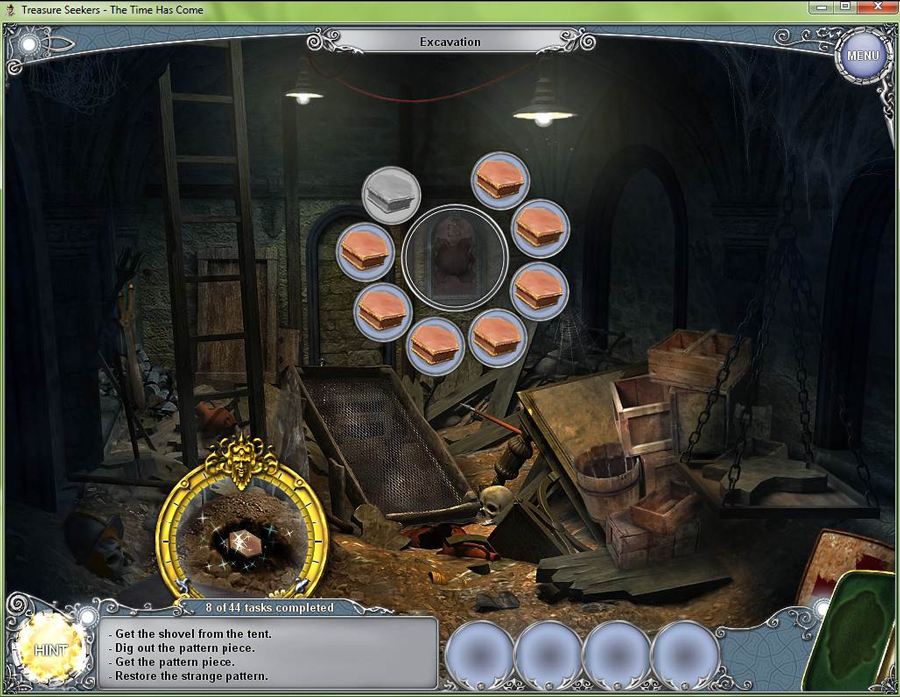
- To find the last piece, you have to use the X-Glass
- Click on the x-glass and move it over the dirt mound in the bottom-left corner to see the final missing piece.
- Go back to the campsite.
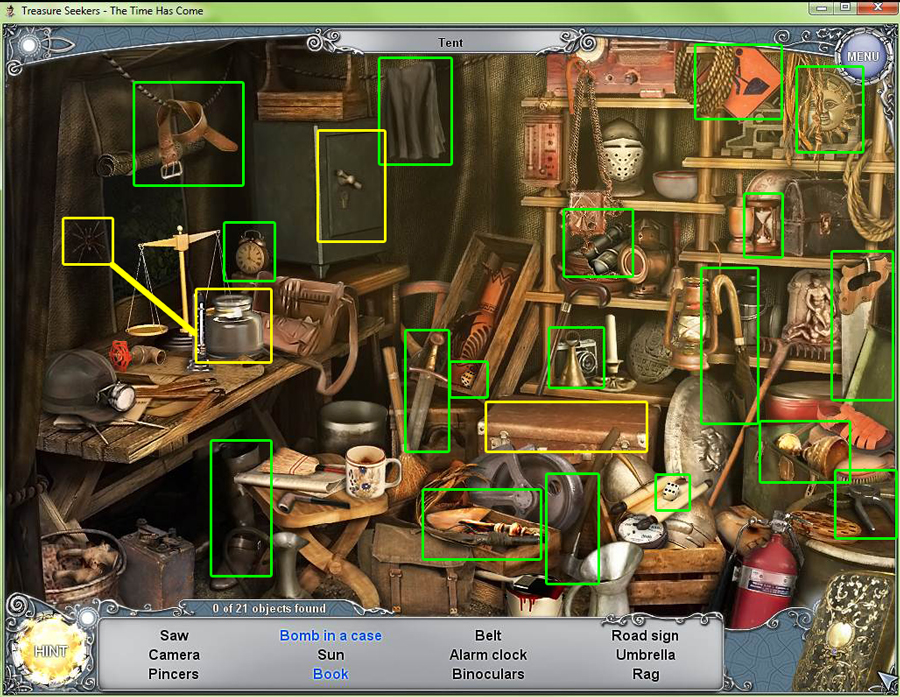
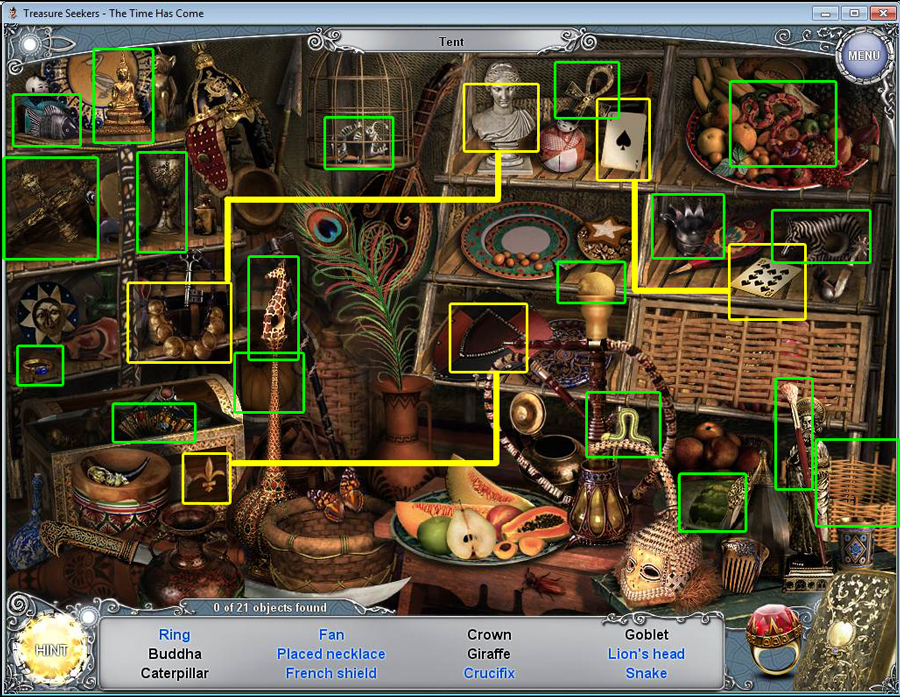
- Click on the hidden object scene near the tent to play it.
- Open the safe to find the book.
- Click on the spider to put it in the jar.
- Open the case to find the bomb.
- Once you have found all the objects, you will receive the shovel.
- Go back to the excavation site.
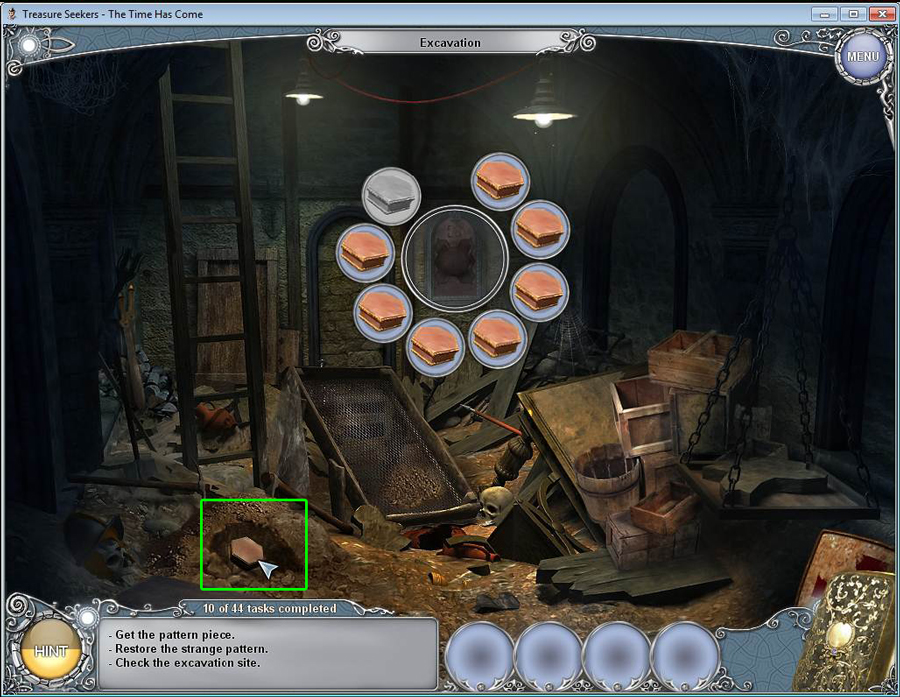
- Use the shovel on the dirt mound three times to uncover the last hexagon.
- Click on the object and bring it back to the key object.
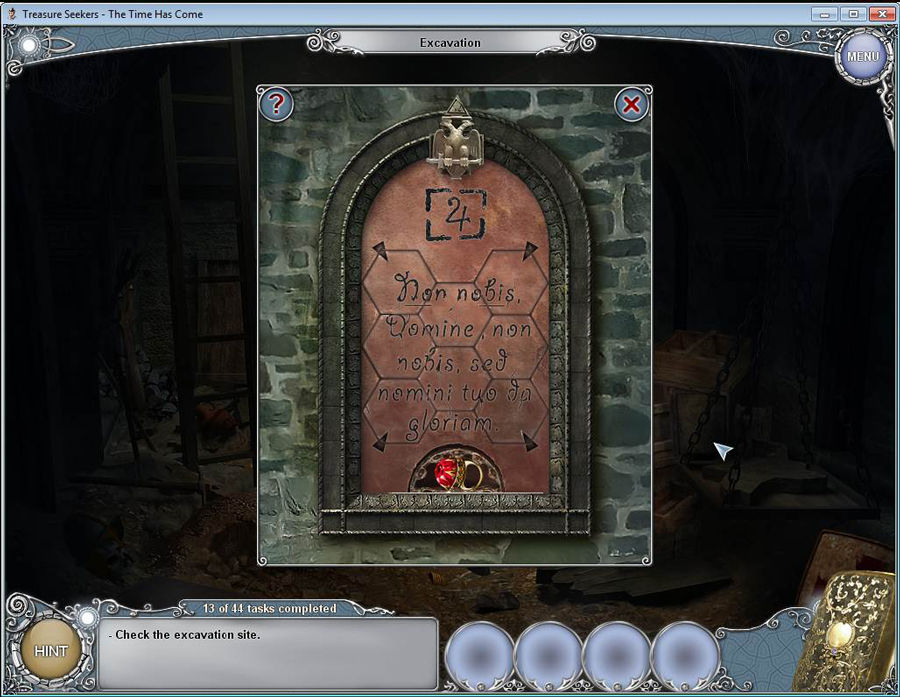
- Click on the plate to start a puzzle.
- Click on two hexagons to switch them. See the screen shot above to see the completed puzzle.
- Click on the ring when you are done and you will be transported to Molay's Room.
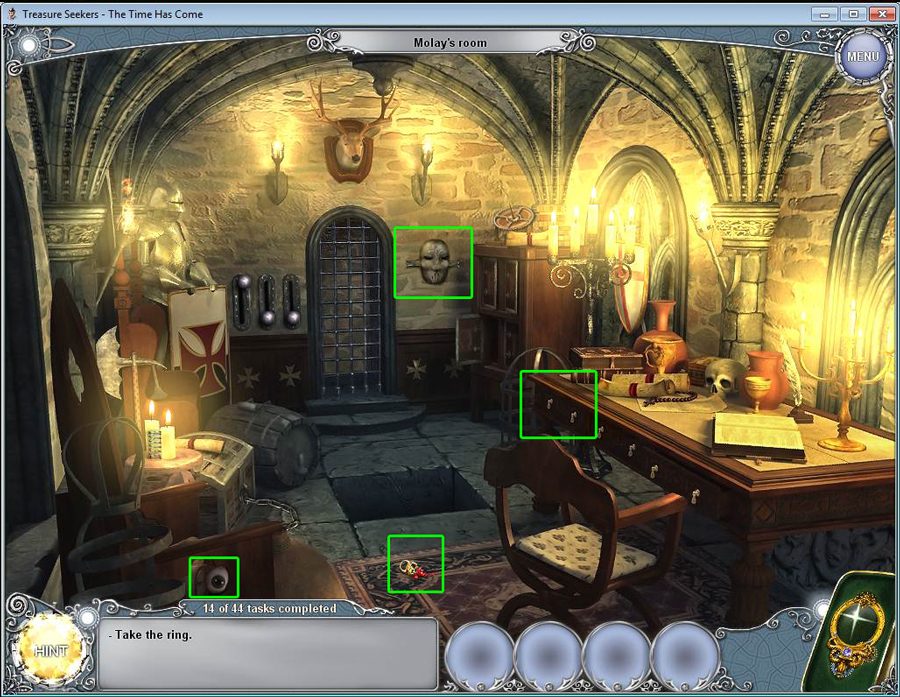
- Click on the broken ring to add it to your inventory.
- Click on the mask on the wall to discover you need to find the eyes for the mask.
- Click on the eye in the lower left-hand corner of the screen.
- Click on the far left desk drawer to open it. Click to zoom in and take the eye.
- Click on the mask and use the 2 eyes on the sockets.
- Listen in on the conversation
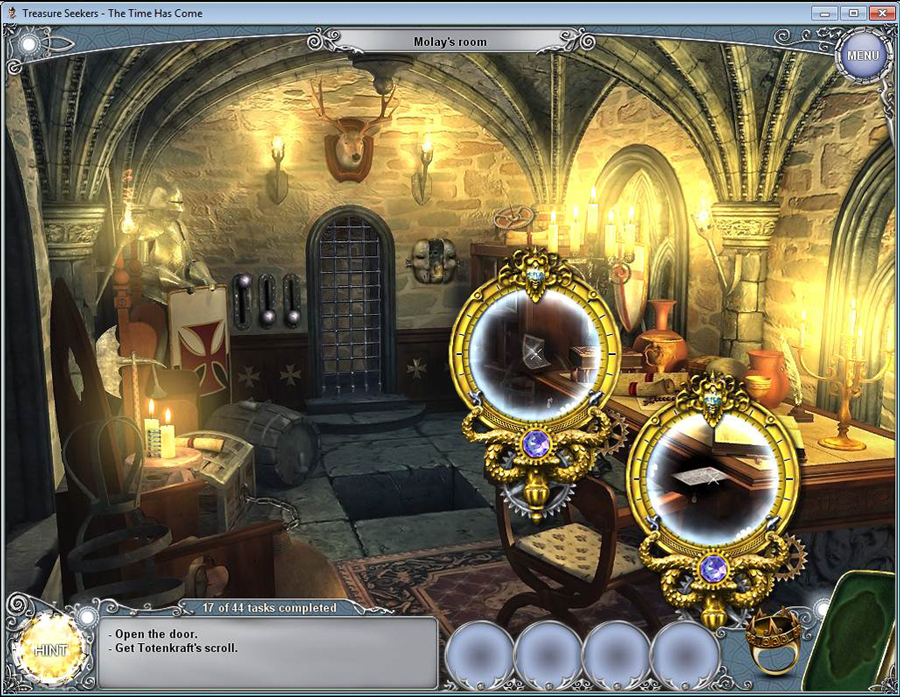
- Use the x-glass on the desk and the cabinet to get the two torn pages.
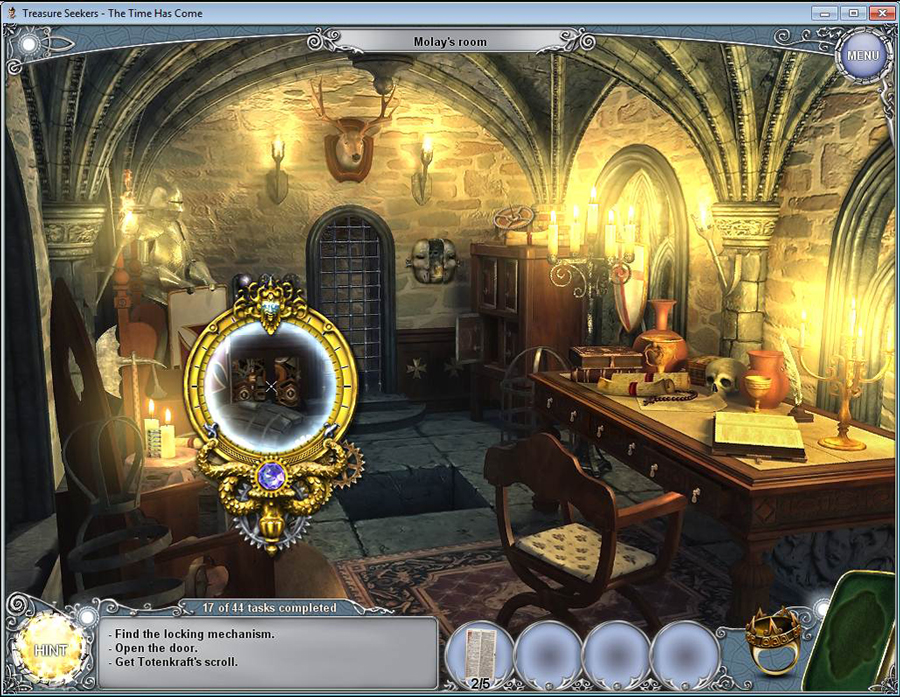
- Click on the gate. You need to find the mechanism to open it.
- Use the x-glass on the area to the left of the door to find the mechanism.
- Click on it to open the wall where the mechanism is located and discover that it's missing parts.
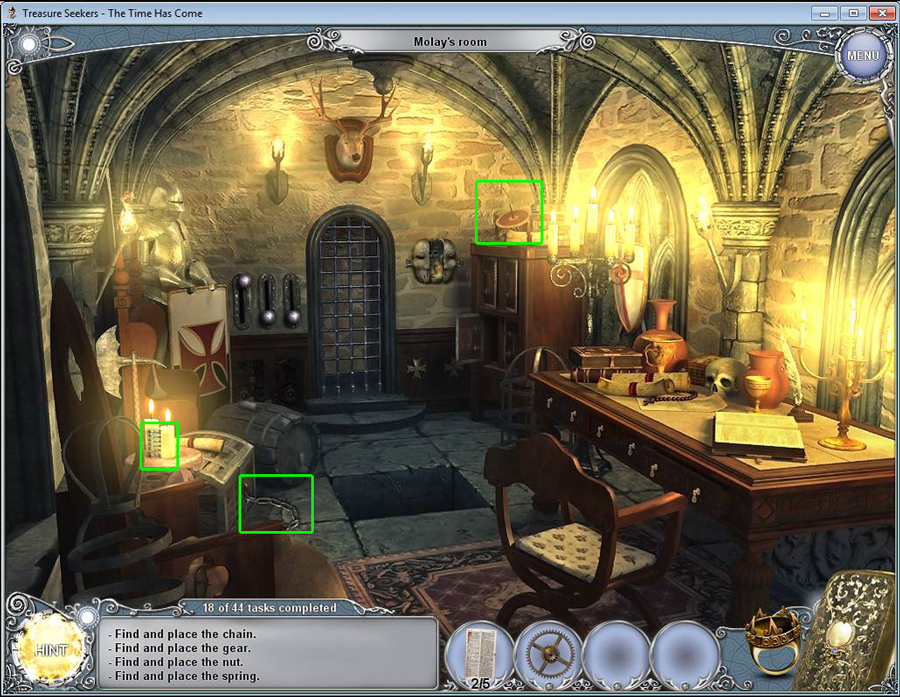
- Click on the gear on the cabinet at the right.
- Click on the dagger and use it on the 4 areas of rope holding it down.
- Take the gear.
- Click on the spring by the candles on the left to take it.
- Take the chain on the floor.
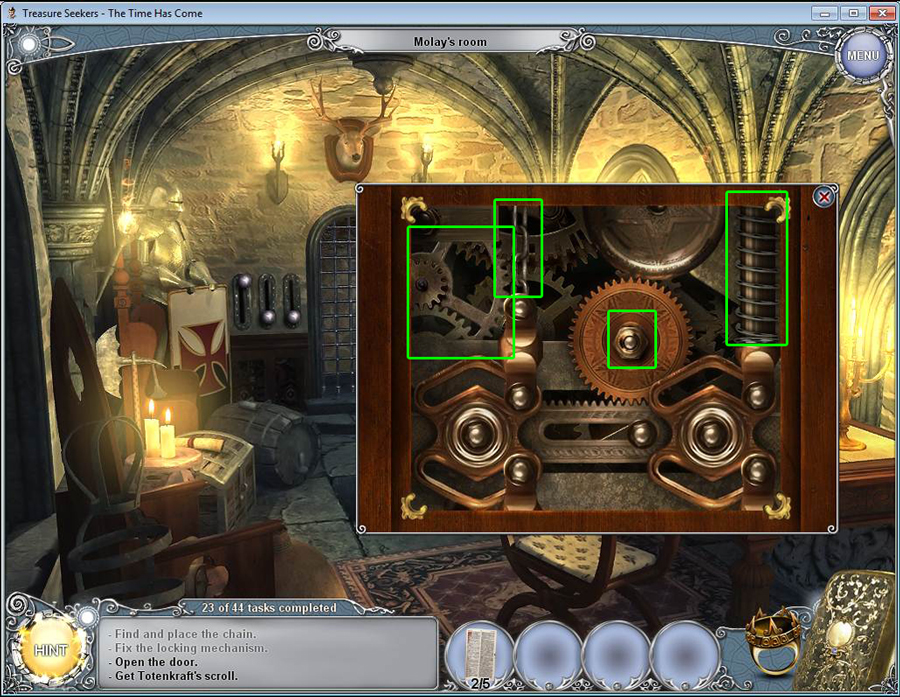
- Click on the mechansim.
- Click on the nut in the bottom right of the mechanism and place it on the correct spot.
- Use the gear, the chain, and the spring in the approriate areas as well.
- Now, click on the levers to the left of the door. Click on each once from left to right to open the door.
- Enter the hall.
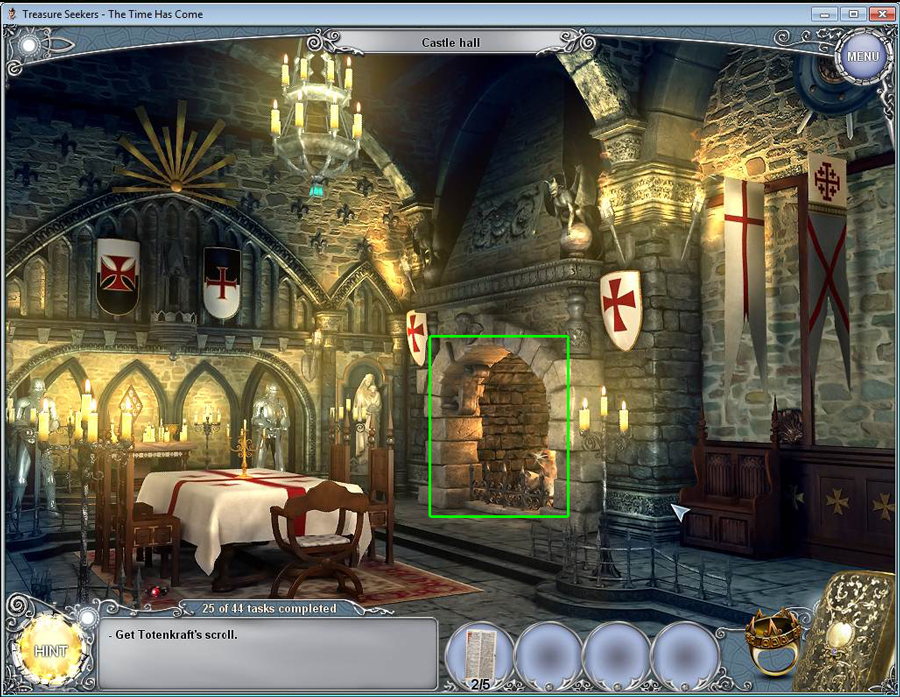
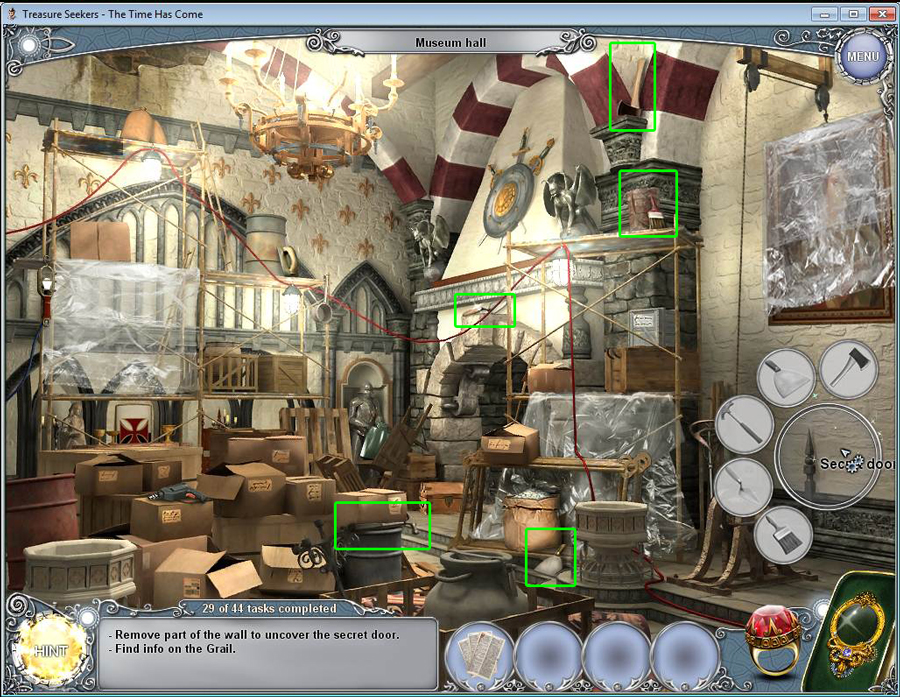
- Once you enter the hall, click on the fireplace to zoom in on it.
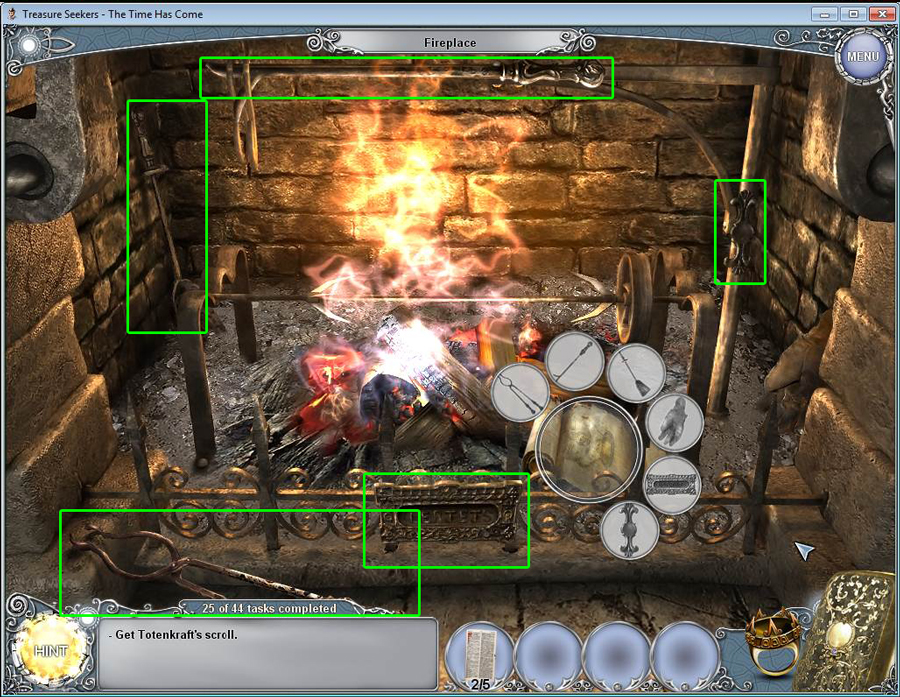
- You need to find the pieces of the key object to get the scroll.
- Once you find all the key object pieces, you will receive the scroll and discover that Totenkraft is after the Holy Grail.
- Click back to exit the fireplace.
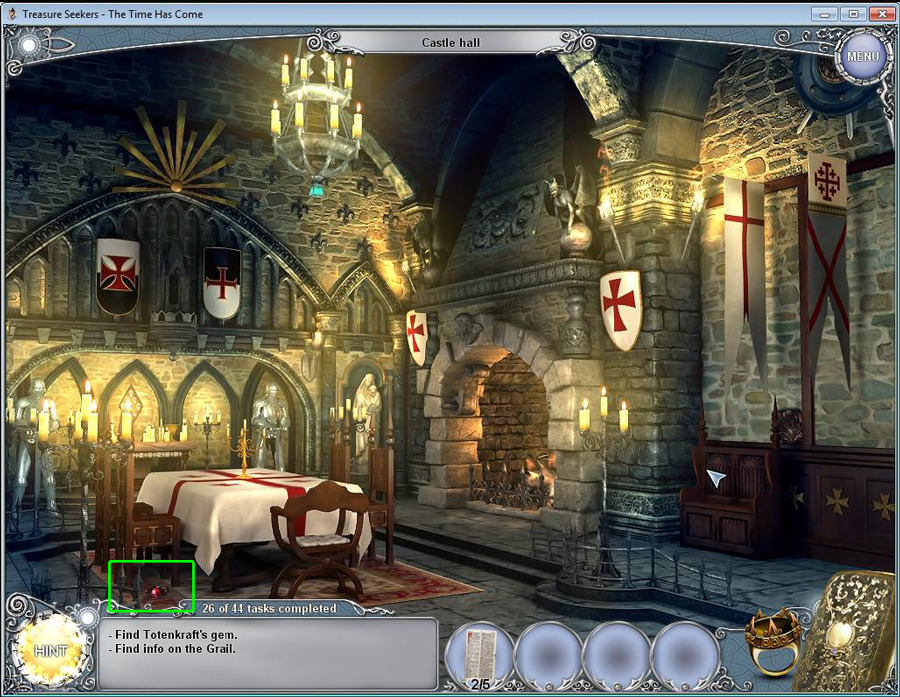
- Click on the gem on the floor to zoom in.
- Click on the gem and you will be transported to the future.
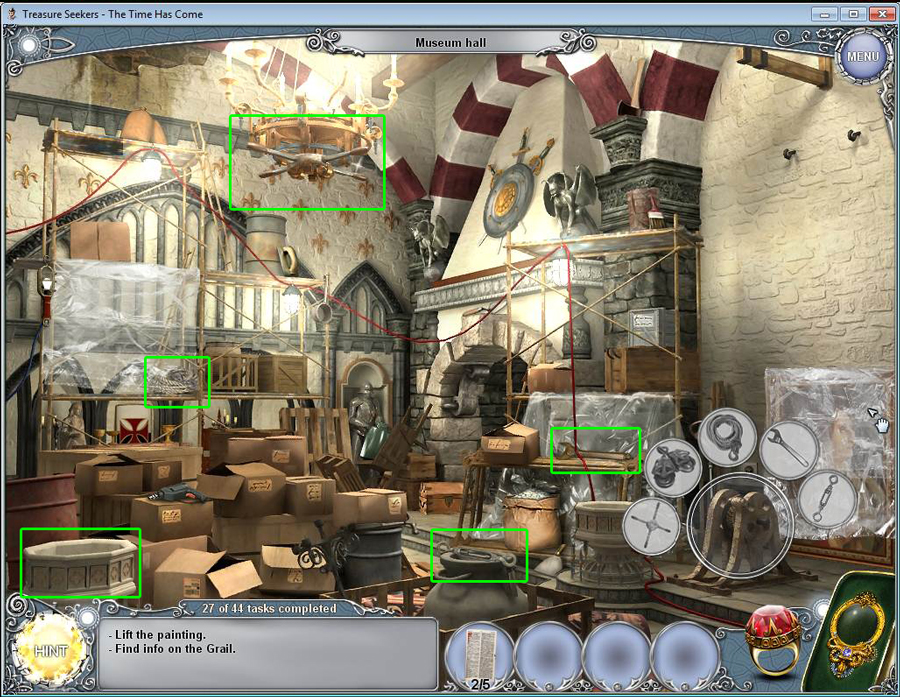
- Click on the winch in the bottom right corner of your screen to open the key object.
- Find all the objects and place them in the key object.
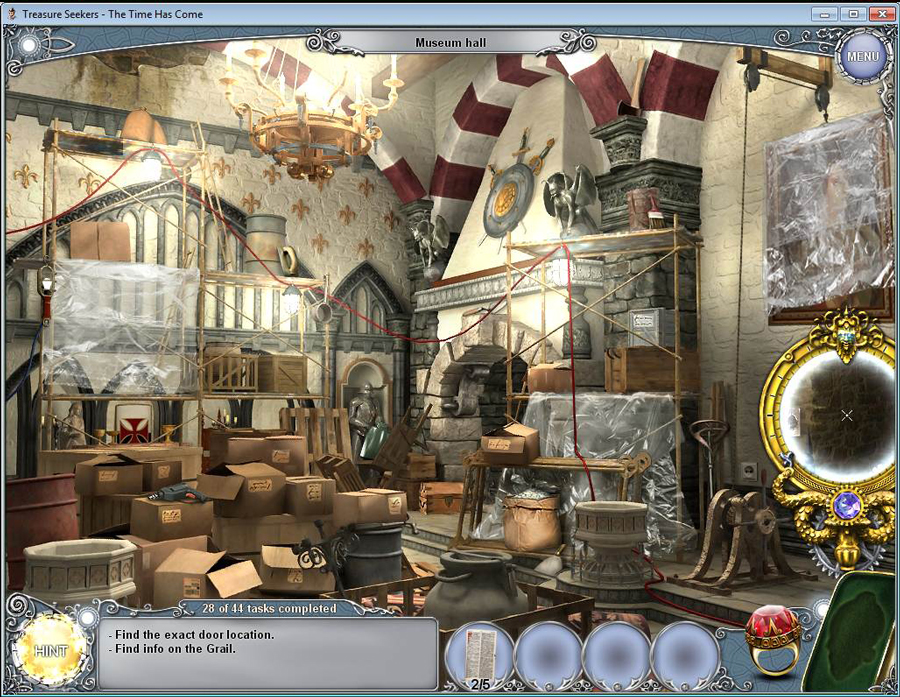
- Click on the winch when you are finished to lift the painting.
- Use the x-glass to find the door on the right.
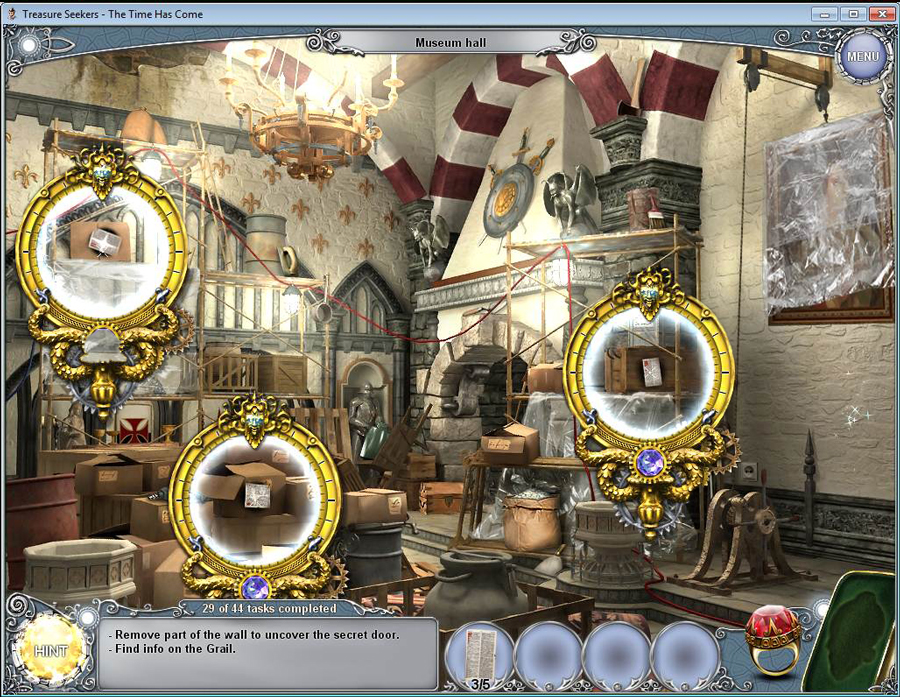
- Use the x-glass to find the three torn pages hidden in the boxes.
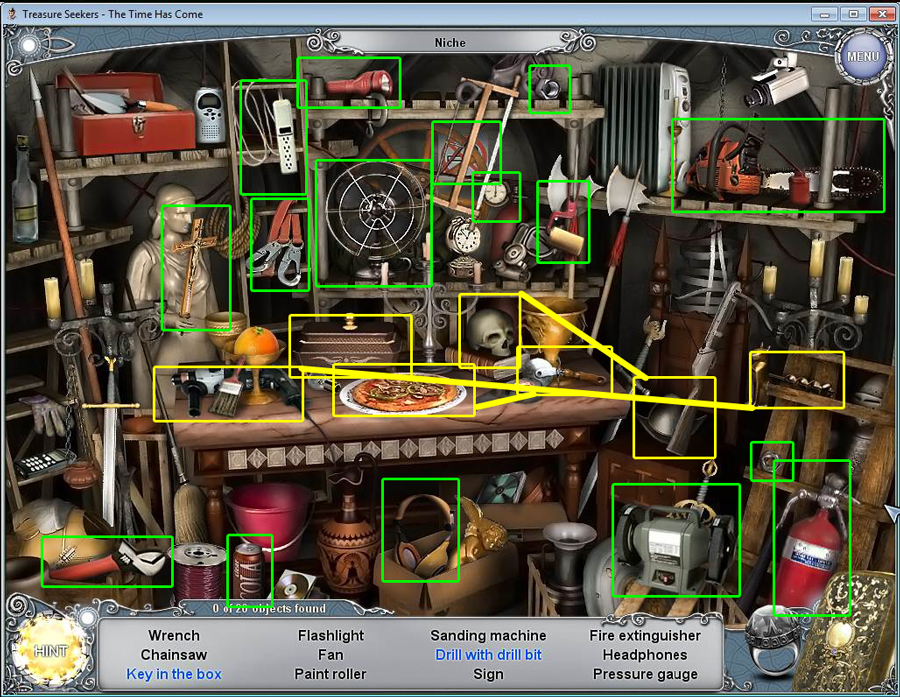
- Click on the door to open the key object.
- Find all the objects and place them in the key object.
- Click on the strange glyph on the wall next to the door.
- Search for the chest in the room. It's by the fireplace. Click on it.
- Click on the lock and a hidden object scene will appear on the left.
- Click to access the hidden object scene.
- After you have found all the objects in the scene, you will receive the key.
- Click on the chest and use the key on it to open it.
- To open the door you have to return to the past.
- Click on the ring to go back to the past.
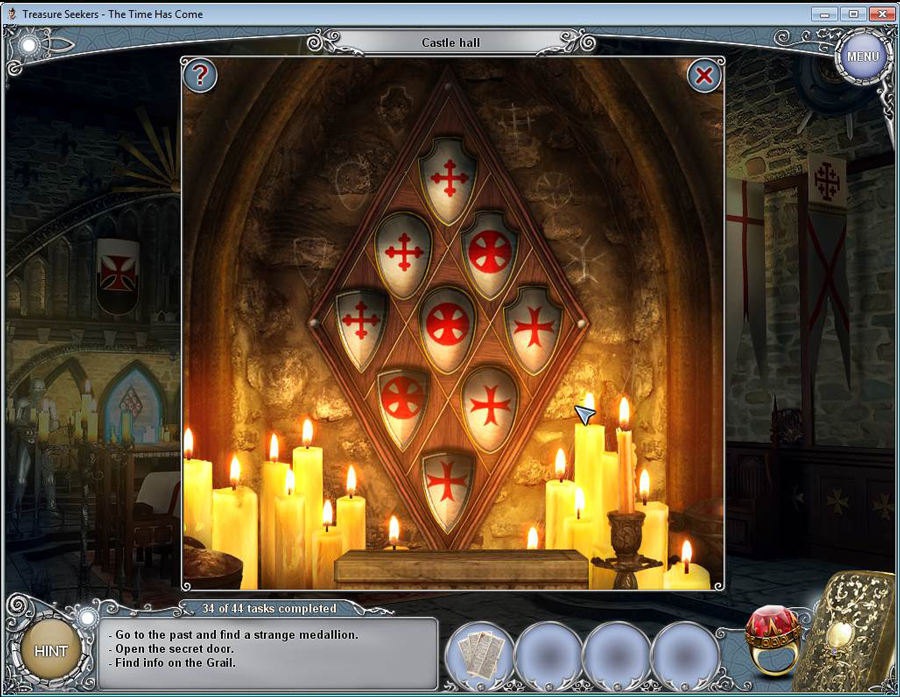
- Once you are in the past, click on the back of the wall to start a puzzle.
- Click on two shields to swap places.
- See the screen shot above to see the correct placement of the shields. Keep in mind the shape of the shield as well as the symbol needs to match.
- Click on the chest that is revealed once you complete the puzzle.
- You'll discover that the medallion has already been taken.
- Click on the ring to return to the future.
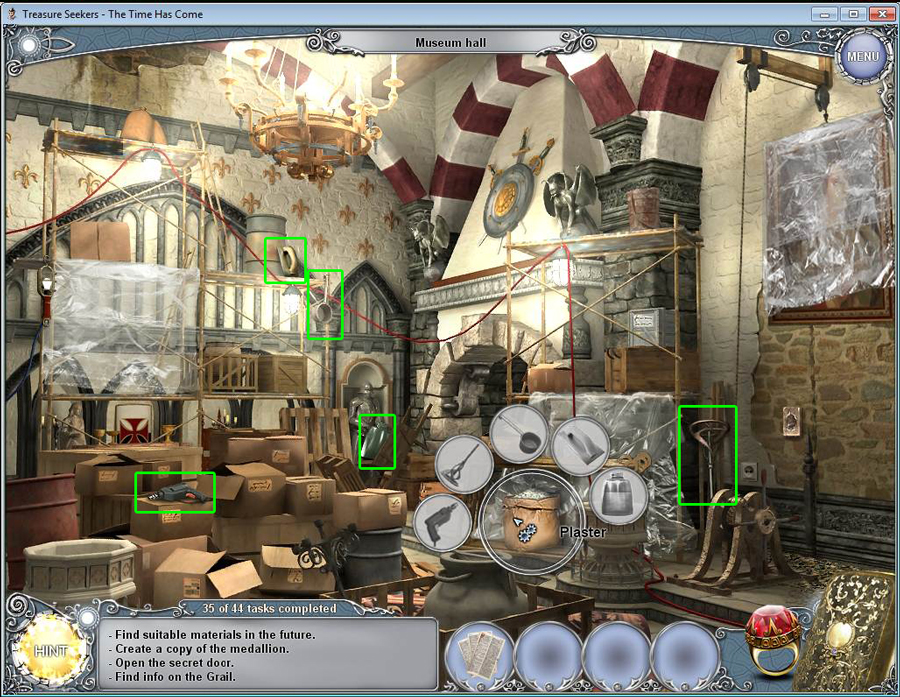
- Click on the plaster to open the key object.
- Click on the drill on the left. You will have to assemble it first using the pieces lying next to the drill.
- Click on the drill to add it to the key object once you are done.
- Click on the jar and fill it with water from the area near the roof at the top left.
- Find the rest of the objects and place them in the key object
- You will receive plaster.
- Click on the ring to go back to the past.
- Click on the area where the medallion imprint is.
- Use the plaster on the medallion imprint to make a copy.
- Return to the present.
- Click on the strange glyph by the door.
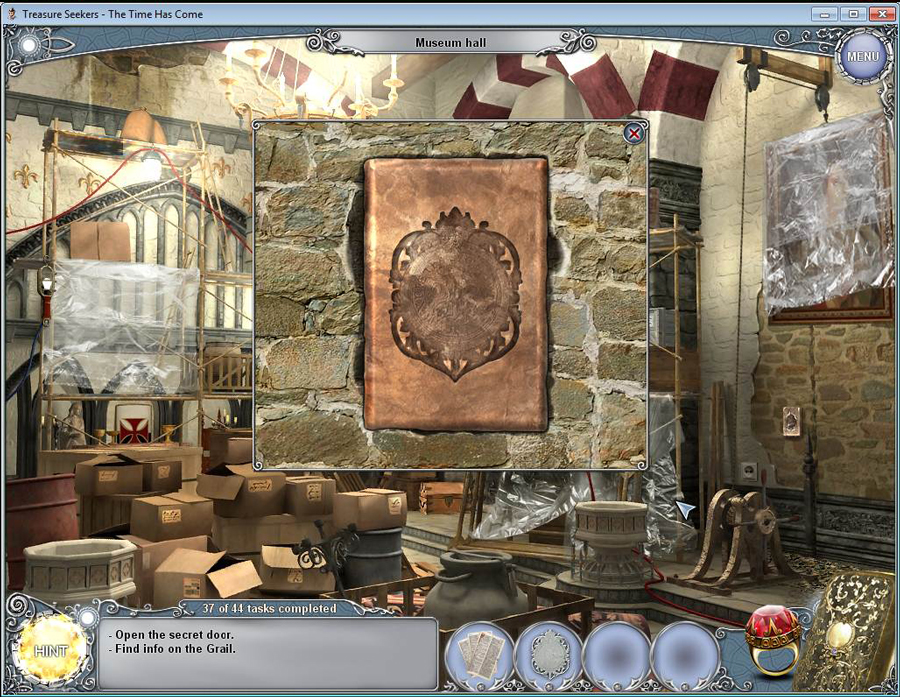
- Place the replica of the medallion on the glyph to open the door.
- Enter the secret door.
- It's too dark in the room, so exit back to the hall.
- Take the handlamp hanging on the wall to the left.
- Go back into the secret room.
- Hang the handlamp on the hook at the top of your screen.
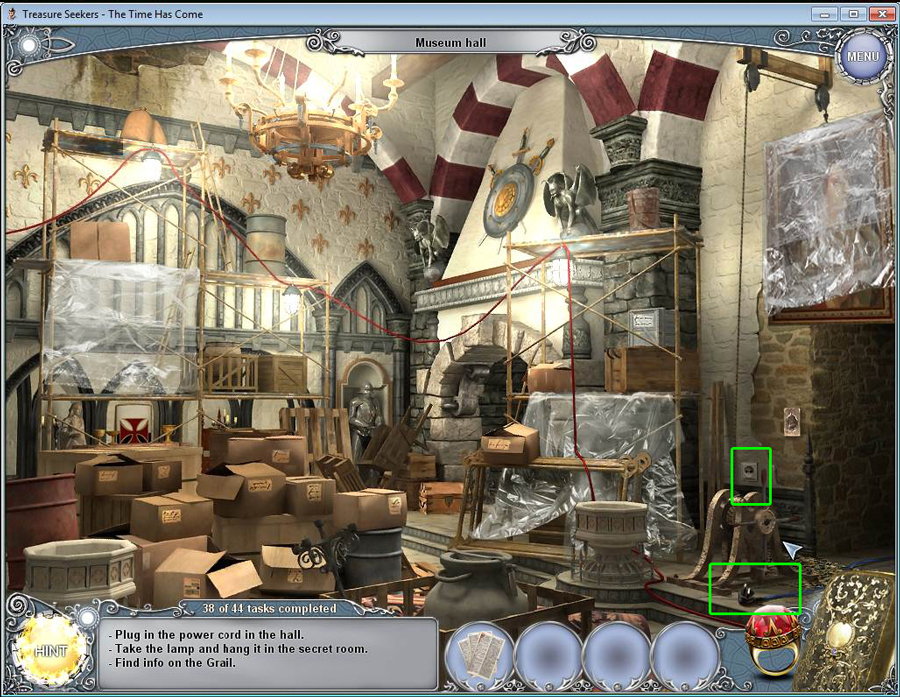
- It's not plugged in, so return to the hall.
- Find the cord in the lower-right corner and click on it.
- Plug it into the socket on the wall.
- Return to the secret room.
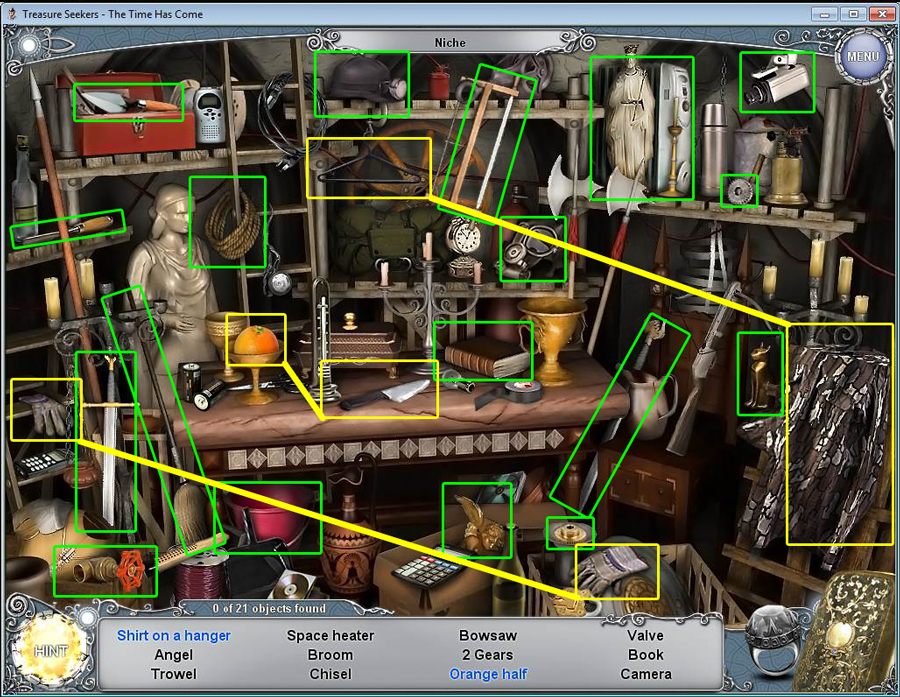
- The room is dusty, and you need a broom to clear it out. Go back to the hall and play the hidden object scene there.
- After you find all the hidden objects, you will receive the broom.
- Go back to the secret room.
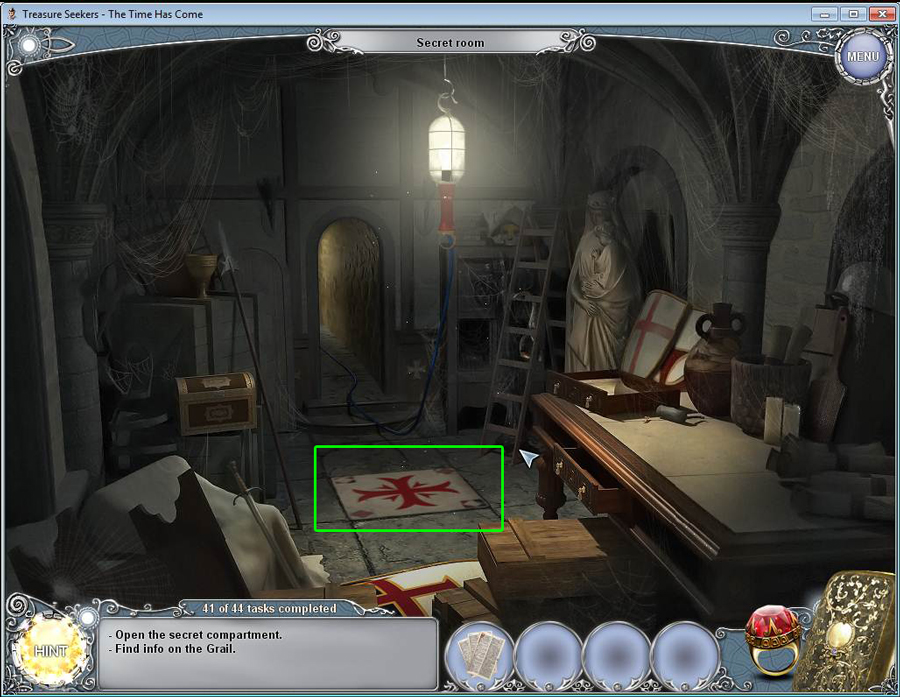
- Use the broom on the dust until it's gone and the secret compartment is revealed.
- Click on the compartment to discover that there are missing buttons.
- Click on the ring to go back to the past.
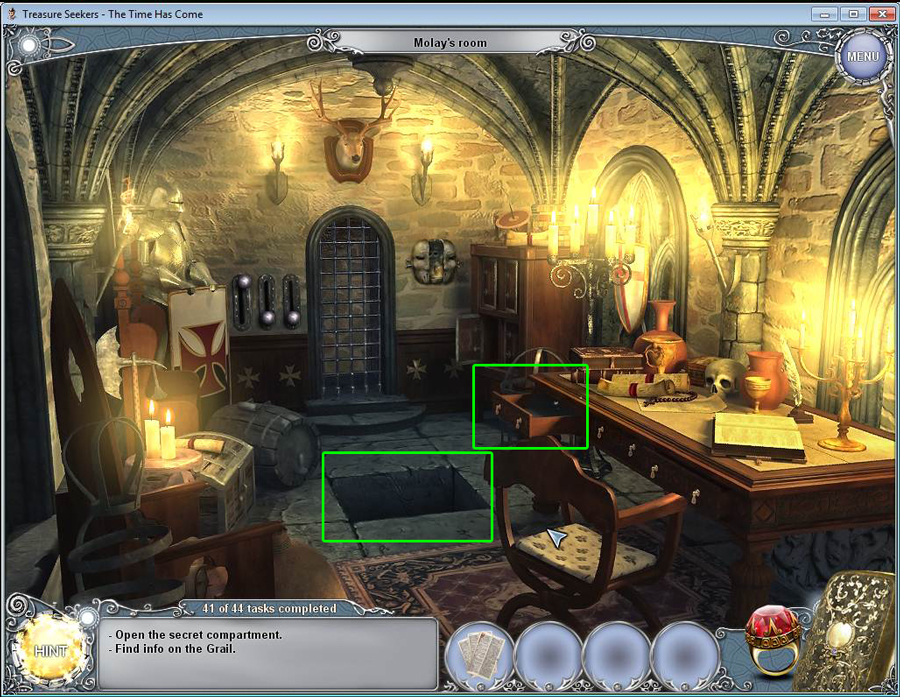
- Click on the far left drawer in the desk and take the dagger.
- Click on the secret compartment in the floor.
- Use the dagger to remove the three buttons.
- Return to the future.
- Click on the secret compartment in the floor.
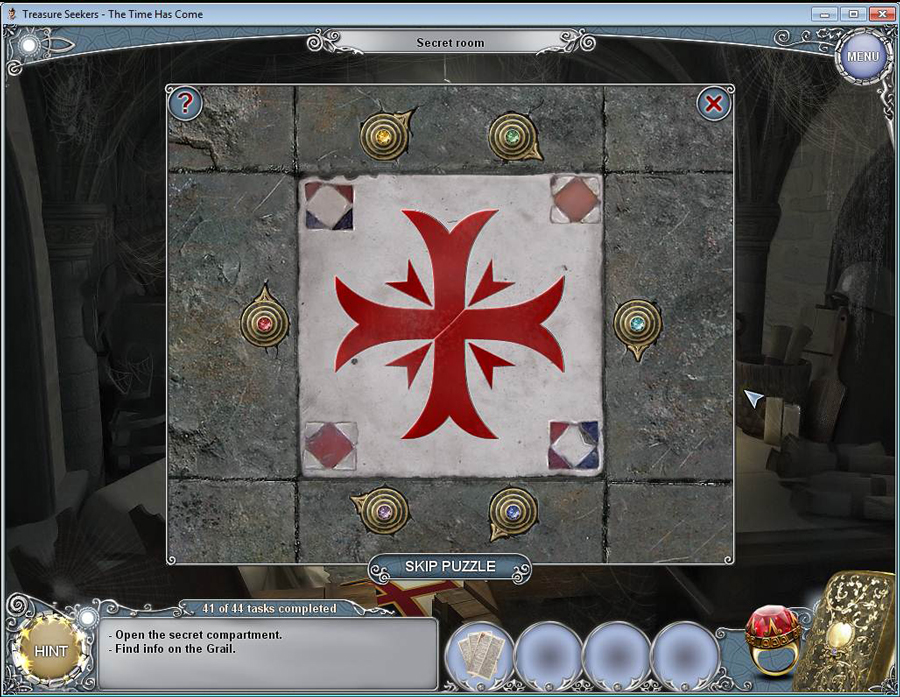
- Place all the buttons in the correct location. This will start a puzzle.
- Click on the buttons in the correct order. See video for the solution.
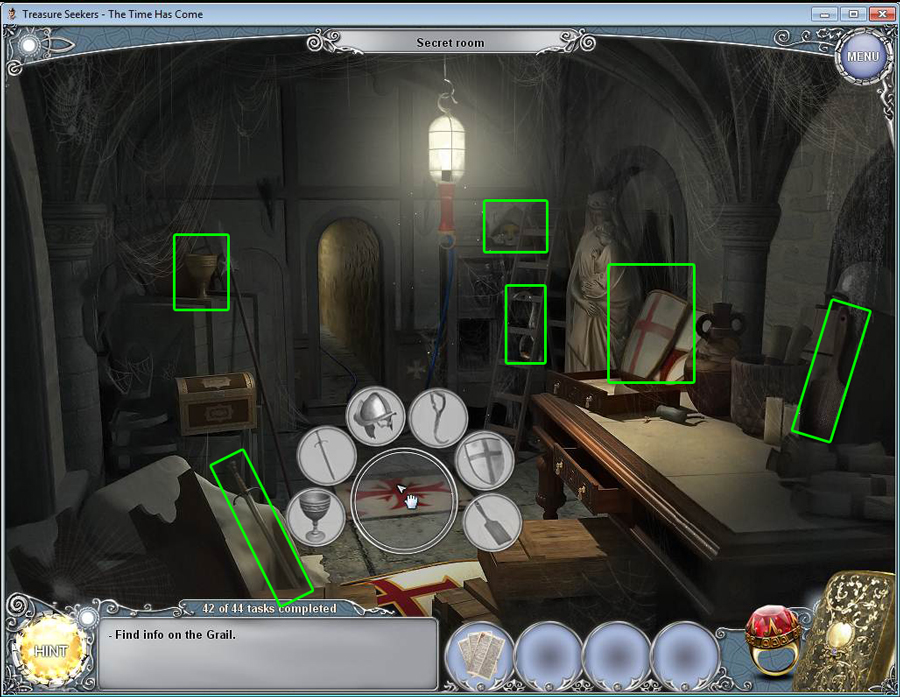
- Once you complete the puzzle, the tile is stuck., click on it to open a key object.
- Find the objects for the key object.
- The tile will open all the way once all the objects are found.
- Click on the secret compartment, and you'll see a book with pages torn out.
- Use the torn pages from your inventory on the book.
- This ends chapter 1.
Chapter 2 - The City of David
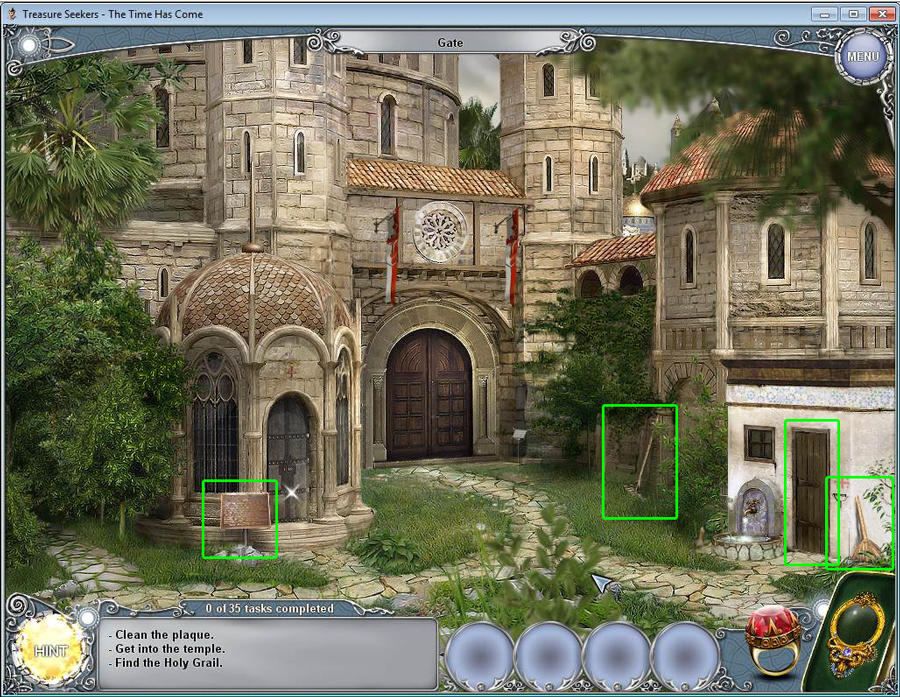
- Click on the rake to take it.
- Click on the broom by the door to take it.
- Click on the plaque to read it.
- It's too dusty to read, so use the broom on it to clear away the dust.
- Remember the date 1306.
- Click on the door on the right to start a puzzle.
- Enter the numbers 1306 from the date.
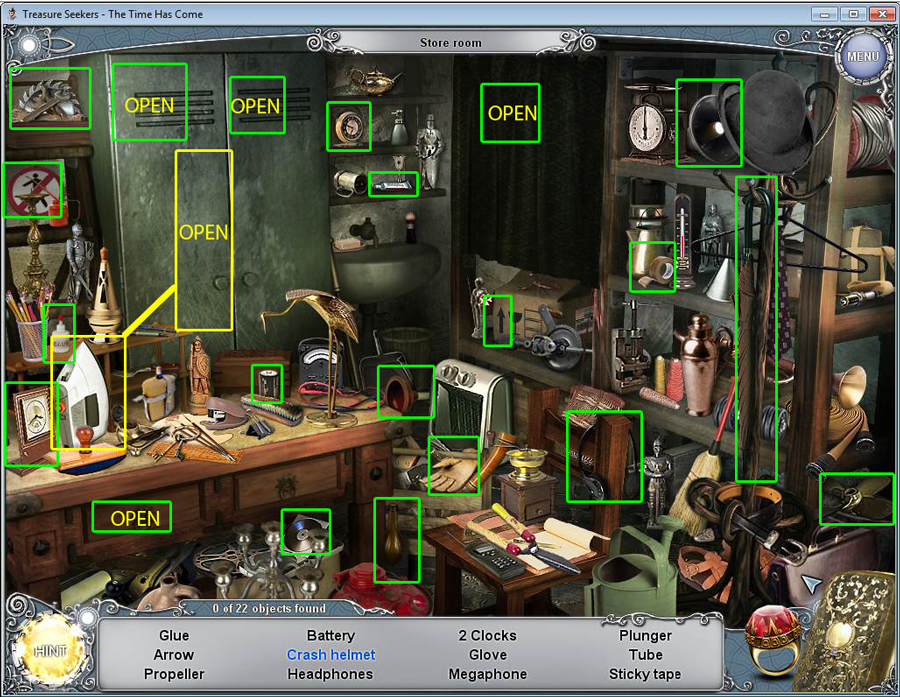
- Enter the store room to access a hidden object area.
- Find all the hidden objects in the scene. Open the desk drawer, pull back the curtain, and open the cabinet in the back to find everything.
- Once you find all the objects, you will receive some glue.
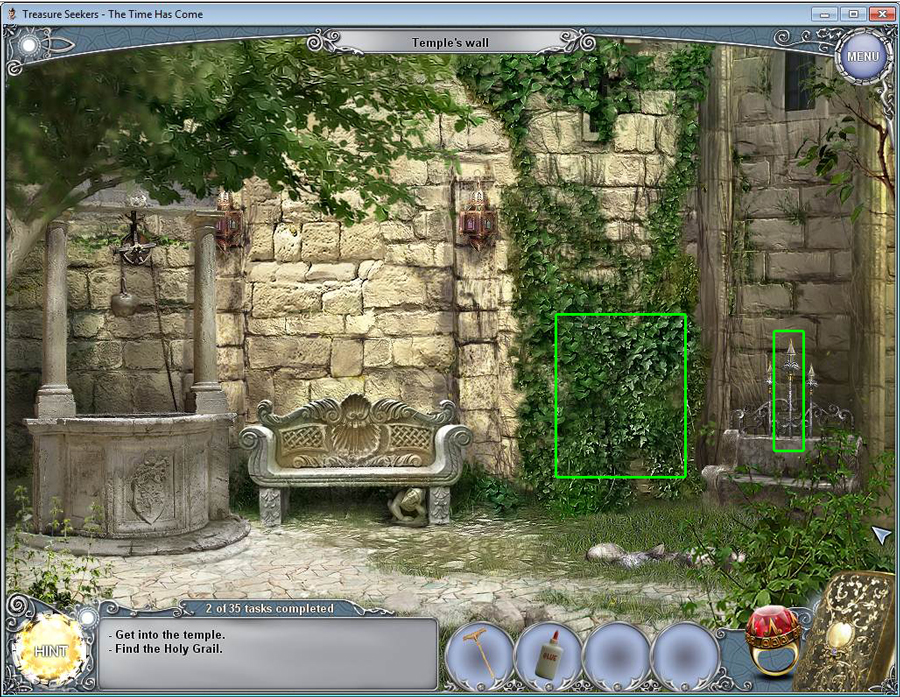
- Head to the wall on the left.
- Use the rake on the wall with the weeds. Click the rake 5 times to remove the weeds completely.
- Now grab the spear in the middle to the right of the wall.
- Use the spear on the wall to remove all the stones and clear the way to the secret passage.
- Click on the secret passage to zoom in closer and see the bars in the way.
- Click on the ring to travel to the past.
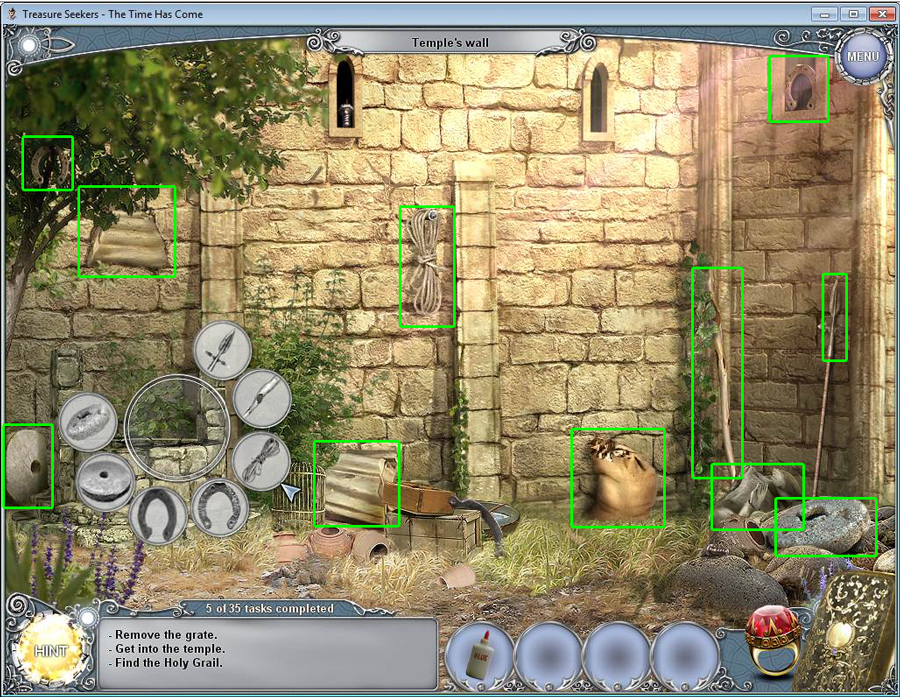
- Click on the bag of straw to take it.
- Take the 3 statue parts visible in the scene.
- Click on the well to see that the last statue part is at the bottom of the well.
- Click on the well to open the key object.
- Find all the key objects to fix the well.
- Click on the well when it's fixed and take the final statue part.
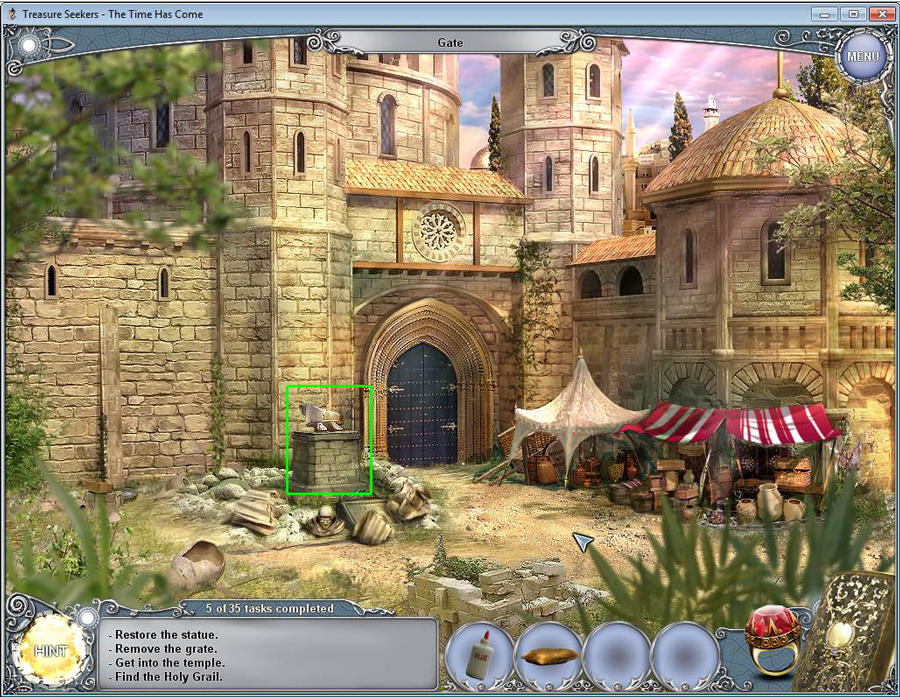
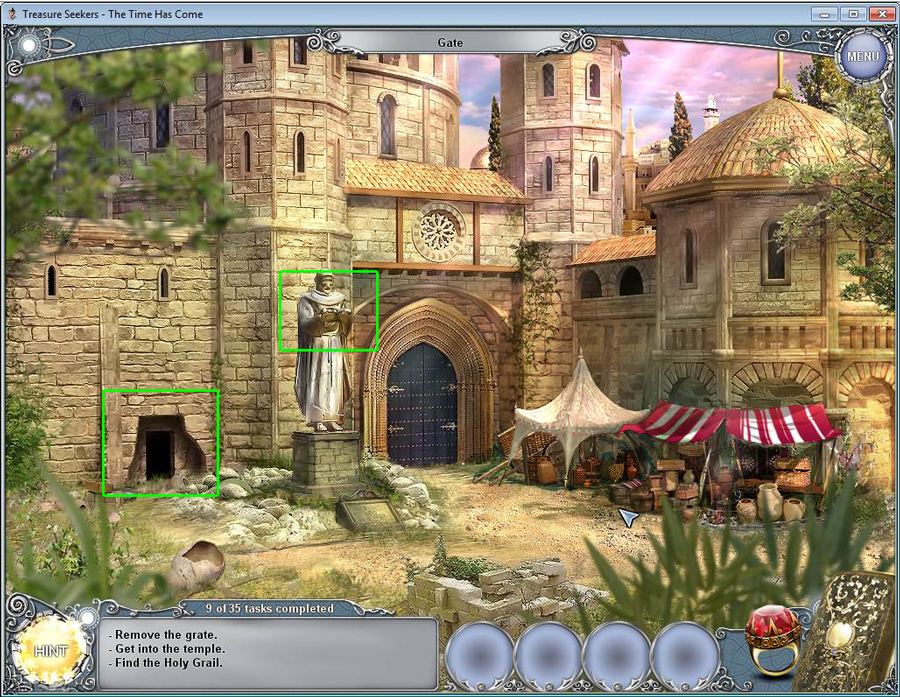
- Go down to the gates.
- Place the statue parts on the broken statue. They will appear on the ground.
- Use the glue on the statue parts.
- Then place the statue parts on the statue to rebuild it.
- Go to the future.
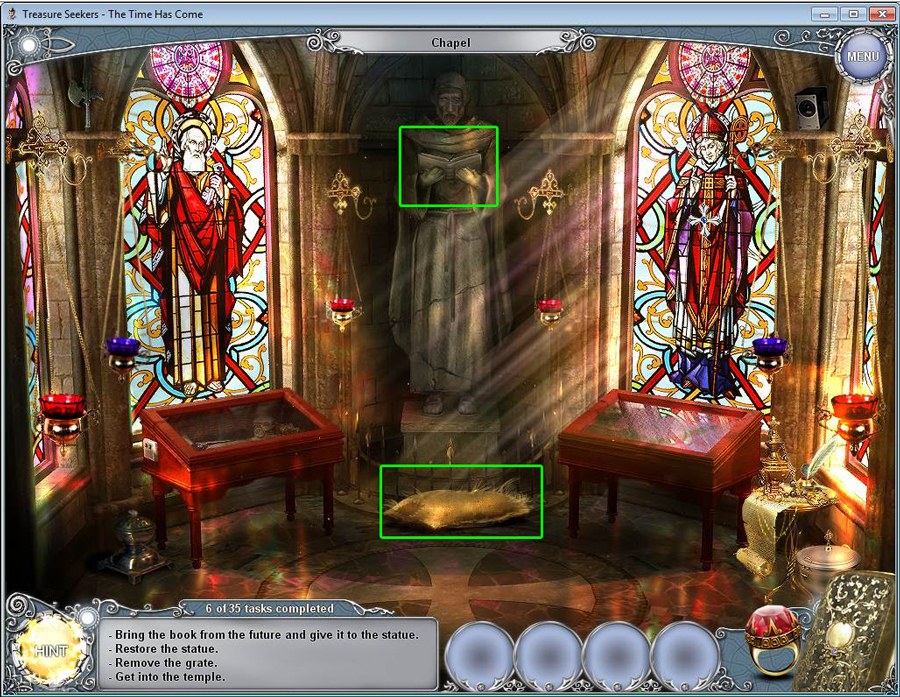
- Enter the chapel.
- Click on the book in the statue's hands twice.
- You need something soft for the book to fall on. Place the bag of straw at the staute's feet.
- Click on the book one more time to make it fall. Take the book.
- Return to the past by clicking the ring.
- Click on the book in your inventory and use it on the statue. This will open the passageway.
- Go through the passageway to the wall.
- Click on the door to examine it.
- Return to the future by clicking the ring.
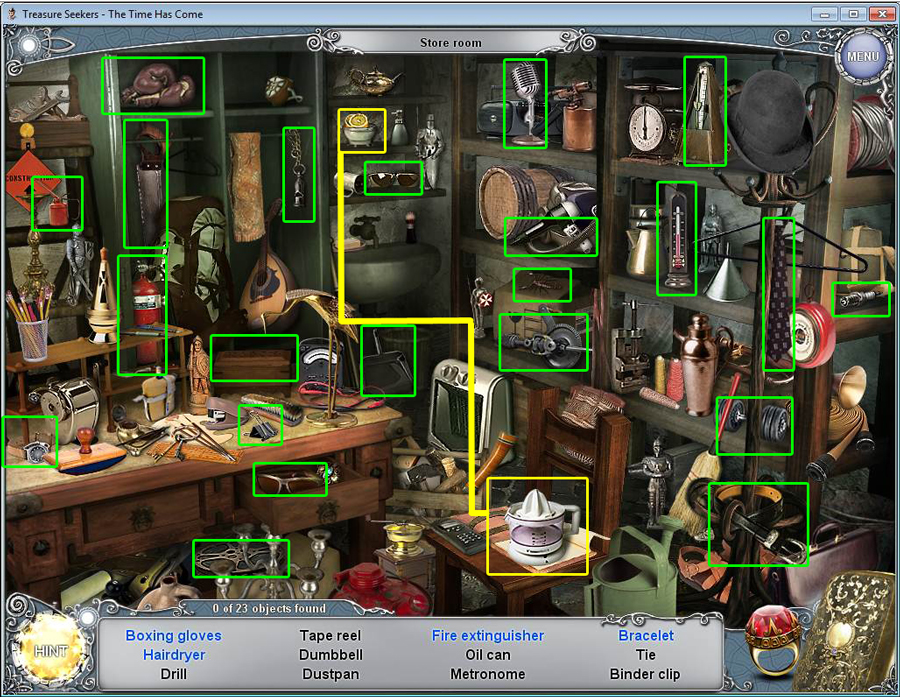
- Return to the gate area and access the hidden object area in the storage room on the right.
- Once you find all the hidden objects, you will receive the saw.
- Go back to the wall.
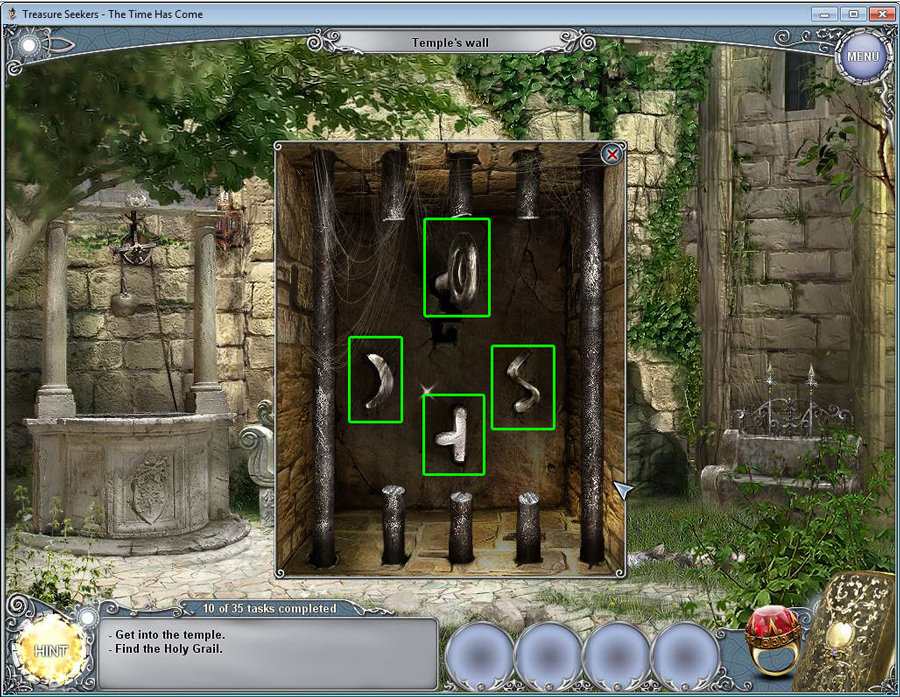
- Click on the secret passageway and use the saw on the three middle bars to cut them away.
- Click on the 4 key parts to take them.
- Return to the past by clicking on the ring.
- Click on the secret passageway to zoom in.
- Place the 4 keys in the proper spots to open the passageway.
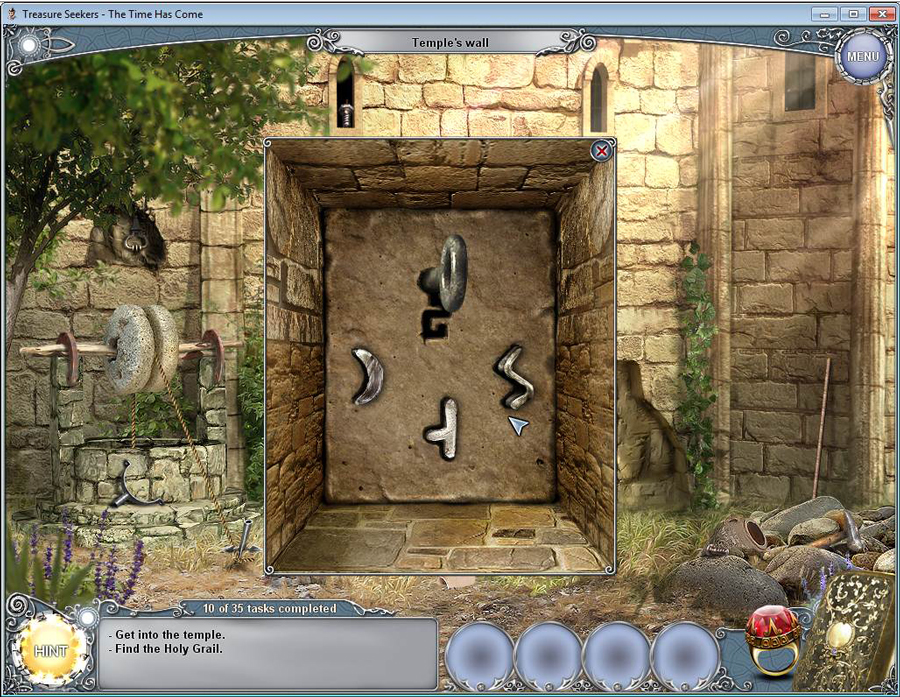
- Click to enter the temple.
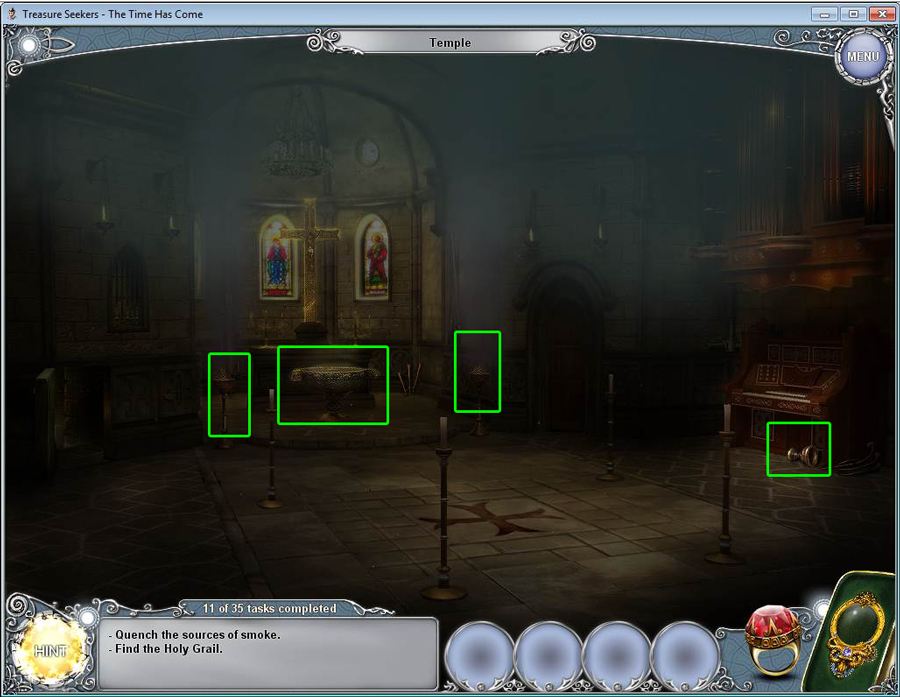
- Click on the goblet on the right on the floor under the organ.
- Click on the brazen bowl in the center.
- Use the goblet on the bowl to fill it with water.
- Click on the lens that's left in the bowl to add it to your inventory.
- Use the goblet with water on the smoke on either side of the bowl.
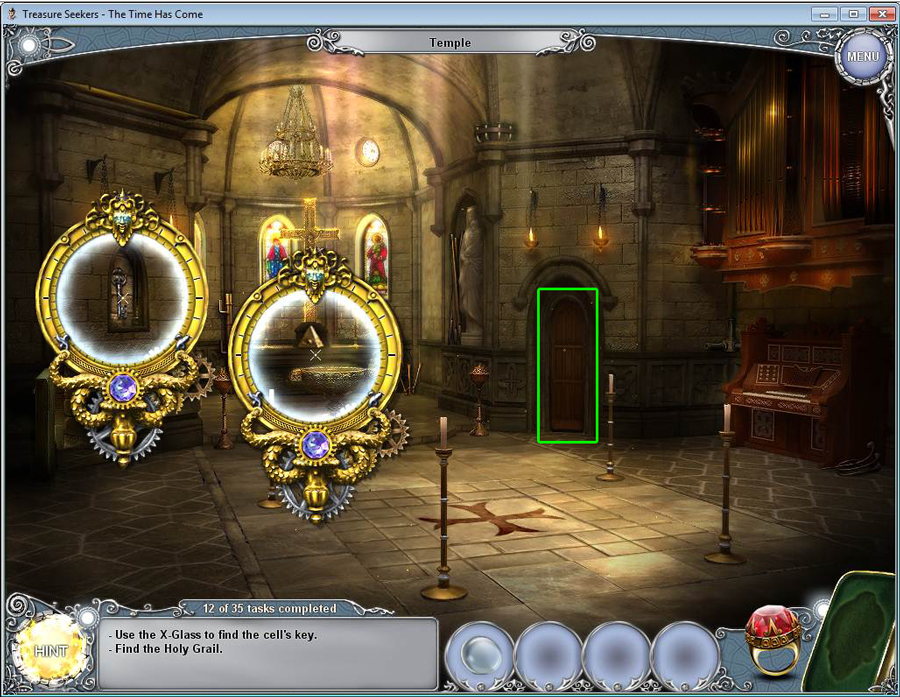
- Click on the door on the right to see that it is locked.
- Use the x-glass to locate the eye of omniscience in the altar. Click to add it to your inventory.
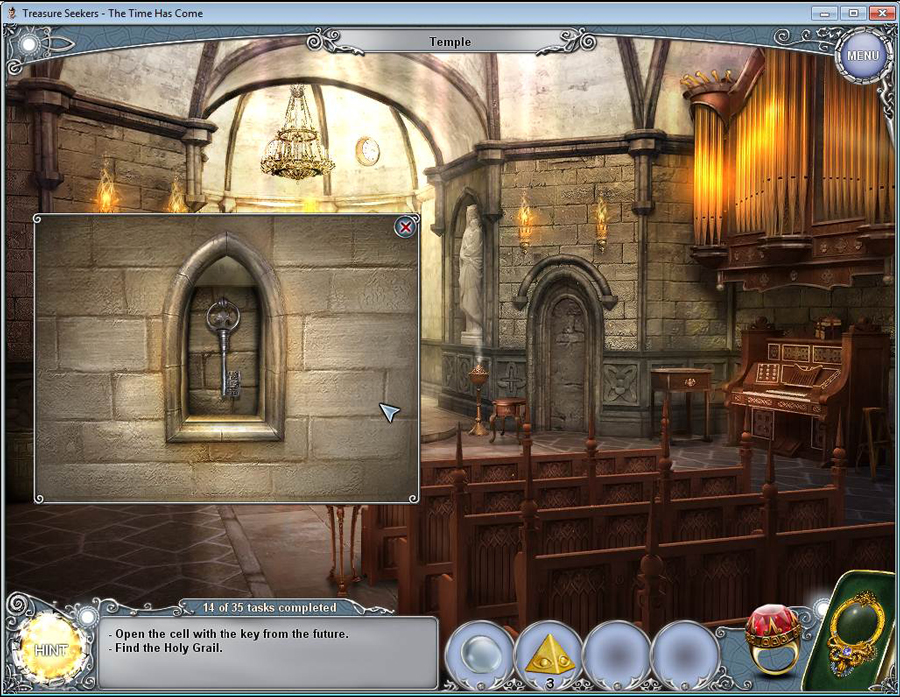
- Use the x-glass on the niche on the left to locate the key.
- The key is behind bars so you can't get it here.
- Click on the ring to go to the future.
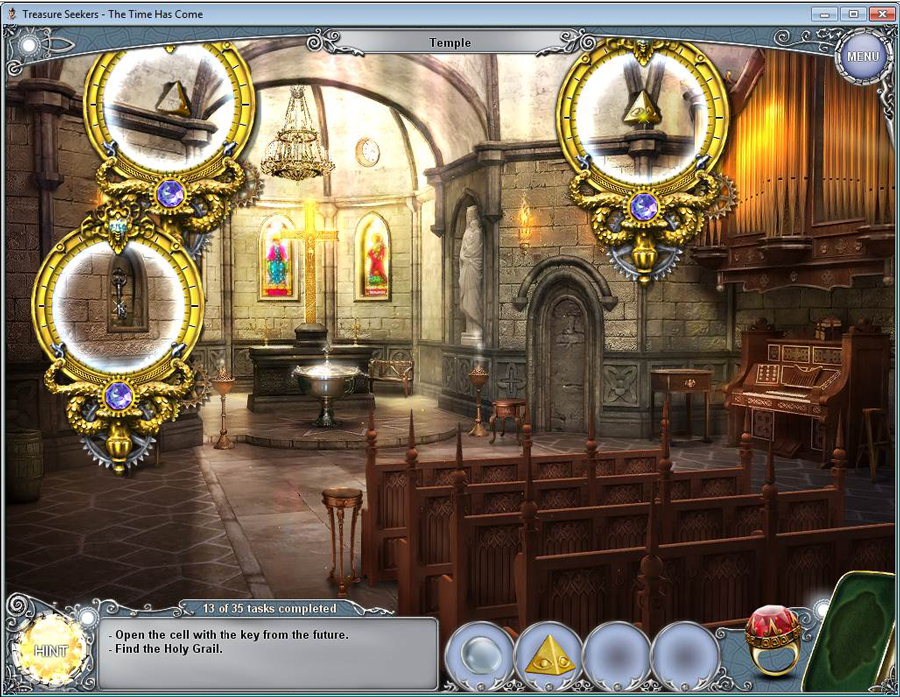
- Use the x-glass to locate the eye of omniscience in the right corner. Click to add it to your inventory.
- Use the x-glass to find the eye of omniscience in the left corner. Click to add it to your inventory.
- Use the x-glass to find the key in the niche on the left. The bars are gone, but it's still behind the wall. Click to get a task.
- Click on the ring to travel to the past.
- Go back to the main gate and click to access the hidden object area.
- Collect all the hidden objects. The lion's head is in the basket on the right.
- Once you have collected all the hidden objects, you will receive the lion's head.
- Go back to the temple and click on the ring to travel to the future.
- Click on the niche where the key is.
- Use the lion's head on the wall.
- Take the key.
- Click on the ring to return to the past.
- Click on the door and use the key on the lock.
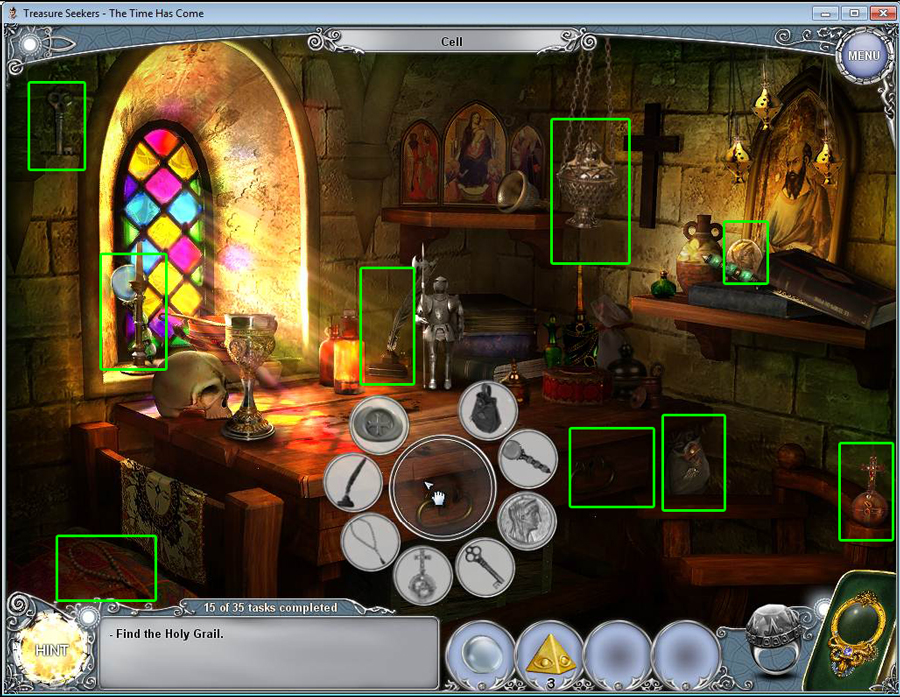
- Enter the cell.
- Click on the censer in the upper right to add it to your inventory.
- Click on the drawer on the left to open a key object.
- Click on the right drawer and zoom in to take the seal and place it in the key object.
- Find the rest of the key objects.
- Open the drawer and click on the book. It will be placed on the desk.
- Click on the book. It's written in invisible ink.
- Go back to the temple wall.
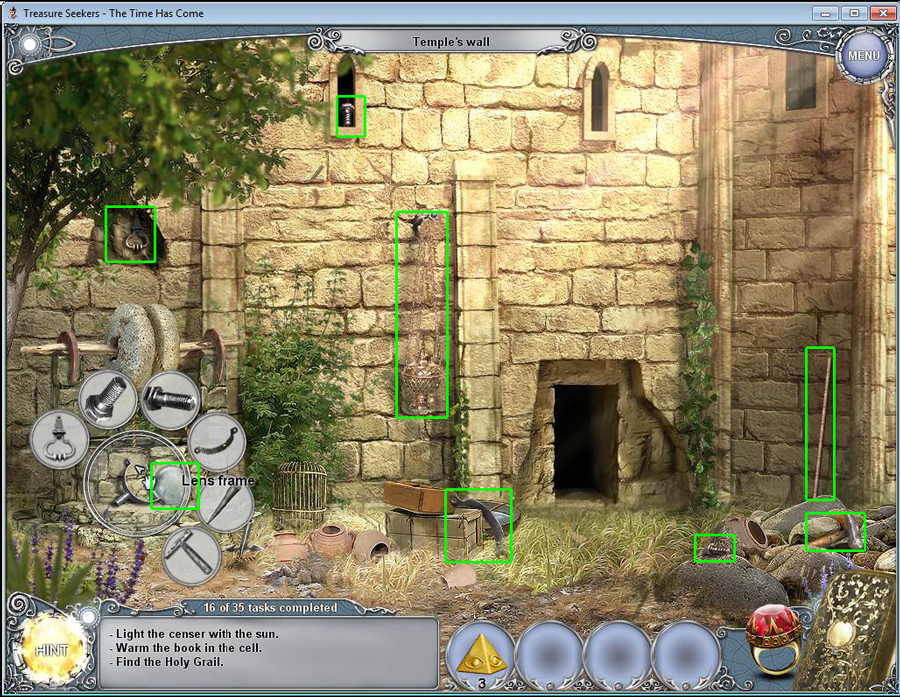
- Hang the censer on the wall where the hook is.
- Use the lens on the lens frame by the well.
- Open the key object of the lens.
- Find all the key objects.
- Click on the magnifying glass that appears to pick it up.
- Aim the light of the magnifying glass on the censer to light it.
- Click on the censer to take it.
- Now, go back to the cell and use the censer on the book.
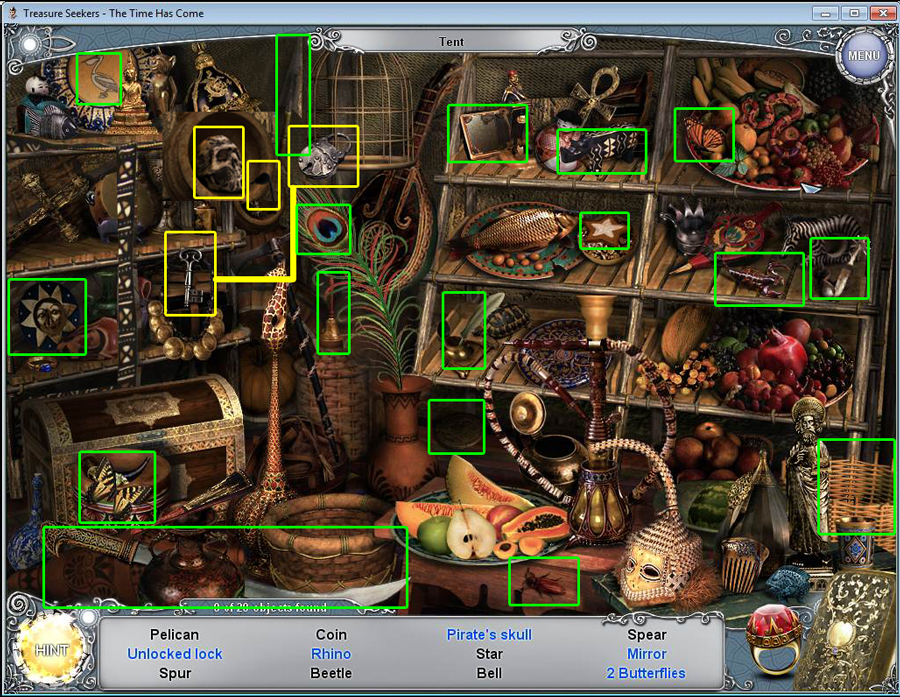
- Go back to the gate to play the hidden object area.
- Find all the hidden objects. The chicken is in the basket on the right. Click to zoom and then click on the egg to free the chick.
- The pirate skull needs an eye patch. Zoom in on the barrel with the skull and grab the patch right next to the skull and place it on the eye.
- Once you find all the hidden objects, you will receive the mirror.
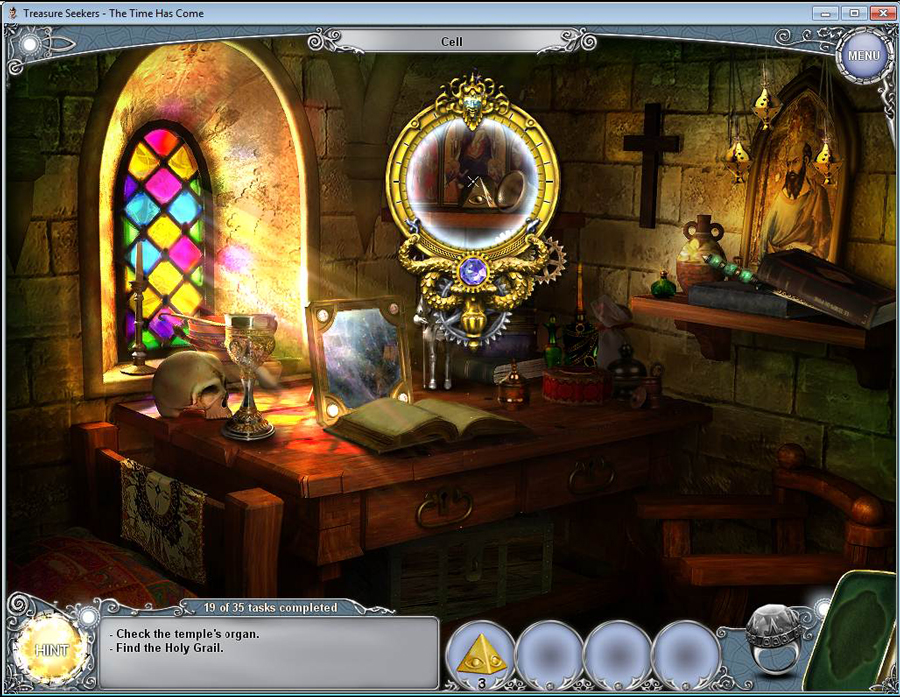
- Go back to the cell in the temple.
- Click on the book and use the mirror on it to read the text.
- Use the x-glass to find the eye of omniscience.
- Go back to the temple.
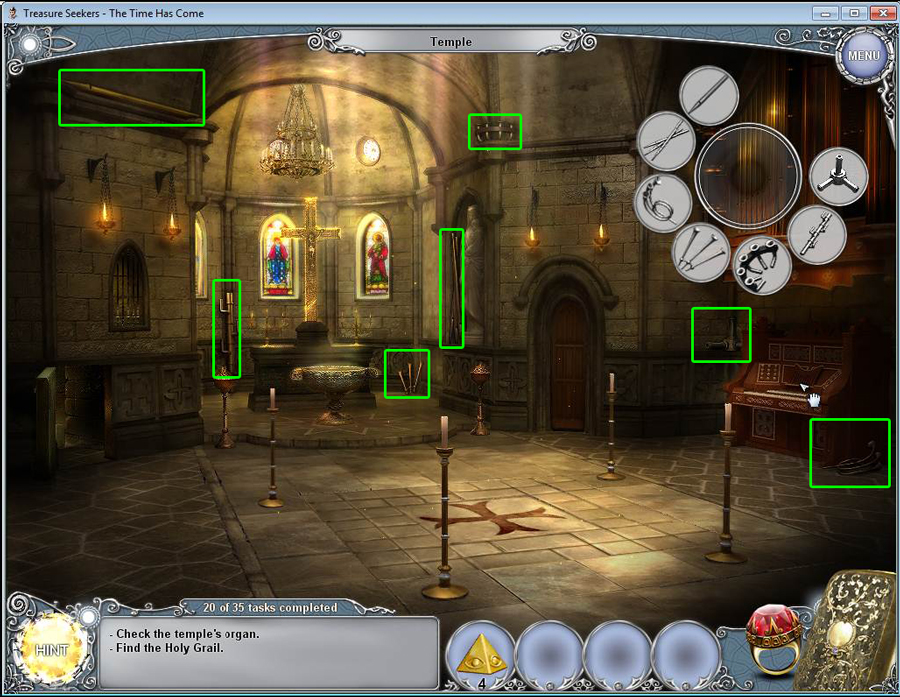
- Click on the organ on the right to open the key object.
- Collect all the objects.
- Click on the organ to receive a new task.
- Click on the ring to travel to the future.
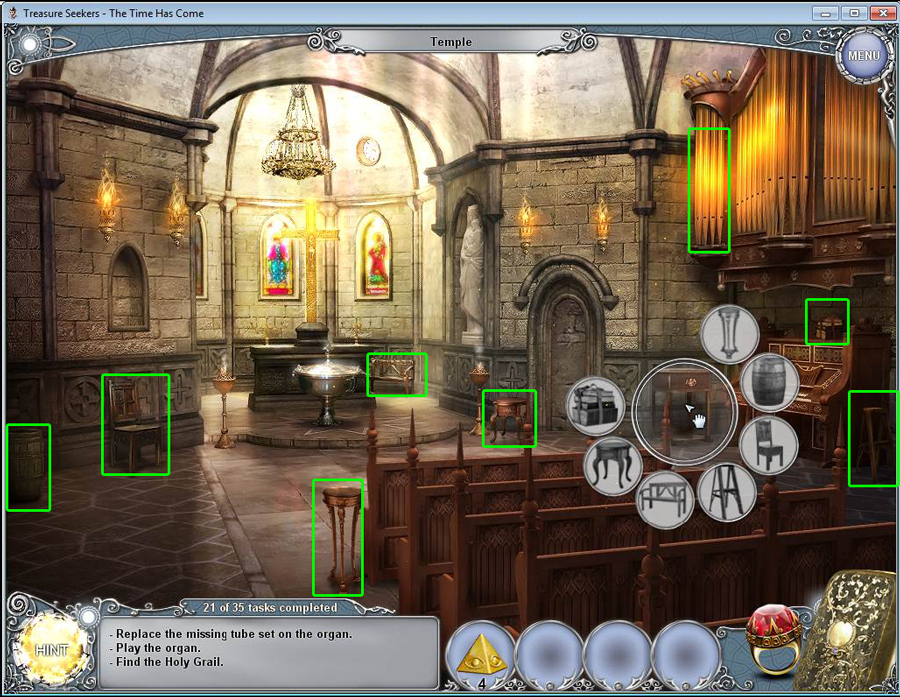
- Click on the desk to open the key object.
- Collect all the objects.
- Click on the organ pipe on the right when you are finished.
- Travel back to the past by clicking on the ring.
- Place the organ pipes in the missing area.
- Click on the organ to receive a new task.
- Go back out to the gate.
- Click on the ring to travel to the future.
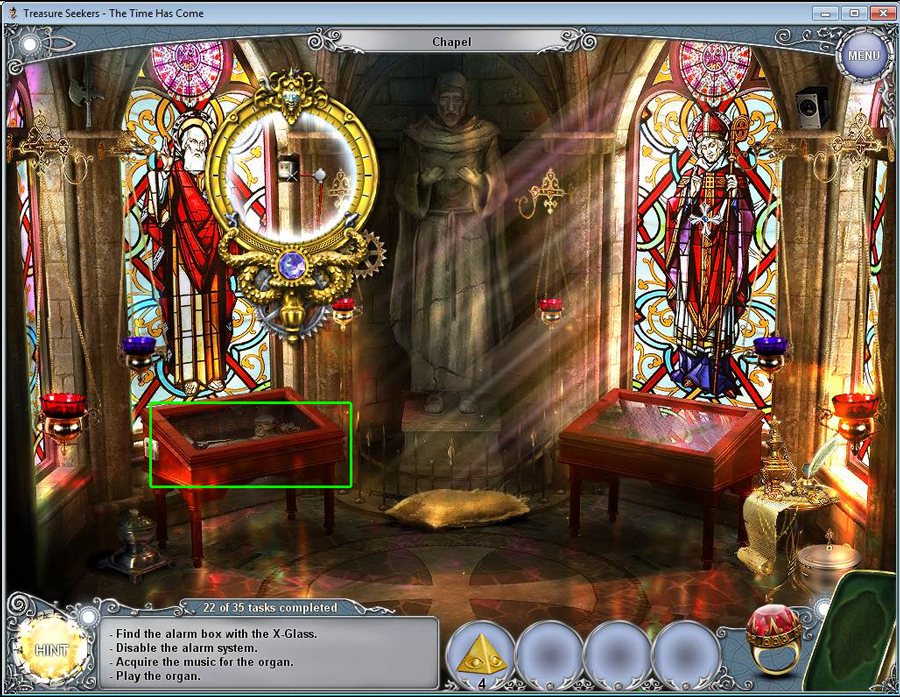
- Go into the chapel.
- Click on the display case to examine it closer and see the sheet music.
- Use the x-glass to find the alarm system on the case.
- Click on it to disable the alarm.
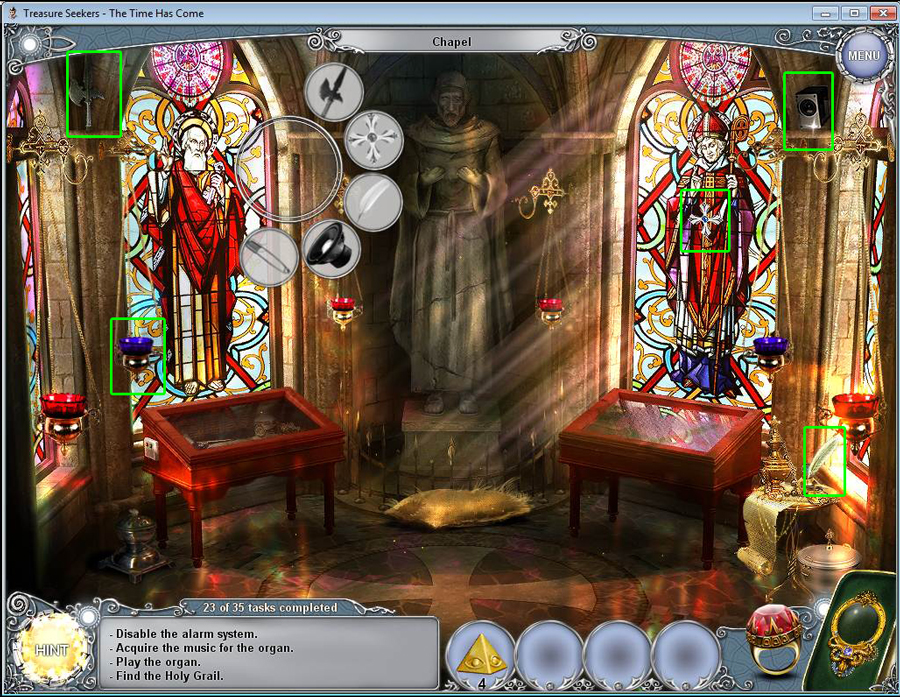
- Click on the brick to open the key object.
- Click on the speaker in the upper right hand corner. Pick up the coin and use it on the screws on the speaker.
- Take the loudspeaker.
- Click on the blue censor on the left that is swinging. Take the safety pin.
- Collect the rest of the items.
- Click to zoom in on the display case.
- Take the sheet music.
- Click the ring to go back to the past.
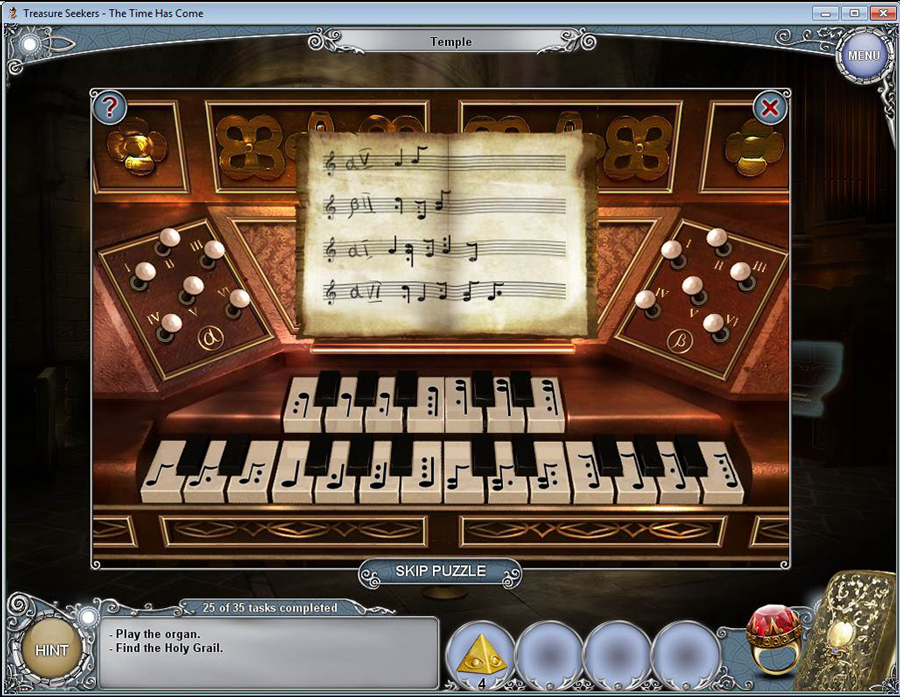
- Go to the temple and click on the organ.
- Use the sheet music on the organ to start the puzzle.
- See the video for the solution.
- Once you play all the music, the secret room will be open up.
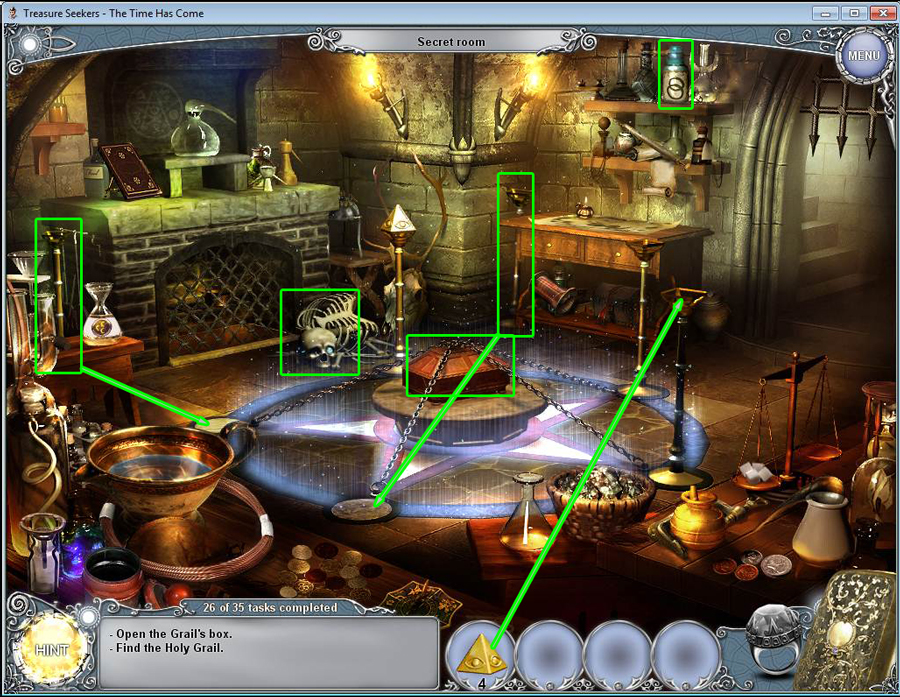
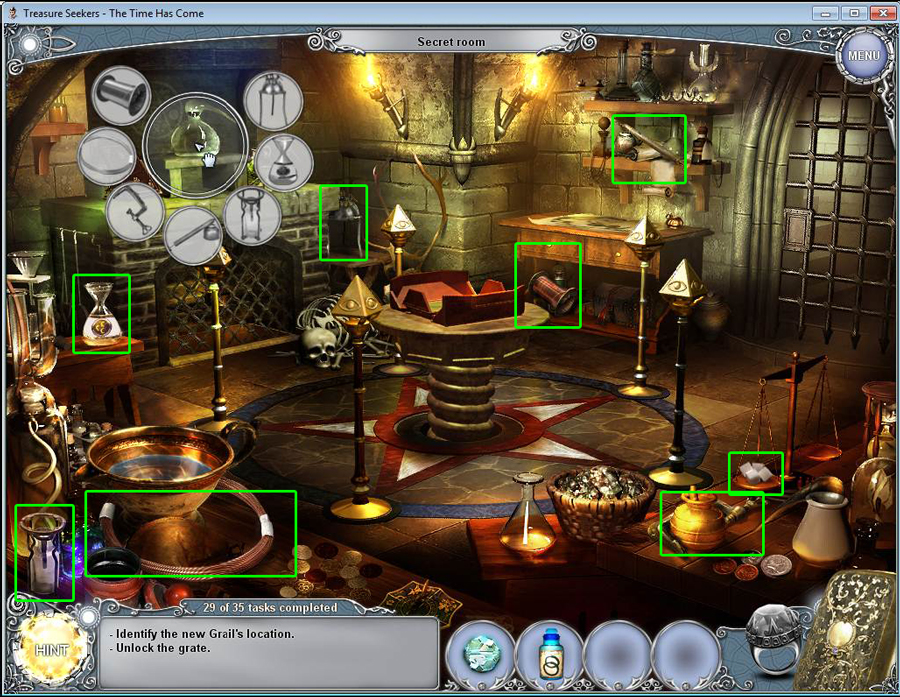
- Go into the secret room.
- Move the pillars into the center area.
- Place the eyes of omnisciene at the top of the pillars.
- Click on the skeleton on the floor to zoom in.
- Take the gem in his eye.
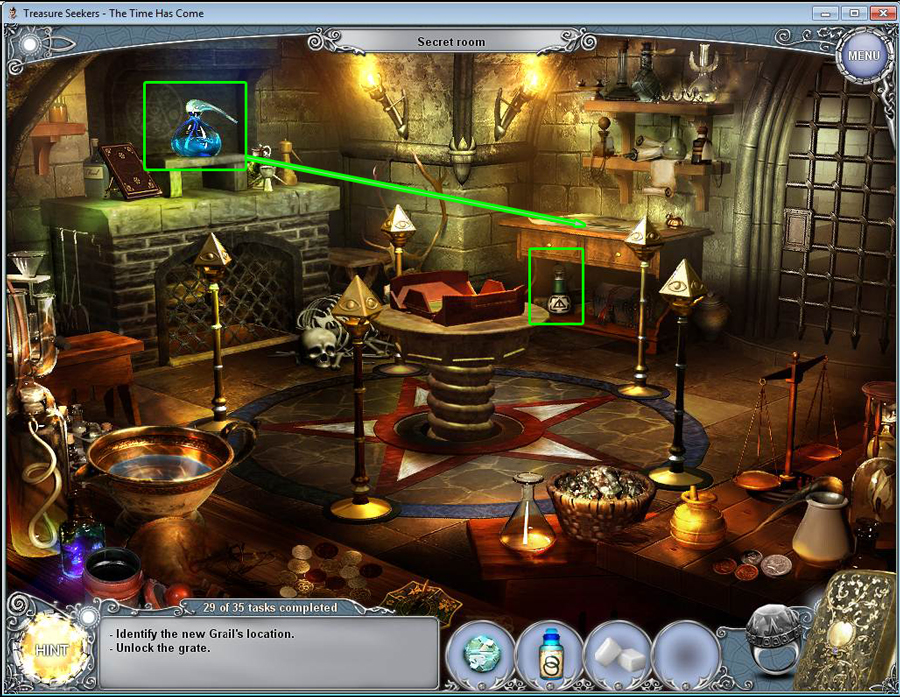
- Take the bottle on the top right.
- Click on the chest in the center and it will raise up.
- Click on the chest again to discover the note.
- Click on the flask to open the key object.
- Collect the pieces of the key object.
- Take the sugar cubes at the bottom.
- Click on the bottle to add it to your inventory.
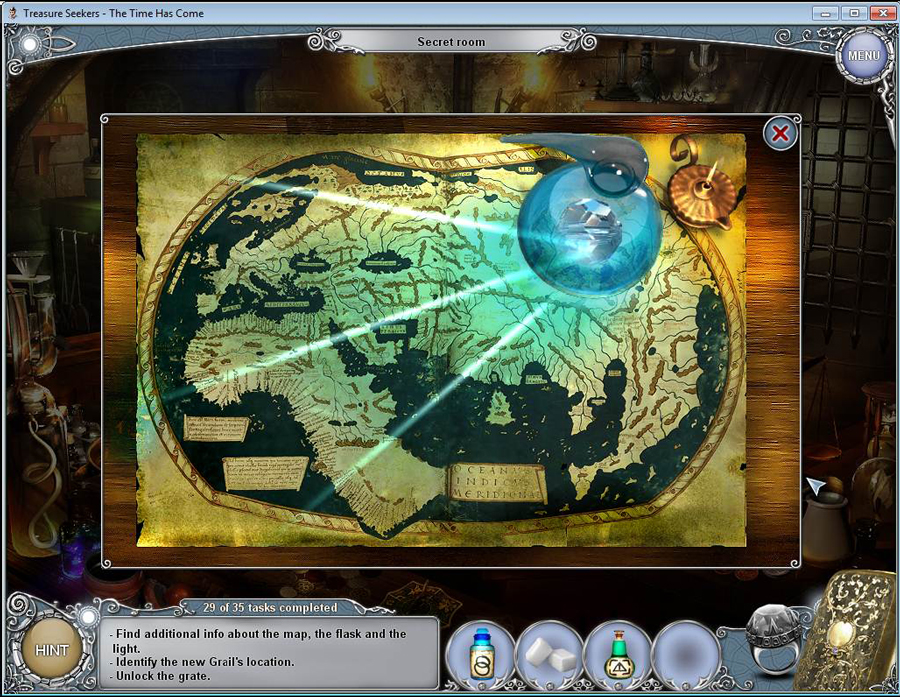
- Click on the flask and bring it over to the map.
- Move the lamp from the left side over to the right where the flask is.
- Use the gem on the flask.
- Close the window so you can see the whole room again.
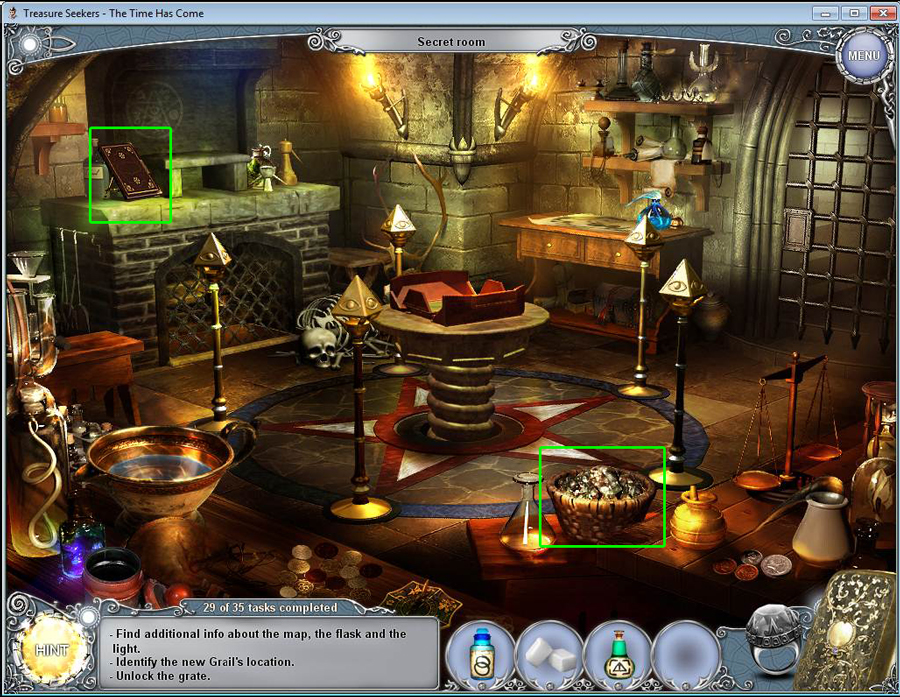
- Click on the coal at the bottom of the screen to take it.
- Click on the strange book to open it.
- Click the book again to be brought closer.
- Click on the flask and place it on the fireplace.
- Click on the sugar and place it in the flask.
- Use the coal from your inventory in the fireplace.
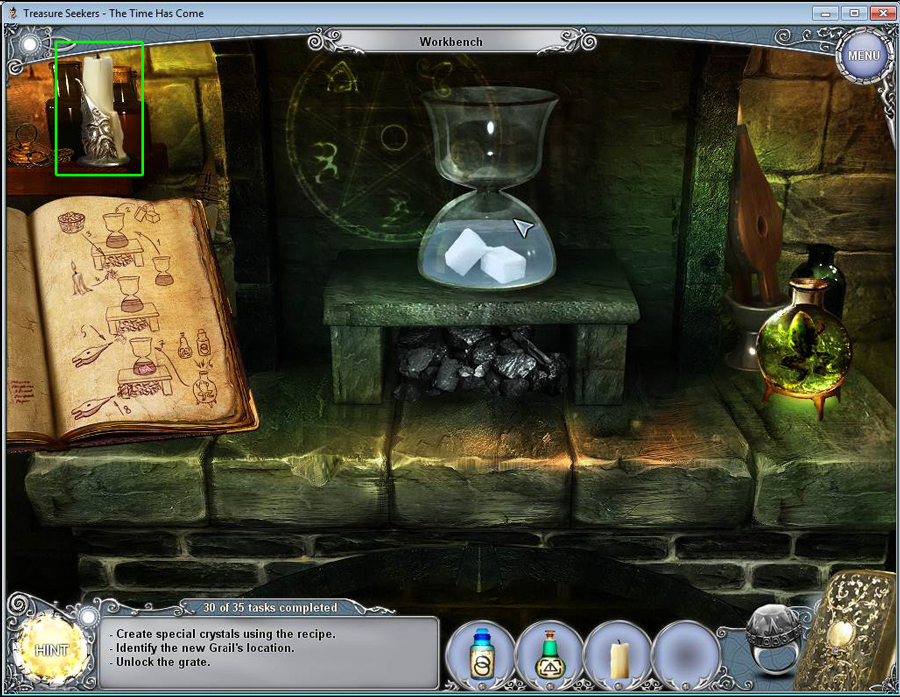
- Take the candle in the upper left.
- Go back to the main room.
- Use the candle on one of the torches to light it.
- Zoom back into the workbench.
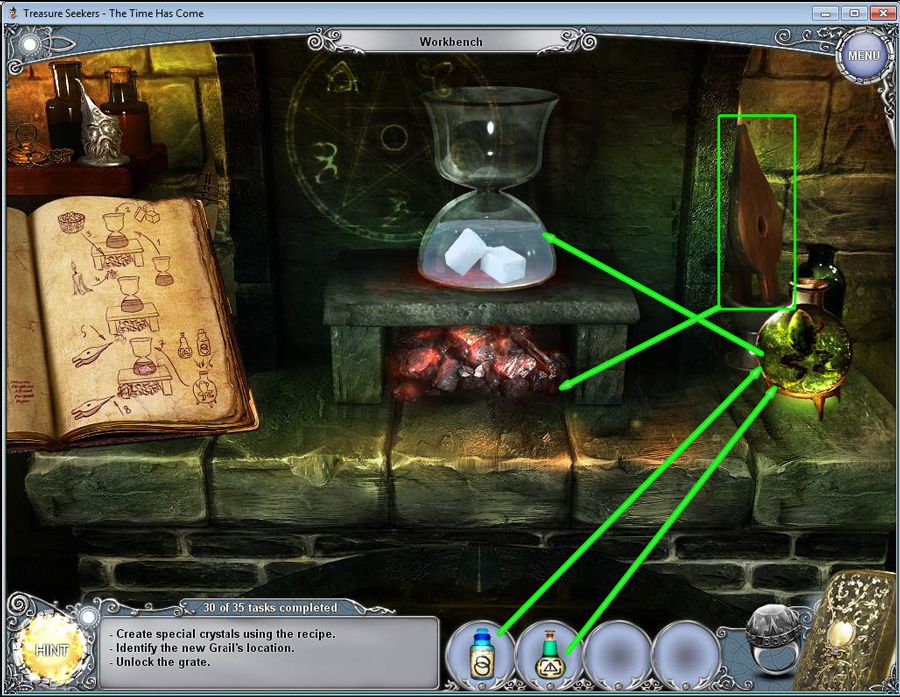
- Use the lit candle on the coals.
- Use the bellows on the right on the coals.
- The sugar has now turned to crystals.
- Use the two bottles from your inventory on the flask with the frog in it.
- Place the flask with the frog in it in the flask with the crystals.
- Use the bellows on the coals again.
- Take the crystals.
- Exit the workbench area.
- Zoom in on the map again.
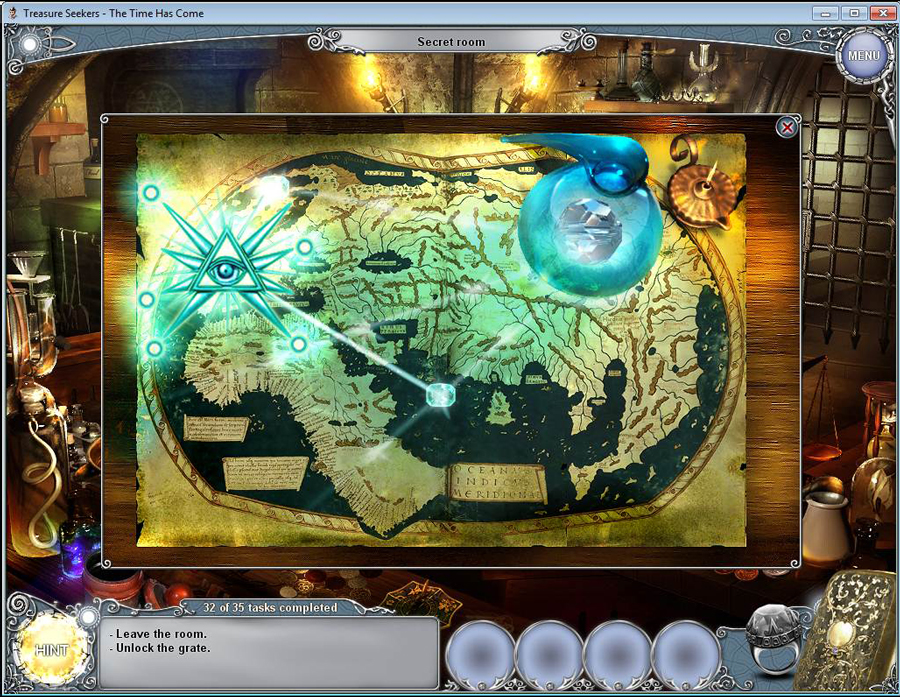
- Place the crystals on the map.
- See the screenshot above to see the correct placement of each crystal.
- The key that appears will help you solve the puzzle of the door.
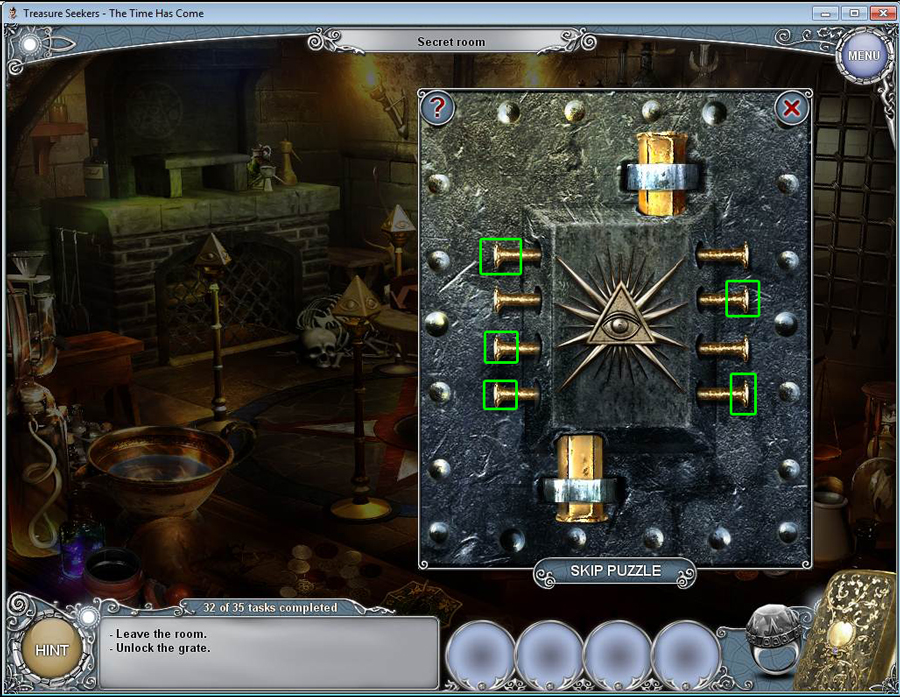
- Close the window to the map and click on the door on the right.
- You need to click on the keys that correspond to the eye on the map.
- See the video for a detailed solution.
- Go through the gate to end the chapter.
Chapter 3: Scotland
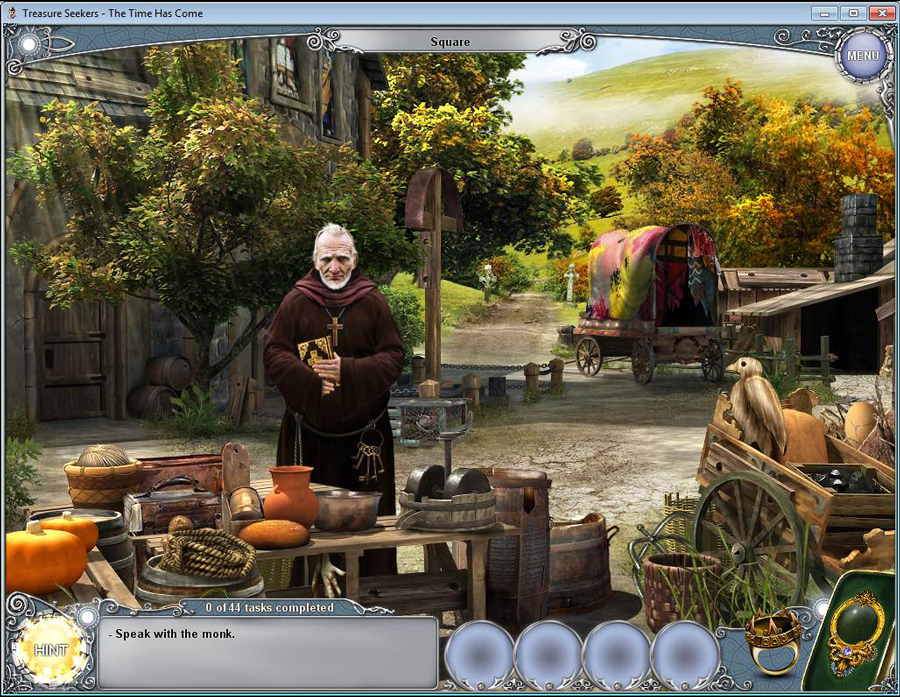
- Once you get to Scotland, speak to the monk in front of you.
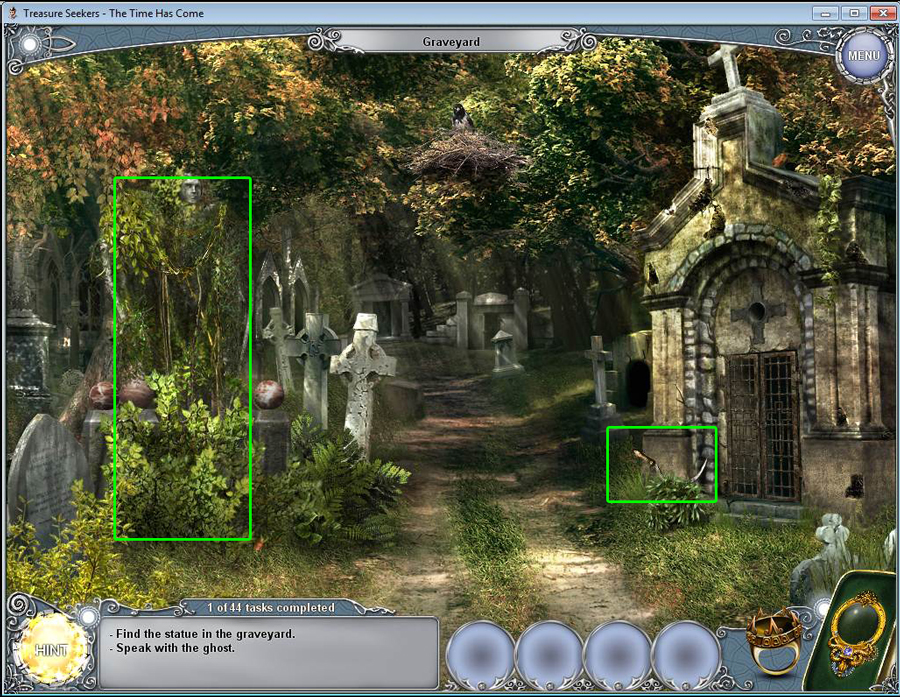
- When you are done, head toward the graveyard.
- Look on the left at the branches covering the statue.
- Click on the sickle in the lower right to add it to your inventory.
- Use the sickle on the branches to cut them away from the statue.
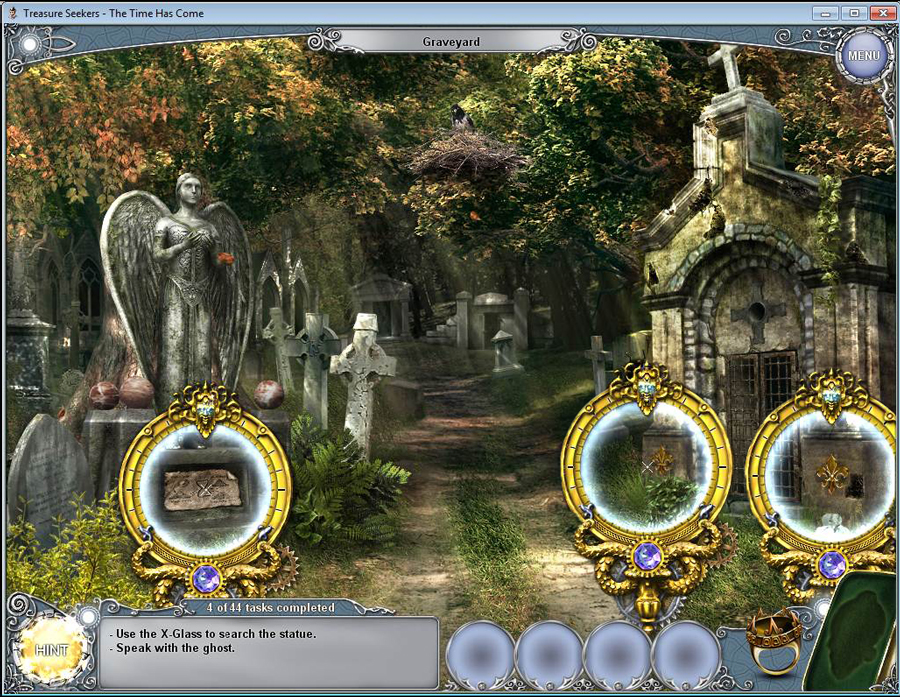
- Use the x-glass on the base of the statue.
- Click on the base to zoom in.
- Use the rock near the base to break off the plaster.
- Click on the puzzle to discover you need to ask the monk to learn how to open the plaque.
- Use the x-glass to find the two lillies on the right. Click to add them both to your inventory.
- Return to the monk and speak to him to find out you have to go to the dungeon.
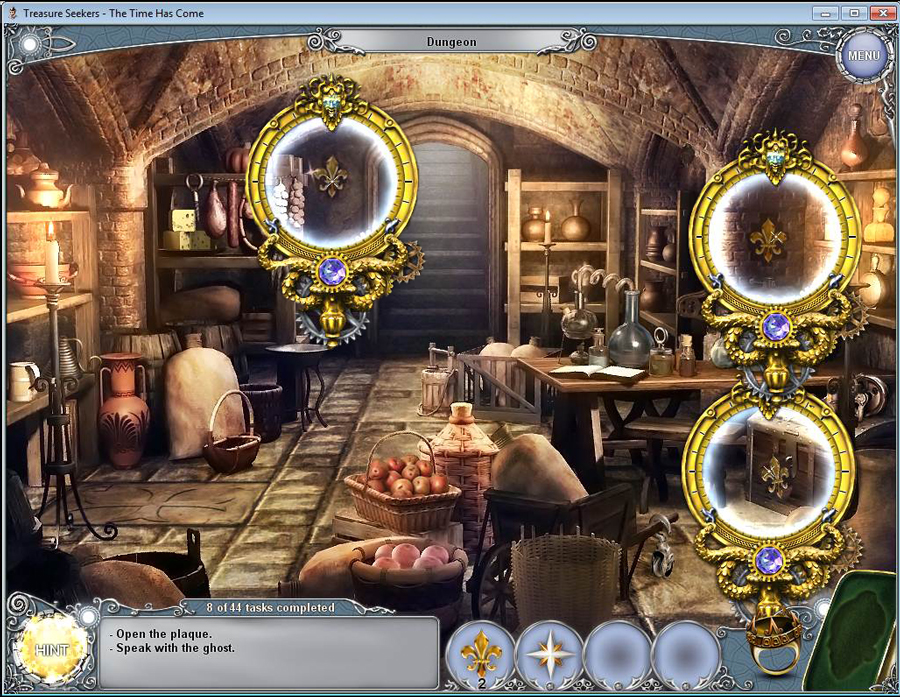
- Go to the dungeon on the left and access the hidden object scene.
- After you find all the hidden objects, you will receive the wind rose.
- Take out the x-glass in the dungeon and find the three lillies hidden there.
- Click on each to add them to your inventory.
- Now, go back to the graveyard.
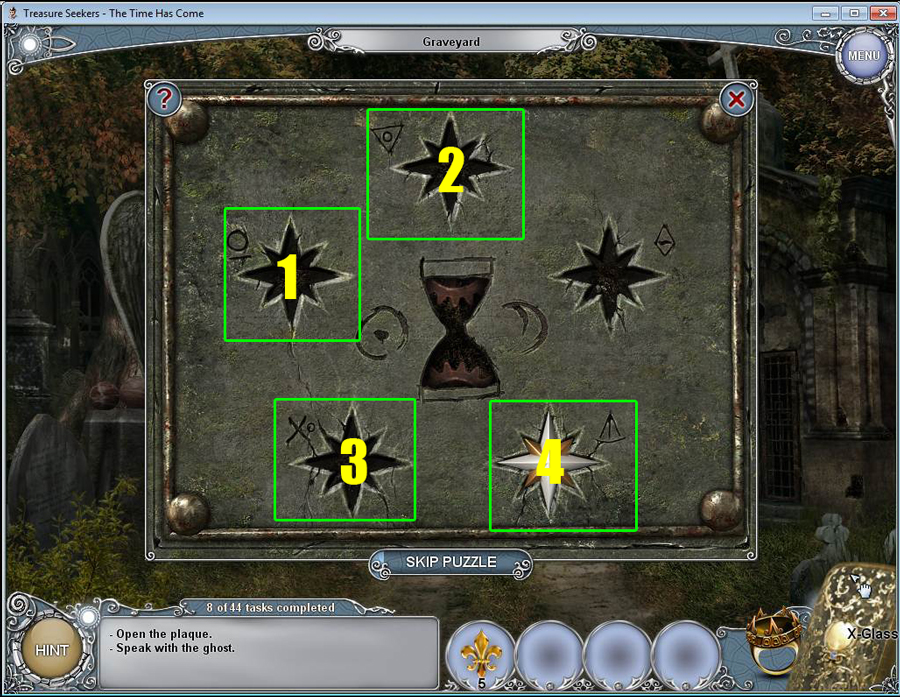
- Click on the doors on the right to zoom in. Take note of the symbols on the wall. You will need them for the next puzzle.
- Click on the plaque at the base of the statue to zoom in.
- Place the wind rose in any slot to start the puzzle.
- Now place the wind rose in the slots according to the symbols on the wall. See the screenshot for the solution.
- After you solve the puzzle, click on the base of the statue to see the blueprint on how to create the hourglass.
- Click on the marble globe on the statue to take it.
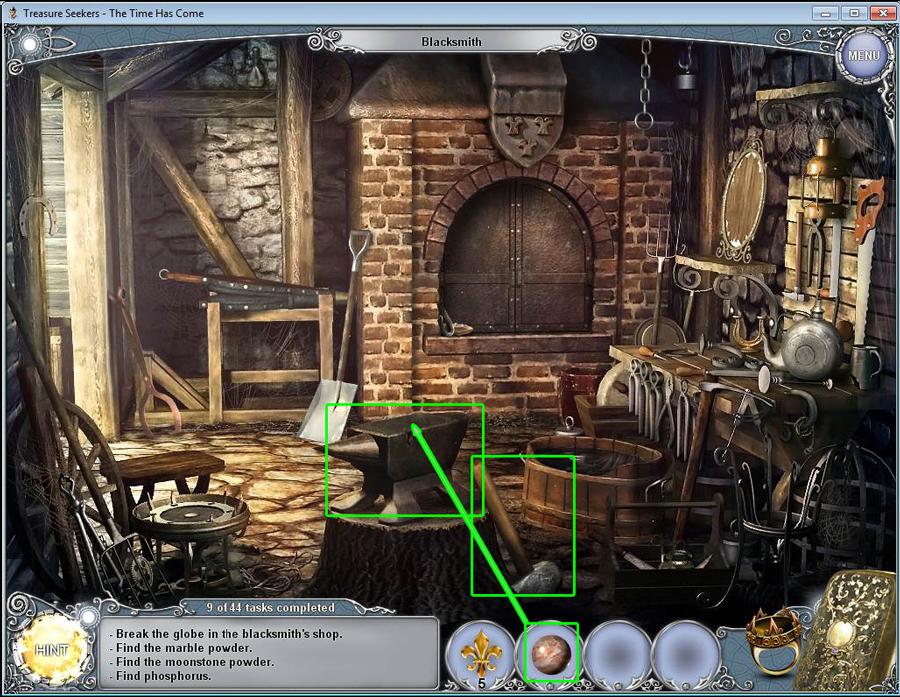
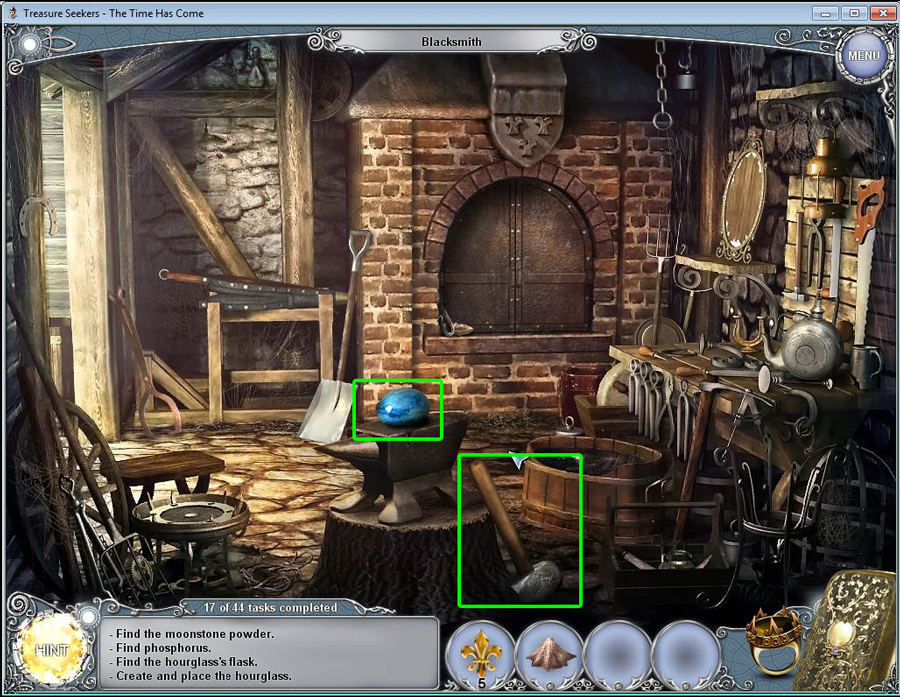
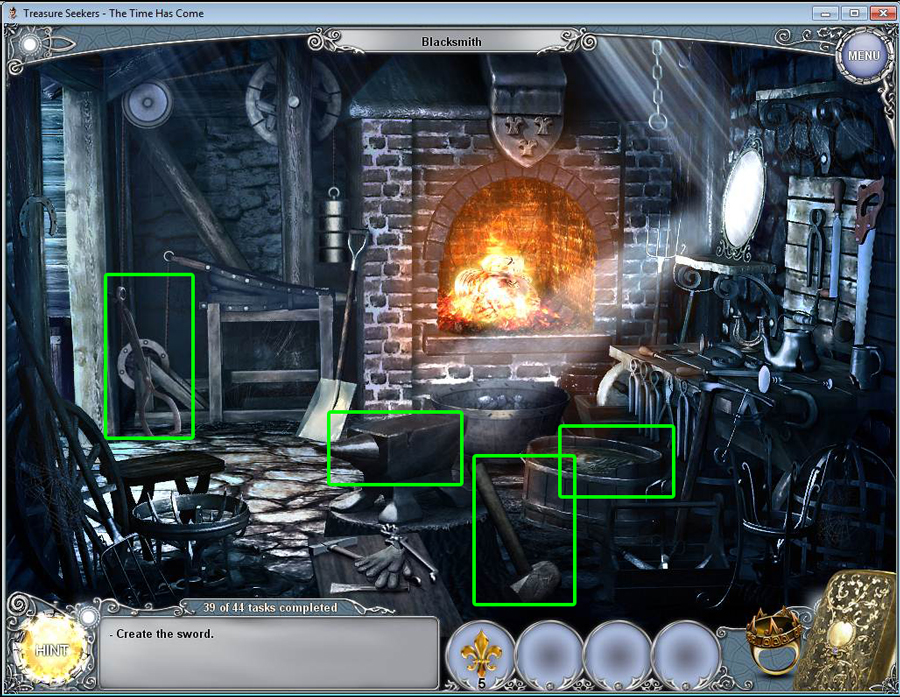
- Go back to the square where the monk is. This time, click on the right side to go to the blacksmith.
- Take the marble globe from your inventory and put it on the anvil.
- Click on the hammer next to the anvil and use it on the marble globe.
- Click on the marble pieces on the anvil to take them.
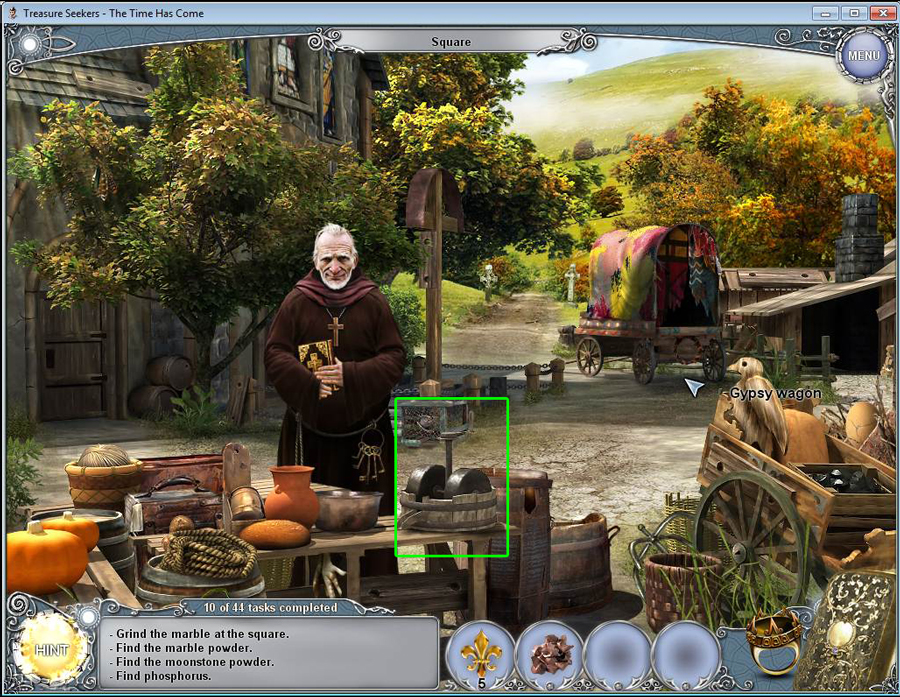
- Go back to the square.
- Use the marble peices on the handmill on the table in front of the monk.
- Speak to the monk.
- Go back to the graveyard.
- Click on the nest in the tree to discover it's too high to reach.
- Go back to the square.
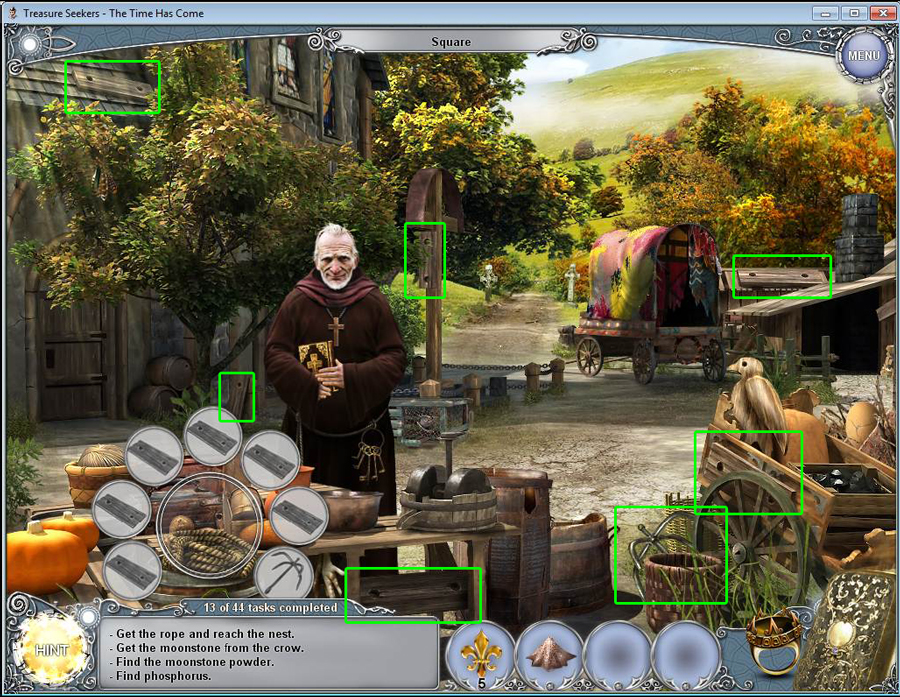
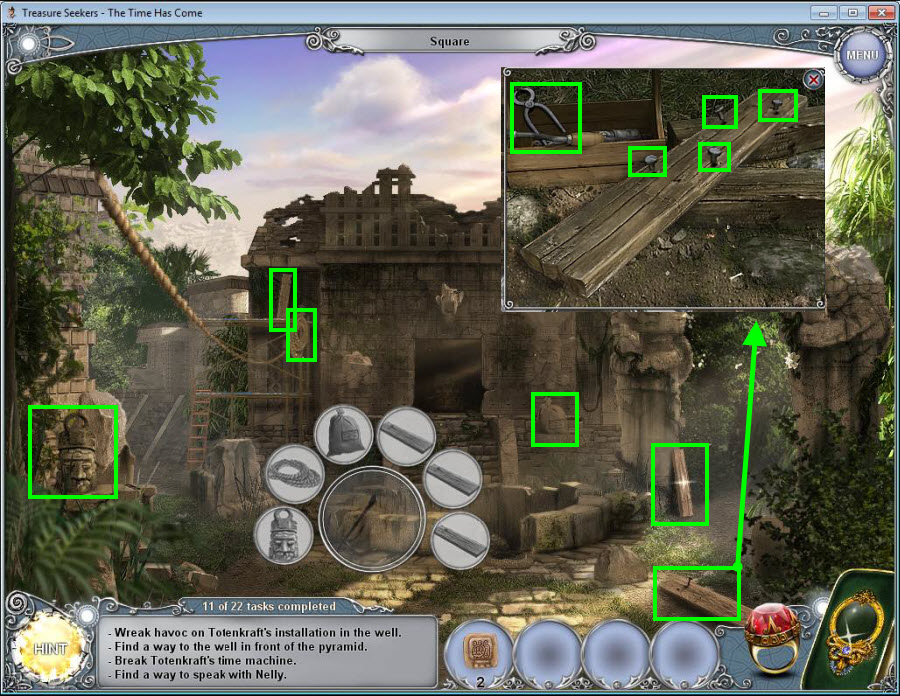
- Click on the rope at the bottom left of your screen to open a key object.
- Click at the plank on the roof on the left to zoom in.
- Use the tool on the right to pull out all three nails.
- Click on the plank and drag it to the key object.
- Find the rest of the planks and the grappling hook.
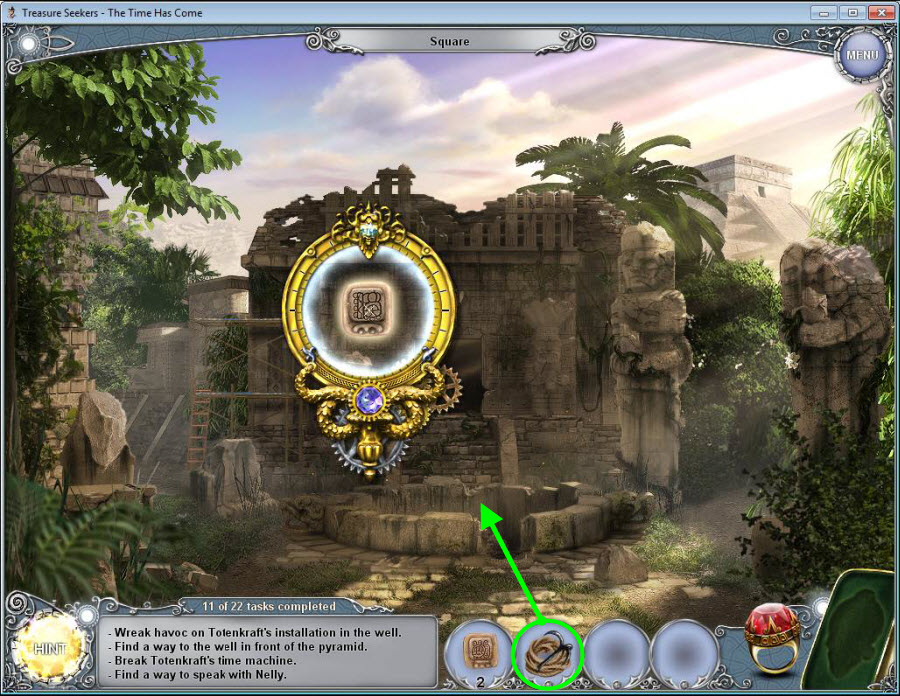
- Click on the rope ladder to take it.
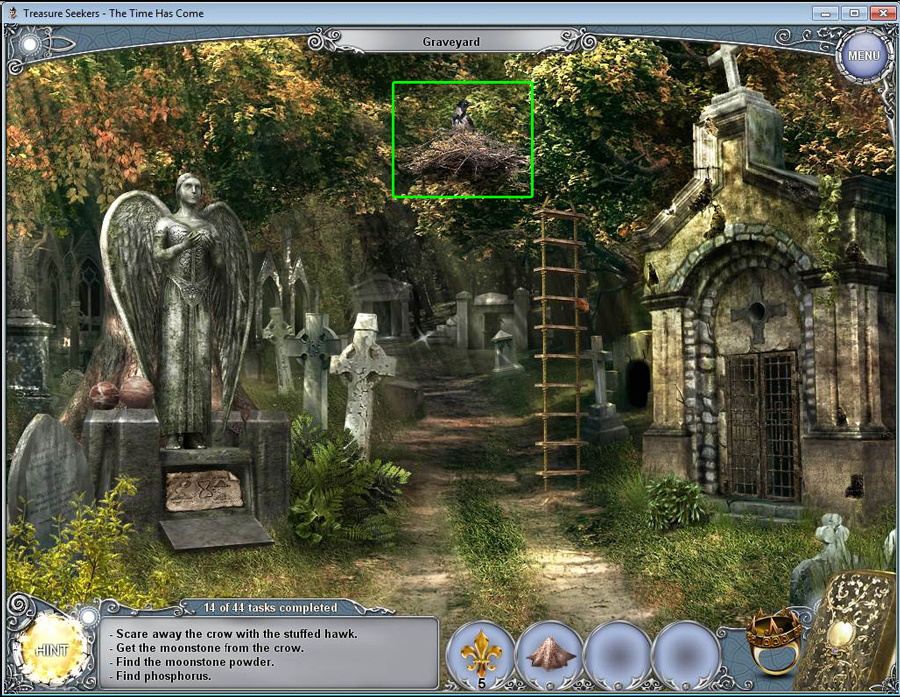
- Return to the graveyard.
- Use the rope ladder on the nest.
- Click on the nest to discover that you need to scare away the bird.
- Go back to the square.
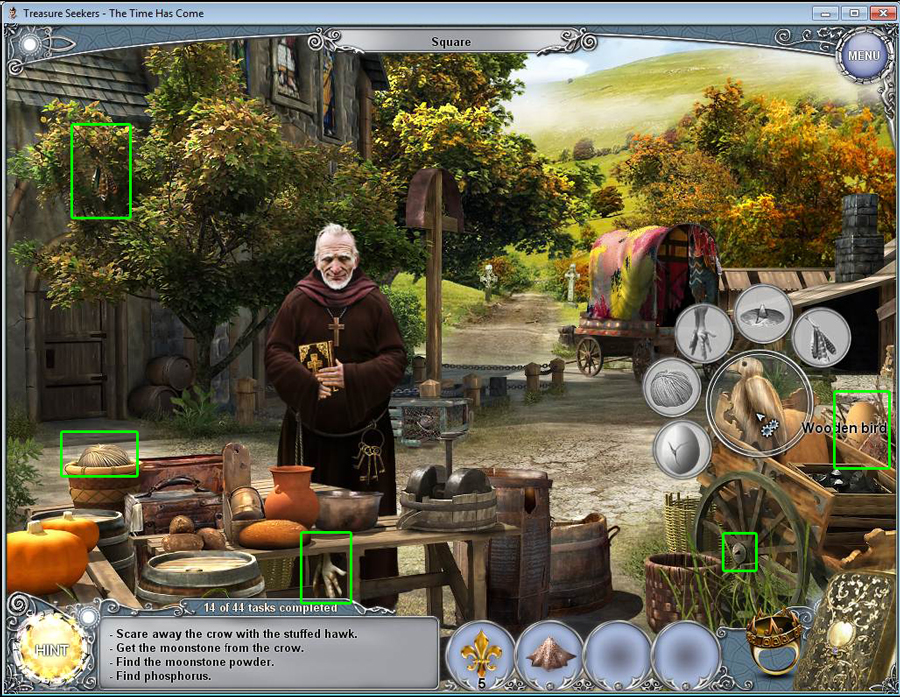
- Click on the wooden bird on the right to open a key object.
- On the very left are three feathers handing from a tree. Click on them to zoom in and then place the feathers in the silhouetted spots.
- Click on the feathers and drag them to the key object.
- Find the rest of the items in the scene and place them in the key object.
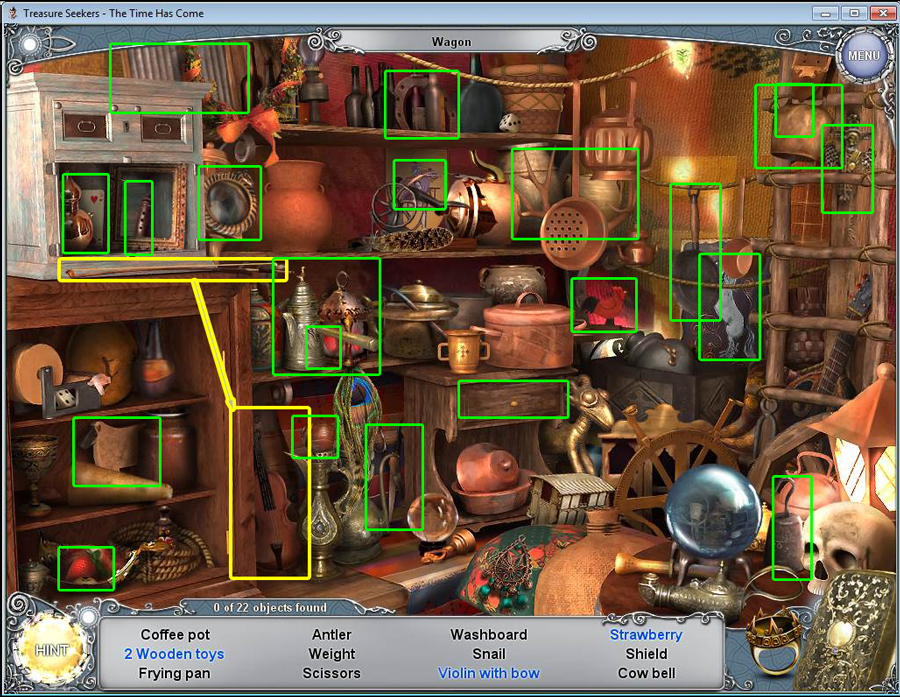
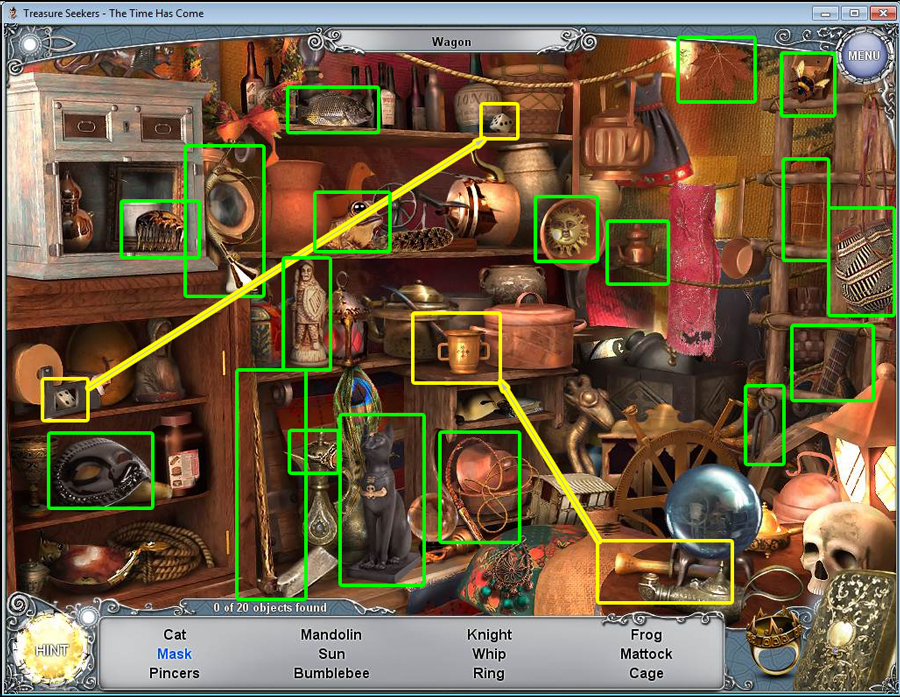
- Click on the wagon to access the hidden object scene.
- Once you find all the hidden objects, you will receive the hunter's whistle.
- Use the hunter's whistle on the stuffed hawk and it will be added to your inventory.
- Go back to the graveyard.
- Use the stuffed hawk on the nest.
- Click on the nest to zoom in and take the moonstone.
- Go back to the blacksmith.
- Take the moonstone and put it on the anvil.
- Use the hammer on the moonstone.
- Take the moonstone peices that are left.
- Go back to the square and put the moonstone pieces in the handmill, and you will receive moonstone dust.
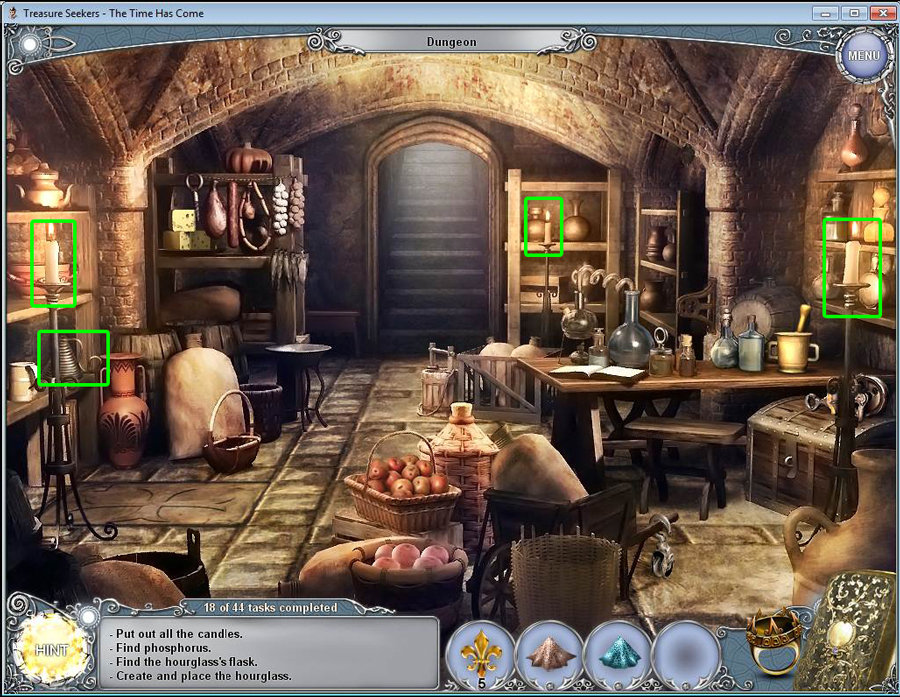
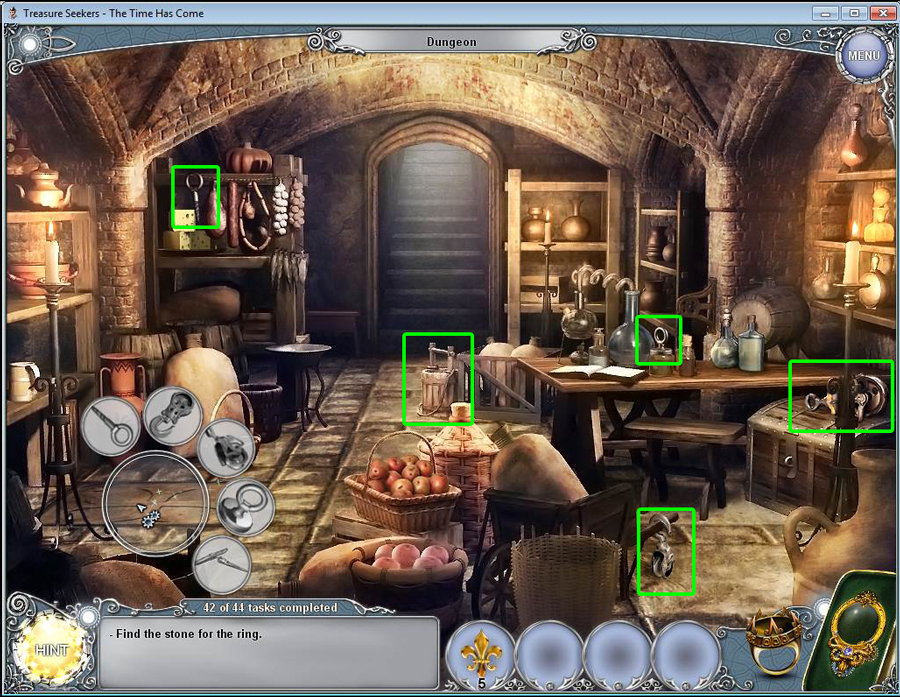
- Go to the dungeon.
- Take the candle snuffer on the shelf on the left and use it on the three candles to snuff out the lights.
- Take the phosphorous in the right.
- Once you have the phosphorous, the dusts will combine into a powder mix in your inventory.
- Return to the square and talk to the monk.
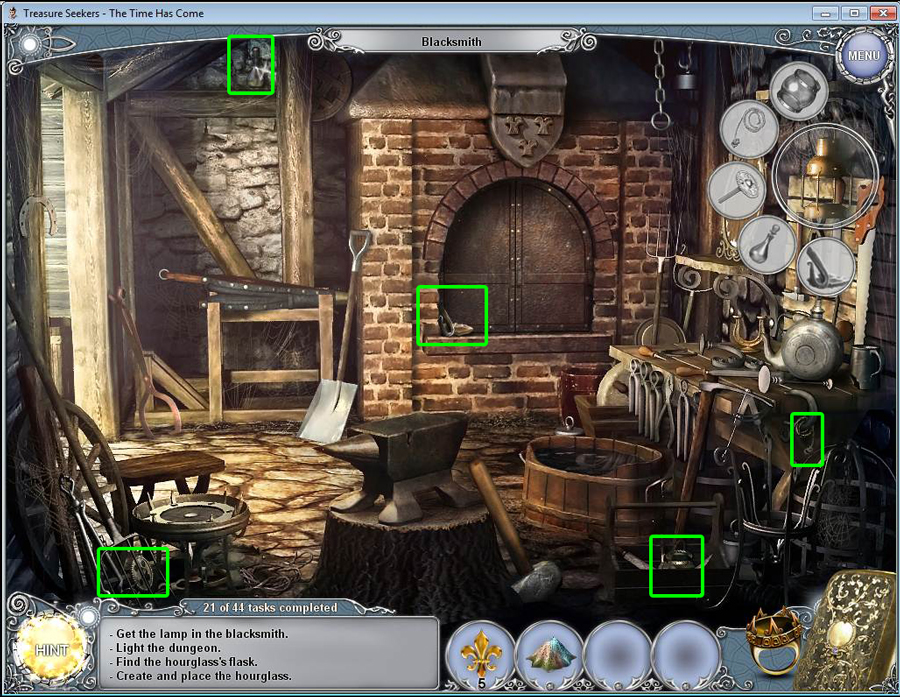
- Go to the blacksmith.
- Click on the lamp in the upper right to open the key object.
- Find all the objects and drag them to the key object.
- Click on the lamp to take it.
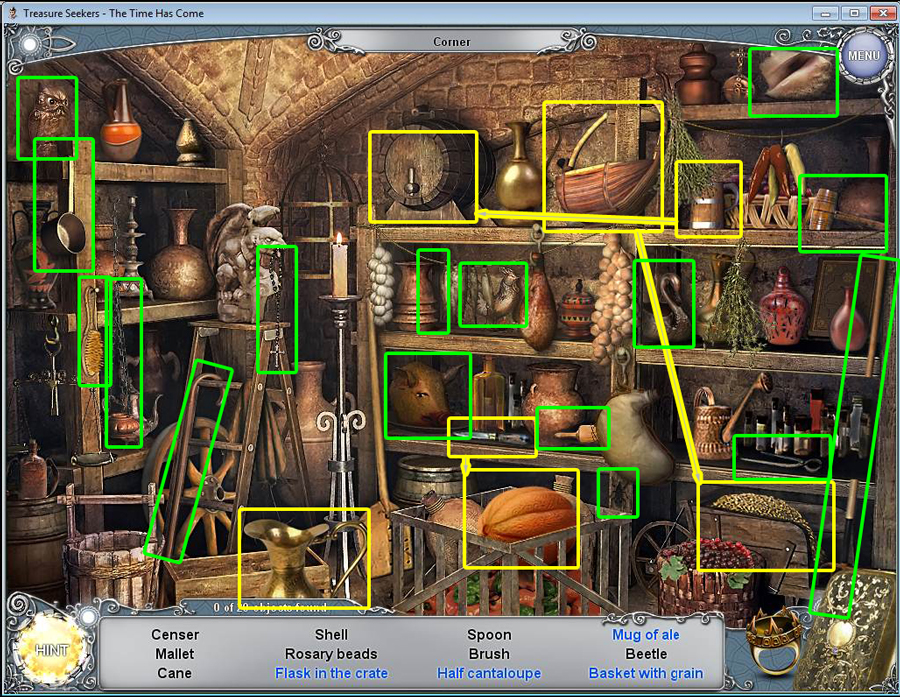
- Go back to the dungeon and light the 3 candles.
- Click on the hidden object scene to play it.
- Once you complete the hidden object scene, you will receive a flask.
- Use the powder mix on the mortar and pestle on the table.
- Use the flask on the mortar and pestle.
- Go to the graveyard and use the hourglass on the statue.
- Click on the hourglass to make it night.
- Go to the square.
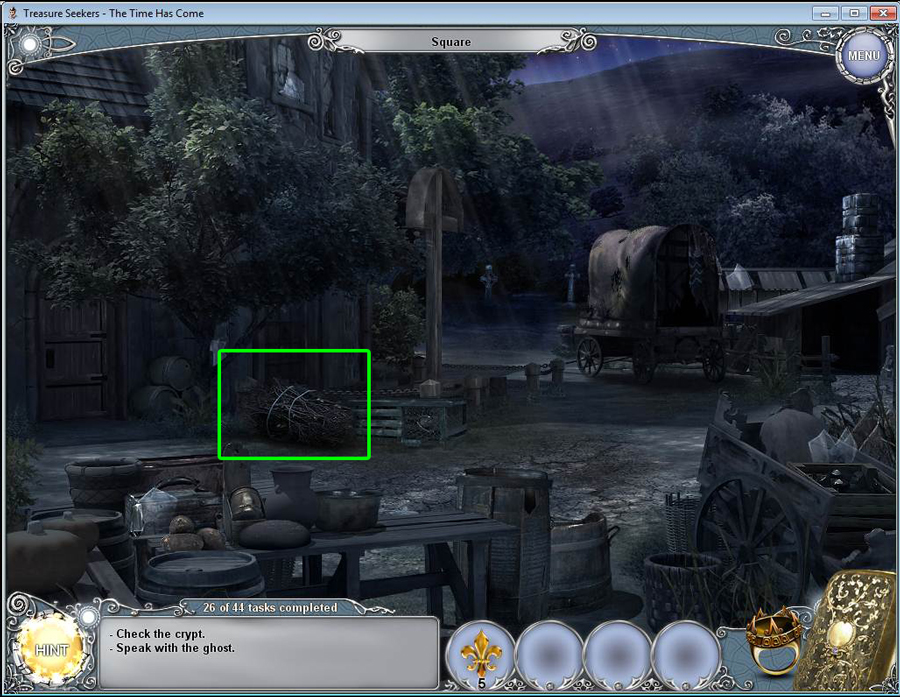
- Click on the brushwood to take it.
- Now, go to the blacksmith.
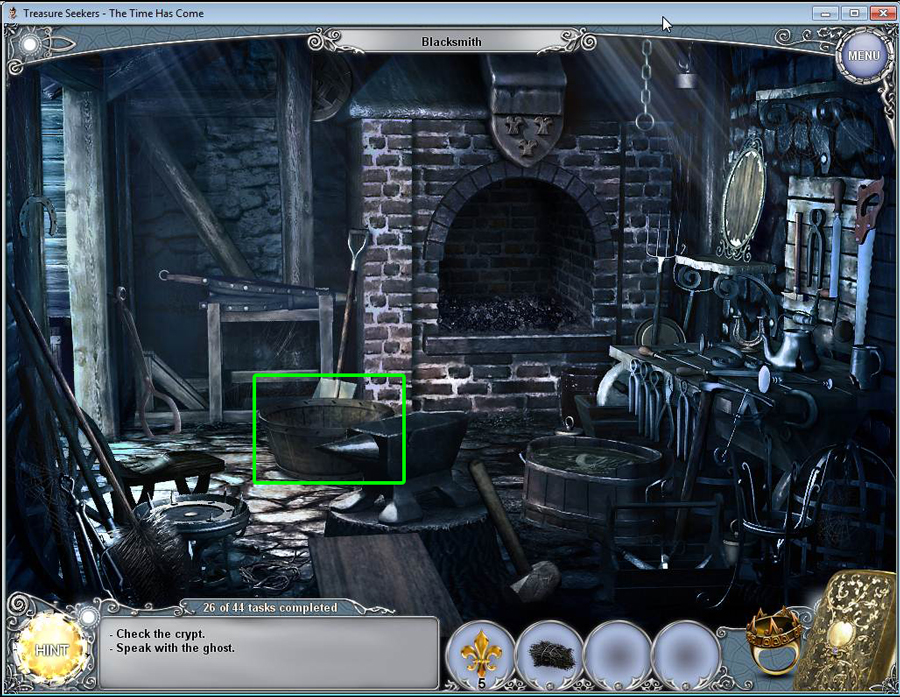
- Take the coal basket on the ground.
- Go back to the square.
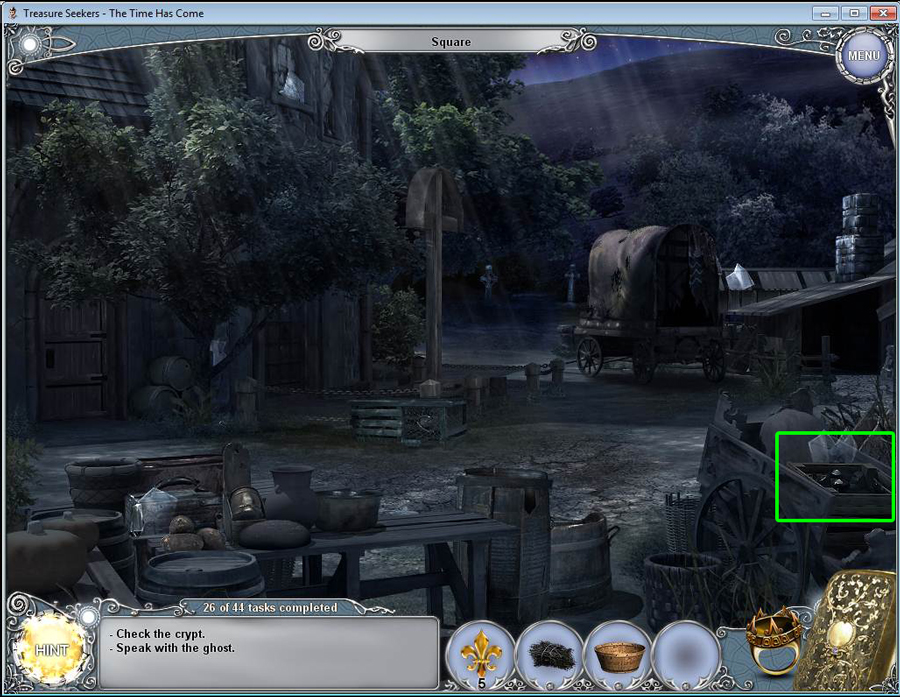
- Use the coal basket on the coal to fill it.
- Go back to the blacksmith.
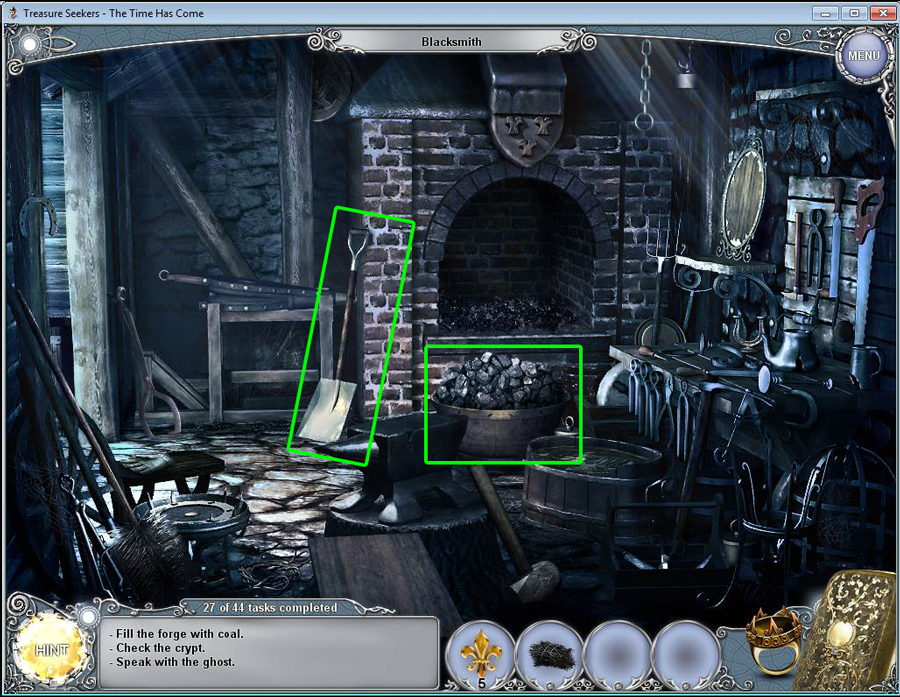
- Use the coal basket on the forge.
- Click on the shovel and use it on the basket full of coal a few times until the forge is full.
- Click on the forge to get a new task.
- Go back to the graveyard.
- Click on the door to the right to get a new task.
- Go back to the square.
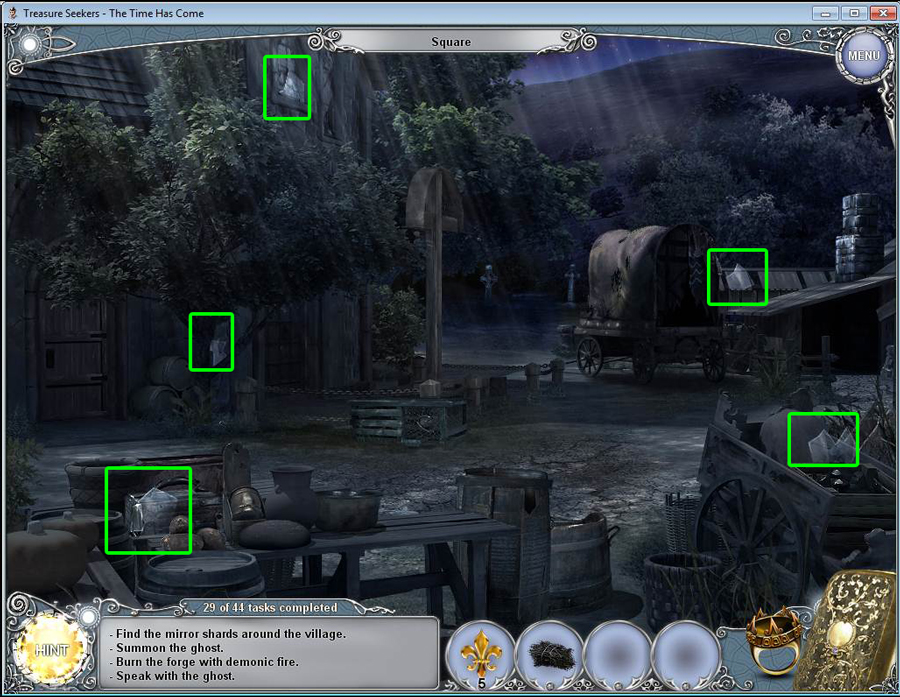
- Find the mirror shards scattered throughout the scene.
- Use the knife to free the mirror shard in the window.
- Go back to the graveyard.
- Click on the door to the right to zoom in.
- Use the mirror shards on the crypt to start a puzzle.
- See the video for the solution.
- Talk to the ghost that appears.
- Click on the statue to make it day again.
- Go to the blacksmith.
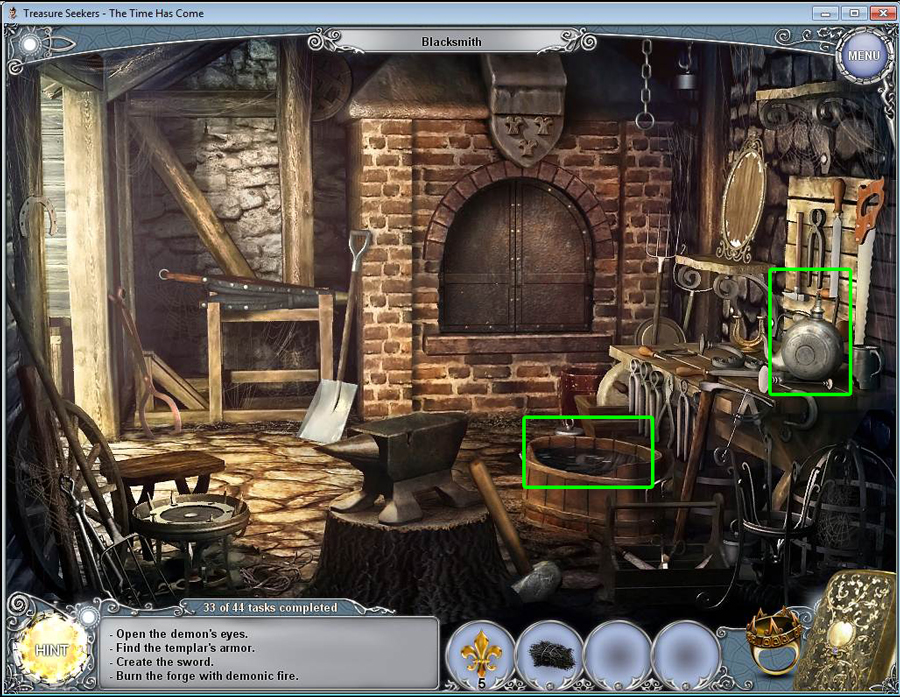
- Click on the canteen on the right and use it on the water to fill it.
- Go back to the square.
- Use the flask with water on the monk, and he will turn it into holy water.
- Go back to the graveyard.
- Click on the statue to make it nighttime.
- Use the holy water on the devil statue.
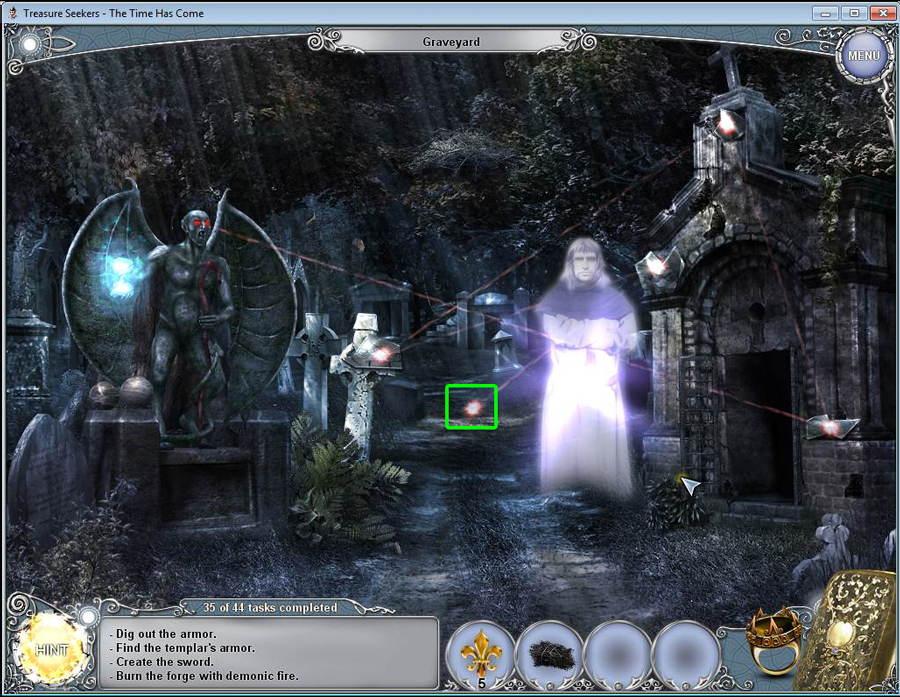
- Click on the doors to the crypt and take the 5 mirror shards.
- Use the mirror shards where the light from the devil's eye is pointing. Keep placing a shard where the light points until you have used all the shards.
- You need something to dig with. Click on the statue to make it daytime.
- Go back to the square and play the hidden object scene.
- Once you have found all the hidden objects, you will receive the mattock.
- Go back to the graveyard.
- Click on the statue to make it night.
- Use the mattock on the ground where the light is pointing.
- Click on the hole and take the armor.
- Use the brushwood on the hole to set it on fire.
- You will receive the burning branch.
- Go to the blacksmith.
- Use the burning branch on the forge to light a fire.
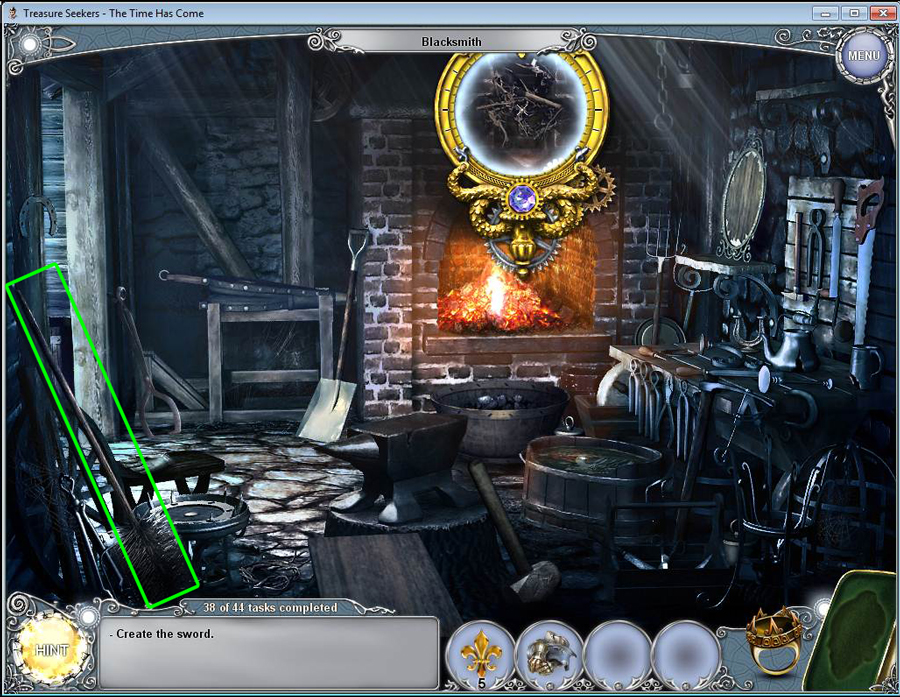
- The chimney is clogged, use the x-glass on the chimney to see it.
- Take the brush in the lower left.
- Go back to the square.
- Look at the chimney on the blacksmith.
- Use the brush to clean out the clogged debris.
- Go back to the blacksmith.
- Use the armor on the fireplace.
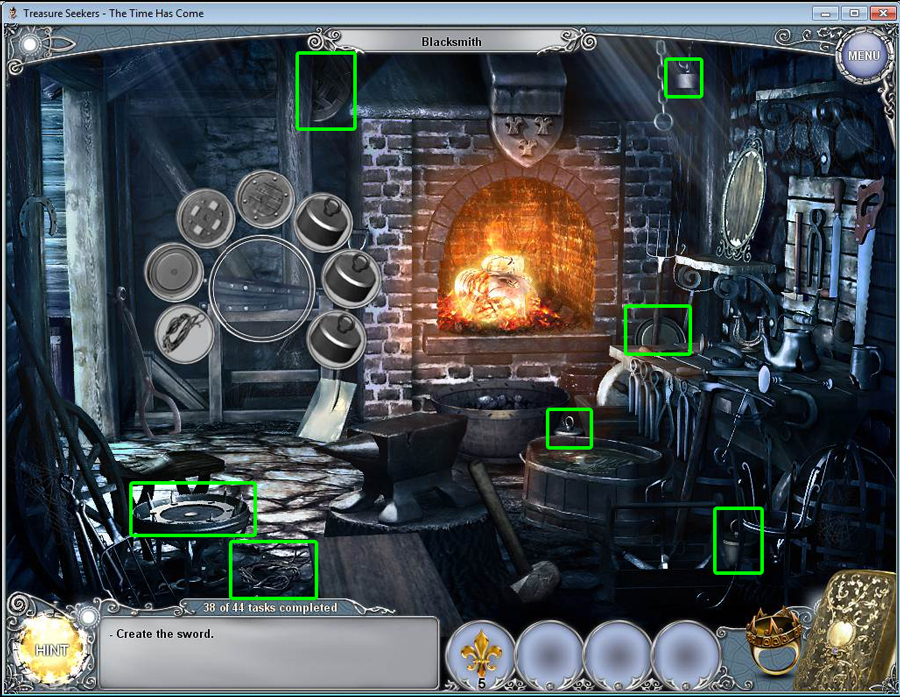
- Click on the bellows on the left to open the key object.
- Click on the wheel in the lower left and use the scissors next to it to cut it free.
- Find the rest of the items.
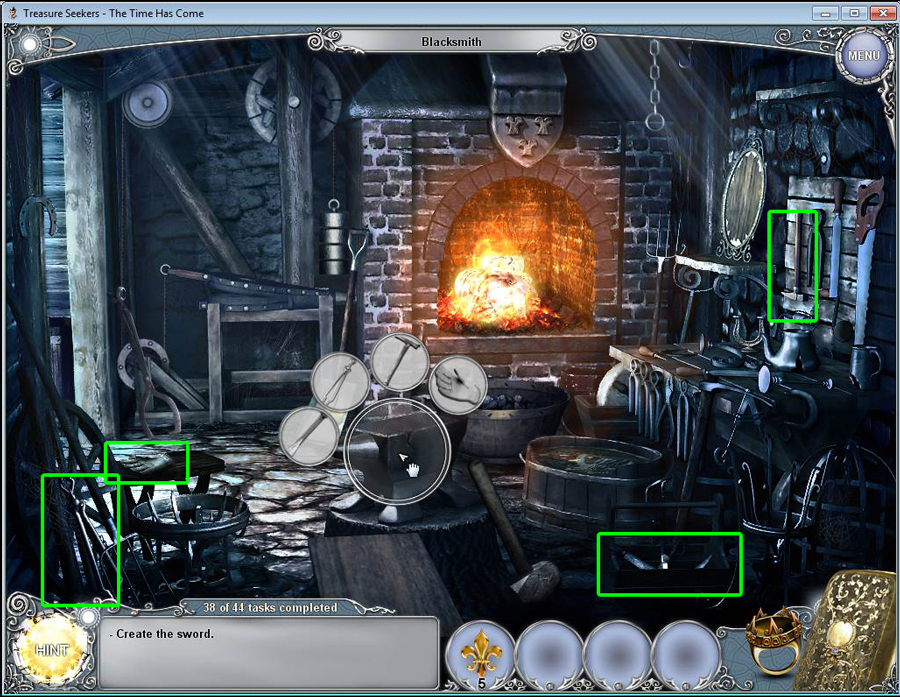
- Click on the anvil to open the key object.
- Find the items and drag them to the key object.
- Go back to the graveyard and take the mirror shards. There are 4 of them.
- Return to the blacksmith.
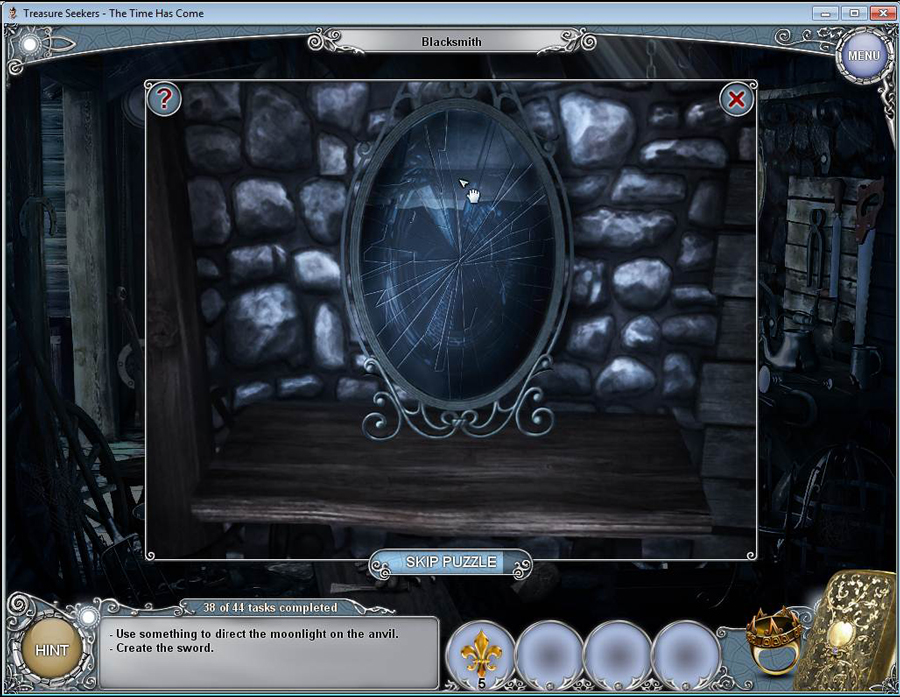
- Click on the mirror in the right-hand corner.
- Use the mirror shards on the mirror to start a puzzle.
- Place the broken shards in the correct place on the mirror. The pieces will stick once it's in the correct place.
- Now, use the tongs to take the armor out of the forge and place it on the anvil.
- Use the hammer on the armor to make it a sword.
- Use the tongs again to put the sword in the water to cool it.
- The sword is now in your inventory.
- Go to the graveyard.
- Give the sword to the ghost.
- Click on the statue to turn it to daytime.
- Go back to the square and talk to the monk.
- Go to the dungeon.
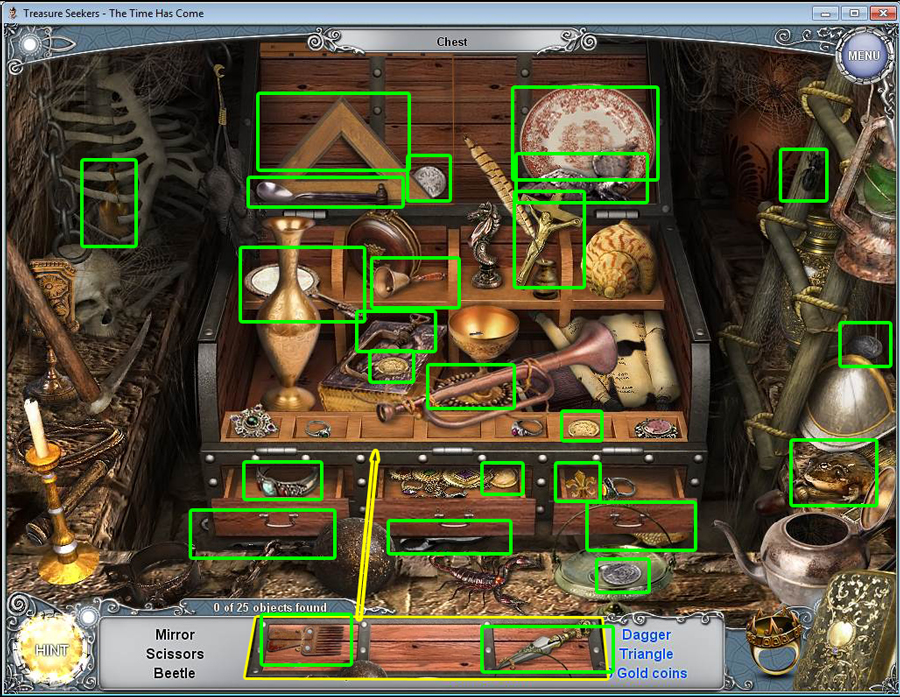
- Use the x-glass on the lower left corner of your screen to see the chest. Click on it.
- Click again where the chest is and it will open the key object.
- Find the objects and place them in the key object.
- Click on the ground to play the hidden object scene.
- Once you find all the hidden items, you will receive the last lily.
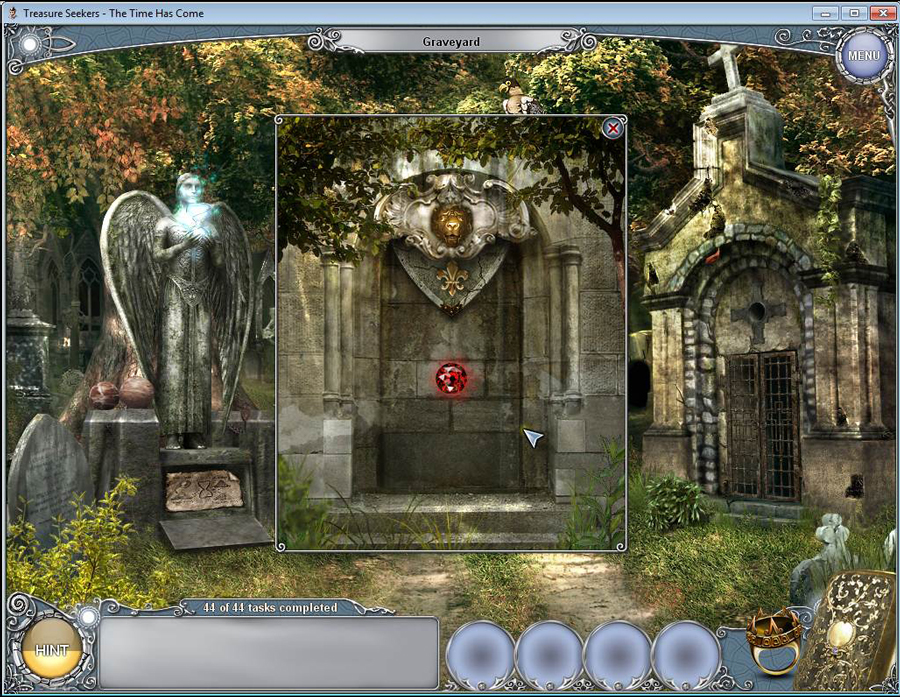
- Go to the graveyard.
- Click on the back area of the graveyard to zoom in.
- Use all 6 of the lilies on the shield.
- Click on the red stone to take it and end the chapter.
Chapter 4: Yucatan
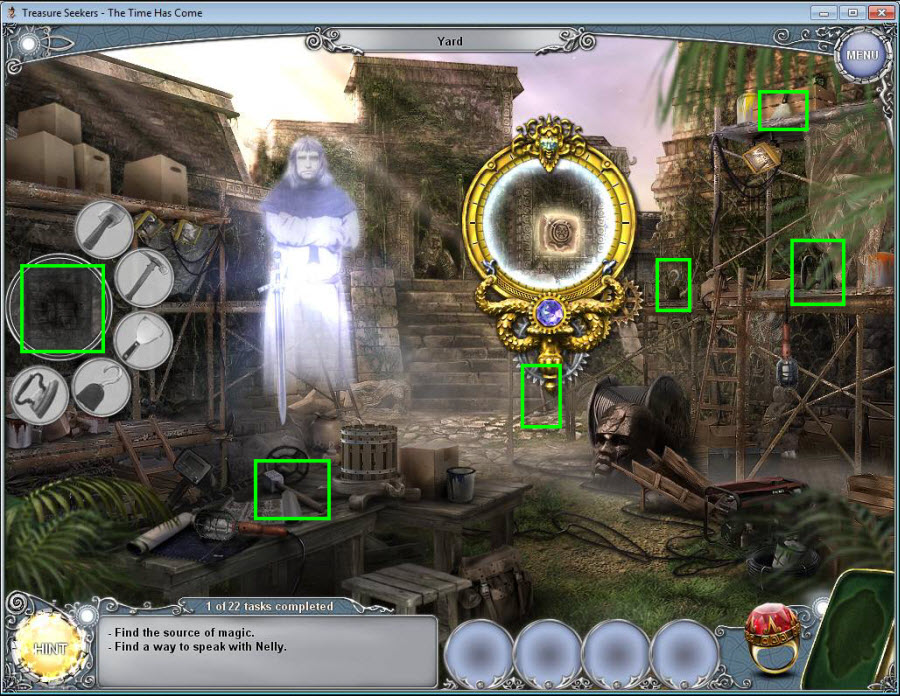
- Once in the Yucatan, go to the yard on the left.
- Talk to the ghost.
- Click to use the x-glass and find the stone tile.
- Click to use the x-glass to find a key object on the left side of your screen.
- Once the key object is open, find the objects and place them in the key object.
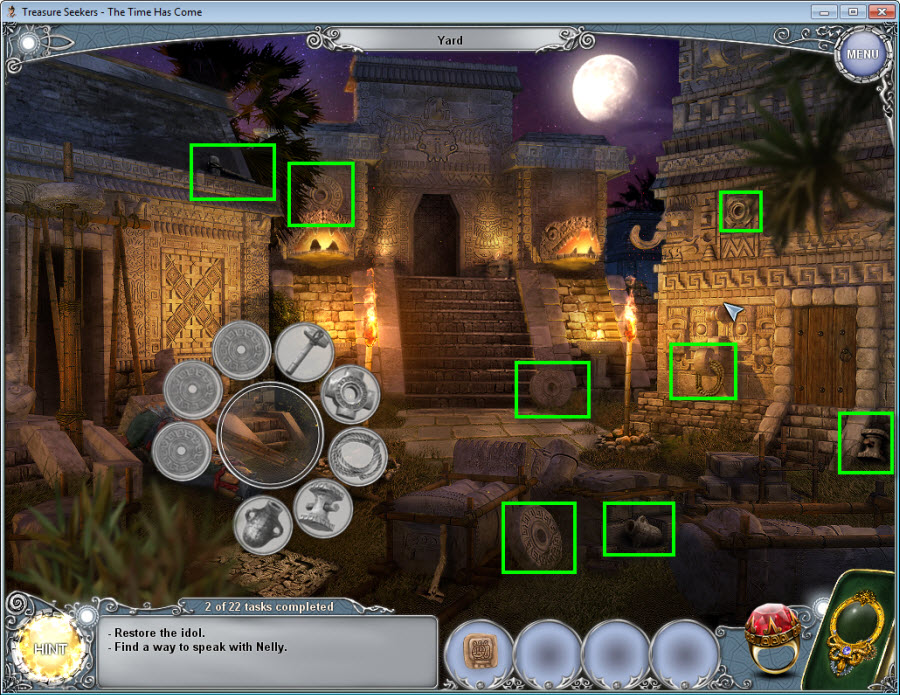
- Click on the ring to travel to the past.
- Click on the idol on the ground to open a key object.
- Collect the items for the key object.
- Click on the idol to take its head.
- Use the x-glass to grab the second stone tile in the right hand corner of your screen.
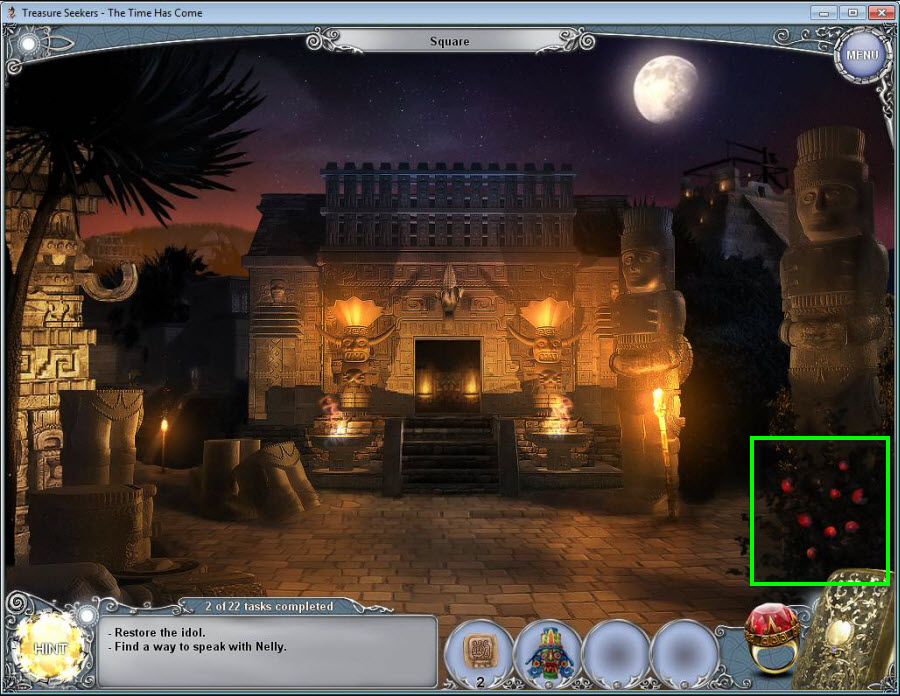
- Go to the square.
- Click on the tomatoes on the right to add them to your inventory.
- Go back to the future by clicking on the ring.
- Go back to the yard.
- Click on the idol to zoom in.
- Use the idol's head on the idol to place it.
- Click back out to the yard.
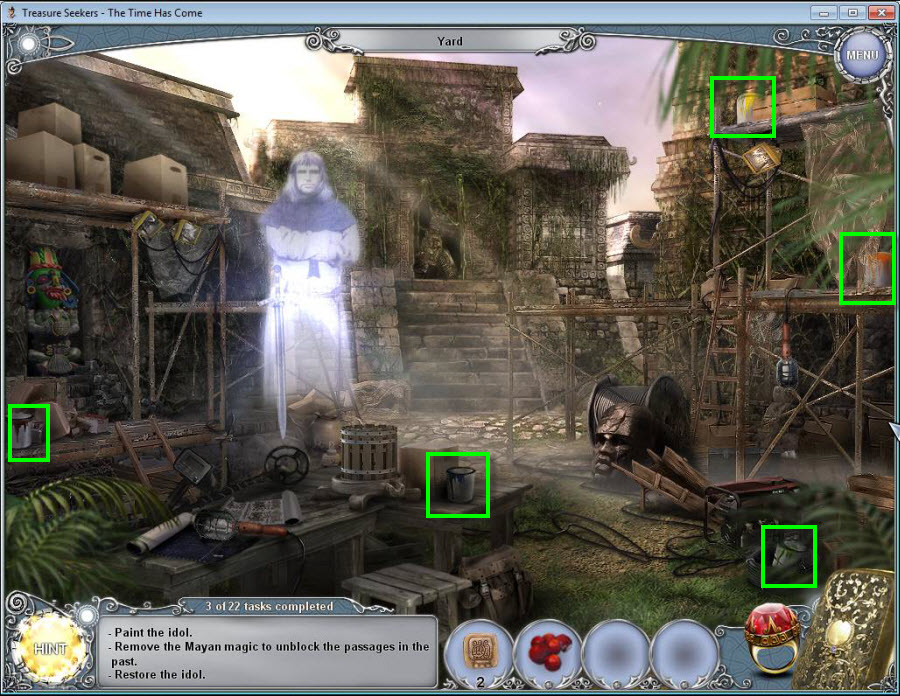
- Find the 5 paint cans in the yard.
- Once you find all 5 paint cans, a hidden object area will appear.
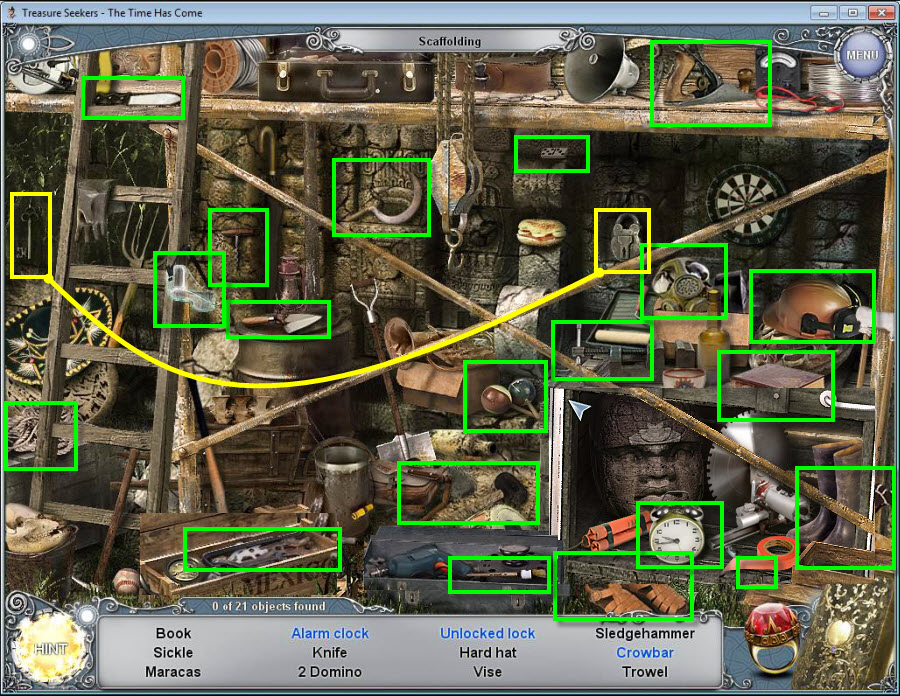
- Click to access the hidden object area.
- Once you have found all the hidden objects, you will receive a brush.
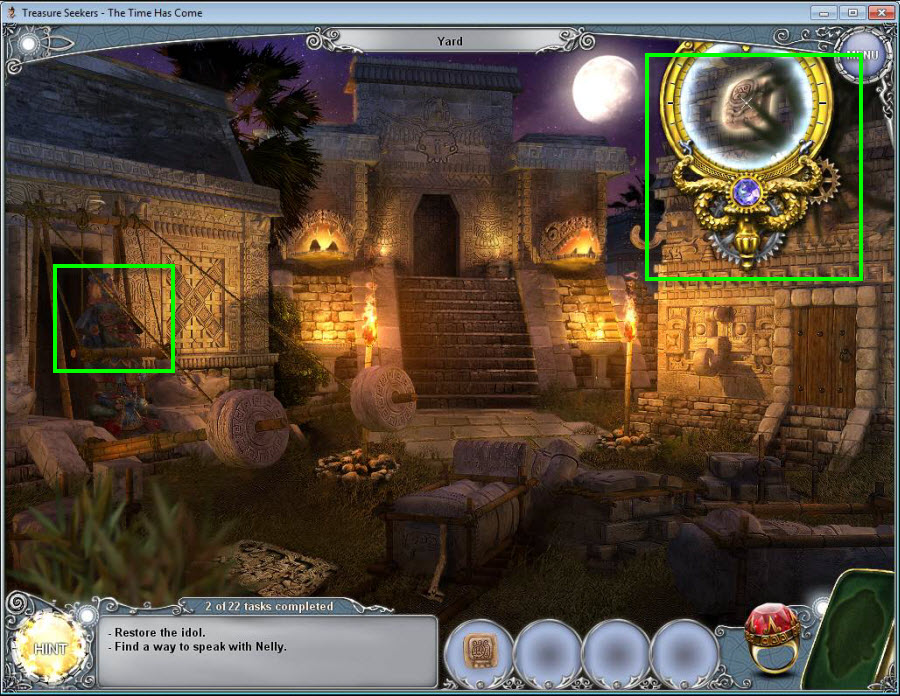
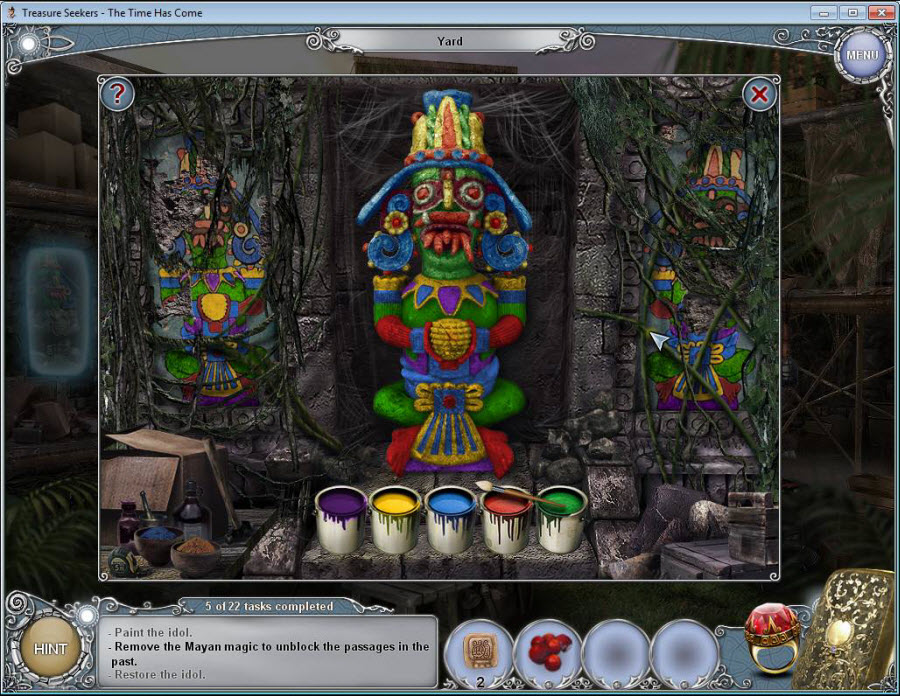
- Click on the idol once more.
- Use the paints on the idol.
- Click on the paintbrush to pick it up.
- Click on the color to use that paint color.
- Paint the idol to restore it. See the screenshot above for the correct final colors.
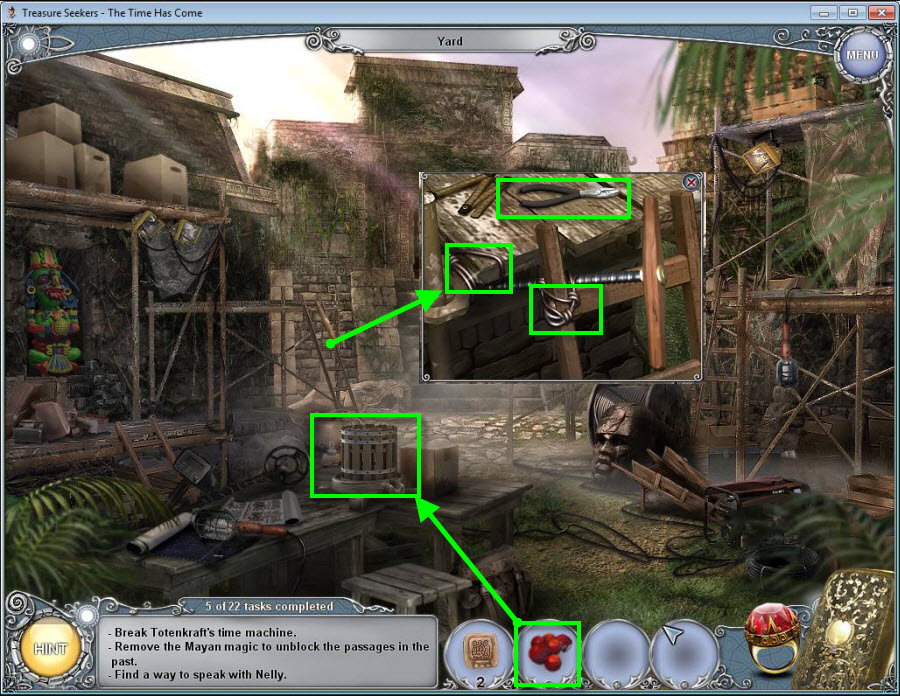
- Take the tomoatoes from your inventory and place them in the juicer on the table.
- Click on the ladder in the background to zoom in.
- Use the wire cutters to cut the two wires holding the screw handle in place.
- Click on the screw handle and drag it to the juicer.
- Click on the ring to travel to the past.
- Click on the door in the back to zoom in.
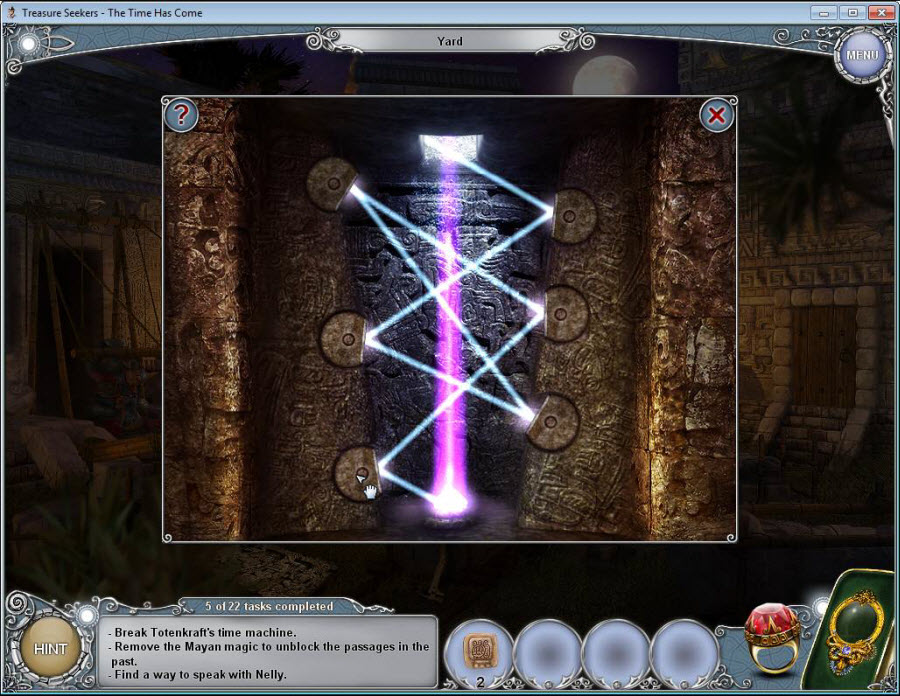
- You have to move the stone circles so that the light will shine all the way to the bottom.
- See the screenshot for the solution.
- Click on the door again and take the pot.
- Click on the ring to go back to the future.
- Use the pot on the juicer and you will receive the pot with red juice.
- Click on the ring to go back to the past.
- Go to the square.
- Use the pot with red juice on the idols.
- Click on the door.
- Take the stone slab.
- Click on the ring to go back to the future.
- Go to the yard.
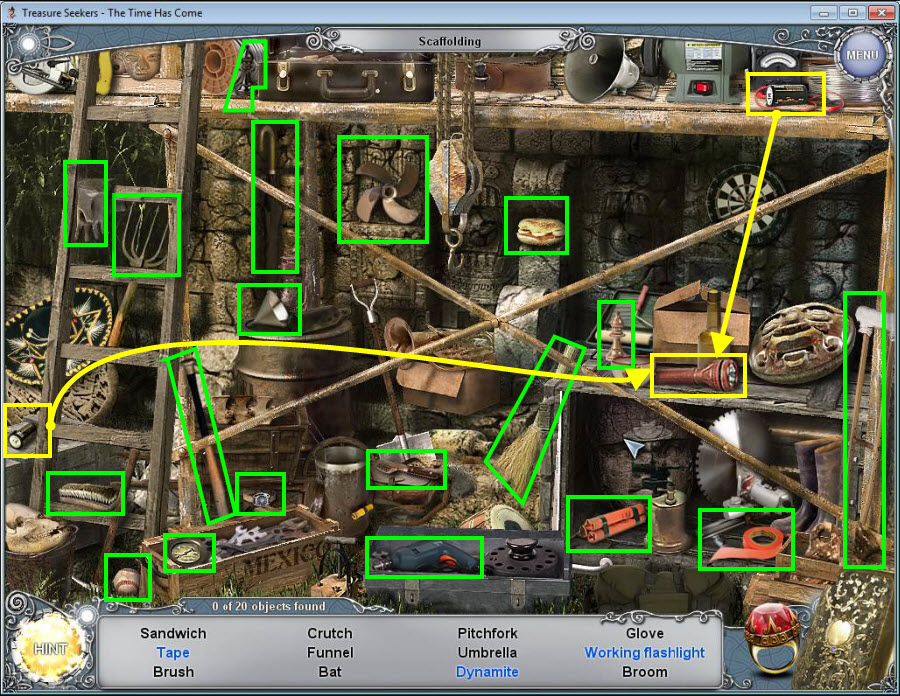
- Click on the hidden object scene to access it.
- Once you 've found all the hidden objects, you will receive a stone slab.
- Click on the ring to go back to the past.
- Click on the x-glass to use it and drag it over the door on the left.
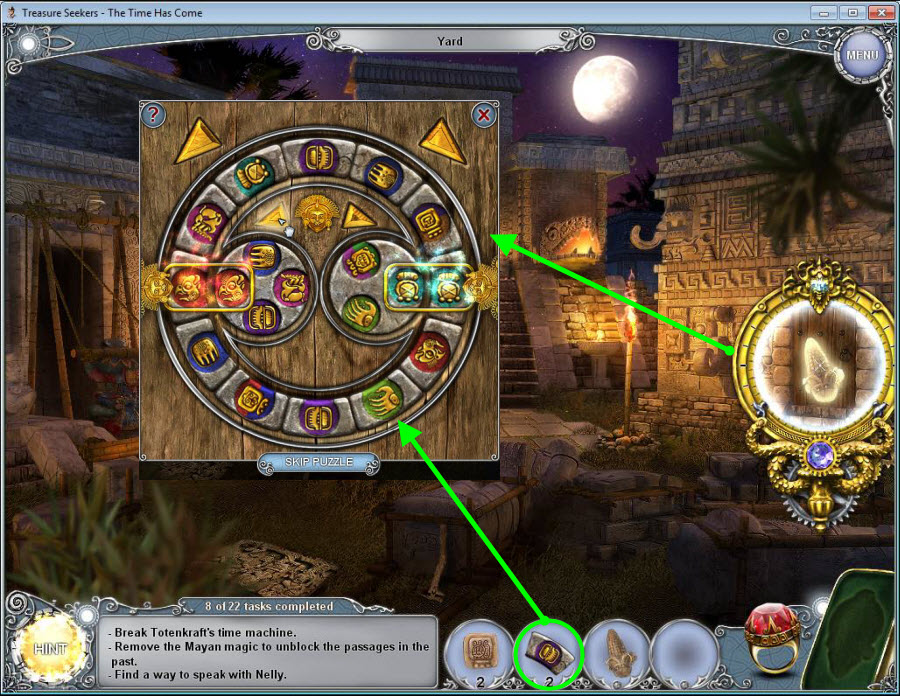
- Click on the door to zoom in and place the two stone slabs in the circle from your inventory to start a puzzle.
- Click the arrows to rotate the symbols untl they match up red and teal as shown in the screen shot.
- Click on the corn to take it.
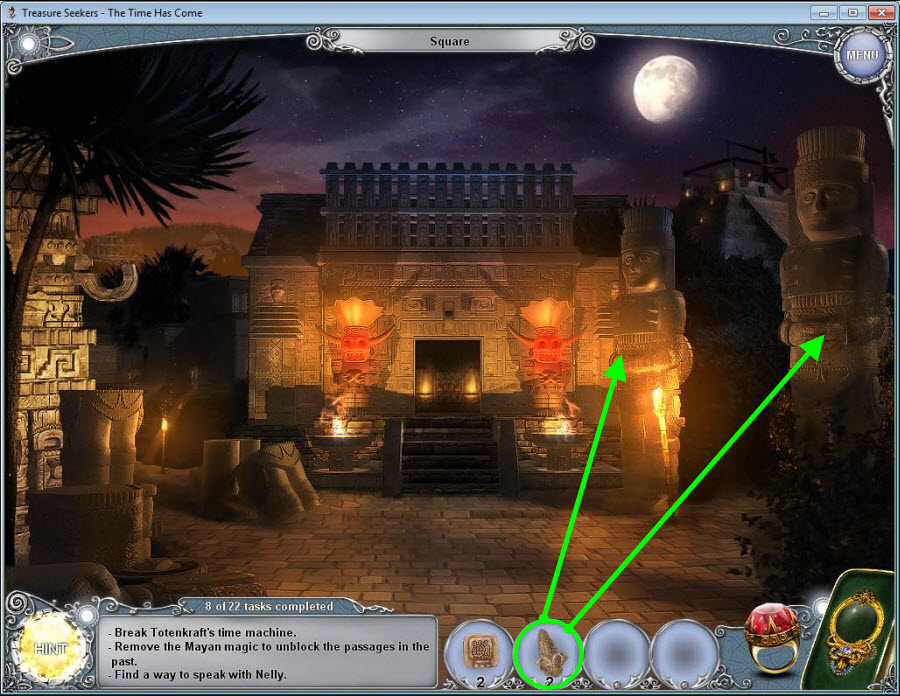
- Go to the square.
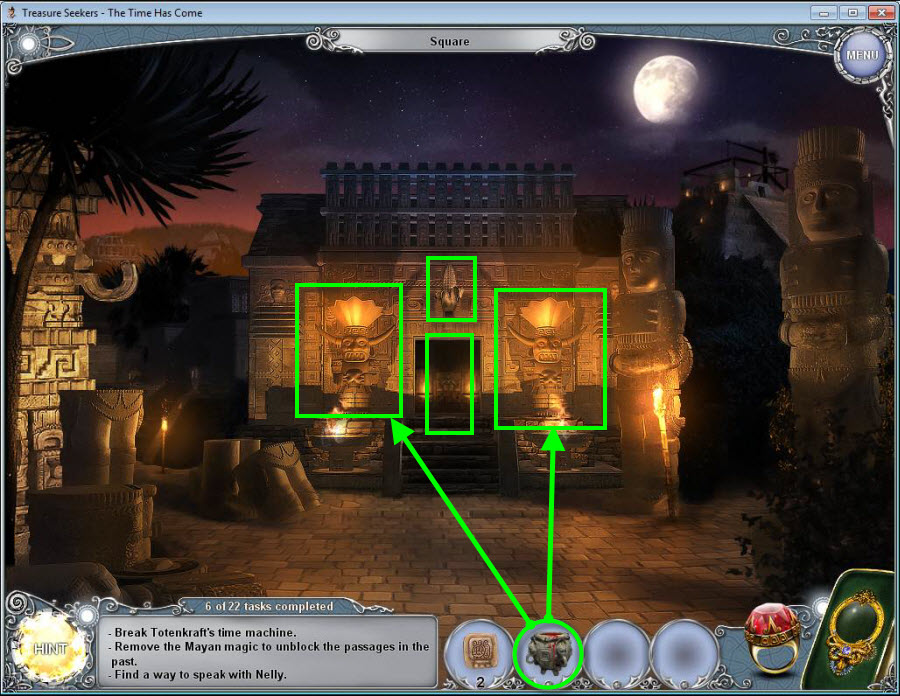
- Click on the corn in your inventory and place each of them in the hands of the statues on the right blocking the way to the pyramid.
- This will remove the forcefield blocking your way.
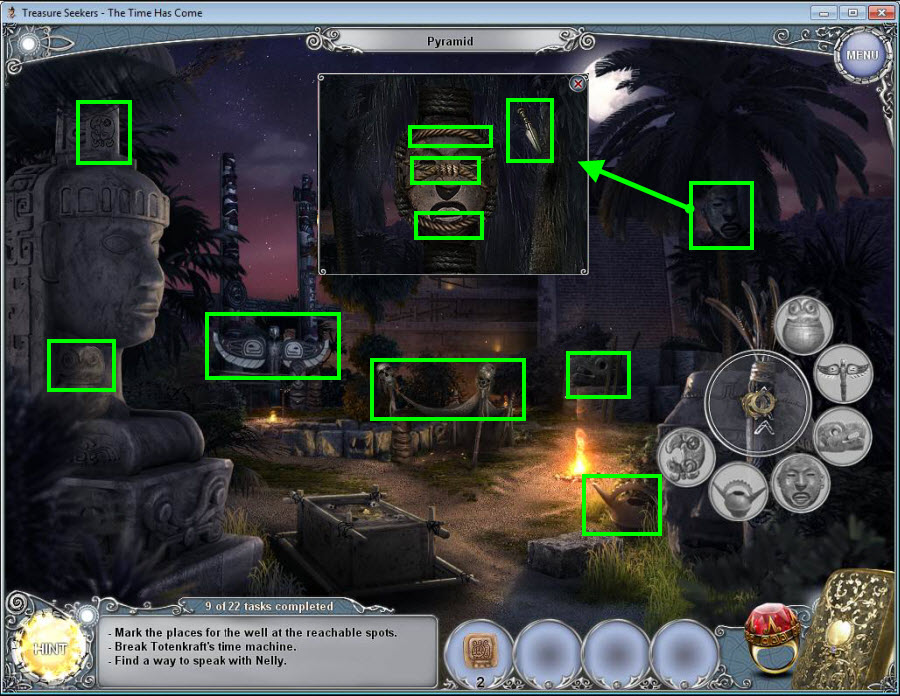
- Go to the pyramid.
- Click on the map in the middle to view it.
- Click on the rings hanging on the right to open the key object.
- Drag the items to the key object.
- You will receive 3 rings.
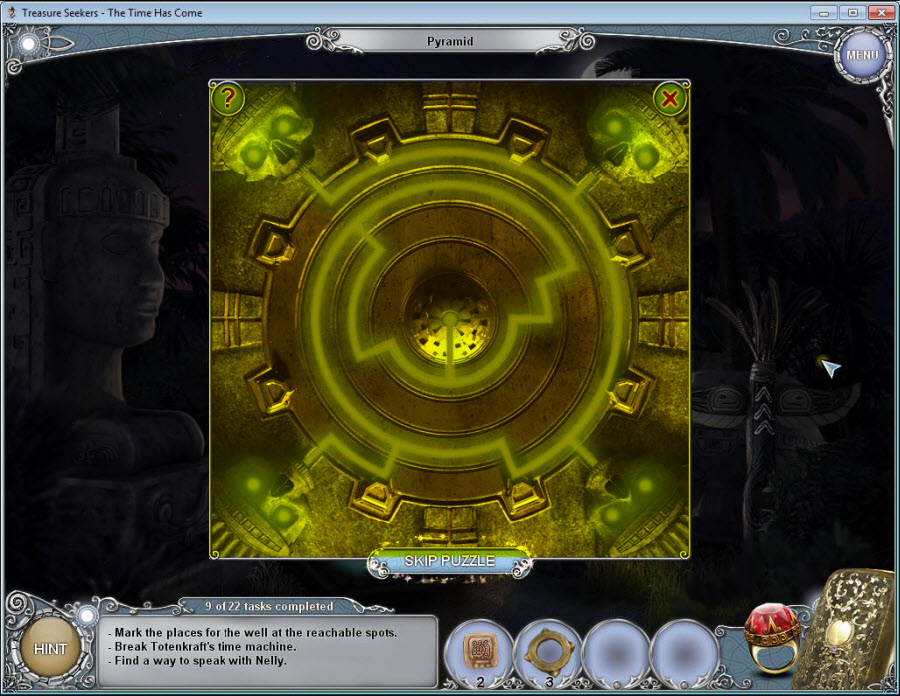
- Click on the crate in front of you to start a puzzle.
- Move the rings so that the lines join and connect the lines with the skulls. It helps to work from the outside in.
- Once you line everything up correctly, you will receive another ring.
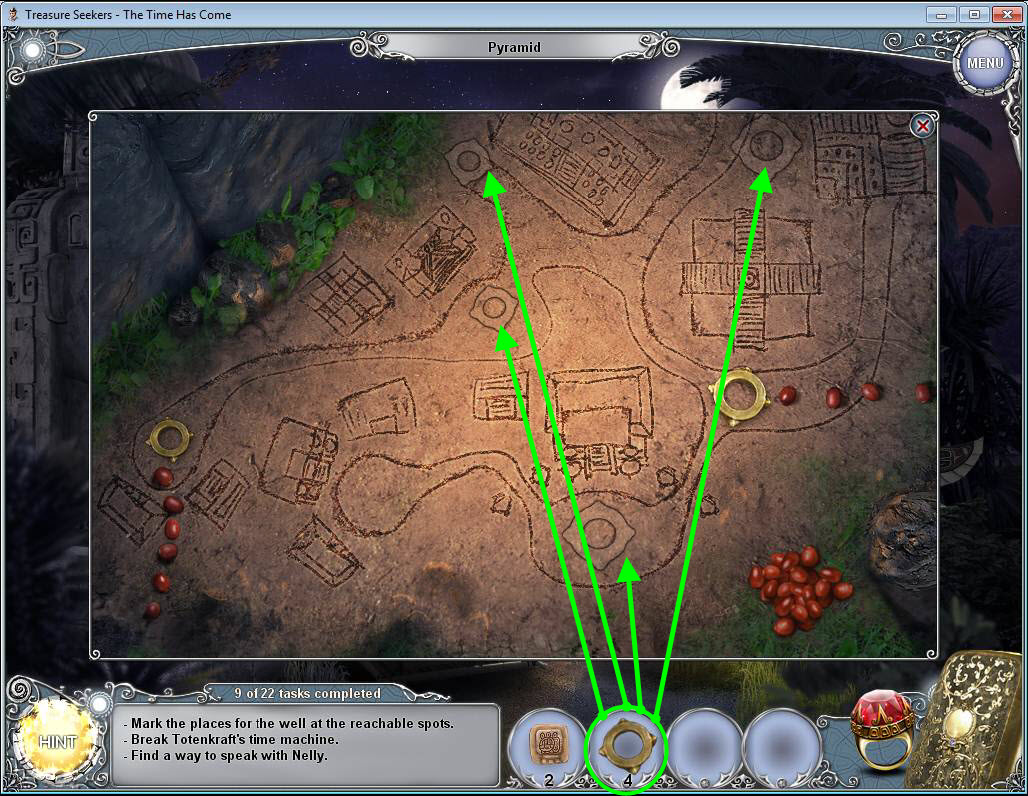
- Click on the map to zoom in again.
- Click on the rings and place them in the correct areas marked.
- Click on the ring to go back to the future.
- Go to the square.
- Click on the left of the well to open a key object.
- Find all the items for the key object.
- You will receive a hook with a rope.
- Take out the x-glass and use it on the upper right of the building to find another stone tile.
- Use the hook with the rope on the well.
- Click to go down the well.
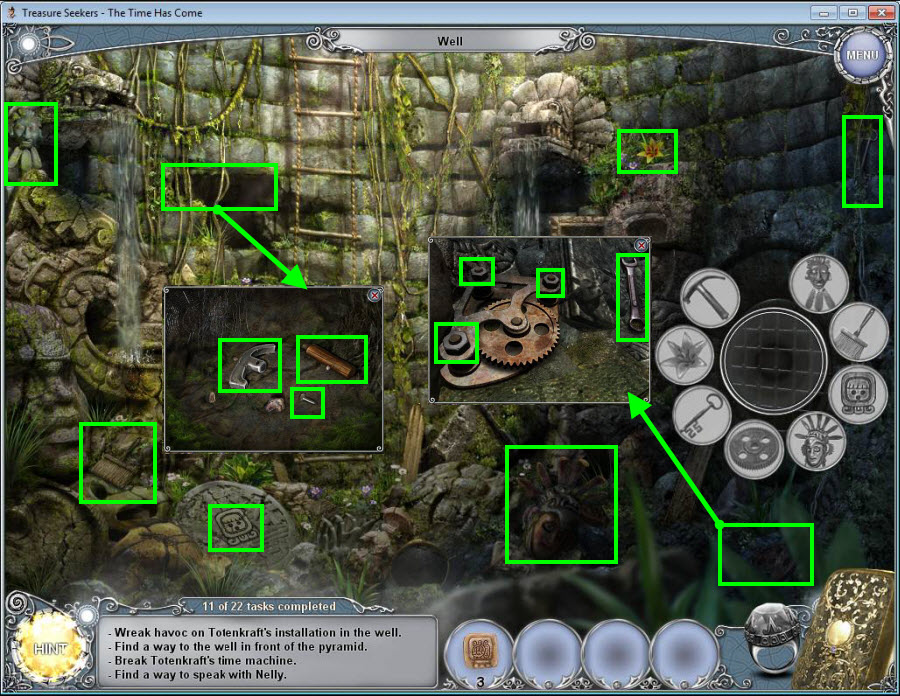
- Click on the grate on the right to open the key object.
- Find the items needed and drag them to the key object.
- Once you are done, the grate will open.
- Go into the grate to the well.
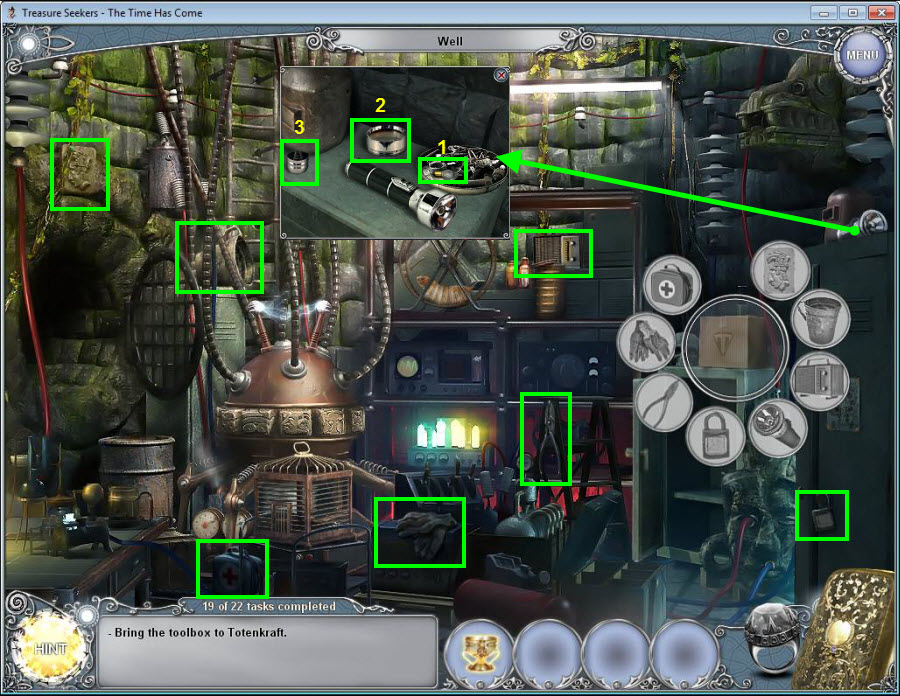
- Click on the shelf to open the key object.
- Find the items for the key object.
- Click on the hamster to add it to your inventory.
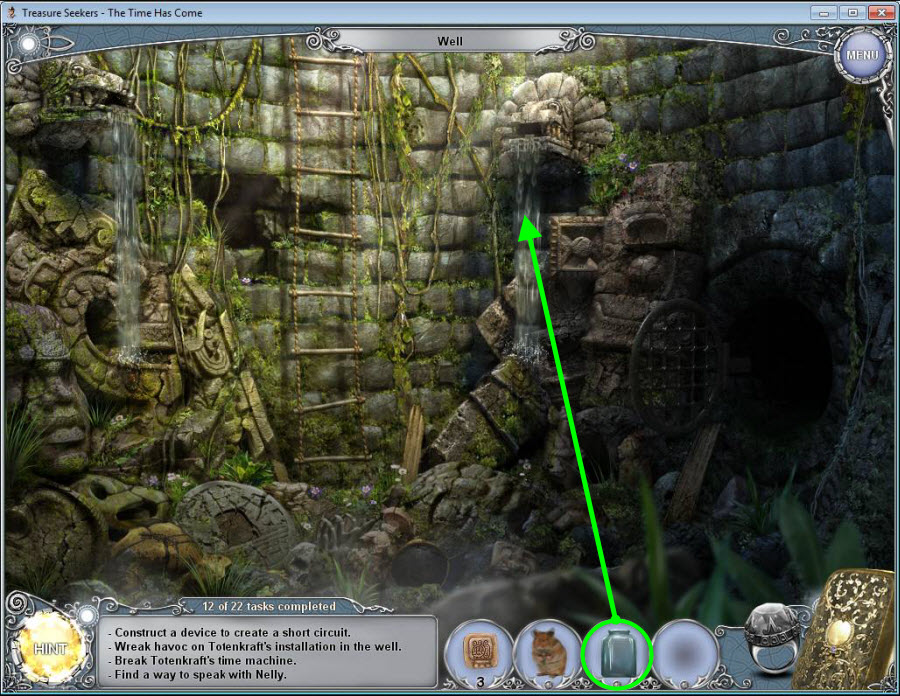
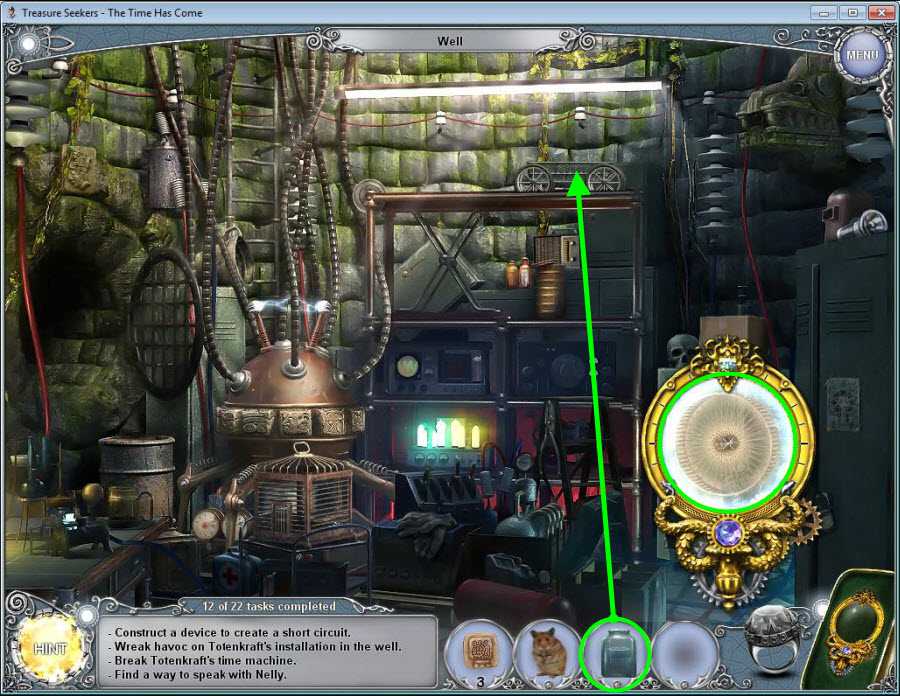
- Click on the jar to add that to your inventory as well.
- Go back to the bottom of the well on the left.
- Use the jar on the waterfall to fill with with water.
- Go back to the right through the grate.
- Use the jar with water and place it on the cart on top of the shelf.
- Take out the x-glass and use it on the safe.
- This will open a hidden object area.
- Click to access it.
- Once you have found all the hidden objects, you will receive lockpicks.
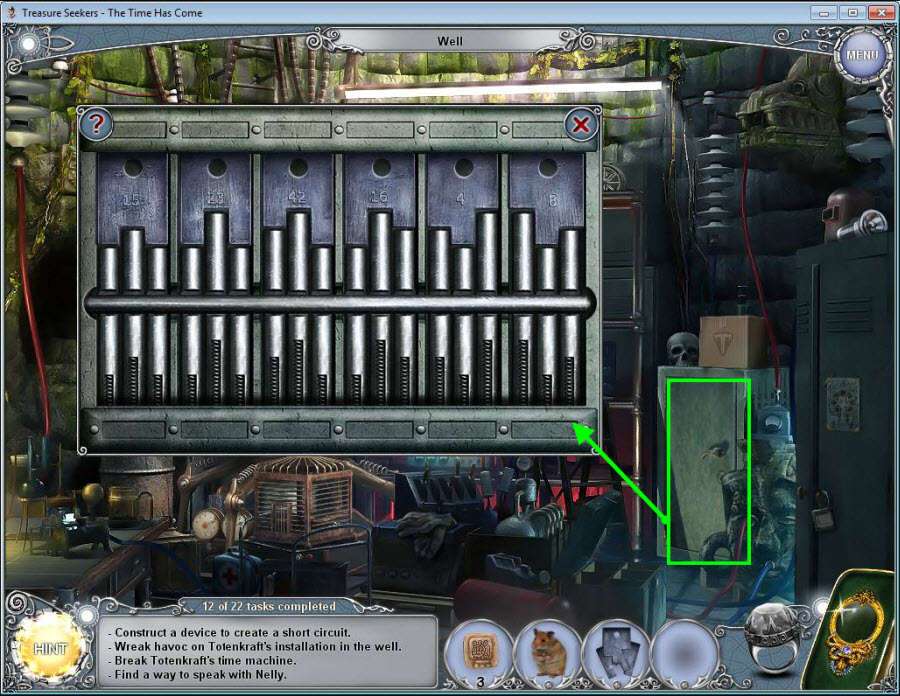
- Click on the safe to zoom in.
- Use the lockpicks on the safe to start a puzzle.
- Clicking on two locks will swap them.
- Click on the locks and arrange them so they are in this order: 15, 23, 42, 16, 4, 8.
- Click on the hamster wheel to grab it and place it near the cart on the shelf.
- Place the hamster in the wheel to move the cart.
- Now, go to the pyramid.
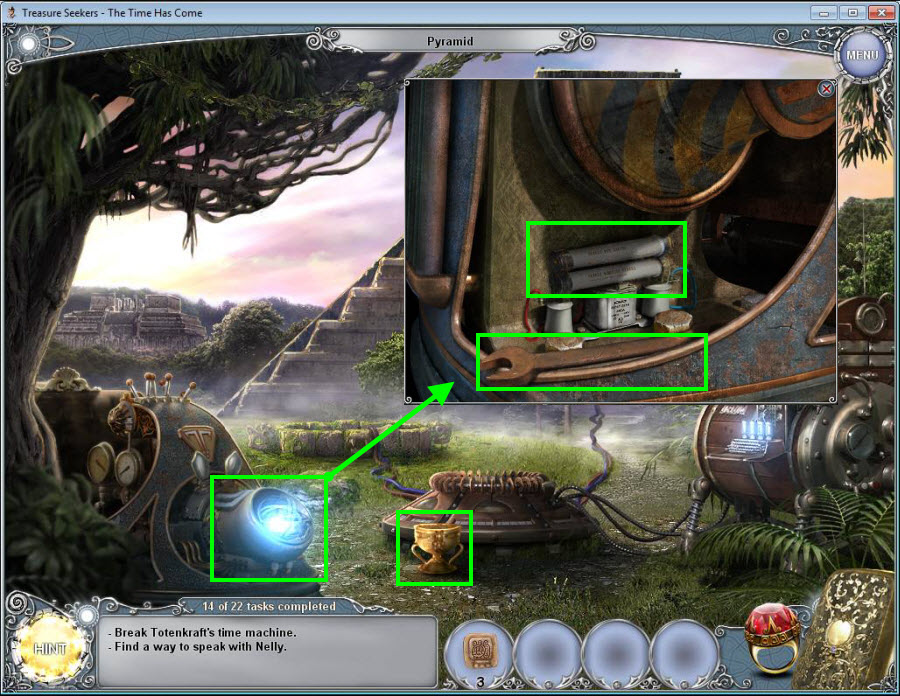
- Click to take the grail.
- Click on the machine on the left to zoom in on it.
- Grab the wrench and click on the fuses to break them with it.
- Go to the top of the pyramid.
- Talk to Nelly.
- Use the x-glass on the wall on the left to locate the final stone tile.
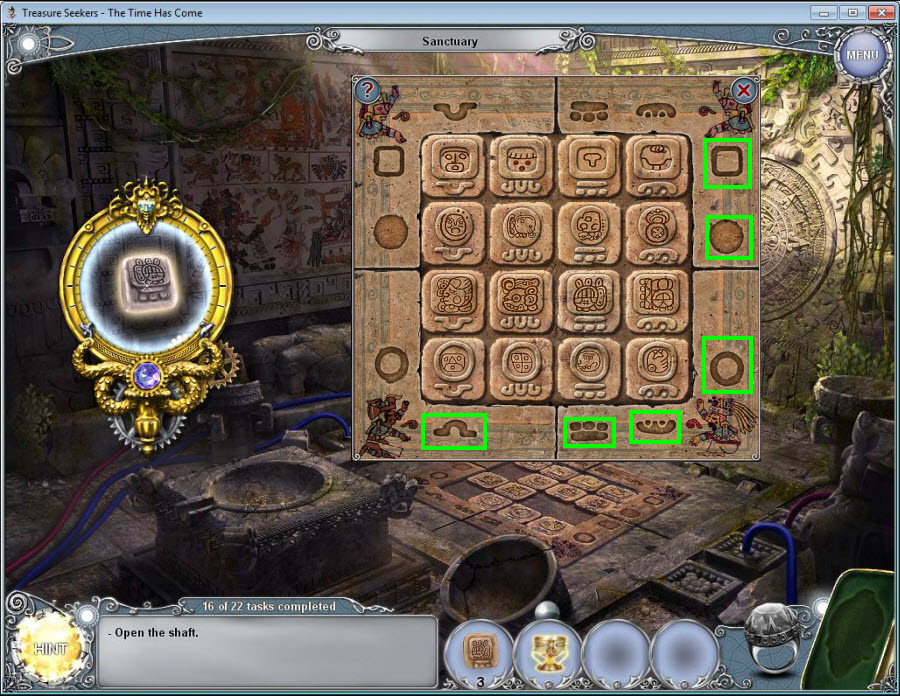
- Click on the floor to zoom in.
- Use the stone tiles on the puzzle to start it.
- Note the images on the outside of the puzzle. You have to swap the tiles so that they line up correctly vertically and horizontally. Note the shape of both images.
- Go back down to the pyramid and talk to Nelly.
- Go back to the bottom of the well where the hamster machine is.
- Click on the box to open the key object.
- Find the items and drag them to the key object.
- You will receive the box.
- Return to the pyramid.
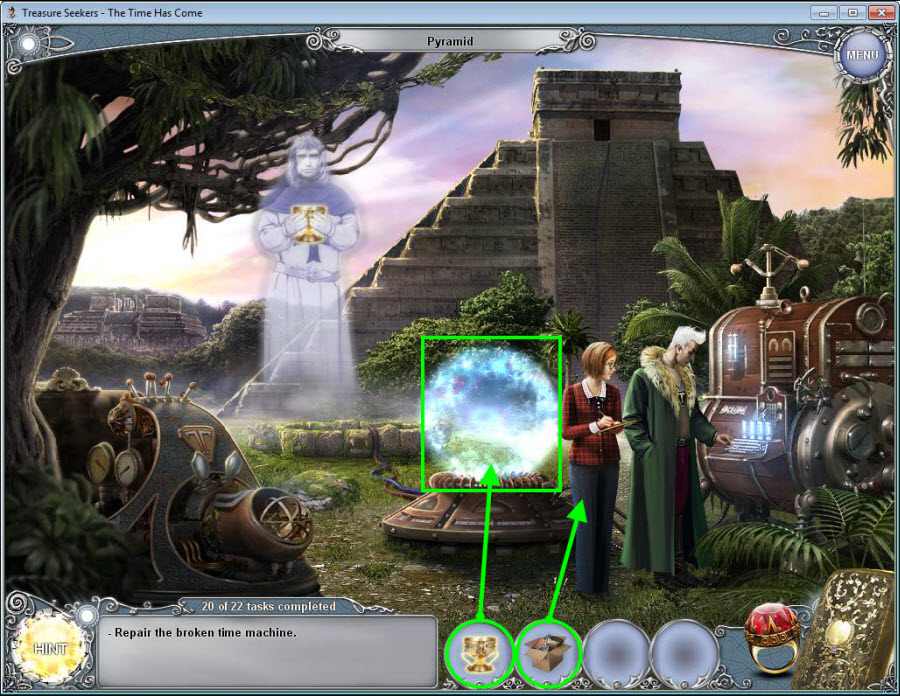
- Use the box of tools on Nelly. This will create a forcefield.
- Use the grail in the forcefield.
- Go back to the bottom of the well.
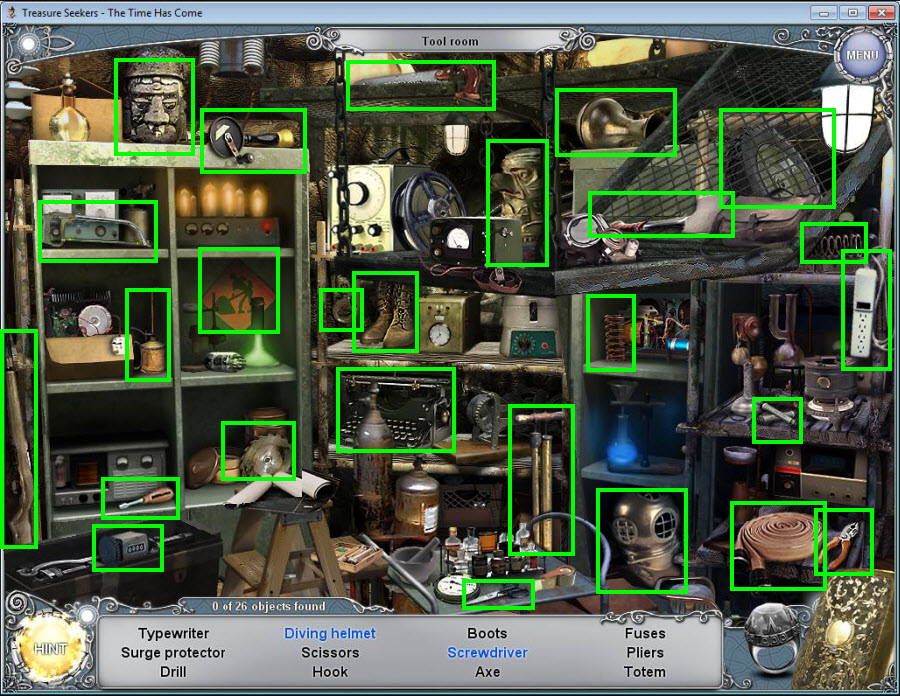
- Click to access the hidden object area.
- Find all the items in the hidden object area.
- You will receive the fuses.
- Go back to the pyramid.
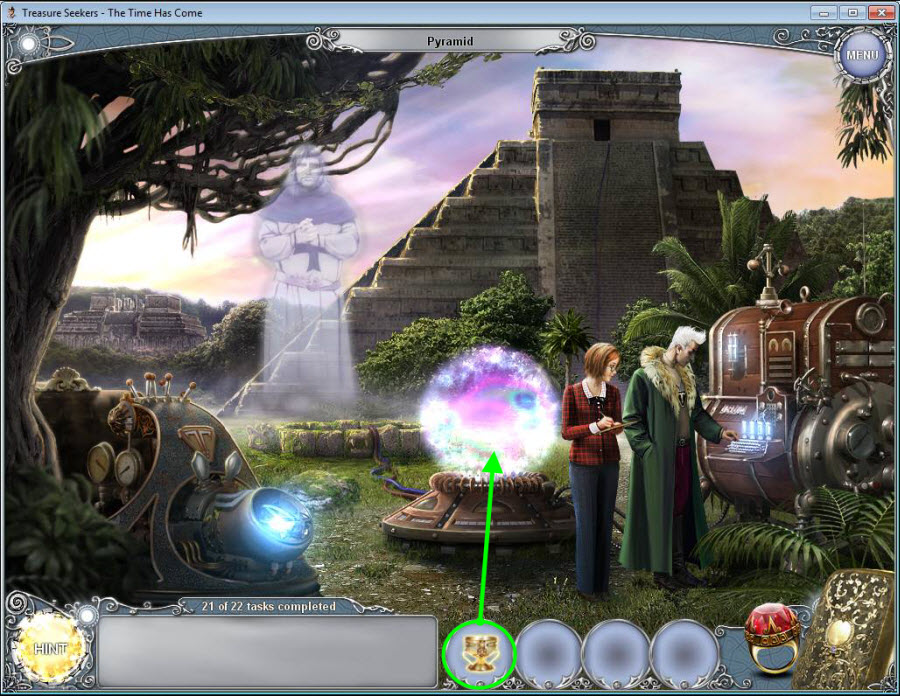
- Click on the broken machine on the left to zoom in.
- Use the fuses on the machine to fix it.
- Click on the grail and place it in the forcefield.
- Congratulations! You have helped the Treasure Seekers save the world and beat the game!
Content(s) of this game guide may not be copied or
published on any other site without permission from Casual Game Guides.
©CasualGameGuides.com 2006 - 2021

