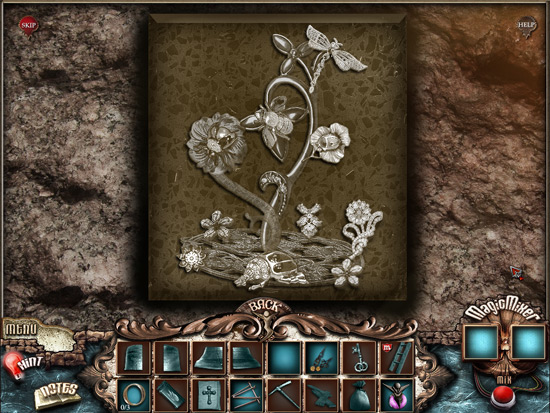
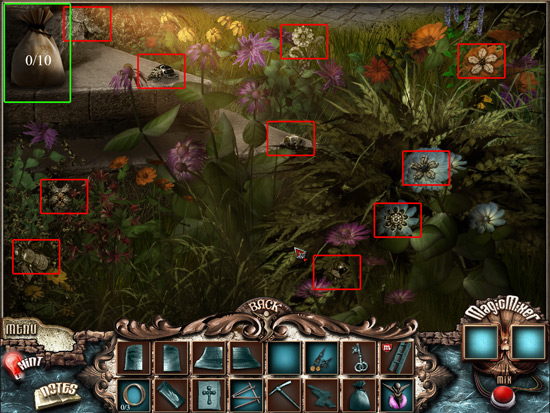
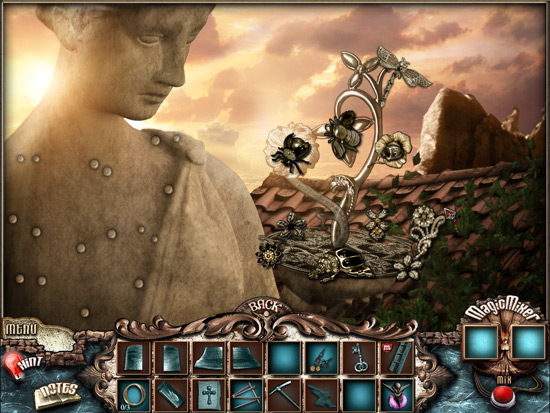
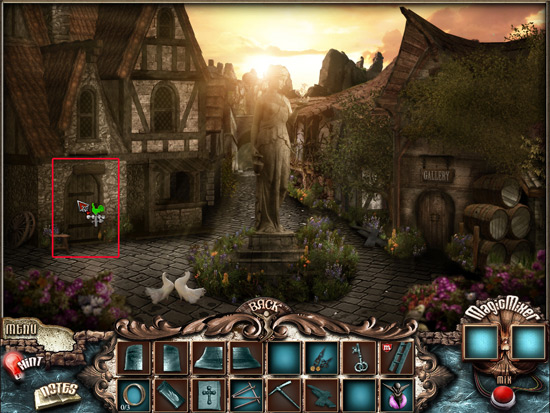
Tearstone
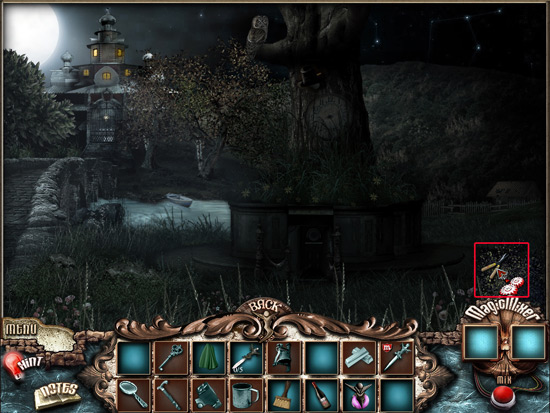
Our Tearstone Walkthrough will be your guide as you set off on the adventure of a lifetime. After your professor makes an unusual discovery you agree to accompany him on his journey of investigation and discovery. Now you will travel to strange places and meet many unusual people on your quest to discover the truth of the Tearstone. Our helpful hints, step-by-step instructions, and custom screenshots will be with you every step of the way on this journey of discovery.
Prologue
General Hints and Tips on How to Play Tearstone
If you’ve played other Hidden Object/Adventure games before, then you should be able to pick up the gameplay for Tearstone rather quickly.
A few things to keep in mind as you play:
1. When you hover over things with your cursor, it will change depending on what you can do in that particular place. Here’s a little cheat sheet for you to remember as you play.
3. The hint button is a valuable tool, not only because it well… give you hints… but it will tell you if there’s nothing to do in that area as well. Use this as a secret weapon if you’re not sure what to do. The hint button will regenerate over time so don’t worry about using it.
4. Keep your eyes open for sparkles during the game. They will point you in the right direction.
5. The mini games can be challenging and the hint button doesn’t work while you’re playing them. There is a help button to give you a clue as to what you’re supposed to do, and you can always feel free to skip the puzzle if it becomes too frustrating.
Prologue: Tutorial
Now that you kind of have an idea of what to expect about the game, let’s play! Input your name and click play to start the game. This will begin the first chapter which is really just the tutorial part of the game that will help you get familiar with how to play the game.
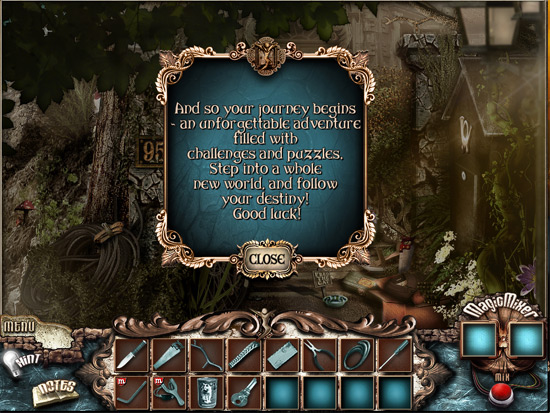
While playing the tutorial chapter, try to follow the instructions. The first thing you will need to do is learn how to pick things up from the screen and place them in your inventory.
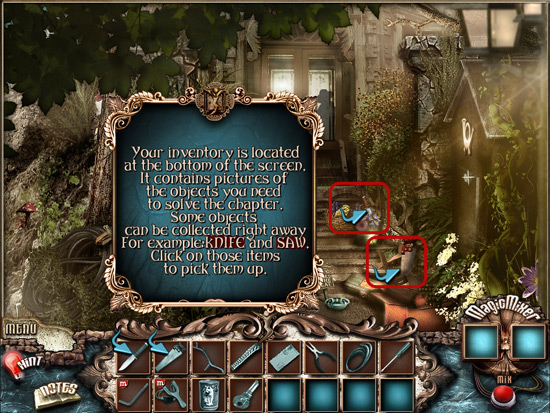
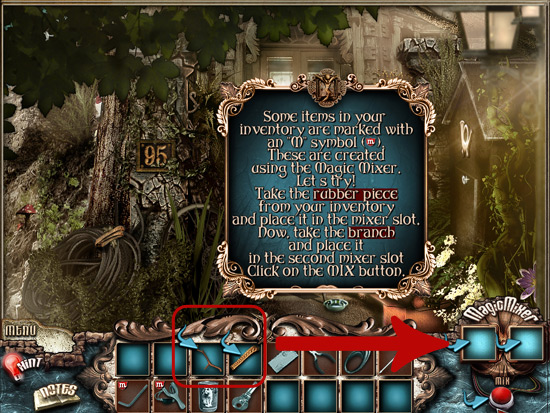
1. Pick up the knife and the saw. They are indicated on the screen by the blue arrows.
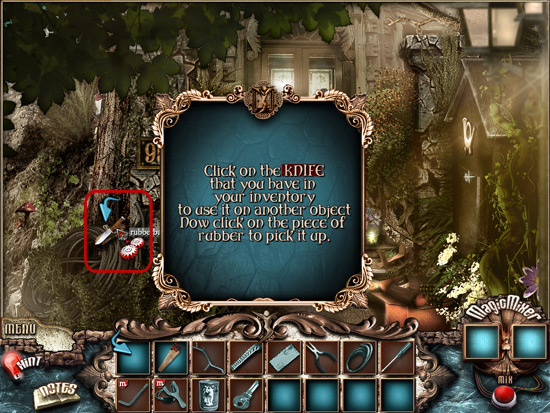
2. Now use the knife on the piece of rubber band in the screen on the left under the tree. Notice that you see a set of gears appear when you hover your mouse over the rubber band. Click and you will cut the band.
3. Once you cut the band, a smaller piece of it will appear. Pick this up to add it to your inventory.
4. Now, use the saw on the tree branch in the top right of your screen. There will be a blue arrow pointing to it.
5. Once the branch is cut with the saw, you can then pick it up and add it to your inventory.
6. Now, you will learn how to use the Magic Mixer. Some items must be made in order for you to have them in your inventory. To make items, you have to join 2 other items together. Let’s try it out by taking the branch and the rubber band in your inventory and placing them in the Magic Mixer on the right. Hit the red button to combine them. Now you have a slingshot!
7. Take the slingshot and use it on the shadow of the thief in the house. This will scare him away!
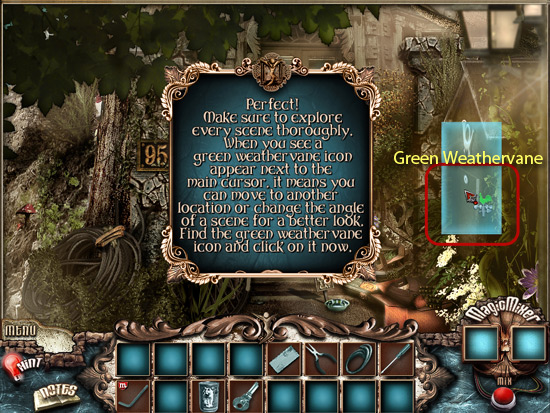
8. You will now be able to move onto the next scene. Look for the blue highlighted area on the right. When you hover your cursor over that area, it will turn into a green weathervane. Remember that this means you can move to that location. Click on it to go to the next scene.
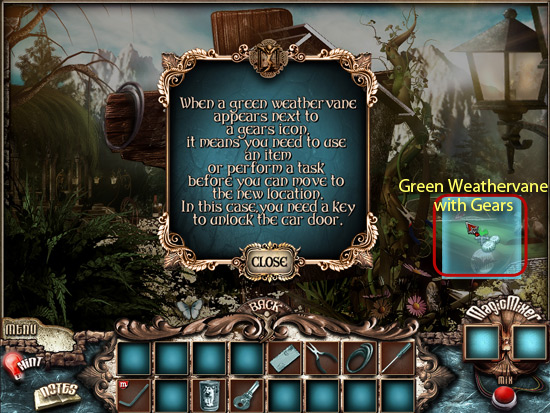
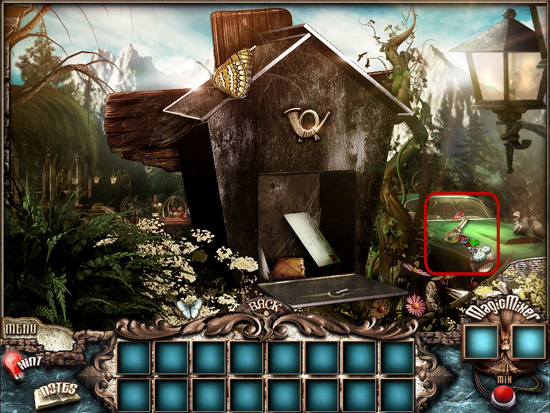
9. In the next scene, you’ll see a car and a mailbox. On the right is a blue box that is highlighted over the car. Hover your cursor over this section and you’ll see a green weathervane with gears next to it. This means you have to use an item here before you can move on to the next scene.
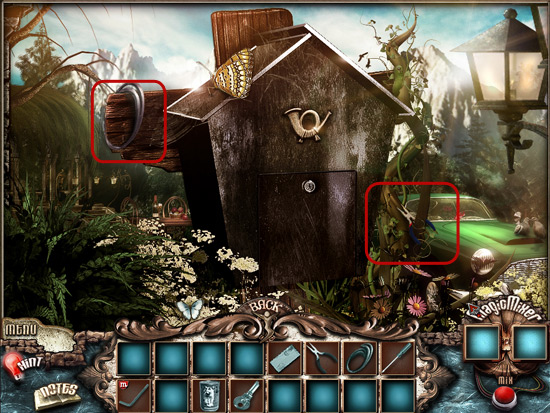
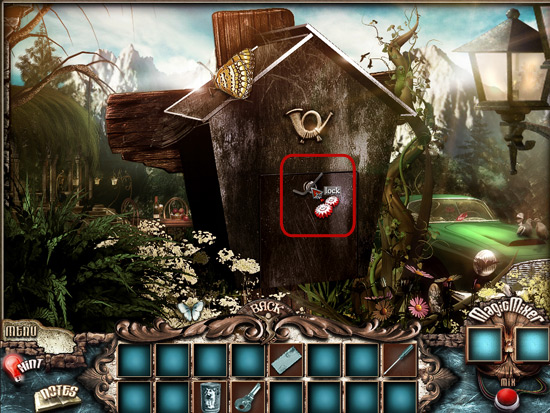
10. The first task in this scene is to open the mailbox. To do so, you have to find the pliers and the wire. Click on them and add them to your inventory.
11. Now use them in the Magic Mixer to create a lock pick so you can open the mailbox.
12. Use the lock pick on the mailbox keyhole to open it. Once it’s open, take the cat food and read the letter.
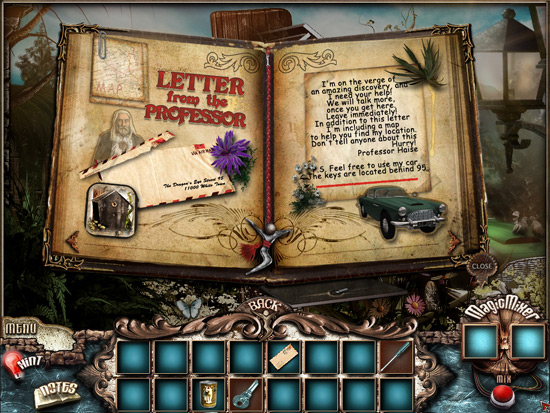
13. Once you read the letter, you’ll learn a little bit more about the storyline of the game. You are introduced to the Professor, who is a leading character who needs your help. He tells you that he is on the verge of an amazing discovery. He also tells you to feel free to use his car and that the keys are located behind 95. The letter no goes in your Notebook where you can look at it at any time by clicking on the Notes icon in the bottom left corner.
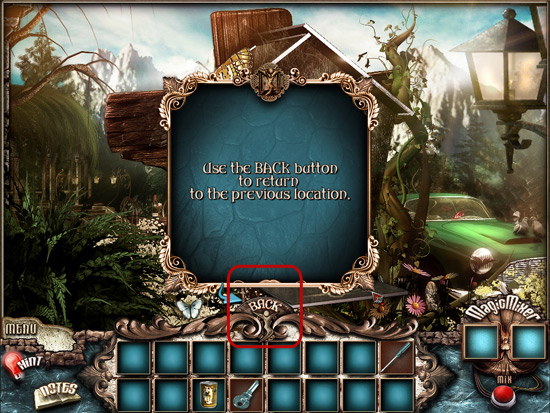
14. Once you are done with your Notebook, click on the close button in the bottom left of the book. Now you need to go back to the screen before. Do so by clicking on the “Back” button in the bottom middle of your screen.
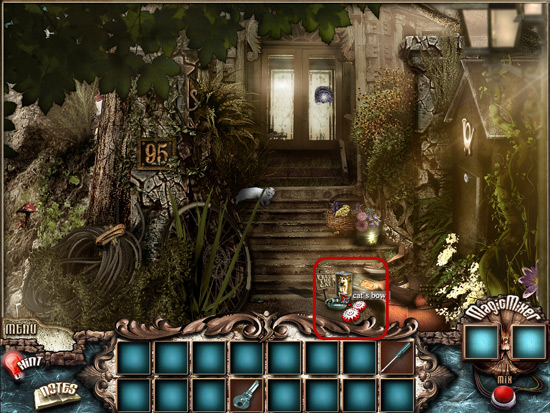
15. You should now be back at the first screen. Feed the cat by putting the cat food in the bowl.
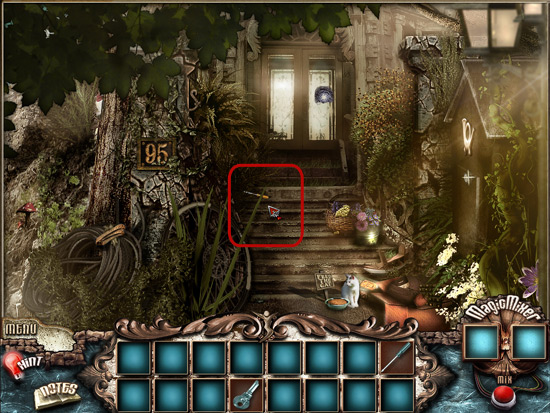
16. Now pick up the screwdriver. It was underneath the cat!
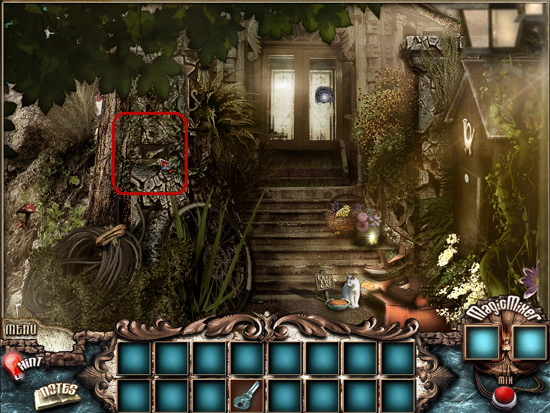
17. Once you have the screwdriver, use it on the number 95 on the house. This will remove the screws and show the key that was hidden behind it. Take the key!
18. This marks the end of the tutorial! Now that you have the key, go back to the screen that has the car and use the key on the car to get moving to the next location.
Chapter 1
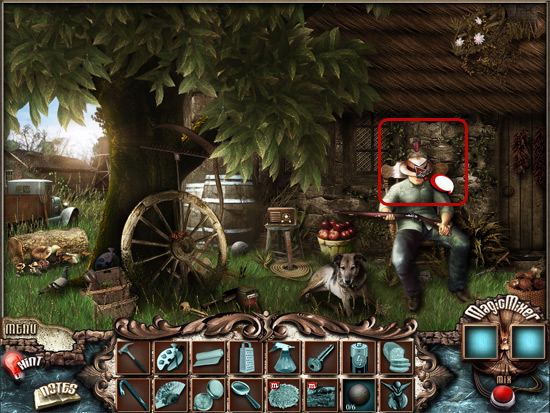
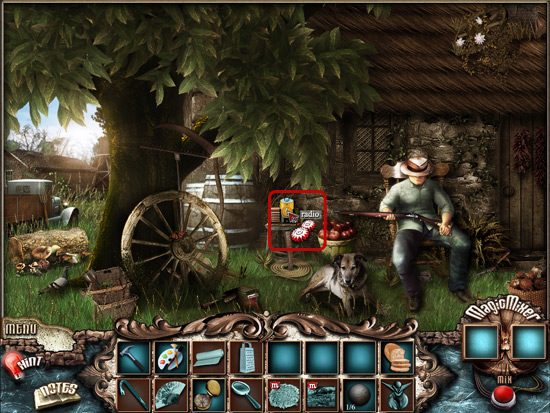
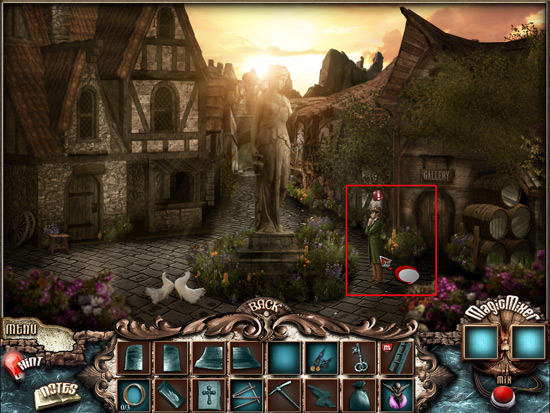
Chapter one begins with your first character interaction. You'll notice the dialogue icon of a red circle with a white exclamation point above the man with the gun's head.
1. Click on the man. He tells you that he is too tired to talk to you, but that there is a path in the woods and that you should ask someone else where it is.
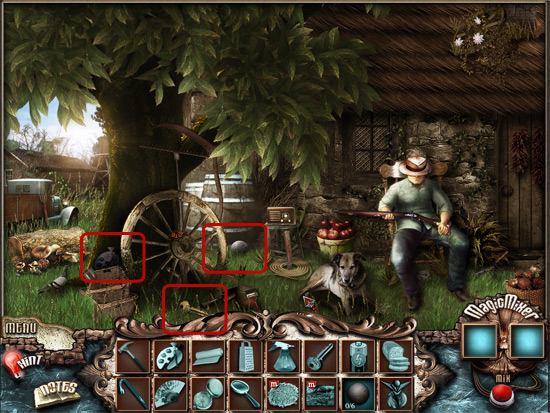
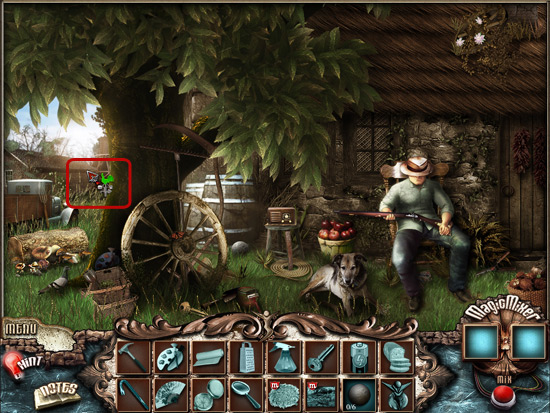
2. There's nothing you can do with him now, so take this time to look around. There are 3 items you need to find in this screen right now: A key, an artist's palette, and a stone ball.
3. That's all there is to do in this scene for now so it's time to move on to the next location. Move your cursor to the left of the screen until you see a green weather vane with no gears. Click here to move to the next area.
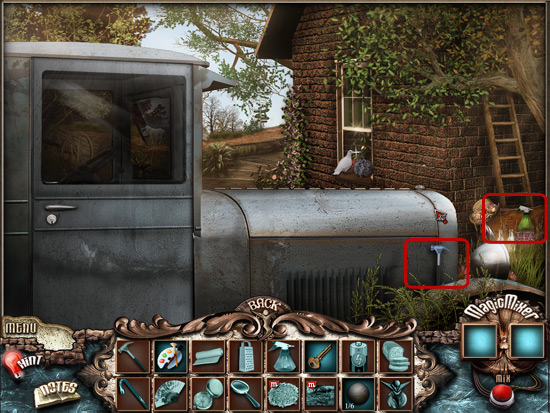
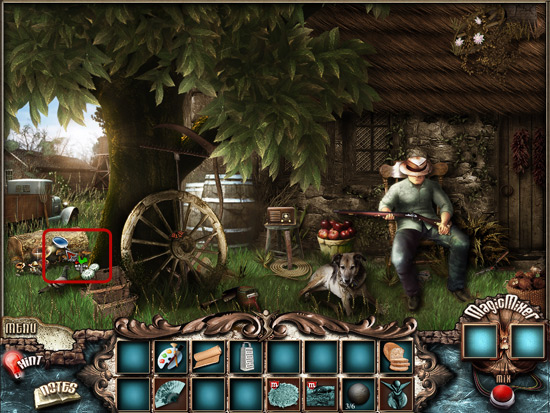
4. This next area, you can collect 2 hidden objects. The bug spray and the hammer. Click on them to add them to your inventory.
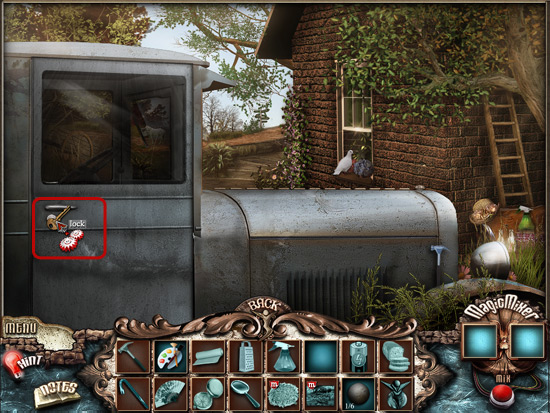
5. Next, take the key you found in the previous screen and use it to unlock the truck door.
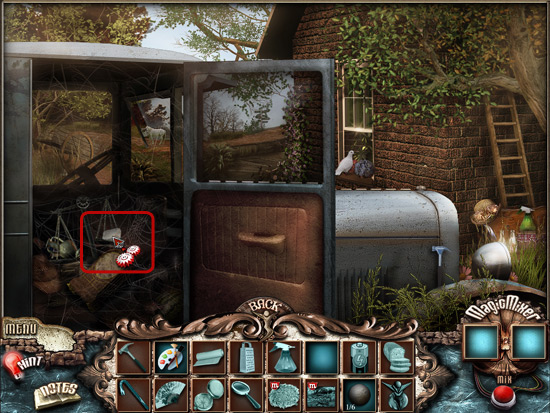
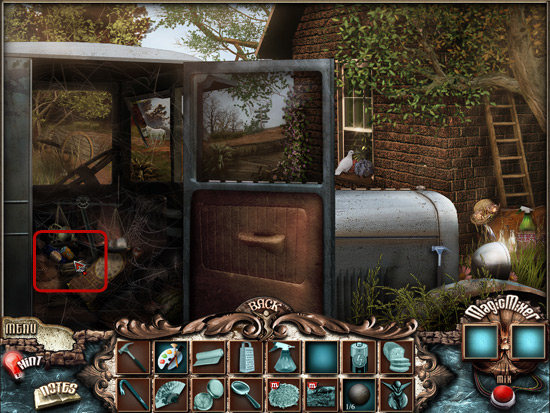
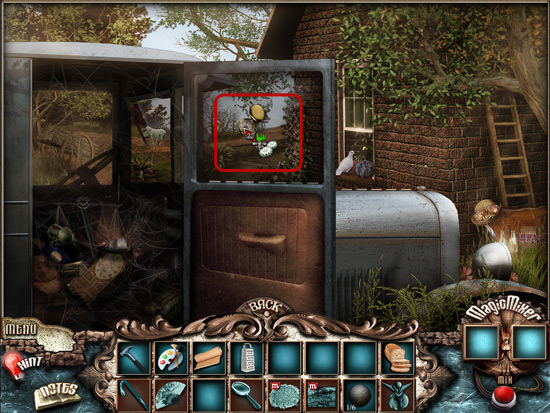
6. Once the door is opened, you'll see a hand cursor for the first time. You will need to pick up the stone ball and place it on the scale.
7. After you place the stone on the scale, the left part of the scale will move up and a battery will be revealed. Click on the battery to add it to your inventory.
8. That's all you can do here for now. Next, you need to click on the window where the bird is sitting to move on to the next screen.
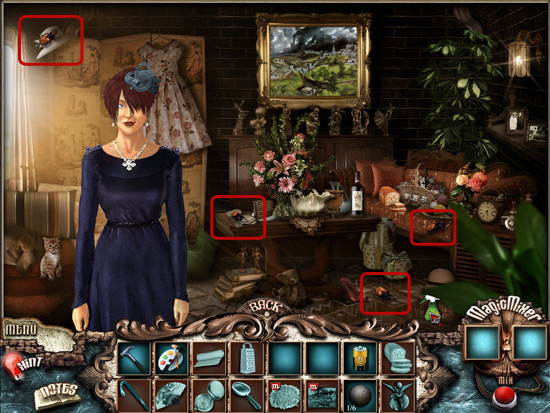
9. The next scene introduces a woman who has a bug problem. Click on her to talk to her and get a new goal. To get rid of the bugs in the house.
10. Remember the bug spray you picked up in the previous screen? Click on that in your inventory and then find all 4 bugs in the room. Once you find them, click on them with the bug spray and they will disappear.
11. Once you're done killing the bugs, the woman will talk to you again. Click on her and she will thank you for your help by giving you a compass that she says will help you through the woods.
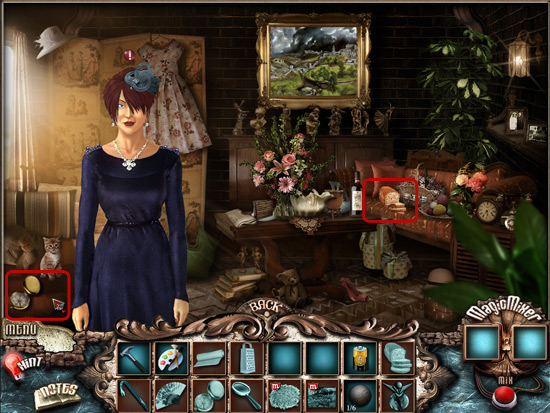
12. Click on the compass and the loaf of bread on the couch.
13. Click on the woman one more time to discover that she has lost her fan somewhere. She asks if you find it, to please return it to her.
14. Now, return to the scene where the man is sitting on the chair. Hit the back button twice.
15. Use the battery from your inventory on the radio to turn it on. The man in the chair will now fall asleep so you can enter the house safely.
16. Click on the door of the house to enter.
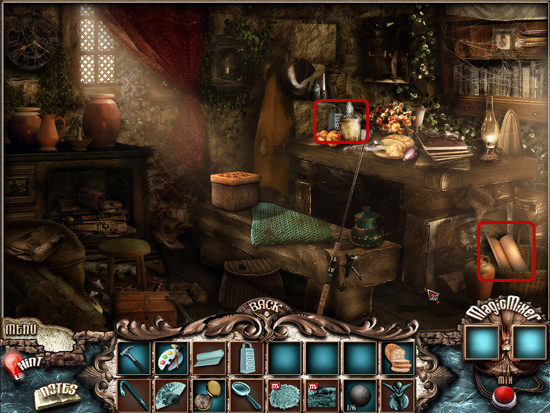
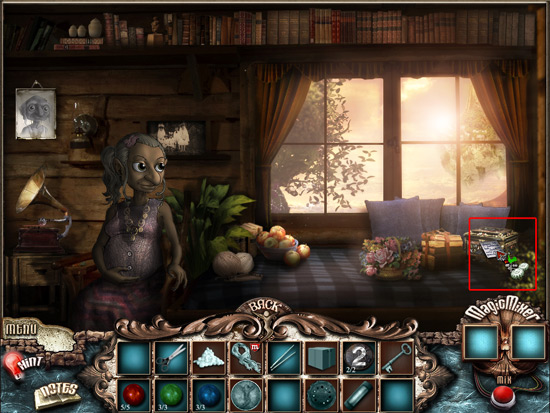
17. Once in the room, there are two hidden objects you can find right away. Click on the canvas at the bottom right and the grater on the table.
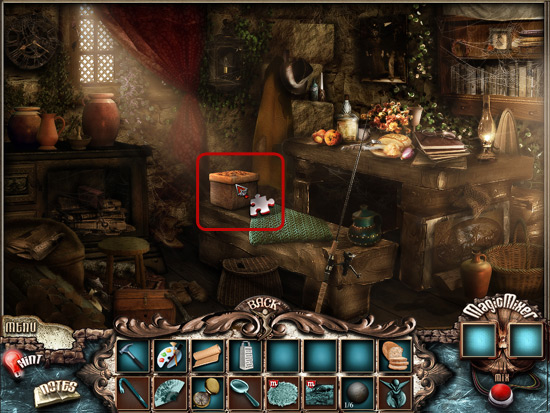
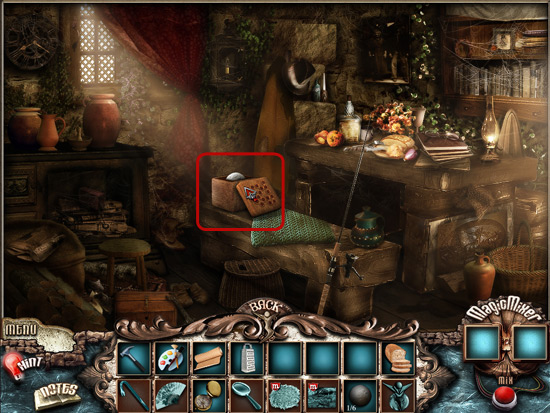
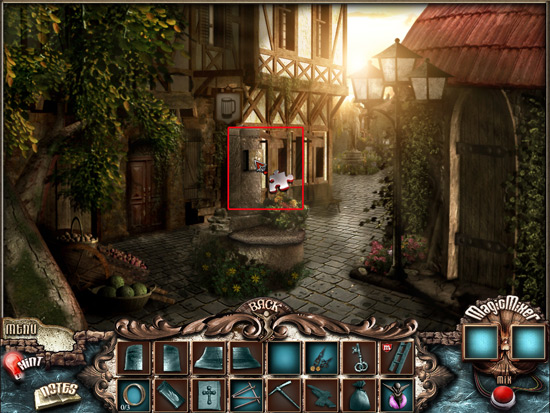
18. Now put your cursor on the box on the bench. This will make a puzzle piece appear, indicating that there is a mini-game to be played here.
19. Click on the box to start the mini game.
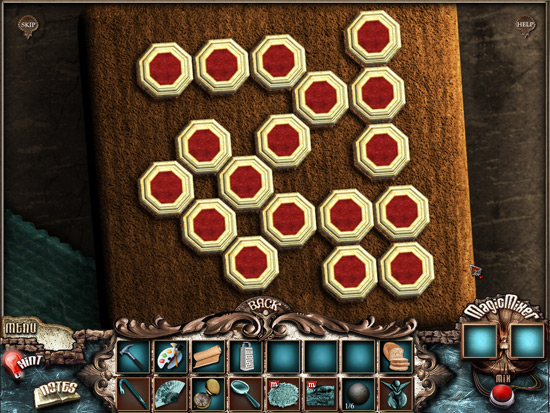
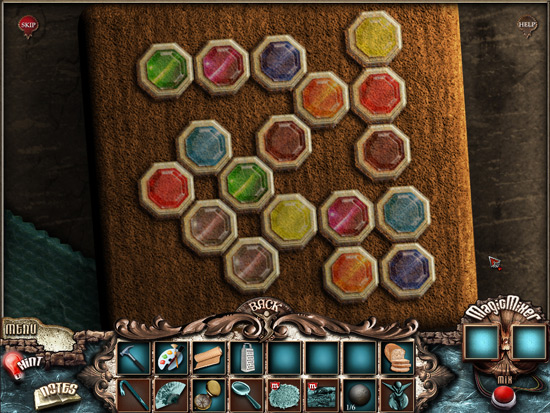
20. This mini-game is a simple memory match game. You can click on two shapes to turn them over and reveal a color. You need to match the colors of all the shapes in order to win.
21. Here is the solution. If you get frustrated, you can always skip the puzzle by clicking on the top-left button.
22. After the mini-game is complete, the box will be open and reveals a stone ball. Click on the ball to add it to your inventory.
23. Now go back to the scene with the truck by hitting the back button and then moving forward.
24. Take the compass out of your inventory and click on the area behind the house and the truck in order to move on to the next location.
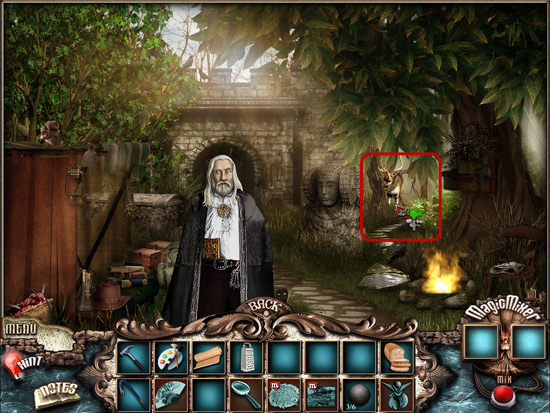
25. You will now be in a new area and you will finally get to meet the Professor. Click on him to talk to him. He wants you to try to find a way in through the gate.
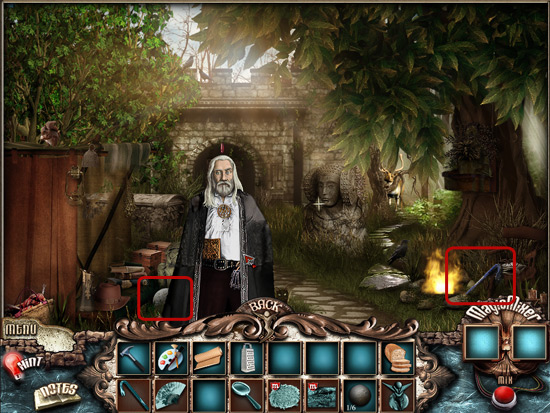
26. Click on the crowbar and the stone ball to add them to your inventory.
27. Next, click on the area where the elk-like creature is on the right. You'll see a green weather vane. This will take you closer to that area.
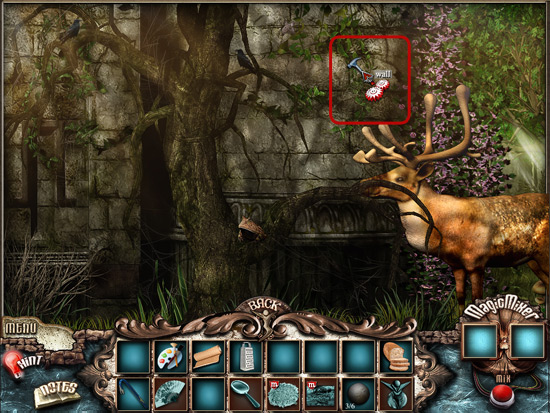
28. In this next scene you will need to use the hammer on the wall to break it open. This will reveal a stuck valve.
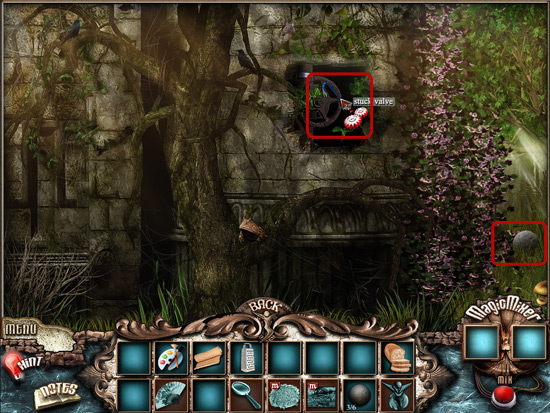
29. Use the crowbar from your inventory on the stuck valve to make it move. You'll see a message that says you hear a fountain in the background.
30. Grab the stone ball on the right before you leave.
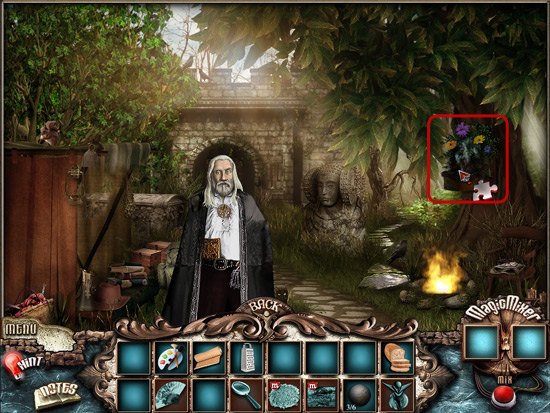
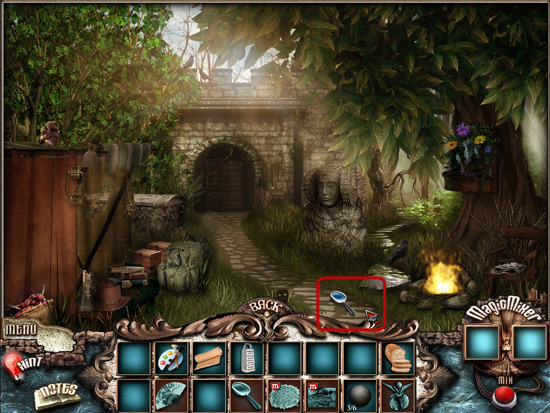
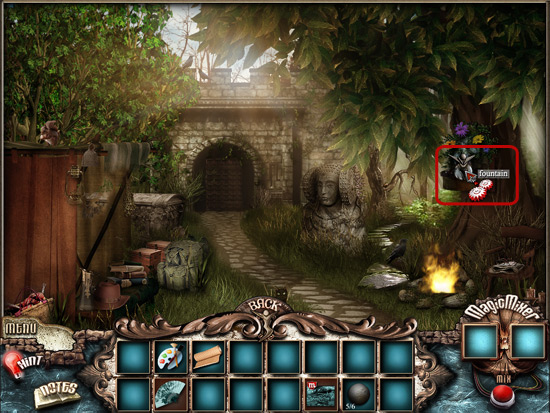
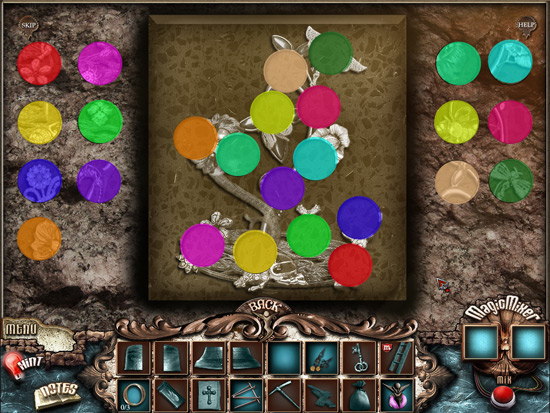
31. Hit the back button to go back to where the professor is. You'll see a fountain now in the tree on the right. Place your cursor over it and you'll see that this is another mini-game. Click on it to start the game.
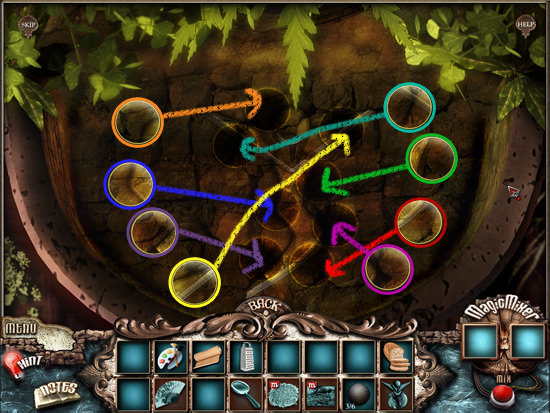
32. The mini game will show you 8 different circles on the outside and you will need to pick each one of these up and place them in the holes in the middle. Below is the solution. Remember, you can always skip the mini game by clicking the skip button in the top left.
33. Once you complete the mini-game, you'll be taken back to the screen with the professor. He will want to talk to you. Click on him. He'll congratulate you and give you a magnifying glass. Click on the magnifying glass to add it to your inventory.
34. Now go back to the scene with the man sleeping in the chair.
35. Take the magnifying glass from your inventory and use it on the log on the left part of the screen.
36. The next screen shows the classic grasshopper and the ant story, and just like that story, the grasshopper needs food. He says he will help you in exchange for some.
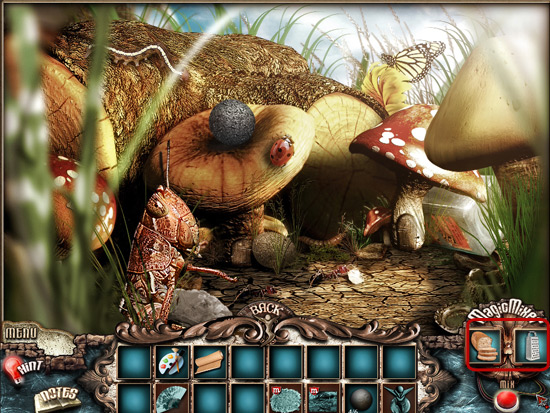
37. Take the grater and the bread from your inventory and put it in the magic mixer. This will make bread crumbs.
38. Give the breadcrumbs to the grasshopper. In return, he will give you a magic bottle. Click on it.
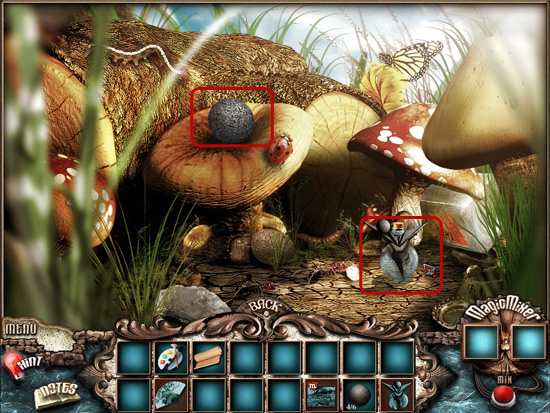
39. Grab the stone ball on the mushroom and then head back to the scene with the fountain.
40. Back at the fountain, take the magic bottle and use it on the fountain. This will fill it up with water from the fountain.
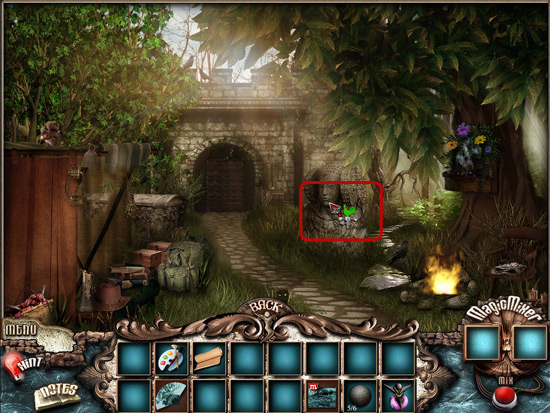
41. Now click on the statue in the middle of the screen. And you'll be taken in for a closer look.
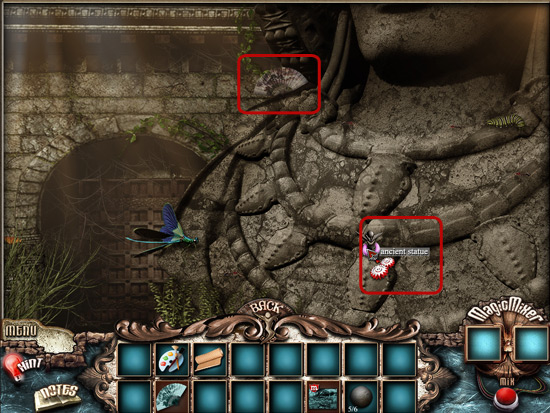
42. Once at the statue, grab the fan in the upper left corner and then use the magic bottle on the statue. This will open up some holes.
43. Now, go back to the lady with the bugs in the house and give her the fan. This will cause her to leave the house.
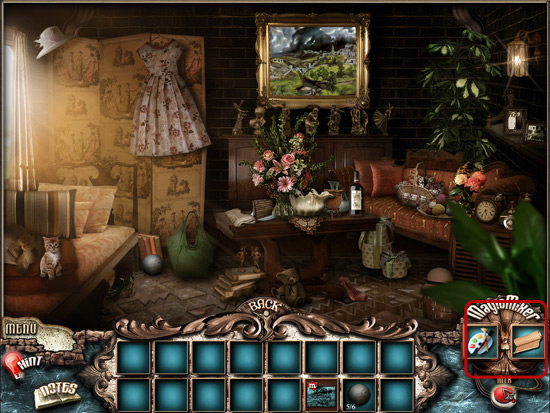
44. Now, use the magic mixture. Put the canvas and the paint palette together to create a forgery.
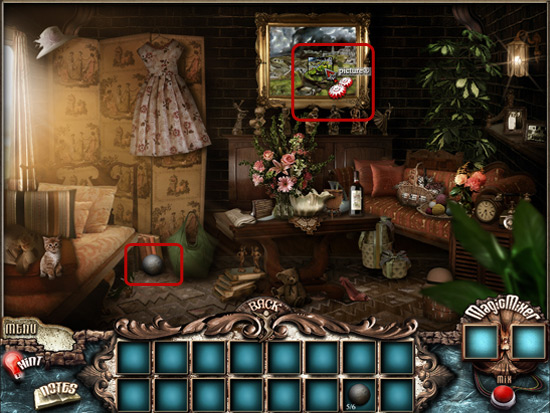
45. Pick up the stone ball on the left.
46. Now use the forgery on the painting. This will start a mini game.
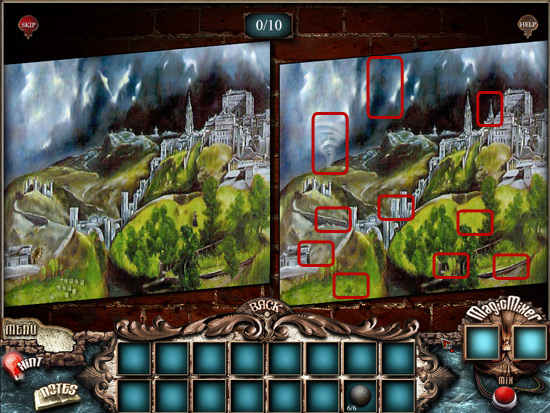
47. In this mini game, you will need to find 10 differences between the real painting and the forgery. See the solution below.
48. When you complete the mini game, you will find a piece of paper with the solution to the final mini game of the chapter.
49. Go back to the screen where the stone statue is and click on it to get the close up look of the holes. You will need to place the stone balls in them in a certain order which is shown on the paper you just received. See the solution below.
50. Once the last stone ball is placed, the gate will open and the next chapter will begin.
Chapter 2
Chapter 2 begins with the first room you enter after you go through the gate, which is a mess of a room.
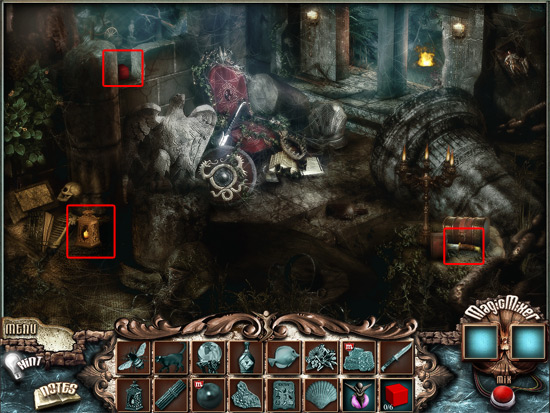
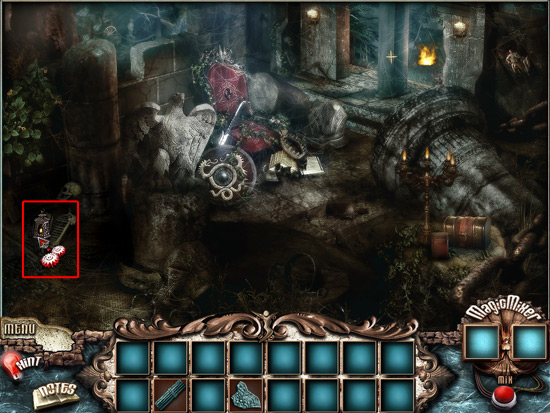
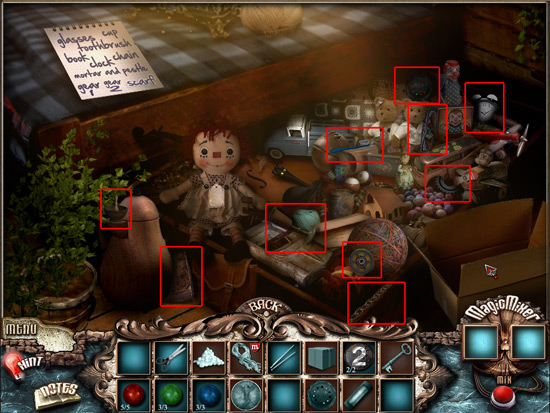
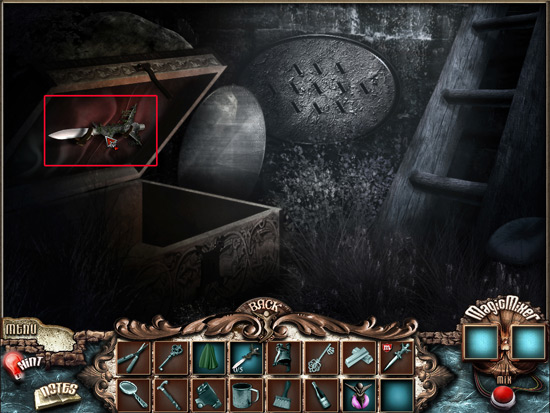
1. You can immediately pick up three items from this room: the knife, the lantern, and a red box.
2. You now have two choices on where you an go next. To the back right or to the back left. Put your cursor to the back right and click to proceed to the next room.
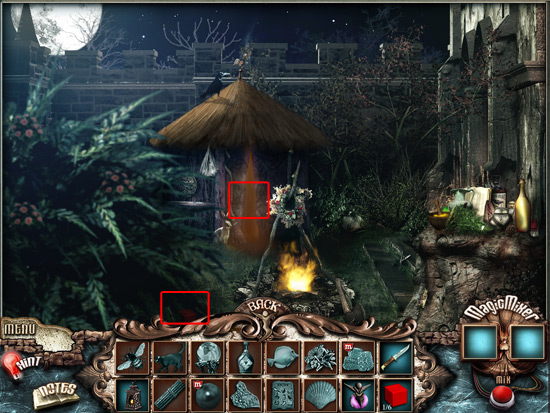
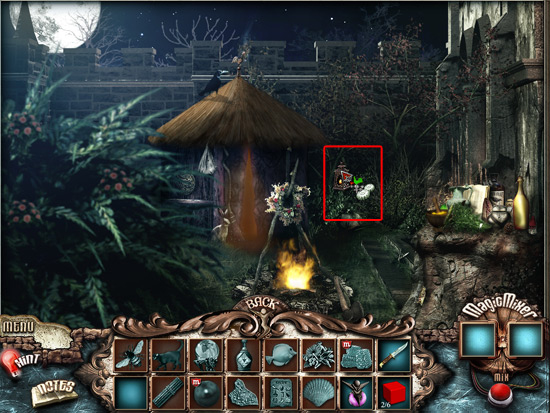
3. You'll see a hut in the next scene. Grab the small red box in the bottom and then click on the doorway of the hut to enter.
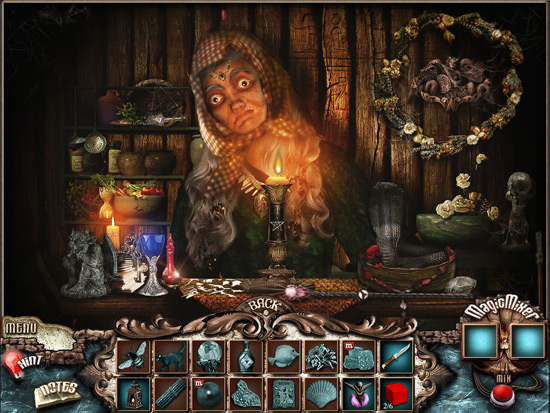
4. Inside will be a fortune teller. Click on her to talk to her and she will tell you that she knew you were coming and that if you bring her crystal ball to her, she will tell your fortune.
5. Click on the back button and go back to the scene outside the hut. You'll notice several areas here have the green weathervane with the gears, which means you need an item to unlock this area.
6. Click the back button and return to the first room you were in. It's now time to go to the left path. Click on the back left path and you'll be taken to a scene with a tree.
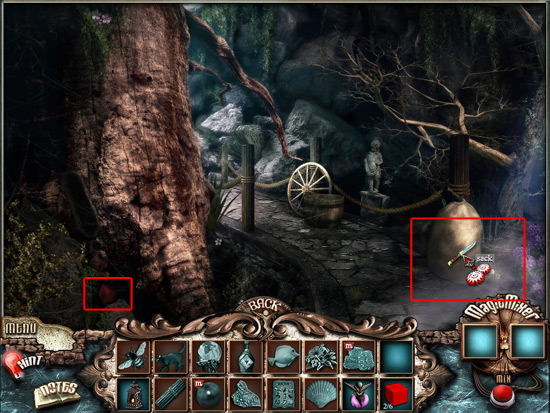
7. Pick up the red box on the left and use the knife from your inventory on the sack on the right.
8. Once the sack is ripped open with the knife, it will reveal the crystal ball the fortune teller was looking for. Click on it to add it to your inventory.
9. Go back to the fortune teller in the hut.
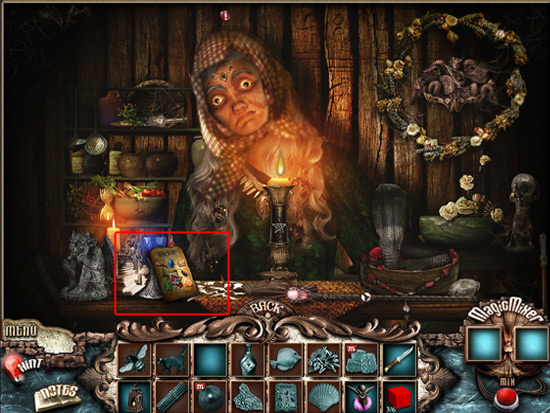
10. Give the fortune teller her crystal ball. She will then give you a recipe that will help you in a later scene. It will let you breath under water, but you first have to gather all the ingredients. Don't forget to click on the recipe before you leave.
11. Click on her one more time and she will then ask you to find her cat.
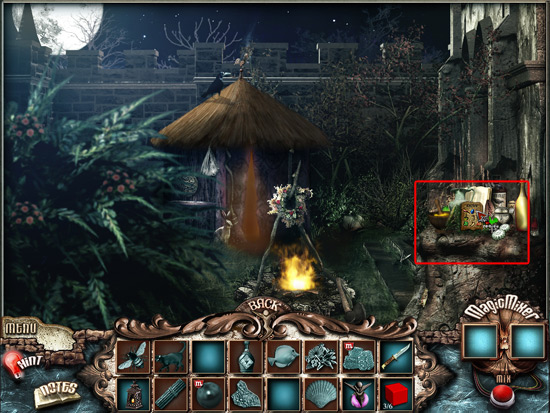
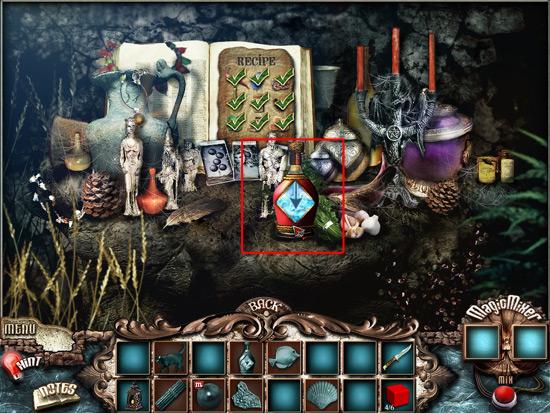
12. Leave the hut by clicking on the back button. Take the recipe out of your inventory and use it on the area on your right where all the bottles and ingredients are. This will unlock this scene.
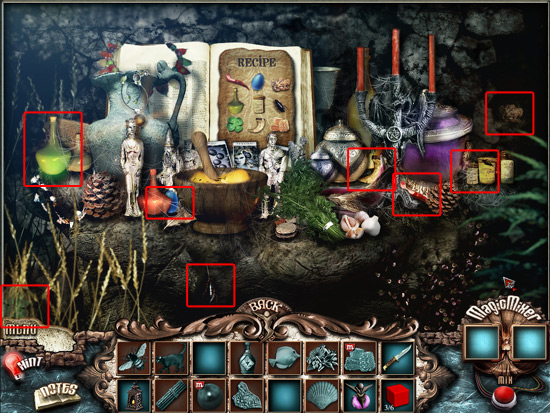
13. You will now be in the recipe scene where you can collect some of the ingredients needed right here on this table. Collect the items shown below.
14. The one item remaining will be the honey cubes, which you will notice will have to be made from two other items in the Magic Mixer. Click on the back button to exit this scene.
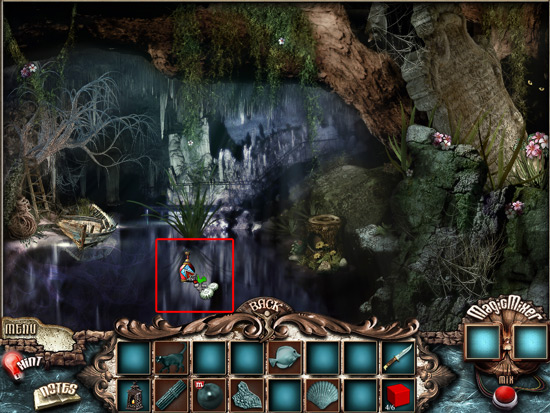
15. Go back to the scene with the tree and the place you sliced open the sack. You can proceed by clicking at the end of the path to move forward to the lake scene.
16. Collect the red box on the left and the bee at the top of the screen. Then click on the stump to start a mini game.
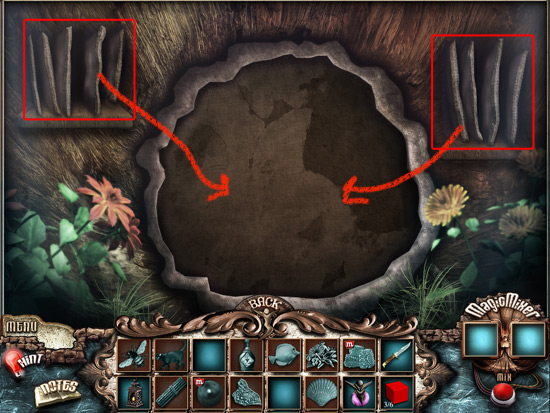
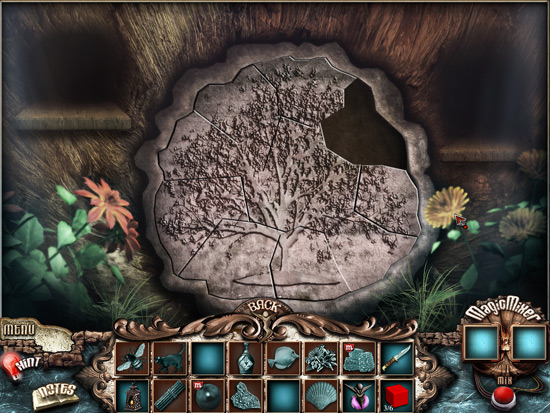
17. For this mini game, you will have to take the tiles from the left and right as noted below and put them in the right place in order to create a picture.
18. You should be able to place all the tiles of the picture except one.
19. Now, return to the area where the hut is and use the lantern on the area directly to right to light the way.
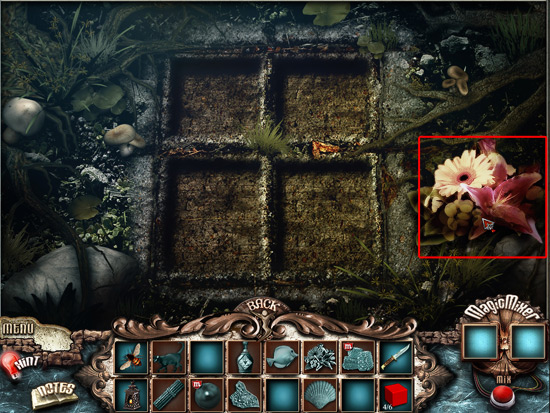
21. This reveals another mini-game, but you're not quite ready to solve it yet. You do however, need those flowers on the right. But they are dry. Use your magic bottle on the flowers to make them come to life.
22. Click on the flowers to add them to your inventory.
23. Now combine the flowers and the bee in the Magic Mixer to create the honey cubes.
24. Return to the scene where you are mixing the recipe together and add the honey cubes to the recipe. You will now receive the magic elixir. Click on this to add it to your inventory.
25. Now that you have the elixir, you can breath underwater. Return to the scene with the lake.
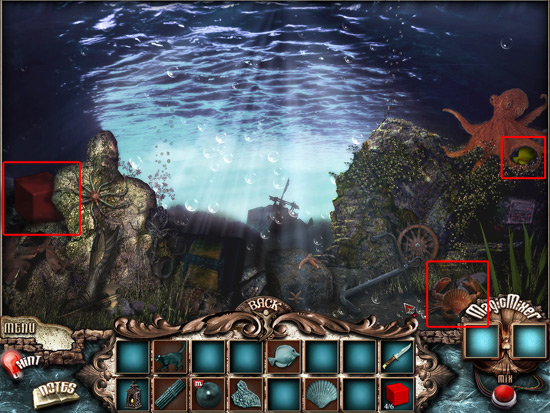
26. Use the magic elixir on the lake and you'll be take to an underwater scene.
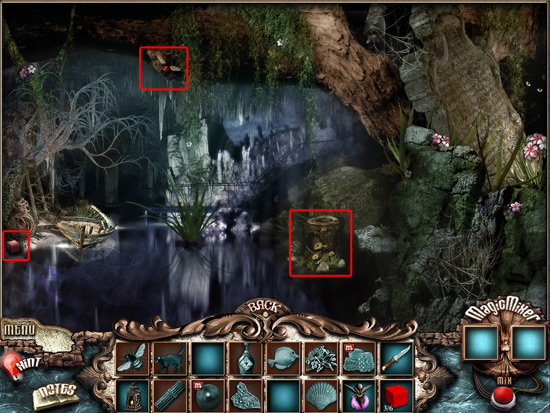
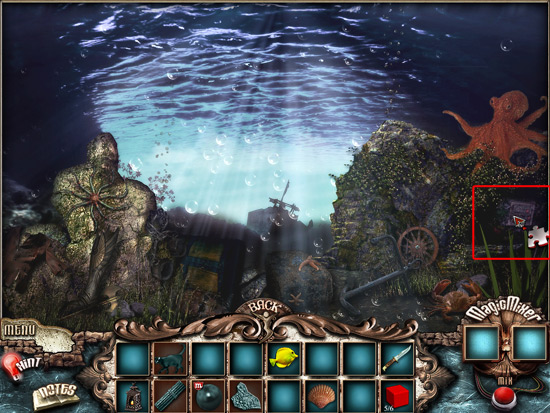
27. Find the hidden objects in this scene first: the fish, a red box, and the seashell .
28. Now, click on the box to the right to start a mini game.
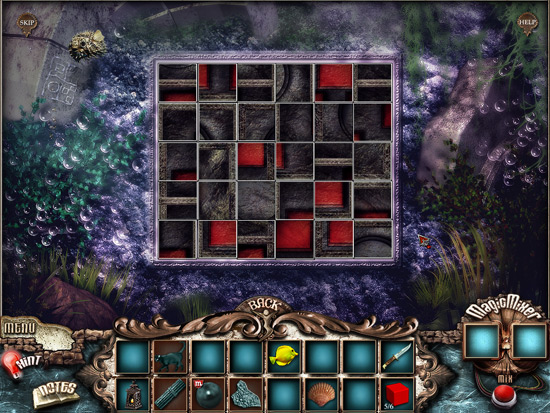
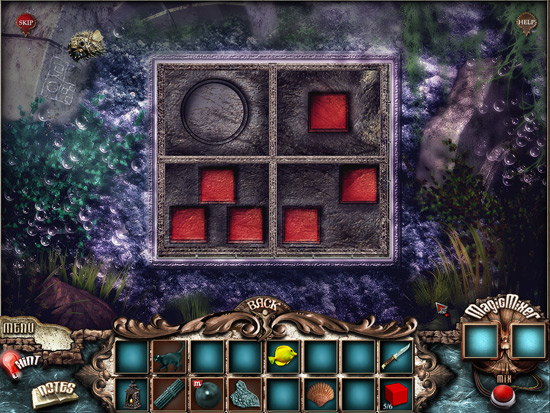
29. To solve this mini game, you will need to swap tiles in order to form the right picture. The tiles don't need to be next to each other in order to sway them. Any two tiles can be swapped.
30. The easiest way to solve the puzzle is to start with the circle, which needs to be in the top-left. Then look at the borders of each tile and match the width. See the solution below.
31. Once you complete the puzzle, a sketch of the solution will be added to your notes, which will help you in a later puzzle.
32. Now combine the knife and the seashell in the magic mixer to get the pearl.
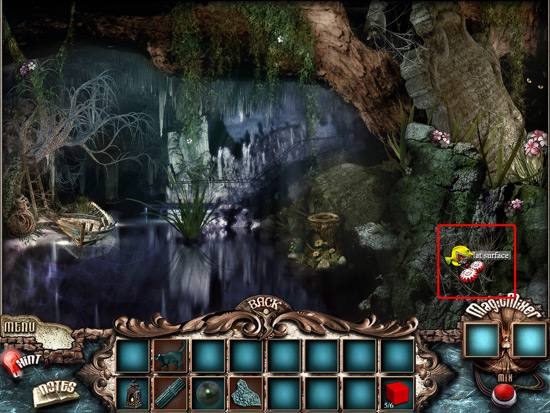
33. Hit the back button so you are back in the lake scene. Notice the cat eyes to the right? Use the fish on the spot below the cat eyes to draw out the cat.
34. The cat will appear to eat the fish. Click on the cat to add it to your inventory.
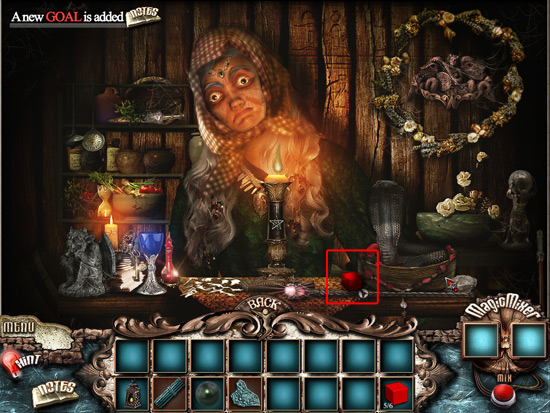
35. Go back to the fortune teller scene and give her back her cat. She will be so happy that she will give you the final red box. Click on the box to add it to your inventory.
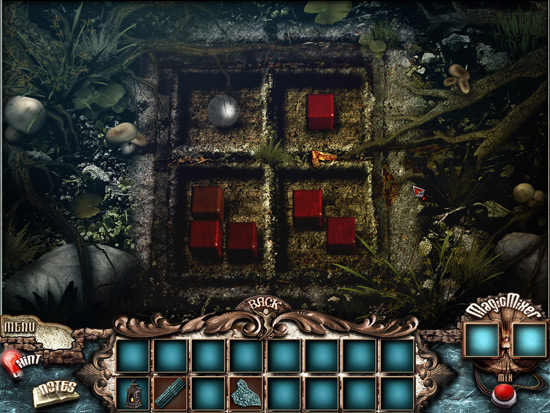
36. Now hit the back button and go back to the place where you shined the lantern and collected the dry flowers. You now have all the red boxes and the pearl and can solve this mini game.
37. Remember that sketch you drew of the puzzle you solved earlier? This is where you need to use it. The pearl is the circle and the red boxes need to go in the places they were in the puzzle. See the solution below.
38. Once you complete the mini game, you will see a message that it sounds like something has moved somewhere. Go back to the first room you were in when you started the chapter.
39. Use the lantern on the area on the left by the skeleton. It will reveal the last tile you need to complete the puzzle by the lake.
40. Click on the puzzle piece and return to the stump by the lake.
41. Use the puzzle piece to complete the puzzle. It will now move to reveal a lever. Click on the lever to add in to your inventory.
42. Now return to the scene with the tree and the sack.
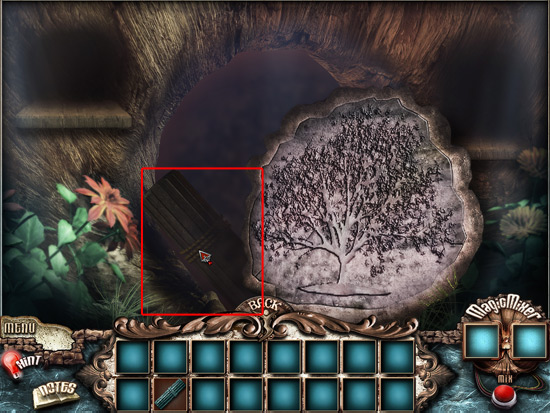
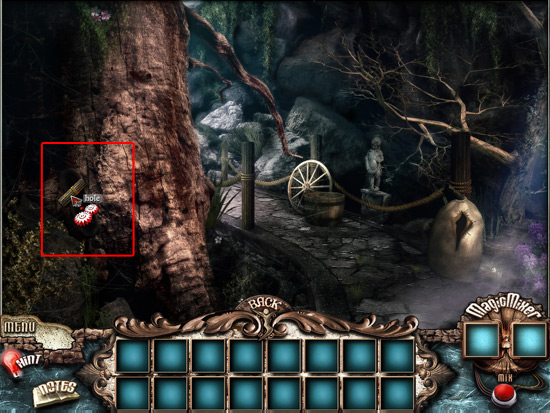
43. Use the lever on the hole in the tree.
44. Once you use the lever on the hole, stairs will appear and will mark the end of Chapter 2.
Chapter 3
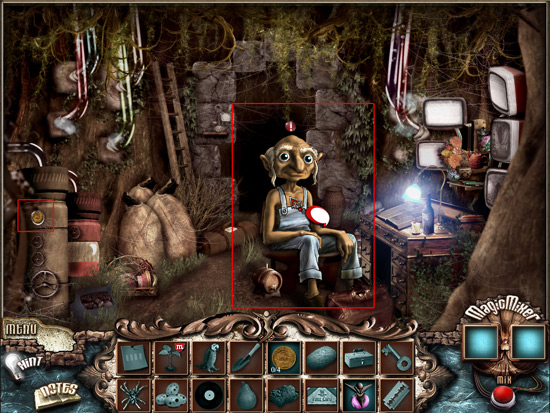
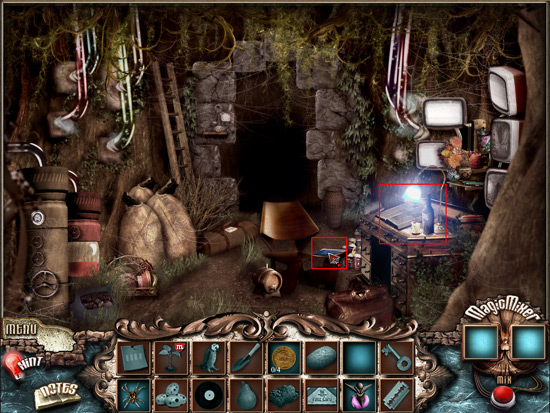
Chapter 3 begins with you meeting Tommy in a strange scene with lots of electronics and vegetation.
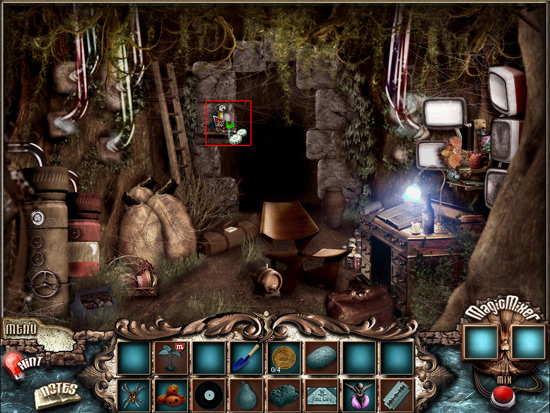
1. Talk to Tommy and he will tell you that you need to start the alarm system to trick the guard in the next room to move away from his post so you can get to the elevator. He will help you if you bring him his toolbox.
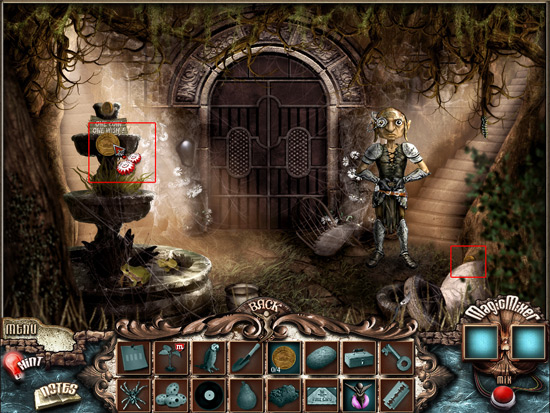
2. There is a gold coin hidden in the room on the left of the screen, click on it to add it to your inventory.
3. Click on the doorway directly in front of you to move to the next scene.
4. The next scene features an elevator with a guard in front of it. Clicking on the guard will show that he says "Access Denied" meaning you can't get through that way. You have to get him to move.
5. You'll also notice a fountain on the left that says "One Coin, One Wish." Use the coin you found in the room before on the fountain. You will receive Tommy's Toolbox.
6. Collect another coin from the left of the room. Use this on the fountain as well to get the spider.
7. Return to Tommy and give him his toolbox.
8. Tommy will tell you he can fix the surveillance cameras now and he leaves behind a blueprint.
9. Click on the blueprint on his chair and use it on his desk area.
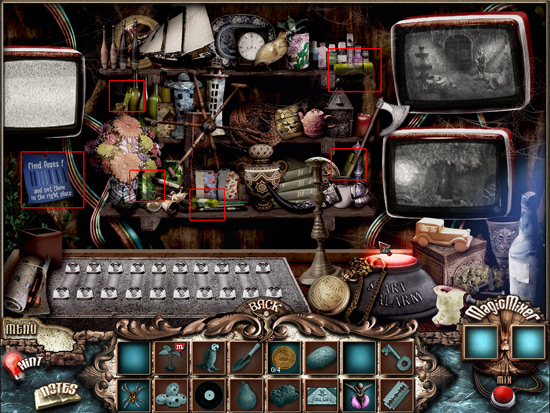
10. This will take you to a scene where you will see a lot of monitors and a fuse board. If you look to the left you will see the solution to this puzzle on the blueprint.
11. Find the fuses hidden in the shelves. There are 5 total.
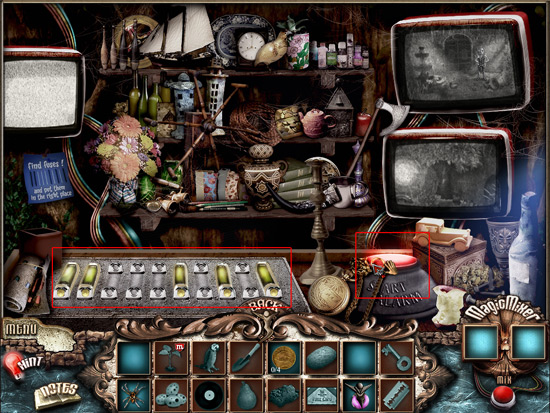
12. Place the fuses on the fuse board so that it matches the blueprint.
13. Hit the red button when you are done to trigger the alarm.
14. Now that the alarm is going off, the guard by the elevator will have moved. Go back to that scene and go up the stairway to the right.
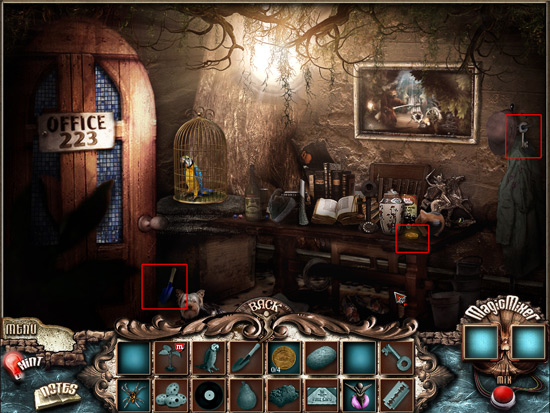
15. Once in this room, you can find the gold coin, the spade, and the key in the room.
16. Now use the key on the bird cage on the table to let the parrot out. Click on him to add him to your inventory.
17. That's all you can do in this room for now, so head back down the stair and use the coin you just collected on the fountain. You'll receive the eggs. Click on them to add them to your inventory.
18. Go back to the scene where Tommy was.
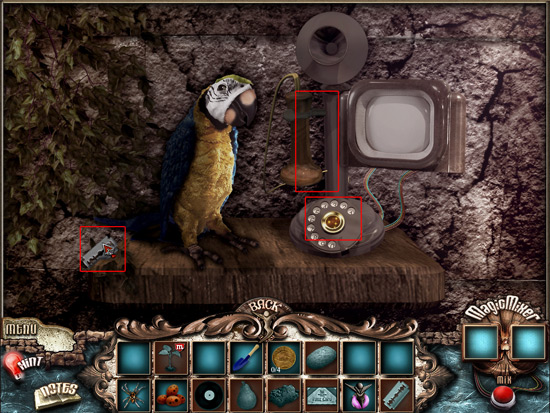
19. There is a telephone by the left of the door. Click on the parrot in your inventory and use him on the phone.
20. You'll be taken to a scene then with a phone. Grab the razor on the left to add it to your inventory.
21. Now, click on the phone to take it off the hook.
22. Dial 2-2-3. Click on each number and wait a second before you try to click on the next number. This will cause the guard to leave his post on the left so you can now go into that room.
23. Go back to the scene with the elevator and fountain and click on the left path.
24. You now are in a room with a statue.
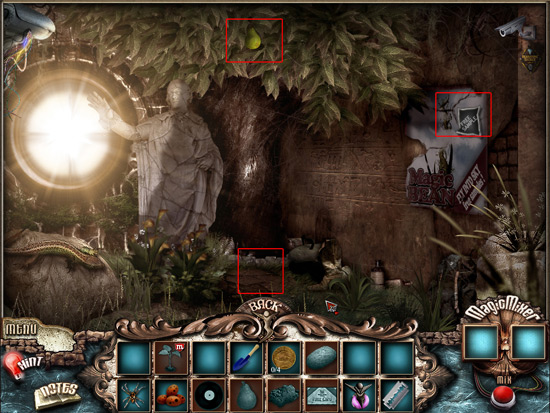
25. Collect the pear from the top of the tree.
26. Use the shovel on the plot of ground in the middle of the screen. This will unearth the last gold coin and some dirt. Click the coin and the dirt to add it to your inventory.
27. Now use the razor on the poster on the wall to the right. This will unveil a seed. Click on the seed to add it to your inventory.
28. Go back to the room with the fountain now and use the last coin in the fountain to get the record. Add that to your inventory.
29. Now go back to the first room where you found Tommy. You need to start the alarm again to move the guard back over to the left so you can get up the stairs again. Click on the desk again and then click on the red alarm button. This will start the alarm again.
30. Go back up the staircase in the elevator room.
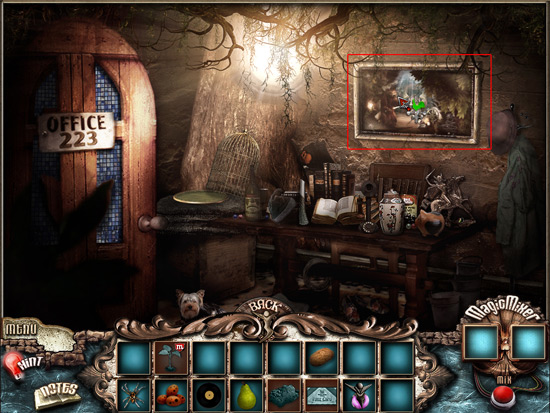
31. Once you're back in this room, click on the painting on the wall.
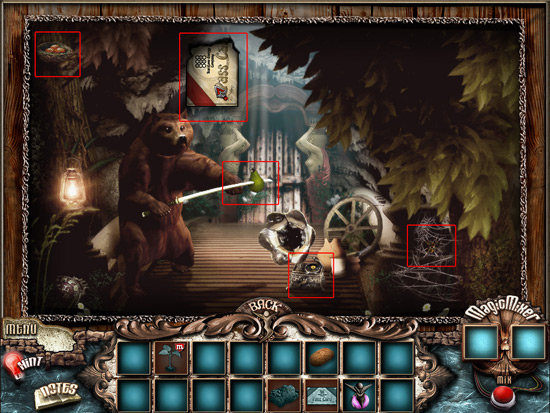
32. You will need to place certain items in your inventory on the painting.
33. Put the eggs in the nest on the top left.
34. Put the pear on the bear's sword
35. Put the record on the record player.
36. Put the spider on the spider web.
37. Once all four items have been place, the pass key will appear. Click on it to add it to your inventory.
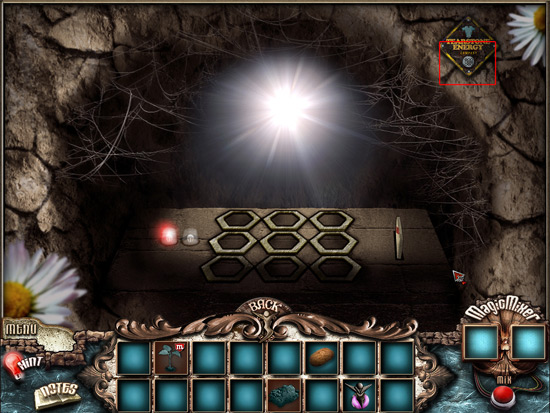
38. Go back to the room with the elevator and the fountain and use the pass card on the elevator. This will start a mini game.
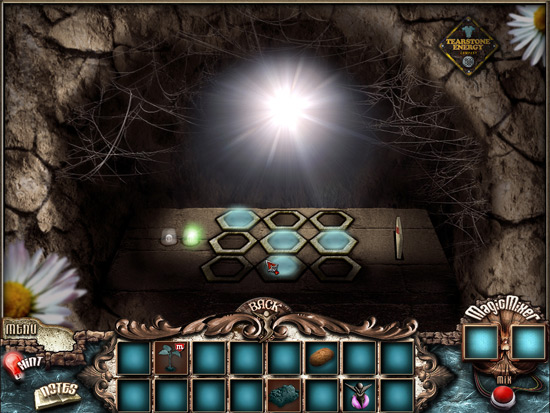
39. If you noticed on the pass card, it had the solution to this puzzle on it. You can refer to your notes to find it . It's also shown in the top right of this screen where it says "Tearstone Energy"
40. See the solution below.
41. Once the green light turns on, the door to the elevator is open and you can move inside.
42. Once inside, you can combine the soil and the seed you had collected before in the Magic Mixer and create a plant.
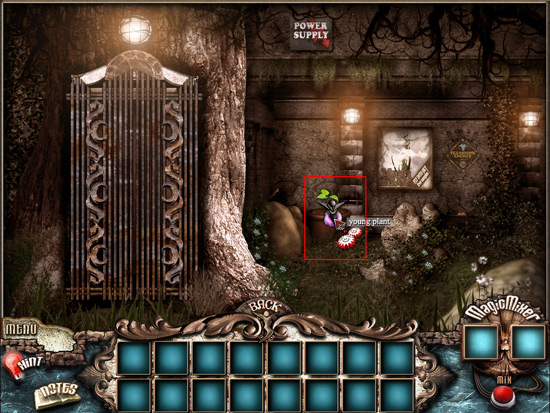
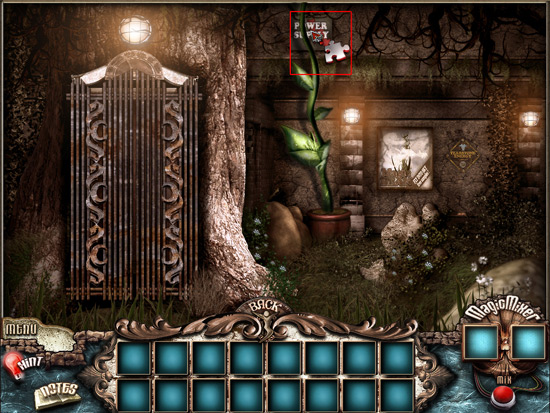
43. Place the plant in the flower pot. And then use the magic elixir on the plant.
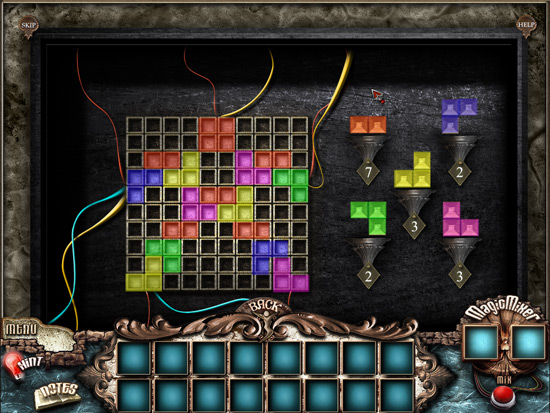
44. The plant will grow allowing you to access the Power Supply. Click on the Power Supply sign to start a mini game.
45. The Power Supply game can be a little tricky. You have to place the pieces on the right into the gray squares on the left. But, you can't rotate them, so they have to fit perfectly just the way they are. See the solution below.
46. Once you have completed the puzzle, the elevator will work. Click on it to enter and end Chapter 3.
Chapter 4
Chapter 4 begins as you get off the elevator and you are suddenly in a very strange land.
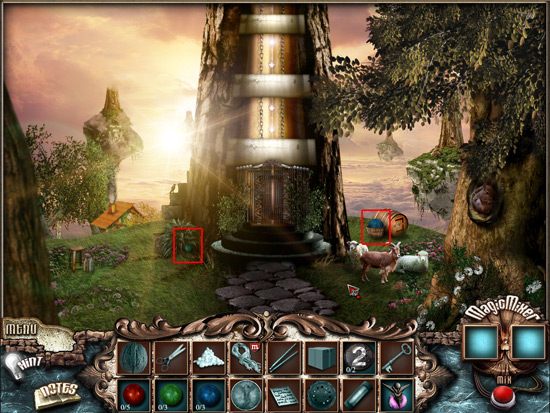
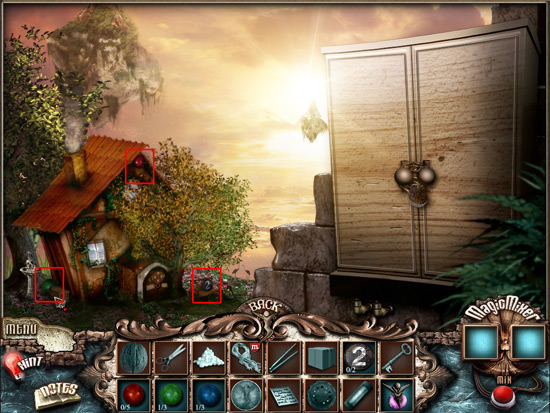
1. First thing you need to do is to find the hidden objects in the first scene, which is the green ball and the blue ball.
2. Once you collect the balls, click on the area to the left where you can see the roof of a house to go to the next scene.
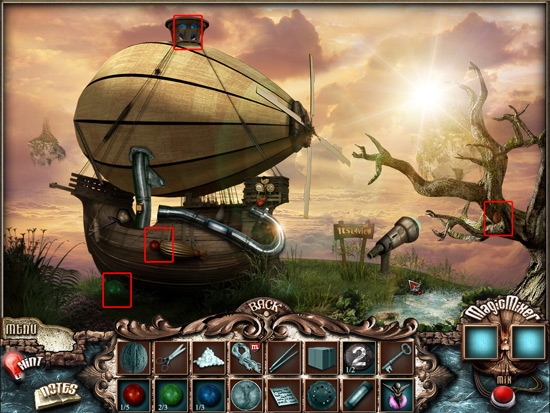
3. In this scene, you can find three hidden items. A red ball, a green ball, and the No. 2. Click on each of these to add them to your inventory.
4. Now click on the center of the screen where the green weather vane appears, to move on to the next scene.
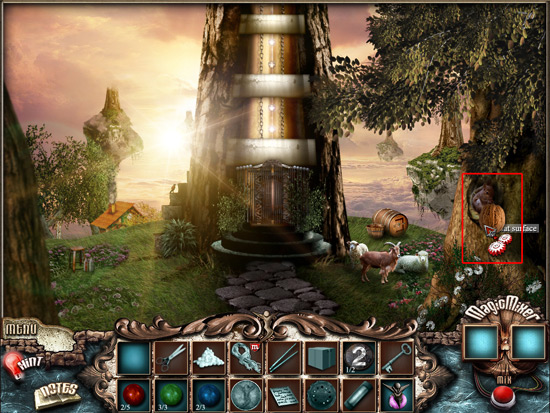
5. Here you can find 4 hidden items, a green ball, a red ball, a blue ball, and a walnut. Click on each of them to add them to your inventory.
6. Now return to the scene where you first got off the elevator.
7. Use the walnut on the flat surface under the squirrel to the right. He will move out of the way so you see inside the den.
8. Once the squirrel moves out of the way, click on the hole.
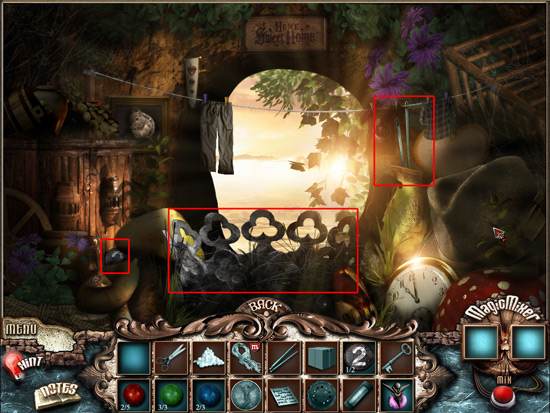
9. Find the hidden objects in the scene. You can find the No. 2 coin and sewing needles.
10. Use the magic elixir on the stone crown and collect the red balls that appear.
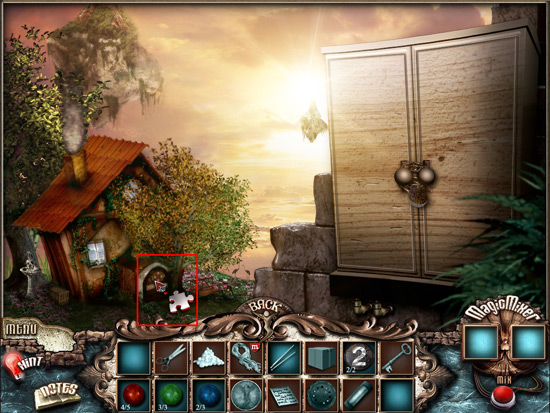
11. Go back to the scene with the house and click on the door to start a mini game.
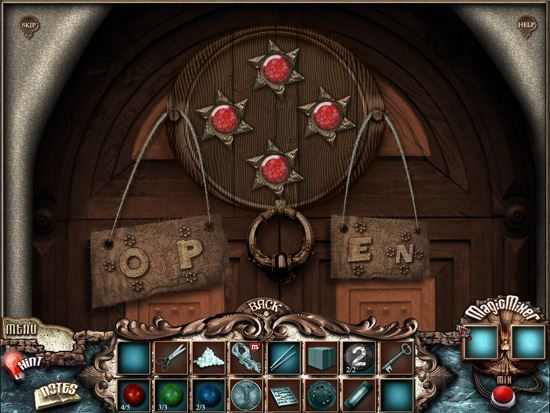
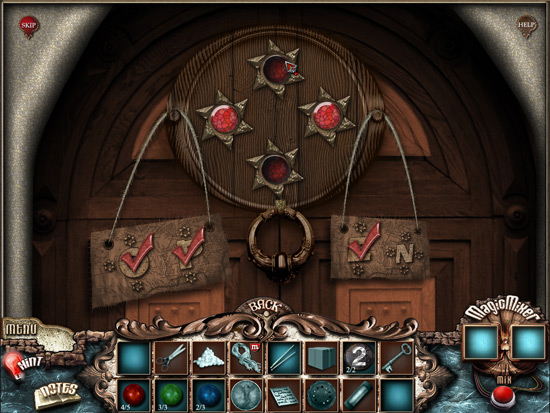
12. In this mini game, you have in front of you 4 red buttons and the word Open.
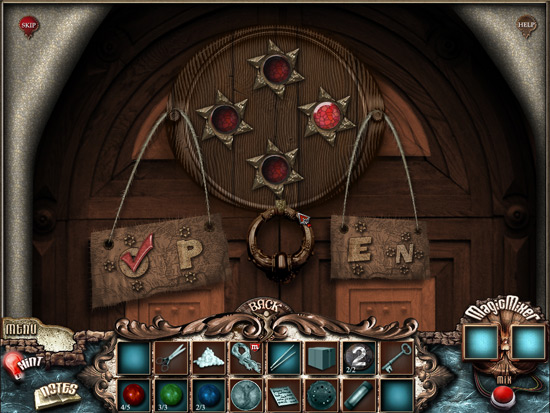
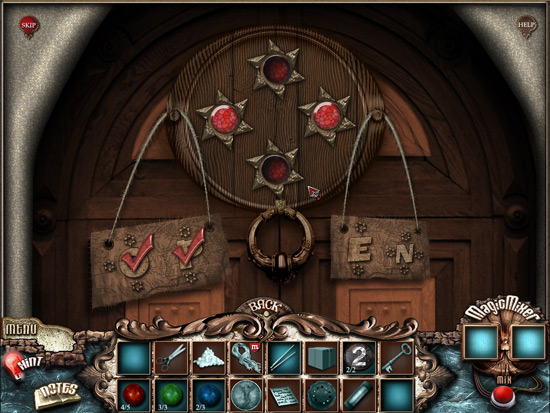
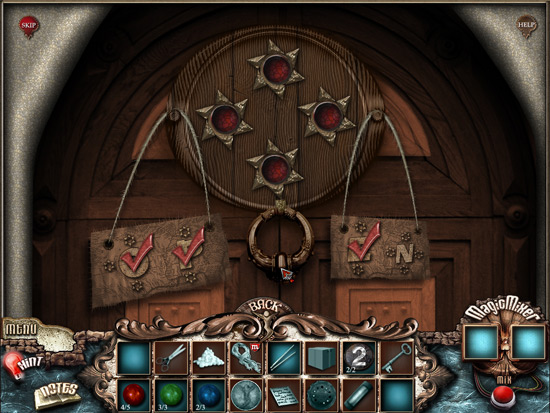
13. If you notice there is a pattern by each letter. You have to press the buttons in this pattern for each letter and then after each pattern, hit the door knocker to enter it.
14. The first pattern is for the Letter O. Press the buttons as shown below and then click on the knocker.
15. The next letter is P.
16. Next is E.
17. And finally N.
18. Once you input all the letters, you'll hear a click and you'll be able to enter the house.
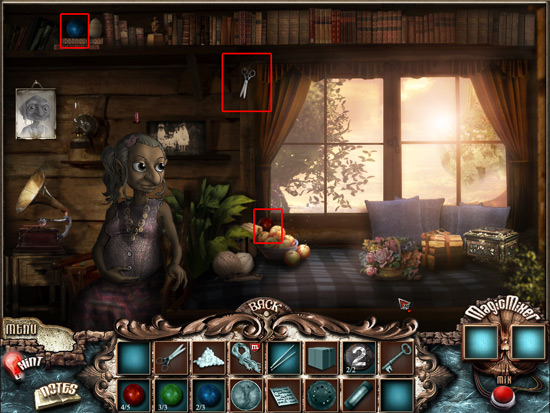
19. Once in the house, find the hidden items: a blue ball, a red ball, and a pair of scissors.
20. Talk to the woman, who is Tommy's wife. She will help you get to Tearstone, but first you need to get some items for her. A list will appear after you talk to her. Click on the list to add it to your inventory.
21. Now use the list on the box on the bed.
22. You will be able to find all the items except the scarf. You will even find an item, the machine part, that's not on the list, but in your inventory.
23. Once you find all the items except the scarf, leave the house and go back to the first scene with the elevator.
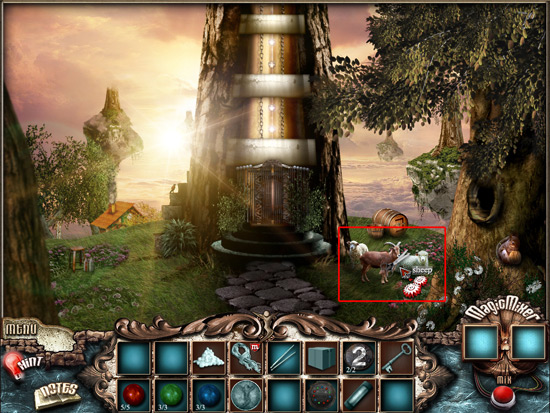
24. Use the scissors on the sheep. A pile of wool will appear. Click on it to add it to your inventory.
25. Now use the wool and the sewing needles in the Magic Mixer to create a scarf. This is the final item on the list for Tommy's wife.
26. Go back to the house and click on the box again.
27. Now move the scarf into the box and the list will be complete.
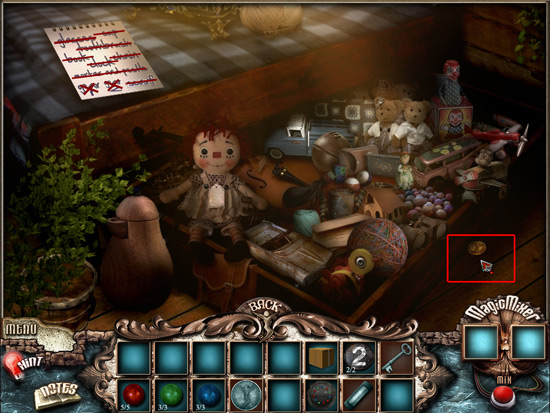
28. Click on the box to seal it and a TS Token will appear. Click on the token to add it to your inventory.
29. Go back to Tommy's wife and give her the carton from your inventory. She will then give you a key. Click on the key to add it to your inventory.
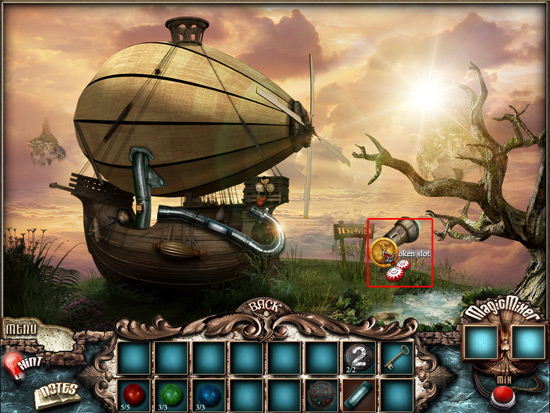
30. Go to the scene with the airship and use the token on the telescope. This will start a mini game.
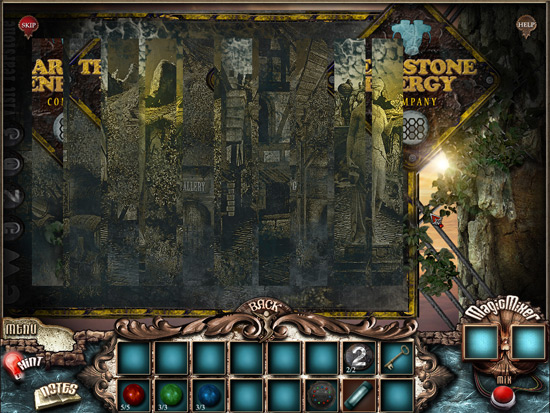
31. This mini game is fairly easy. You just need to swap the vertical pieces to complete the puzzle. The pieces don't have to be next to each other.
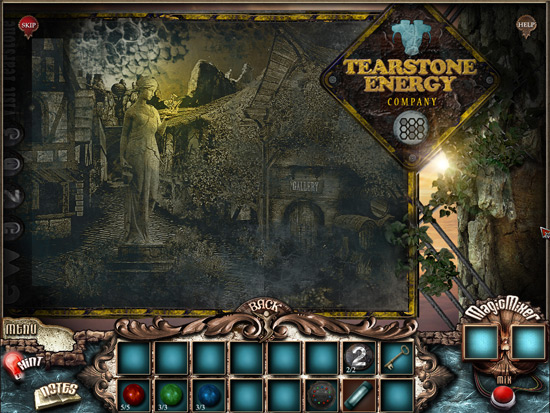
32. The completed puzzle is shown below.
33. Once you complete the puzzle, you'll realize that it's a billboard and it has a number. "EW 5263." You will write this down in your notes. You will need this information later in the chapter.
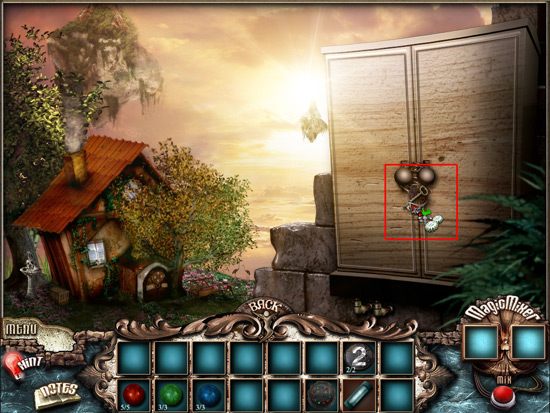
34. Now, go back to the scene outside of Tommy's House. There is a cabinet on the right. Use the key that Tommy's wife gave you to open the door.
35. This will start another mini game.
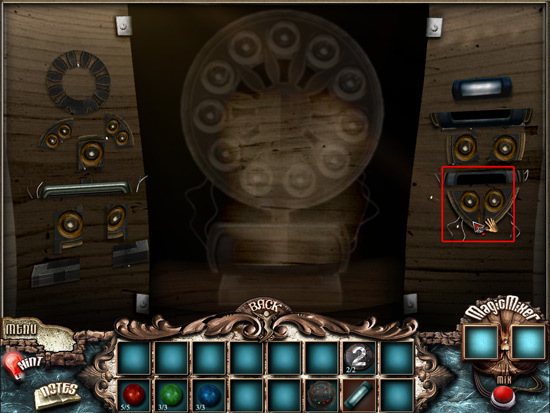
36. First thing you need to do as put the machine together using the items on the sides. If you're correct in the placement, the part will lock into place.
37. Once you have complete assembled the machine, take the machine part from your inventory and place it in the center.
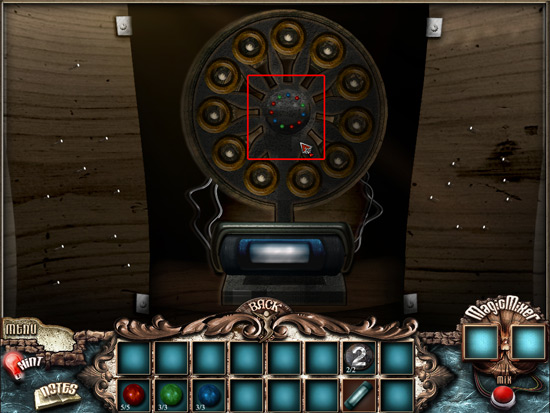
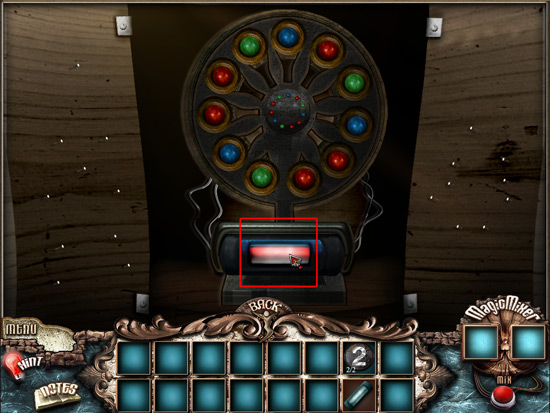
38. Now it's time to use all the colored balls you've been gathering. You'll notice on the machine part in the center that there are colors all around it. It's showing you what the pattern of the balls should be.
39. Once you put all the balls in place, you will be able to pick up the fuel for the airship. Click on it to add it to your inventory.
40. Now return to the scene with the airship.
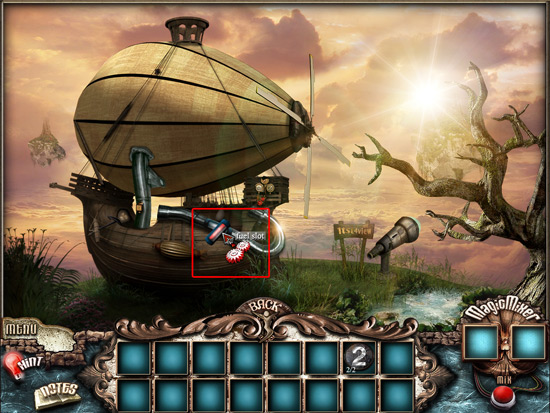
41. Place the fuel in the fuel slot.
42. Now, click on the airship to the left to start the final mini game of the chapter.
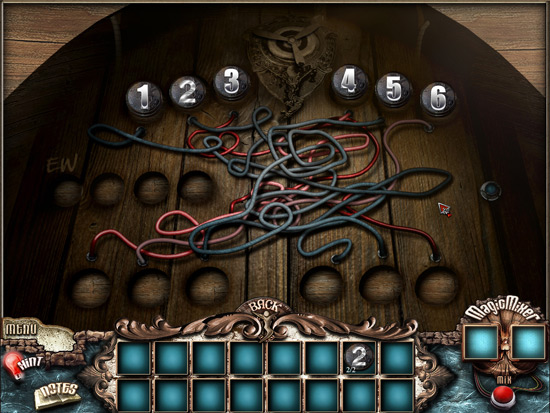
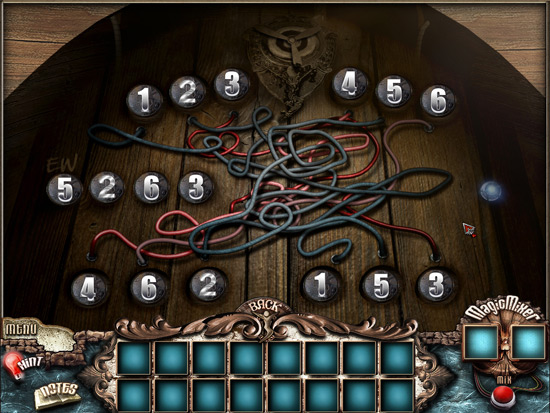
43. You will see numbers at the top connected to wires. You need to follow the wire down to the bottom area and place the right number in the slot. You will need to use the 2 coins you have with the No. 2 on them to fill in any places were a "2" goes.
44. Also, you will need to put in a code on the left. So the little EW before the 4 slots? You found that number on the billboard. 5263. See the solution below.
45. Once you input all the numbers correctly, this will end the chapter and you will travel to Tearstone on the airship.
Chapter 5
Congratulations! You have finally made it to Tearstone! Now it's time to explore the island!
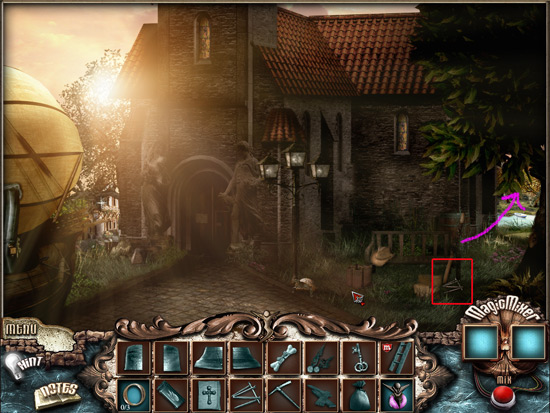
1. Pick up the nails in the bottom right of the screen to add them to your inventory.
2. Click on the right part of the screen to move to the next scene.
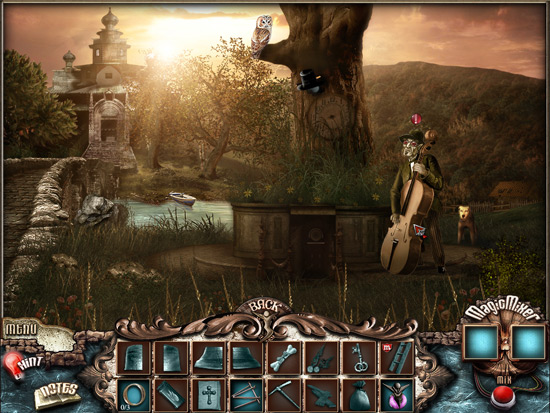
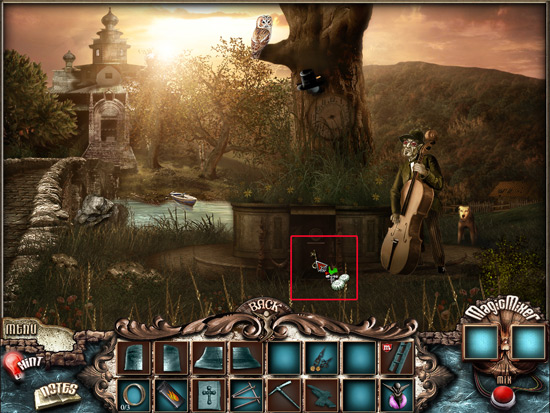
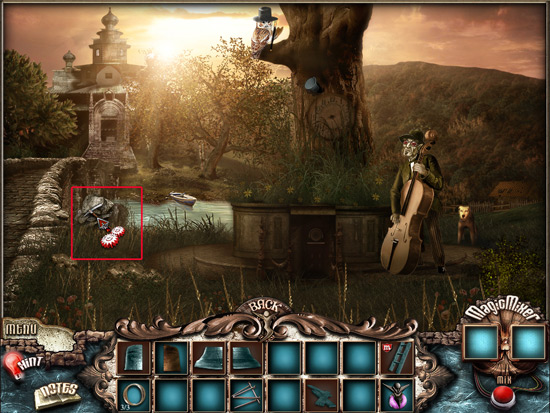
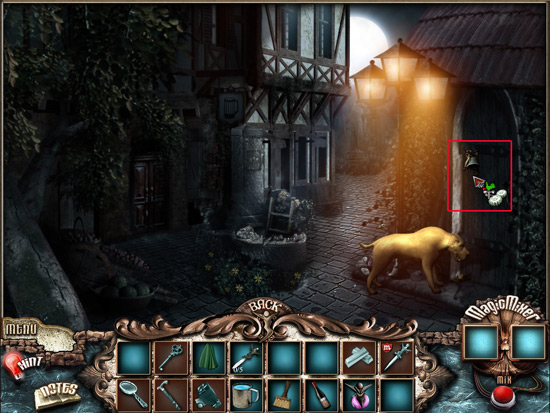
3. In the next scene you will see a blind musician. Click on him to talk to him and you'll discover that he wants you to give his dog a treat. This will be added to your goals
4. Go back to the first screen and now head to the left side of the building.
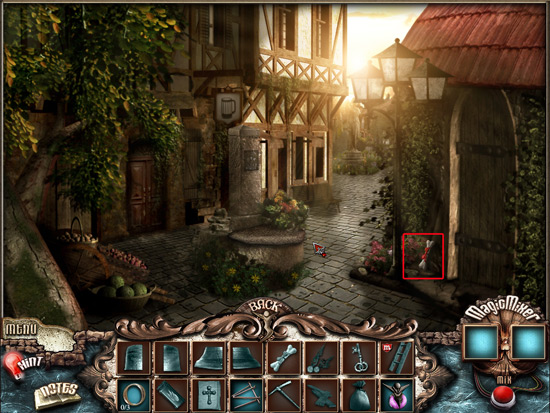
5. You should see a dog toy near the door on the left. Click on it to add it to your inventory.
6. Now head back to the blind musician and give the dog toy to the dog.
7. The man will thank you for your kindness by giving you some clock hands. Click on them to add them to your inventory.
8. Now go back to the first screen and head to the left again. Click on middle of the screen to head forward one more screen. You will now be in a scene with a statue and a man standing before it.
9. Click on the man standing next to the statue to talk to him. He wants you to repair the statue but you don't know what it looked like.
10. Go back to the screen before. There is a section of the wall that's pushed out in the middle of the screen. Click on this to start a mini game.
11. In this mini game, you have to complete the puzzle by clicking on the puzzle pieces on the sides and placing them in the holes in the middle of the screen. See the solution below.
12. Once you complete the puzzle it should look like the following:
13. Once you've solved the puzzle, go back to the statue and click on the bottom of the statue. The pieces of the statue will be scattered throughout the next scene.
14. Find all 10 pieces of the statue to complete the puzzle. Then click on the bag in the top left corner when you are finished.
15. Go back to the statue and use the bag on the head of the statue. This will start another puzzle where you will have to put the statue back together. If you check in your notes, you will have the sketch of what it needs to look like. The solution is below.
16. As soon as you complete the puzzle, go back to the man by the statue and click on him to talk. He is very thankful that you fixed the statue and he invites you to his house to meet his wife.
17. Grab the planks that appear behind the man and then click on the door on the left to enter the building.
18. Once inside, you'll see the man and his wife. Notice the newspaper under the man's arm? Take not of the picture and the number 1645. You will need this information later.
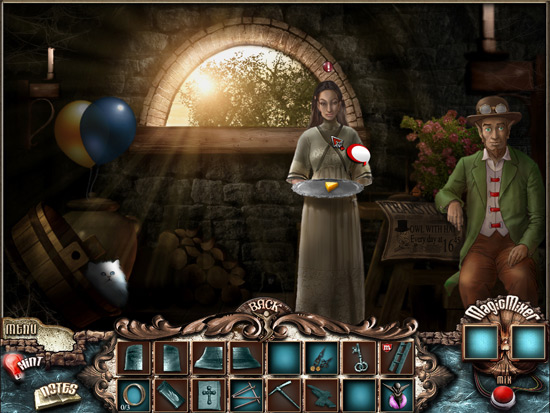
19. Click on his wife to talk to her. She is happy you repaired the statue and offers you some cheese.
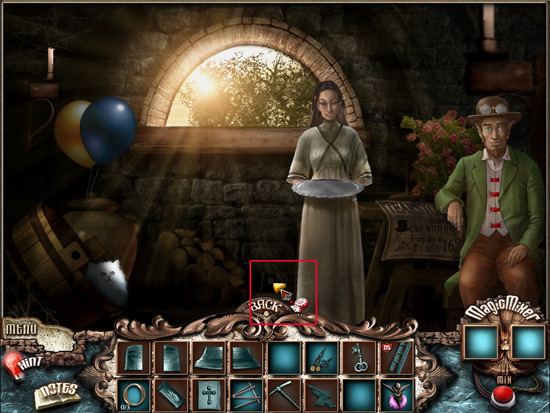
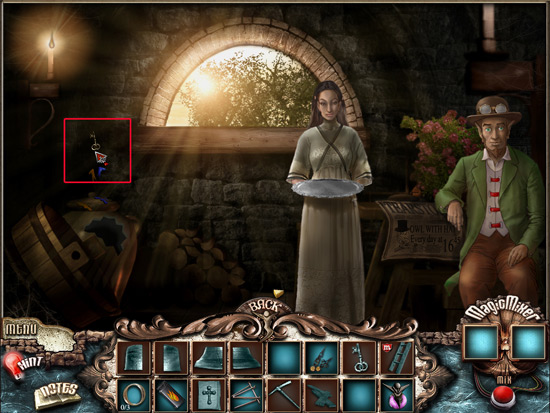
20. Take the cheese and put it on the ground near the mouse hole. This will cause the mouse to come out and the cat on the left will chase the mouse.
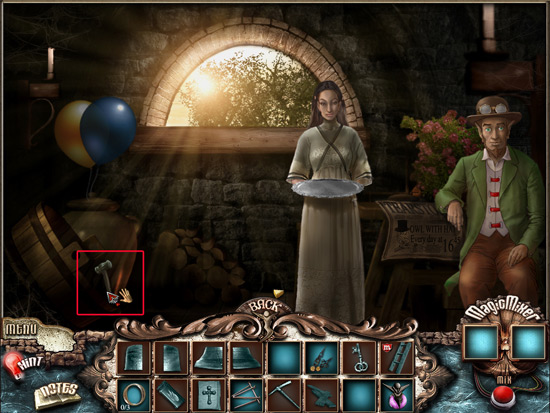
21. Once the cat disappears, a hammer will appear. Click on the hammer and you will pick it up.
22. Use the hammer on the jar directly behind it… the one the balloons are attached to. This will break it, revealing a lighter. Click on the lighter to add it to your inventory.
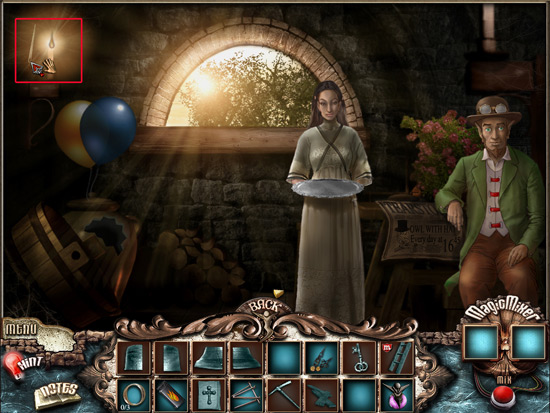
23. Now use the lighter on the candle in the upper left corner to light it. This will reveal a needle in the cobwebs by the candle.
24. Click on the need to grab it and then use it on the balloons to pop them. A small key will appear. Click on the key to add it to your inventory.
25. Go back to the scene where you met the blind musician and his dog.
26. Use the key on the cabinet just to the left of the musician. This will take you to a new scene.
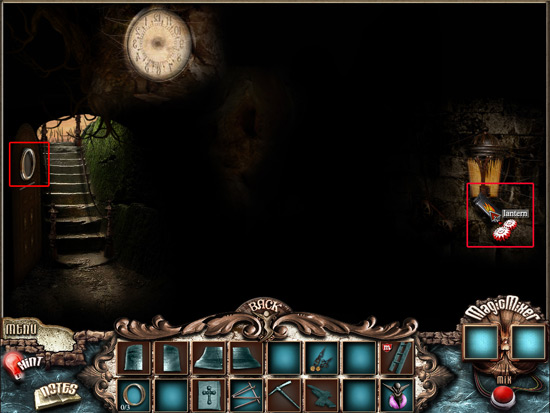
27. In the new scene, you'll see a lantern on the right and an O on the wall on the left. Grab the O.
28. Use the lighter on the lantern.
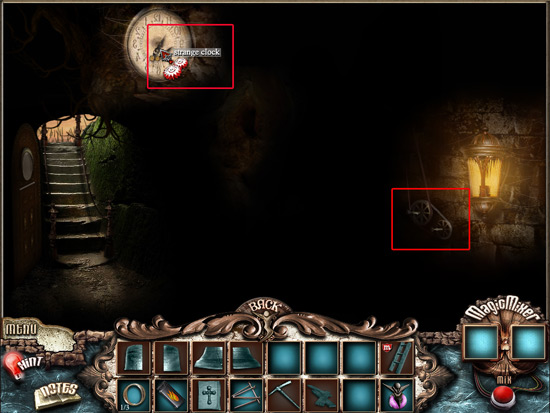
29. Once the lantern is lit, a clock face and some gears will appear from the darkness.
30. Use the clock hands in your inventory on the clock face.
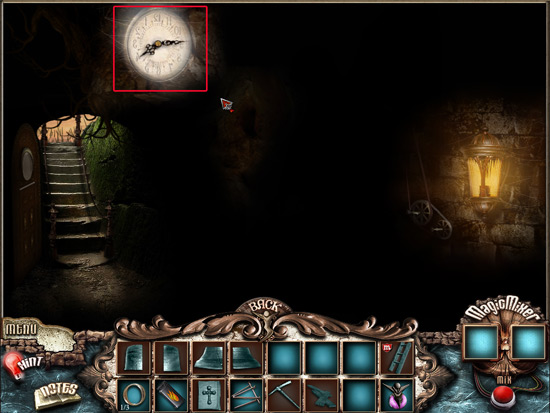
31. Now the gears on the right control the clock hands. Remember 1645 that you saw on the newspaper? This is the time you need to input. 1645 is military time for 4:45. However, the clock is backwards. The hour hand needs to be facing the 4 on this clock and the minute hand needs to be facing the 9 mark. If the clock was normal, it would read 8:15. The clock will glow when you set the right time.
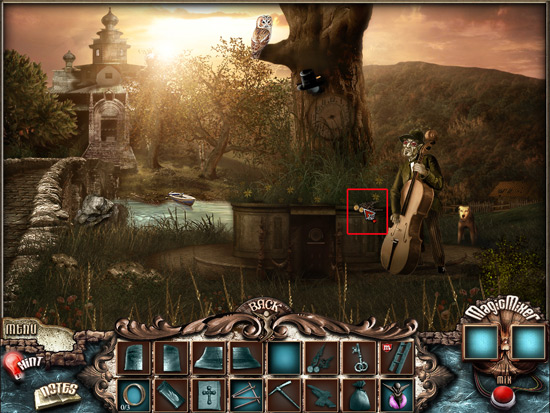
32. Go back to the blind musician and watch as the owl puts the top hat on… now for some reason you can enter the monastery in the first scene.
33. Go back to this scene and enter the monastery.
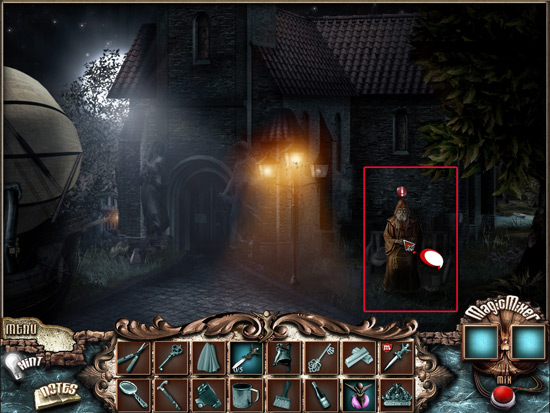
34. Click on the monk to talk to him. He welcomes you to Tearstone and asks that you find a cross in the attic for him.
35. Click on the note that he leaves for you to add it to your inventory and then click on the cabinet on the wall to play a mini game.
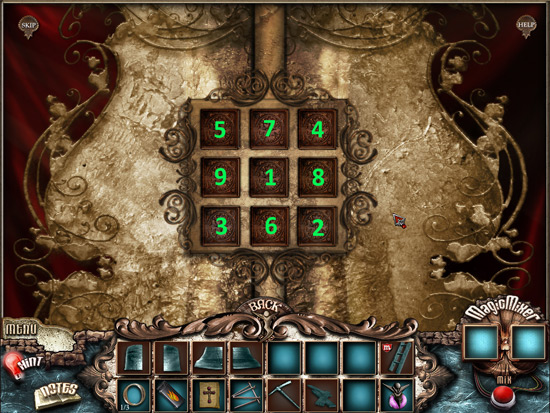
36. With this mini game, when you click on a tile, it will reveal a number. You need to reveal the numbers in order from 1 to 9. If you make a mistake, all the tiles will turn back over. See the solution below.
37. Once you complete the mini game, you can now click on the open cabinet for a closer view.
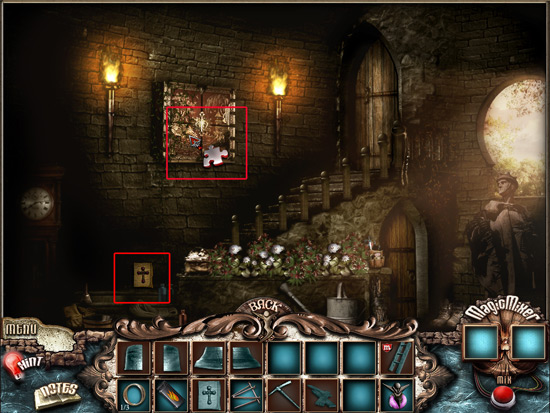
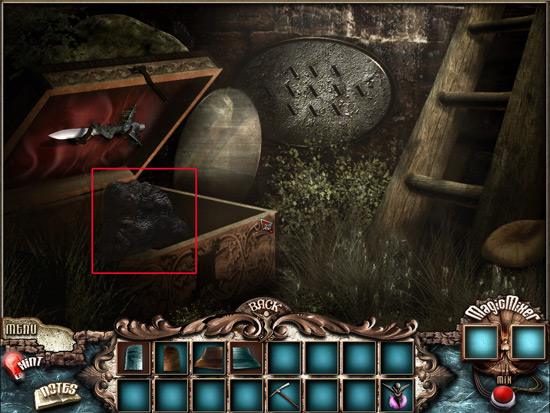
38. Take the O and the part of the bell.
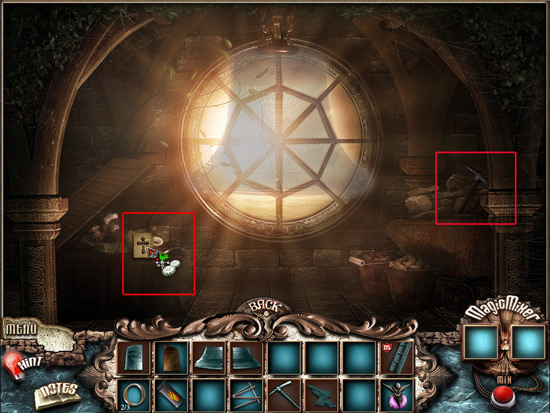
39. Go back and then click on the door at the top of the stairs.
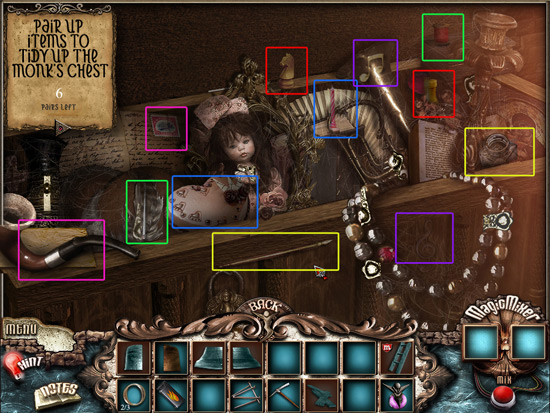
40. Click on the pick ax on the right and then use the note the monk gave you on the box of items on the left.
41. You will be taken to a closer look at the box and you will need to tidy up the box by pairing items that go together.
a. Need and thread
b. Ink bottle and pen
c. Chess pieces, a rook and a knight
d. Birthday candle and a cake
e. An envelope and a stamp
f. Note and a treble
42. Once you have found all the pairs, click on the little red arrow in the left under where it has the instructions for the screen.
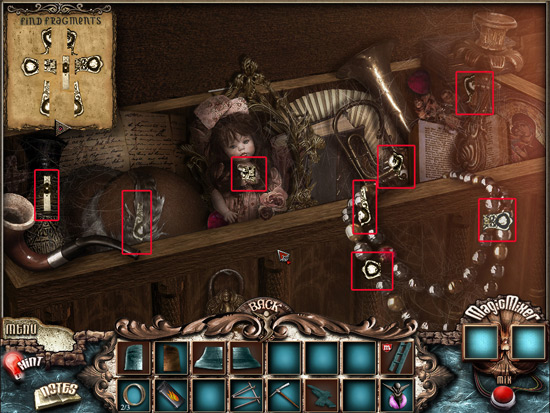
43. Now, you have to find the fragments of the cross. See the solution below.
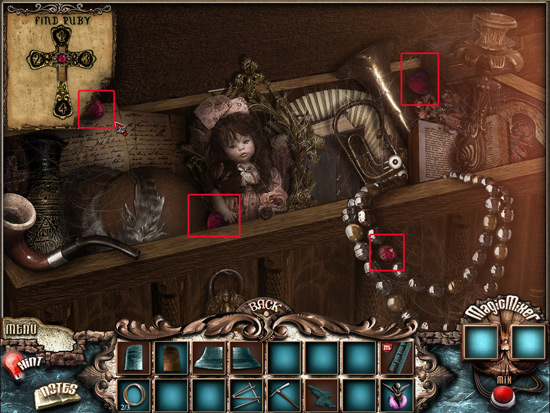
44. Next, you need to find the rubies for the cross. The first three are pretty easy to find. The fourth one is hidden behind the list.
45. Use your lighter on the bottom right corner of the list to burn it away and reveal the final ruby. Collect all 4 rubies.
46. Once you are done collecting the rubies, the monk will appear and the cross will be in your inventory.
47. Give the monk the cross. He will tell you that you are chosen one and that you need to put together the pieces of the bell.
48. Click on the O in the top left corner.
49. Go back to the blind musician.
50. Use the pick ax on the pile of rocks on the left. You will have to do this 3 times to reveal a piece of the bell. Click on the piece of bell to add it to your inventory.
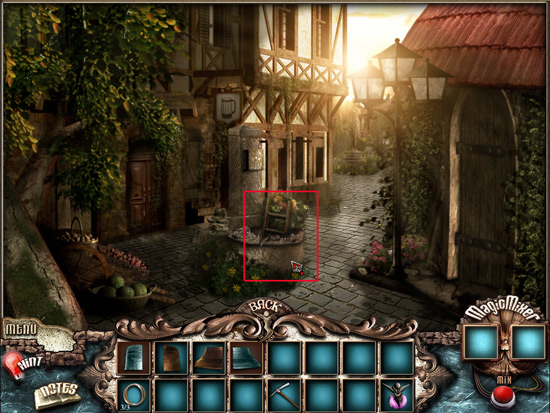
51. Go back to the courtyard where the well is. Use your pickax on the well.
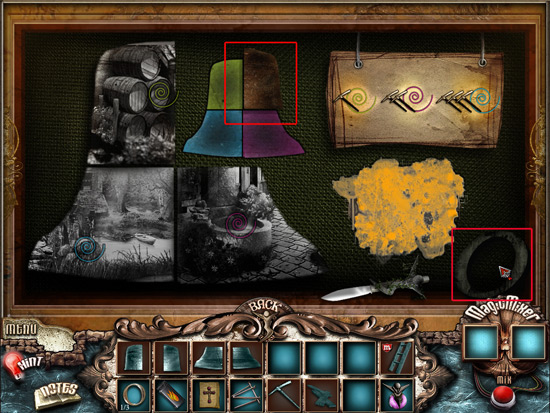
52. Combine your nails and the planks to create a ladder.
53. Use the ladder on the well.
54. Click to go down the well.
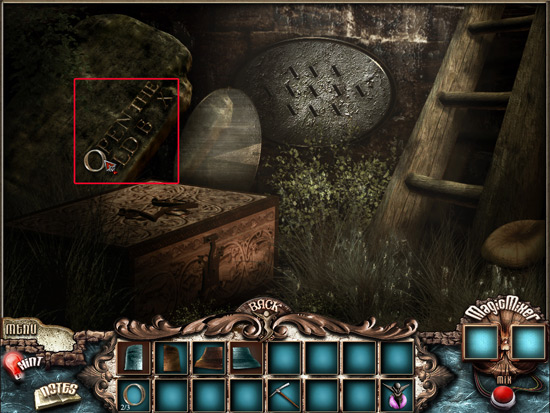
55. At the bottom of the well, place all of the Os that you have on the box on the left so that it says "Open the Old Box."
56. A ghost will then appear and opens the box for you.
57. Now, use the magic elixir on the old stone. It will then turn into a piece of the bell.
58. Head back out to the scene with the statue.
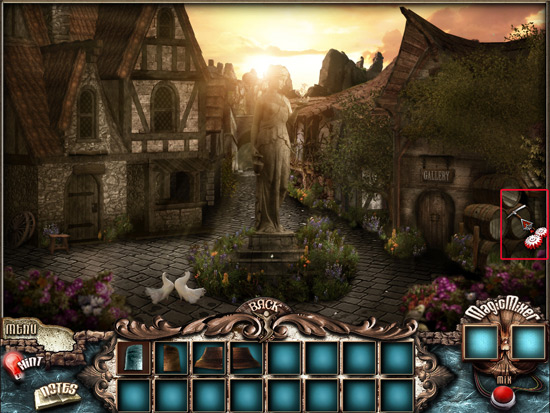
59. Use the pick ax on the barrel on the right.
60. The final piece of the bell will be in the barrel. Click on it to add it to your inventory.
61. Now go back to the monk in the attic.
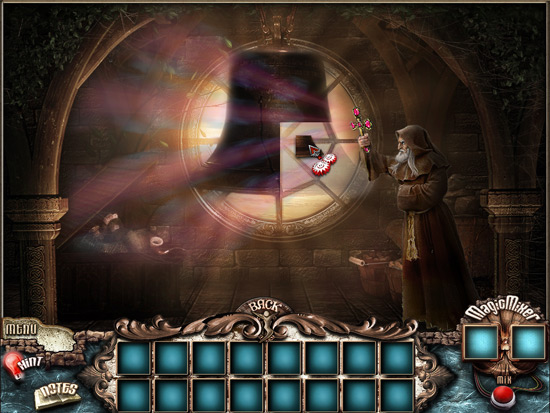
62. In the attic, take each piece of the bell and place them in the window.
63. Once the bell has been put together it will ring and Chapter 5 will end!
Chapter 6
Chapter 6 begins with you back outside of the monastery and it is nighttime. You will see a monk sitting on a bench in front of you.
1. Click on the monk to talk to him and he will tell you that the gates of the castle are now open and you should go there. He also lost his cane and thinks the ghost stole it. He wants you to find it for him.
2. When you are finished talking to him, go down the path on the right where the blind musician used to be. Click on the gates on the left to go to the castle.
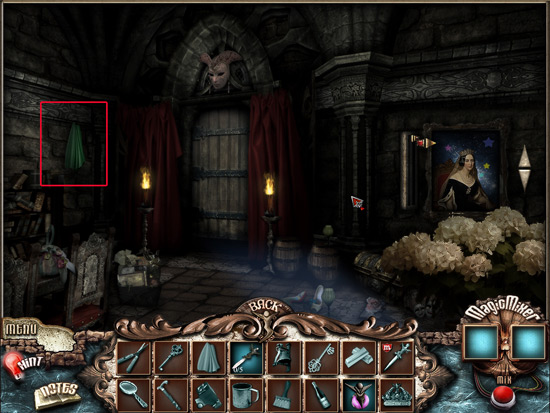
3. Take the green cloth hanging on the left of the screen and then enter through the door in front of you.
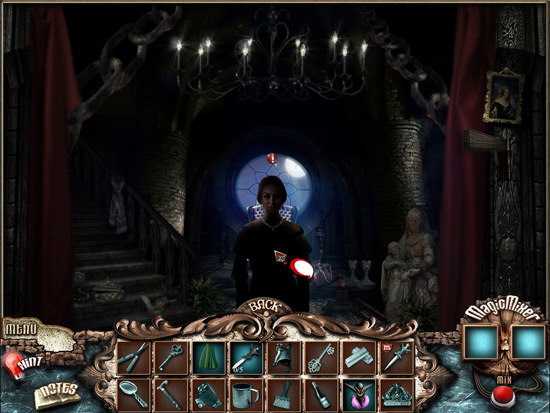
4. The Queen will be before you. Click on her to speak to her. She asks you to bring her the crown. Go up the stairs on the left of the screen.
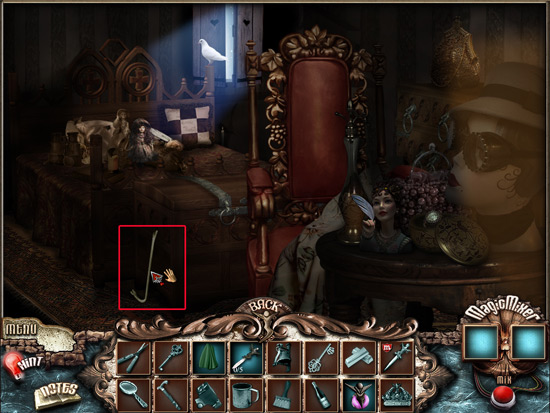
5. Click on the crowbar to grab it and then use it on the trunk it was leaning against.
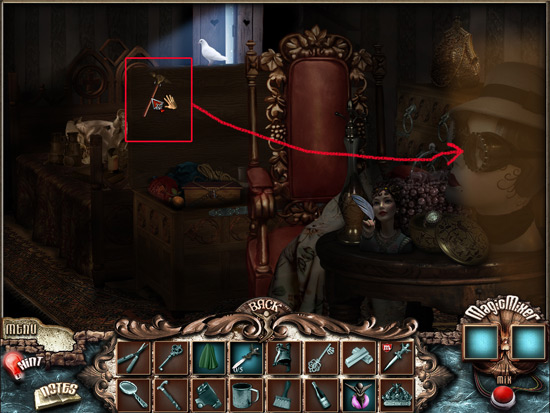
6. Then, take the hammer that was in the trunk and use it on the glass head of a statue on the right.
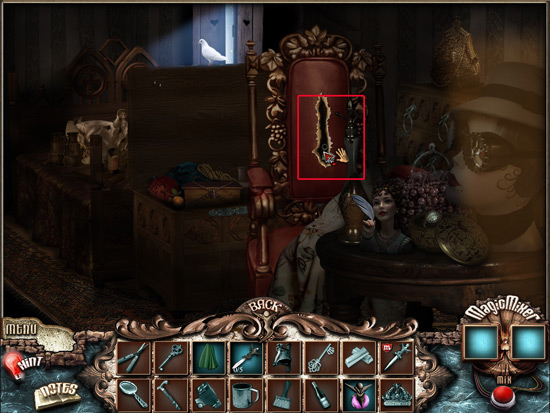
7. Once you break the glass, a piece will fall. Pick that up and use it on the chair. It will reveal a key.
8. Pick up the key and use it on the box in the trunk. The crown is in the box. Click on it to add it to your inventory.
9. Return to the queen and give her the crown. She will tell you that the jewels are missing from the crown and that you have to go find them.
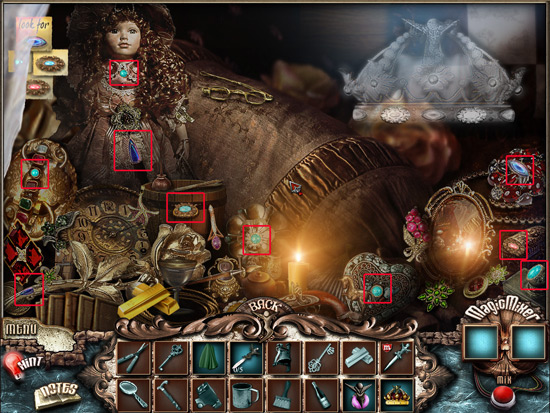
10. Go back up the stairs and click on the back of the room to the left. You will have a close up of an area to look for the jewels. There are 10 in all to find. See the solution below.
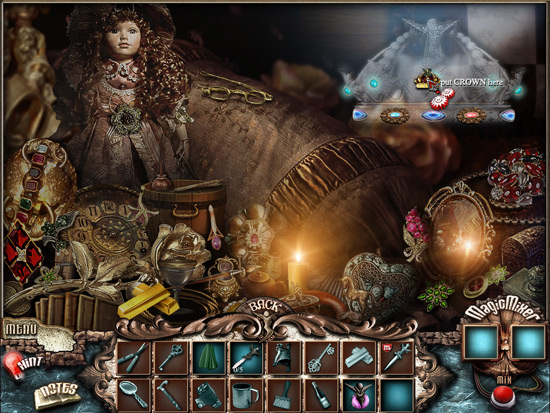
11. Once you have found all the jewels, you will need to place the crown from your inventory on the spot on the right where the jewels have been collected.
12. Now go back to the Queen and give her the crown. She will in turn, give you a letter from the king.
13. The letter reveals that you are the chosen one, the person who will find the heart of Tearstone. The King tells you to also look out for daggers as they play an important role in finding the heart.
14. Now, go back to the first room in the castle. The king told you to find the doorbell that is located between the crown and the gold star.
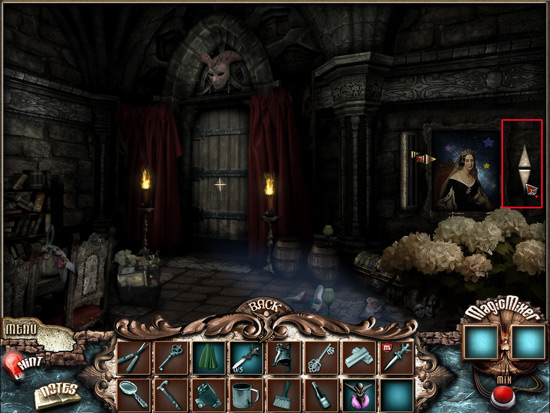
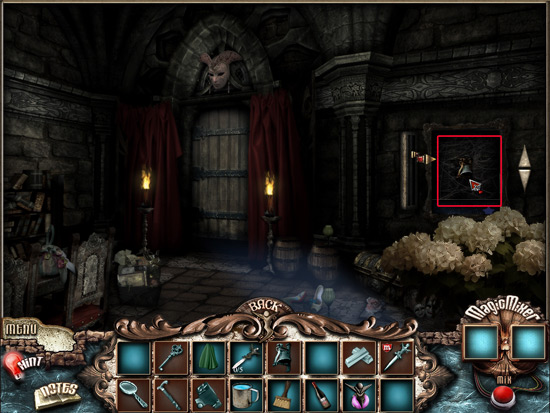
15. Look on the right side of the screen and find the painting. Next to it on the right are two arrows. Click on them to move the marker on the left up and down. Click on the arrows until the marker is between the crown and the gold star.
16. Now, go back to the monastery, and head down the path to the left where the well is.
17. Once there, click on the ladder to go down the well.
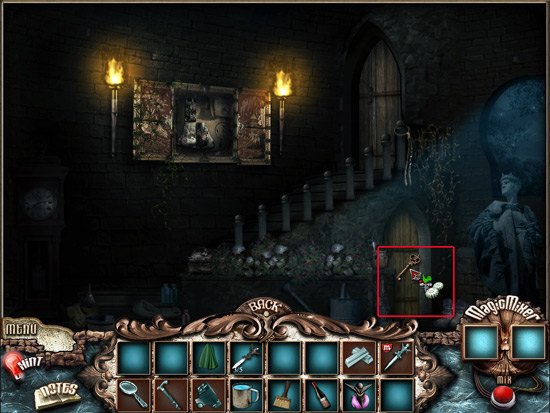
18. Take the dagger on the top of the trunk.
19. Now go to the scene with the statue and click on the part of the statue that is holding the pitcher.
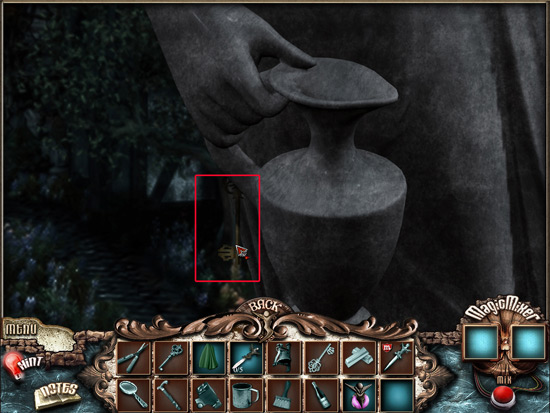
20. Click on the key hanging from the pitcher to add it to your inventory.
21. Now click back and use the key on the gallery door to get inside.
22. Grab the shears by the barrels.
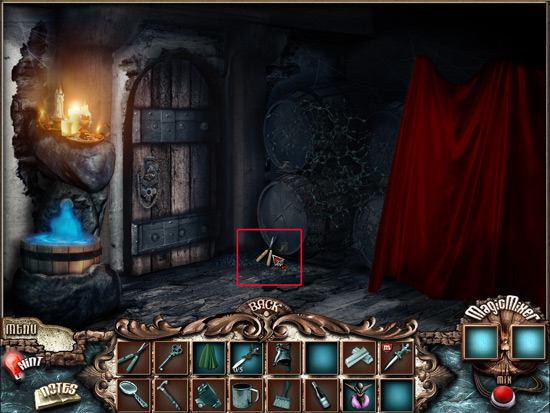
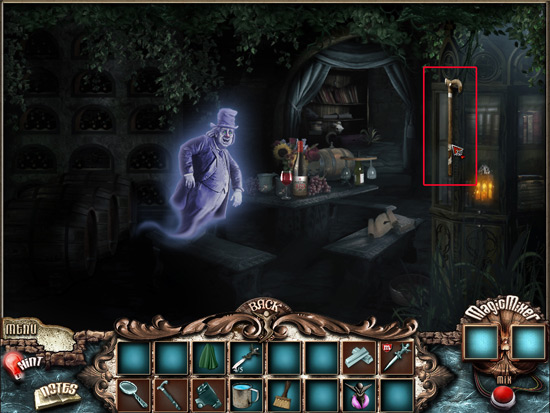
23. Pull the red curtain away to reveal what's behind it.
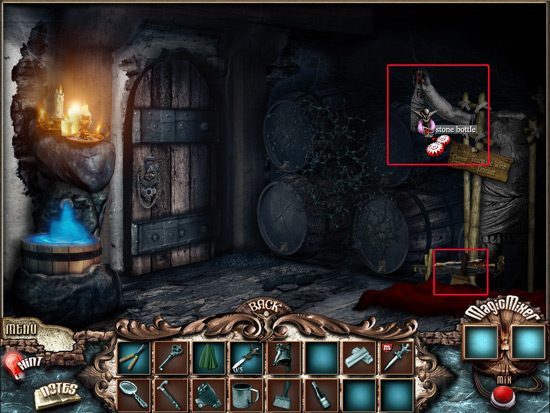
24. Now use the Magic Elixir on the stone bottle. It will become a real bottle of wine. Click on it to add it to your inventory.
25. Grab the steel brush at the bottom to add that to your inventory as well.
26. Now go back to the place where the blind musician used to be.
27. Use the shears in your inventory on the weeds on the right side of the screen.
28. Once the weeds are removed, you will see a mug. Click on it to add to your inventory.
29. Go back to the gallery.
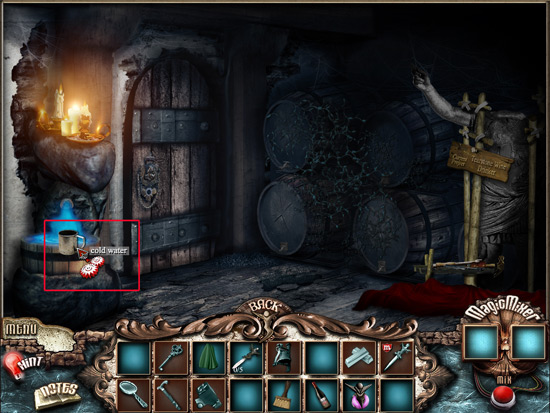
30. Use the mug on the cold water on the left to fill it up.
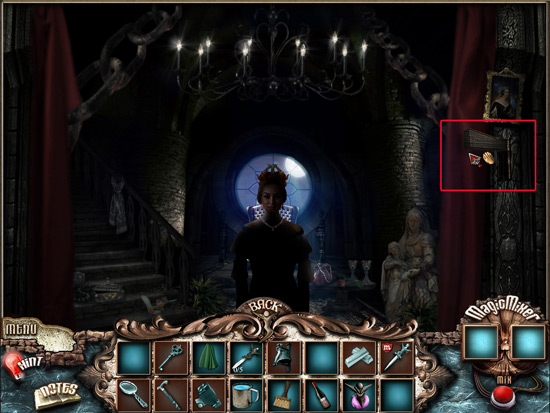
31. Now go back to the scene where the Queen is. There is a lever on the right. Click on it to activate it.
32. Now go to the first room in the castle and you will see that the painting on the right is moved to reveal the bell. If nothing has happened, you need to make sure that the marker is between the crown and the gold star.
33. Click on the bell to add it to your inventory.
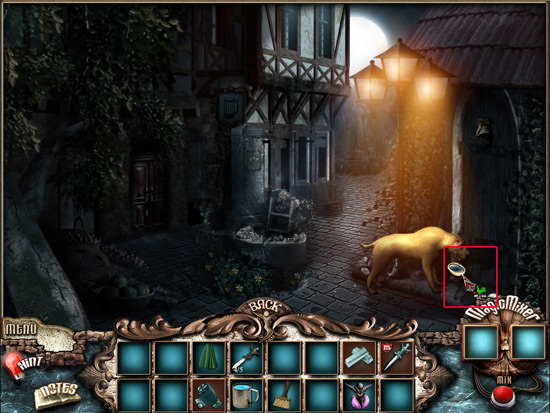
34. Now go back to the scene with the well. There is a dog by a door. Use the bell on that door.
35. Now go inside.
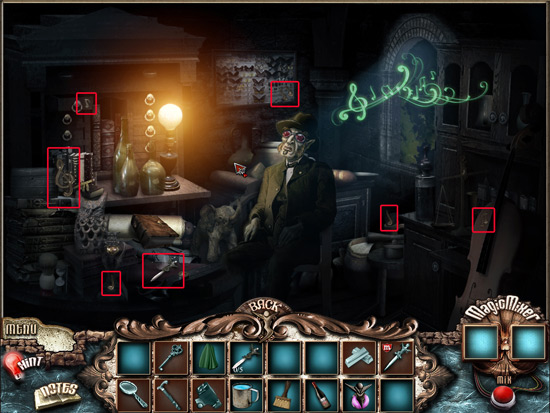
36. Click on the blind musician to talk to him. You interrupted him as he was writing a song, so you need to help him now find the melody he lost. Find the musical notes in the room. Also grab the dagger on the table.
37. When you are finished collected all the notes, he will let you look at the book on the table.
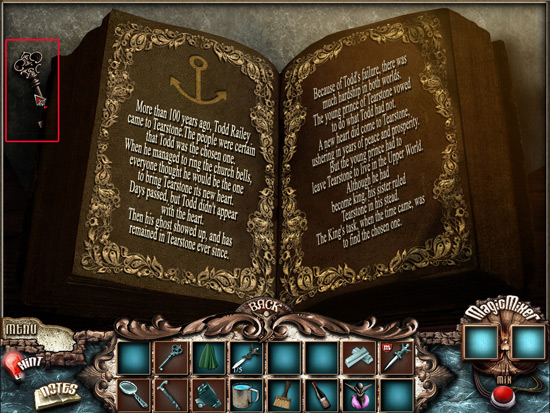
38. When you first open it, there is a key on the top left. Click on that to add it to your inventory.
39. Click on the book once to turn the page and a dagger will be revealed. Click on it to add it to your inventory.
40. Now go back to the monastery and enter. Click on the cupboard on the wall where you found a piece of the bell before. Click on the dagger at the bottom to add it to your inventory.
41. Hit back and use the basement key on the door at the bottom of the stairs.
42. Click on the dagger on the left.
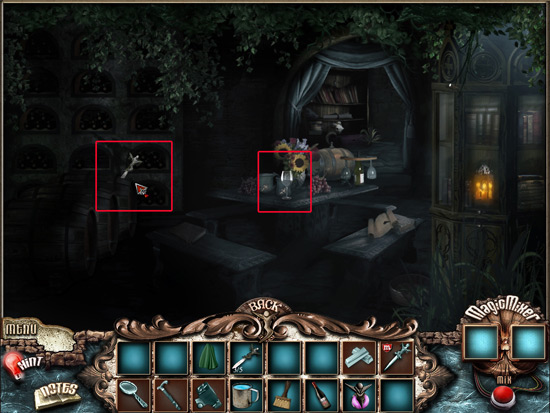
43. Now, use the wine bottle on the empty wine glass on the table.
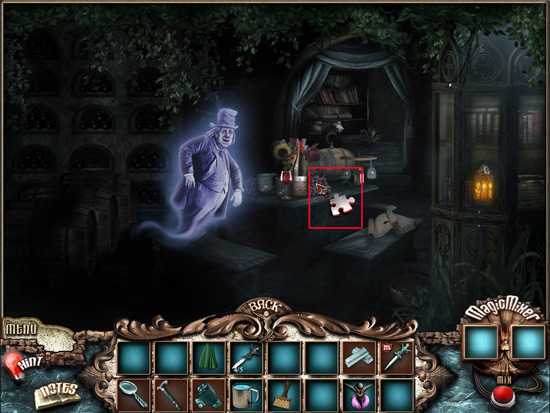
44. The ghost will then appear. Click on him to talk to him. He will tell you that he wants to help you. He says to write on the table what you want from him. Click on the table to start a mini game.
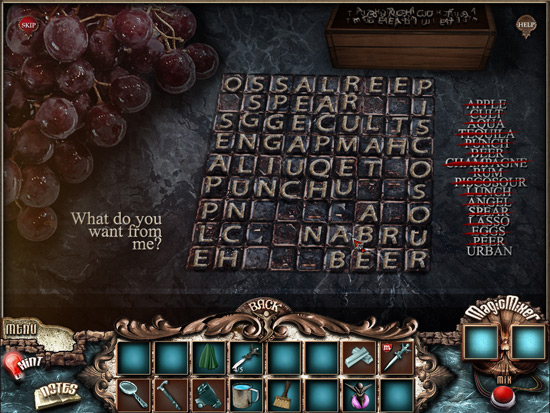
45. You will be shown next what looks like a scrabble board. You need to pick the letters from the bin at the top and then place them in the correct place on the board. See the solution below.
46. Once the mini game is over, you can talk to the ghost again. He will then give you the Monk's can. Click on it to add to your inventory.
47. Now return to outside the monastery again and give the cane to the monk.
48. In return, he will give you a magnifying glass. Click on it to add it to your inventory.
49. Then return to the scene with the dog by the well.
50. The dog is look at something… use the magnifying glass to find out what it is.
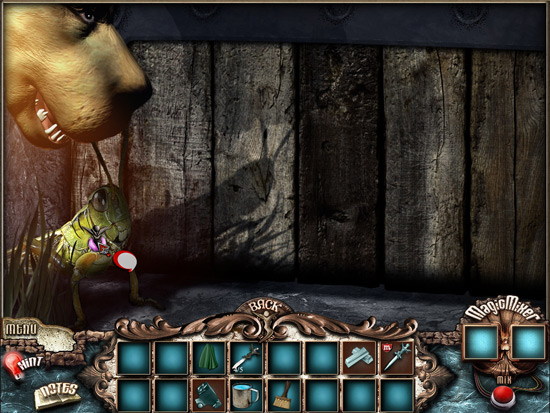
51. Talk to the grasshopper to discover that he wants your magic bottle. Give him the bottle. He will then give you the monument key. Click to add it to your inventory.
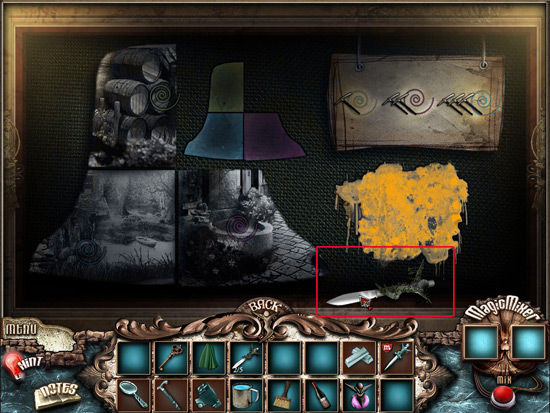
52. Now go back to the church and look at the cupboard on the wall. There is a stain there that is all yellow. Use the cold water on the stain first. Then use the green cloth on the stain to clean it up.
53. A pattern will be revealed once the stain has been removed.
54. Now return to the castle and go back up the stairs to the room where you found the crown.
55. Click on the left side of the room to enter the place where you found all the jewels.
56. There will be gold in the bottom left. Click on that to add it to your inventory.
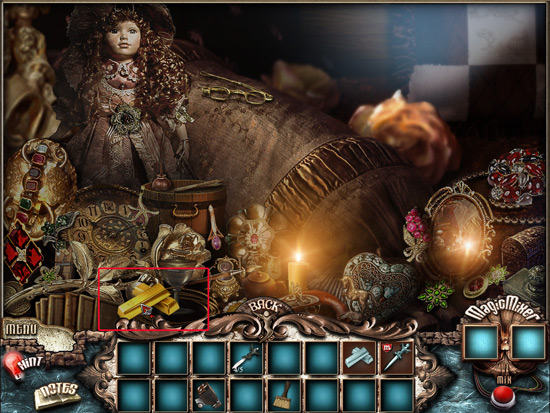
57. Now combine the gold with one of the daggers to make a golden dagger. Now go back to the bottom of the well.
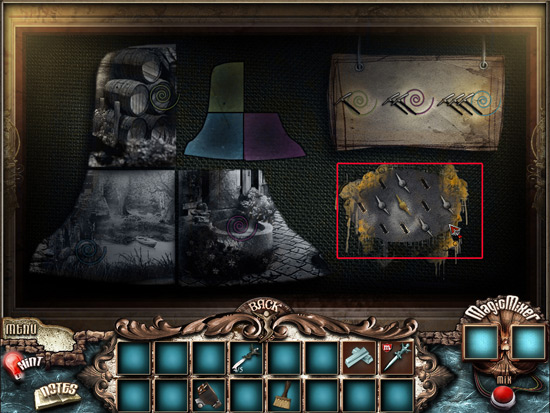
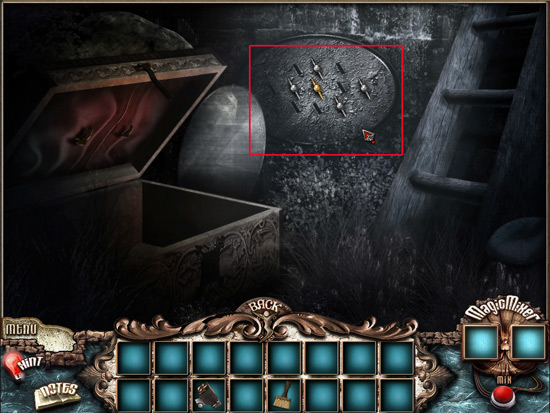
58. Place the daggers in the wall in the same pattern you found when you cleaned the stain.
59. When the daggers are in the correct spots, something will happen at the monument. Go to the scene with the statue.
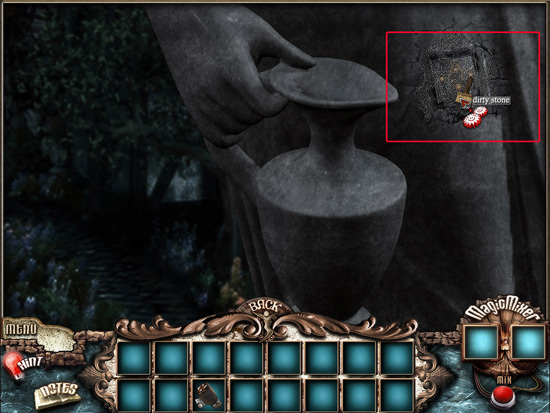
60. Click on the arm of the statue where the pitcher is. There is a section to the right of the pitcher that is dirty. Use the steel brush on this area to clean it.
61. Once it has been cleaned, you will see a keyhole. Use the monument key on keyhole.
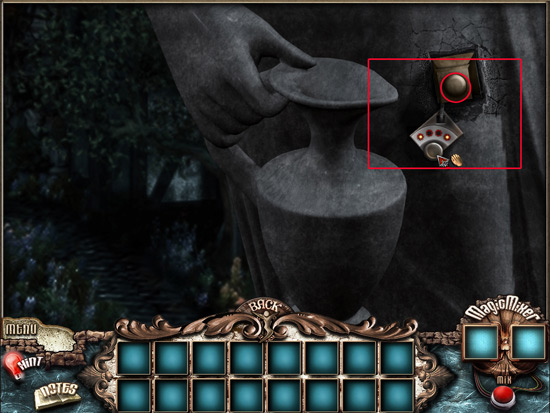
62. You will then see a knob with a key light attached to it. Click on the knob on the bottom until you see a pattern that has the first light lit, the second and third lights off, and the fourth light lit.
63. Now click on the knob at the top and you will have completed Chapter 6!
Chapter 7
Awesome! You made it to the last chapter in Tearstone! You traveled by airship to a new area.
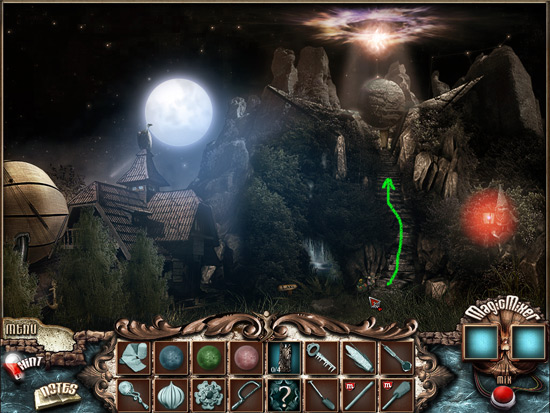
1. When you first arrive, you can go in several different directions. First go up the stairs in front of you.
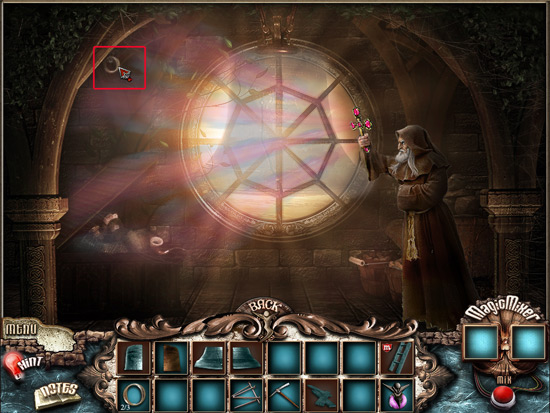
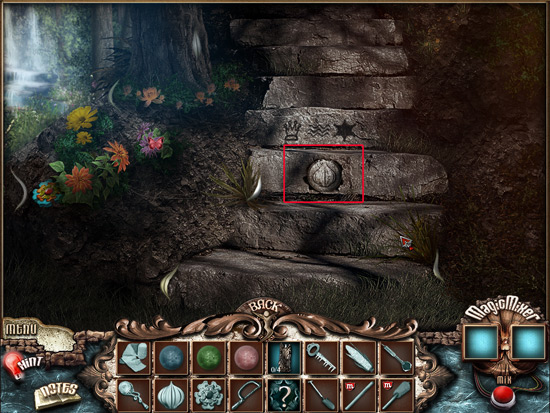
2. The next screen shows the stairs with some carvings in the middle of them. Click on the carving that looks like an onion. It's image will appear in the top right.
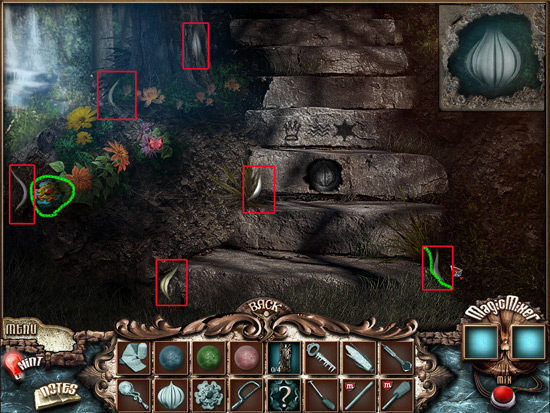
3. Now you have to find all the pieces of the onion. There is also a radio button on the left.
4. Once you have found all the pieces, the onion will be complete. Click on it to add it to your inventory.
5. Now continue up the stairs.
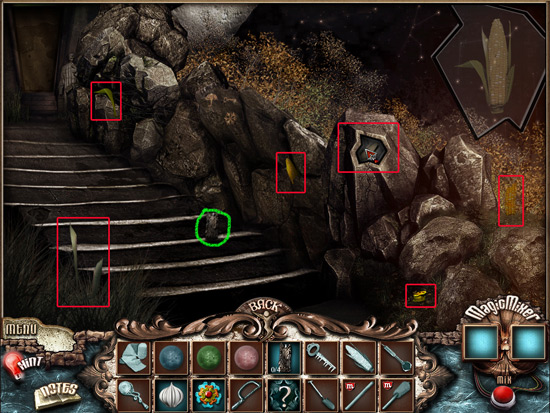
6. The next scene is very similar to the previous one. This time, you need to find the pieces of corn.
7. Click on the carved image of the corn first. Then find the pieces of the corn.
8. There is also a candle in the middle of the screen. Click on that to add it to your inventory.
9. Once you have found all the pieces of the corn, it will appear in the top right. Click on it to add it to your inventory.
10. Now, continue moving up the stairs.
11. Pick up the candle and the shovel.
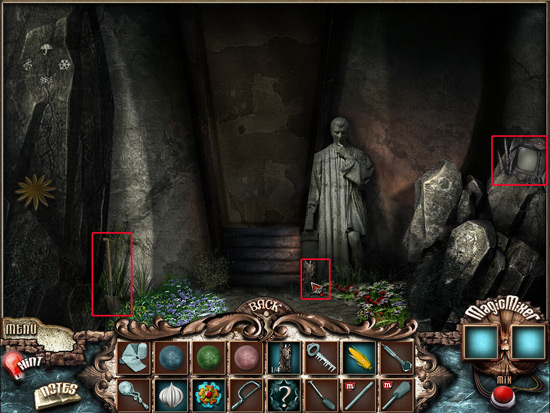
12. Then click on the TV on the right.
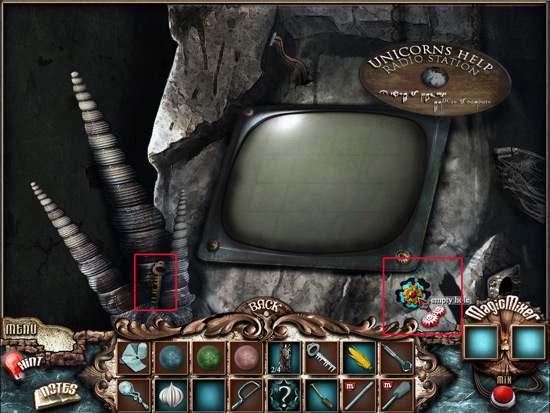
13. Click on the key on the left to add it to your inventory.
14. Now use the knob on the TV to turn it on.
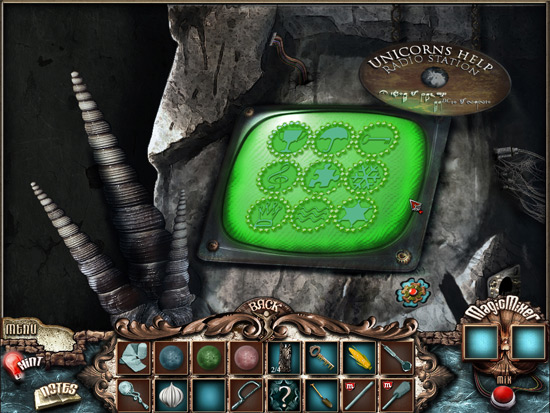
15. You need to now put the symbols in the right order. If you paid attention, there are clues on the way up the stairs. The solution is from left to right. Top: Cup, Umbrella, Key. Middle: Treble Clef, Puzzle Piece, Snowflake. Bottom: Crown, Wavy Lines, Star.
16. Once you complete the puzzle, lights will flash and the horns on the left will light up.
17. Now, return to the very first screen in this chapter.
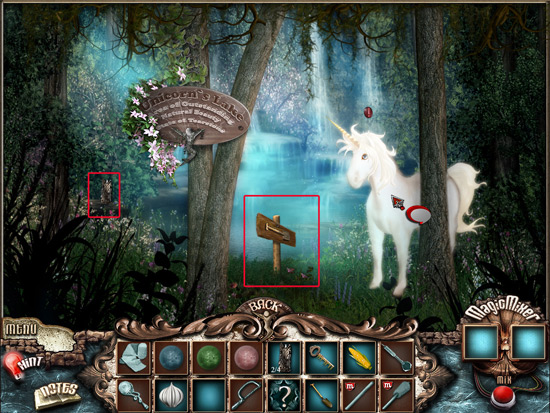
18. In the middle of the screen, you should see a sign that says lake. Click on the area it's pointing at to go to the lake.
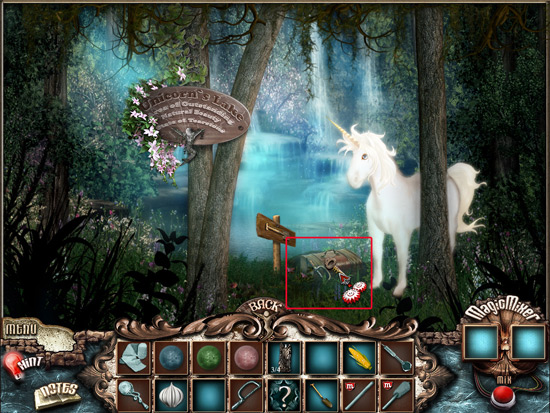
19. You will see a Unicorn in front of you. Click on him to talk to him. He talks to you in a language you don't understand.
20. Collect the candle on the left.
21. Then use the shovel you have on the plot of ground. You will need to use it three times before you can completely uncover the chest.
22. Now, use the key you found by the Unicorn radio on the chest.
23. Inside there is a hacksaw and a dart. Click on them to add them to your inventory.
24. Now go back to the first screen and click on the house on the left.
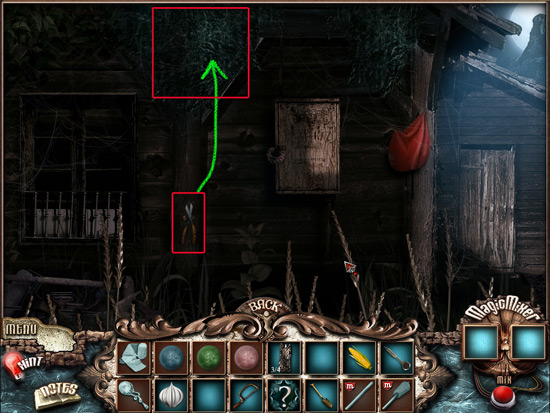
25. Grab the shears and use them on the vegetation at the top of the house.
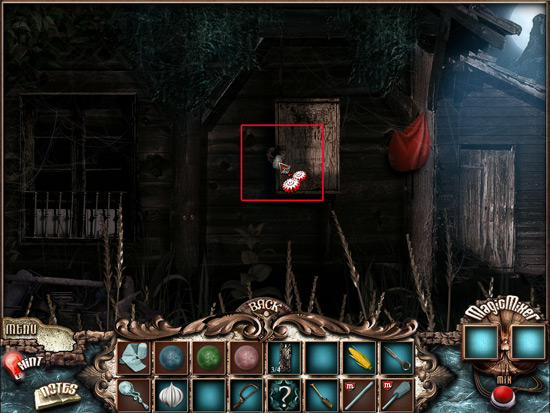
26. Behind the vegetation is a rock. Grab it and then use it to smash the lock on the fuse box in front of you.
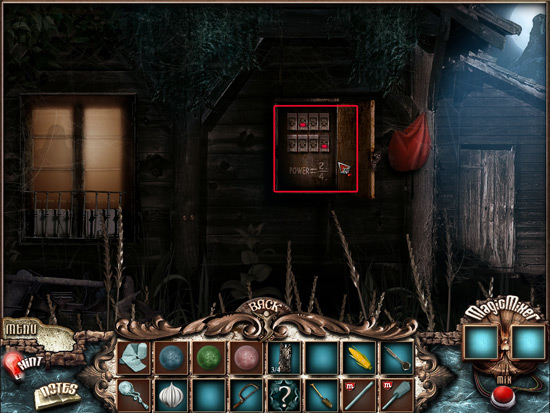
26. Once the box is open, you will see the words Power 2/4. This means that you need to hit the 2nd fuse on the top row and the 4th fuse on the bottom row to turn the power on.
27. Once the power is on, click on the door to the right.
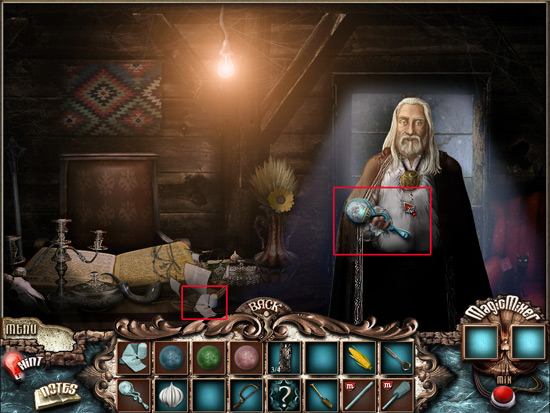
28. Inside, you'll meet the professor. Click on him and you will discover that he really is the King of Tearstone.
29. Click on the bandage on the table and the light collector he's holding.
30. Now go back to the top of the stairs.
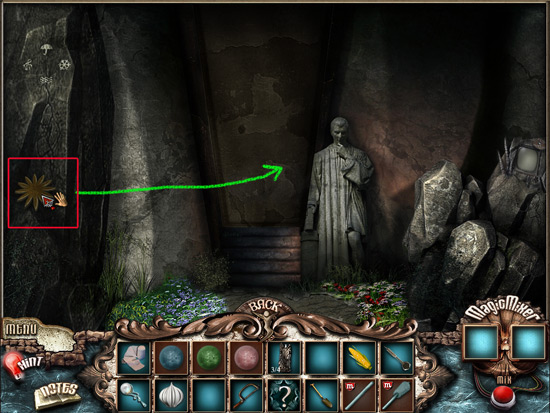
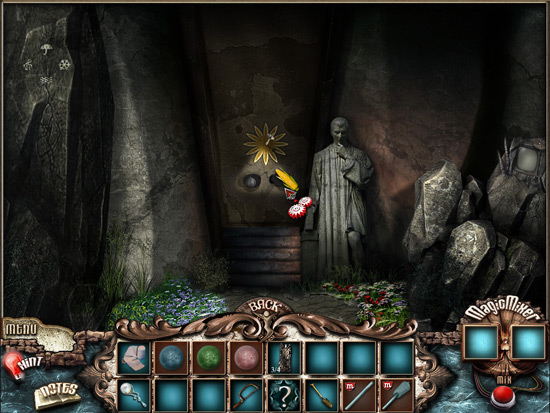
31. At the top of the stairs, take the yellow sun on the wall on the left and place it on the door in front of you.
32. Now, use the dart in your inventory on the sun. Two openings will appear.
33. Place the onion in the hole on the left and the corn in the hole on the right.
34. The door will open. Go through the door.
35. Click on the candle on the right.
36. Click to move closer.
37. Now, it's time to combine a few items. Combine the hacksaw and the shovel. This will make a stick.
38. Combine the stick you just made and the bandage. This will make the torch.
39. Then click on the carving at the bottom and place it in the center of the holes.
40. This will make the figure glow and become larger.
41. Now place each of the candles that you have in the holes on the side of the statue.
42. Use the torch on the fire on the left to light it.
43. Now use the lit torch to light the four candles in the statue.
44. Once the candles have been lit, we need to go collect the lights using the light collector.
45. Go back to the first scene of this chapter.
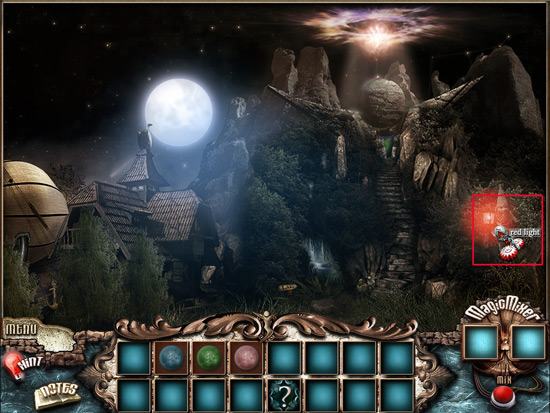
46. You should see the red light on the right in the lantern. Use the light collector on it.
47. Click on the red sphere to add it to your inventory.
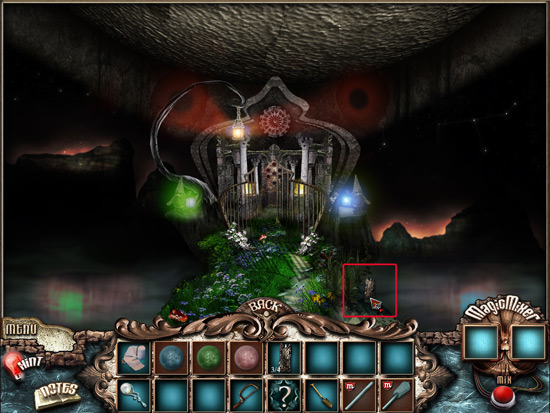
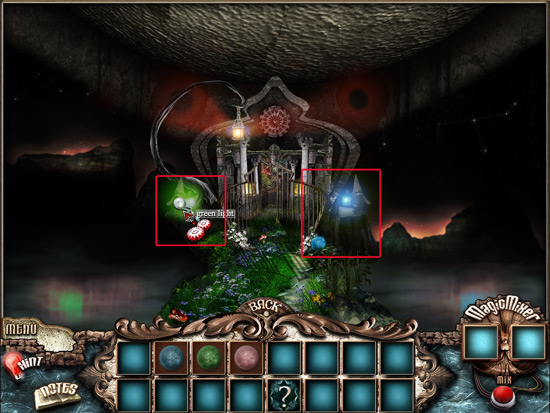
48. Now go back up the stairs to the scene with the gate and the two gnome on either side. One has the green light and the other had the blue light. Collect both and then add the two sphere to your inventory.
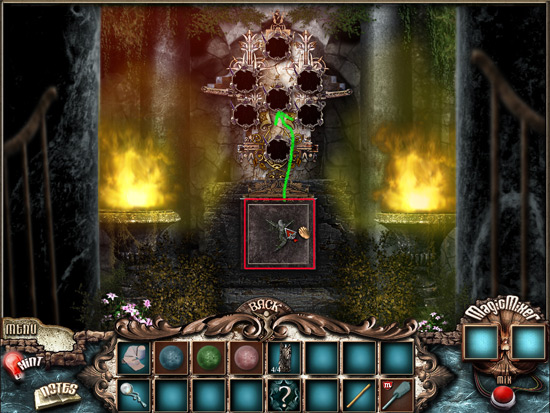
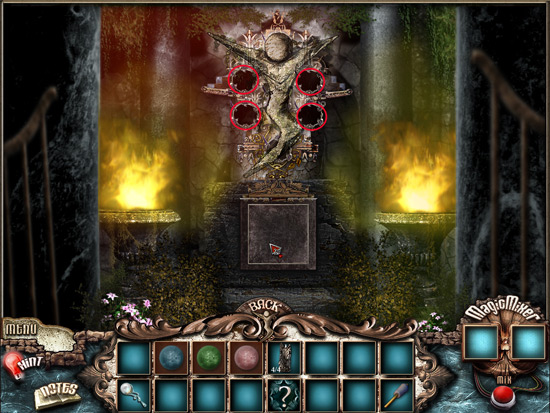
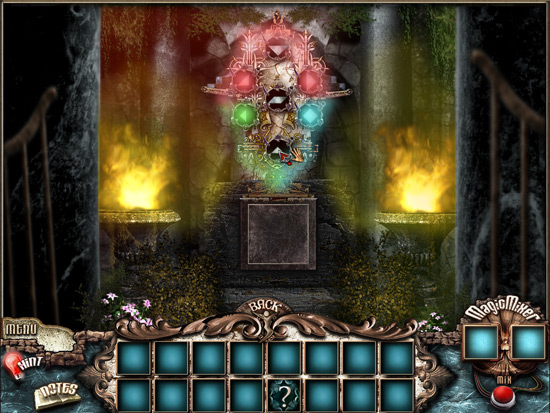
49. Now go back to the room with the statue and place the colored spheres in the spots where the candles are. Place two red on top, green on the left, and blue on the right.
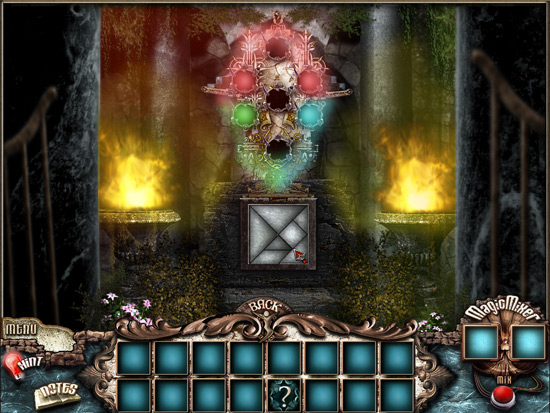
50. Once you placed the colored light in the correct places, it will become very bright and will reveal metal geometric shapes in each of the holes. You need to grab them and place them in the square at the base of the statue.
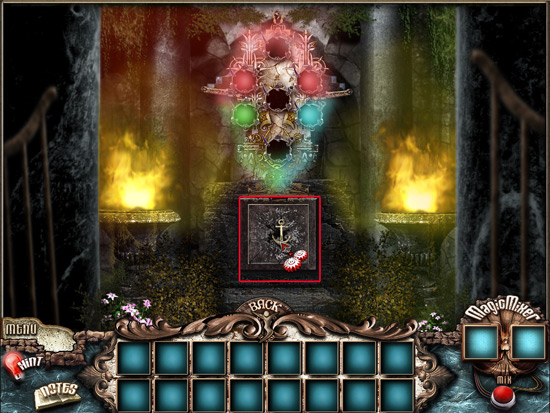
51. Once you have completed the puzzle, the ghost will appear. Click on the place where the metal pieces were and he will give you a riddle to solve.
52. The answer to the riddle is Anchor and you just happen to have one on your ship!
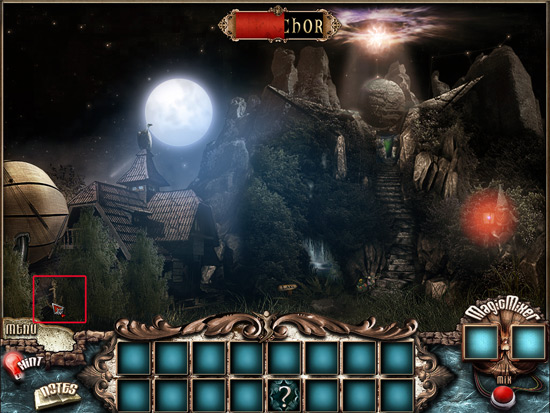
53. Go back to the first screen and click on the anchor.
54. Now bring the anchor back to the ghost and place it on the metal area.
55. This will start the final movie sequence and end the game! Congratulations!!! You completed Tearstone!
General Hints and Tips on How to Play Tearstone
If you’ve played other Hidden Object/Adventure games before, then you should be able to pick up the gameplay for Tearstone rather quickly.
A few things to keep in mind as you play:
1. When you hover over things with your cursor, it will change depending on what you can do in that particular place. Here’s a little cheat sheet for you to remember as you play.
- A green weather vane means that you can click on that area and it will take you to a new location or let you focus on an area of the screen.
- A green weather vane with gears means you can’t go on to that location unless you use something in your inventory to unlock that area… for example, it could be as simple as a key.
- Gears on their own will appear if you need to use an item in your inventory
- Exclamation points appear when you can talk to a character in the game.
- Hands mean that you can grab an item and move it to another area of the screen.
- Puzzle pieces appear when you have to solve a mini-game in order to progress to the next area.
3. The hint button is a valuable tool, not only because it well… give you hints… but it will tell you if there’s nothing to do in that area as well. Use this as a secret weapon if you’re not sure what to do. The hint button will regenerate over time so don’t worry about using it.
4. Keep your eyes open for sparkles during the game. They will point you in the right direction.
5. The mini games can be challenging and the hint button doesn’t work while you’re playing them. There is a help button to give you a clue as to what you’re supposed to do, and you can always feel free to skip the puzzle if it becomes too frustrating.
Prologue: Tutorial
Now that you kind of have an idea of what to expect about the game, let’s play! Input your name and click play to start the game. This will begin the first chapter which is really just the tutorial part of the game that will help you get familiar with how to play the game.
While playing the tutorial chapter, try to follow the instructions. The first thing you will need to do is learn how to pick things up from the screen and place them in your inventory.
1. Pick up the knife and the saw. They are indicated on the screen by the blue arrows.
2. Now use the knife on the piece of rubber band in the screen on the left under the tree. Notice that you see a set of gears appear when you hover your mouse over the rubber band. Click and you will cut the band.
3. Once you cut the band, a smaller piece of it will appear. Pick this up to add it to your inventory.
4. Now, use the saw on the tree branch in the top right of your screen. There will be a blue arrow pointing to it.
5. Once the branch is cut with the saw, you can then pick it up and add it to your inventory.
6. Now, you will learn how to use the Magic Mixer. Some items must be made in order for you to have them in your inventory. To make items, you have to join 2 other items together. Let’s try it out by taking the branch and the rubber band in your inventory and placing them in the Magic Mixer on the right. Hit the red button to combine them. Now you have a slingshot!
7. Take the slingshot and use it on the shadow of the thief in the house. This will scare him away!
8. You will now be able to move onto the next scene. Look for the blue highlighted area on the right. When you hover your cursor over that area, it will turn into a green weathervane. Remember that this means you can move to that location. Click on it to go to the next scene.
9. In the next scene, you’ll see a car and a mailbox. On the right is a blue box that is highlighted over the car. Hover your cursor over this section and you’ll see a green weathervane with gears next to it. This means you have to use an item here before you can move on to the next scene.
10. The first task in this scene is to open the mailbox. To do so, you have to find the pliers and the wire. Click on them and add them to your inventory.
11. Now use them in the Magic Mixer to create a lock pick so you can open the mailbox.
12. Use the lock pick on the mailbox keyhole to open it. Once it’s open, take the cat food and read the letter.
13. Once you read the letter, you’ll learn a little bit more about the storyline of the game. You are introduced to the Professor, who is a leading character who needs your help. He tells you that he is on the verge of an amazing discovery. He also tells you to feel free to use his car and that the keys are located behind 95. The letter no goes in your Notebook where you can look at it at any time by clicking on the Notes icon in the bottom left corner.
14. Once you are done with your Notebook, click on the close button in the bottom left of the book. Now you need to go back to the screen before. Do so by clicking on the “Back” button in the bottom middle of your screen.
15. You should now be back at the first screen. Feed the cat by putting the cat food in the bowl.
16. Now pick up the screwdriver. It was underneath the cat!
17. Once you have the screwdriver, use it on the number 95 on the house. This will remove the screws and show the key that was hidden behind it. Take the key!
18. This marks the end of the tutorial! Now that you have the key, go back to the screen that has the car and use the key on the car to get moving to the next location.
Chapter 1
Chapter one begins with your first character interaction. You'll notice the dialogue icon of a red circle with a white exclamation point above the man with the gun's head.
1. Click on the man. He tells you that he is too tired to talk to you, but that there is a path in the woods and that you should ask someone else where it is.
2. There's nothing you can do with him now, so take this time to look around. There are 3 items you need to find in this screen right now: A key, an artist's palette, and a stone ball.
3. That's all there is to do in this scene for now so it's time to move on to the next location. Move your cursor to the left of the screen until you see a green weather vane with no gears. Click here to move to the next area.
4. This next area, you can collect 2 hidden objects. The bug spray and the hammer. Click on them to add them to your inventory.
5. Next, take the key you found in the previous screen and use it to unlock the truck door.
6. Once the door is opened, you'll see a hand cursor for the first time. You will need to pick up the stone ball and place it on the scale.
7. After you place the stone on the scale, the left part of the scale will move up and a battery will be revealed. Click on the battery to add it to your inventory.
8. That's all you can do here for now. Next, you need to click on the window where the bird is sitting to move on to the next screen.
9. The next scene introduces a woman who has a bug problem. Click on her to talk to her and get a new goal. To get rid of the bugs in the house.
10. Remember the bug spray you picked up in the previous screen? Click on that in your inventory and then find all 4 bugs in the room. Once you find them, click on them with the bug spray and they will disappear.
11. Once you're done killing the bugs, the woman will talk to you again. Click on her and she will thank you for your help by giving you a compass that she says will help you through the woods.
12. Click on the compass and the loaf of bread on the couch.
13. Click on the woman one more time to discover that she has lost her fan somewhere. She asks if you find it, to please return it to her.
14. Now, return to the scene where the man is sitting on the chair. Hit the back button twice.
15. Use the battery from your inventory on the radio to turn it on. The man in the chair will now fall asleep so you can enter the house safely.
16. Click on the door of the house to enter.
17. Once in the room, there are two hidden objects you can find right away. Click on the canvas at the bottom right and the grater on the table.
18. Now put your cursor on the box on the bench. This will make a puzzle piece appear, indicating that there is a mini-game to be played here.
19. Click on the box to start the mini game.
20. This mini-game is a simple memory match game. You can click on two shapes to turn them over and reveal a color. You need to match the colors of all the shapes in order to win.
21. Here is the solution. If you get frustrated, you can always skip the puzzle by clicking on the top-left button.
22. After the mini-game is complete, the box will be open and reveals a stone ball. Click on the ball to add it to your inventory.
23. Now go back to the scene with the truck by hitting the back button and then moving forward.
24. Take the compass out of your inventory and click on the area behind the house and the truck in order to move on to the next location.
25. You will now be in a new area and you will finally get to meet the Professor. Click on him to talk to him. He wants you to try to find a way in through the gate.
26. Click on the crowbar and the stone ball to add them to your inventory.
27. Next, click on the area where the elk-like creature is on the right. You'll see a green weather vane. This will take you closer to that area.
28. In this next scene you will need to use the hammer on the wall to break it open. This will reveal a stuck valve.
29. Use the crowbar from your inventory on the stuck valve to make it move. You'll see a message that says you hear a fountain in the background.
30. Grab the stone ball on the right before you leave.
31. Hit the back button to go back to where the professor is. You'll see a fountain now in the tree on the right. Place your cursor over it and you'll see that this is another mini-game. Click on it to start the game.
32. The mini game will show you 8 different circles on the outside and you will need to pick each one of these up and place them in the holes in the middle. Below is the solution. Remember, you can always skip the mini game by clicking the skip button in the top left.
33. Once you complete the mini-game, you'll be taken back to the screen with the professor. He will want to talk to you. Click on him. He'll congratulate you and give you a magnifying glass. Click on the magnifying glass to add it to your inventory.
34. Now go back to the scene with the man sleeping in the chair.
35. Take the magnifying glass from your inventory and use it on the log on the left part of the screen.
36. The next screen shows the classic grasshopper and the ant story, and just like that story, the grasshopper needs food. He says he will help you in exchange for some.
37. Take the grater and the bread from your inventory and put it in the magic mixer. This will make bread crumbs.
38. Give the breadcrumbs to the grasshopper. In return, he will give you a magic bottle. Click on it.
39. Grab the stone ball on the mushroom and then head back to the scene with the fountain.
40. Back at the fountain, take the magic bottle and use it on the fountain. This will fill it up with water from the fountain.
41. Now click on the statue in the middle of the screen. And you'll be taken in for a closer look.
42. Once at the statue, grab the fan in the upper left corner and then use the magic bottle on the statue. This will open up some holes.
43. Now, go back to the lady with the bugs in the house and give her the fan. This will cause her to leave the house.
44. Now, use the magic mixture. Put the canvas and the paint palette together to create a forgery.
45. Pick up the stone ball on the left.
46. Now use the forgery on the painting. This will start a mini game.
47. In this mini game, you will need to find 10 differences between the real painting and the forgery. See the solution below.
48. When you complete the mini game, you will find a piece of paper with the solution to the final mini game of the chapter.
49. Go back to the screen where the stone statue is and click on it to get the close up look of the holes. You will need to place the stone balls in them in a certain order which is shown on the paper you just received. See the solution below.
50. Once the last stone ball is placed, the gate will open and the next chapter will begin.
Chapter 2
Chapter 2 begins with the first room you enter after you go through the gate, which is a mess of a room.
1. You can immediately pick up three items from this room: the knife, the lantern, and a red box.
2. You now have two choices on where you an go next. To the back right or to the back left. Put your cursor to the back right and click to proceed to the next room.
3. You'll see a hut in the next scene. Grab the small red box in the bottom and then click on the doorway of the hut to enter.
4. Inside will be a fortune teller. Click on her to talk to her and she will tell you that she knew you were coming and that if you bring her crystal ball to her, she will tell your fortune.
5. Click on the back button and go back to the scene outside the hut. You'll notice several areas here have the green weathervane with the gears, which means you need an item to unlock this area.
6. Click the back button and return to the first room you were in. It's now time to go to the left path. Click on the back left path and you'll be taken to a scene with a tree.
7. Pick up the red box on the left and use the knife from your inventory on the sack on the right.
8. Once the sack is ripped open with the knife, it will reveal the crystal ball the fortune teller was looking for. Click on it to add it to your inventory.
9. Go back to the fortune teller in the hut.
10. Give the fortune teller her crystal ball. She will then give you a recipe that will help you in a later scene. It will let you breath under water, but you first have to gather all the ingredients. Don't forget to click on the recipe before you leave.
11. Click on her one more time and she will then ask you to find her cat.
12. Leave the hut by clicking on the back button. Take the recipe out of your inventory and use it on the area on your right where all the bottles and ingredients are. This will unlock this scene.
13. You will now be in the recipe scene where you can collect some of the ingredients needed right here on this table. Collect the items shown below.
14. The one item remaining will be the honey cubes, which you will notice will have to be made from two other items in the Magic Mixer. Click on the back button to exit this scene.
15. Go back to the scene with the tree and the place you sliced open the sack. You can proceed by clicking at the end of the path to move forward to the lake scene.
16. Collect the red box on the left and the bee at the top of the screen. Then click on the stump to start a mini game.
17. For this mini game, you will have to take the tiles from the left and right as noted below and put them in the right place in order to create a picture.
18. You should be able to place all the tiles of the picture except one.
19. Now, return to the area where the hut is and use the lantern on the area directly to right to light the way.
21. This reveals another mini-game, but you're not quite ready to solve it yet. You do however, need those flowers on the right. But they are dry. Use your magic bottle on the flowers to make them come to life.
22. Click on the flowers to add them to your inventory.
23. Now combine the flowers and the bee in the Magic Mixer to create the honey cubes.
24. Return to the scene where you are mixing the recipe together and add the honey cubes to the recipe. You will now receive the magic elixir. Click on this to add it to your inventory.
25. Now that you have the elixir, you can breath underwater. Return to the scene with the lake.
26. Use the magic elixir on the lake and you'll be take to an underwater scene.
27. Find the hidden objects in this scene first: the fish, a red box, and the seashell .
28. Now, click on the box to the right to start a mini game.
29. To solve this mini game, you will need to swap tiles in order to form the right picture. The tiles don't need to be next to each other in order to sway them. Any two tiles can be swapped.
30. The easiest way to solve the puzzle is to start with the circle, which needs to be in the top-left. Then look at the borders of each tile and match the width. See the solution below.
31. Once you complete the puzzle, a sketch of the solution will be added to your notes, which will help you in a later puzzle.
32. Now combine the knife and the seashell in the magic mixer to get the pearl.
33. Hit the back button so you are back in the lake scene. Notice the cat eyes to the right? Use the fish on the spot below the cat eyes to draw out the cat.
34. The cat will appear to eat the fish. Click on the cat to add it to your inventory.
35. Go back to the fortune teller scene and give her back her cat. She will be so happy that she will give you the final red box. Click on the box to add it to your inventory.
36. Now hit the back button and go back to the place where you shined the lantern and collected the dry flowers. You now have all the red boxes and the pearl and can solve this mini game.
37. Remember that sketch you drew of the puzzle you solved earlier? This is where you need to use it. The pearl is the circle and the red boxes need to go in the places they were in the puzzle. See the solution below.
38. Once you complete the mini game, you will see a message that it sounds like something has moved somewhere. Go back to the first room you were in when you started the chapter.
39. Use the lantern on the area on the left by the skeleton. It will reveal the last tile you need to complete the puzzle by the lake.
40. Click on the puzzle piece and return to the stump by the lake.
41. Use the puzzle piece to complete the puzzle. It will now move to reveal a lever. Click on the lever to add in to your inventory.
42. Now return to the scene with the tree and the sack.
43. Use the lever on the hole in the tree.
44. Once you use the lever on the hole, stairs will appear and will mark the end of Chapter 2.
Chapter 3
Chapter 3 begins with you meeting Tommy in a strange scene with lots of electronics and vegetation.
1. Talk to Tommy and he will tell you that you need to start the alarm system to trick the guard in the next room to move away from his post so you can get to the elevator. He will help you if you bring him his toolbox.
2. There is a gold coin hidden in the room on the left of the screen, click on it to add it to your inventory.
3. Click on the doorway directly in front of you to move to the next scene.
4. The next scene features an elevator with a guard in front of it. Clicking on the guard will show that he says "Access Denied" meaning you can't get through that way. You have to get him to move.
5. You'll also notice a fountain on the left that says "One Coin, One Wish." Use the coin you found in the room before on the fountain. You will receive Tommy's Toolbox.
6. Collect another coin from the left of the room. Use this on the fountain as well to get the spider.
7. Return to Tommy and give him his toolbox.
8. Tommy will tell you he can fix the surveillance cameras now and he leaves behind a blueprint.
9. Click on the blueprint on his chair and use it on his desk area.
10. This will take you to a scene where you will see a lot of monitors and a fuse board. If you look to the left you will see the solution to this puzzle on the blueprint.
11. Find the fuses hidden in the shelves. There are 5 total.
12. Place the fuses on the fuse board so that it matches the blueprint.
13. Hit the red button when you are done to trigger the alarm.
14. Now that the alarm is going off, the guard by the elevator will have moved. Go back to that scene and go up the stairway to the right.
15. Once in this room, you can find the gold coin, the spade, and the key in the room.
16. Now use the key on the bird cage on the table to let the parrot out. Click on him to add him to your inventory.
17. That's all you can do in this room for now, so head back down the stair and use the coin you just collected on the fountain. You'll receive the eggs. Click on them to add them to your inventory.
18. Go back to the scene where Tommy was.
19. There is a telephone by the left of the door. Click on the parrot in your inventory and use him on the phone.
20. You'll be taken to a scene then with a phone. Grab the razor on the left to add it to your inventory.
21. Now, click on the phone to take it off the hook.
22. Dial 2-2-3. Click on each number and wait a second before you try to click on the next number. This will cause the guard to leave his post on the left so you can now go into that room.
23. Go back to the scene with the elevator and fountain and click on the left path.
24. You now are in a room with a statue.
25. Collect the pear from the top of the tree.
26. Use the shovel on the plot of ground in the middle of the screen. This will unearth the last gold coin and some dirt. Click the coin and the dirt to add it to your inventory.
27. Now use the razor on the poster on the wall to the right. This will unveil a seed. Click on the seed to add it to your inventory.
28. Go back to the room with the fountain now and use the last coin in the fountain to get the record. Add that to your inventory.
29. Now go back to the first room where you found Tommy. You need to start the alarm again to move the guard back over to the left so you can get up the stairs again. Click on the desk again and then click on the red alarm button. This will start the alarm again.
30. Go back up the staircase in the elevator room.
31. Once you're back in this room, click on the painting on the wall.
32. You will need to place certain items in your inventory on the painting.
33. Put the eggs in the nest on the top left.
34. Put the pear on the bear's sword
35. Put the record on the record player.
36. Put the spider on the spider web.
37. Once all four items have been place, the pass key will appear. Click on it to add it to your inventory.
38. Go back to the room with the elevator and the fountain and use the pass card on the elevator. This will start a mini game.
39. If you noticed on the pass card, it had the solution to this puzzle on it. You can refer to your notes to find it . It's also shown in the top right of this screen where it says "Tearstone Energy"
40. See the solution below.
41. Once the green light turns on, the door to the elevator is open and you can move inside.
42. Once inside, you can combine the soil and the seed you had collected before in the Magic Mixer and create a plant.
43. Place the plant in the flower pot. And then use the magic elixir on the plant.
44. The plant will grow allowing you to access the Power Supply. Click on the Power Supply sign to start a mini game.
45. The Power Supply game can be a little tricky. You have to place the pieces on the right into the gray squares on the left. But, you can't rotate them, so they have to fit perfectly just the way they are. See the solution below.
46. Once you have completed the puzzle, the elevator will work. Click on it to enter and end Chapter 3.
Chapter 4
Chapter 4 begins as you get off the elevator and you are suddenly in a very strange land.
1. First thing you need to do is to find the hidden objects in the first scene, which is the green ball and the blue ball.
2. Once you collect the balls, click on the area to the left where you can see the roof of a house to go to the next scene.
3. In this scene, you can find three hidden items. A red ball, a green ball, and the No. 2. Click on each of these to add them to your inventory.
4. Now click on the center of the screen where the green weather vane appears, to move on to the next scene.
5. Here you can find 4 hidden items, a green ball, a red ball, a blue ball, and a walnut. Click on each of them to add them to your inventory.
6. Now return to the scene where you first got off the elevator.
7. Use the walnut on the flat surface under the squirrel to the right. He will move out of the way so you see inside the den.
8. Once the squirrel moves out of the way, click on the hole.
9. Find the hidden objects in the scene. You can find the No. 2 coin and sewing needles.
10. Use the magic elixir on the stone crown and collect the red balls that appear.
11. Go back to the scene with the house and click on the door to start a mini game.
12. In this mini game, you have in front of you 4 red buttons and the word Open.
13. If you notice there is a pattern by each letter. You have to press the buttons in this pattern for each letter and then after each pattern, hit the door knocker to enter it.
14. The first pattern is for the Letter O. Press the buttons as shown below and then click on the knocker.
15. The next letter is P.
16. Next is E.
17. And finally N.
18. Once you input all the letters, you'll hear a click and you'll be able to enter the house.
19. Once in the house, find the hidden items: a blue ball, a red ball, and a pair of scissors.
20. Talk to the woman, who is Tommy's wife. She will help you get to Tearstone, but first you need to get some items for her. A list will appear after you talk to her. Click on the list to add it to your inventory.
21. Now use the list on the box on the bed.
22. You will be able to find all the items except the scarf. You will even find an item, the machine part, that's not on the list, but in your inventory.
23. Once you find all the items except the scarf, leave the house and go back to the first scene with the elevator.
24. Use the scissors on the sheep. A pile of wool will appear. Click on it to add it to your inventory.
25. Now use the wool and the sewing needles in the Magic Mixer to create a scarf. This is the final item on the list for Tommy's wife.
26. Go back to the house and click on the box again.
27. Now move the scarf into the box and the list will be complete.
28. Click on the box to seal it and a TS Token will appear. Click on the token to add it to your inventory.
29. Go back to Tommy's wife and give her the carton from your inventory. She will then give you a key. Click on the key to add it to your inventory.
30. Go to the scene with the airship and use the token on the telescope. This will start a mini game.
31. This mini game is fairly easy. You just need to swap the vertical pieces to complete the puzzle. The pieces don't have to be next to each other.
32. The completed puzzle is shown below.
33. Once you complete the puzzle, you'll realize that it's a billboard and it has a number. "EW 5263." You will write this down in your notes. You will need this information later in the chapter.
34. Now, go back to the scene outside of Tommy's House. There is a cabinet on the right. Use the key that Tommy's wife gave you to open the door.
35. This will start another mini game.
36. First thing you need to do as put the machine together using the items on the sides. If you're correct in the placement, the part will lock into place.
37. Once you have complete assembled the machine, take the machine part from your inventory and place it in the center.
38. Now it's time to use all the colored balls you've been gathering. You'll notice on the machine part in the center that there are colors all around it. It's showing you what the pattern of the balls should be.
39. Once you put all the balls in place, you will be able to pick up the fuel for the airship. Click on it to add it to your inventory.
40. Now return to the scene with the airship.
41. Place the fuel in the fuel slot.
42. Now, click on the airship to the left to start the final mini game of the chapter.
43. You will see numbers at the top connected to wires. You need to follow the wire down to the bottom area and place the right number in the slot. You will need to use the 2 coins you have with the No. 2 on them to fill in any places were a "2" goes.
44. Also, you will need to put in a code on the left. So the little EW before the 4 slots? You found that number on the billboard. 5263. See the solution below.
45. Once you input all the numbers correctly, this will end the chapter and you will travel to Tearstone on the airship.
Chapter 5
Congratulations! You have finally made it to Tearstone! Now it's time to explore the island!
1. Pick up the nails in the bottom right of the screen to add them to your inventory.
2. Click on the right part of the screen to move to the next scene.
3. In the next scene you will see a blind musician. Click on him to talk to him and you'll discover that he wants you to give his dog a treat. This will be added to your goals
4. Go back to the first screen and now head to the left side of the building.
5. You should see a dog toy near the door on the left. Click on it to add it to your inventory.
6. Now head back to the blind musician and give the dog toy to the dog.
7. The man will thank you for your kindness by giving you some clock hands. Click on them to add them to your inventory.
8. Now go back to the first screen and head to the left again. Click on middle of the screen to head forward one more screen. You will now be in a scene with a statue and a man standing before it.
9. Click on the man standing next to the statue to talk to him. He wants you to repair the statue but you don't know what it looked like.
10. Go back to the screen before. There is a section of the wall that's pushed out in the middle of the screen. Click on this to start a mini game.
11. In this mini game, you have to complete the puzzle by clicking on the puzzle pieces on the sides and placing them in the holes in the middle of the screen. See the solution below.
12. Once you complete the puzzle it should look like the following:
13. Once you've solved the puzzle, go back to the statue and click on the bottom of the statue. The pieces of the statue will be scattered throughout the next scene.
14. Find all 10 pieces of the statue to complete the puzzle. Then click on the bag in the top left corner when you are finished.
15. Go back to the statue and use the bag on the head of the statue. This will start another puzzle where you will have to put the statue back together. If you check in your notes, you will have the sketch of what it needs to look like. The solution is below.
16. As soon as you complete the puzzle, go back to the man by the statue and click on him to talk. He is very thankful that you fixed the statue and he invites you to his house to meet his wife.
17. Grab the planks that appear behind the man and then click on the door on the left to enter the building.
18. Once inside, you'll see the man and his wife. Notice the newspaper under the man's arm? Take not of the picture and the number 1645. You will need this information later.
19. Click on his wife to talk to her. She is happy you repaired the statue and offers you some cheese.
20. Take the cheese and put it on the ground near the mouse hole. This will cause the mouse to come out and the cat on the left will chase the mouse.
21. Once the cat disappears, a hammer will appear. Click on the hammer and you will pick it up.
22. Use the hammer on the jar directly behind it… the one the balloons are attached to. This will break it, revealing a lighter. Click on the lighter to add it to your inventory.
23. Now use the lighter on the candle in the upper left corner to light it. This will reveal a needle in the cobwebs by the candle.
24. Click on the need to grab it and then use it on the balloons to pop them. A small key will appear. Click on the key to add it to your inventory.
25. Go back to the scene where you met the blind musician and his dog.
26. Use the key on the cabinet just to the left of the musician. This will take you to a new scene.
27. In the new scene, you'll see a lantern on the right and an O on the wall on the left. Grab the O.
28. Use the lighter on the lantern.
29. Once the lantern is lit, a clock face and some gears will appear from the darkness.
30. Use the clock hands in your inventory on the clock face.
31. Now the gears on the right control the clock hands. Remember 1645 that you saw on the newspaper? This is the time you need to input. 1645 is military time for 4:45. However, the clock is backwards. The hour hand needs to be facing the 4 on this clock and the minute hand needs to be facing the 9 mark. If the clock was normal, it would read 8:15. The clock will glow when you set the right time.
32. Go back to the blind musician and watch as the owl puts the top hat on… now for some reason you can enter the monastery in the first scene.
33. Go back to this scene and enter the monastery.
34. Click on the monk to talk to him. He welcomes you to Tearstone and asks that you find a cross in the attic for him.
35. Click on the note that he leaves for you to add it to your inventory and then click on the cabinet on the wall to play a mini game.
36. With this mini game, when you click on a tile, it will reveal a number. You need to reveal the numbers in order from 1 to 9. If you make a mistake, all the tiles will turn back over. See the solution below.
37. Once you complete the mini game, you can now click on the open cabinet for a closer view.
38. Take the O and the part of the bell.
39. Go back and then click on the door at the top of the stairs.
40. Click on the pick ax on the right and then use the note the monk gave you on the box of items on the left.
41. You will be taken to a closer look at the box and you will need to tidy up the box by pairing items that go together.
a. Need and thread
b. Ink bottle and pen
c. Chess pieces, a rook and a knight
d. Birthday candle and a cake
e. An envelope and a stamp
f. Note and a treble
42. Once you have found all the pairs, click on the little red arrow in the left under where it has the instructions for the screen.
43. Now, you have to find the fragments of the cross. See the solution below.
44. Next, you need to find the rubies for the cross. The first three are pretty easy to find. The fourth one is hidden behind the list.
45. Use your lighter on the bottom right corner of the list to burn it away and reveal the final ruby. Collect all 4 rubies.
46. Once you are done collecting the rubies, the monk will appear and the cross will be in your inventory.
47. Give the monk the cross. He will tell you that you are chosen one and that you need to put together the pieces of the bell.
48. Click on the O in the top left corner.
49. Go back to the blind musician.
50. Use the pick ax on the pile of rocks on the left. You will have to do this 3 times to reveal a piece of the bell. Click on the piece of bell to add it to your inventory.
51. Go back to the courtyard where the well is. Use your pickax on the well.
52. Combine your nails and the planks to create a ladder.
53. Use the ladder on the well.
54. Click to go down the well.
55. At the bottom of the well, place all of the Os that you have on the box on the left so that it says "Open the Old Box."
56. A ghost will then appear and opens the box for you.
57. Now, use the magic elixir on the old stone. It will then turn into a piece of the bell.
58. Head back out to the scene with the statue.
59. Use the pick ax on the barrel on the right.
60. The final piece of the bell will be in the barrel. Click on it to add it to your inventory.
61. Now go back to the monk in the attic.
62. In the attic, take each piece of the bell and place them in the window.
63. Once the bell has been put together it will ring and Chapter 5 will end!
Chapter 6
Chapter 6 begins with you back outside of the monastery and it is nighttime. You will see a monk sitting on a bench in front of you.
1. Click on the monk to talk to him and he will tell you that the gates of the castle are now open and you should go there. He also lost his cane and thinks the ghost stole it. He wants you to find it for him.
2. When you are finished talking to him, go down the path on the right where the blind musician used to be. Click on the gates on the left to go to the castle.
3. Take the green cloth hanging on the left of the screen and then enter through the door in front of you.
4. The Queen will be before you. Click on her to speak to her. She asks you to bring her the crown. Go up the stairs on the left of the screen.
5. Click on the crowbar to grab it and then use it on the trunk it was leaning against.
6. Then, take the hammer that was in the trunk and use it on the glass head of a statue on the right.
7. Once you break the glass, a piece will fall. Pick that up and use it on the chair. It will reveal a key.
8. Pick up the key and use it on the box in the trunk. The crown is in the box. Click on it to add it to your inventory.
9. Return to the queen and give her the crown. She will tell you that the jewels are missing from the crown and that you have to go find them.
10. Go back up the stairs and click on the back of the room to the left. You will have a close up of an area to look for the jewels. There are 10 in all to find. See the solution below.
11. Once you have found all the jewels, you will need to place the crown from your inventory on the spot on the right where the jewels have been collected.
12. Now go back to the Queen and give her the crown. She will in turn, give you a letter from the king.
13. The letter reveals that you are the chosen one, the person who will find the heart of Tearstone. The King tells you to also look out for daggers as they play an important role in finding the heart.
14. Now, go back to the first room in the castle. The king told you to find the doorbell that is located between the crown and the gold star.
15. Look on the right side of the screen and find the painting. Next to it on the right are two arrows. Click on them to move the marker on the left up and down. Click on the arrows until the marker is between the crown and the gold star.
16. Now, go back to the monastery, and head down the path to the left where the well is.
17. Once there, click on the ladder to go down the well.
18. Take the dagger on the top of the trunk.
19. Now go to the scene with the statue and click on the part of the statue that is holding the pitcher.
20. Click on the key hanging from the pitcher to add it to your inventory.
21. Now click back and use the key on the gallery door to get inside.
22. Grab the shears by the barrels.
23. Pull the red curtain away to reveal what's behind it.
24. Now use the Magic Elixir on the stone bottle. It will become a real bottle of wine. Click on it to add it to your inventory.
25. Grab the steel brush at the bottom to add that to your inventory as well.
26. Now go back to the place where the blind musician used to be.
27. Use the shears in your inventory on the weeds on the right side of the screen.
28. Once the weeds are removed, you will see a mug. Click on it to add to your inventory.
29. Go back to the gallery.
30. Use the mug on the cold water on the left to fill it up.
31. Now go back to the scene where the Queen is. There is a lever on the right. Click on it to activate it.
32. Now go to the first room in the castle and you will see that the painting on the right is moved to reveal the bell. If nothing has happened, you need to make sure that the marker is between the crown and the gold star.
33. Click on the bell to add it to your inventory.
34. Now go back to the scene with the well. There is a dog by a door. Use the bell on that door.
35. Now go inside.
36. Click on the blind musician to talk to him. You interrupted him as he was writing a song, so you need to help him now find the melody he lost. Find the musical notes in the room. Also grab the dagger on the table.
37. When you are finished collected all the notes, he will let you look at the book on the table.
38. When you first open it, there is a key on the top left. Click on that to add it to your inventory.
39. Click on the book once to turn the page and a dagger will be revealed. Click on it to add it to your inventory.
40. Now go back to the monastery and enter. Click on the cupboard on the wall where you found a piece of the bell before. Click on the dagger at the bottom to add it to your inventory.
41. Hit back and use the basement key on the door at the bottom of the stairs.
42. Click on the dagger on the left.
43. Now, use the wine bottle on the empty wine glass on the table.
44. The ghost will then appear. Click on him to talk to him. He will tell you that he wants to help you. He says to write on the table what you want from him. Click on the table to start a mini game.
45. You will be shown next what looks like a scrabble board. You need to pick the letters from the bin at the top and then place them in the correct place on the board. See the solution below.
46. Once the mini game is over, you can talk to the ghost again. He will then give you the Monk's can. Click on it to add to your inventory.
47. Now return to outside the monastery again and give the cane to the monk.
48. In return, he will give you a magnifying glass. Click on it to add it to your inventory.
49. Then return to the scene with the dog by the well.
50. The dog is look at something… use the magnifying glass to find out what it is.
51. Talk to the grasshopper to discover that he wants your magic bottle. Give him the bottle. He will then give you the monument key. Click to add it to your inventory.
52. Now go back to the church and look at the cupboard on the wall. There is a stain there that is all yellow. Use the cold water on the stain first. Then use the green cloth on the stain to clean it up.
53. A pattern will be revealed once the stain has been removed.
54. Now return to the castle and go back up the stairs to the room where you found the crown.
55. Click on the left side of the room to enter the place where you found all the jewels.
56. There will be gold in the bottom left. Click on that to add it to your inventory.
57. Now combine the gold with one of the daggers to make a golden dagger. Now go back to the bottom of the well.
58. Place the daggers in the wall in the same pattern you found when you cleaned the stain.
59. When the daggers are in the correct spots, something will happen at the monument. Go to the scene with the statue.
60. Click on the arm of the statue where the pitcher is. There is a section to the right of the pitcher that is dirty. Use the steel brush on this area to clean it.
61. Once it has been cleaned, you will see a keyhole. Use the monument key on keyhole.
62. You will then see a knob with a key light attached to it. Click on the knob on the bottom until you see a pattern that has the first light lit, the second and third lights off, and the fourth light lit.
63. Now click on the knob at the top and you will have completed Chapter 6!
Chapter 7
Awesome! You made it to the last chapter in Tearstone! You traveled by airship to a new area.
1. When you first arrive, you can go in several different directions. First go up the stairs in front of you.
2. The next screen shows the stairs with some carvings in the middle of them. Click on the carving that looks like an onion. It's image will appear in the top right.
3. Now you have to find all the pieces of the onion. There is also a radio button on the left.
4. Once you have found all the pieces, the onion will be complete. Click on it to add it to your inventory.
5. Now continue up the stairs.
6. The next scene is very similar to the previous one. This time, you need to find the pieces of corn.
7. Click on the carved image of the corn first. Then find the pieces of the corn.
8. There is also a candle in the middle of the screen. Click on that to add it to your inventory.
9. Once you have found all the pieces of the corn, it will appear in the top right. Click on it to add it to your inventory.
10. Now, continue moving up the stairs.
11. Pick up the candle and the shovel.
12. Then click on the TV on the right.
13. Click on the key on the left to add it to your inventory.
14. Now use the knob on the TV to turn it on.
15. You need to now put the symbols in the right order. If you paid attention, there are clues on the way up the stairs. The solution is from left to right. Top: Cup, Umbrella, Key. Middle: Treble Clef, Puzzle Piece, Snowflake. Bottom: Crown, Wavy Lines, Star.
16. Once you complete the puzzle, lights will flash and the horns on the left will light up.
17. Now, return to the very first screen in this chapter.
18. In the middle of the screen, you should see a sign that says lake. Click on the area it's pointing at to go to the lake.
19. You will see a Unicorn in front of you. Click on him to talk to him. He talks to you in a language you don't understand.
20. Collect the candle on the left.
21. Then use the shovel you have on the plot of ground. You will need to use it three times before you can completely uncover the chest.
22. Now, use the key you found by the Unicorn radio on the chest.
23. Inside there is a hacksaw and a dart. Click on them to add them to your inventory.
24. Now go back to the first screen and click on the house on the left.
25. Grab the shears and use them on the vegetation at the top of the house.
26. Behind the vegetation is a rock. Grab it and then use it to smash the lock on the fuse box in front of you.
26. Once the box is open, you will see the words Power 2/4. This means that you need to hit the 2nd fuse on the top row and the 4th fuse on the bottom row to turn the power on.
27. Once the power is on, click on the door to the right.
28. Inside, you'll meet the professor. Click on him and you will discover that he really is the King of Tearstone.
29. Click on the bandage on the table and the light collector he's holding.
30. Now go back to the top of the stairs.
31. At the top of the stairs, take the yellow sun on the wall on the left and place it on the door in front of you.
32. Now, use the dart in your inventory on the sun. Two openings will appear.
33. Place the onion in the hole on the left and the corn in the hole on the right.
34. The door will open. Go through the door.
35. Click on the candle on the right.
36. Click to move closer.
37. Now, it's time to combine a few items. Combine the hacksaw and the shovel. This will make a stick.
38. Combine the stick you just made and the bandage. This will make the torch.
39. Then click on the carving at the bottom and place it in the center of the holes.
40. This will make the figure glow and become larger.
41. Now place each of the candles that you have in the holes on the side of the statue.
42. Use the torch on the fire on the left to light it.
43. Now use the lit torch to light the four candles in the statue.
44. Once the candles have been lit, we need to go collect the lights using the light collector.
45. Go back to the first scene of this chapter.
46. You should see the red light on the right in the lantern. Use the light collector on it.
47. Click on the red sphere to add it to your inventory.
48. Now go back up the stairs to the scene with the gate and the two gnome on either side. One has the green light and the other had the blue light. Collect both and then add the two sphere to your inventory.
49. Now go back to the room with the statue and place the colored spheres in the spots where the candles are. Place two red on top, green on the left, and blue on the right.
50. Once you placed the colored light in the correct places, it will become very bright and will reveal metal geometric shapes in each of the holes. You need to grab them and place them in the square at the base of the statue.
51. Once you have completed the puzzle, the ghost will appear. Click on the place where the metal pieces were and he will give you a riddle to solve.
52. The answer to the riddle is Anchor and you just happen to have one on your ship!
53. Go back to the first screen and click on the anchor.
54. Now bring the anchor back to the ghost and place it on the metal area.
55. This will start the final movie sequence and end the game! Congratulations!!! You completed Tearstone!
Content(s) of this game guide may not be copied or
published on any other site without permission from Casual Game Guides.
©CasualGameGuides.com 2006 - 2021
