The Game:
Warning! This is a step by step walkthrough so please use it sparingly and only if you are stuck. There are so many places to explore and things to do. Turn your lights down and take your time playing this game. It is the next best thing to actually being in Egypt. The game is non-linear. Follow Gil's advice, "Assume nothing, examine everything, and of course write exhaustive notes. And, what ever you do, Do Not give up! Clues abound everywhere and there are multiple clues for each puzzle. There is a warp arrow that can transport you fast from one place to another previously visited site. Use it only after you are sure that you have examined the areas in between thoroughly. Be sure to place items in the inventory bag after using it. Do not click an inventory item over another item - if you do, it will go back where you got it from and that's usually a long trek but it is also a good way to remove excess inventory like stars or arrows.
HINTS:
If the player wants to go through with minimum trekking on his own, start at the Gil's tent, sphinx site, Great Pyramid, Cheoptronic, King's Chamber, Queen's Chamber and back to the Sphinx.
WALKTHROUGH:
After landing on the heliport, go to the farthest tent (Gil's).
GIL'S TENT:
Pick up Gil's tape, click eject, insert tape, adjust the volume of the tape recorder, press play. Listen to Gil's tape that's on the desk and read the letter. Heed Gil's warning. Check the box on the bed containing Gil's possessions. Take note of the numbers written on a scrap of paper behind one of the cards (R 6:10, L 15:24, R 8:25). Take note of the numbers of Gil's Campus ID (1 007-72-33-1334). Using the Bible (Book of Numbers) found under the candle box, correlate the numbers written on the scrap of paper with passages from the bible. Passage 6:10 speaks about 2 turtle doves or 2 young pigeons; passage 15:24 about one young bull and one male goat; passage 8:25 talks about age of fifty. Look in carton box at the opposite corner of the tent and take note of the discarded empty carton of a padlock. Turn the carton and read the procedure in the back of the carton.
Lie Down and sleep. Click and wake during nighttime. Light candle with match by opening match folder, picking match and striking fast on match cover. Using the lit candle as a backdrop, examine paper under pillow. At daylight upon waking up again, light another match and walk over to cooking range on the table at far end of tent. Click on the knob to turn the gas on and light burner under stew pot. Get the skeleton key from the stew pot. Open all drawers on desk. Take note of the star maps on the top drawer specifically the updated Plot to 10,500 BC. Pick up all 3 tapes from the side drawers. Examine clues on pullout board found above the topmost side drawer. It says R tape #3 0105, L Artifacts Tape 0223, R Tape#1 0031.Turn the timer of the tape recorder to 0000. Fast forward the tapes to the corresponding number found from the clues on the writing board. Gil tells you the mathematical procedure to do to the passages from the Book of Numbers. With numbers gathered from above clues (12-5-20), open chest. Turn the dial with the T in the hand a couple of revolutions, then stop and with the R in the hand turn the dial to 12 clockwise, stop. With L in the hand turn the dial past the 5 counterclockwise, once then stop the 2nd time you reach 5. With the R in the hand turn the dial to 20 clockwise. A click will be heard if it opens. If it doesn't open try again. This is a touchy puzzle. Click on the 2 side latches. Take translation tape and Translation Scroll. Listen to Translation tape. Gil advises you to use the 6 tablet as "your first clue".
SPHINX DIG SITE:
Walk to Sphinx dig site, down the ramp, turn left, look at scaffolding and take note of date written on it - "constructed 02/17". Walk further down and enter excavation tunnel under the left foot of the sphinx. Note the intricate "door" with holes in each point. It looks familiar. This is one described by the drawing in the middle bottom part of the Translation Scroll.
Go back to the helicopter and take a ride to the Great Pyramid.
GREAT PYRAMID OF CHEOPS:
Go to the tent. Pick up the gas can from the tent. Try to get water from the water container. But it flows to the sand - look down at sand. Something is happening there. Keep pouring water on sand. Pick up the Sacred Scroll. Upon examining the scroll, again it has the drawing of the "door" found at the excavation site under the Sphinx but this time it has icons on the red circles. Walk up to the entrance of the pyramid. It is dark in the tunnel. Fill the generator with gasoline. Press start. Now you have light. Enter tunnel. When you reach a VR spot, look up and go up that tunnel.Upon reaching an area with a ladder and ramp on either side, you can turn right to a grate, forward to Queen's chamber or left and up the ramp to the King's chamber. Open the grate on the right and read Gil's note. Going up the ramp, you end up in a bare room of the King's chamber - there is just an empty tomb. Lets go back down and check the middle passage. Go forward to the Queen's Chamber.
QUEEN'S CHAMBER:
Look around. There is a desk with some electronic equipment on it, a small hole on the wall by the desk and there's an alcove to the left of the desk that has a low entryway. Read the journal found on the desk. Take note of the pyramid cross section drawing and the reference to Gatenbrink's mystery door. Examine control panel. Turn main power supply on (top left), middle power for imaging matrix (only library 1 works) and bottom power for more data retrieval. Check the Data retrieval by pressing each number, especially #2, how to manipulate the Cheoptronic and #6 and #12 tells of problems encountered in running the Cheoptronic. Pick up Cheoptronic (robot car) from the stacked cases on the right side of the room. Place it on small hole on the wall by the desk. Using the control panel and Library #1, drive the cheoptronic through the tunnel until you reach the mystery door. Use the Forward and backward switch on the left side of the panel and when you reach a difficult area, use either auxiliary lever 1 or 2 until you get over the blockage. My, that's a looooong tunnel! Open Mystery door by typing the numbers deduced from clues given by Gil's letter found in the grate - date of the raising of the scaffolding and the last 4 numbers from his Campus ID (0217+1334=1551) on the data retrieval panel. When the mystery door gets pushed back, the wall of alcove to the left of the Queens chamber gets pushed also. Lets find out what happened when that wall got pushed.
KING'S CHAMBER:
Go back up the ramp and enter the King's chamber. Looking around, you find that a block at the back of the tomb is recessed. Click on that stone block. Enter. WOW! The real King's Tomb! Pharaoh Cheops is still resting here. What a find! Go under the tomb, up the incline and face the cobra fire stand. More rooms to explore. Turn towards the left, down the corridor, turn the corner and see the first room to your right.
Hidden Corridor/Treasure Antechamber/Astrological Alcove:
Take note of the throne icon on top of the door. Enter. Look around. See a silver pot in the corner, push lid and get Heraldic Key. Take note of Gold Disk with Anubis pictured at the center. It looks like a map of a maze.
Anubis Maze Disk
Enter the other room. There is a statue at one corner and a throne. I'm tired, I think I'd like to rest and also see how it feels to sit on a throne. The statue moved. Enter the secret room. Pick up the Royal Scope. Look at the wall mural. It looks like a 6-prong comb.
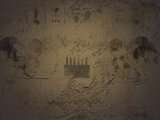
6-prong Mural
Go back out to the hallway and look at the next room.
Weaponry Room:
The icon on top of the doorway shows a dagger. In a wooden chest on the right side of the stairs, you find the Yacht Scroll. Beside it is a pot with arrows, maybe you want to pick up 2 or more of the arrows. You can come back if you need some more. You also find a pot with stars on a chart and on the base of the pot is a tower symbol. Lets leave it for a while, if you need it, you know where to find it. Climb the stairs and look in the chest. Get the Gold Dagger.
Move on to the next room down the hallway.
Festive Chamber:
There's a bag like icon on top of the doorway. Upon entering the room, on the right side, pick up the Royal Trumpet. In the pot close to the trumpet, get the Flautist Scroll. Inspect the scroll. Interesting! A flutist, cobra and 8 bags - Wonder what the meaning of that is? Going to the other side of the room, we see another pot with stars on it and an icon with horns protruding from it. Nearby is an Egyptian board game and upon opening the side drawer, you see and pick up the Flat Wick Key. On the wall left of the Flutist statue, you find another star pot, this time with a cross on the base and inside the pot beside it is another scroll. Pick it up and examine. It is the Throne Scroll. It showed a star and sun on the top corners of the scroll, 4 stars above and the throne underneath. Examine the Flutist statue and find a plug at the back. Plug the Flutist. There are two side panels that show a statue blowing a trumpet. Do what the panel depicts - place the trumpet on the stand at the center of the room while facing one of the side panels, click on it. Wow!
Trumpet Stand
It broke the wall on the opposite side. Place the trumpet again on the stand, now facing the other side panel. Click on trumpet again. It broke the wall panel again! Inspect the broken panels. One of the revealed entryway showed cobras on baskets. Better wait, to enter here. The other revealed entryway has a bag like contraption attached to some pipes. Those pipes look like the pipes on the back of the Flutist statue and the bag look like the one on the scroll. Now we know the meaning of the Flautist scroll. Squeeze the bags 8 times, the flutist statue start playing. Go back to the cobra room. The cobras are gone and we can enter. Get the Hathor's Tablet. It looks like one of the tablets on the Translation Scroll Gil said are clues to start on. Leave the room.
Explore some more. Turn the corner and midway down the hall is a door with a sun like symbol on it and on the other side of that is a small opening at the base of the wall. Go back to those areas later. Check the other hallway first. Turn the corner and see 3 more rooms to explore as shown by the lighted torch by the doorway. Enter the first door. Leave the room.
Furniture Chamber:
This entryway has an arrow on top of the door. Looking around you see 6 pillars with knots on the doors. On the left alcove, open the wooden box and pick up the Reed Leaf Key. On the other side, there is another star pot with 8 prongs and 2 prongs on the other side icon. On the wall opposite of the blank wall is another star pot, this time with 3 waves at the bottom. There sure are a lot of these pots.
Using the Gold Dagger, we cut the knots on the 6 doors. Only one of the doors allowed entry. Climbing the pole to the top, there is a suspended bridge made out of bones. Crossing it, a fire, arrows and bow on a stand are seen. Across the room are 2 statues with their hands tied to ropes attached to a platform in front of them. On the top of that wall are 2 of those tablets. We have got to get there and see. Get the arrow, light the tip on the fire, click the lit arrow on the bow, using the round knob at the bottom of the screen, turn the bow and aim it a little bit inward to account for the angle, on one of the statues hand. Do this until the ropes are burned off the statue's hands. Do the same to the other statue. If you missed, there are more arrows at the Weaponry room. The platform is released. Go to the other side. There are 2 tablets of Anubis seen. Save game here! Choose wisely, my friend or you die! Pick up one of the Anubis' Tablet. Now, you have 2 of the tablets seen on the Translation Scroll. Going back on the other side of the platform, get the scroll at the back of the bow stand. It is the Archway Scroll depicting Sobek, crocodile God under an archway made of numbered stones. Better leave these rooms and continue exploring.
Religious Chamber:
The icon on top of this doorway looks like a boat with a mast. Inspect the miniature yacht complex at the center of the room. Click/hold/slide makes the yacht moves back and forth. There are 4 pillars on each side of the yacht. There is a stairway in front and a wheel on the back of the yacht.
At the corner of the room, there is a brown wooden standing chest, inside pick up the Pillar Key. On the other side of the room is a chest. Inside is found the Sacred Amulet and the Charmer Scroll. Pick both up. The Charmer scroll shows a lady using the amulet in front of a cobra. Leave the room.
Food Chamber:
Above this doorway is a pot icon. By the corner to the right of the entryway, you see 2 star jugs, one has a lined circle at the bottom and the other has a 6-prong icon at the base. Now where have we seen that icon before - on the wall of the Astrological Alcove on the other side of the building. It must mean something. Copy this star map with 9 stars on it.
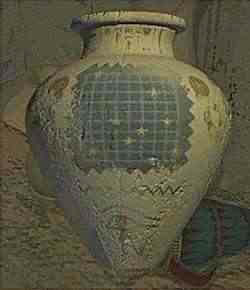
6-Prong Star Map
Looking at the items on the table, there is a jug with a gold lid. Inside, get the Ahnk Key.
All the rooms on both sides of the hallways have been inspected, its time to check that opening at the bottom of the wall and the door with the sun like structure on it.
Sobek Antechamber:
Inside is a bigger version of the yacht complex seen at the Furniture Chamber. Instead of 4 pillars on each side, there are 3 crocodile statues. To the left, facing the wheel, the colors of the eyes are White, Green and White. To the right facing the wheel, the colors of the eyes are Red (closest to wheel), Blue and Green. Interesting!
Exit and go across to the door with the sun icon.
Astrological Forechamber:
Enter. My what a climb, need a rest. Halfway up, there is a Star on the wall with a lever and a star shaped hole at the bottom. The star is similar to the star of the Throne Scroll. Climbing to the top, there is a chamber that has a star chart with 2 statues on either side. This looks exactly like the drawings on the pots complete with the statues on the side except there is no stars on the chart. There is a star shaped hole on the left side of the star chart. A big pot on the side has a lot of little stars with different icons at the center. Based on the wall mural at the Astrological Alcove showing the 6 prong icon, the Throne Scroll showing the star in the stairway and the throne that was found before the secret room with the mural - pick up the stars with the 6 prong icon at the center. Place 9 6 prong stars on the empty star chart in a similar pattern to the corresponding pot star chart arrangement.
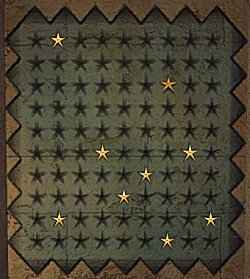
Star Chart Puzzle
A Star Scepter shoots out of the star hole into the arms of the left statue. Pick it up. Climb the stairs and realize it is dark up there. Go back down to the star/lever/hole midway down the steps. Place the Star Scepter in the hole and then turn the lever. Now, the star is a sun, just like on the scroll. Go back up to the Astrological Room at the top.
Sacred Astrological Chamber:
The room is now lighted. There is a lever across the stairs. Facing the stairs, pull the lever to the opposite side. This causes the movement of the stairs forward revealing another staircase. Go down and pick up the Astro Scroll. Examine the scroll and note the similarity to the Throne Scroll with the exception of Horus looking through a telescope. In one corner, you find 2 Thoth Tablets. Save Game here! Take note of the words on the paper held by the skeleton - "The Curse is Real". Curiosity killed the cat! Pick a Thoth'sTablet. Lie down, sleep and click immediately to wake up to nighttime. In each of the four walls an opening on the ceiling and a stand is seen. Above the openings are heads of Egyptian Gods - Horus (hawk), Hathor (horned cow), hippopotamus God and Thoth (ibis). Place the Royal Scope on each of the 4 stands around the room and look at the star pattern. Move the lever to the other side and go down the stairs.
All the secret rooms at the King's Chambers have now been visited. Go back down to the Queen's Chamber.
QUEEN'S CHAMBER:
Go to the alcove to the left of the Queen's chamber. Enter the small opening at the base of the wall.
Crawl through the low tunnel and then go right in another opening.
Queen's Hidden Chamber:
Go left to a room with chains on the side and a circular gold maze map above the opening. Take the Lever Handle from the statue of a Pharaoh. Turn around. Place the lever handle on the hole on the side of the opening. Pull lever down and the stone door goes up, closing you in. Oh My! Raise the lever back up and exit the room. Go down the Queen's Corridor. Across from 2 Sitting Pharaohs, turn left. Turn right to a pillared opening. Go down the steps.
Harp Chamber:
Go towards the giant pillar with a giant gold cobra wrapped around it. Climb the incline. In VR mode, span towards the right and click there. Go around the base to the other side of the giant pillar. Go to the open entryway at the end of the corridor. You find a small harp on a pedestal. Click on the harp, it will turn and hear discordant harp music and sound of something turning. Go back to the top of the incline and climb up the wrapped cobra. At the very top, there is a room with 5 harpist. Examine the harp of each of harpist and note that each harp is missing a harp key. Looking in the inventory you collected from the King's chamber, you have 5 keys. Place the keys from your inventory to the appropriate holes in each harp. From left to right - Reed leaf key, pillar key, flat wick key, ahnk key and heraldic key. Go back down the cobra body and see the hallway going to the room of the small harp. Go to the small harp room. Play the harp again and now and hear nice harp music and again the sound of turning. The harp snaps off. Pick the Gold Harp Key. Go back out to the Queen's corridor and turn right. Go forward.
Queen's Corridor:
Click on the single sitting pharaoh. Enter the small opening on the back revealed when the statue moved. Go forward 3x and then left. Go down to the underground chamber.
Funerary Yacht Chamber:
Go down the steps to the landing. Look in big jug and see a Stairs Rod. Walking down the right side of the funerary yacht, between the third and fourth pillar is a red wicker basket that contains a pyramid bolt. Going around the yacht, there is an alcove. Enter and click on the vase at the side. Get the VaseBolt. Look at the stone mural. This looks like the archway scroll that shows numbered stones on the arch. Take note of the positions of the recessed stones.
|
|
Sobek Archway |
Archway Scroll |
On the other side of the yacht is a ramp. Climb up and open the door to the shelter and see a wooden box that contains the sun bolt. Walk back towards the stairs and see an entry to the right side under the landing. There is pink jug by the entryway that holds a cross bolt. Enter the alcove and see the statue of Sobek, crocodile God. Numbering the stones on the arch from left to right, press stones in position # 12, 18, 20, 9, 3, 7 . As soon as the statue turns, jump on the base and will end up in a tunnel.
Alligator Cove:
Walk towards the end of the ramp. Click on water, wait for the middle crocodile to be at the center and then click on his body and then click to the other side. Go straight and look down. Save Game Here! Ooops! Pick up Sobek's Tablet. Go back out to the funerary yacht chamber.
Funerary Yacht Chamber:
There are four pillars on each side of the yacht. On top of each pillar a crocodile head is seen. The color of the eye of the crocodile can be changed. Examining the Yacht scroll, only 3 pillars have a picture of a crocodile on each side of the yacht. Recalling the colors of the crocodile statues' eyes in Sobek's antechamber up in the King's Secret Rooms, arrange the colors of the crocodile eyes on the pillars. On the side of the yacht with the ramp, (L to R), arrange the color of the eyes of the crocodile: no change in color, white, green and white. On the other side of the yacht, (L to R), the color change is red, blue, no change and green. The no change eyes could be any color as long as the other eye colors are the ones shown in Sobek's antechamber. Climb up to the wheel area. Place the vase bolt on the rod holding the wheel. Click on the top of the wheel and get close up view and then click on the wheel again with the down arrow. The yacht gets pulled towards the wheel. Just like the miniature copy at the Religious chamber. Go towards the main stairs at the other side of the room and turn around. Face the yacht. An opening is revealed under the yacht. Enter. Walk forward until you reach a small circular pool. Dive in and surface. Whew!
River of Death:
When you surface, in VR mode, span a little to the right and click 14x forward through the cavern. Stopping in VR Mode, you will be at the center of 4 exits. In front will be to the Lost Temple of Ra, to the right will be to the River Cavern, to the left will be to the Cobra Shrine and on your back will be the return way to the Funerary Yacht Chamber. Go to your right cavern.
River Cavern:
Go forward until you reach an embankment. Turn left and enter the opening behind a red stone. Swim underwater and climb the ladder. Get the Pickaxe. Read the notes found inside the briefcase. Look at the skeleton holding a tablet. You are warned - don't touch that tablet! Climb up the round pillar using the recessed toeholds. Pick up Horus' Tablet.
Go back to the Cavern intersection. Using the warp arrow facilitates travel in this area. Go forward to the opposite cavern until you reach a wall covered with hieroglyphs.
Cobra Shrine:
Inspect the white wall with hieroglyphs and see a eyehole. Get your pickaxe and strike the hole. Save game here! Strike the hole again with your pickaxe and immediately get the sacred amulet from your inventory. Click the sacred amulet on the cobra's head as soon as it appears. Move forward toward the Cobra statue. Turn around, click on the left side of the screen and see 2 tablets on the sand. Save game here! Pick up Tauert's Tablet. Go back to the cavern intersection and now go to the cavern to your left.
Lost Temple of Ra:
Climb up to the temple and go out through the arch. You will see cliff statues across the lake. Turn right. Go forward. You will see an oasis with Palm trees and an arch structure. Go there. Climb the top of the arch and see 3 sun balls. Clicking on them shows the colors, (L-R) Blue, Yellow, Red. Continue back towards the cliff statue. When you reach an area (9 clicks from last VR) in the shadow of a cliff on the left side, look for a ball on the right side of the screen. Pick the Scarab Weight. Continue towards the Cliff Statues.
Cliff Statues:
Climb the steps towards the structure. Go Forward. Pick up the Ra's Scroll from the sand. Turn back. Turn left before reaching the steps. 4 steps forward, turn left. Climb the steps, the foot and handholds until you reach the top. What a view! Enjoy it. Look down and note the 3 circled icons.
Circled Icons on Top of Cliff Statue
Go back down towards the steps and down to the sand bar. Turn right. Look at the head of the fallen statue. Get the Scarab Weight from the ear. Go back towards the temple. Continue forward upon reaching the temple area. Circle around the shore and get to an area with Palm Trees and see an arch nestled in the cliffs. Go forward to the arch and reach the gold pyramid. Look around. Pick up the Scarab Weight lying at the base of a Palm Tree (on the left with a view of the arch in the background). Go back to the temple.
Lost Temple of Ra:
Enter through the arch and turn right. Go forward and turn left towards the end of the complex. Turn right and see a statue. Note the colored geometric shapes on his front: red bar, green circle, blue circle and those on his knees: clear circle, black circle, clear circle. Go to the other side of the complex, across the river from where you are and find an entryway. Climb up and cross the escarpment. Climb up some more and reach a landing with windows on the side. Turn around and note the markings on this statue. On his front: red circle, green bar, blue circle and on his knees: black circle, clear circle, clear circle. Turn around and go forward. When you reach the balcony, look around. On the left is the vista inside the temple complex and the river, while on the other side is a gold disk similar to that on the gold pyramid. Continue forward and see another statue with markings. This statue has on his front: green bar, blue circle, red bar and on his knee: clear circle, clear circle and black circle. Go down the steps and see a blue triple weigh balance. Place the scarab weights on missing end of the rods. Now based on the markings on the knees of the statues, turn the center balls to top: red circle, green bar, blue circle; middle: red bar, green circle, blue circle, bottom: green bar, blue circle, red bar. You'll hear a click if the ball is in place. The chains in the back moved.
Go back out on the balcony and look at the view inside the temple complex. The temple river now has patterns: Circle with dot at the center, cobra, a boat and 3 waves.
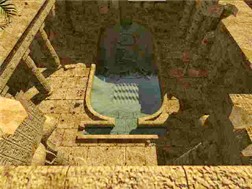
Temple River Pattern
Go back to the Gold pyramid.
Gold Pyramid:
The door to the pyramid shows icons when you pass the hand over it. Select the temple river pattern (seen after finishing the scarab weigh puzzle) on the door. Pass the hand on icons and click to select and sound will be heard. The door opens. Enter and look around. Go outside.
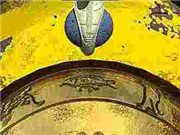
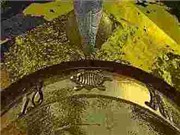
On three side of the pyramid are recessed slots to climb up the pyramid. On top of the pyramid are disks similar to the disk at the temple balcony. There are creatures embossed on the rim of each disk. Above the disks are Cobras on a colored ball. This is reminiscent of the colored sun balls on top of the arch by the oasis. The 3 icons on the top of the cliff statue are also in a circle. These 3 icons are found on Ra's scroll but in reverse position: bottom leftmost column, third from the bottom leftmost column, third from the top next column. The corresponding creatures of those icons found on the right side of Ra's scroll: slug, cobra and owl. The colors on top of the arch: blue, yellow and red. Turn the disk and place the creatures at the 6 o'clock position (icon reversed remember). Blue ball - slug, yellow ball - cobra, red ball - owl. The creatures that will be in 12 o'clock position will be: Blue ball - fish, yellow ball - turtle, red ball - stork.
 |
 |
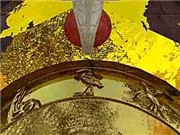 | |
A clink and sliding sound will be heard. Go back inside the pyramid.
Place the matching tablet in the recessed area that appeared on the ramp in front of each God and a corresponding scroll will come out of the circular hole above it. Collect the scrolls. From L to R: Anubis - Giza Complex Scroll, Hathor - Mayan Pyramid Scroll, Horus - Easter Island Scroll, Sobek - Atlantian Scroll, Tauret - Bermuda Scroll, Thoth - Stonehenge Scroll.
Go back to the Funerary Yacht Chamber (use the warp arrow) and up to the Queen's corridor.
Queen's Corridor:
Turn right on the hallway and go down to the far end. Look at the door raised by chains and has a circular gold maze map above it. Taking a peek inside, a gold coiled circlet is seen lying on an altar. This door looks similar to the first side room entered, with the lever handle and the statue of standing Pharaoh. Go back to that room. Lower the lever handle and while the stone door is rising, get out of the room. Trek back to the similar door at the end of the hallway.
Primitive Chamber II:
The door is now opened. Enter and pick up the Cobra Wheel from the altar. Turn around and note a maze map drawn from on a block of stone. Exit to hallway.
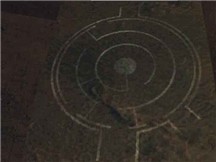
Primitive Maze Map
Queen's Corridor:
Turn left and insert Cobra wheel on pink stone. Click once on the cobra wheel and opening on the wall is revealed.
Revolving Maze:
Looking at the Maze map, the entry at the bottom of the map is where the cobra wheel stand is situated. Enter and go to the next opening on the other side of the circle maze. This is the entry on the top of the maze map Another beautiful chamber is revealed.
Go back out to the corridor and turn the cobra wheel once more. Enter the revolving maze again. This time, the maze exit is blocked everywhere, as shown by the maze map as it is now.
Go out again and turn the cobra wheel for the third time. Enter again to see what will be revealed by the third entry shown in the Maze map.
Primitive Chamber III:
This looks like the exit on the bottom right of the maze map. Get the Sacred Cull on the altar. The skeleton on the left corner of the room is holding a scroll. Pick up the Flume Scroll. Go back out and turn the cobra wheel once more.
Lotus Dome Chamber:
Turning left in the maze, an exit back to the beautiful chamber (seen the first time the cobra wheel was turned) is revealed. Enter. In the middle of the chamber, a giant closed lotus is seen. A stand with 4 holes is before it. Place gold harp key on the stand. The giant lotus opens up and a throne carried by statues is revealed. A pot is set before the throne.
Turn back and while facing the exit, go to the right side aisle and find an intricate chest that opens to a star to sun contraption. Go to the other side aisle and at the end of the hallway stands a sand dispenser. Place the sacred cull on the top of the pot at the bottom of the dispenser and slide the lever to the right. Bring the grain full cull back to the lotus throne and empty it to the pot. Do this a total of 6 times. You will sit on the throne and descend. Get off and click on the stone door.
Maze:
Go through and see a mosaic cobra. Look behind the cobra and see a hole covered by a wooden frame. Keeping in mind, the gold maze map (seen at the Hidden Chamber up in the King's secret room) with Anubis (Jackal) at the center, start on the maze. Take the right passageway while facing the cobra. Go forward 10x until you see Anubis on your left. Forward to Anubis. Turn Right. Forward 3x (see Spotted God on your left), forward 10x and see Anubis on your left again. Forward to Anubis. Turn Right. Forward 10x. 1 click on curve. Forward 6x. Turn Right. Forward to Horus (Hawk). Forward 4x. See Anubis with another Anubis on the top left. Forward 1x. Turn Right. Forward to Anubis. Forward 2x to Hippopotamus God. Forward 2x towards Anubis. Forward 4x (passing Horus on your right). Forward 3x and there will be columns on the right and left side of the hallway and an entryway on the left to the sacred pool.
Notice the pattern - just look for Anubis and go to him.
Sacred Pool:
Before entering the sacred pool chamber, go to the column on the right side of the hallway and check the contraption on the wall. This is similar to the Flume scroll found with the sacred cull. Go back to the other entry framed by columns and enter the sacred pool. Anubis statues surround the sacred pool. Check each statue. At the base of each statue, icons on a wooden wheel and circles similar to the flume scroll is seen. Turn each wooden wheel, raising it up. The water is drained from the pool.
Go down the pool. Look around the different gates and in close up view, turn the wooden wheel of each gate. Only the Giza candelabra wheel turns and opens the barred opening at the bottom.
Go back to the contraption on the wall outside the pool area. The mechanics behind the contraption shows that by turning the tap on top, water is added and by using the tap at the bottom, water is drained. Arrange the red and white balls on each tap, based on the icons on the top of the square pipe and the flume scroll and the icons seen on the wooden wheel at the foot of each Anubis statue.
| Icons | Site | Circles |
| Y shaped icon | Maya | 4 white 1 red |
| S shaped icon | Bermuda | 3 white 2 red |
| Water pouring | Atlantis | 2 white 3 red |
| Candelabra | Giza | 0 white 5 red |
| Block | Stonehenge | 5 white 0 red |
| 3 balls | Easter Island | 1 white 4 red |
Go back down to the sacred pool. Open and enter each gate. Look at mummified aliens on slabs and pick up a key from each golden ark. (R-L Gates) Bermuda key, Giza key, Stonehenge key, Easter Island key, Mayan key, Atlantian key.
Go to the drain tunnel on the opposite of the metal steps. Climb in and go to the end. Click on mesh covering. Climb out. Go back to the Lotus throne. Tilt the pot by clicking on the wooden rod holding it. Get off.
Go back to the Sphinx site.
SPHINX DIG SITE:
Go to the "door" under the Sphinx.
Using the Atlantian script on the red circles written on the Sacred Scroll and the script on each individual site scroll taken from the Gold pyramid, the placements of the 6 Gold Keys from the Sacred pool can be obtained. From one o clock position, going clockwise: Stonehenge key, Bermuda Key, Easter Island key, Atlantian key, Mayan key, Giza key. The wheeled door opens. Go forward.
A star viewer goes down. Pass the hand over each blue circle on the rim of the round star viewer and look at the star pattern shown at the center. We need the star pattern for Anubis. We saw the other 4 at the Sacred Astrological Chamber for the other Gods.
Which one will you choose? The star pattern above the Sphinx 10,500 BC. Orion
Content(s) of this game guide may not be copied or
published on any other site without permission from Casual Game Guides.
©CasualGameGuides.com 2006 - 2021
