PuppetShow: Lost Town
The Puppet Show: Lost Town Walkthrough contains more than 100 customized screenshots, step-by-step instructions on how to beat the game, along with helpful hints and tips. For this walkthrough or to play Puppet Show: Lost Town, visit www.casualgameguides.com.
The Puppet Show: Lost Town Walkthrough is a helpful guide created by Casual Game Guides for this exciting hidden object adventure game. This walkthrough contains step-by-step instructions on how to beat the game along with customized screenshots and helpful tips and hints if you're stuck at a particular part in the game.
Opening Story for Puppet Show: Lost Town:
The townspeople are excited to celebrate the opening of a newly discovered cave system. Everyone wants the chance to explore. However, tragedy strikes when little Suzy is kidnapped by a malevolent mechanical creature.
General Tips:
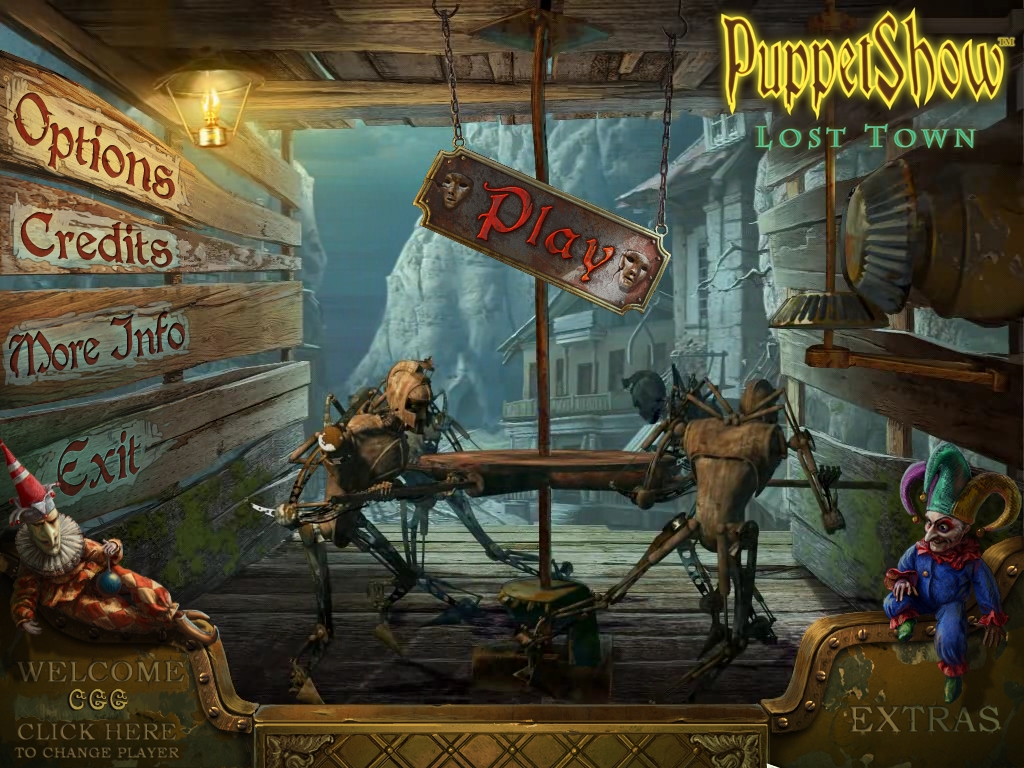
Click PLAY to begin your adventure.
Use the OPTIONS button to customize the screen size, music, sound, and cursor.
You may CHANGE PLAYER to manage your activities within the game.
EXTRAS are available only for purchasers of the collector’s edition.
The MORE INFO button allows access to other titles from this game creator, as well as the Big Fish Games forums.
Hidden Object Areas sparkle. Zoom into these sparkling areas to initiate that activity. Often these areas contain inventory items you will require to proceed in the game. If an item is listed in pink, it is “hidden†from view. You may need to click to move or relocate something to reveal this particular item.
When the cursor transforms into a magnifying glass, you may zoom into that area for a closer look.
When the cursor transforms into a hand, you may pick up or interact with the item over which it is hovering.
HINT is only available in Hidden Object Areas. HINT disappears outside of Hidden Object Areas and is replaced by the TOOLS or SKIP button. You also may use the SKIP button (when full) to skip a mini-game
The diary may appear in different areas of the game. Read the diary when available to gain knowledge about the story. The diary also may contain inventory items you need.
While stored and before use, inventory items appear in the TOOLS tab in the lower left corner. Only so many objects may be displayed at one time. If necessary, use the arrows on either end of the tab to scroll through the items. To use an inventory item, open the TOOLS tab and select the item. Drag the item to the area on the screen where it is needed.
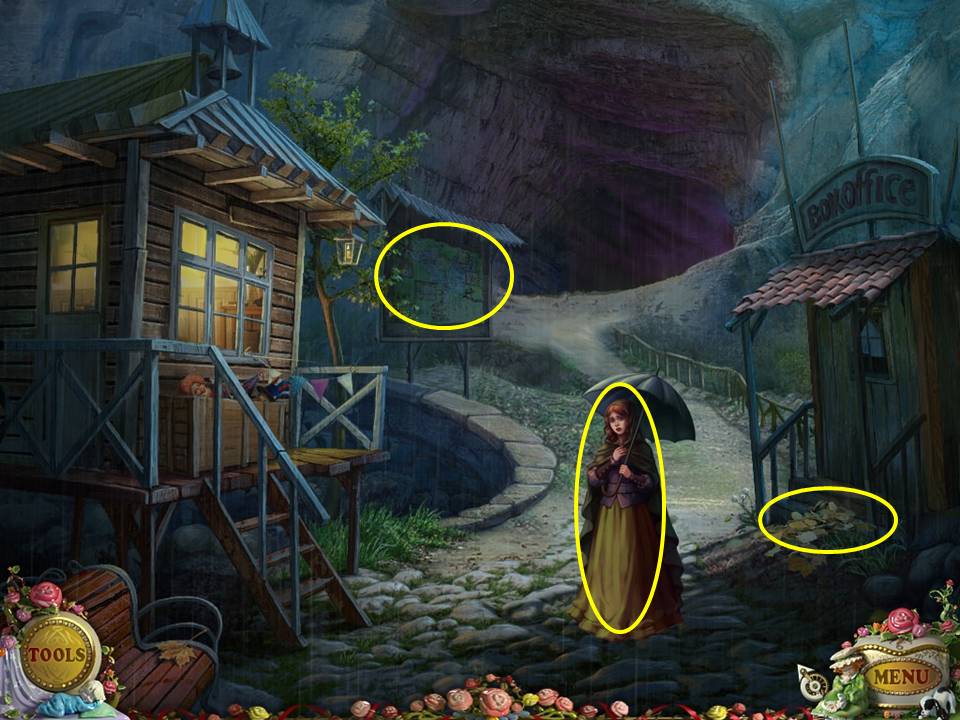
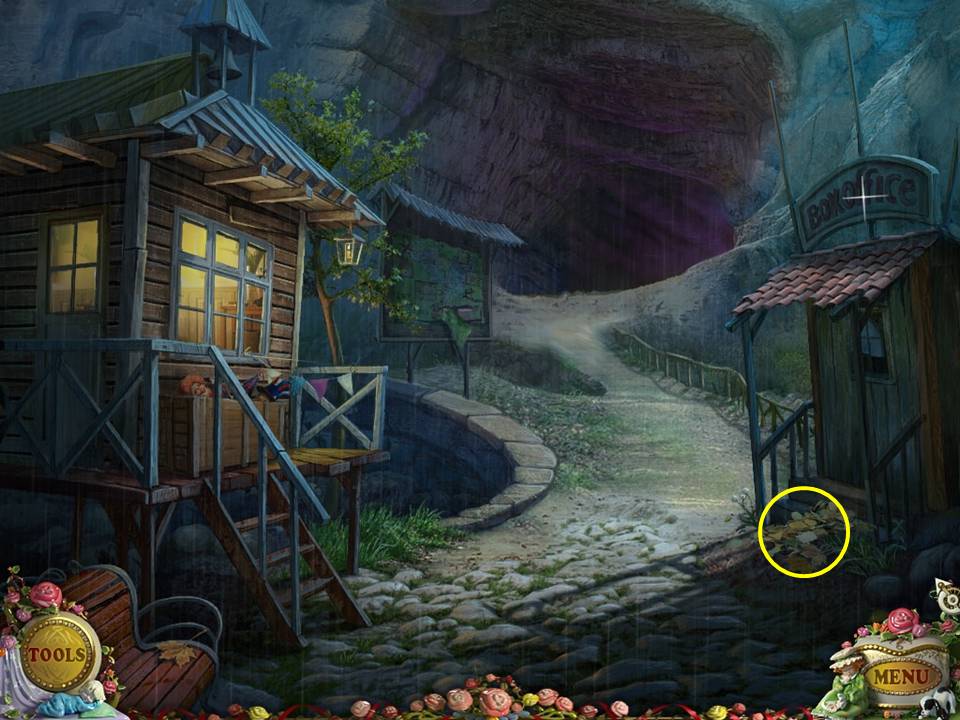
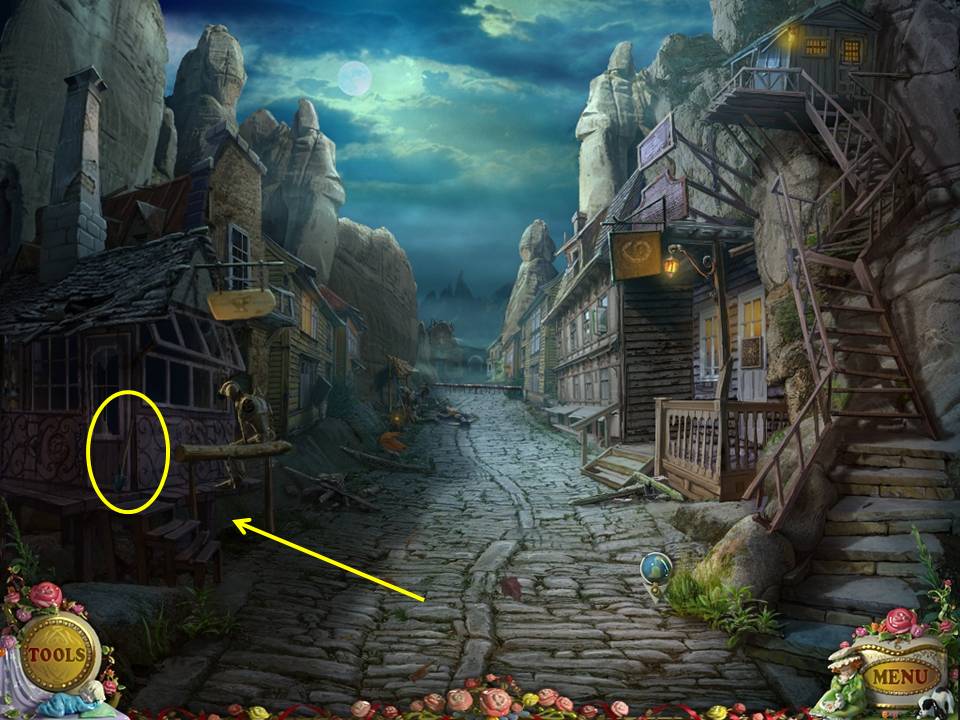
Click on the woman. Examine the ground in front of the box office. Pick up the CROWBAR.
Zoom into the bulletin board. Click on the map to tear a bit of the paper. Remove the nails with the CROWBAR. Take the MATCHES.
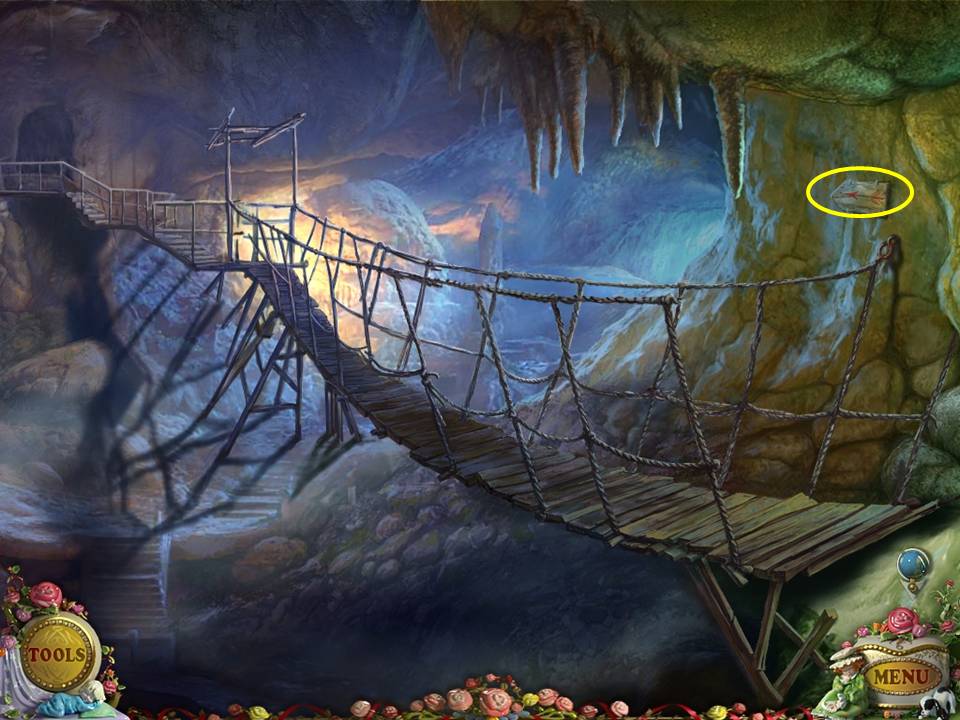
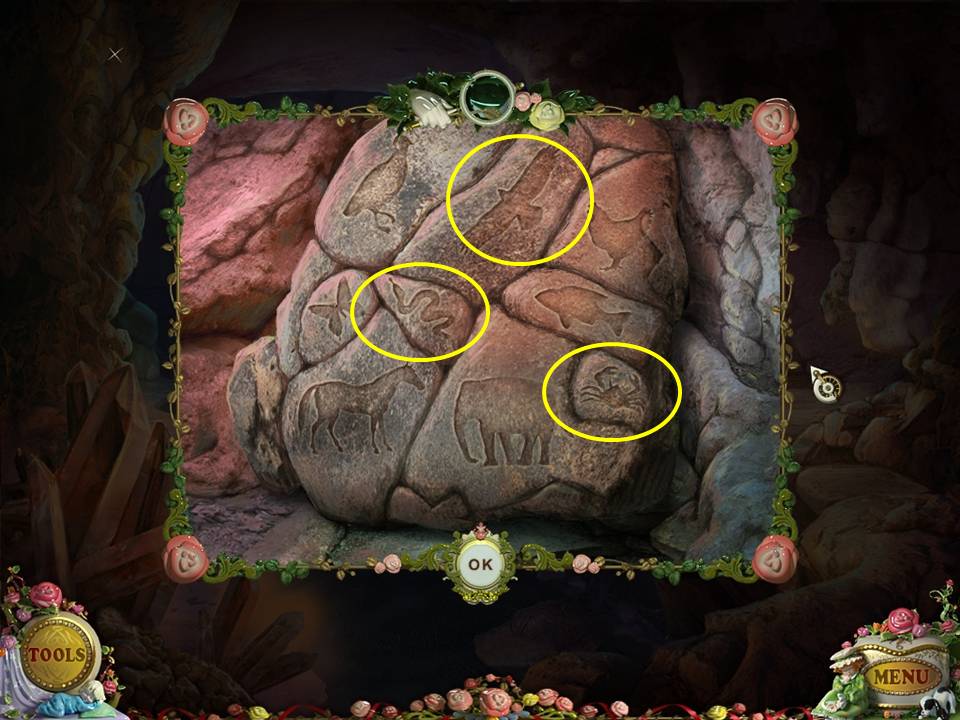
Move forward. Zoom into the sign on the right hand side. Click on the four fastening (two on top and two on bottom) to remove them. A cave painting showing a BIRD, CRAB, and SNAKE will be revealed. Cross the bridge.
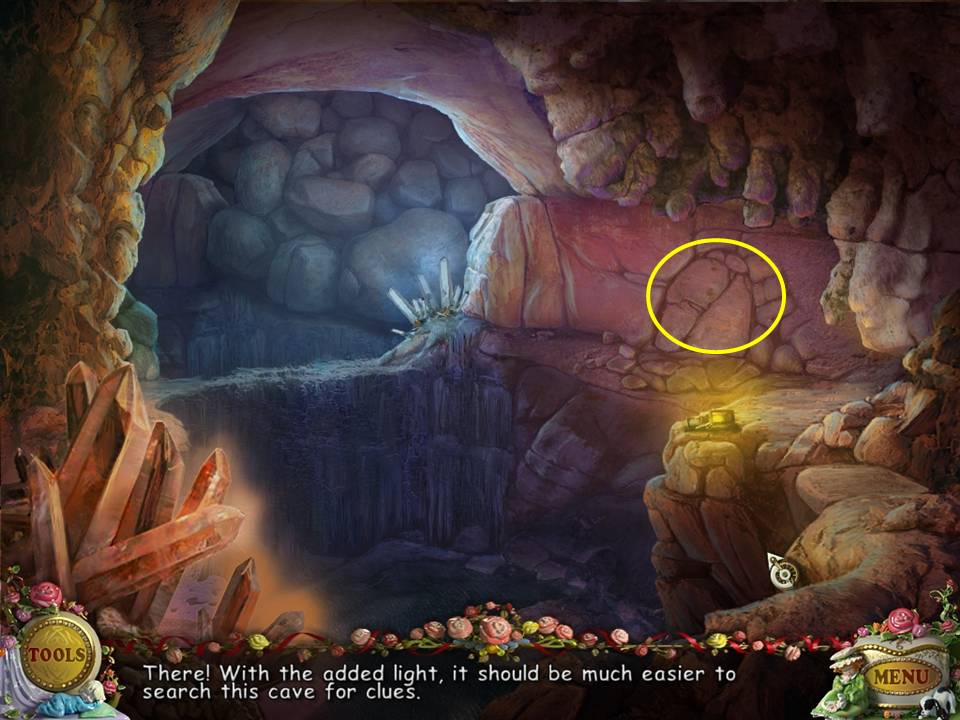
Zoom into the lantern on the lower right side. Open the cover. Light the lantern with the MATCHES.
Zoom into the right side of the now-lit cave.
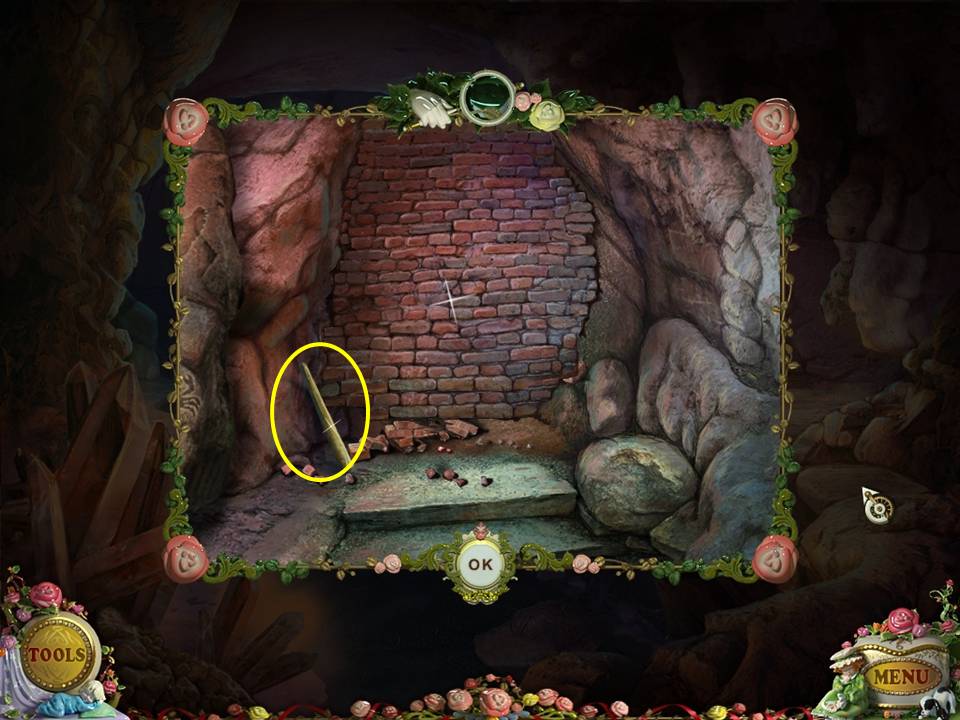
Click on the stones with the carvings of the BIRD, CRAB, and SNAKE. A wall is revealed.
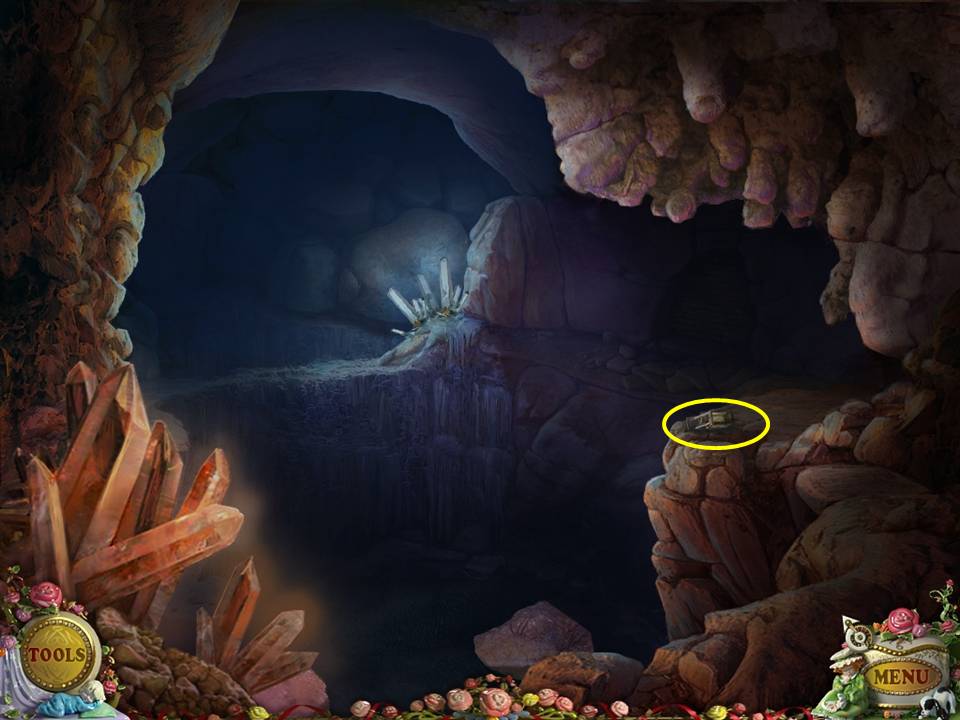
Pick up the PICKAXE HANDLE.
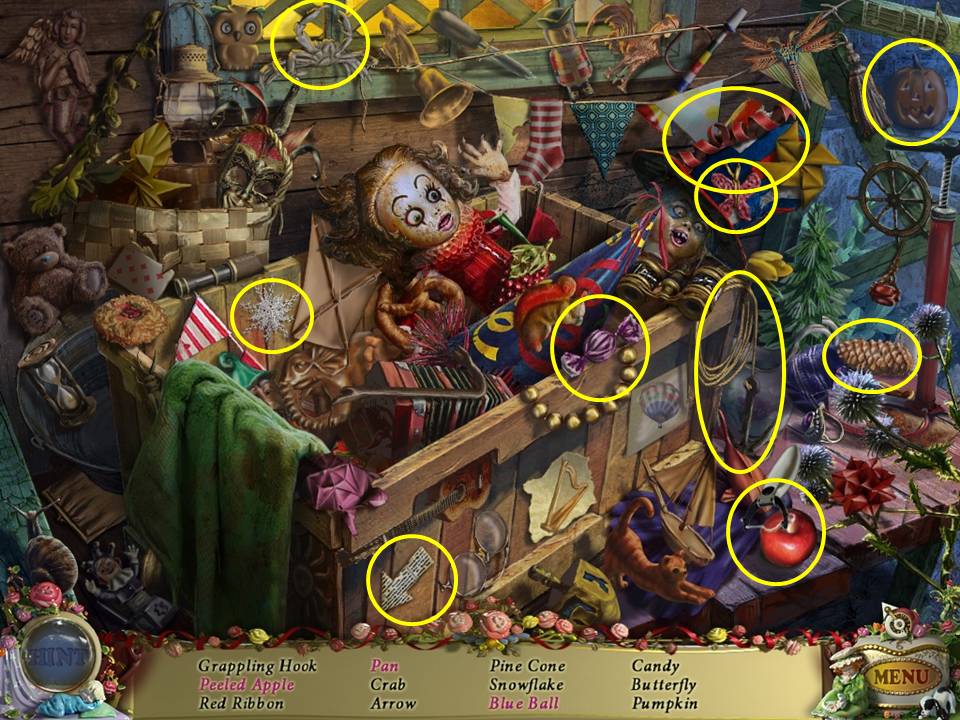
Click down two times. Play the Hidden Object Area on the left opposite the Box Office.
Find the items listed. Move the towel to pick up the pan. Click on the apple with peeler to obtain the peeled apple. Click on the pump to make it inflate the blue ball. Receive the GRAPPLING HOOK. Return to the first scene.
Zoom into the ground by the box office. Remove the leaves by clicking three times. This will reveal the PICKAXE HEAD. Place the PICKAXE HANDLE on the PICKAXE HEAD. Receive the PICKAXE. Return to the cave.
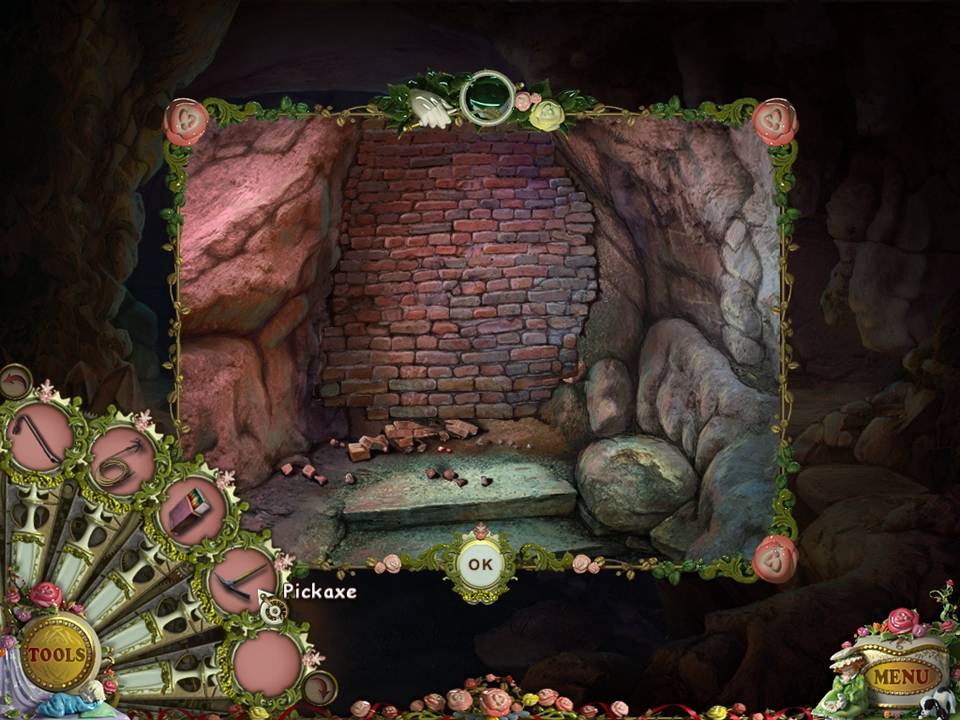
Zoom into the brick wall on the right. Break the wall with the PICKAXE. Proceed through the opening in the wall.
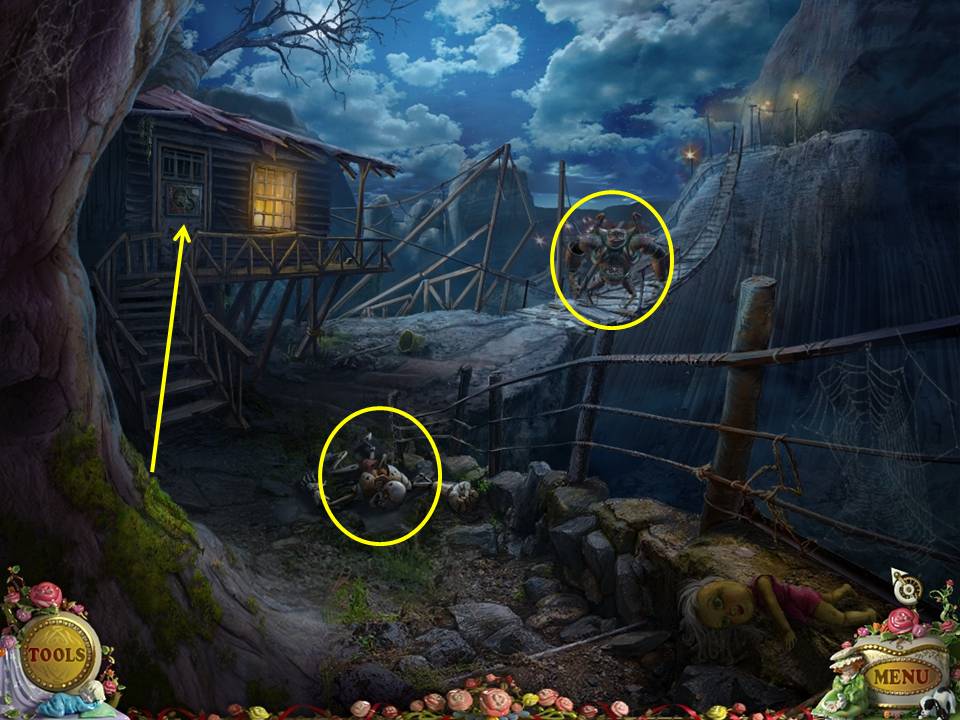
Click on the creature on the bridge. Click on the puppet in the foreground. Click twice on its hand. Take the PIECE OF PAPER. Zoom into the door.
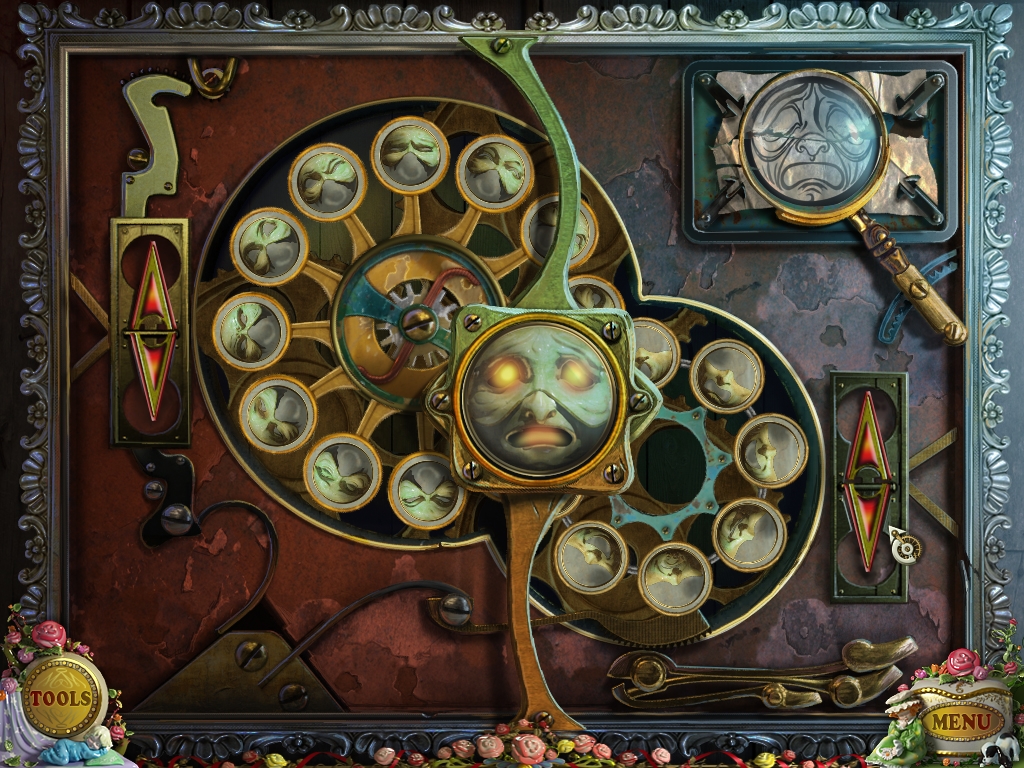
Use the PIECE OF PAPER in the top right corner to initiate the puzzle. The puzzle has two sets of arrows, one on the left and one on the right. You will click the up and down portions of the arrows to rotate the discs. The object of the game is to click through the faces until you find the expression that matches the face shown on the paper in the top right corner. The disc on the right controls the lower portion of the face (mouth). The disc on the left controls the upper portion of the face (eyes). Match the eyes and, once correct, match the mouth. When completed, the door opens and you will enter the Guardhouse. Move the curtain on the far right aside to locate a Hidden Object Area.
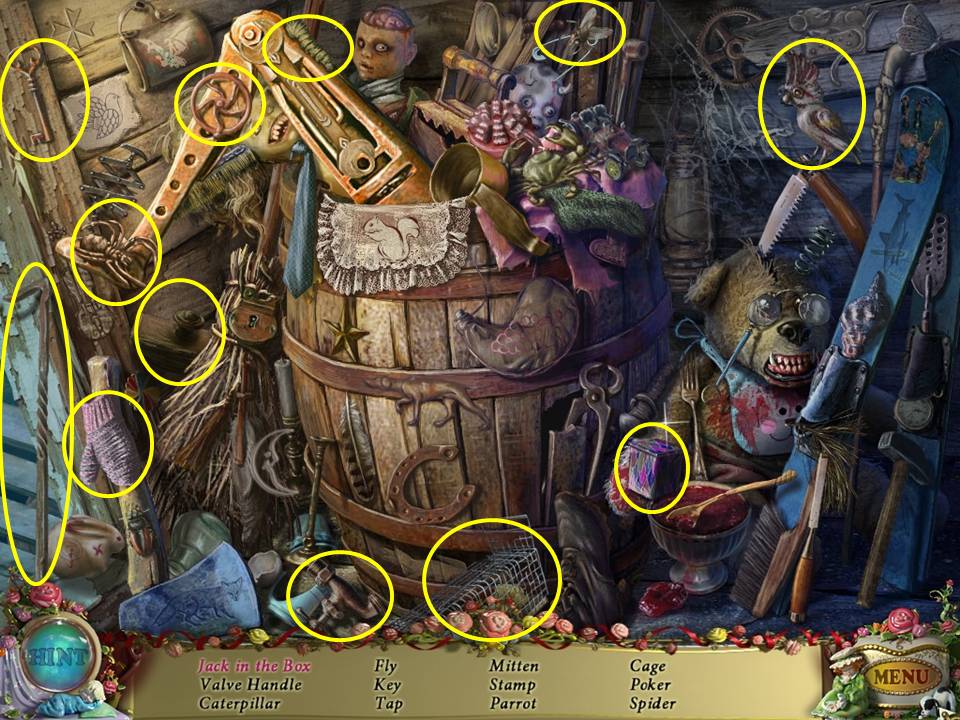
Find the items listed. Click on the box to the right of the barrel to find the jack in the box. Receive the CAGE. Return to the Guardhouse.
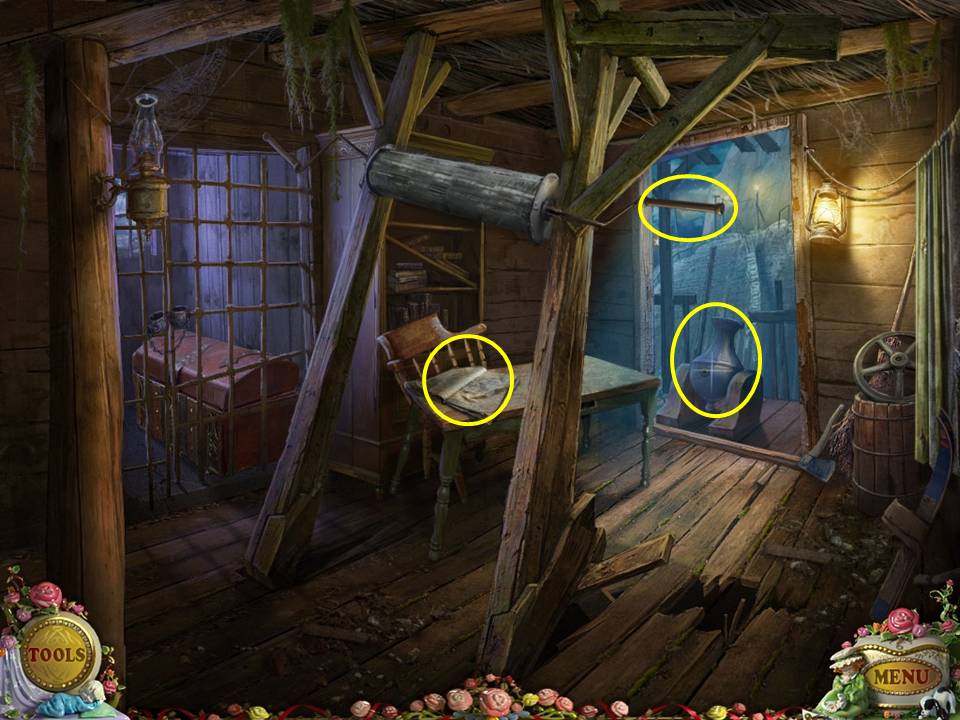
Zoom into the diary that is on the table. Use the arrows on the bottom of the left and right pages to flip through and read the diary. Take the FLOWER DISC on the right hand page. You will eventually find and take three FLOWER DISCS in total.
Zoom into the cannon. Place the GRAPPLING HOOK in the cannon. Light the fuse with the MATCHES. Click on the winch to raise the bridge.
Leave the Guardhouse and proceed to the bridge.
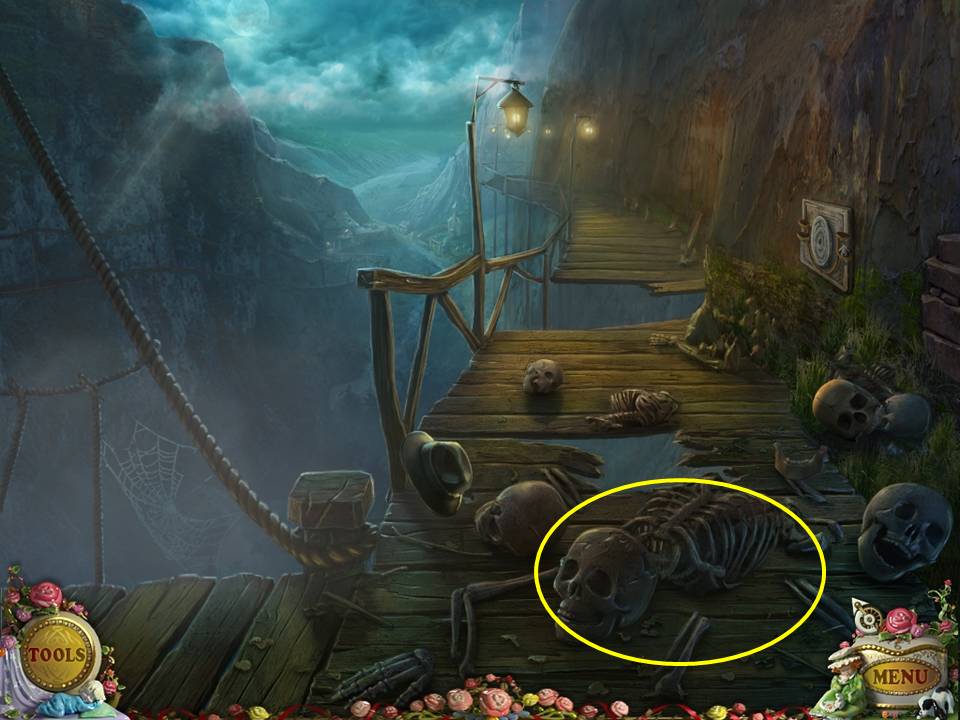
Zoom into the skeleton on the bridge. Pick up the KNIFE. Click down once.
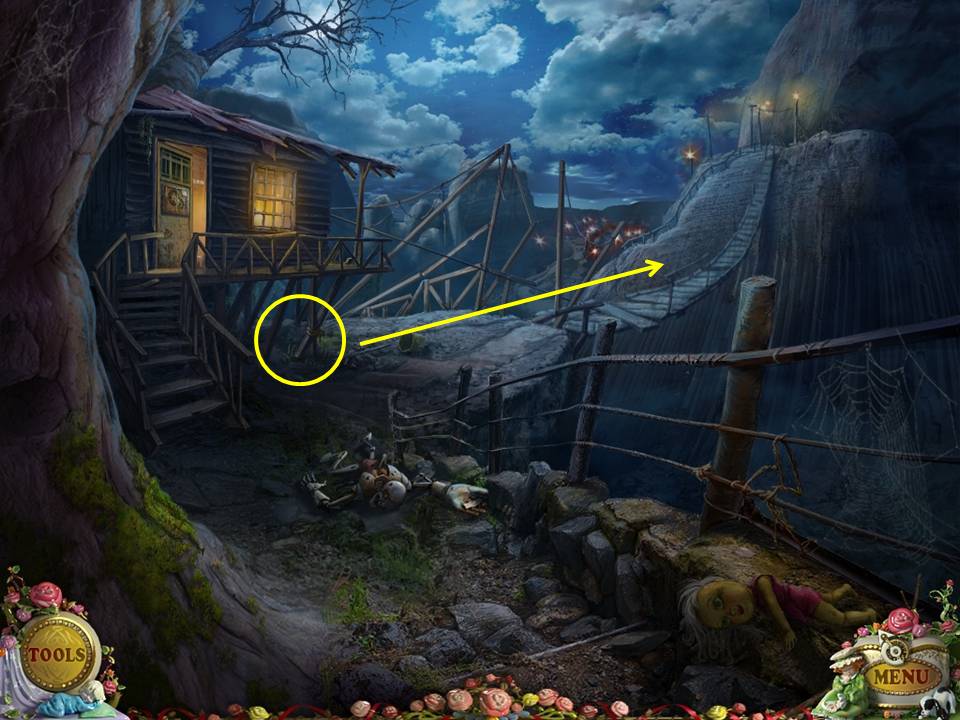
Zoom into the supports underneath the Guardhouse. Cut the ROPE with the KNIFE. Pick up the WOODEN BEAMS. Use the WOODEN BEAMS to repair the gaps in the bridge. Cross the bridge and move forward into town.
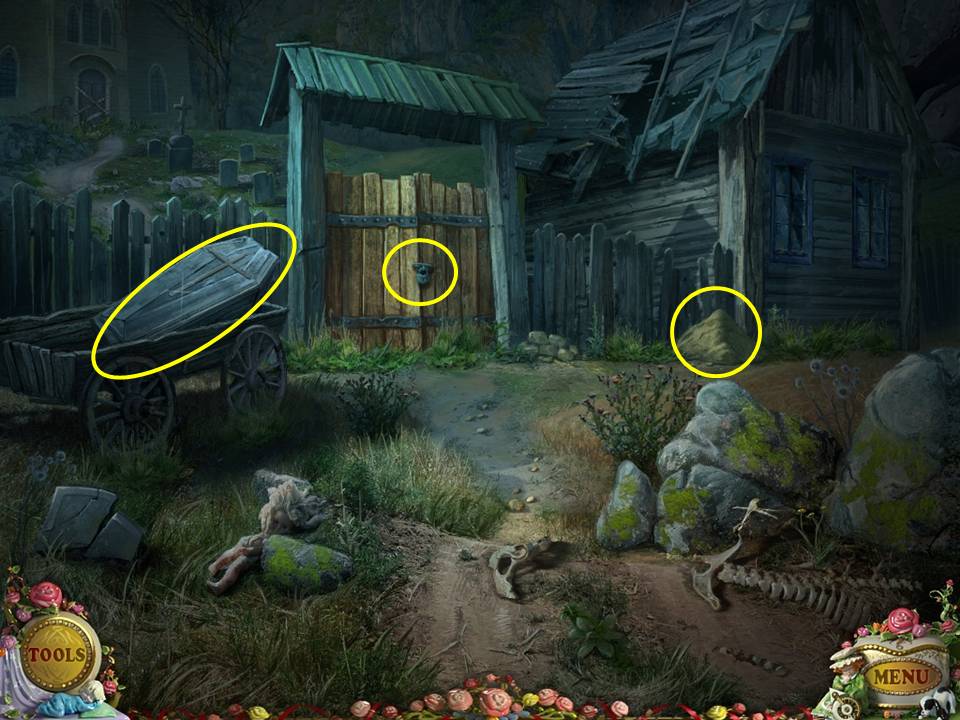
Zoom into the house on the left. Pick up the SHOVEL from the front porch. Zoom into the crawlspace under the house. Put the CAGE under the crawlspace to catch the MOUSE. Click down twice and move to the right to enter the cemetery.
Zoom into the coffin on the left. Use the CROWBAR to remove four nails. Open the coffin. Pick up the second FLOWER DISC from inside the coffin.
Zoom into the sandpile by the house. Use the SHOVEL to dig in the sand and find the CEMETERY KEY.
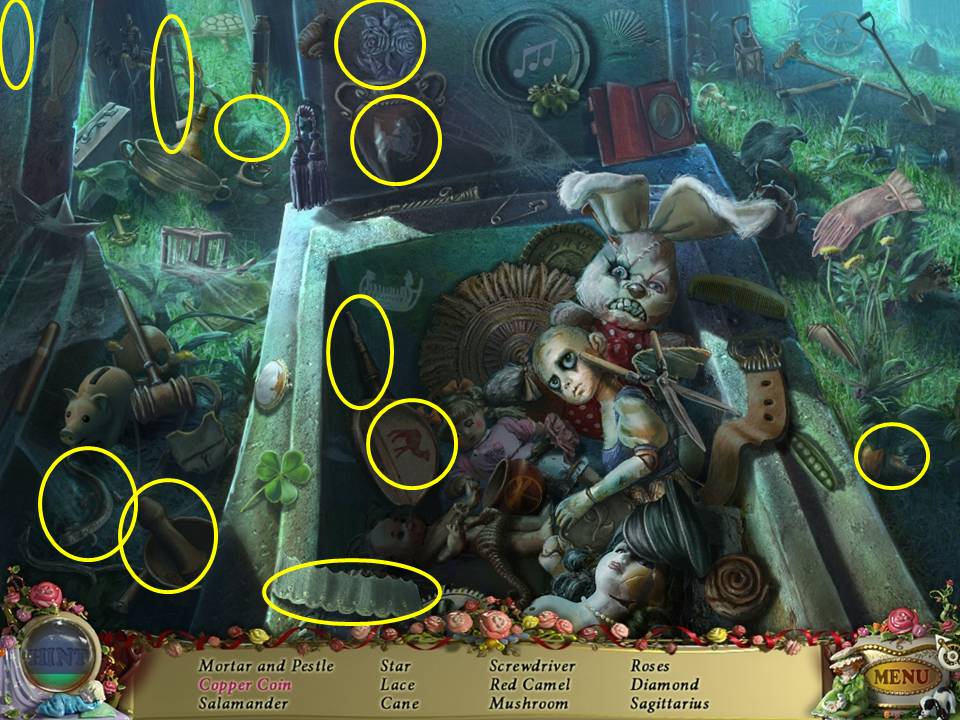
Zoom into the fence and unlock it with the CEMETERY KEY. Proceed through the gate and into the cemetery. Lift the cover off the coffin on the left to initiate a Hidden Object Area.
Find the items listed. Click on the mallet to smash the piggy bank. The broken piggy bank holds the COPPER COIN. Receive the COPPER COIN. Leave the Hidden Object Area and click down twice.
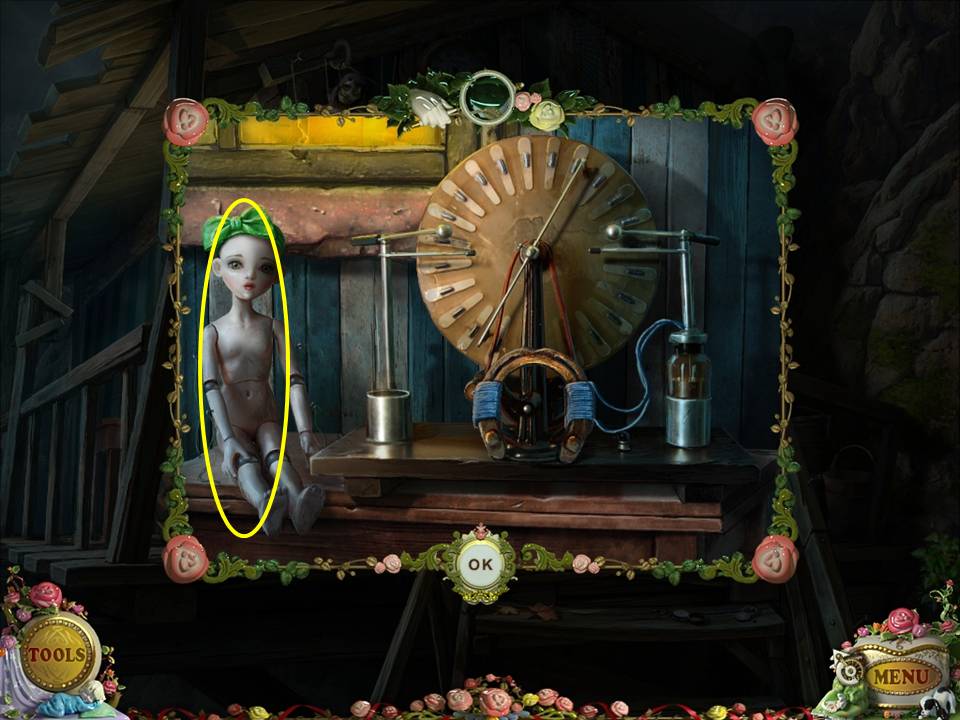
Proceed forward into town and click on the house at the top of the stairs on the right. Zoom into the small table on the left side of the porch. Take the PUPPET on the left with the green bow on its head. Click down twice and zoom into the house with the “Welcome†sign located on the left of the screen.
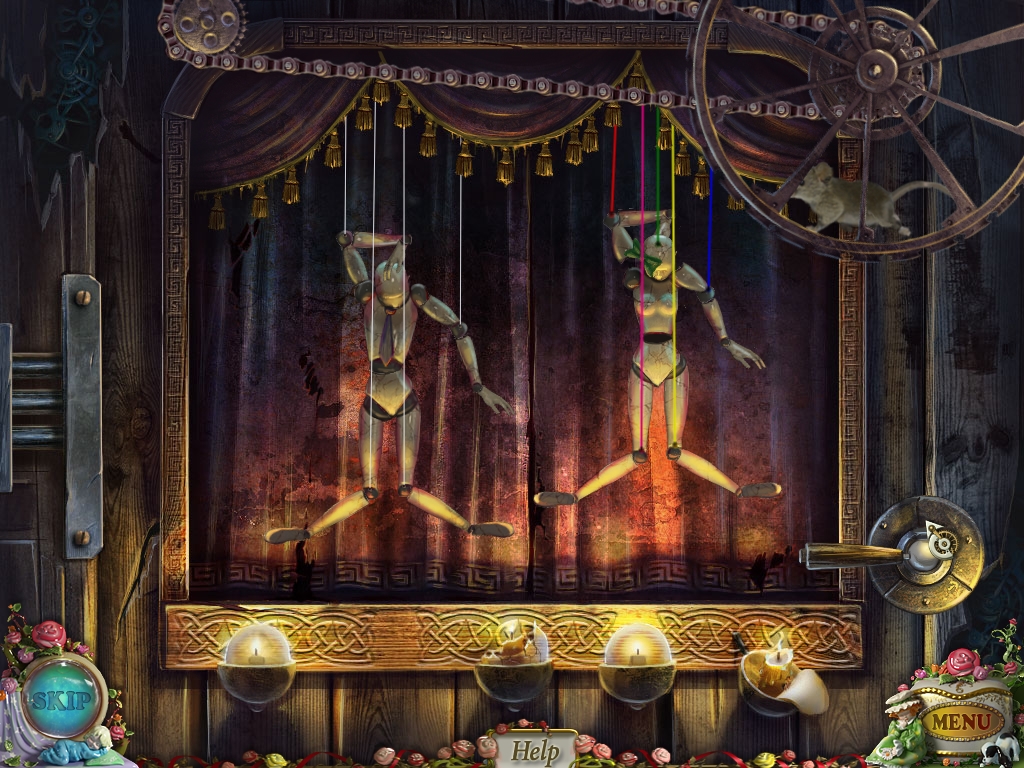
Hang the PUPPET from the strings on the right, opposite the puppet already hanging on the left. Place the MOUSE in the activity wheel at the top right corner. Pull the lever at the bottom right corner to activate the puppets. The object of the game is to get the puppets moving in unison. Watch the movement upon your first pull of the lever. Click on any two strings on the puppet to switch their positions. Pull the lever again to test. Continue swapping strings until the puppets move in unison. The correct order for the strings, moving left to right, is red, pink, green, yellow, blue. After solving this challenge correctly, the game will return you to the top of the stairs. Go back into the building with the “Welcome†sign.
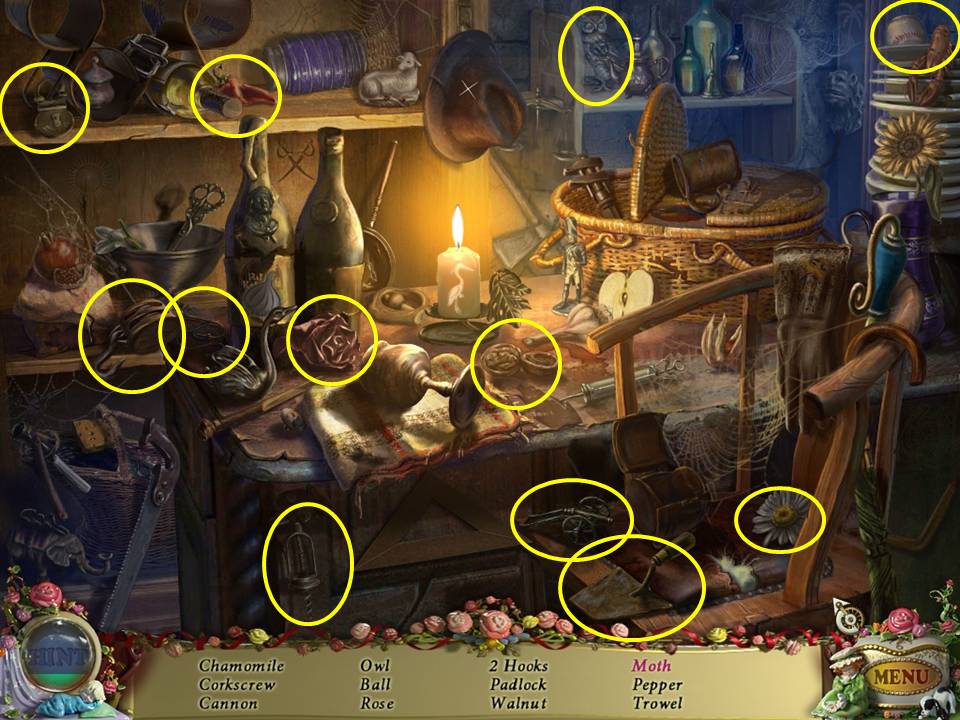
Play the Hidden Object Area on the bar area on the left. Move the hat to find the MOTH. The moth will fly around after the hat is removed. Wait for it to stop before clicking. Receive the HOOK.
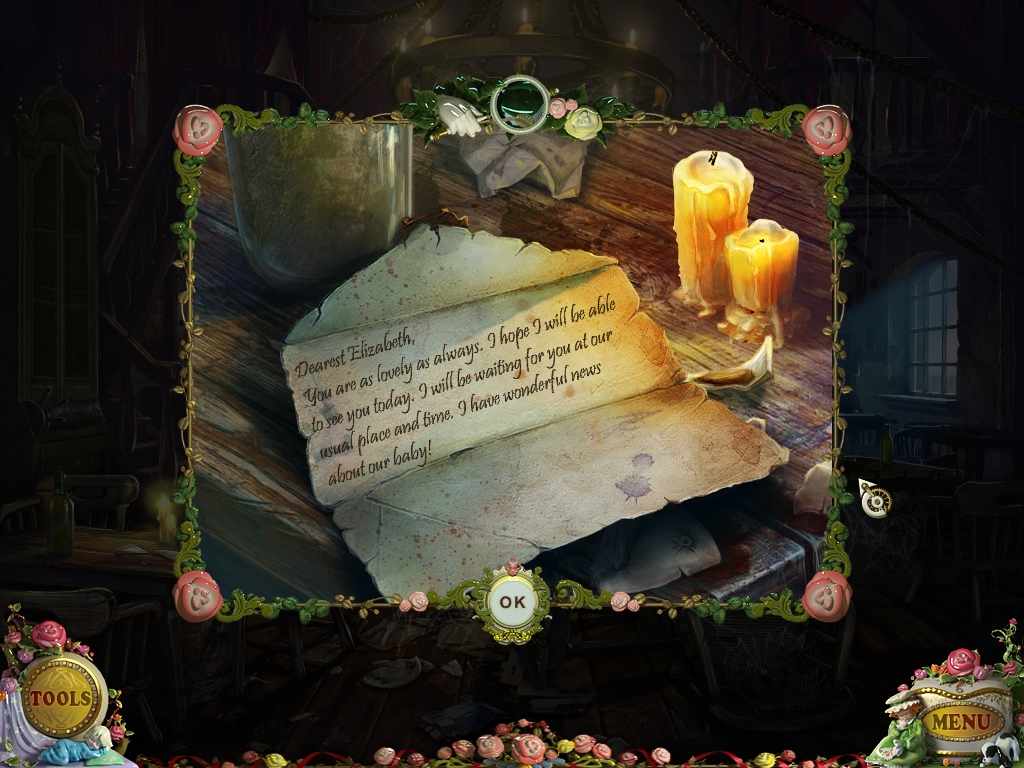
Zoom into the table in the lower left corner. Open the letter. Click down once and proceed forward.
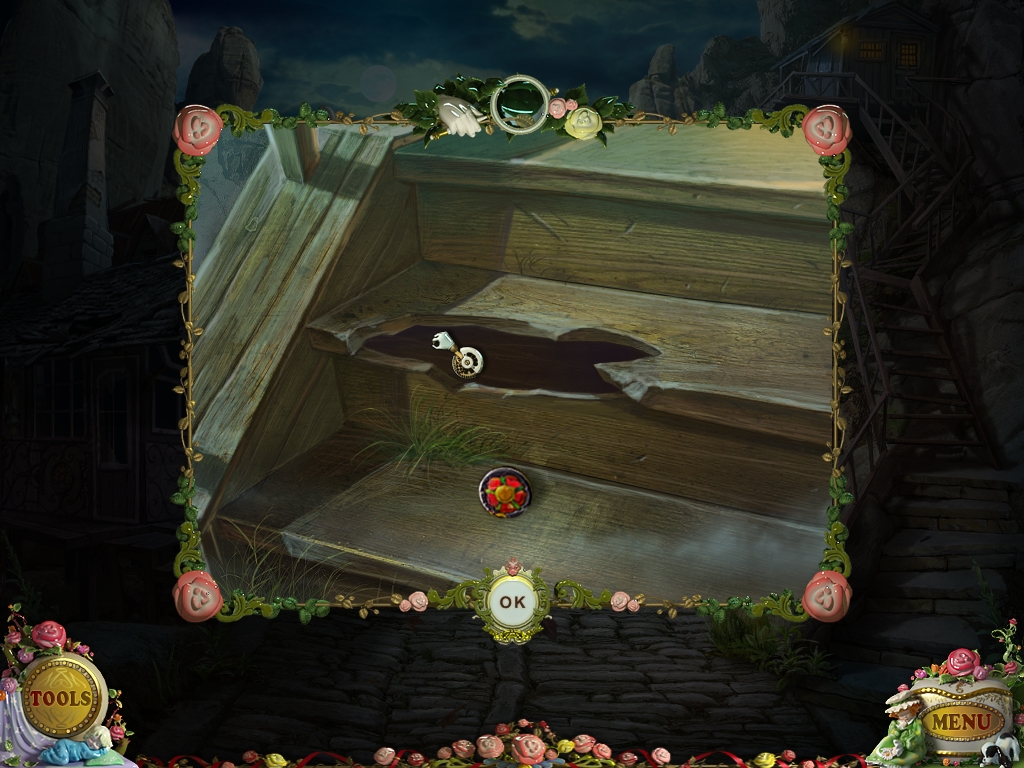
Zoom into the steps beneath the hanging sign on the right. Use the HOOK on the opening in the broken steps to retrieve the third FLOWER DISC. Zoom into the door between the hanging sign and the broken step to activate a puzzle.
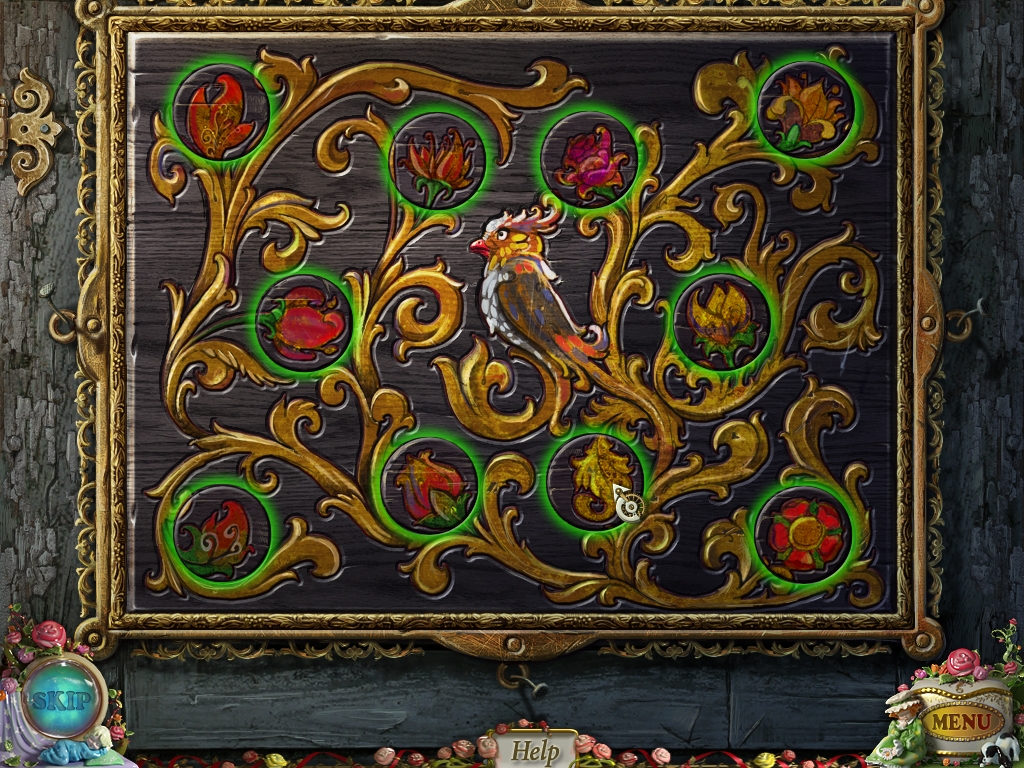
Initiate the game by inserting the 3 FLOWER DISCS on the board. The object of the game is to swap discs until the picture is complete. Click on any two discs to swap their positions. The best way to tackle this is to examine the stems and match the stem position on the disc with the correct position on the background board. When complete, enter the General Store.
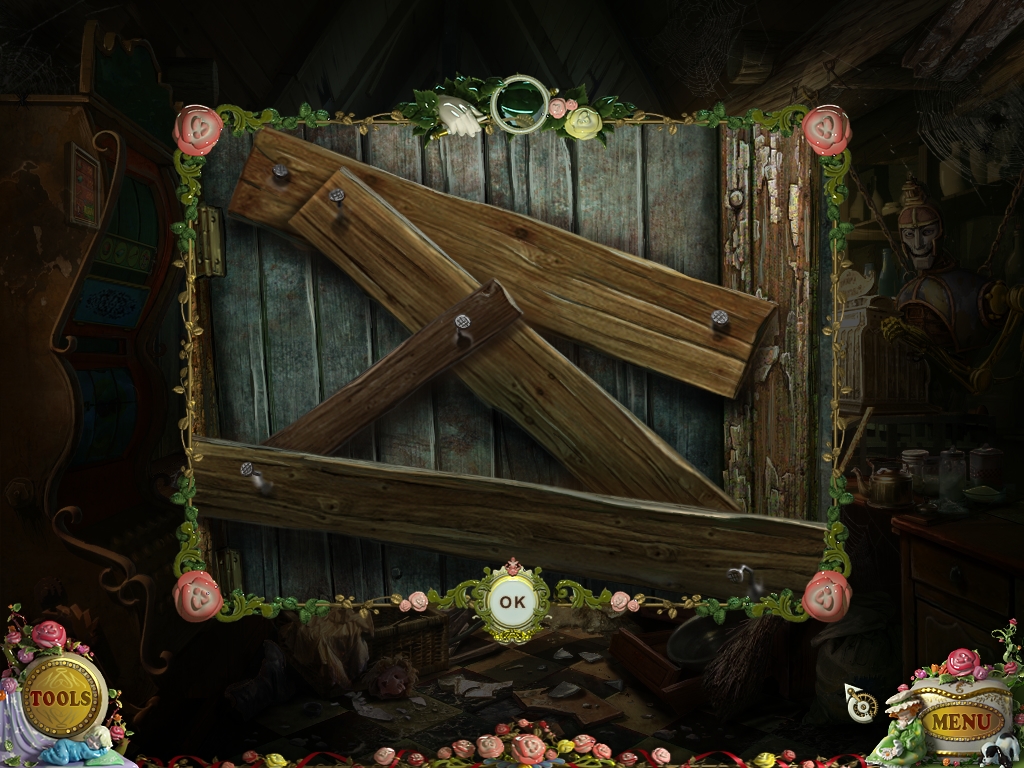
Zoom into the back door. Starting with the outermost board, use the crowbar to remove the 4 boards and to activate a Hidden Object Area.
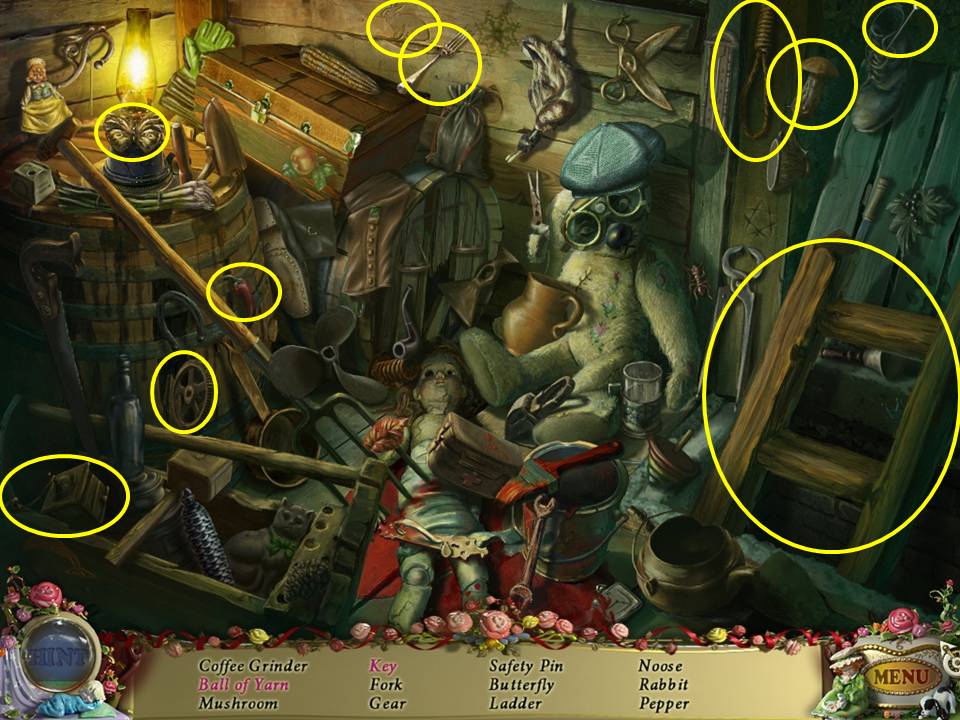
Open the chest to find the ball of yarn. Move the teddy bear’s arm to find the key. Receive the LADDER.
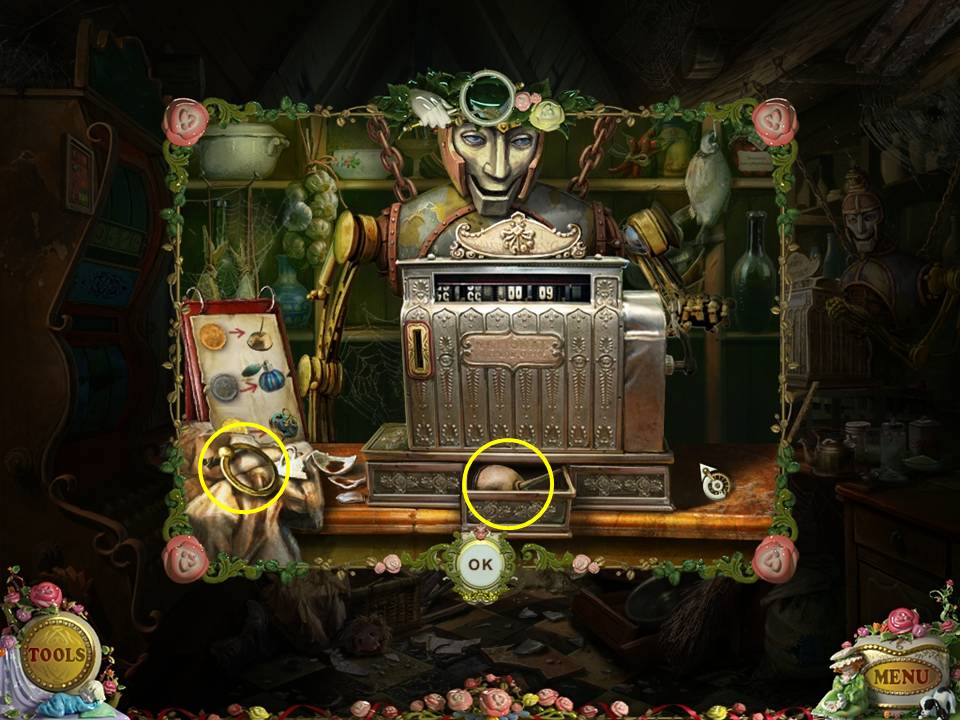
Zoom into the cash register. Insert the COPPER COIN into the slot on the left. Pick up the OIL CAN when the till drawer opens. Pick up the WELL RING. Click down and move toward the back gate at the end of the street.
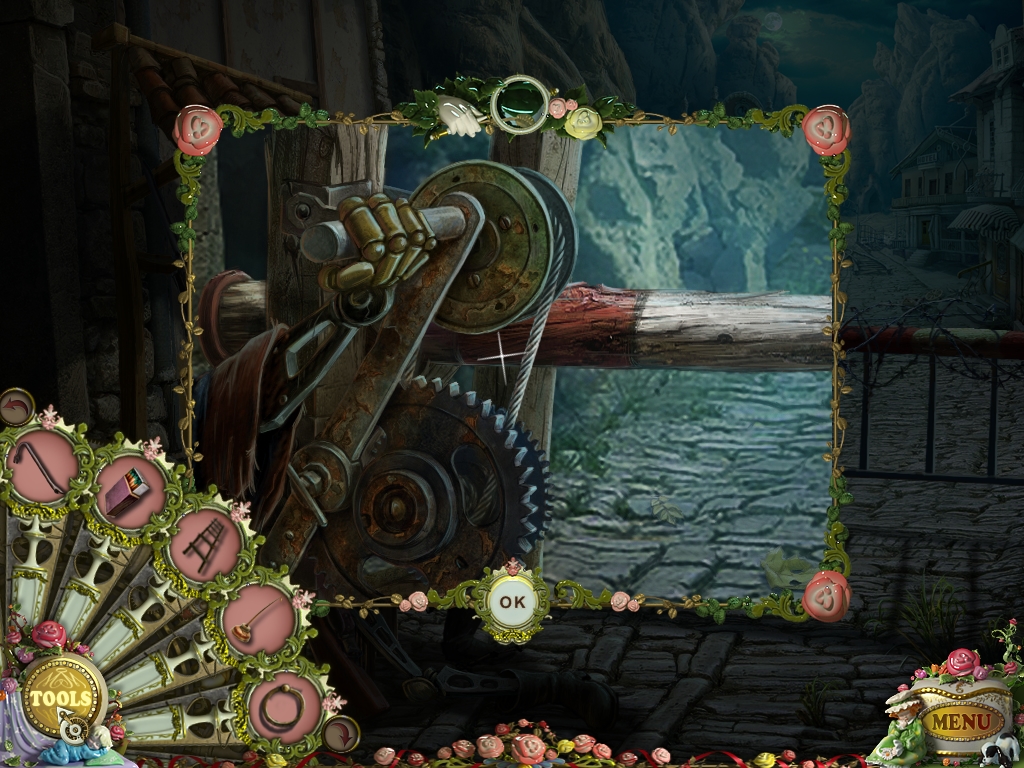
Zoom into the puppet’s hand, which is grasping the gate mechanism. Use the OIL CAN on the gate mechanism to unlock the gate. Proceed through the gate. Click on the puppet with scissors for hands that is standing in the street. Move to the right of the large building at the back. Play the Hidden Object Area to the left of the gate.
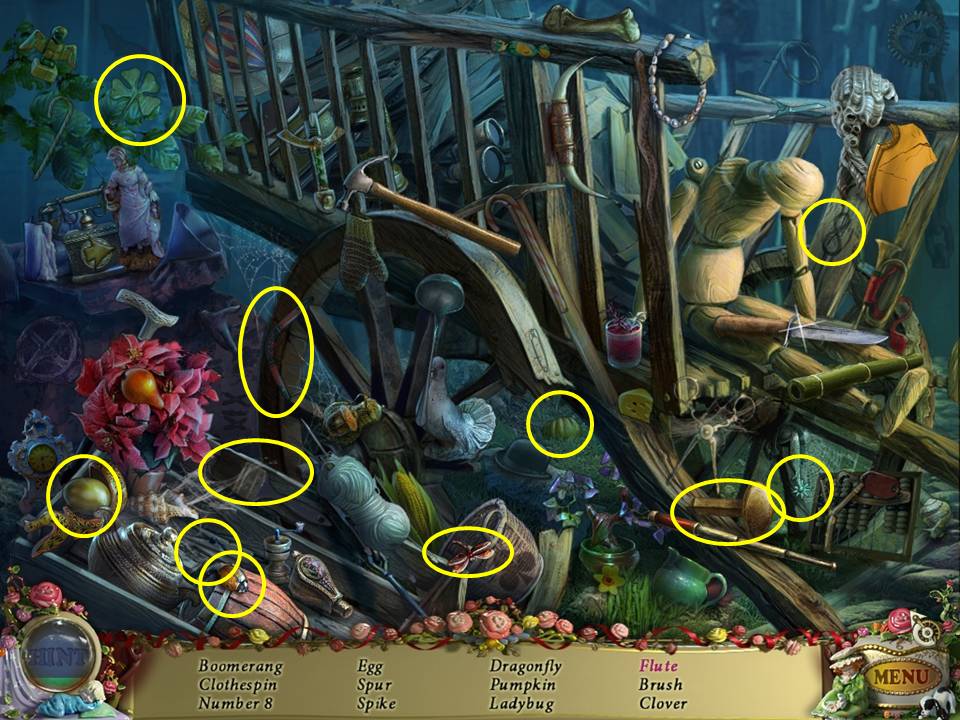
Find the items listed. To get the flute, you must click on the knife to make it carve the flute. Receive the SPIKE. Return to the center of town.
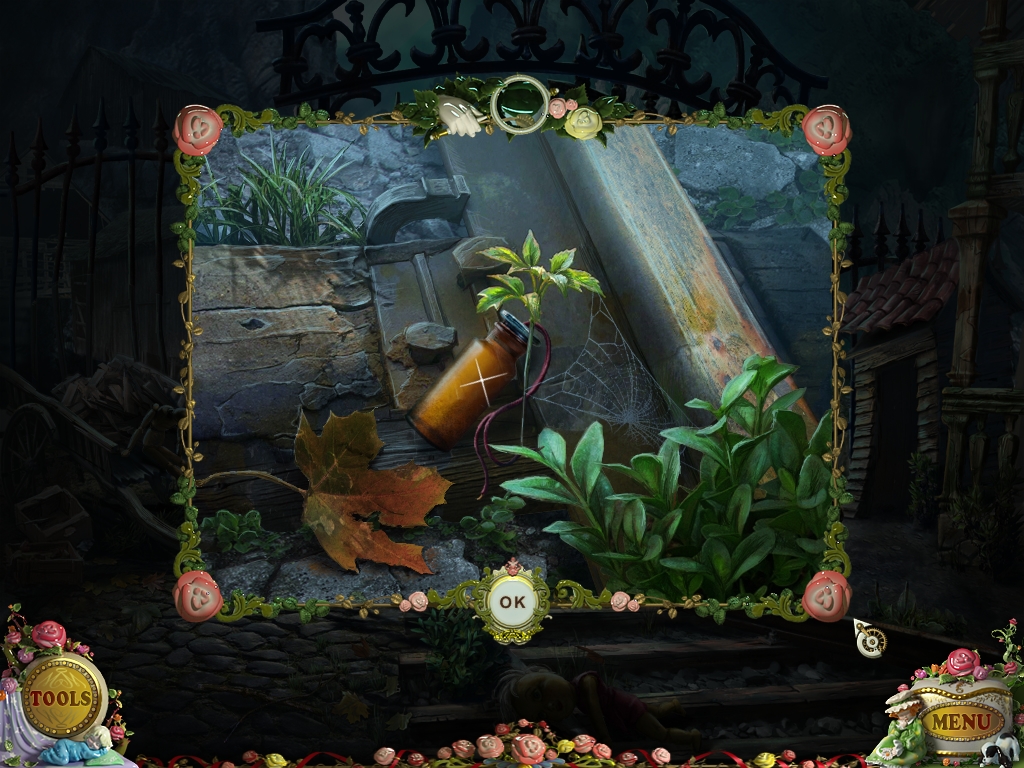
Zoom into the railroad ties. Pick up the BATTERY. Click down twice and move to the house at the top of the stairs on the upper right corner of the screen.
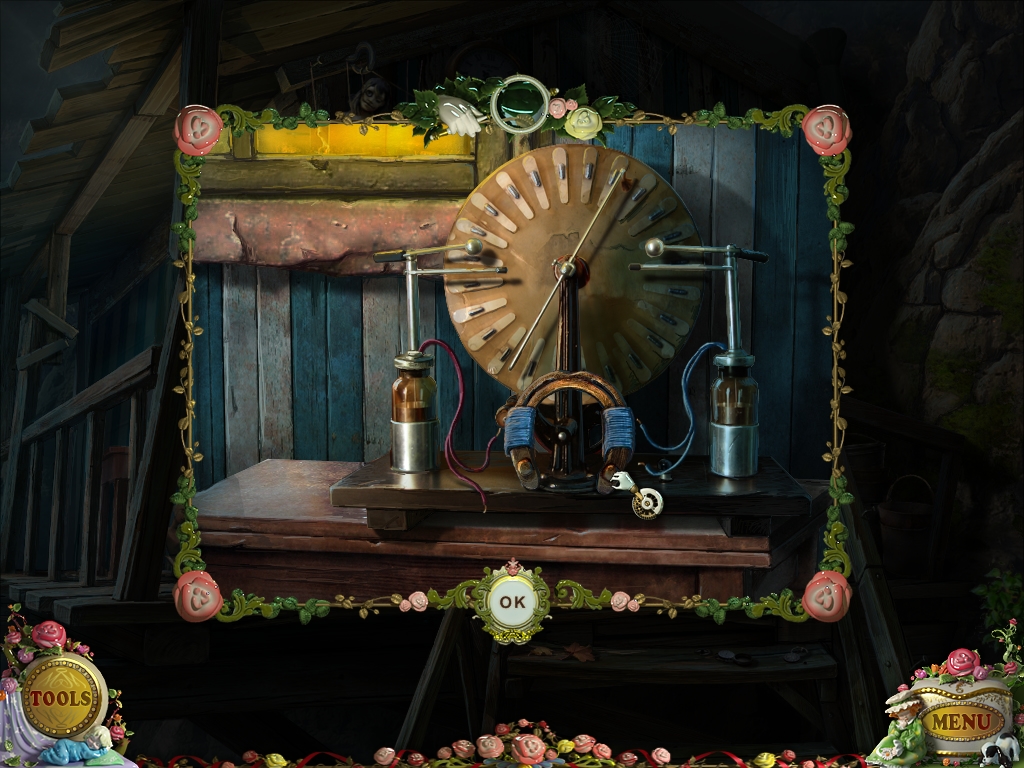
Zoom into the small table on the left. You will see a device on the table. Put the BATTERY on the left side of this device. Pick up the MAGNET in the middle. Click down. Move forward and to the left by the large building in the back.
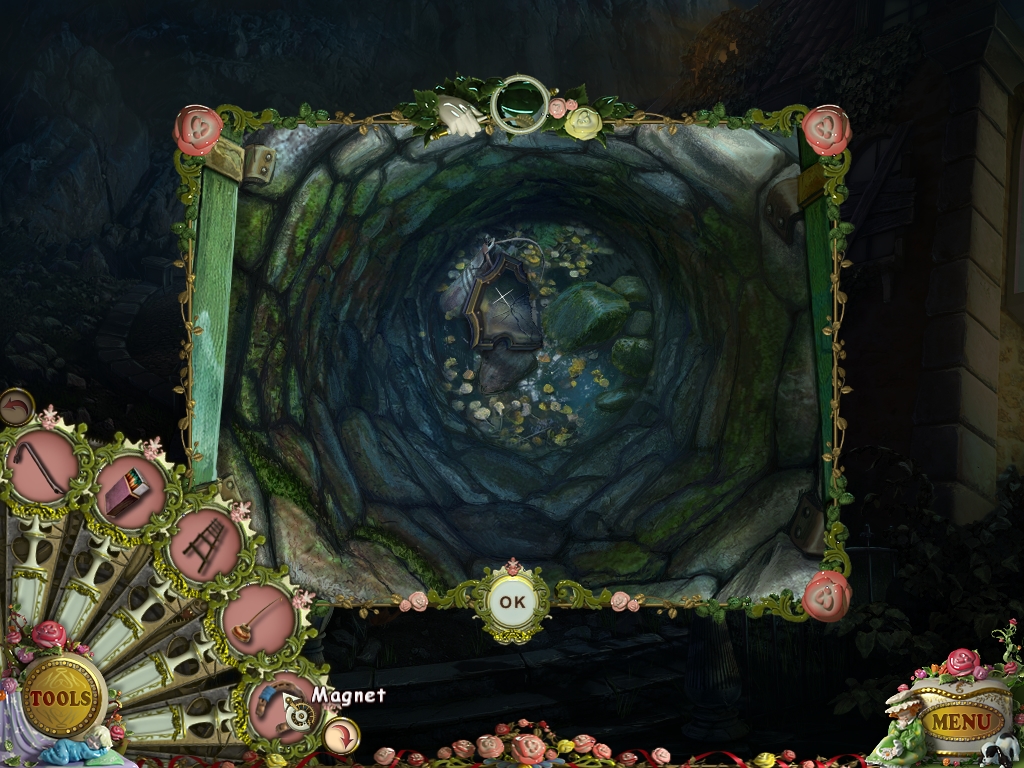
Zoom into the well. Insert the WELL RING on the well cover. Open the cover. Drop the MAGNET down the well to retrieve the COAT OF ARMS PIECE. Click down.
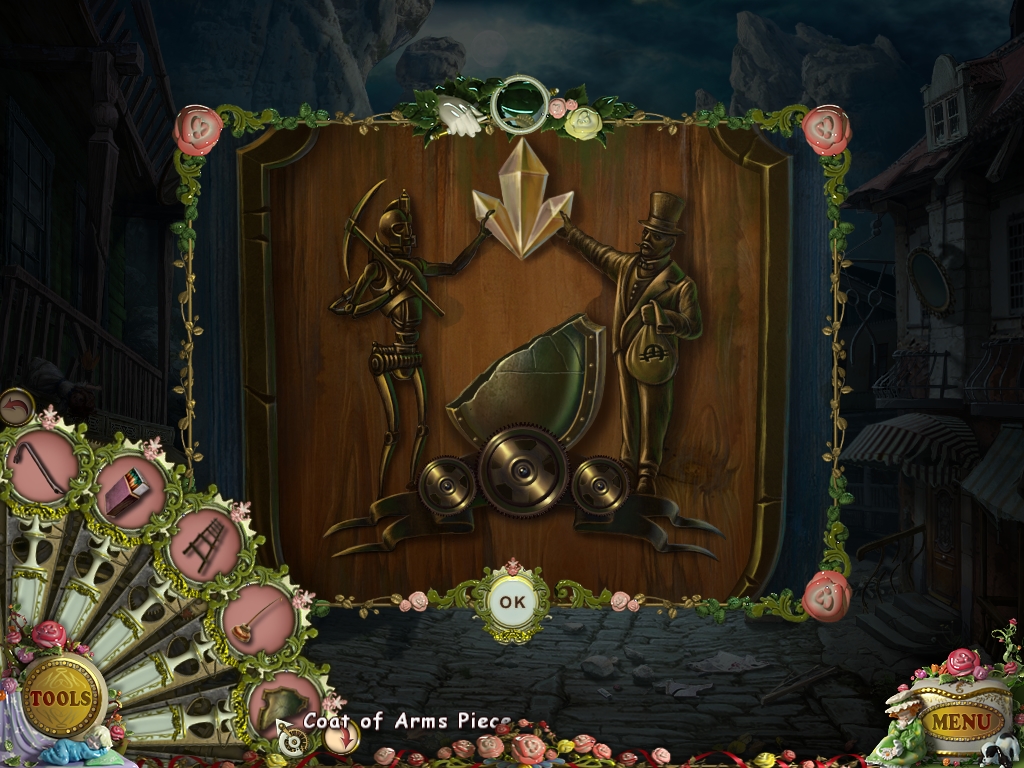
Zoom into the door on the large building in the back. Insert the COAT OF ARMS PIECE in the door. Enter the Estate. Click on the steps, which will crumble and activate a Hidden Object Area for you to play.
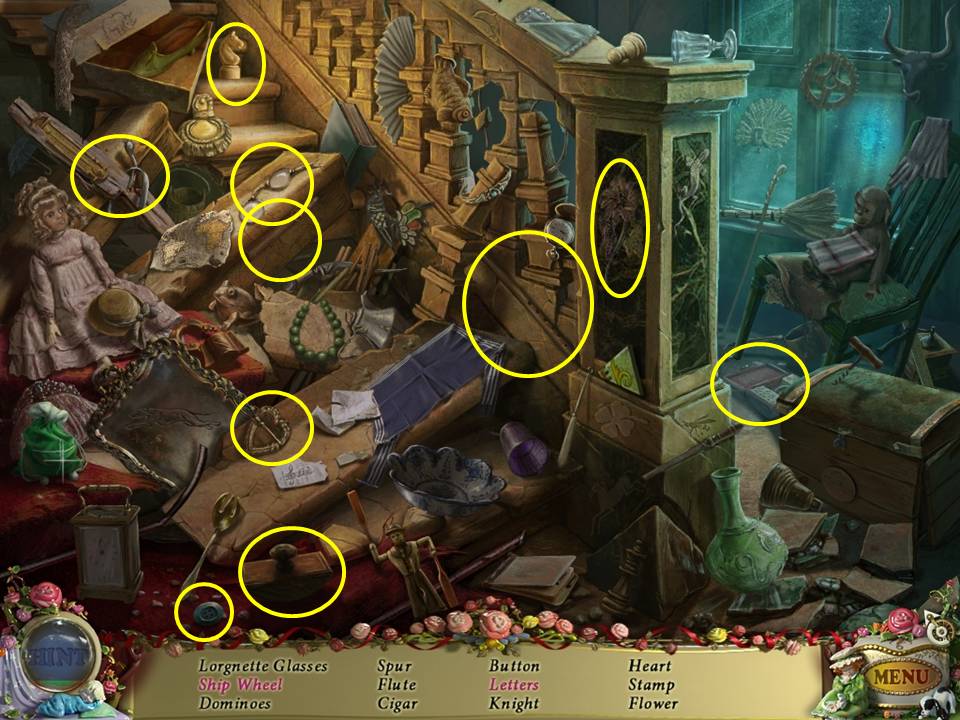
Find the items listed. Locate the ship wheel by opening the chest on the right. Open the green pouch on the left to locate the LETTERS. Receive the LETTERS. Return to the Estate.
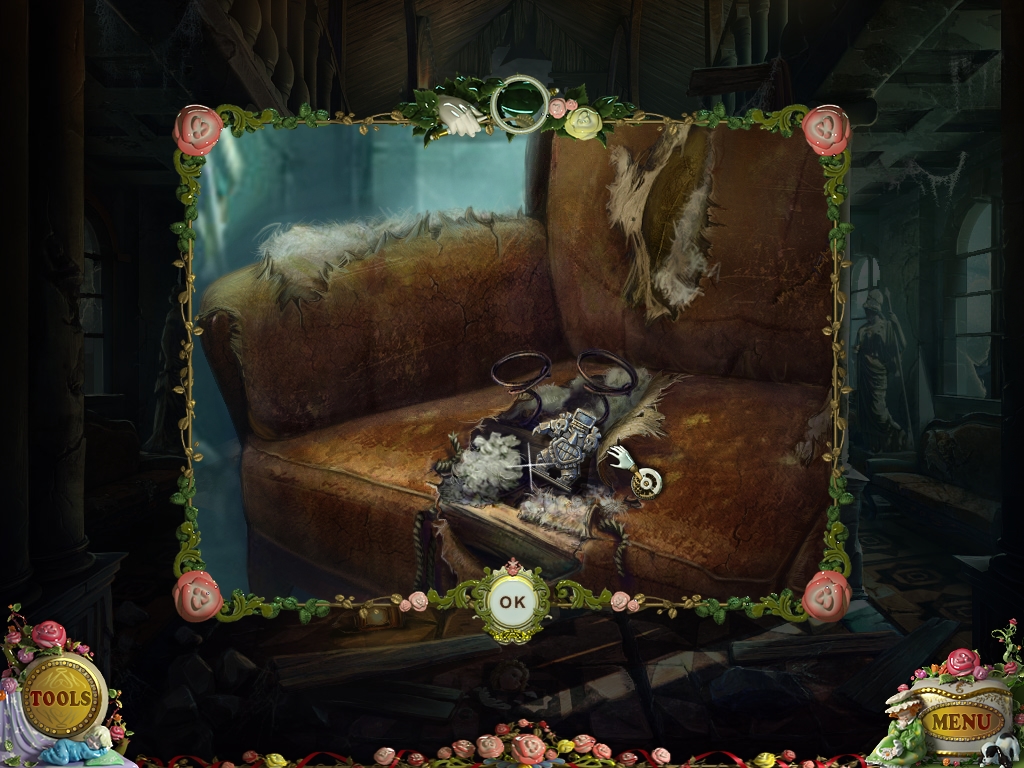
Zoom into the chair on the right. Click on the stitches to remove them. Take the METAL STATUE. Return to the Cemetery.
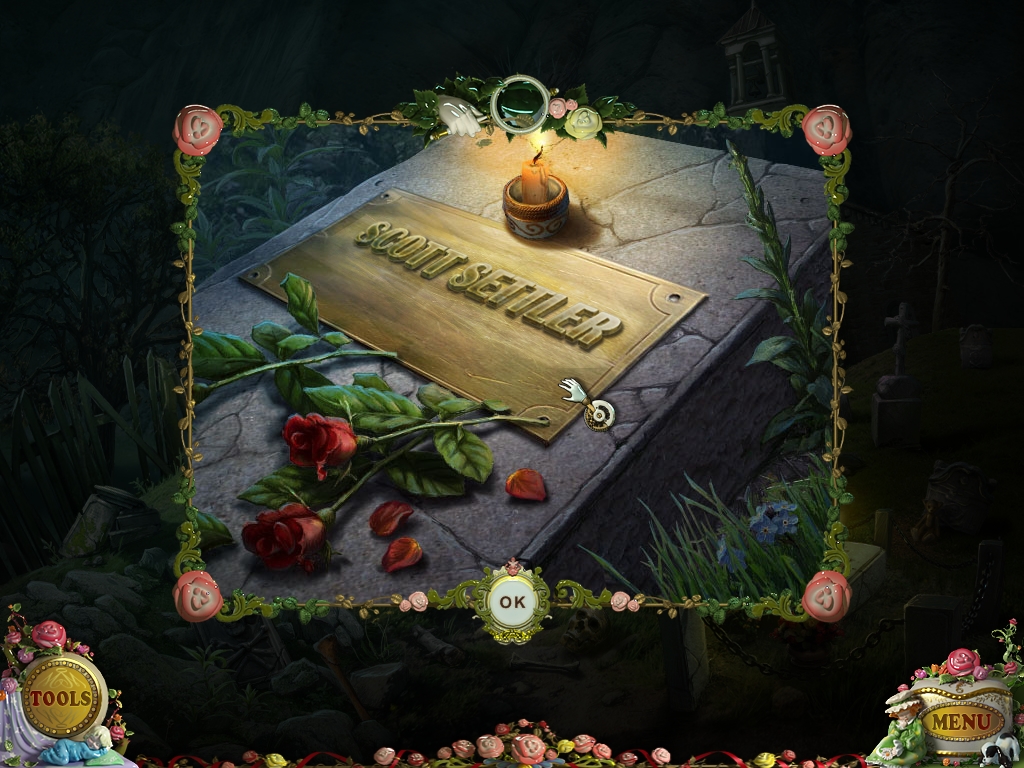
Zoom into the coffin on the lower right. Place the LETTERS on top of the coffin. The deceased’s name, Scott Settler, appears. Open the coffin cover and pick up the BUTTERFLY RING. Play the Hidden Object Area again.
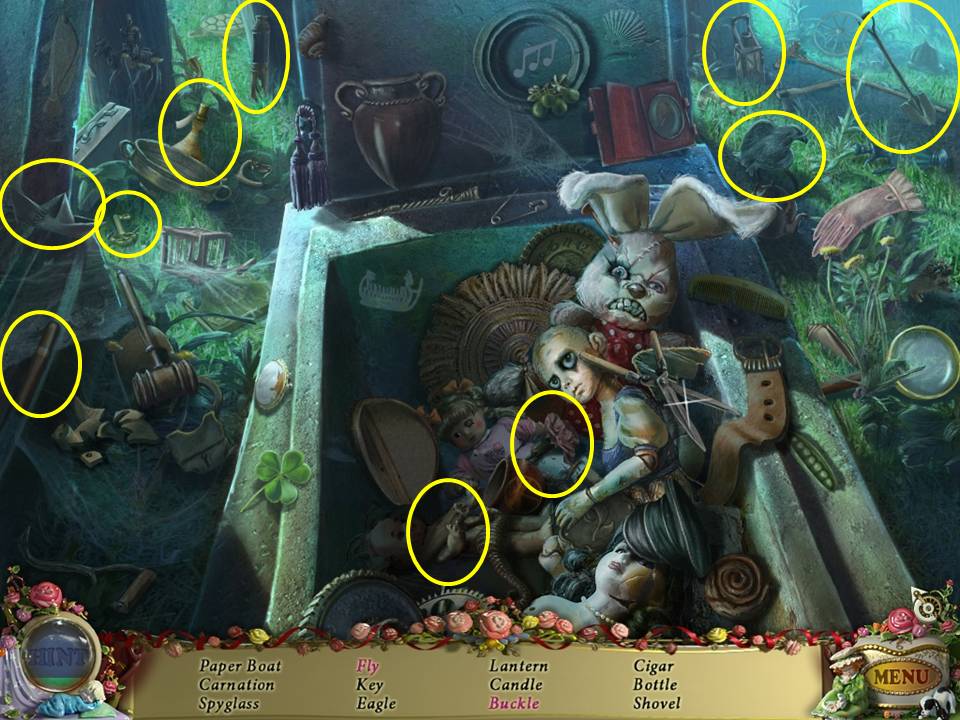
Find the items listed.
Click on the clippers to cut the buckle from the belt. Move the magnifying glass to locate the fly. Receive the WEED KILLER. Click down twice.
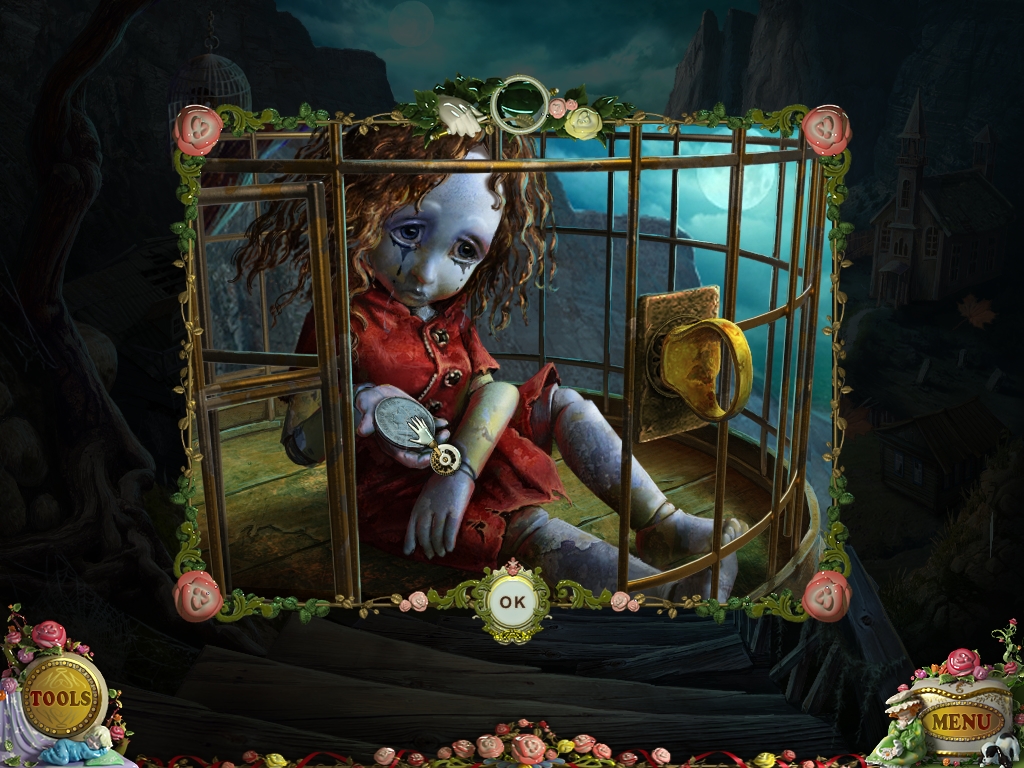
Zoom into the birdcage in the top left corner. Place the BUTTERFLY RING on the lock. Click the ring and pick up the SILVER COIN from inside the cage. Return to the General Store.
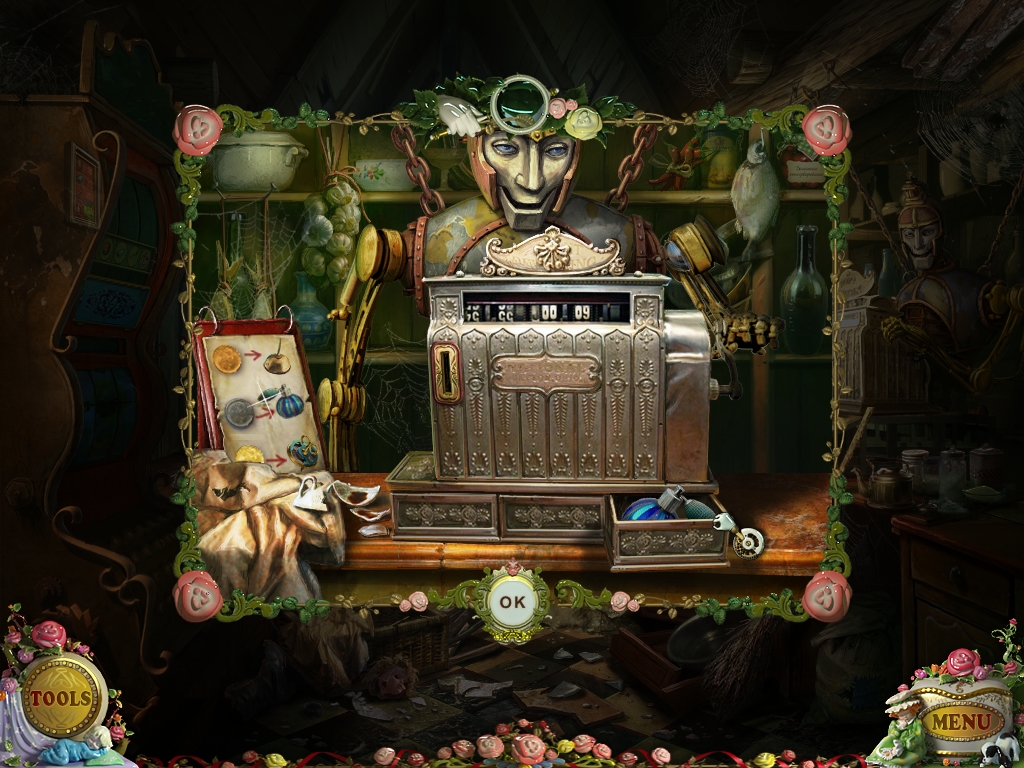
Zoom into the cash register. Insert the SILVER COIN into the slot on the left. Pick up the PESTICIDE from the till when the drawer opens. Return to the Well area.
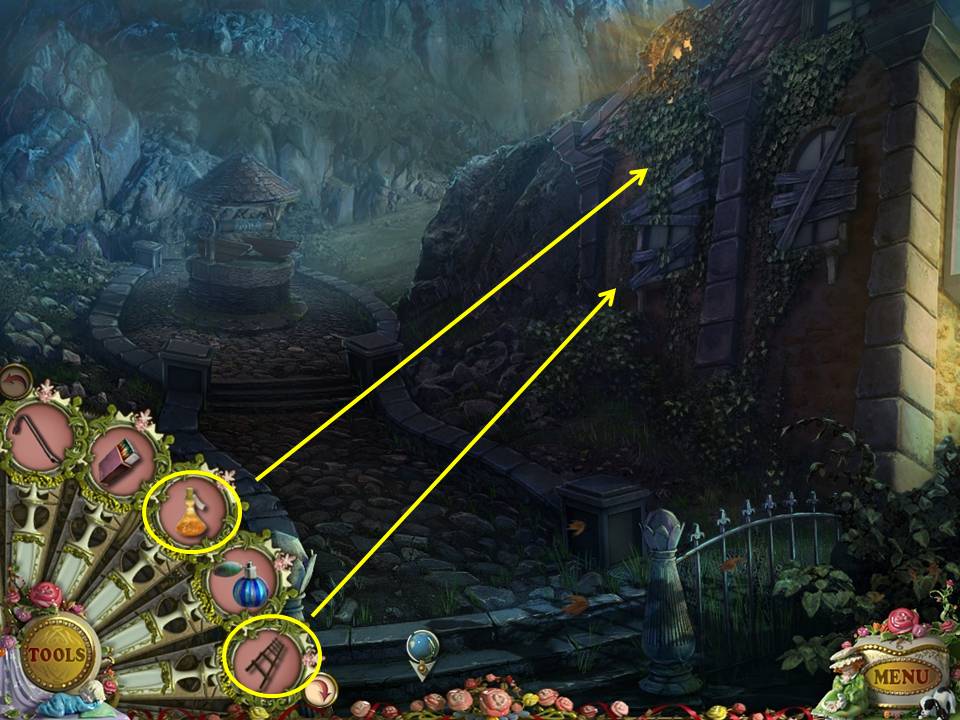
Place the LADDER on the side of the building. Zoom into the window. Use the WEED KILLER to kill the poison ivy. Open the window. Enter the building.
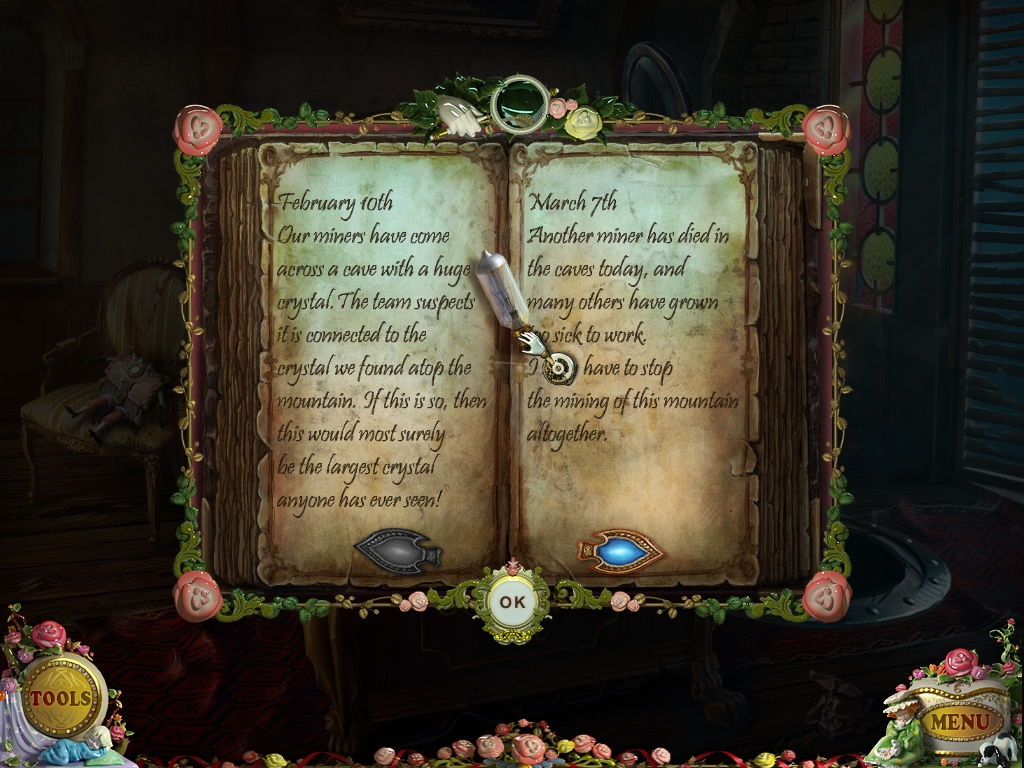
Click on Felicia. Zoom into the diary on the desk. Take the BULB. Click down three times and then click on the house at the top of the stairs in the upper right corner of the screen. Zoom into the door.
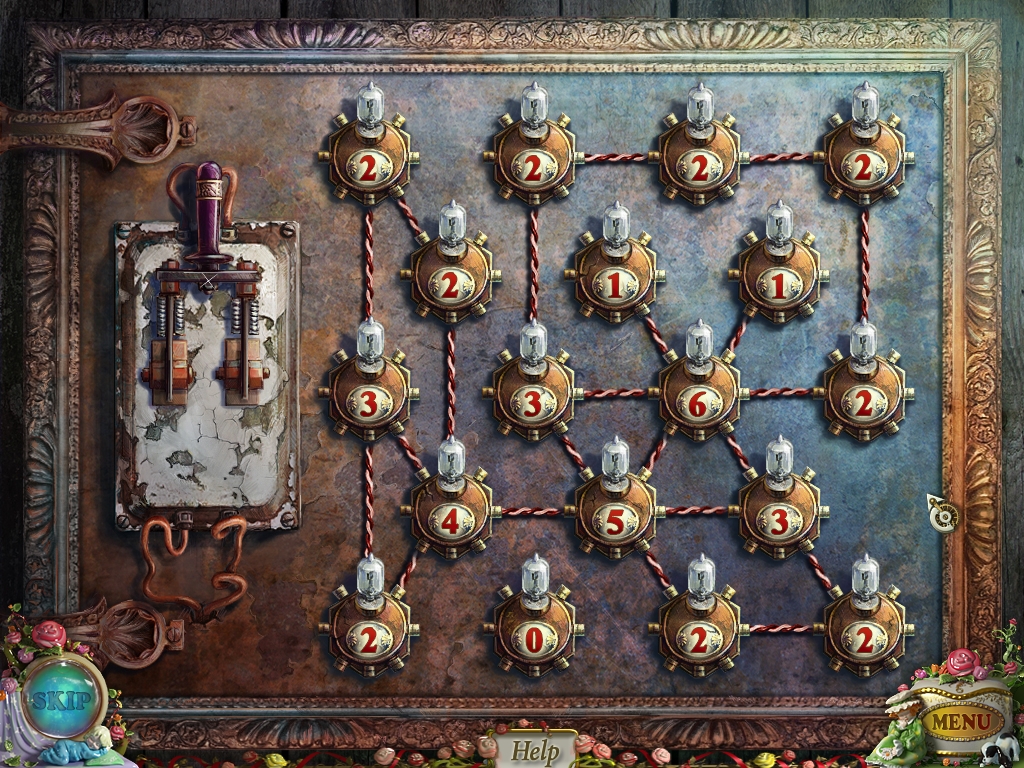
Remove the burnt bulb. Replace it with the BULB in your inventory. This will activate a puzzle. The object of the puzzle is to connect the bulb so that the number displayed in the center is equivalent to the number of wires attached to it. Place your cursor between the two bulbs you want to connect. A faint line will appear. Click on it to confirm the connection. If you make a connection in error, click on the wire to remove it. Connect wires until you have everything in place. When completed, flip the lever on the left to initiate power. Bulbs that have been connected correctly will light up. After you successfully complete this challenge, enter the Puppetmaker’s Shop and play the Hidden Object Area.
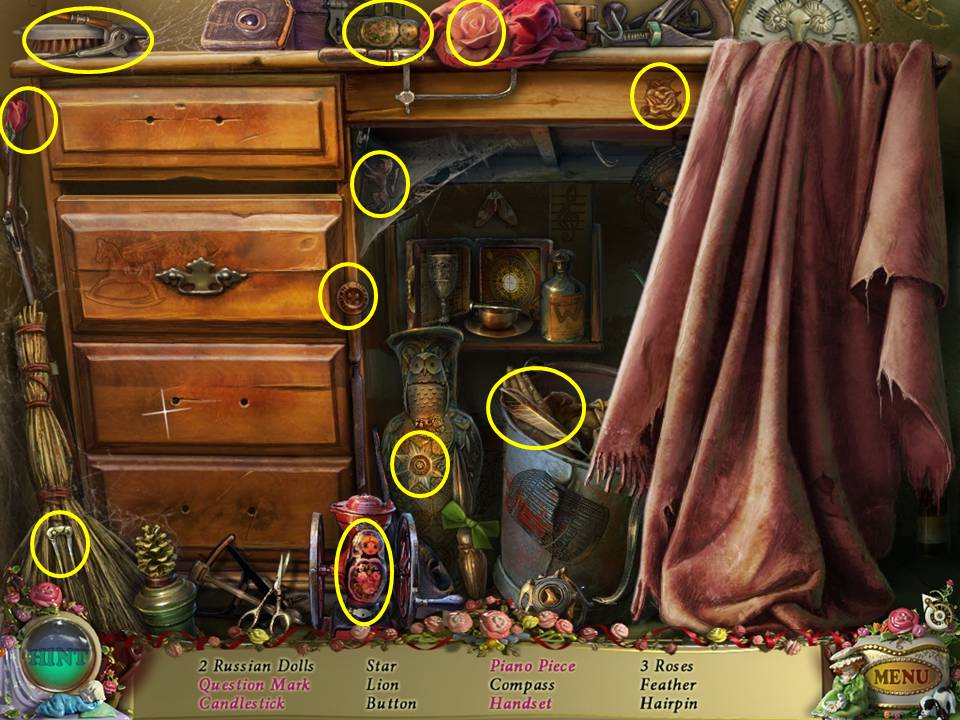
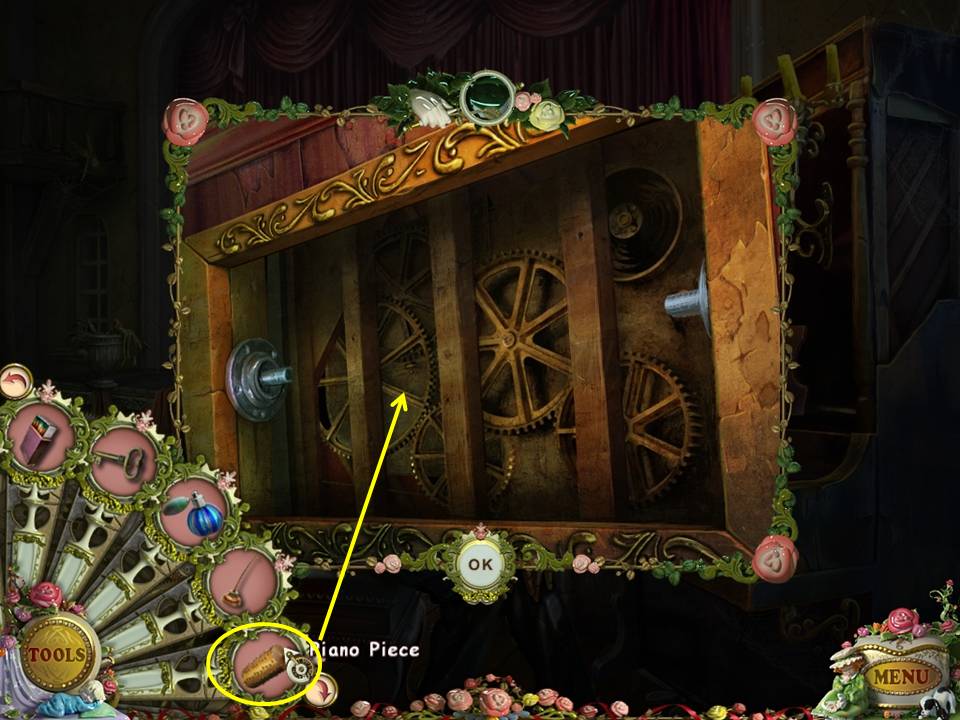
Find the items listed. Open the bottom left drawer to take the PIANO PIECE. Draw aside the red curtain on the right to find the handset, question mark, and candlestick. Return to the Puppetmaker’s Shop.
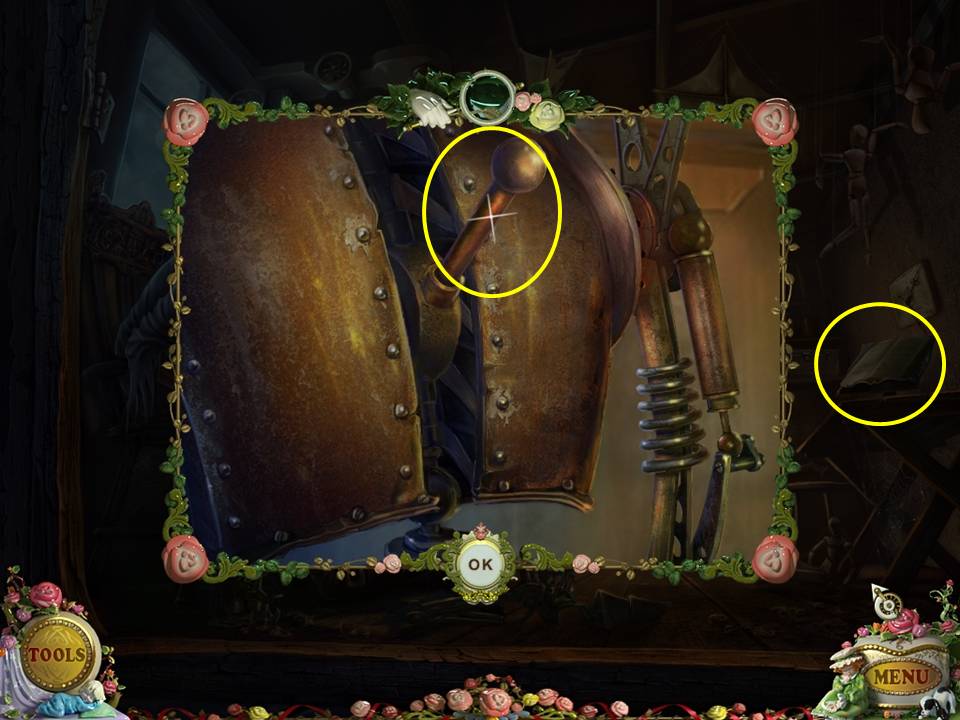
Zoom into the puppet standing by the table. Pick up the LEVER. Read the diary marked on the right. Click down twice and click on the house on the left.
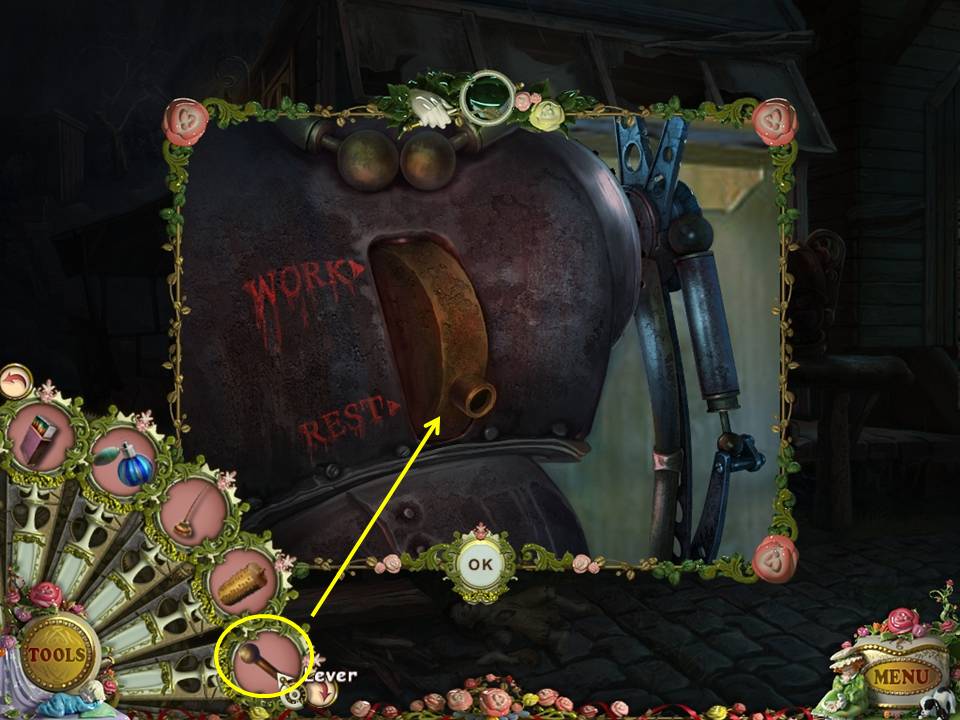
Zoom into the puppet. Insert the LEVER in the slot. Click on it to activate the puppet. Follow the puppet into the Blacksmith’s House.
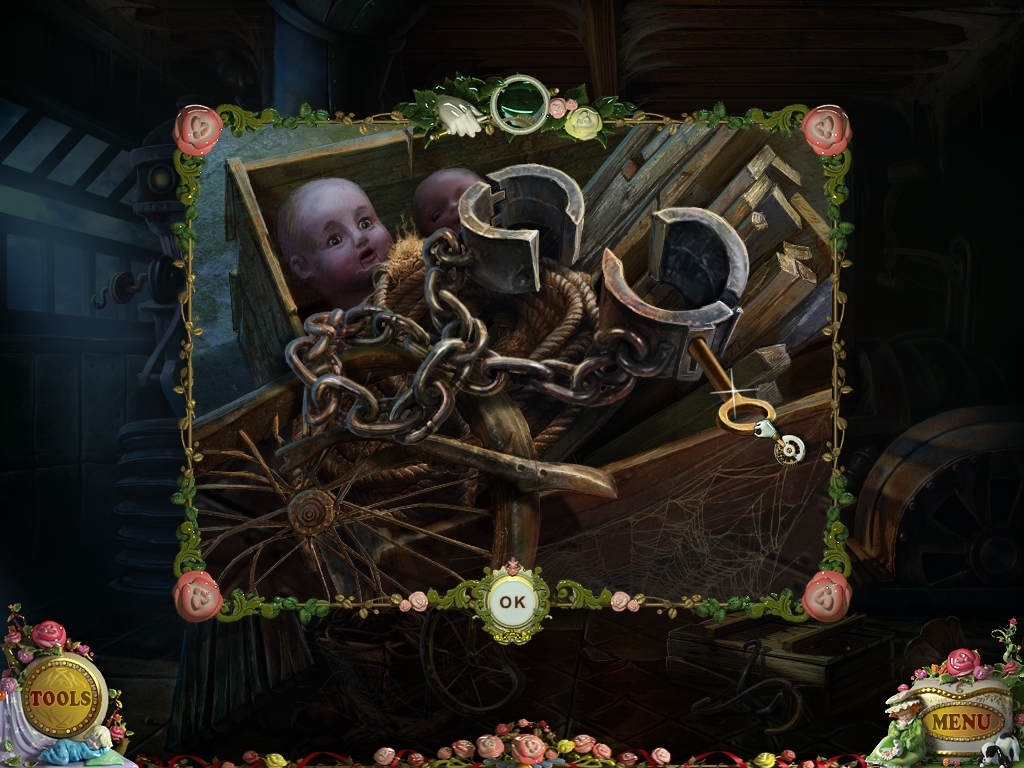
Zoom into the junkpile in the foreground. Pick up the HANDCUFF KEY. Click down three times and go into the Saloon on the left. Play the Saloon Hidden Object Area again.
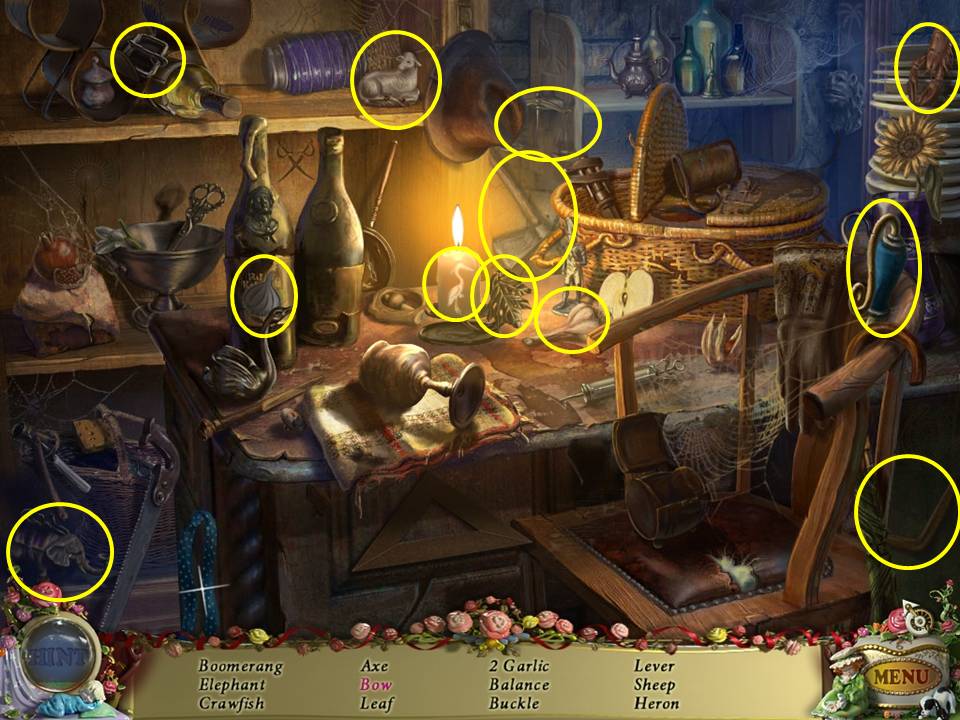
Find the items listed. Click on the blue ribbon in the lower left to tie the bow. Receive the LEVER. Return to the Saloon.
Zoom into the puppet playing the piano at far right. Zoom into the top part of the piano. Place the PIANO PIECE in the space.
Zoom into the last dancer on stage, the one with the blue headdress. Pick up the HEART. Click down.
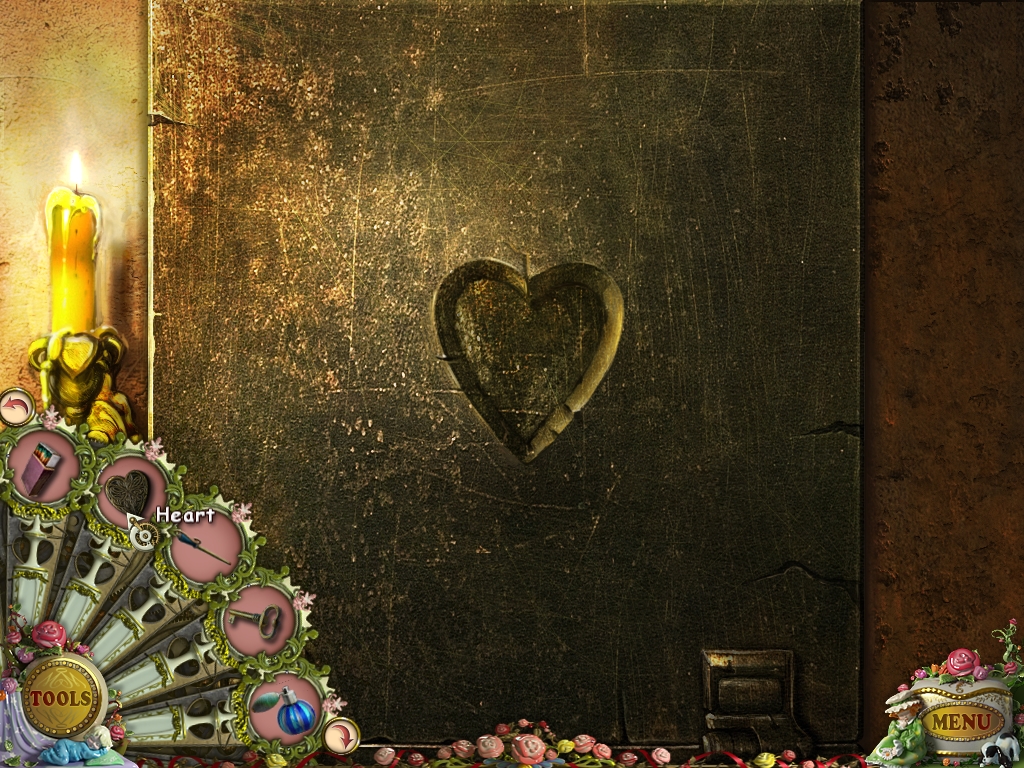
Click on the curtain in the upper left hand corner. Zoom into the door located there. Insert the HEART into the slot to initiate a puzzle.
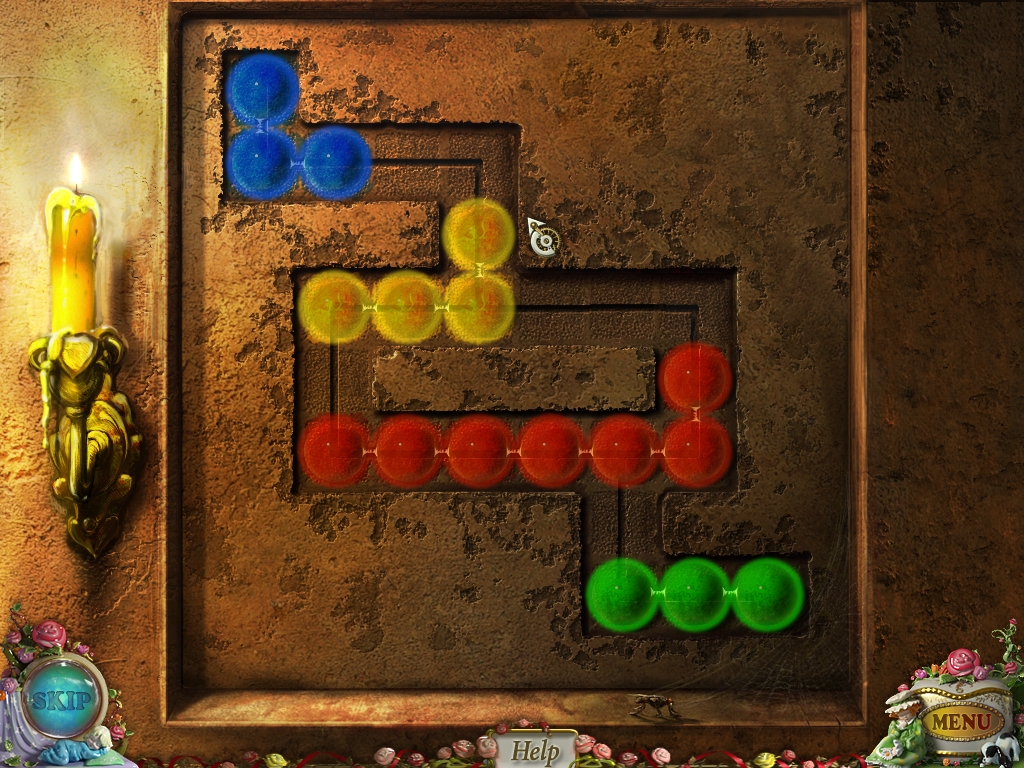
The object of this puzzle is to drag the balls in a string to pull it along the track through the channel that has its matching color. You can only drag a ball from either end of the string, not the middle. When correctly placed, the balls will light up. All balls must be lit to solve the puzzle and move forward. Proceed through the door into the Bedroom after solving the puzzle. Play the Hidden Object Area in the Bedroom.
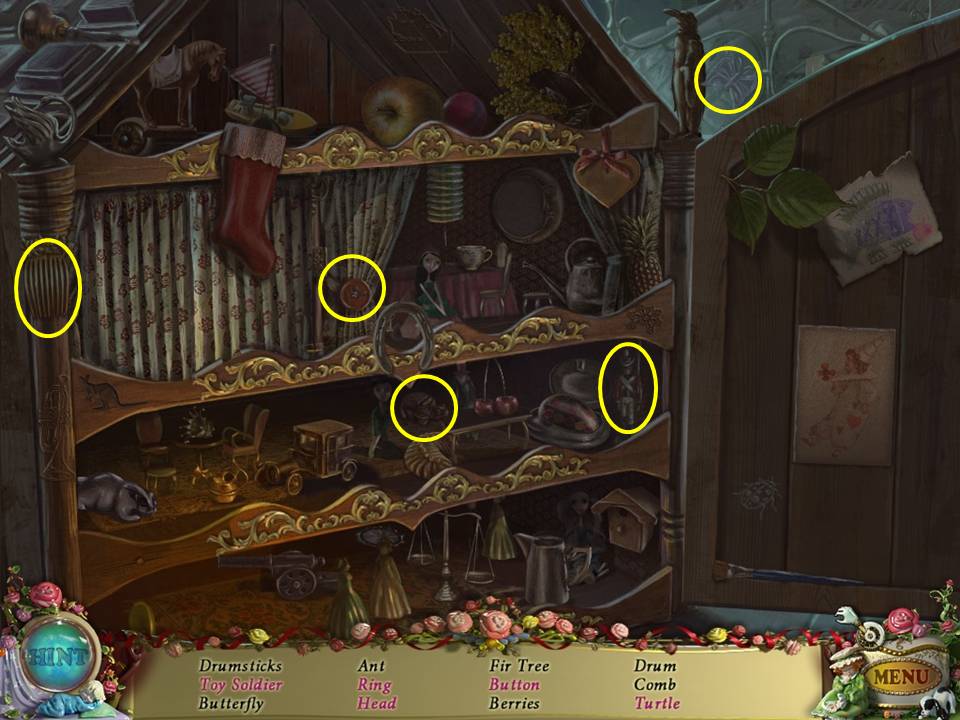
Find the items listed. Items listed in pink are either inside the cupboard doors or behind the curtain within the cupboard. The ring and PUPPET HEAD are behind the curtain. The berries and the ant are on the outside of the door. The drumsticks, drum, and the fir tree are behind the right-hand door. Receive the PUPPET HEAD. Return to the General Store.
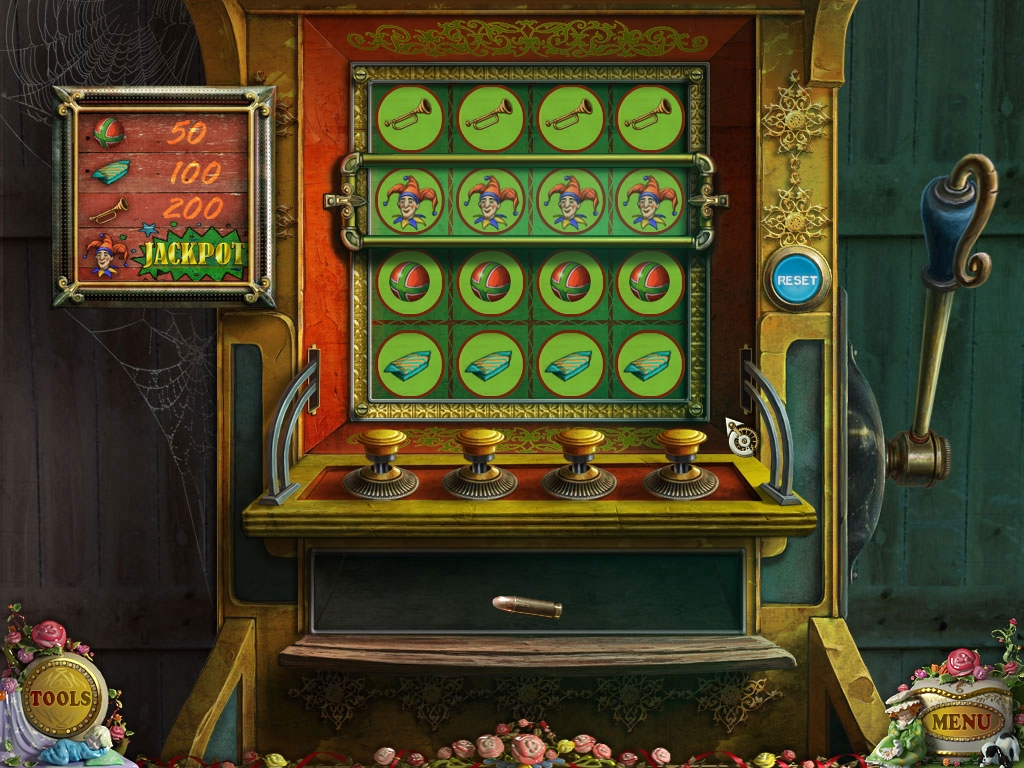
Zoom into the slot machine on the left. Place the LEVER on the right side of the machine. Buttons will be revealed. The object of the game is to press the buttons in the correct order to obtain 4 jokers across the middle line. Moving from left to right, count the buttons as 1, 2, 3, and 4. You can try this on your own and hit reset to begin again. To solve the puzzle, press the buttons in this order 1, 4, 3, 3, 1, 1. Pick up the BULLET from the coin tray. Return to the Guardhouse (click down four times from the store and enter on the left) and play the Hidden Object Area.
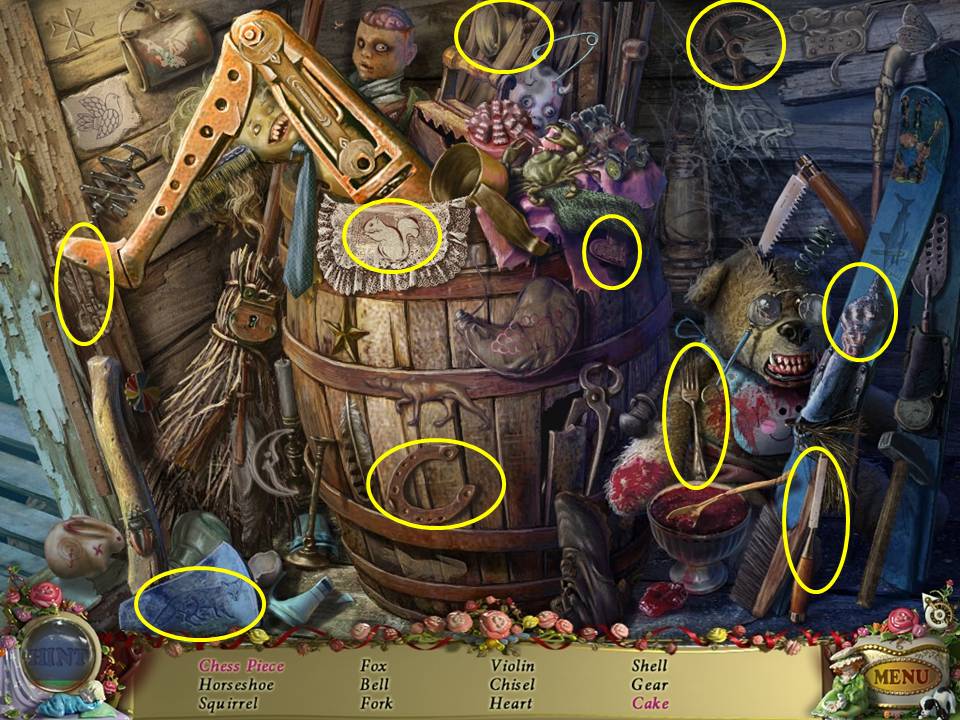
Find the items listed. Move the box with a bow to find the cake. Click the spoon in the bowl to find the chess piece. Receive the CHISEL. Return to the Guardhouse.
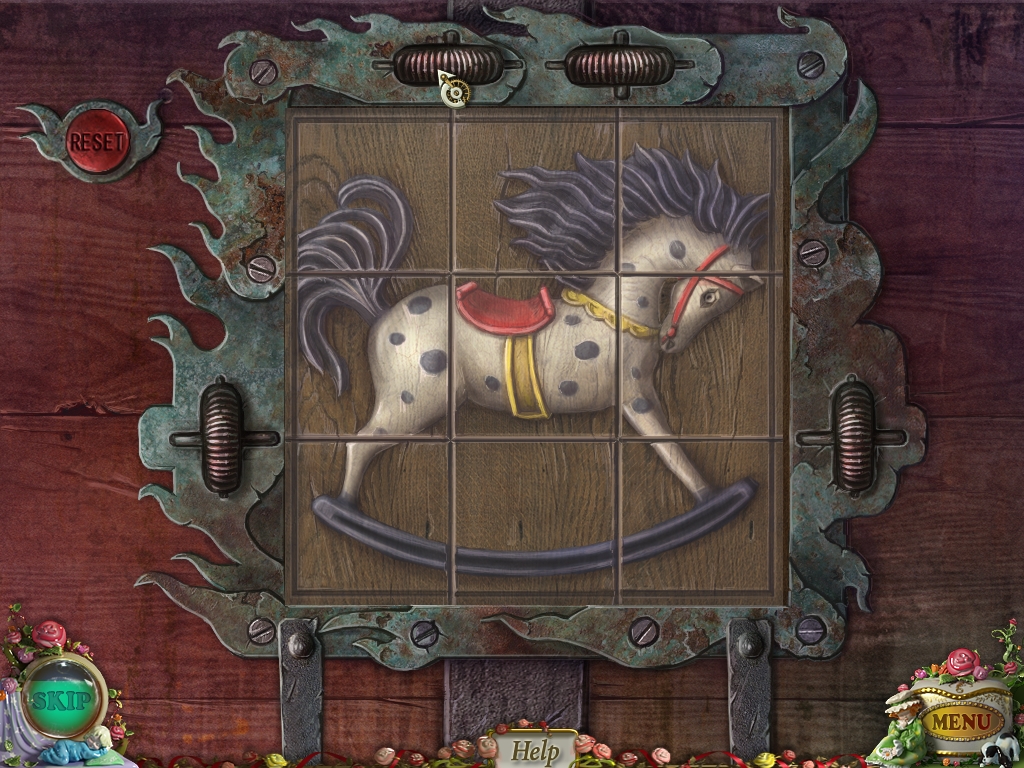
Zoom into the cell. Insert the HANDCUFF KEY into the keyhole. Zoom into the jail door and then the chest to initiate a puzzle. Click on the rollers to adjust the rocking horse image. If you complete a row or column it will lock into place. You can try this on your own or use the following formula to solve the puzzle. If you consider that the two rollers across the top are 1 and 2 and the ones on the side from left to right are 3 and 4, make these moves: 1, 2, 2, 3, 3, 3, 4, 3, 4, 3, 1, 1, 3, 1, 1, 1. When the puzzle is completed, the chest will open to reveal a revolver. Insert the BULLET into the REVOLVER. Take the REVOLVER. Return to the Well area.
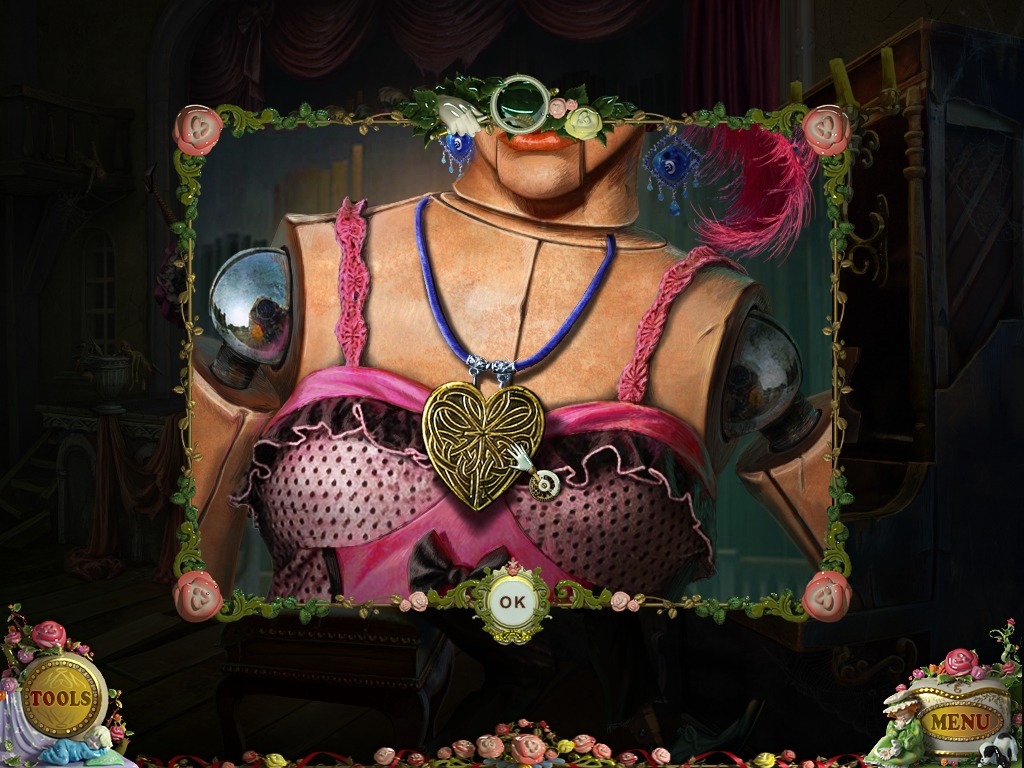
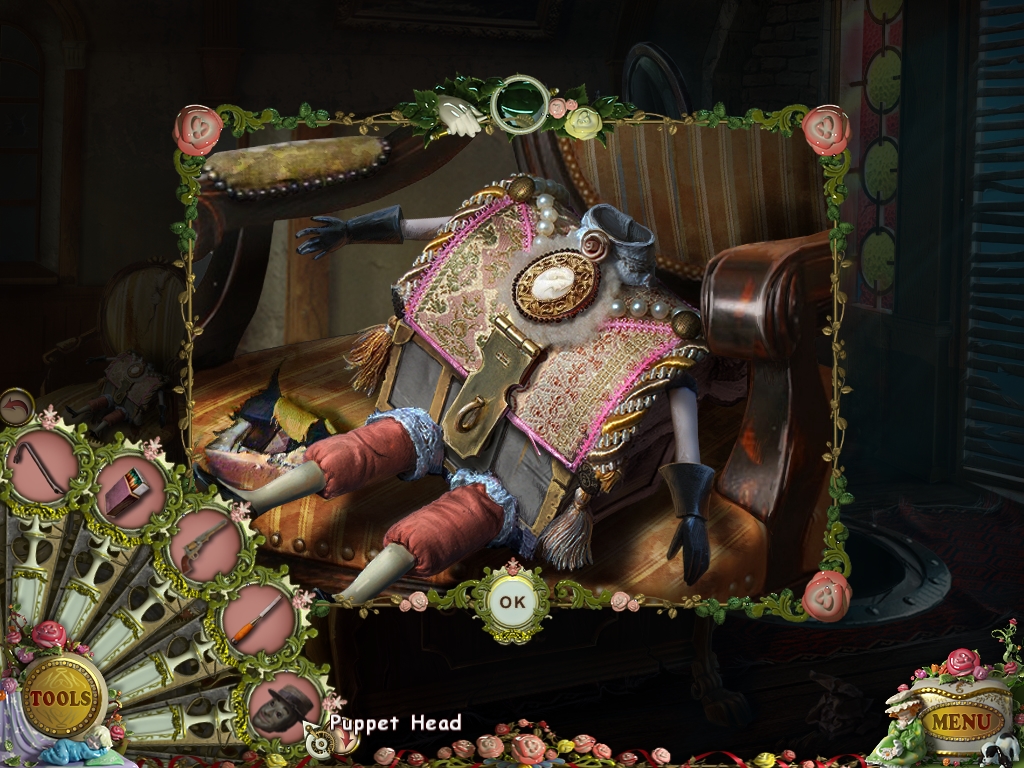
Scale the ladder on the side of the building. Zoom into the headless doll on the chair. Place the PUPPET HEAD on the doll body. Open the latch and pick up the PENDANT. Return to the Saloon and go into the door on the upper left leading to the Bedroom. Play the Hidden Object Area again.
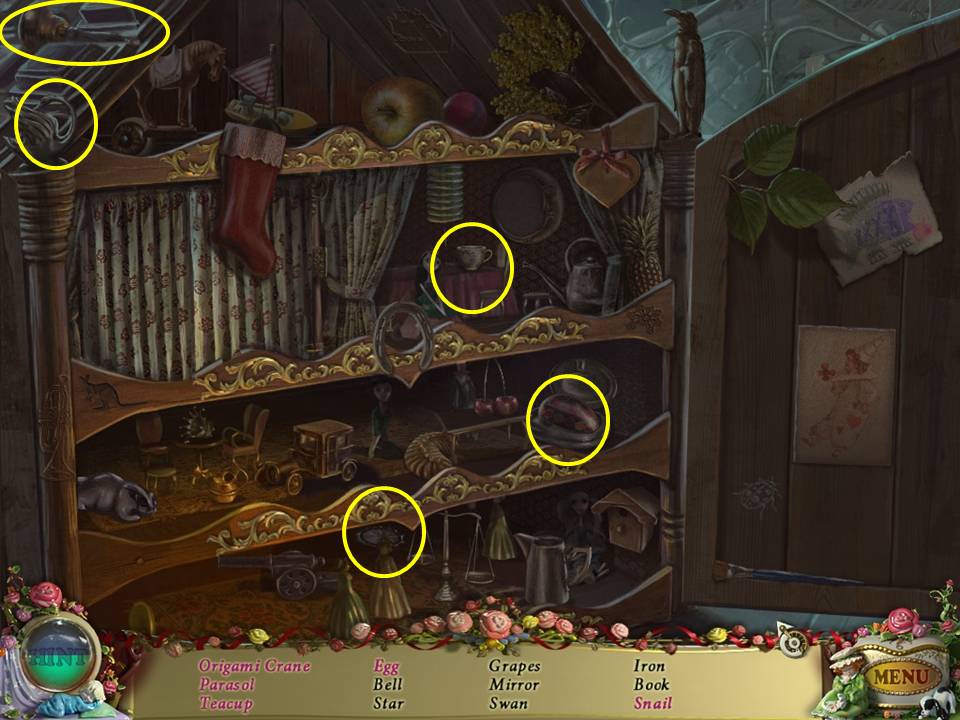
Find the items listed. You may need to open the doors and draw back the curtain to find all the items. Locate the MIRROR, star, grapes, iron and book outside the cupboard. Click the paper outside the cupboard by the teddy bear to assemble the origami crane. Move the curtain inside the cupboard to locate the snail. Receive the MIRROR. Return to the Bedroom.
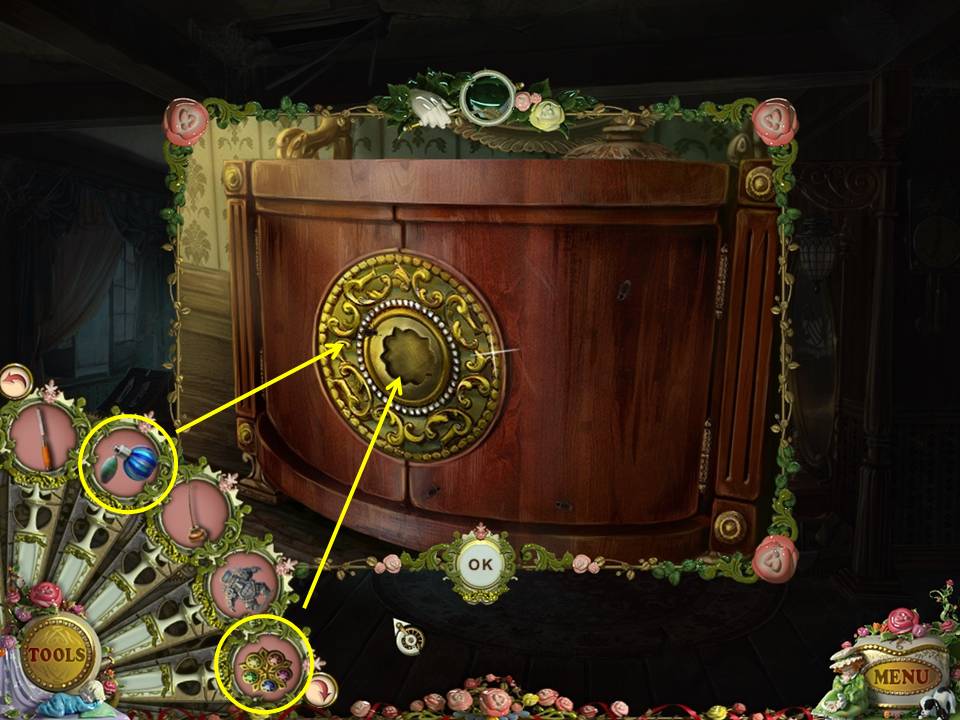
Zoom into the dresser in the lower right. Kill the bugs with the PESTICIDE. Place the PENDANT in the center of the dresser to unlock the doors. Pick up the LENS inside the dresser. Return to the Well area.
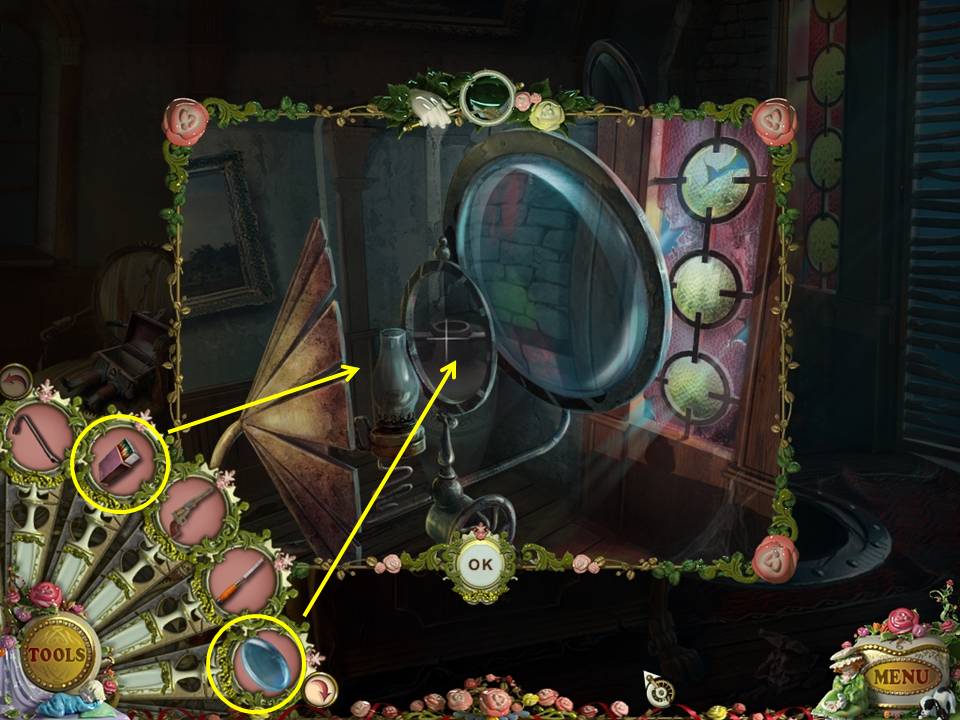
Scale the ladder on the side of the building. Zoom into the light magnifier. Place the LENS in the small frame. Put the MATCHES in the LANTERN next to the lens. A light will shine through the lens. Click down two times.
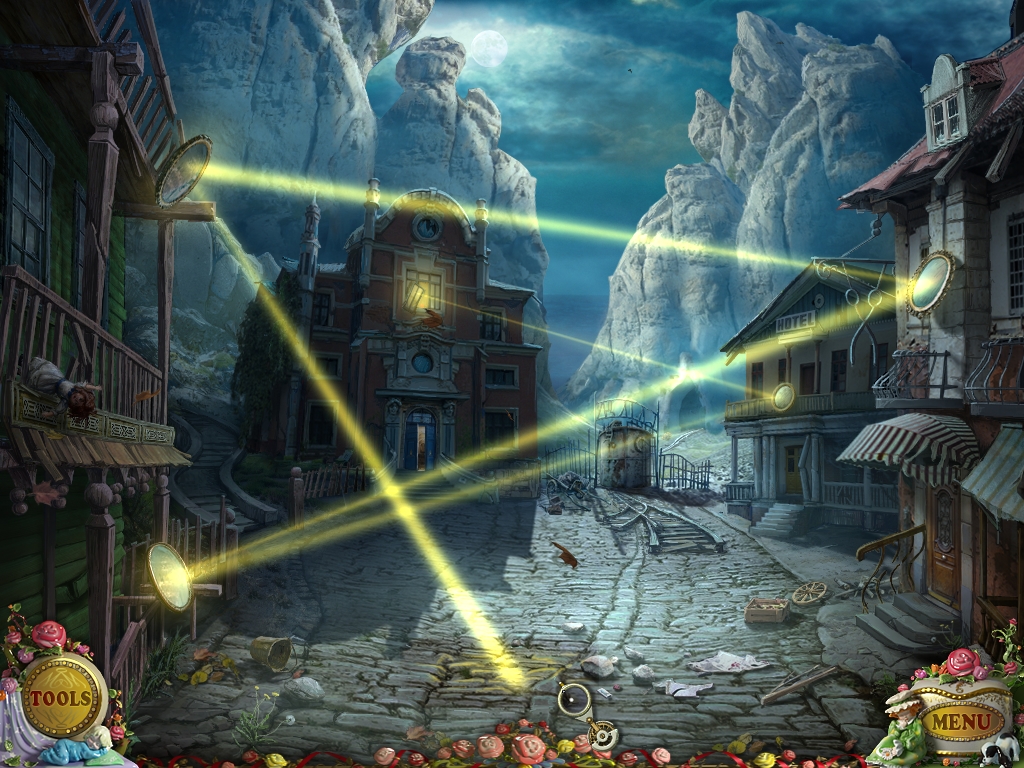
Place the MIRROR in the frame near the upper left side of the screen. Adjust the mirrors as indicated on the screenshot. Zoom into the area on the ground which the light beam is illuminating. Click on the loose stone to remove it. Pick up the GEARS. Proceed toward the gate on the far right.
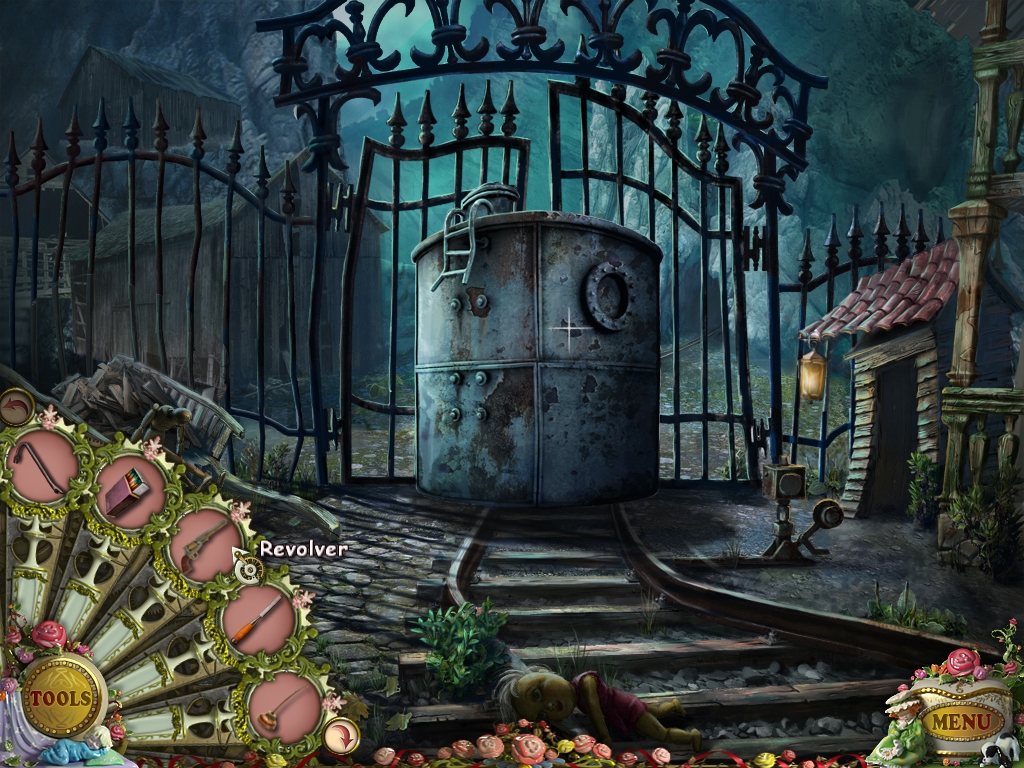
Shoot the tank with the REVOLVER. Click on the tank to move it aside. Open and go through the gate.
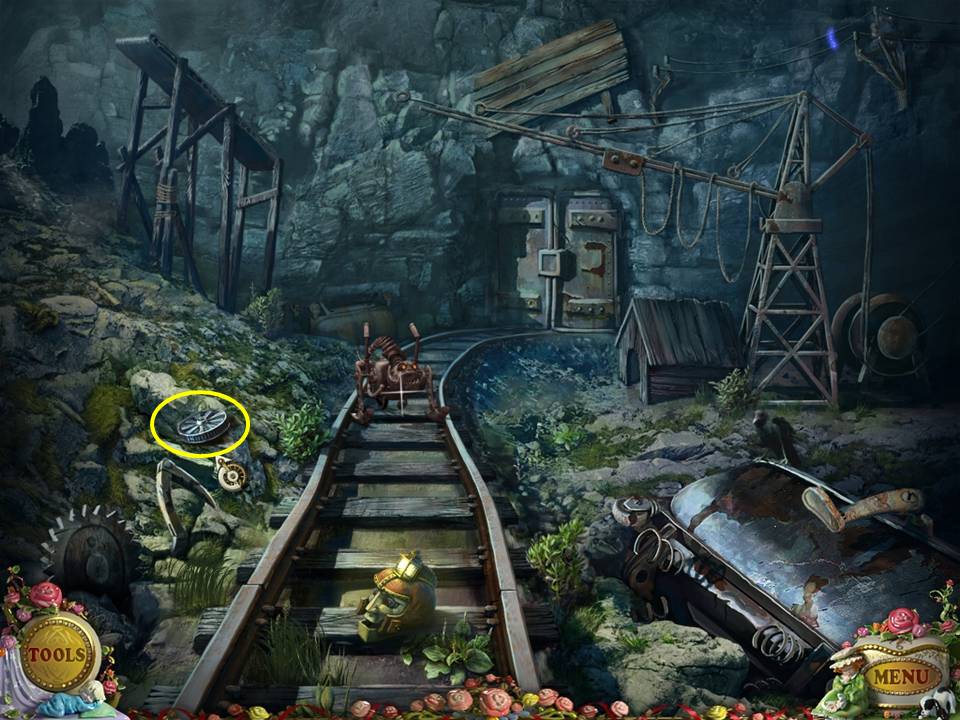
Pick up the PUPPET WHEEL on the lower left. Return to the Puppet Maker’s Shop and play the Hidden Object Area there.
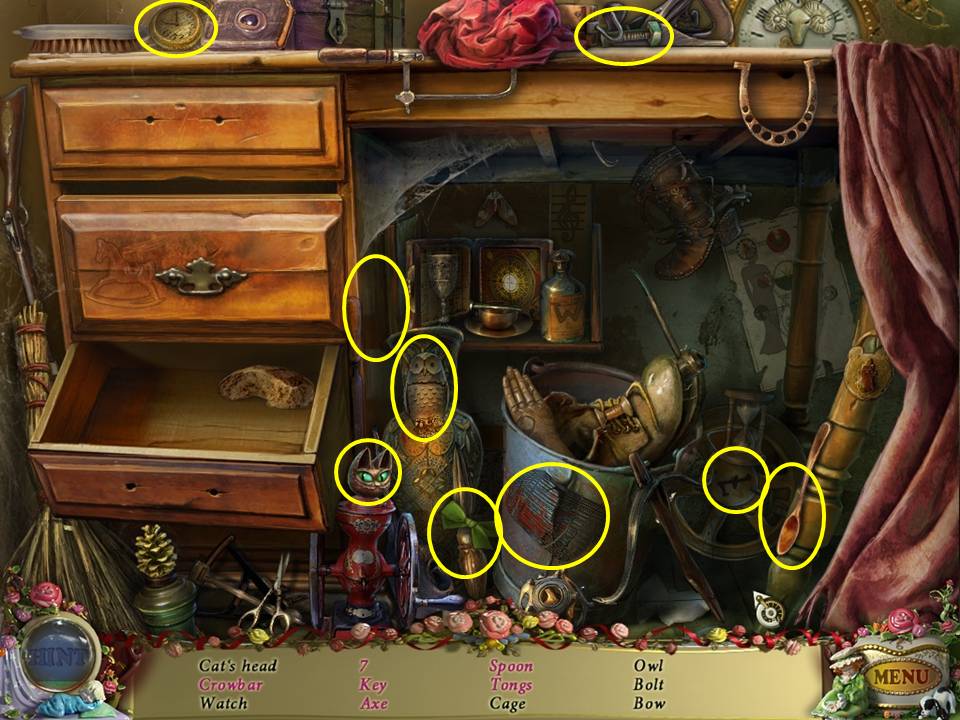
Find the items listed. Draw back the cloth on the right further to find the crowbar and the key. Open the top left drawer to find the tongs. Receive the CAT’S HEAD.
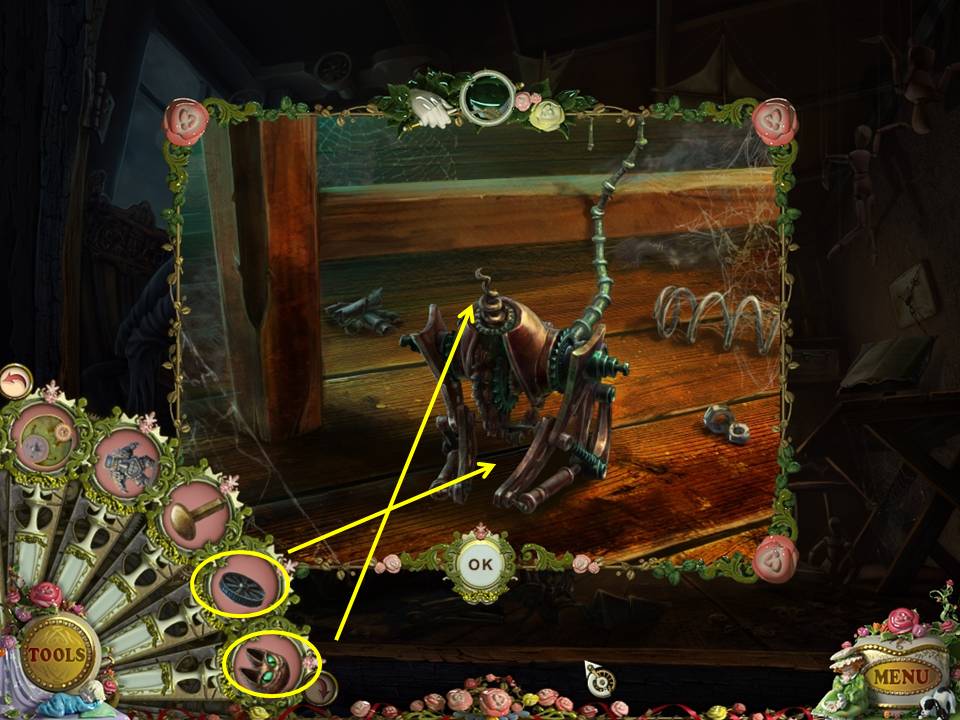
Zoom into the mechanical cat on the floor. Place the CAT’S HEAD and the PUPPET WHEEL on the mechanical cat. Receive the CAT PUPPET. Click down two times. Head forward and go right through the gate.
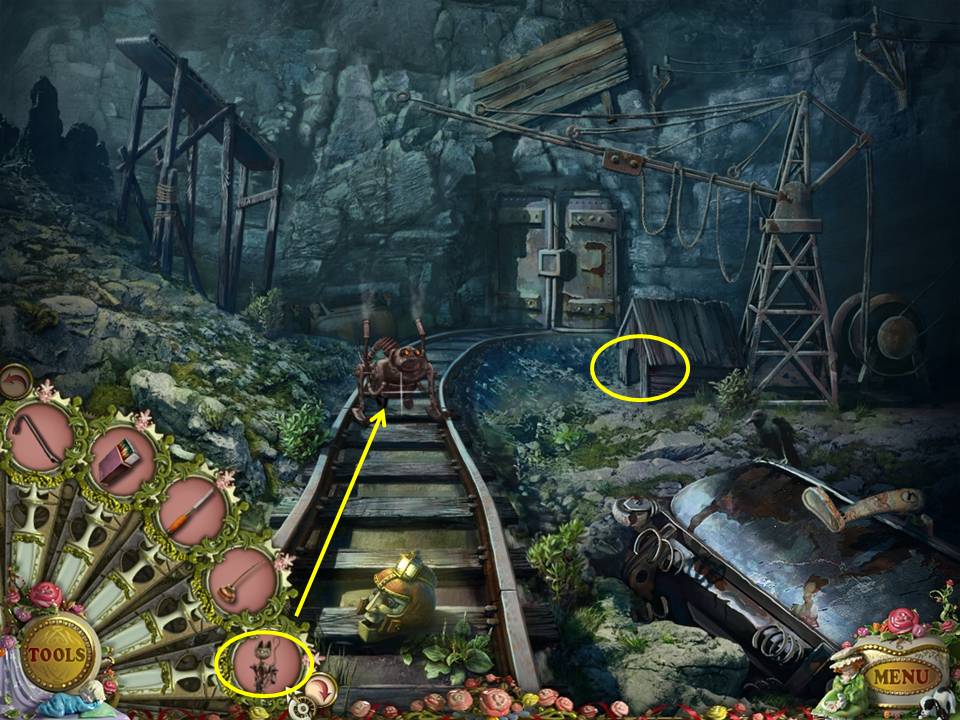
Give the mechanical guard dog the CAT PUPPET. Zoom into the dog house. Pick up the WRENCH. Zoom into the door at the end of the railroad track.
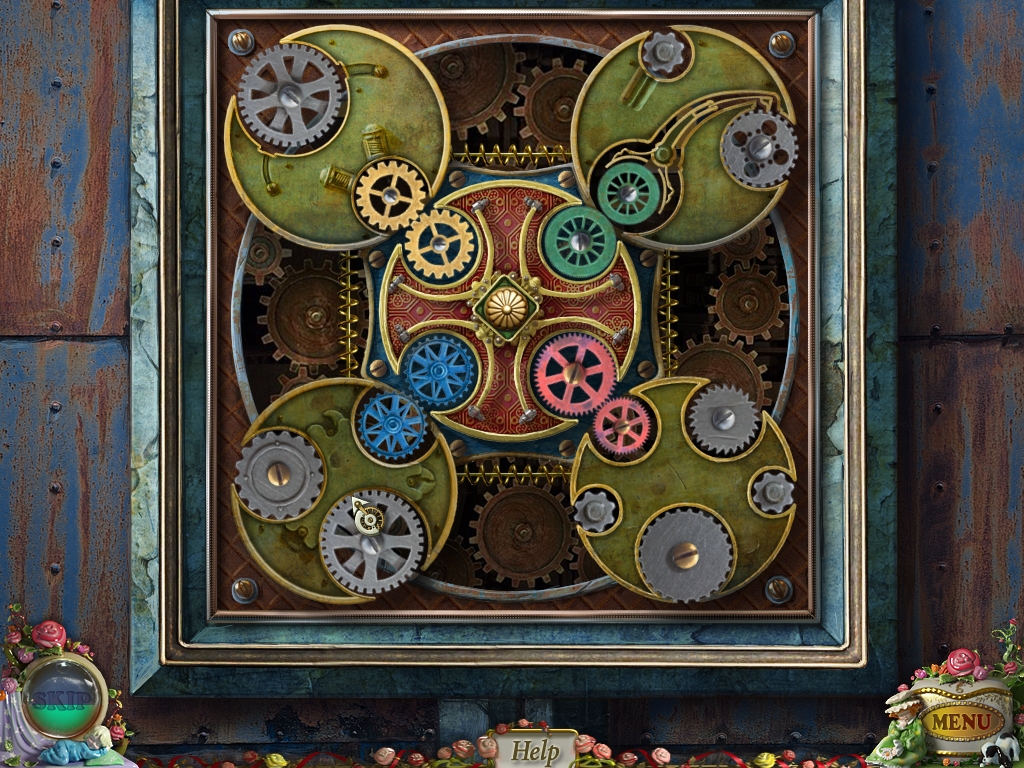
Place the GEARS on the door to initiate a puzzle. Rotate each set of gears until all the small gears of matching colors mesh and spin. You can try to solve this puzzle yourself or use this formula, assuming that the gears on the top are 1 and 2 and the gears on the bottom are 3 and 4: 1, 3, 3, 3, 1, 4, 4, 2, 4, 2, 2, 3, 2, 2, 3. When you have completed the puzzle, move through the door into the Mine.
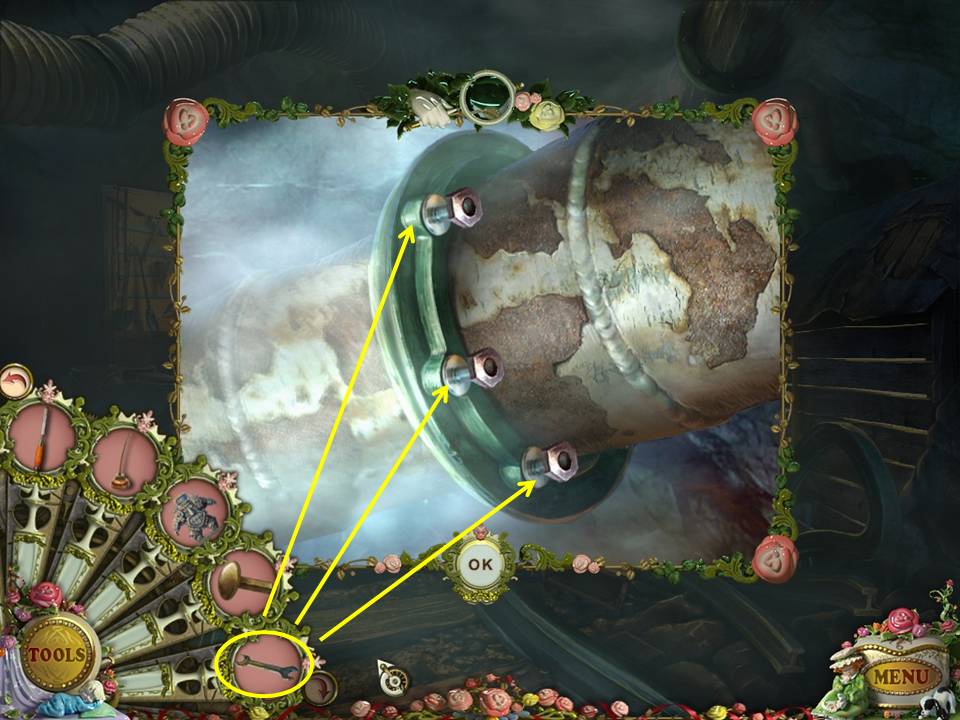
Zoom into the steaming pipe at the top right. Use the WRENCH on the 3 bolts to shut off the steam. Play the Hidden Object Area on the left.
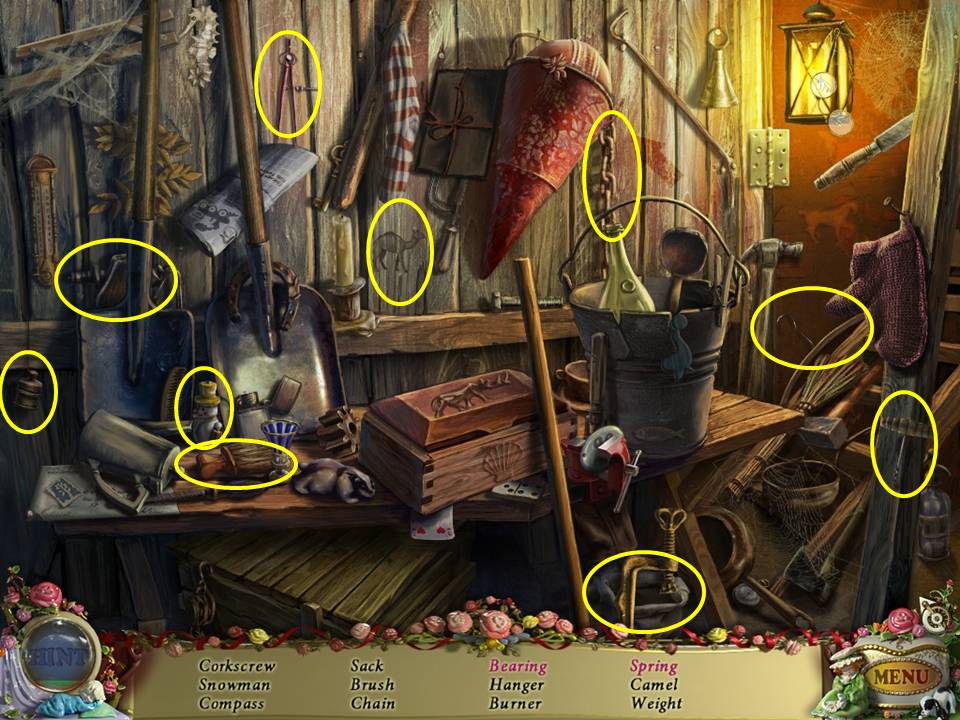
Find the items listed. Open the crate in the lower left to find the spring Open the wooden box on the table to locate the bearing. Receive the EMPTY SACK. Return to the Mine.
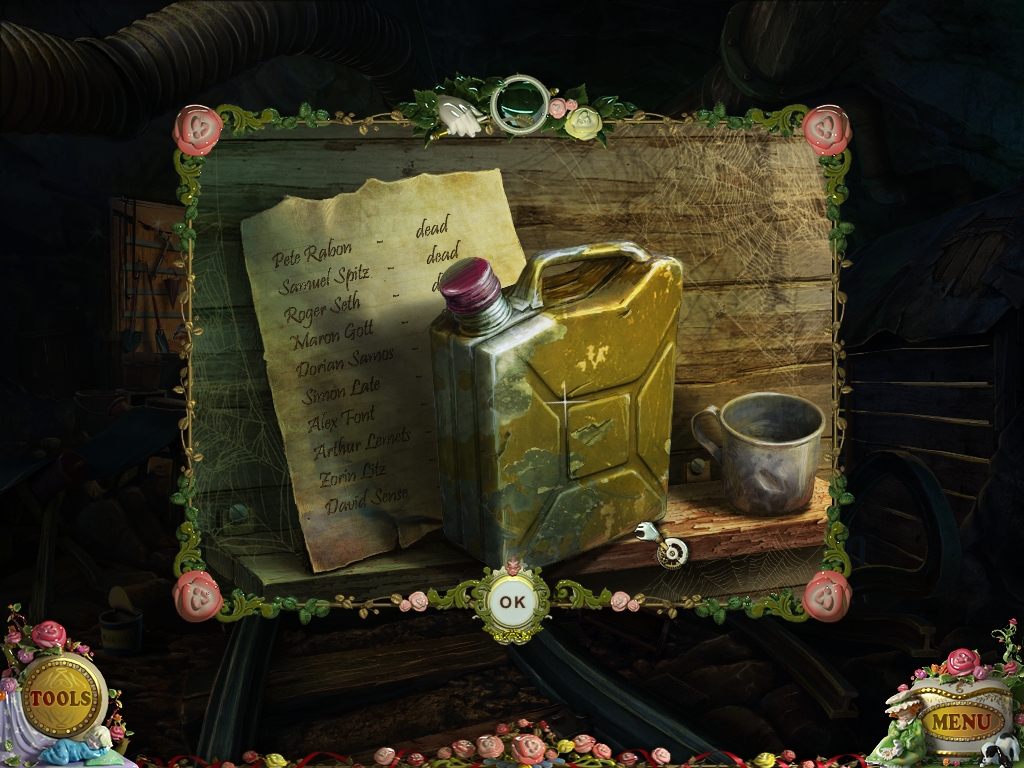
Zoom into the area on the right. Pick up the FUEL. Move forward.
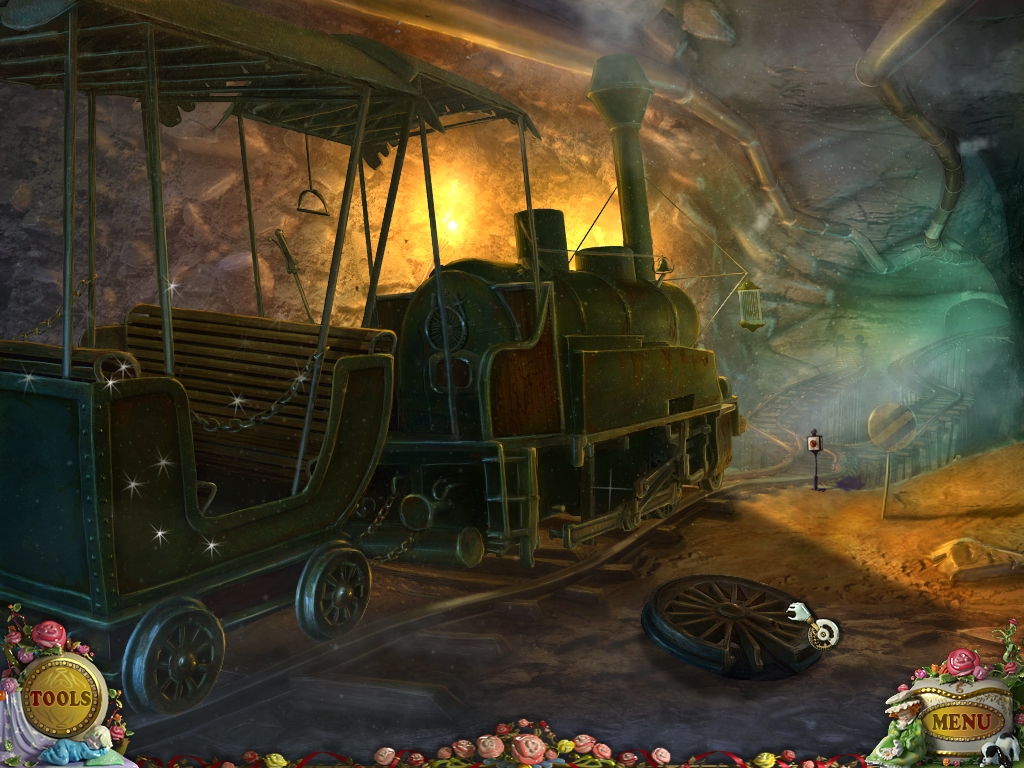
Pick up the BROKEN WHEEL from the ground. Play the Hidden Object Area to the left of where you picked up the BROKEN WHEEL.
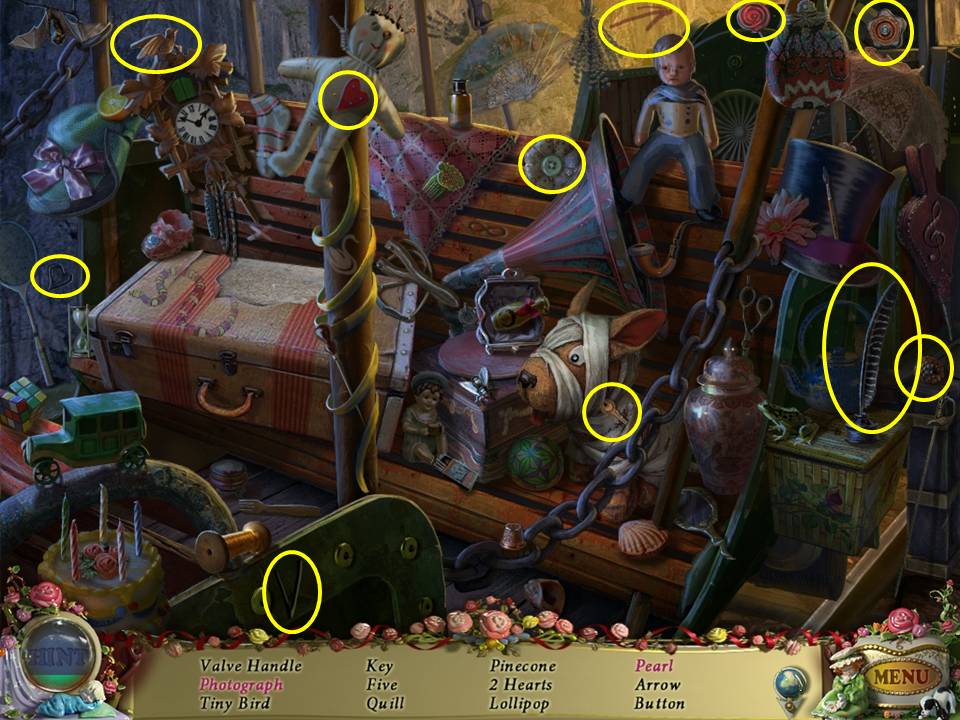
Find the items listed. Open the suitcase to find the photograph. Open the oyster in the lower right to locate the pearl. Receive the VALVE. Click down. Play the Hidden Object Area on the left.
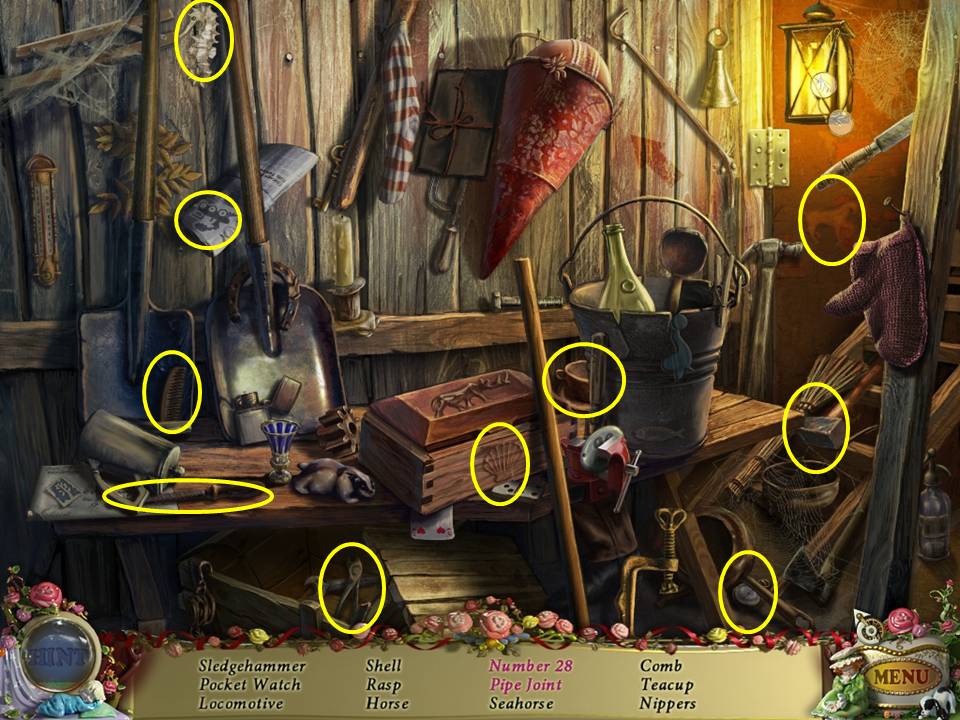
Find the items listed. Open the box to locate the pipe joint. Click on the vise grip to find the number 28. Receive the SLEDGEHAMMER. Click down two times. Play the Hidden Object Area on the left.
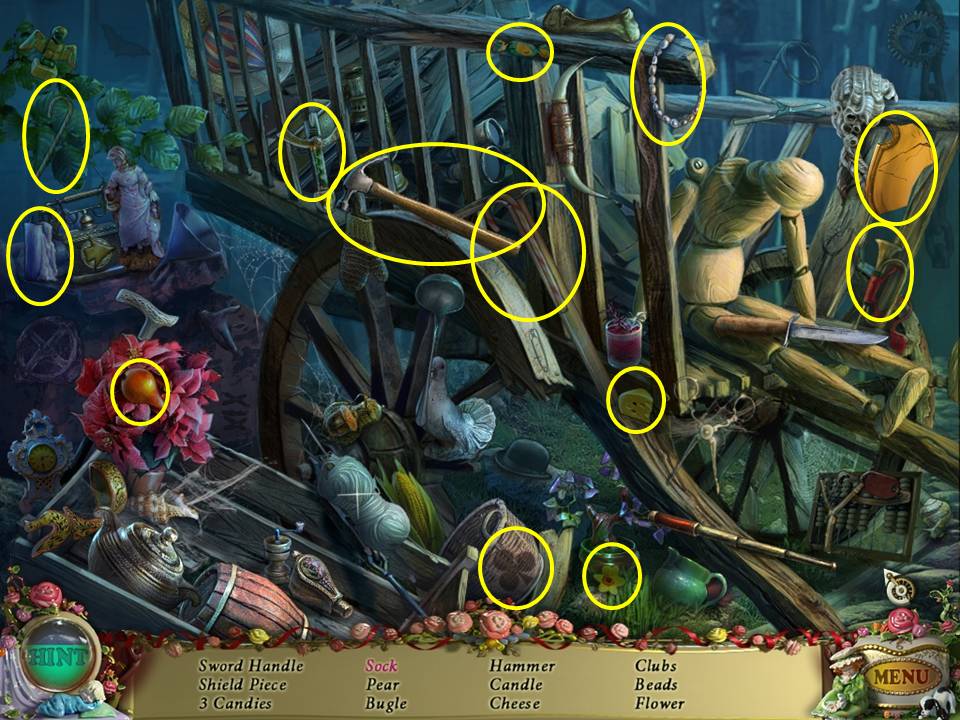
Find the items listed. Move the yarn to find the sock. Receive the HAMMER. Click down three times.
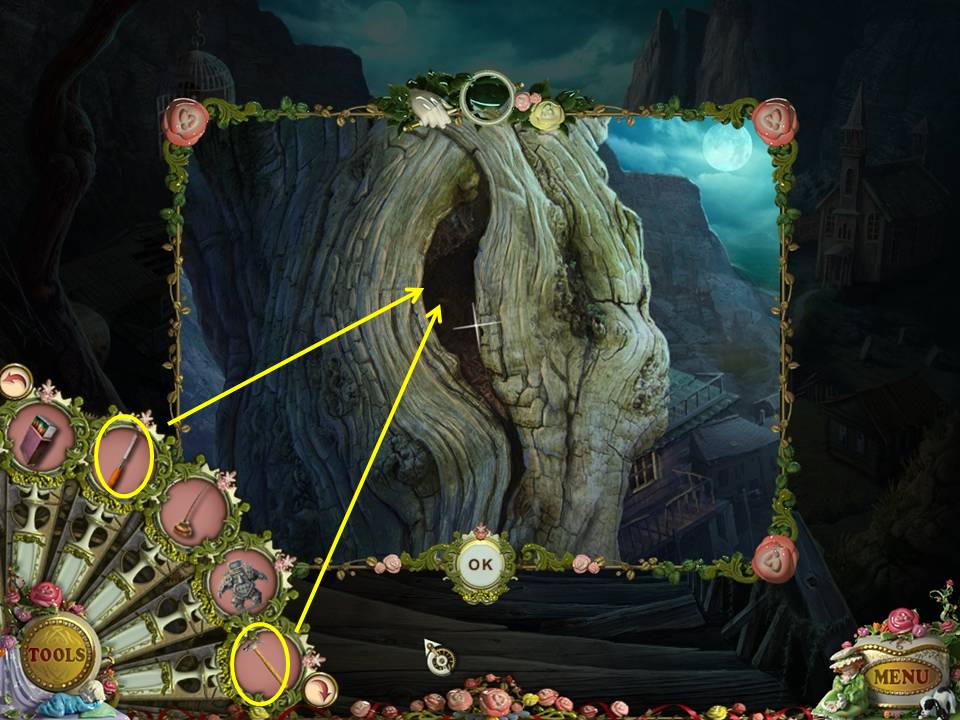
Zoom into the knothole in the tree on the top left corner of the screen. Insert the CHISEL into the hole. HAMMER on the CHISEL two times. Pick up the GOLDEN TOOTH. Move right toward the Cemetery.
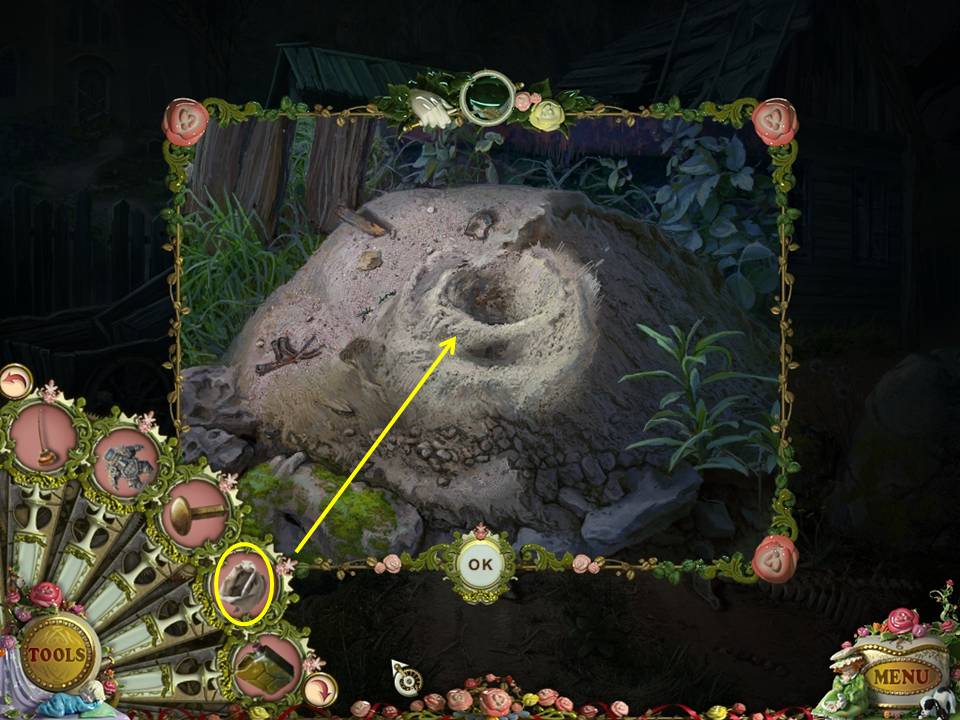
Zoom into the sandpile by the house. Put the EMPTY SACK on the sandpile to receive the BAG WITH SAND. Return to the Blacksmith’s house.
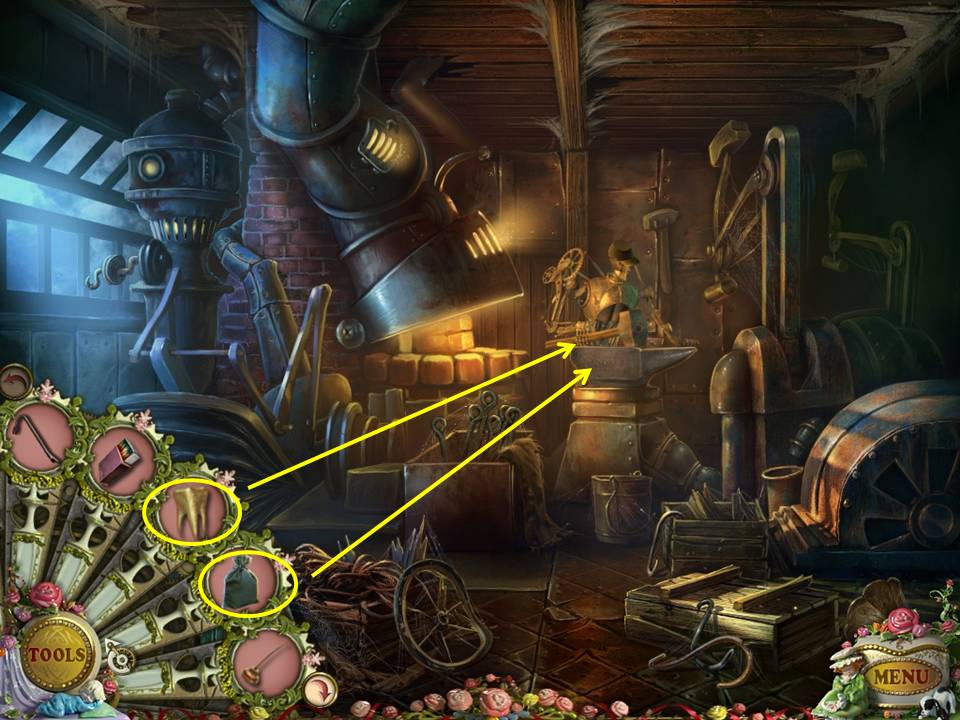
Zoom into the machine on the left. Hang the BAG WITH SAND on the hook to activate the machine. Zoom into the anvil. Place the BROKEN WHEEL on the anvil. The puppet begins repairing the wheel. When the puppet stops, zoom into the anvil and take the TRAIN WHEEL. Place the GOLDEN TOOTH on the anvil. When the puppet stops, zoom into the anvil and take the GOLDEN COIN. Return to the General Store. Play the Hidden Object Area in the back.
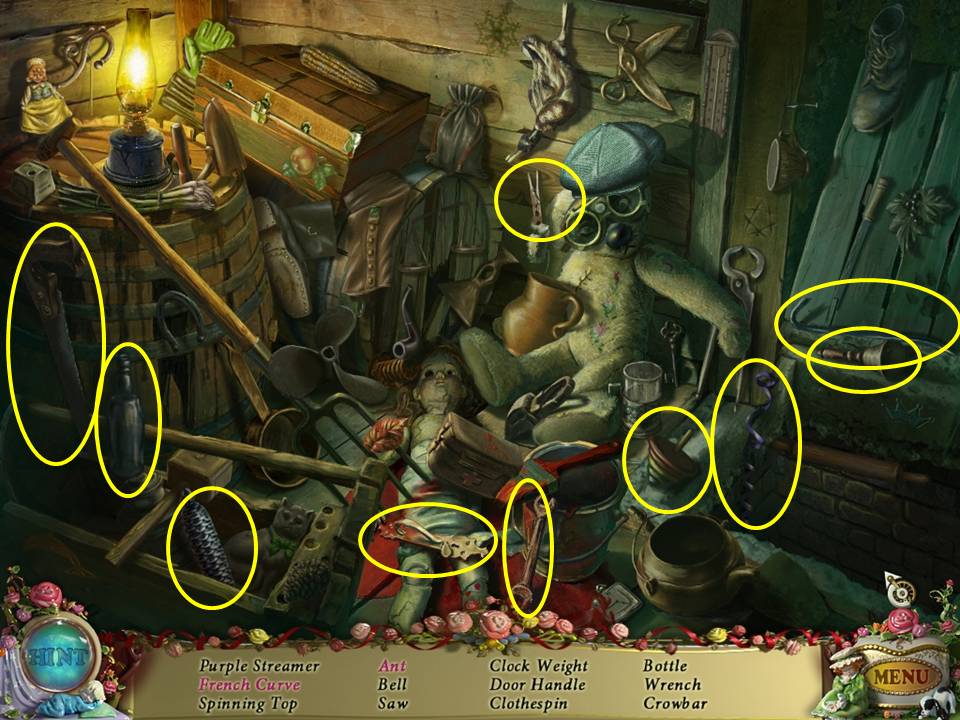
Find the items listed. Open the chest to find the French curve. Move the teddy bear's arm to find the ant. Receive the CLOCK WEIGHT.
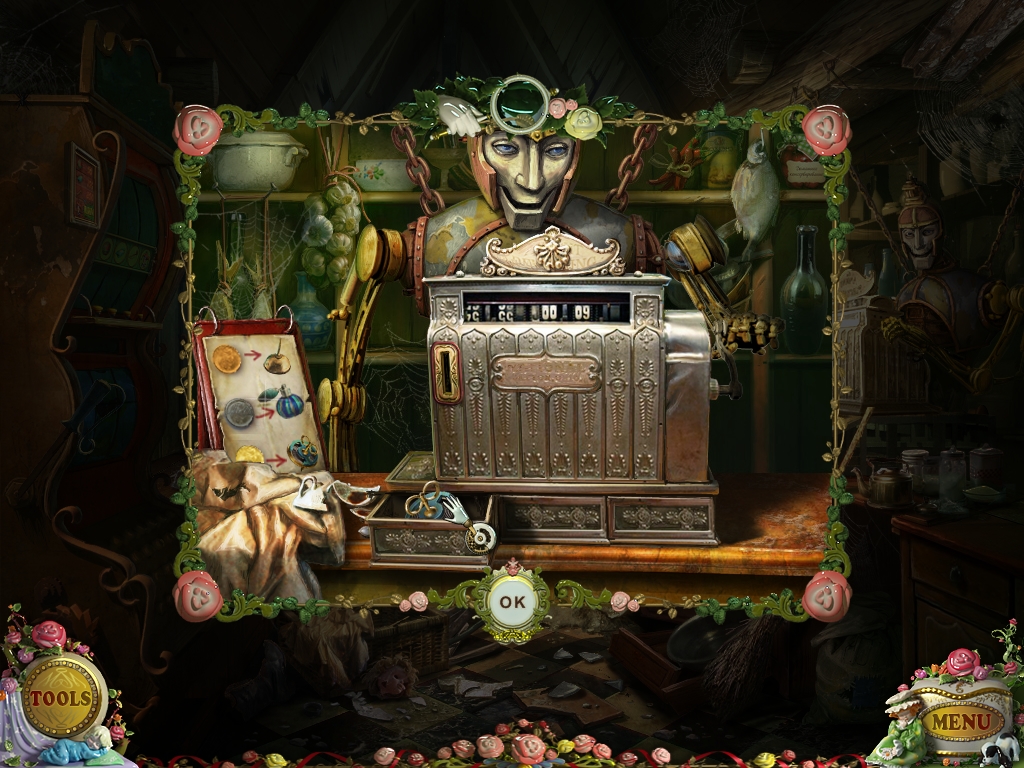
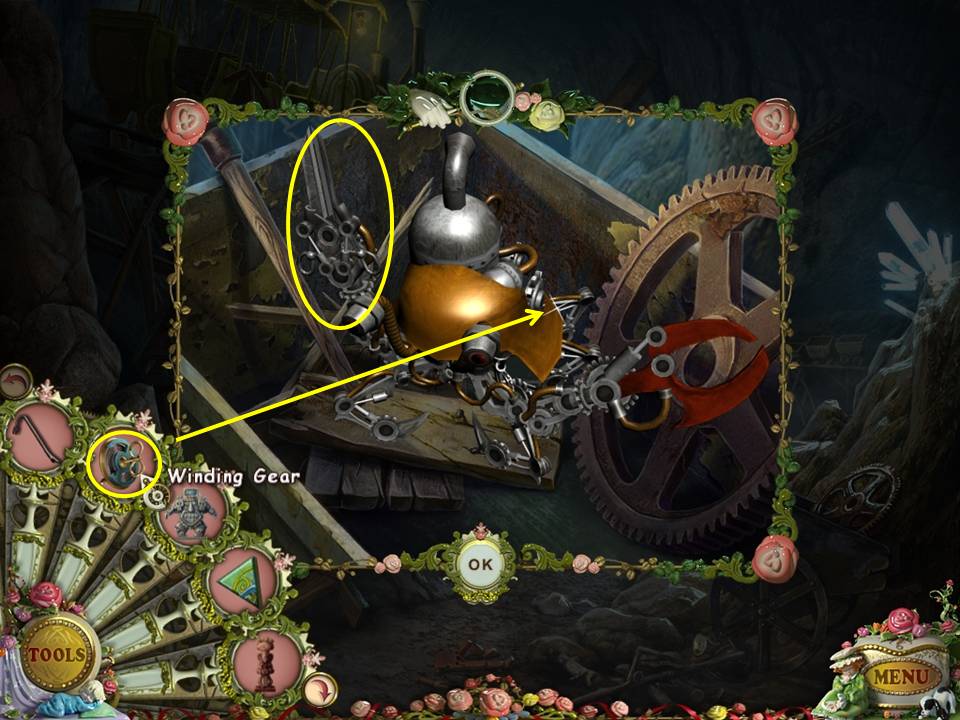
Zoom into the cash register. Insert the GOLDEN COIN into the slot. Pick up the WINDING GEAR from the till. Return to the Mine.
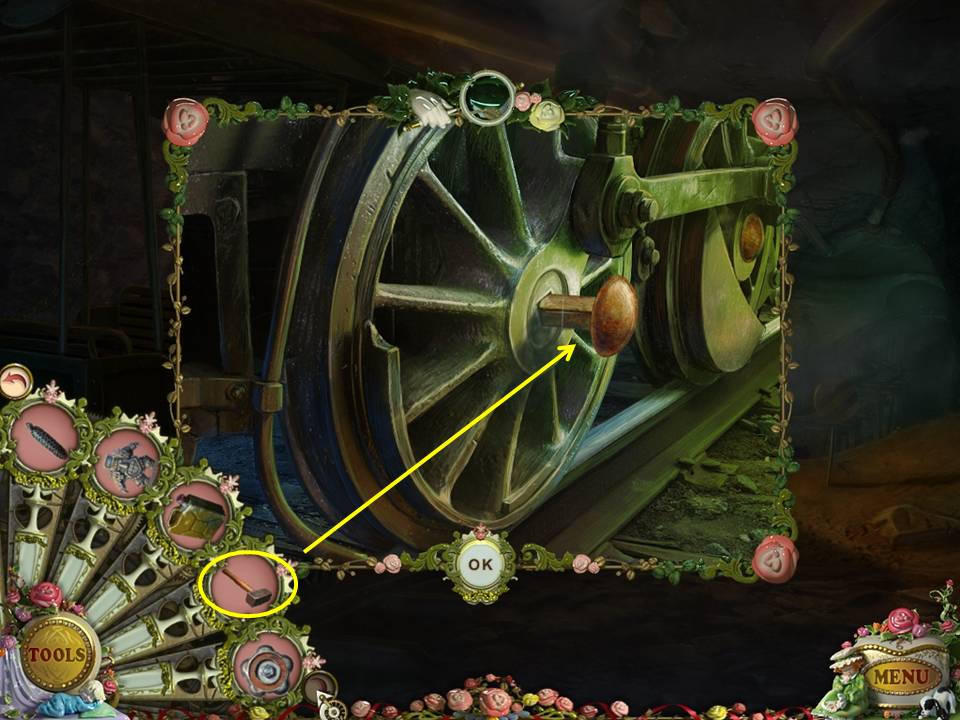
Zoom into the bottom of the train. Place the repaired TRAIN WHEEL on the axle. Insert the SPIKE in the center of the wheel. Hit the SPIKE with the SLEDGEHAMMER.
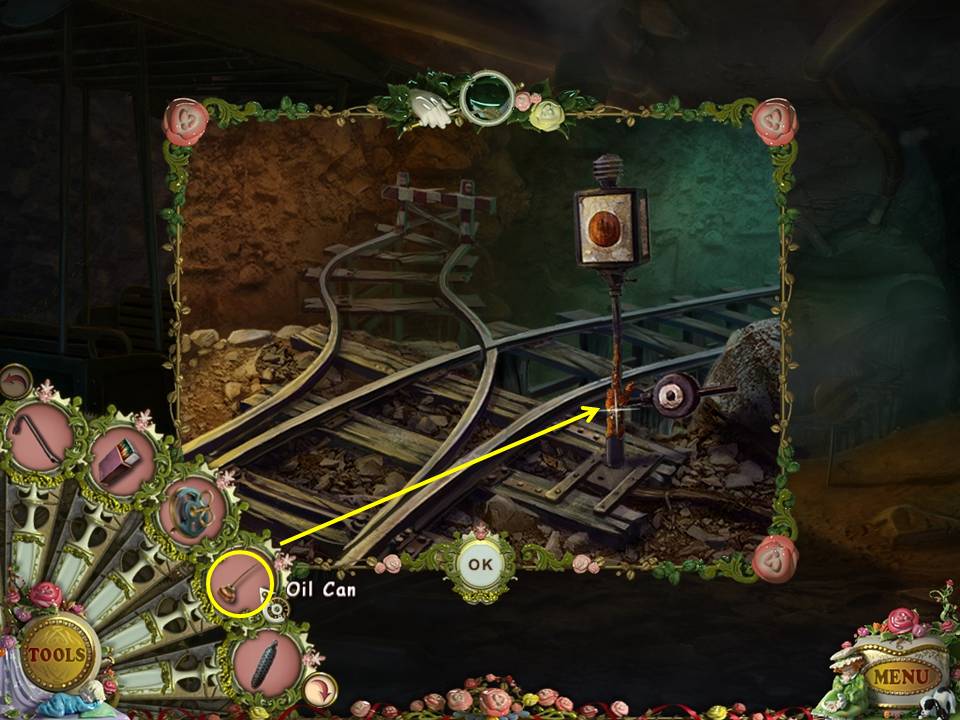
Zoom into the tracks in front of the train. Oil the LEVER with the OIL CAN.
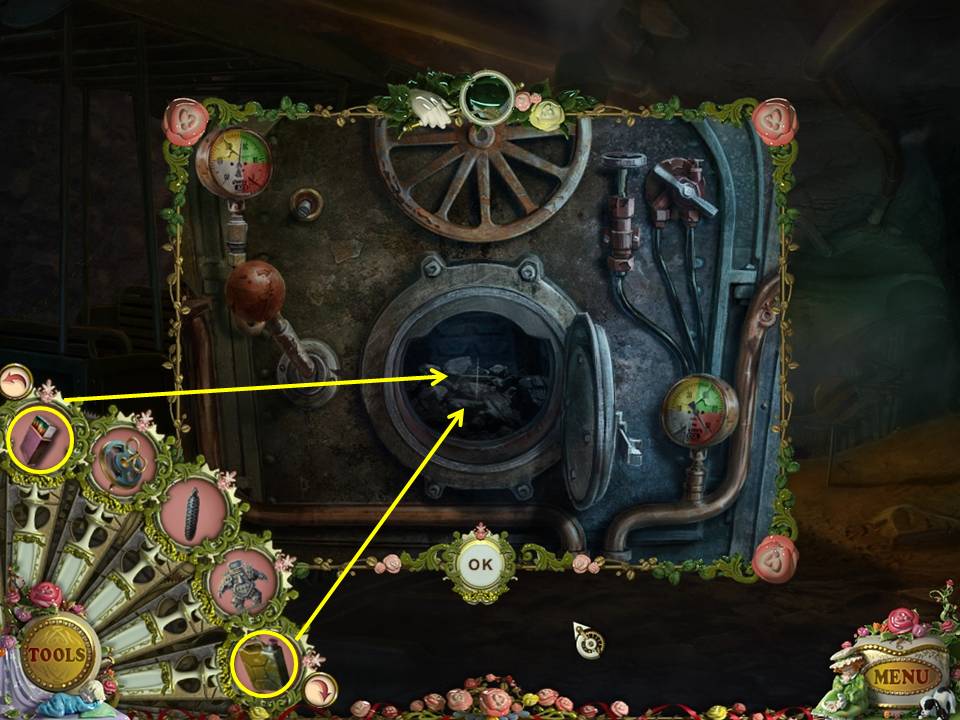
Zoom into the train's engine. Place the FUEL on the COALS. Light the COALS with the MATCHES. Close the cover.
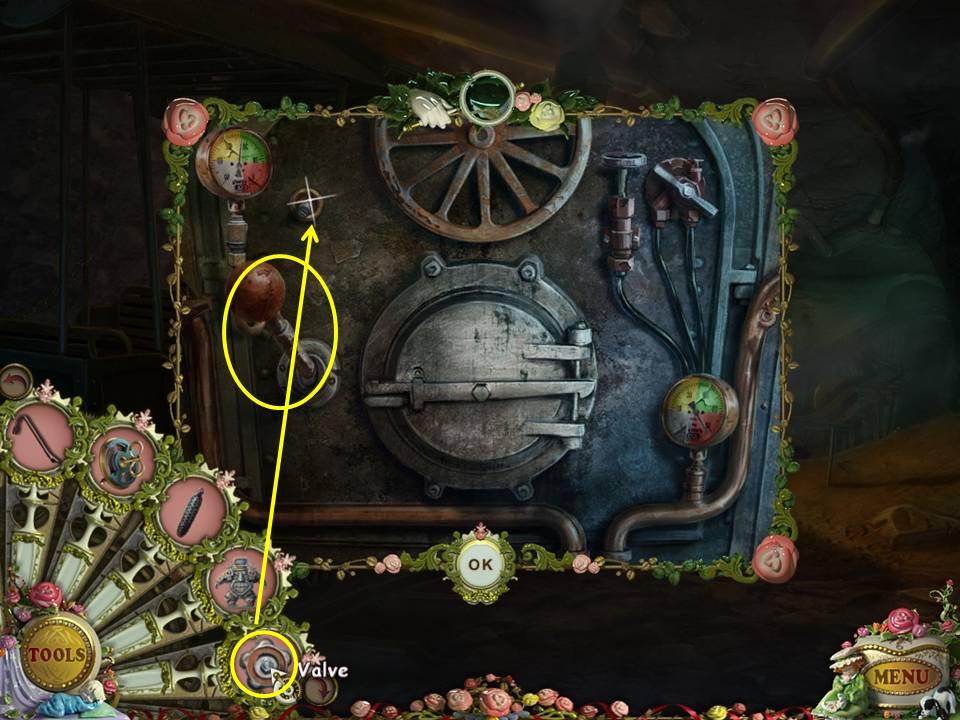
While still zoomed-in to the train engine, place the VALVE in the upper left of the inset and turn it. Click on the lever to send the train farther into the mine. Follow the train into the mine.
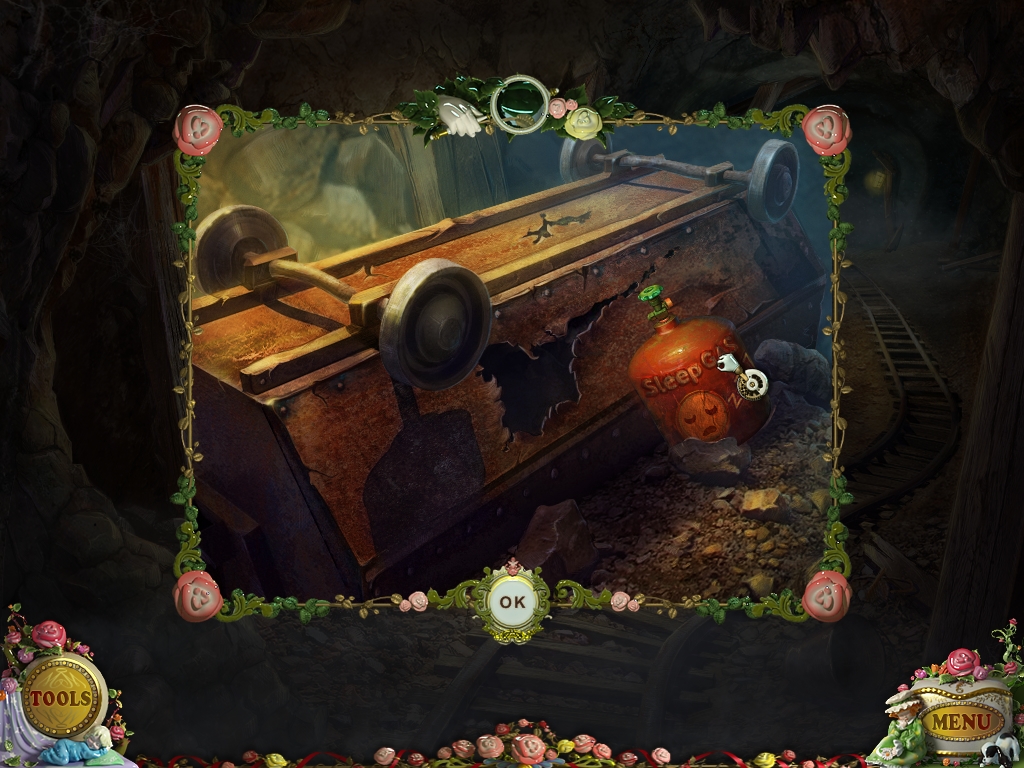
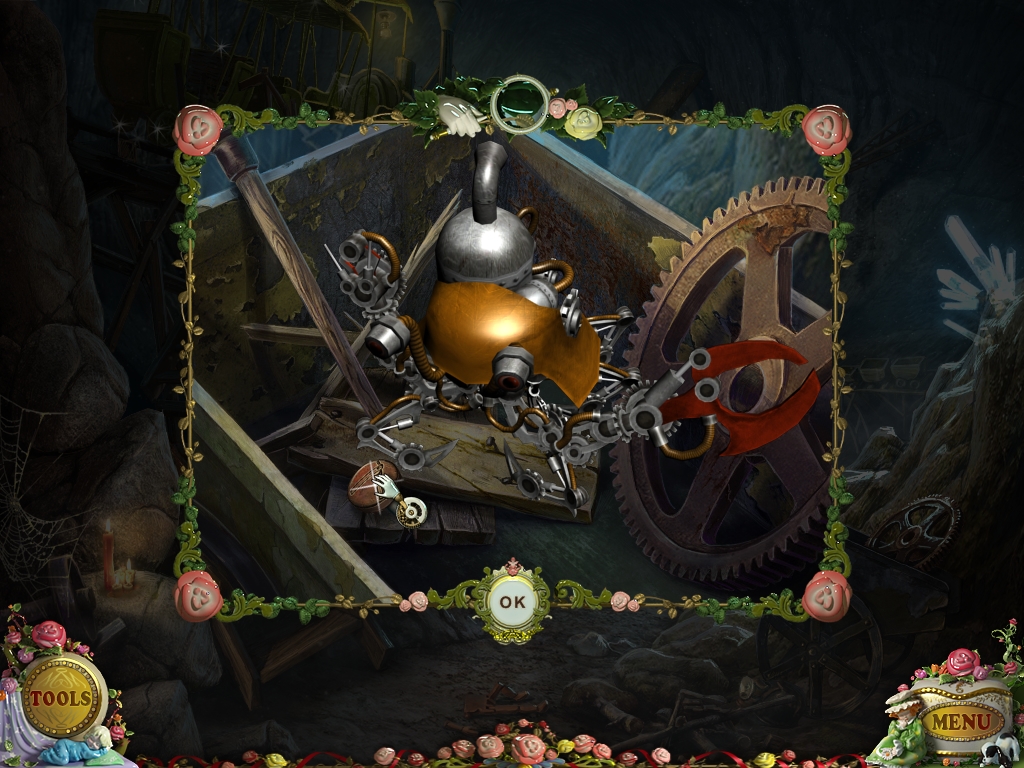
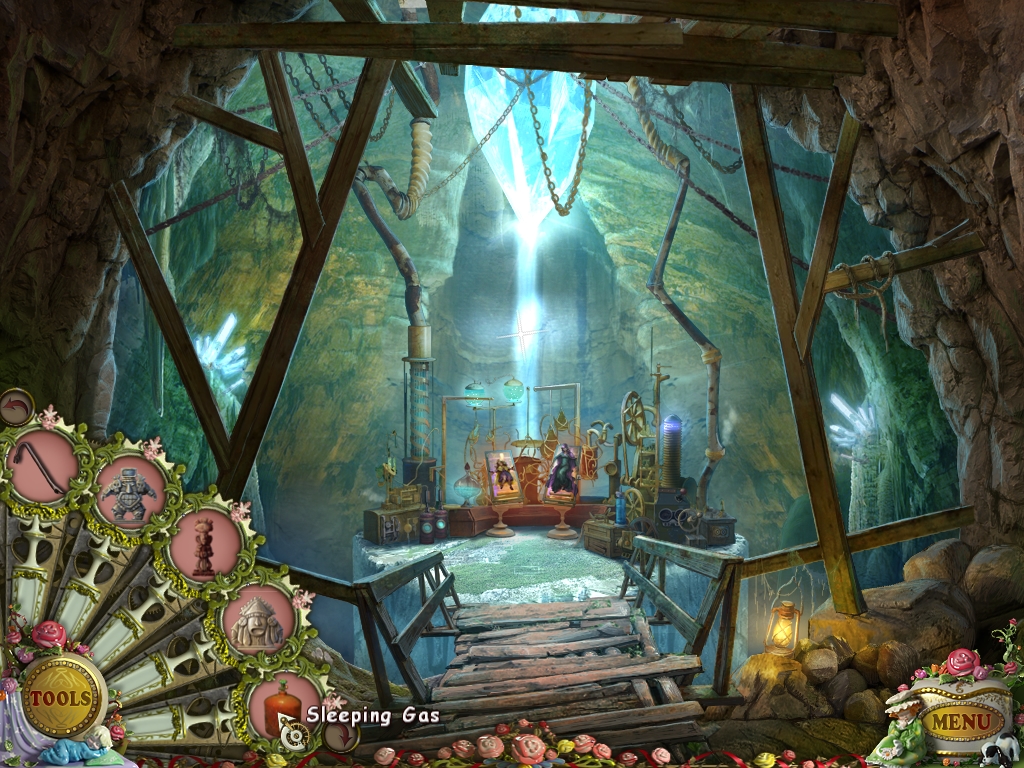
Zoom into the upside down cart. Pick up the SLEEP GAS. Continue forward.
Zoom into the cart in the lower right. Pick up the BUTTON. Play the Hidden Object Area.
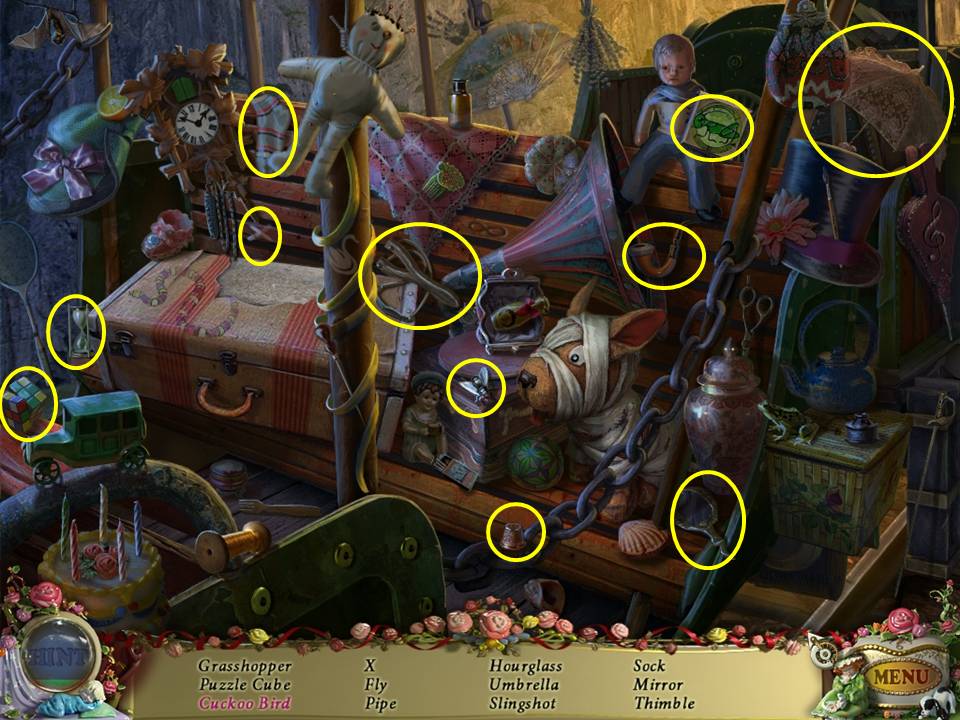
Find the items listed. Open the clock to locate the cuckoo bird. Receive the GRASSHOPPER. Click down five times.
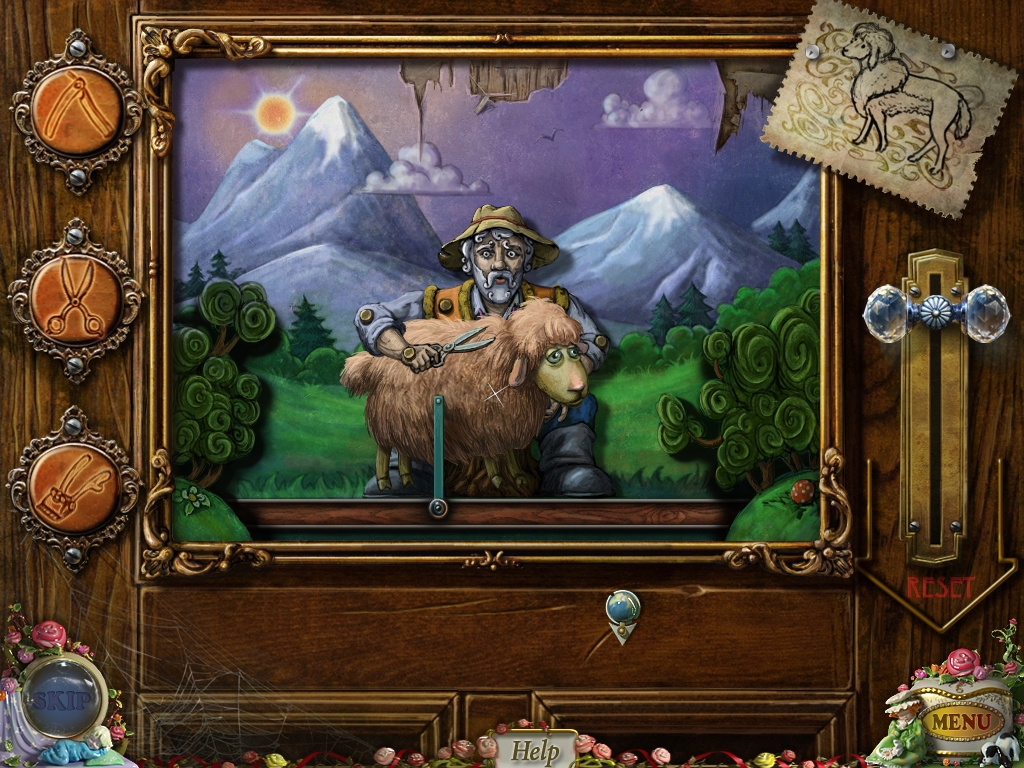
Zoom into the door on the right under the striped awning. Place the BUTTON in the empty slot to initiate the game. The object of this game is to shear the sheep in a fashion that is identical to the sample picture in the top right corner. If you make a mistake, you can hit the reset button on the right to get a new sheep. The buttons on the left, moving from top to bottom, are razor, scissors, clips. The solution is razor, scissors, clips, razor. Enter the Barbershop and play the Hidden Object Area.
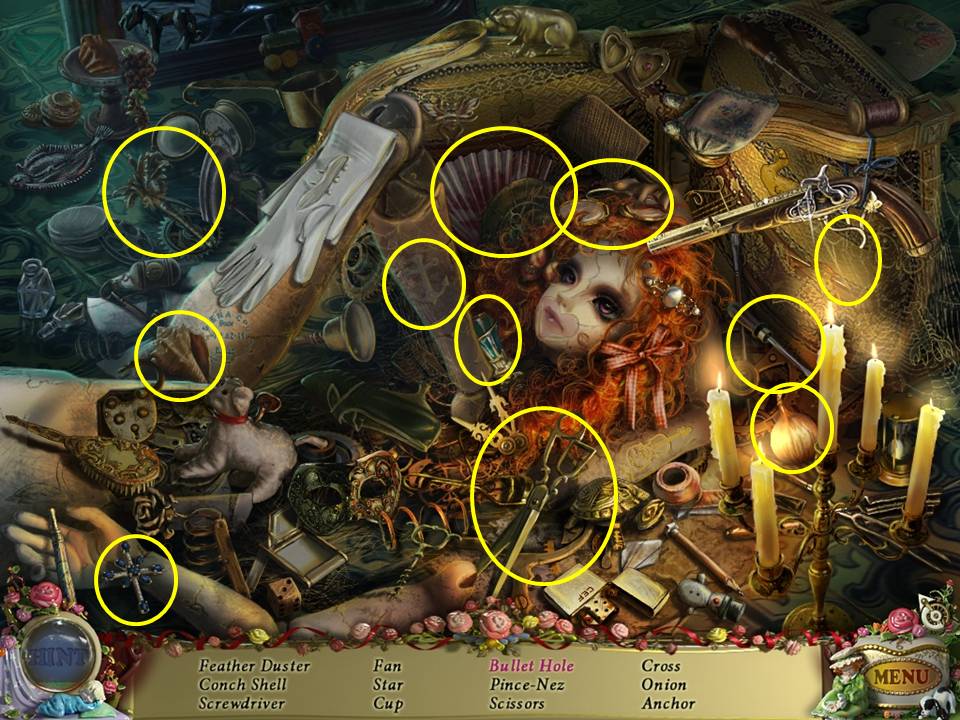
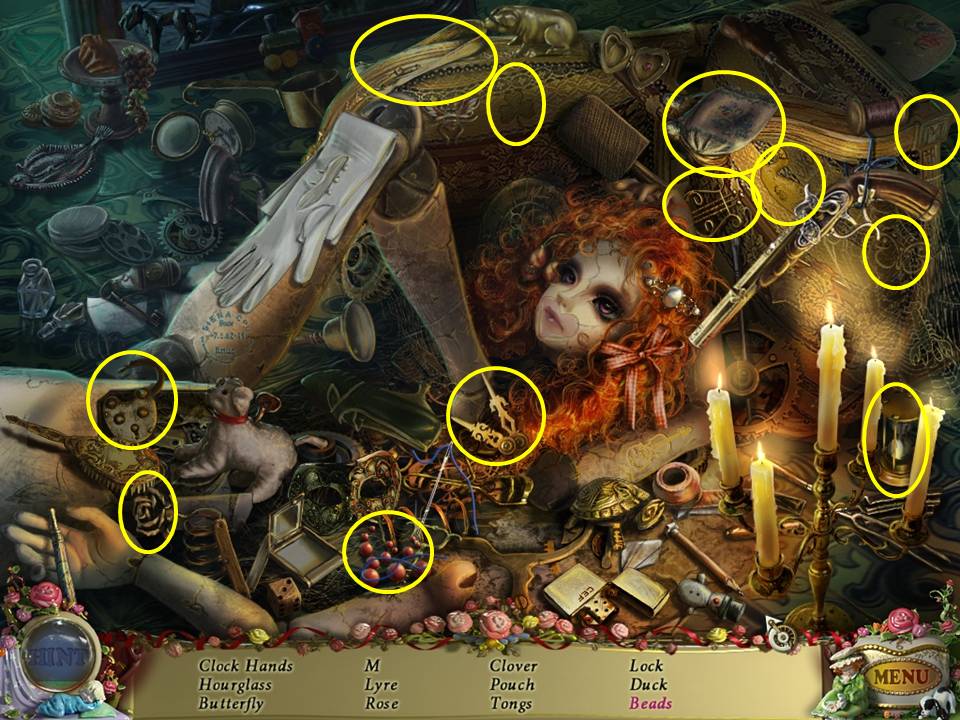
Find the objects listed. Shoot the revolver to obtain the bullet hole. Receive the SCREWDRIVER. Play this Hidden Object Area a second time.
Find the items listed. Click on the string with beads to obtain the beads. Receive the CLOCK HANDS.
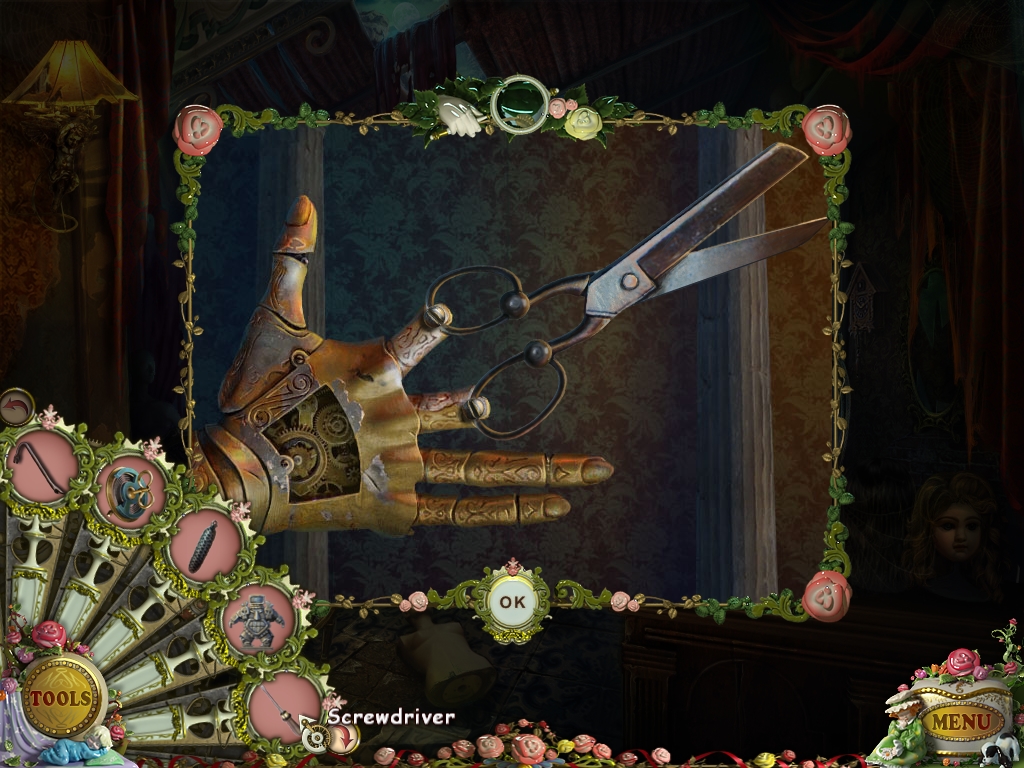
Zoom into the barber puppet. Remove the screws with the SCREWDRIVER. You will automatically receive the SCISSORS.
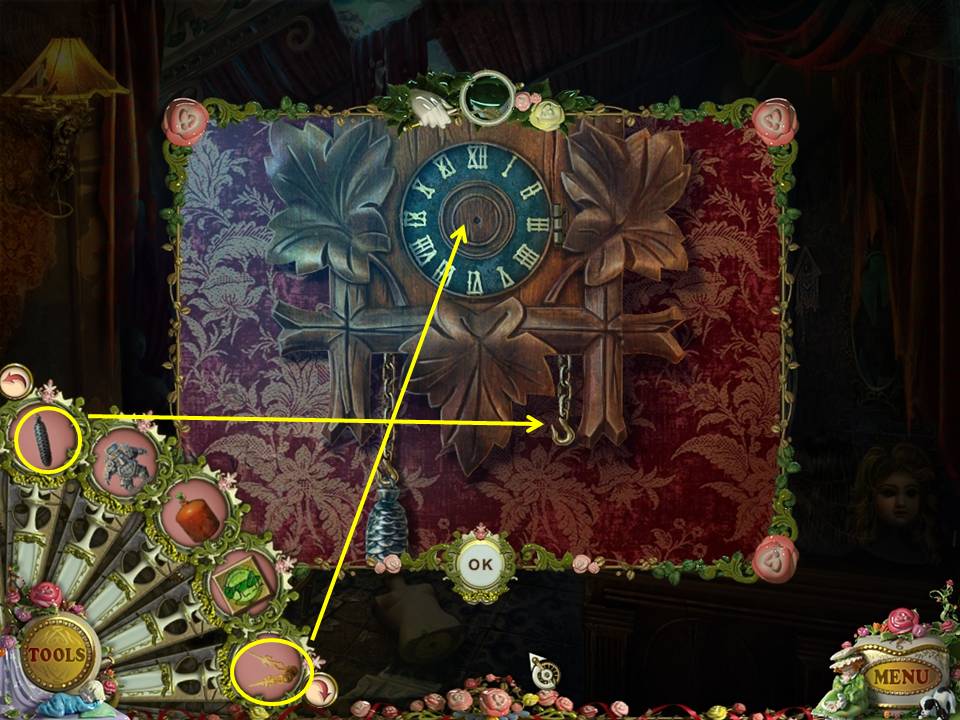
Zoom into the cuckoo clock. Place the CLOCK HANDS and CLOCK WEIGHT on the clock. Clock will open. Pick up the IVORY STATUE inside the clock. Return to the Estate and play the Hidden Object Area there.
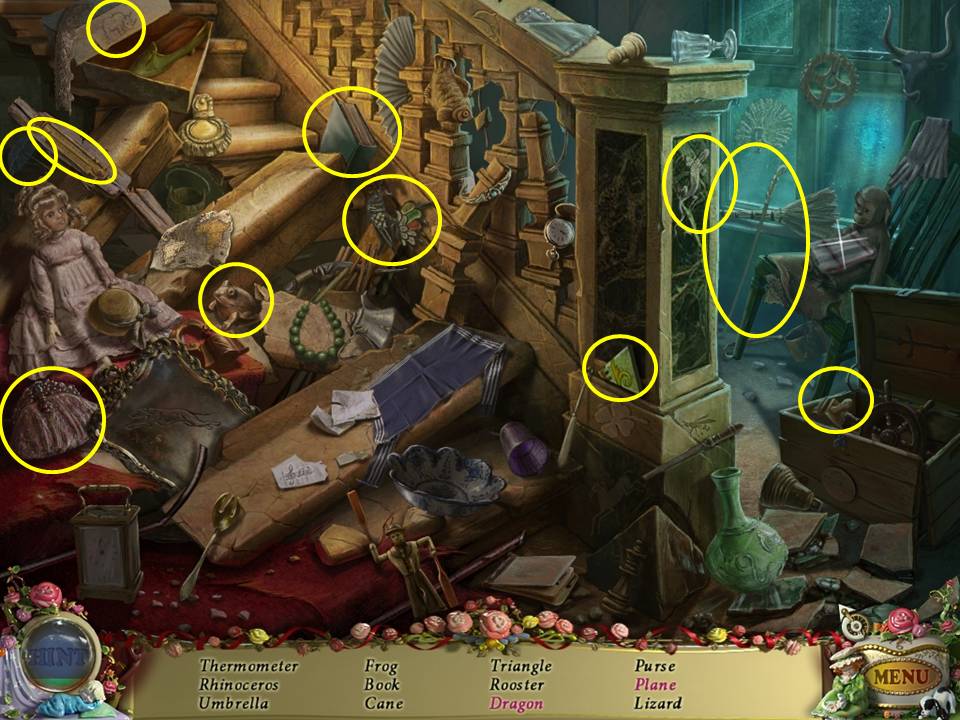
Find the items listed. Open the trunk to locate the plane. Click on the dish towel to clean the window. A dragon will appear in the clean window. Receive a TRIANGLE.
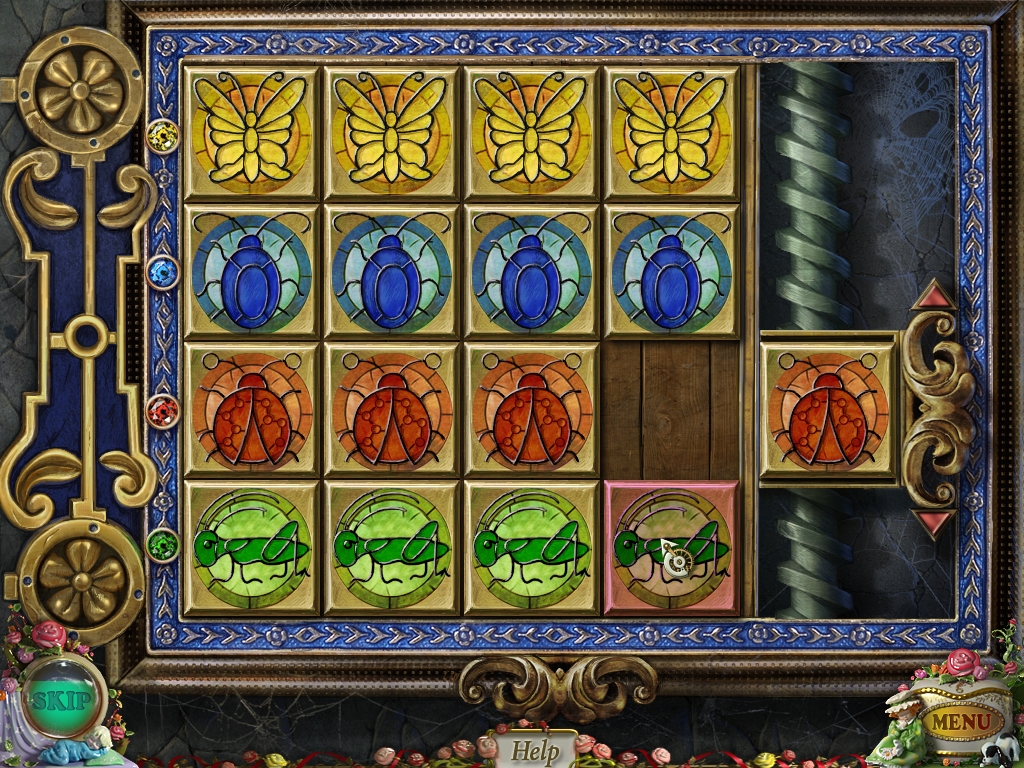
Zoom into the lower left column. Place the grasshopper on the board to initiate the game. The object of the game is to move all the pieces to their correct rows. The gems on the left are the clues on how to perform this game. The blue gem indicates that row should be filled with blue bugs. You can click on a piece to slide it to an empty spot. You can also click on a column or row end to move all of the pieces over. The arrows on the right can be used to slide the outside piece up or down if necessary. The starting configuration of the game may vary; the ultimate solution does not. When you have completed the game, take the WOODEN STATUE. Proceed to the Mine.
Enter the Mine through the hole on the right. Move right toward the tracks. Zoom into the cart on the lower right. Place the SCISSORS and the WINDING GEAR on the mechanical crab. Follow the mechanical crab through the fence. Click on the area to the right of the hole in the fence to initiate a Hidden Object Area.
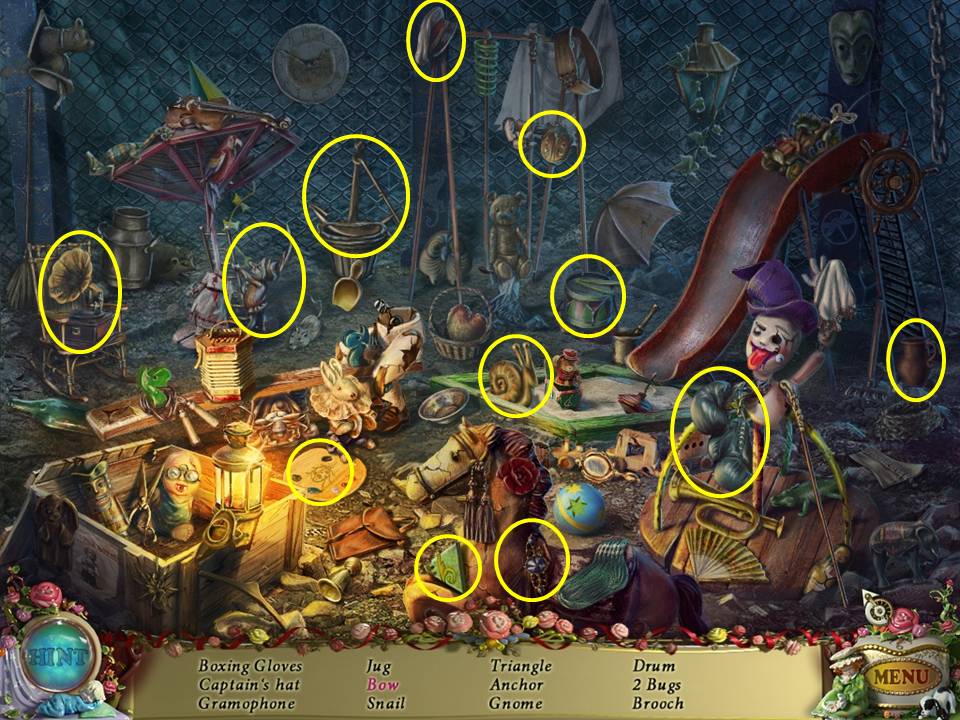
Find the items listed. Remove the hat to find the bow. Receive the TRIANGLE. Return to the Yard.
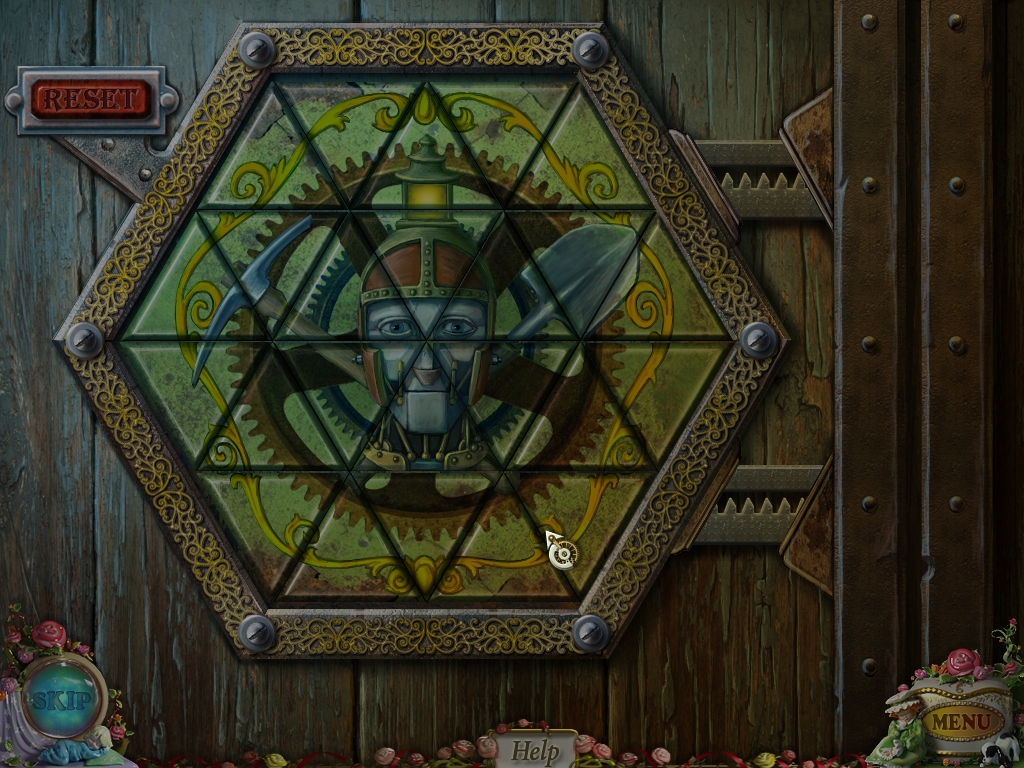
Click on the door. Insert the TRIANGLES into the two empty slots to initiate a game. The object of the game is to assemble the image correctly. Click on the gap between two adjacent triangles to swap their positions. Click in the center of a triangle to rotate it. After you complete this game, enter the house to initiate a Hidden Object Area outside. Exit the house and play the Hidden Object Area.
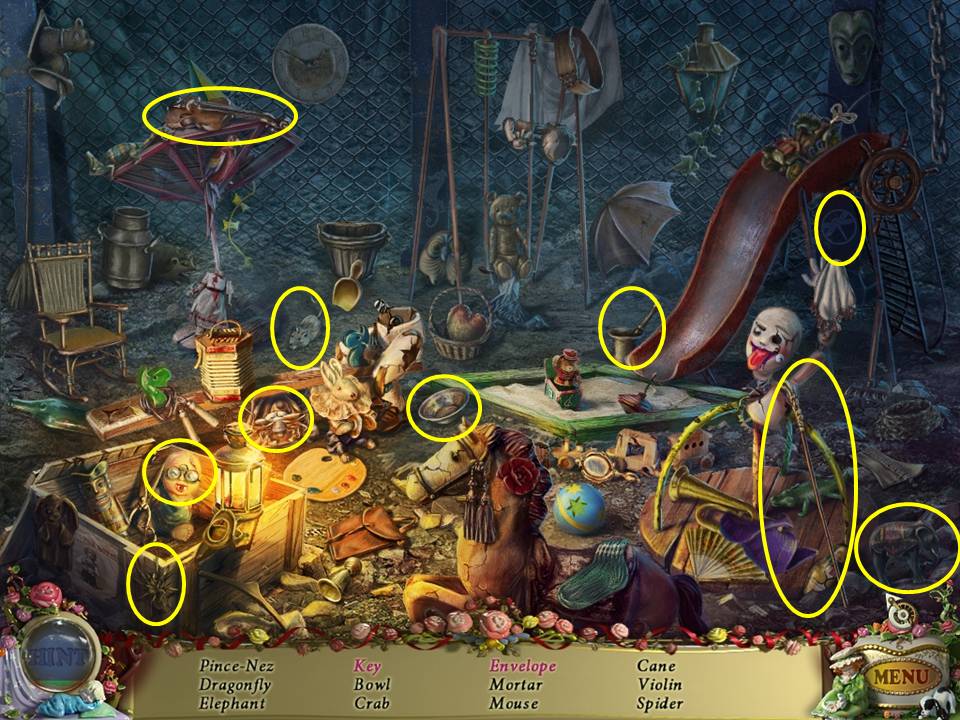
Find the items listed. Click on the train at the top of the slide to send it down the ramp and dislodge the key. Open the bag to locate the envelope. Receive the KEY. Return to the House.
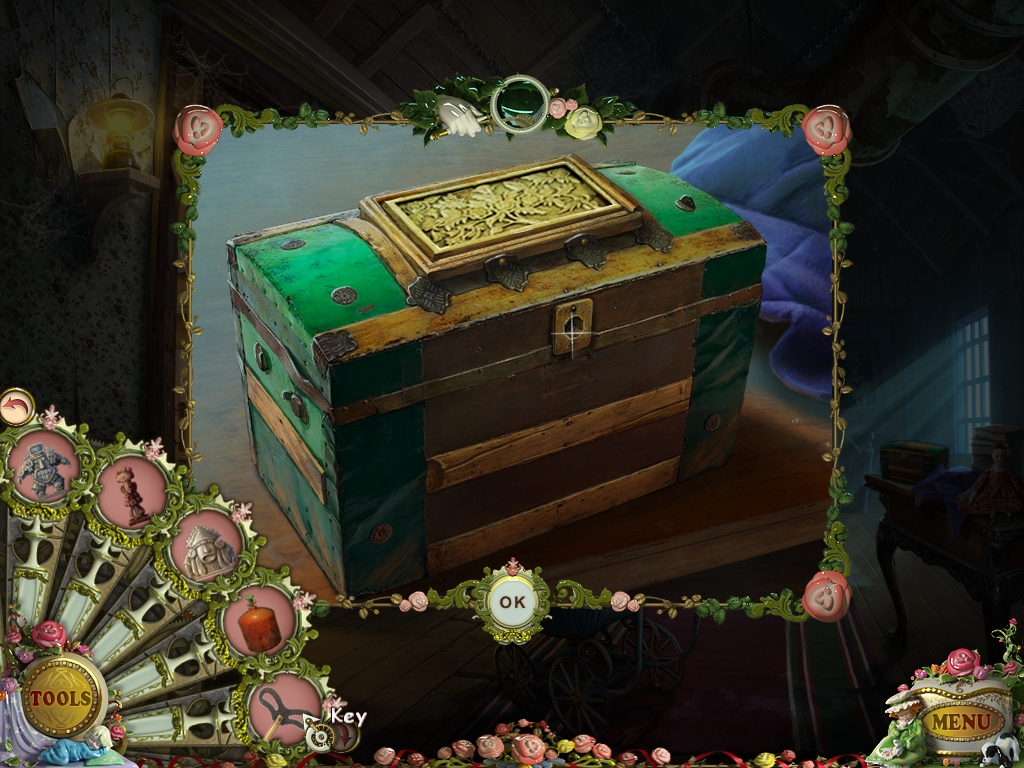
Zoom into the box on the right. Use the KEY in the lock. Click the top of the box to initiate a game.
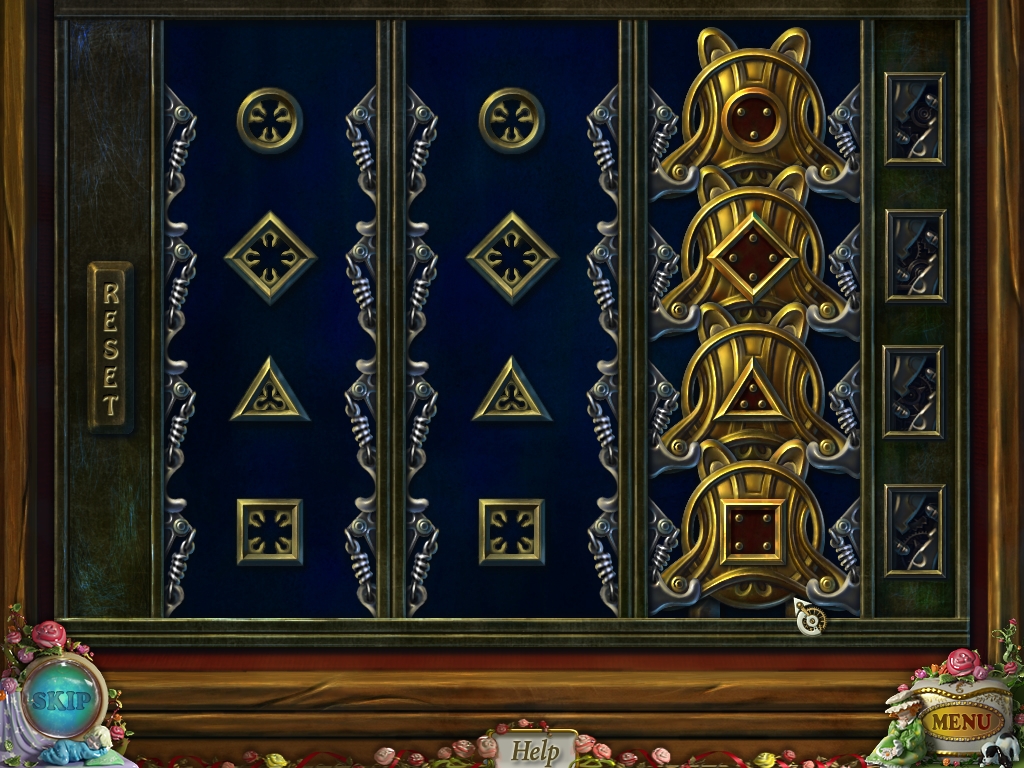
The object of the game is to move the pieces from the far left column to the far right column, while maintaining their same order. You may only move one piece at a time. Begin with the one at the bottom. A piece may only be placed on top of its matching symbol (C = circle, D = diamond, S = square, and T = triangle). If you imagine the columns are numbered 1 to 3 from left to right, the solution is as follows: Move S to 3, Move T to 2, Move S to 2, Move D to 3, Move S to 3, Move T to 1, Move S to 1, Move D to 2, Move S to 3, Move T to 2, Move S to 2, Move C to 3, Move S to 3, Move T to 1, Move S to 1, Move D to 3, Move S to 2, Move T to 3, and Move S to 3 to complete the puzzle. When the puzzle is completed, take the KEY from inside the box. Click down three times.
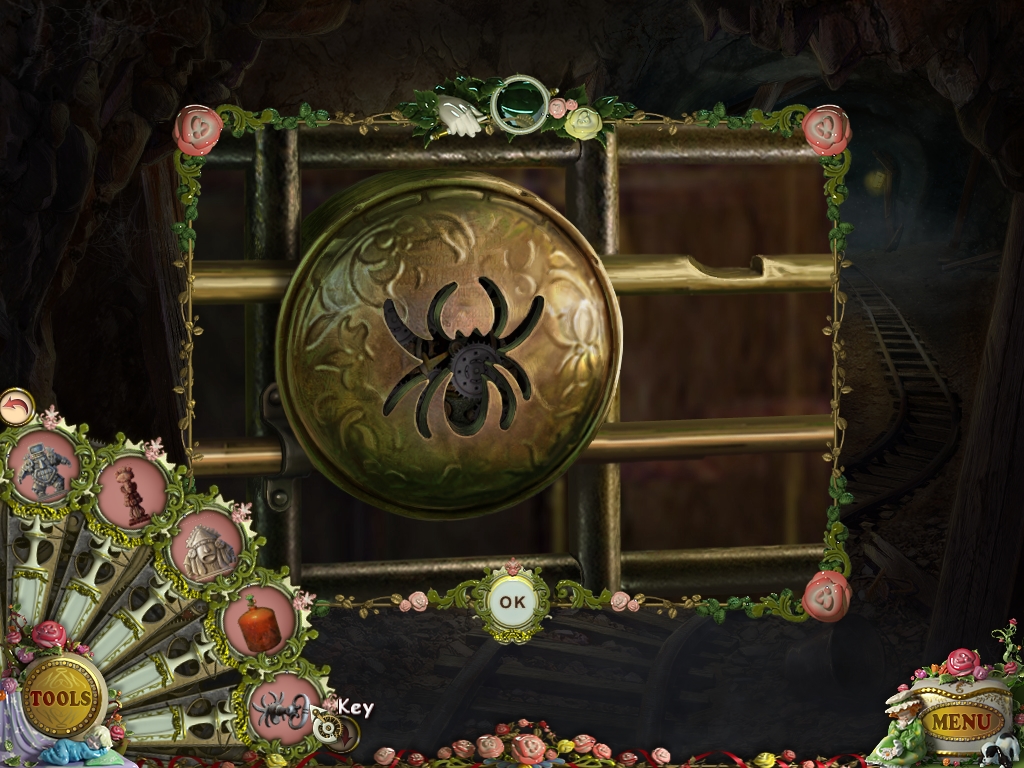
Zoom into the left door. Insert the KEY into the lock. Enter the Underground Lab.
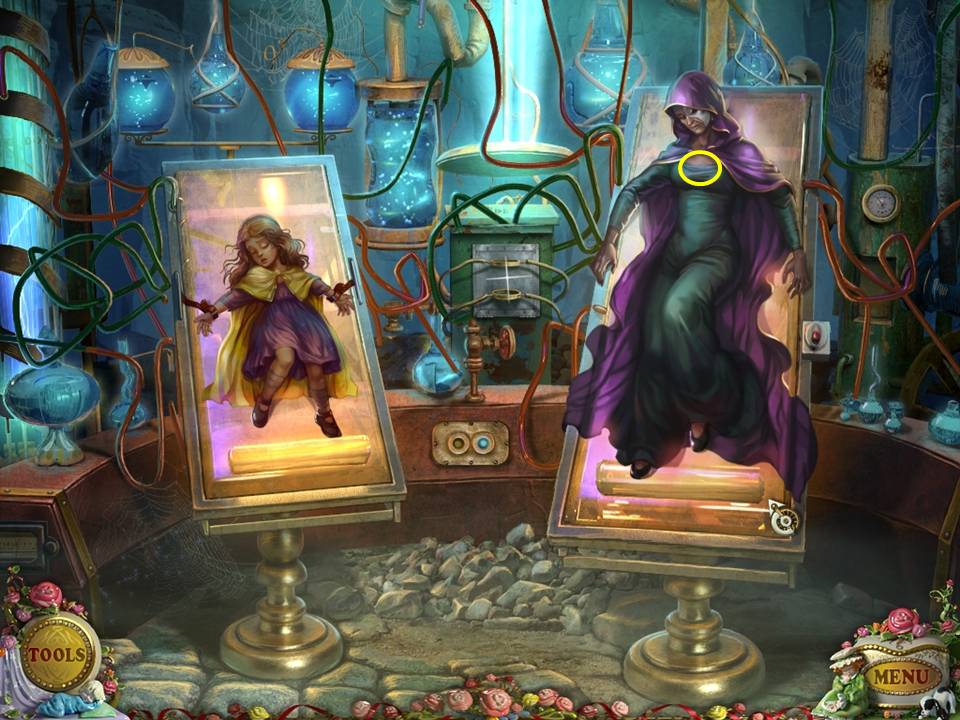
Place the SLEEP GAS anywhere in the scene. Zoom into Felicia.
Pick up FELICIA'S BROOCH. Click down nine times. Zoom into the puzzle on the right cliff wall.
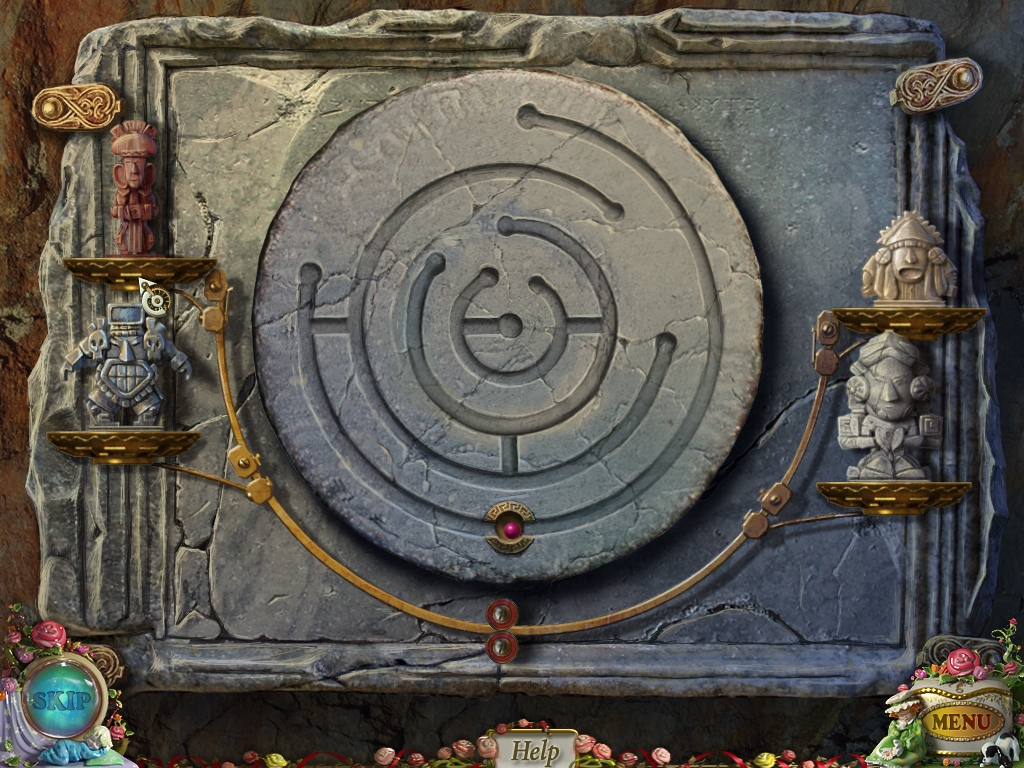
Place the IVORY STATUE, the METAL STATUE, and the WOODEN STATUE on the pedestals to activate the game. The object of the game is to shift the board to maneuver the ball into the golden hole. Click on any two statues to swap their positions. Any “swap†will cause the board to shift. If you want the board to shift right, place the heavier statues on the right and vice versa.
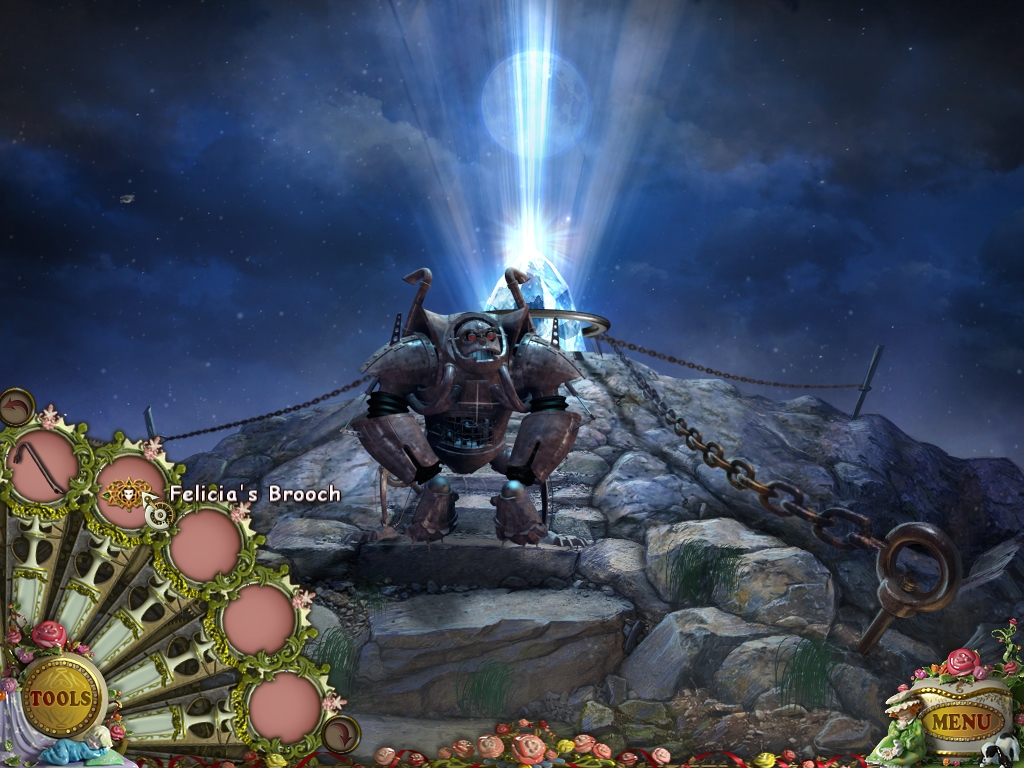
Go up the steps on the right. Click on the large puppet lying on the bridge and give it FELICIA'S BROOCH. Zoom into the large puppet to initiate a puzzle.
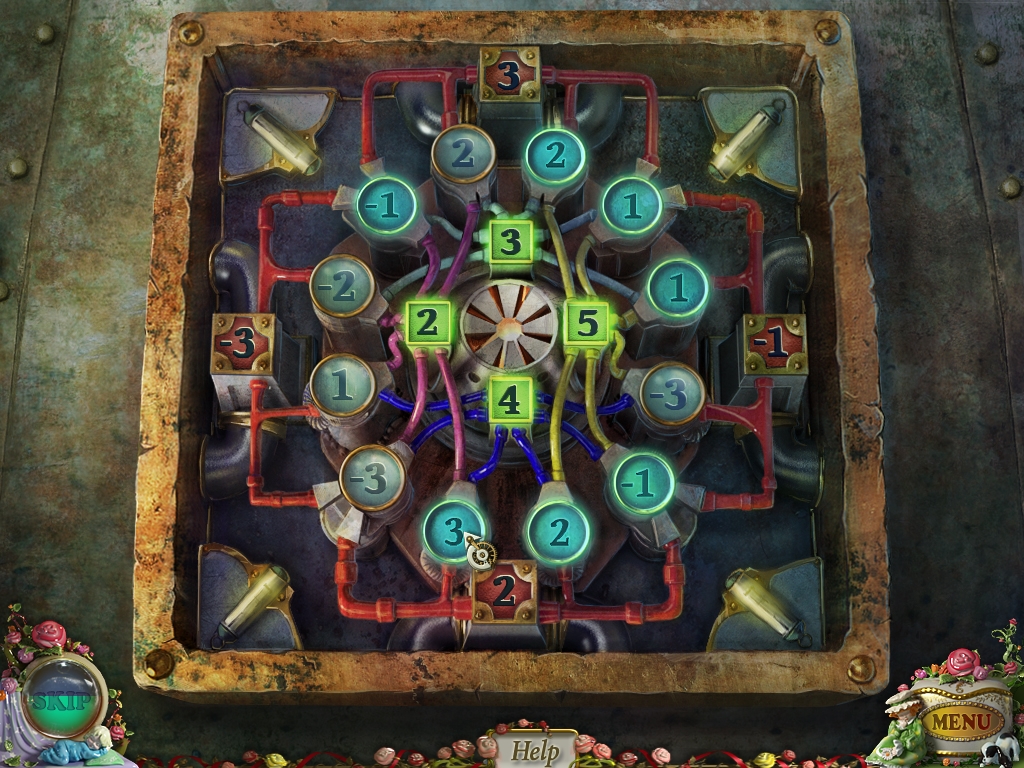
The object of the game is to click on the correct set of numbers in blue that when totaled equal the numbers in red.
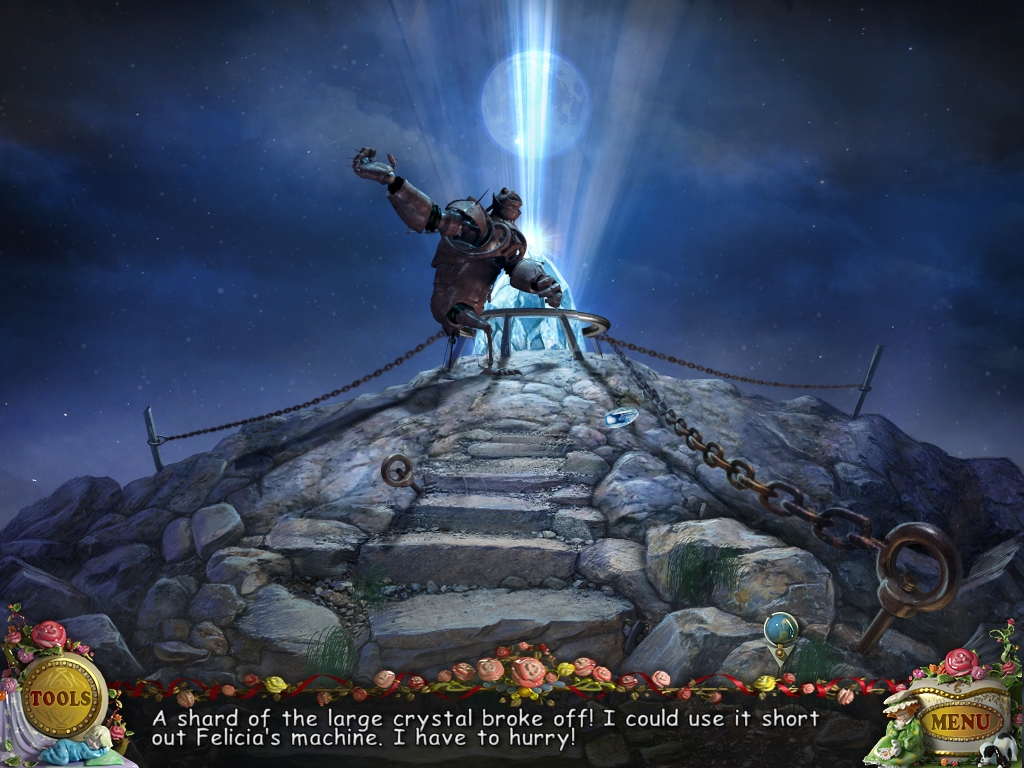
The large puppet will start pounding at the crystals. Pick up the CRYSTAL which lands on the ground. Return to the Underground Lab in the mine.
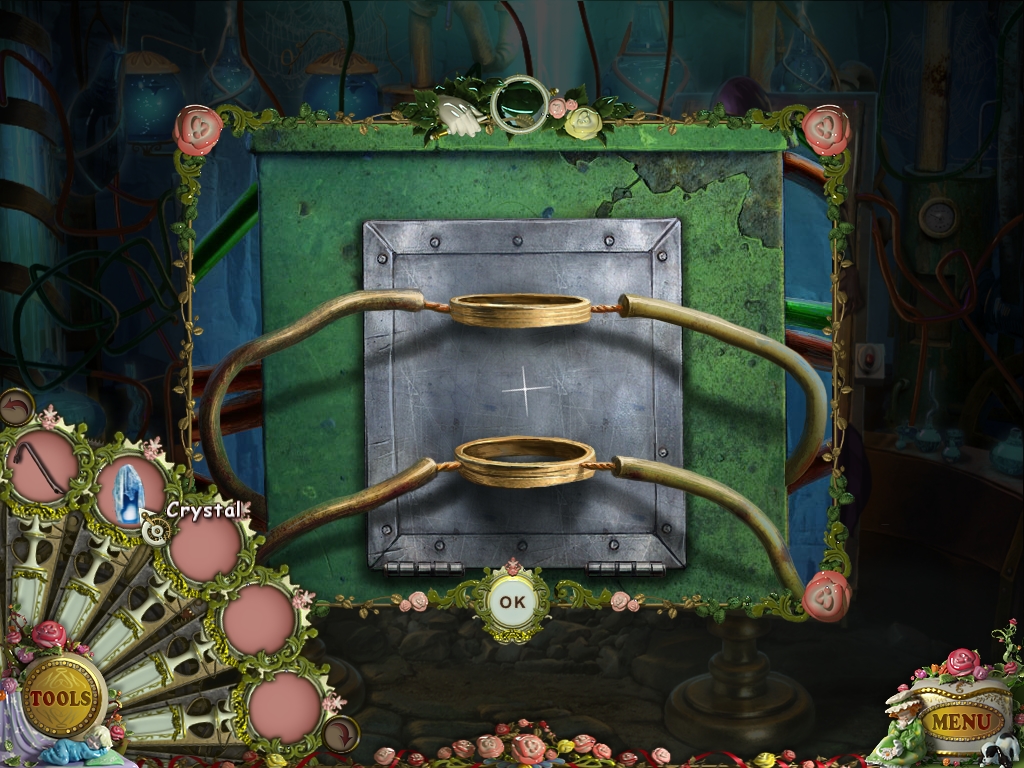
Zoom into the center of the device between the bodies of Felicia and Suzy. Place the CRYSTAL within the two metal bands. Click on the panel to initiate a puzzle.
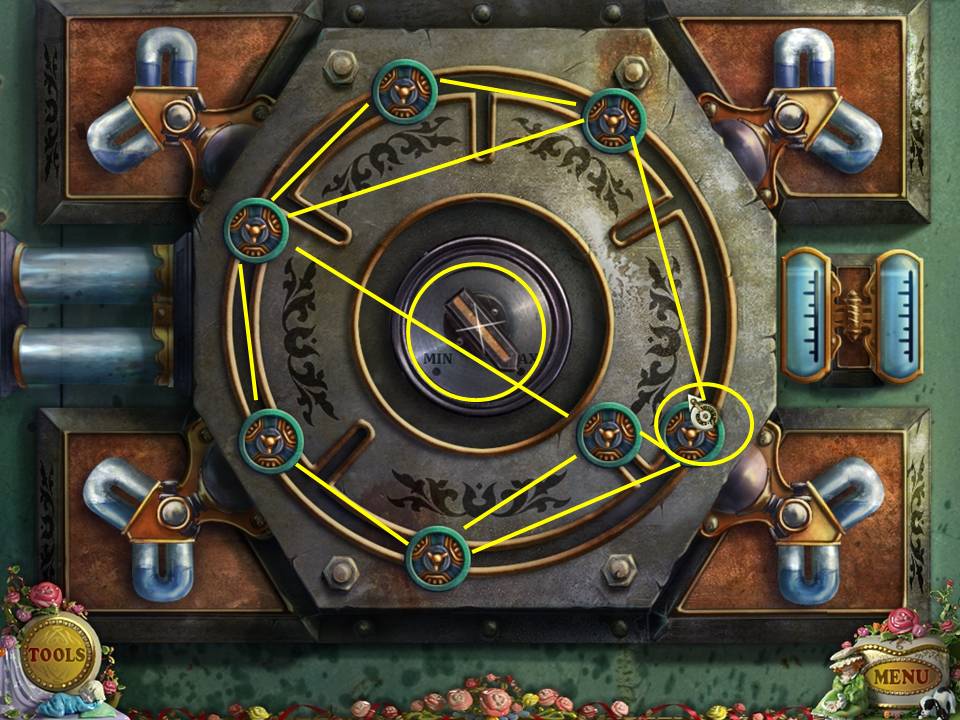
The object of the game is to click and drag the circles so that none of the blue lines overlap each other. You can use the slots on the board to move a circle out of the way to allow free access to another circle that it was blocking. The puzzle allows solution variations. The solution shown was accomplished simply by moving the single circle with the yellow ring down along the outer path about an inch. When finished the blue lines will disappear. Then, move the pointer in the center of the game from the MAX to the MIN setting.
Congratulations!
Content(s) of this game guide may not be copied or
published on any other site without permission from Casual Game Guides.
©CasualGameGuides.com 2006 - 2021
