

Images©
Big Fish Games & GOGii
Overview: In the sequel to Princess Isabella: Witches Curse, you find out the witch has returned and stolen Baby Bella.
Tasks: The left hand side shows you your current task.
Journal: Inside is information and a map.
Map: The map will show you your current location, cursed locations, uncursed locations, and all clear locations.
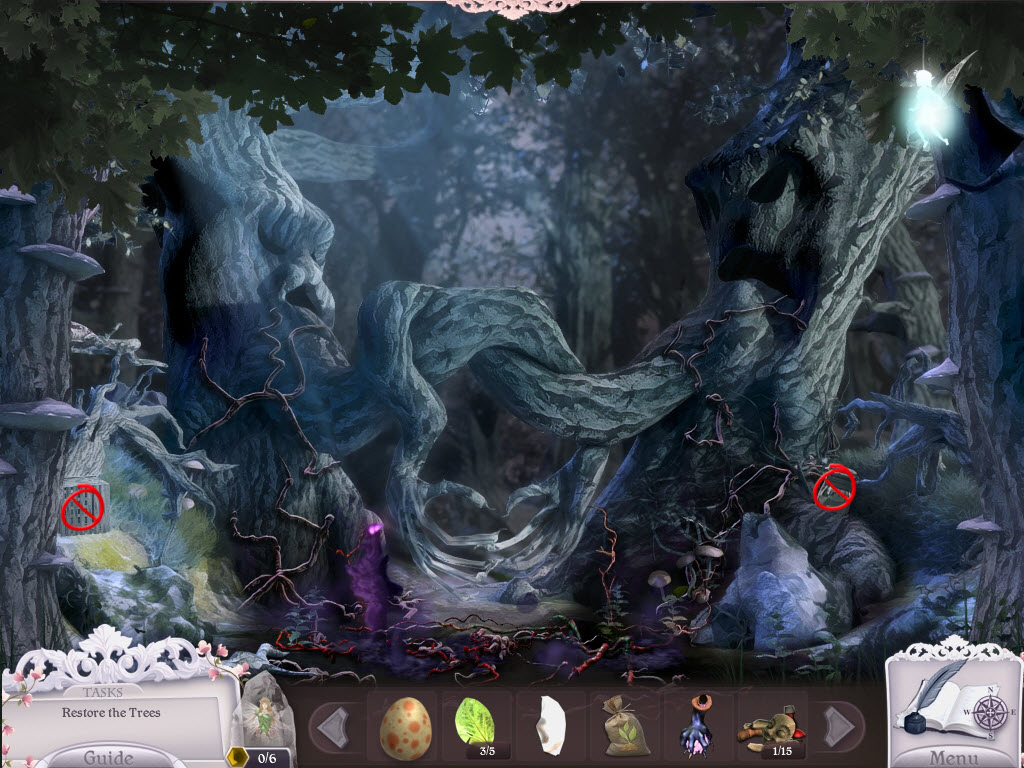
Fairy: The fairy enables hints and spells. Abilities are marked in the guide with a circle with a line through it.
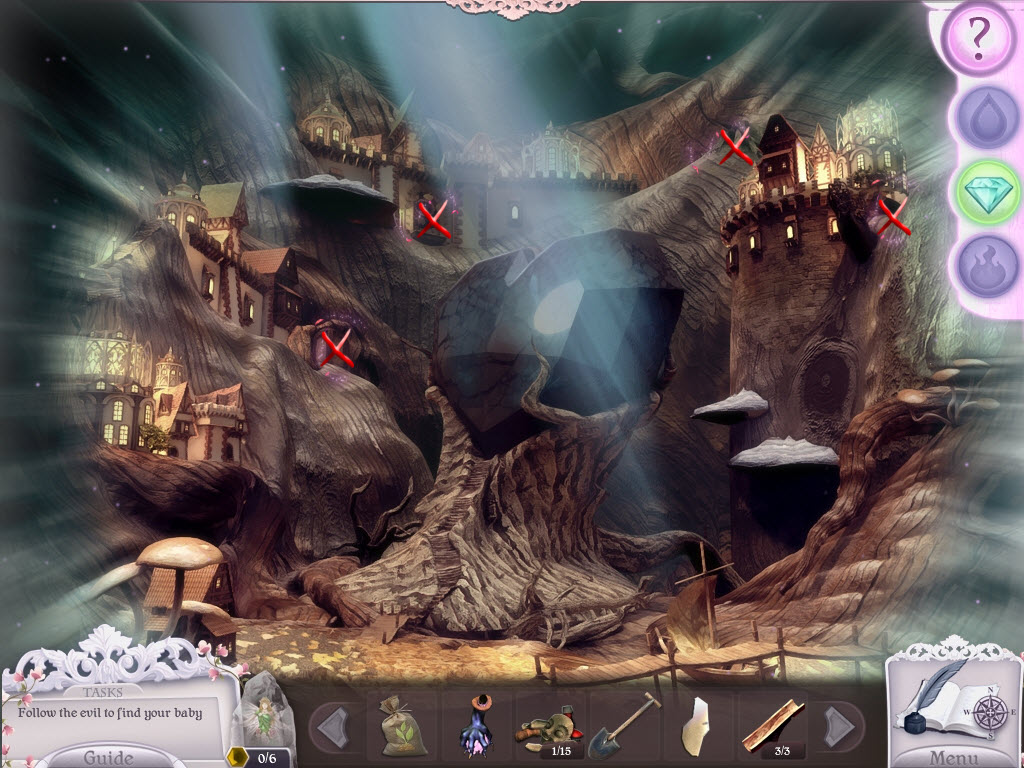
Evil Objects: These are hidden anywhere and everywhere. They can be skulls, snakes, eyeballs, or anything out of place.
Hidden Objects: Items will vary per game, per player. Only items that go into your inventory will be marked.
Location of All Gems: Click link to be taken to a spoiler section which contains the location of all the gems!
Nursery
Bedroom
Royal Bathroom
Bedroom
Royal Bathroom
Bedroom
Royal Bathroom
Caves
Caves
Cave Exit
Witches Tree
Fairy Village
Inside Fairy Village
Fairy Village
Outside Town
Castle Gates
Dark Path
Troll Bridge
Castle Gates
Outside Town
Dark Path
Castle Gates
Herbalist
Herbalist Back Room
Herbalist
Herbalist Back Room
Herbalist
Witches Tree
Toy Shop First Floor
Toy Shop Second Floor
Toy Shop Third Floor
Toy Shop First Floor
Troll Bridge
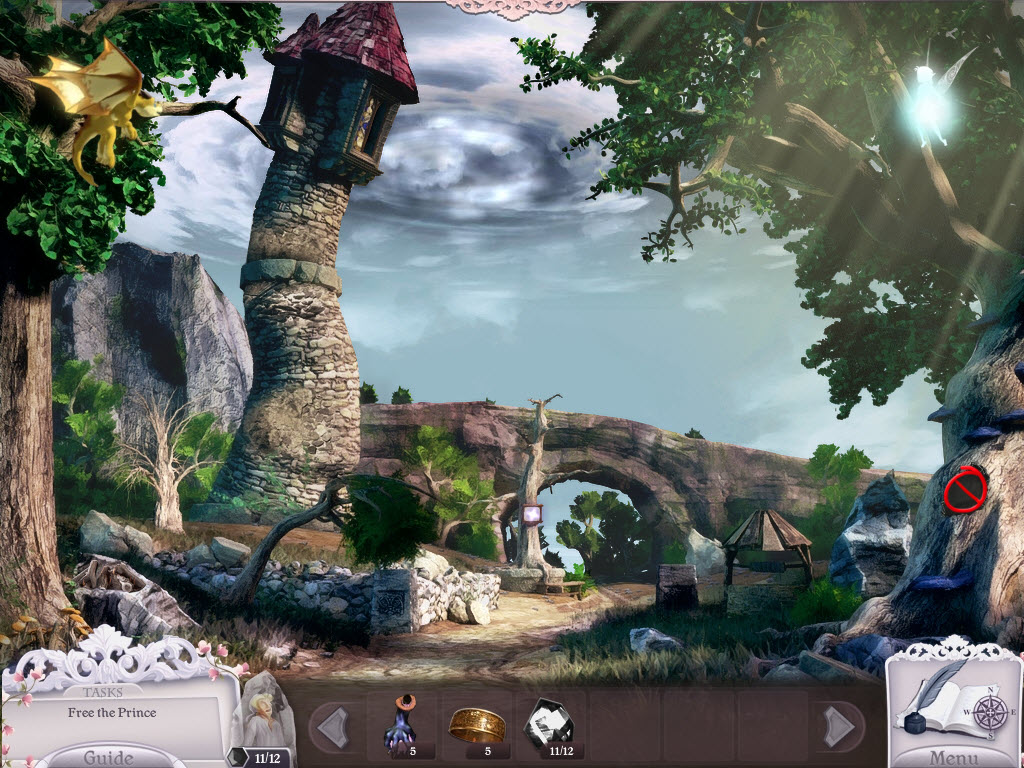
Rapunzel's Tower
Rapunzel's Tower
Tower
Witches Tree
Troll Bridge
Rapunzel's Tower
Tower
Dwarfs House
Toy Shop Second Floor
Toy Shop First Floor
Herbalist
Herbalist Back Room
Witches Tree
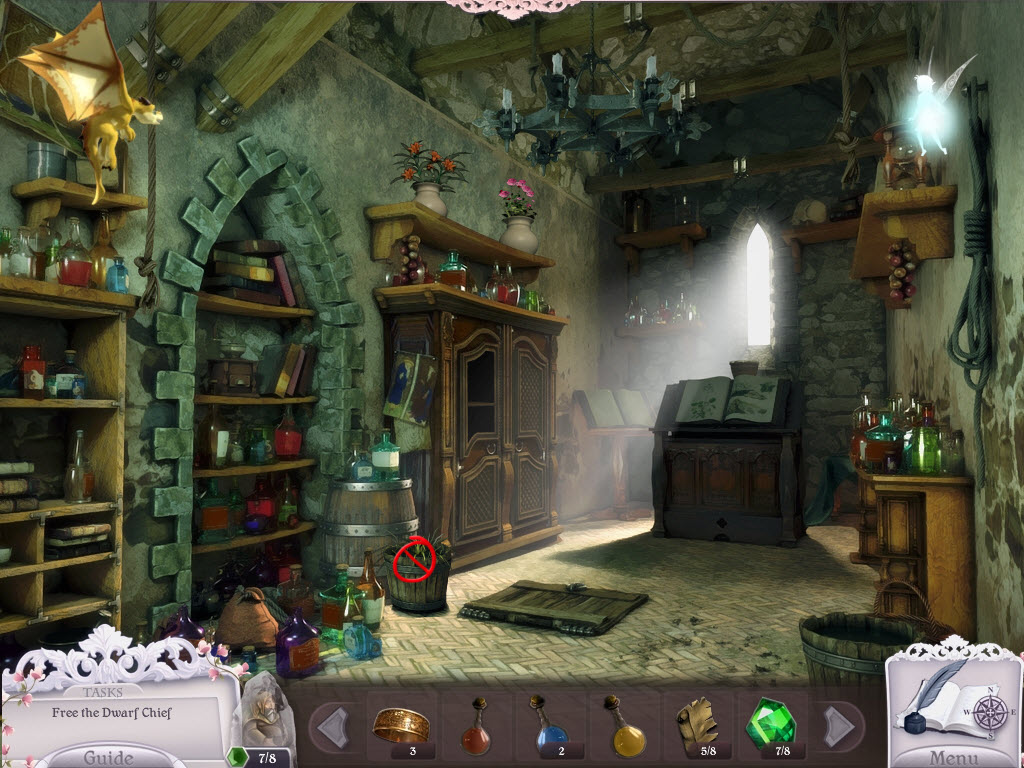
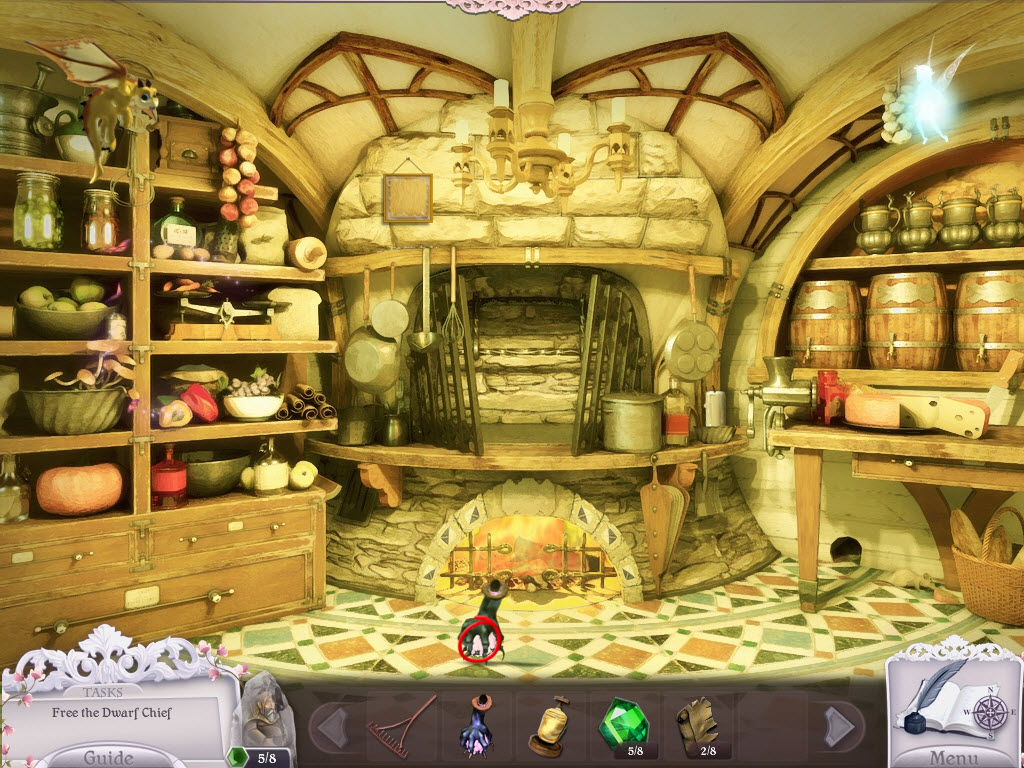
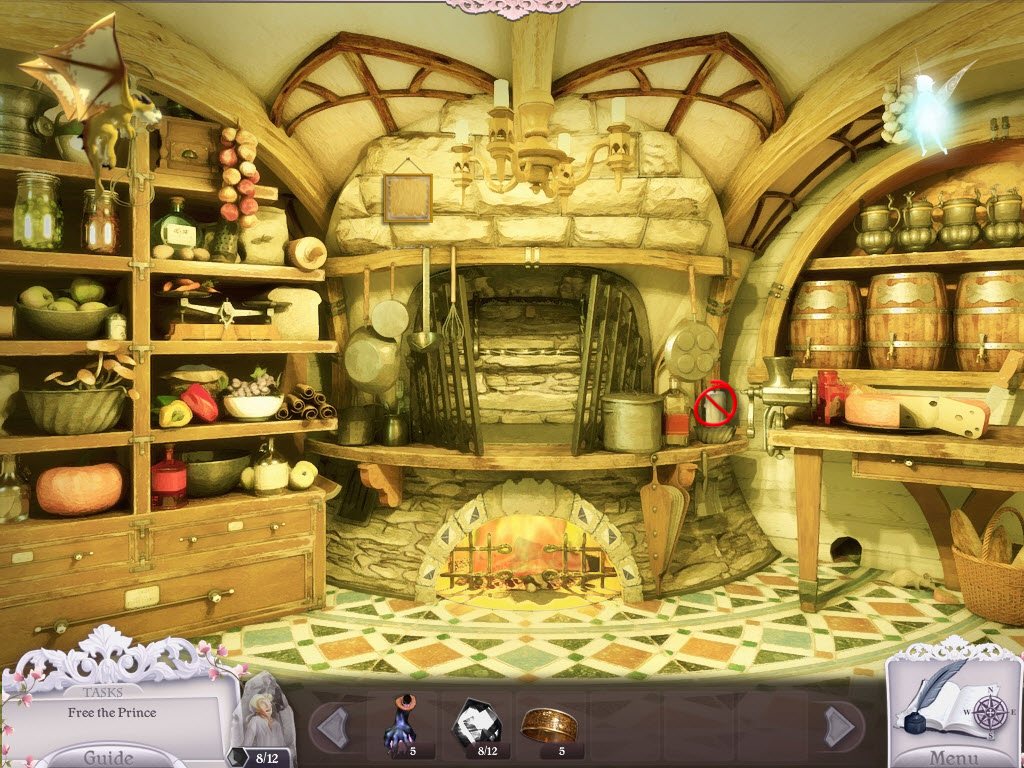
Dwarf Kitchen
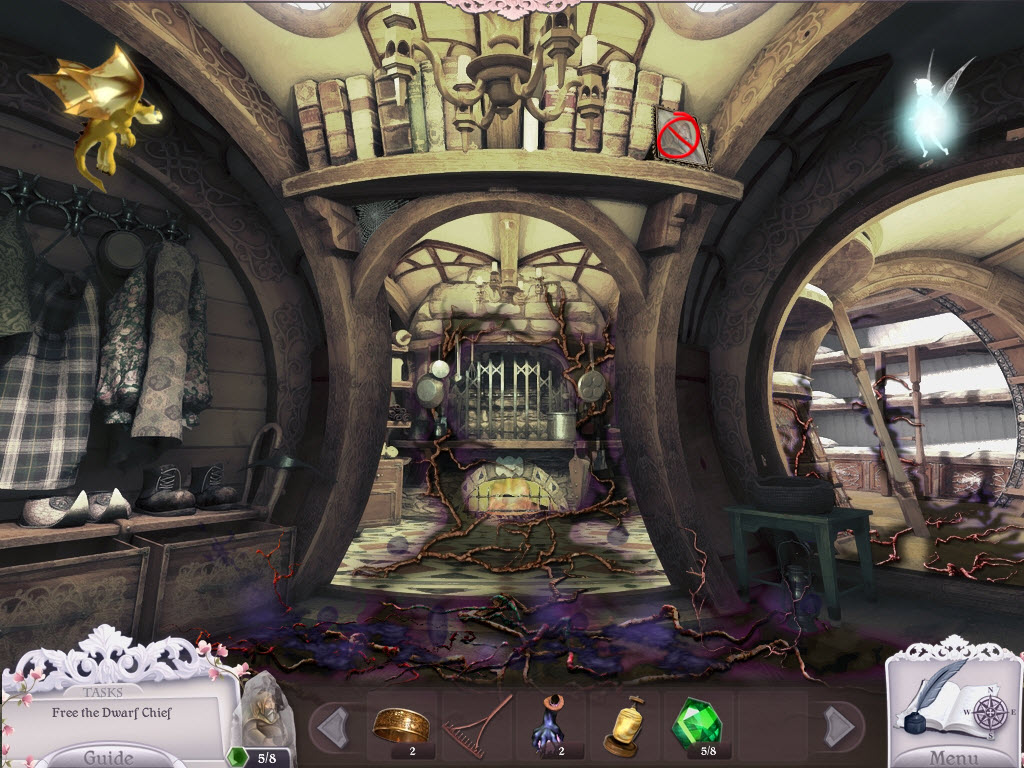
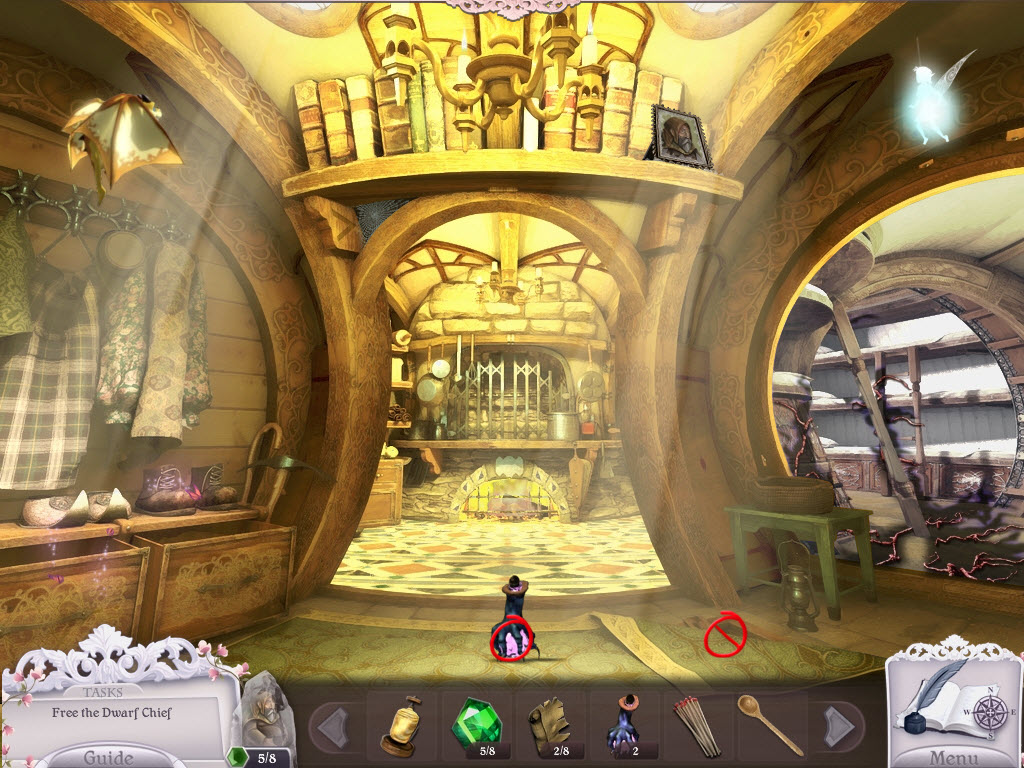
Dwarf Foyer
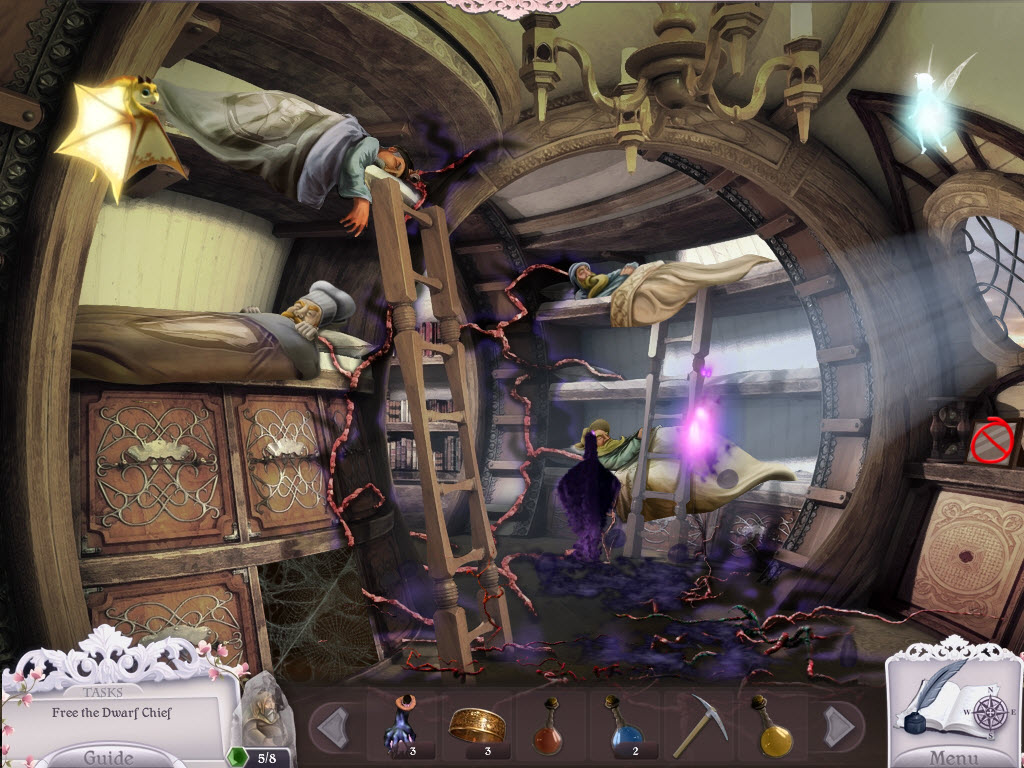
Dwarf Bedroom
Dwarf Library
Dwarf Kitchen
Dwarf Bedroom
Dwarf Library
Dwarf Secret Room
Dwarf Kitchen
Dwarfs House
Rapunzel's Tower
Tower
Witches Tree
Red Gems
Overview: In the sequel to Princess Isabella: Witches Curse, you find out the witch has returned and stolen Baby Bella.
Tasks: The left hand side shows you your current task.
Journal: Inside is information and a map.
Map: The map will show you your current location, cursed locations, uncursed locations, and all clear locations.
Fairy: The fairy enables hints and spells. Abilities are marked in the guide with a circle with a line through it.
- Hints: These are unlimited but must refill. During puzzles the hint button becomes a skip button.
- Diamond Ability: This can be used to break things open.
- Water: This can be used to restore water.
- Fire: This can burn things.
- Hints: These are unlimited but must refill. During puzzles the hint button becomes a skip button.
- Lift: Nessie can lift objects that aren't "too" heavy.
- Smoke: Nessie can now use smoke.
Evil Objects: These are hidden anywhere and everywhere. They can be skulls, snakes, eyeballs, or anything out of place.
Hidden Objects: Items will vary per game, per player. Only items that go into your inventory will be marked.
Location of All Gems: Click link to be taken to a spoiler section which contains the location of all the gems!
Nursery
- click on the bird cage
- Bird Cage Puzzle
- flip the rings so a circle forms in the middle
- you can flip the rings by clicking their ends
- remove the Ring and release the fairy
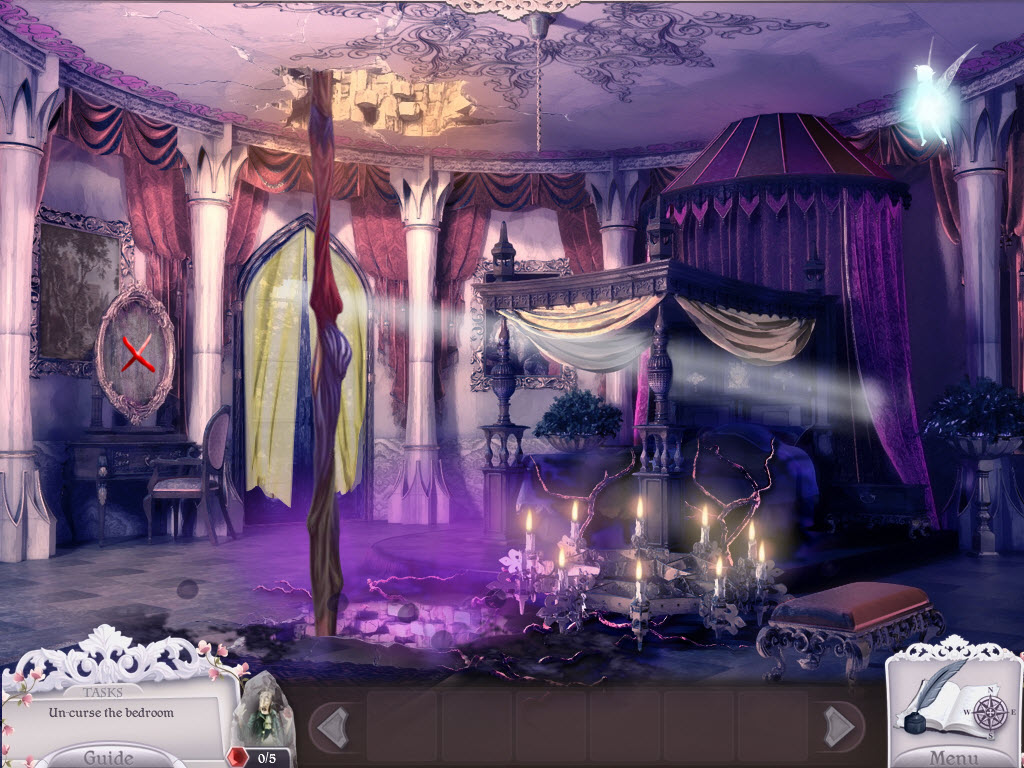
- examine the chest
- place the Ring on top of the chest
- turn the ring so the sun symbol is at the top
- remove all the Evil Objects
- pick up the Potion left behind
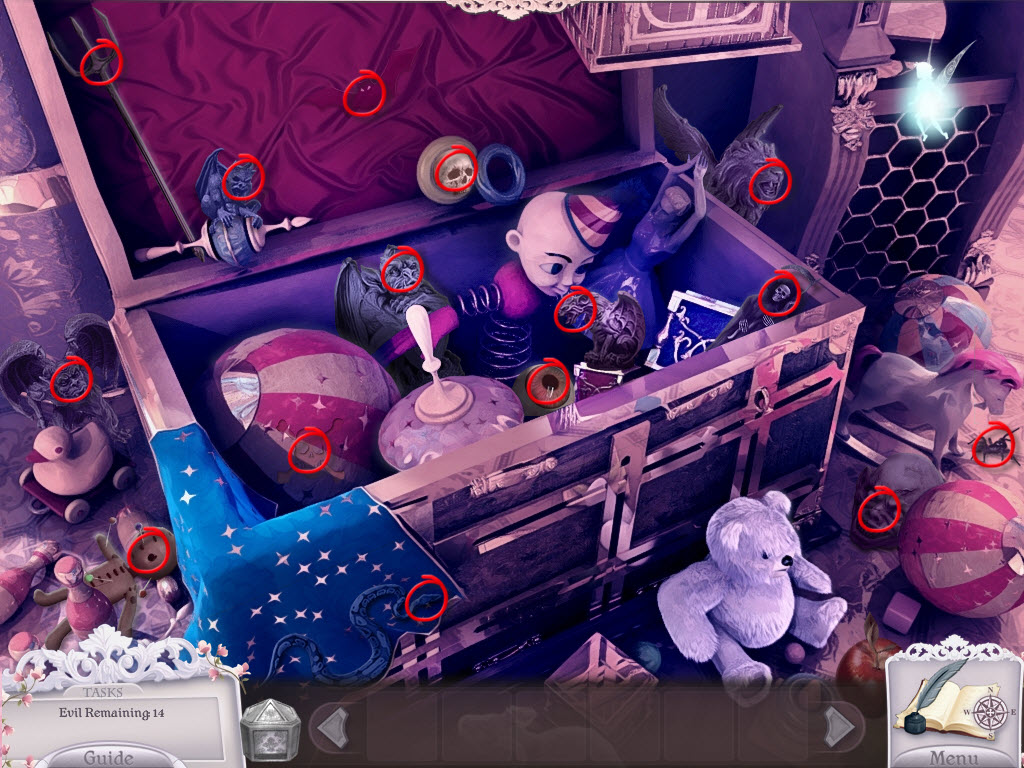
- examine the wardrobe
- find ten Baby Clothes
- examine the sewing machine
- sew the Baby Clothes together
- use the Rope on the chandelier
- use the Transformation Potion on the Rope
- go down
- AREA CLEARED
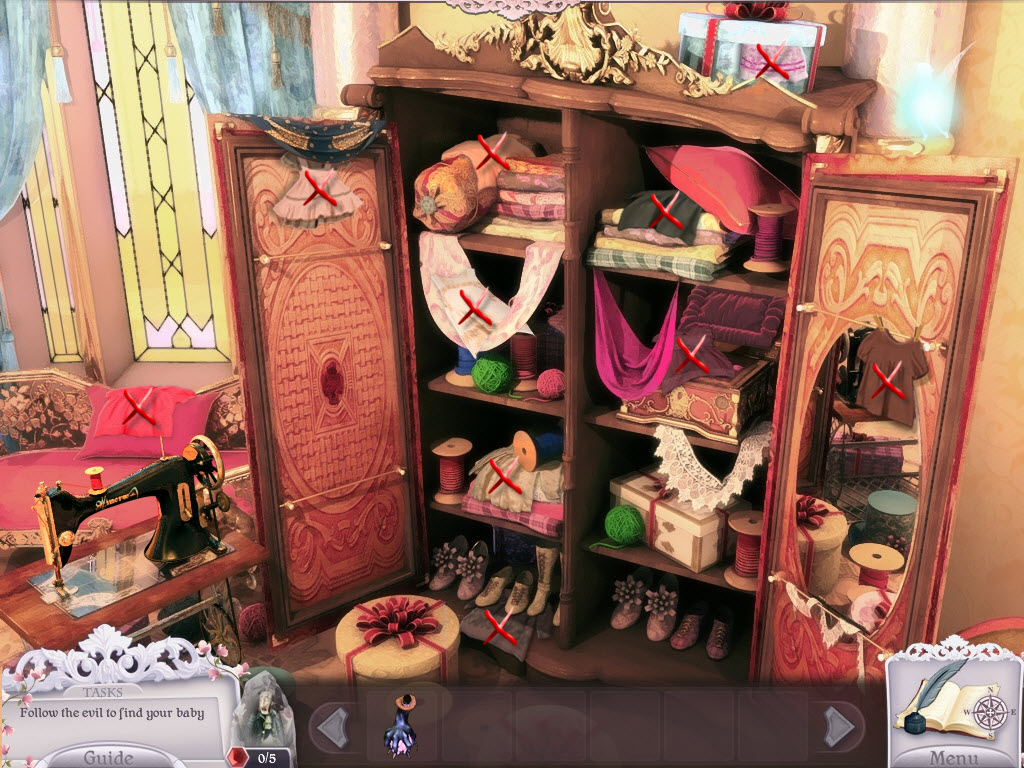
Bedroom
- take the Mirror
- examine the area by the bed
- place the Mirror beside the bed (where the sunbeam is)
- go down
Royal Bathroom
- take the Gem from the right fountain
- pick up the Towel underneath the left fountain
- examine the right fountain
- wet the Towel
- return to the bedroom
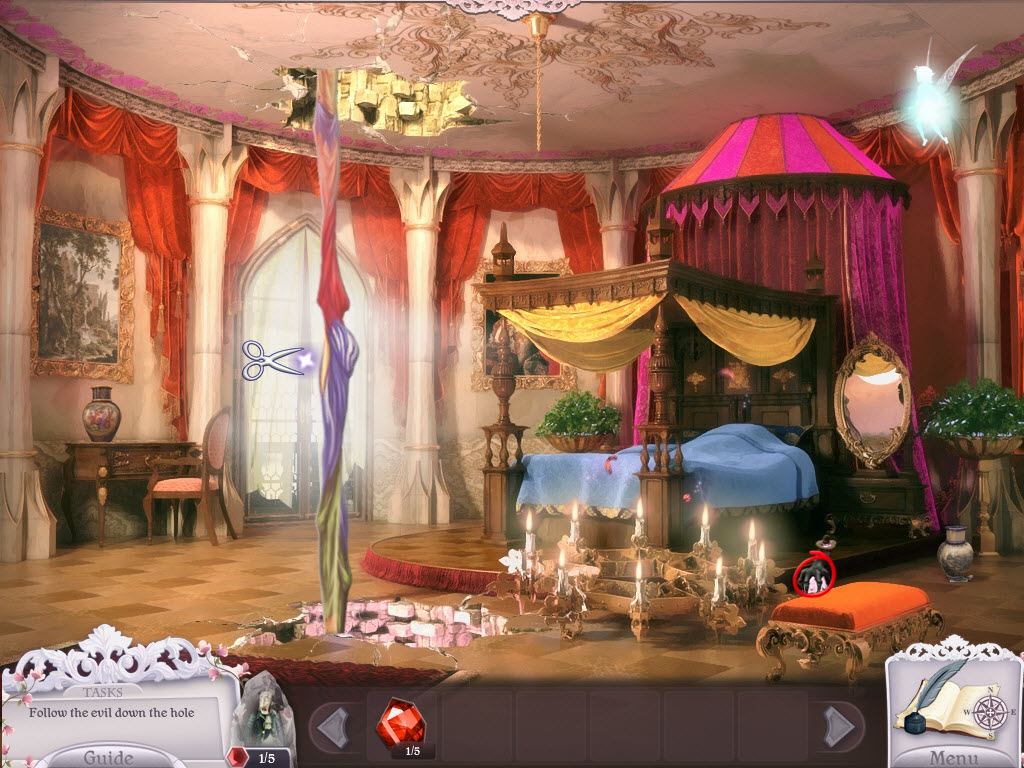
Bedroom
- examine the Mirror
- clean the mirror with the Towel
- pick up the Potion
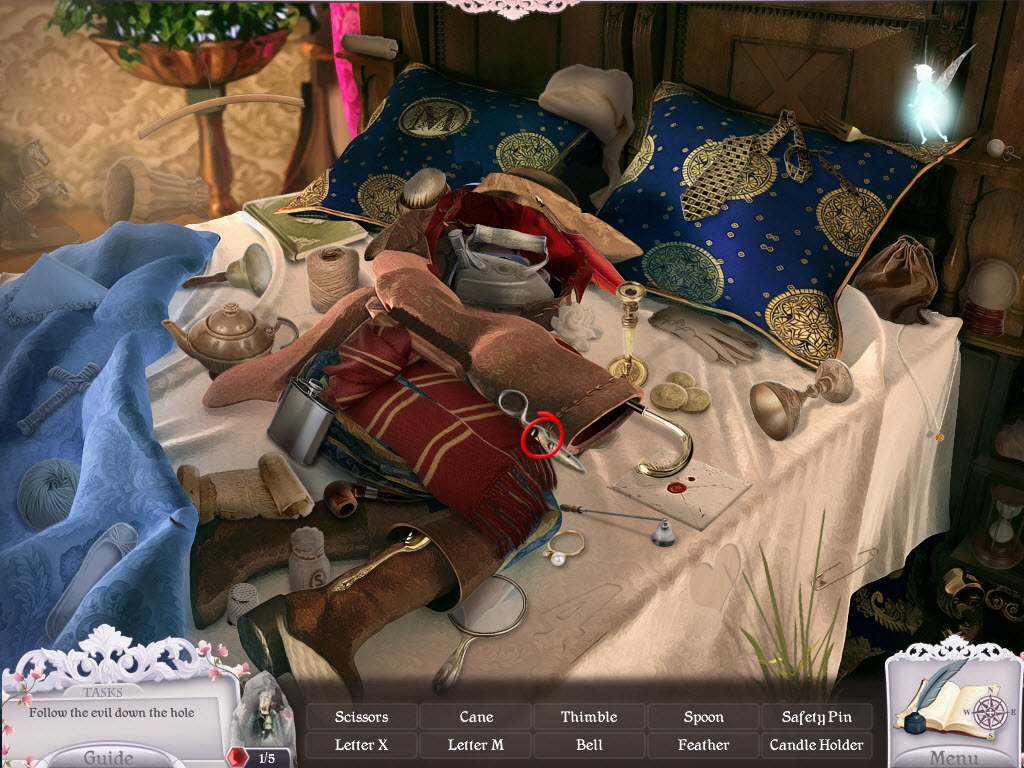
- examine the Prince - hidden object area
- take the Scissors
- use the Scissors
on the curtains
- return to the royal bathroom
Royal Bathroom
- attach the Curtains to the Rope
- go down
- examine the pool
- find all the Evil Objects
- pick up the Rattle
- pick up the
Gem
- examine the pool - hidden object area
- take the Key and two Buckets
- return to the Bedroom
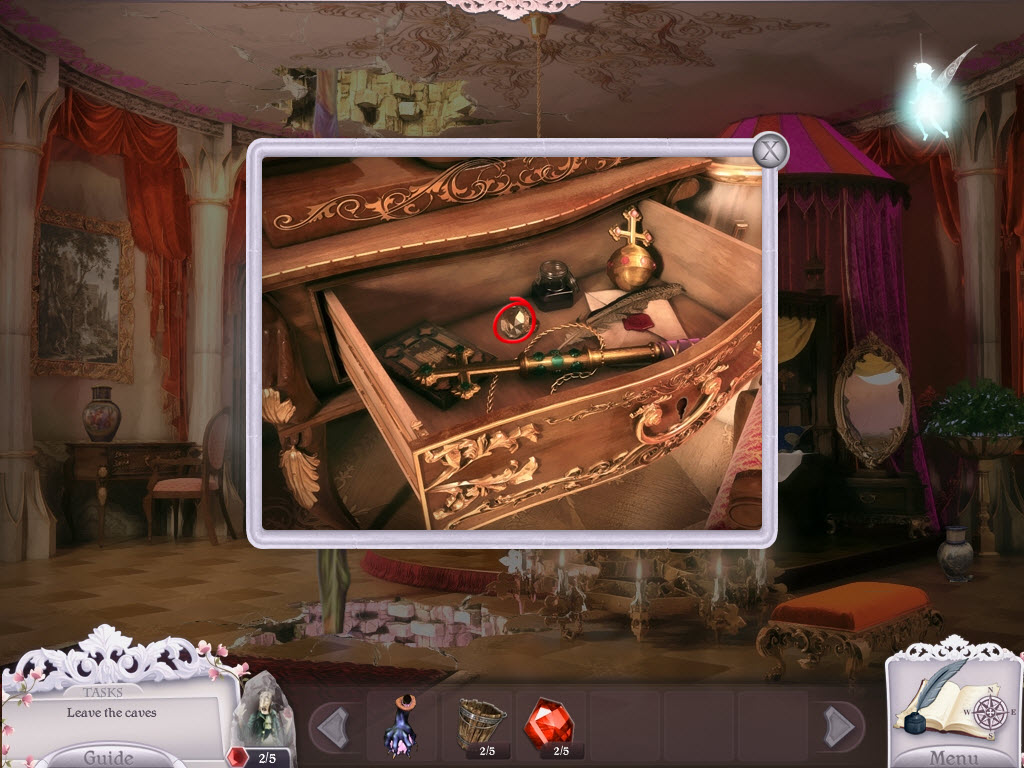
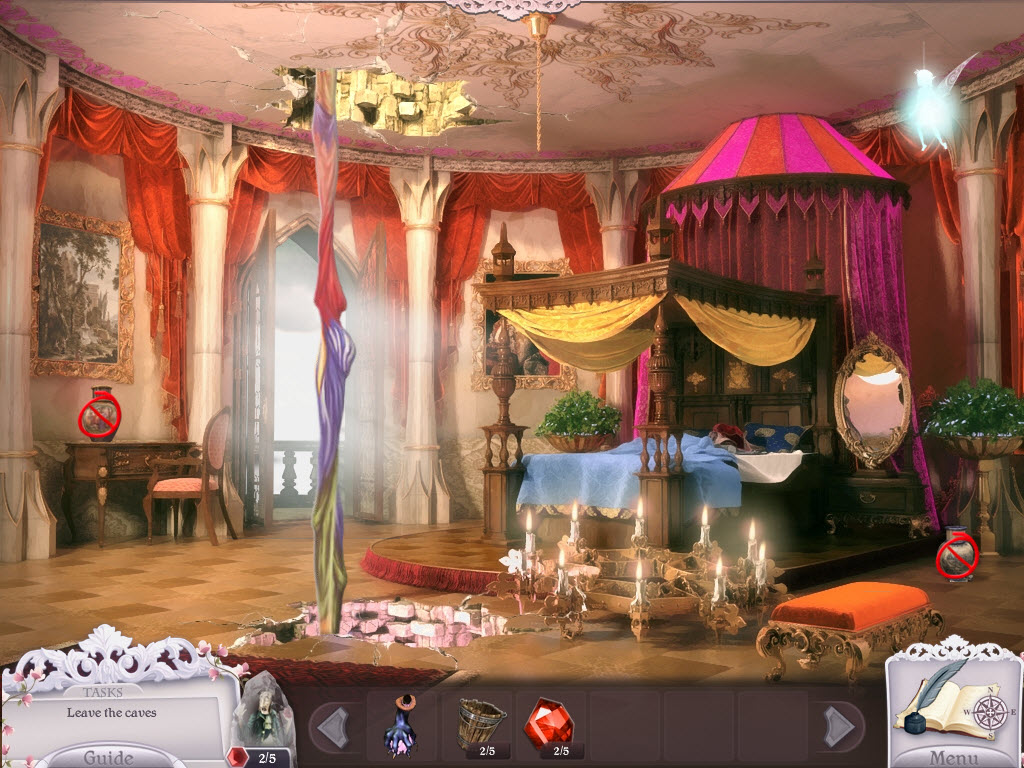
Bedroom
- examine the desk
- use the Key to open the drawer
- take the Diamond Ring
- use the Fairy to break the two vases
- click on a vase and see "ability"
- now click on the diamond on the Fairy
- she will break the vase
- take the Gem and Leaf
- return to the royal bathroom
- AREA CLEARED
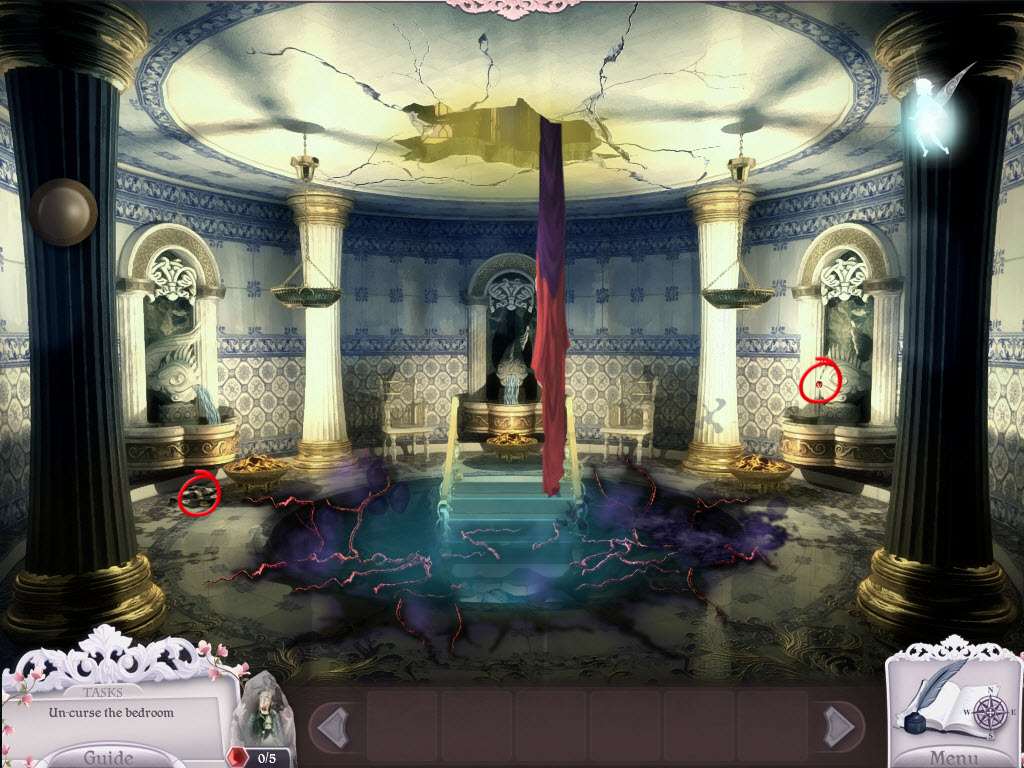
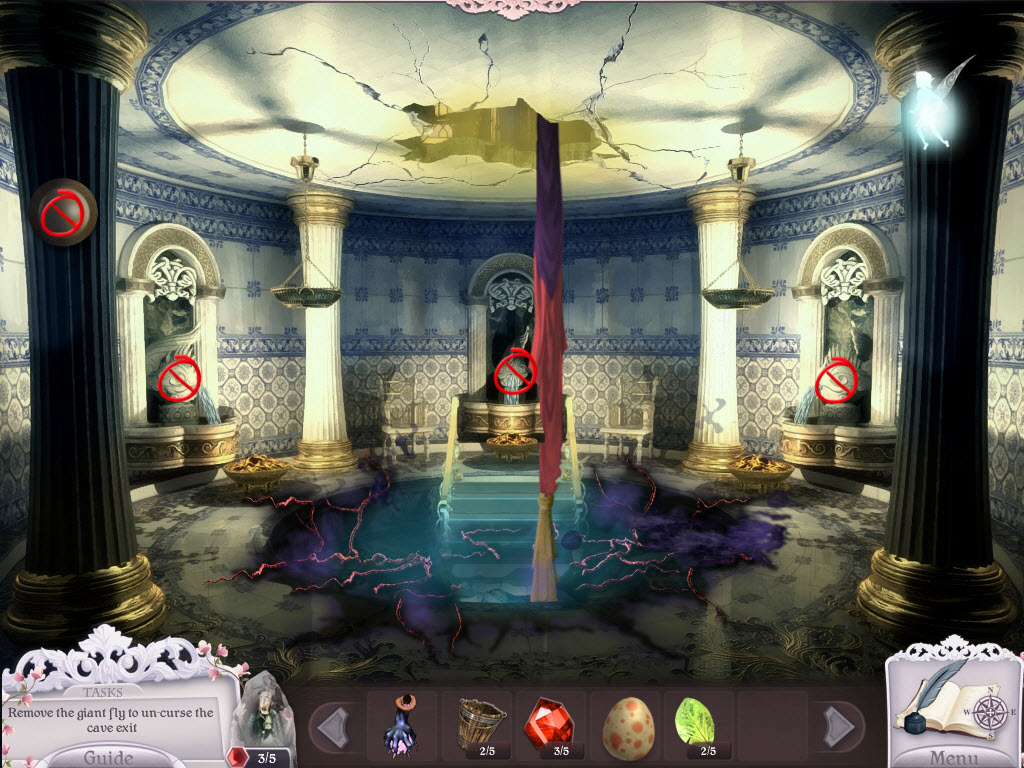
Royal Bathroom
- use the Fairy to break the circle on the left Column
- take the Bamboo
- use the Fairy to break all three fountains
- pick up the Potion
- examine the right fountain
- use the Potion on the tadpole
- take the Frog
- return to the cave
- AREA CLEARED

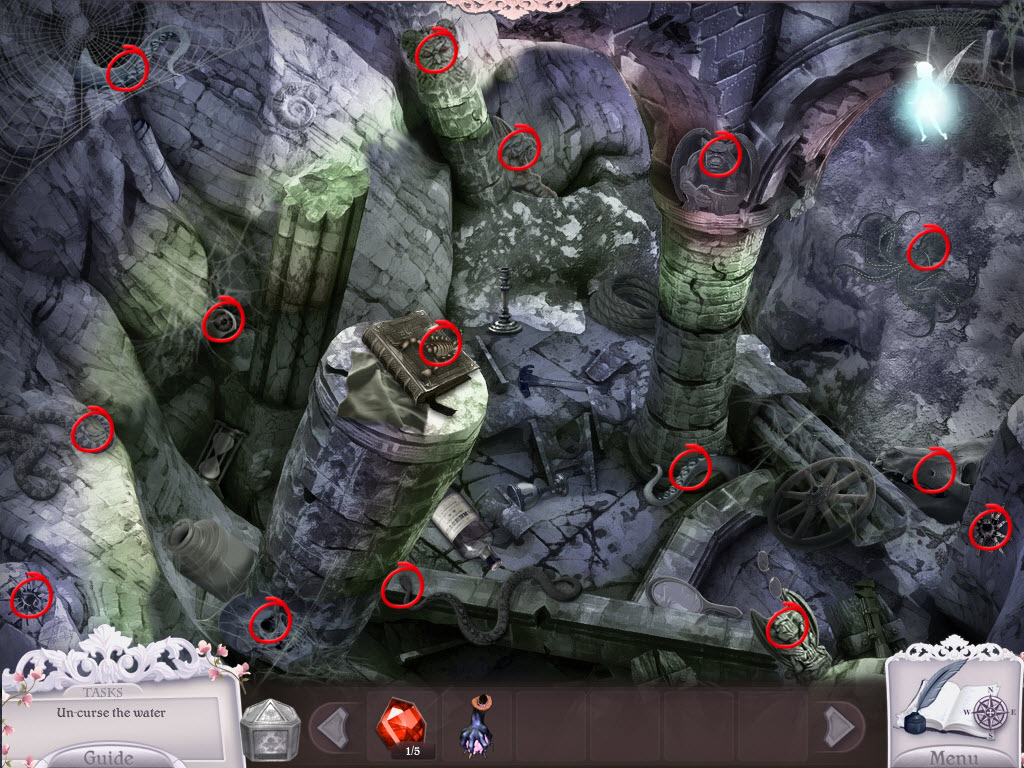
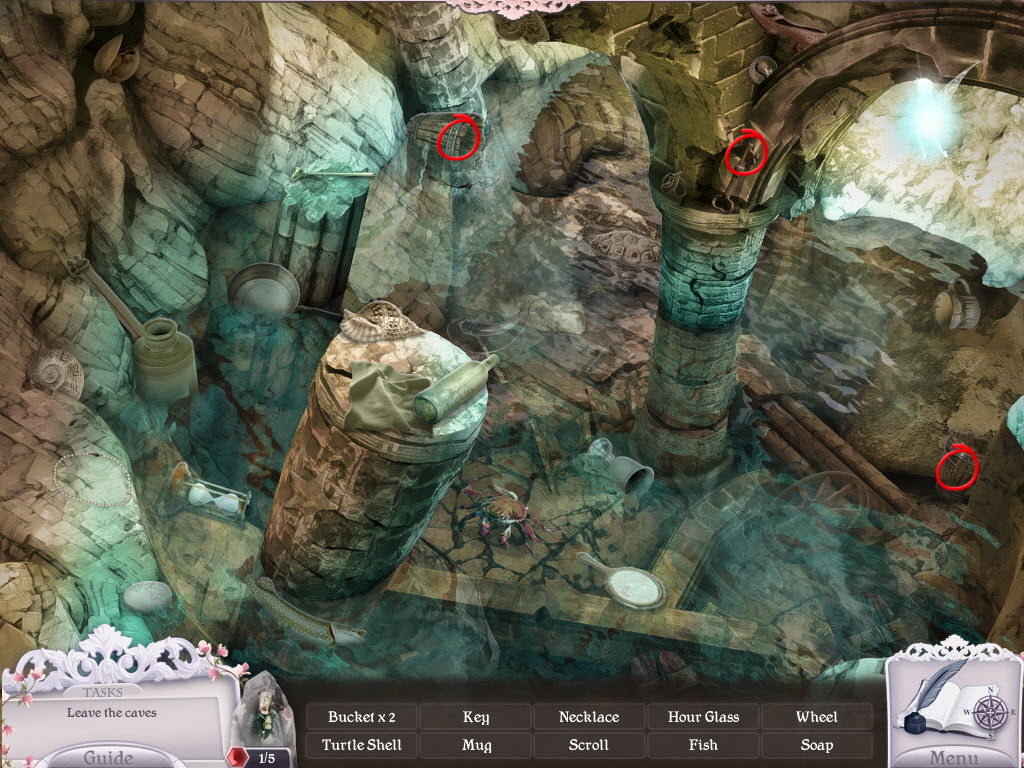
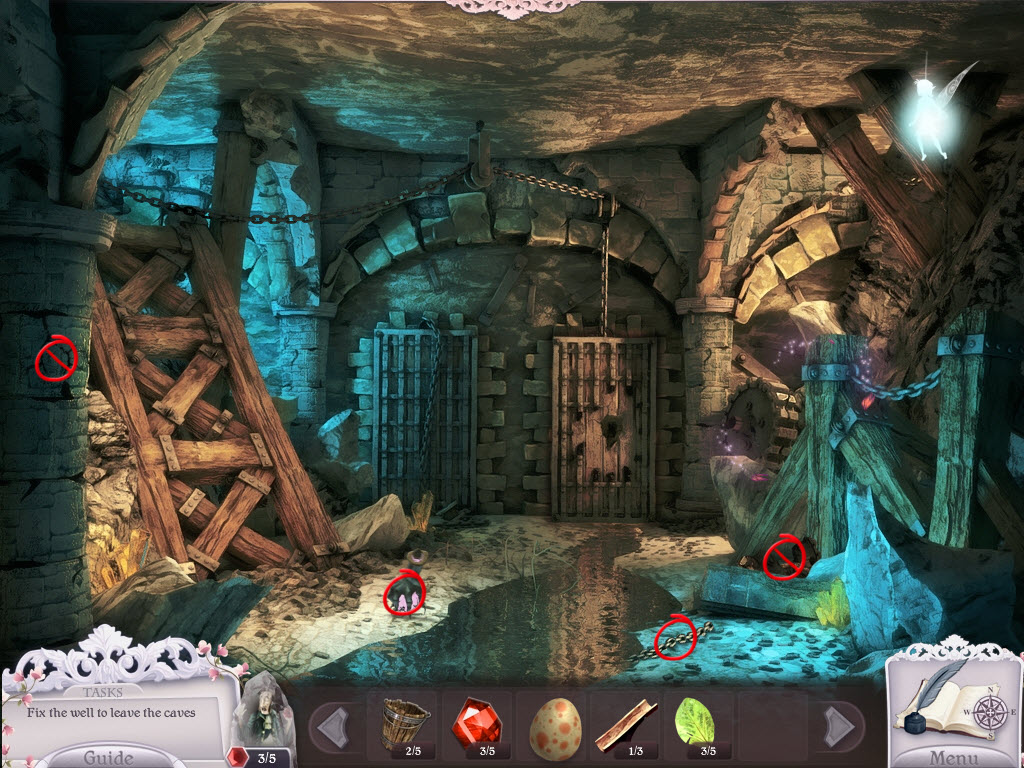
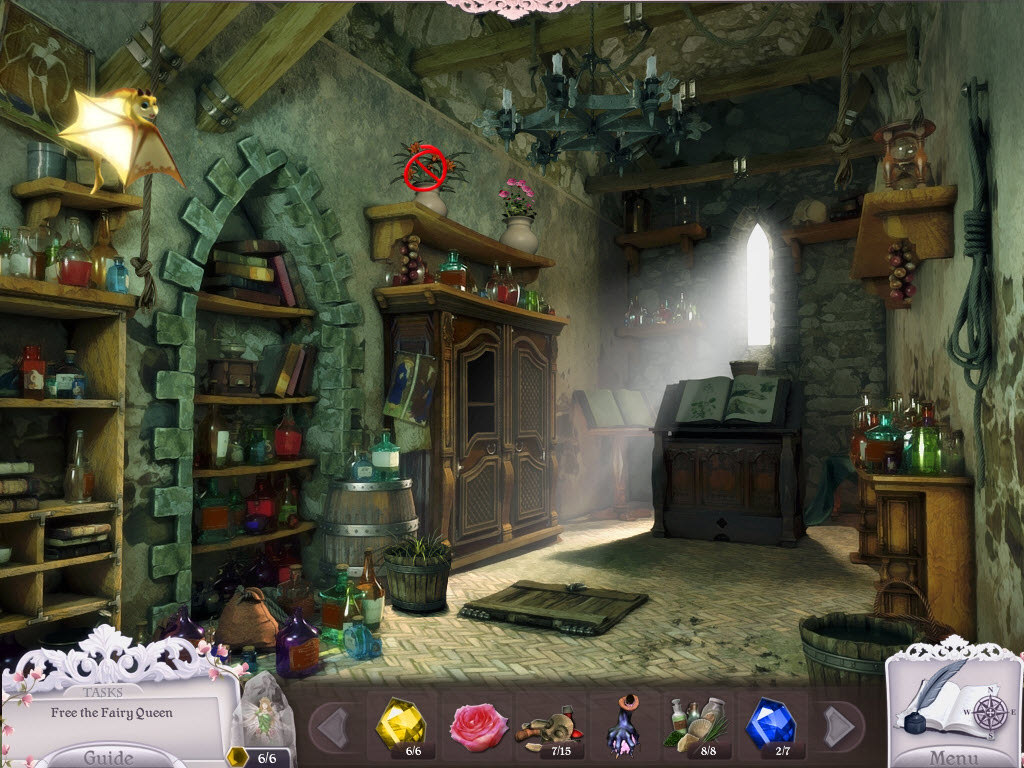
Caves
- examine the claw in the background
- take the Egg
- use the Fairy on the dragon symbol on the rocks
- take the Leaf
- go right
- place the Frog on the ground
- use the Potion on the Frog
- pick up the Potion
- pick up the Chain
- use the Fairy to break the column
- take the Gem
- use the Fairy to break the gear on the right
- take the Leaf
- examine the area to the right - hidden object area
- take the Crank and three Buckets
- exit
- AREA CLEARED
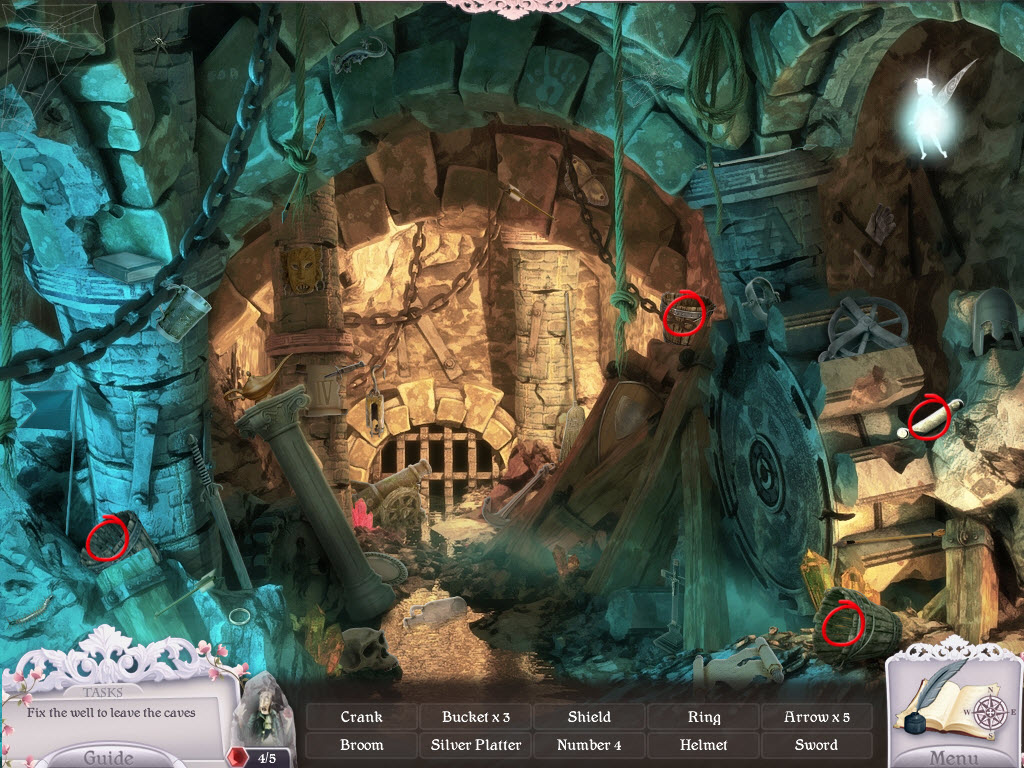
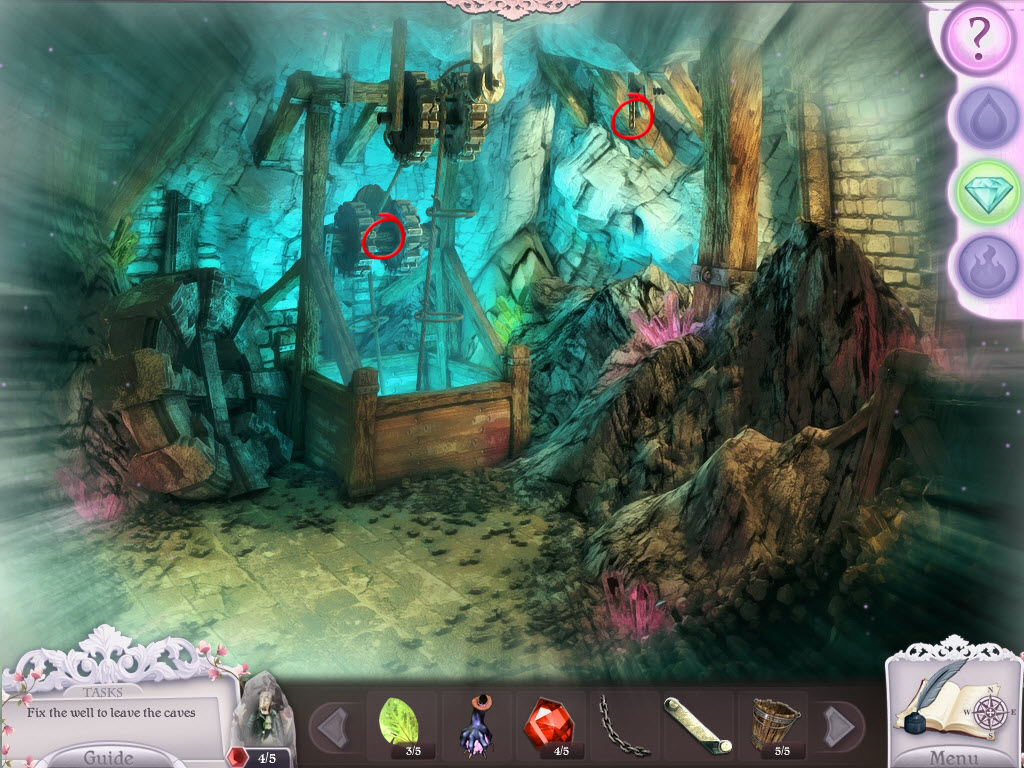
Caves
- go left into the small cave (only the Fairy can access it)
- examine the pulley (upper - right)
- use the Chain to extend it
- examine the gears in the middle of the well
- place a Bucket on the hook
- use the Potion on the Bucket
- place the Crank on the well
- place the remaining four Buckets on the well
- return to the cave exit
- AREA CLEARED
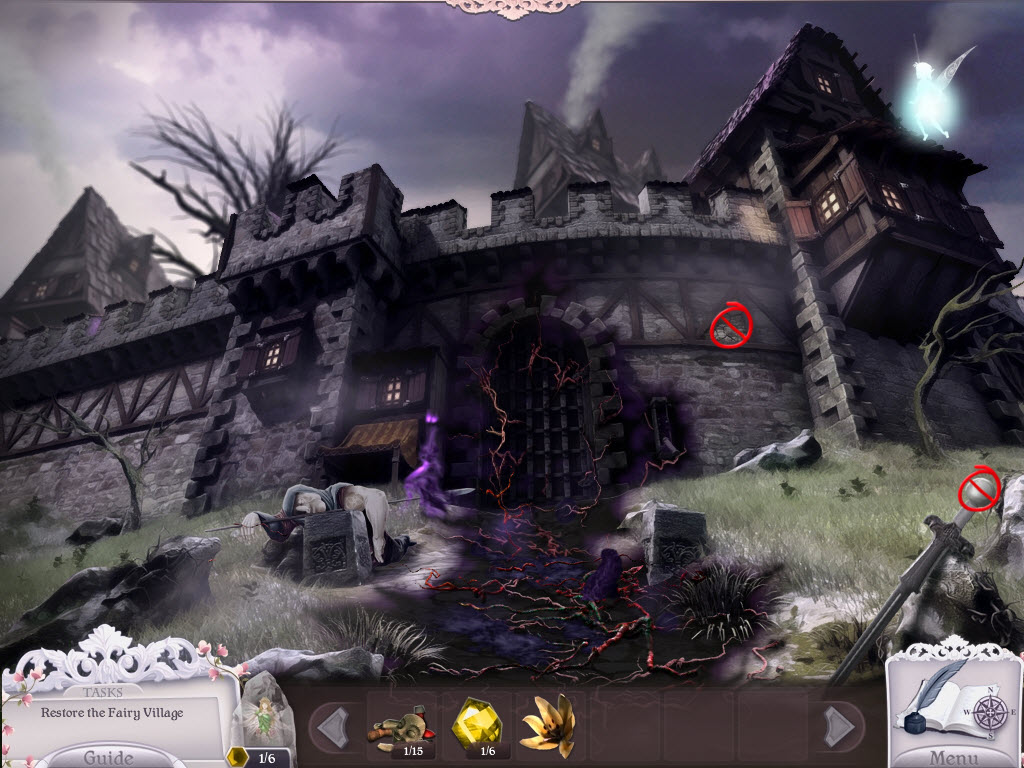
Cave Exit
- exit the castle
- fun fact: the eyes in the witches tree will follow your cursor
- examine the trapped souls - you need to collect more items
- go up
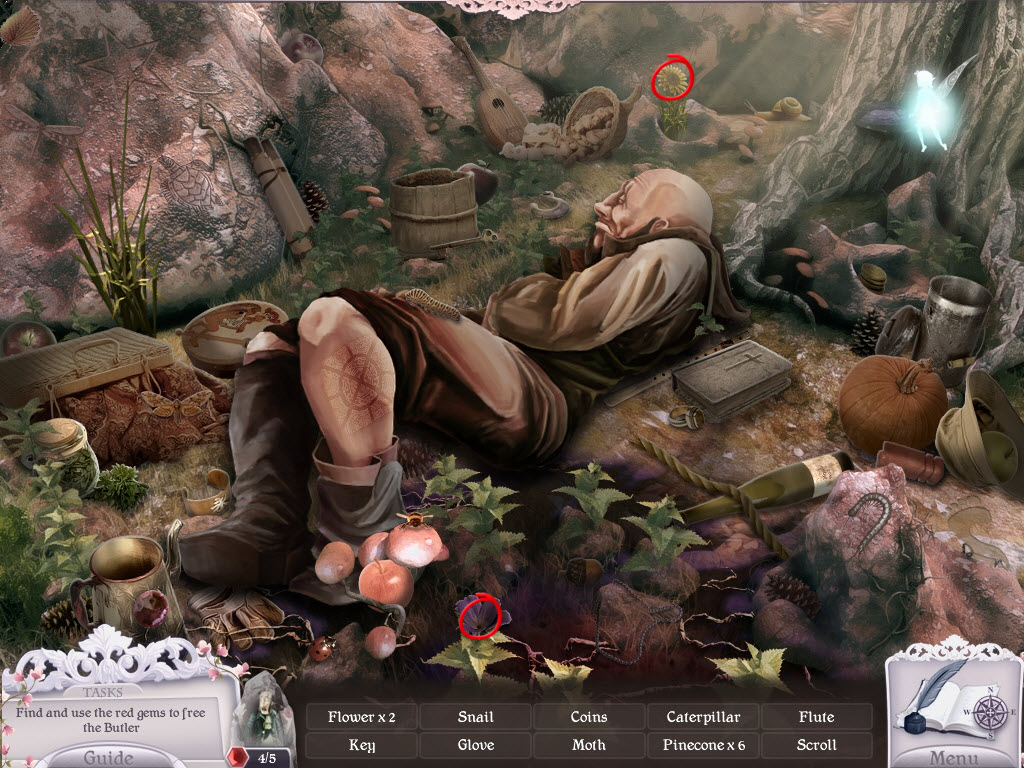
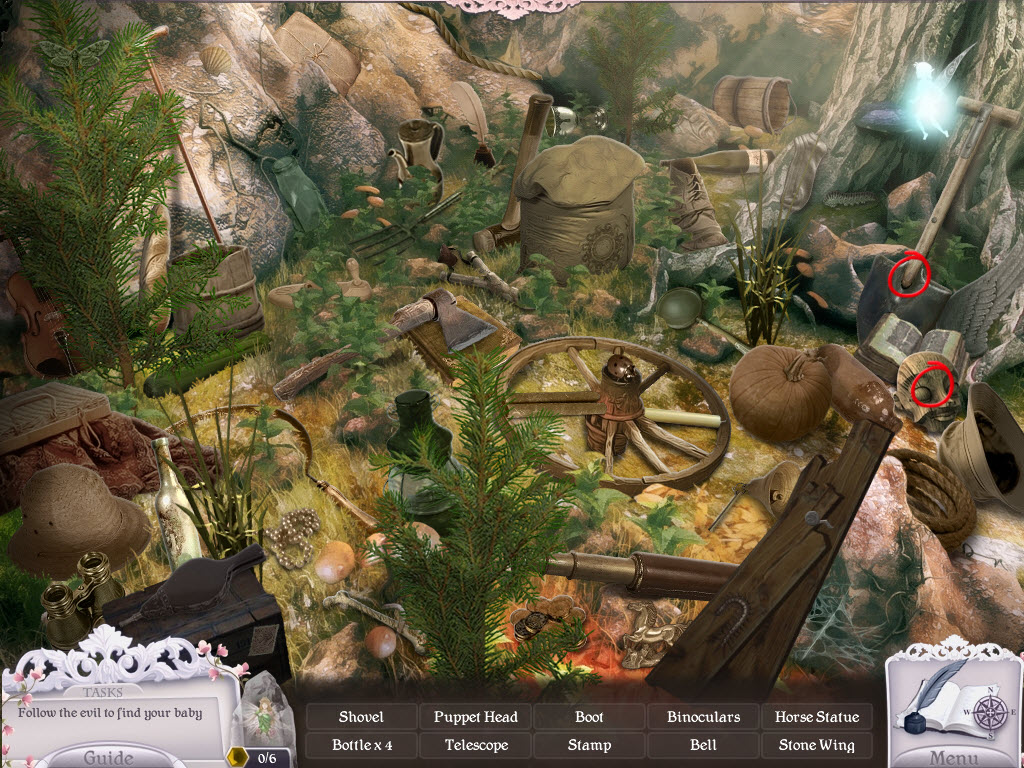
- examine the sleeping lumberjack - hidden object area
- take the two Flowers
- use the Fairy to break the wood pieces on the left bank
- take the Mirror Shard
- use the Fairy to break open the bee hive
- take the Bamboo
- use the Fairy to break the rock
- take the Gem
- return to the witches tree
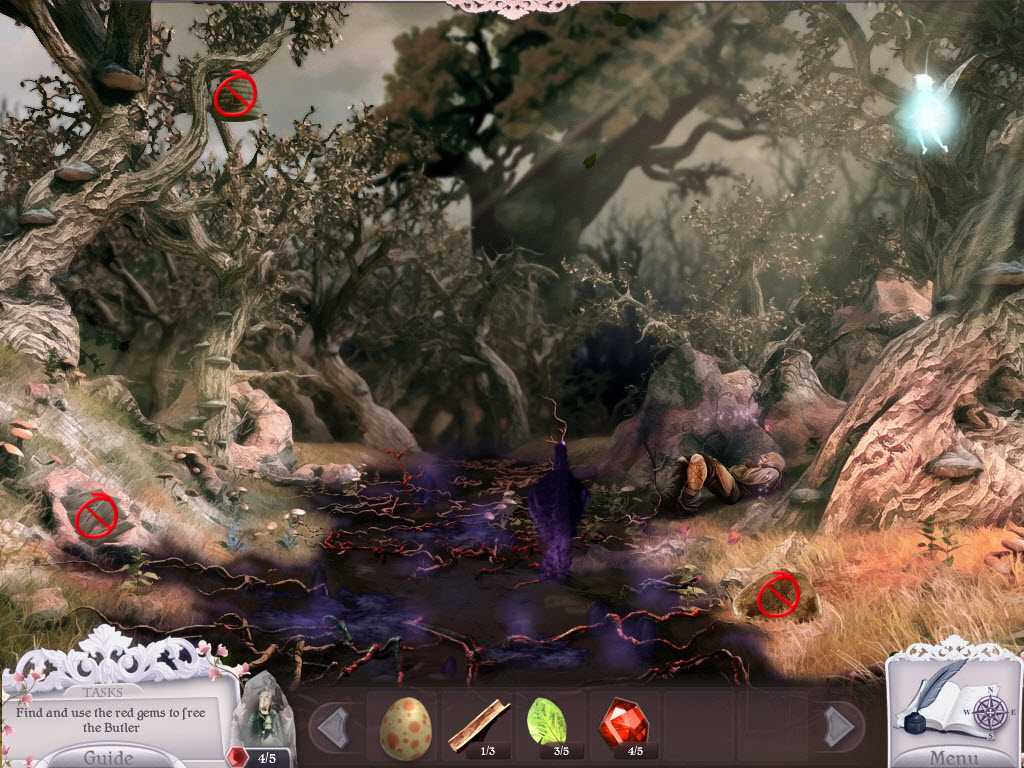
Witches Tree
- examine the captured soul on the far right
- Butler Puzzle (easy)
- replace the red Gems
- use the arrows to move the gems into the red outlines
- there are multiple solutions
- receive a Flower
- go up
- examine the lumberjack
- Lumberjack Puzzle (easy)
- place the matching Flowers in the grid on the right
- use the flowers to paint the lumberjack's tattoo
- no color can border the same color
- there are multiple solutions
- receive Rose Seeds
- take the Potion
- examine the area where the lumberjack was asleep - hidden object area
- take the Puppet Part and Shovel
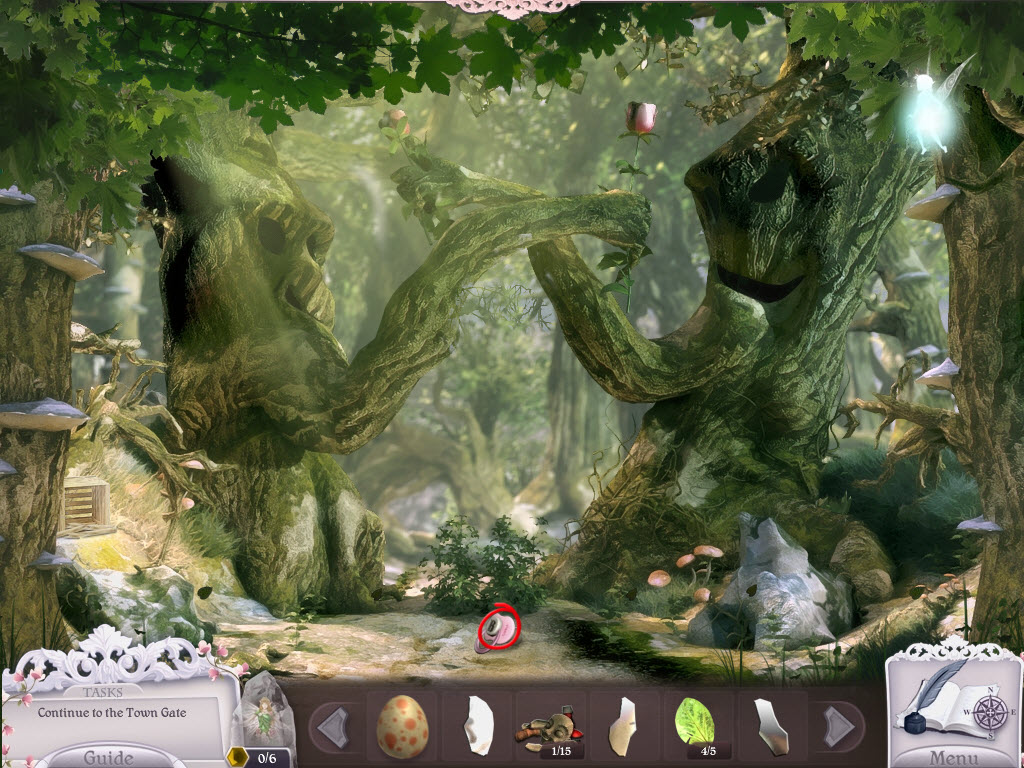
- continue up
- AREA CLEARED
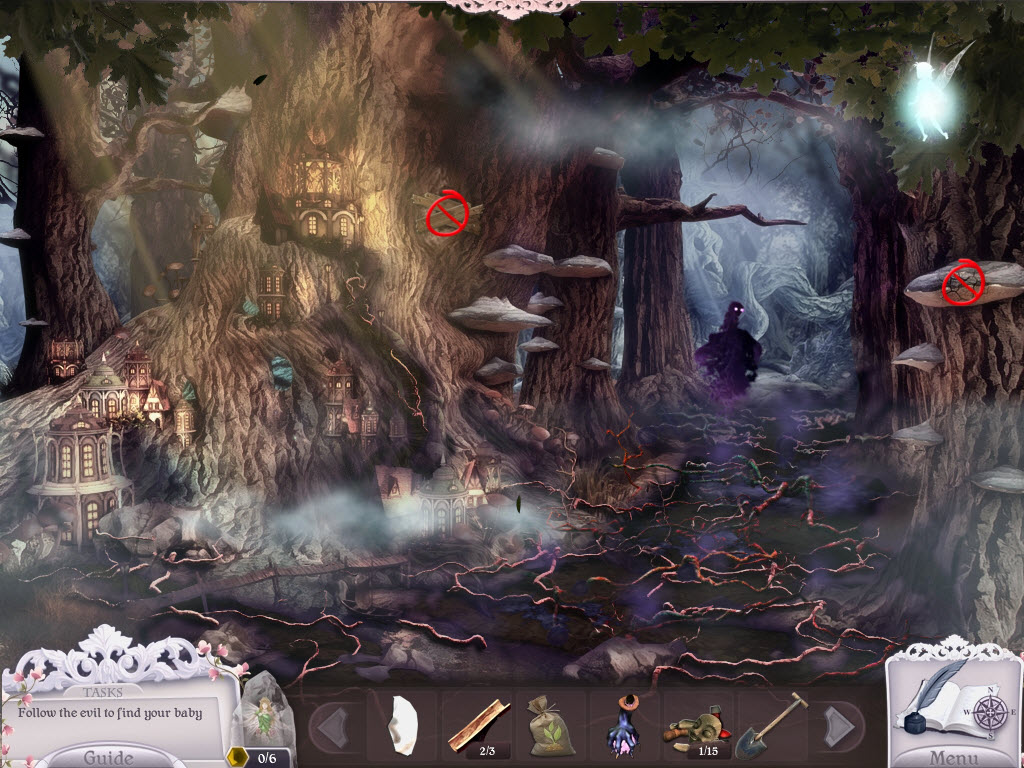
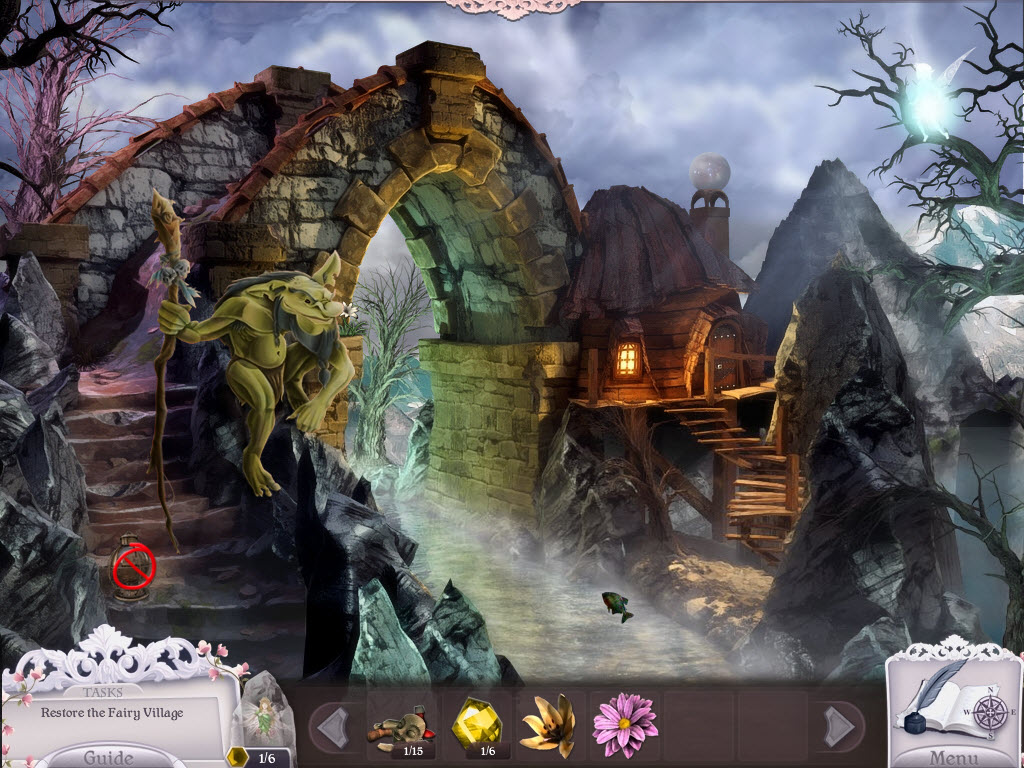
Fairy Village
- use the Fairy to break the boards on the tree
- take the Mirror Shard
- use the Fairy to break open the tree fungus
- take the Bamboo
- have the Fairy enter the village
Inside Fairy Village
- examine the lower left doorway
- Lock Puzzle (moderate)
- this is a slider puzzle
- free the lock
- see video for solution
- examine the lower right doorway
- Bamboo Puzzle (easy)
- replace the Bamboo
- reposition the three bamboo chutes you just placed so the water flows into the hole at the bottom
- see video for solution
- exit out (there is nothing more to do here right now)
Fairy Village
- continue up
- use the Fairy to break the bottle
- take the Leaf
- use the Fairy to break the small crate
- take the Mirror Shard
- examine the ground
- use the Shovel to dig a hole
- plant the Seeds
- use the Potion
on the plant
- take the Pacifier
- take the Gem
- continue up
- AREA CLEARED
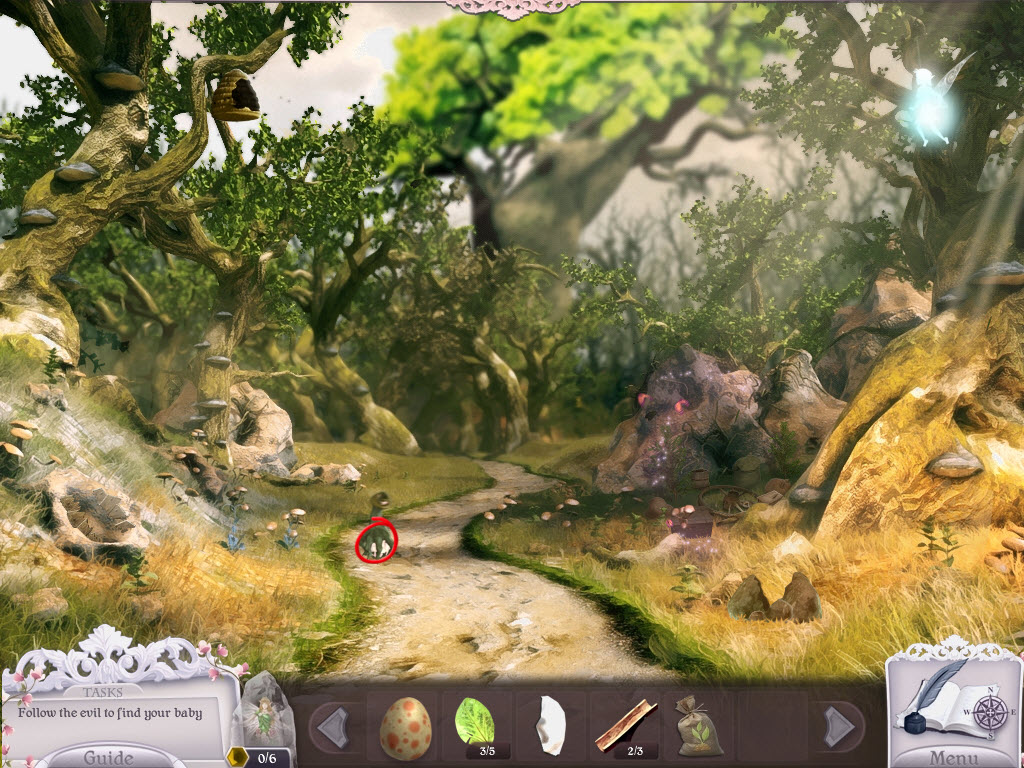
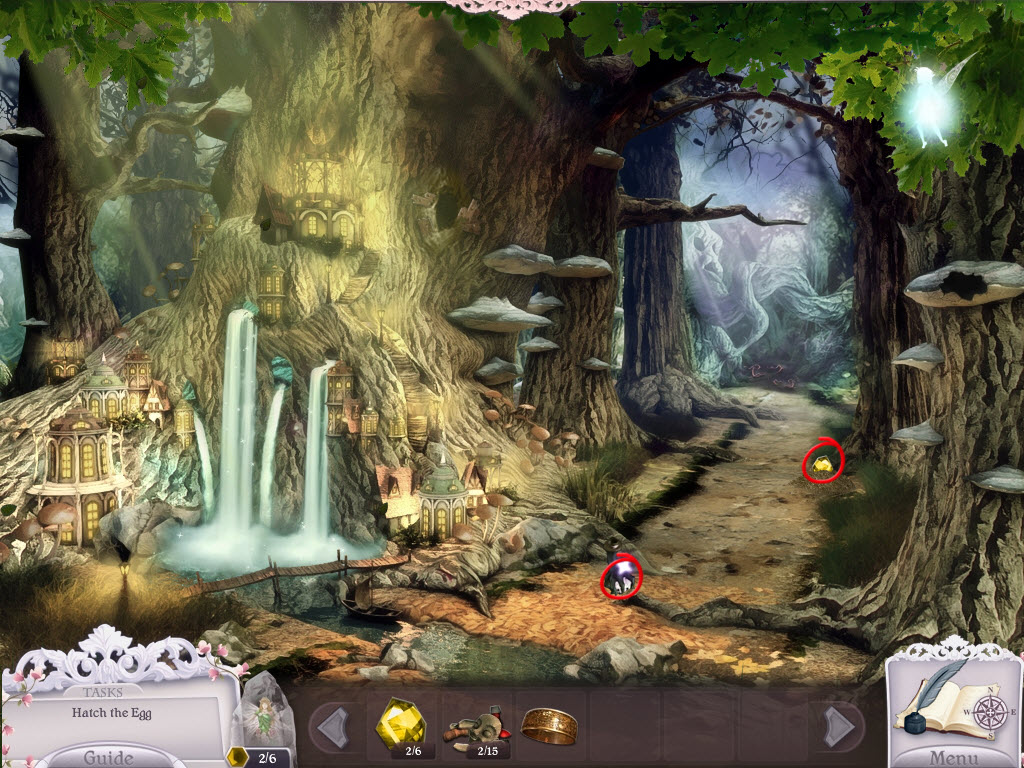
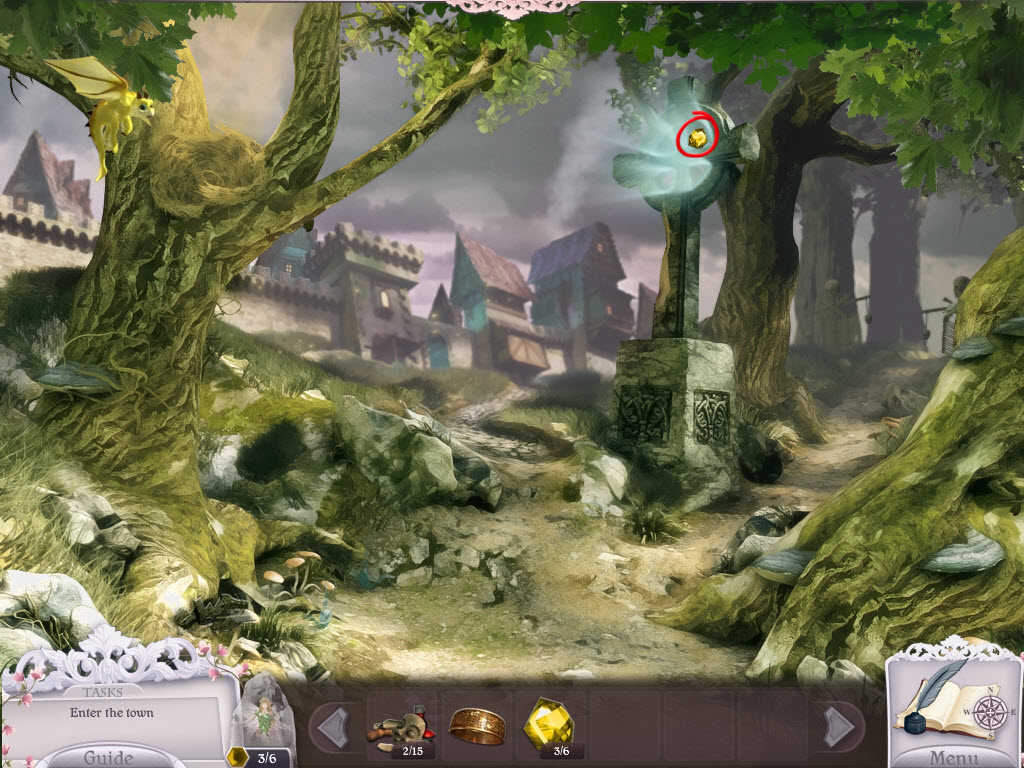
Outside Town
- place the Egg in the birds nest
- use the Fairy to break the bottle
- take the Lily
- use the Fairy to break the rocks
- take the Mirror Shard
- use the Fairy to break the bird house
- take the Leaf
- continue up
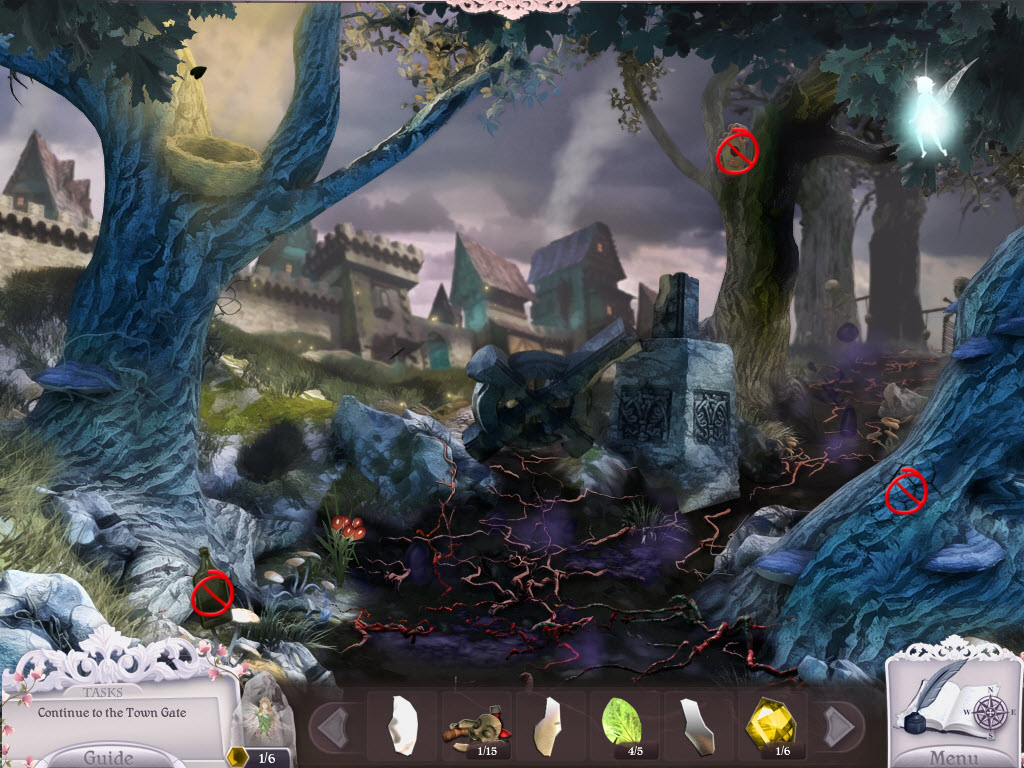
Castle Gates
- use the Fairy to break the handle of the sword
- take the Flower
- use the Fairy to break the right castle wall
- take the Puppet Part
- go down and turn right
Dark Path
- examine the gate
- Skull Gate Puzzle (easy)
- turn the skulls so that the colors line up diagonally
- see video for solution
- go through the gate
Troll Bridge
- speak to the Troll
- use the Fairy to break the lantern
- take the Flower
- return to the castle gates
Castle Gates
- examine the sleeping guard
- Guard Puzzle (easy)
- place the three Flowers on the right side
- color in his tattoo
- no two colors can be side by side
- there are multiple solutions for this puzzle
- take the Baby Shoes
- take the Gem
- return to the fairy village and go inside
- examine the upper left door
- replace the Leaves
- examine the upper right door
- Mirror Puzzle (easy)
- replace the Mirror Shards
- use the Lenses on the remaining mirrors
- receive Ring
- AREA CLEARED
- tale the Potion
- take the Gem
- return to outside town
- AREA CLEARED
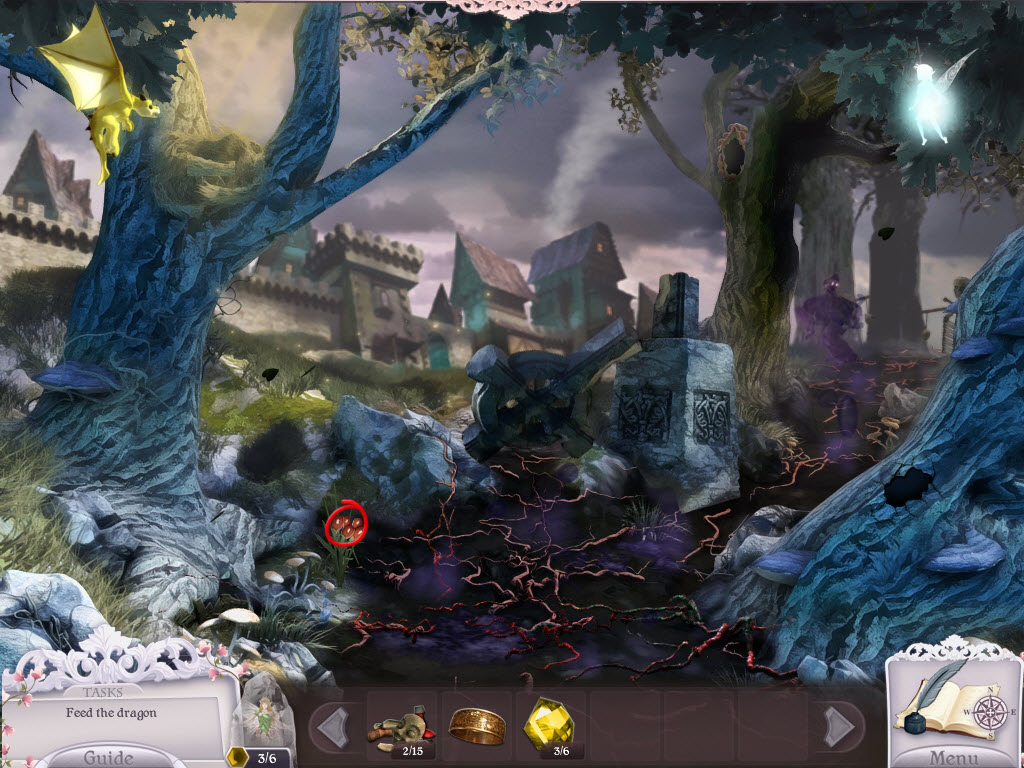
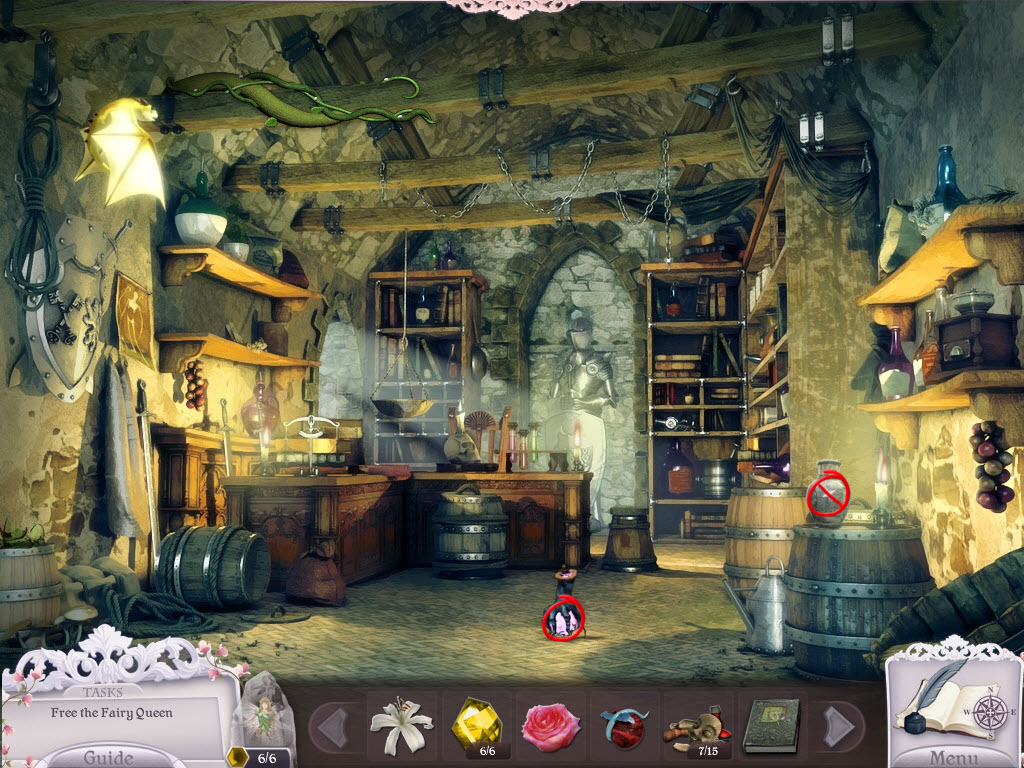
Outside Town
- examine the birds nest
- note: if you haven't already - place the Egg in the nest
- use the Potion on the Egg
- click the Berries to feed Nessie
- use Nessie to lift the statue
- take the Gem
- continue right
- AREA CLEARED
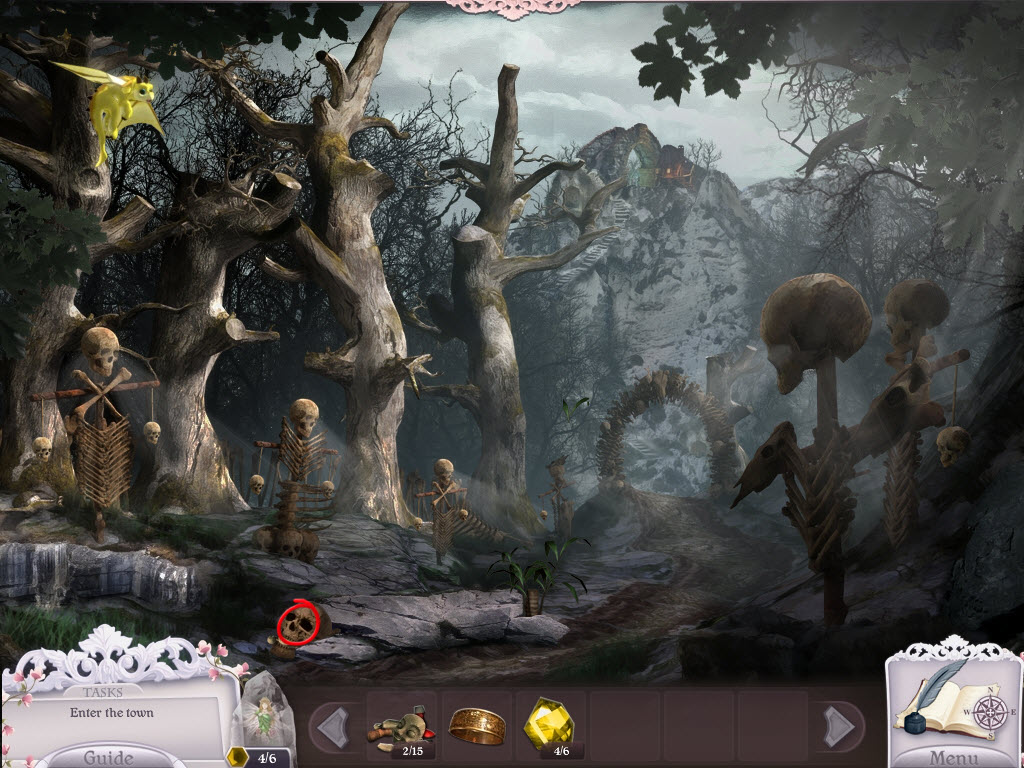
Dark Path
- use Nessie to lift the skull
- take the Puppet Part
- return to the castle gates
Castle Gates
- send Nessie into town (go up)
- examine the chimney - hidden object area
- take the Five/Ten/Twenty Pounds and the Puppet Part
- examine the building on the left
- Weight Puzzle (easy)
- place the Weights on the hooks until the gate opens
- start at the bottom
- Top: 5 Pounds
- Middle: 10 Pounds
- Bottom: 20 Pounds
- pull the lever
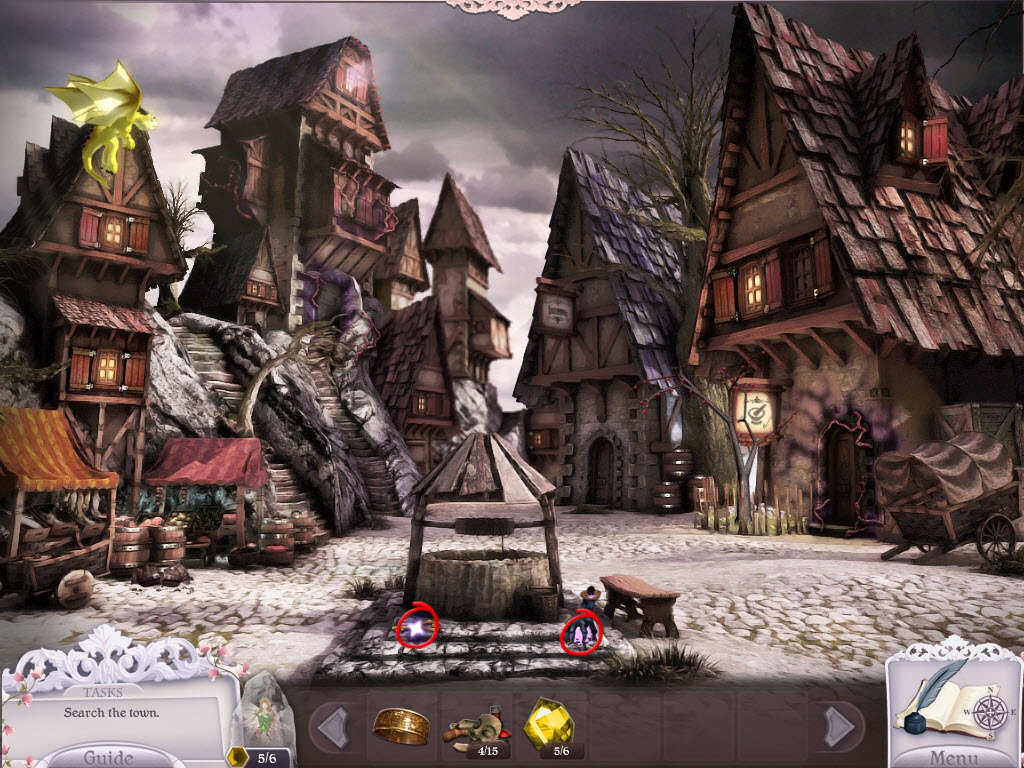
- enter the town
- use Nessie to lift up the barrel
- take the Gem
- send Nessie down the well
- use Nessie to lift the board across the door
- take the Key
- take the Potion
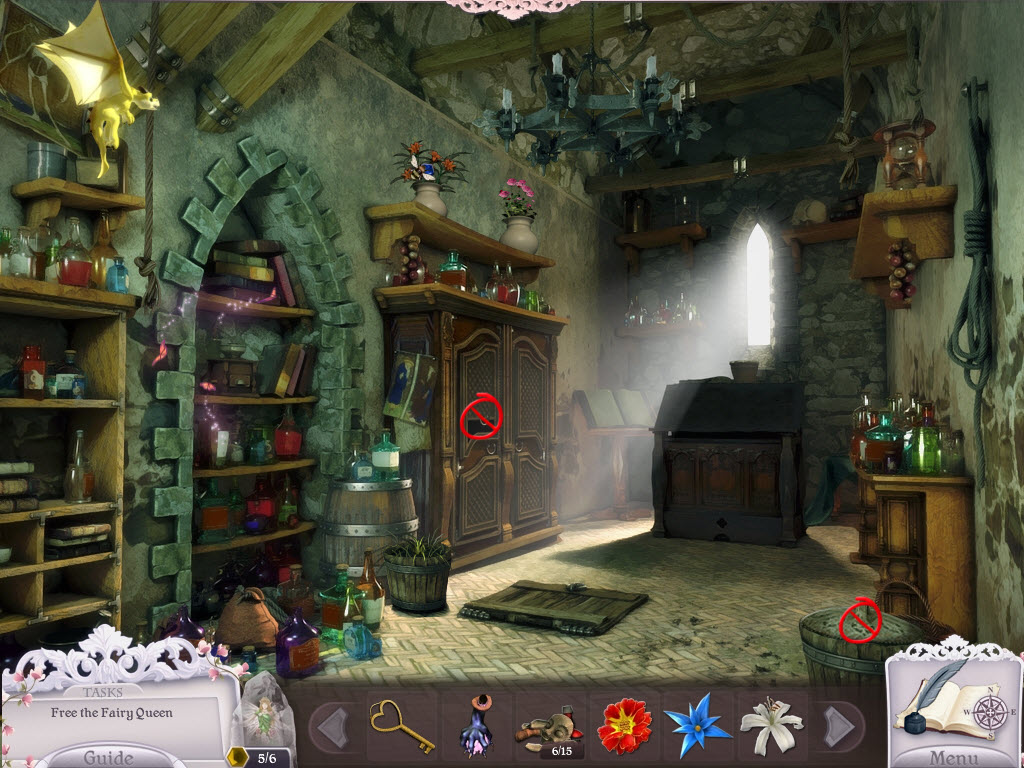
- go right
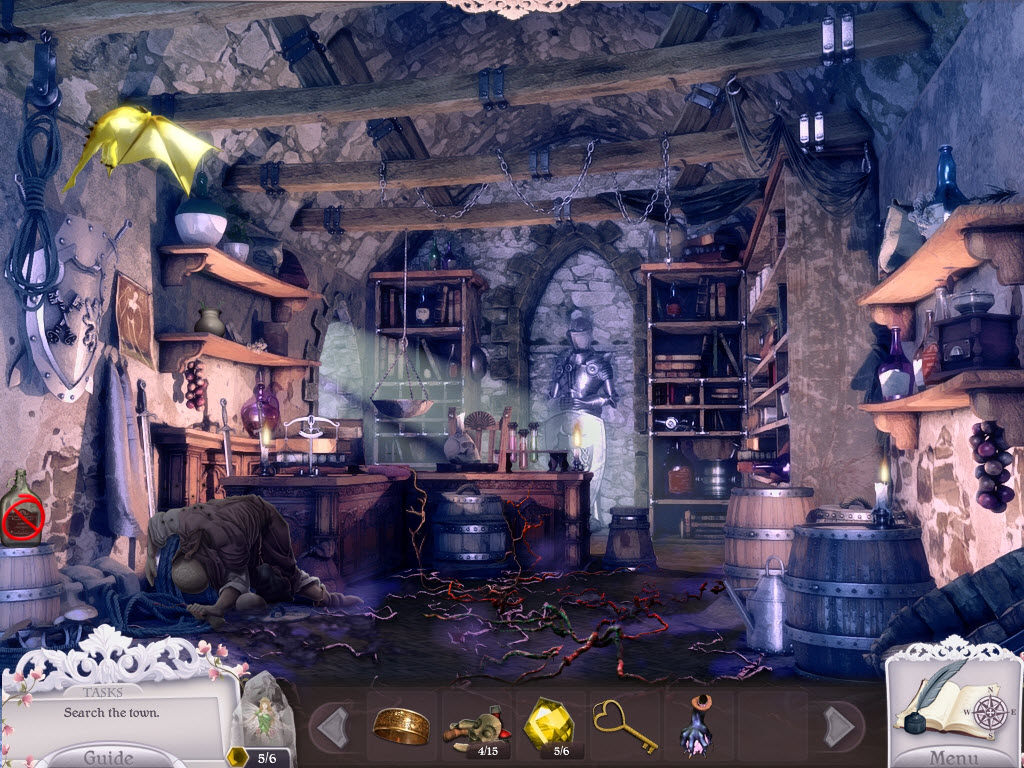
Herbalist
- use Nessie to lift the bottle
- take the Puppet Part
- go left into the back room
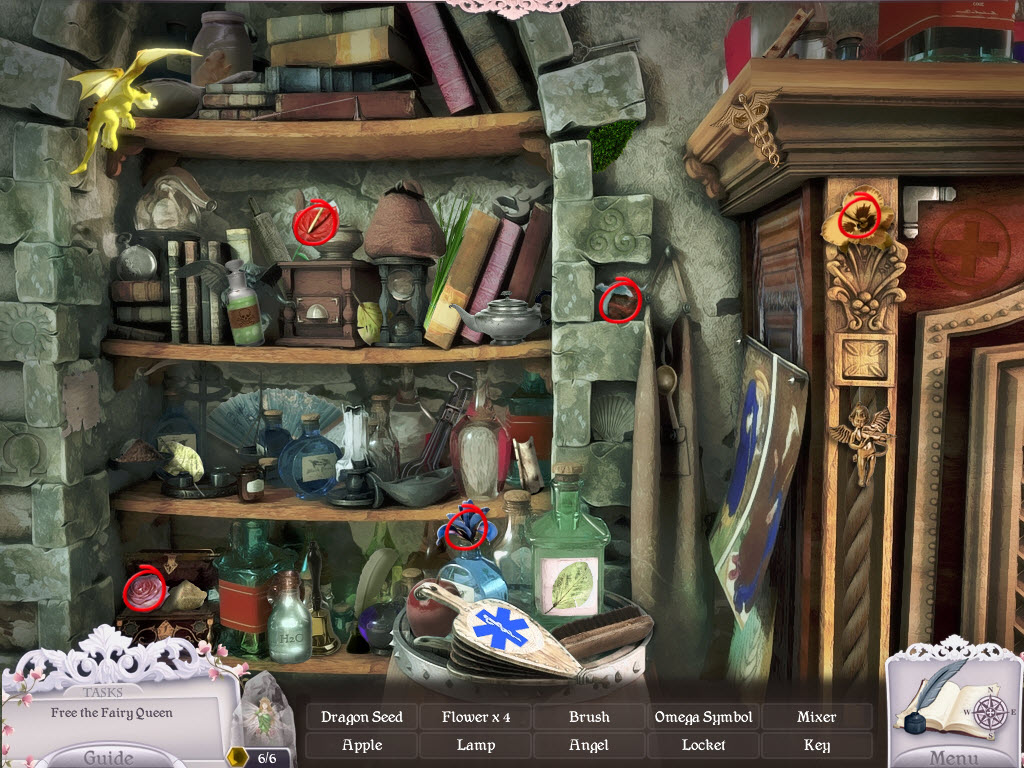
Herbalist Back Room
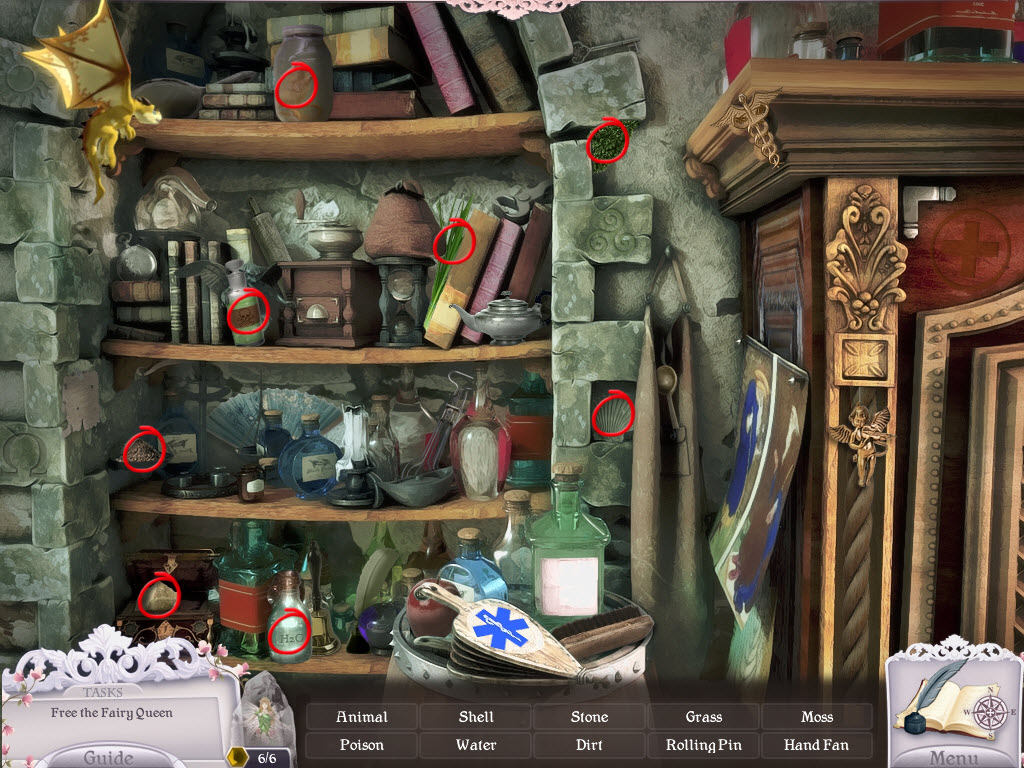
- examine the shelf - hidden object area
- take the four Flowers and the Dragon Seed
- use Nessie to lift the lid on the basket
- take the Puppet Part
- use Nessie to lift part of the left door on the wardrobe
- take the Gem
- you can return to the witches tree now if you wish, but for the purpose of this guide, I chose not to
- return to the sleeping herbalist and examine him
Herbalist
- Herbalist Puzzle (easy)
- place the three Flowers on the right side
- color in the tattoo
- no two colors can be placed side by side
- there are multiple solutions to this puzzle
- receive a Cook Book
- take the Potion
- use Nessie to lift the vase
- take the Gem
- go left into the back room
Herbalist Back Room
- examine the podium
- place the Cook Book on the podium
- flip through the pages until you find the Fire Pepper Recipe
- use the Dragon Seed on the flower pot (sitting on the podium)
- use the Potion on the seed
- click the Berries to feed Nessie
- examine the bookshelf - hidden object area
- take the eight Ingredients
- use Nessie to blow smoke on the bee in the flower pot (top shelf)
- take the Gem
- exit
Herbalist
- examine the lab set
- Fire Pepper Recipe Puzzle (easy)
- follow the diagram to make fire pepper
- place the Ingredients in the glass bottles
- match the ingredients according to the diagram
- see video for solution
- return to the witches tree
Witches Tree
- click on the Fairy Queen (2nd from left)
- Fairy Queen Puzzle (moderate)
- place the Gems in the empty spots
- use the arrows to move the gems into the places with the yellow outline
- there are multiple solutions
- return to town
- go up the steps
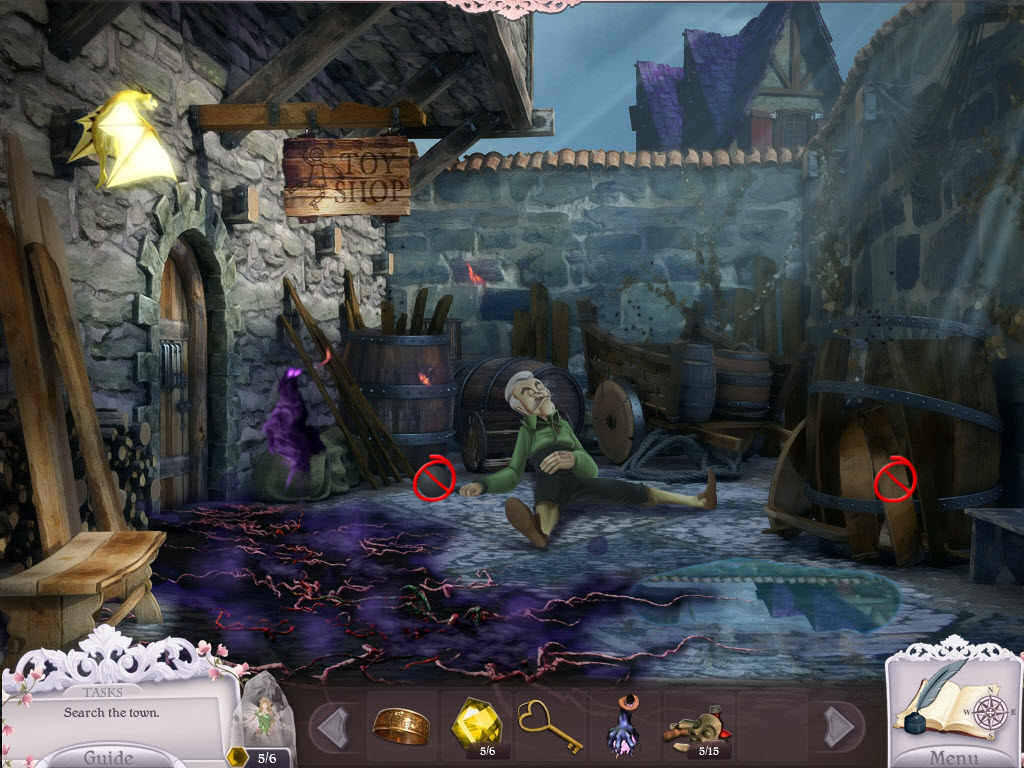
- use Nessie to lift the ball and chain on the man's right arm - we need flowers
- use Nessie to lift up the plank on the barrel
- take the Puppet Part
- examine the barrel behind the man - hidden object area
- take the three Flowers
- examine the toymaker
- Toymaker Puzzle (easy)
- place the three Flowers on the right side
- color in his tattoo
- no two colors can be side by side
- receive Sketches
- take the Potion
- take the Teddy Bear
- take the Gem
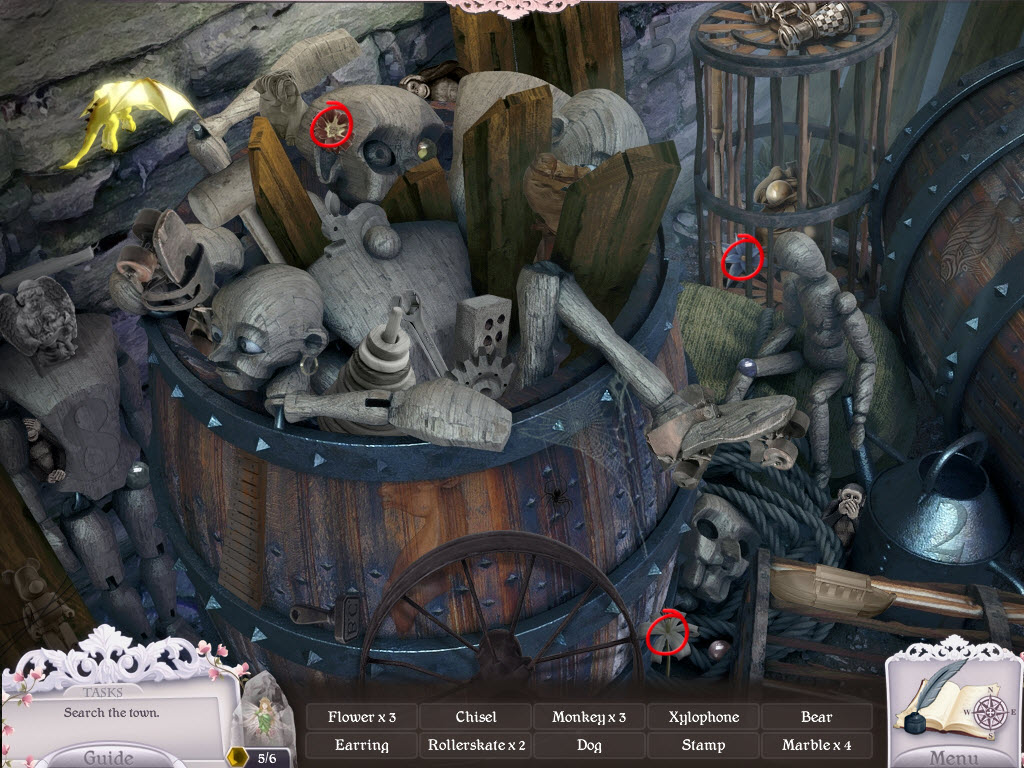
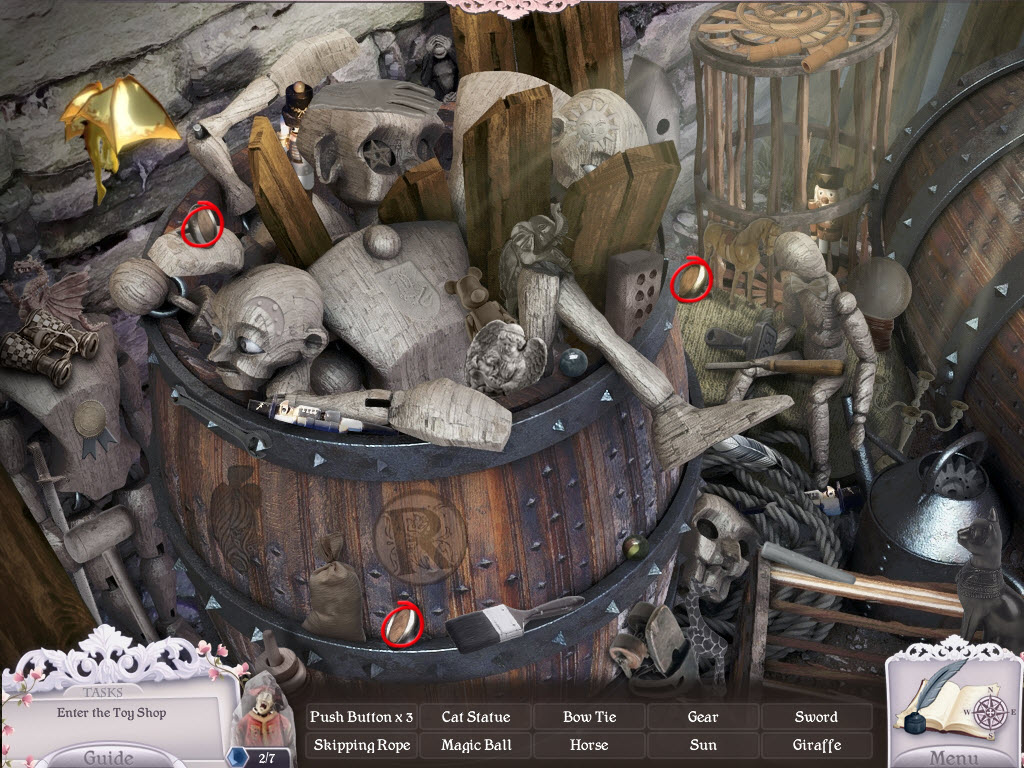
- examine the barrel - hidden object area
- take the three Push Buttons
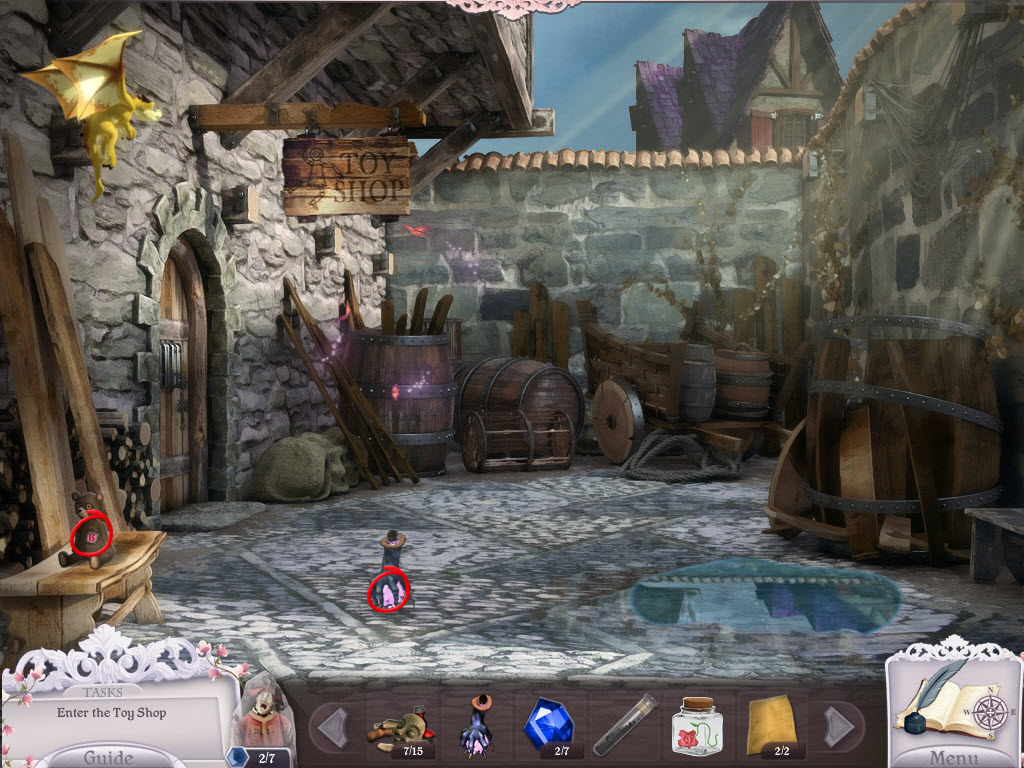
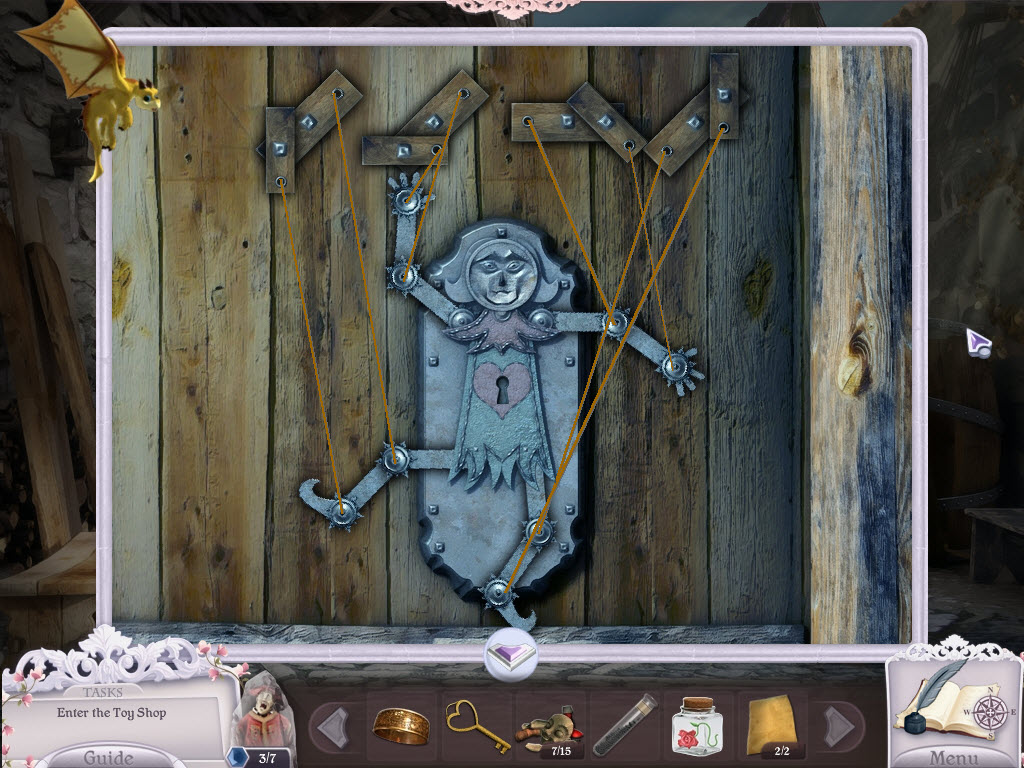
- examine the door
- Toy Shop Door Puzzle (easy)
- examine the logo on the sign
- move the parts of the puppet so they match the sign
- see screenshot for solution
- use the Key on the keyhole
- enter the toy shop
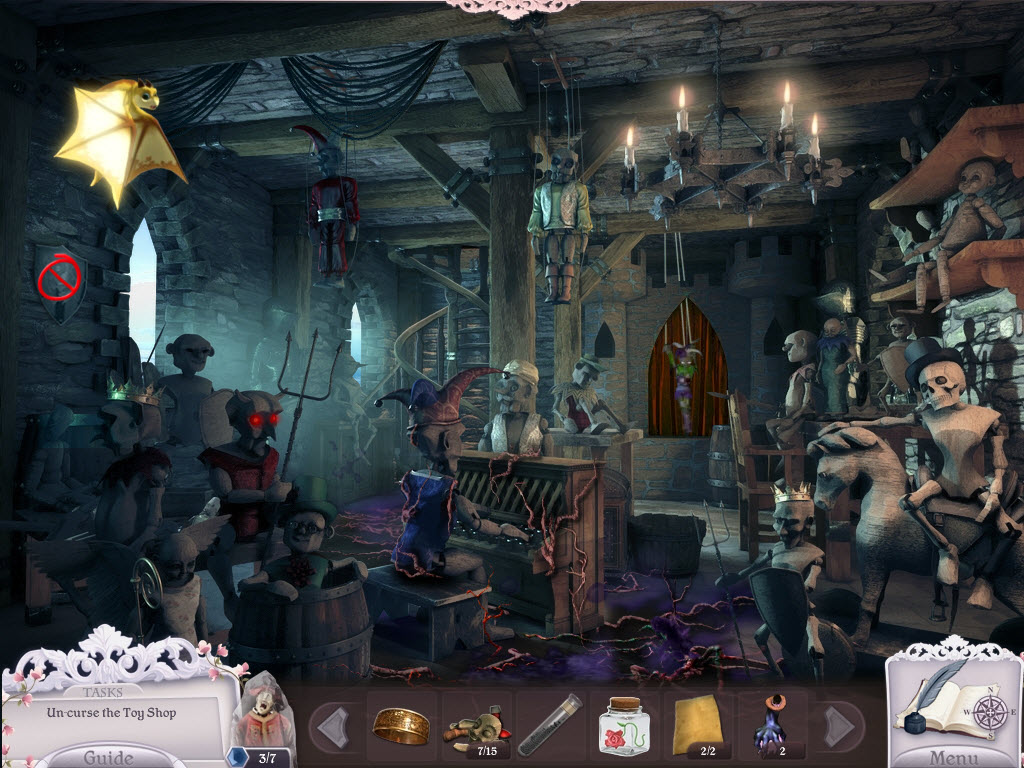
Toy Shop First Floor
- use Nessie to life the shield on the left wall
- take the Puppet Part
- go up
Toy Shop Second Floor
- use Nessie to smoke the bee
- use the Potion on the bee
- take the Potion
- use Nessie to lift the floorboard
- take the Puppet Part
- use Nessie to lift up the lantern
- take the Gem
- use the Jar on the honey
- examine the art table
- Art Puzzle (easy)
- place a sketch on the table
- paint the scissors grey
- take the Scissors
- place the other sketch on the table
- paint the heart red
- take the Heart
- go up
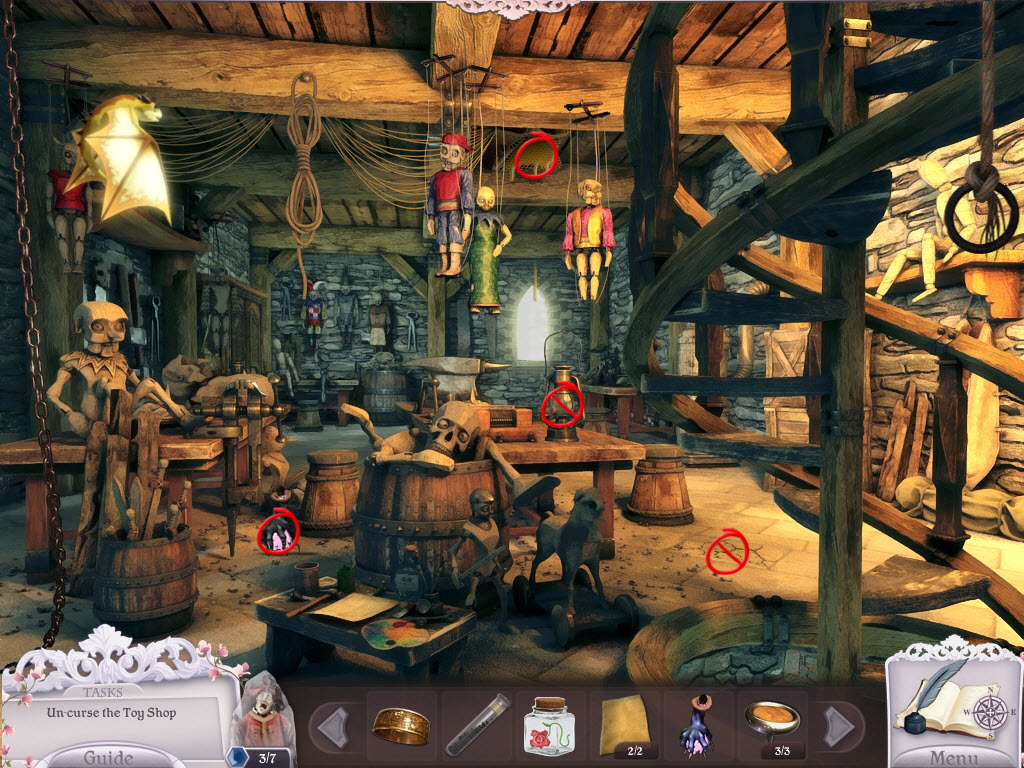
Toy Shop Third Floor
- examine the baby crib
- find all the Evil Objects
- pick up the Potion
- pick up the Gem
- use Nessie to move the floorboard
- take the Puppet Part
- use Nessie to lift the curtain
- take the Puppet Part
- examine the doll against the right wall
- Wooden Doll Puzzle (difficult)
- push the buttons to change the colors surround the heart
- you only have 25 moves to solve the puzzle in
- the object is to get all the buttons one color
- this puzzle varies per player/per game
- take the Wooden Heart
- return to the first floor
- AREA CLEARED
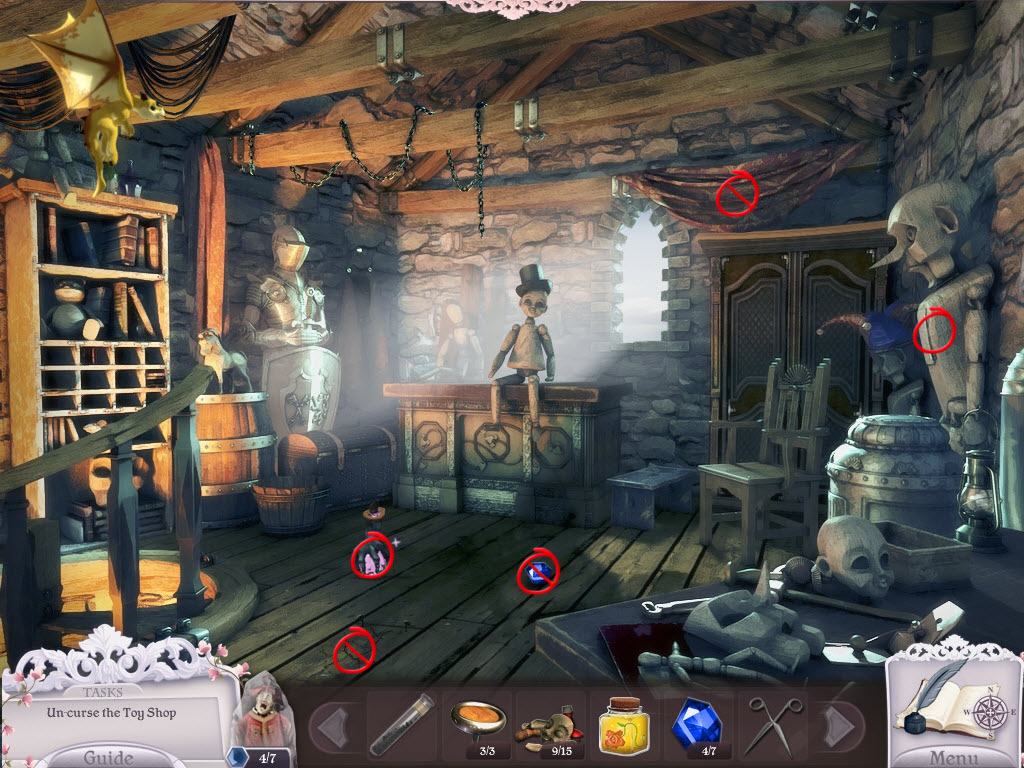
Toy Shop First Floor
- use the Scissors on the evil puppet
- take the Potion
- use Nessie to smoke the bee
- take the Gem
- examine the piano player
- replace the three Push Keys
- take the Ring
- return to the troll bridge
Troll Bridge
- give the Honey to the Troll (them piranhas sure were hungry!)
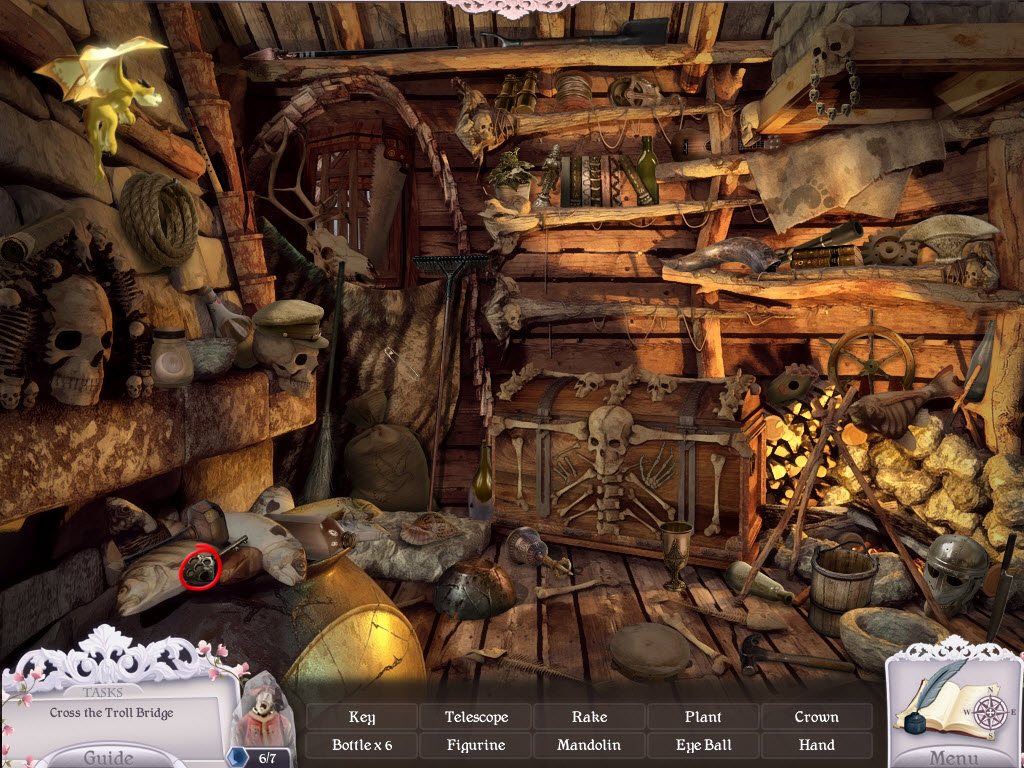
- examine the Troll's shack - hidden object area
- take the Key
- use Nessie to lift the ball off the top of the shack
- take the Puppet Part
- go up

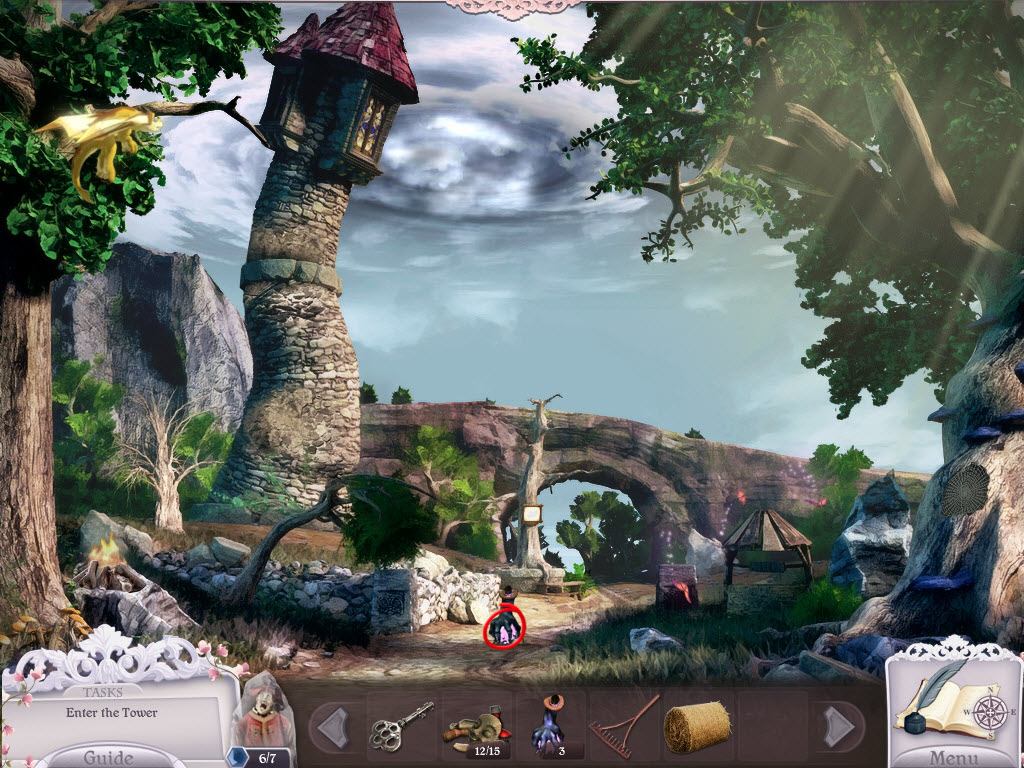
Rapunzel's Tower
- there is nothing we can do here yet
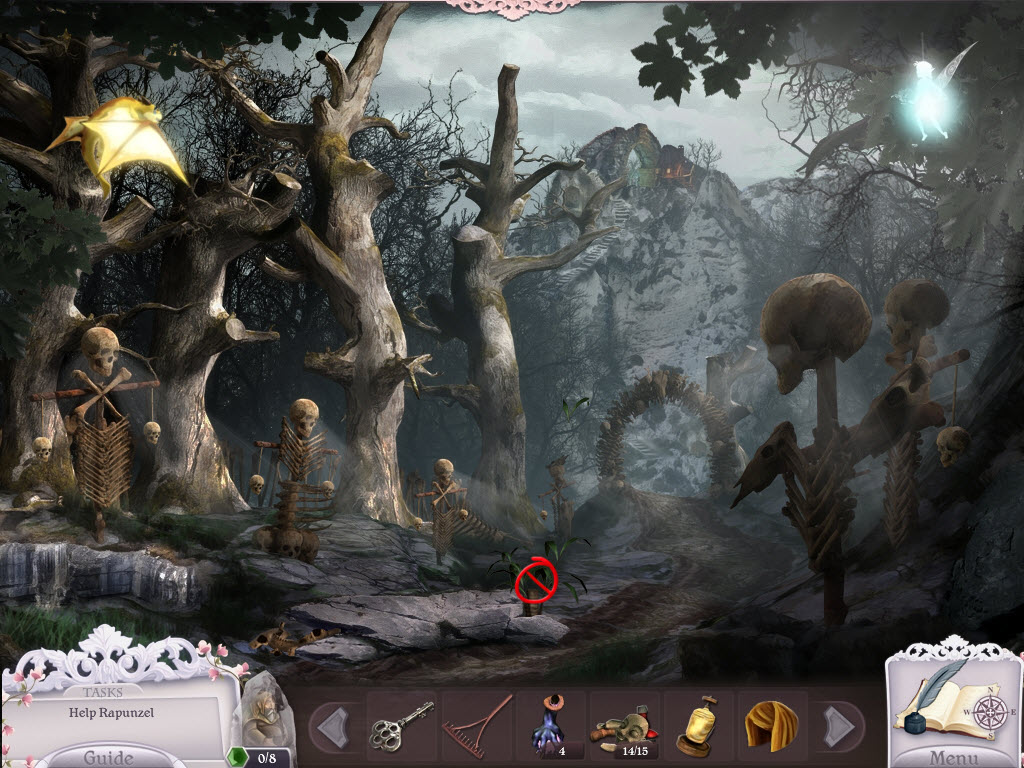
- continue up
- use Nessie to lift the axe out of the tree
- take the Potion
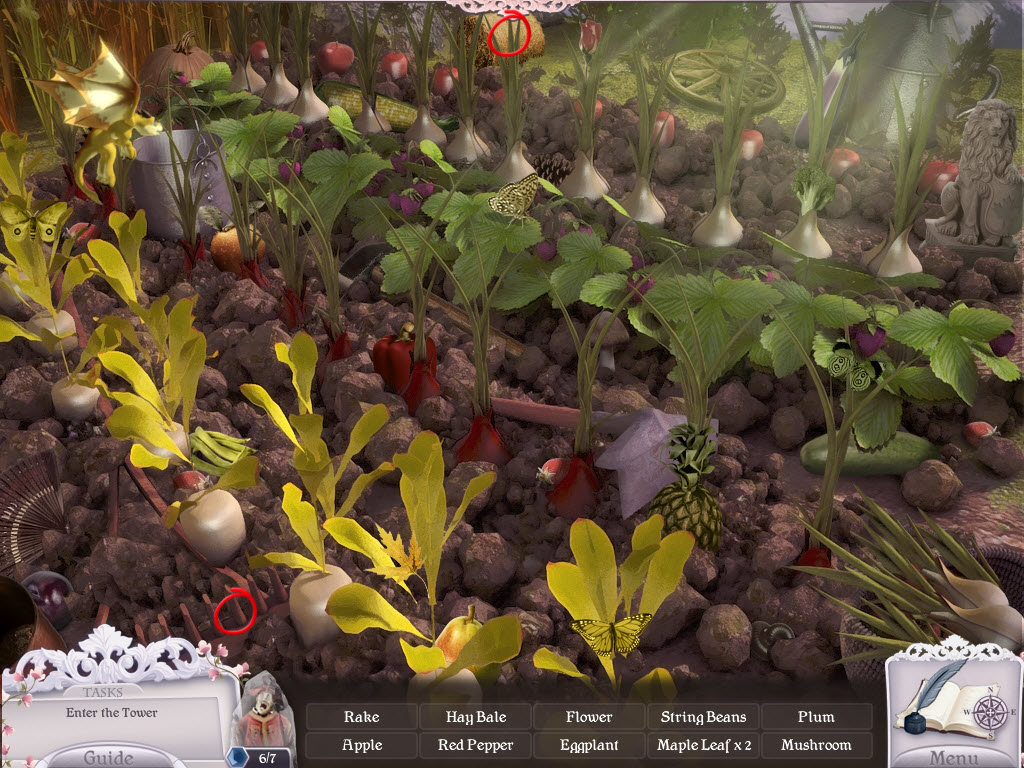
- examine the garden - hidden object area
- take the Rake and Hay
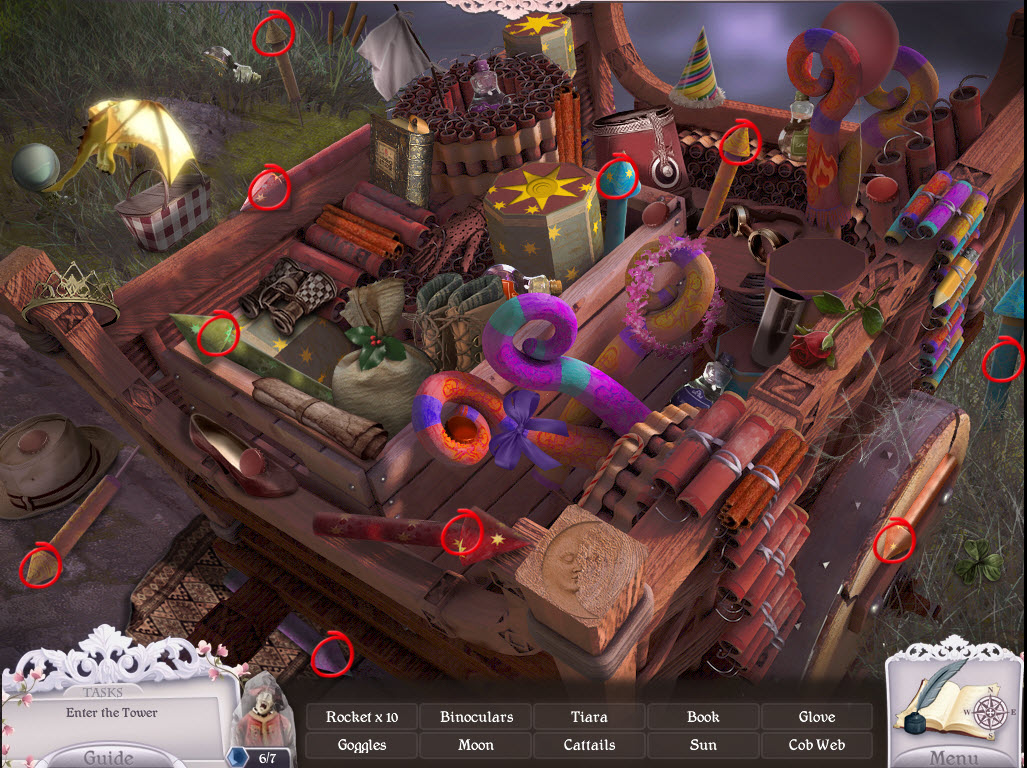
- examine the cart -hidden object area
- take the ten Rockets
- go down

Rapunzel's Tower
- use the Fire Pepper on Rapunzel's hair
- use the Rockets on Rapunzel's hair
- take the Potion
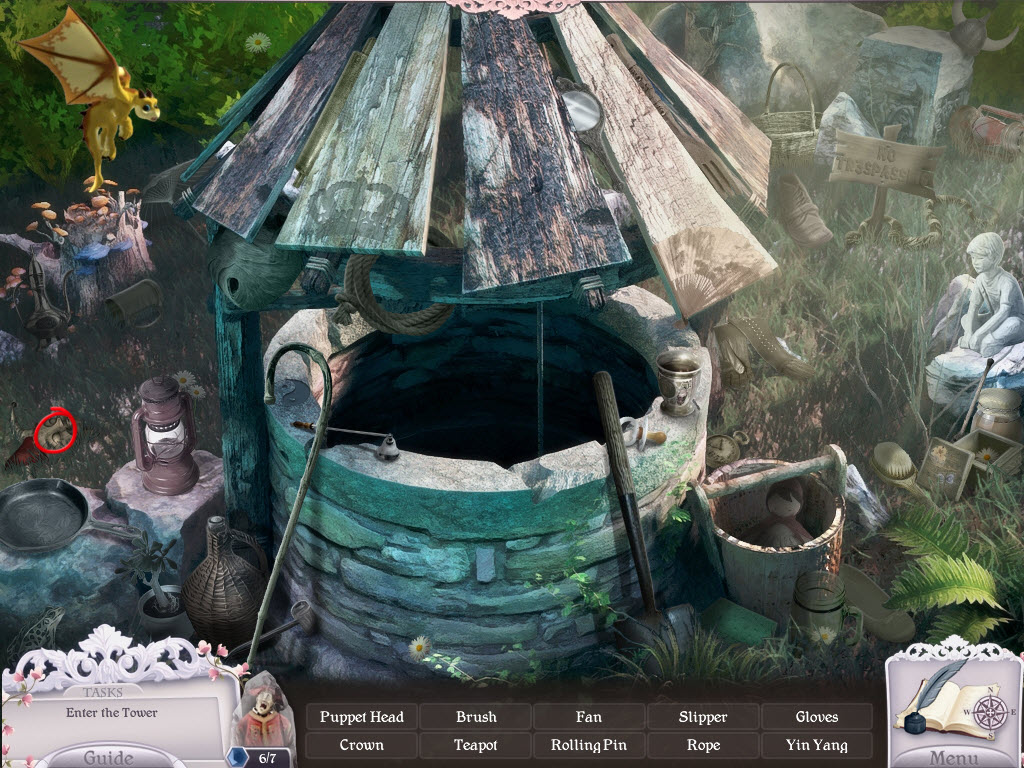
- examine the well - hidden object area
- take the Puppet Part
- enter the tower
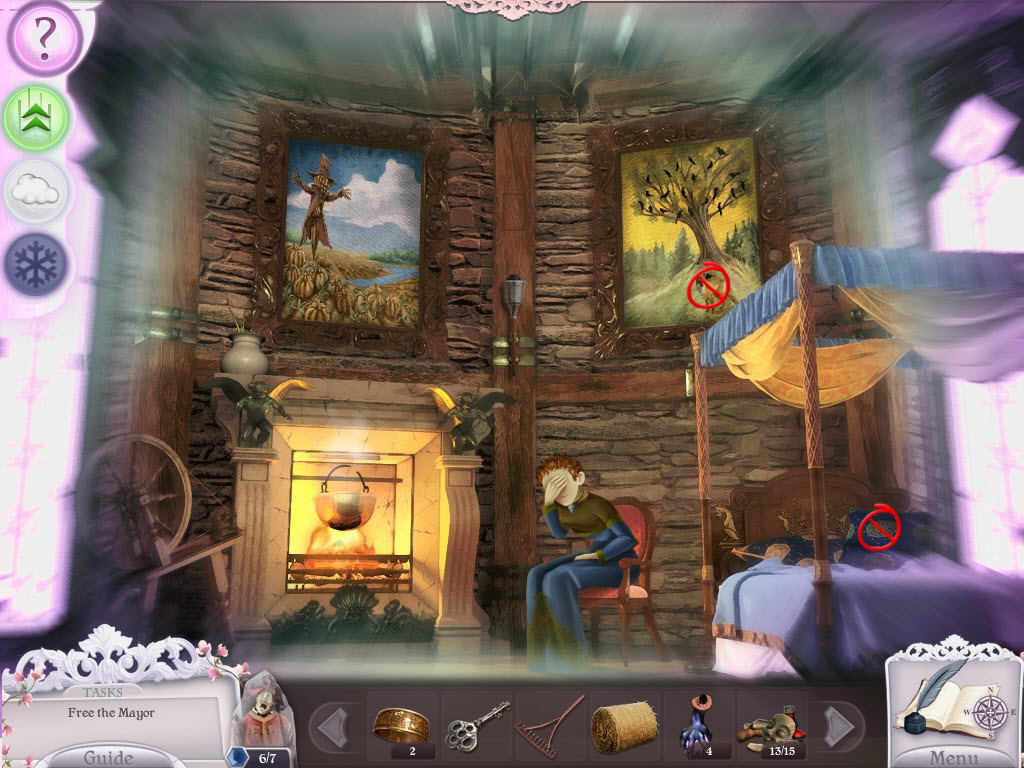
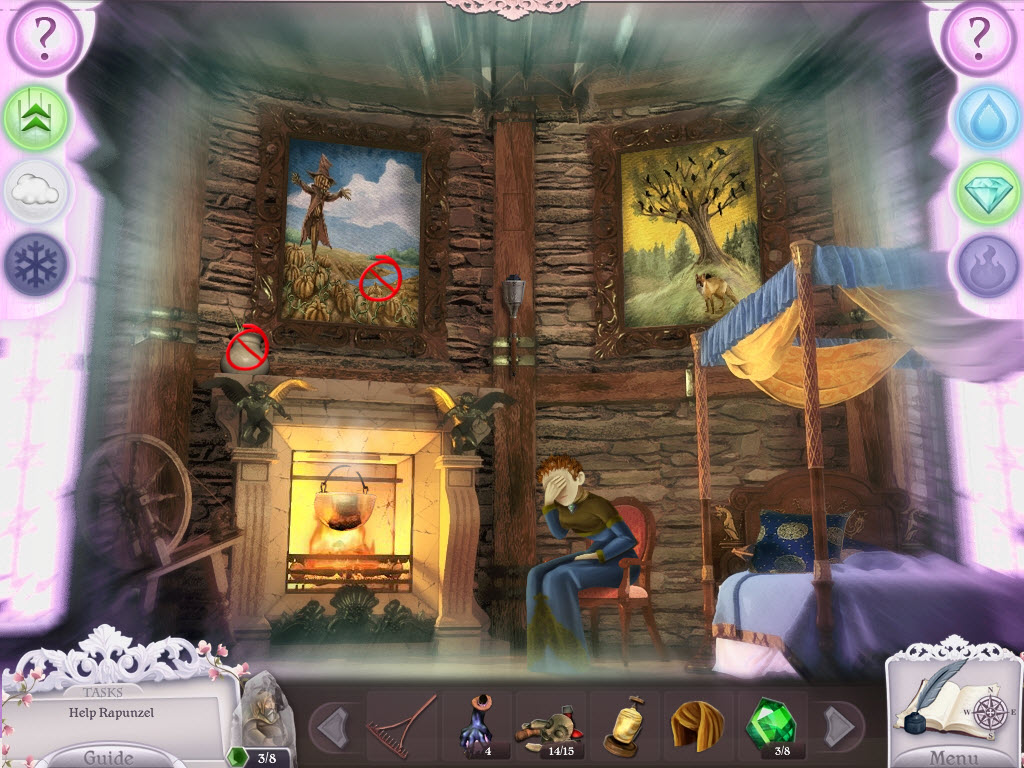
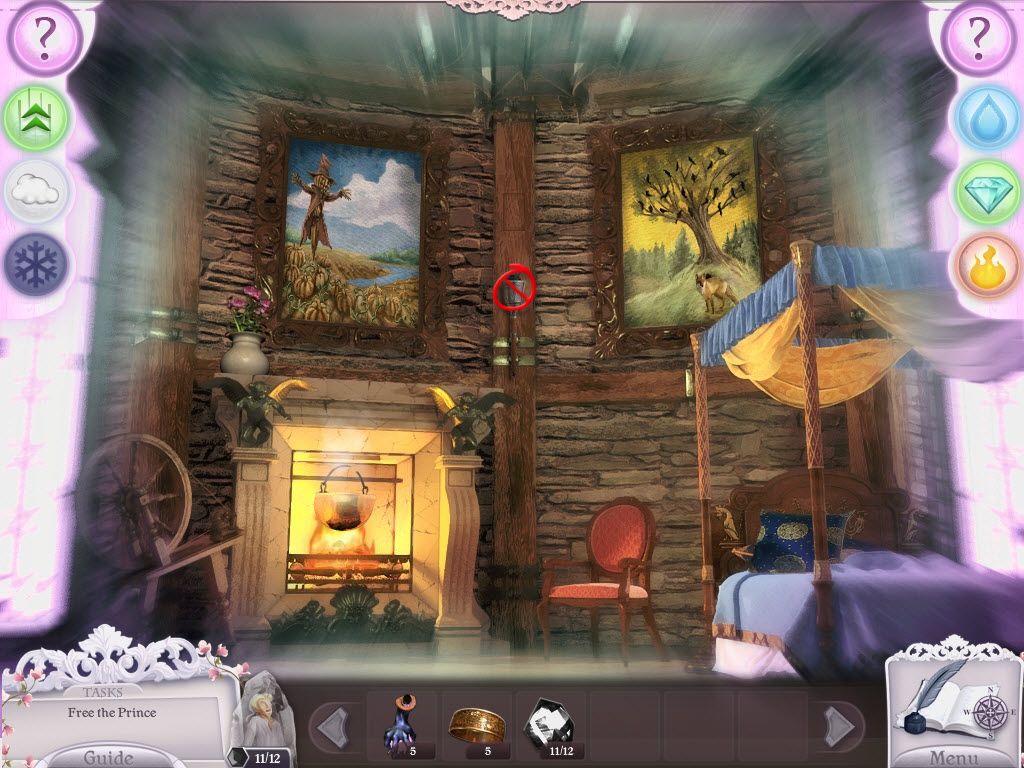
Tower
- examine the right painting
- use Nessie to blow smoke in the hole
- take the Puppet Part
- use Nessie to lift the pillow on the bed
- take the Gem
- examine the spindle
- use the Hay to make gold thread
- return to the witches tree
Witches Tree
- examine the Mayors soul (middle)
- Mayor Puzzle (moderate)
- place the Gems in the empty spots
- use the arrows to move them into the spots outlined in blue
- there are multiple solutions
- receive a Wig
- return to the dark path
- use the Fairy to water the plant
- take the Gem
- continue up
- AREA CLEARED
Troll Bridge
- use the Fairy to water the flowers
- take the Gem
- continue up
- AREA CLEARED
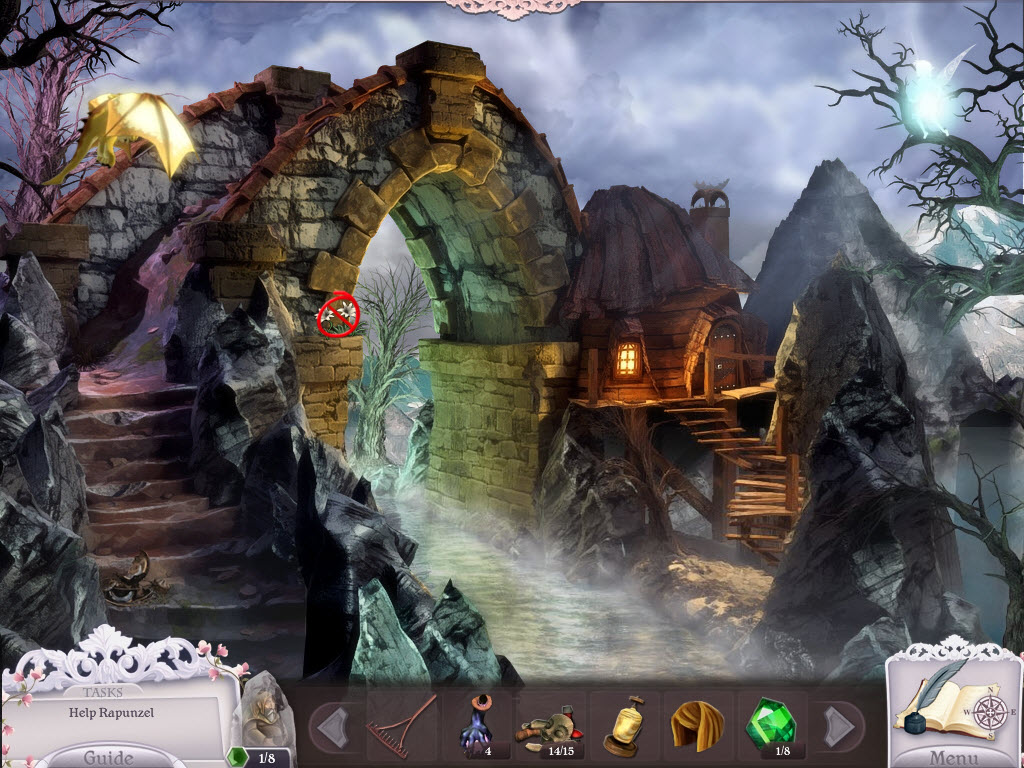
Rapunzel's Tower
- use the Fairy to douse the fire
- take the Gem
- enter the tower
Tower
- examine the left painting
- use the Fairy to restore the water
- take the Puppet Part
- use the Fairy to water the plant
- take the Gem
- give the Wig to Rapunzel
- receive a Heart
- continue up
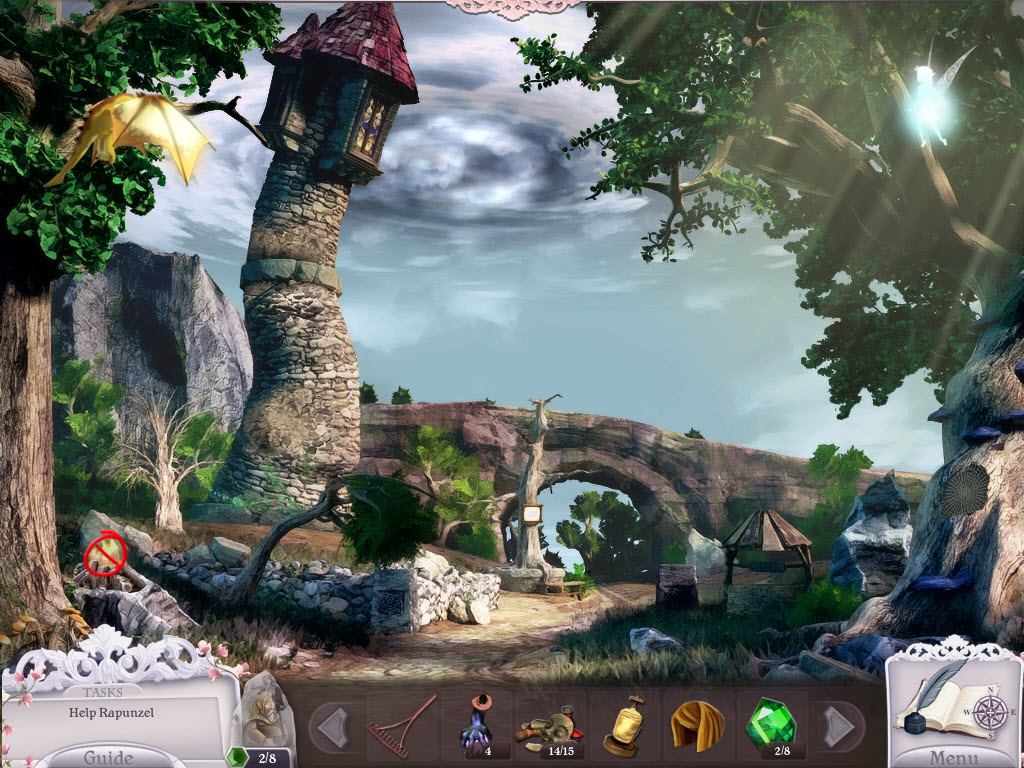
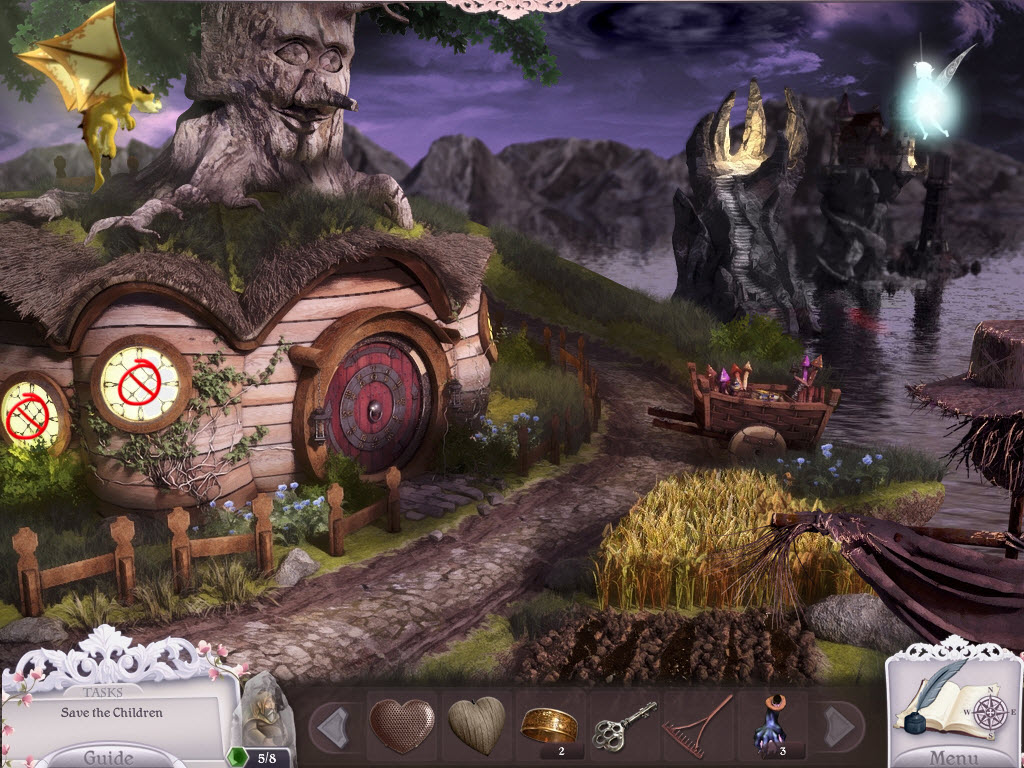
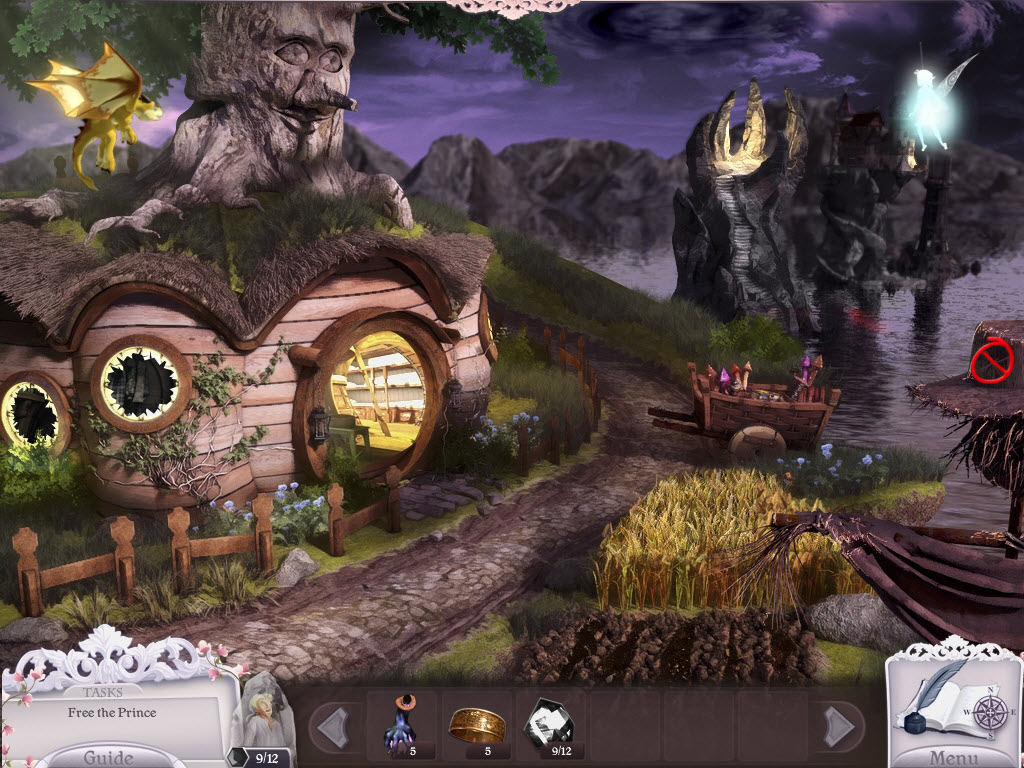
Dwarfs House
- use the Fairy to right break the window
- take the Gem
- use the Fairy to break the left window
- take the Schematics Piece
- return to the toy shop (second floor)
Toy Shop Second Floor
- examine the puppets on the back wall
- Puppet Puzzle (easy)
- replace the Puppet Parts
- put each part on the correct puppet
- place the Hearts on the correct puppet
- see screenshot for solution
- take the Puppets
- return to the first floor
- AREA CLEARED

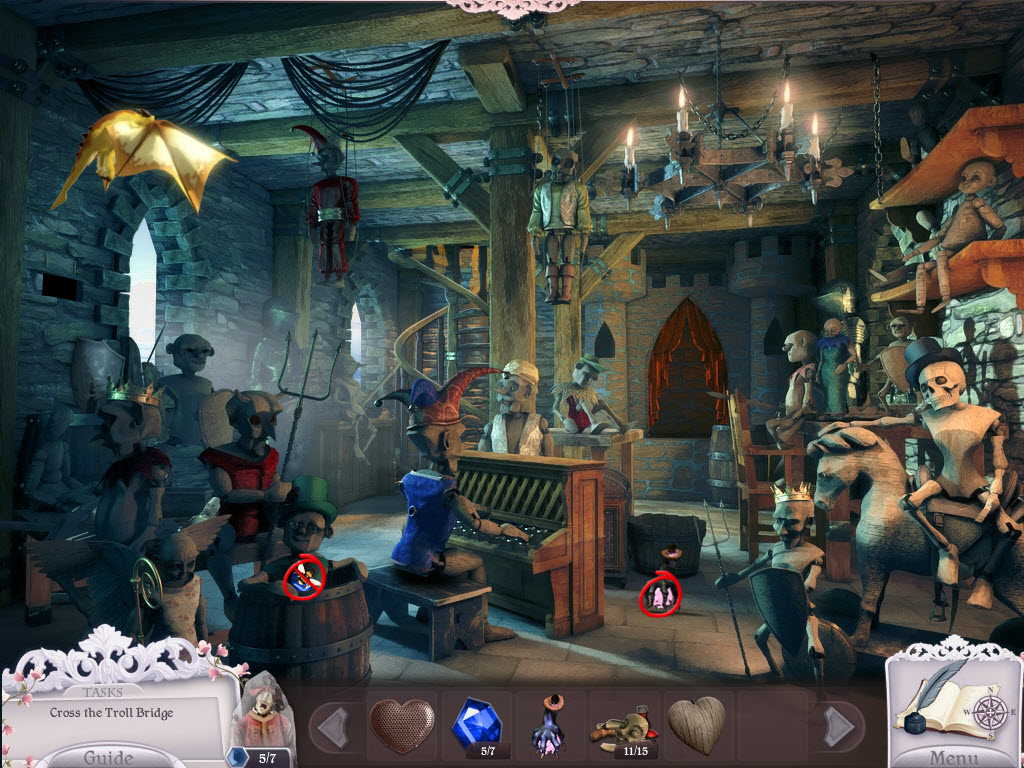
Toy Shop First Floor
- examine the stage (where the evil puppet was)
- place the Puppets on the stage
- examine the piano
- place the Key in the puppets back
- use the Potion on the key
- talk to the children
- receive a Handle
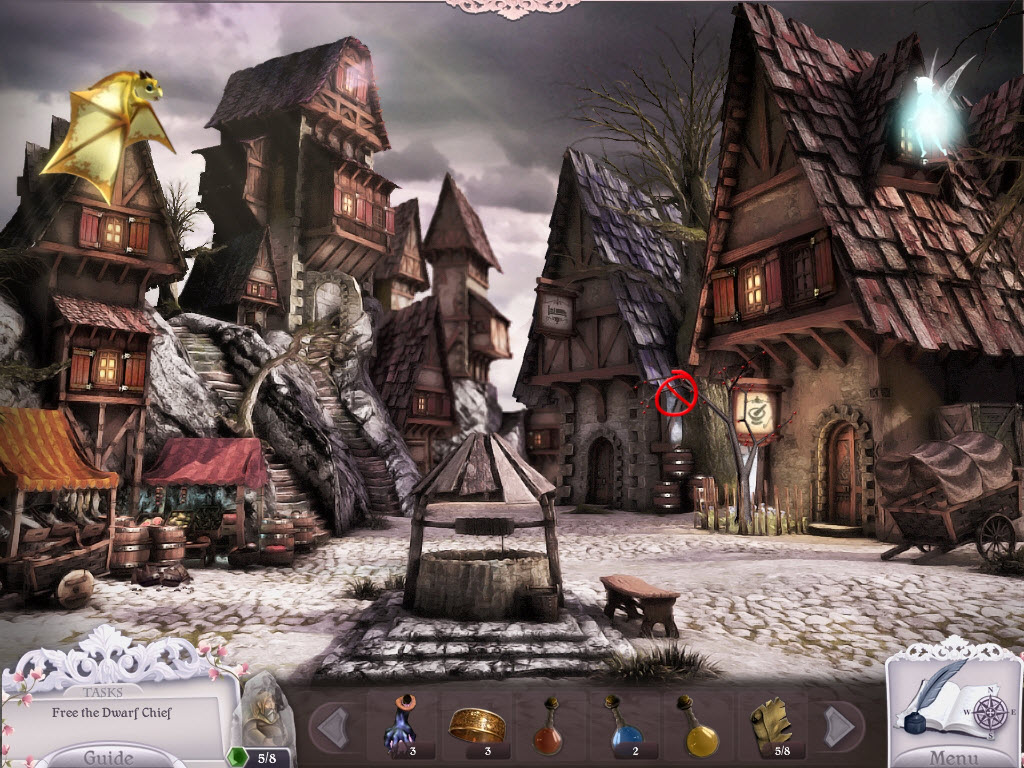
- return to town
- use the Fairy to water the tree
- take the Gem
- go into the herbalist
- AREA CLEARED
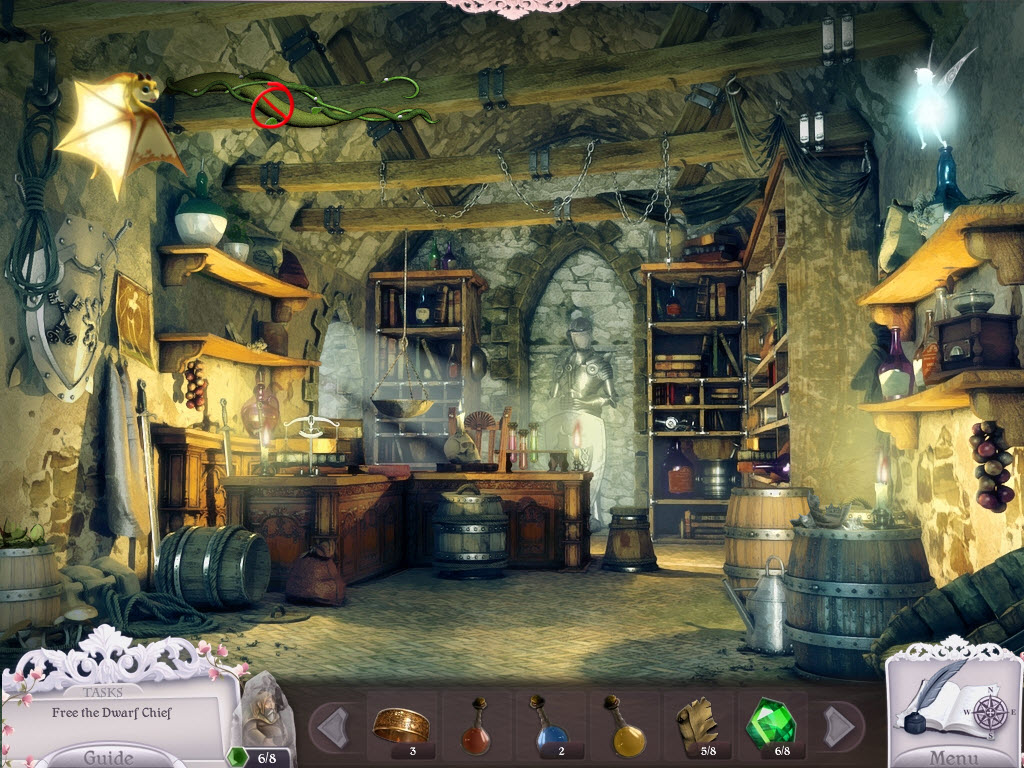
Herbalist
- use the Fairy to water the vine on the beams
- take the Gem
- go to the back room
- AREA CLEARED
Herbalist Back Room
- use the Fairy to water the plant
- take the Gem
- return to the witches tree
- AREA CLEARED
Witches Tree
- examine Papa Dwarf soul (left)
- Papa Dwarf Puzzle (difficult)
- place Gems in the empty spots
- use the arrow to move the gems into the spaces outlined in green
- there are multiple solutions for this puzzle
- receive Coal
- return to the dwarfs house
- examine the door
- Dwarf Door Puzzle (easy)
- turn the handle until it says the lens is in focus
- replace the outer Handle
- turn that handle until it says the lens is in focus
- enter the house
- use the Fairy to break the photo
- take the Schematic Piece
- go up
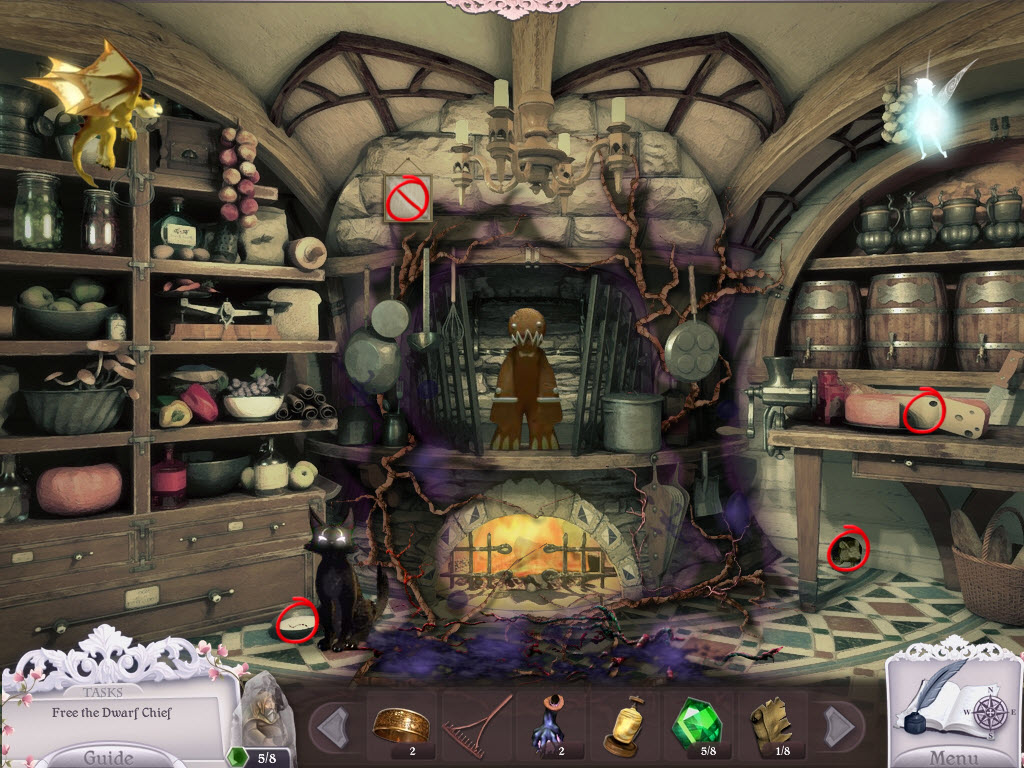
Dwarf Kitchen
- use the Fairy to break the plaque
- take the Schematic Piece
- take a piece of Cheese
- give the Cheese to the mouse
- use the Potion on the cats milk
- take the Milk Jug
- use the Milk Jug on the cookie
- fun fact: the cookie will swat at your cursor
- take the Potion
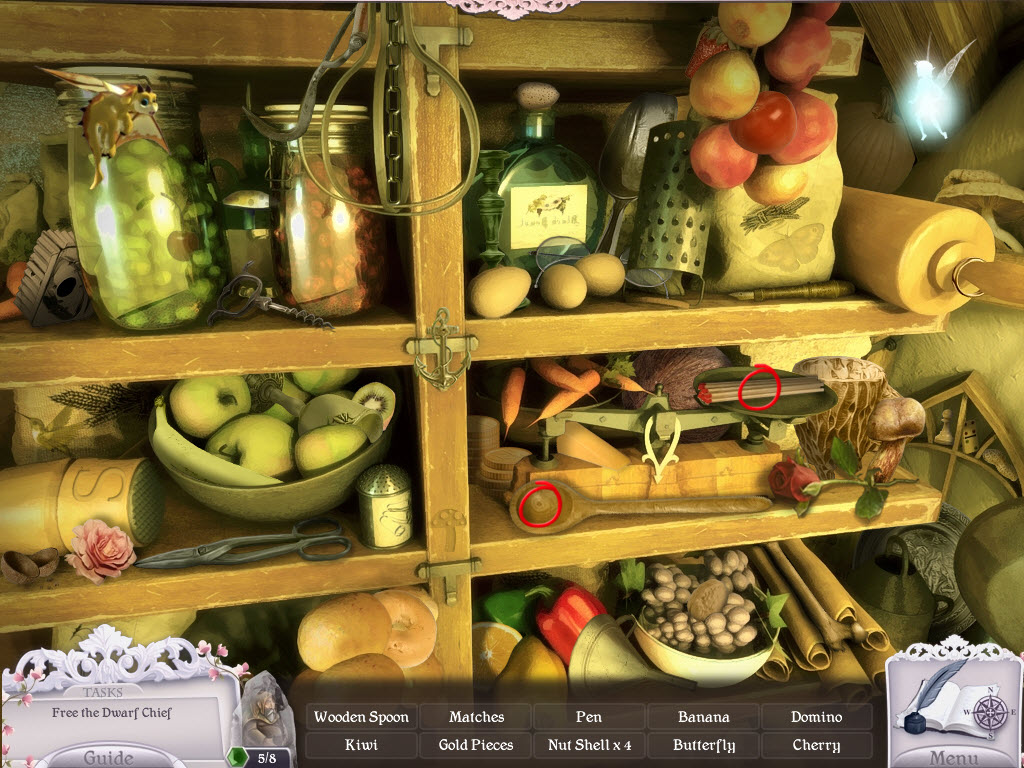
- examine the left shelves - hidden object area
- take the Wooden Spoon and the Matches
- go down
Dwarf Foyer
- pick up the Potion
- use Nessie to lift the rug
- Box Puzzle (easy)
- move the triangles to they fit in the corners
- move the top-left up and left
- move the top-right up and right
- move the bottom-left down and left
- move the bottom-right down and right
- move the bottom-left up, move the top left right, move the top-right down, move the bottom-right left
- continue this pattern until they are in the correct spots
- take the Ring
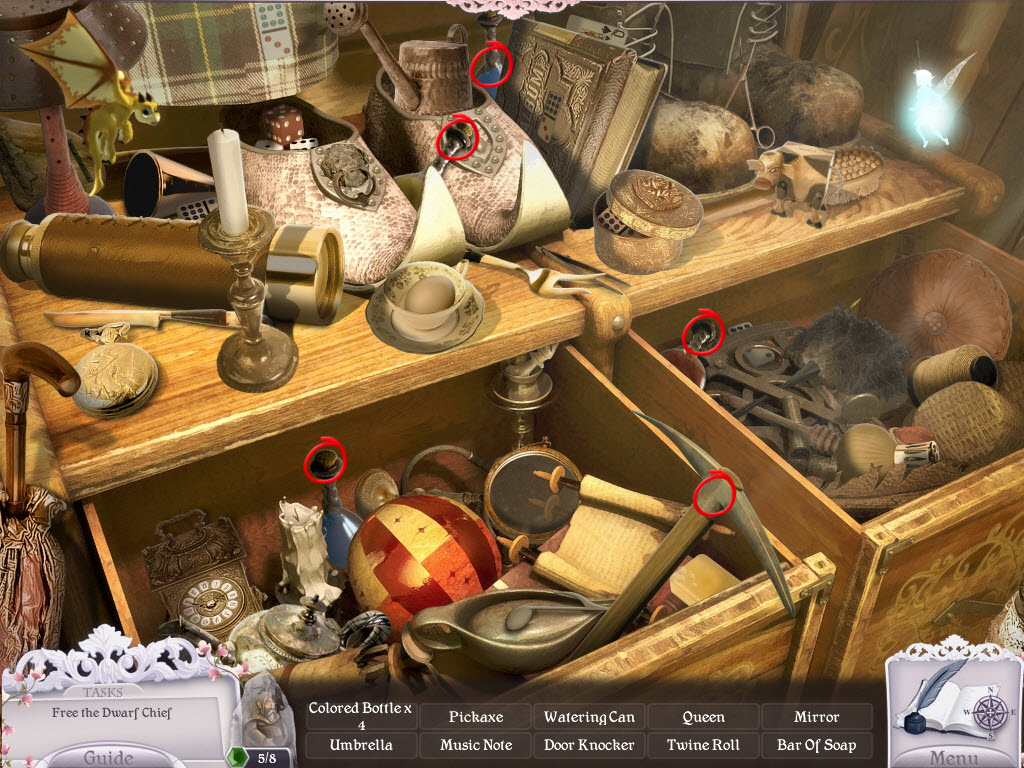
- examine the cupboard on the left - hidden object area
- take the four Colored Bottles and the Pick Axe
- go right
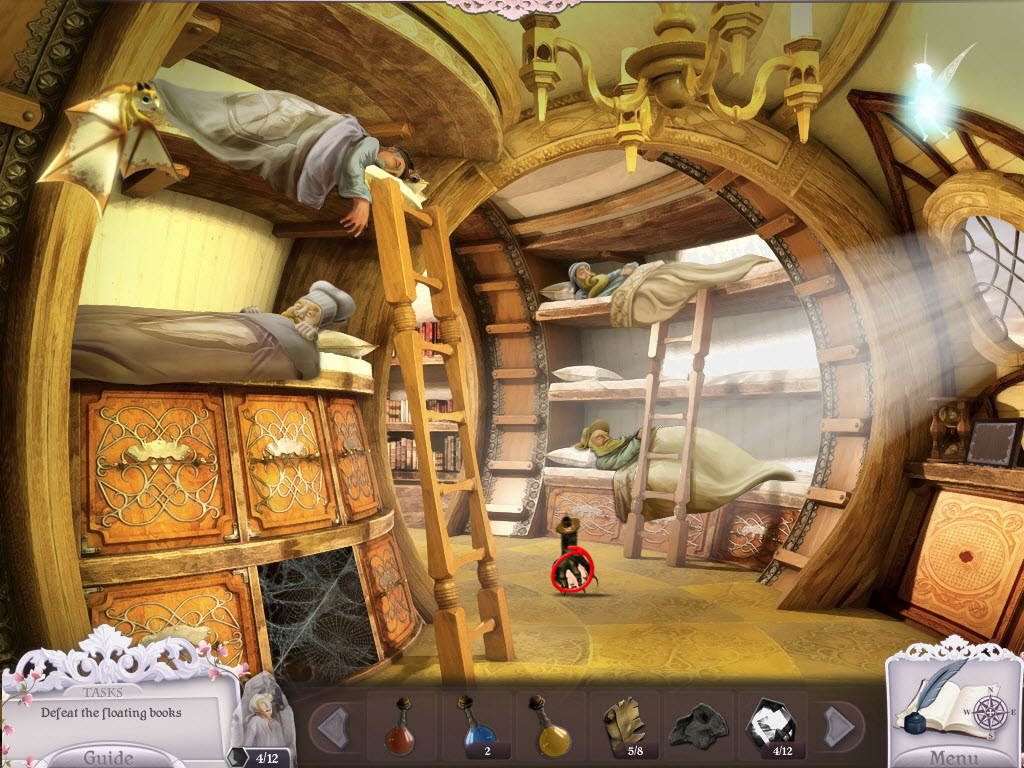
Dwarf Bedroom
- use the Fairy to break the plaque
- take the Schematics Piece
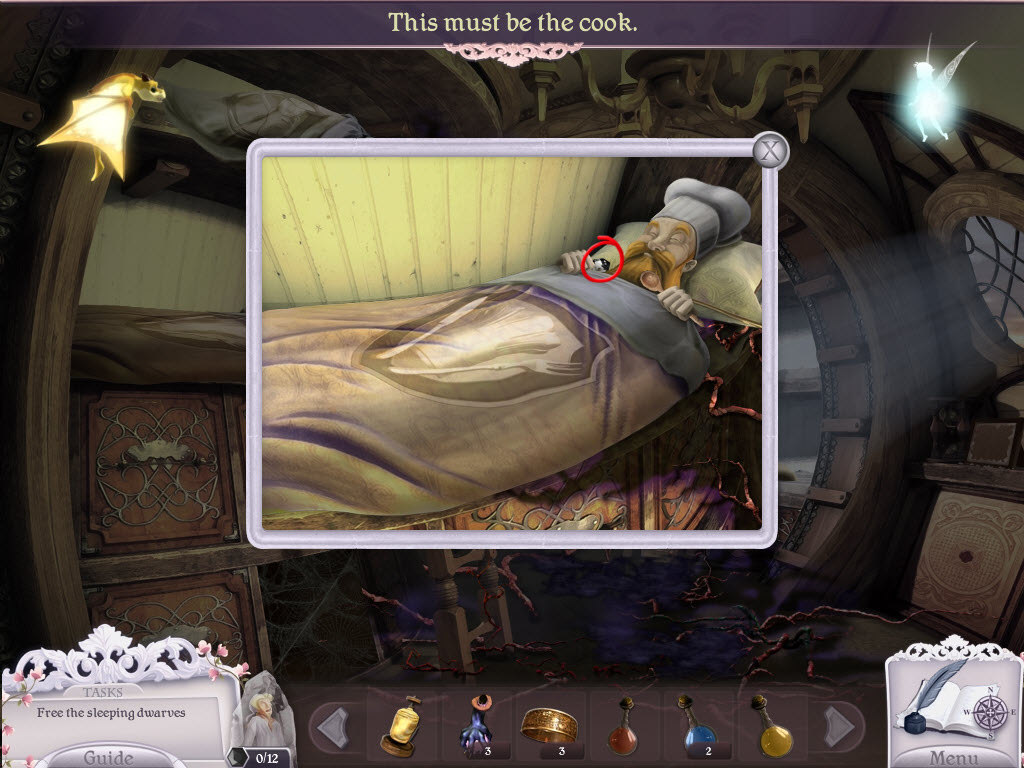
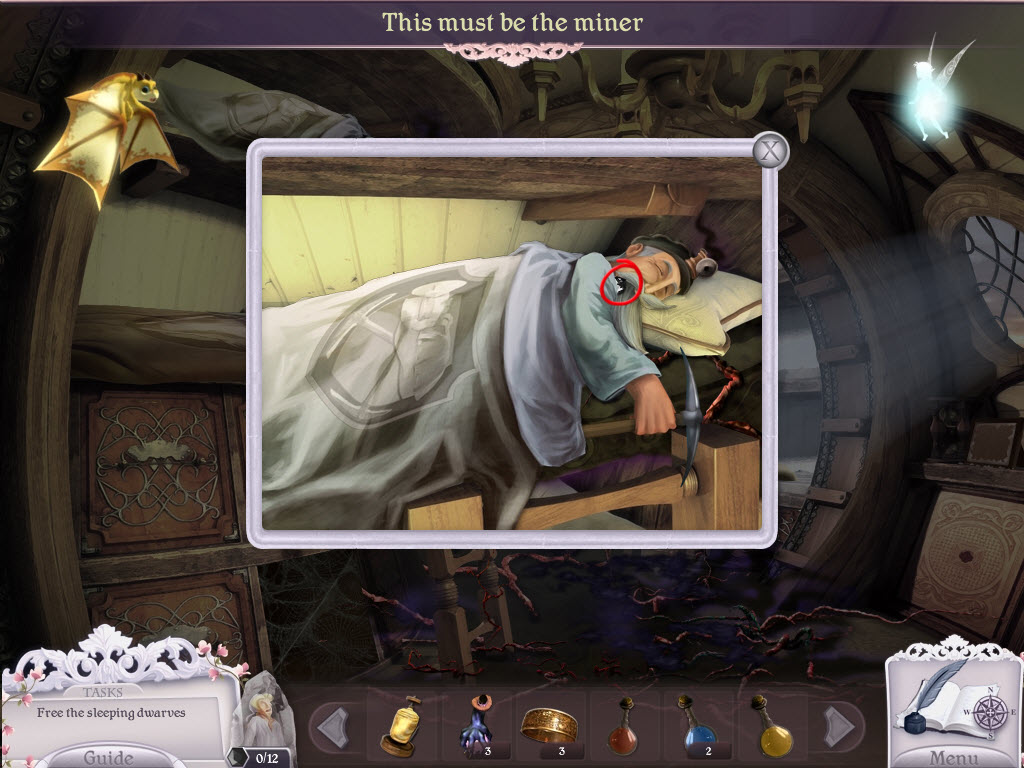
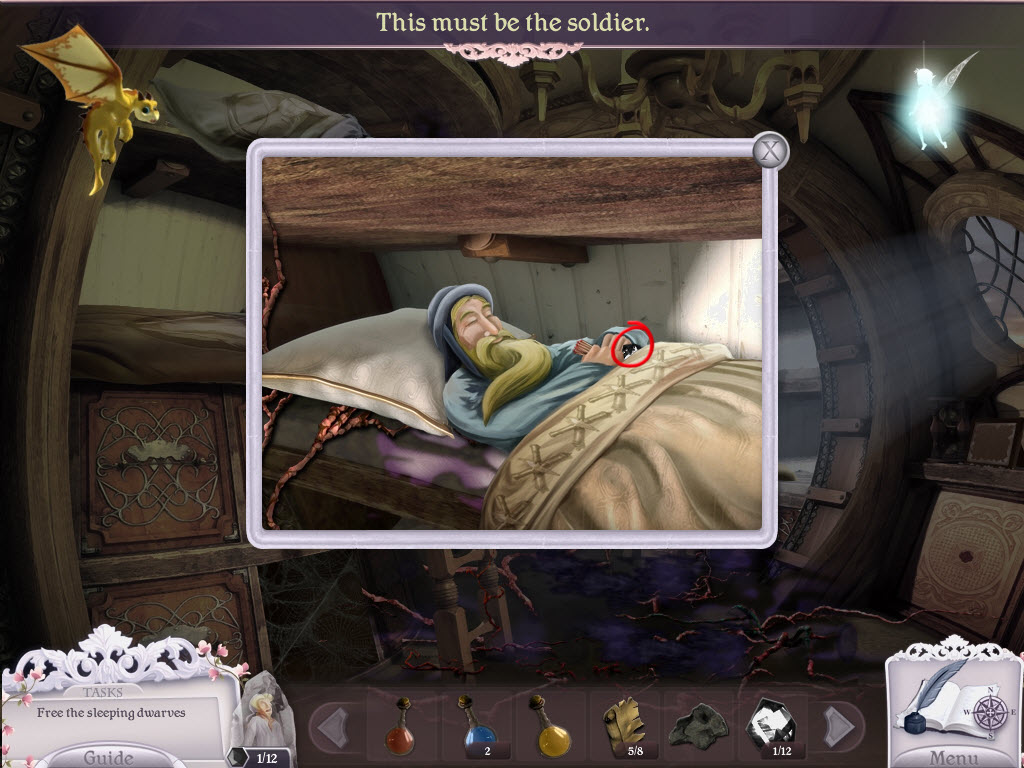
- examine the dwarves
- give the Chef the Wooden Spoon
- give the Miner the Pick Axe
- give the Soldier the Matches
- give the Gardener the Rake
- take the black Gem from each of them
- take the Potion
- go up

Dwarf Library
- use the Fairy to break the mirror
- take the Schematic Piece
- use the Fairy to break a hole in the archway
- take the Schematic Piece
- return to the kitchen

Dwarf Kitchen
- examine the oven
- place the Coal in the oven
- take the Coal
- go down
- use the Fairy to breath fire on the cobweb
- take Gem
- go right
- AREA CLEARED

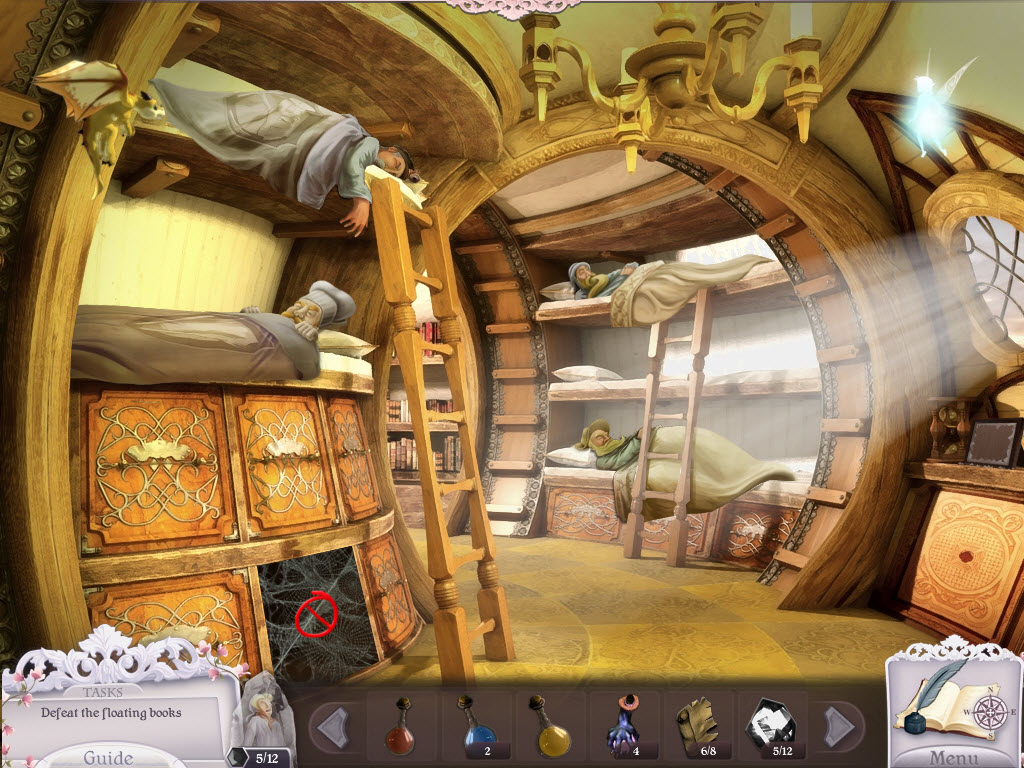
Dwarf Bedroom
- use the Fairy to breath fire on the cobweb
- take the Schematic Piece
- go up
- AREA CLEARED
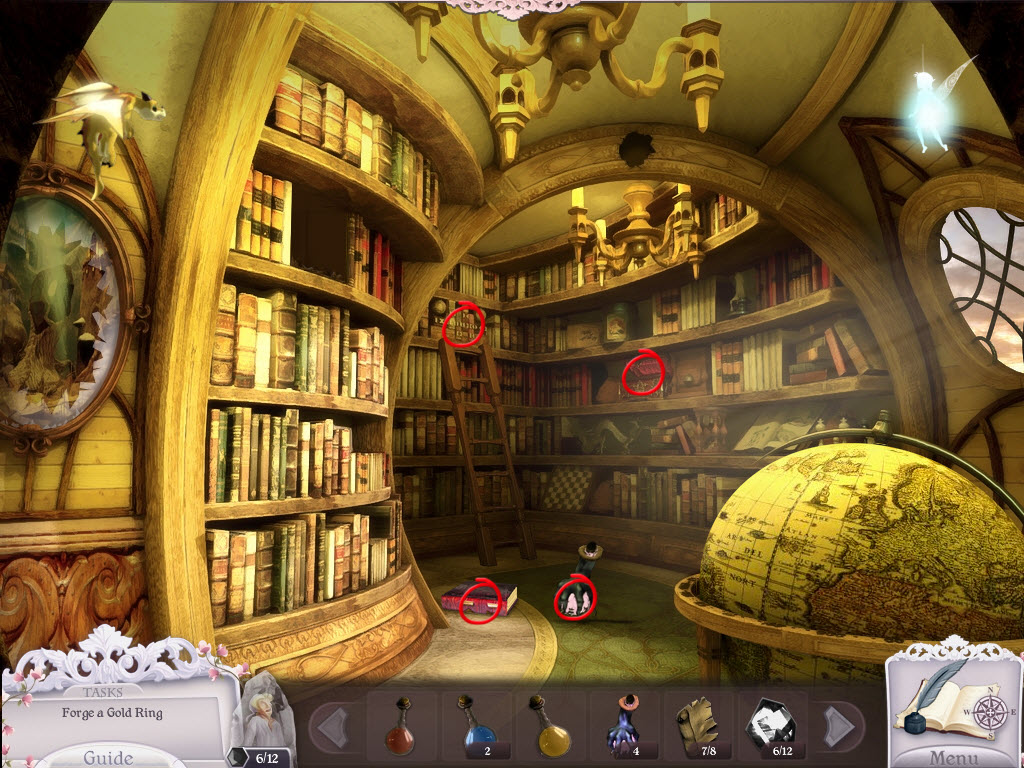
Dwarf Library
- use the Fairy to breath fire on the books with the fire symbol
- take the Gem
- use the Fairy to breathe fire on the flying books
- take the Potion
- take the Book
- examine the back bookshelf
- Colored Box Puzzle (easy)
- push the buttons to move the leaf to an adjacent color
- example: if you press the red button, the leaf will move to the farthest red spot
- the object is to get the leaf into the center
- solution: red, green, blue, red, green, purple
- take the Casting Stone
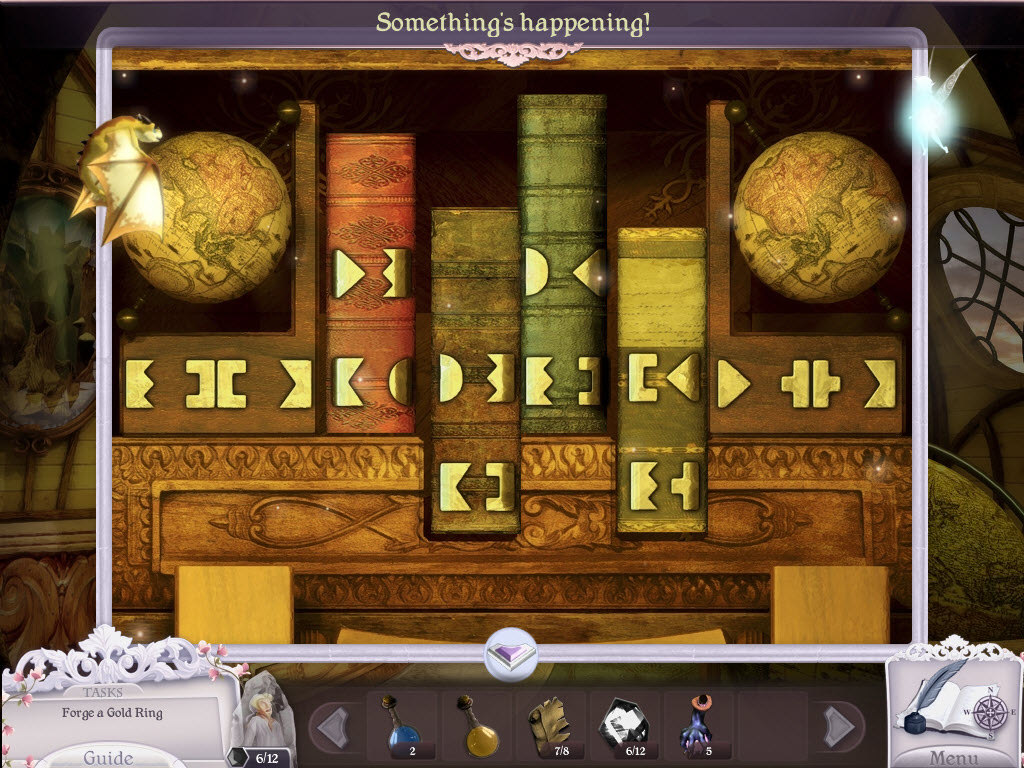
- Bookshelf Puzzle (moderate)
- replace the missing Book
- look at the symbols to the left and right of the books
- rearrange the books so they form a continuous pattern
- see screenshot for solution
- examine the bookshelf on the right
- enter the secret door in the bookshelf
- AREA CLEARED
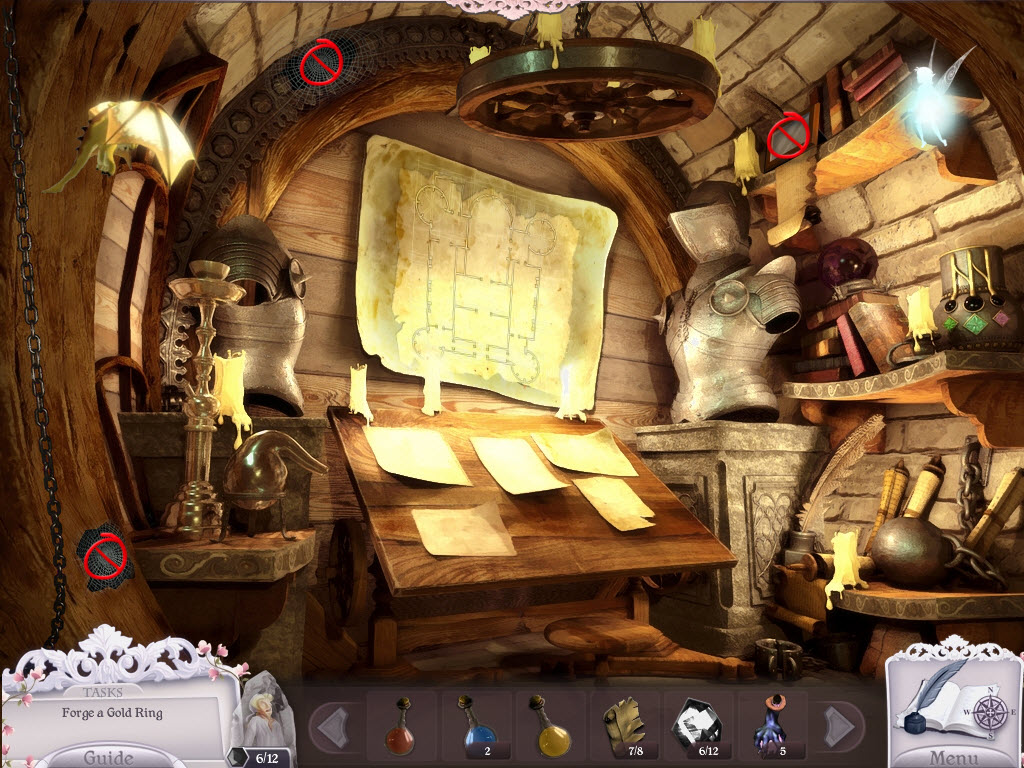
Dwarf Secret Room
- use the Fairy to breath fire on the cobwebs
- take the Casting Stone and Gem
- use the Fairy to break the plaque
- take the Schematics Piece
- examine the container on the right shelf
- Colored Container Puzzle (easy)
- pour the colored liquids in the holes
- mix them to create colors that match the gems
- see video for solution
- take the Ring
- examine the map
- Map Puzzle (easy)
- place the Schematics Pieces on the map
- put them back together like a jigsaw puzzle
- note: the pieces can be hard to grab/move
- examine the gem
- use Nessie to lift the Gem out of the wall
- return to the kitchen
- AREA CLEARED
Dwarf Kitchen
- examine the oven
- place both Casting Stones in the oven
- place the Gold String in the pot (above the stones)
- take the Ring
- use the Fairy to light the candle
- take the Gem
- leave the dwarfs house
- AREA CLEARED
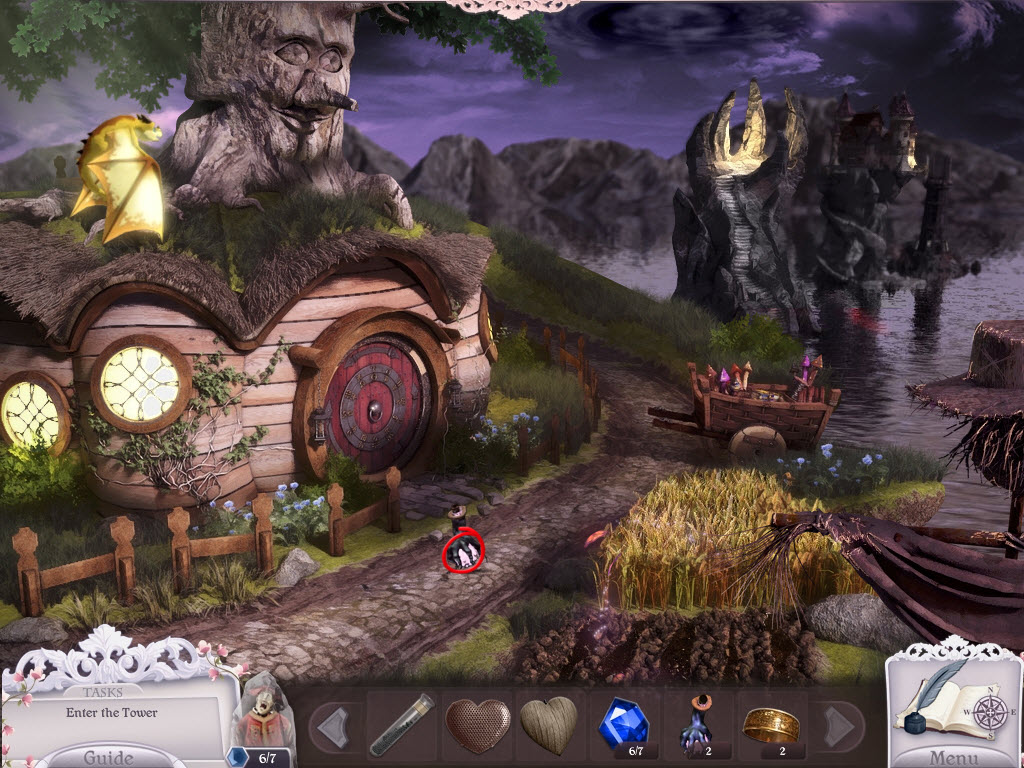
Dwarfs House
- use the Fairy to light the scarecrow's hat on fire
- take the Gem
- go down
- AREA CLEARED
Rapunzel's Tower
- use the Fairy to breathe fire on the cobweb
- take the Gem
- go into the tower
- AREA CLEARED
Tower
- use the Fairy to like the torch
- take the Gem
- return to the witches tree
- AREA CLEARED
Witches Tree
- examine the Prince's soul
- Prince Puzzle (difficult)
- place the Gems in the empty spots
- use the arrow to move the gems into the spots outlined in black
- there are multiple solutions to this puzzle
- follow the Prince down the portal
- examine the claw
- place the five Rings on the five fingers
- use the Potion on the five Rings
- enter the portal
- find the objects as fast as you can
- you need to beat the Witch
- every time you complete a set of items it will drain her energy
- a new set will appear, each time with more items to find
- how long it takes you depends on how fast you are
- items vary for each game/player
The End...?
Location of All GemsRed Gems
- Royal Bathroom - right fountain in fishes mouth
- Caves - underneath baby rattle (after you get rid of the evil)
- Bedroom - vase (use Fairy diamond ability)
- Cave Exit - column (use Fairy diamond ability)
- Forest Lumberjack - rock (use Fairy diamond ability)
- Angry/Happy Trees - underneath pacifier (after you get rid of the evil)
- Castle Gates - underneath baby shoes (after you get rid of the evil)
- Fairy Village - on the ground (after you get rid of the evil)
- Outside Town - in cross on statue (after you get rid of the evil)
- Town - barrel (use Nessie to lift barrel)
- Herbalist Back Room - wardrobe (use Nessie to lift left wardrobe door)
- Herbalist - vase (use Nessie to lift vase after you get rid of the evil)
- Herbalist Back Room - flower pot on top shelf (use Nessie to blow smoke on bee)
- Toy Shop - underneath teddy bear (after you get rid of the evil)
- Toy Shop Second Floor - underneath lantern (use Nessie to lift the lantern after you get rid of the evil)
- Toy Shop Third Floor - on floor (after you get rid of evil)
- Toy Shop First Floor - bee (use Nessie to blow smoke on bee after you get rid of the evil)
- Tower - underneath pillow on bed (use Nessie to lift the pillow)
- Herbalist Back Room - flower pot (use Fairy to water the flowers)
- Herbalist - vine on ceiling (use Fairy to water the vine)
- Town - tree in from of Herbalist (use Fairy to water the tree)
- Dark Path - plant (use Fairy to water plant)
- Troll Bridge - flowers (use Fairy to water flowers)
- Rapunzel's Tower - fire pit (use Fairy to put out fire)
- Tower - flower pot on hearth (use Fairy to water the flower)
- Dwarfs House - window (use Fairy diamond ability)
- Dwarf Bedroom - all 4 dwarfs (once you give each of them their tools) 1 through 4
- Dwarf Kitchen - candle (use Fairy to light the candle)
- Dwarf Foyer - cobweb (use Fairy to burn cobweb)
- Dwarf Library - top of archway (use Fairy diamond ability)
- Dwarf Secret Room - cobweb (use Fairy to burn cobweb)
- Dwarf Secret Room - behind map (after you solve the map puzzle use Nessie to lift the gem out of the wall)
- Dwarfs House - scarecrow hat (use Fairy to burn hat)
- Rapunzel's Tower - cobweb (use Fairy to burn the cobweb)
- Tower - torch (use Fairy to light the torch)
Content(s) of this game guide may not be copied or
published on any other site without permission from Casual Game Guides.
©CasualGameGuides.com 2006 - 2021