Images
©Big Fish Games
Overview:
In the
third installment of the series, you start out when Iris is very young
and learning how it all started. Enter the past and see how it all
began.
Features: You can move the screen slightly to the left/right which gives it a 3D feel.
Objectives & Hints: Click the bottom, left corner for your objectives and hints.
Inventory: You can lock or unlock the inventory bar by clicking the lock symbol.
Pigs: Find 27 pigs to unlock something. This may or may not be in your version of the game. Click the link to be taken to the location of all the pigs.
Chapters:
Chapter 1: The Cottage
Chapter 2: The Garden
Chapter 3: The Cave
Chapter 4: The Mountain
Chapter 5: The Giants Head
Chapter 1: The Cottage
- go forward
- pick up the pieces of painting around the frame (two on top and one on the bottom-right side)
- repair the painting
- enter the painting
- read the note
- take the Scrap of Paper
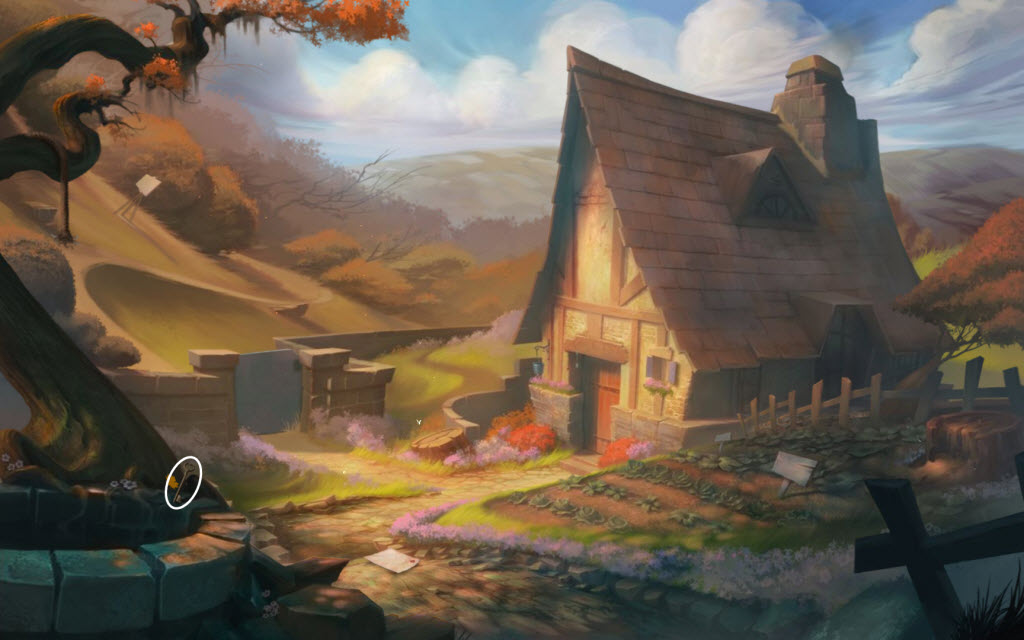
- pick up the Wooden Bucket and Cottage Key on the edge of the well
- examine the tree stump
- click on the empty honey jar - note the "pooh" comment
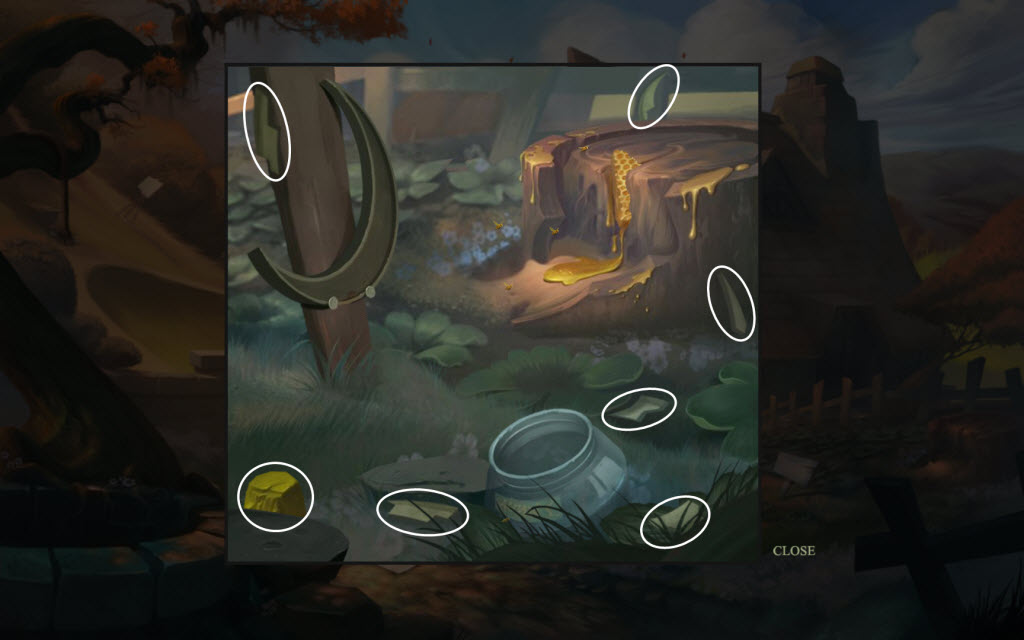
- pick up the six pieces of the moon
- take the Little Moon and the Yellow Stone
- use the Cottage Key on the cottage door
- read the note in the blue box on the left
- take the Blue Stone
- go forward to the desk
- pick up the Charcoal from on top of the storybook
- examine the drawings on the wall
- click on the push pin
- put all the pieces back together
- use the Scrap of Paper from your inventory to complete it
- use the Charcoal to color in the ravens wing
- take the Storybook Key
- take the Metal Pot from above the fireplace
- look in the fireplace
- pick up the Iron Tongs and use them to take the Glowing Sun
- go forward to the desk
- use the Storybook Key on the storybook
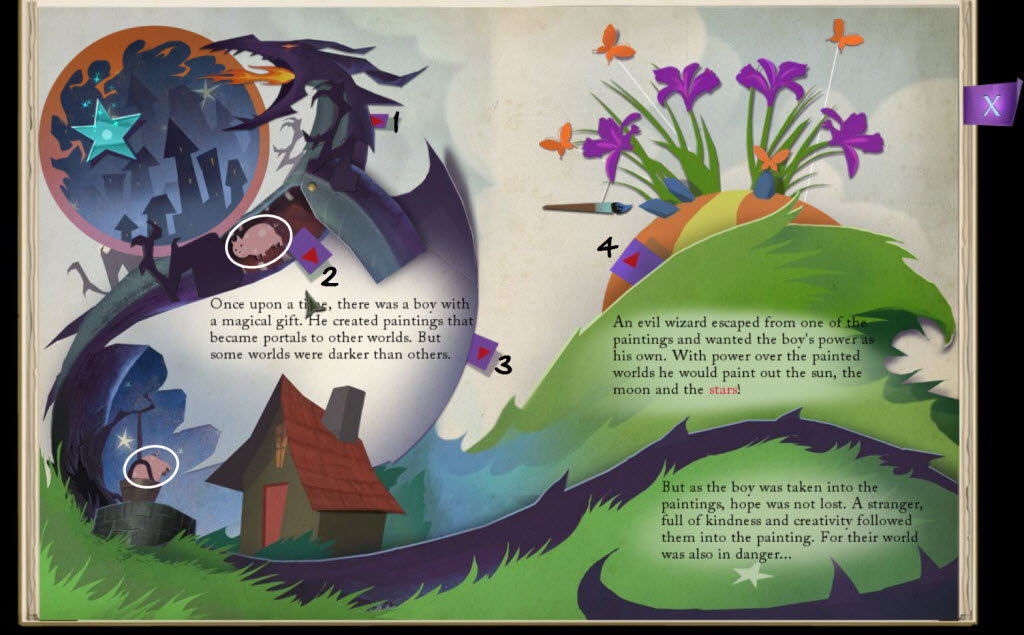
- Storybook Puzzle
- pull the first tab and a star appears
- pull the second tab and the arms and legs of the dragon moves
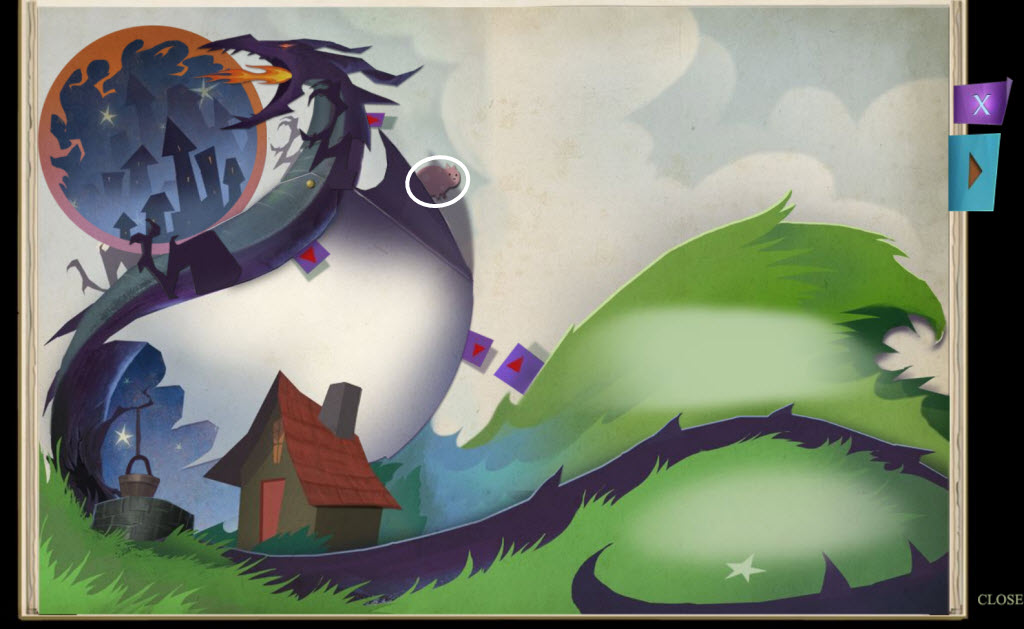
- pull the third tab and the light turns on/off in the window and the bucket goes up/down (pig)
- open up the dragons body between his arms/legs (pig)
- pull the fourth tab to continue the story
- flip back the dragons wing (pig)
- take the Small Star
- exit the cottage
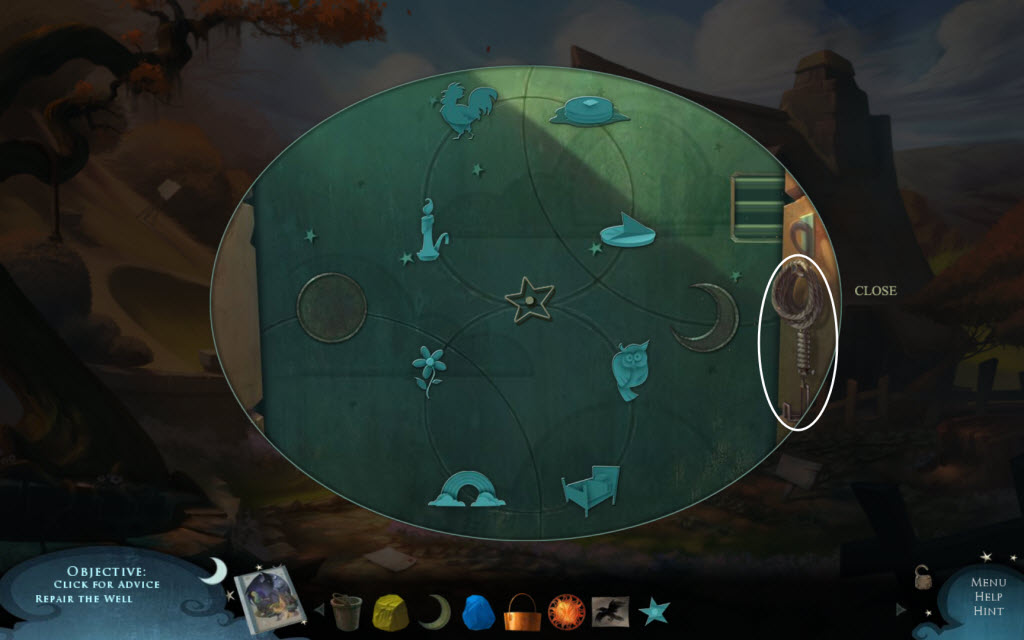
- examine the blue gate
- take the Rope from the hook on the right
- use the Rope on the tree branch above the well
- use the Wooden Bucket on the Rope
- use the Glowing Sun on the Wooden Bucket
- examine the blue gate
- Gate Puzzle
- replace the Glowing Sun, Little Moon, and Small Star
- rotate the items by clicking the sun or moon so they reflect morning (sun) or night (moon)
- solution (highlight to see): Sun = Sundial, Rainbow, Pancakes, Flower; Moon = Bed, Star, Owl, Candle; Middle = Rooster
- see video for solution
- go through the gate
- examine the canvas
- pick up the Red Stone
- take the Sharp Stick (tree branch)
- look in the box and read the note
- take the Empty Palette and Linseed Oil
- go down
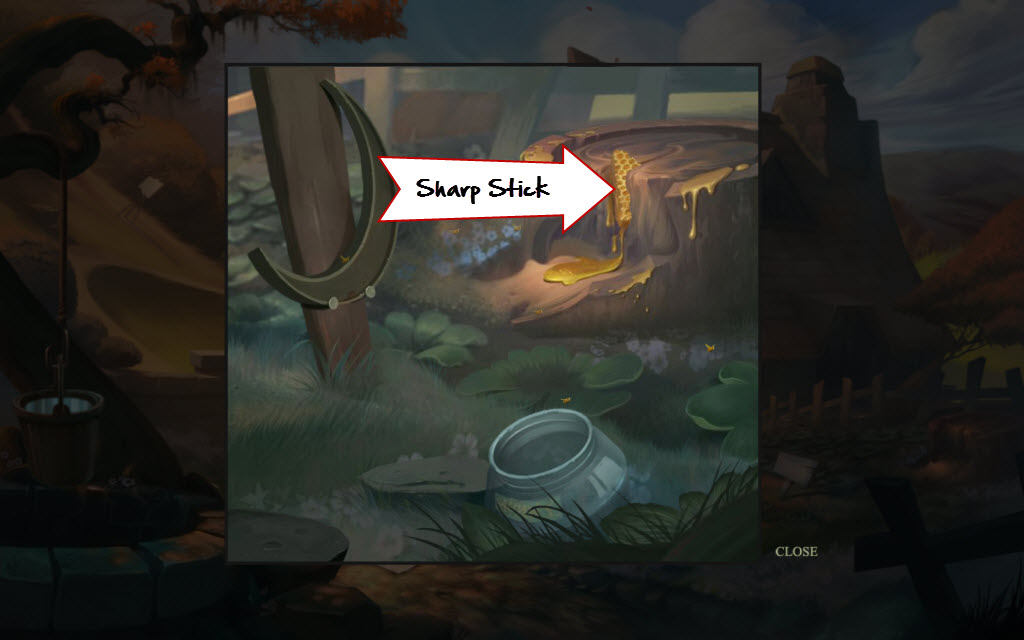
- examine the tree stump
- use the Sharp Stick to loosen the beeswax and pick it up
- Beeswax Mini Game
- move the beeswax back and forth over the jar
- watch for the small drips and aim for the jar
- take the Hardened Beeswax
- go inside the cottage
- look inside the fireplace
- put the Metal Pot above the fire
- place the Hardened Beeswax inside the pot
- take out Softened Beeswax
- go forward to the desk
- Paint Puzzle
- place the Red, Blue, and Yellow Stones in their respective bowls - top to bottom = blue, red, yellow
- place the Empty Palette in the back
- place the Linseed Oil in the top-right hole
- place the Softened Beeswax inside the bottom-right hole
- use the white pestle to crush each colored stone three times
- click the blue powder
- use the linseed oil on the blue powder
- use the wax on the blue powder
- use the palette knife to combine everything
- continue to to this for red and yellow
- combine the following powders: blue and red, blue and yellow, red and yellow
- repeat the process each time
- receive the Palette of Paint
- return to the hillside
- examine the canvas
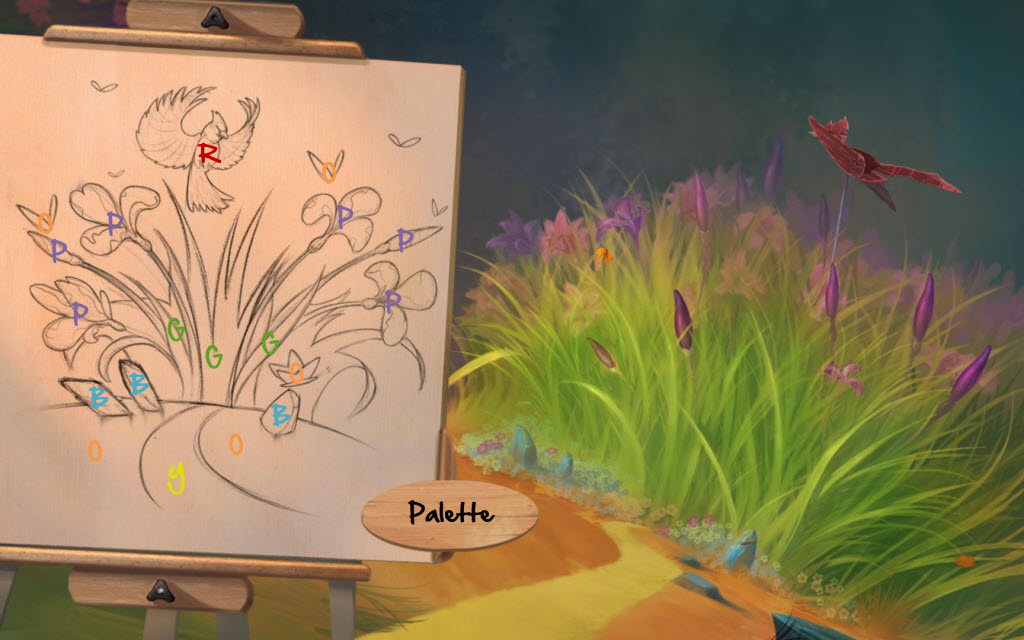
- Panting Puzzle
- place the Palette of Paint by the painting
- paint the picture just like the hillside
- Cardinal = Red; Butterflies and Hillside = Orange; Path = Yellow; Flowers = Purple; Stems = Green, Stones = Blue
- go forward up the path
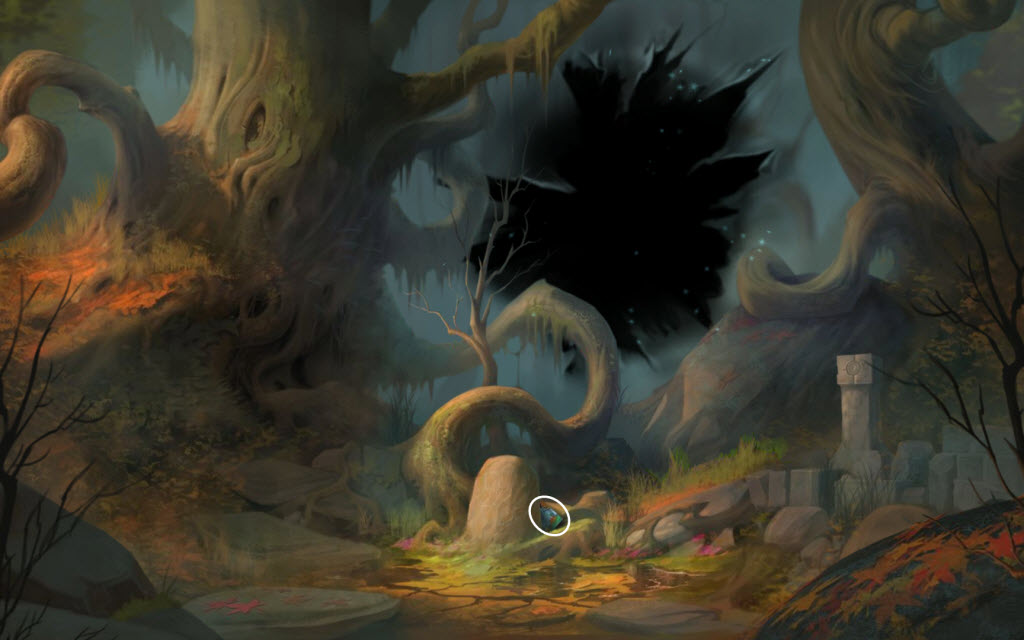
- examine the base of the middle stone by the tree roots
- pick up the Storybook Page
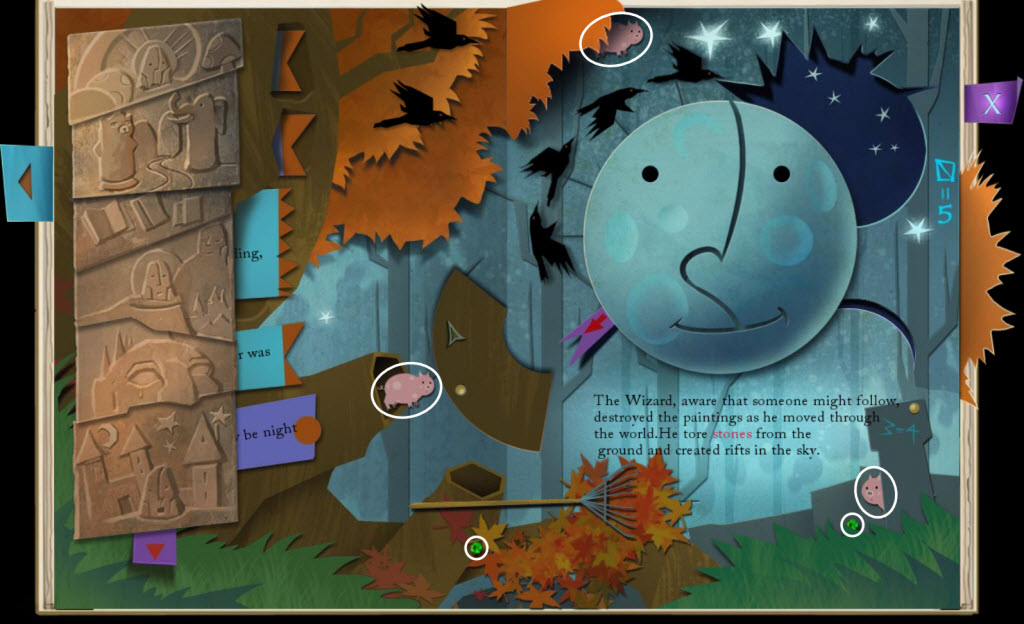
- Storybook Puzzle
- pull the first tab all the way down
- click the two ravens on the top two side tabs - one will drop a gem
- pull the tab on the moon - another gem will drop
- now pull all the side tabs all the way to the right
- pull the rake right/left (pig)
- pick back the fall leaves on the side
- pull back the fall leaves on the top (pig)
- pick up the two Green Stones
- make a note of the numbers and symbols they equal
- you can turn the tree roots (pig)
- the moon turns all the way round
- examine the tall stone on the right
- make a note of the numbers and symbols they equal and the reference to the green stones
- examine the stone in the middle by the tree roots
- Stone Puzzle
- place the Green Stones in the holes on each side
- five dots will light up below
- remember the symbol from the storybook that equaled five
- place that symbol in an "X" pattern (to match the five dots)
- repeat the process for all the numbers
- see video for solution
- take the Forest Fragment
- replace the Forest Fragment
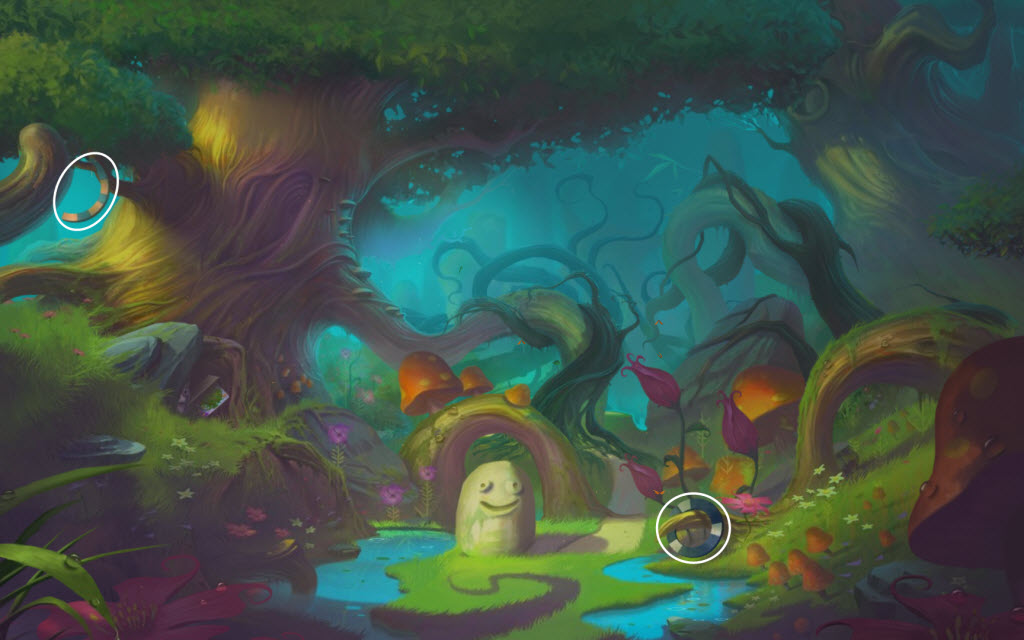
- pick up the Ring Piece and Wooden Ring
- talk to the stone - make a note of the diagram
- push back the leaves on the left tree - where you found the ring piece
- examine the flower the sun is shining on
- take the Seeds
- go forward
- talk to the bushes on the left and right - note the "whinnied" and "poohed" comments
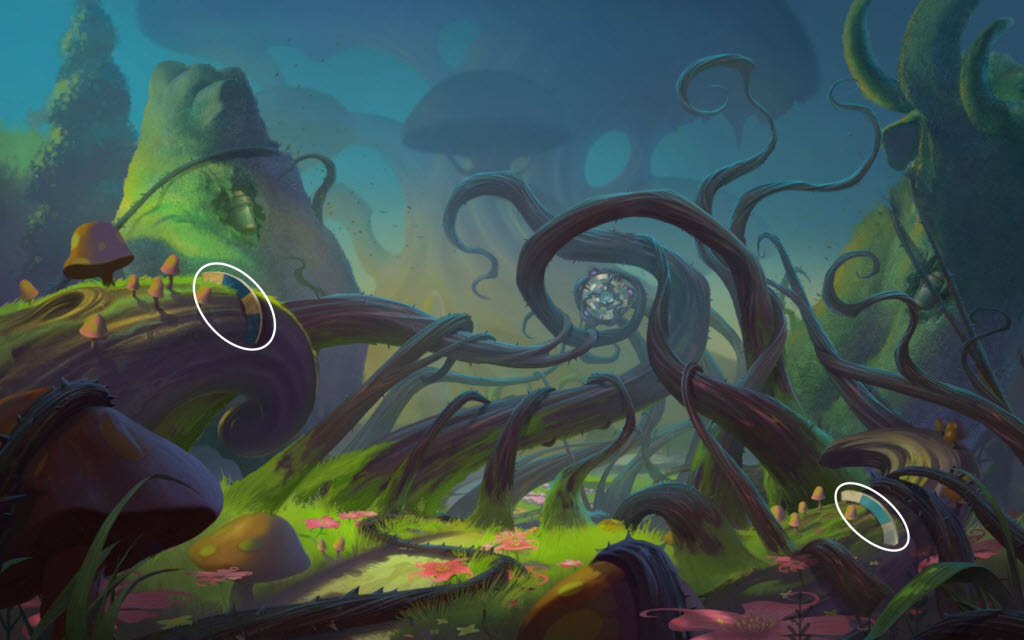
- pick up the two Ring Pieces
- examine the device in the center of the roots
- Root Puzzle
- replace the Ring Pieces and Wooden Ring
- the object is to light up the brown tabs ring by ring until they form a line to the eyes
- click the middle to light up the inner three tabs
- as each of those tabs touches another in the next ring quickly click it the light tab
- this will light pass the light on to the tabs in the next ring
- the arrows on the tabs dictate which way the tabs will light
- once you have a top tab lit that has arrows pointing out you can click it when it comes in contact with an eye
- see video for solution
- read the note
- take the Lamplighter Sketch
- examine the stone in the distance (middle)
- take the Croquet Scrap
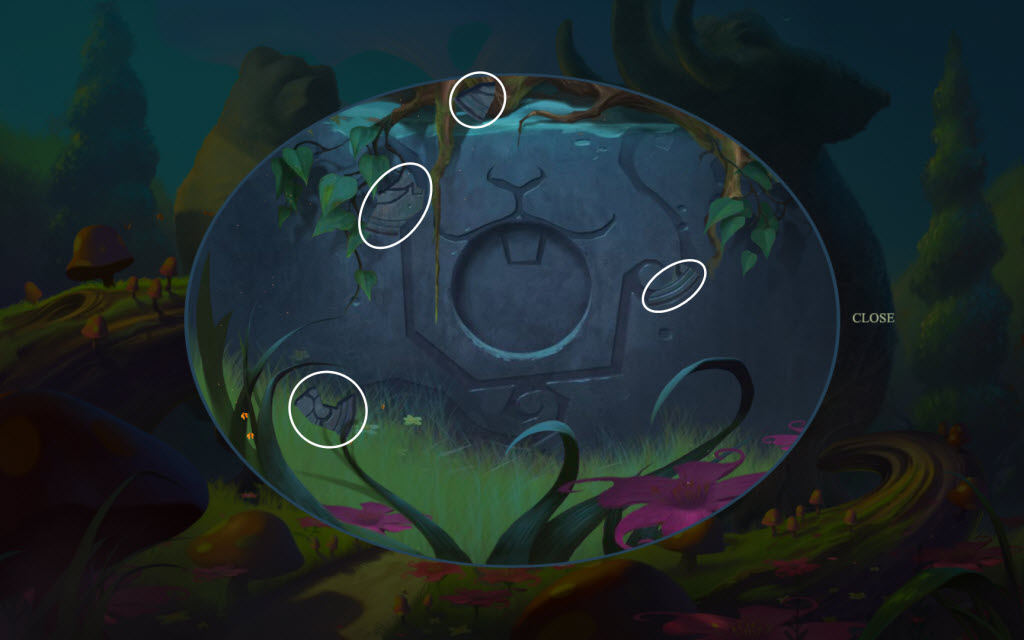
- examine the other stone in the distance (left)
- pick up the medallion pieces
- go forward
- read the torn poster on the sign (pig)
- take the Blue. Orange, and Red Crayons hidden behind the poster
- pull out the lamplighter also hidden behind the poster
- place the Croquet Scrap on the poster
- use the Blue, Orange, and Red Crayons to color in the lamplighter
- Croquet Mini Game
- use your mouse to aim and shoot your croquet ball through the wickets
- the red arrow will show you where to hit the ball
- you can hit the ball through the wicket from either direction for it to count
- you must hit the blue pole that appears at the end
- have fun hitting other things and seeing stuff open and appear
- receive Golden Shears
- use the Golden Shears on the roots
- look in the hole
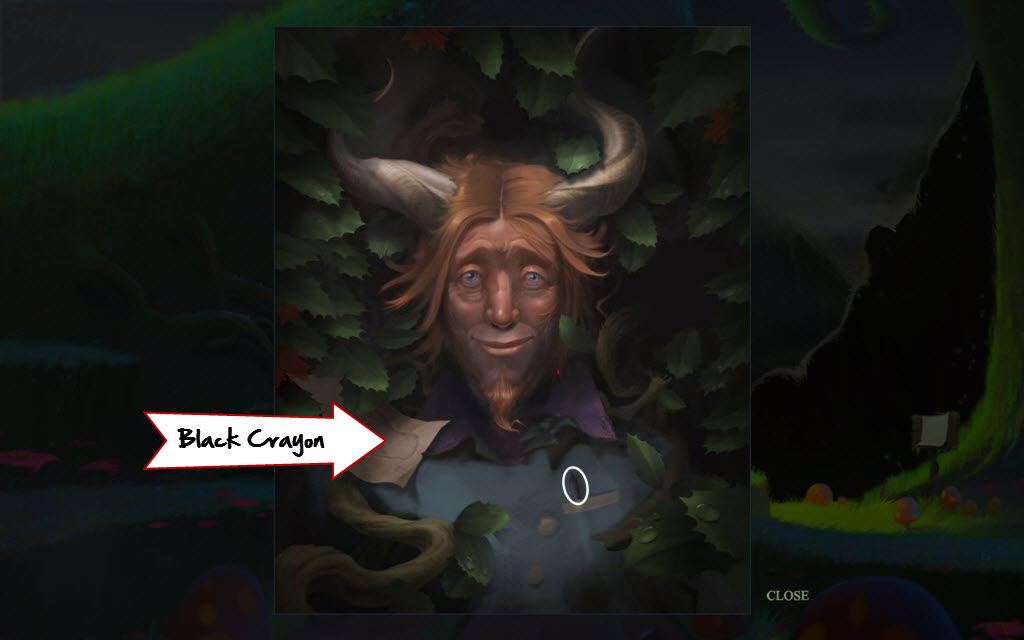
- talk to the Faun
- take the Black Crayon from his pocket
- examine the sketch on his shoulder
- use the Black Crayon to draw the outline of the watering can
- take the Watering Can
- go down twice
- use the Watering Can on the pool of water
- go up
- use the Watering Can on the bear shrub and the elephant shrub
- give the bear shrub the Jar of Honey
- take the Rabbit Medallion from his paw
- take the Painting Scrap from the elephant shrubs mouth
- examine the stone in the distance (left)
- replace the Rabbit Medallion
- examine the rabbit shrub
- talk to the rabbit shrub
- Egg Puzzle
- use the items on the left to recreate the egg on the right
- click the color tab on the top to reveal the colors
- click the color you want to wet the paint roller
- click the paint roller to paint the egg
- find the pattern you want by using the purple arrows to scroll up and down
- pull the bunny tab to the right to place the pattern on the egg
- repeat the process until all three eggs are finished
- see video for solutions
- give the Painted Eggs to the rabbit shrub
- take the Frog Medallion
- examine the stone in the distance (middle)
- replace the Frog Medallion
- examine the frog shrub
- talk to the frog shrub
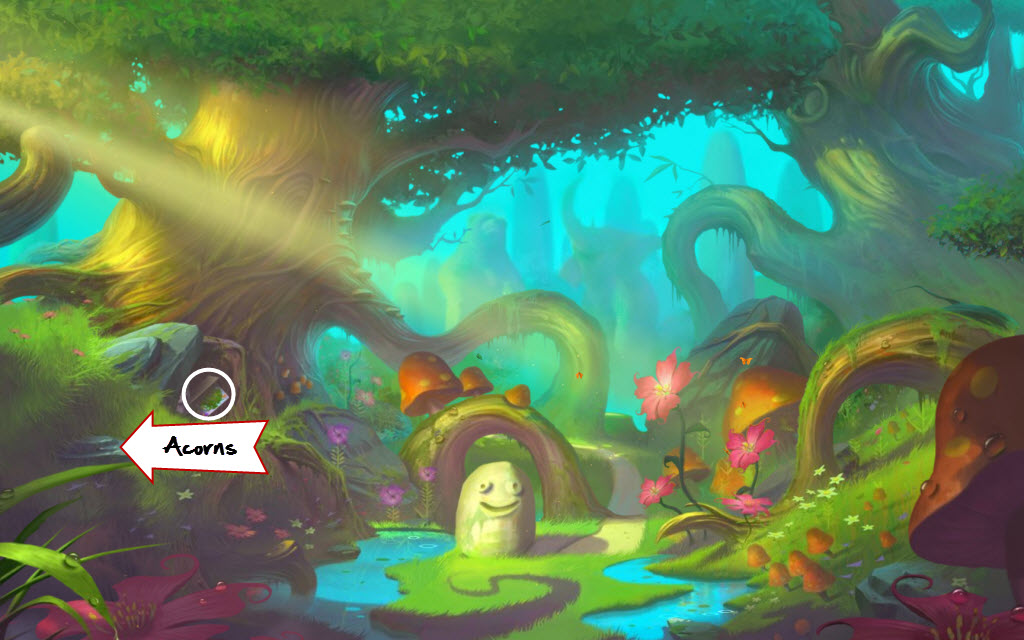
- take the Acorns
- go down
- place the Acorns on the slab of rock below the squirrel
- take the Storybook Page
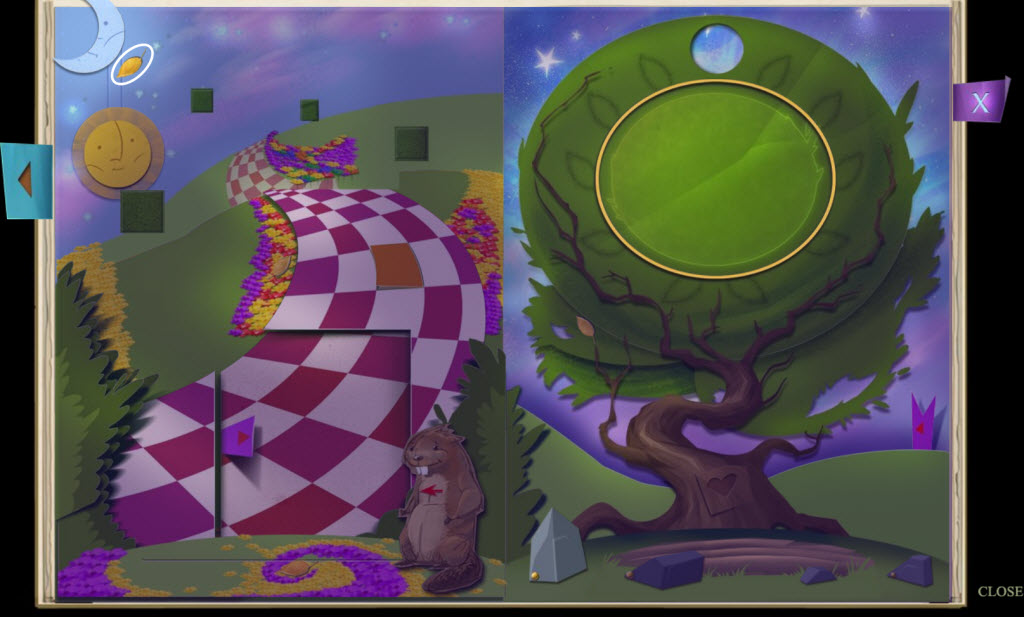
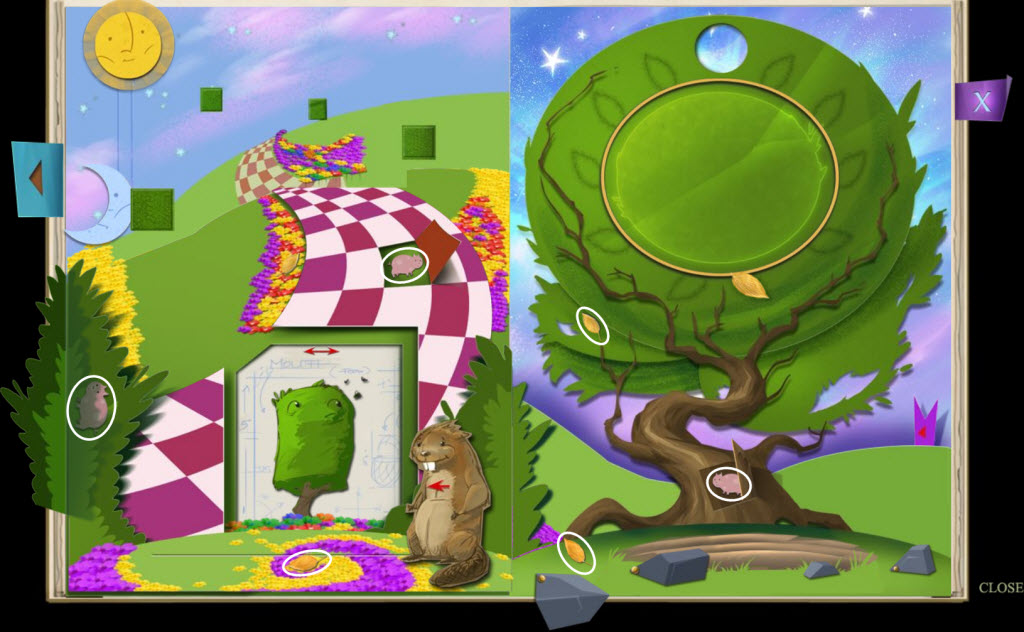
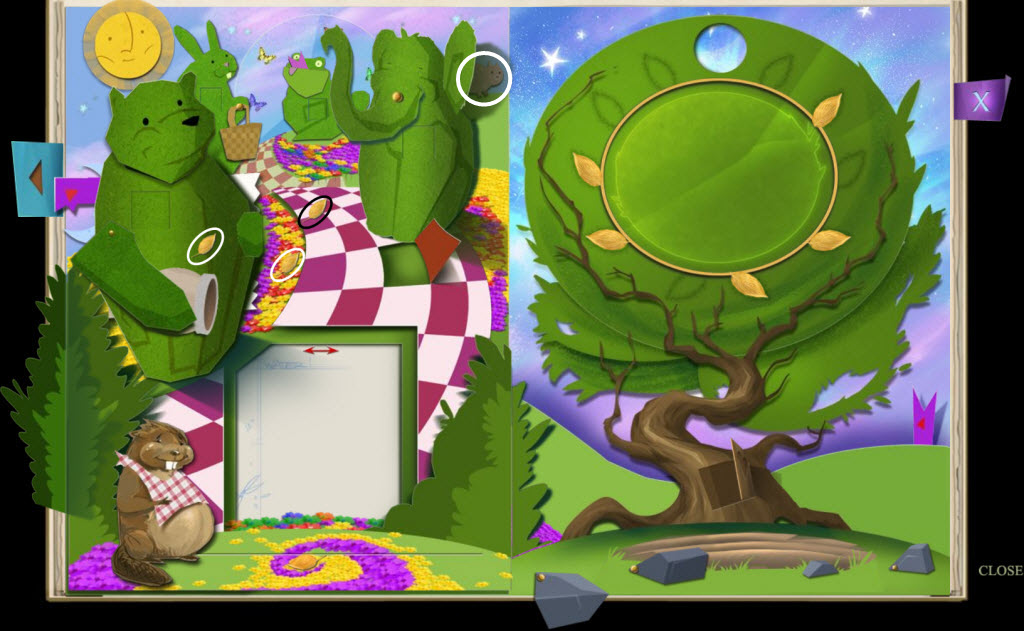
- Storybook Puzzle
- click the sun or moon to change it from day to night
- pick up the Leaf
- change it back to daytime
- click on the bushes on the left (pig)
- click on the different colored box on the path (pig)
- click on the heart on the tree (pig)
- pick up the Leaf in the middle of the flowers at the bottom to the left of the beaver
- pick the Leaf off the lower-left of the tree
- move the first rock and take the Leaf
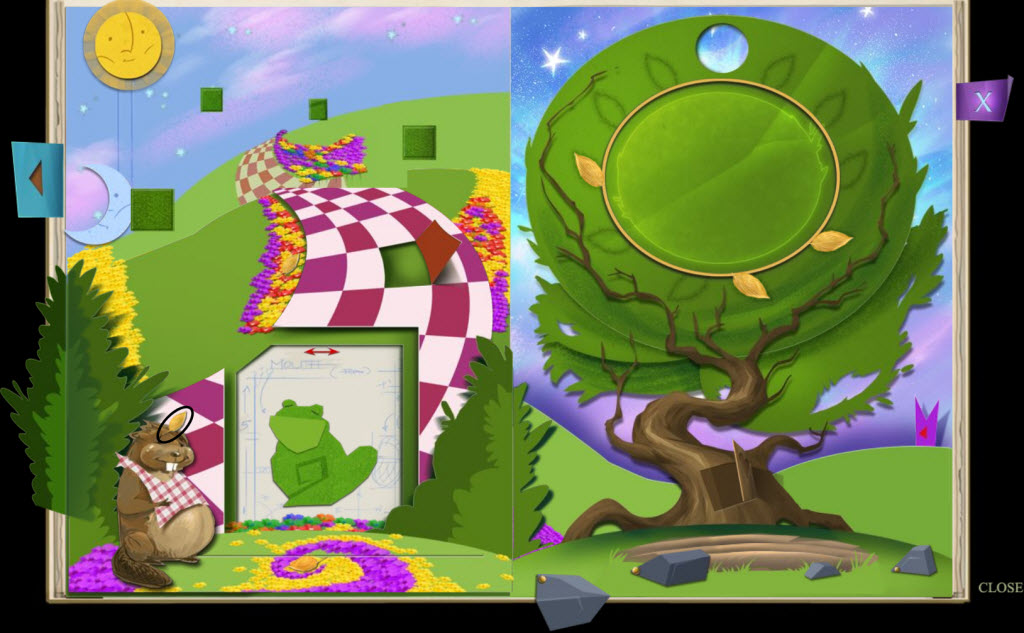
- pull back the door in the path
- pull the beaver all the way to the left
- take the Leaf off his head
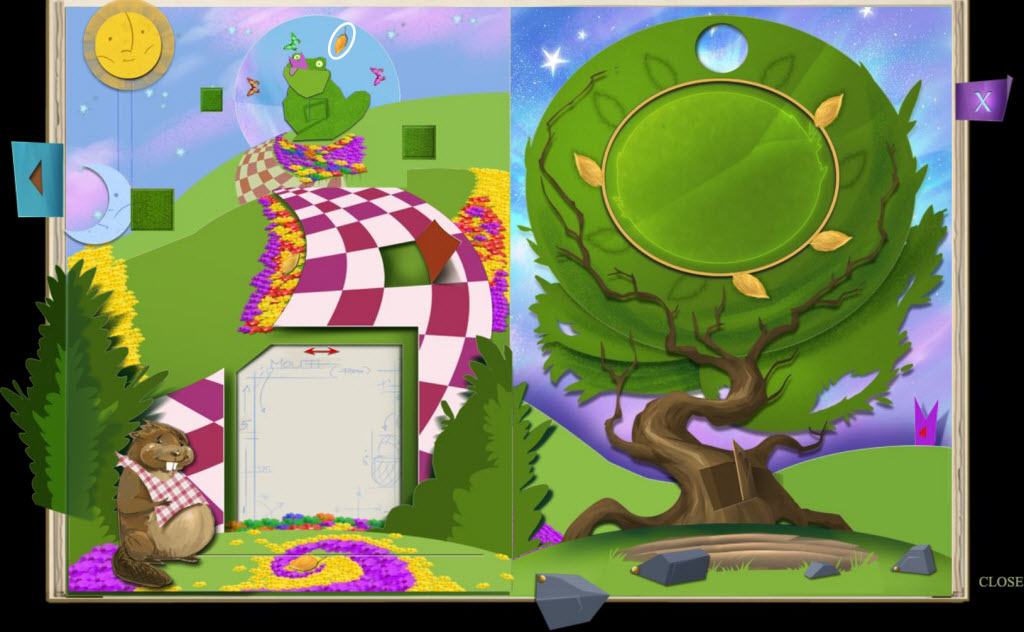
- place the frog shrub on the correct square
- pull the tab on his tongue and take the Leaf from the dial
- reset the beaver and pull the white space (in the path) to the left for a new shrub
- pull the beaver to the left once again
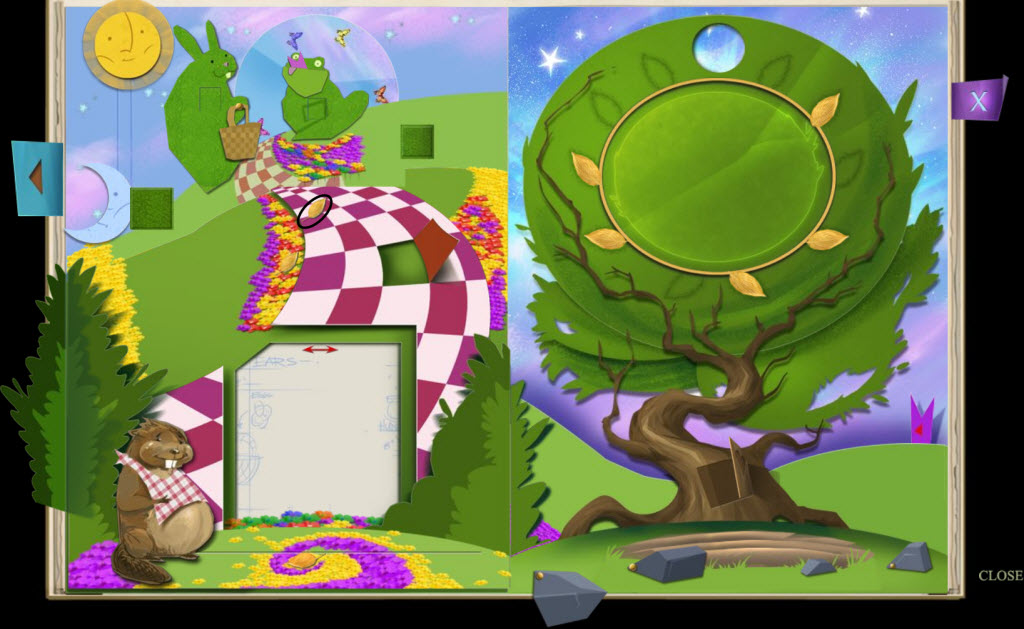
- place the rabbit shrub on the correct square
- turn the rabbits basket upside down and a Leaf will fall out
- reset the beaver again and get a new shrub - repeat process
- place the bear shrub on the correct square
- reset the beaver again and get a new shrub - repeat process
- place the elephant shrub on the correct square
- life up the elephants ear (pig)
- move the elephants trunk so it fills the bears pot with water
- pick up the three Leaves
- turn the elephants trunk towards the right page so he waters the dry ground
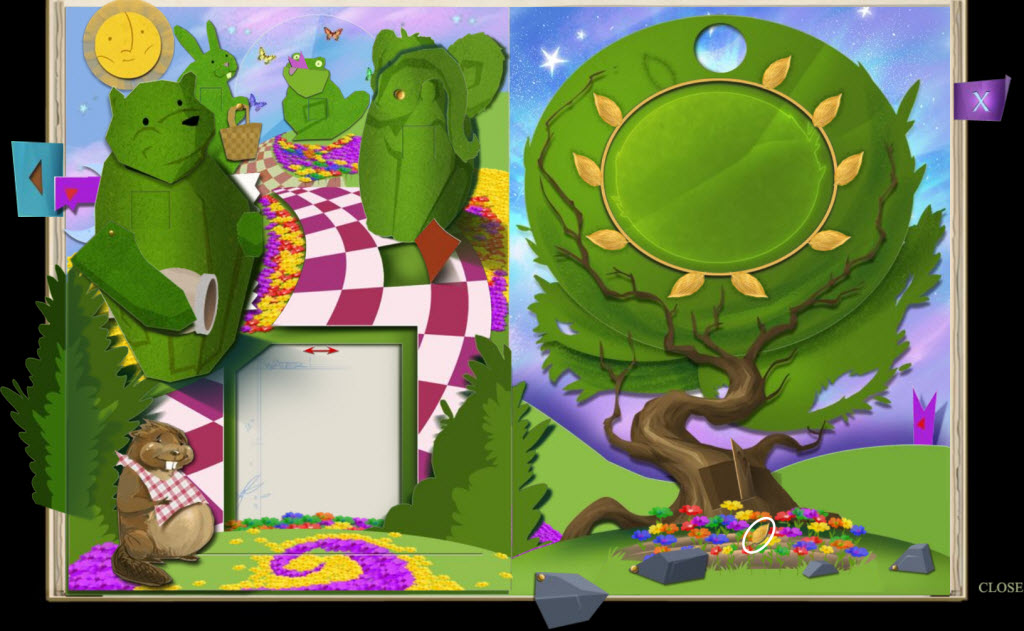
- pick up the Leaf among the flowers
- pull the golden tab on the tree to read the story
- the tab to the right of the tree will make flowers appear on the hillside
- change day into night and pull tab down that's attached to the bear shrub
- take the Gold Crown from the tree
- close the book
- go up
- examine the frog shrub
- place the Gold Crown on the frog
- take the Painting Scrap
- go up
- replace the two Painting Scraps
- go up
- talk to the Faun
- examine the ground to the right of the Faun
- place the Seeds on the ground
- use the Watering Can on the seeds
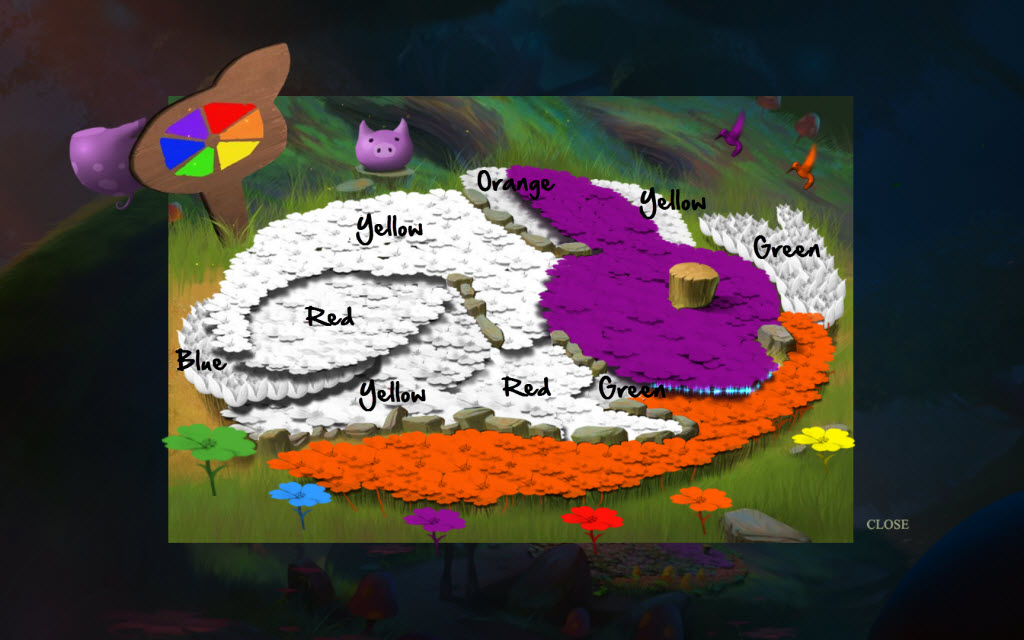
- Humming Bird Puzzle
- watch the hummingbirds paint two areas
- now paint each area by clicking a colored flower and the clicking the area you want to color
- colors side by side as shown on the board cannot touch
- place the pigs head on the pigs body behind the sign to reset the puzzle
- see screenshot for solution
- catch the fireflies
- place the fireflies into the shrubs lanterns
- read the poem on the right
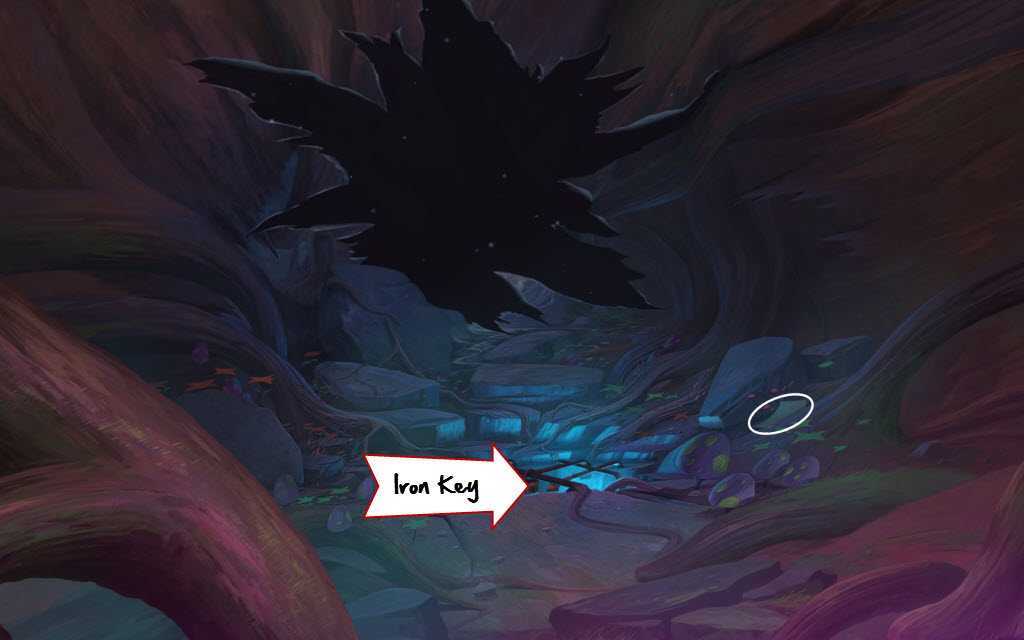
- take the Iron Key and the Diamond
- use the Iron Key on the lock on the gate in the floor
- go down
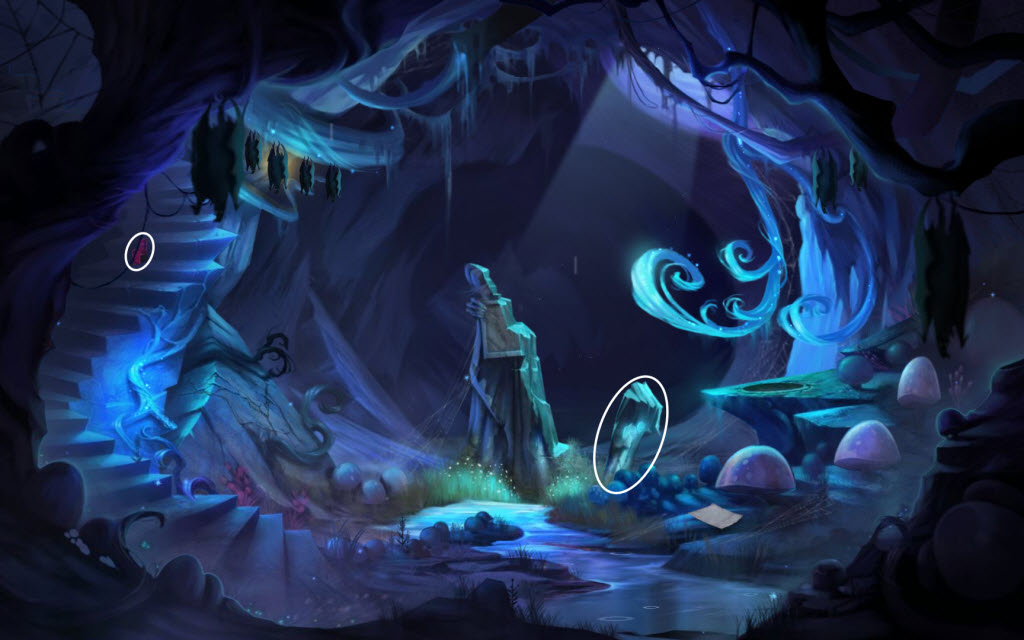
- examine the box on the wall
- take the Sapphire
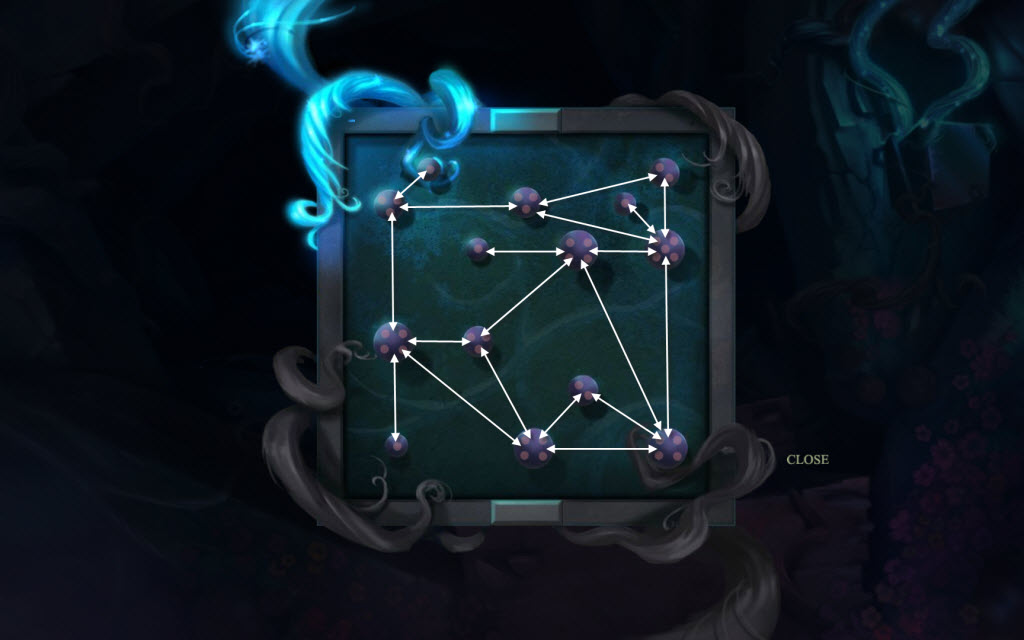
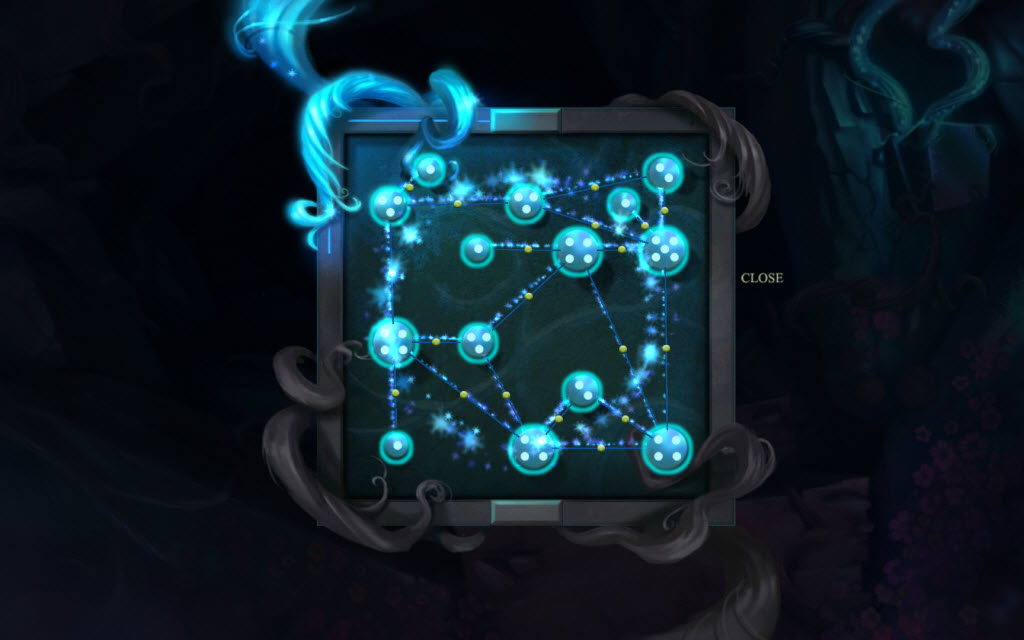
- Cave Puzzle
- connect the dots
- each mushroom has a certain number of dots
- each time you connect one mushroom to another a certain number of dots light up
- you cannot light more than the number of dots on the mushroom
- undo a line by clicking the little yellow dot
- push the upper or lower bar to reset the puzzle
- see screenshot for solution
- pick up the Black Opal and the Glass Shard
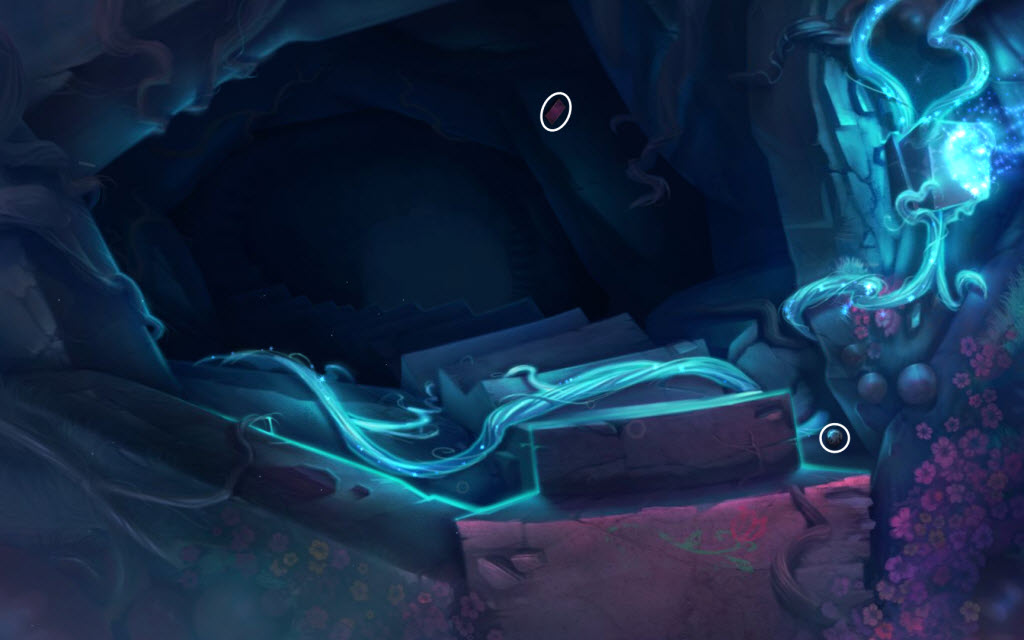
- examine the left side of the stairs
- fix the light by picking up the broken pieces and putting them back
- pick up the Ruby, Emerald, and Stone Head
- go down
- read the note
- pick up the Glass Shard
- pick up the Statue Leg
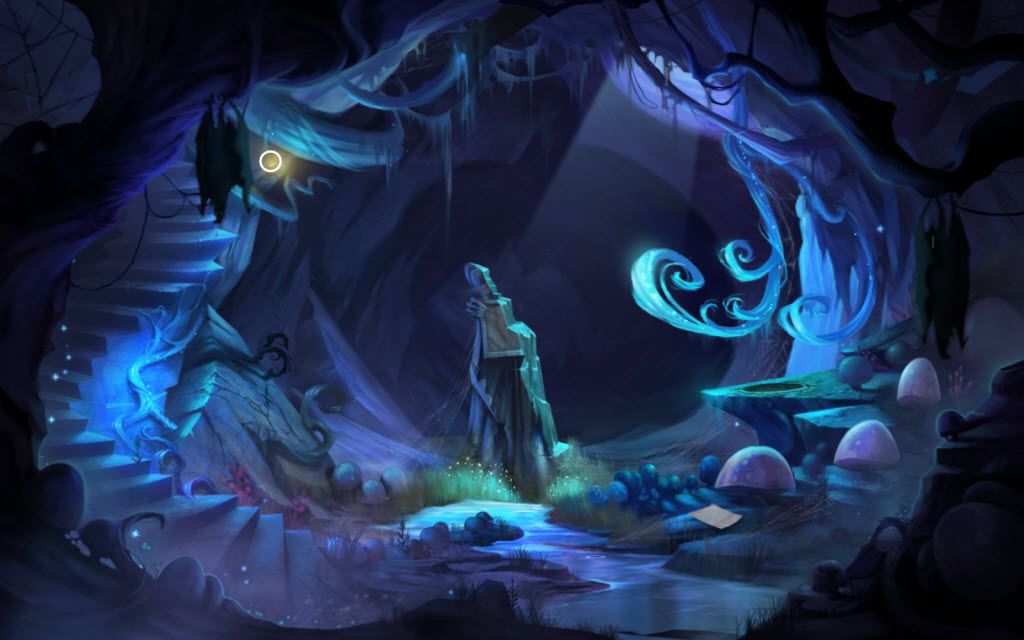
- push the mushrooms one after another to get some of the bats to leave
- take the Yellow Topaz
- examine the round indent in the rocks by the mushrooms
- take the Glass Shard
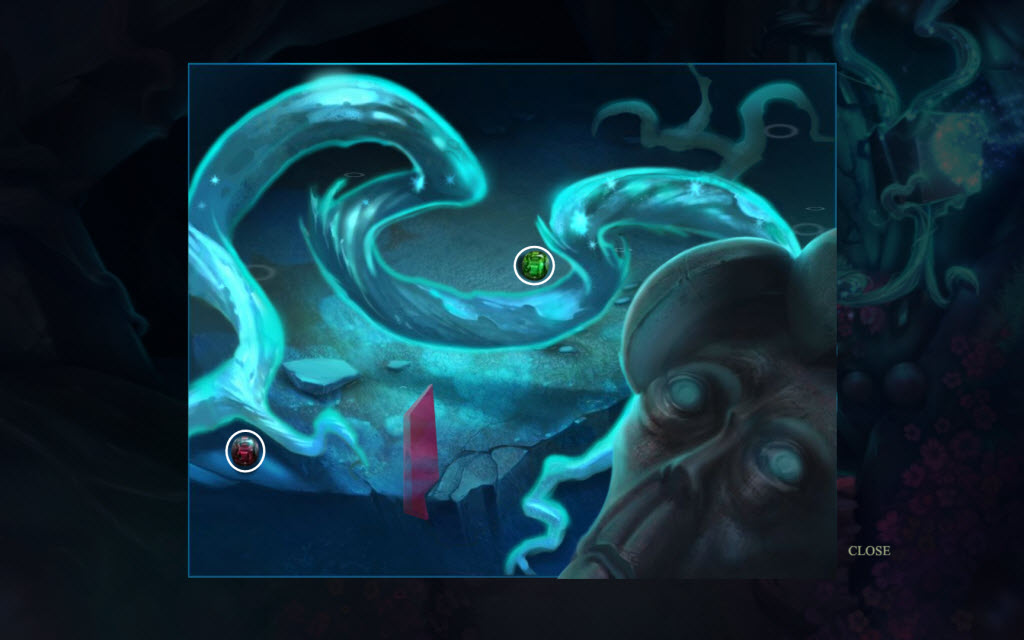
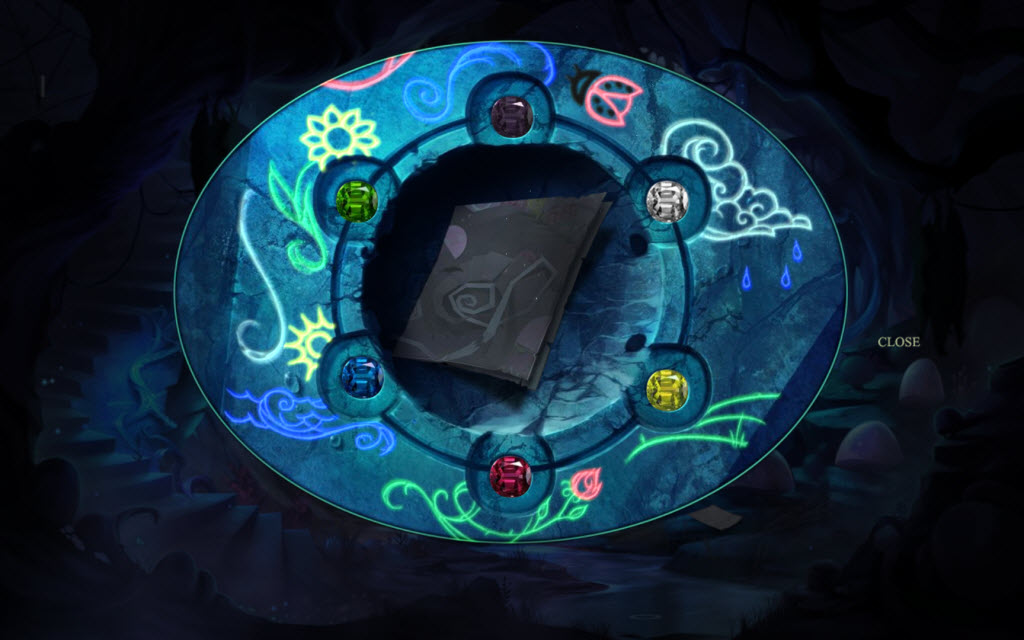
- Gem Puzzle
- place all the Gems into the holes by matching the colors with the engravings
- see screenshot for solution
- take the Storybook Page
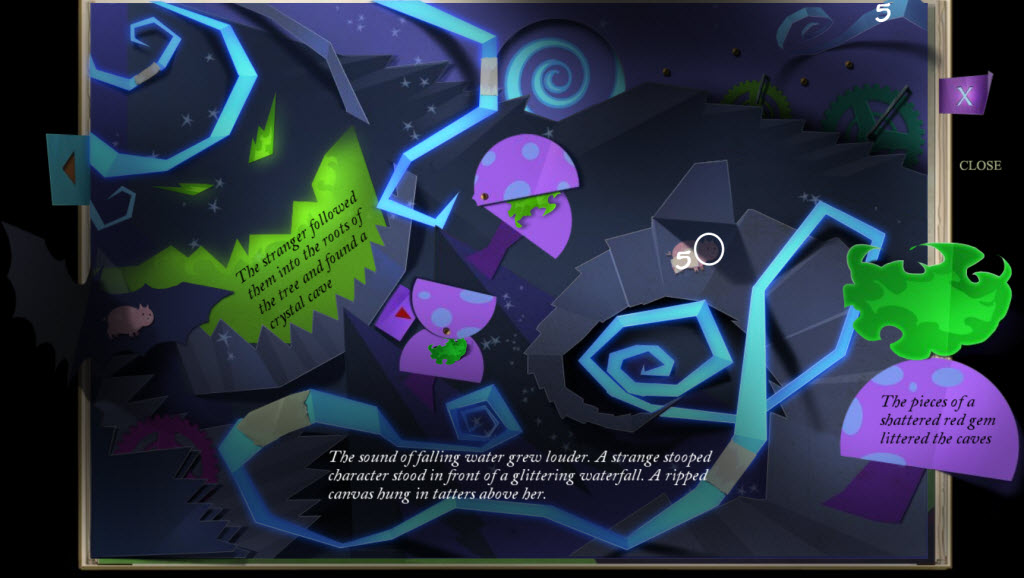
- Storybook Puzzle
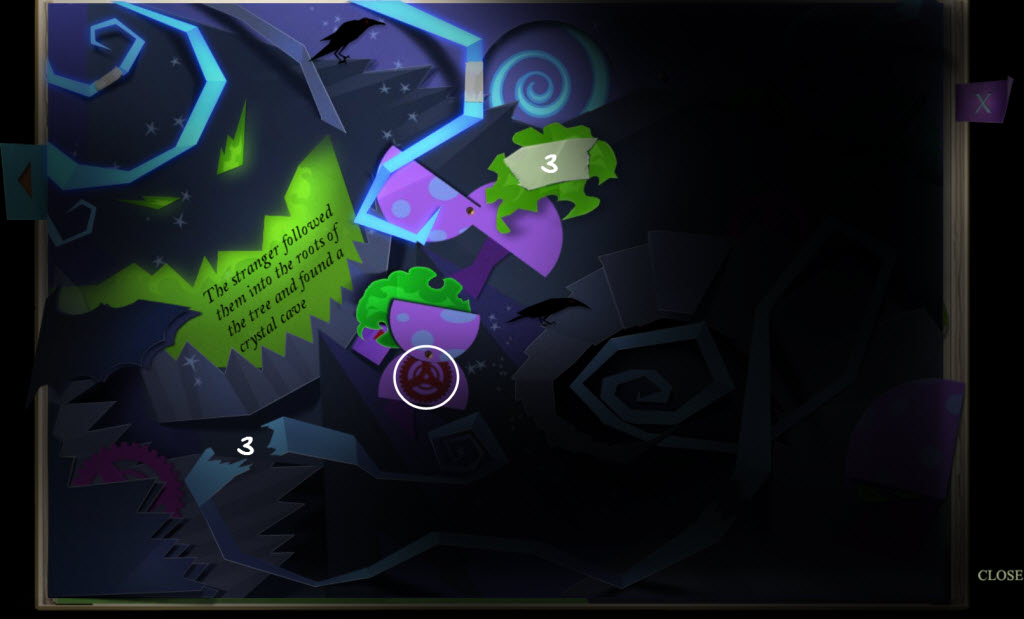
- pick up the piece of Tape in the upper-left corner
- place the tape over the torn part
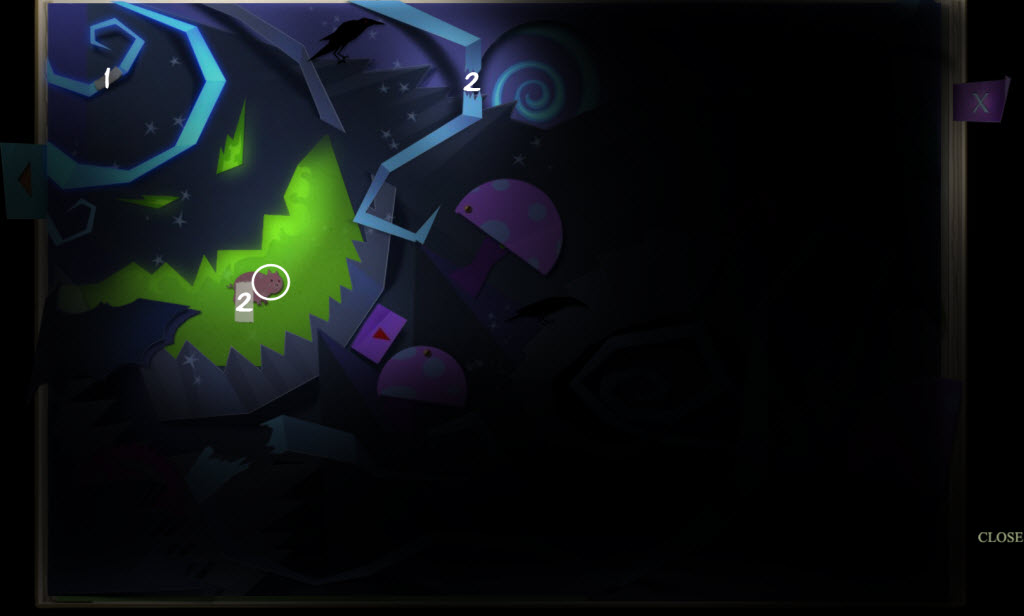
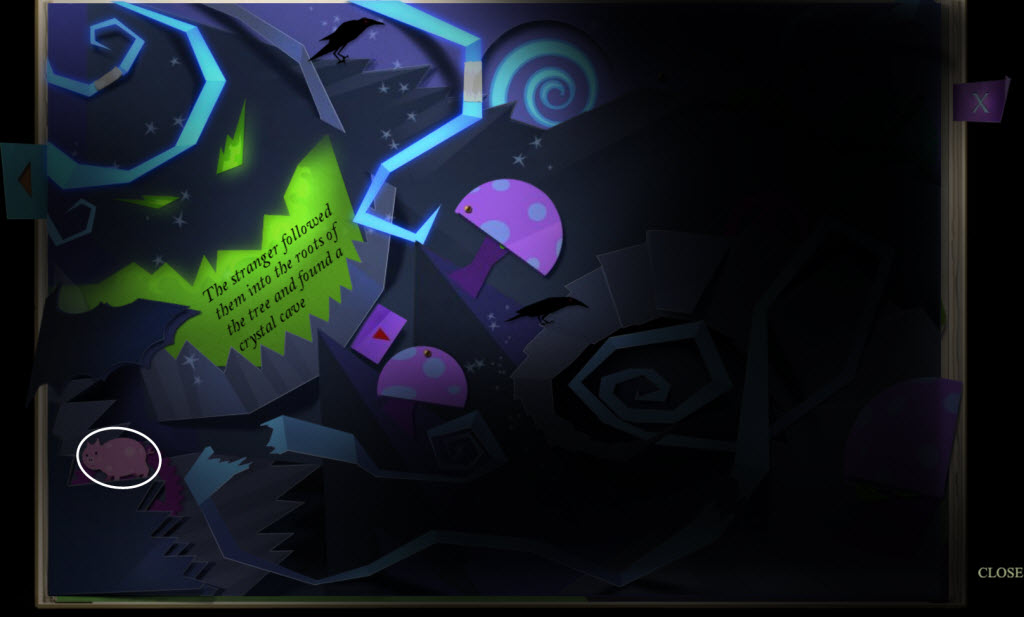
- pull the tab all the way down (pig)
- take the piece of Tape off the pig and repair the torn part
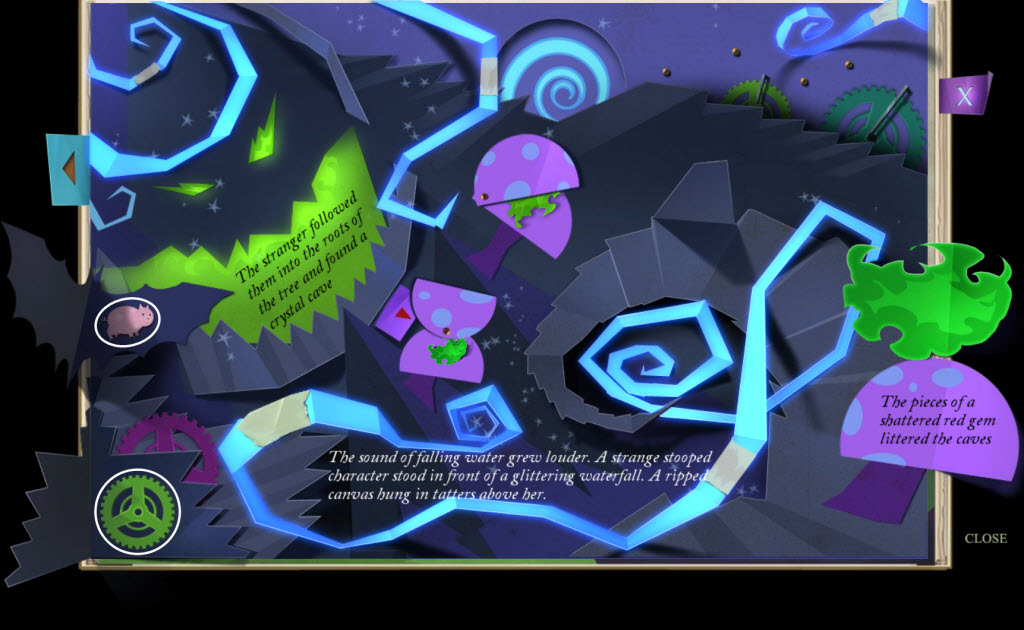
- watch the gear at the bottom-left (pig)
- lift the top mushroom and take the piece of Tape
- use the piece of tape to repair the torn part
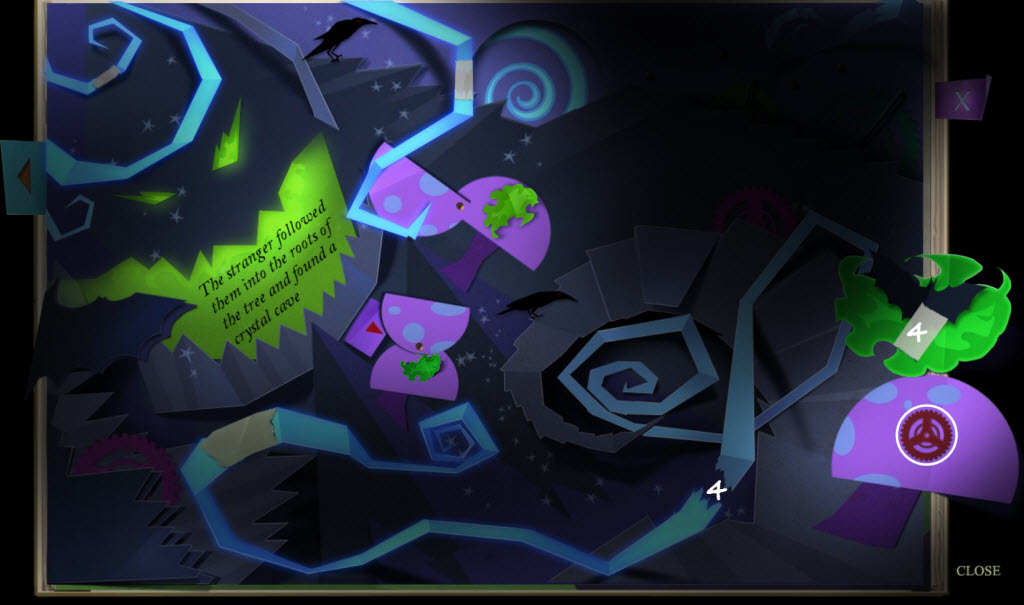
- lift up the top of the bottom mushroom and take the Gear
- life up the top of the right mushroom
- click on the green leaves
- take the Tape and repair the tear
- take the Gear
- pick up the Gear
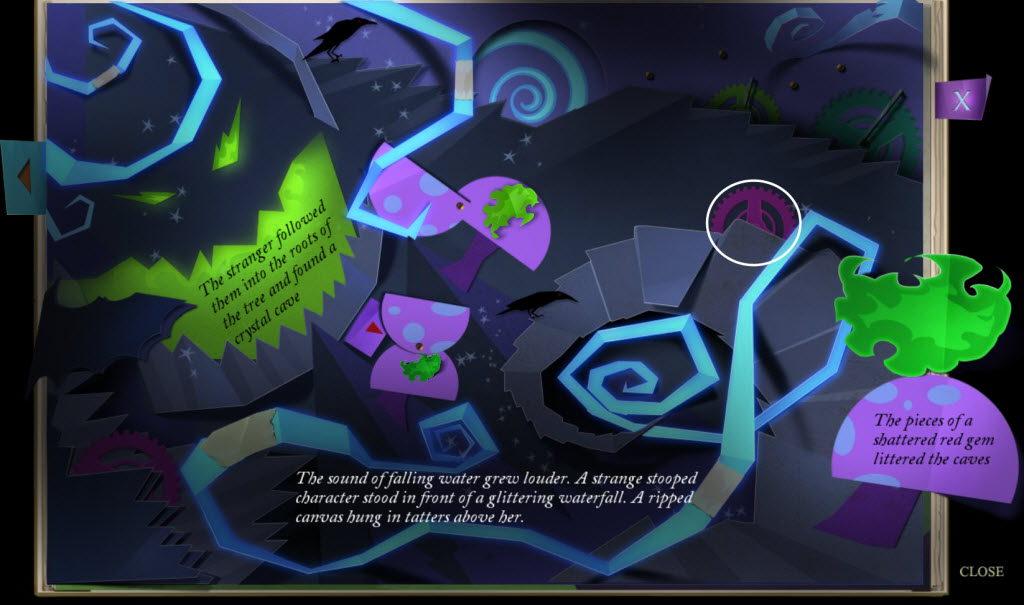
- lift up the stair step (pig)
- take the Tape and use it to repair the upper-right corner
- open up the leaves in the lower-left corner and take the Gear
- open up the bat wings (pig)
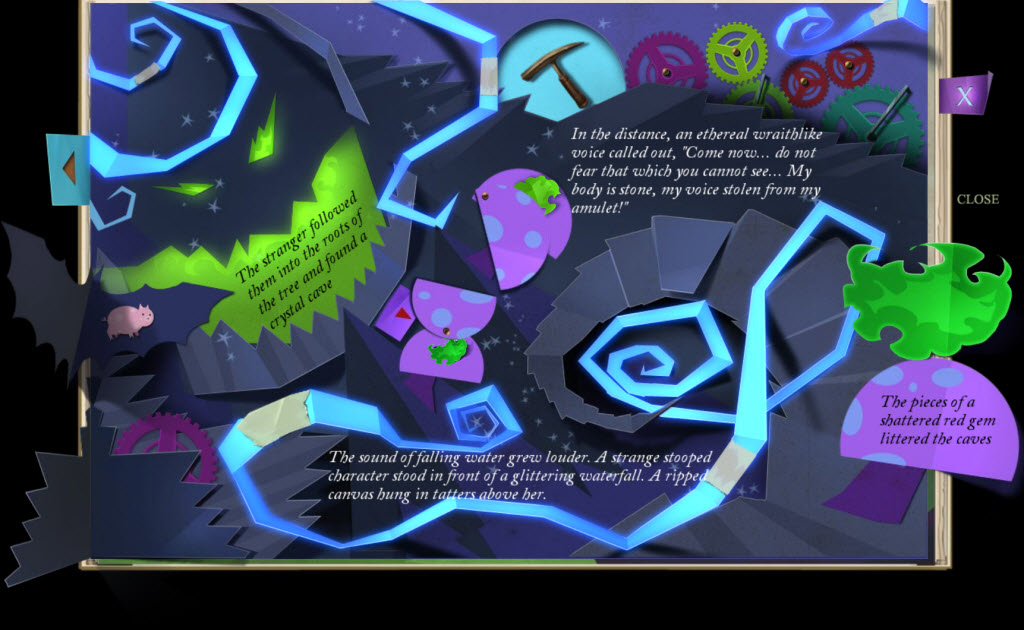
- place the Gears in the back of the book
- take the Pickaxe
- you can click the ravens and they will fly away
- close the book
- examine the rocks on the left side
- use the Pickaxe to clear the rocks
- take the Stone Torso and the Glass Shard
- repair the statue wit the Stone Leg, Torso and Head
- examine the amulet - you need mo glass shards
- go up and look to the left of the steps
- use the Pickaxe to get the Glass Shard out
- go up
- examine the statues amulet
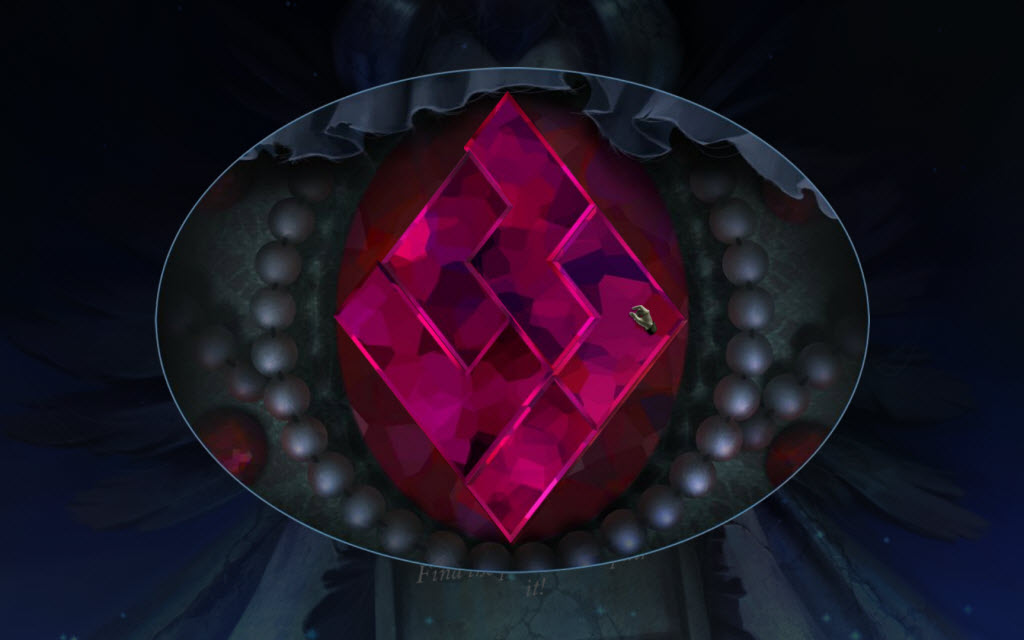
- Amulet Puzzle
- place the Glass Shards in the amulet
- see screenshot for solution
- pick up the chalk and draw the outline of Iris
- Iris Puzzle
- pick the outline that will get Iris from one side to the next
- use the chalk to draw the outline
- solution: stairs, diagonal line, doorway, ladder, trampoline, sailboat, palm tree, flying carpet, weight, cannon, key
- take the Painting Scrap
- go up and down
- use the Painting Scrap in the tear in the painting
- examine the snowy ground in front of you and take the Stone Disc
- take the Stone Disc in the left wall
- go forward
- examine the left peak
- pick up the Sunstone and the Stone Disc and after you clear away the snow
- examine the middle stone
- take the Stone Disc
- go down
- examine the snowy ground in front of you again
- place the Sunstone in the hole
- take the Key
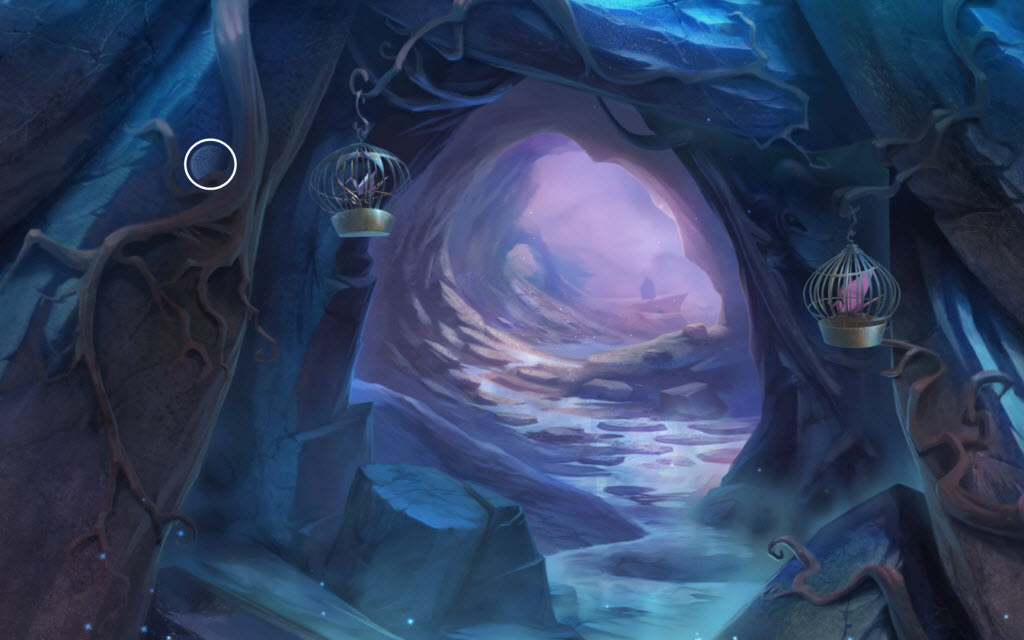
- use the Key on the left birdcage
- unfold the origami bird and take the Legend
- take the Stone Disc
- examine the snowy ground in front of you
- place the Legend on the stone
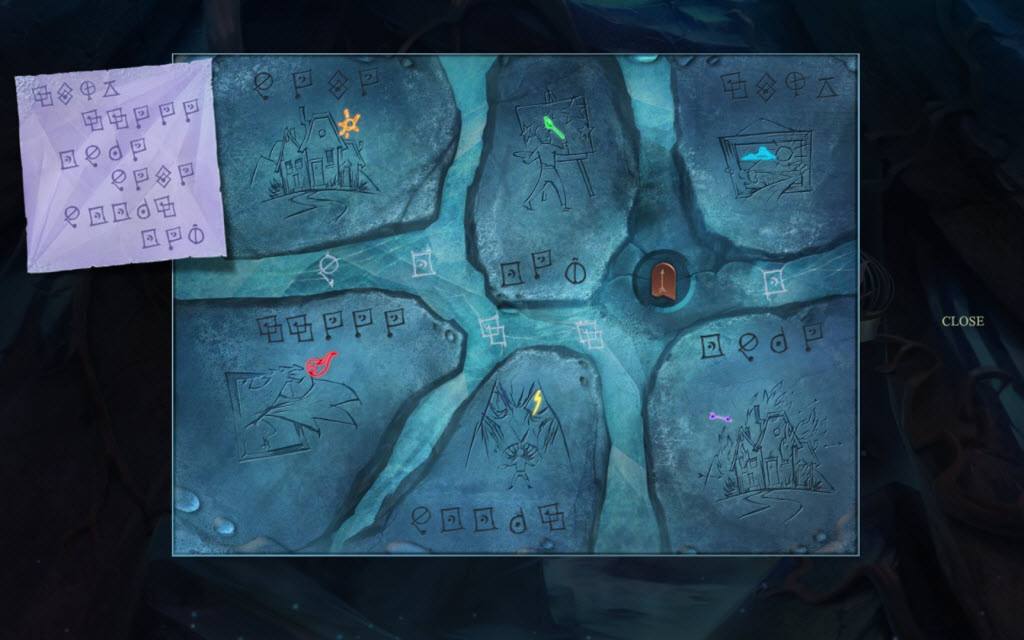
- Symbol Puzzle
- using the legend on the left rearrange the symbols so that pictures appear
- the pictures need to be in the correct order
- if a symbol lights up then you have it in the correct place - if I symbol does not light up you need to find another spot the symbols will fit
- see screenshot for solution
- make a note of the order of the symbols
- take the Ceramic Tab
- examine the right birdcage
- replace the Ceramic Tab
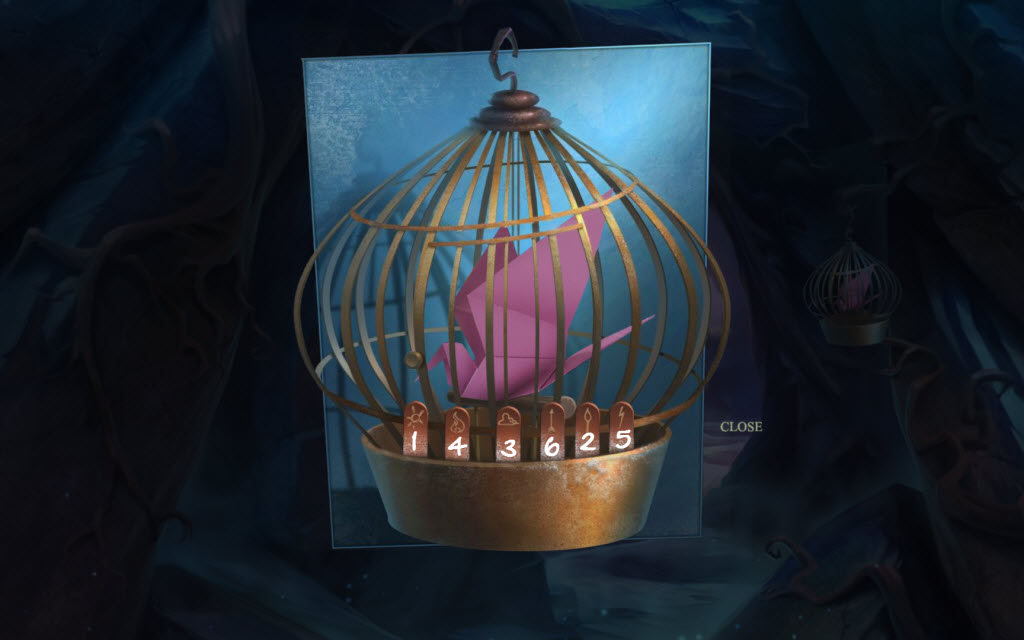
- Birdcage Puzzle
- drag the symbols into order as you saw them on the picture
- solution: sun, paintbrush, cloud, fire, lightning, arrow
- take the two Stone Discs
- go forward
- examine the left peak
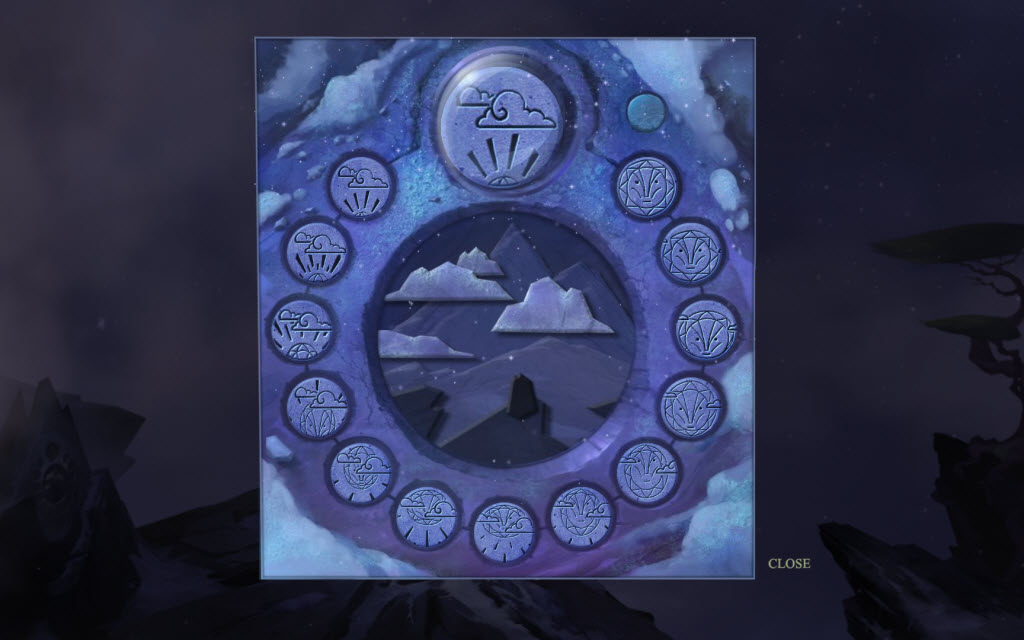
- Stone Disc Puzzle
- replace all the Stone Discs
- put them in order from clouds to sun
- push the upper-right green button when you think you have it correct
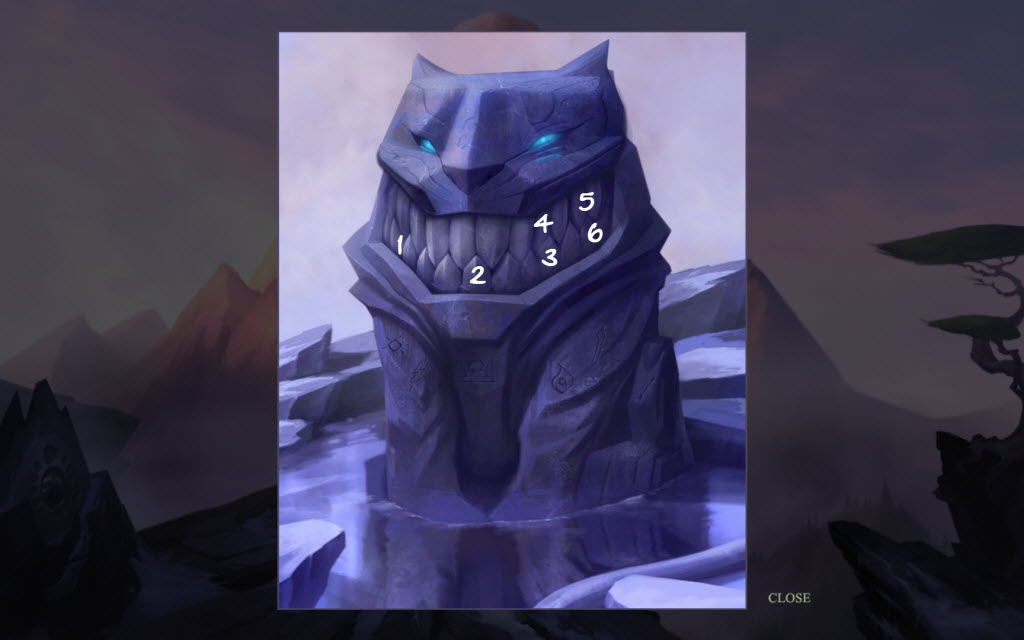
- examine the stone cat
- click his mouth
- Stone Cat Puzzle
- click his teeth to see the colors
- click them in order according to the symbols on his body
- examine the mountains "hand" (right side)
- start removing rocks
- receive Sharp Rock
- use the Sharp Rock to remove the tree branches
- take the Shield
- take the pig (pig)
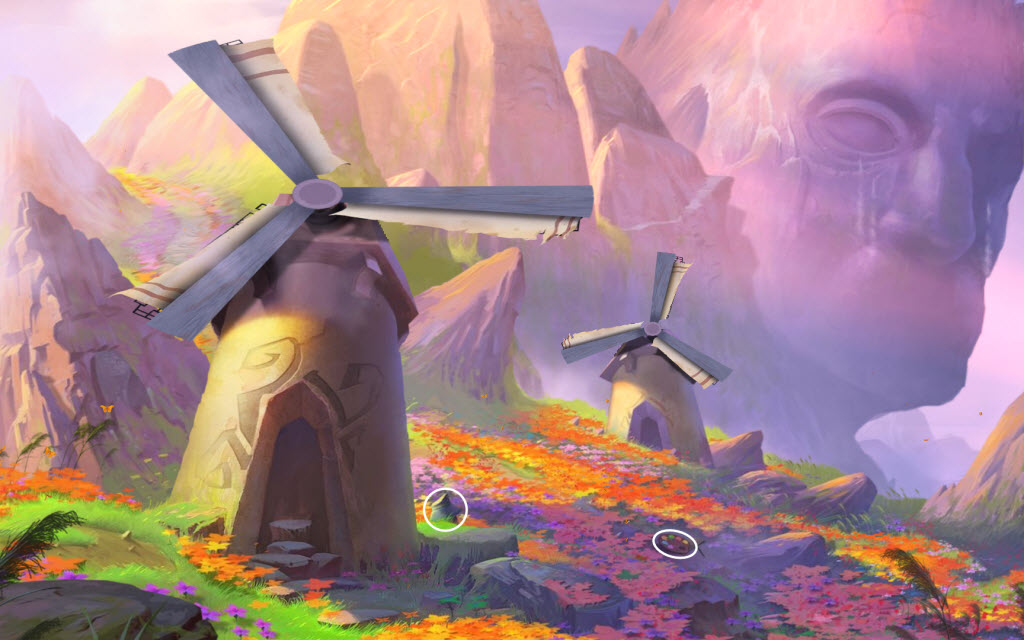
- go forward
- pick up the Paint Palette and read the note
- pick up the Broken Statue
- look in the right windmill
- take the Papers from the back wall
- go forward (the arrow is to the left of the left windmill)
- examine the ledge
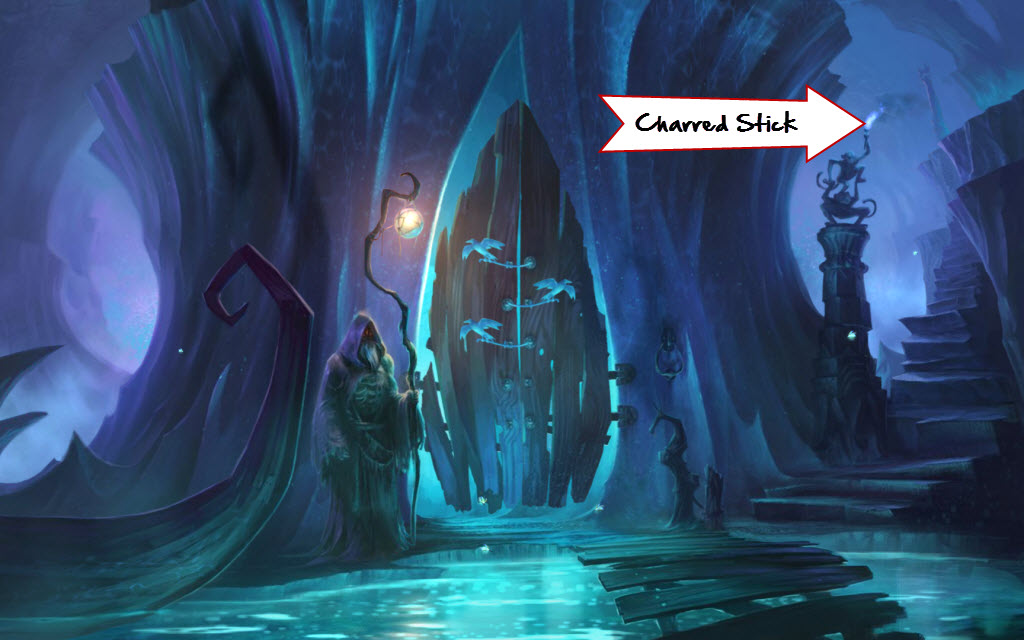
- pick up the Broken Statue and the Charred Stick from the fire pit
- pick up the Storybook Page
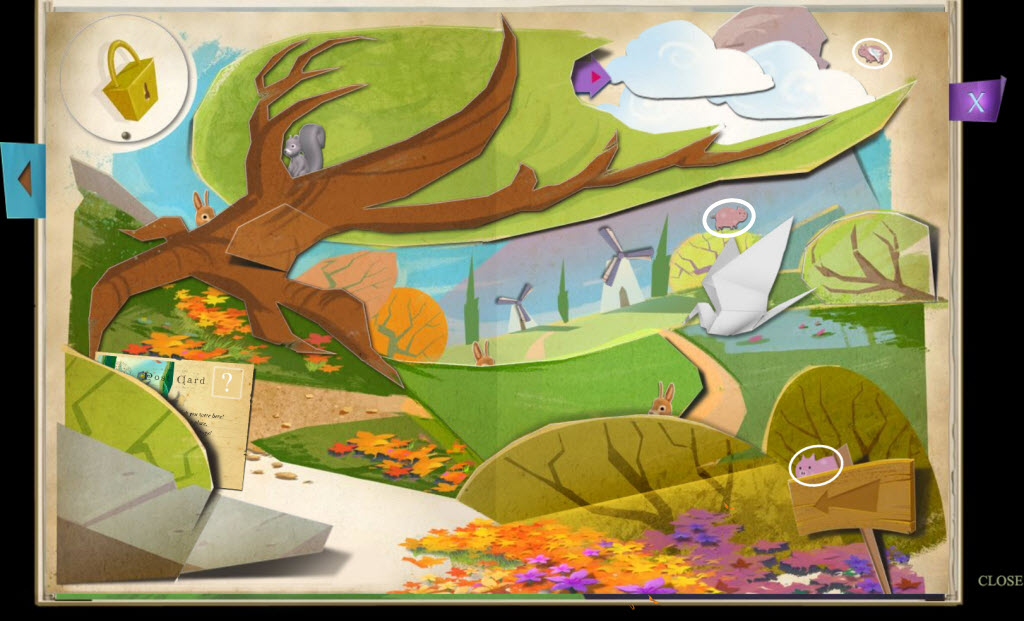
- Storybook Puzzle
- take the flying pig (pig)
- take the pig behind the wooden sign (pig)
- take the pig from on top of the tree in the back (pig)
- pickup the left flap (pig)
- open the tree trunk (pig)
- unfold the origami bird
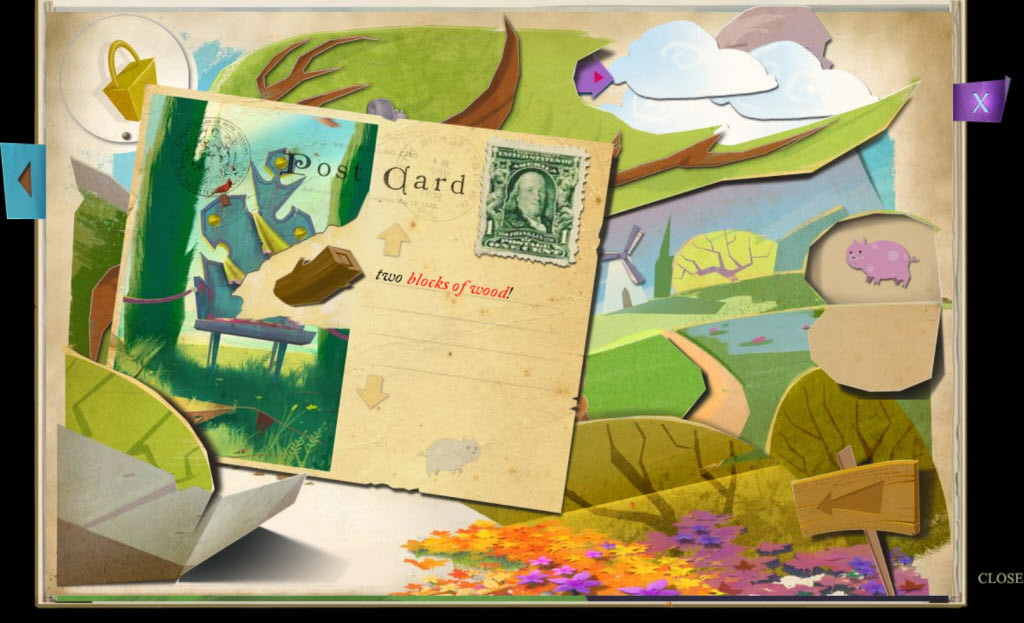
- take the Stamp
- place the Stamp on the postcard
- use the arrows to read the note
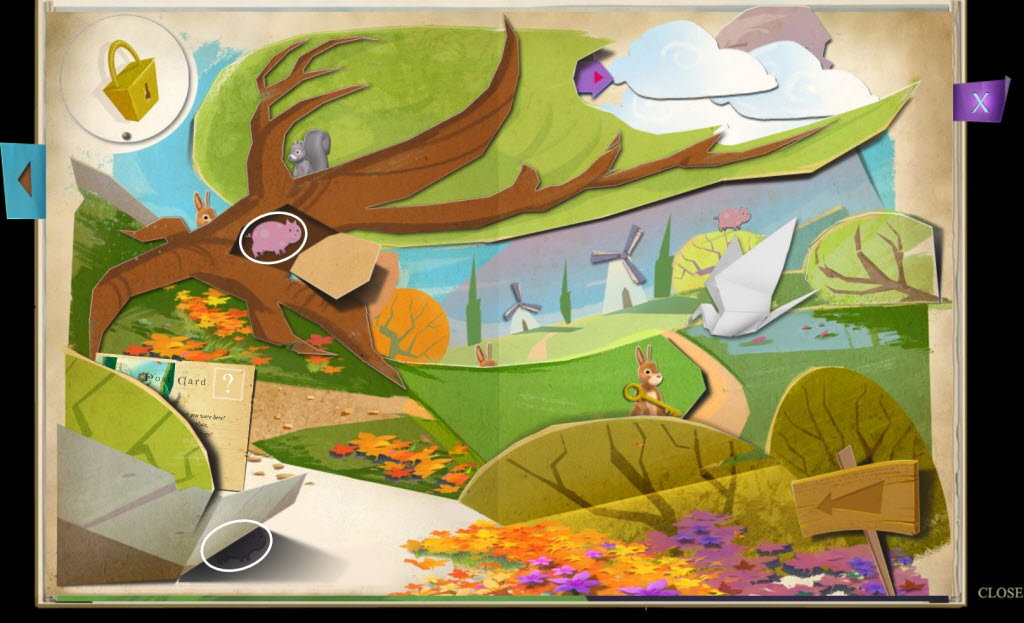
- take the pig (pig)
- rip part of the picture on the left side
- take the Wood Block
- when the rabbit throws the Key up in the air - grab it!
- use the Key on the lock
- move the circle with the lock on it
- take the pig (pig)
- take the Wood Block
- pull down the right shrub (pig)
- you can pull the purple tab
- pull down the face behind the clouds and bats fly out
- close the book
- examine the left rock
- place a Paper over the etching
- use the Charred Stick to make a a copy
- take the Rubbing
- go down
- examine the left rock
- place a Paper over the etching
- use the Charred Stick to make a a copy
- take the Rubbing
- go down
- examine the etching in the rubble
- place a Paper over the etching
- use the Charred Stick to make a a copy
- take the Rubbing
- go up
- examine the right windmill
- place the Rubbings on the wall
- place the Paint Palette on the table
- place the Shield on the stand
- take the cloth and dip it in the polish
- receive Polishing Cloth
- use the Polishing Cloth on the shield
- make a note of the symbols on the shield
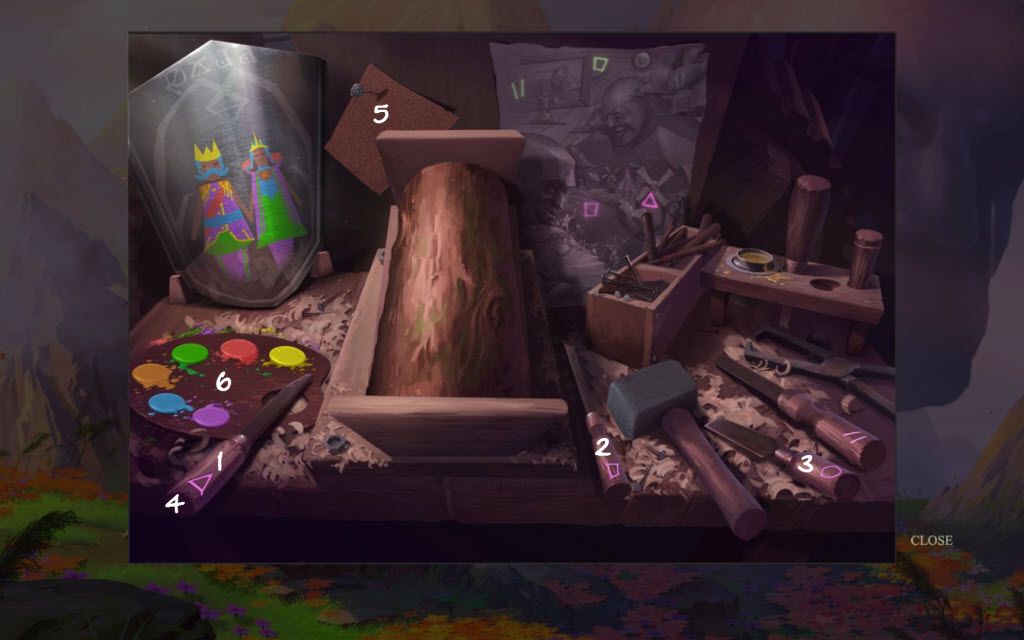
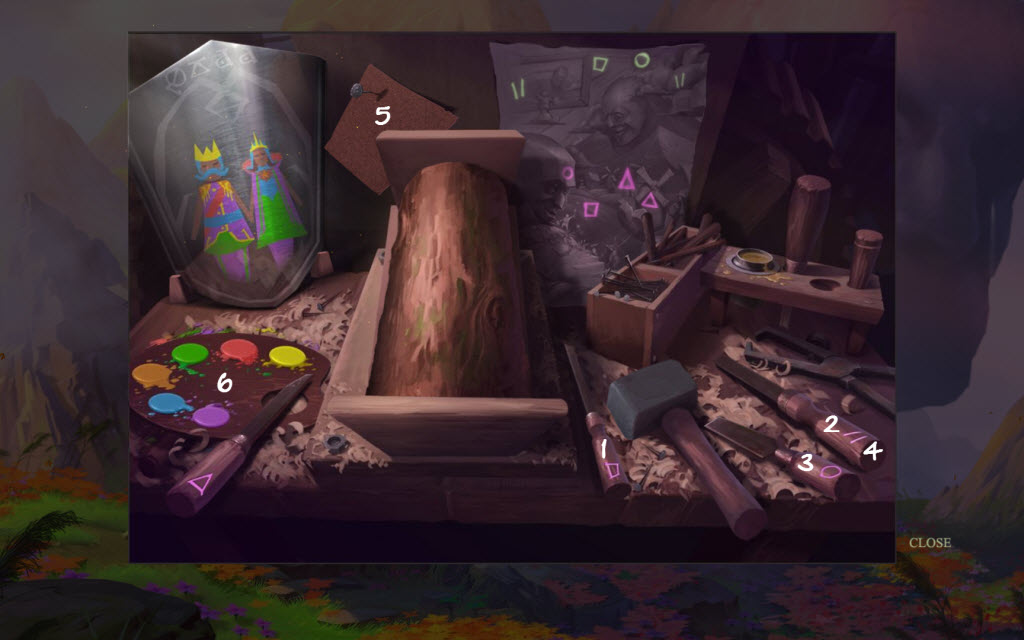
- place a Wood Block in the middle (vice)
- Wood Carving Puzzle
- watch the purple symbols as they appear on the picture
- make a note of the order
- each tool has a symbol on the handle
- use the tools in the correct order
- use the sandpaper on the statue
- paint the statue to match the one on the shield
- make a note of the order of the green symbols
- repeat process for the second block of wood
- take the Wooden King and Wooden Queen
- exit out and examine the left windmill
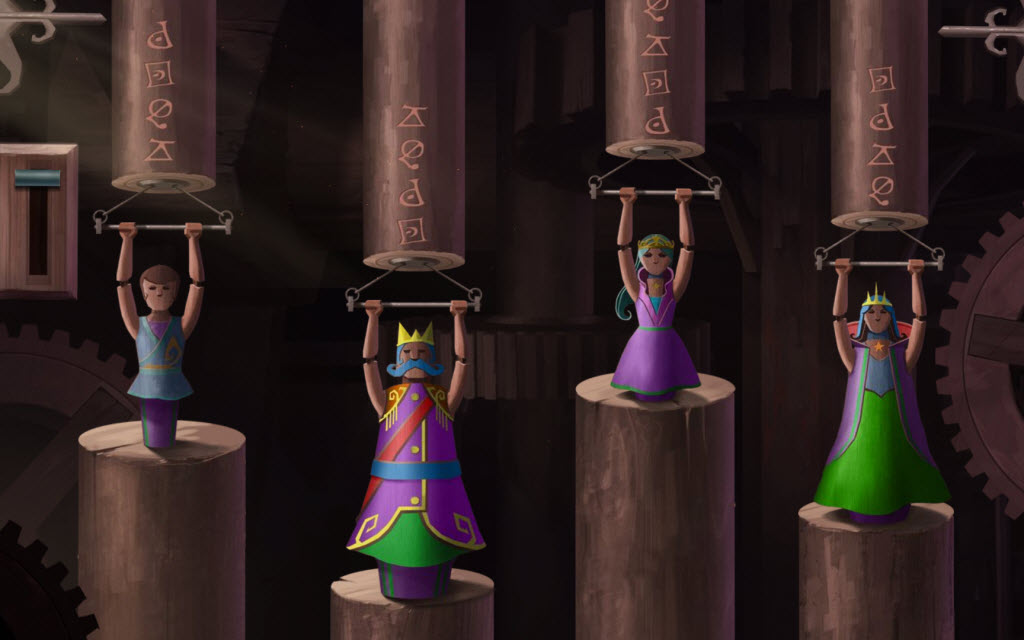
- Wooden Doll Puzzle
- use the Broken Statue pieces on the broken statue
- place the statues in the correct order
- the statues should be placed so the top symbols match those on the shield
- pull the lever
- go up twice
- examine the ledge
- read the note
- pick up the Canvas Scrap
- repair the tear in the painting with the Canvas Scrap
- go forward
- go forward
- speak to the guardian
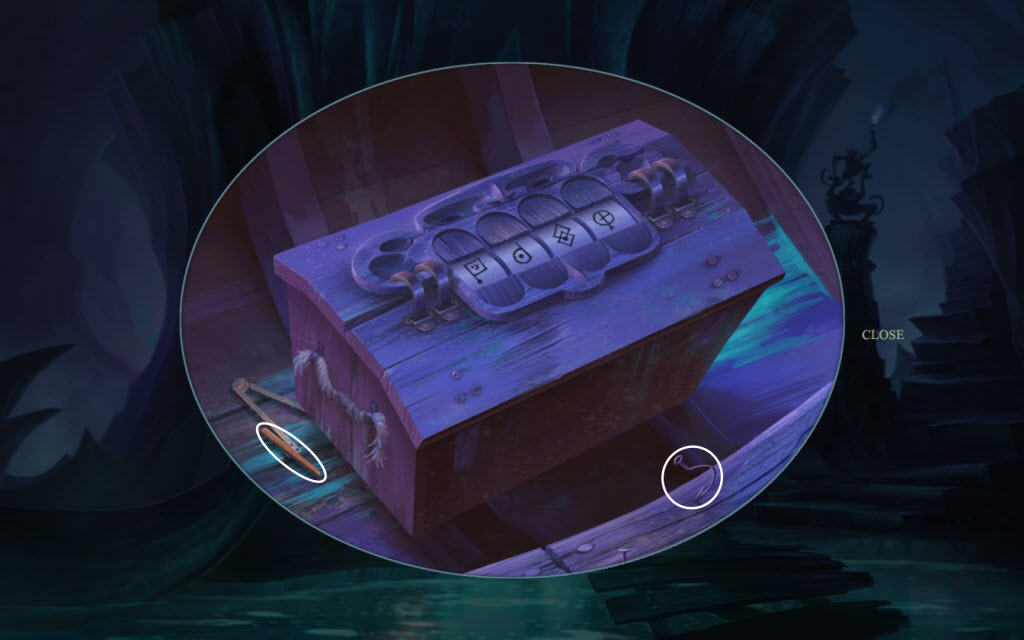
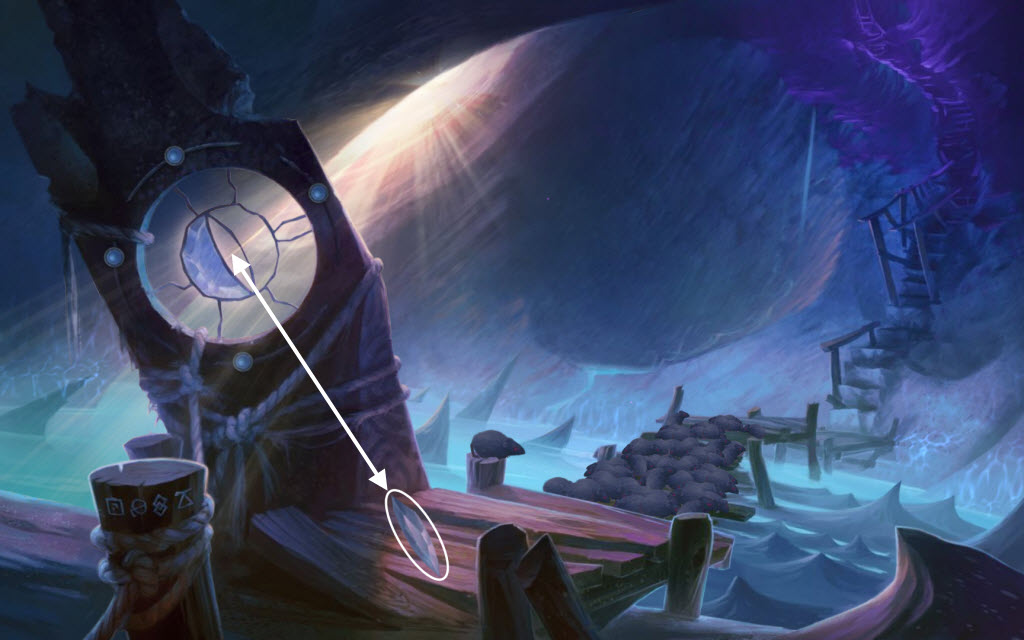
- examine the boat
- take the Pencil and the Hook
- use the Charred Stick on the monkey statue
- receive Lit Torch
- go right
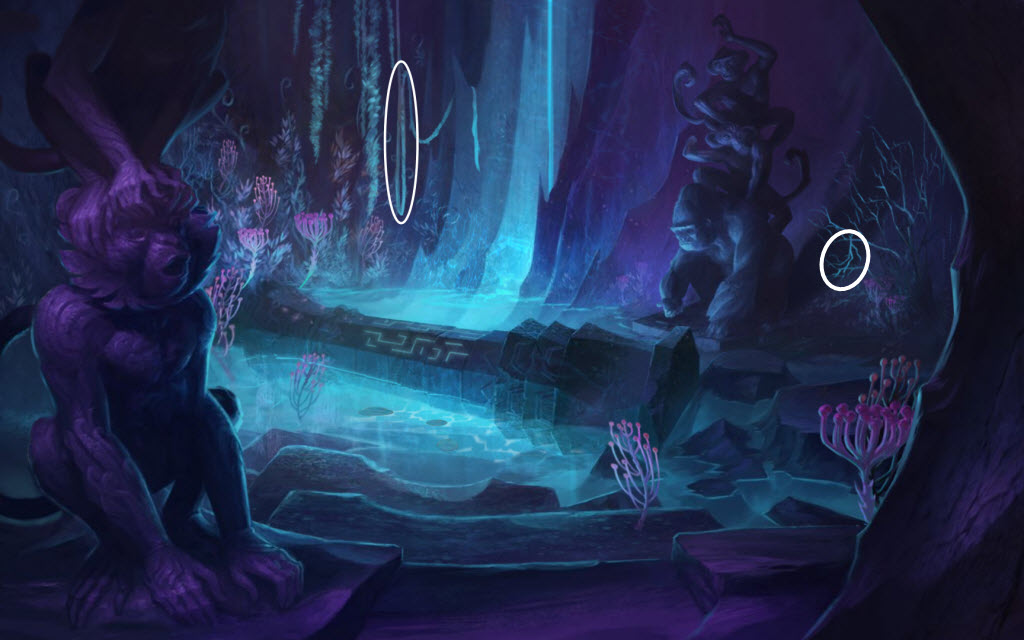
- examine the gorilla statue on the right
- pick up the ceramic pieces
- take the Vine Rope and Dry Twigs
- look at the column in the water
- move the middle-left lilypad
- combine the Vine Rope + Hook in your inventory
- use the Rope and Hook to get the Mold
- use the Rope and Hook again to get the Cage Key
- move the middle-right lilypad and make a note of the symbols
- go down three times
- examine the cage in the owl's mouth
- use the Cage Key and take the Metal Dragon
- look at the sketch under the owl's left wing
- go forward and right
- examine the gorilla's hand
- place the Mold onto the stone slab
- place the Dry Twigs under the gorilla's hand
- place the Metal Dragon in the cup
- light the Dry Twigs with the Lit Torch
- click the cup to pour the silver into the mold
- take the Metal Raven
- make a note of the symbols in the cup
- go down
- use the Raven Sketch and Metal Raven on the door
- Raven Door Puzzle
- move the ravens until they are all at the outer edge and sparkle
- see video for solution
- go forward
- pick up the Beetle
- go down and right
- examine the column in the water
- Column Puzzle
- place the Beetle on the bottom of the column
- rotate the column's pieces so that the Beetle makes a solid path to each of the flowers (one at a time)
- see videos for solutions
- take the Glowing Eyes
- go down and up
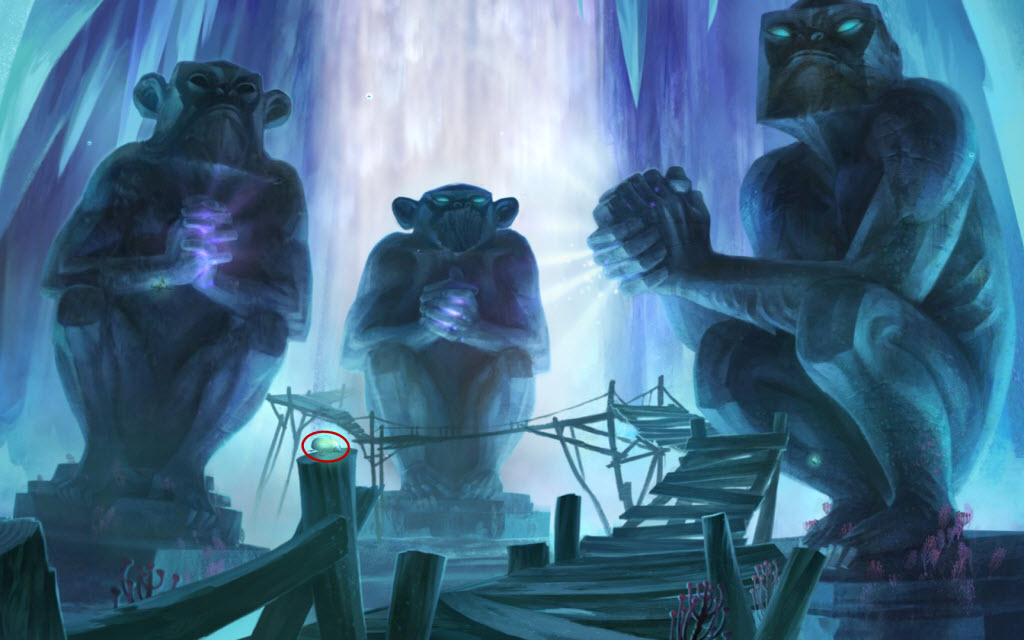
- place the Glowing Eyes in the left monkey
- take the Stone Heart
- make a note of the symbols on his chest
- go down twice
- examine the owl
- place the Stone Heart on the owl
- go left
- make a note of the symbols on the wood post
- pick up the Glass Shard and place it in the eye
- go down and up
- examine the boat
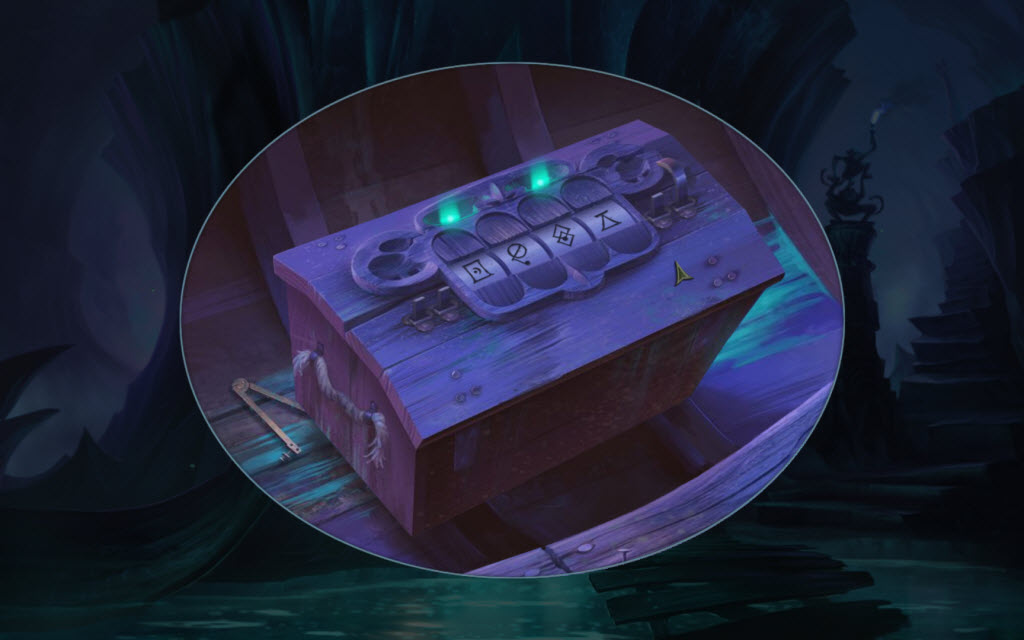
- Boat Puzzle
- you should have found four sets of symbols
- input the four sets of symbols into the chest
- see screenshots for solutions
- take the Glass Shard
- open the piece of paper and take the Gold Coin
- give the coin to the guardian (by the boat)
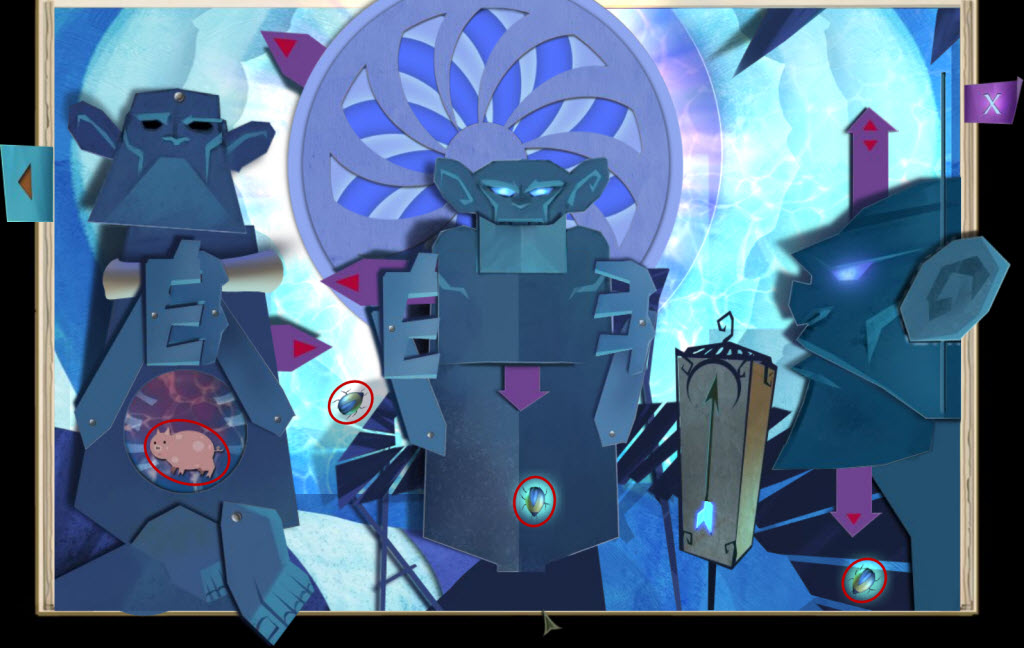
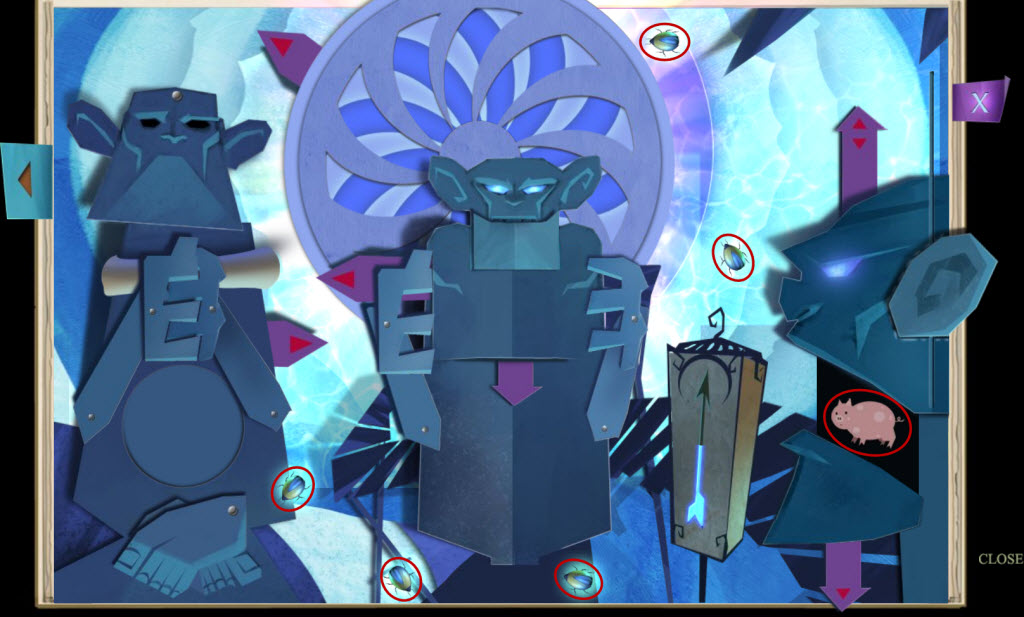
- take the Storybook Page
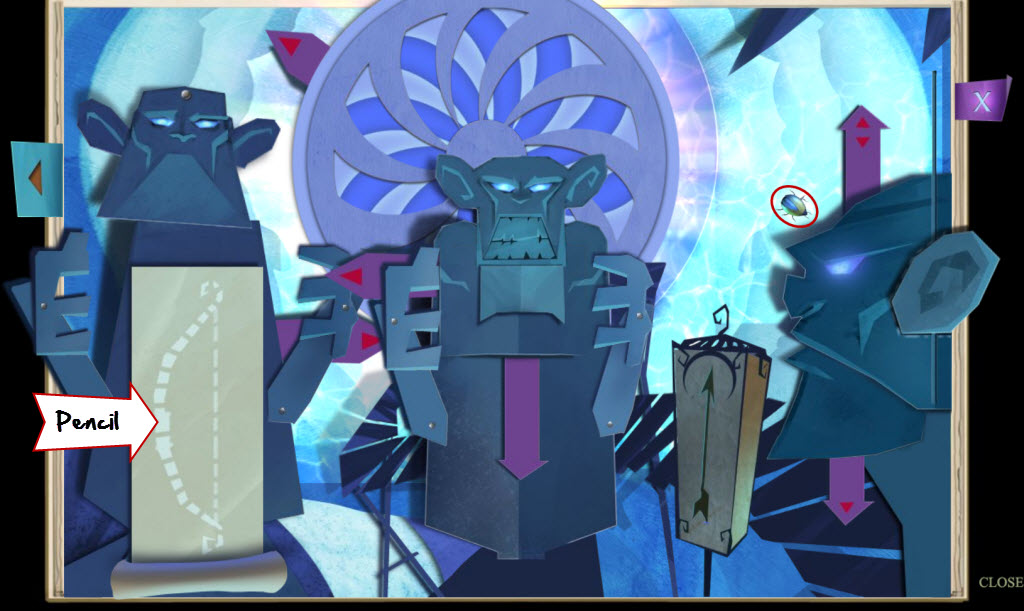
- Storybook Puzzle
- pull the tab on the first (left) monkey
- pull down the scroll
- use the Pencil to draw the outline
- take the Bow
- pull the tab on the middle monkey to move his arms
- pull down his mouth
- catch the Beetle
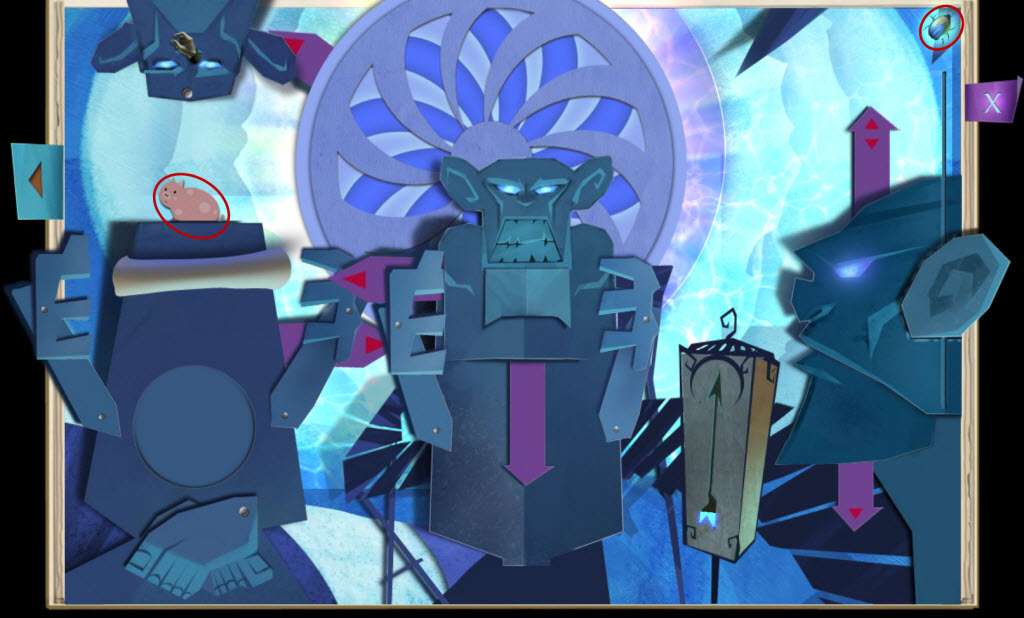
- pull the tab on the third (right) monkey until the ear fits into place
- lift up the first monkeys head (pig)
- catch the Beetle
- pull the tab on the circle
- catch the Beetle
- pull down the foot on the first monkey (pig)
- catch two more Beetles
- pull the tab on the third monkey to open his mouth (pig)
- catch five more Beetles
- take the Arrow
- close the book
- go down and left
- place the Glass Shard in the eye
- Rat Puzzle
- move the buttons around the lens to merge all the cats into one image
- see screenshot for exact location of where the buttons should be
- go forward
- examine the floating boards on the right side
- move the boards
- take the Stone Ears
- go down twice and up twice
- place the Stone Ears on the right monkey
- take the Gemstone
- go down twice, left, and up
- place the Gemstone on the ring finger
- go forward
- Giant Head Puzzle
- flip two circles at a time to reveal a symbol underneath
- match like symbols
- if you run out of matching pairs - click one of the nodes as it hits the wheel and lights up
- a new wheel will appear allowing you to continue matching like pairs
- some pairs may be on different wheels in the same spot
- first click one of the like pairs
- wait for the node to come around and flip the wheel over then click the second of the like pair
- take the Stone Mouth
- go down twice and up twice
- place the Stone Mouth on the middle monkey
- go through the archeway
- give the Bow and Arrow to the statue on the right
- Bow and Arrow Mini Game
- use the Bow and Arrow to shoot the birds
- if you miss the birds get stronger
- keeping shooting the birds until they are all gone
- take the Magic Paint
- go forward
- give the boy the Magic Paint
The End...?
Pigs Locations- Storybook Page 1 - in well bucket
- Storybook Page 1 - in the dragons belly
- Storybook Page 1 - behind the dragons wing
- Storybook Page 2 - behind stone
- Storybook Page 2 - behind leaves
- Storybook Page 2 - in the tree roots
- Garden - torn poster on the sign
- Storybook Page 4 - behind a door in the path
- Storybook Page 4 - behind the left shrubs
- Storybook Page 4 - behind the heart in the tree
- Storybook Page 4 - behind the elephants ear
- Storybook Page 5 - pull the purple tab
- Storybook Page 5 - on the moving gear
- Storybook Page 5 - behind the bat wings
- Storybook Page 5 - under the stair
- Mountain "Hand" Right Side - in the rubble
- Storybook Page 6 - flying pig
- Storybook Page 6 - behind the sign
- Storybook Page 6 - under the left flap
- Storybook Page 6 - in the tree trunk
- Storybook Page 6 - on the bottom of the postcard
- Storybook Page 6 - behind the lock
- Storybook Page 6 - on top of the tree in the back
- Storybook Page 6 - behind the right shrub
- Storybook Page 7 - under the left monkeys head
- Storybook Page 7 - in the left monkeys stomach
- Storybook Page 7 - in the right monkeys mouth
Content(s) of this game guide may not be copied or
published on any other site without permission from Casual Game Guides.
©CasualGameGuides.com 2006 - 2021
