Drawn: The Painted Tower
The Drawn: Painted Tower Walkthrough will take you through the entire game, including every painting, nearly every puzzle, and includes a video for one of the harder puzzles. In the first game in this ongoing series, you find yourself making your way to the top of the tower to save a very magical little girl named Iris. Along the way you must enter various paintings and interact with them in order to help save her.
Images©
Big Fish Games
Overview:
Enter the tower and unlock it. The paintings will come alive
and
inside friends will help you, while foes will try and stop you. Help
save Iris, the King's daughter who is trapped at the top of the tower.
Hints: The Stone Guardian will provide hints. Simply click on his portrait and pick which objective you are having trouble with. He can give multiple hints.
Objectives: Your current objective(s) are on the bottom, left of your screen. These will help guide you through the game.
Tower Steps
The Window
The Window 2
The Window
The Witch Doctor
The Window
The Witch Doctor
The Foyer
The Foyer
The Clock Tower
The Clock Maker
The Clock Tower
The Clock Maker
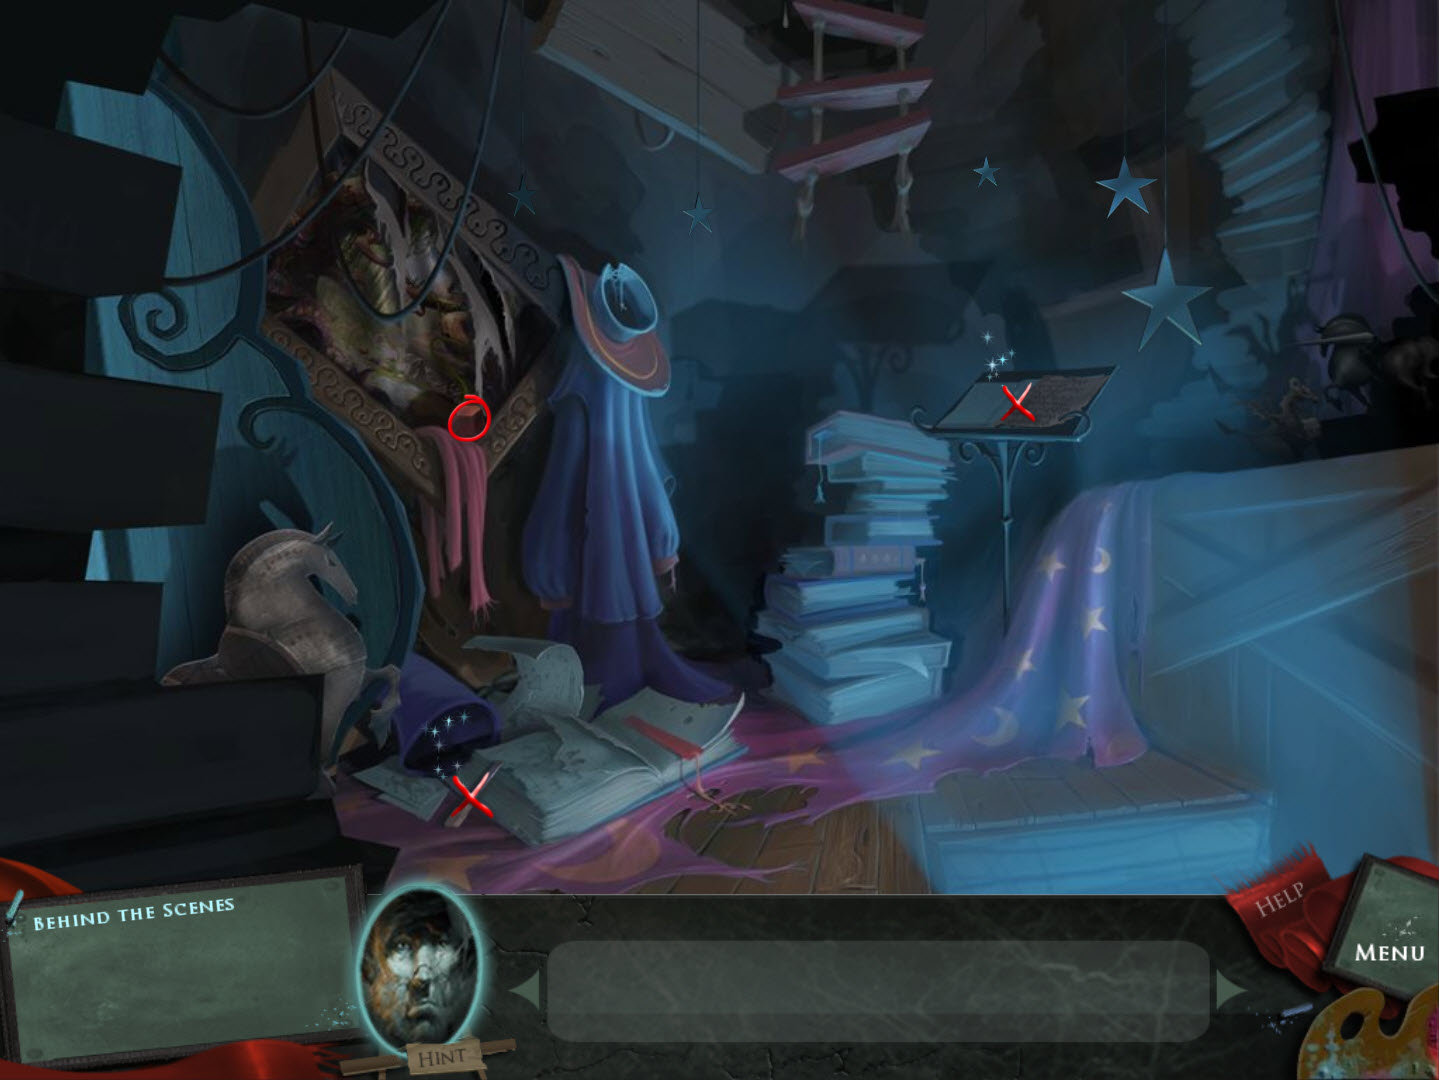
The Theater
The Theater
The Theater
Hall of Giants
The Deep Forest
Hall of Giants
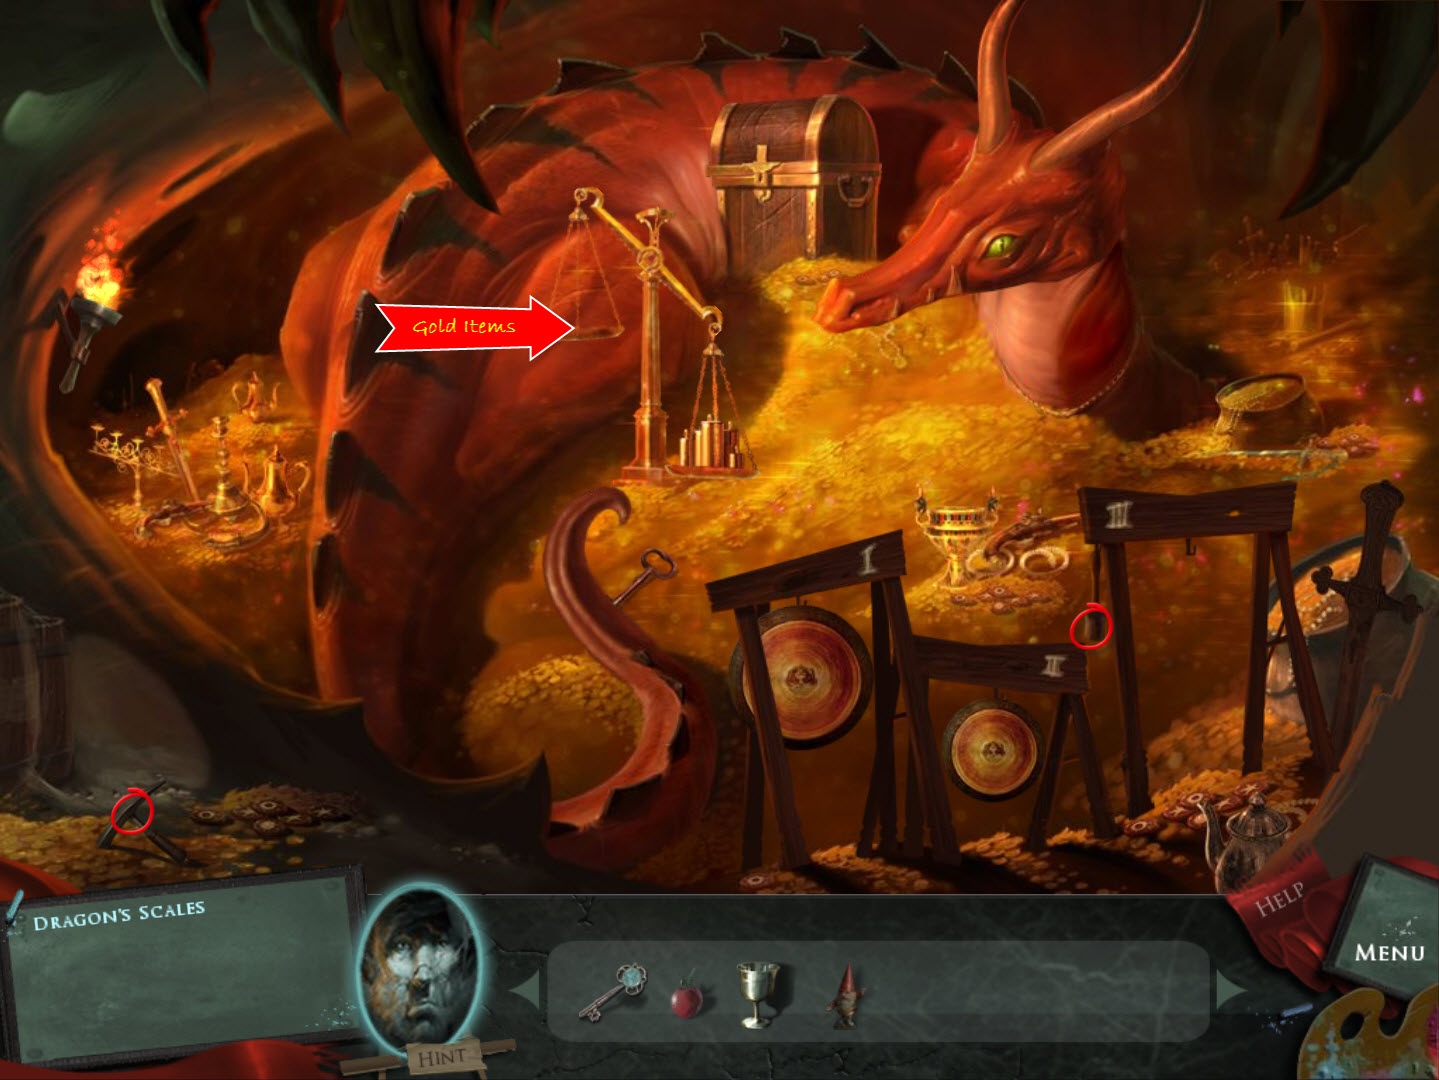
The Dragon's Cave
Fire and Ice
Fire and Ice
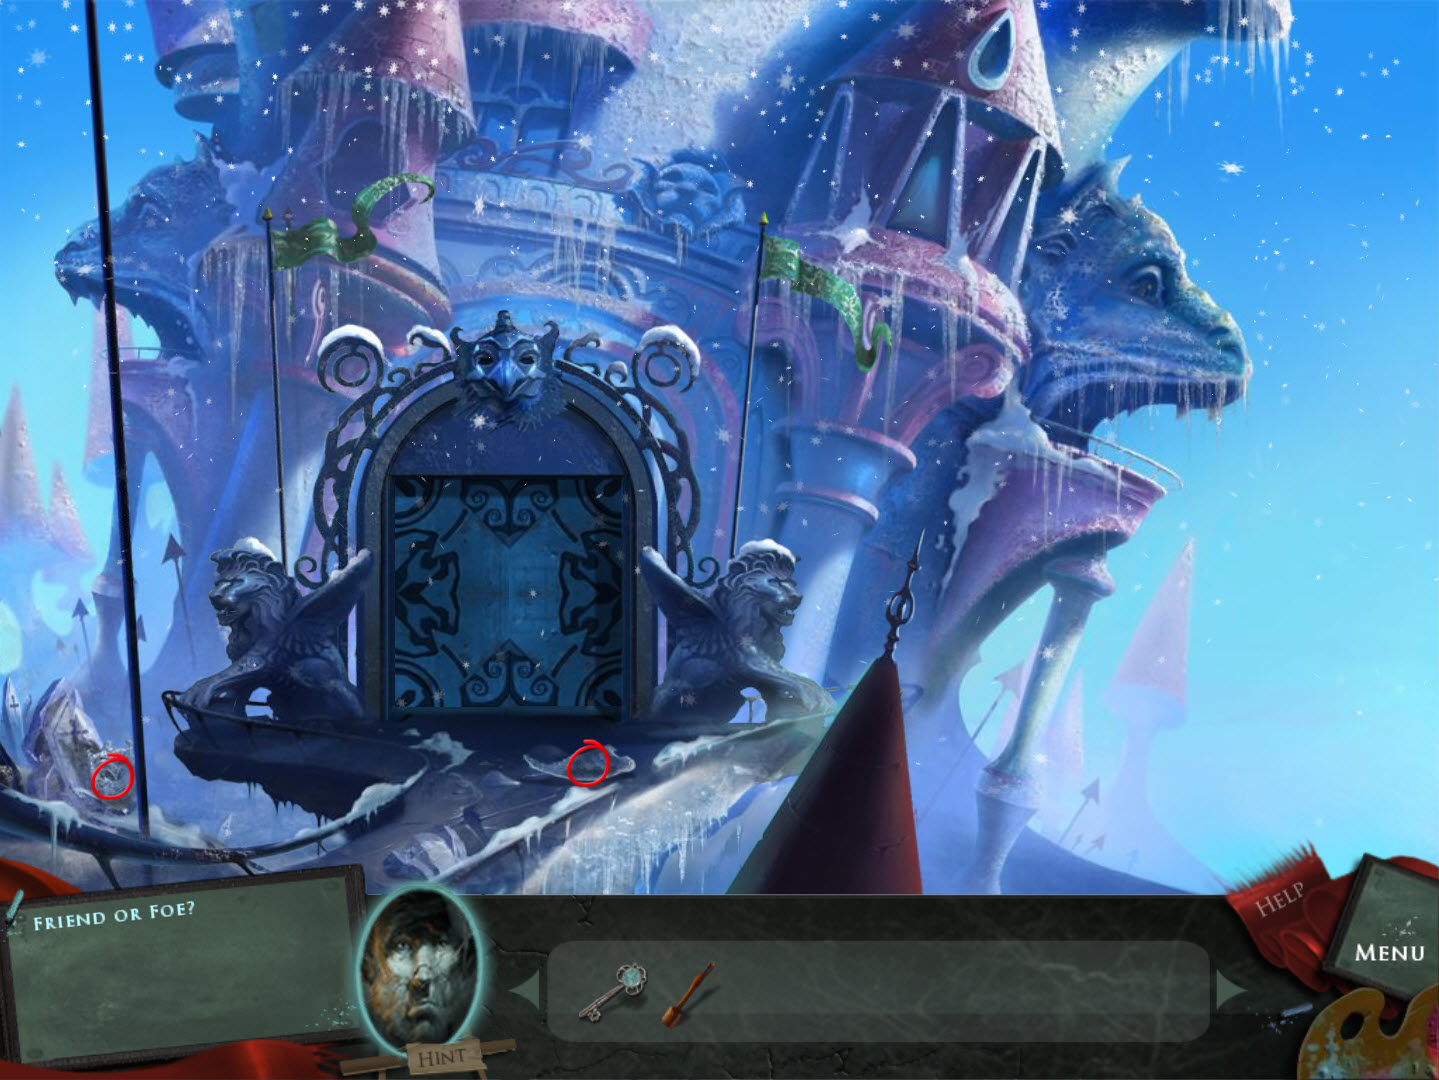
The Ice Castle
The Dragon's Cave
The Ice Castle
Hints: The Stone Guardian will provide hints. Simply click on his portrait and pick which objective you are having trouble with. He can give multiple hints.
Objectives: Your current objective(s) are on the bottom, left of your screen. These will help guide you through the game.
Tower Steps
- pick up and read the Red Ribbon
- pick up the Sketch of a Handle
- read the Note on the door
- use the Sketch of a Handle on the door
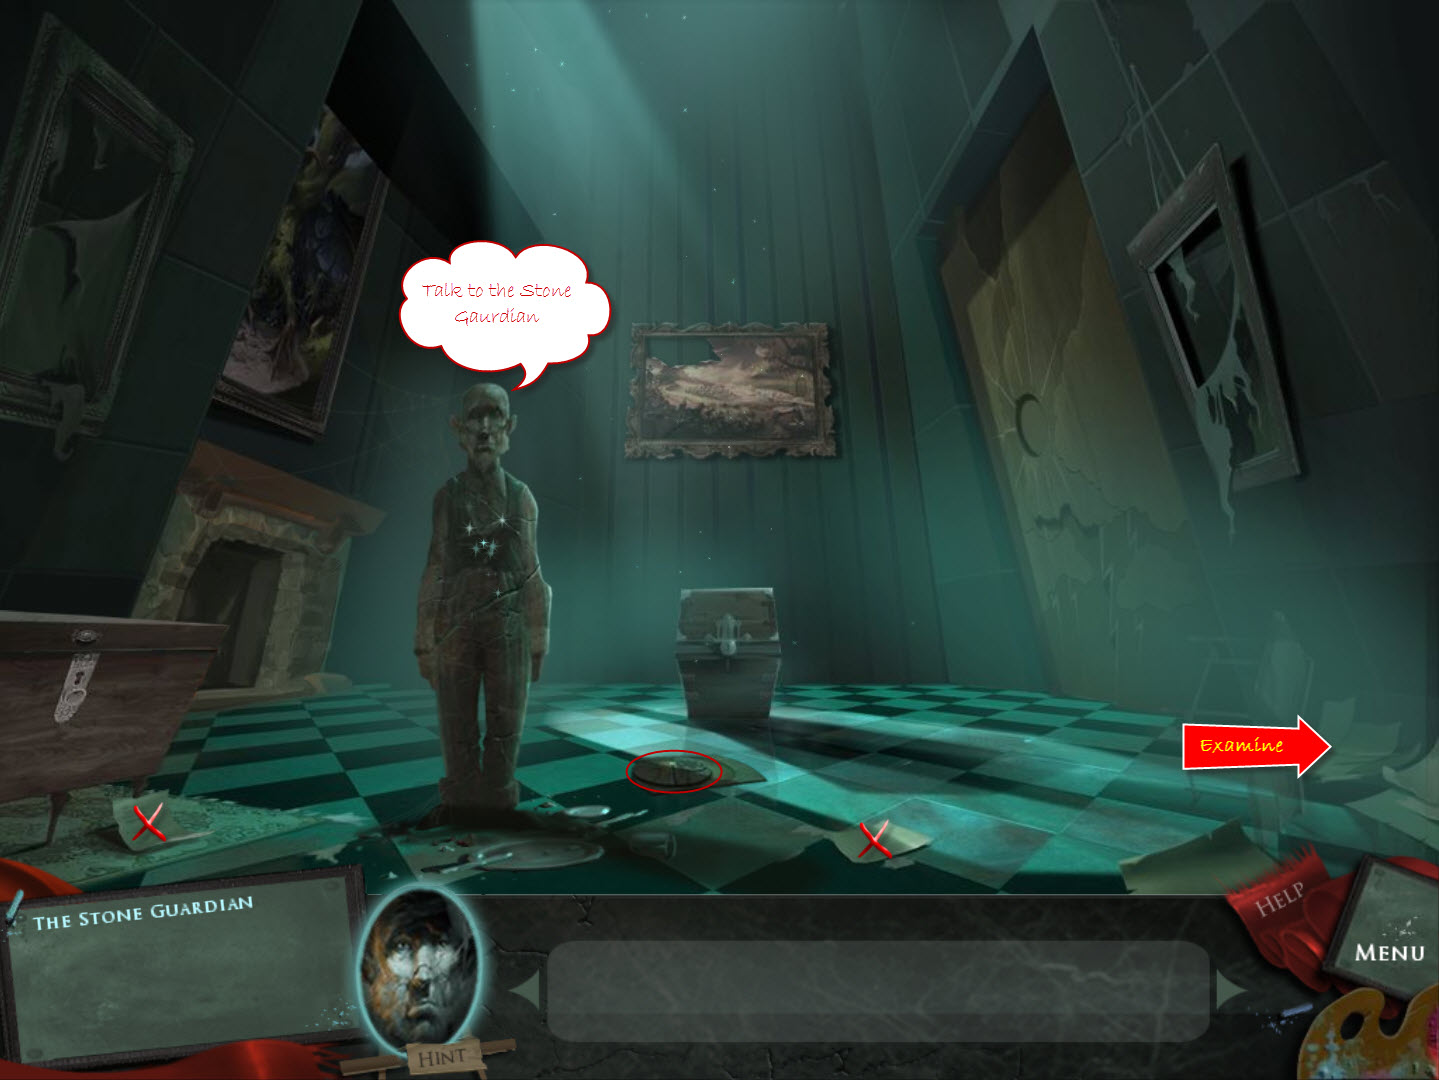
- talk to the Stone Guardian
- read the two Notes on the floor - it seems Iris has a special ability
- pick up the Part of Chest
- examine the area on the right
- take the Squirrel on a Stump sketch and the Glowing Eye
- examine the chest (in the center)
- place the Part of Chest in the chest
- Chest Puzzle (easy)
- pull down the blue buttons
- move the circles into the centers
- rotate the circles until the align
- slide the doors back
- take the Canvas Fragment
- take the Key
- use Key on the other chest (left side)
- take the Rabbit and Pumpkins sketch
- examine the center painting
- replace the Canvas Fragment
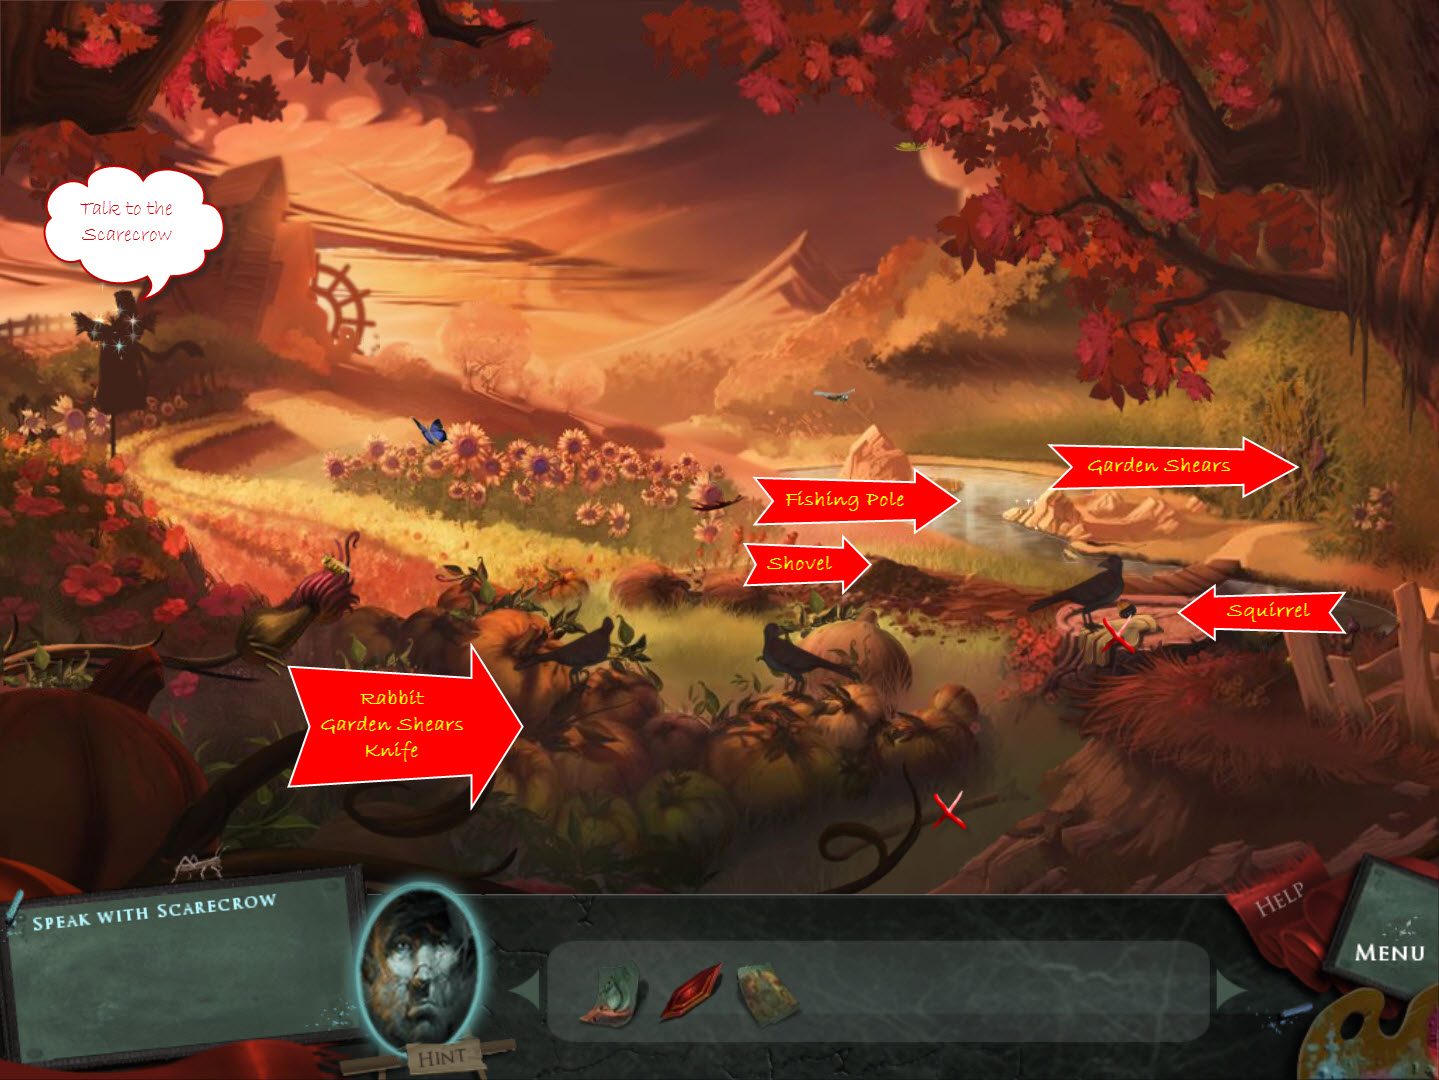
- talk to the Scarecrow
- place the Squirrel on a Stump on the stump
- take the Glove
- give the Glove to the Scarecrow
- receive Garden Shears
- use the Garden Shears on the hedges
- take the Hat
- give the Hat to the Scarecrow
- receive Knife
- place the Rabbit and Pumpkins in the pumpkin patch
- take the Shovel Head
- use the Garden Shears on the vines
- use the Knife on the pumpkin
- take the Button
Eyes
- give the Button Eyes to the Scarecrow
- receive Shovel Handle
- combine the Shovel Head and Handle
- use the Shovel to dig in the dirt mound
- take the Belt
- give the Belt to the Scarecrow
- receive Fishing Line
- pick up the Pole
- combine Fishing Pole and Line
- use Fishing Pole in stream
- take the Boot
- give Boot to the Scarecrow
- receive Glowing Eye
- leave painting
- take the four Scraps of Painting that hang beside the picture
- examine the fireplace (watch for a left arrow)
- replace the Glowing Eyes
- take the Tongs
- examine the chest (in the center)
- Chest Puzzle (easy)
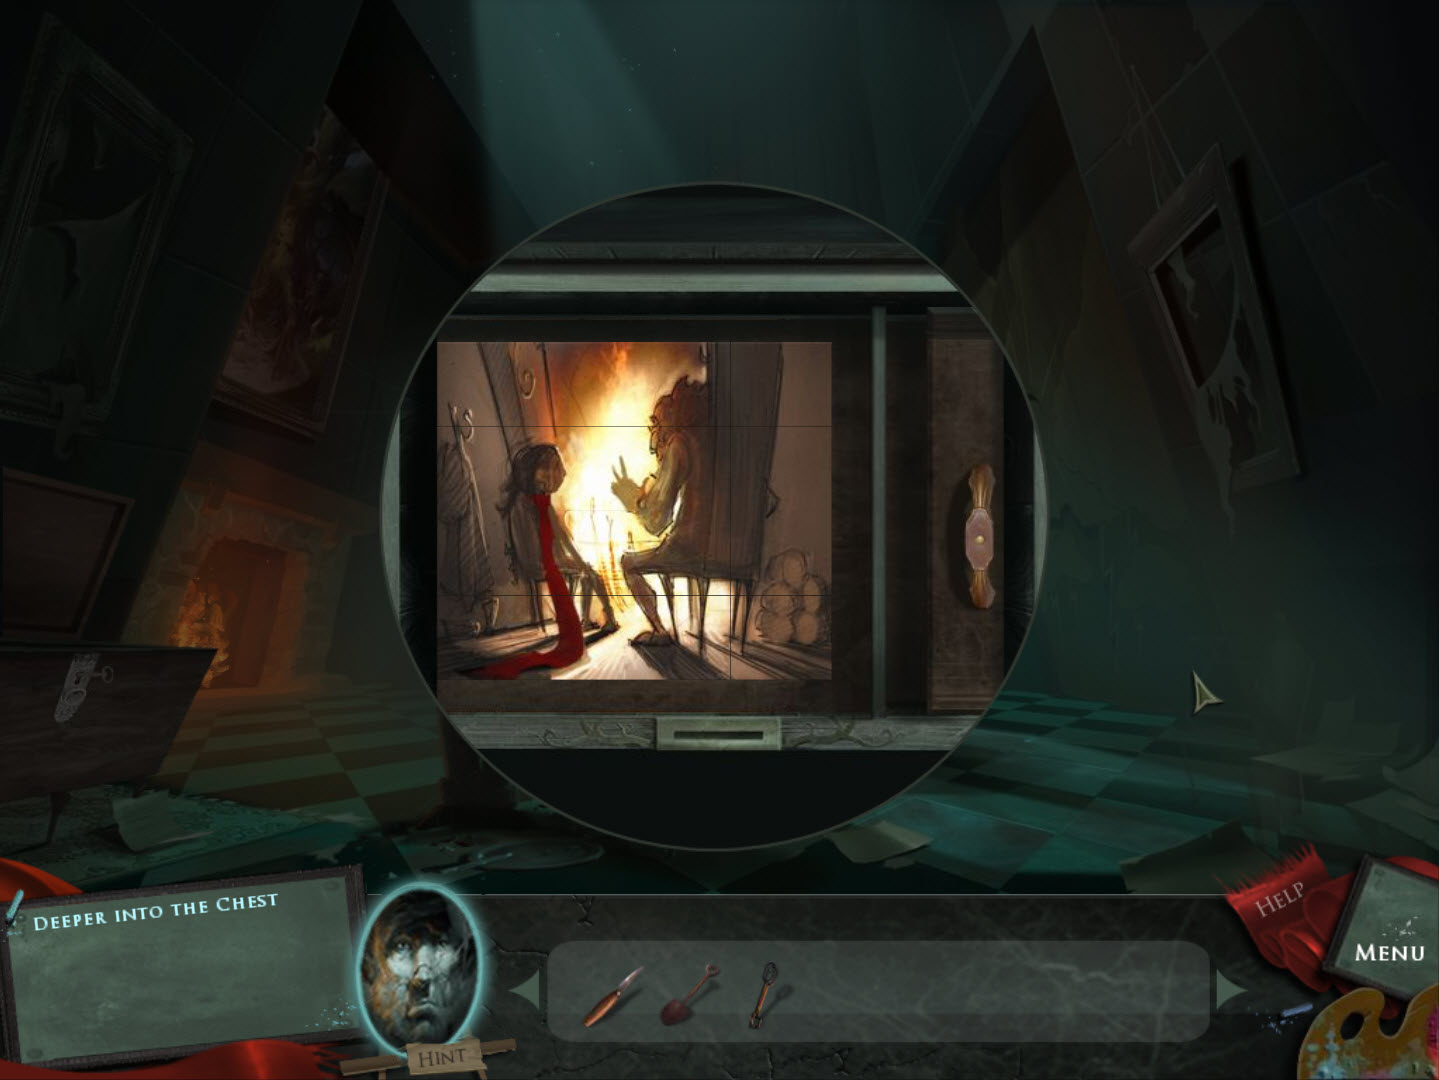
- replace the Scraps of Painting like a jigsaw puzzle
- swap the tiles that appear to form a picture
- see screenshot for solution
- take the Sun
- examine the fireplace
- place the Sun in the fireplace
- use the Tongs to retrieve the Sun
- examine the door (on the right)
- place the Sun on the door
- exit
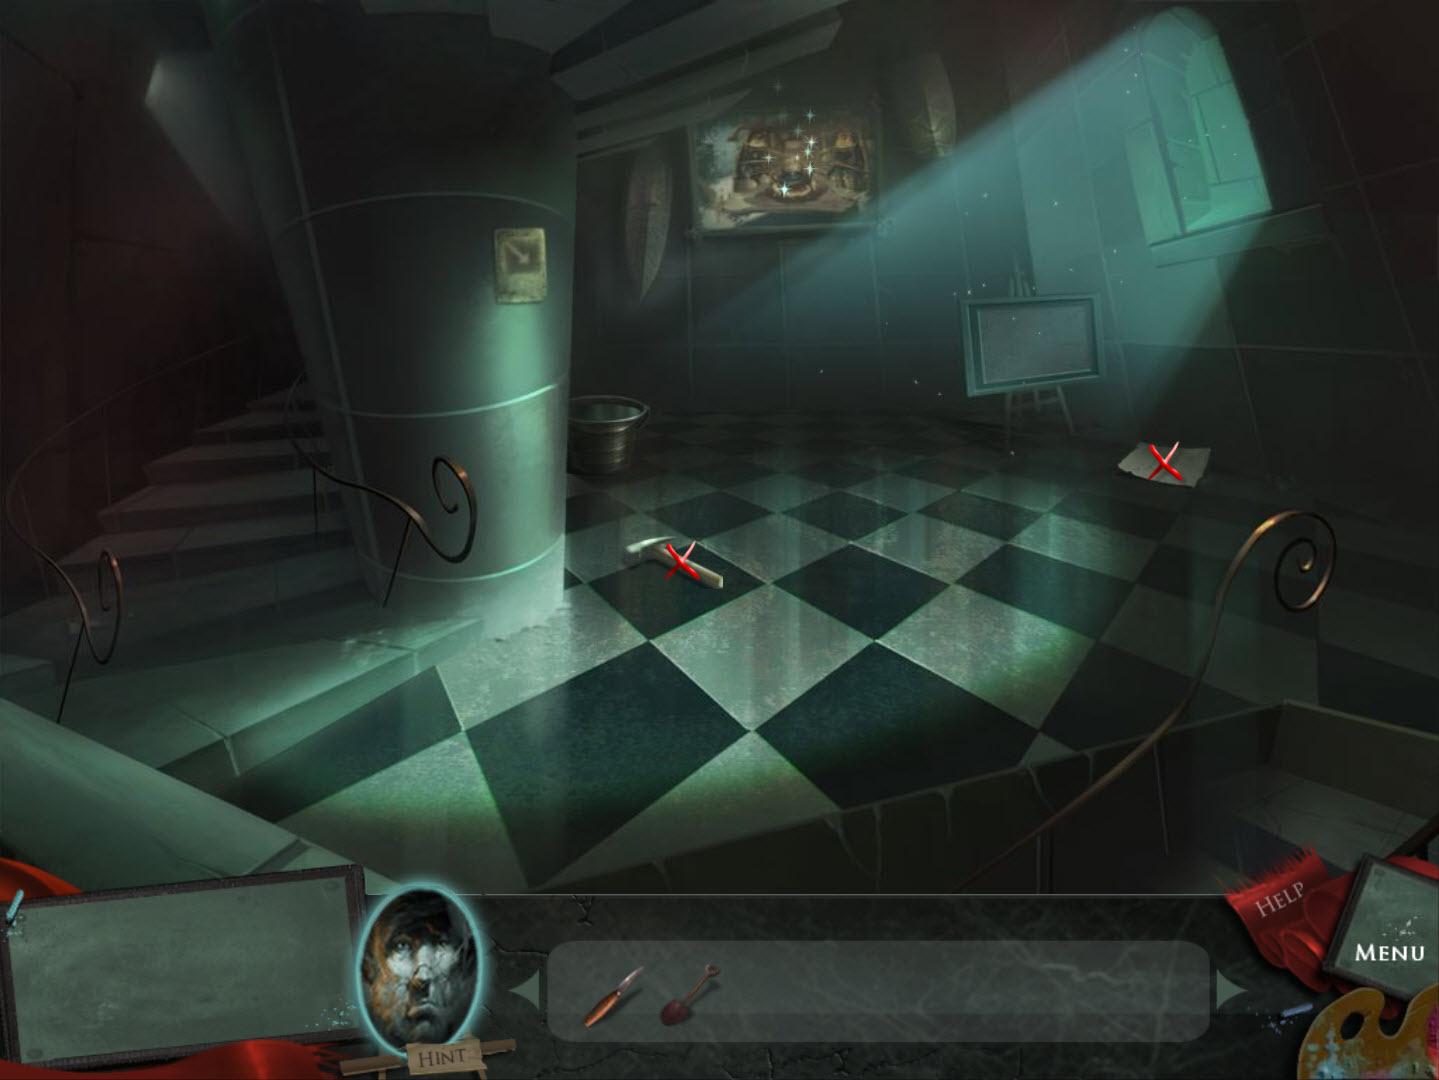
The Window
- pick up the Hammer
- read the Note
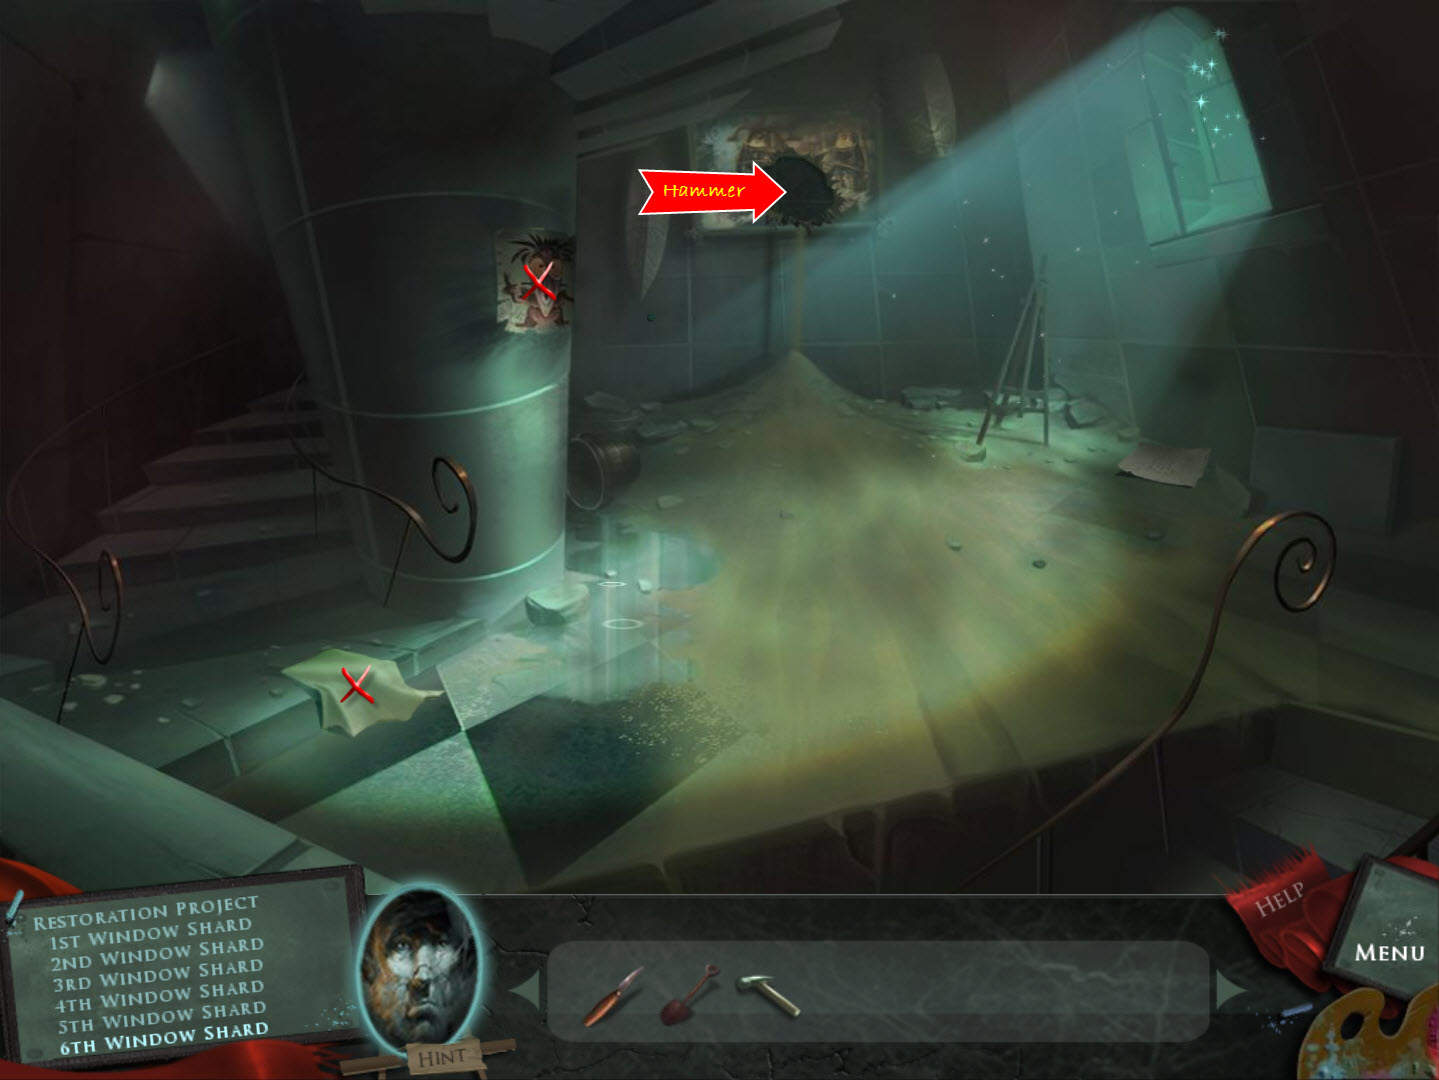
- examine the painting
- touch the painting - kaboom!
- use the Hammer on the broken wall
- take Window Shard
- pick up the Rag
- take the Witch Doctor sketch
- go upstairs
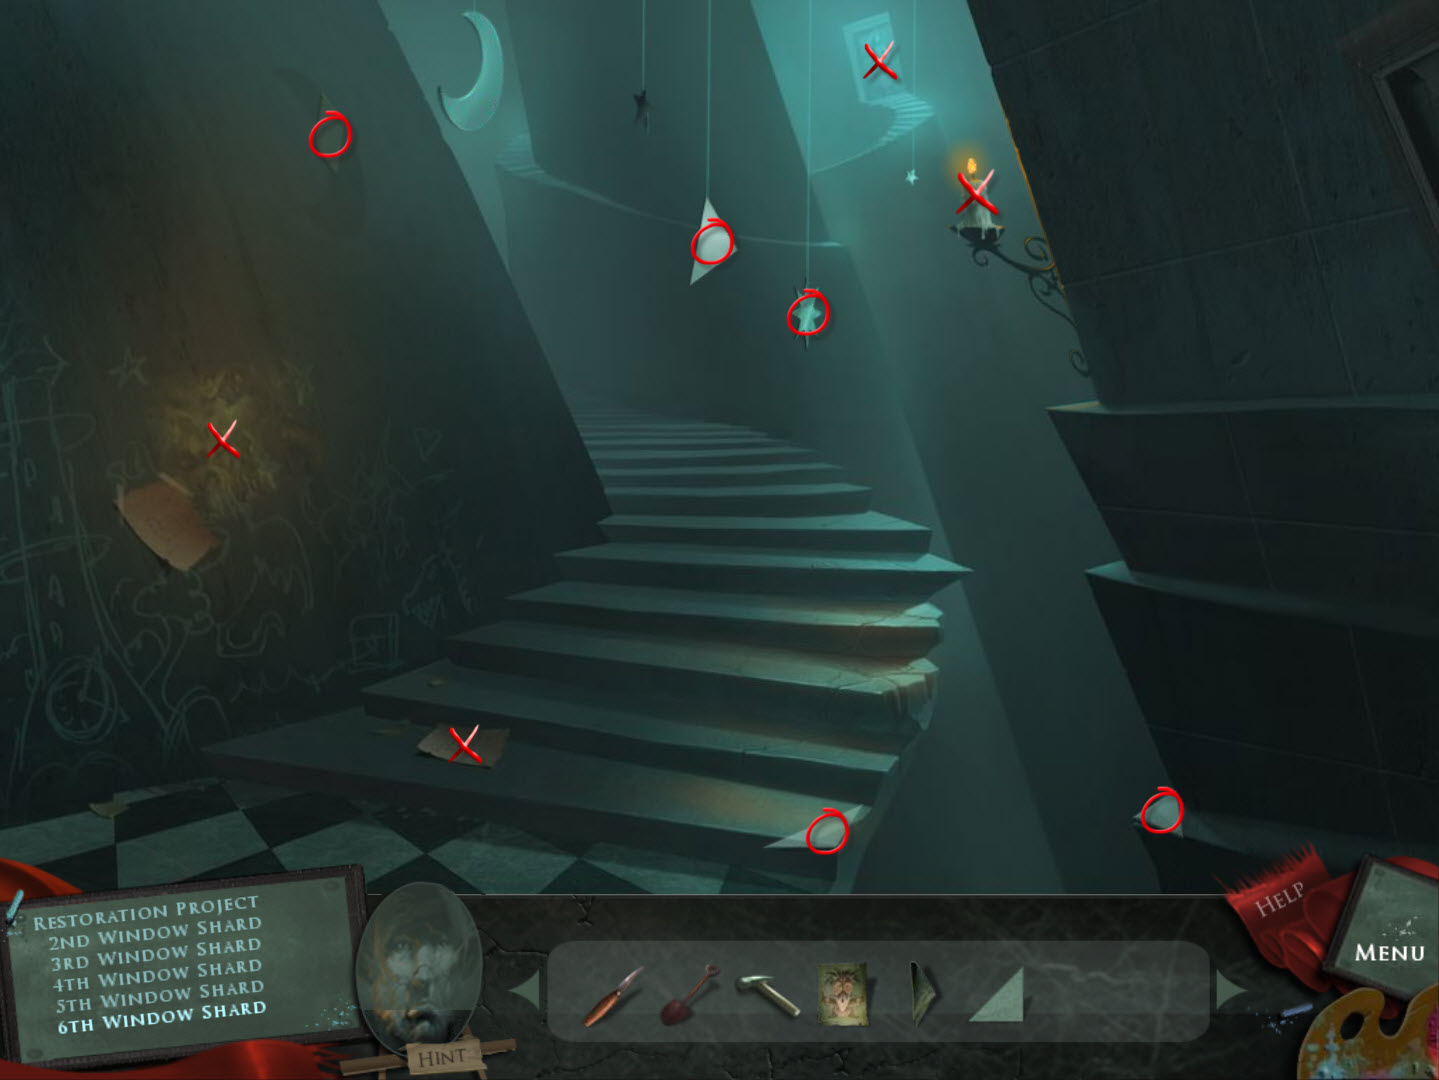
The Window 2
- pick up the four Window Shards
- take the hanging Star
- take the Candle
- examine the wall
- read the Note
- examine the door
- take the Window Shard (in the girls hands)
- go back down
The Window
- examine the arrow on the column
- examine the window
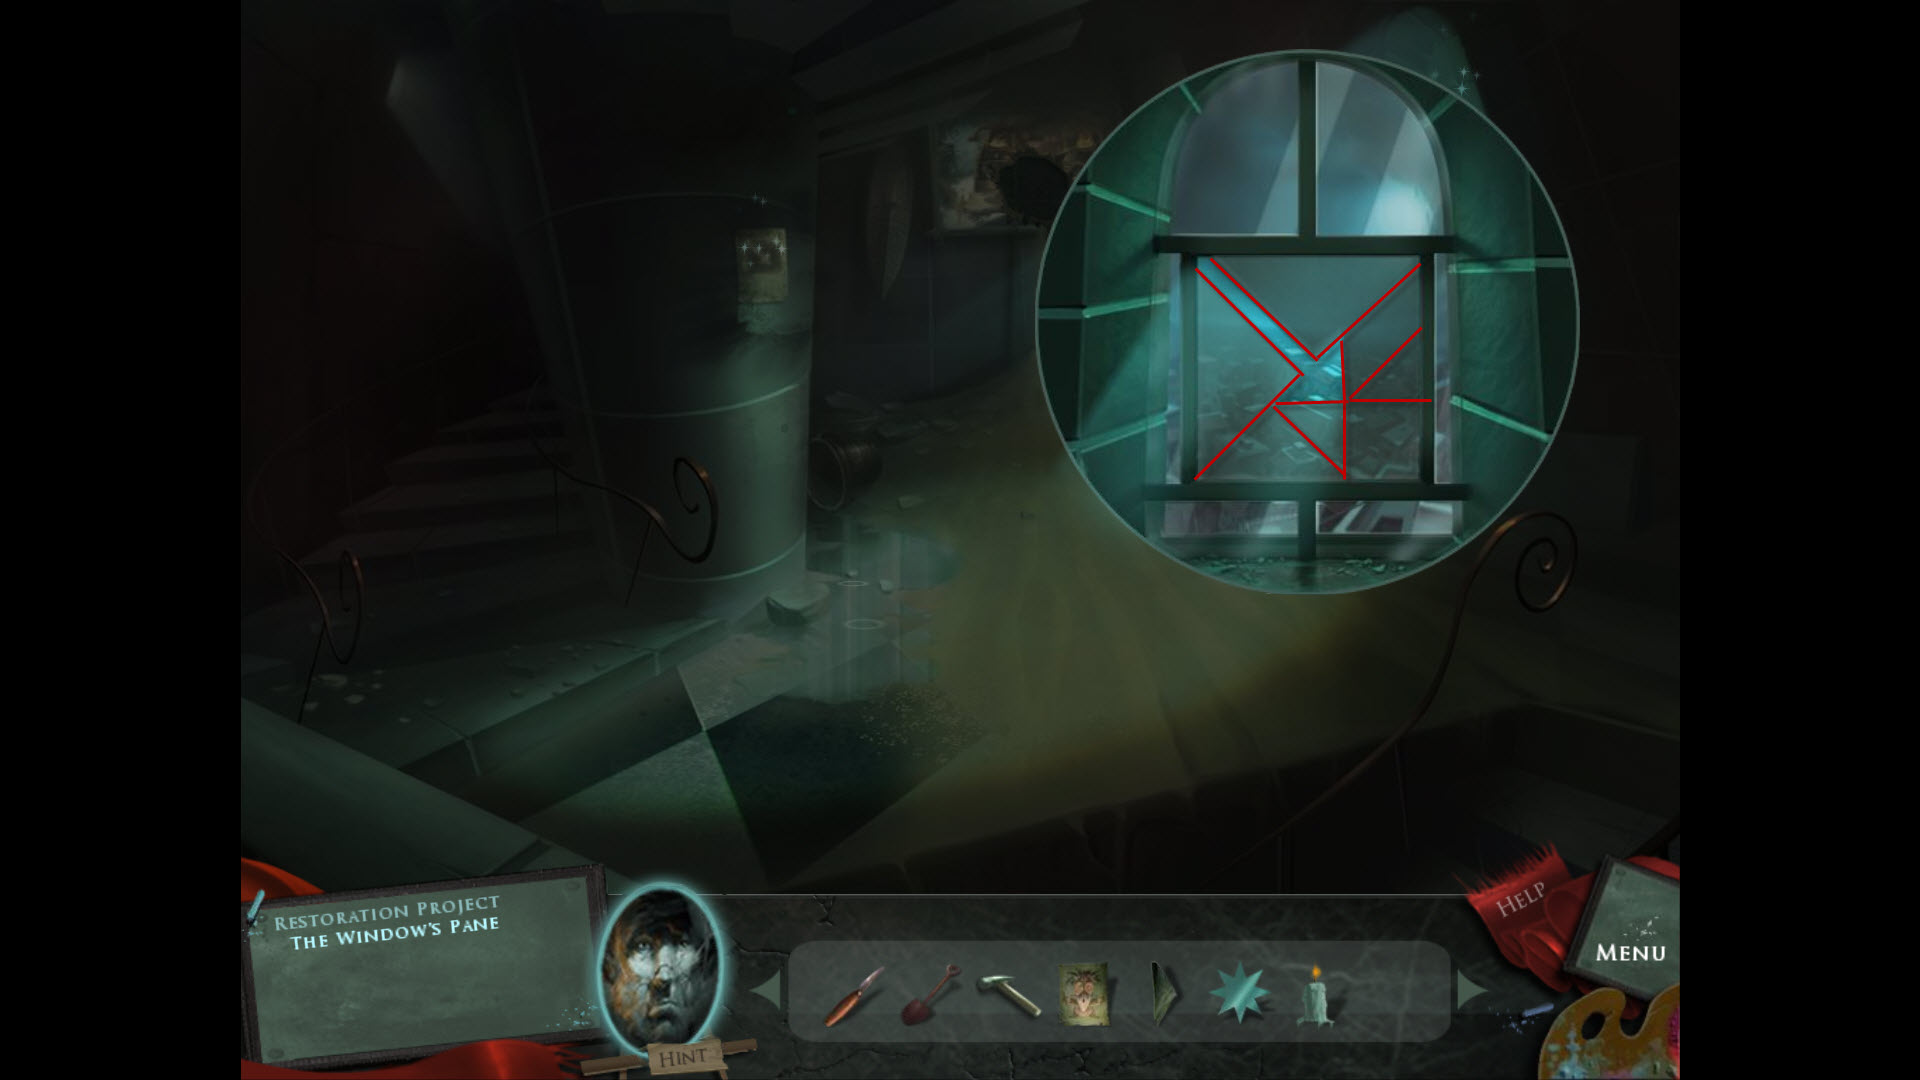
- Window Puzzle (easy)
- place the Window Shards in the window
- right click to rotate them
- the object is to create an arrow like the one on the column
- when they are in the correct spot it will turn grey
- see screenshot for solution
- use the Shovel where the arrow shadow points
- take the Canvas Fragment
- use the Rag on the puddle of water
- examine the painting
- use the Canvas Fragment
- use the Rag to clean the painting
- take the Wooden
Teeth and Wooden
Ear off the masks
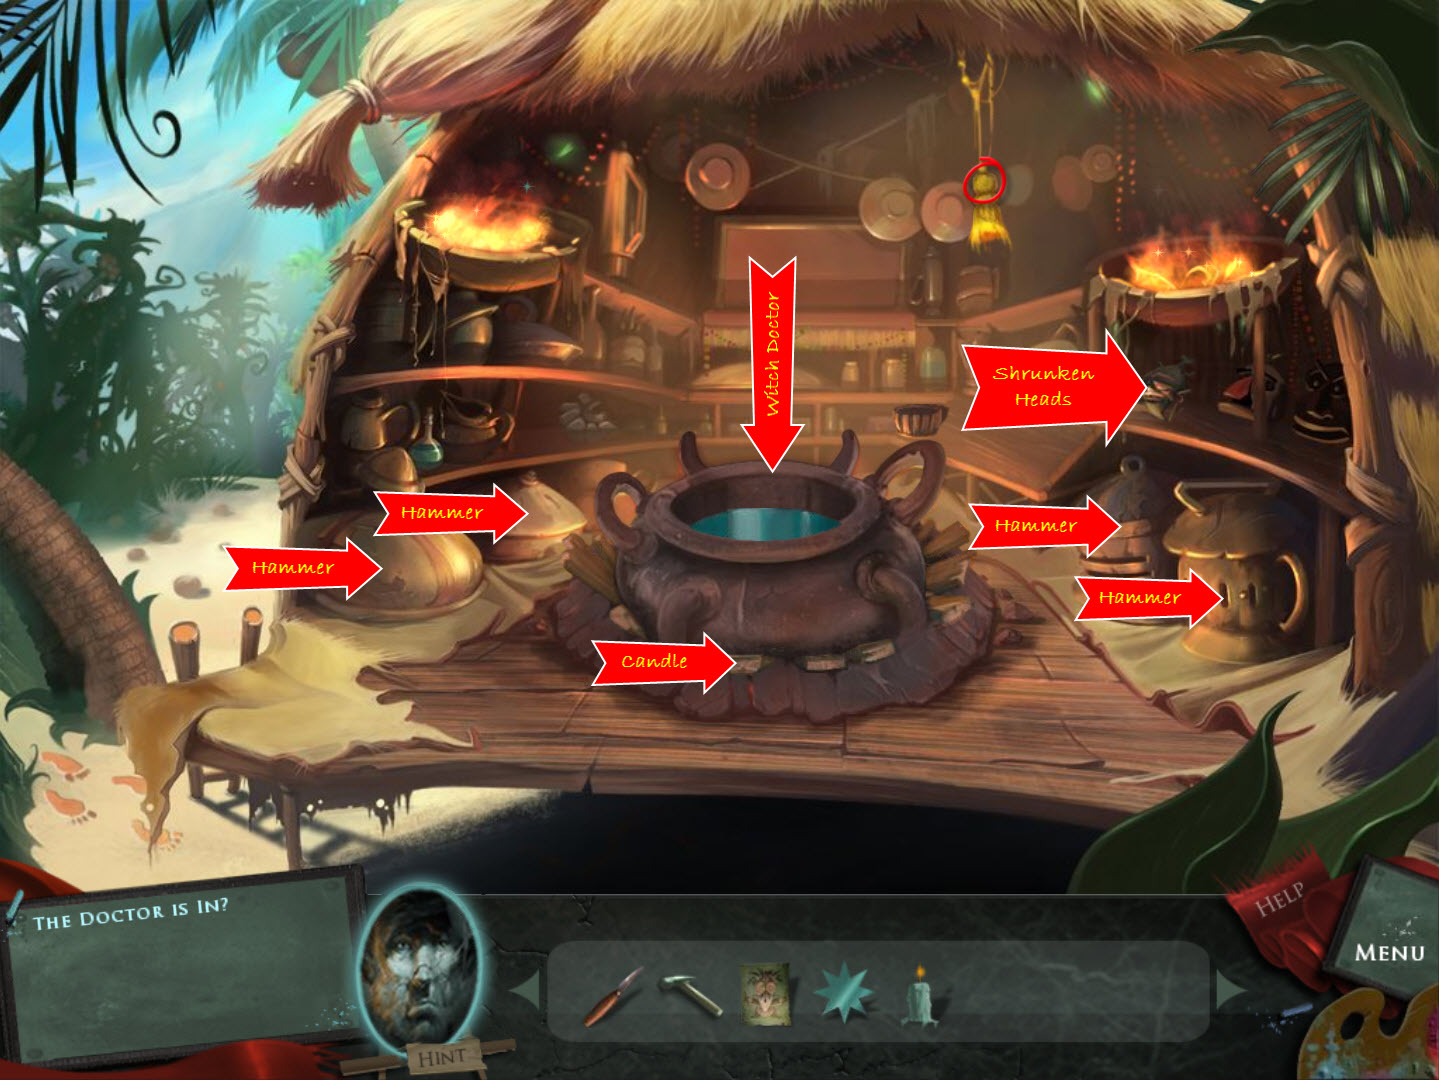
The Witch Doctor
- place the Witch Doctor behind the cauldron
- use the Hammer on the four pots
- take Some Netting, Partial Netting, and two Shrunken Heads
- combine the Netting
- pull the tassel several times
- pick up Magic Staff
- use the Candle to light the firewood under the cauldron
- examine the shelf on the right
- replace the Shrunken Heads
- Shrunken Head Puzzle (easy)
- place the Wooden Teeth on the middle head
- place the Wooden Ear on the left head
- receive Feather and Beads
- talk to the Witch Doctor
- place the Magic Staff, Beads, and Feathers in the circles that appear
- exit the painting
The Window
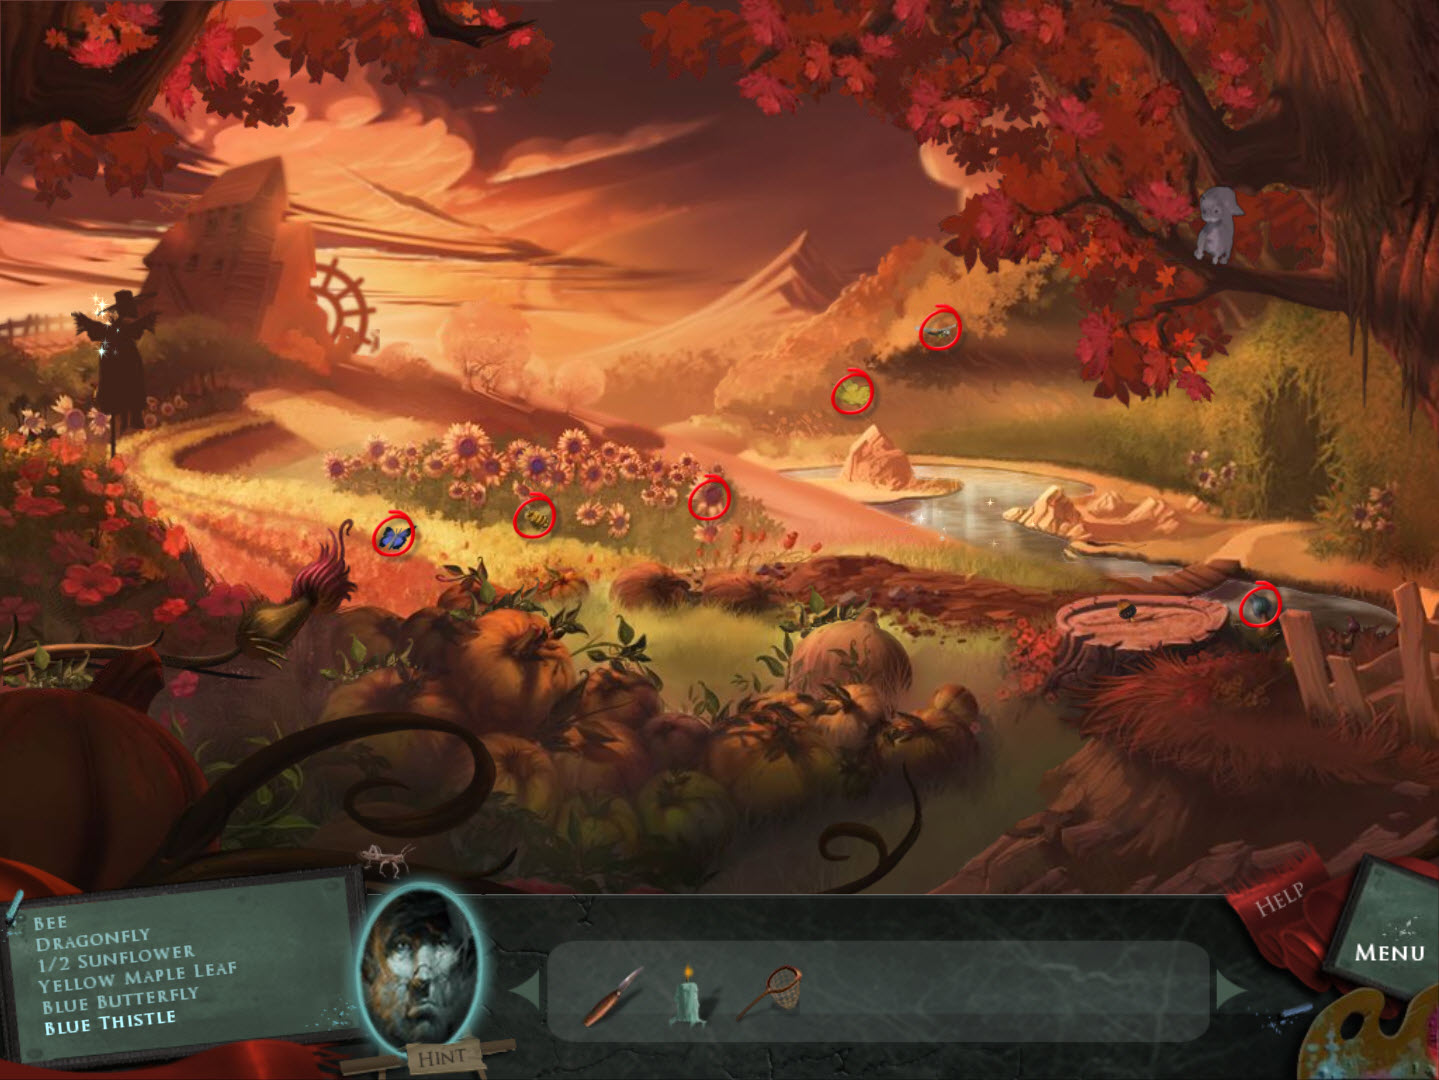
- return to The Farm
- use the Net to catch the Butterfly, Bee, Dragonfly, and Yellow Maple Leaf
- pick the 1/2 Sunflower and Blue Thistle
- return to The Witch Doctor
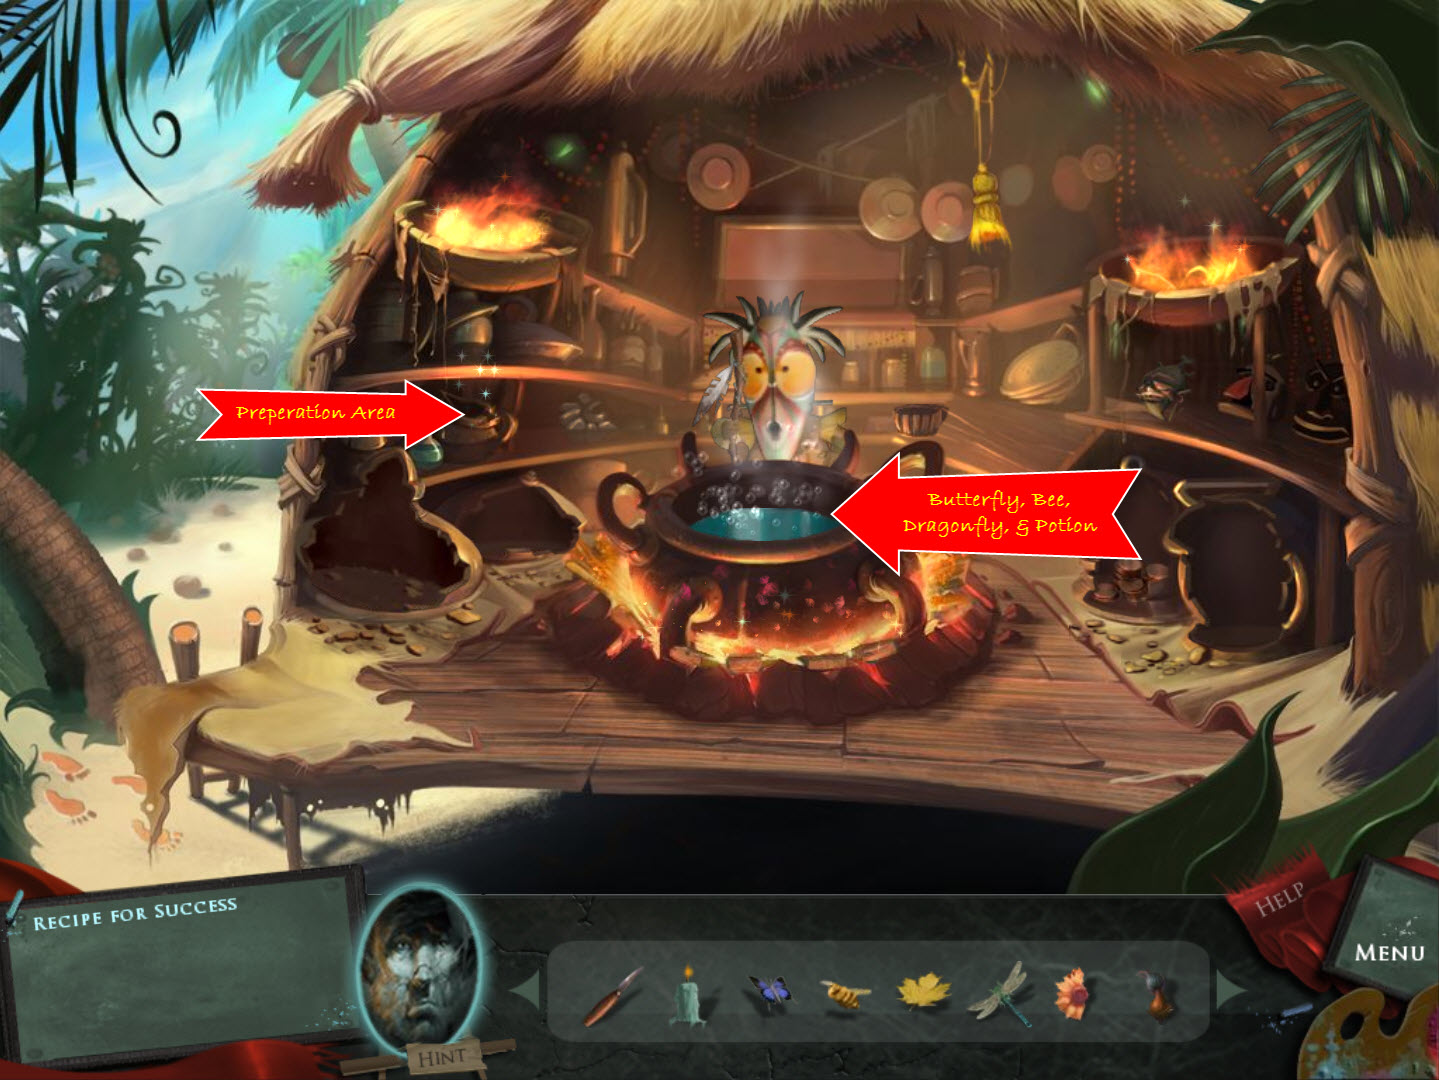
The Witch Doctor
- place the Butterfly, Bee, and Dragonfly in the cauldron
- examine the preparation area on the left
- Recipe Puzzle (moderate)
- place the Yellow Maple Leaf in the preparation area
- use the Knife to cut it up
- place the 1/2 Sunflower in the preparation area
- pick off all the petals
- place the Blue Thistle in the preparation area
- use the mortar and pestle to create powder
- read the recipe
- place the ingredients in the main bowl in the correct order
- solution (highlight to see): Blue Powder, Small Green Vial, Leaves, Petals
- receive Potion
- place the Potion in the cauldron
- receive Heart
- exit the painting and go up the stairs
- examine the door at the very top
- place the Star in the spot above the girl
- place the Heart on the girl
- take the Needle and Thread
- attempt to go across the bridge
- return to The Foyer
- read the Note
- take the Cardinal
sketch from behind the picture (on right)
- examine the painting above the fireplace
- use the Needle and Thread to fix it
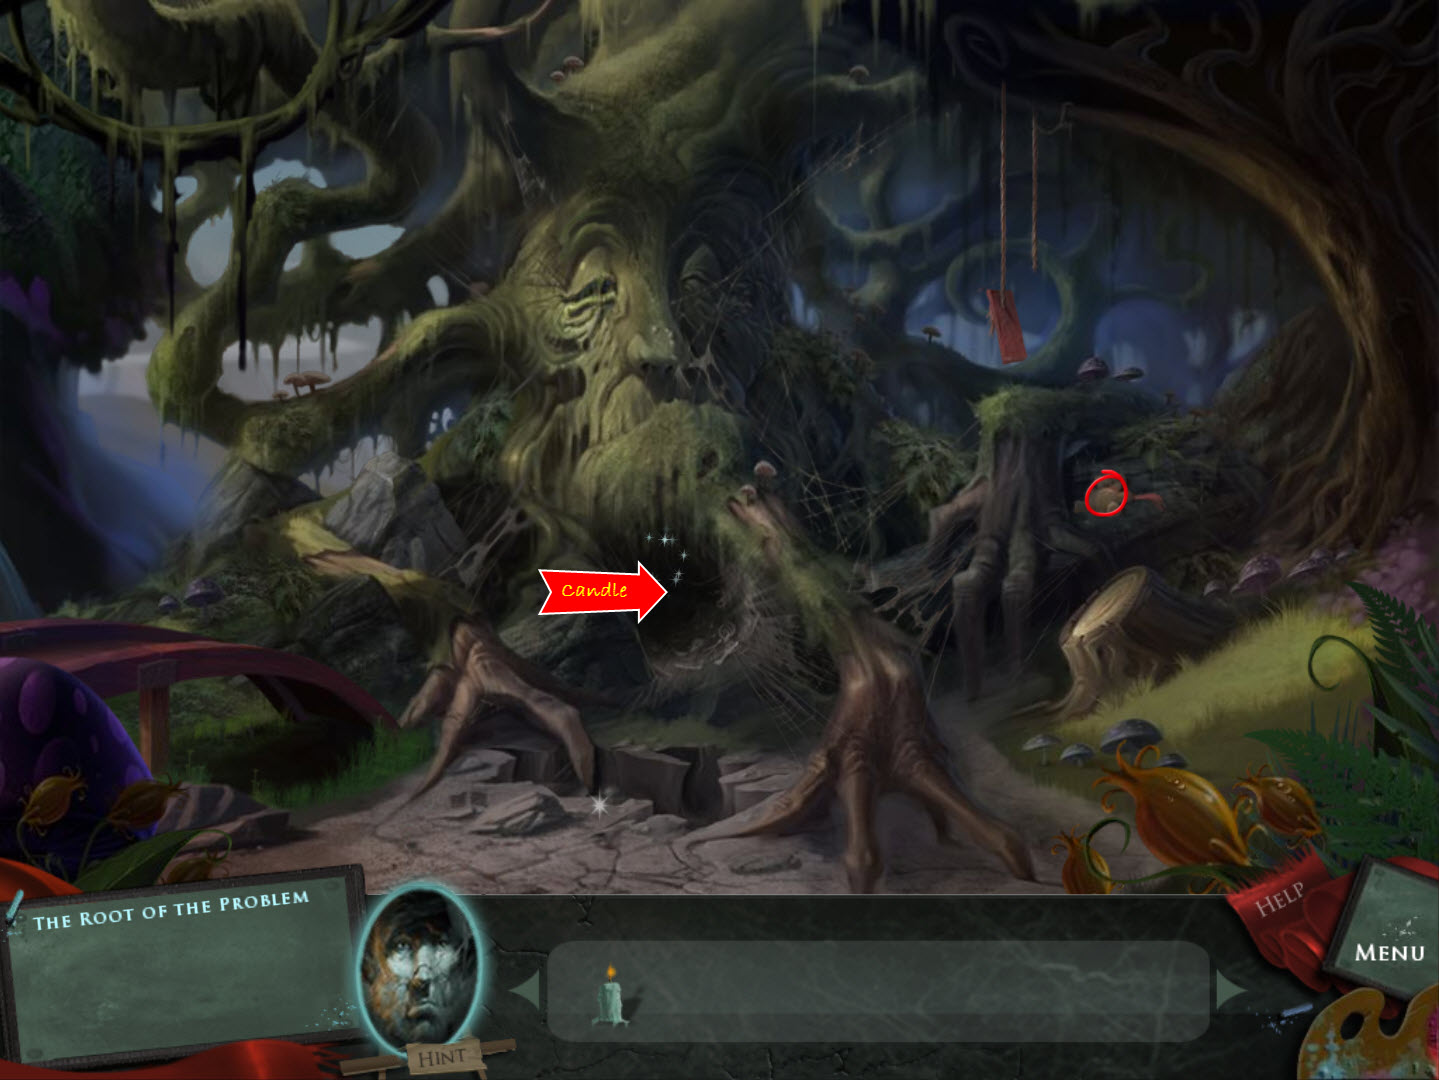
- examine the hole in the tree
- use the Candle so you can see
- examine the Spider
- Puzzle Spider (difficult)
- you need to poke the spiders eyes (ew!) so he closes them
- the object is to close all his eyes
- poking one may uncover another
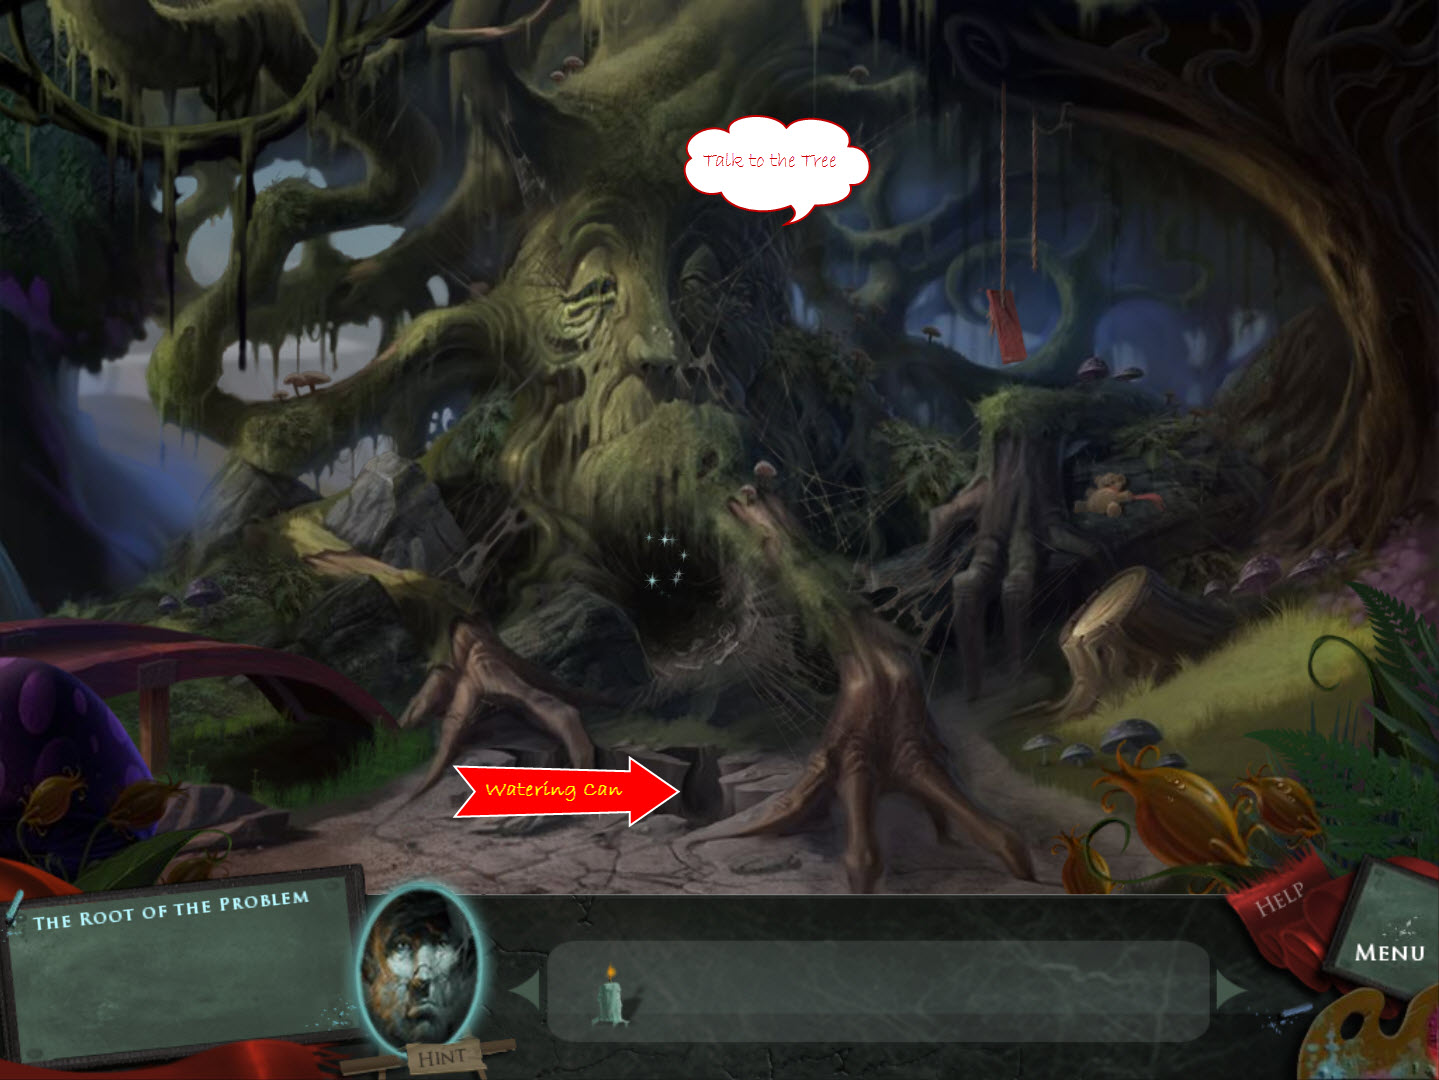
- take the Hour Glass and the Watering Can
- try and talk to the Tree - he is sleeping
- pick up the Teddy Bear
- return to The Witch Doctor
- talk to the Witch Doctor
- use the Watering Can on the cauldron
- return to The Giant Tree
- use the Watering Can on the Tree's roots
- talk to the Tree
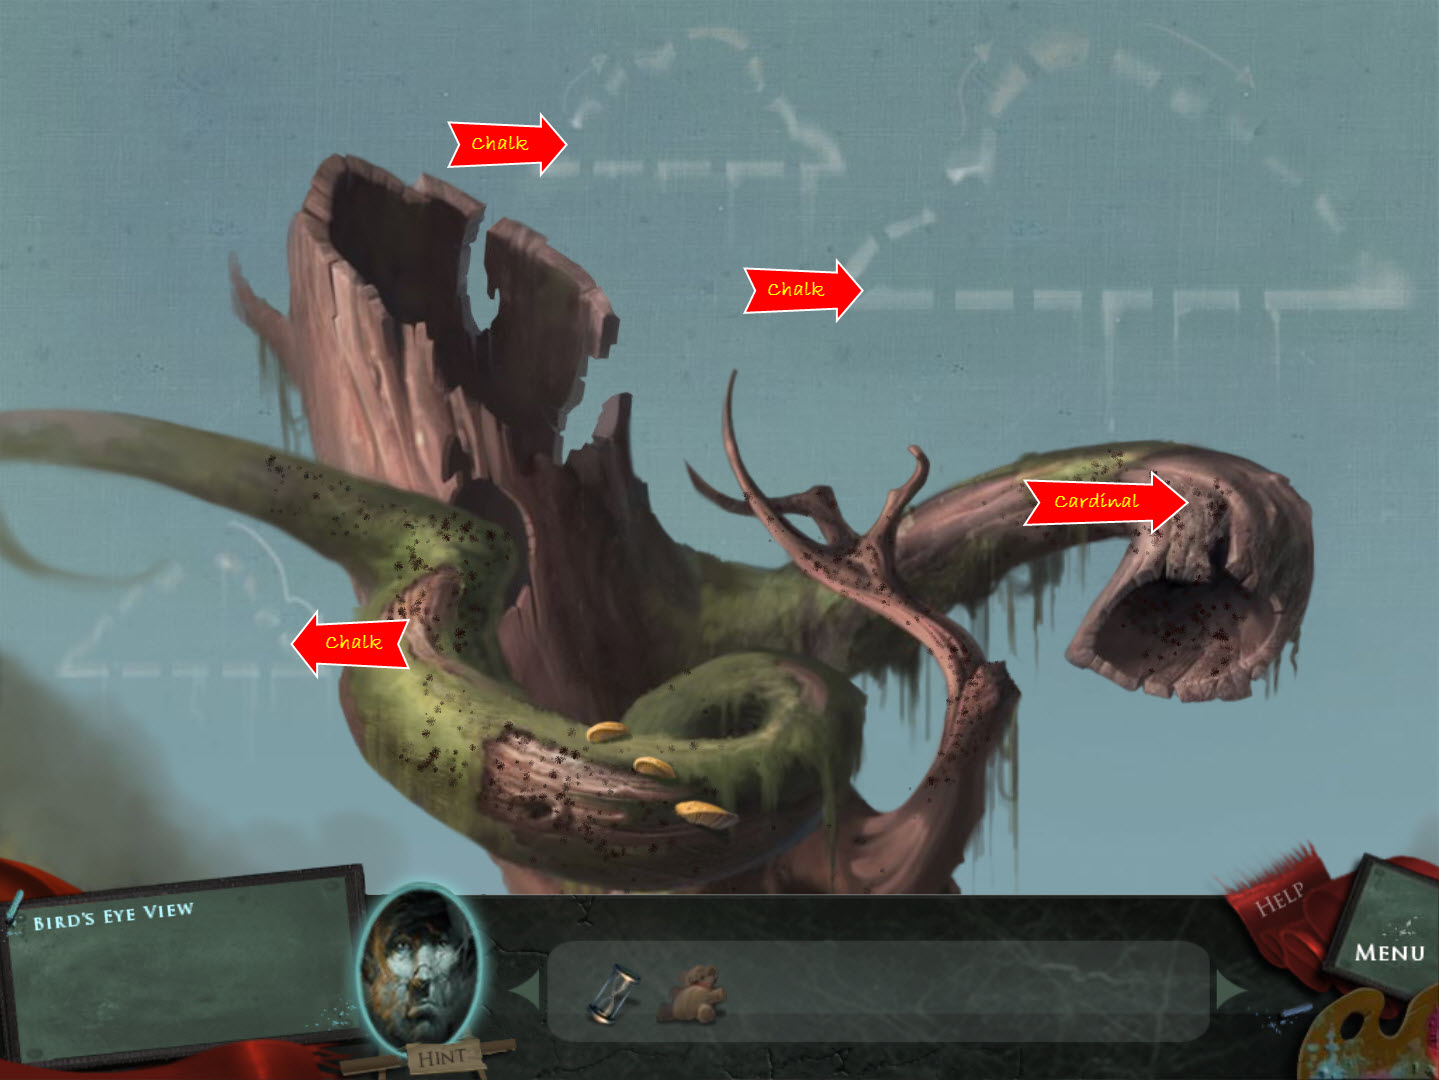
- climb up the Tree
- place Cardinal on far right tree limb
- poke the Cardinal until he has cleaned up all the ants and flies away
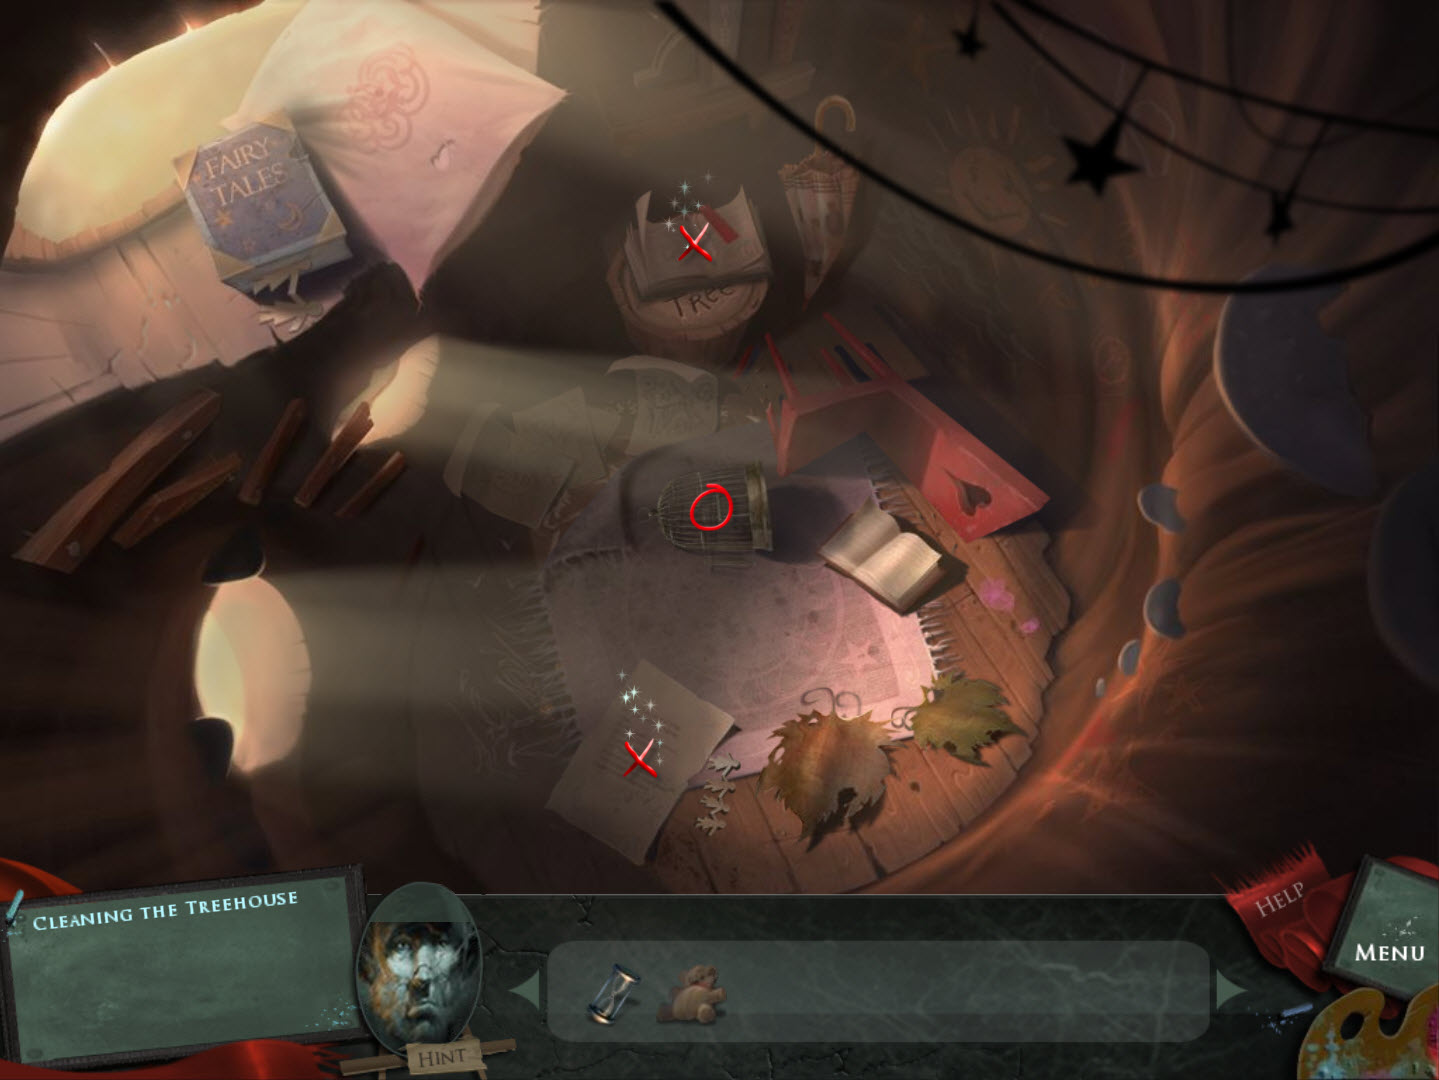
- go into the Tree
- read the Book lying on the stump
- read the Note
- pick up the Bird Cage
- move everything aside
- lift the rug
- examine the trap door
- Trap Door Puzzle (difficult)
- use the large and small nails to move the symbols
- the object is to get the symbols into their matching chalk drawings
- take the Chalk
- return to the top of the Tree
- Chalk Puzzle (easy)
- use the Chalk to drawn the outline of the three clouds
- pay attention to the direction of the arrows around the clouds
- enter the Tree
- take the Wooden Tree
- return to the bottom of the Tree
- you can now exit the painting
The Foyer
- place the Wooden Tree below the The Giant Tree painting
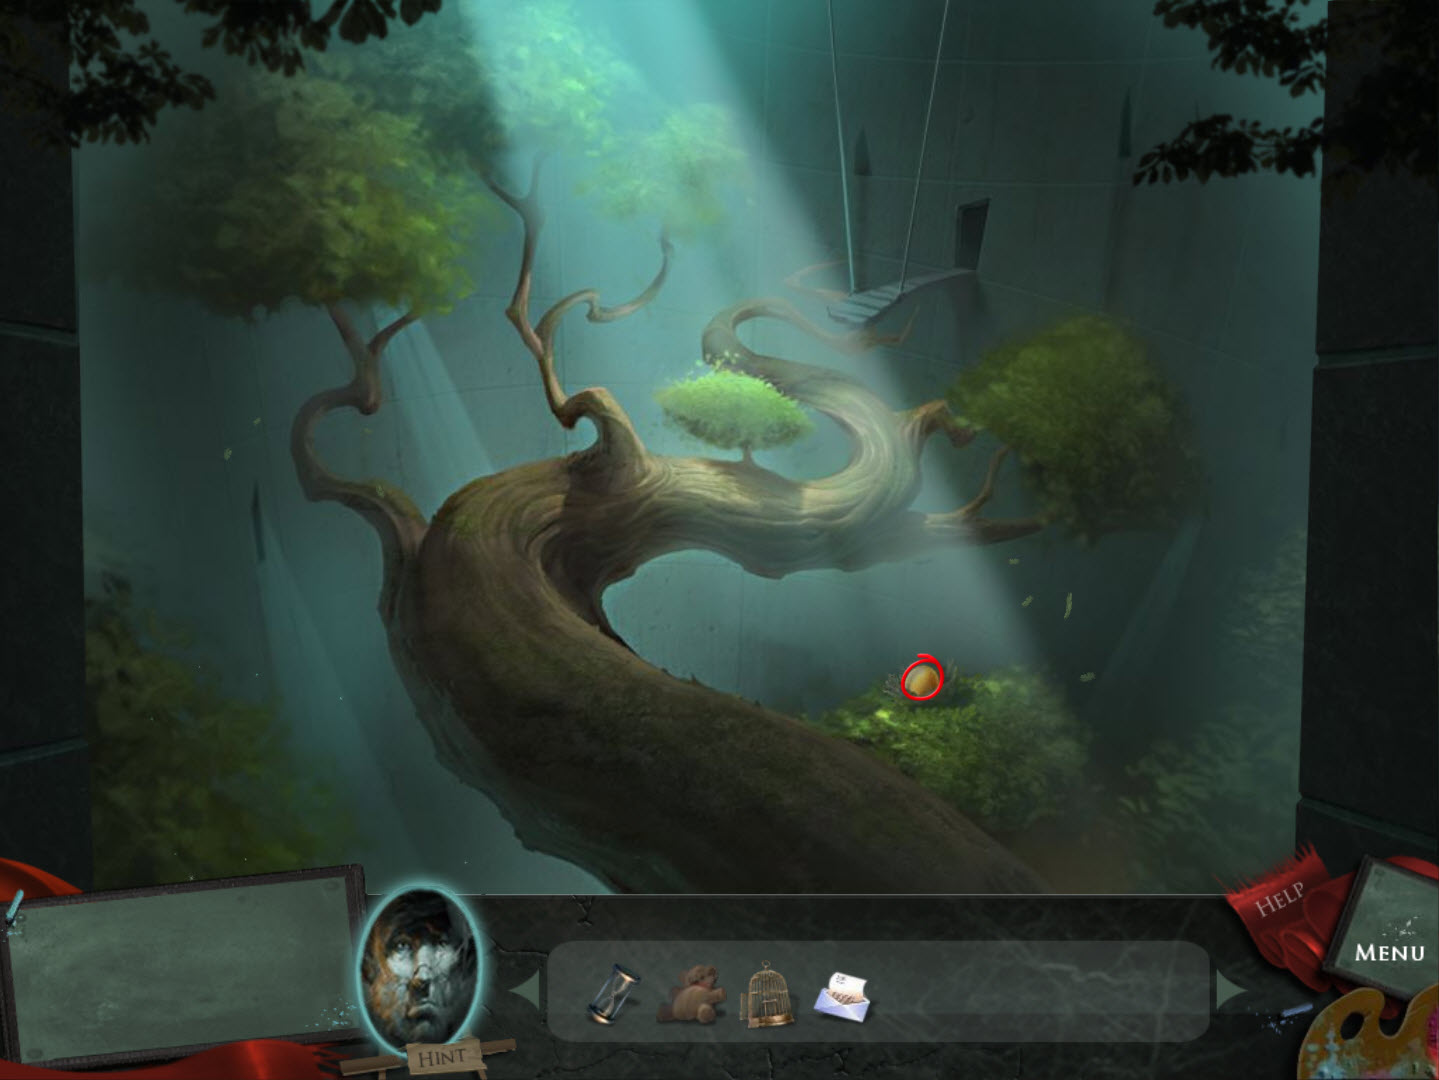
- return to the Broken Bridge
- pick up the Phoenix Egg
- return to The Foyer
The Foyer
- examine the fireplace
- place the Phoenix Egg in the nest
- catch the Phoenix with the Bird Cage
- return to the Broken Bridge and cross over the tree limb
- release the Phoenix
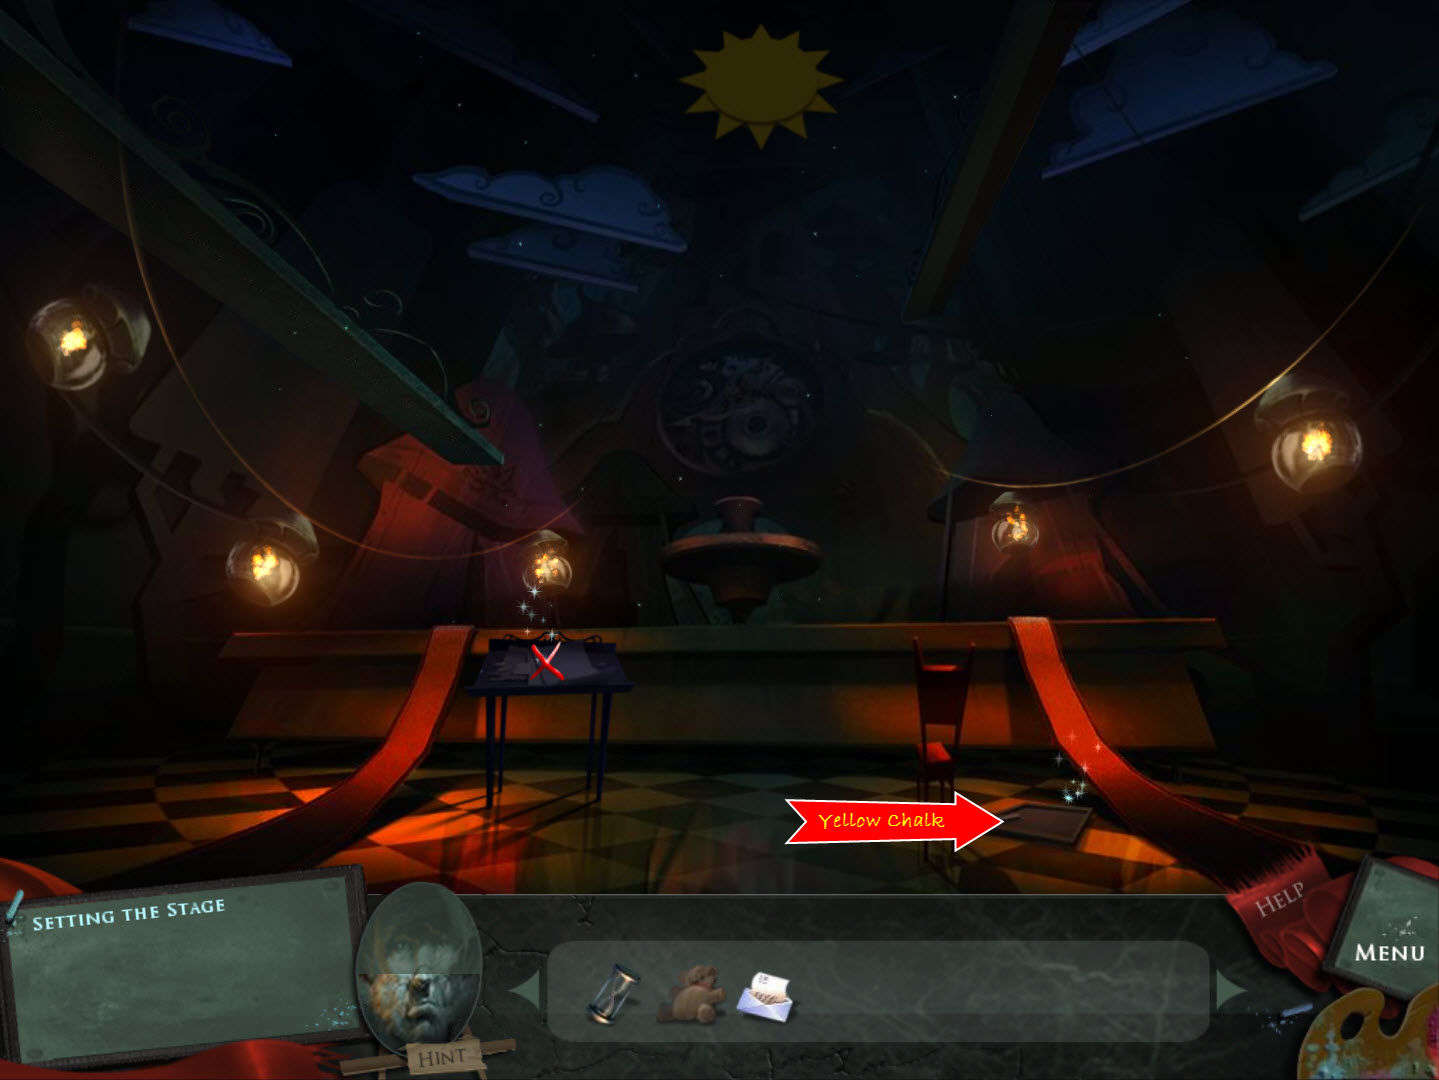
- examine the podium
- take the Yellow Chalk
- take the Bell sketch
- take the Clock Hand sketch
- examine the chalkboard
- Chalkboard Puzzle (Easy)
- use the Yellow Chalk to draw the outline of the sun
- you will automatically enter The Clock Tower
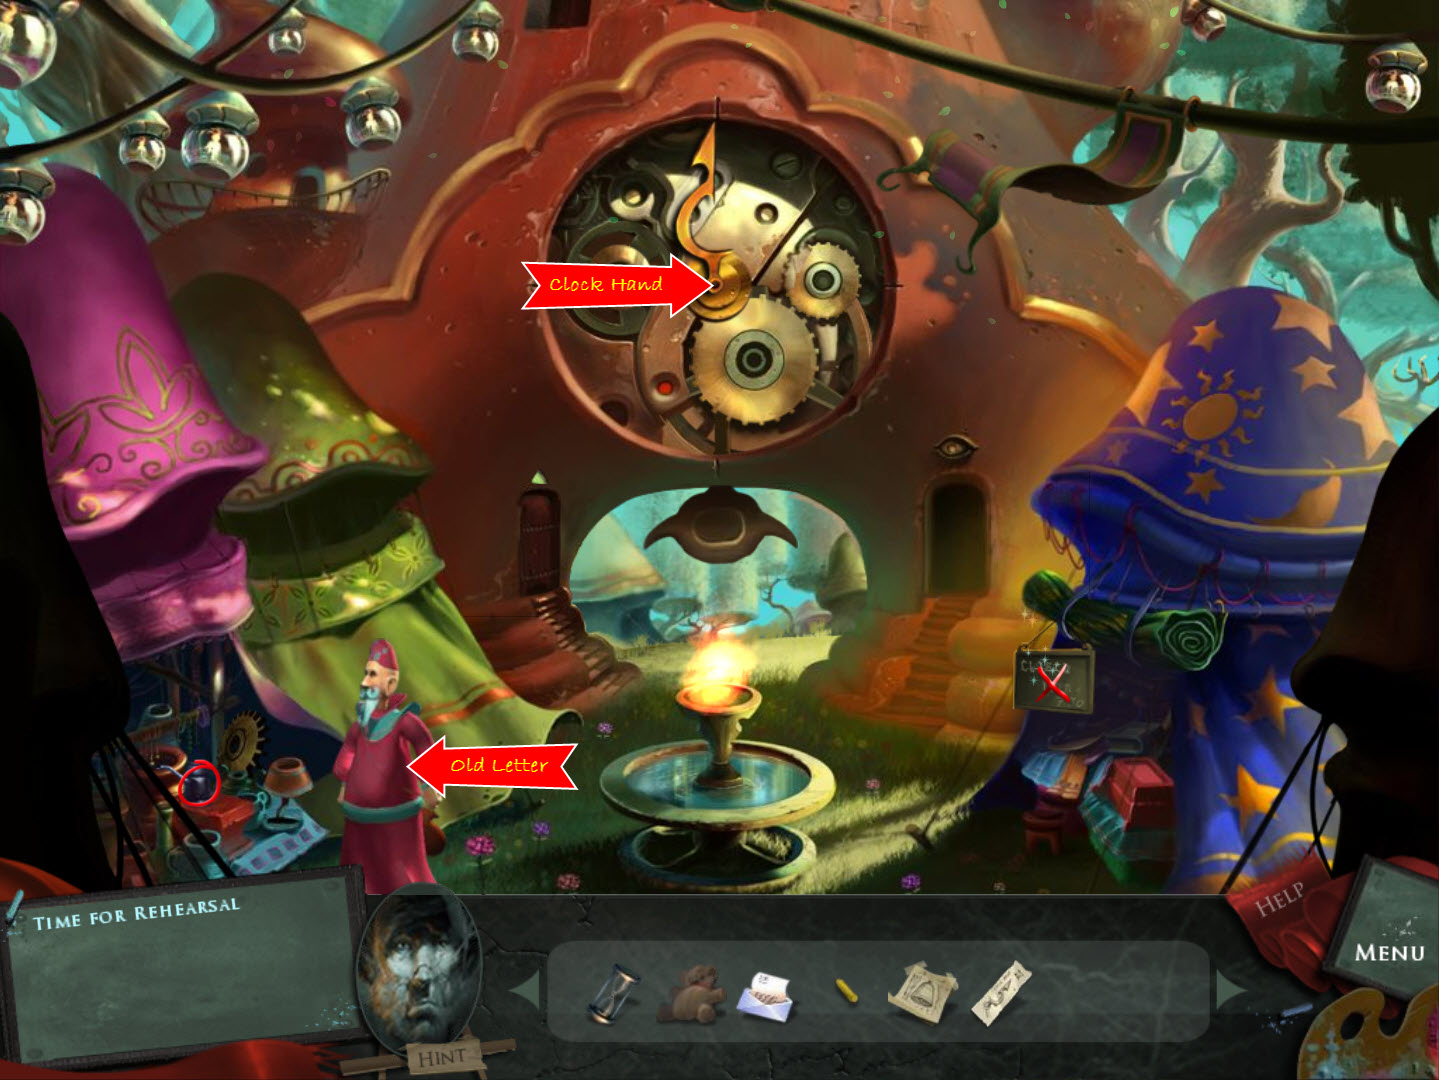
The Clock Tower
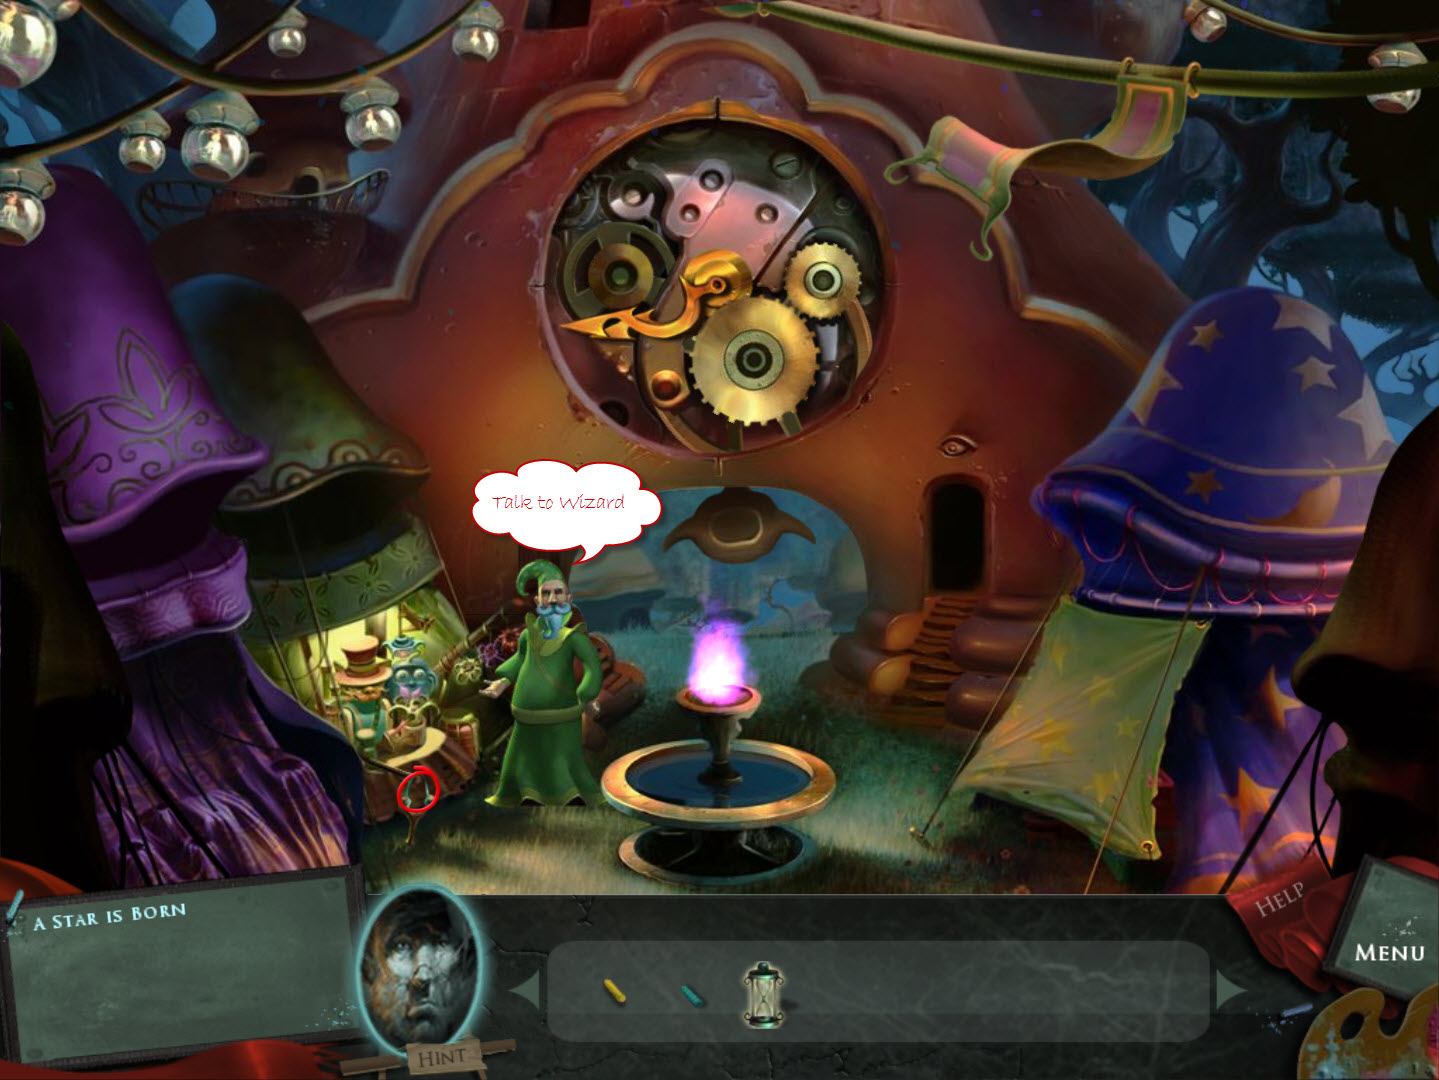
- read the sign on the blue tent
- use the Clock Hand on the clock
- turn the hands to read 7:30
- attempt to the take the Oil Can from the pink tent
- give the Wizard the Old Letter (it's written in black & white and it's been read all over!)
- take the Oil Can
- attempt to take the Gear from the pink tent
- give the Wizard the Teddy Bear
- take the Gear
- enter the door on the right
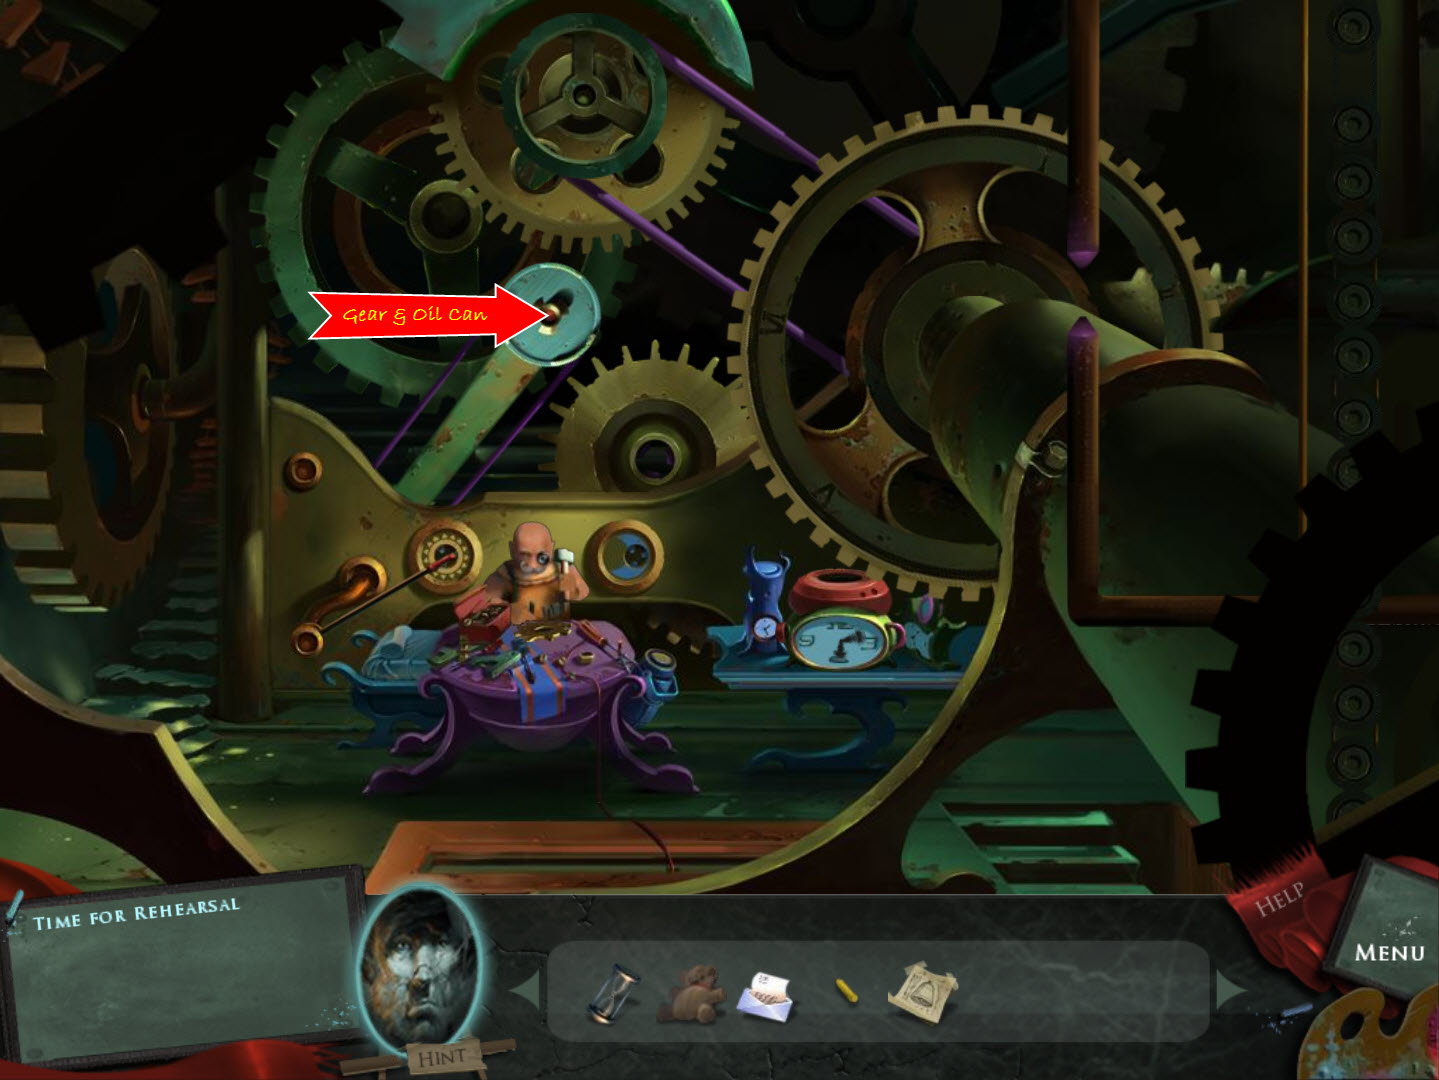
The Clock Maker
- talk to the Worker
- place the Gear in the center of the machine
- use the Oil Can on the gear
- exit
The Clock Tower
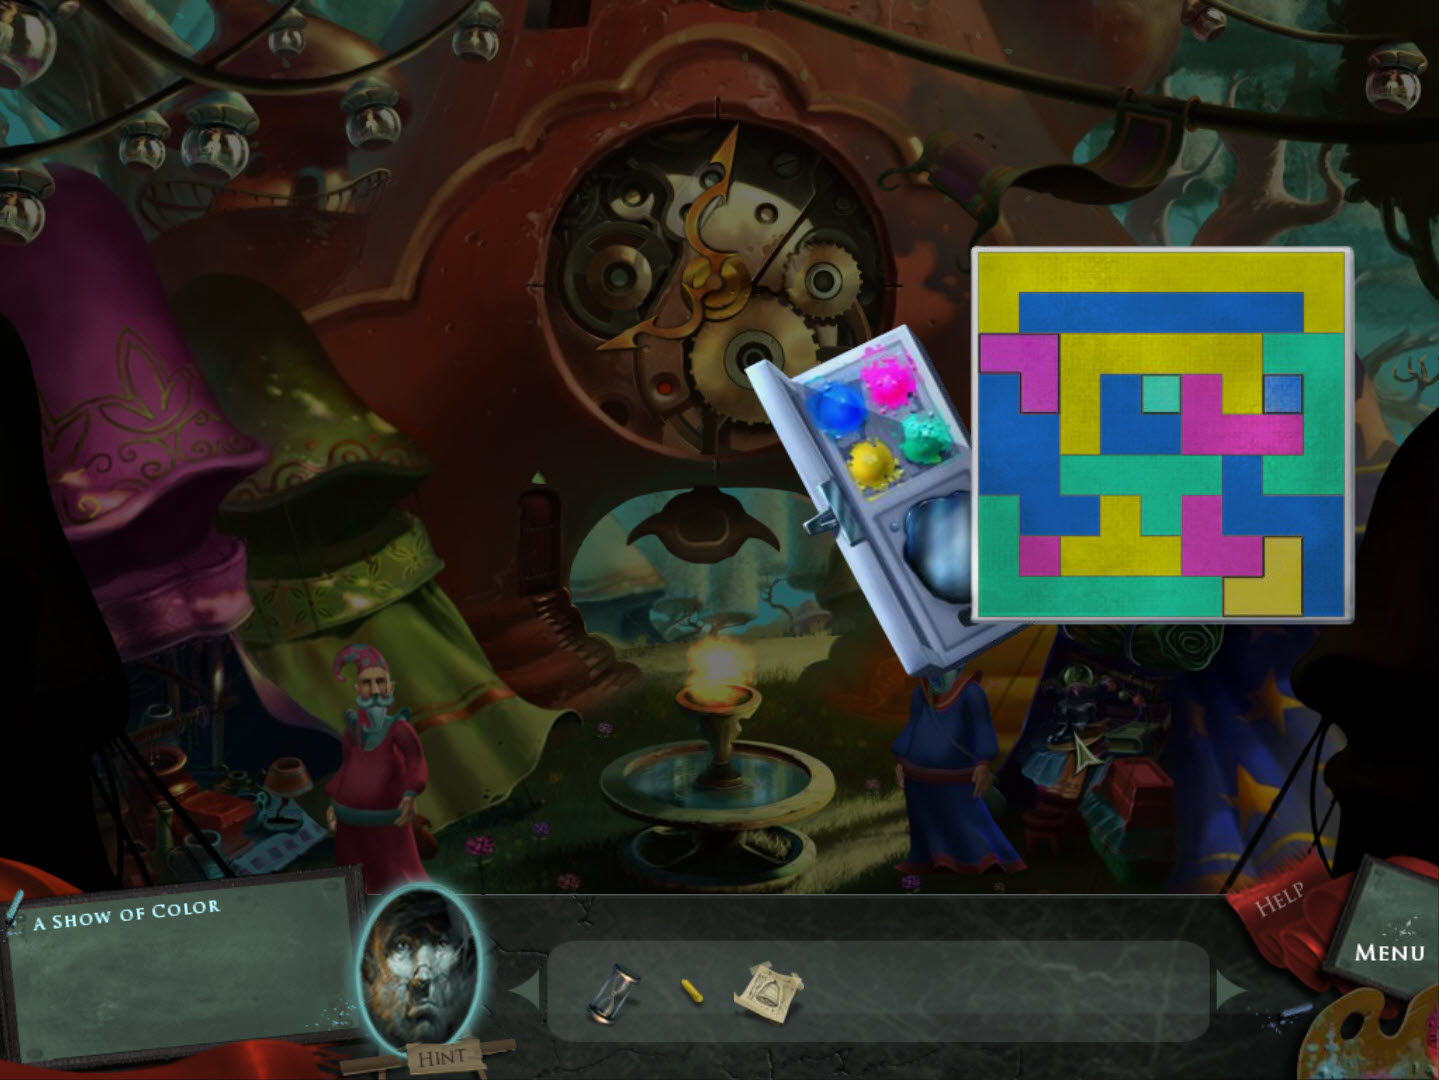
- talk to the Blue Wizard
- Paint Puzzle (Easy)
- paint the squares in the four different colors
- no two colors can match
- see screenshot for one possible solution
- receive Magical Paints
- enter the elevator (left door)
- use the Magical Paints on the unfinished sketch
- place the Bell in the tower
- return to The Clock Maker
The Clock Maker
- talk to the Clock Maker
- receive Dragon Costume
- exit
- talk to the Blue Wizard
- give him the Dragon Costume
- receive Blue Chalk
- give the Hourglass to the Blue Wizard
- return to The Theater
- examine the chalkboard
- use the Blue Chalk to outline the moon
- enter The Clock Tower
- talk to the Green Wizard
- Green Wizard Puzzle (Moderate)
- jump the red and blue piece over each other
- leave no red piece behind
- leave the blue piece in the center
- see video for solution
- enter the elevator
- use the Hourglass on the constellation
- catch the shooting star
- receive Constellation
- return to The Theater
The Theater
- examine the chalkboard
- use the Yellow Chalk to draw the outline of the sun
- enter The Clock Tower
- give the Constellation to the Blue Wizard
- receive Seed
- return to The Clock Maker
- go up the steps
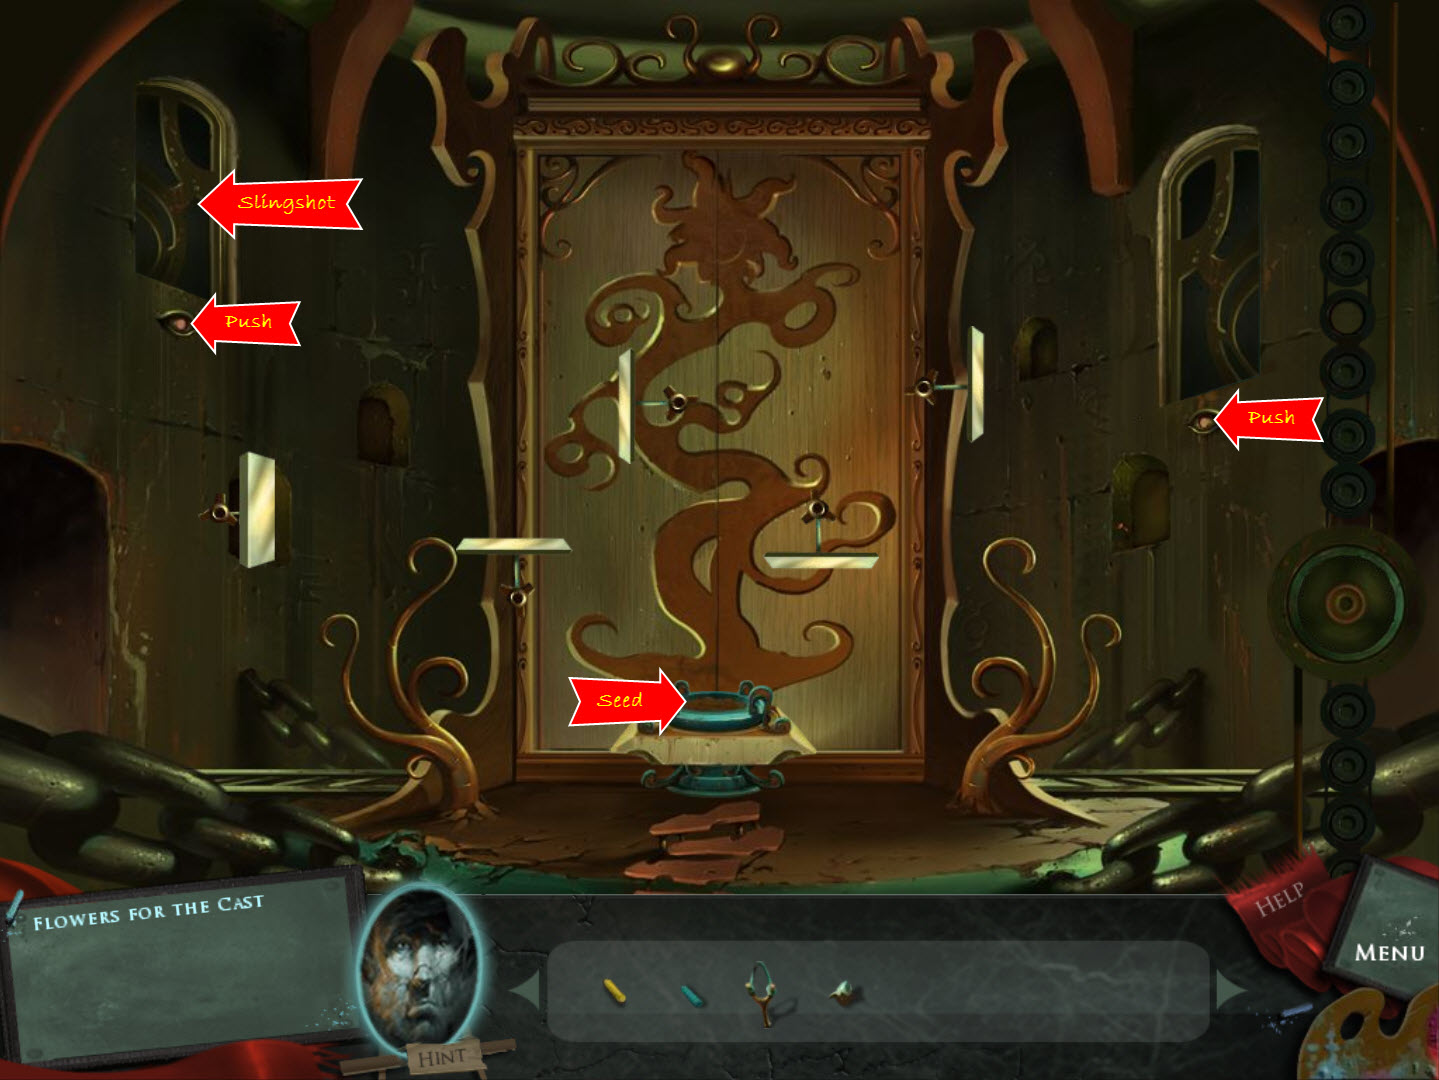
- place the Seed in the pot
- use the Slingshot to the break the left window
- click the "eyes" beneath each the windows to open them
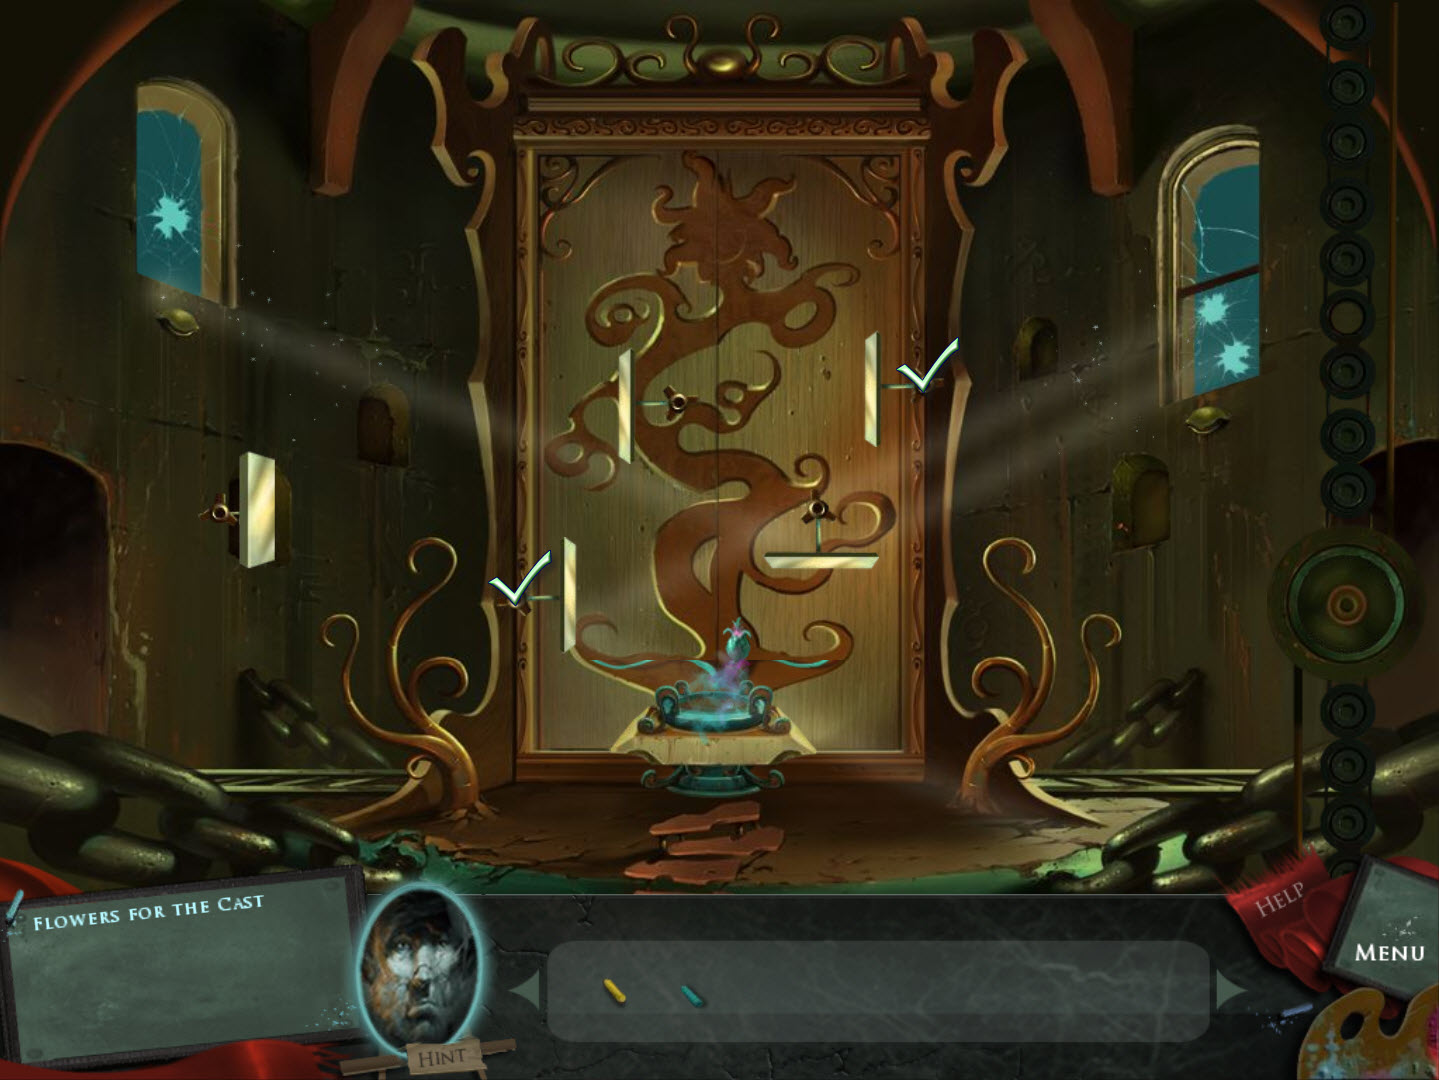
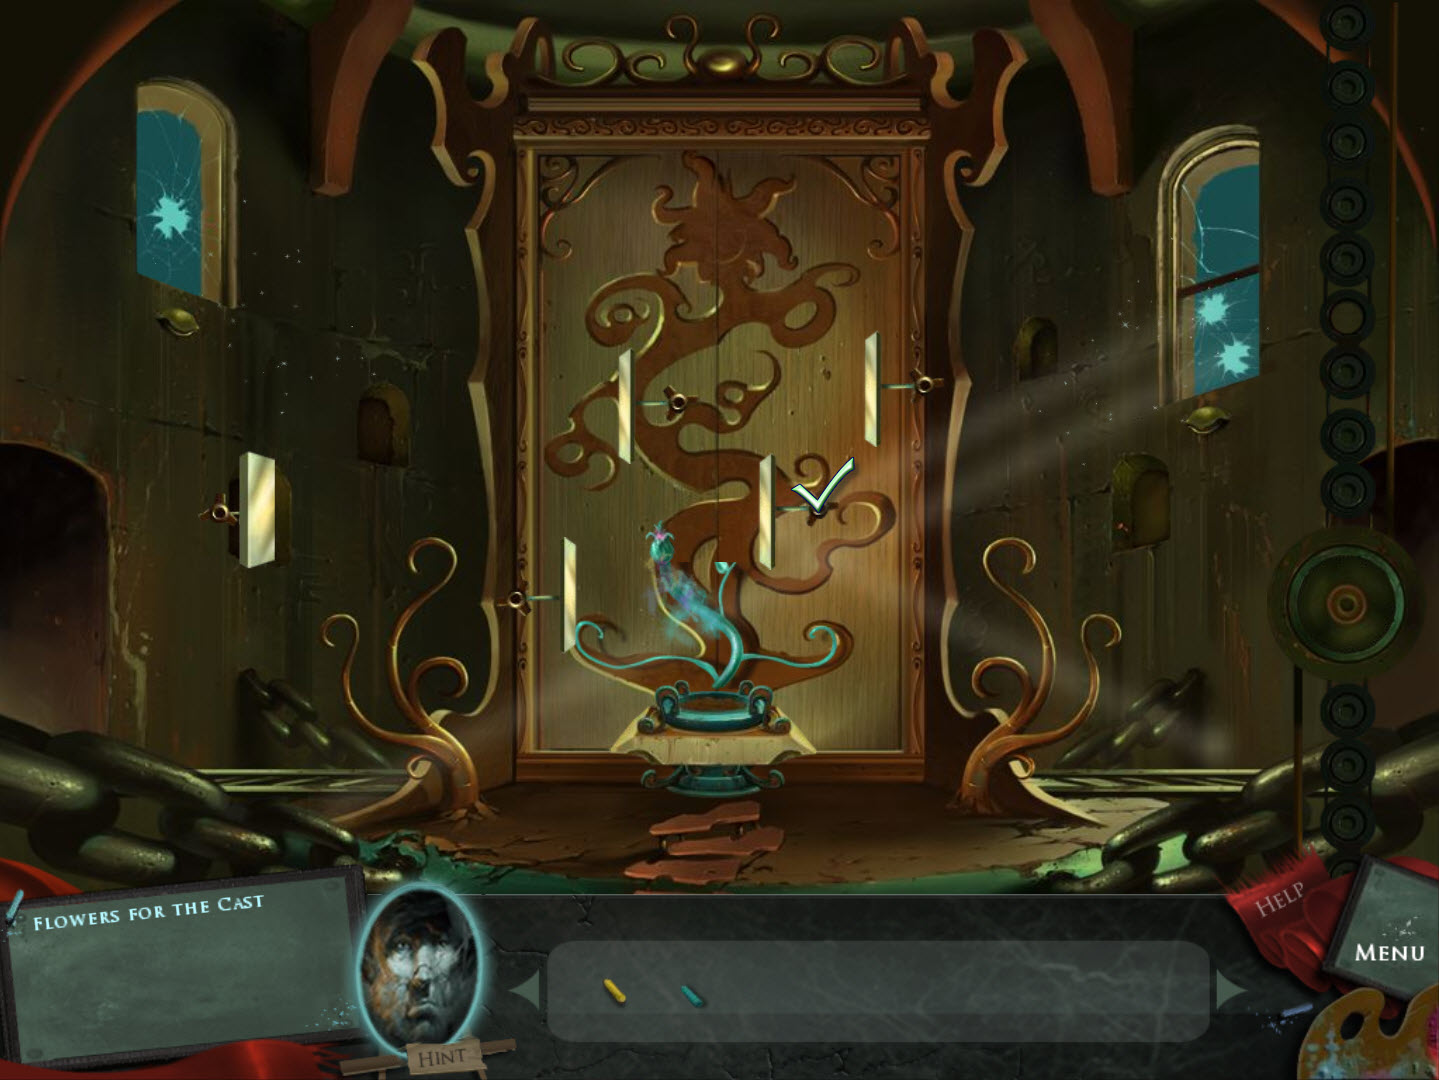
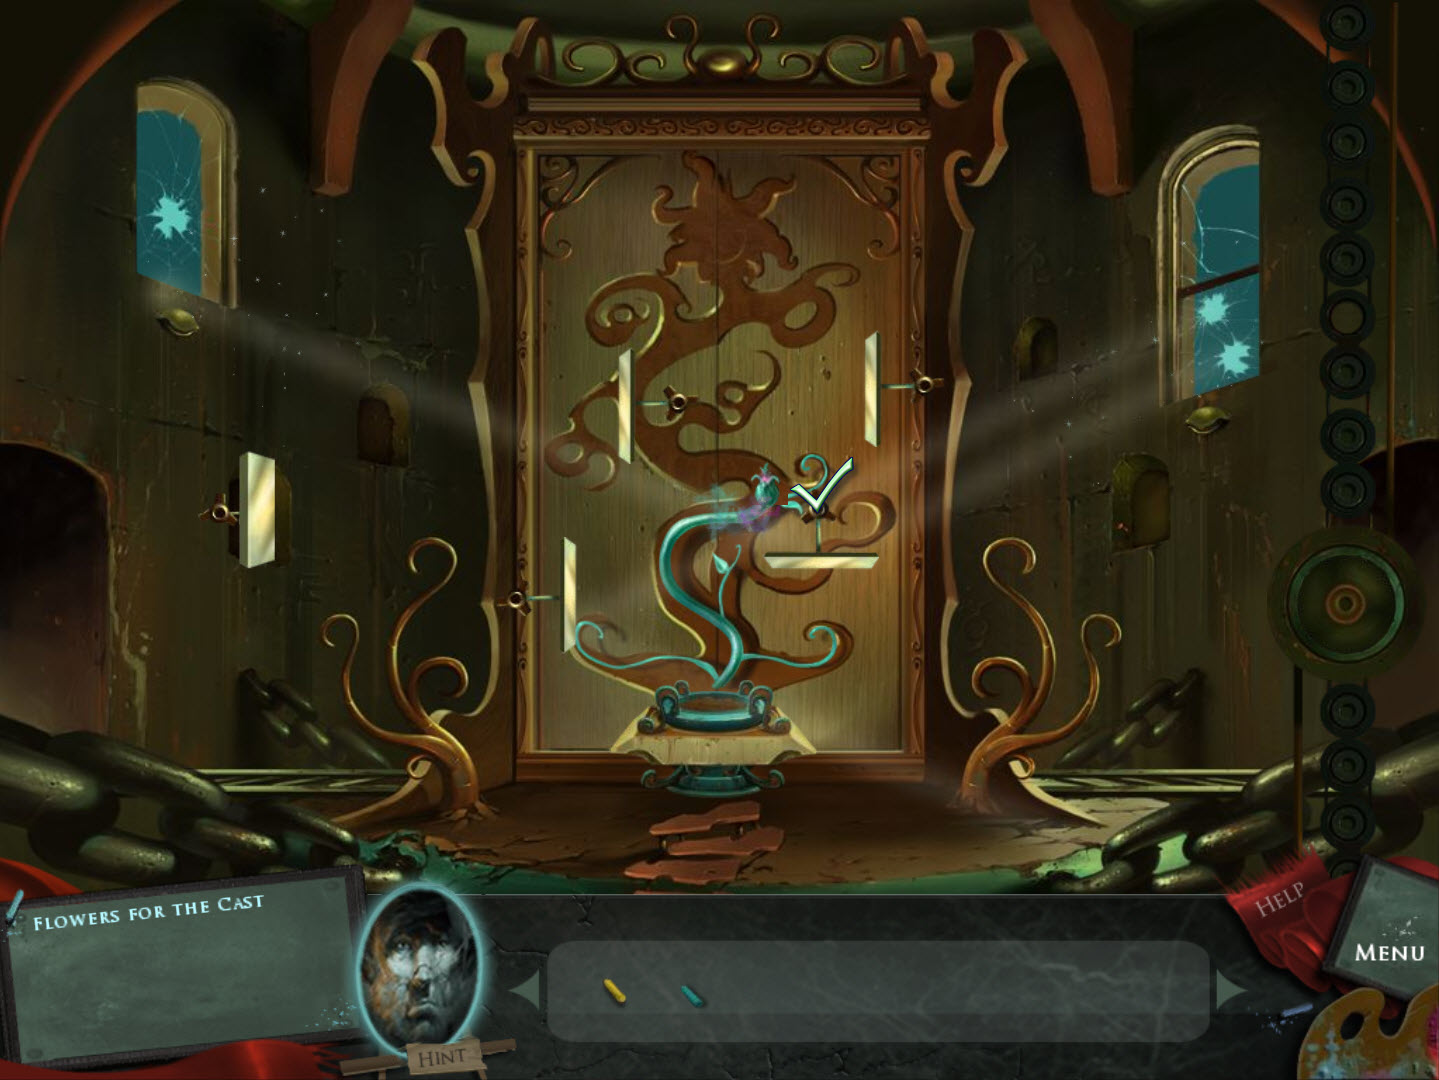
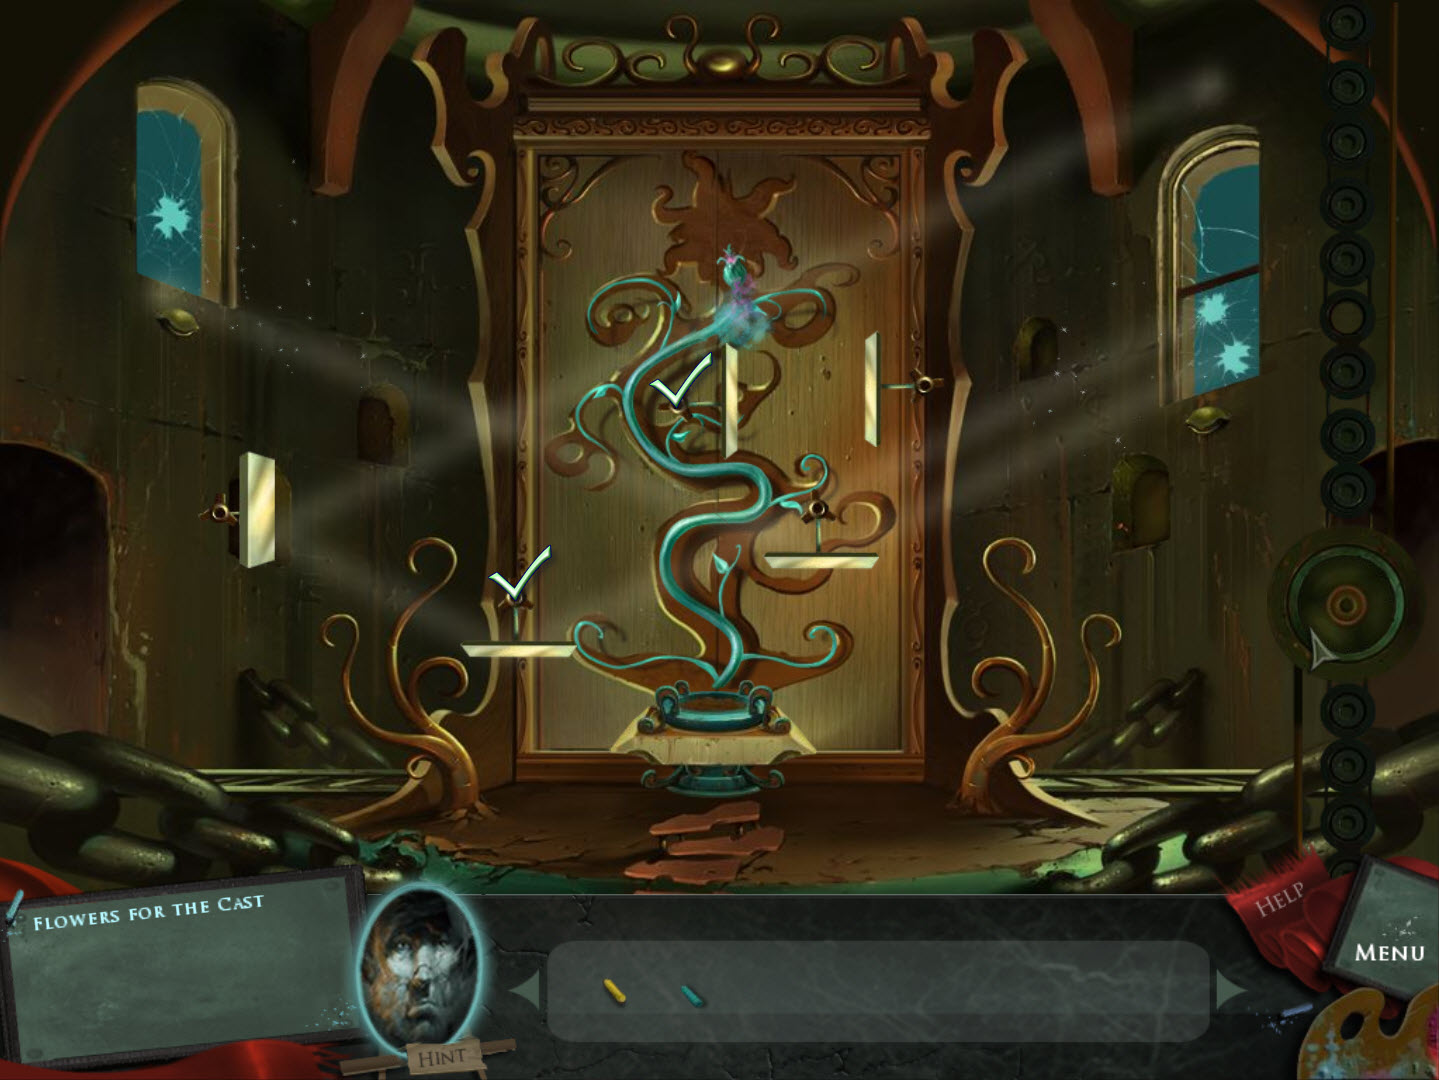
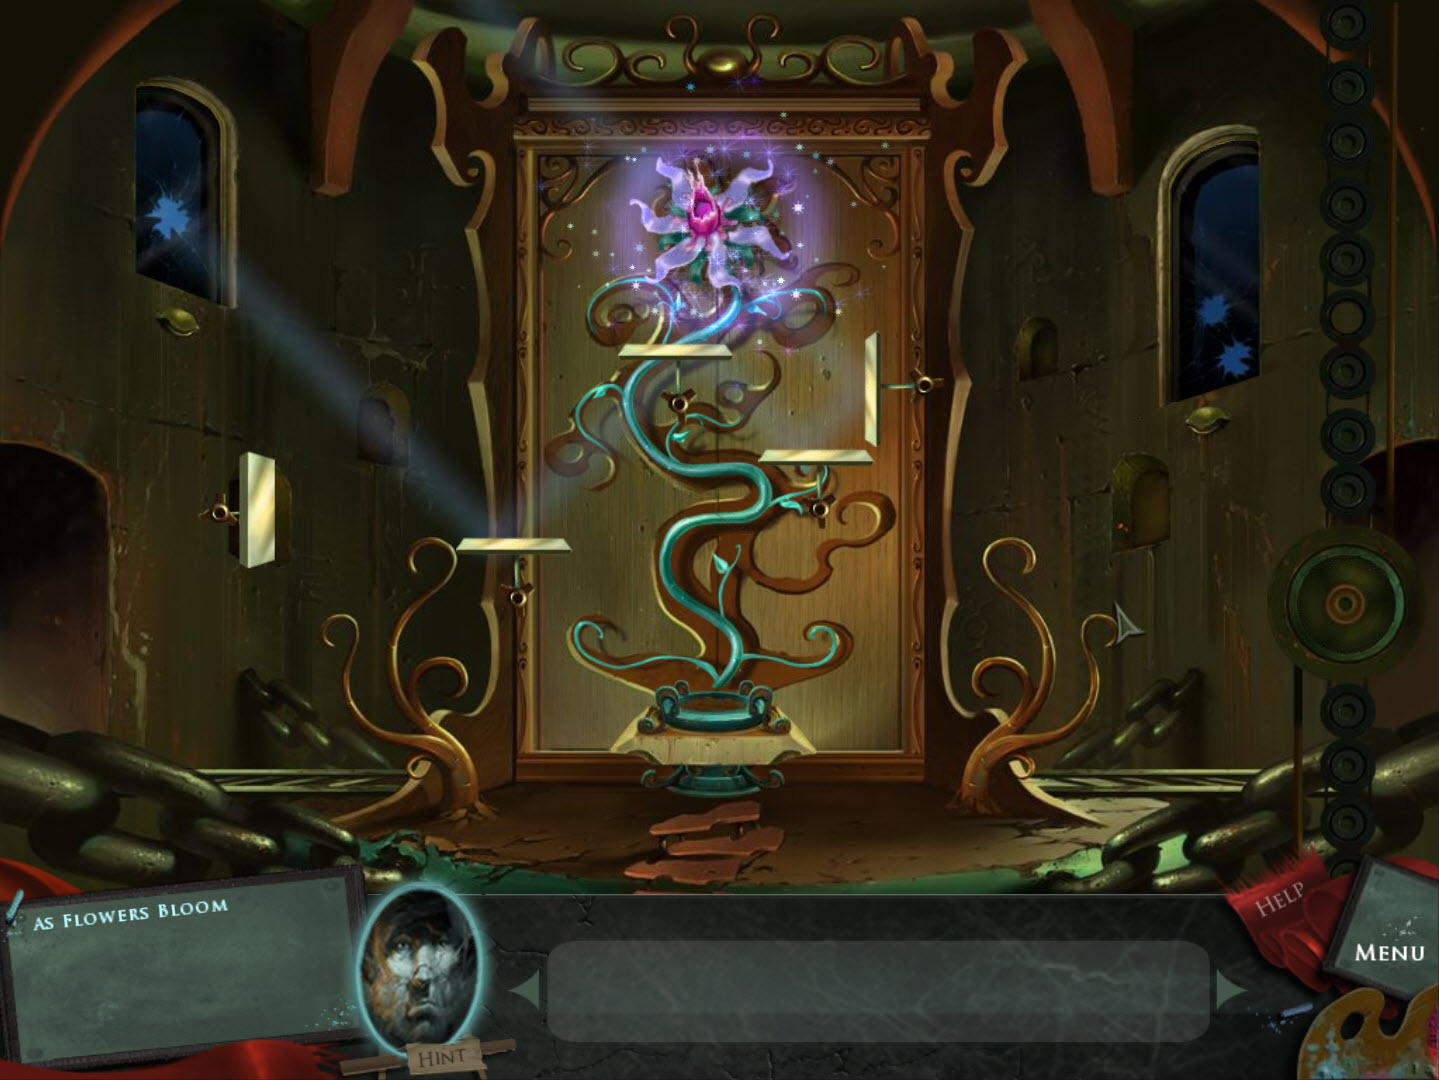
- Mirror Puzzle (Easy)
- move the mirrors so the light hits the seed and it grows
- you will have to do this four times until it grows all the way to the top
- see screenshots for solutions
- note: there is a check mark on the mirrors that need to be moved
- return to The Theater
The Theater
- examine the chalkboard
- use the Blue Chalk to draw the outline of the moon
- return to The Clock Maker and go up the stairs
- move the mirrors so the moonlight hits the bud
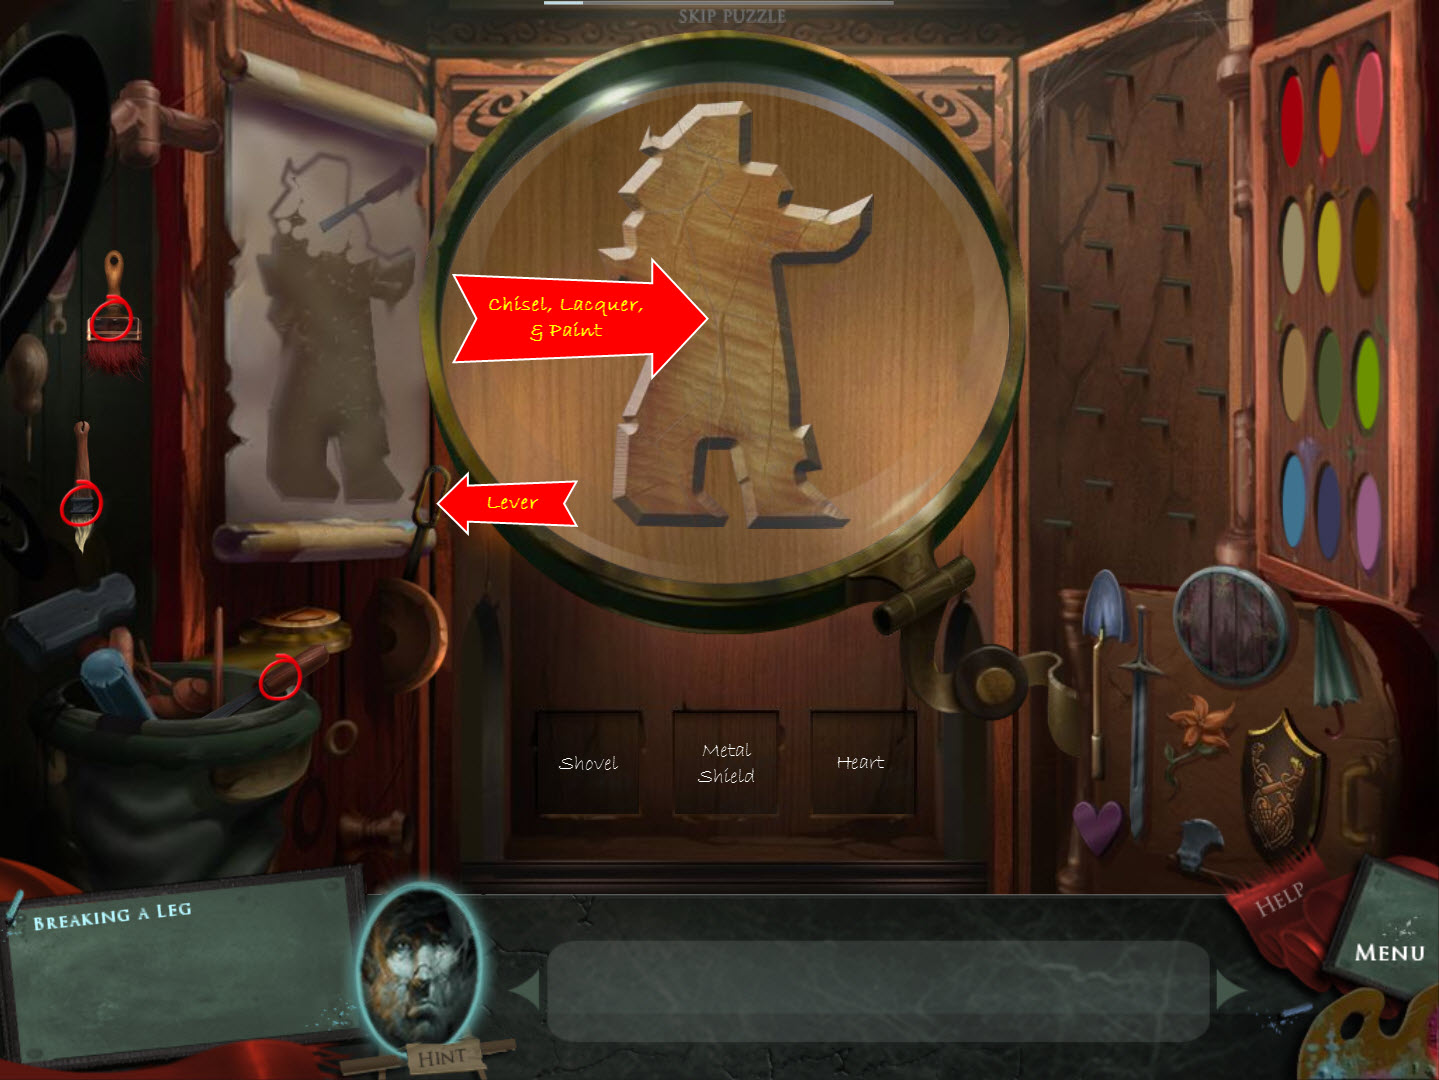
- Hero Puzzle (Moderate)
- take all the pieces on the left and place them in the outline
- if the piece is in the correct spot it will turn grey
- on the right side is door covered with items
- pick up the Chisel and use it on the Hero
- pick up the fat Paint Brush and use it on the Hero
- pick up the small Paint Brush and use it along with the colors to paint the Hero exactly like the picture
- pick the three correct items and put them in the boxes below the Hero
- solution (highlight to see): Shovel, Metal Shield, Heart
- pull the gold lever
- see screenshot for solution(s)
- you will be returned to The Theater
The Theater
- go up
- go through the door
- examine the area on the left
- take the Chisel
- examine the podium
- take the Griffin Skeleton Key
- take the Sheet of Symbols
- pick up the Red Rock
- continue up
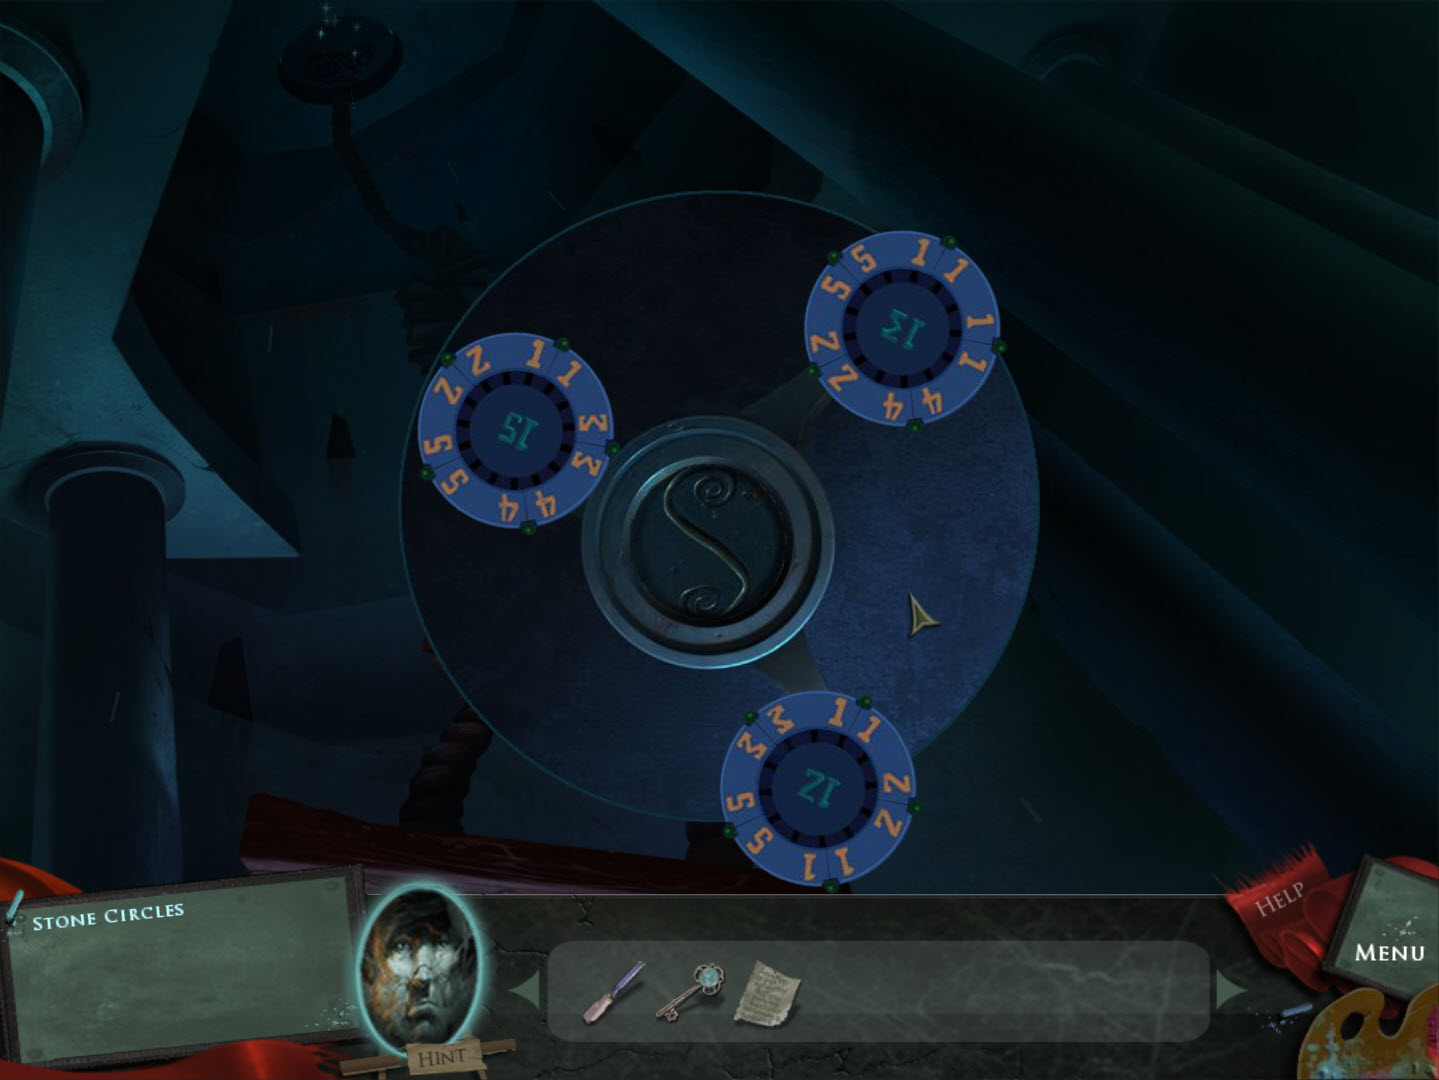
- examine the black hole
- Number Dials Puzzle (Difficult)
- the numbers on each dial can be swapped (on the same dial or on another dial)
- put like numbers side by side to turn the outer part of the dials green
- numbers under the green lights must add up to equal the number in the middle
- if you are correct the entire inner dial will turn green
- see screenshot for solution
- exit through the hole
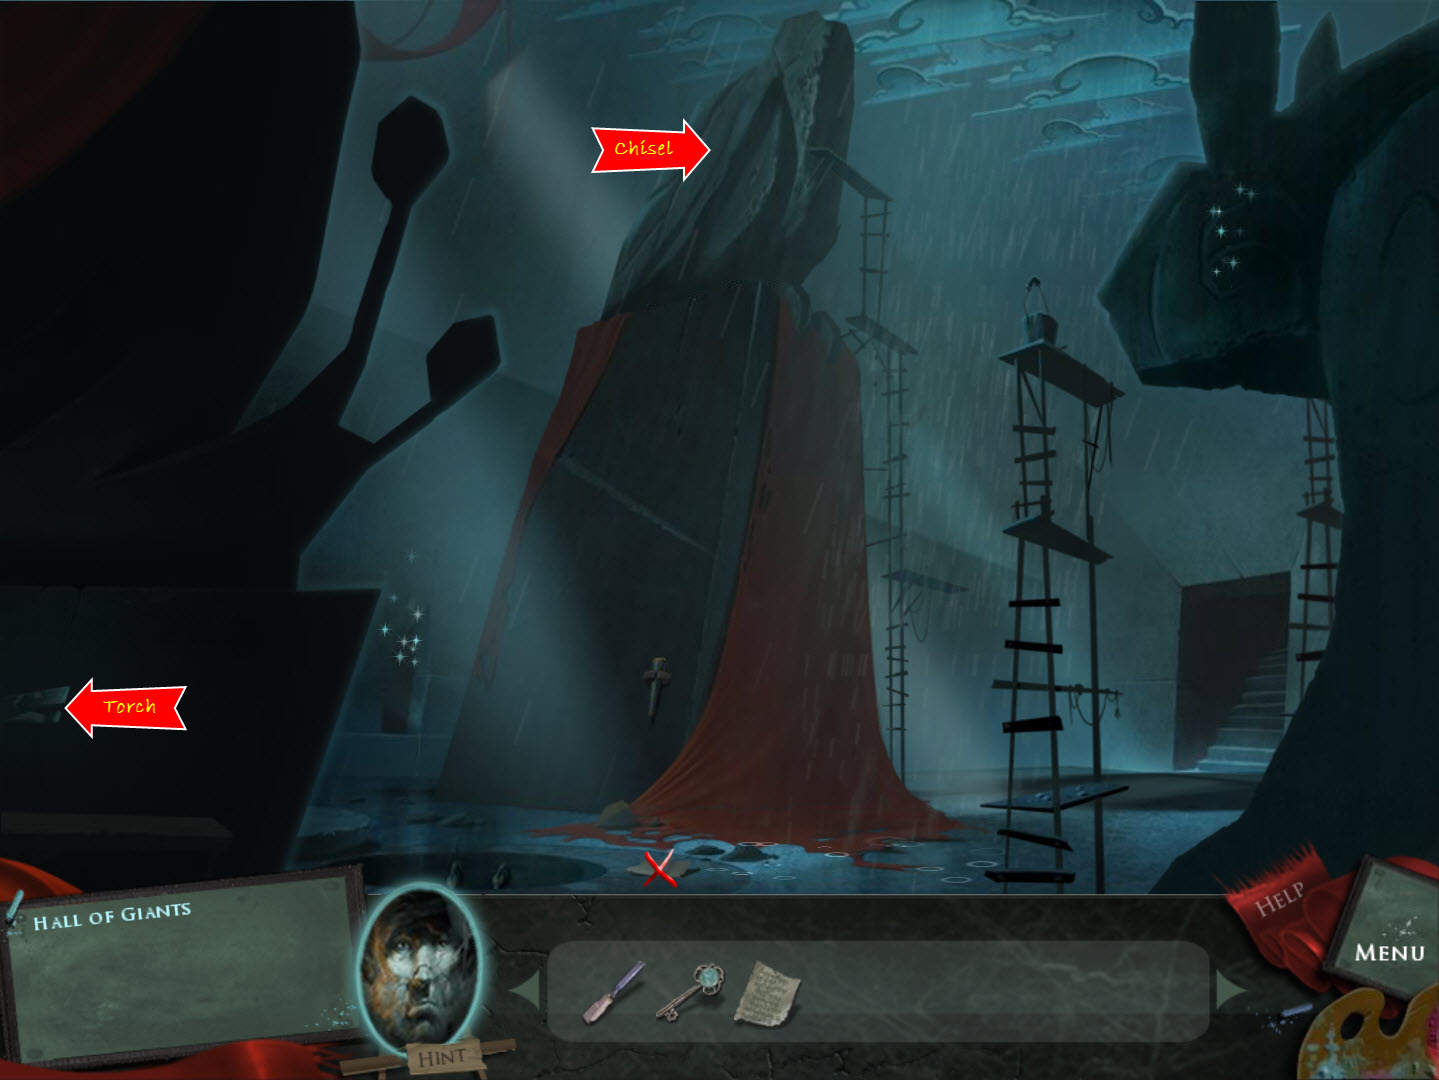
Hall of Giants
- examine the area to the left and see lights approaching
- read the Note
- examine the eye of the giant boulder on the right
- take Yellow Rock
- attempt to move forward - watch out!
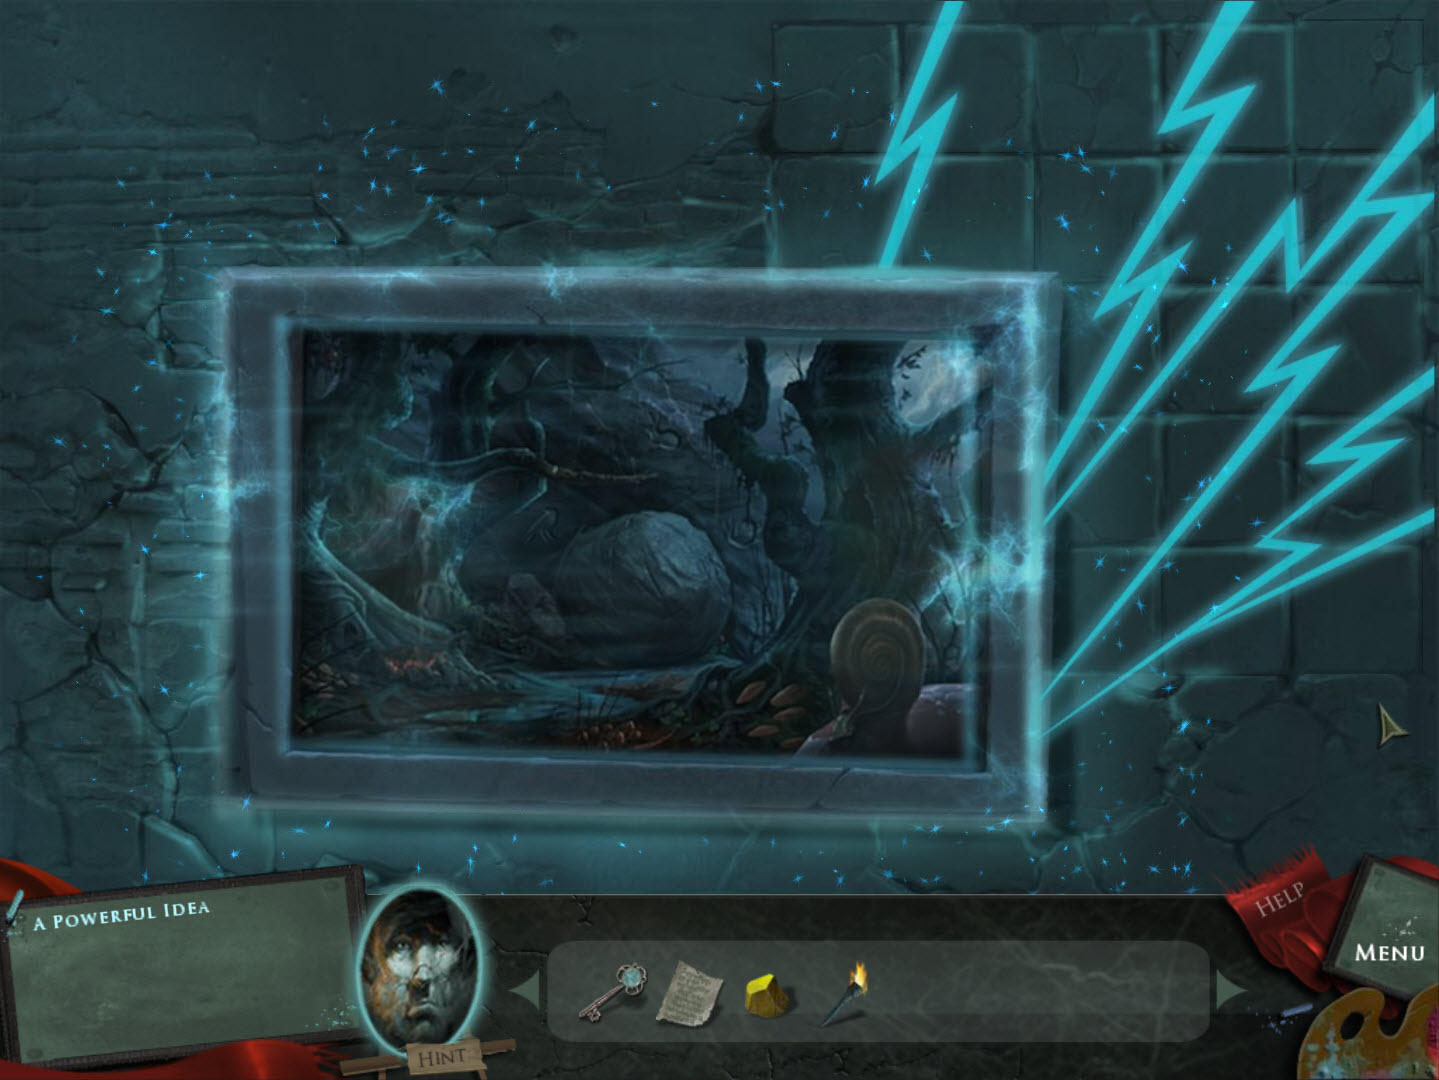
- use the Chisel on the glowing rock
- take the Torch
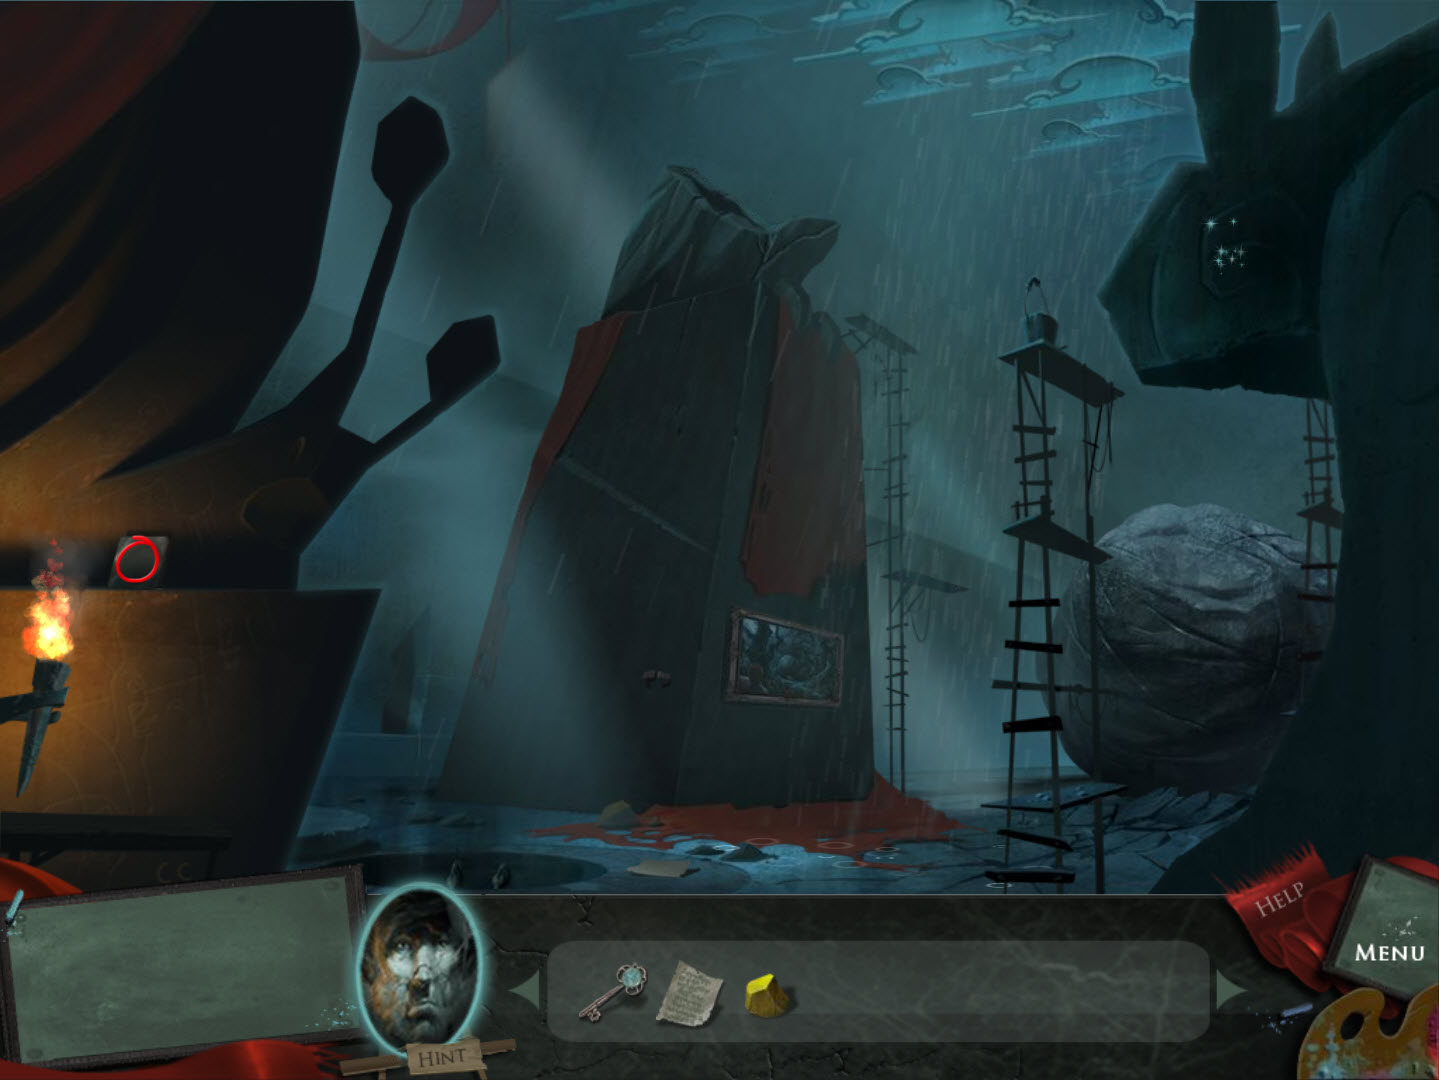
- place the Torch in the brackets on the far left
- pick up the Tile
- take the Torch back
- examine the base of the column
- place the Tile in the missing spot
- Tile Puzzle (Easy)
- rotate the tiles so all the lightning bolts line up
- see screenshot for solution
- you will automatically enter the painting
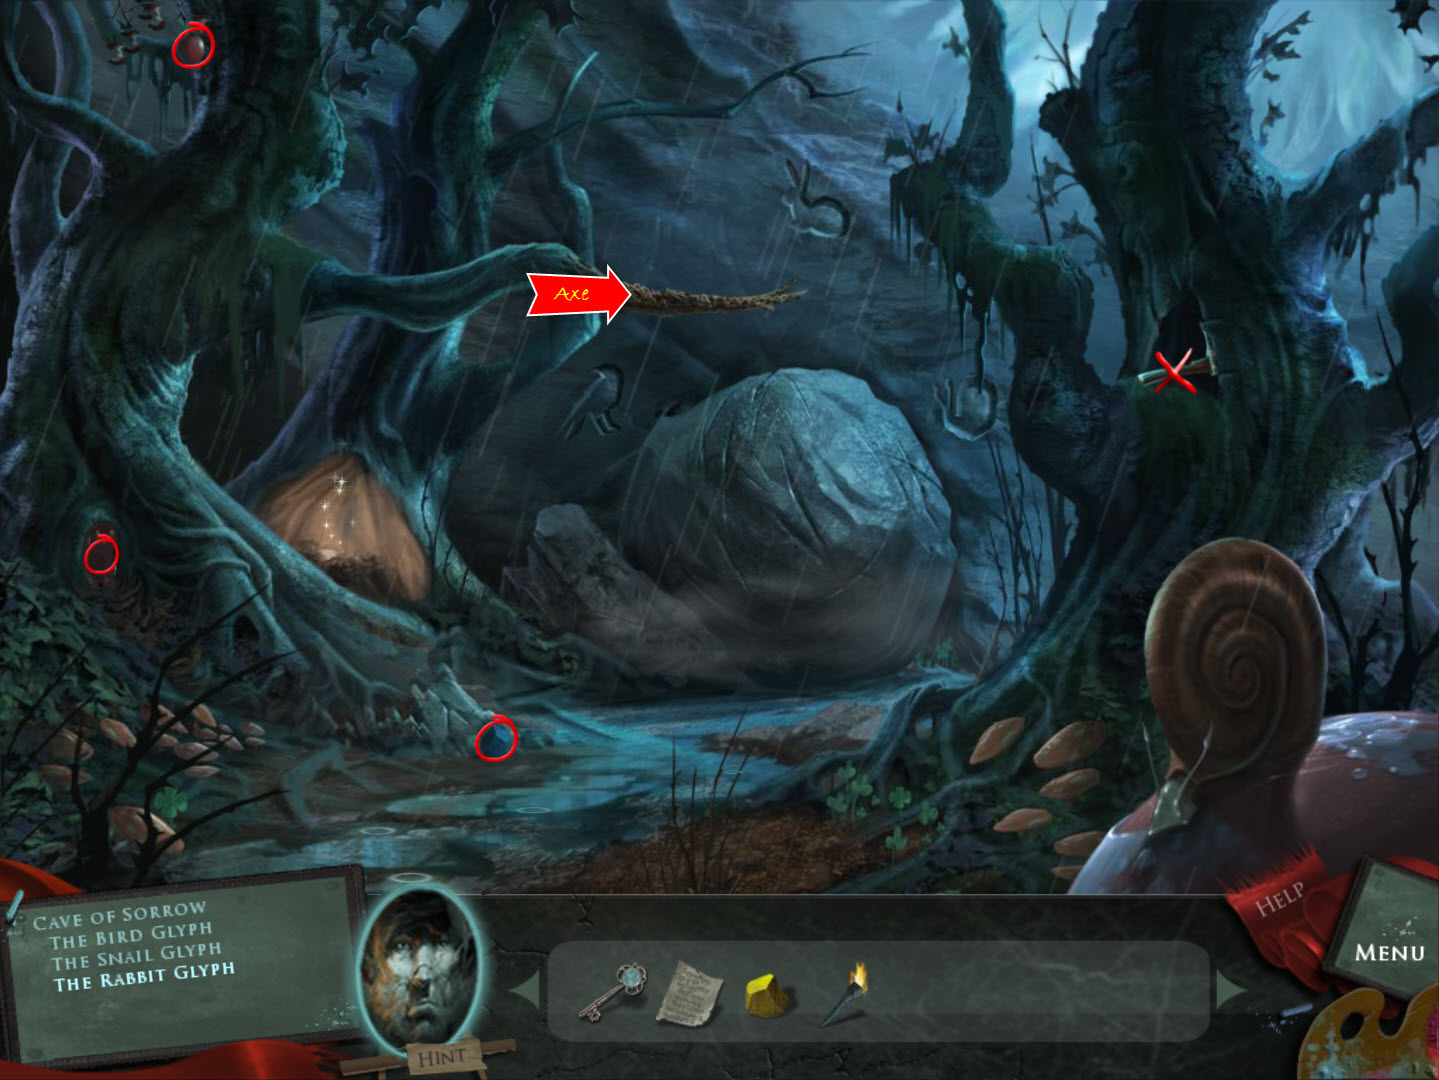
The Deep Forest
- poke the bunny
- attempt to take the Axe
- take the Axe (after the bird leaves)
- use the Axe on the tree branch the bird is perched on
- pick up the Stone Bird
- use the Axe on the snail's shell
- take the Stone Snail
- pick up the Blue Rock
- pick the Apple
- examine the hallow in the tree
- Paint Puzzle (Easy)
- place the Yellow Rock in the left bowl and click
- click the bowl to pour the powder into the middle bowl
- click the far right bowl to pour egg into the powder
- click the middle bowl to pour the paint into the paint try
- repeat with the Blue Rock
- repeat with the Red
Rock
- repeat with the Blue and Yellow Rocks together (mix the Yellow Powder and the Blue Powder)
- repeat with the Blue and Red Rocks together
- repeat with the
Yellow and Red Rocks together
- take the Paint Pallet
- exit the painting
Hall of Giants
- examine the eye of the giant boulder
- Eye Puzzle (Easy)
- place the Paint Pallet on the scaffolding
- paint the eye to match the other one
- note: don't forget the upper eyelid (I nearly missed it!)
- take the Carrot sketch
- return to the Deep Forest
- give the Carrot to the rabbit
- take the Stone Rabbit
- place the Bird, Snail, and Rabbit Stones in the matching indents on the boulder
- enter the cave
- place the Torch in the holder on the left
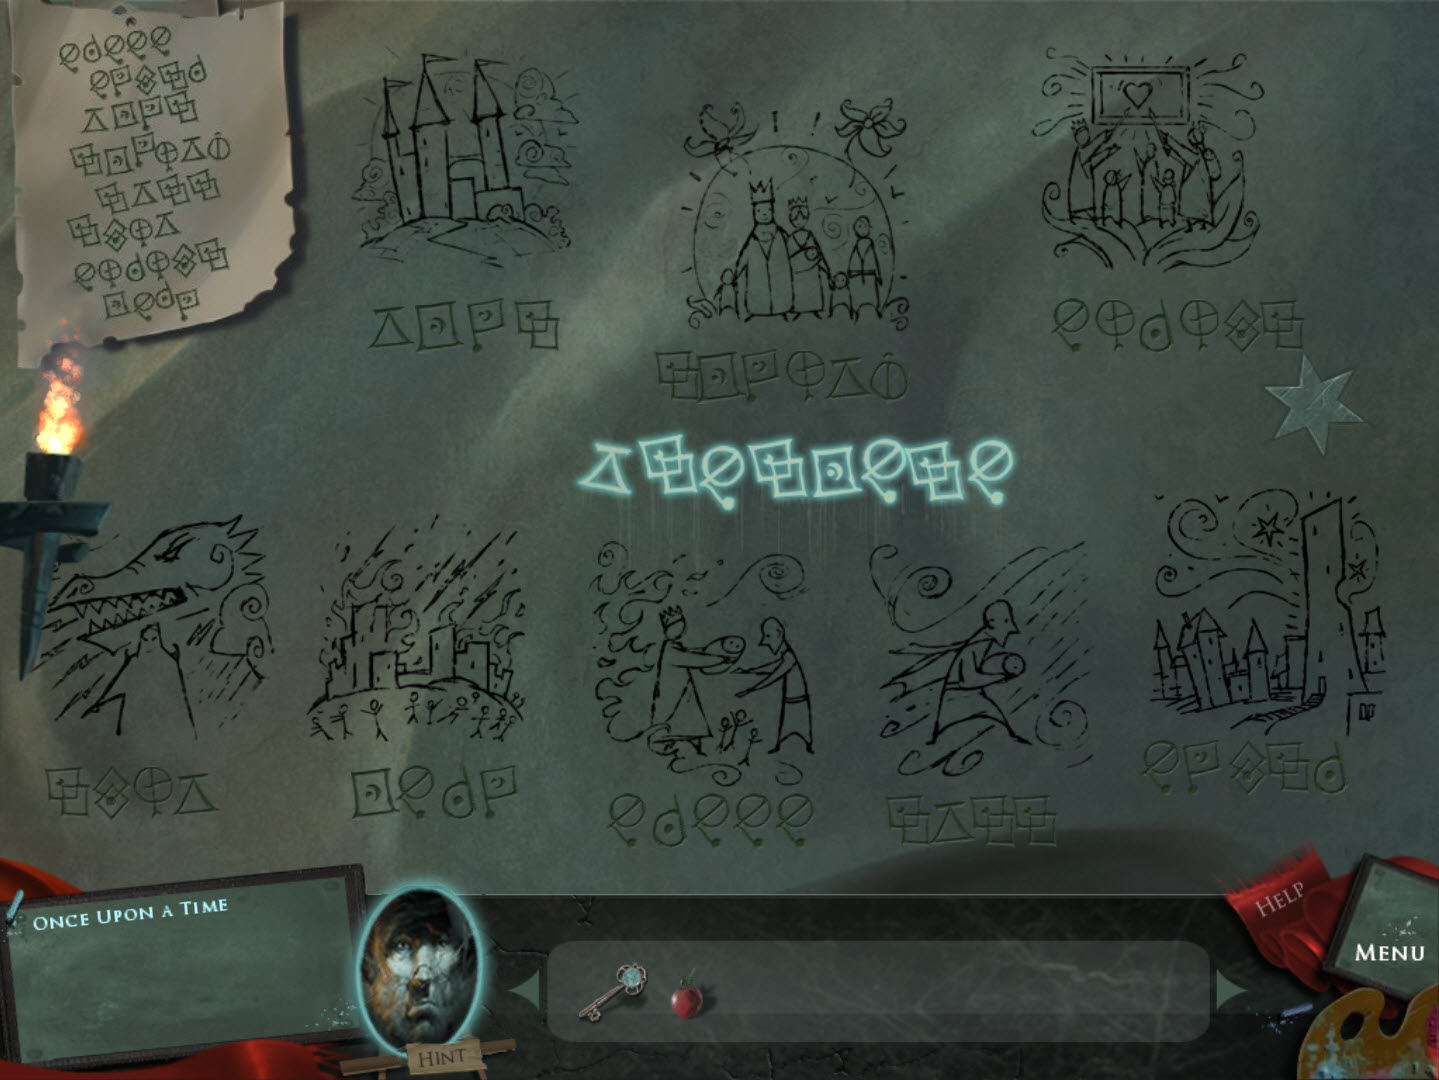
- place the Sheet of Symbols on the nail
- Symbol Puzzle (Difficult)
- swap the symbols to match the solutions on the paper
- they will not be in order on the wall
- the first solution the paper has five symbols, find a row of symbols on the wall that have only five
- place the correct symbols there (bottom, middle)
- when the symbols are in the correct order a sketch will appear
- if the sketch is in the correct place a symbol will light up in the middle
- you need to put the pictures in the correct oder to have all the symbols light up
- see screenshot for solution
- take the Stone Star
- take the Torch
with you before you leave
- exit the painting
- take the Stone Weight
- the boulder has moved - go forward
- place the Stone Weight on the left string
- Weight Puzzle (Easy)
- pull the Weights in order to make the stones move
- the object is to create the picture of Iris
- solution (highlight to see): Right x2 and Left x2
- place the Stone Star on Iris
- examine the left side
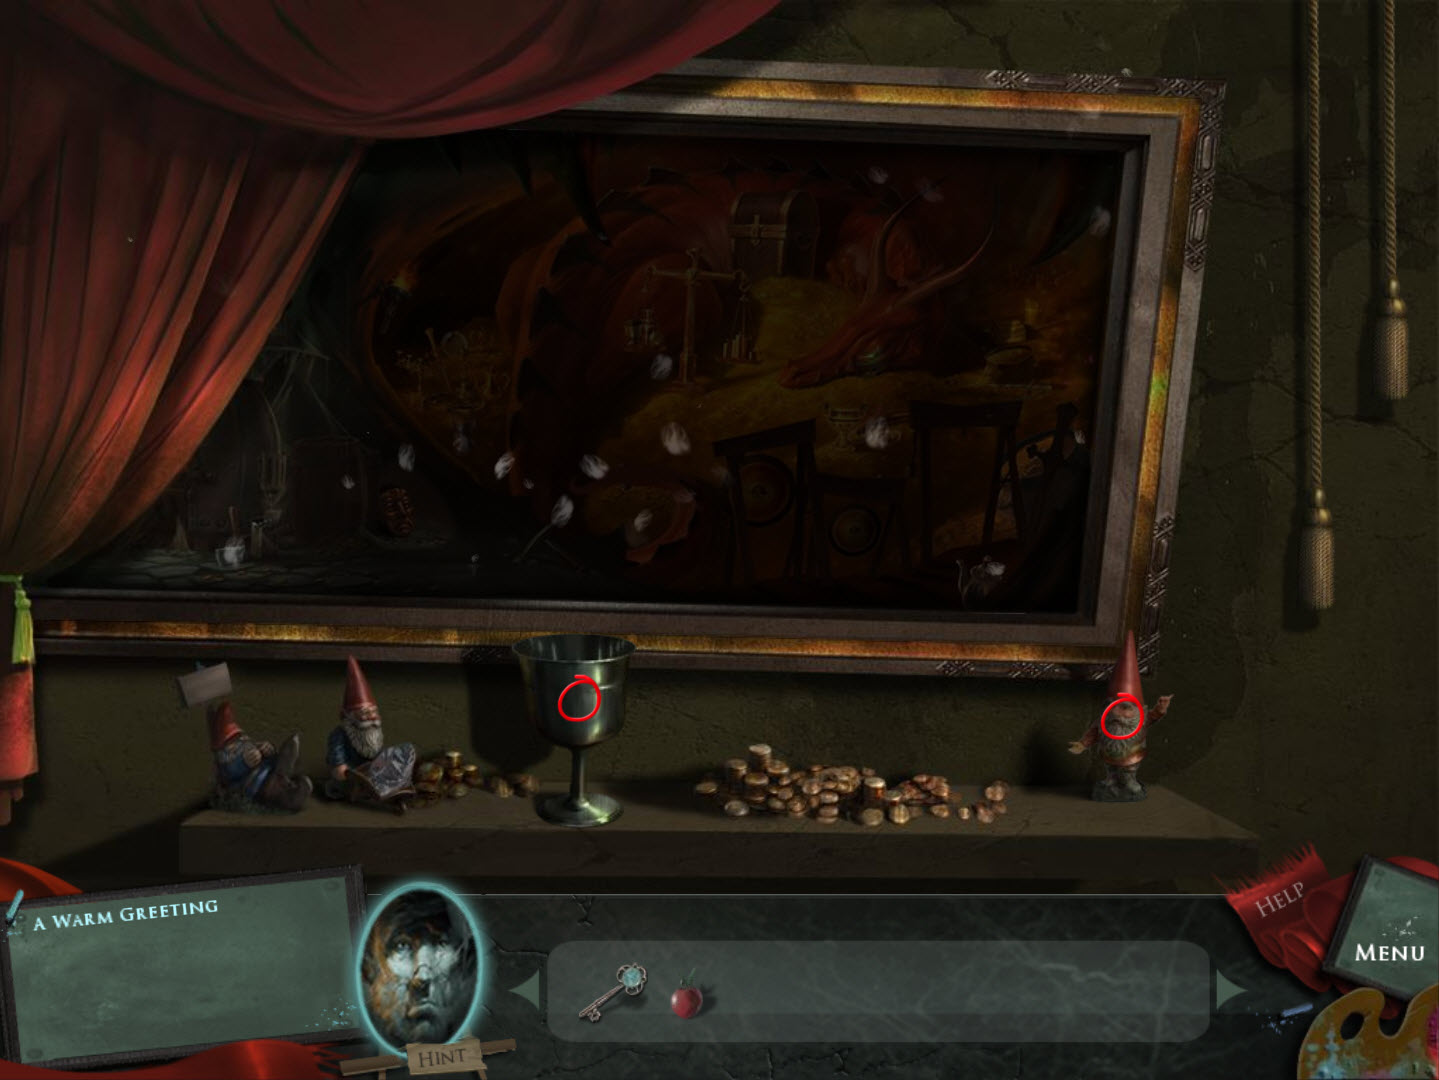
- pick up the Chalice and the Gnome (on the right)
- enter the painting
The Dragon's Cave
- place the Torch in the holder on the left
- note: if you don't have the torch, you left it in the Deep Forest Cave and will have to retrieve it
- take the Mallet
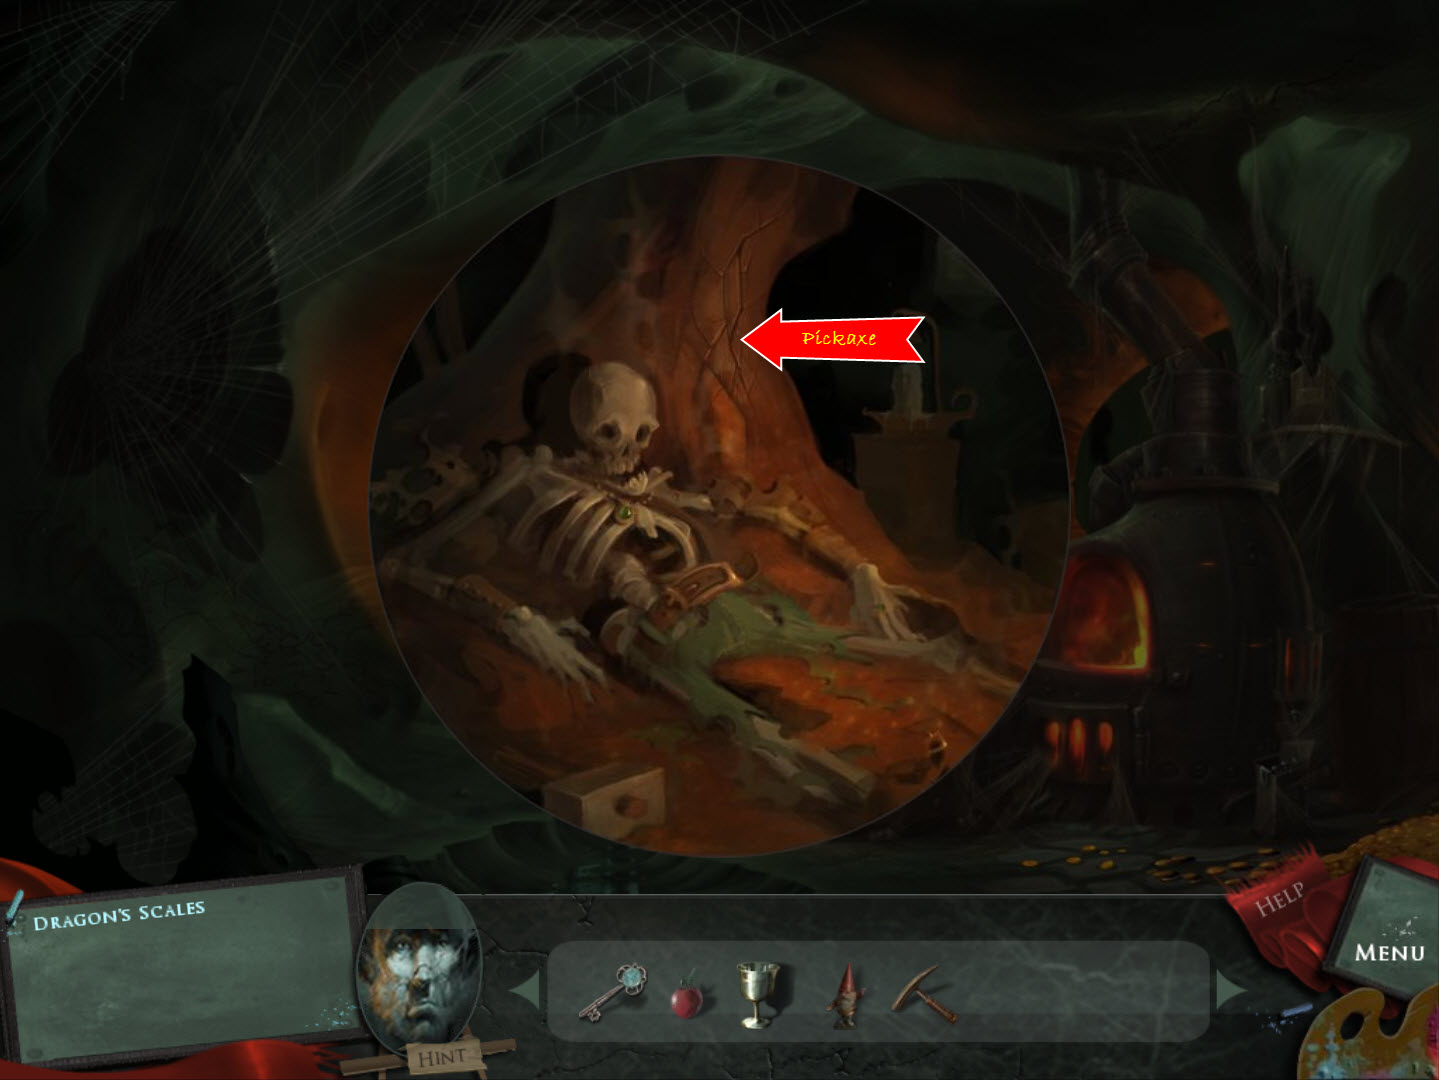
- take the Pickaxe
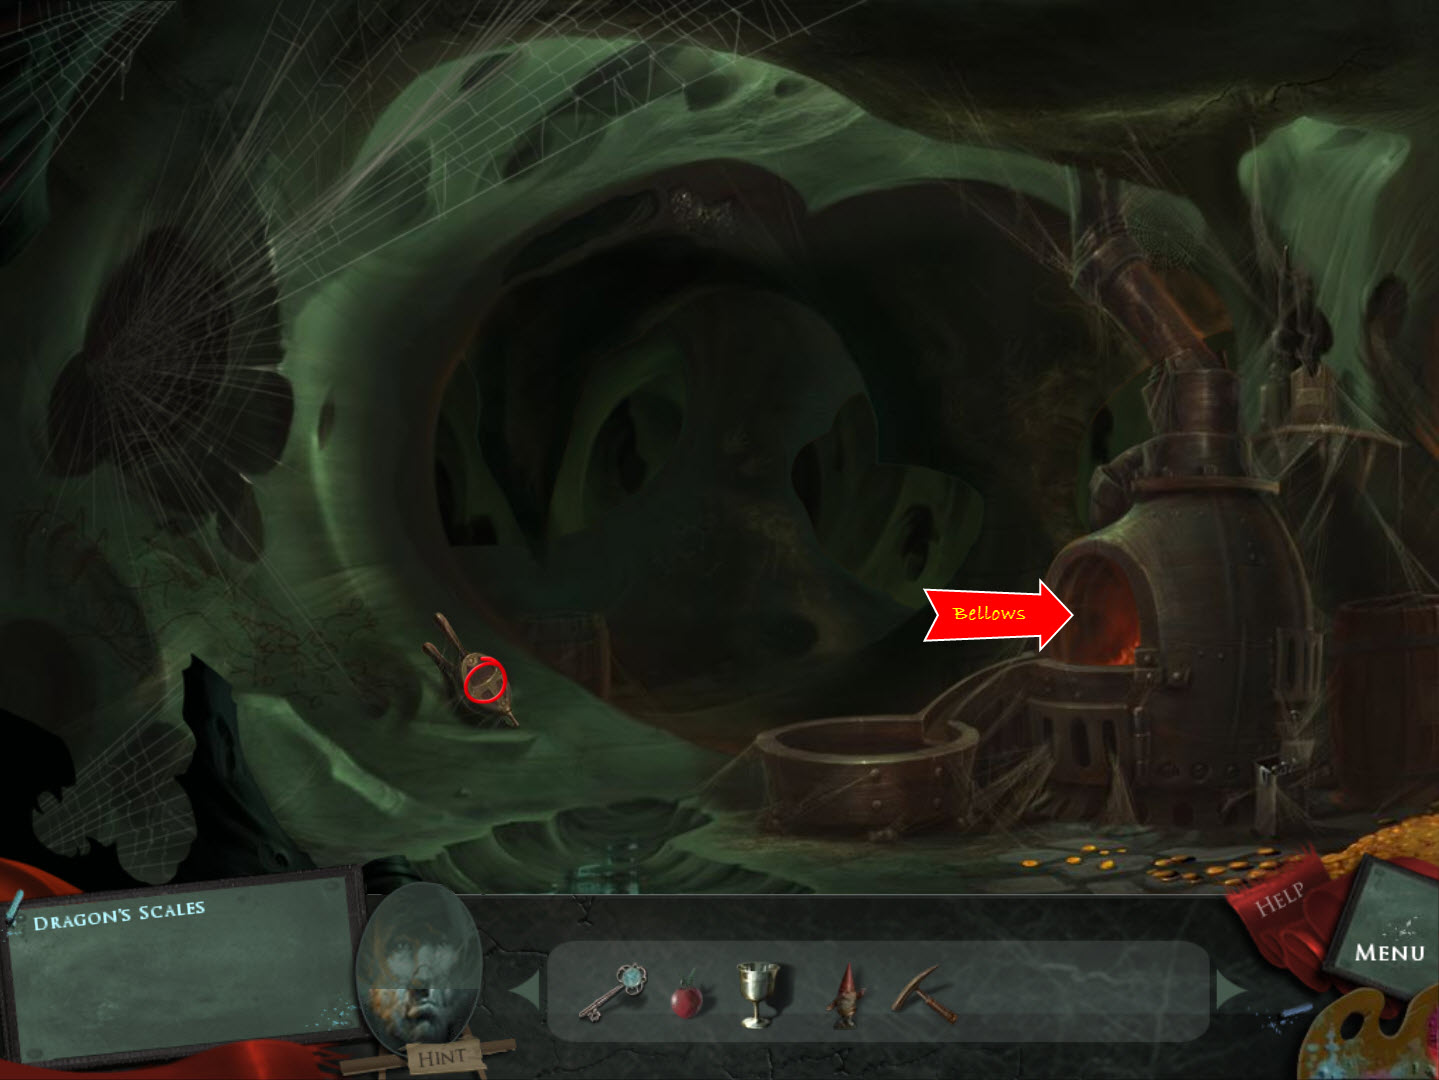
- move left
- pick up the Bellows
- examine the stove
- use the Bellows on the stove
- examine the glowing symbols
- use the Pickaxe on the cracked part of the cave
- take the Gold Piece
- place the Gold Piece in the stove
- place the Apple, Gnome, and Chalice in the gold
- go right
- place the Golden Apple, Gnome, and Chalice on the scales
Fire and Ice
- examine the podium
- take the Canvas Piece
- examine the right side
- replace the Canvas Piece
- pick up the two Frozen Statue pieces
- Door Puzzle (Easy)
- rotate the tiles on the door to create a pattern
- if you create the correct pattern the left eye will turn green
- see screenshots for solution
- exit the painting
Fire and Ice
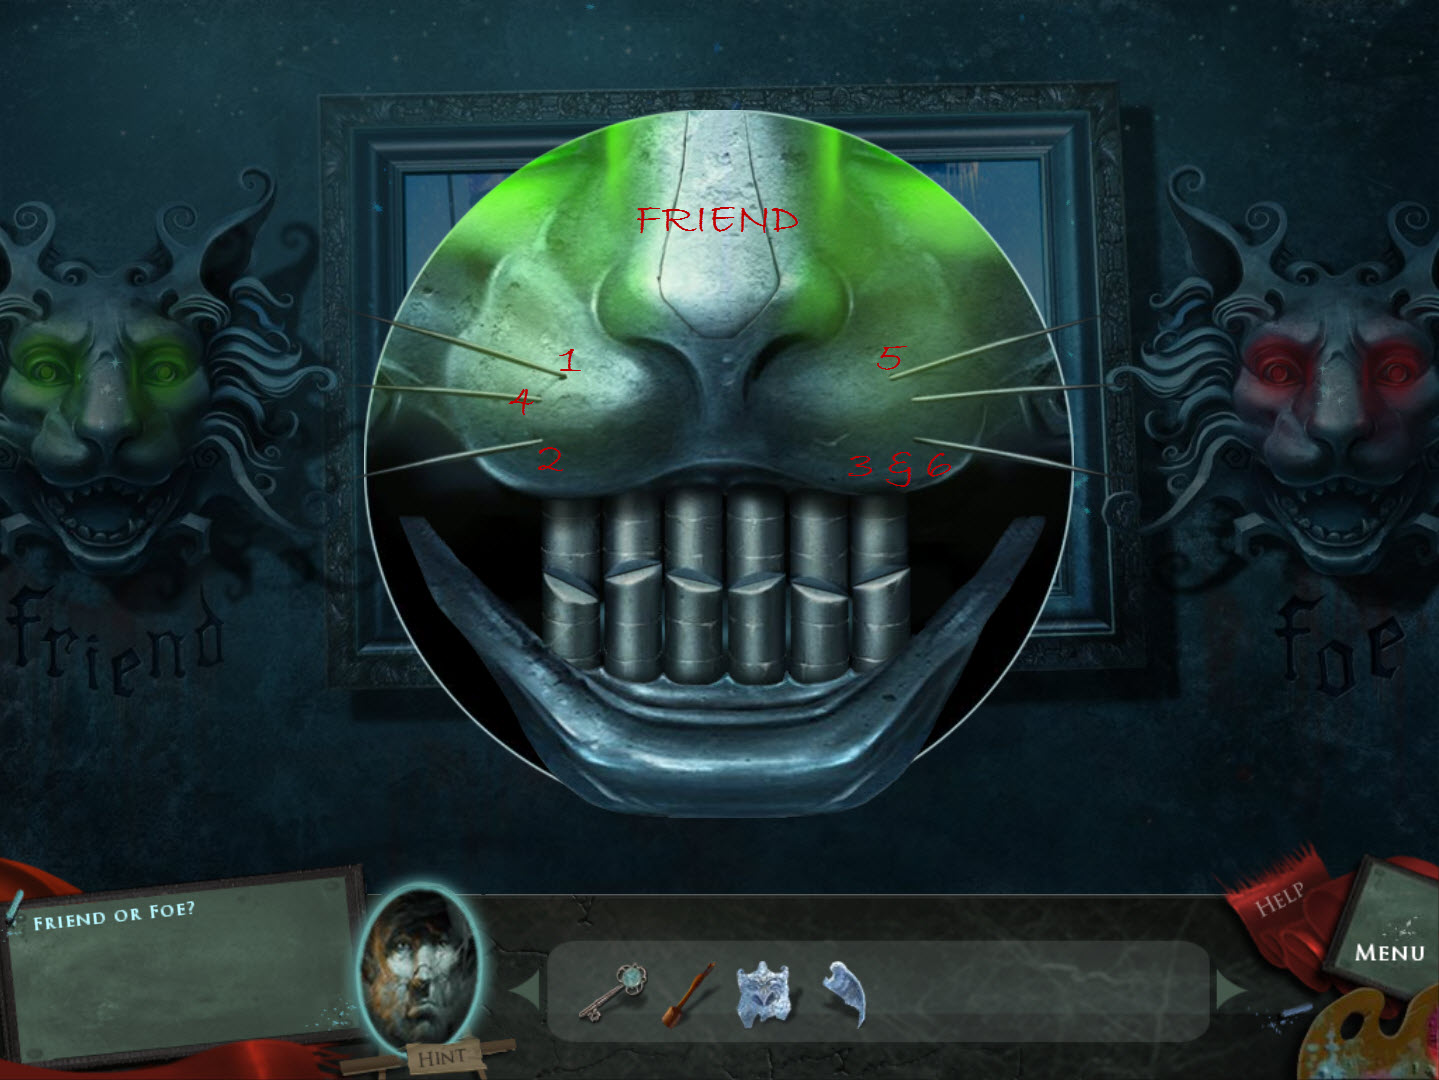
- examine the Lion on the left
- Lion Puzzle (Moderate)
- pull the whiskers so that all the teeth are fully down and his mouth closes
- his eyes will turn green
- you must pull each whisker in the correct order three times
- you can reset the puzzle by clicking his nose
- see screenshot for order
- note: do not pull the whiskers on the right Lion, if you do, you will have to rest the puzzle before you can proceed
- enter the painting
The Ice Castle
- enter the door
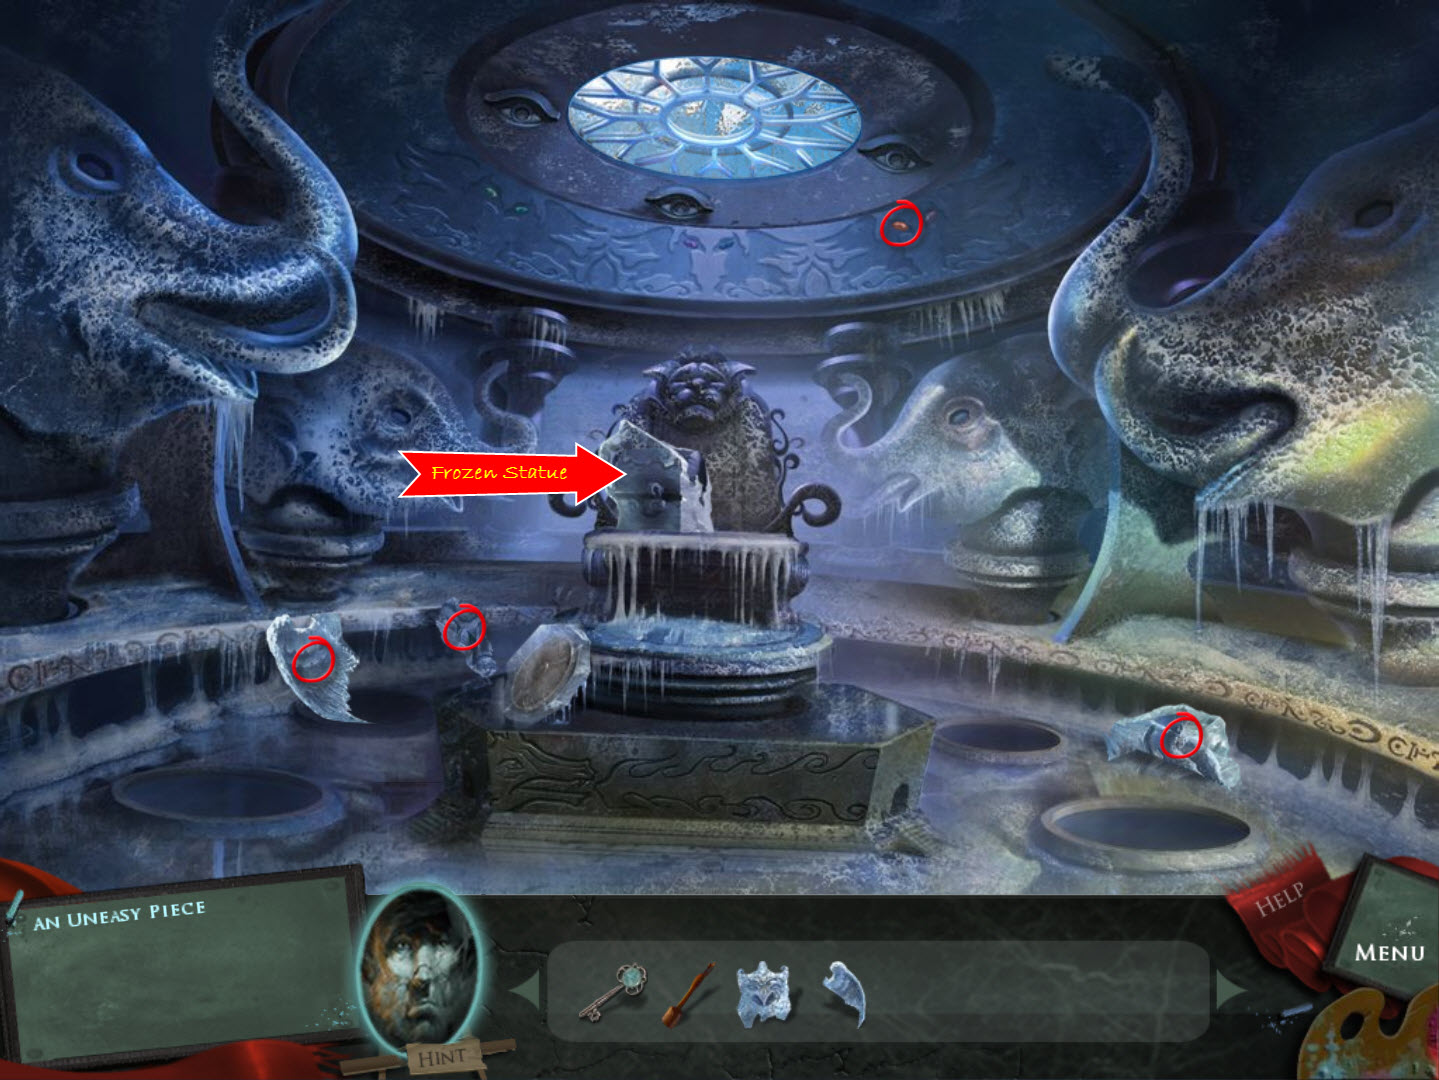
- pick up the three Frozen Statue pieces
- pick up the Red Gem
- use the Frozen Statue pieces to reassemble the statue in the middle of the room
- Eye Puzzle (Easy)
- click the eyes on the ceiling to move the green spot
- the objective is to align the green spot with the green arrow
- the left eye moves seven spaces clockwise
- the middle eye moves three spaces counterclockwise
- the left eye moves five spaces counter clockwise
- pick up the Shield
- return to The Dragon's Cave
The Dragon's Cave
- go left
- place the Shield in the gold
- make a note of the roman numerals on the wall (I, III, II, II, I)
- go right
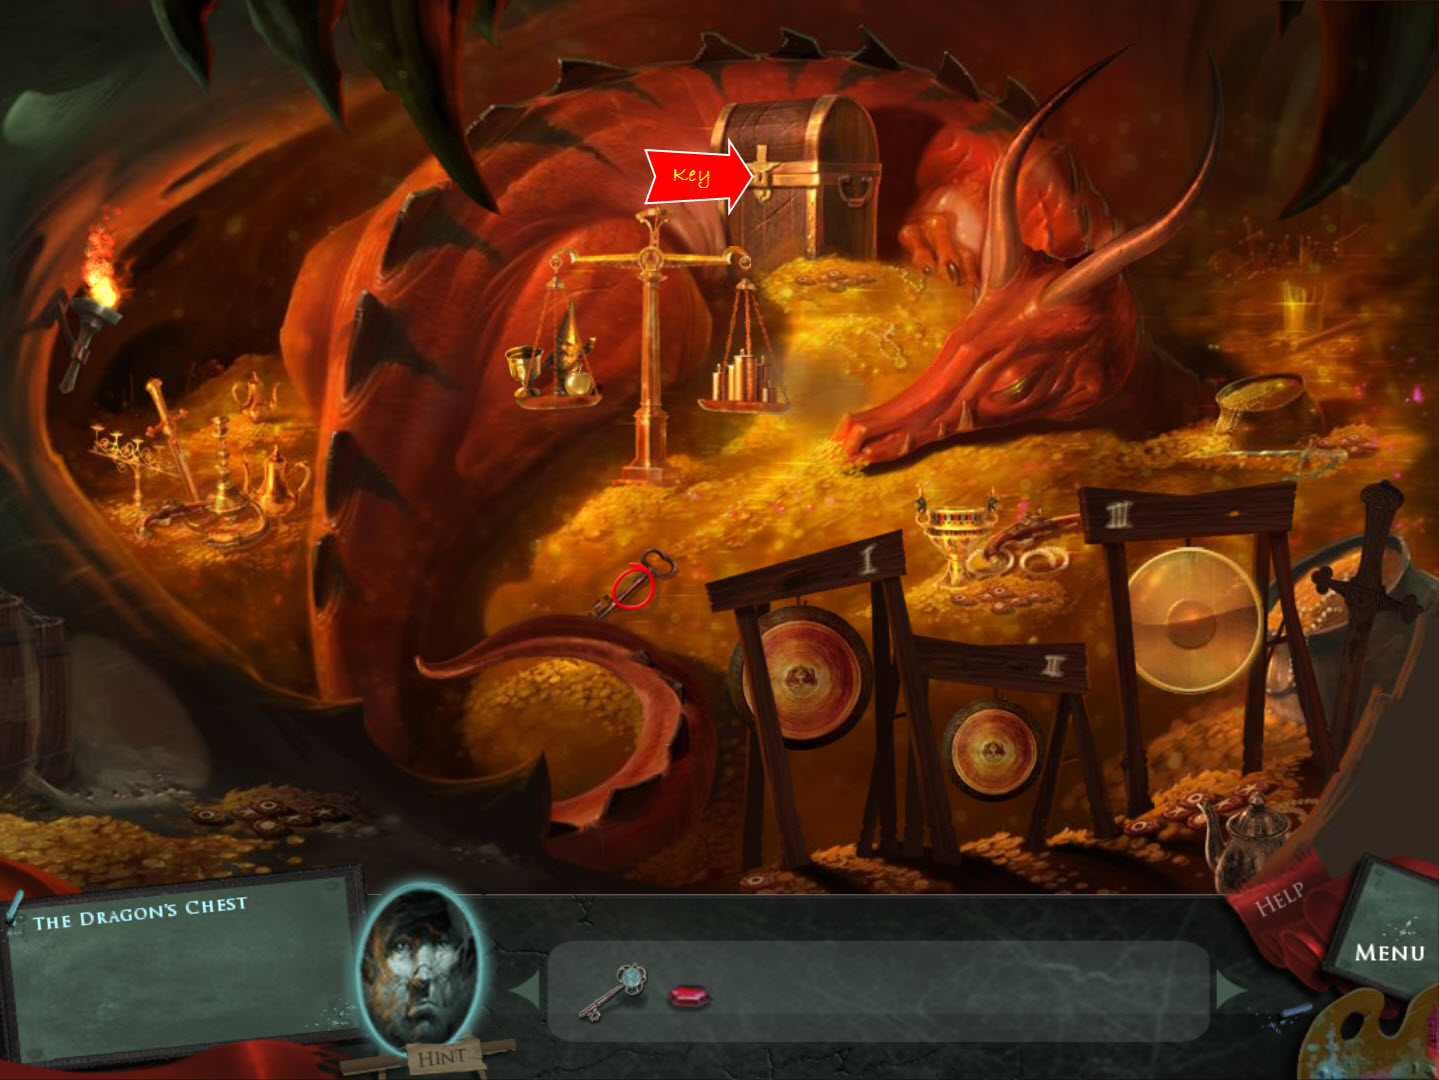
- place the Shield on the third gong stand
- use the Mallet to play the gongs in the order of the roman numerals you saw on the wall
- take the Key
- use the Key on the Dragon's chest
- Dragon Chest Puzzle (Moderate)
- move the bars out of the way (you have to drag them backwards in order)
- press one of the triangles in the four corners
- depending on what it shows in the center - turn the three dials to a picture that relates to the one in the middle
- do this for each triangle
- solutions (highlight to see): Magnet (bottom - right): inner circle = magnet, middle circle = anvil, outer circle = sword; Sun (top - left): inner circle = sun, middle circle = torch, outer circle = candle; Red Dot (upper - right):inner circle = heart, middle circle = apple, outer circle = strawberry; Wave (bottom - left): inner circle = melting ice cube, middle circle = snowflake, outer circle = water drop; Eight (last puzzle): inner circle = flowers, middle circle = family, outer circle = sunflower
- take the Gear of Flames
- take the Three Red Gems
- return to The Ice Castle
The Ice Castle
- go through the door
- place the Red Gems in each elephant's eye
- Music Puzzle (Moderate)
- watch the circles light up and/or listen to them
- touch the circles in the same order as they were just play
- puzzles vary per person, per game
- examine the chest
- take the Gear of Ice
- exit the painting
- examine the pedestal
- place the Gear of Flames and the Gear of Ice in the center
- go up the stairs
- examine the book
- place the Griffin Skeleton Key in the center
- you need to visit The Dragon's Cave, The Ice Castle, The Witch Doctor, The Farm, and The Giant Tree paintings
- take the Sketches hanging from each painting
- return to The Book and examine it
- place the matching Sketch to the matching one in the book
- take the Book
- enter The Rooftop
- talk to Iris
- give Iris the Book
The End...?
